Here is a list of tweaks for the AAHQ 1/16 Sherman M4A3 76W HVSS that I’d like to share with the collective. Scroll through and let me know what you think of my suggestions.
-
use and position of rear view mirrors: I’ve seen several modelers already mount these but keep them precariously upward. In most WW2 pics I’ve seen, the crews folded them away or omitted them completely. Indeed many M4A3 76W HVSS don’t even have the U mount (Part M1) installed at all. Consult photos when deciding on your final position, if you decide to keep the rear view mirrors.
-
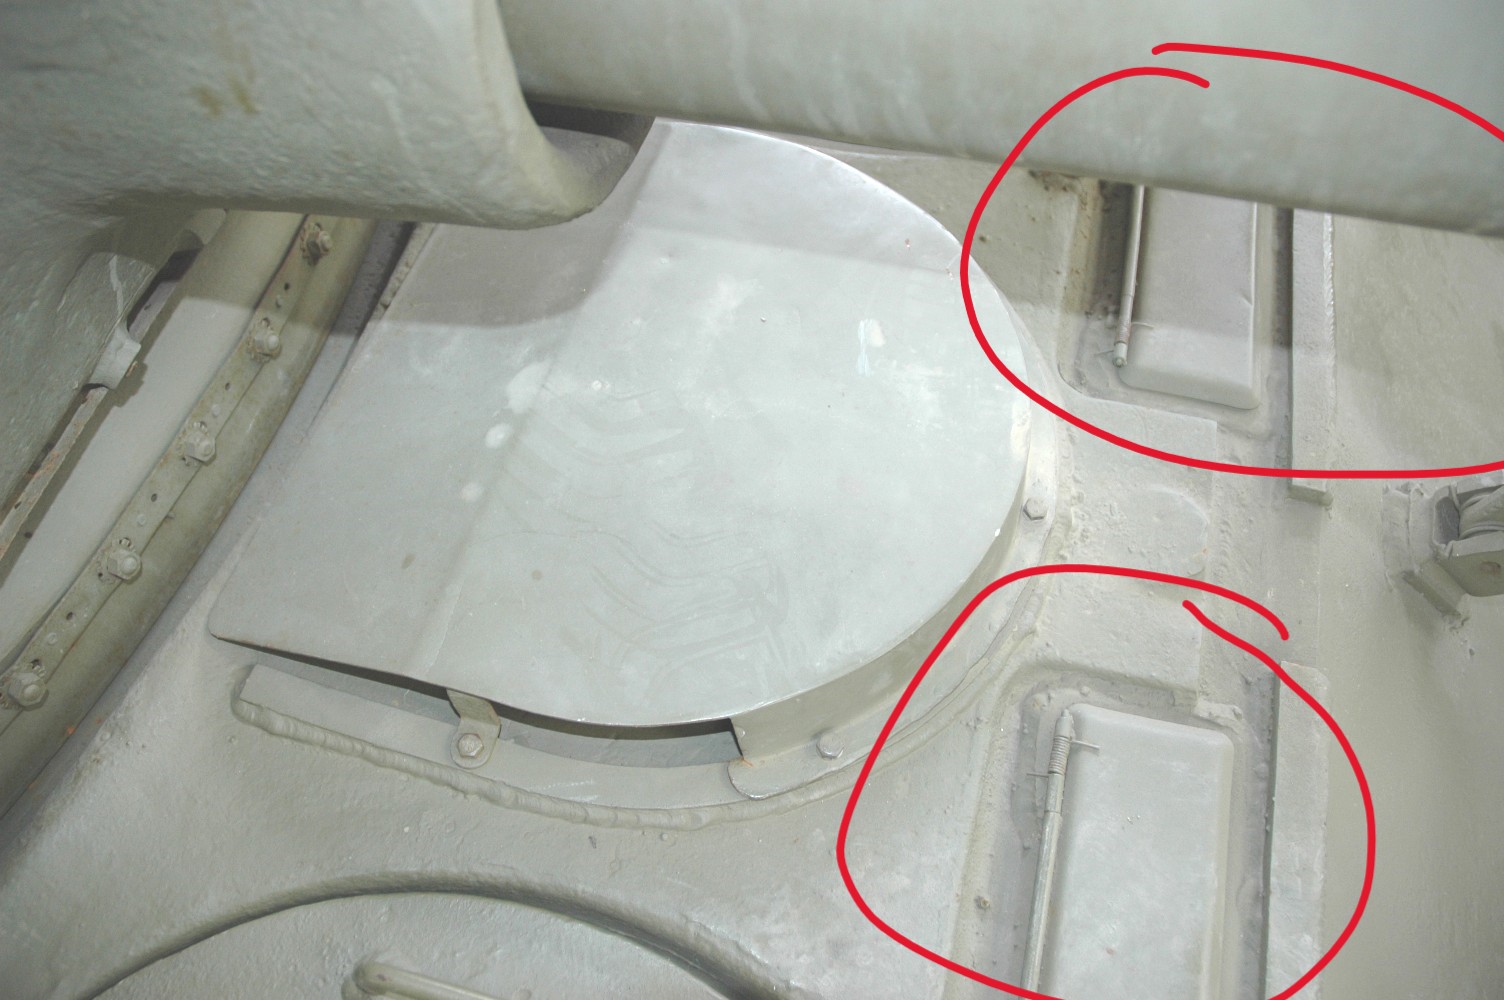
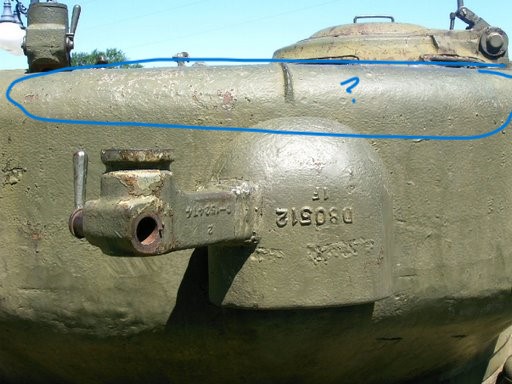
use of forward facing fixed periscopes: In tens of thousands of photos I have of operational Shermans, I’ve seen maybe a dozen where a crewman has inserted the fixed, forward-facing periscopes in place (as suggested in Step 7, parts T7). I strongly suggest you omit T7 and place the covers (M34) in place, sealing the aperture as in the photo above.
I think that they were simply not worth the time and trouble for the crewmen.
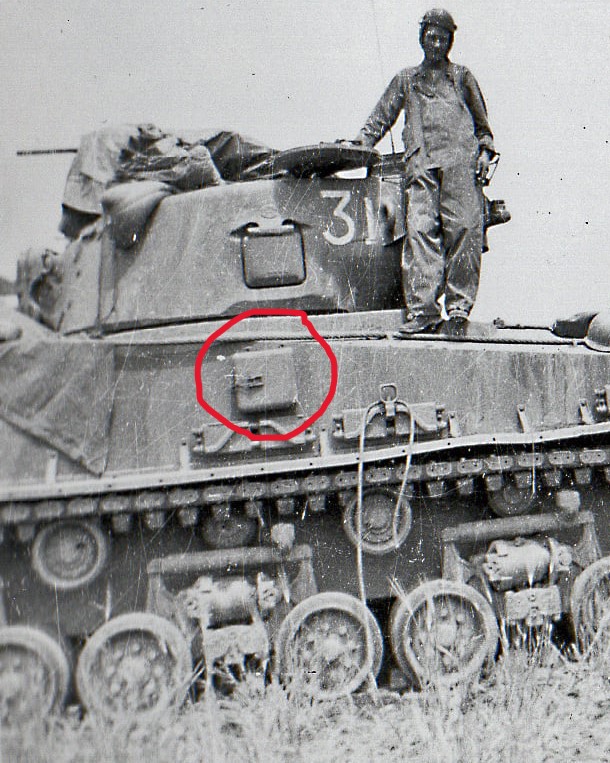
- armored first aid box mounts on left hull side: I recall the MWO (Modification Work Order) to install the armored first aid kit box on the hull sides was issued in mid 1945. To date, I’m not aware of any ETO M4A3 76W HVSS tanks that had this box mounted. If you’re doing WW2, I highly recommend omitting the box (R12) and shaving off the mounts on the left hull wall side.
This photo is from Korea.
- molding seams on rear and roof of turret: Many injection molded Sherman turrets have a horizontal mold seam between the spare MG barrel holder arms. The AAHQ Sherman is no exception. Grind away that seam. It did not exist on any actual turret.
A vertical seam is visible running directly below both spare MG mounting arms. That should be removed.
Finally, there is a faint seam running along the circumference of the roof – I’m going to deal with that as well.
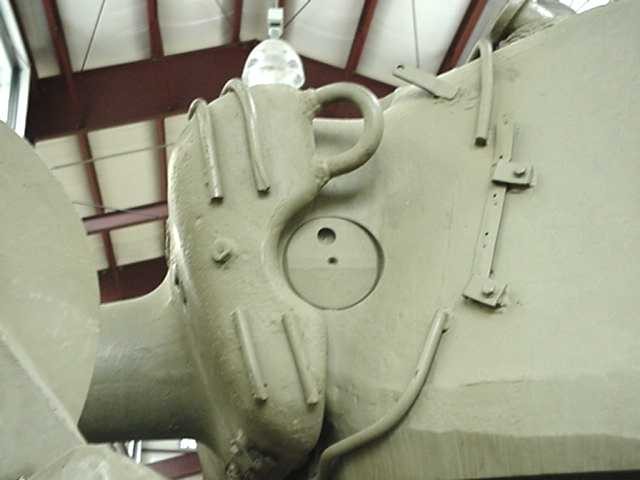
- location squares on turret for canvas mantlet hardware: It’s great that the AAHQ model offers us the option to add the canvas mantlet or its mounting hardware. The kit has faint squares to aid in locating the mounts.
I know many of us are building the kit without either. I’ve seen some models being built where the modeler failed to grind/sand them off. If omitting the canvas cover or its mounts, remember to remove the faint squares around the mantlet.
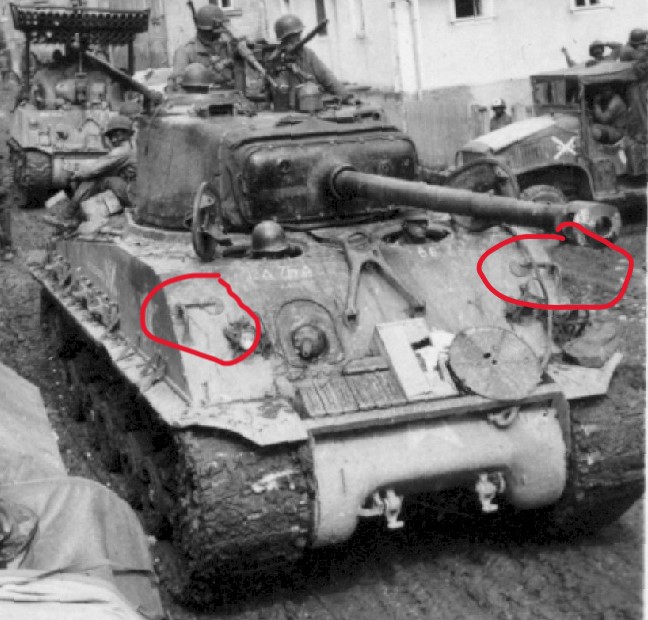
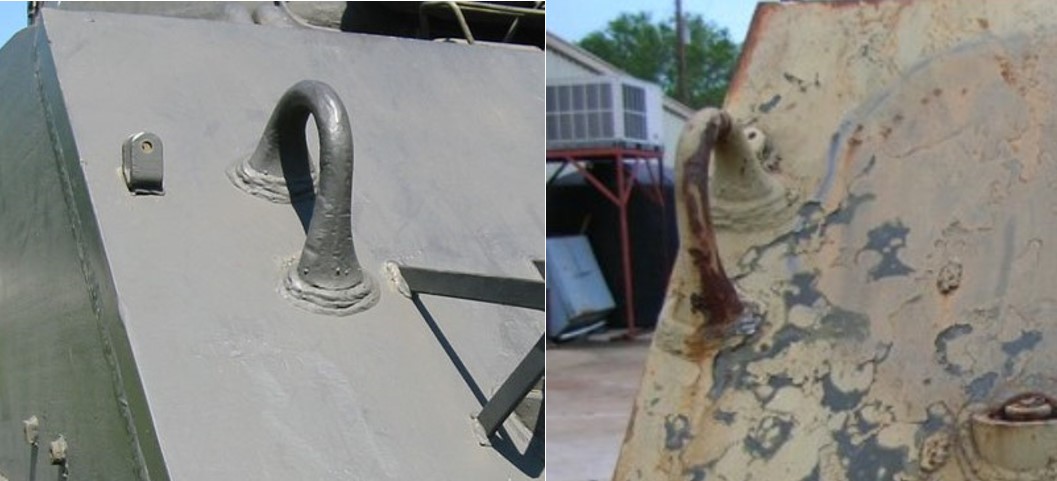
- location of glacis lifting rings:
Please know that the location of glacis lifting rings changed during production of the hull. The earlier hulls had the lift rings inside by several inches. Later ones had them at the extreme edge. Consult photos of your project to get the right position. Thankfully, the AAHQ kit allows us to drill out either location (see step 7). The outside ones seem to accompany the oval loader’s hatch – but exceptions exist.
Just know that not all M4A3 76 HVSS hulls had them on the extreme outside edge. It varied.
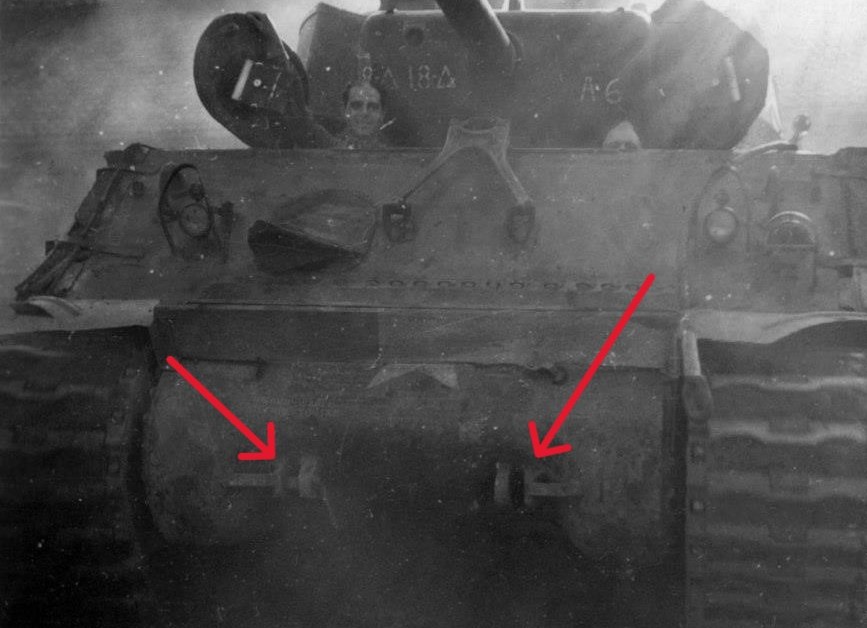
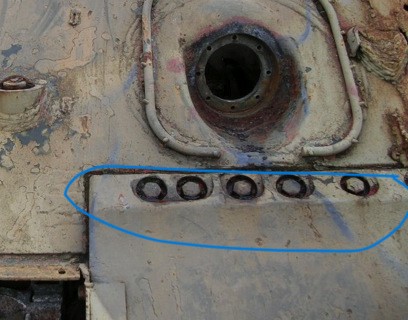
- final drive bolt strip seam: Long time Sherman modelers have had to deal with this on every kit. The 1/16 models are the same. Please note the seam between the bolt strip (R23) and the final drive housing (Q9) should be filled. It was one piece and an unfilled seam here would be quite noticeable.
8 ) quick release tow shackle, optional: Many wartime tanks did not have the quick release tow shackles (parts M19 x4) on the nose and rear towing lugs. If you’re building to a specific photo, be sure to check whether or not to install M19 or not.