Hi all,
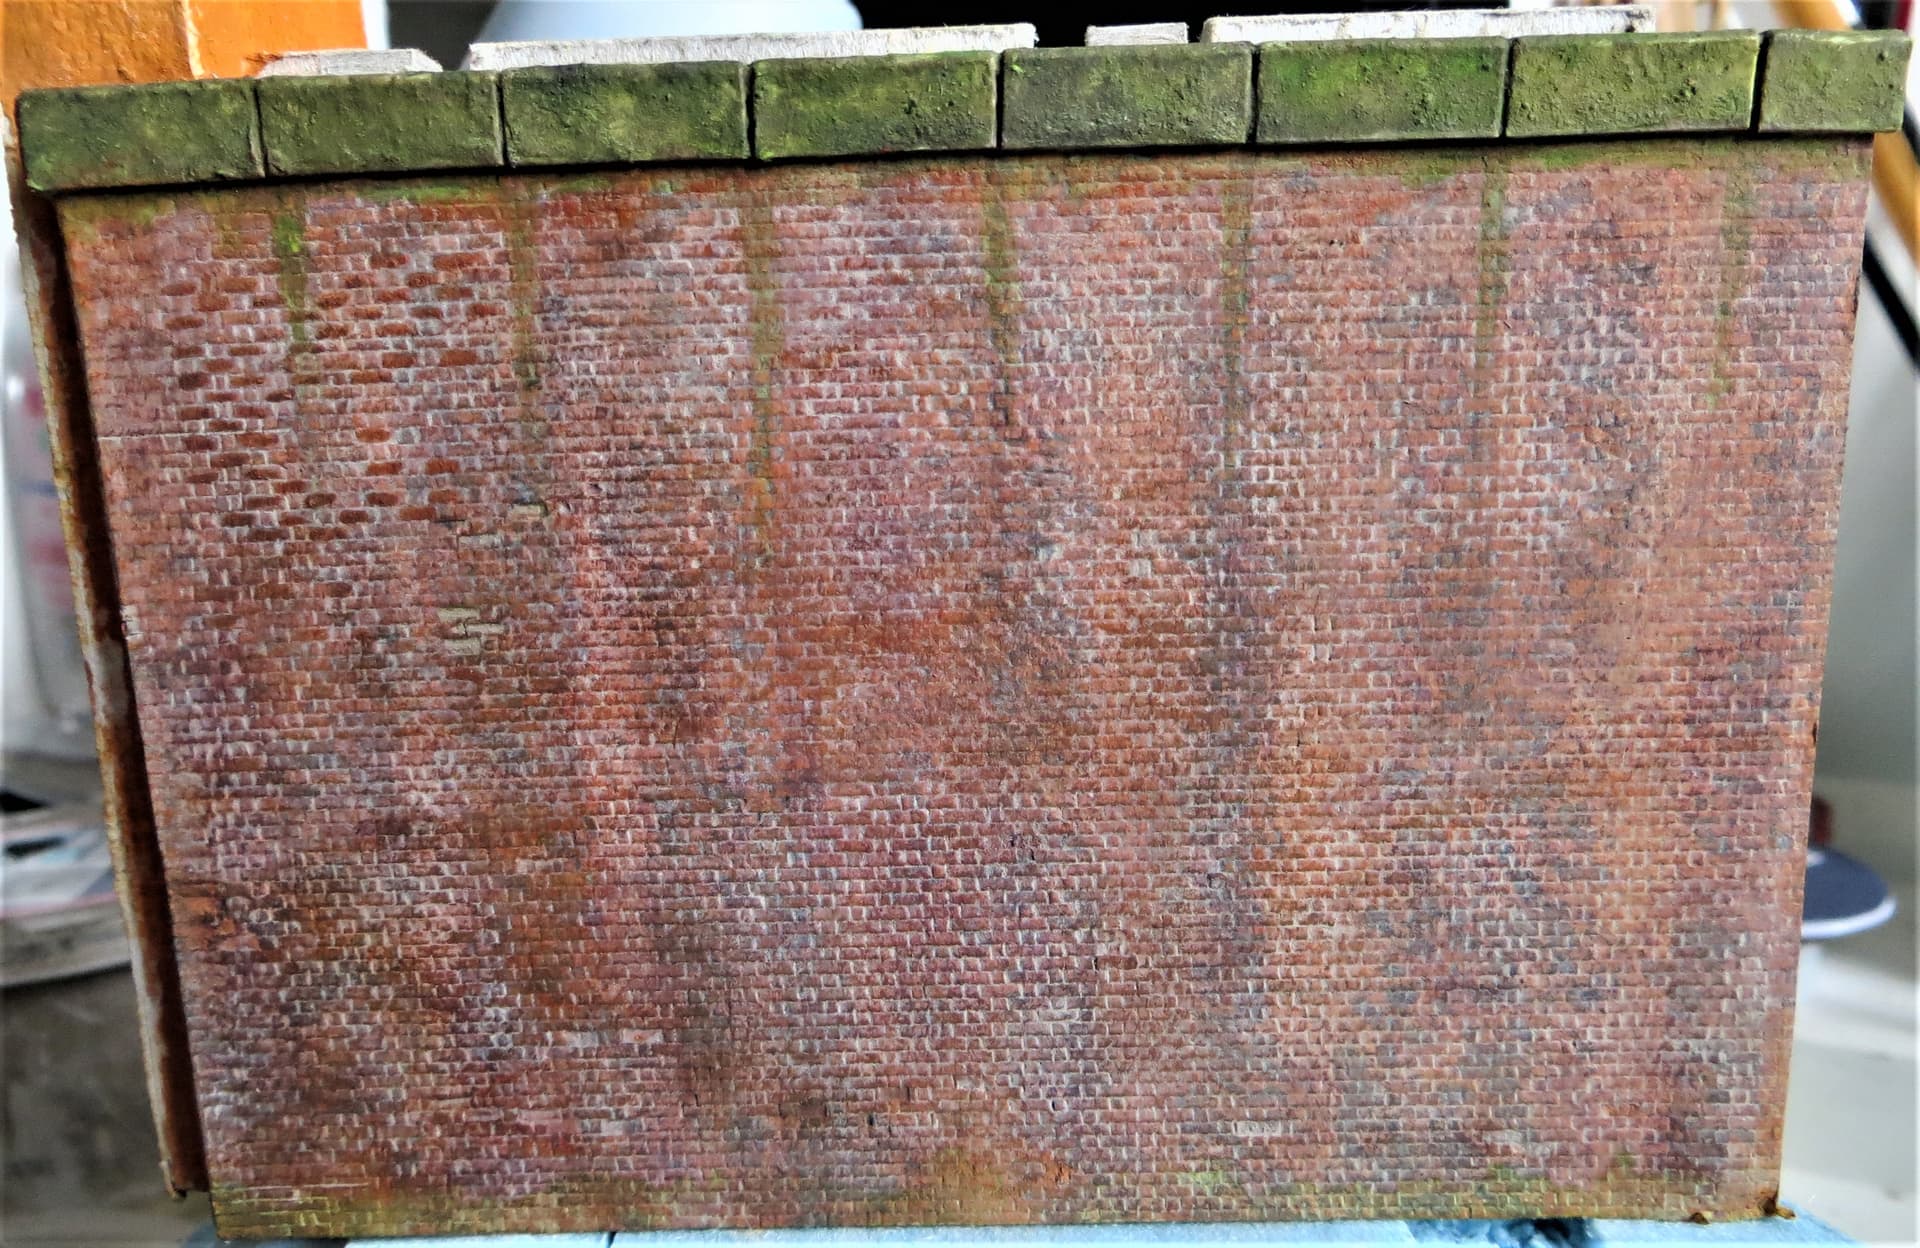
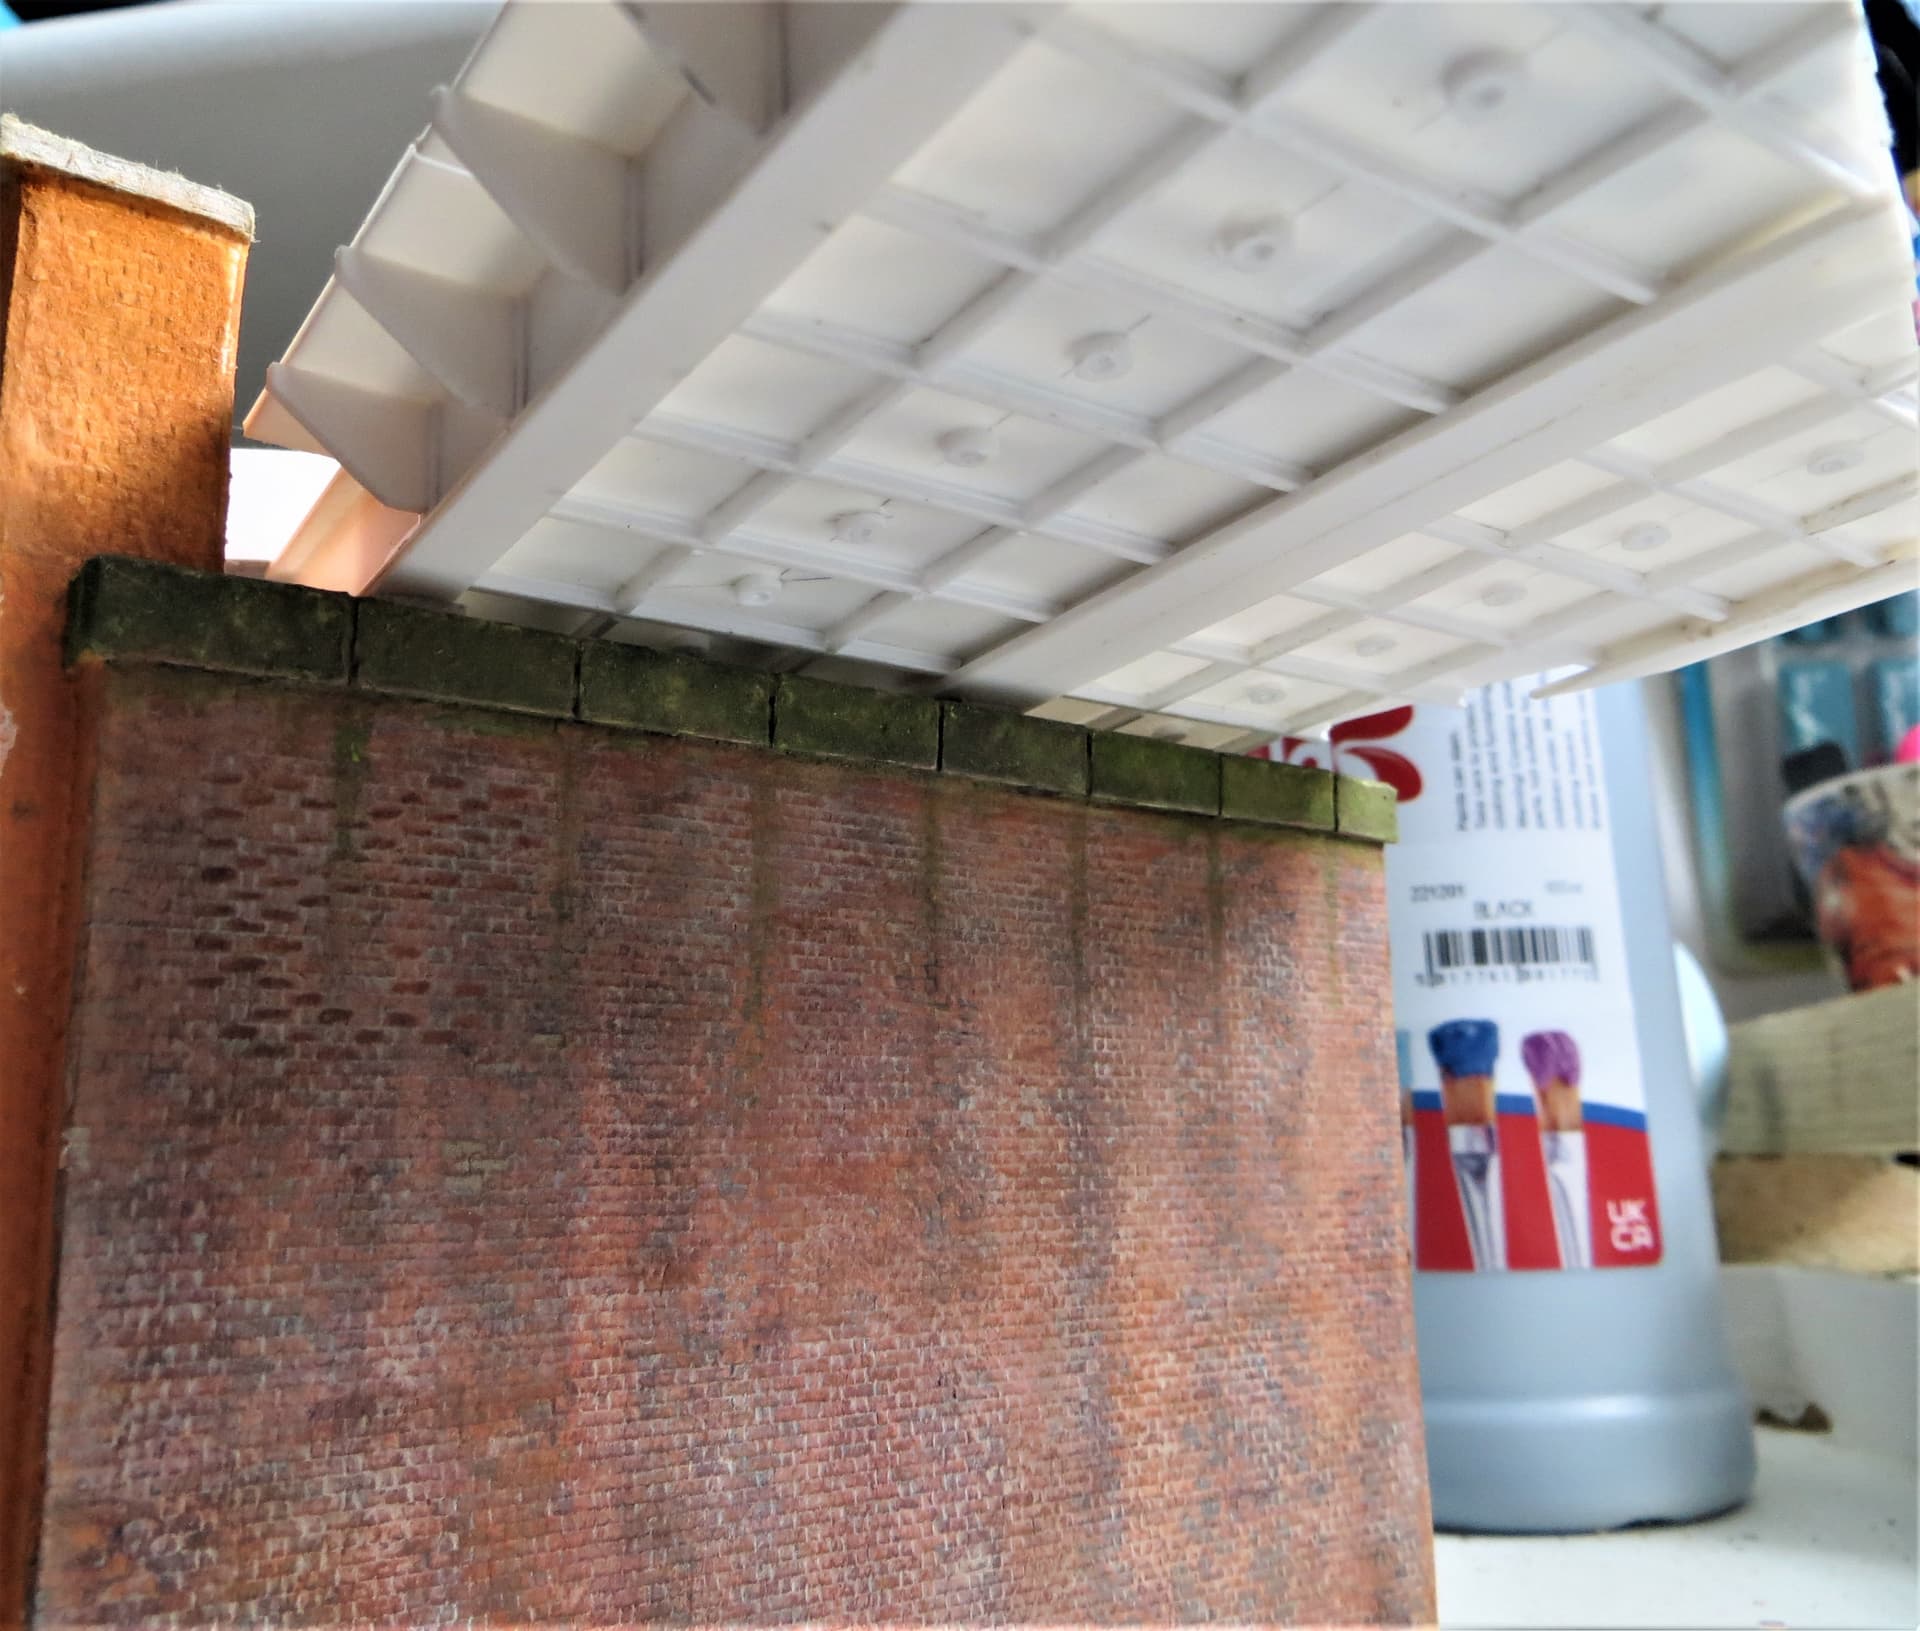
Started to add some more colour to the wall by trying to add the mortar between the bricks. It’s proving quite difficult, so in future I need to scribe deeper so as to enable the paint to collect in the grooves.
Also need to finish adding slime and dirt, not being a railways expert I imagine that bridges in the steam era were very dirty due to rain washing coal dust and ash, etc, down the walls beneath…any thoughts from those more knowledgeable in such matters,  ?
?
Cheers,  ,
,
G
7 Likes
The old steam engines also dripped oil.
One problem that came with electrified railroads in Sweden was that the rails became too “dry” which increased the wear on the running surfaces of the wheels and also the wear on the rails.
I read a report in some railroad fan magazine, I think it was issued in the mid-late 70’ies about trials with automated rail greasing. A small dab was squirted onto the rails when a train passed, it got picked up by the wheels of the train and with each rotation of the wheel it got smeared on the rail and around the wheels.
My father (born 1918) grew up near a Swedish railway line (the line from Stockholm in Sweden to Oslo in Norway). Boys will be boys et.c. and sometime in the late 20’ies the local boys smeared soft soap (the old fashioned green goo) on a stretch of rails that was in an incline. The steam engine comes huffing and puffing pulling a train up the incline and looses traction on the soapy rails. The slow and heavy huffing and puffing turns into a frantic huffhuffhuffhuffhuff when the wheels start spinning. The engineer closes the steam valves to protect the locomotive and then reverses down the incline. On the second attempt he is ready with the sand ejectors to make sure he has traction past the soapy section.
Anyhow: Grease and oil, it collects dust and ashes and turns into a horrible black goo. Especially in places where locomotives stand still. There is, or should be, a pan below the furnace to collect the ashes so that it doesn’t spill all over the tracks. Steam engines are mobile fire hazards …
When a steam locomotive enters a depot they drive in over an ash pit where the pan is emptied. From there they proceed to fill up with water and coal. In cold weather they kept the furnaces burning to prevent pipes from freezing and to make the start-up time for the next assignment shorter.
Stokers went from engine to engine keeping the fires burning.
2 Likes
Keep going with that G and you will smash it out the park … That is jaw droppingly brilliant … The colouring is spot on and I wouldnt worry overly about the mortar, as everywhere you look there is a hint of it and thats plenty I think. The slime and dirt look superb and the missing broken brick areas is a very realistic touch … Fantastic
1 Like
More oared than ever - as in it floats my boat.
G you know we revere you as a Master Slimer already, few can claim that accolade. I’d suggest carbon deposits from steam trains in the higher areas. Tricky to over-/under-do, if your brickwork’s colour-fast maybe try some finely powdered black pastel dust applied with a dry soft brush, if it looks rubbish just stiff-brush or wash it off. Might be a better option than actual washes which are non-reversible.
2 Likes
Hi @G-man69, you have built a fine looking wall!
And your process, wow - no coffee for you during the carving!
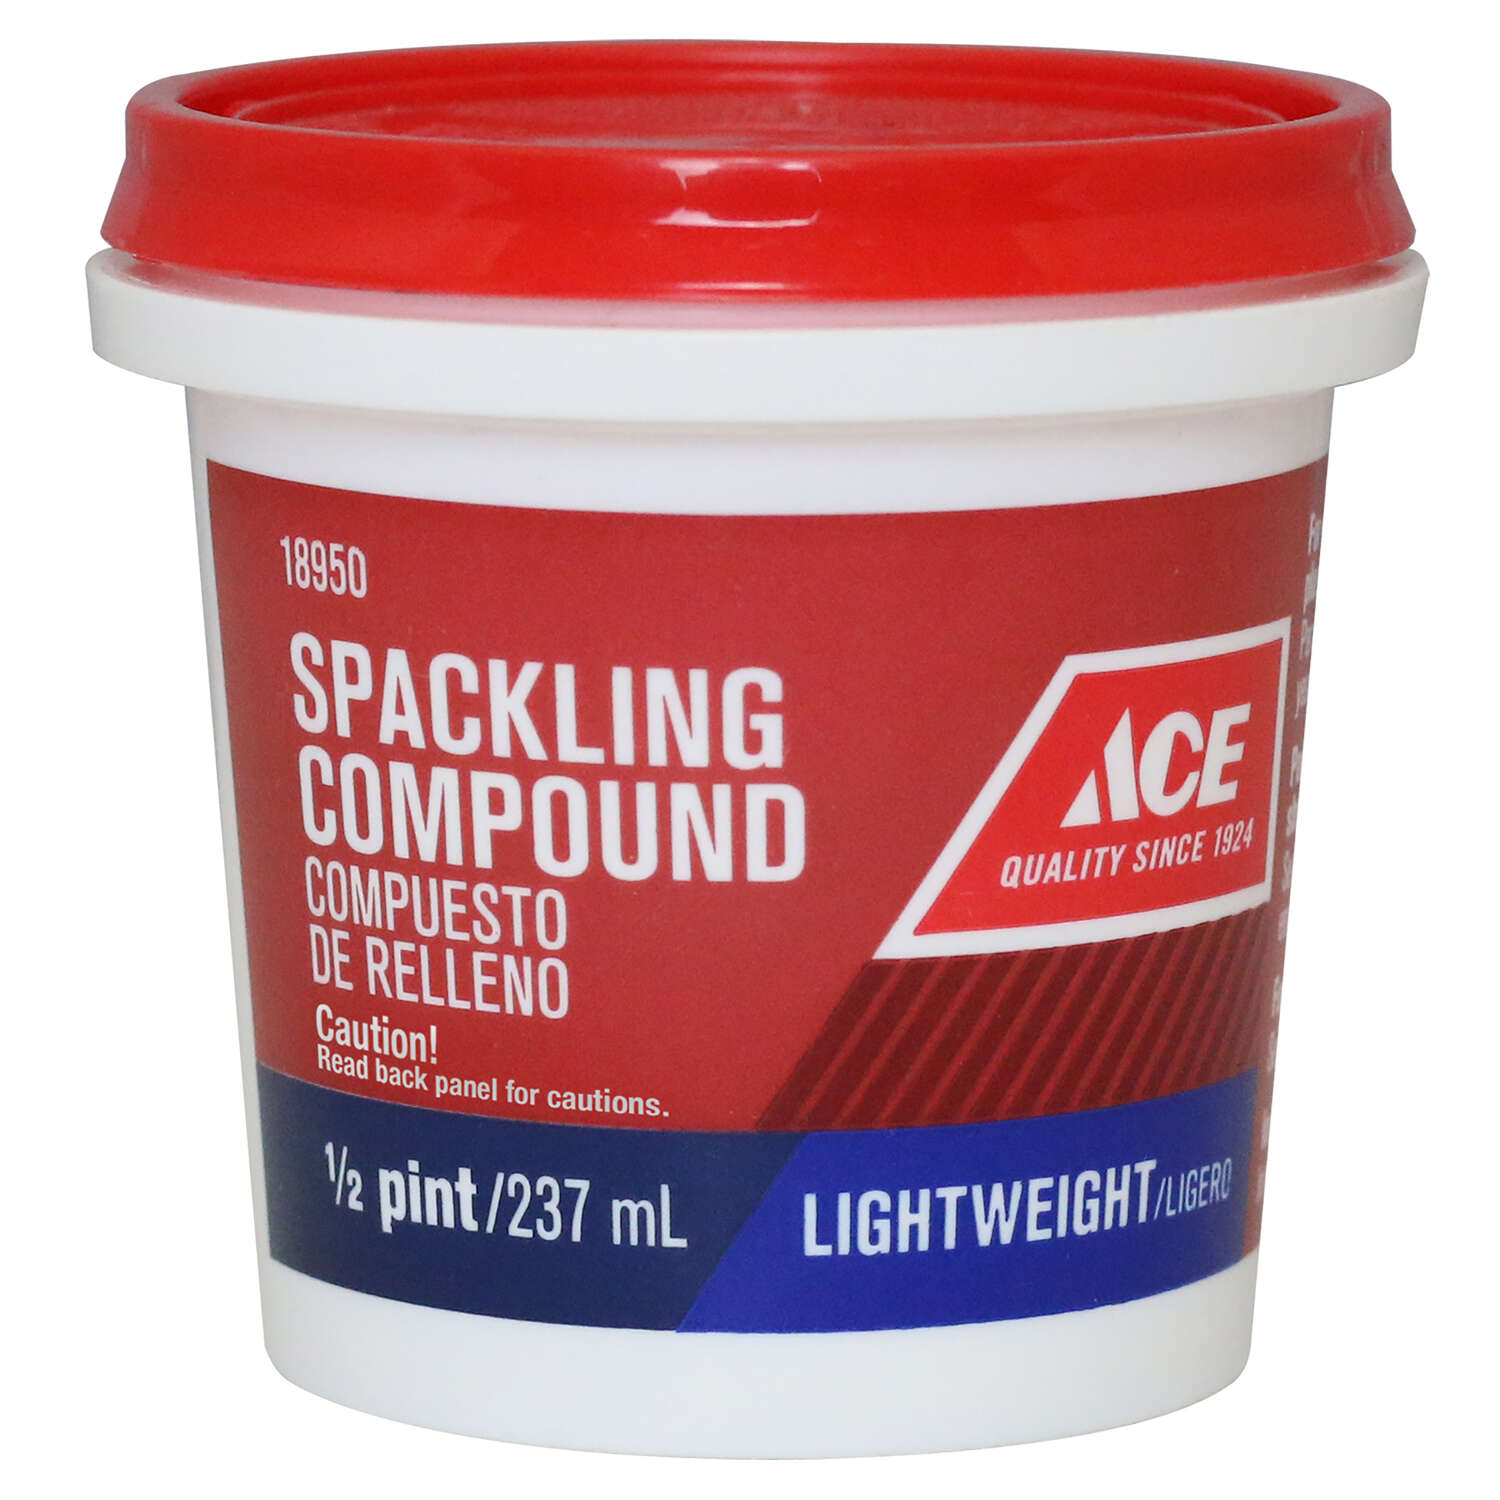
Regarding your question about mortar, I’ve build a few walls for dioramas, in 1/35 and have successfully used “Lightweight spackle compound” for mortar:
If you find this, be sure and use the product called “lightweight”. It is indeed, very lightweight, a sort of putty, which you can trowel on with your fingertips:
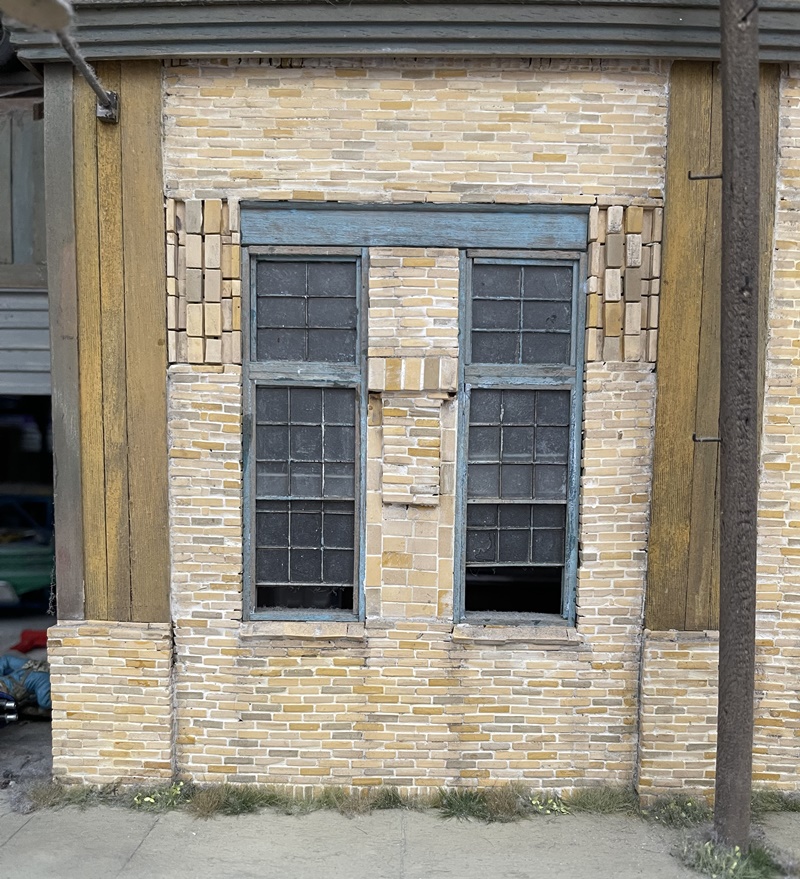
For this wall, a guy went ahead and placed/glued each brick, adding a thin sheet of styrene between each course, to achieve a gap - which of course meant, mortar was needed to get this to look convincing.
Up close:
This building was intentionally made to look pretty old and tired, and the material worked fine. Once you apply your base layer, you you can go back with your finger tip and remove excess. The spackle material is very fine and does not leave any coarse surface, and when set up/dry, you can go over it with various alcohol or acrylic washes to get the look you want.
Hope this helps,
Nick
8 Likes
Thank you to Robin, John, Fred, Tim and Nick for their kind words, and/or helpful advice, it’s all very much appreciated chaps, 
 .
.
Though ‘Master Slimer’ makes me sound like a character from ‘Ghostbusters’,  .
.

Thanks for sharing Nick, that ‘Spackling Compound’ looks interesting, I’ll see if we have an equivalent here in the UK.
As an aside, does anyone have an idea where I can get reasonably priced, good quality 2mm-6mm Polyurethane Foamboard in the UK. I’ve tried a few sites and it’s either very expensive and/or sold in very large sizes, I only need A4 sized sheets?
Thanks again all.
G,
1 Like
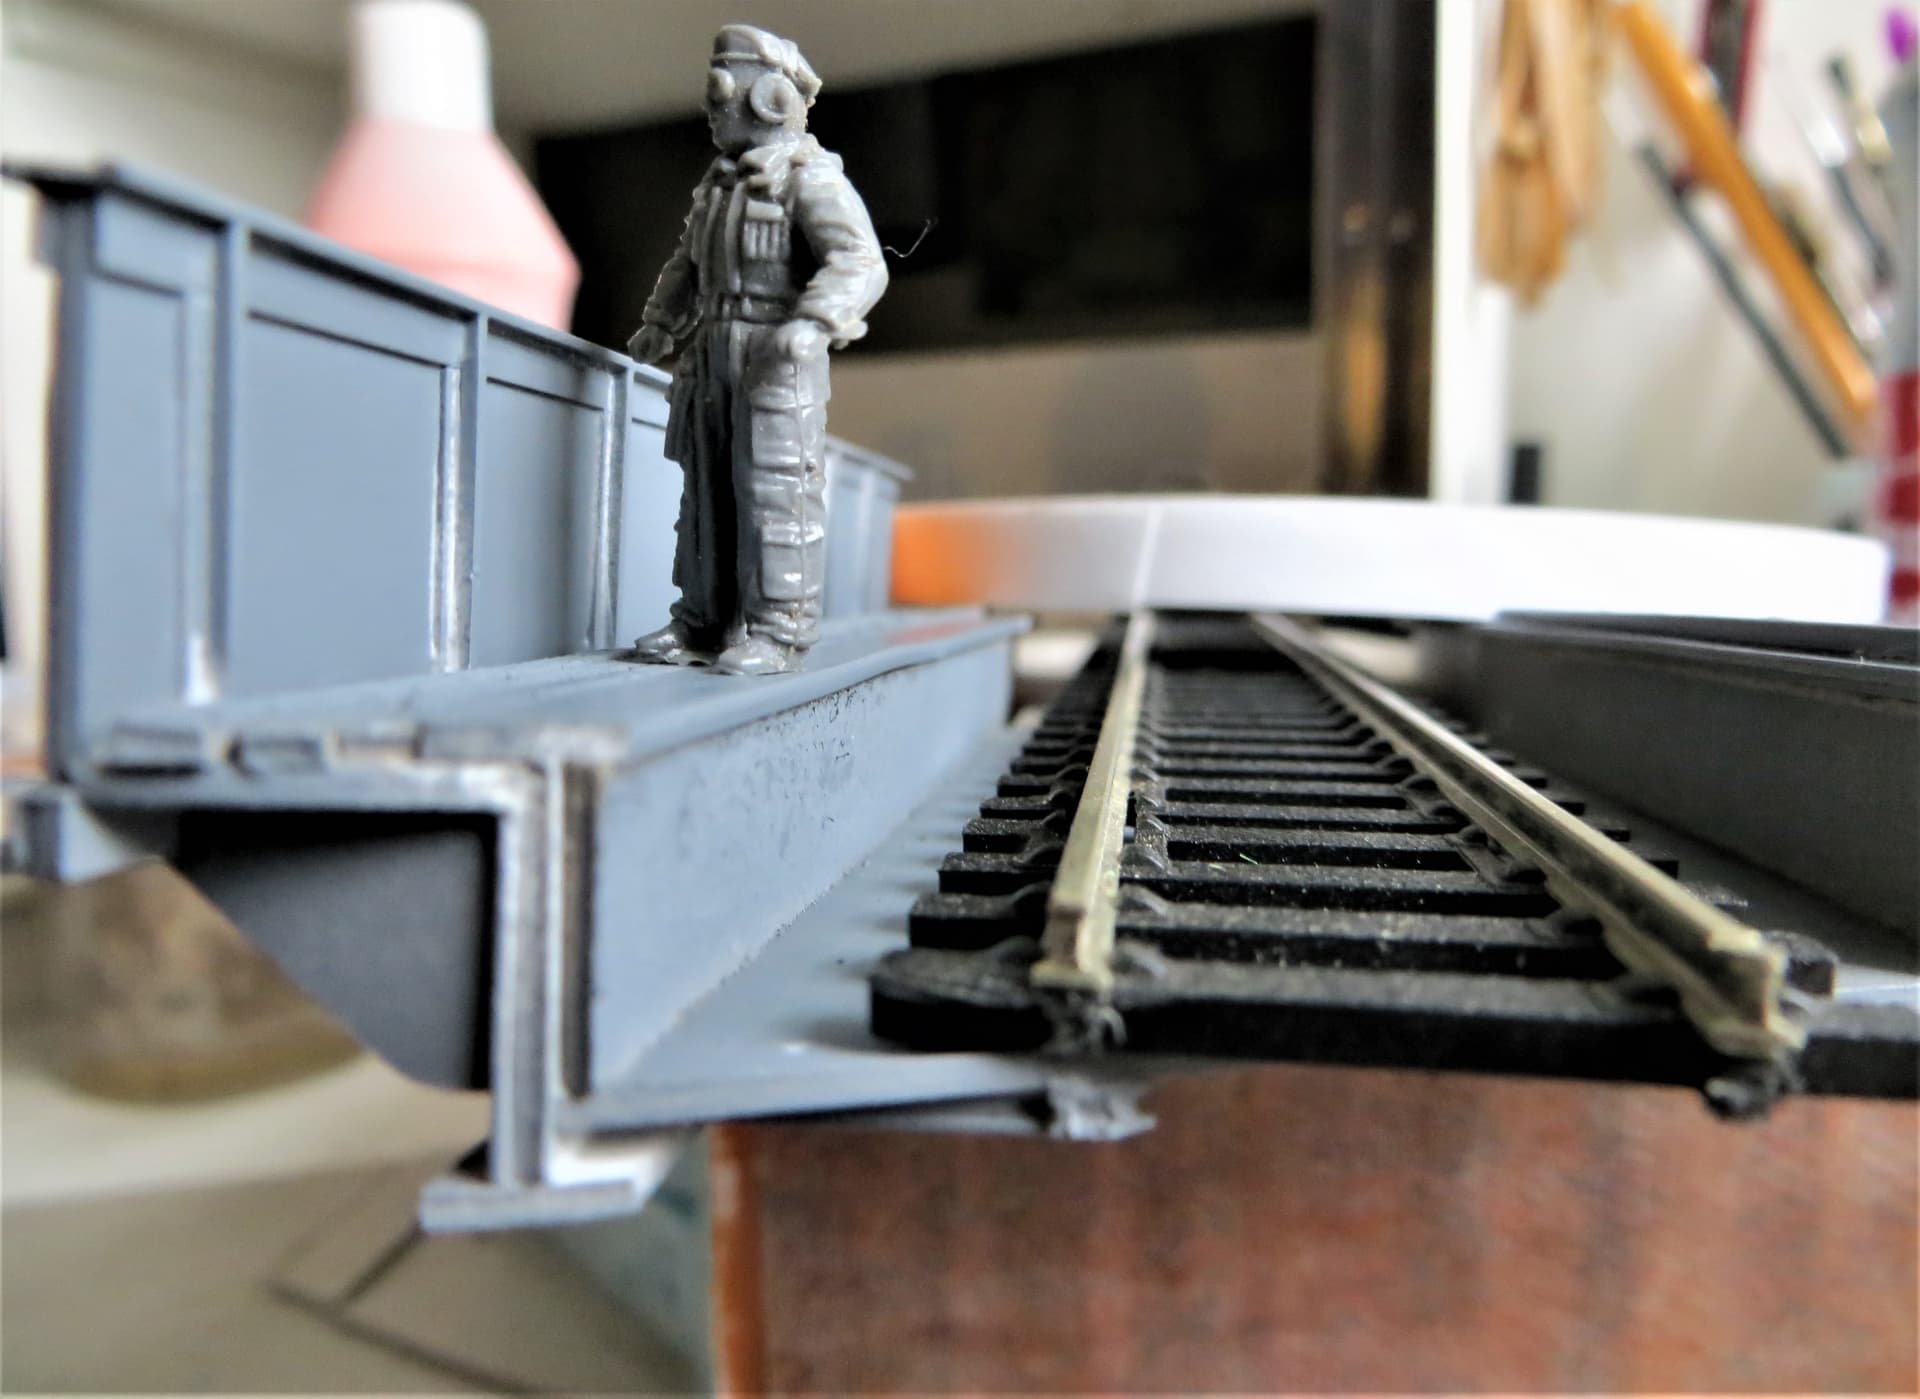
Hi all,
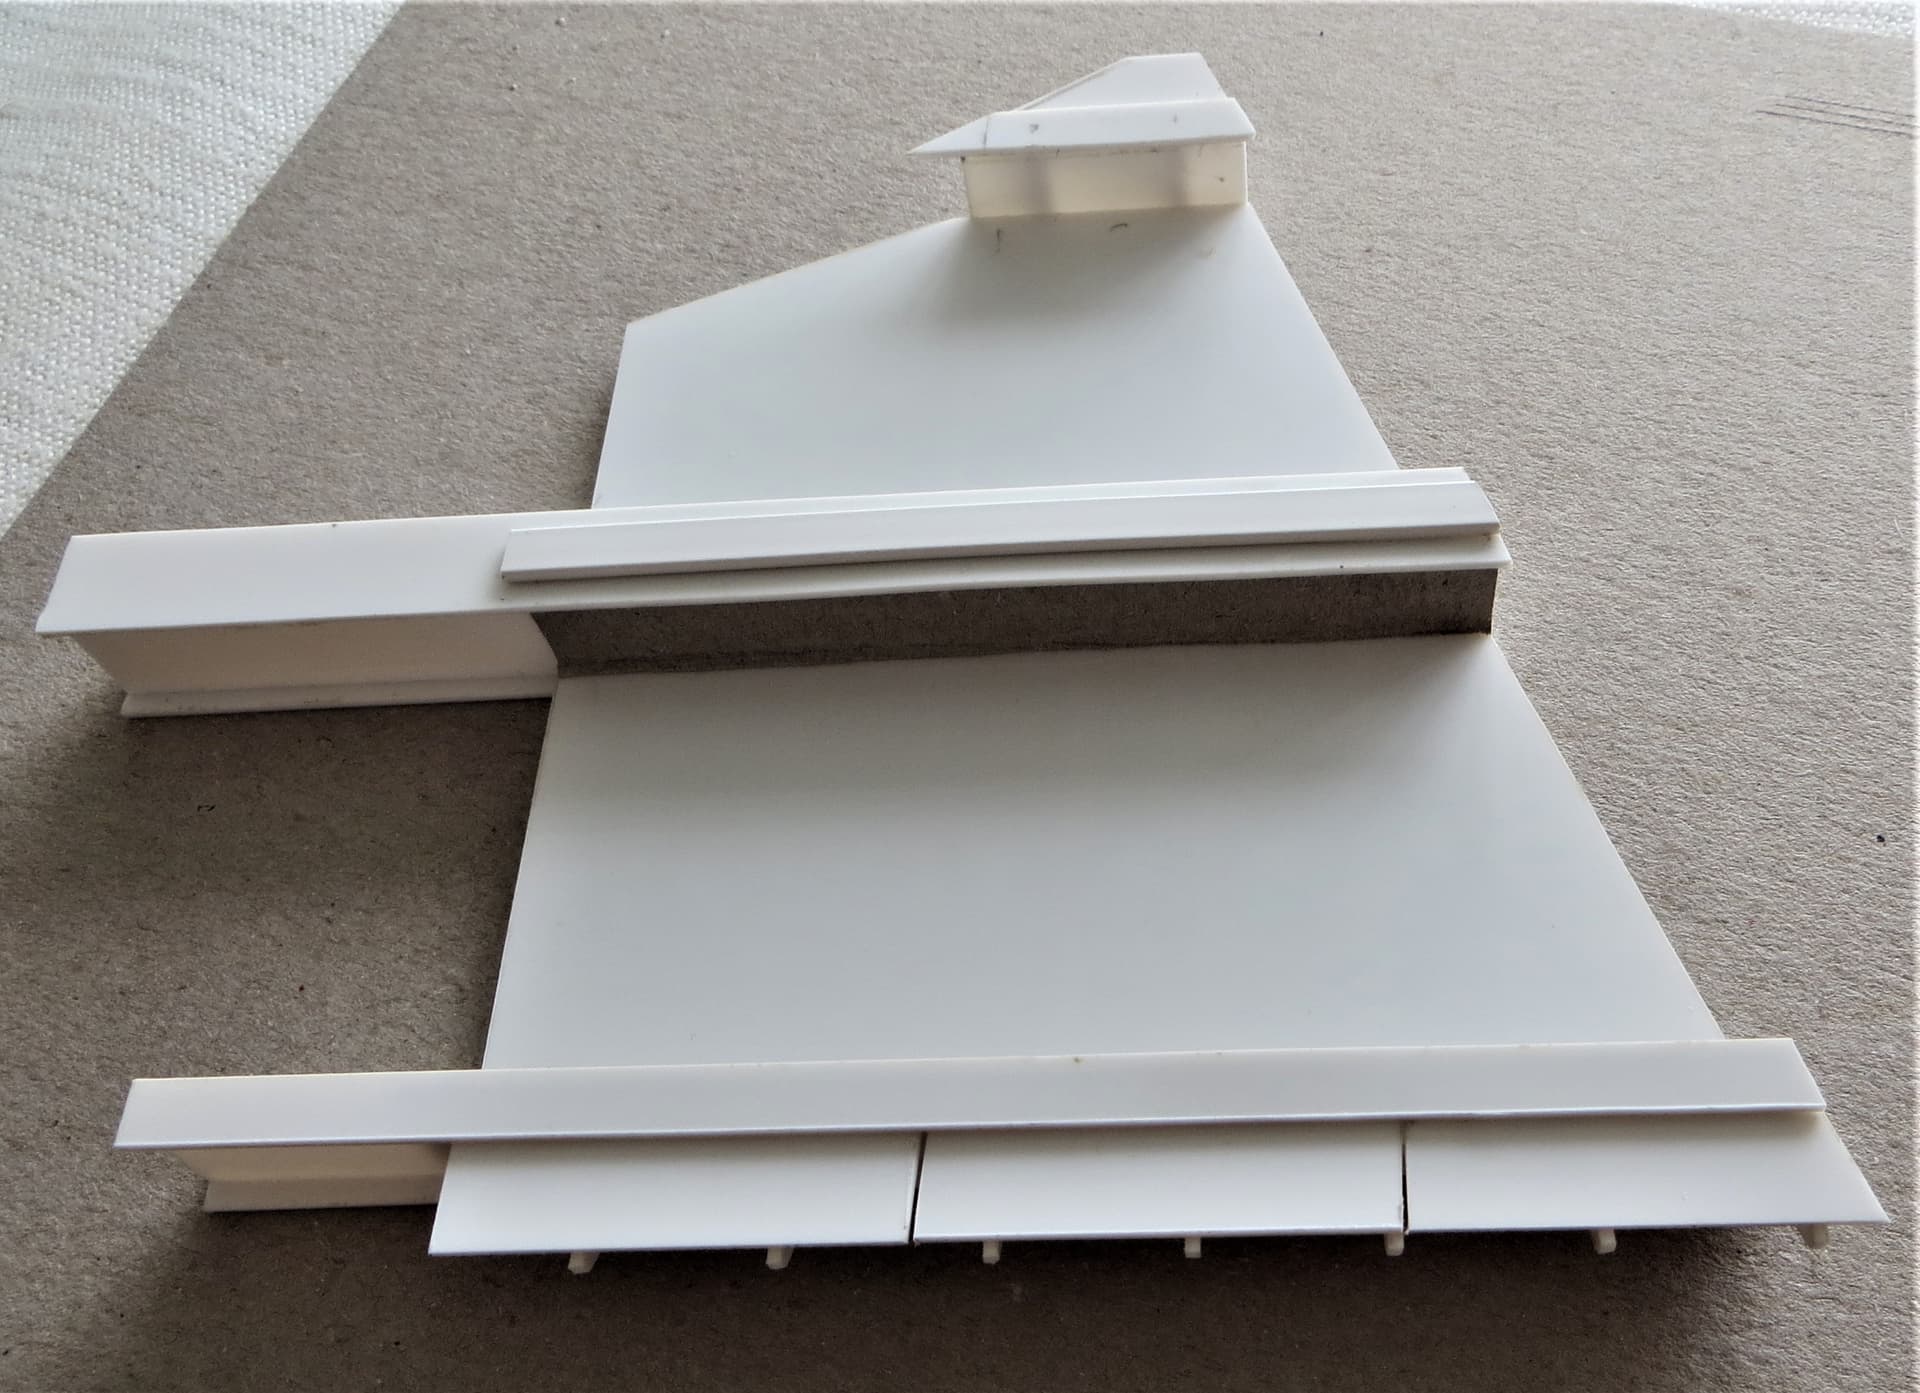
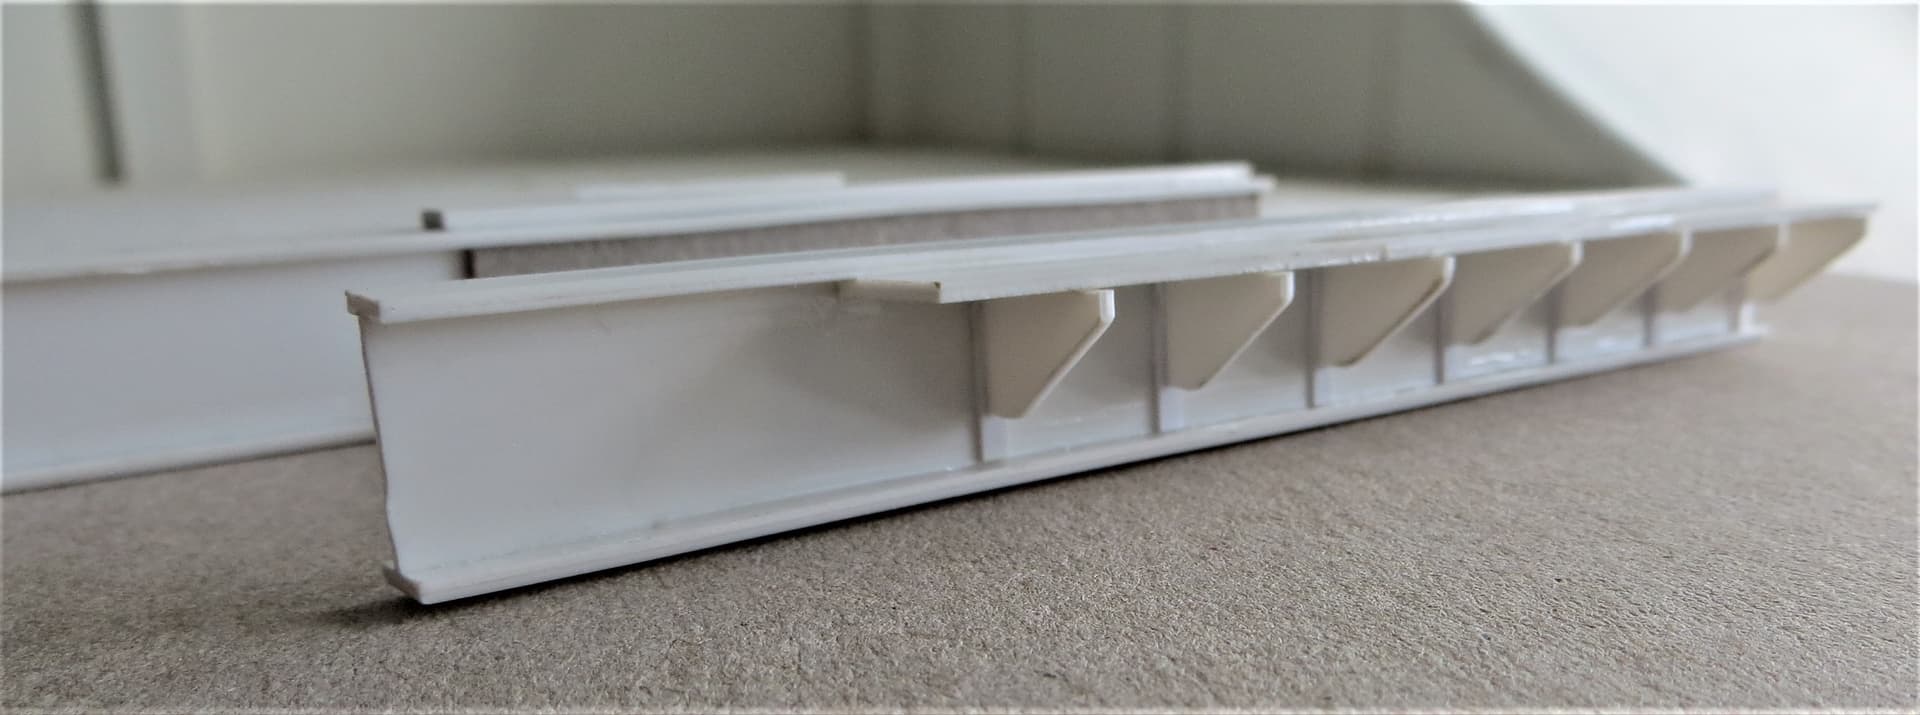
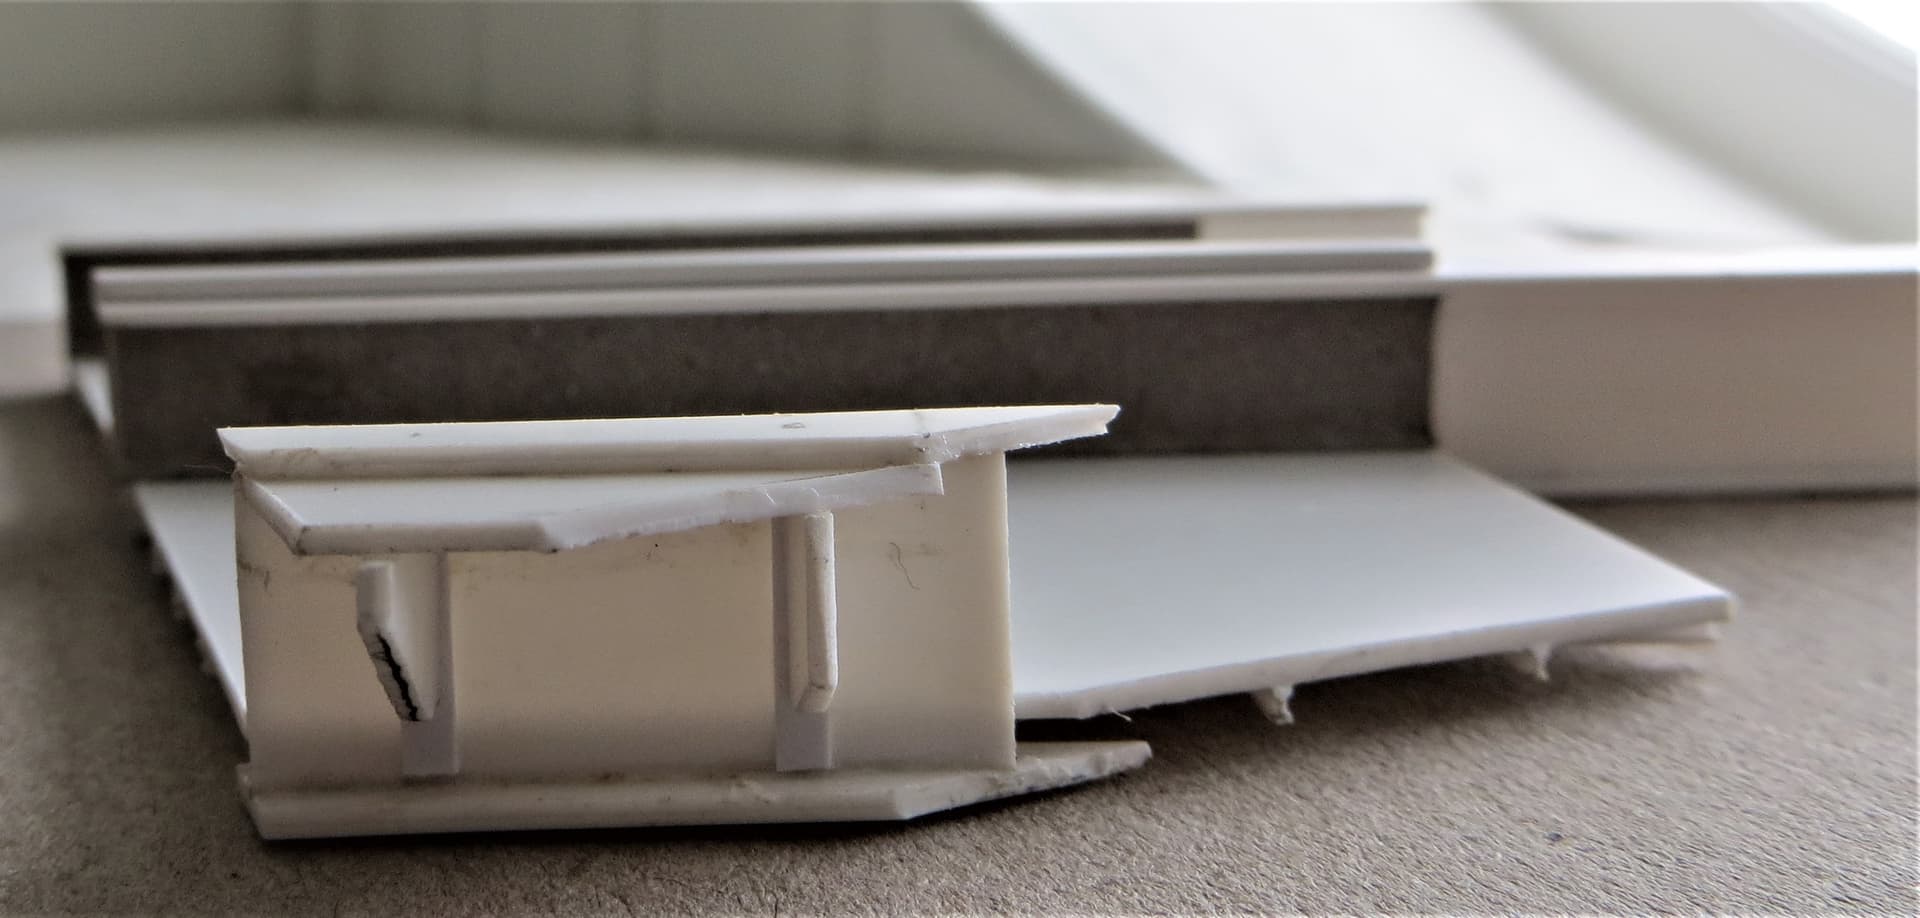
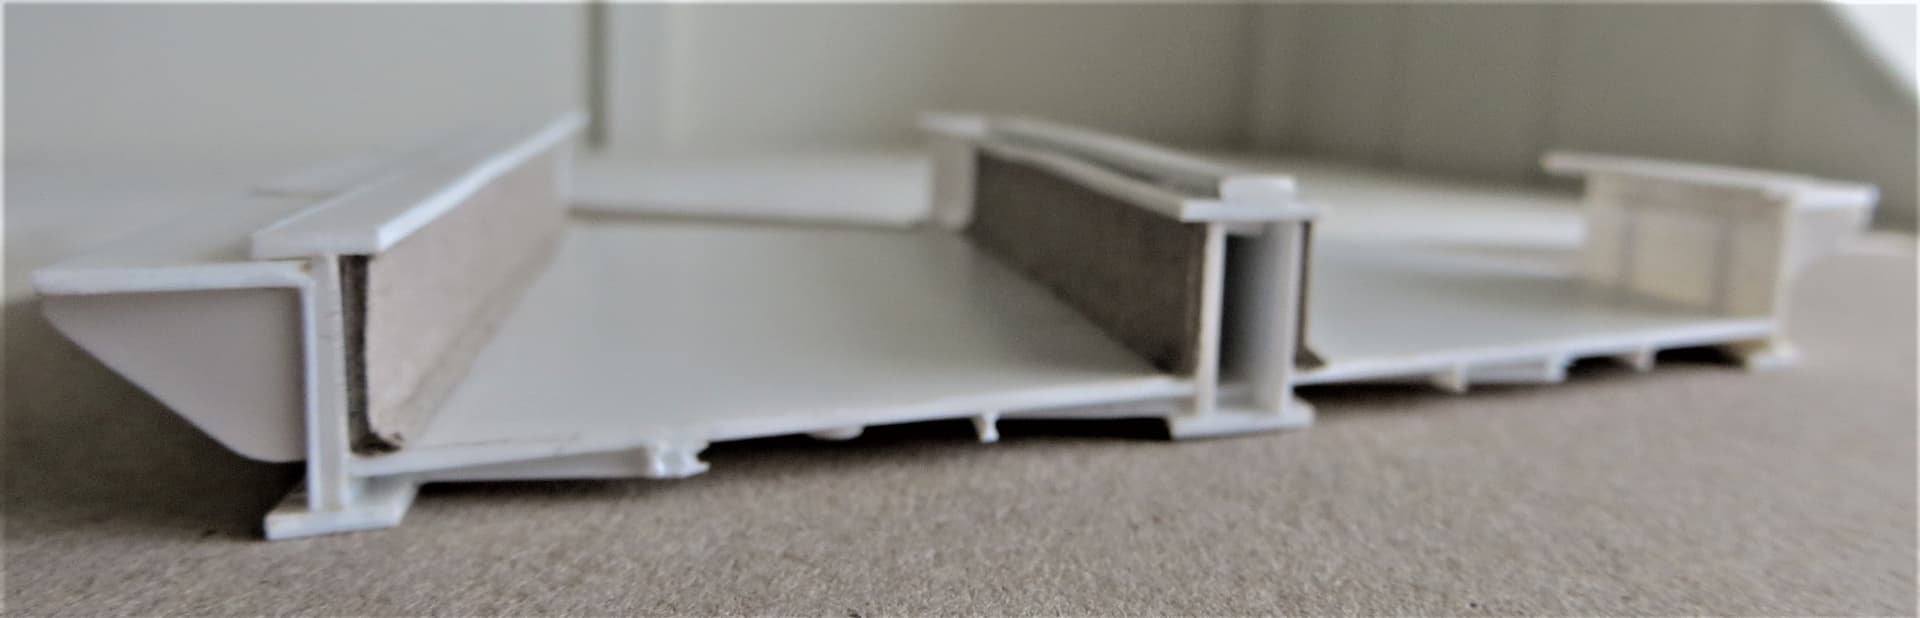
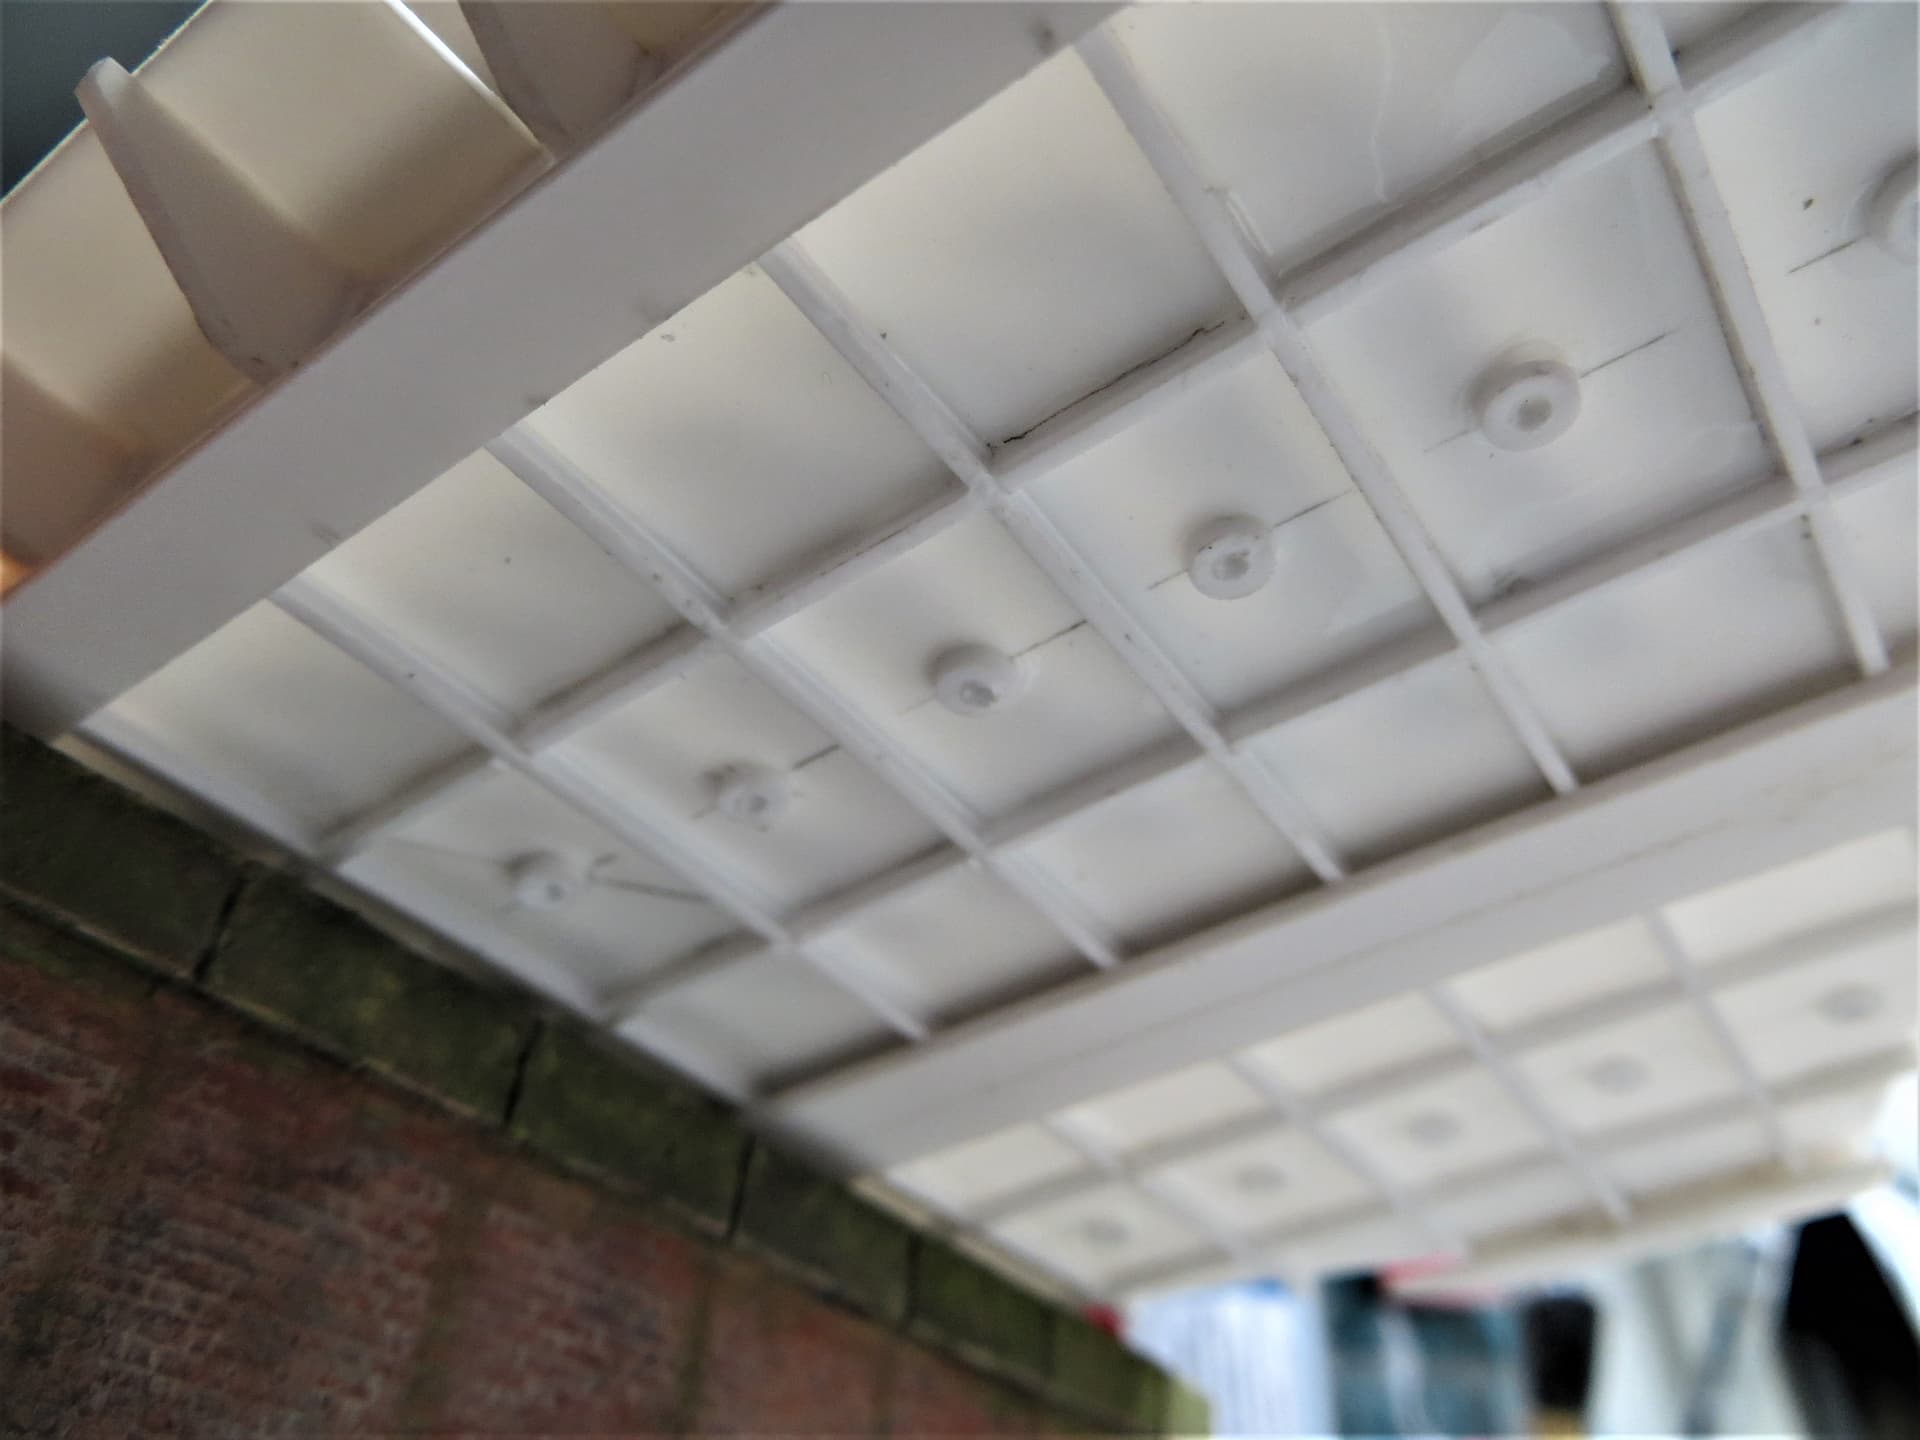
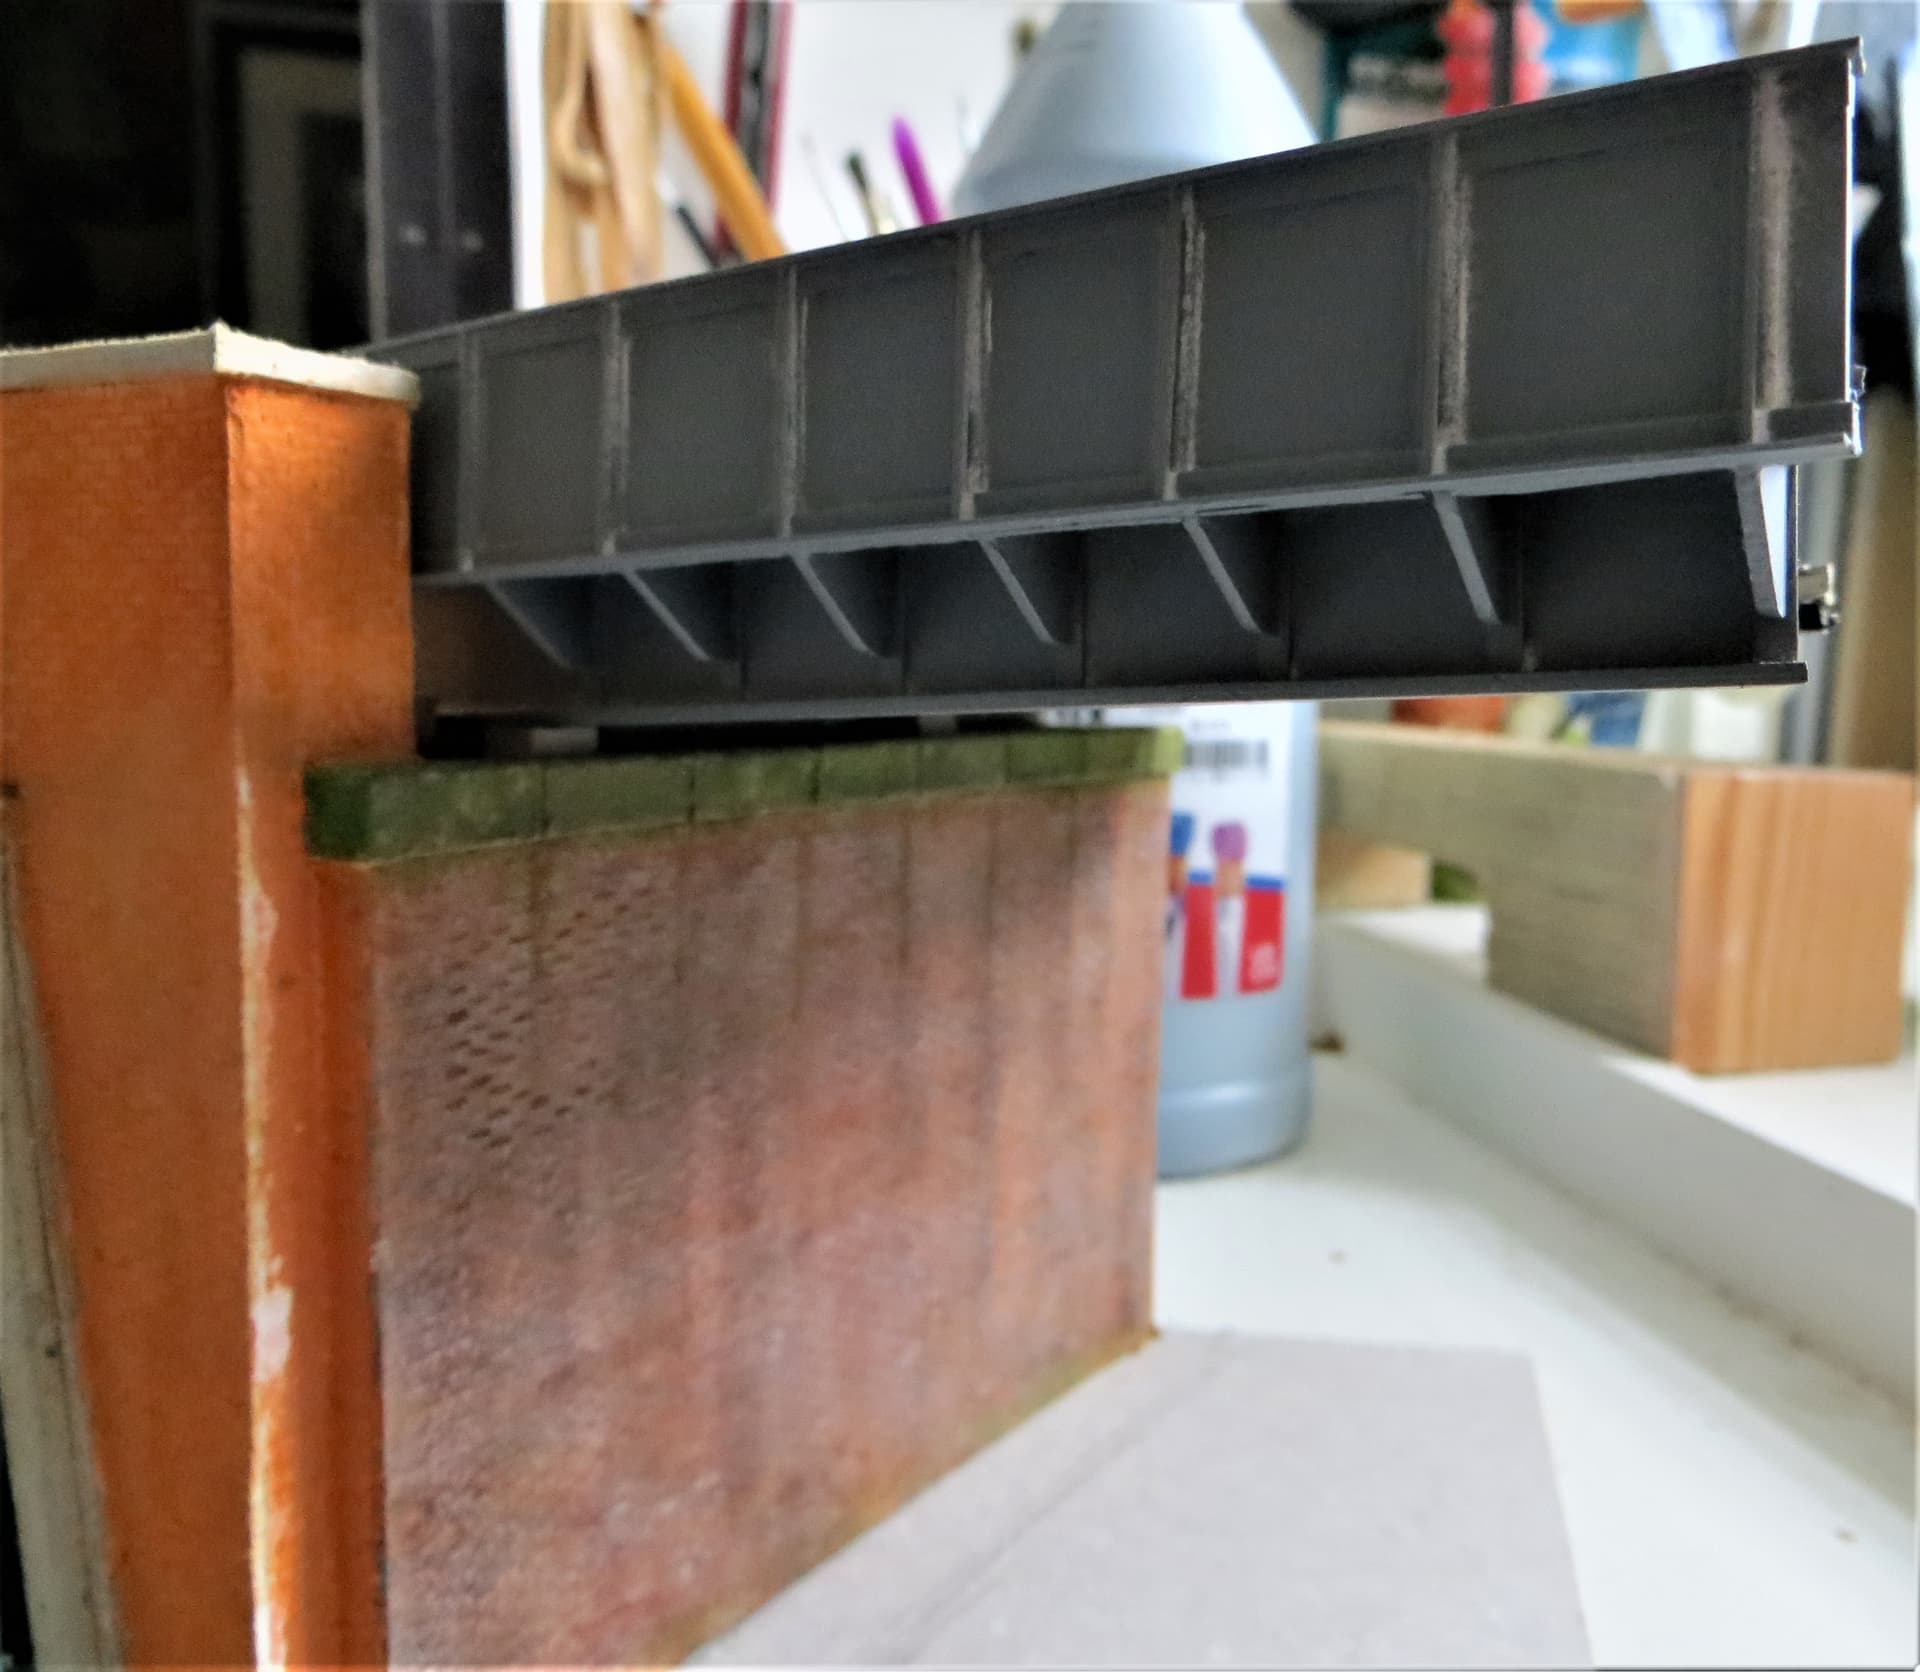
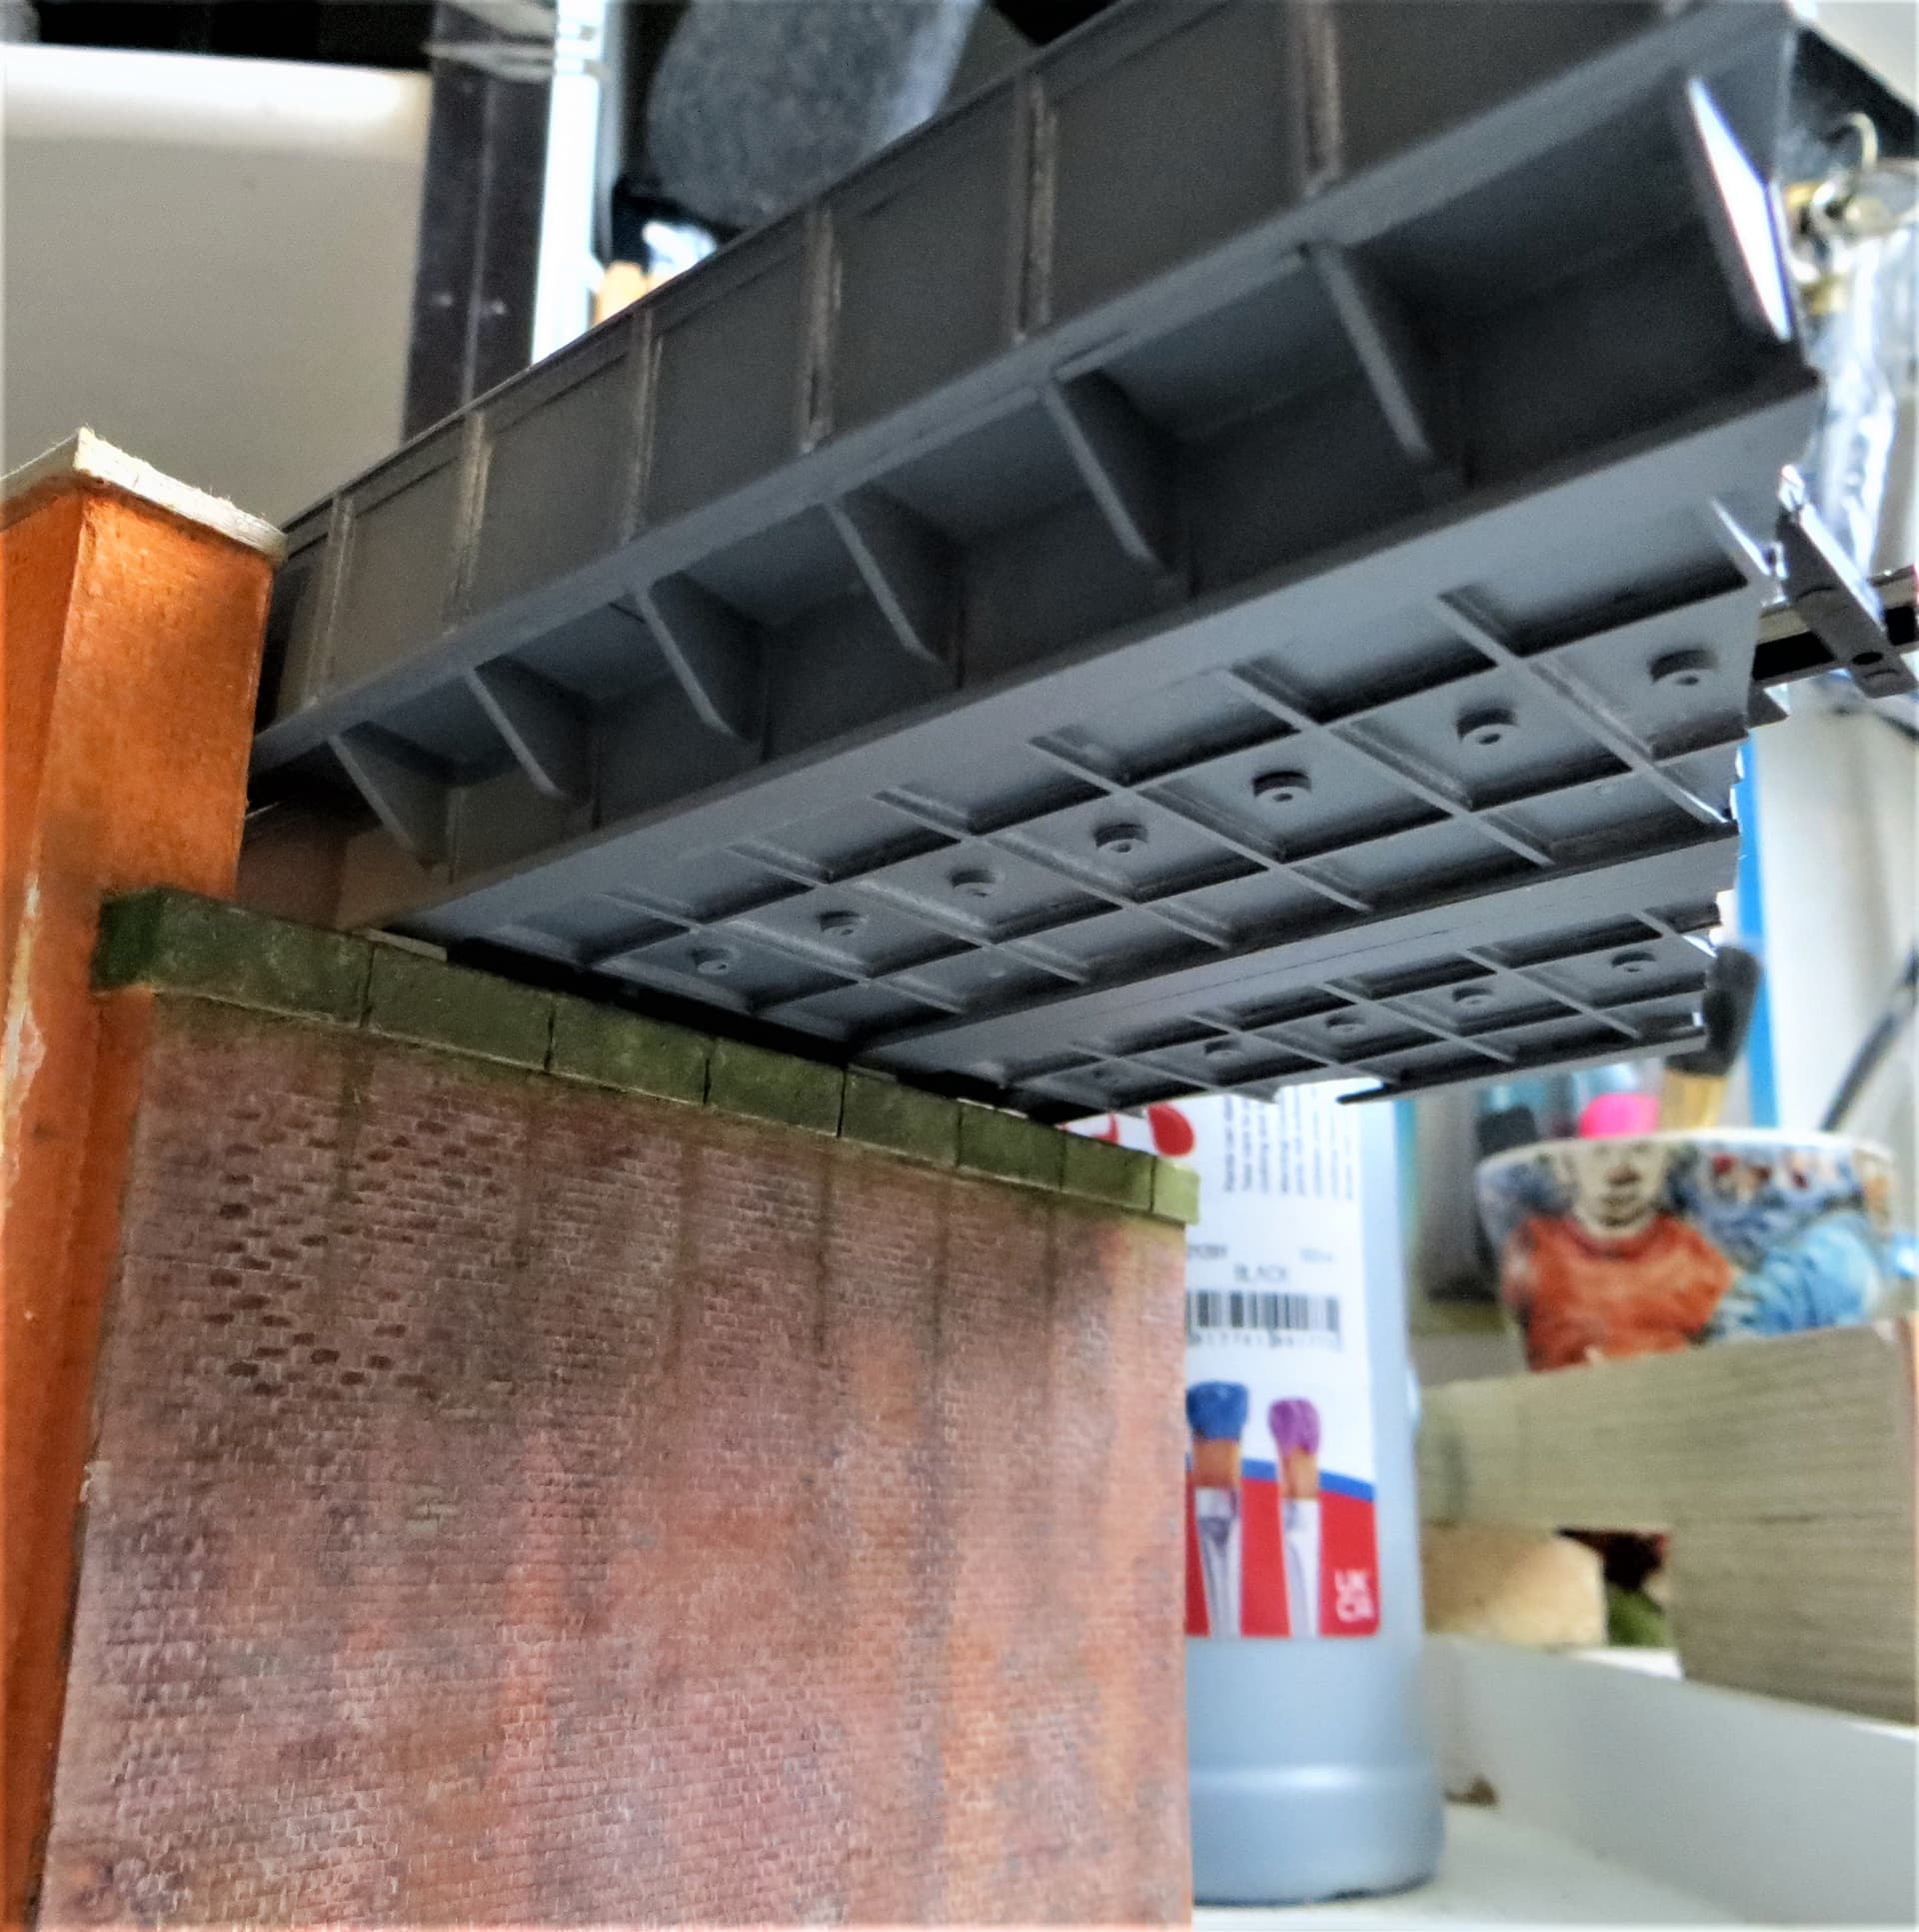
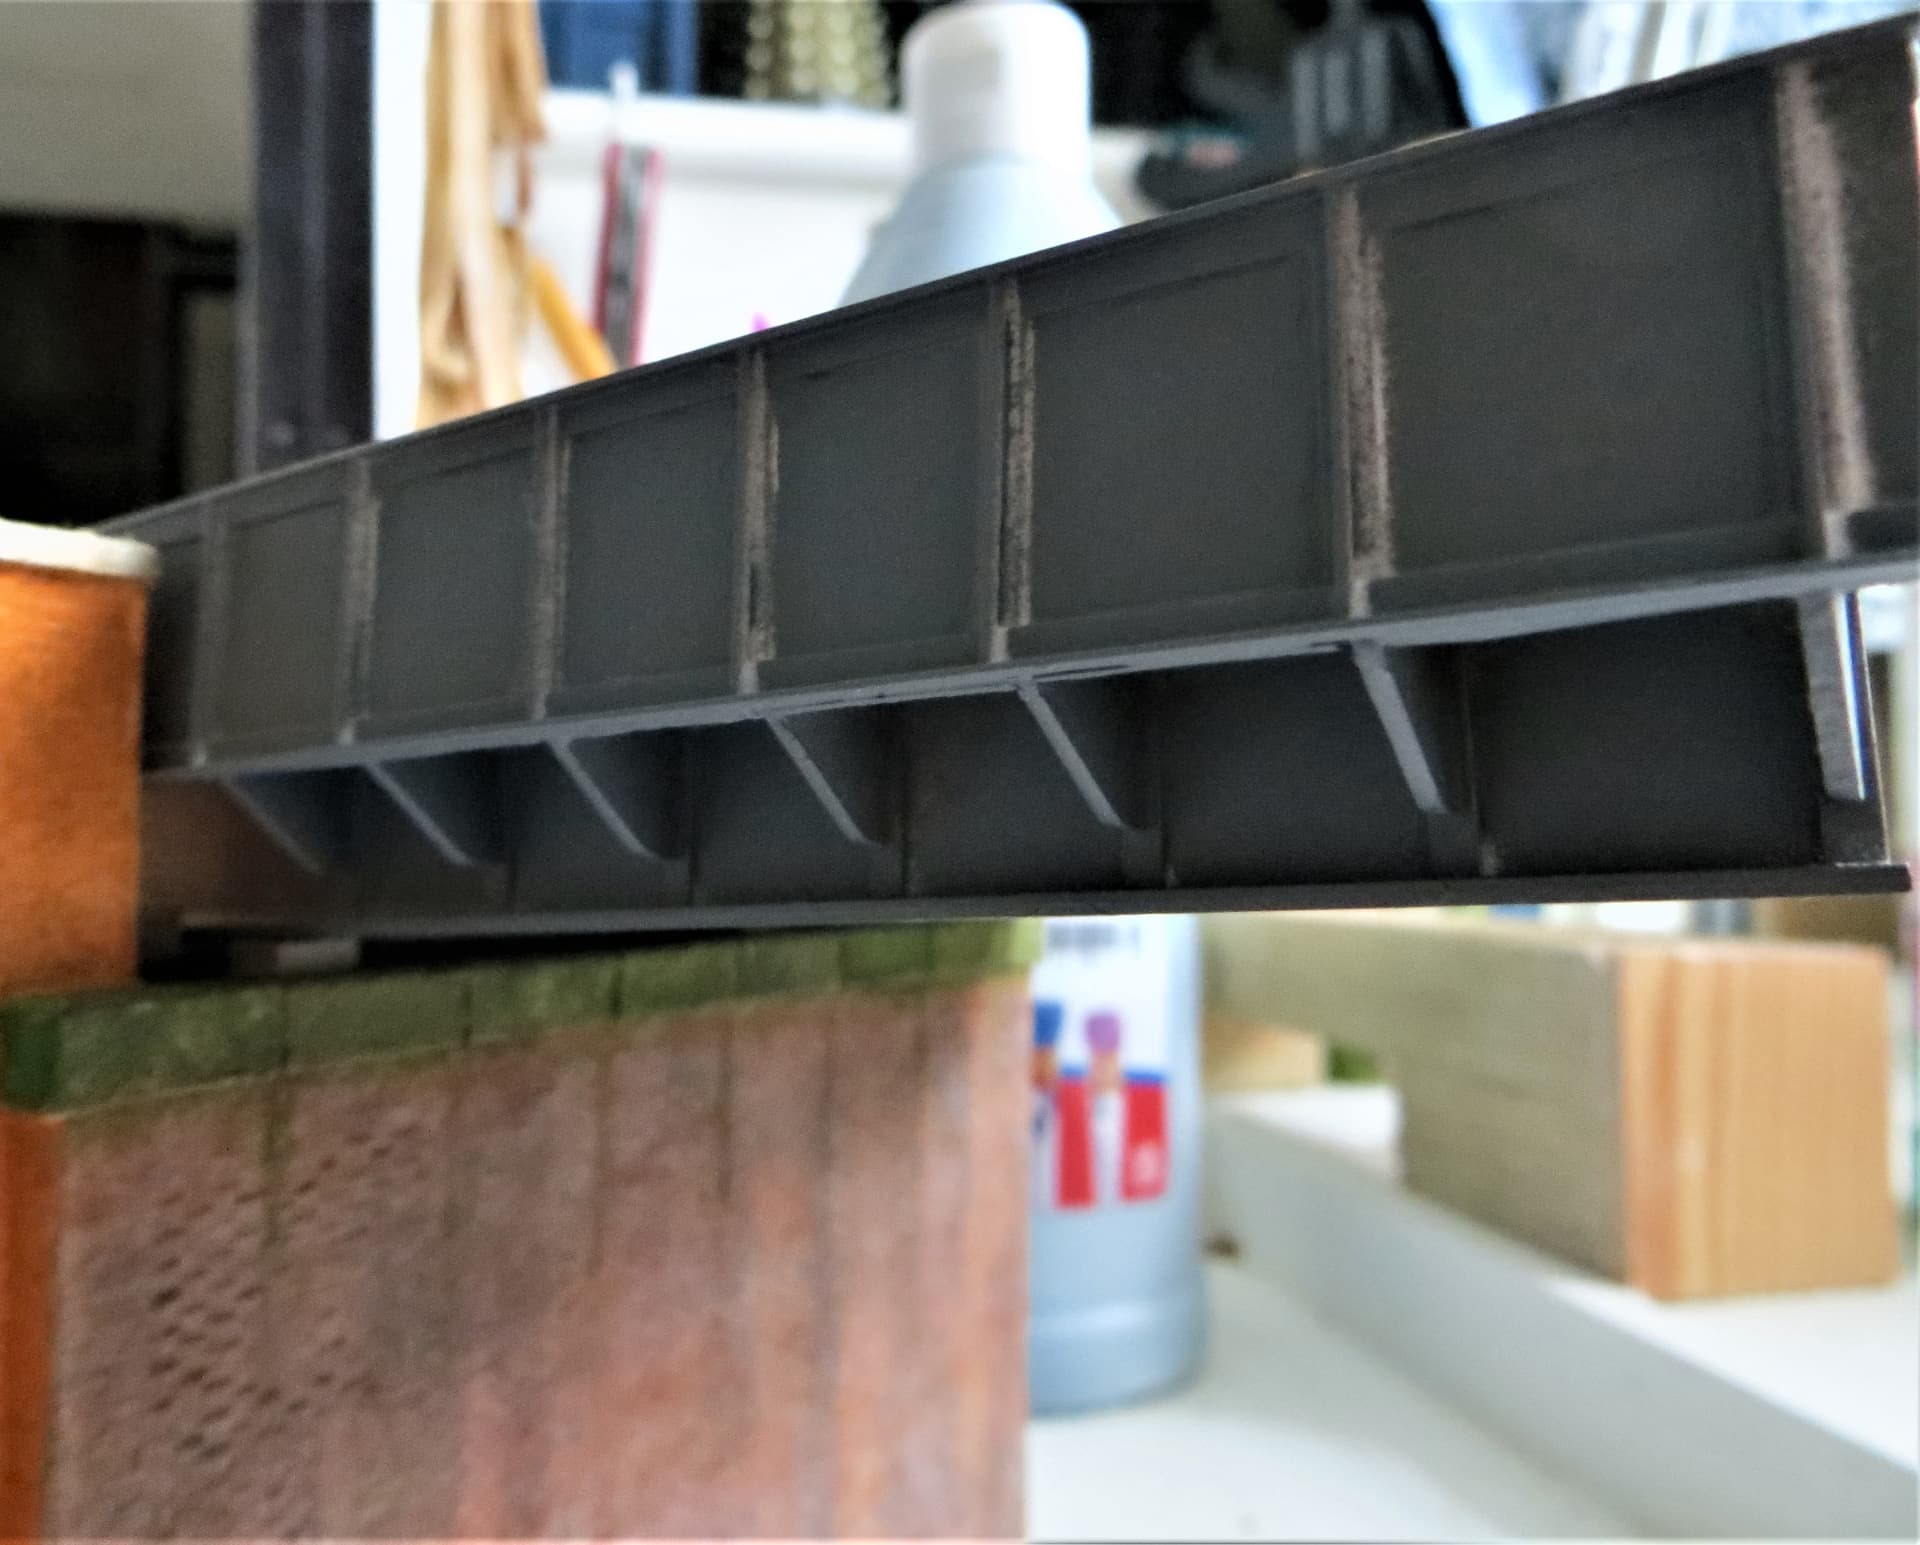
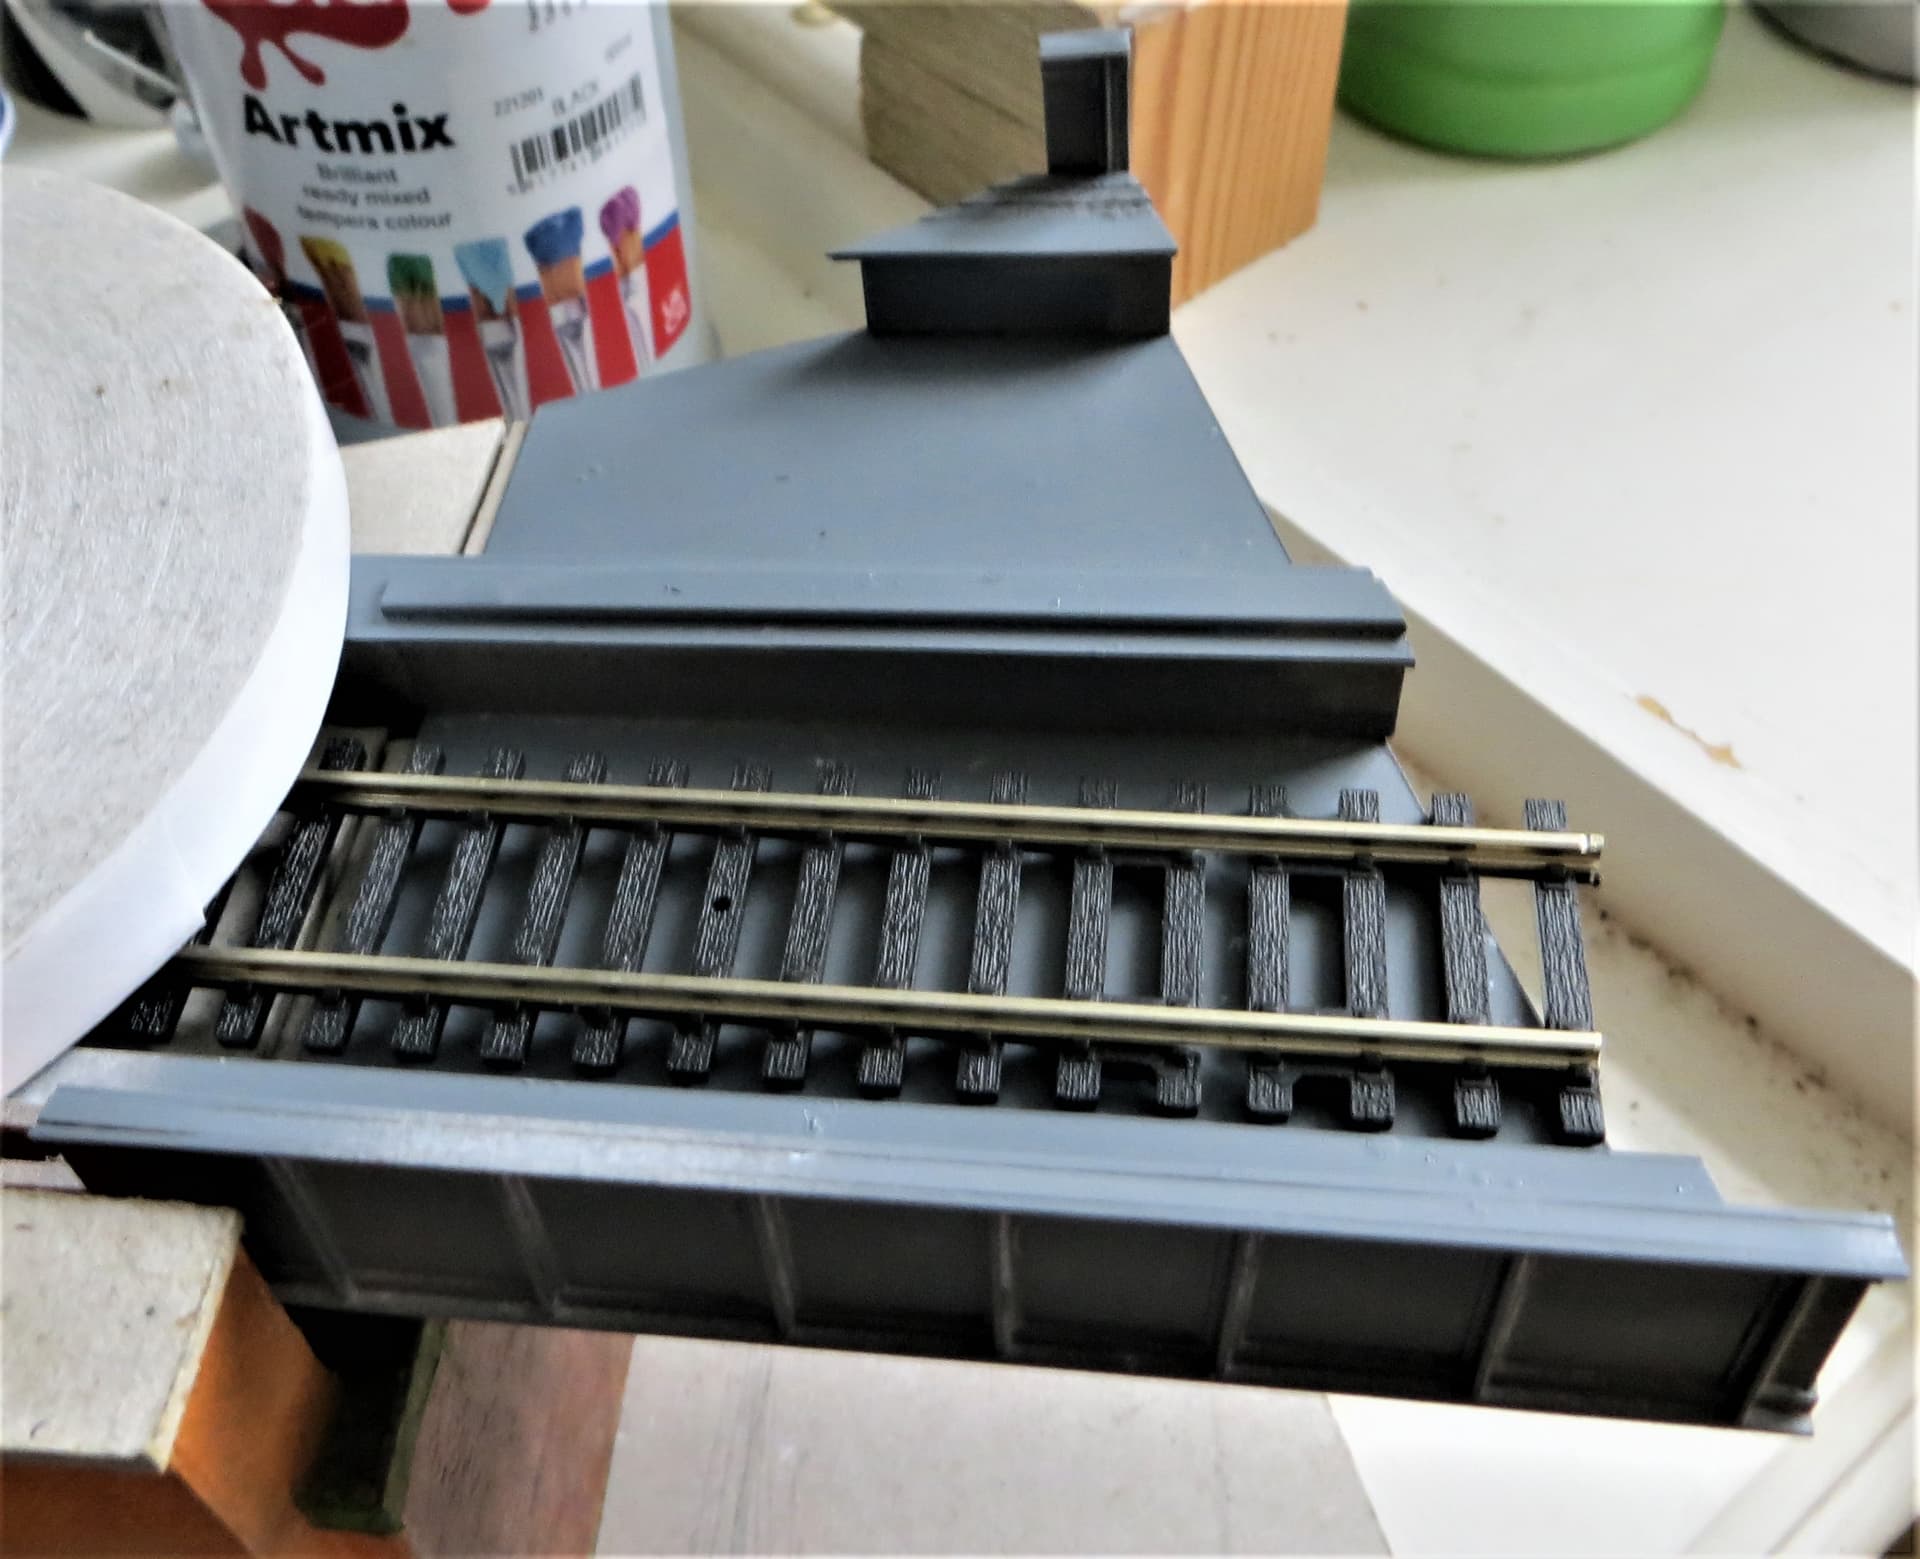
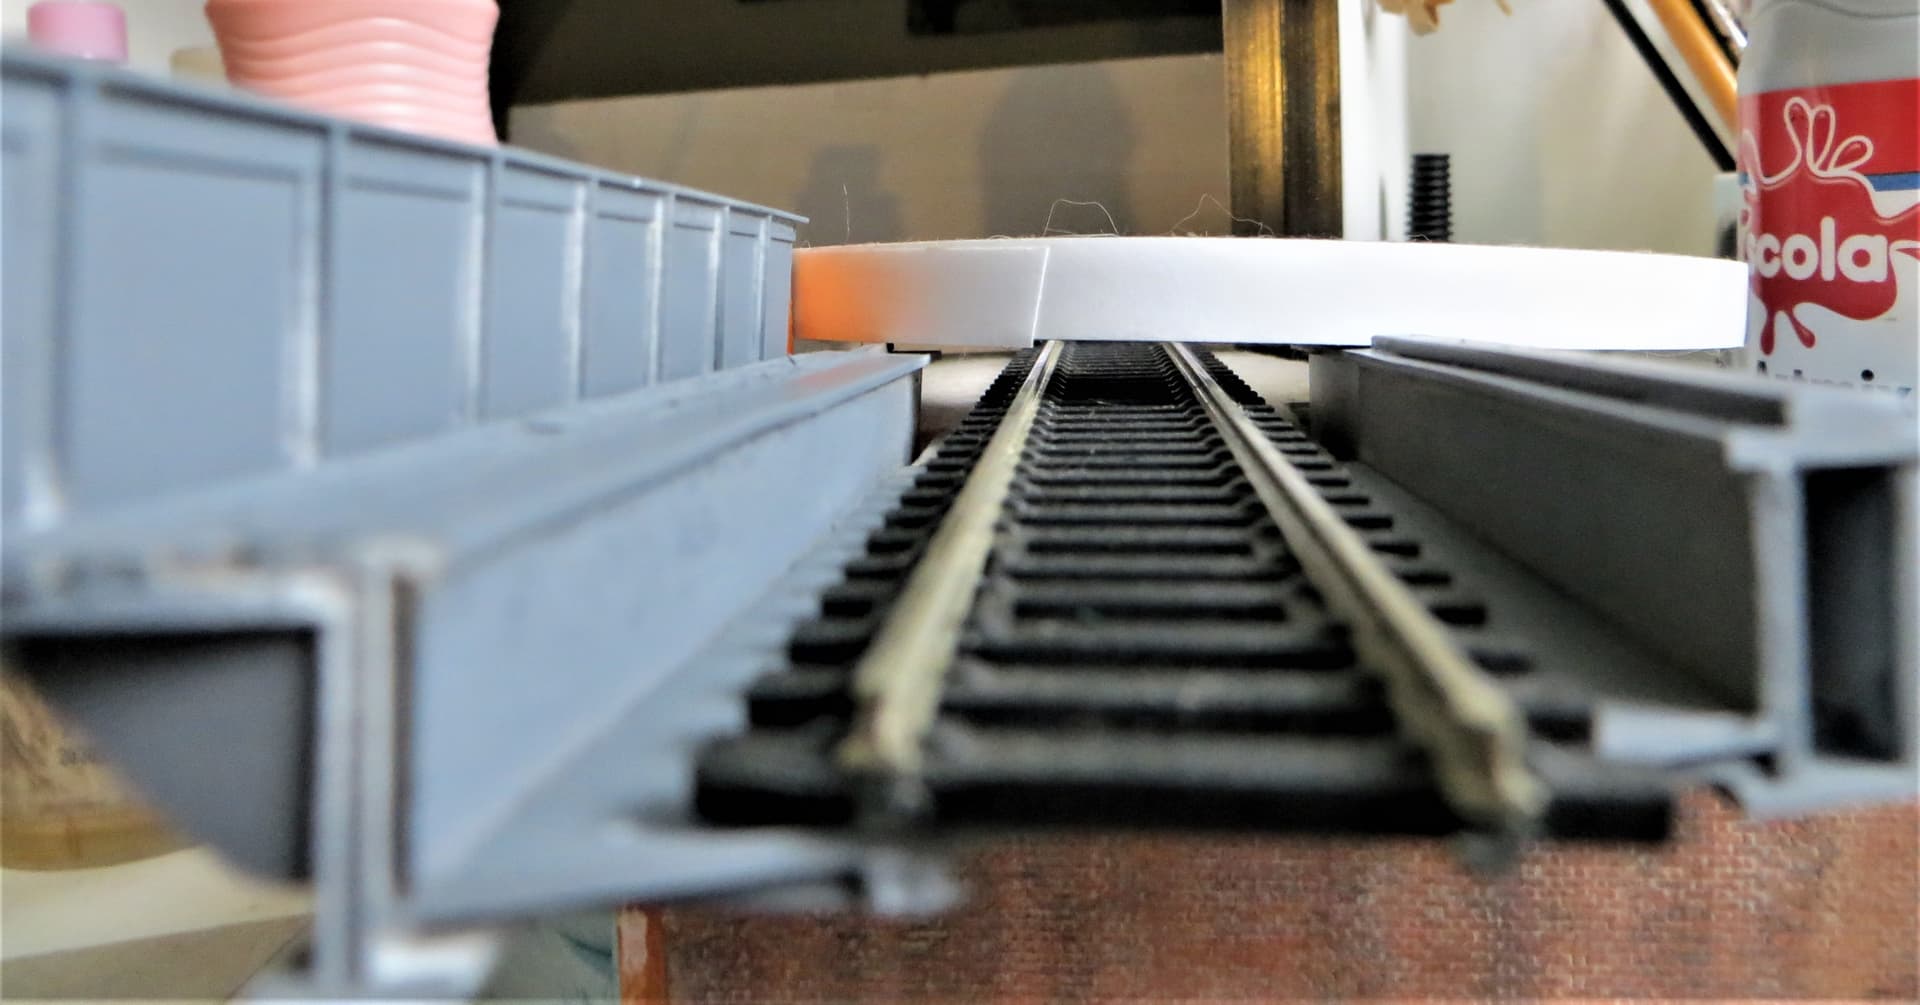
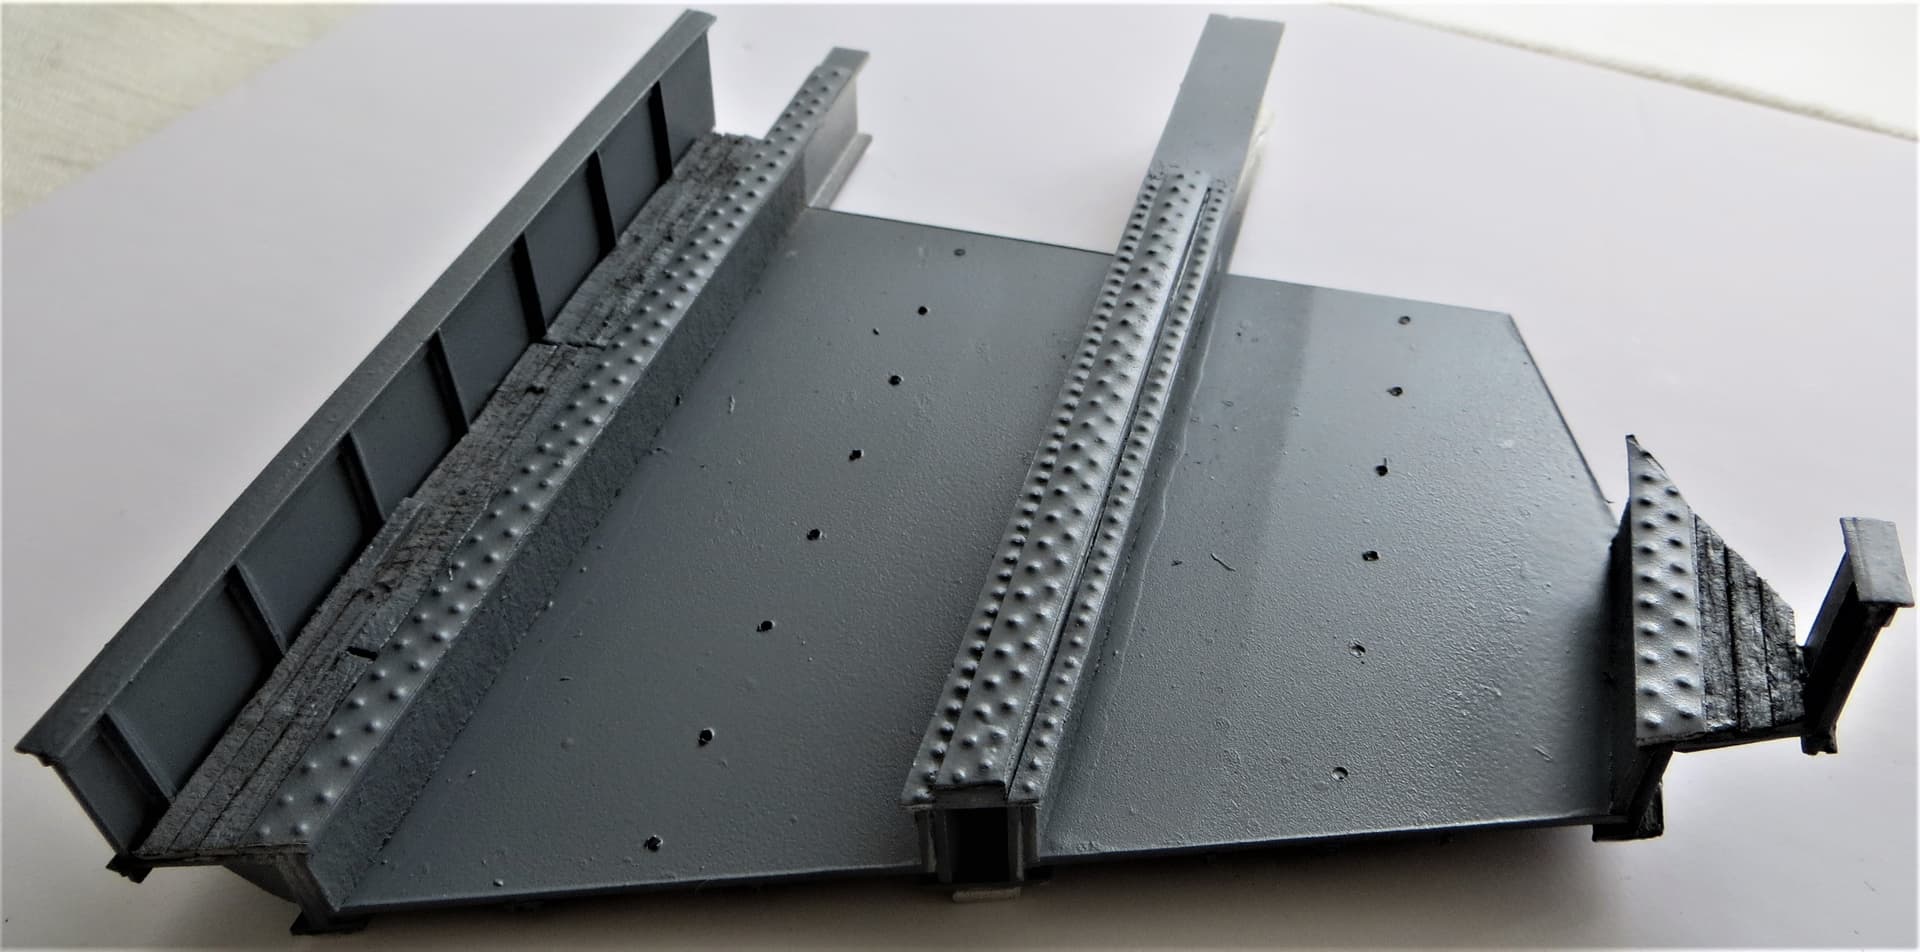
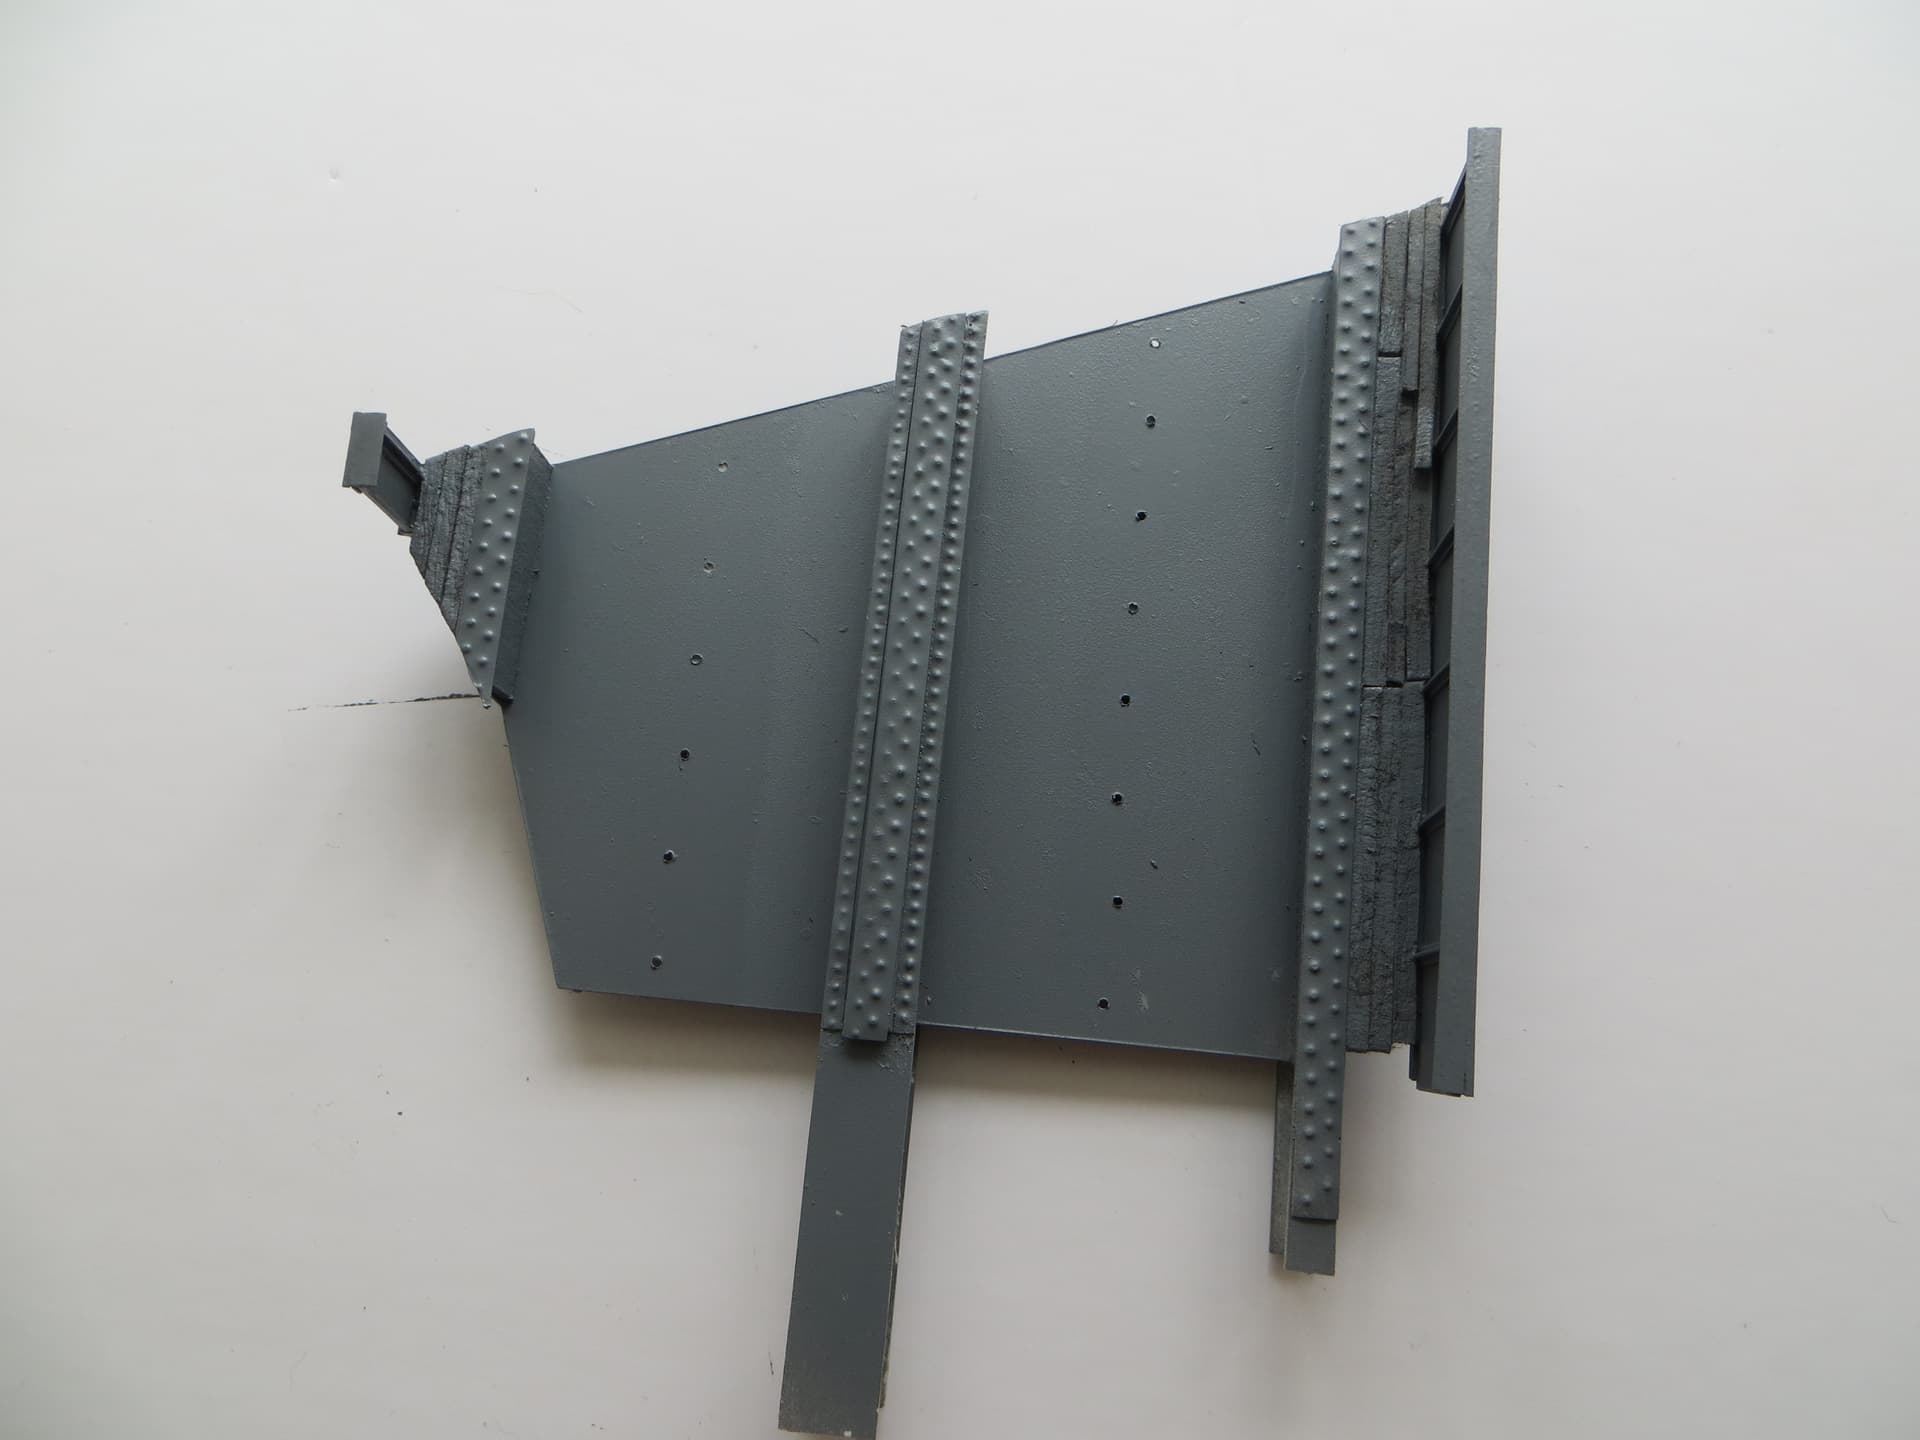
Managed to get an hour or so to work on the bridge structure, it’s a tad rough at this stage, so needs tidying up.
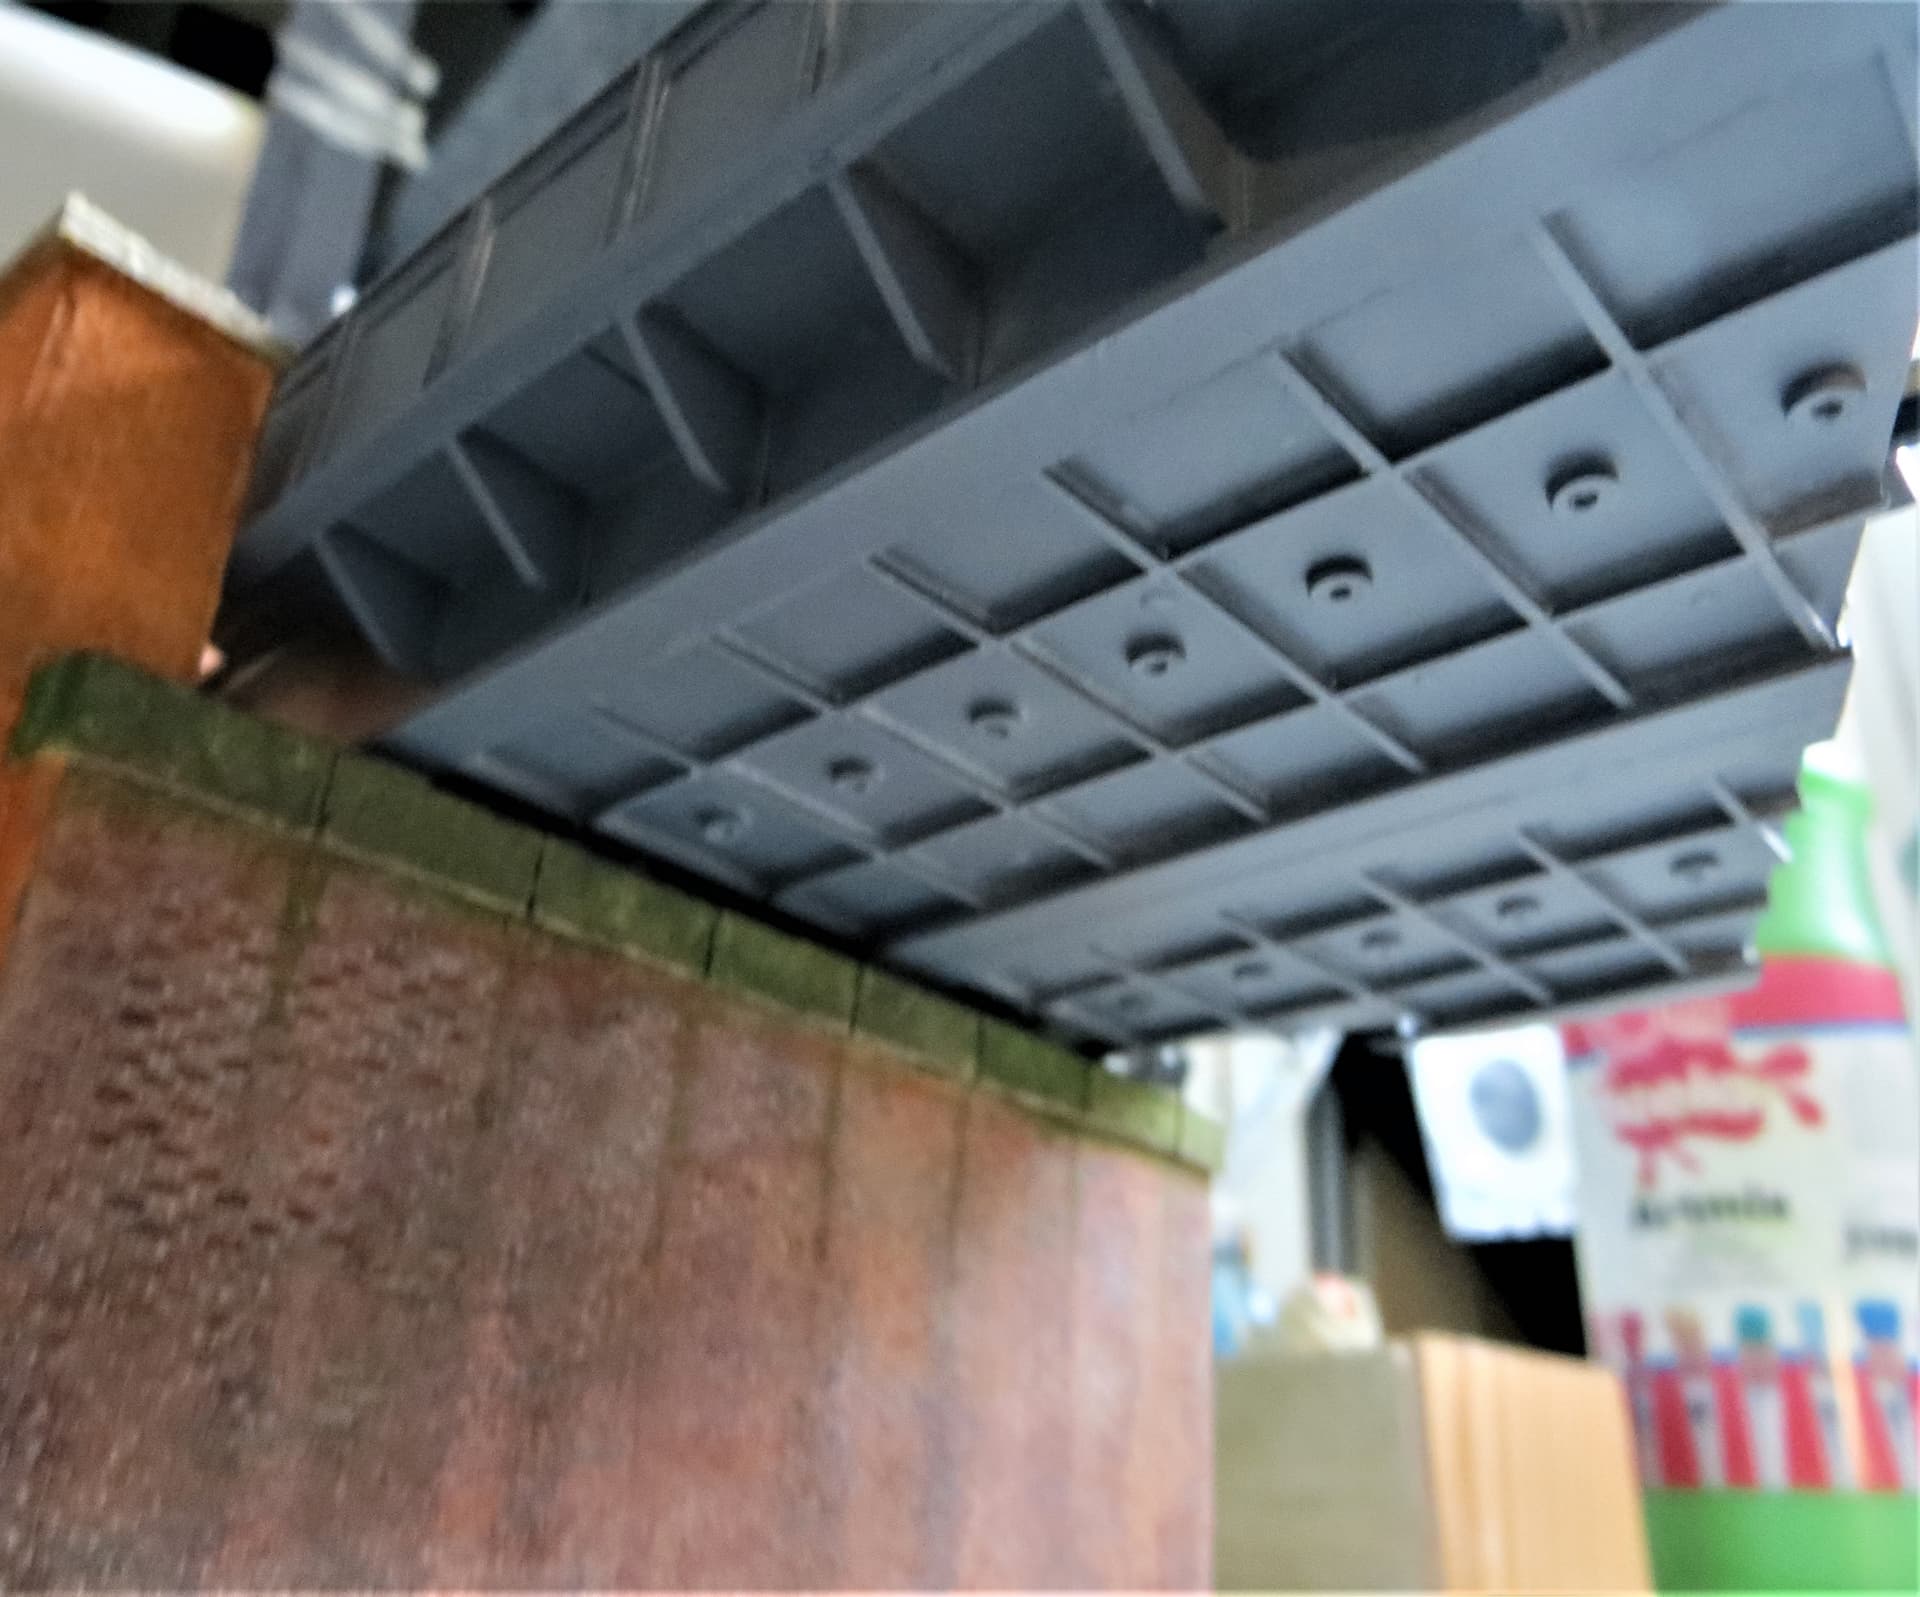
I’ve added the supporting beams that run the length of track below the decking, drainage holes beneath the plates, and have started on the maintenance footpath.
The grey card inserted into the the main supporting beams will be dressed with some embossed brickwork.
A few images of the bridge resting on the supporting buttress.
Cheers, ,
G
4 Likes
Hi all,
Roughed out a bit more of the bridge, very rough,  . I know there will be a lot of filling and sanding, so I’ve given it a very rough primer coat which highlights all the nasty bits,
  .
.
Once everything is filled and sanded I’ll have to start thinking about rivets, etc. I might also add some patches as I imagine the maintenance of such structures wasn’t always great during the war, .
Cheers, ,
G
3 Likes
Thats looking cool mate. Can just imagine it with the paint on and the rusted areas, streaks coming from the rivets. What sort of colours you thinking ? I have seen a lot left just in the primer red and also various shades of grey and some that are just coloured … Very interesting and detailed work dude …
1 Like
My, have you been productive!!! And nice work you delivered too!!! Now up to the riveting?
1 Like
Thanks for reminding me about the rivets chaps, .
I’ve had a bit of a practice and it’s going to be a painful process, and not all areas that would be rivetted will be as they’ll be too tiny, and too fiddly, . However, if I focus on some of the more obvious areas it’ll least, imho, give an indication, , see example below.
G,
5 Likes
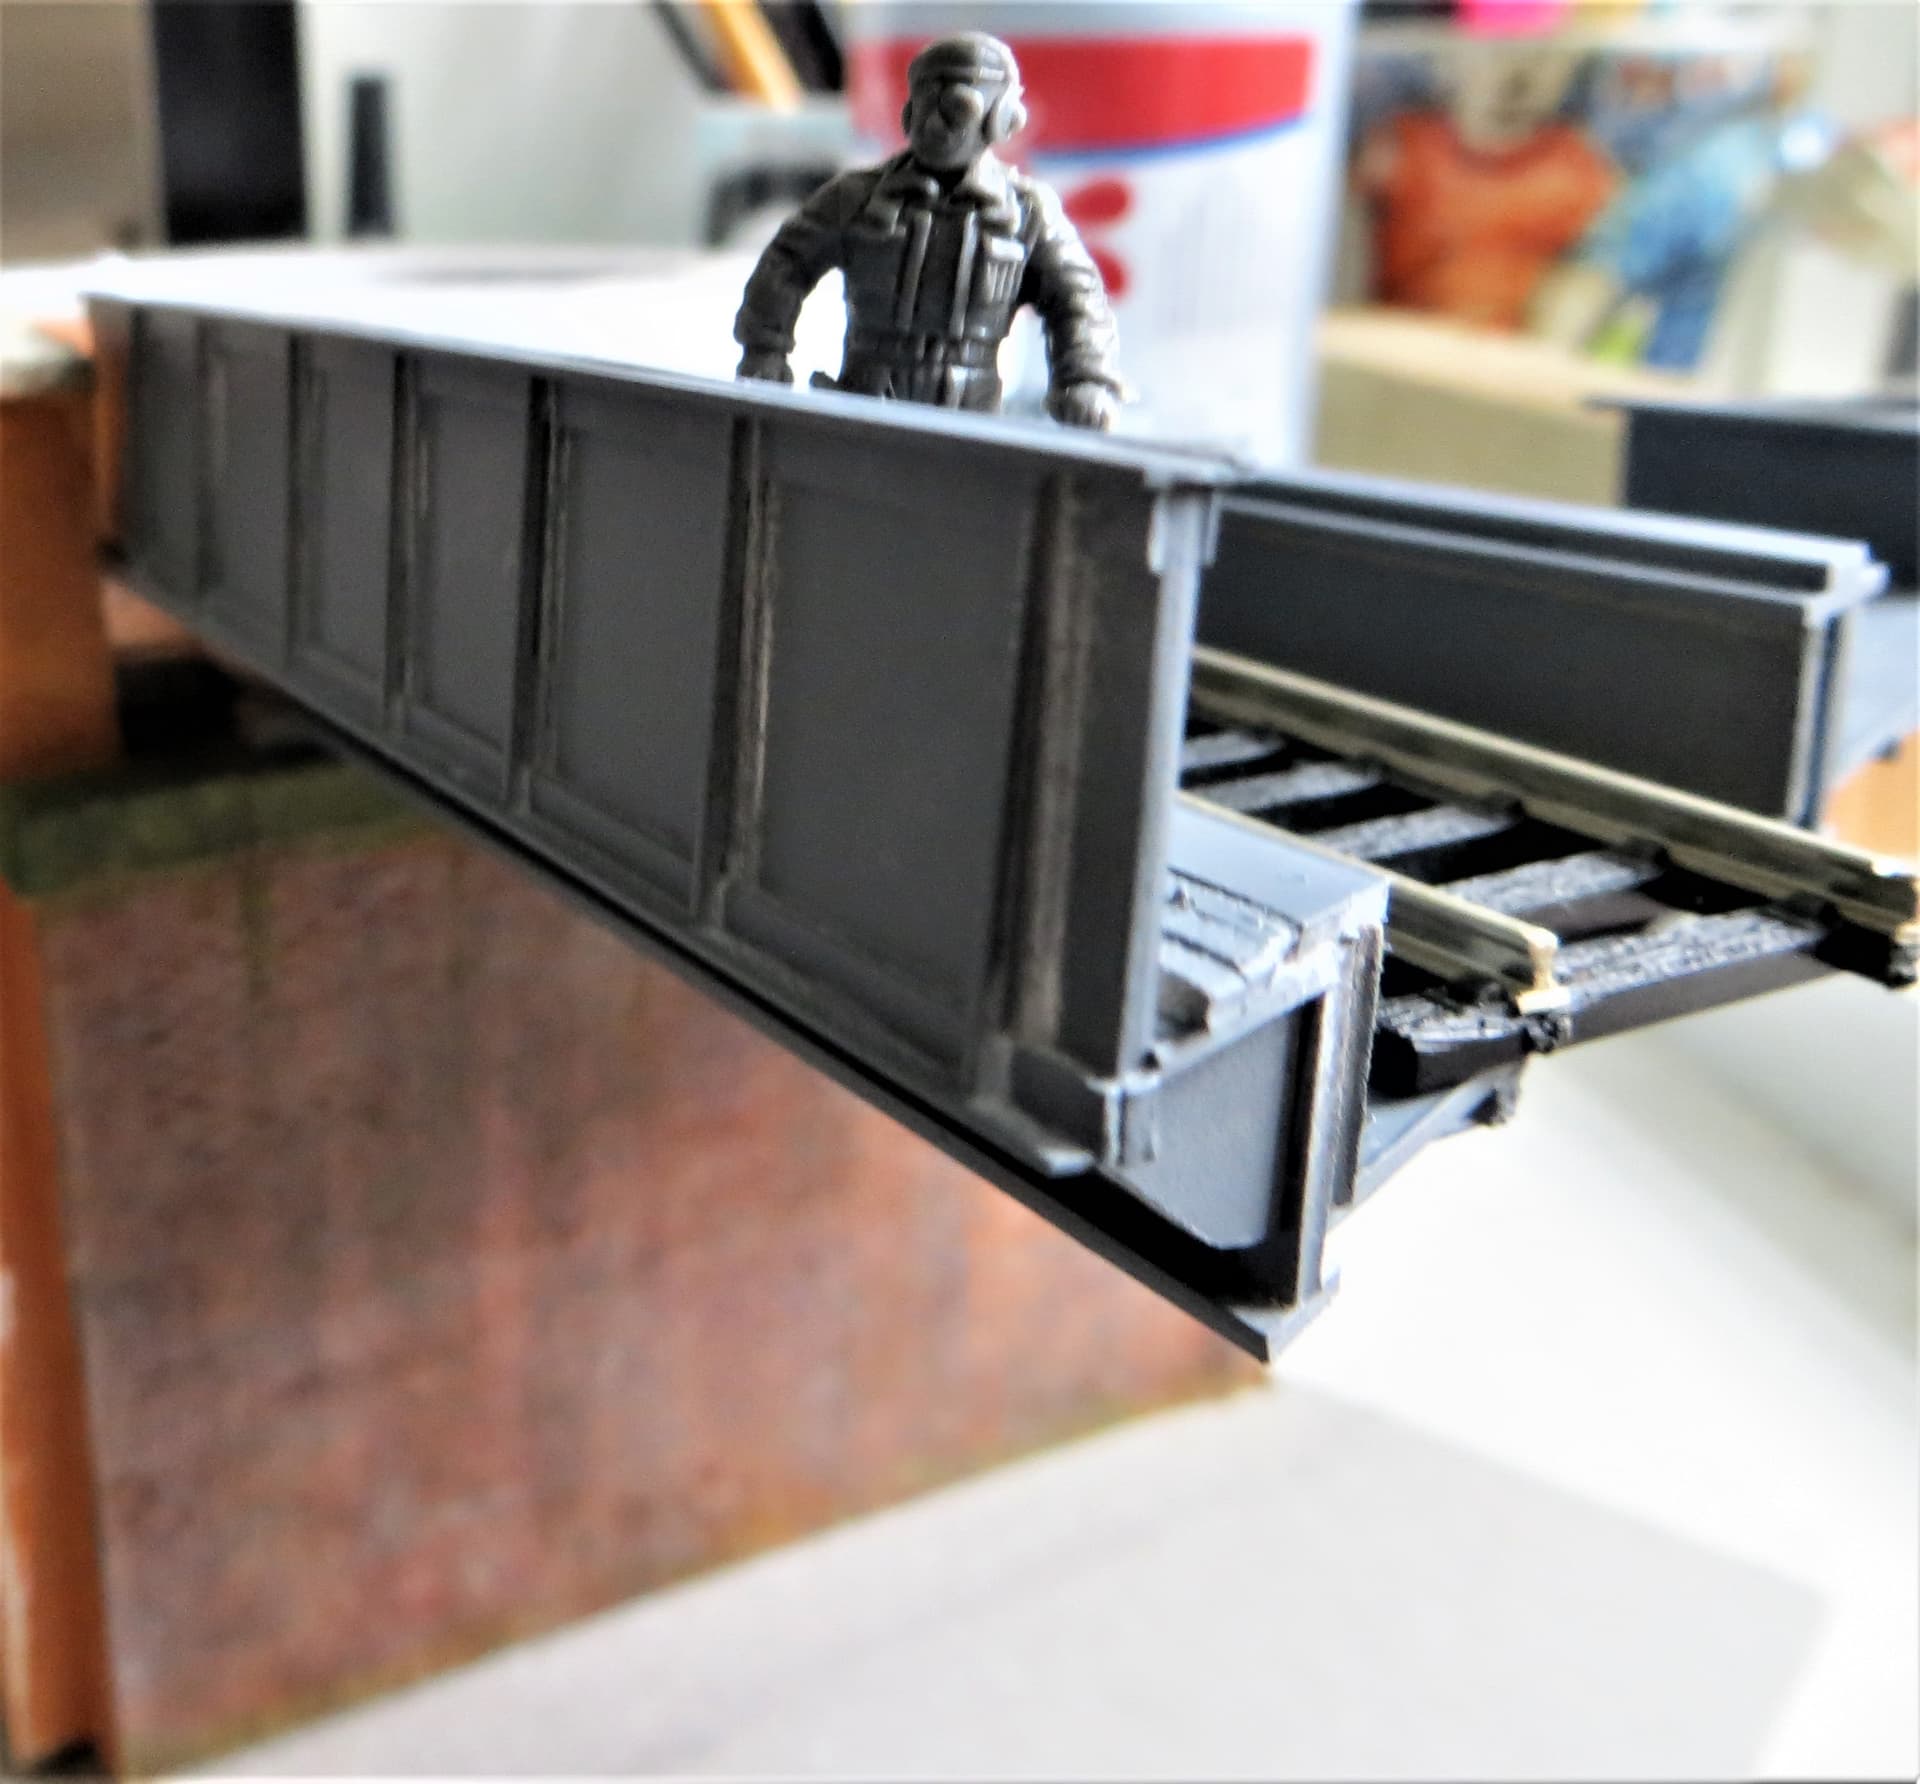
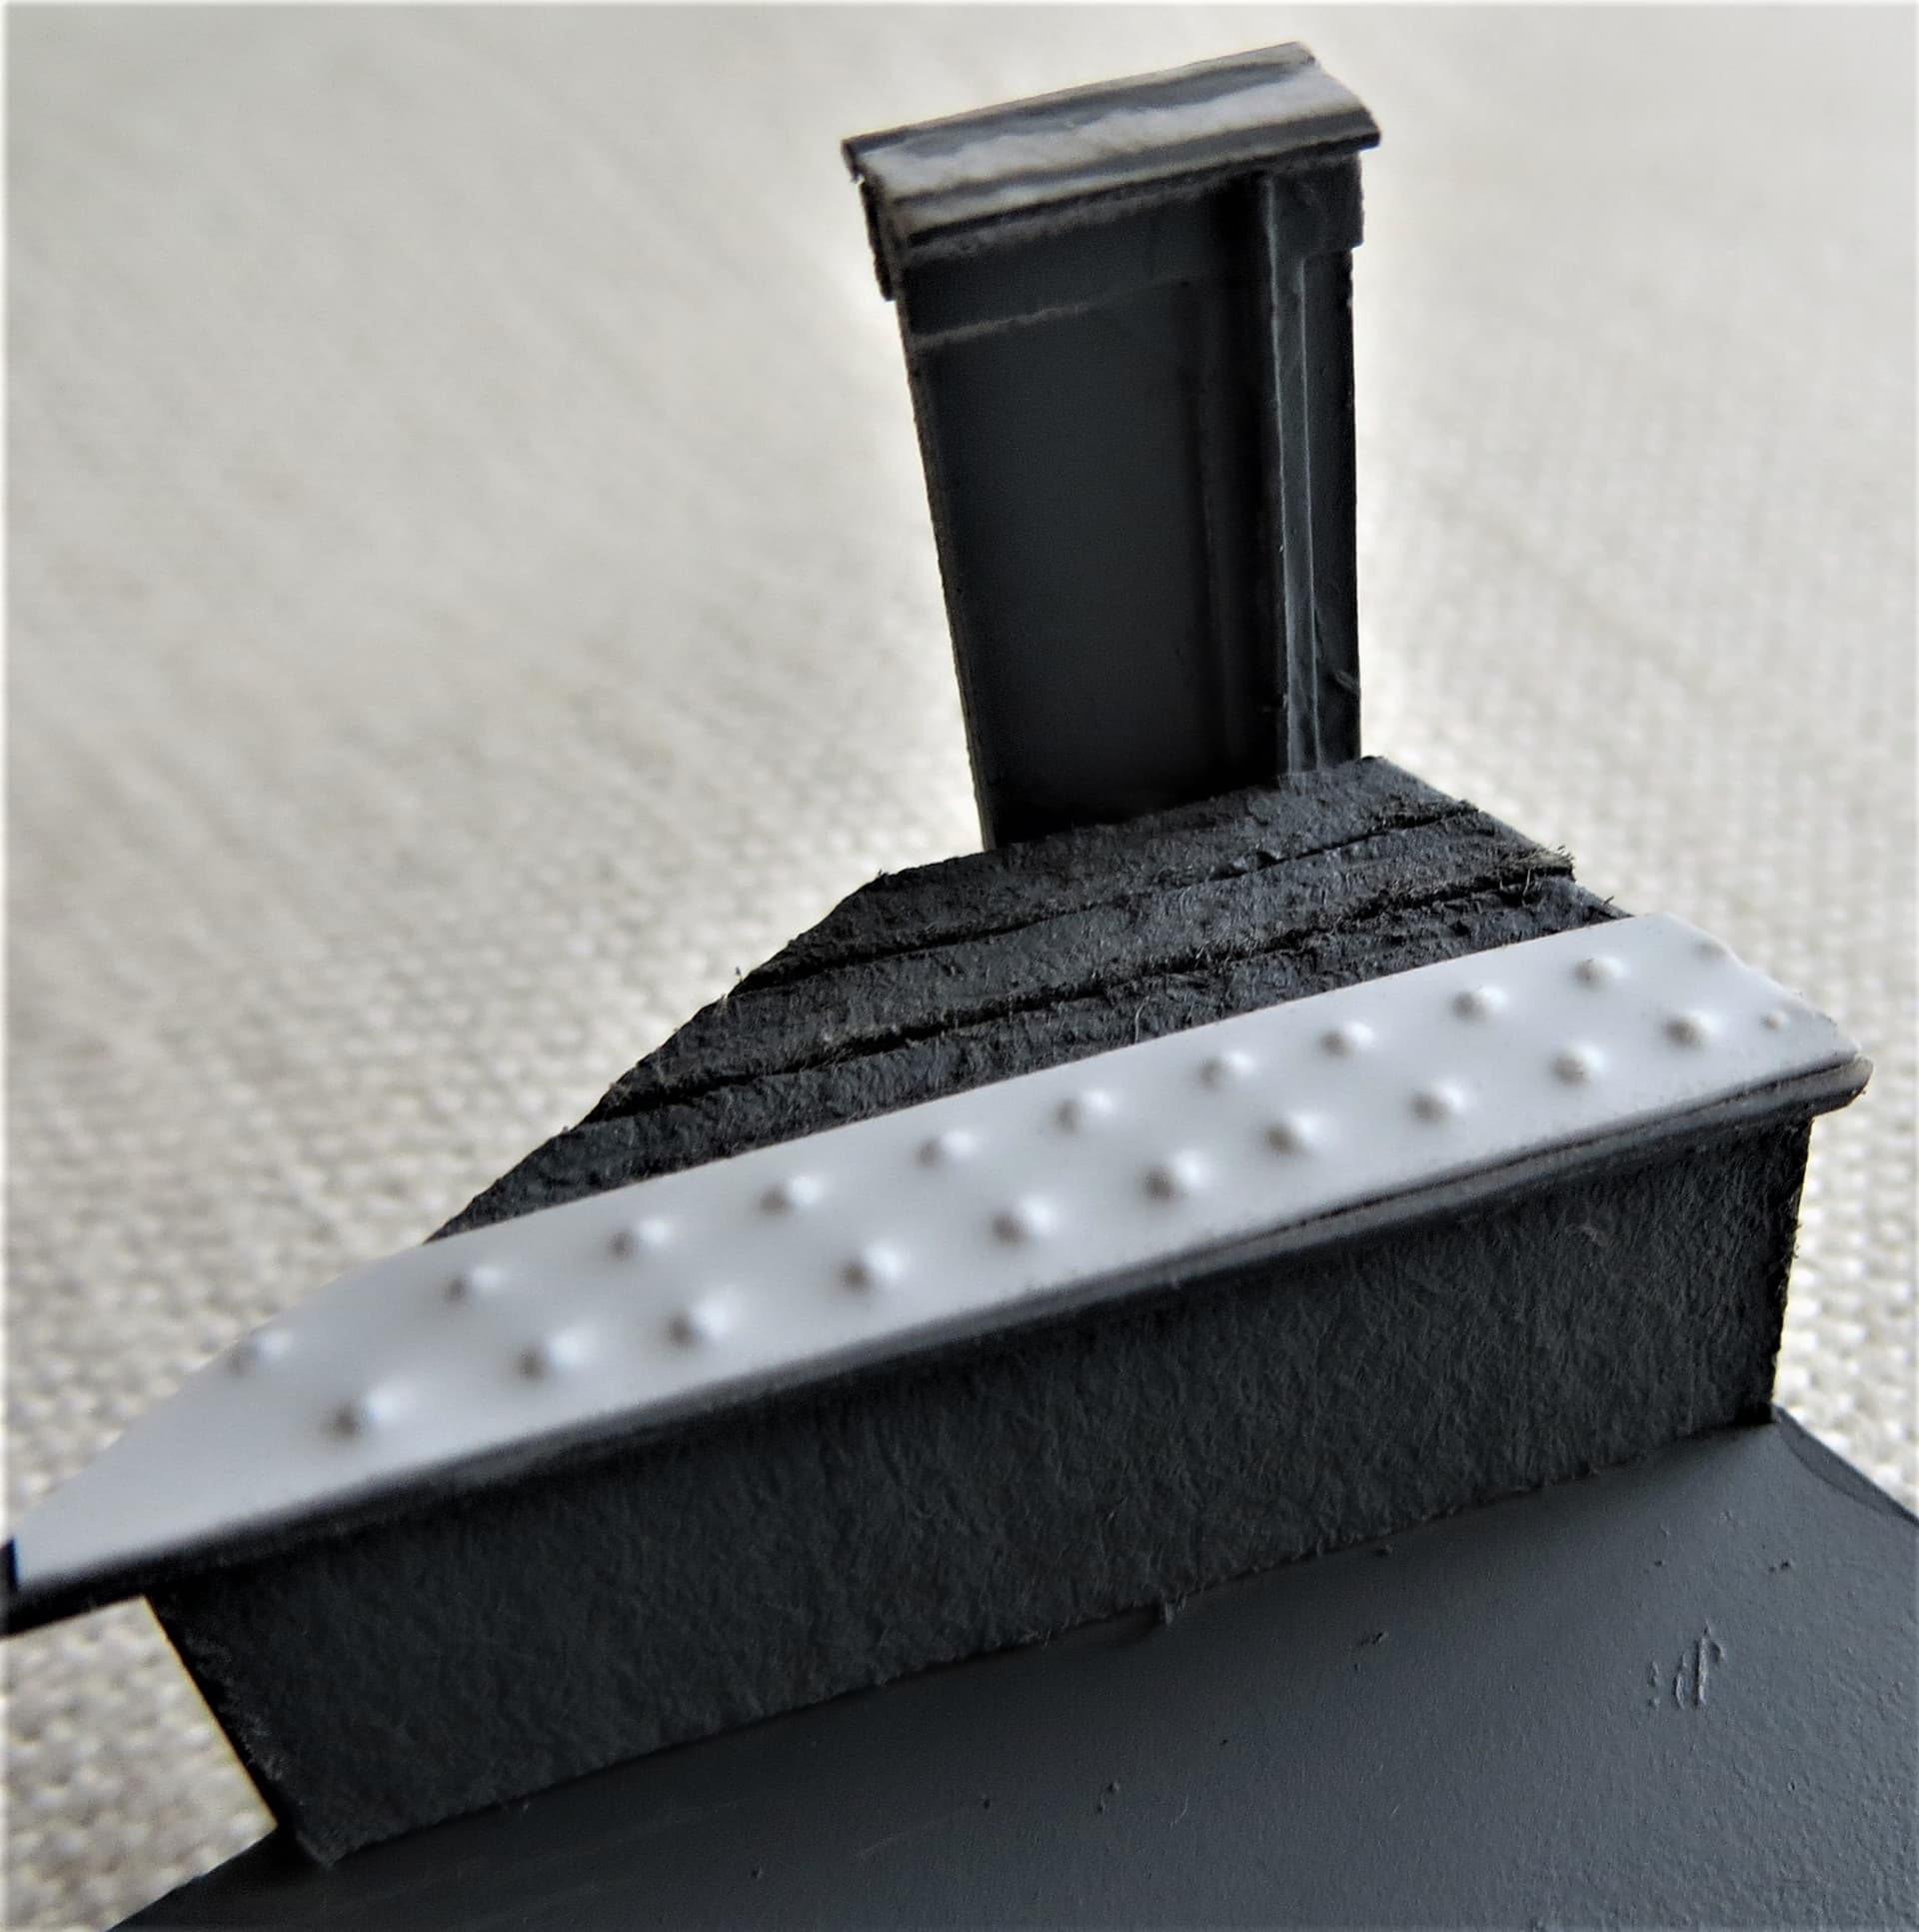
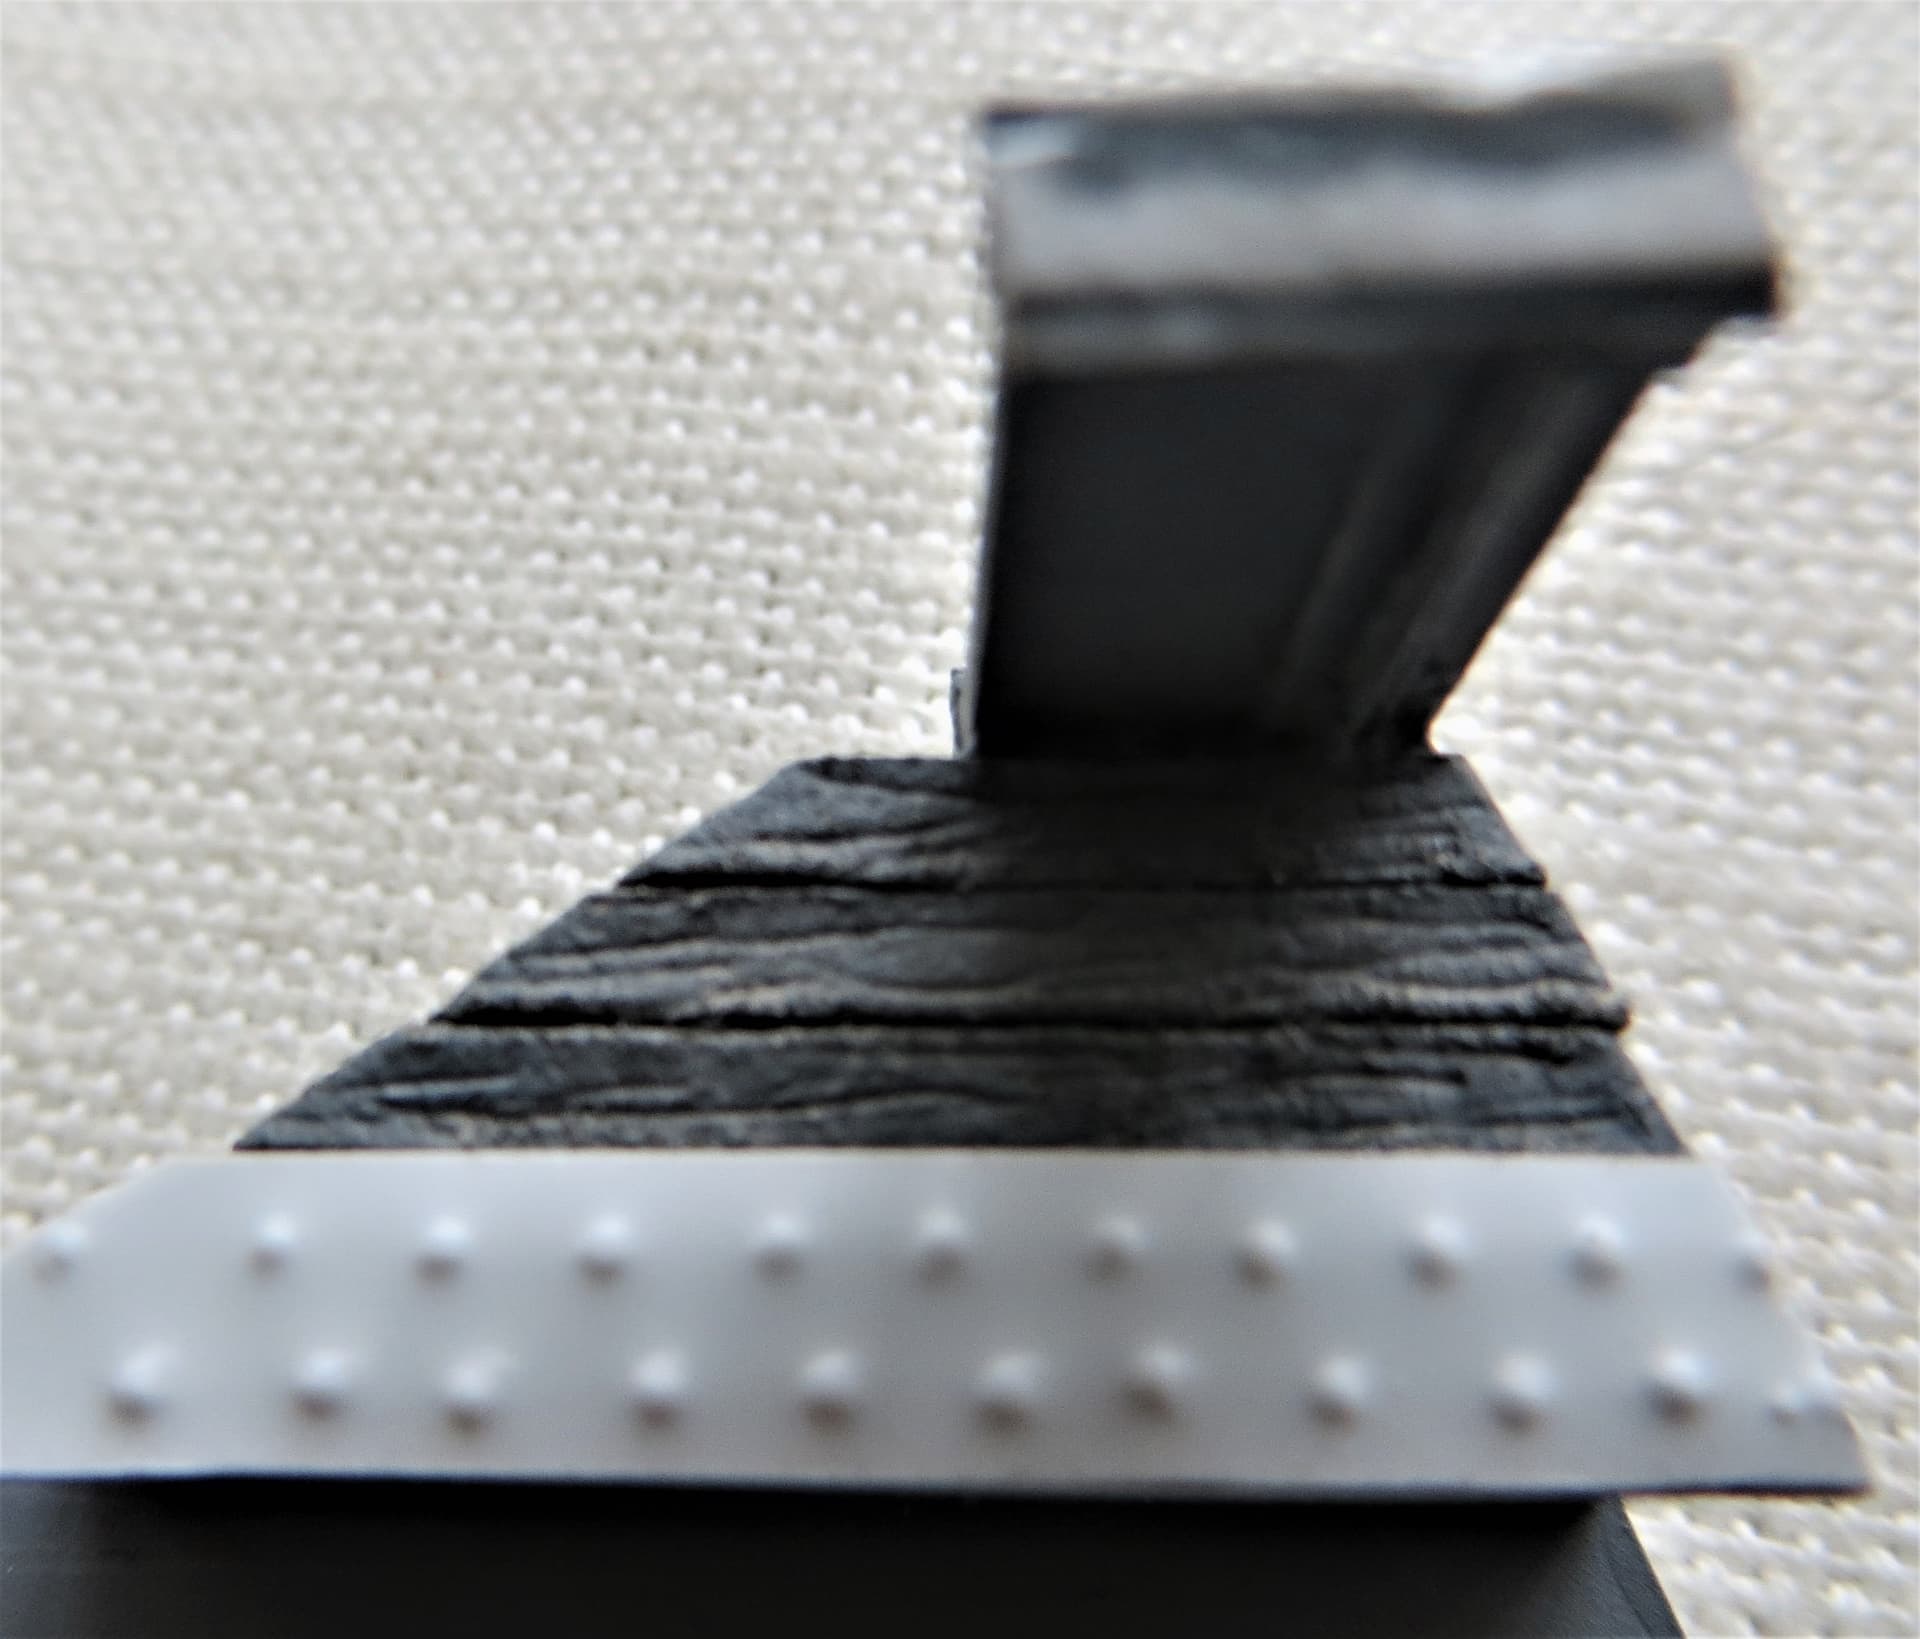
Hi all,
Managed to get a few hours creating rivets for the horizontal surfaces to the top of the bridge deck, will do something similar to the bottom tomorrow…if I get the chance, .
Cheers, ,
G
5 Likes
Just to confirm, that was the pushing through from the other side method to get the rivets ? Looks spot on, really like it.
Hi John,
Yes, I cut strips of very thin plasticard sheet to roughly the same width as the beams, then marked up the position of the rivets and then kept on pressing with a small dome-headed tool that’s…I think…intended for clay sculpting.
I have noticed that a few aren’t as big, so need to be more consistent with the pressure, .
The resultant strip was then glued on top of the relevant beam.
One mistake I did make at the start was to cut the strip first and then emboss it, this resulted in the strip curling up like a chameleon’s crazy tongue,  . Subsequently I did the embossing before cutting the strip from the sheet, it still curves once released, but nowhere near as bad, .
G,
3 Likes
That is one reason I don’t like working with styrene sheet…
1 Like
It paid off … Good technique and it certainly has an old early 1900s feel to it.
1 Like
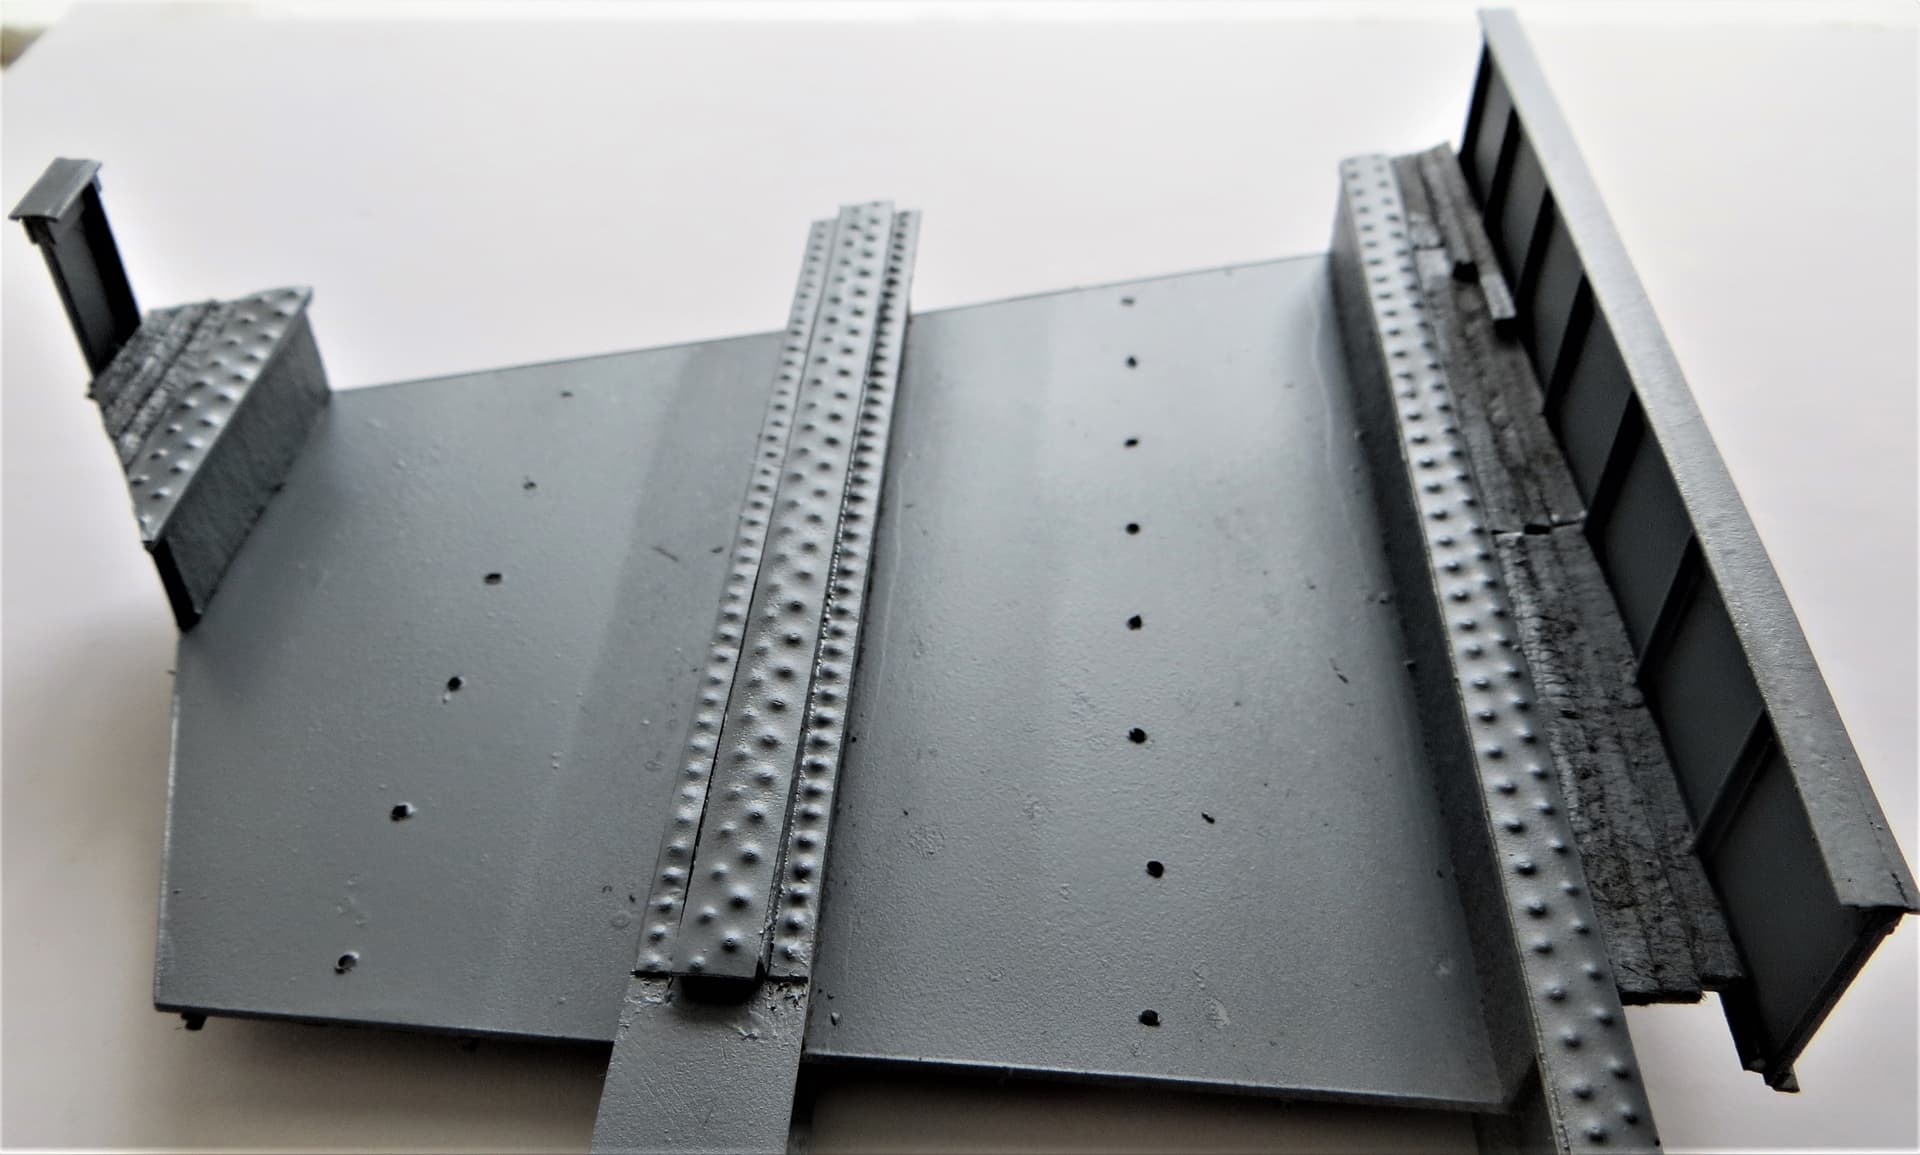
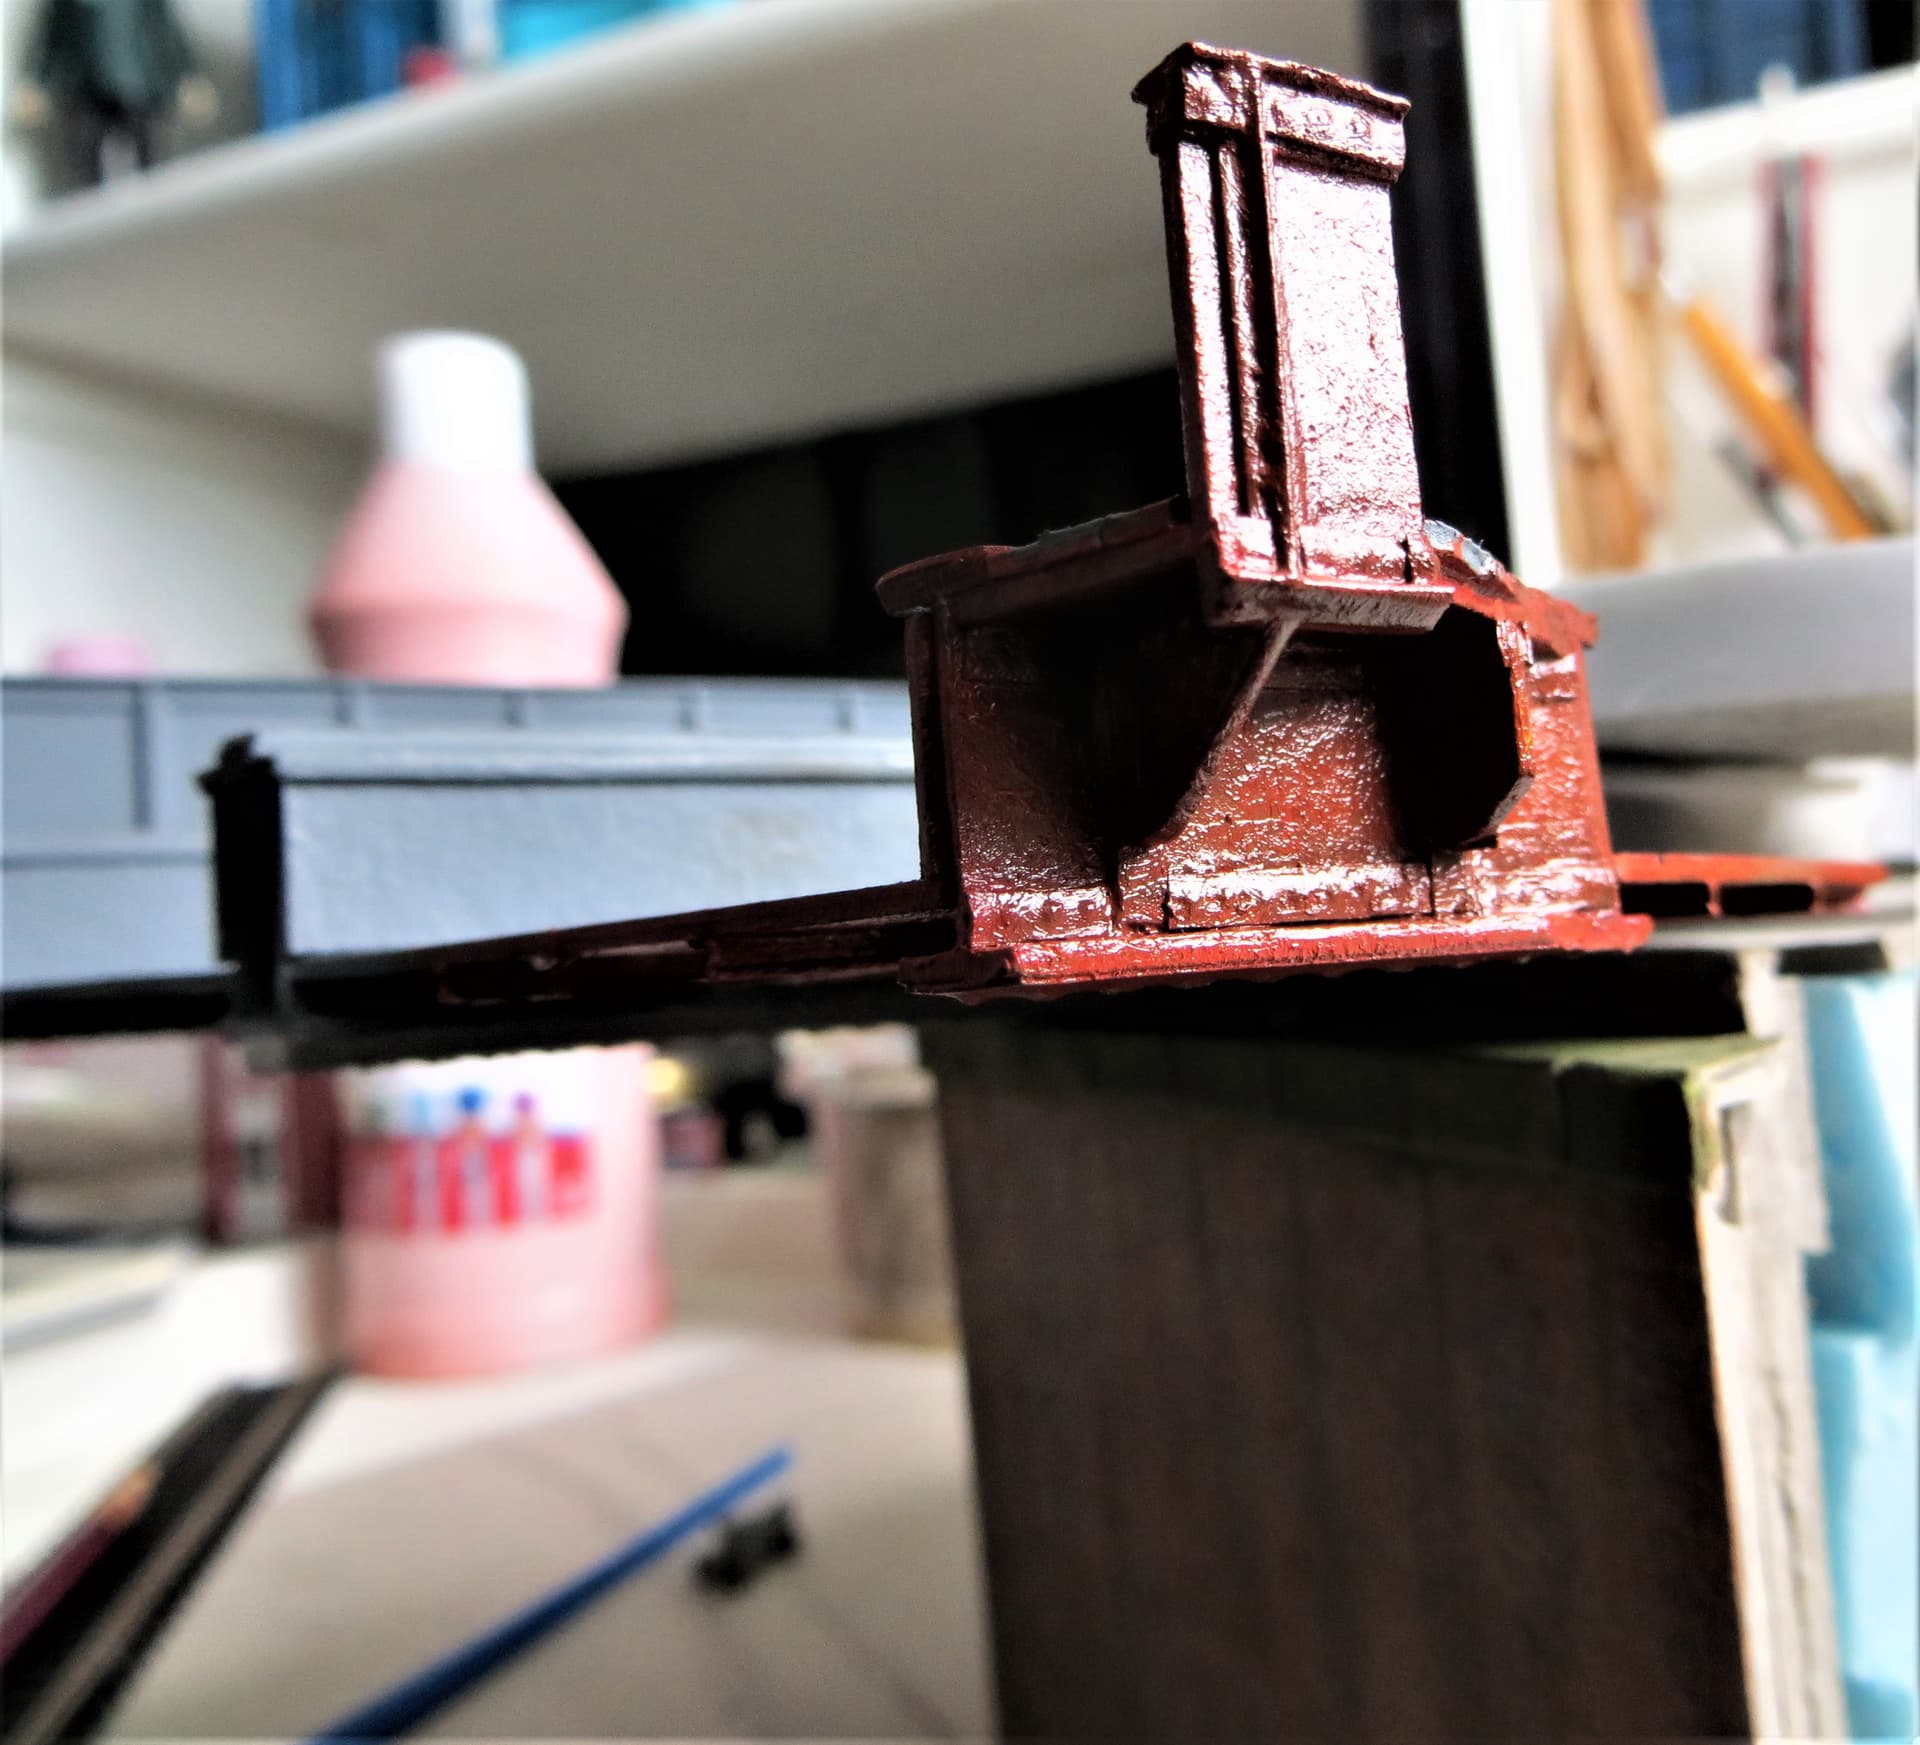
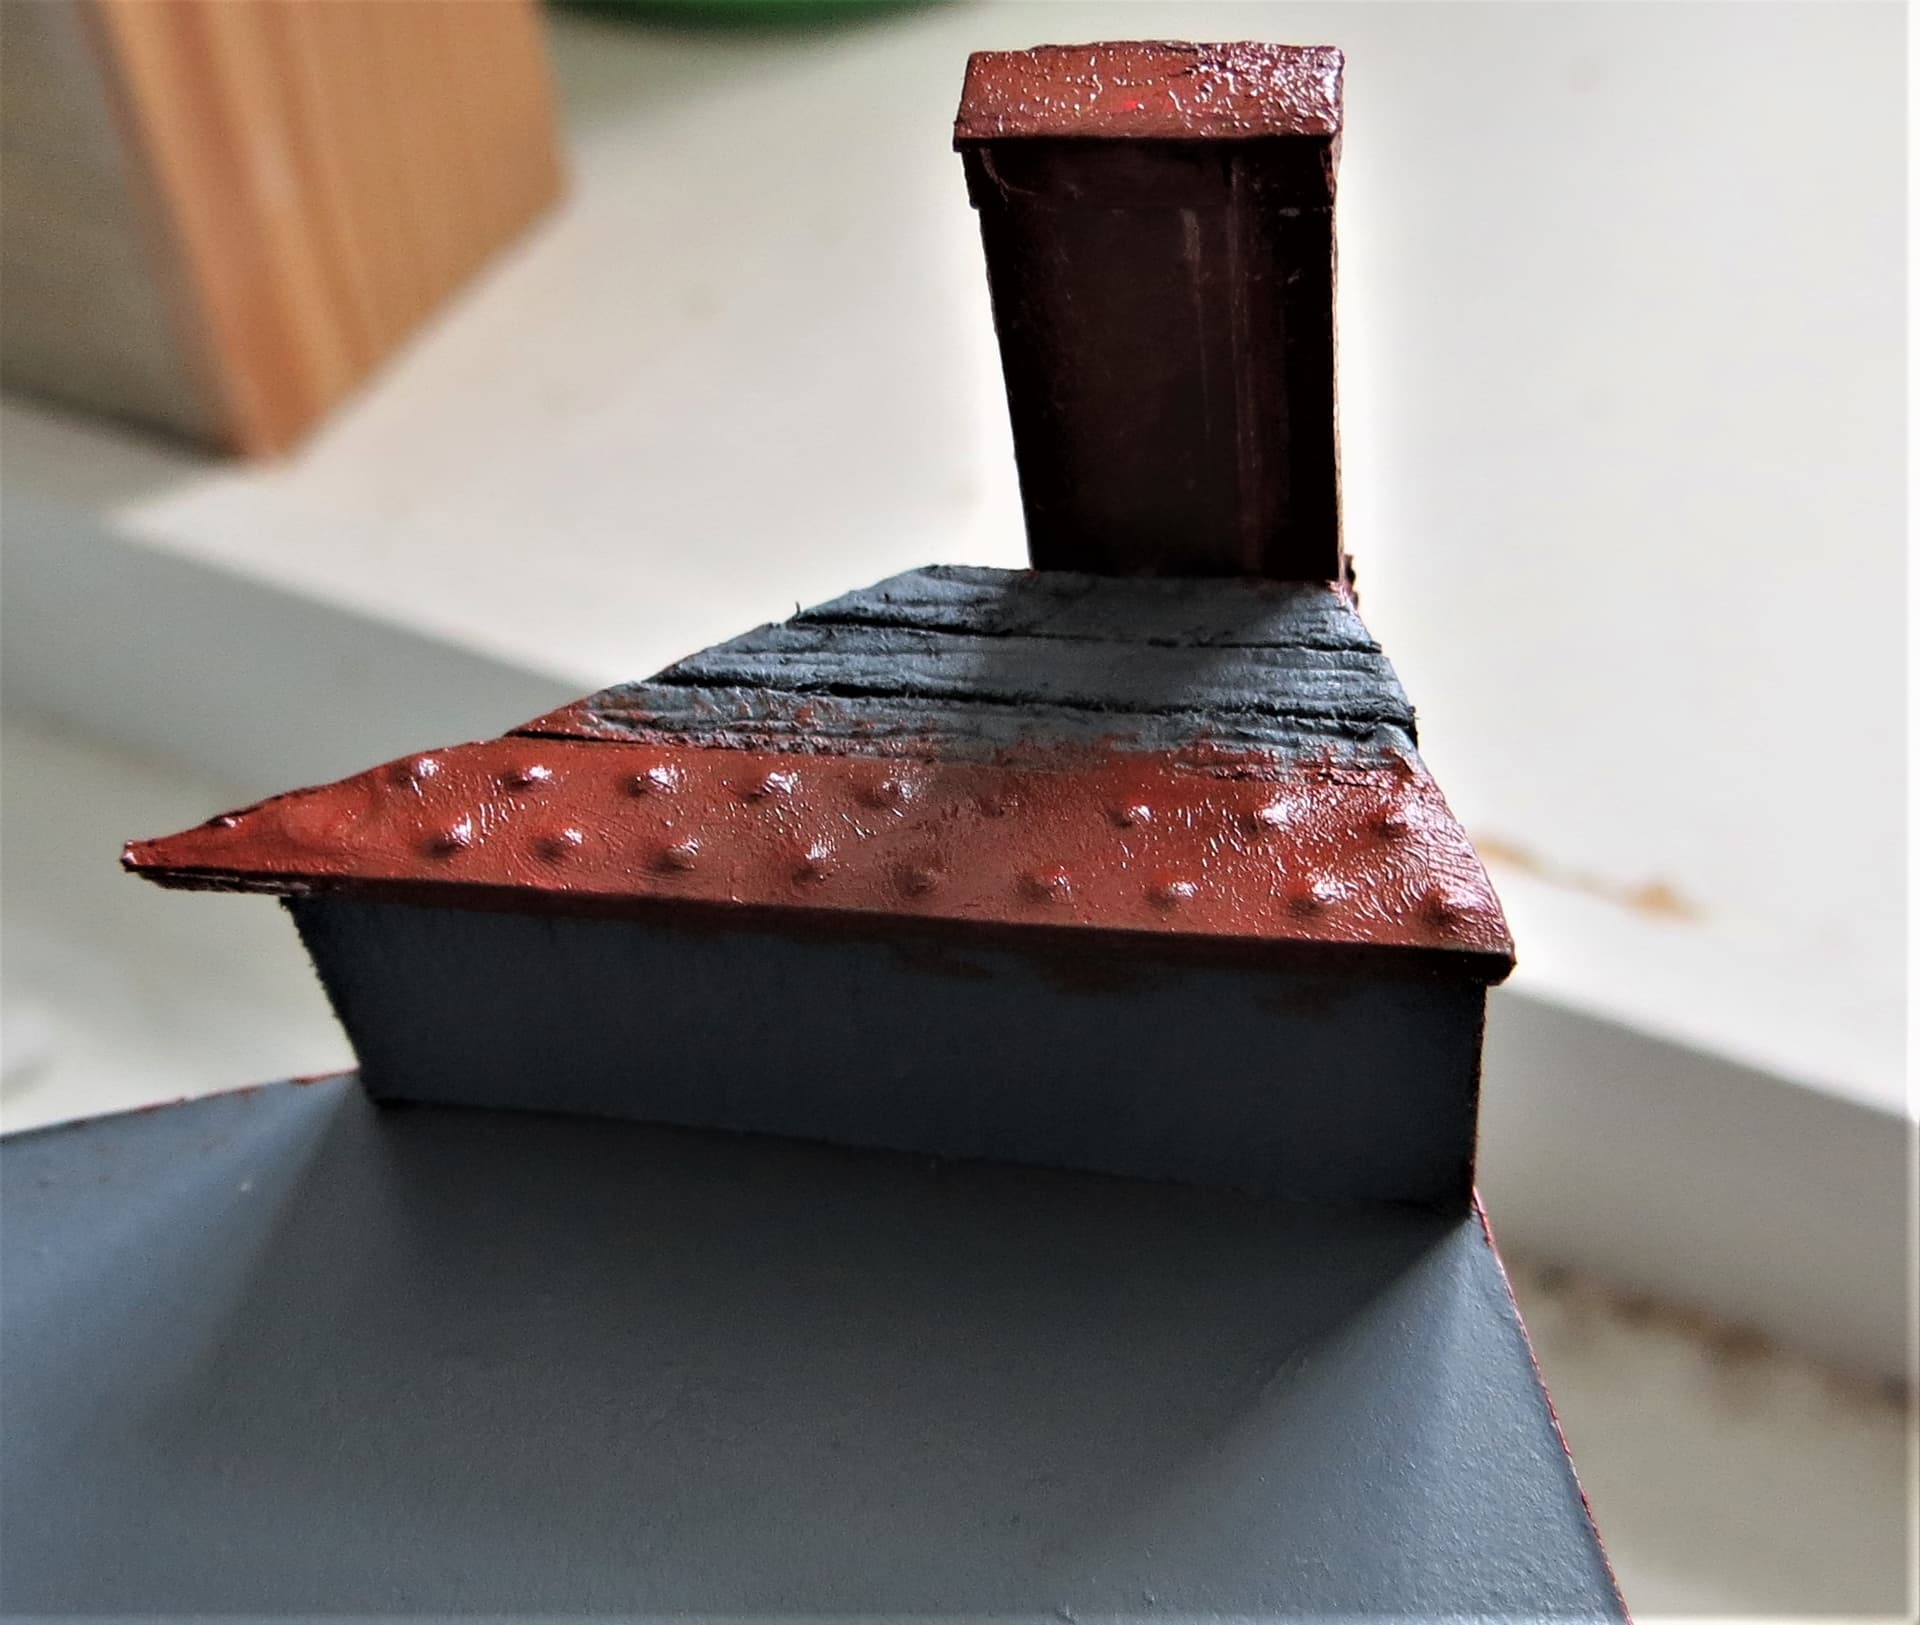
Hi all,
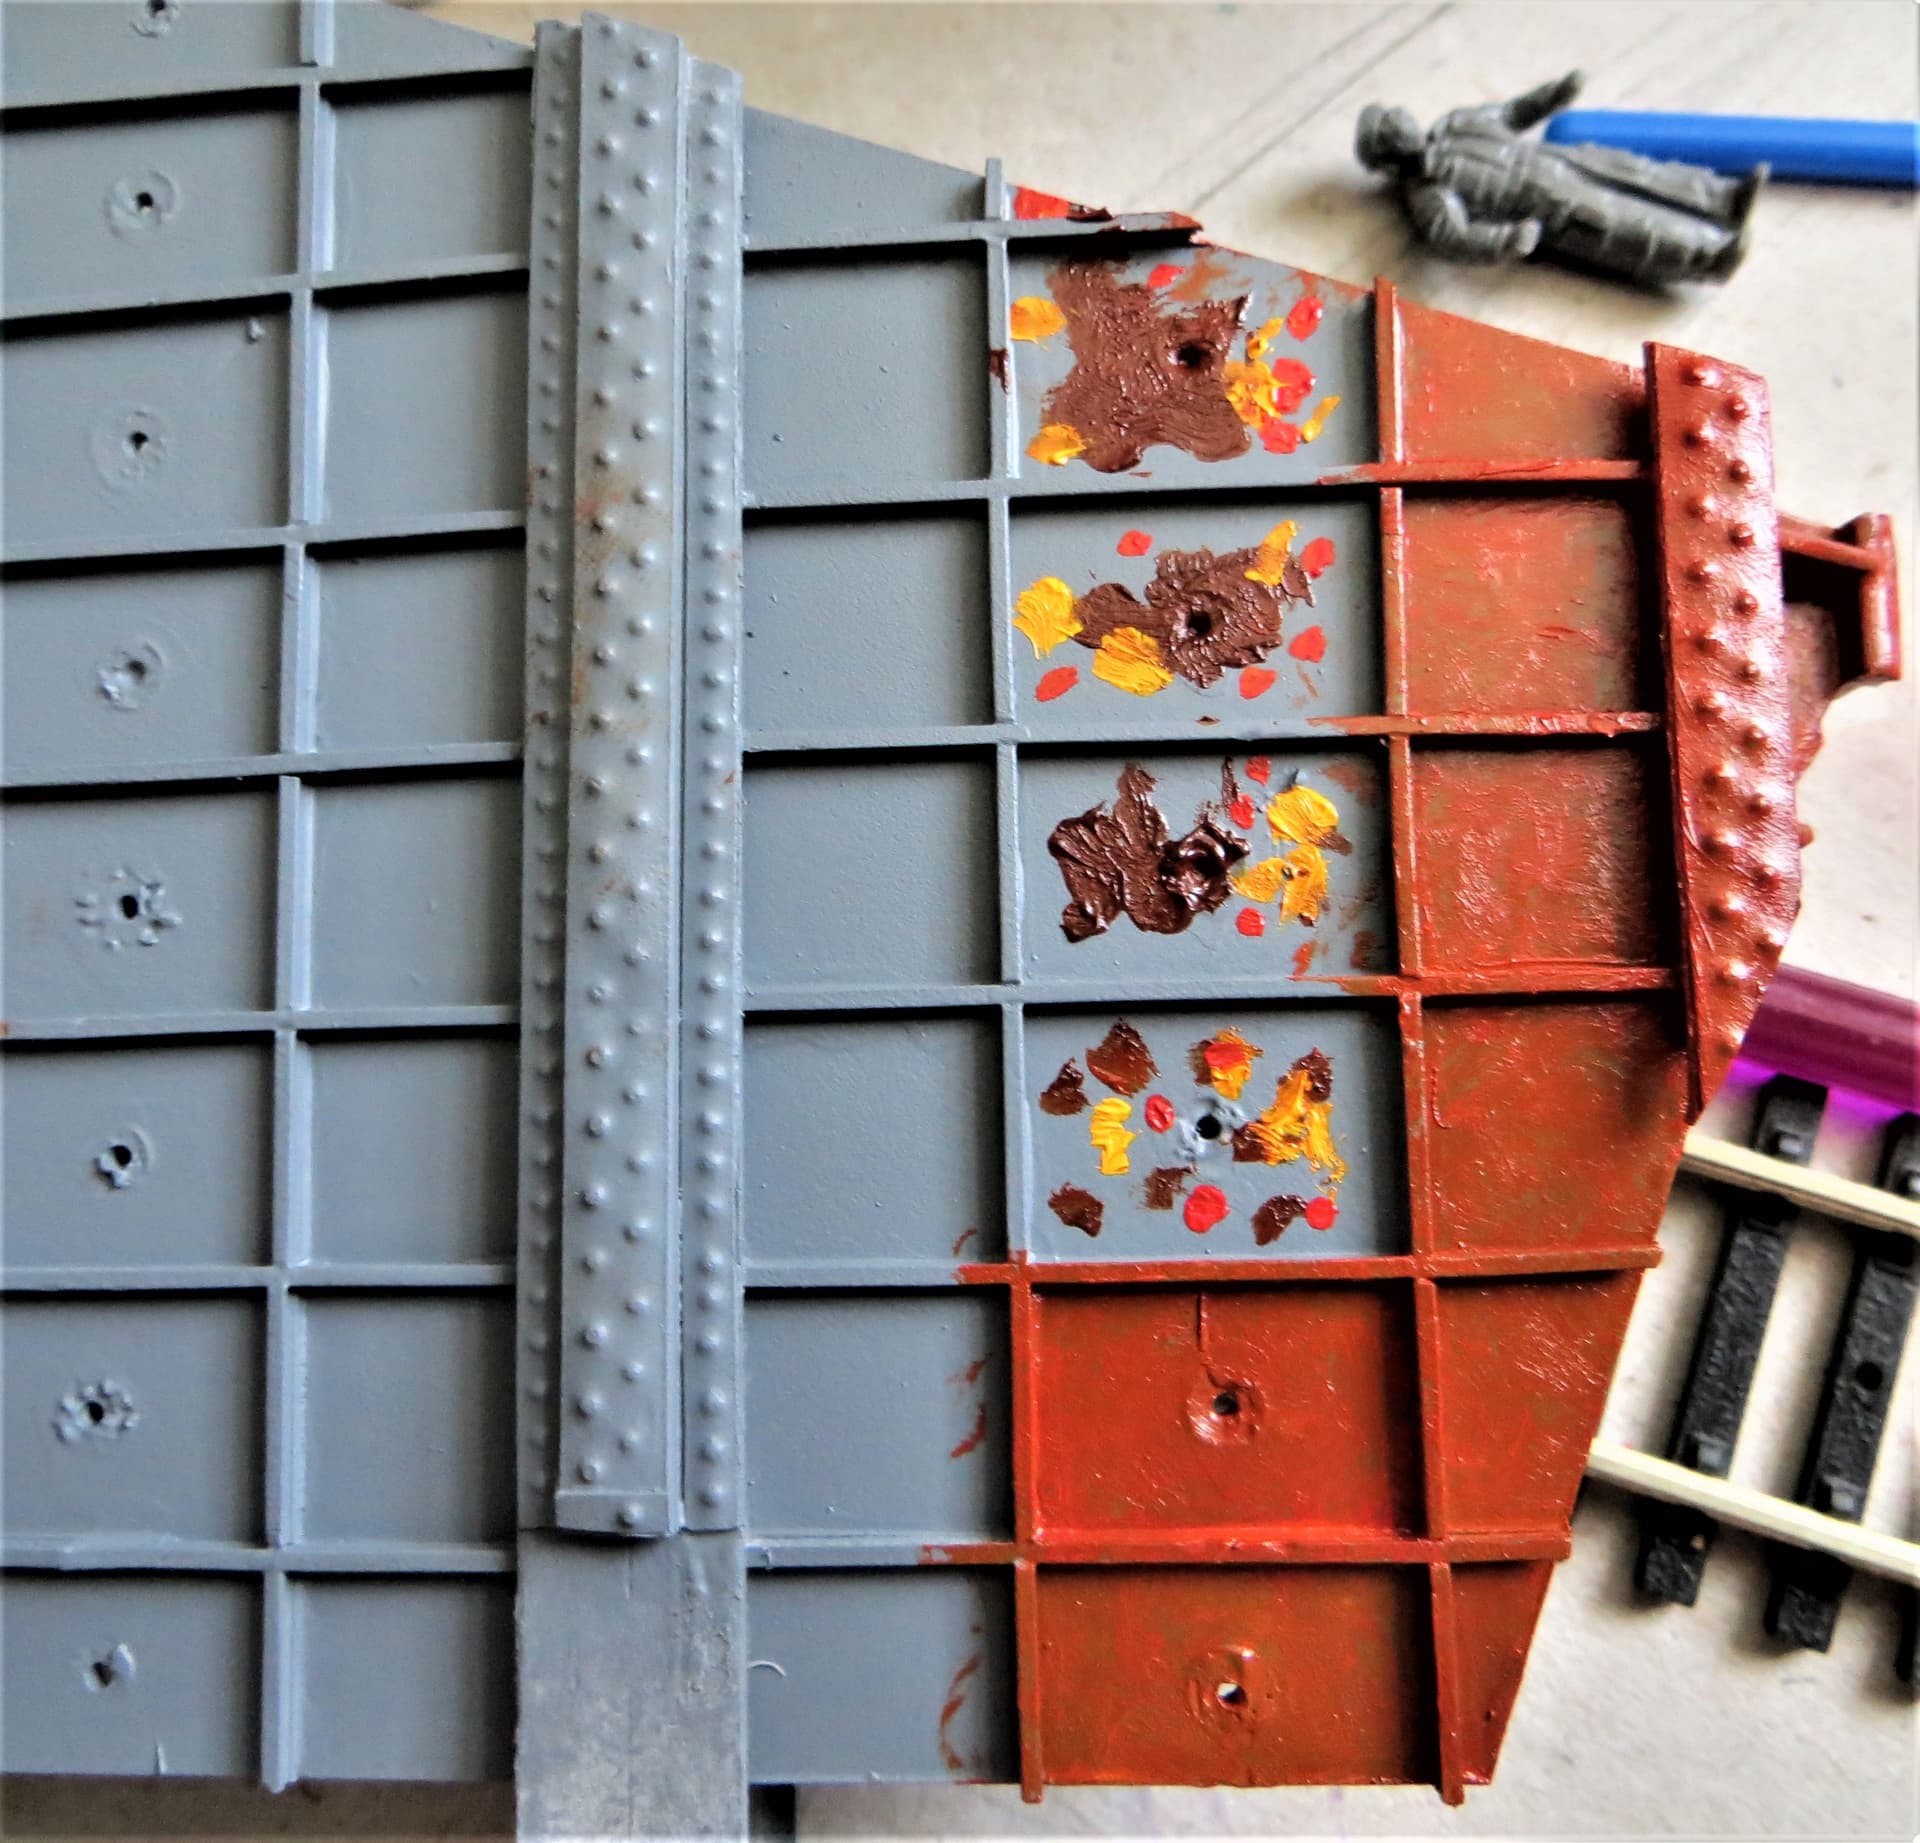
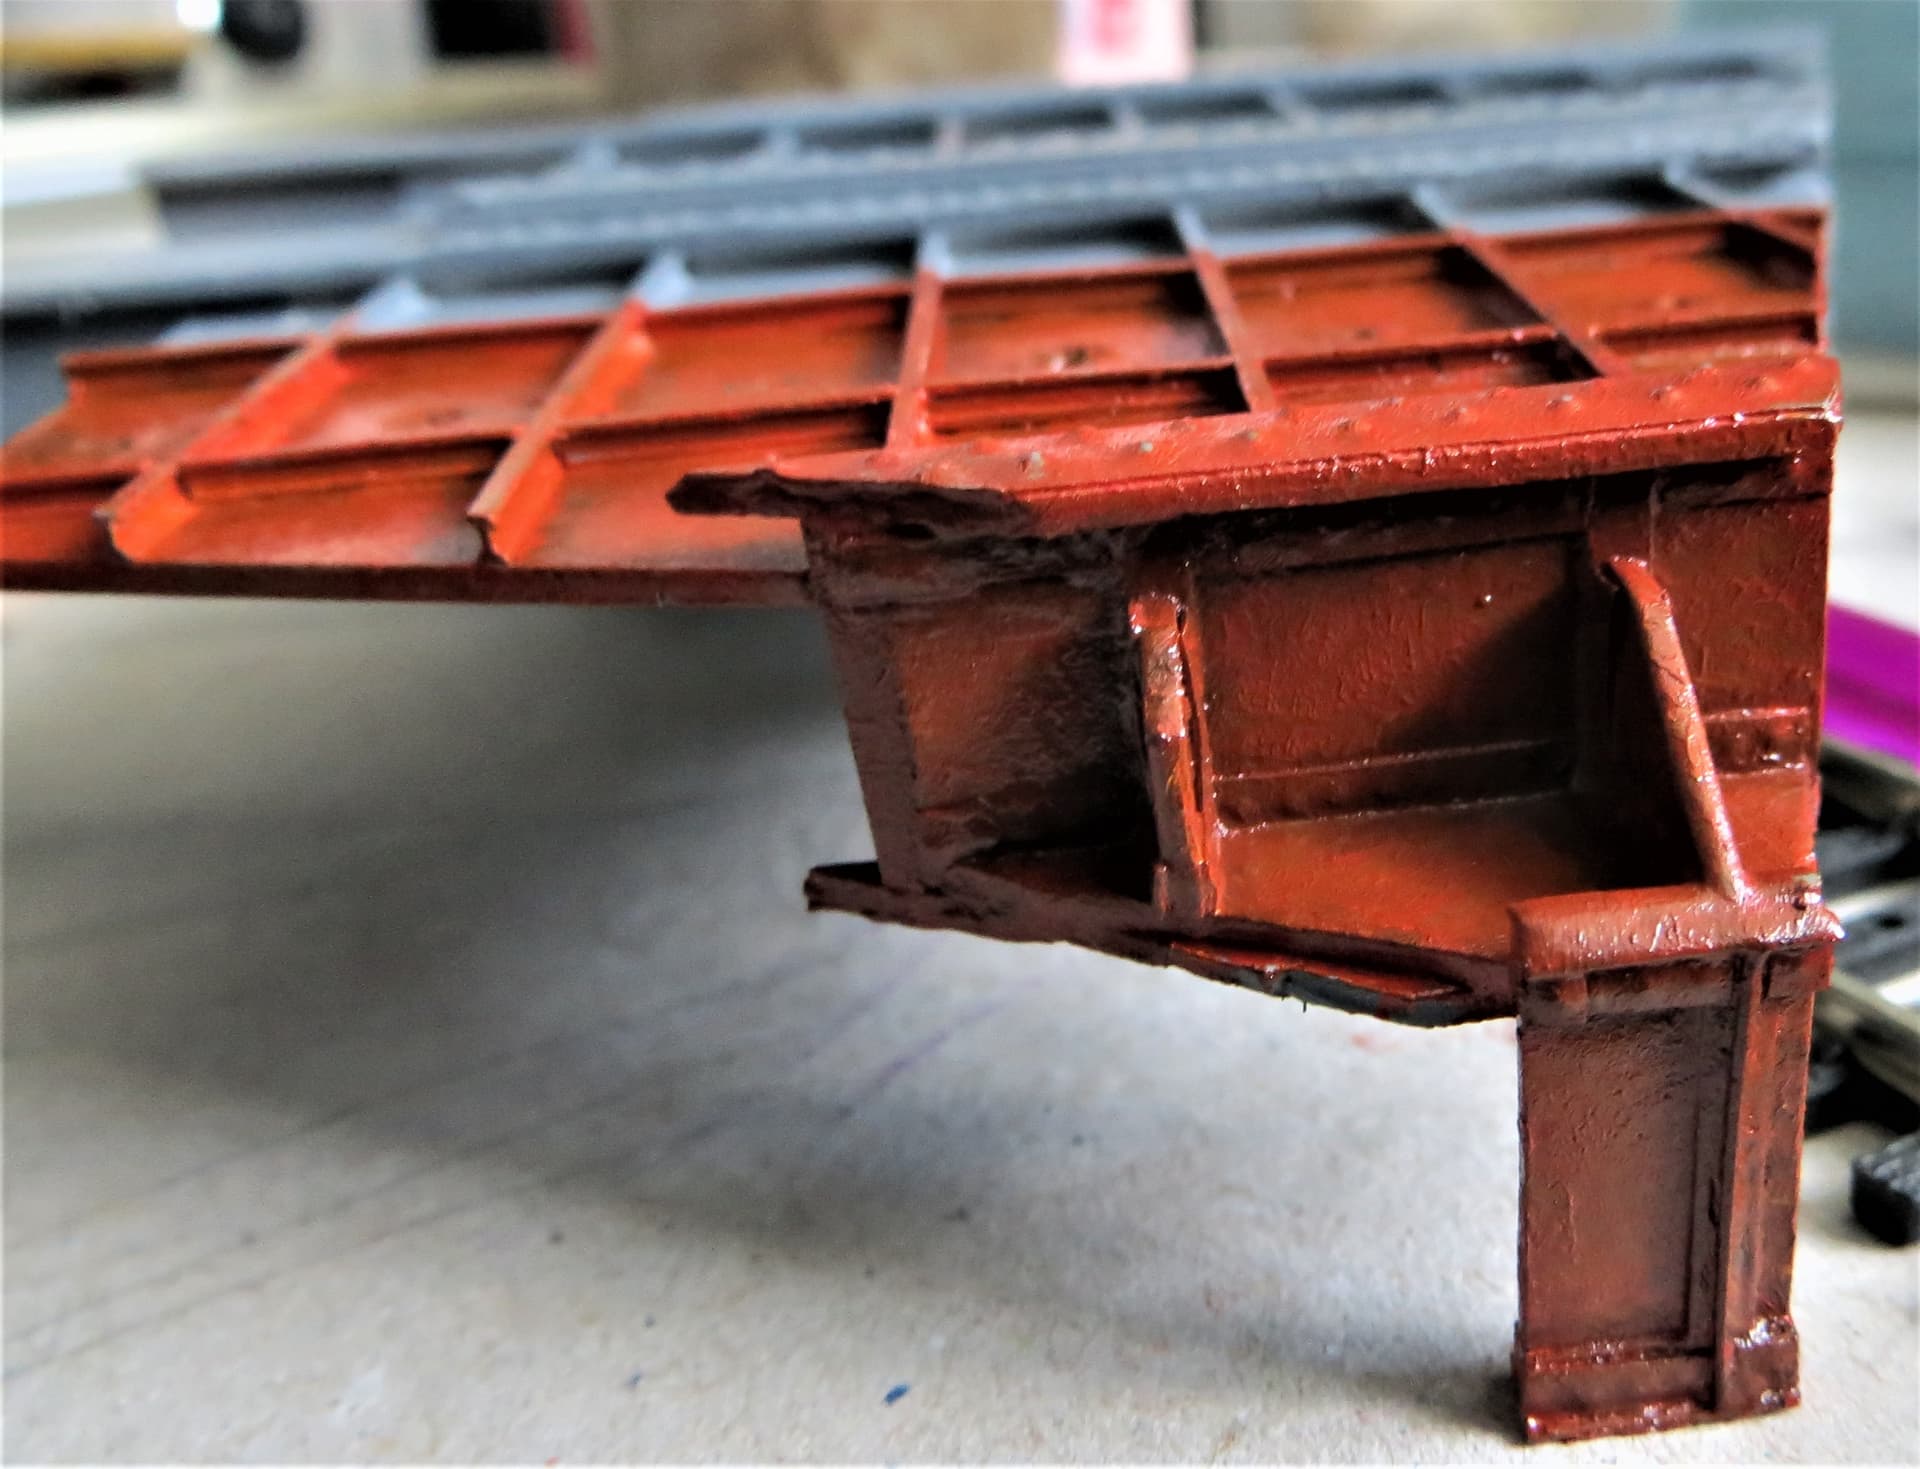
Had a spare hour to play, but a tad fed up with creating rivets so thought I’d have a play with some paint, .
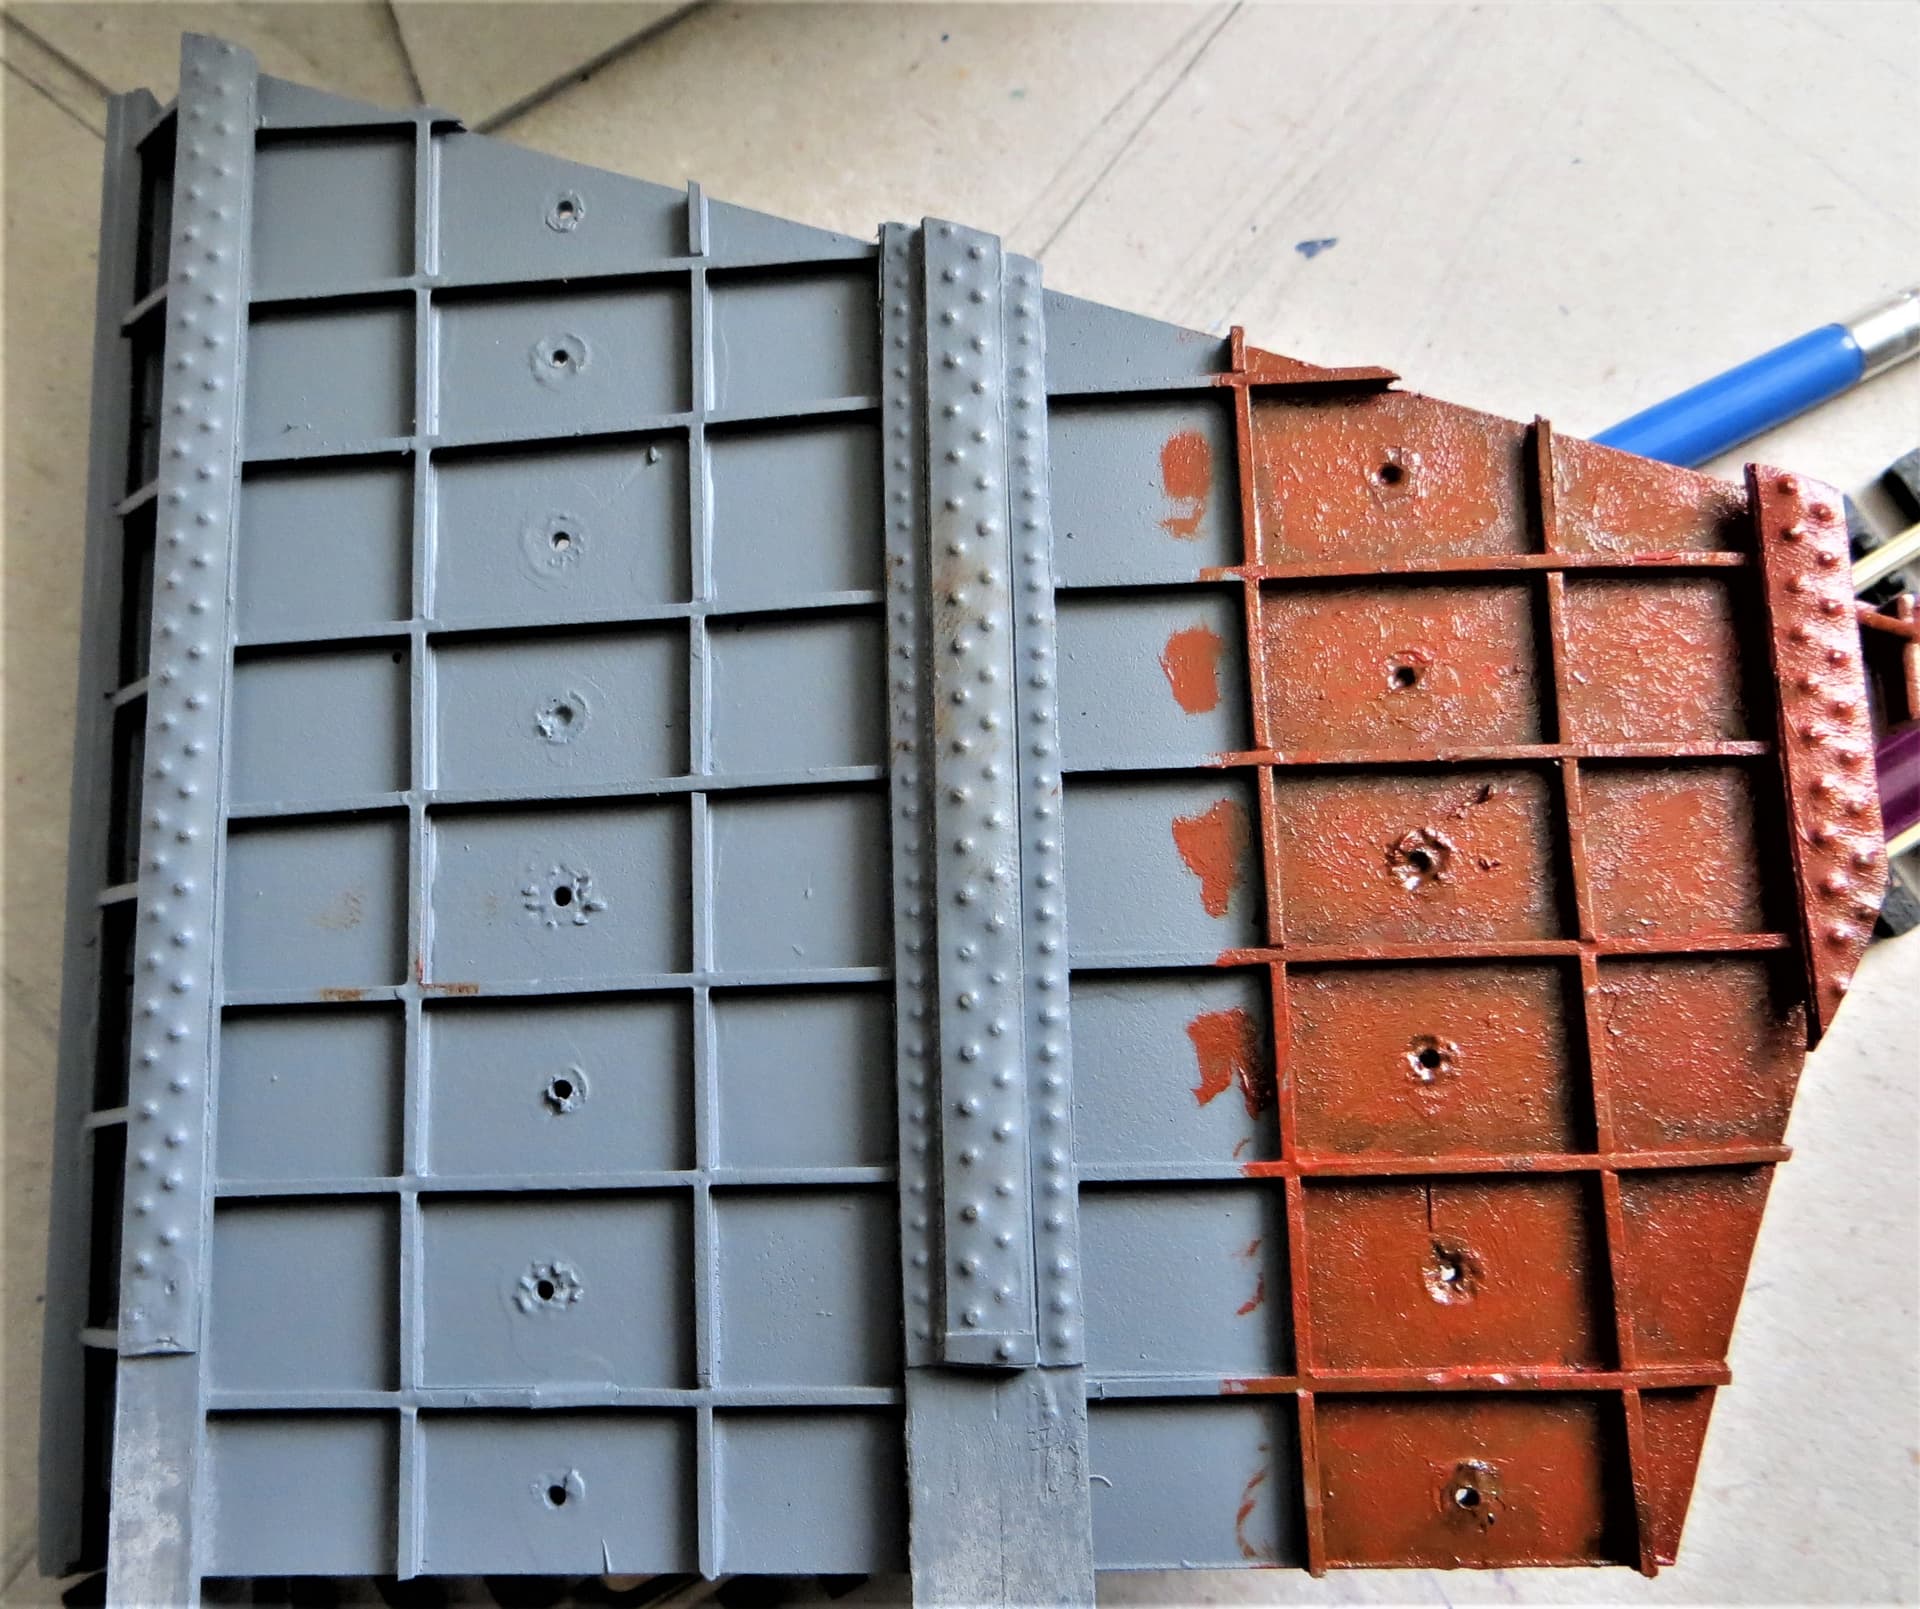
I’m going to give the whole thing a coat of rust, my base layer will be a mix of brown, yellow and red blended together. I also add in a small amount of talcum powder as, imho, it gives a slight roughness which reminds me of many layers of roughly applied paint, .
It’s all a bit shiny at the moment as it’s still wet, but that will get toned down before it gets a top coat of a suitable grey acrylic. Finally I’ll rub away some of the top coat to reveal the rust below…hopefully, .
I removed the circular drainage holes, I really didn’t like them,  . Having looked at a few more images of such drainage holes they often show a simple, badly corroded hole. In pulling off the circular bits that I’d originally added it left some damage which, with a bit of work might pass as extreme corrorion, .
Cheers, ,
G
5 Likes