Hi all,
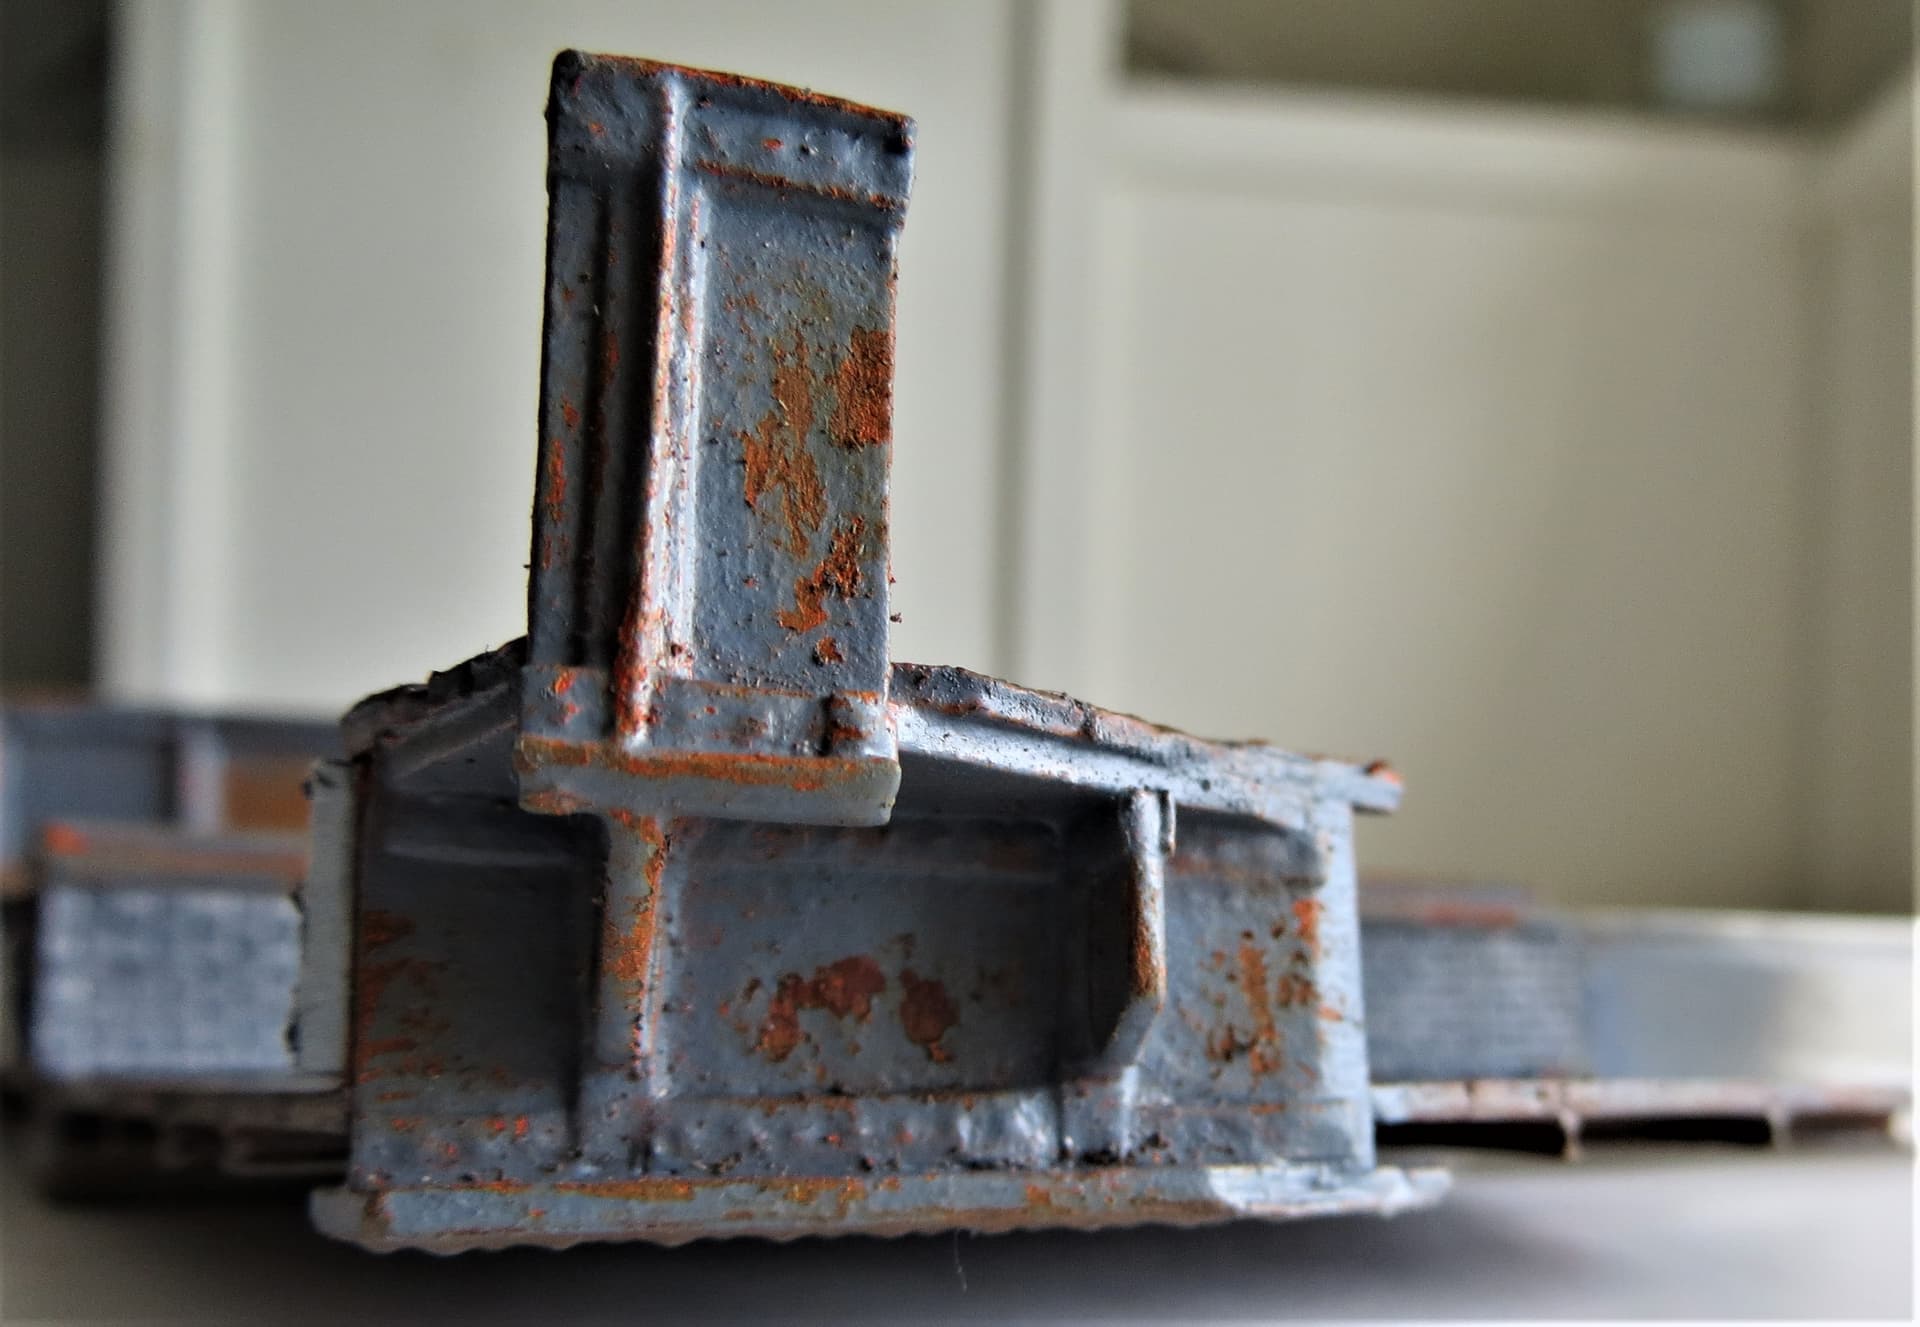
The first layer of wear-and-tear fully done.
There’s still a way to go, I need to soften the edges, add some more tones to both the rust and the paint, staining and pin washes, highlighting, and some build up of dirt and grime, and the odd bit of weed growing in said muck,  .
.
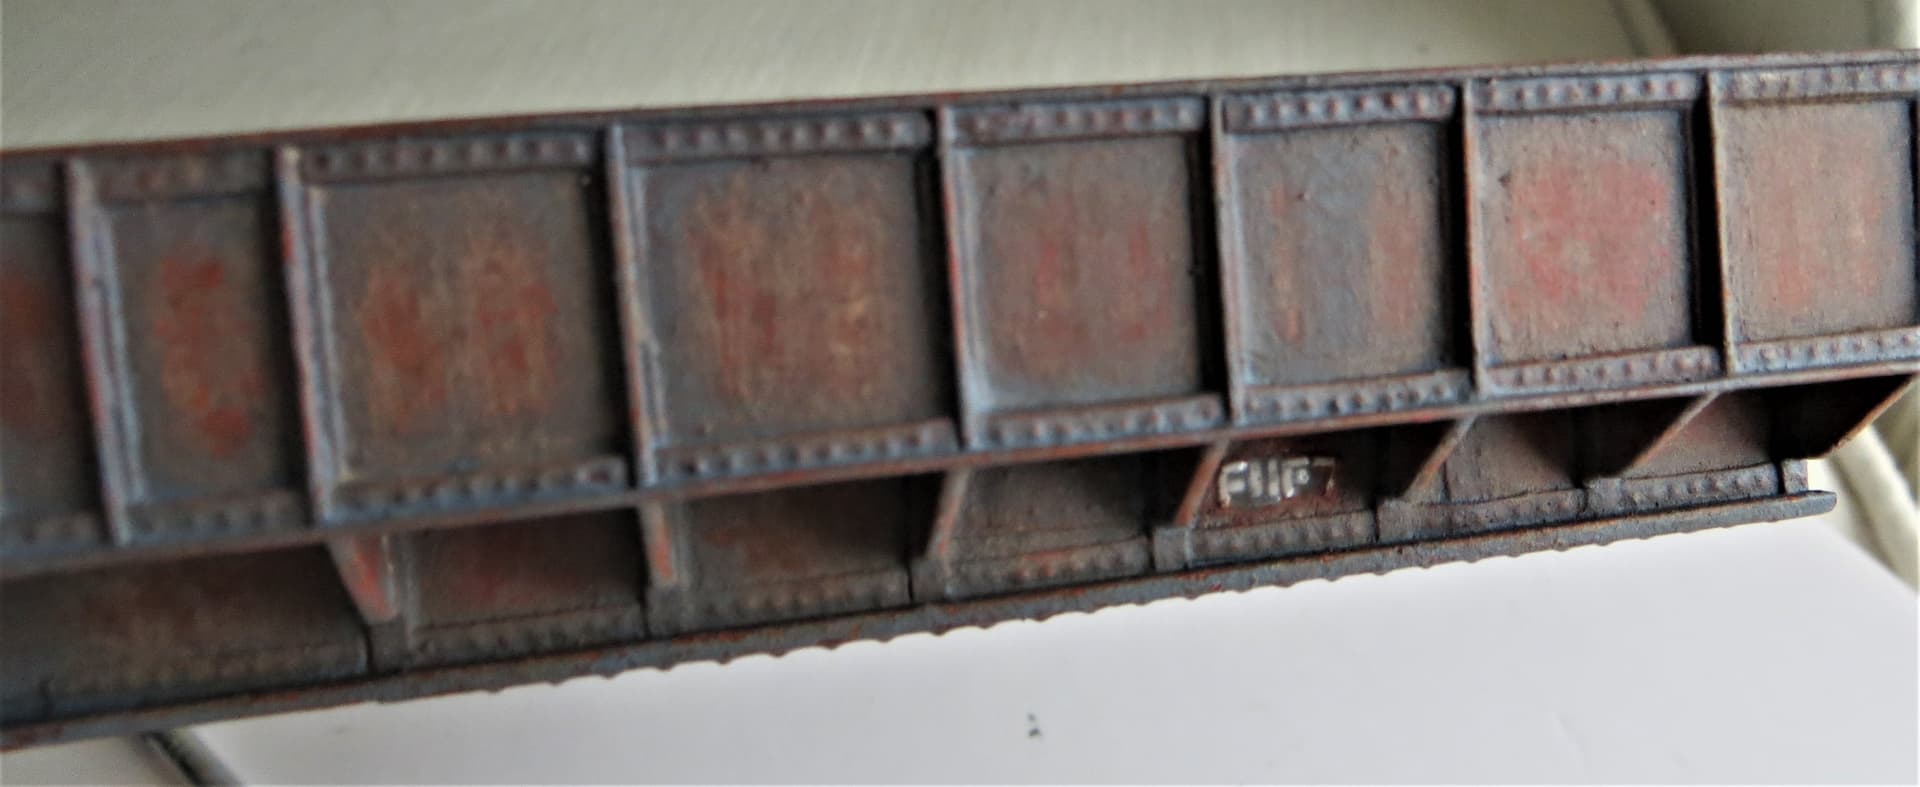
The white writing is my attempt to meet Tim’s challenge regarding ‘foundry marks’, it’s tiny bits of plasticard, hopefully it’ll show up once painted, 
 .
.
Cheers, 
G
4 Likes
That is looking superb as is G. You easily do a bit of minor work and leave it like that. It wouldn’t look out of place at all … Excellent 
 Well I was semi-kidding & it’s probably too late now anyway, but I was thinking a sprue-end tab could be incorporated into a section – kinda amusing if it said “Tamiya 1985” (change the 9 to an 8) or similar - but probably way over-scale alas
1 Like
Wish I’d thought of that Tim, might check through some old sprues and see what’s available that might work better than my previous attempt, 
 .
.
G,
1 Like
Hi all,
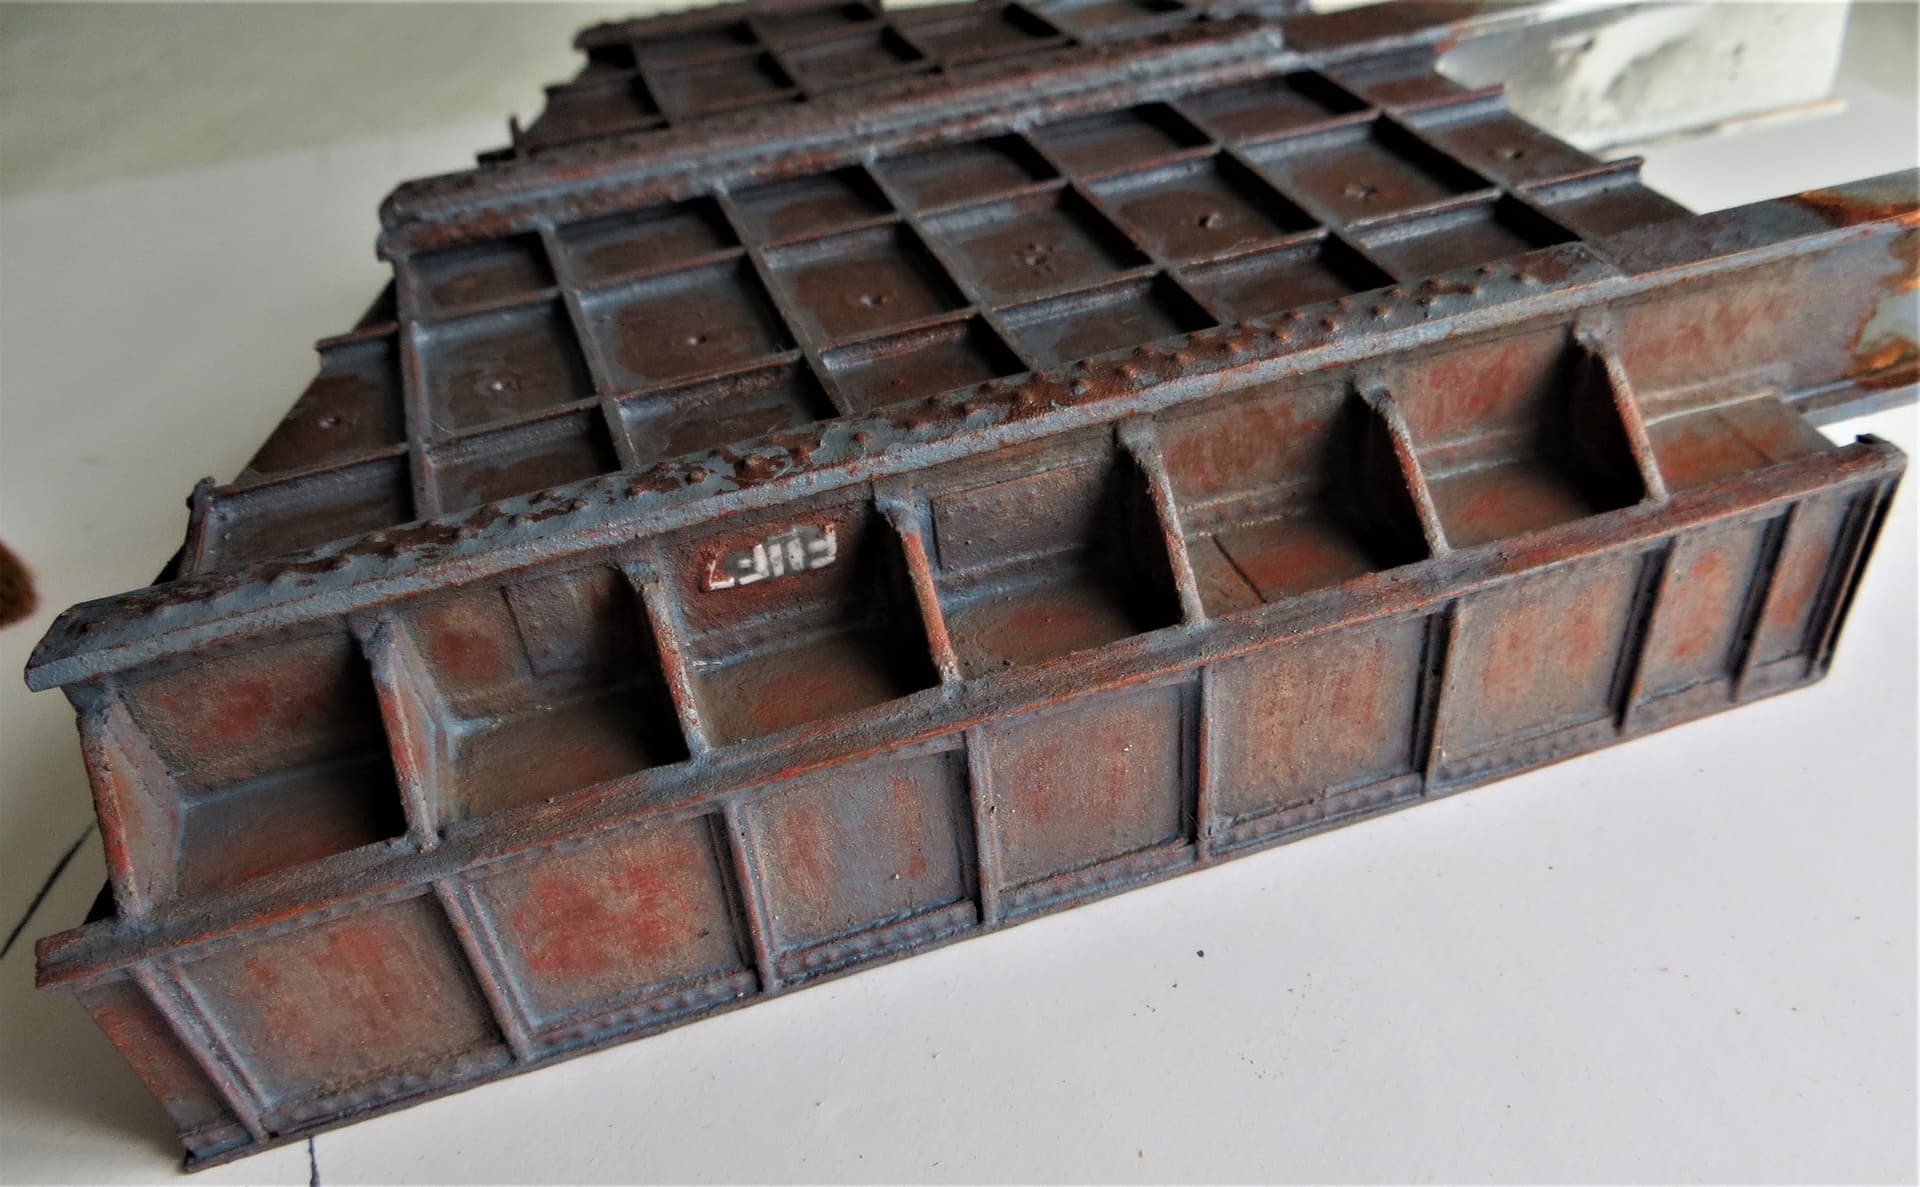
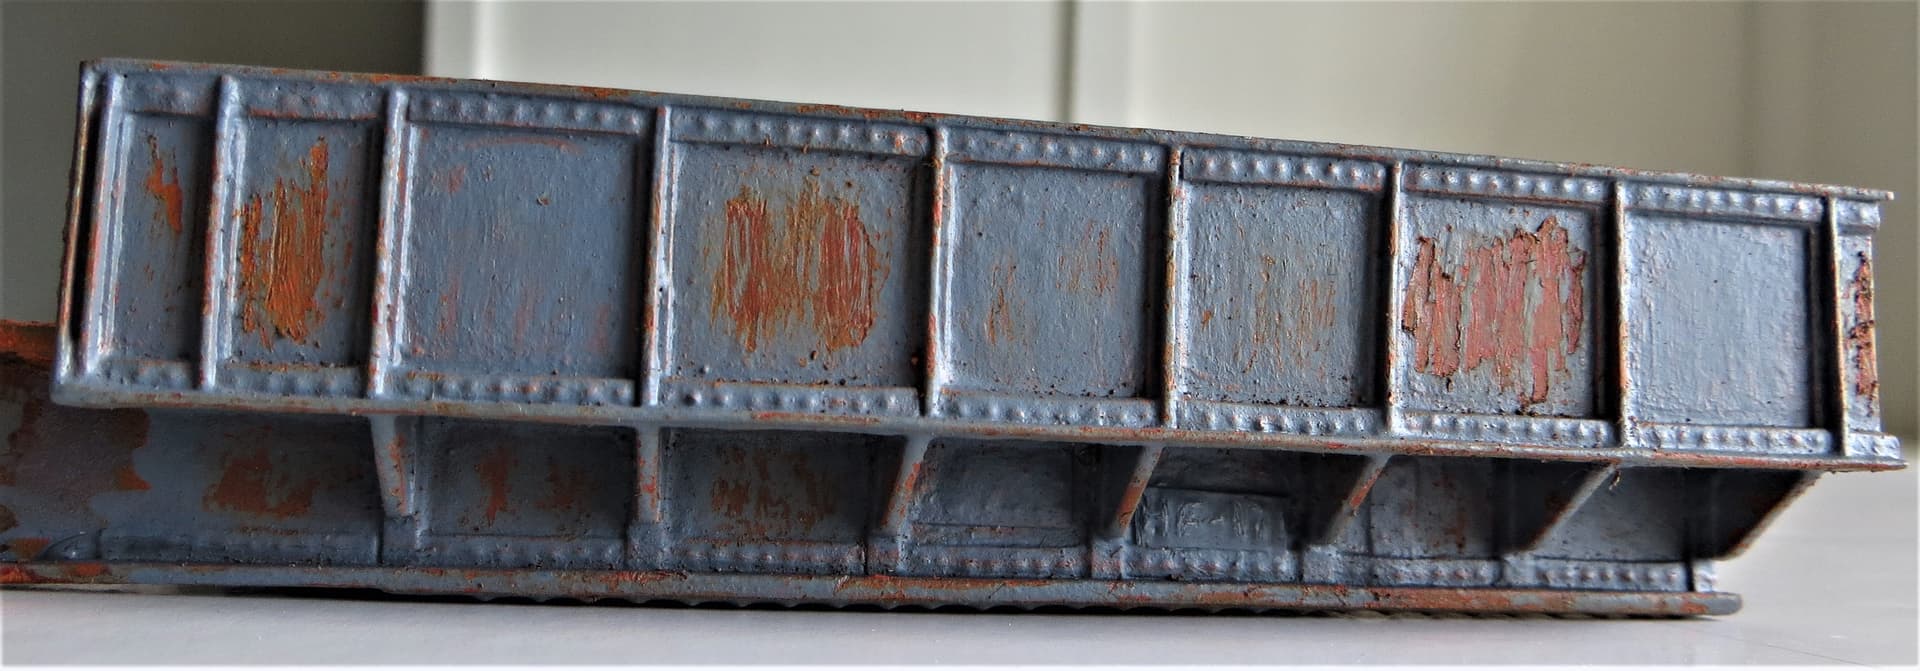
The more I looked at it, the more I didn’t really like the underneath of the bridge, the areas of weathering were too similar, and too dark,  .
.
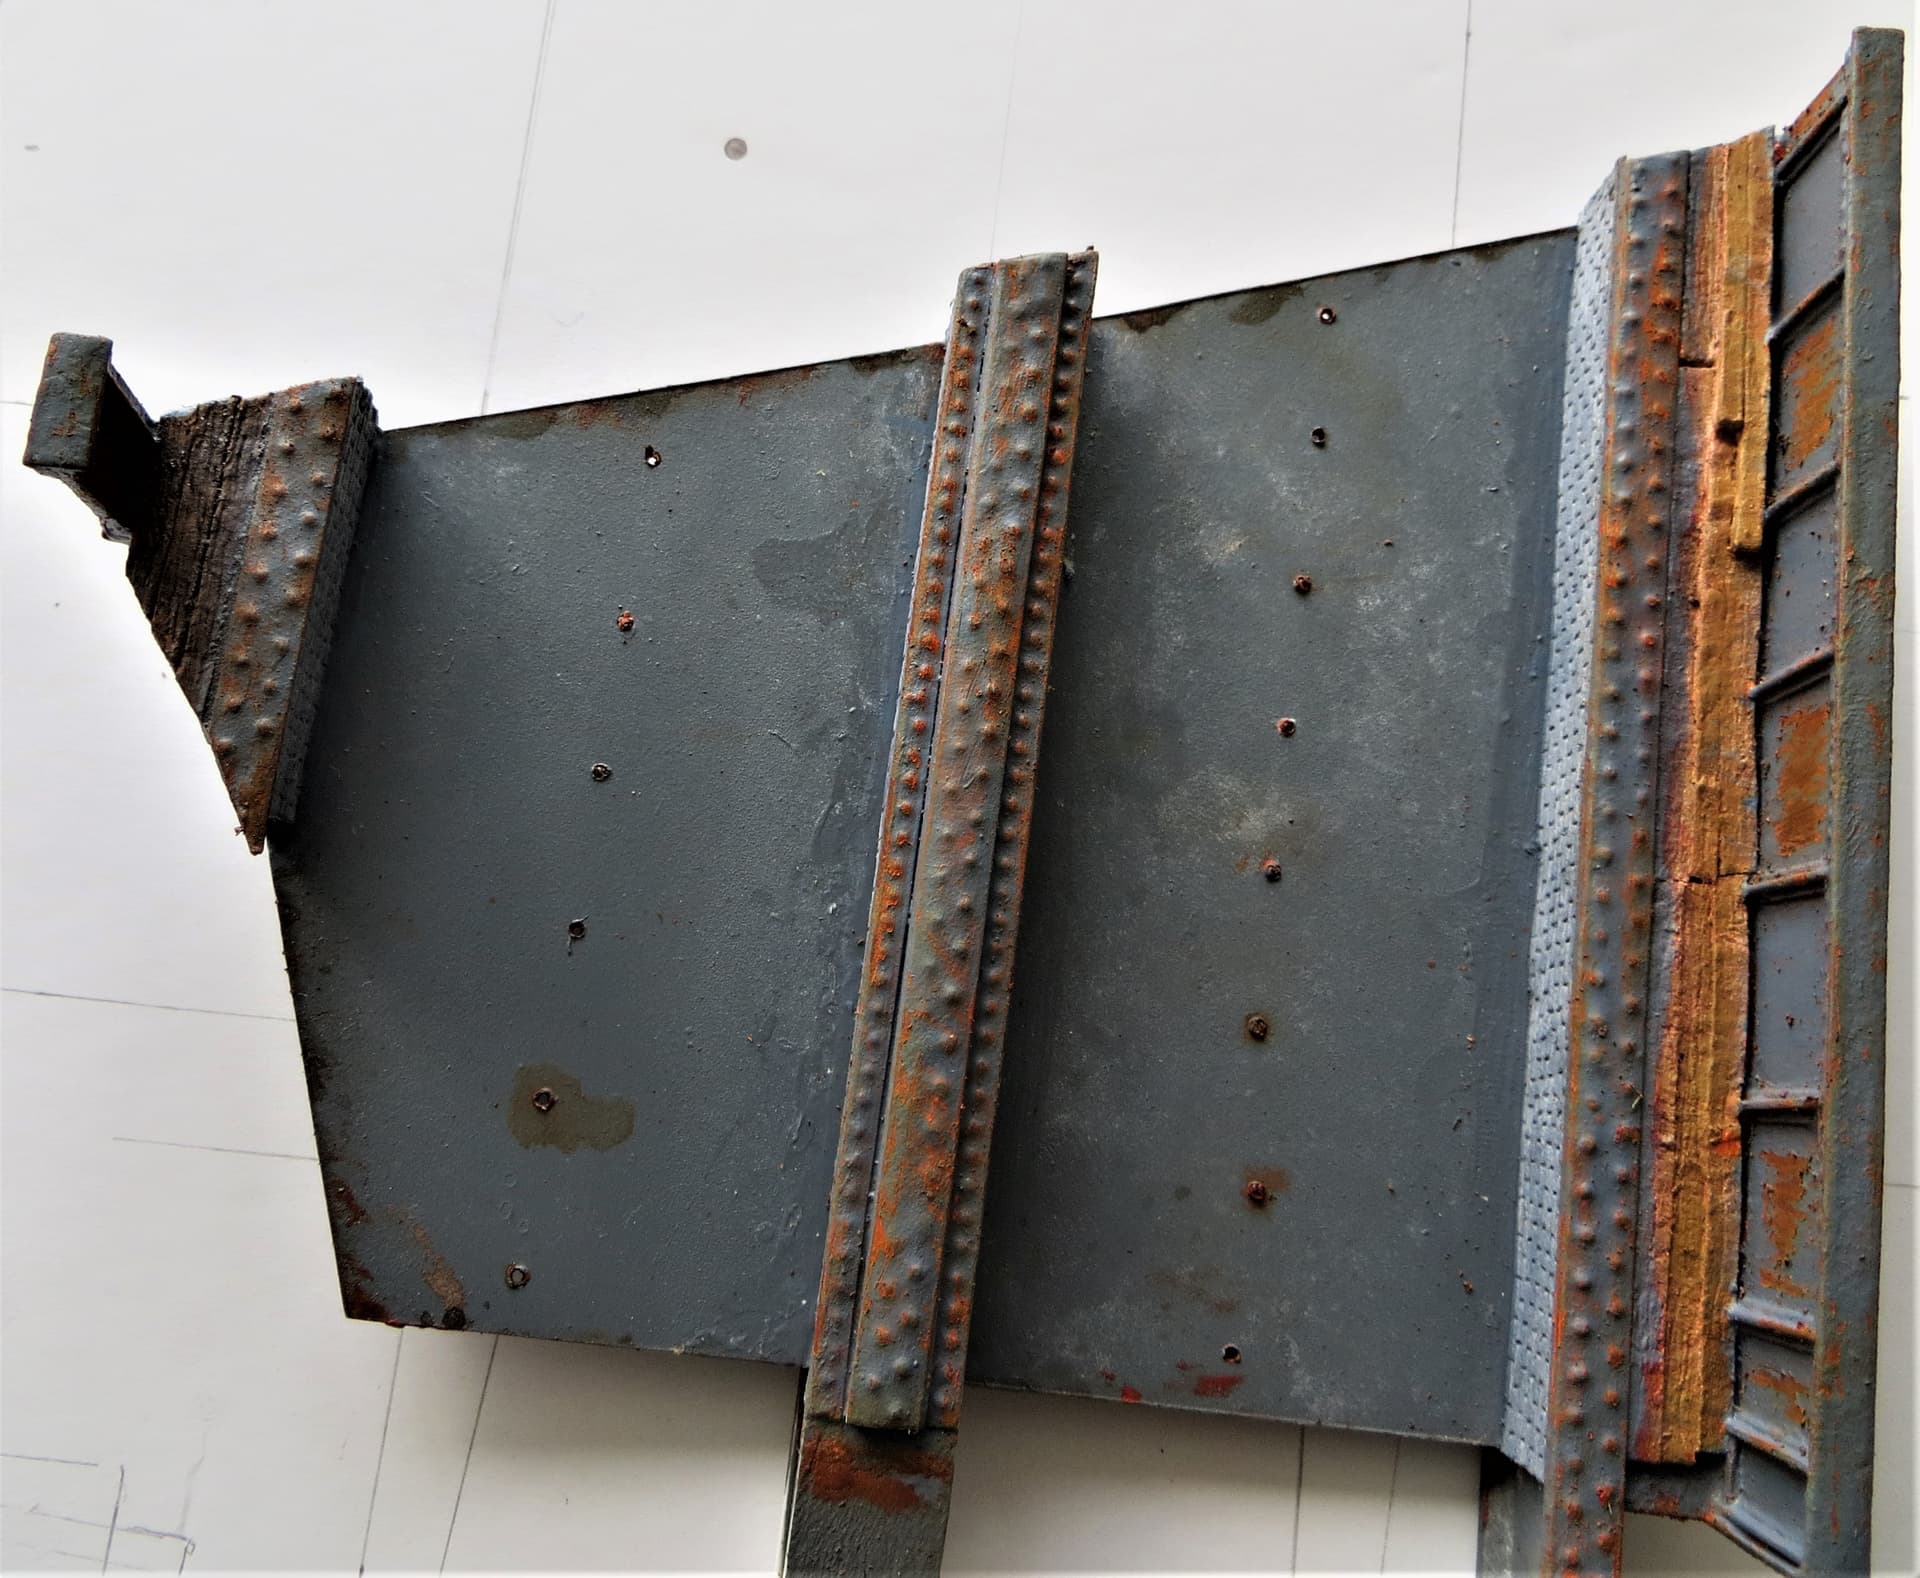
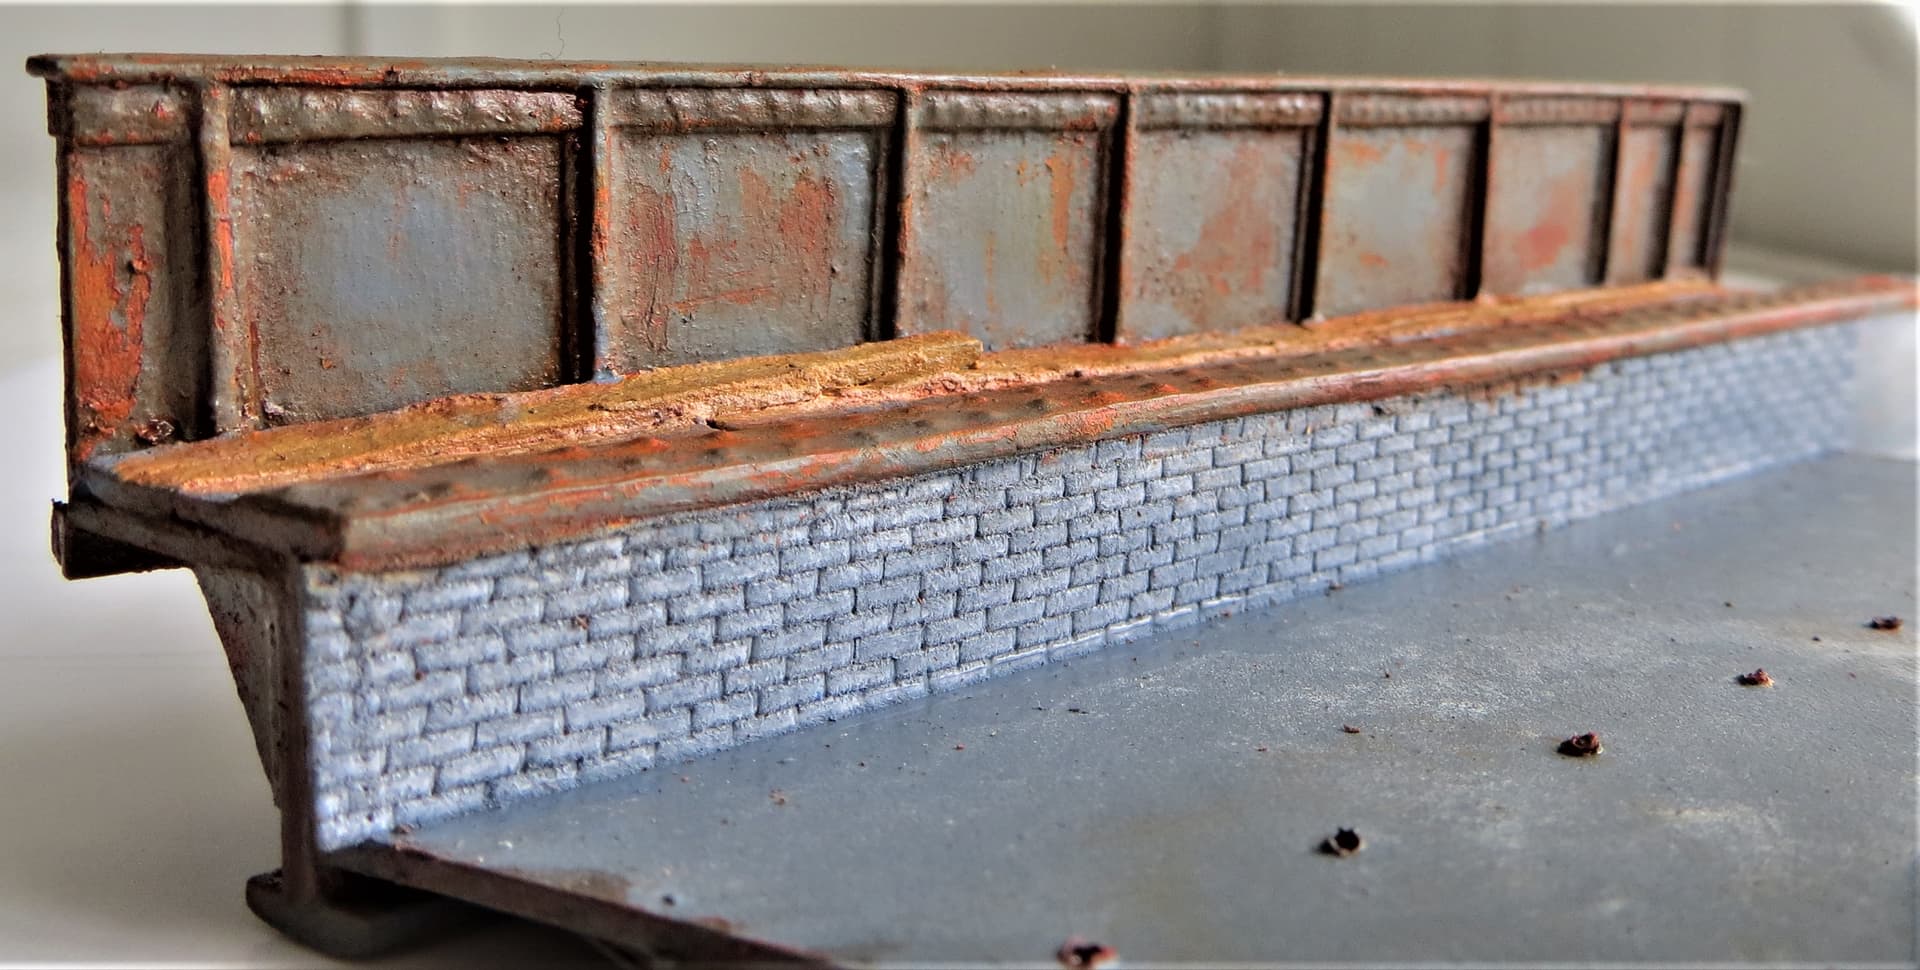
So I decided I’d have a second attempt with less uniformity, .
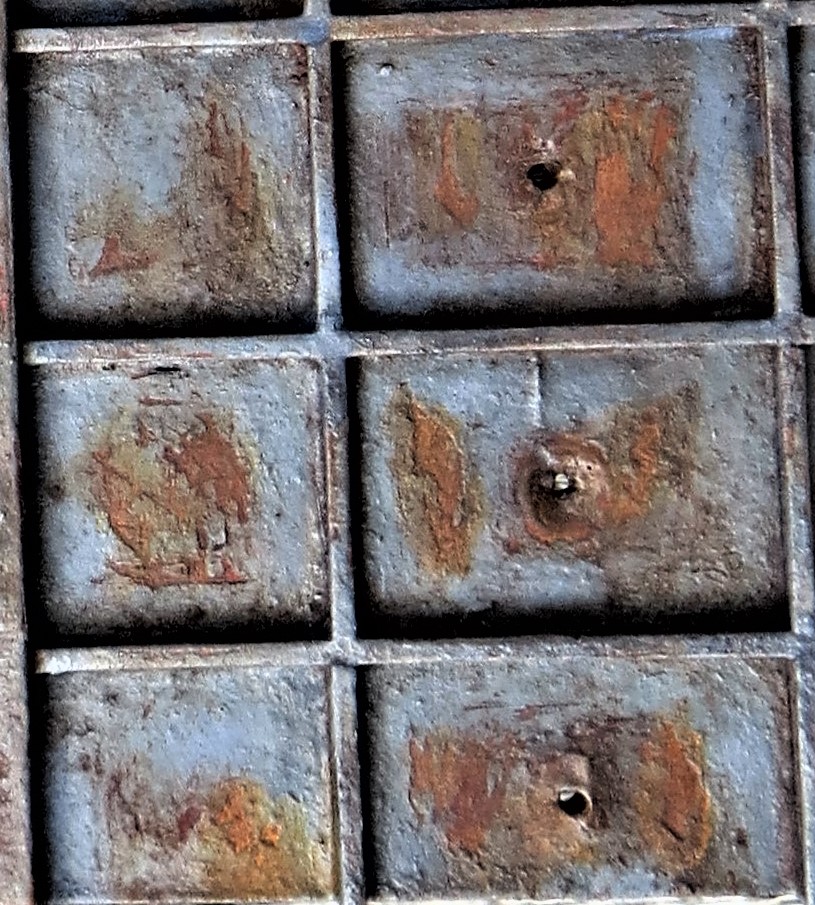
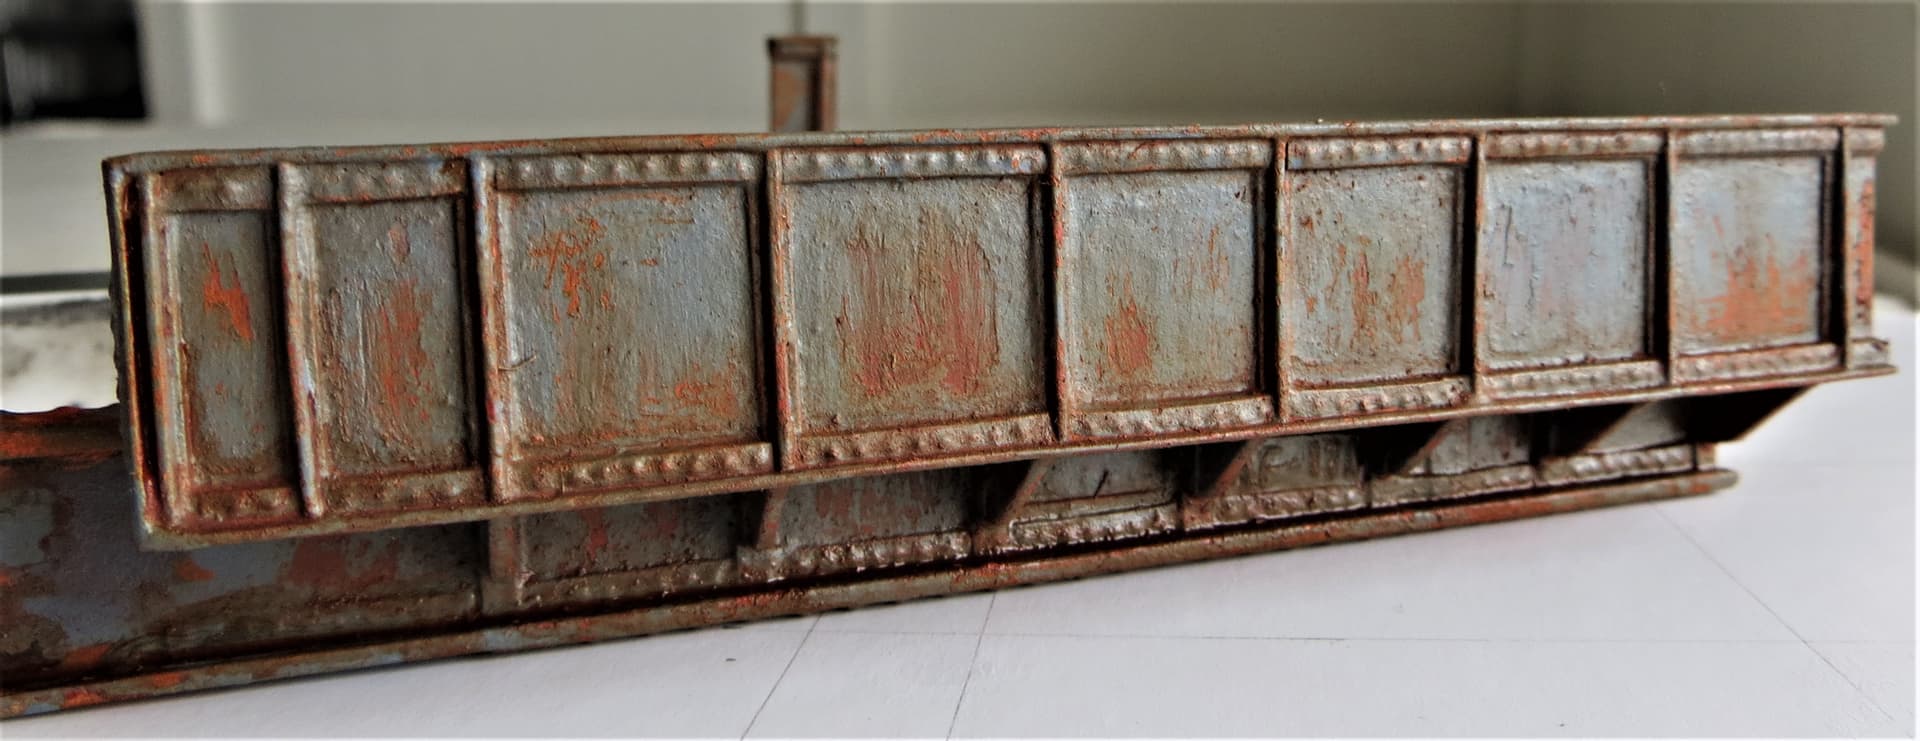
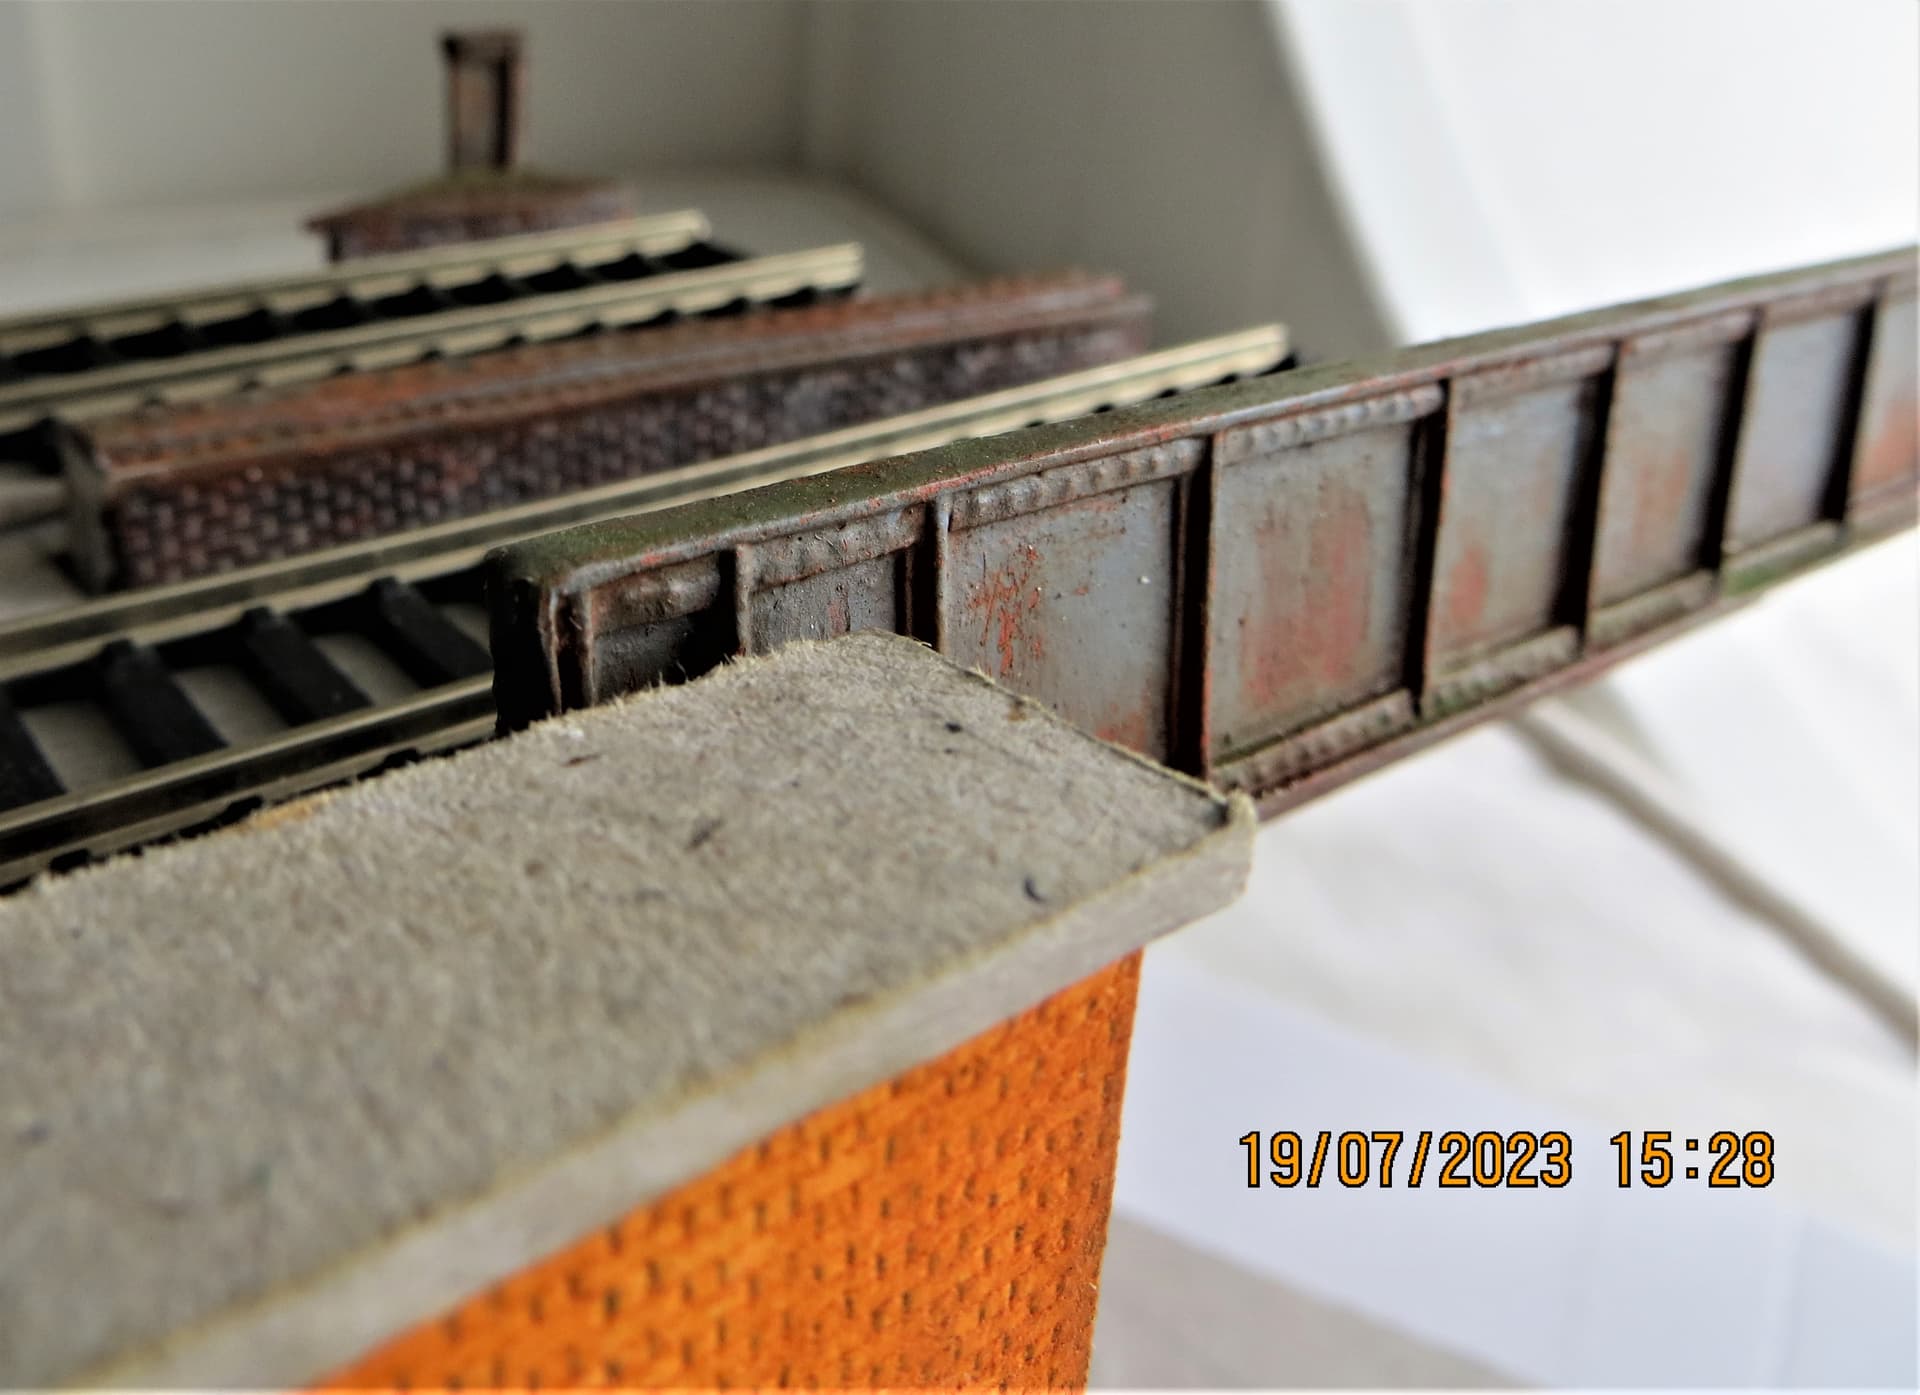
And below is a close-up of a couple of panels which hopefully show the layers of rust beneath the paint, thus giving it a flaky appearance, as opposed to applying rust over the paint?
Opinions always welcome, positive or negative, .
Cheers, ,
G
5 Likes
The new grey tones change the look totally G. I really like the new scheme.
2 Likes
The flaking effect looks extremely realistic!  …
…
—mike
3 Likes
Thanks to John and Mike for their kind words, it’s appreciated, .
G,
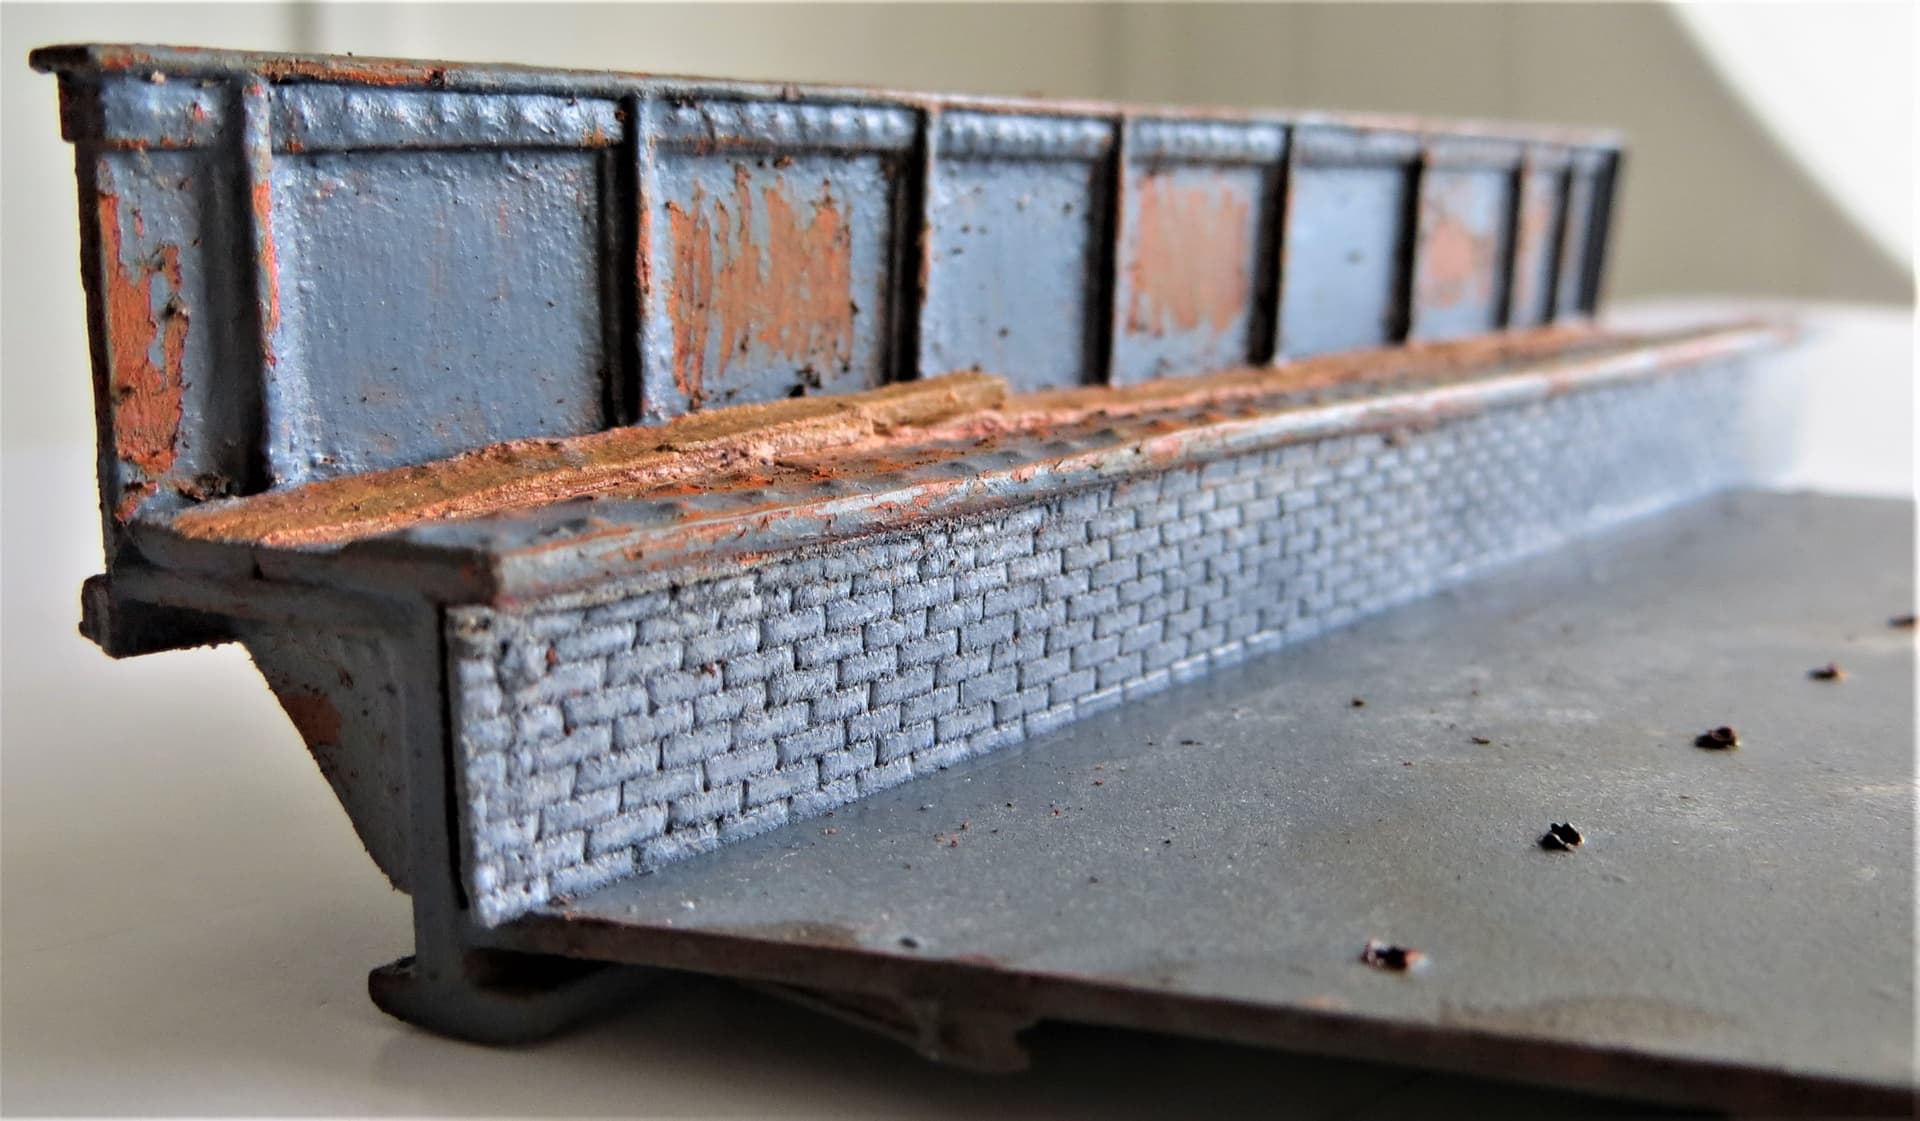
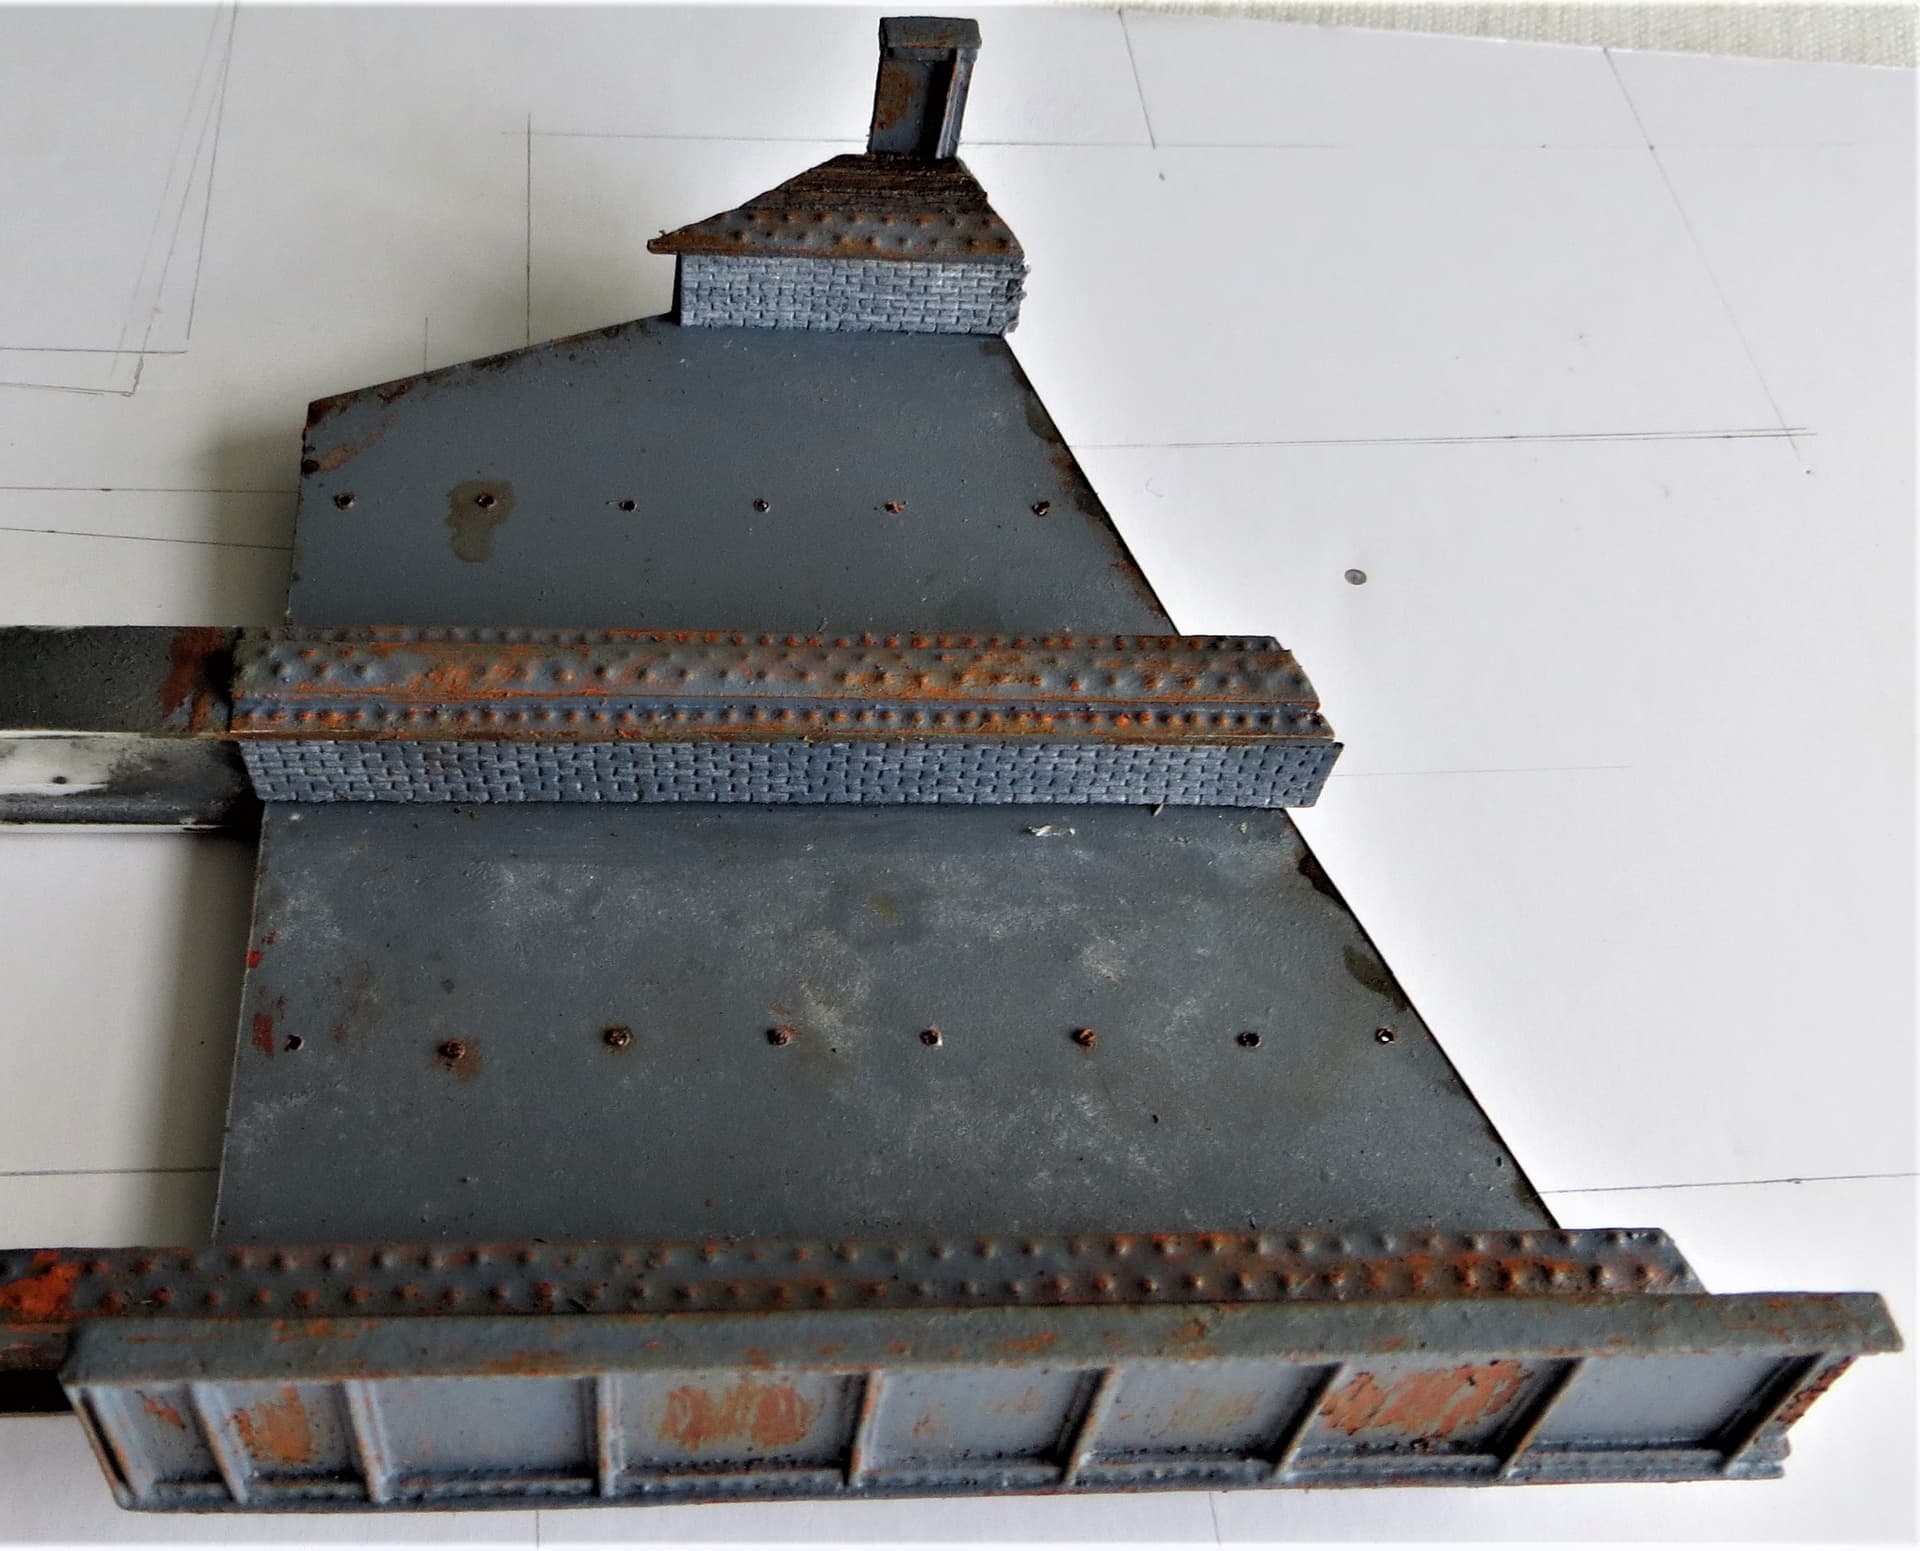
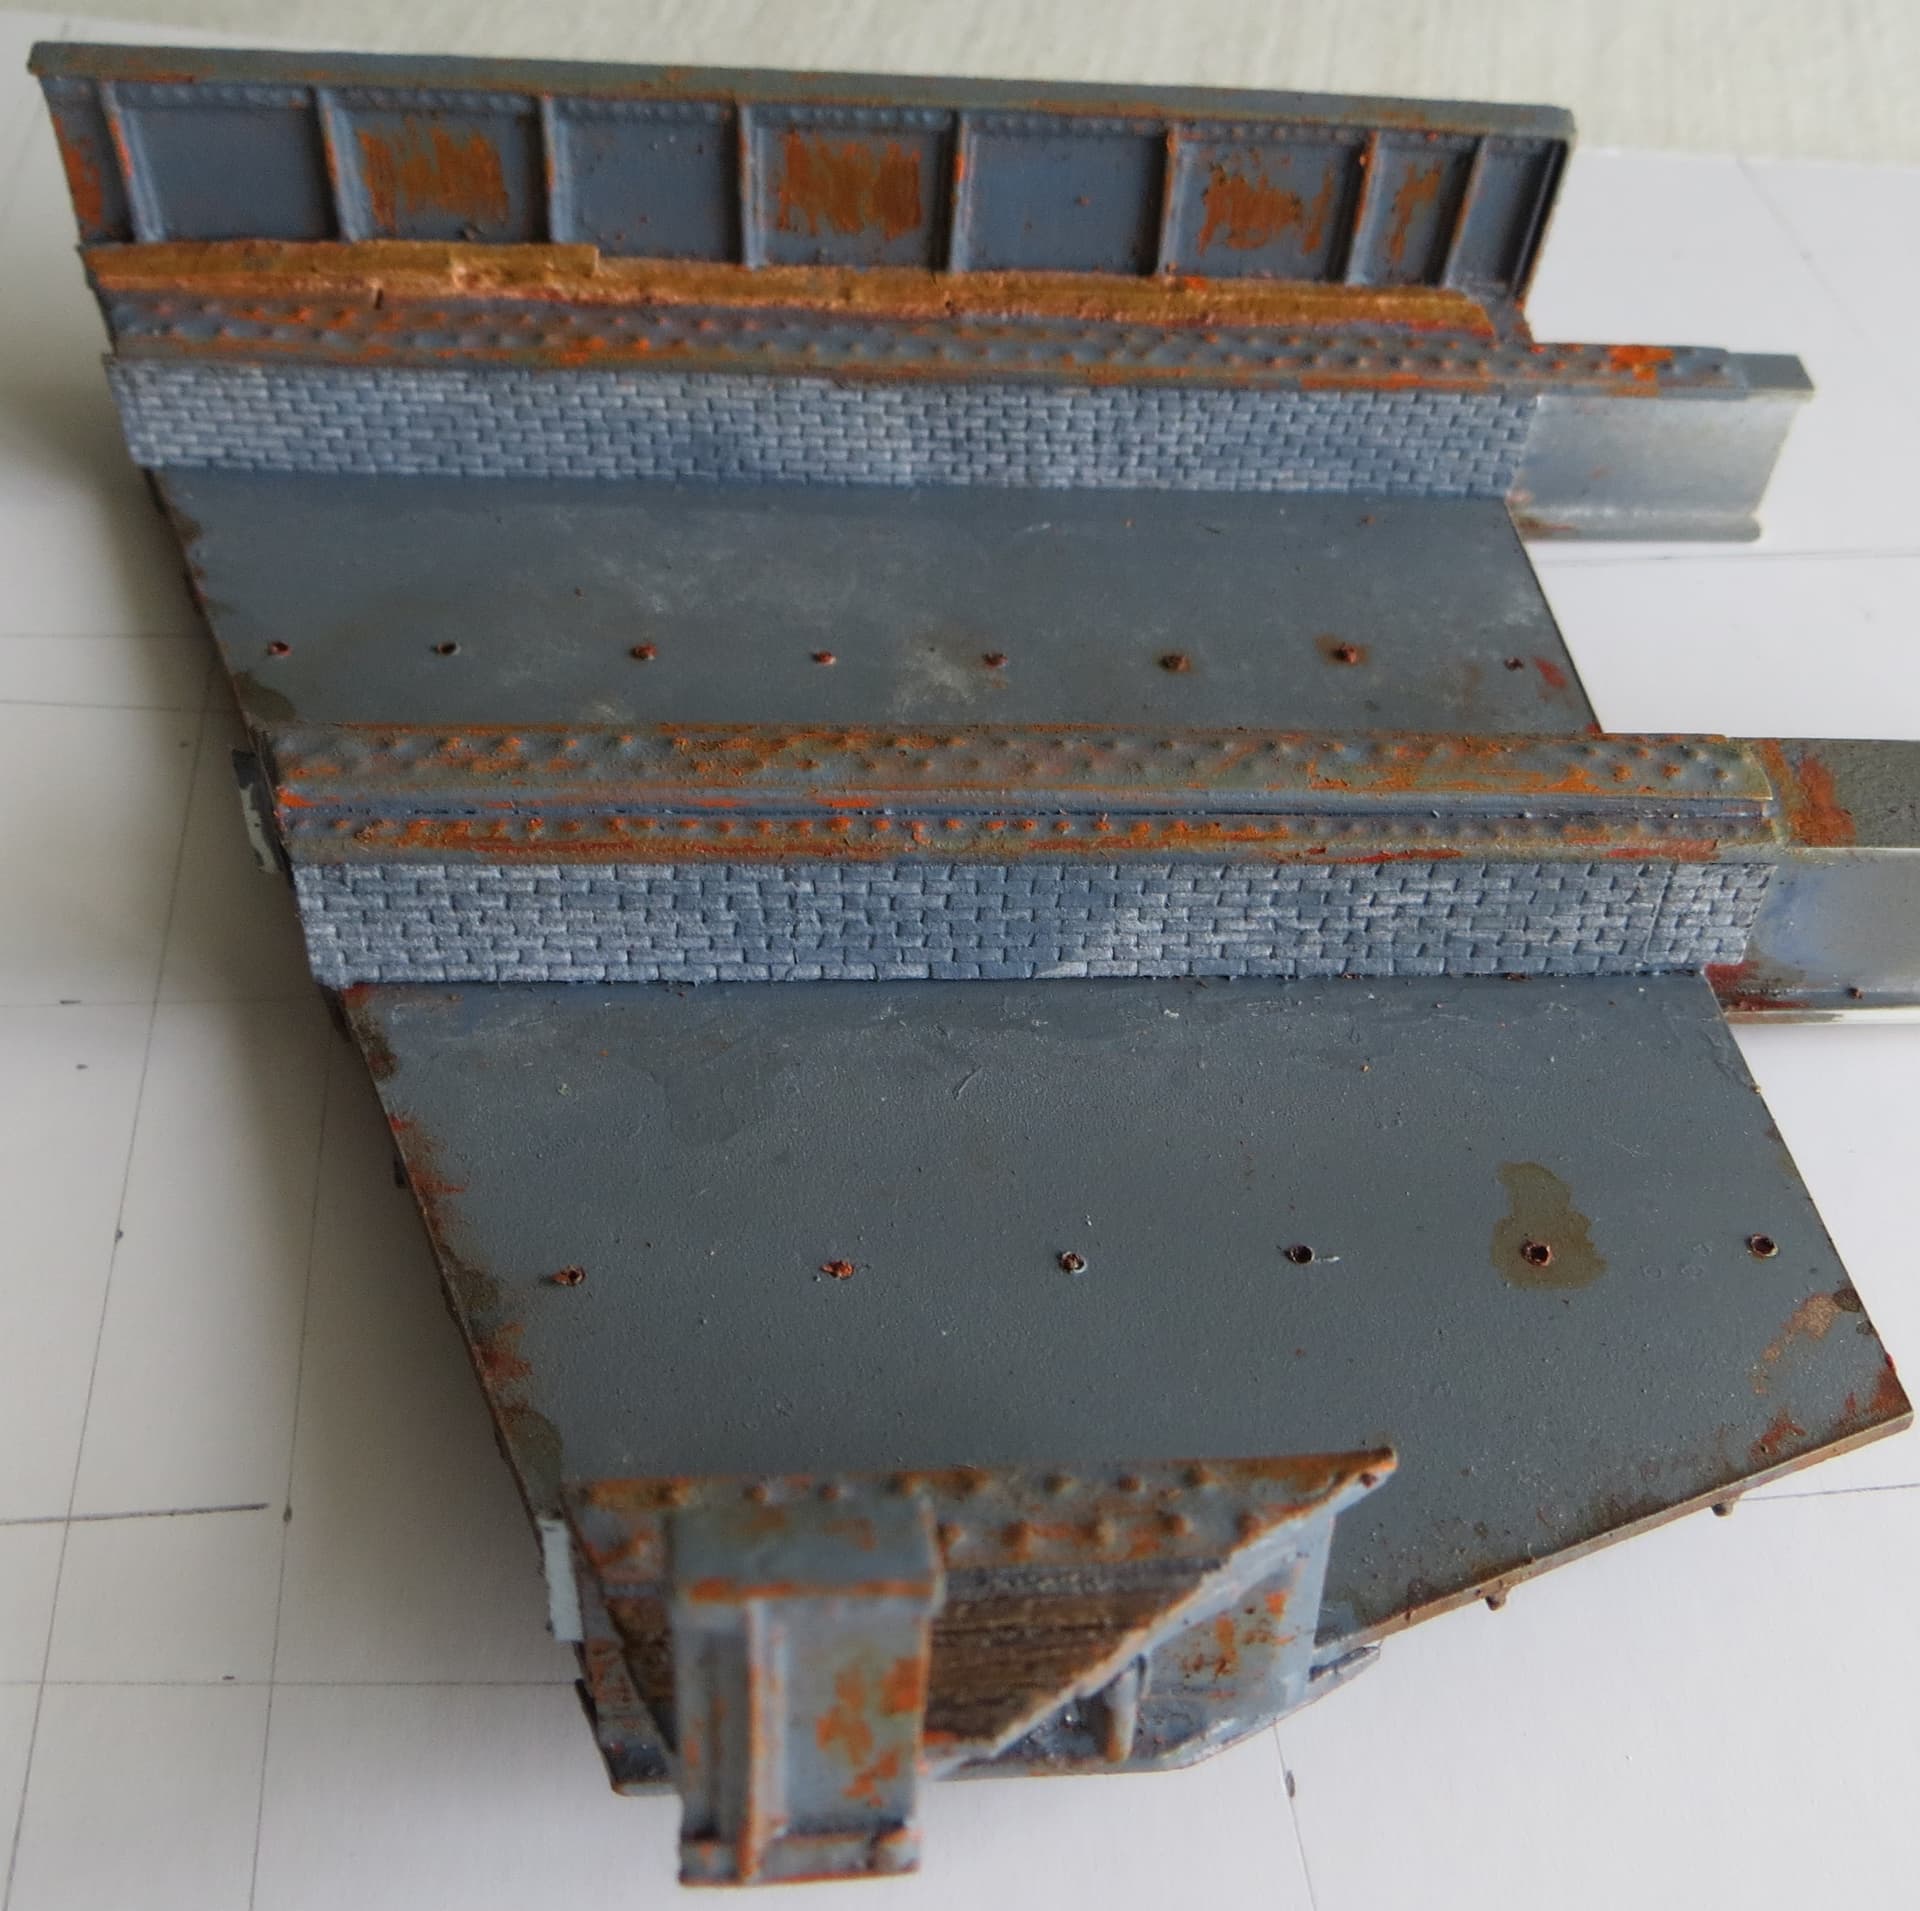
Hi all,
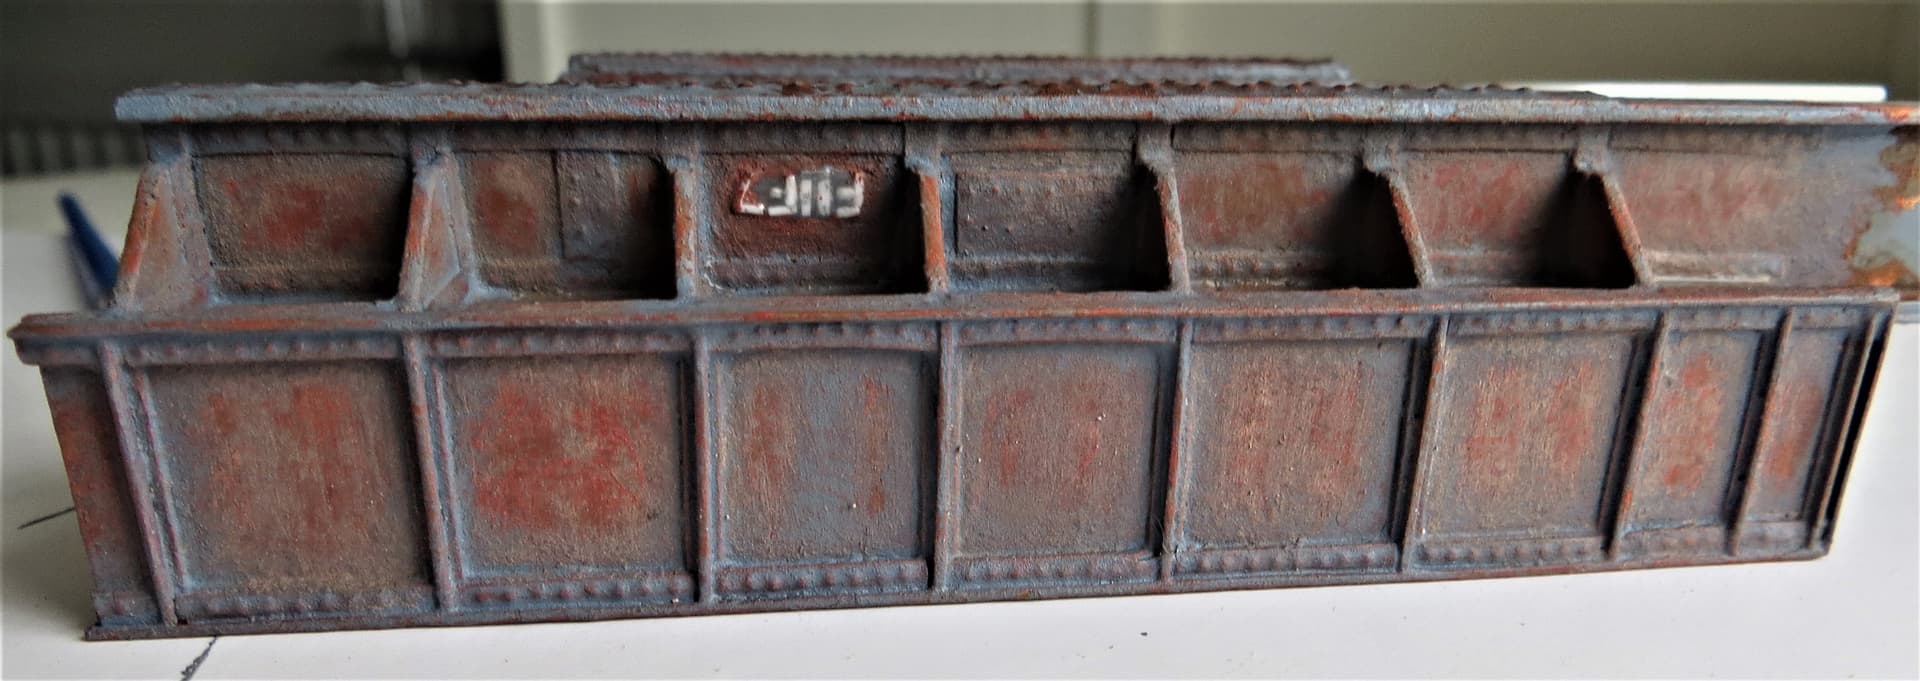
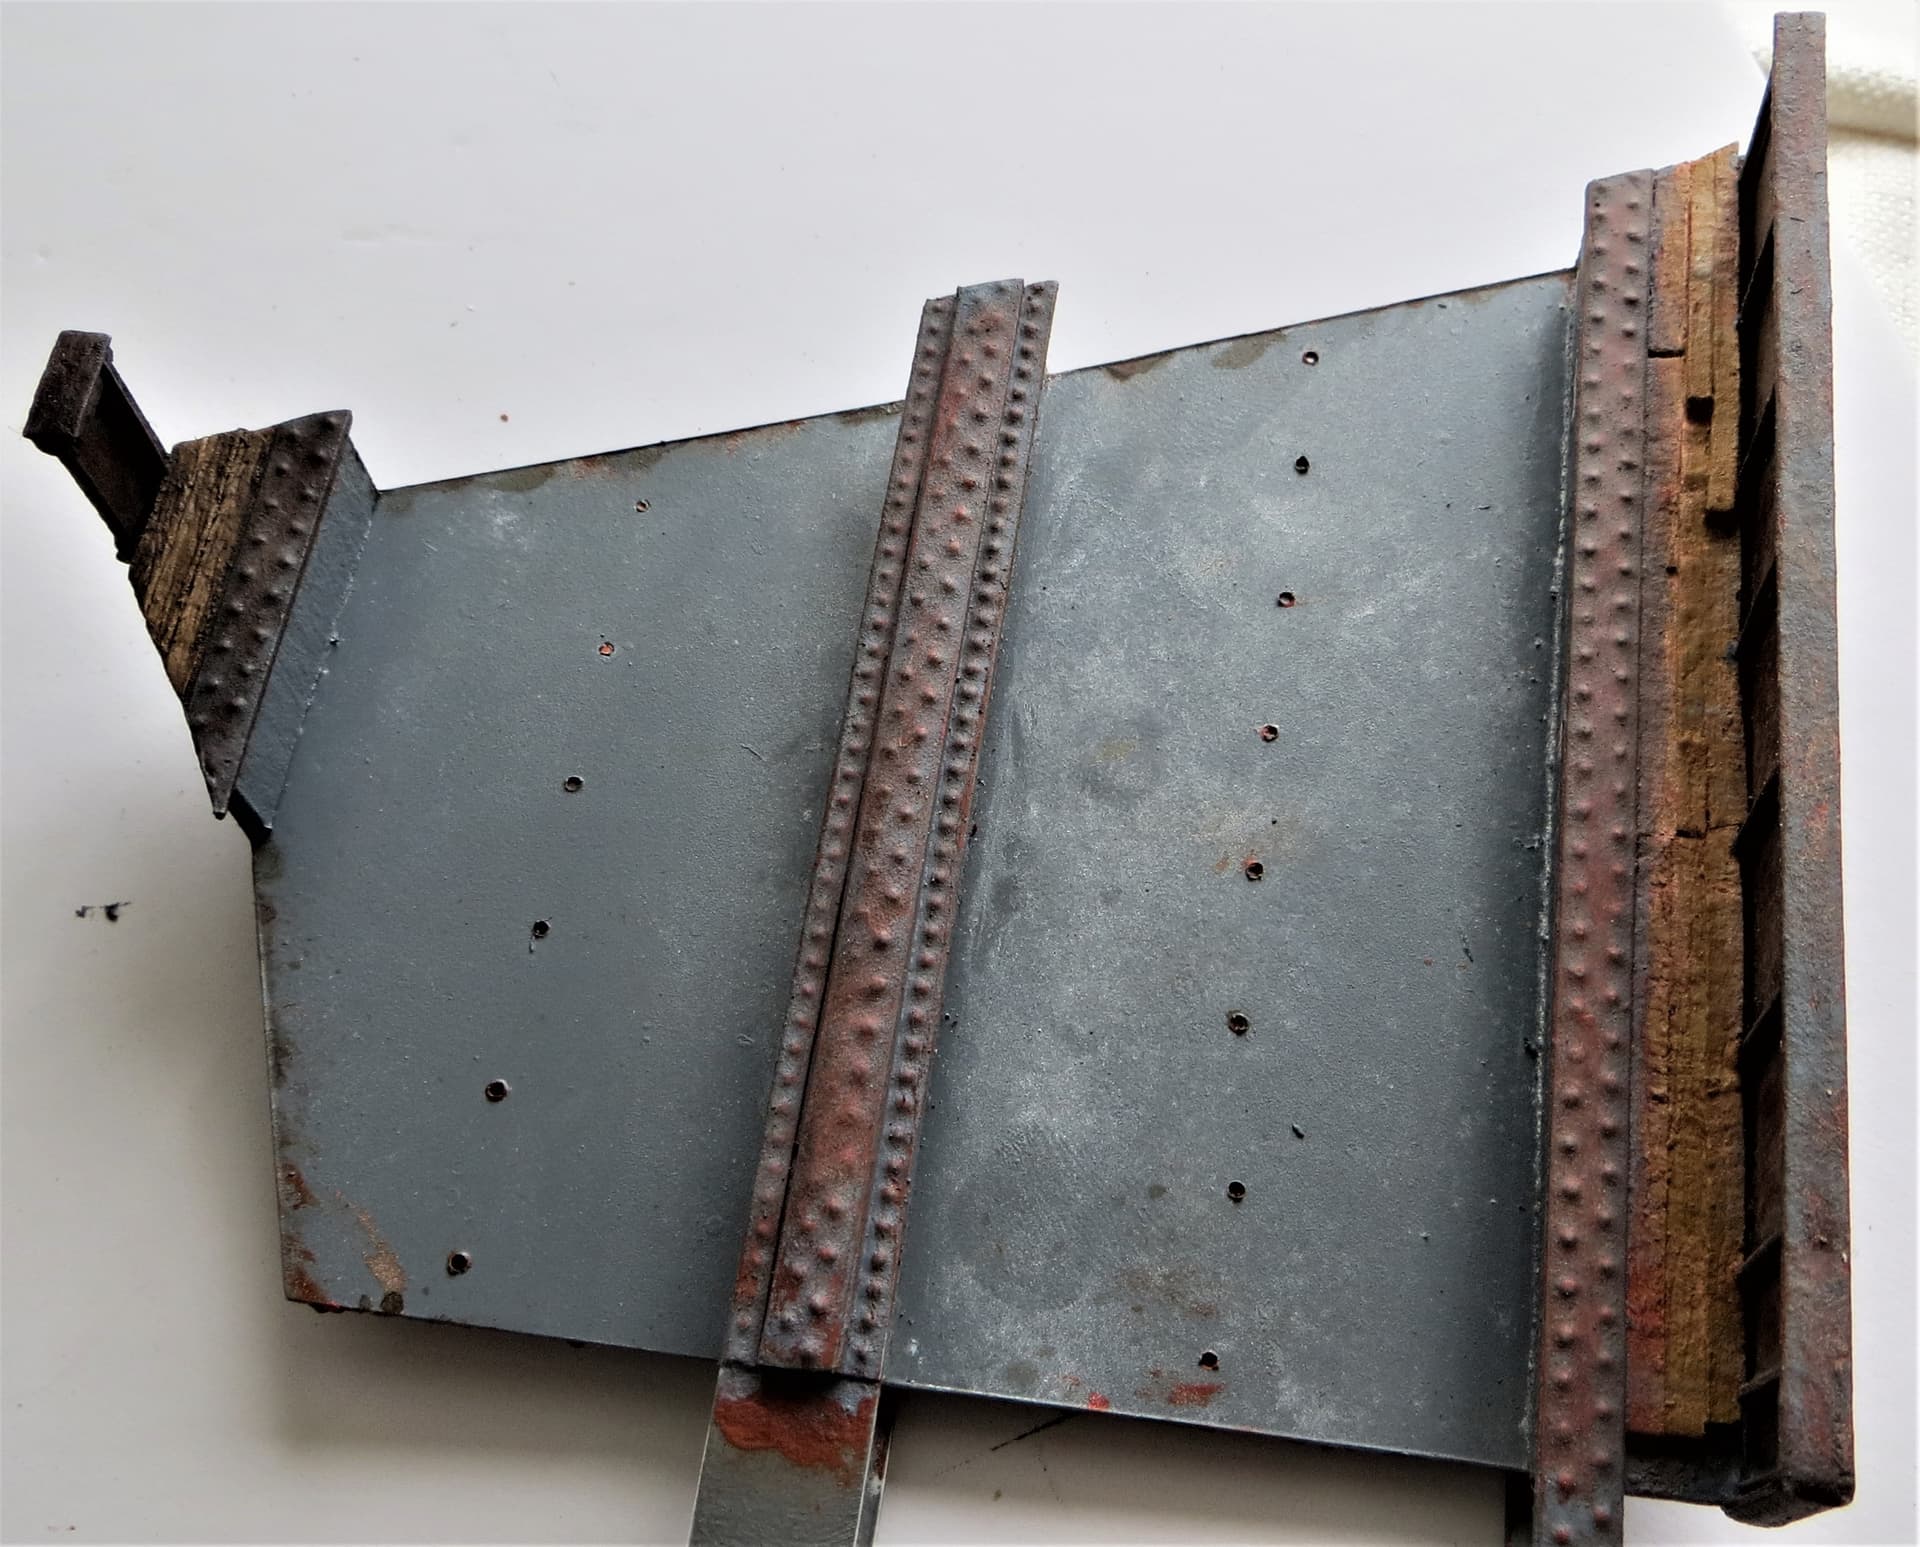
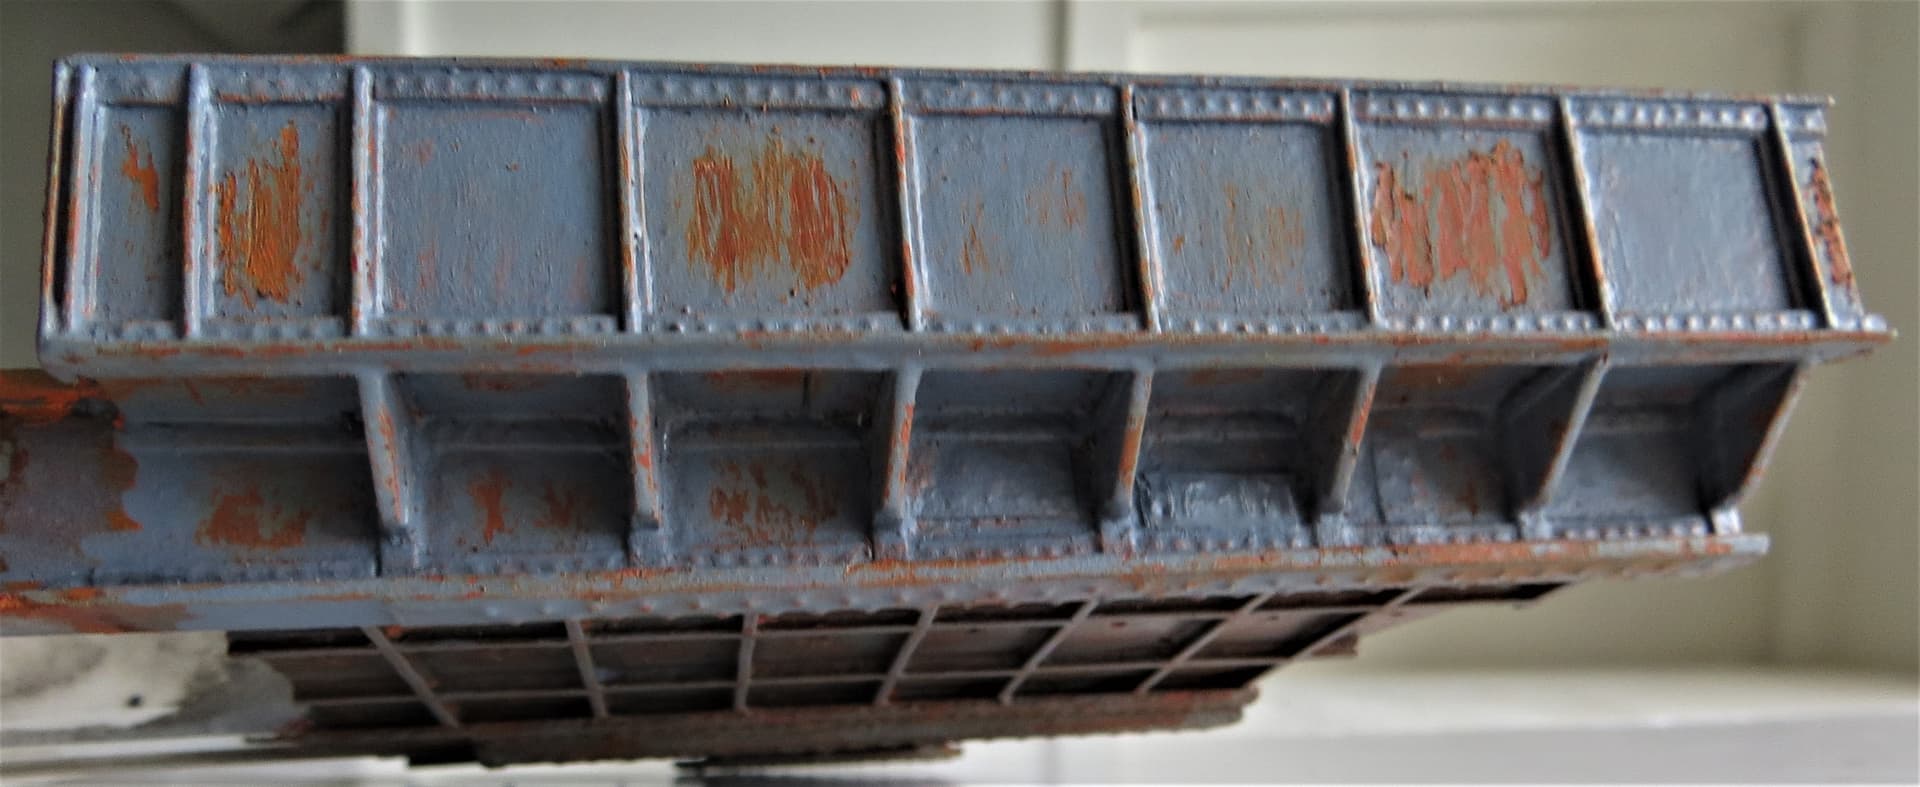
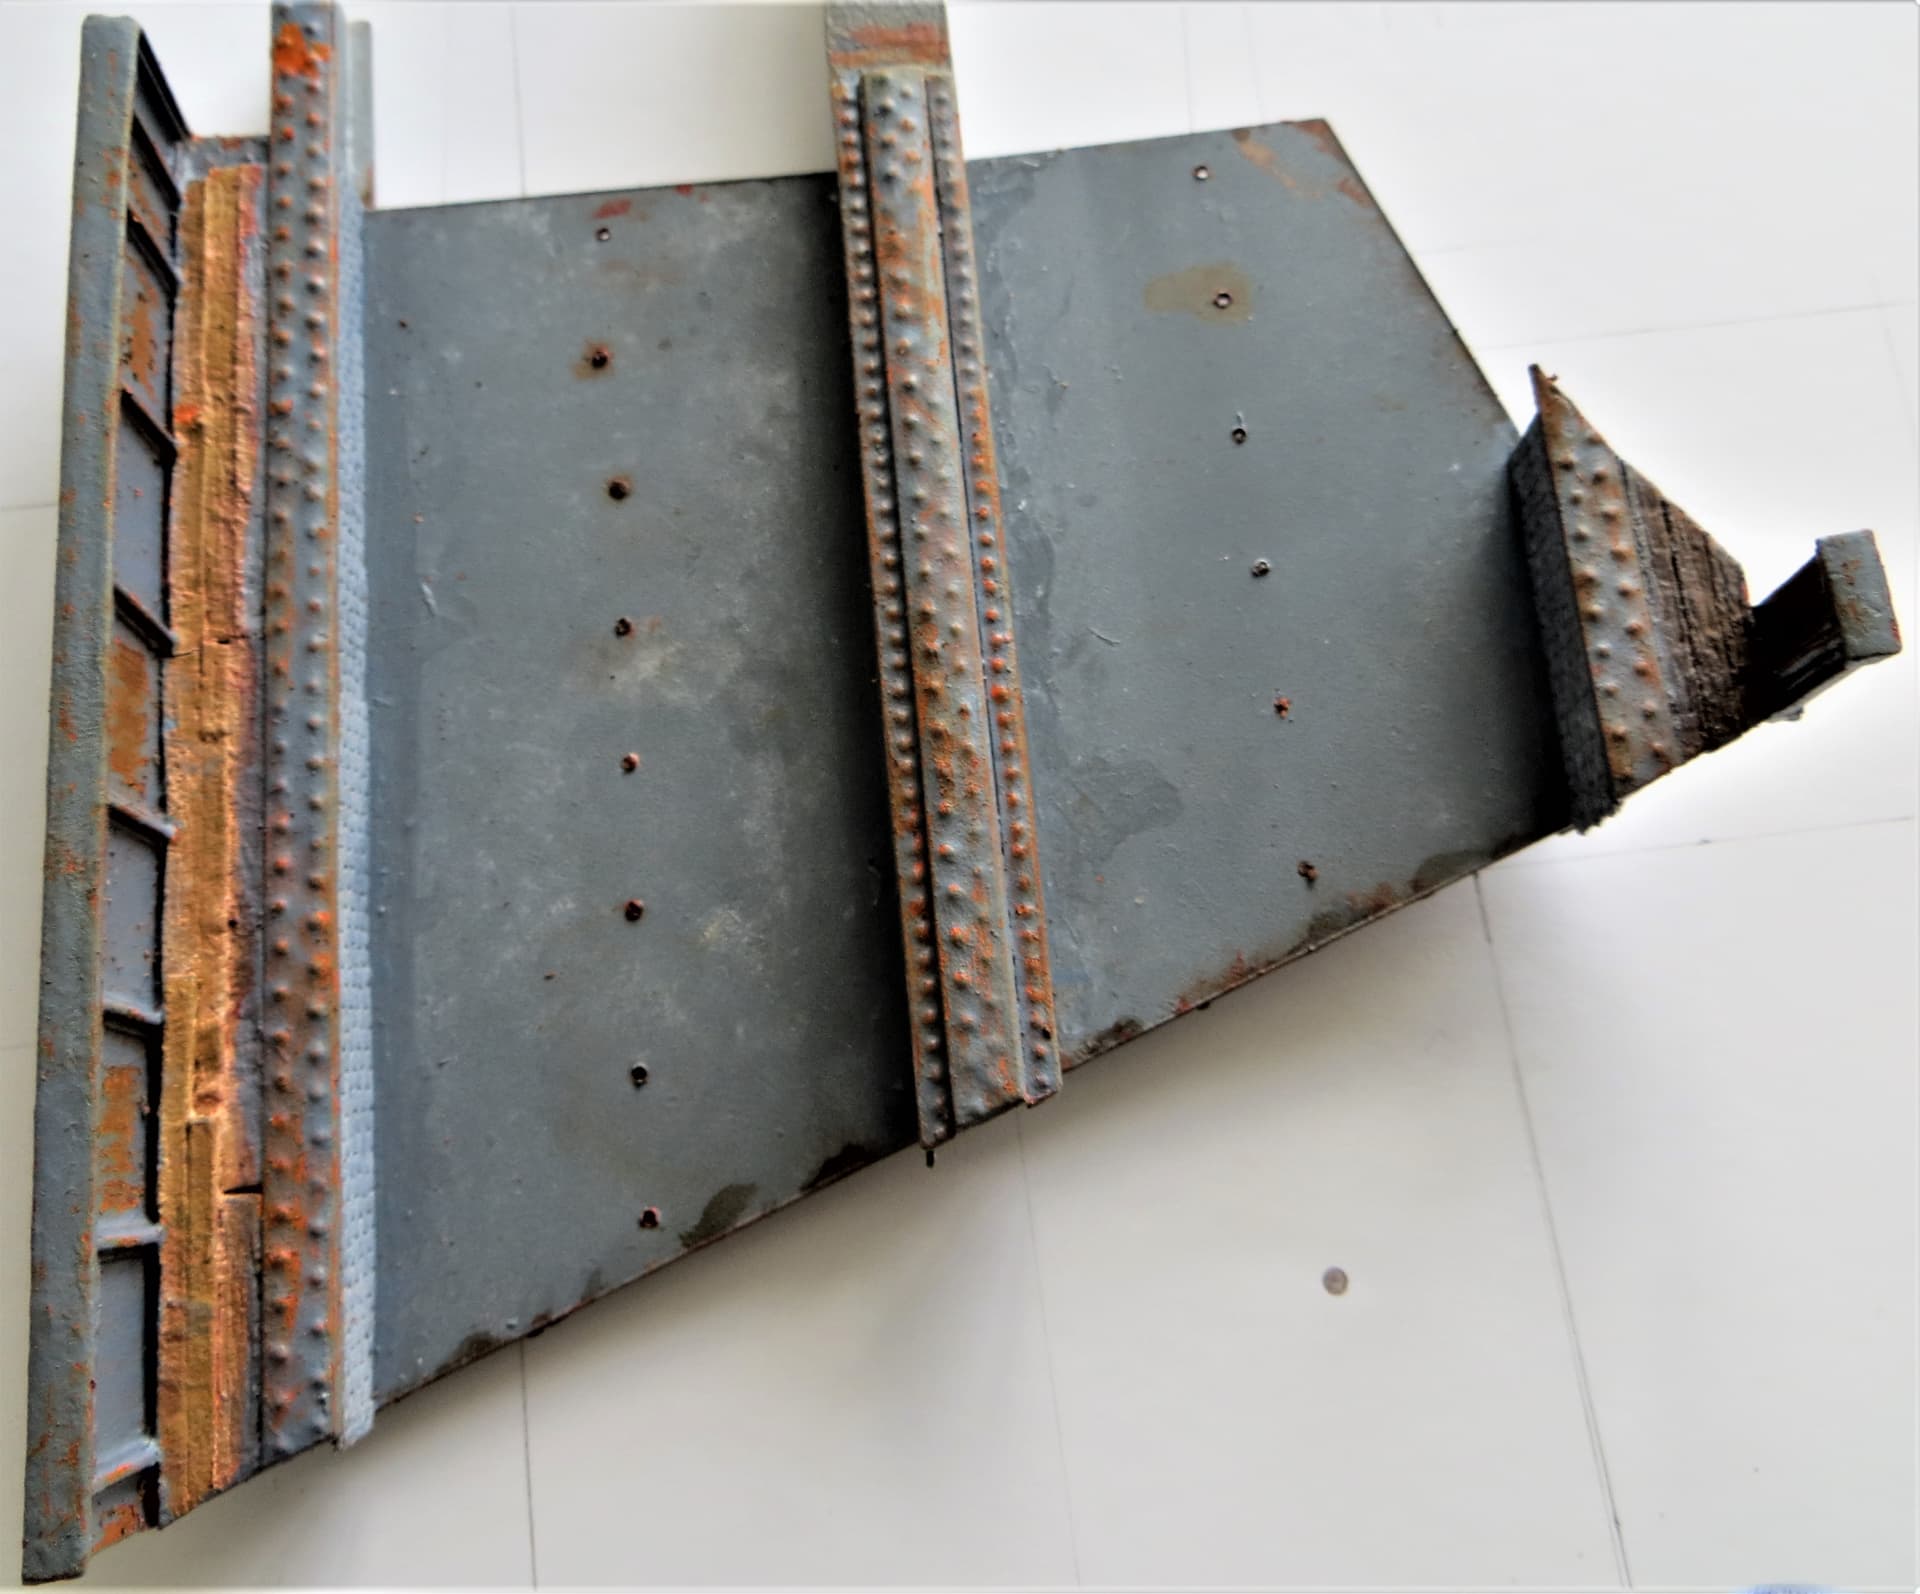
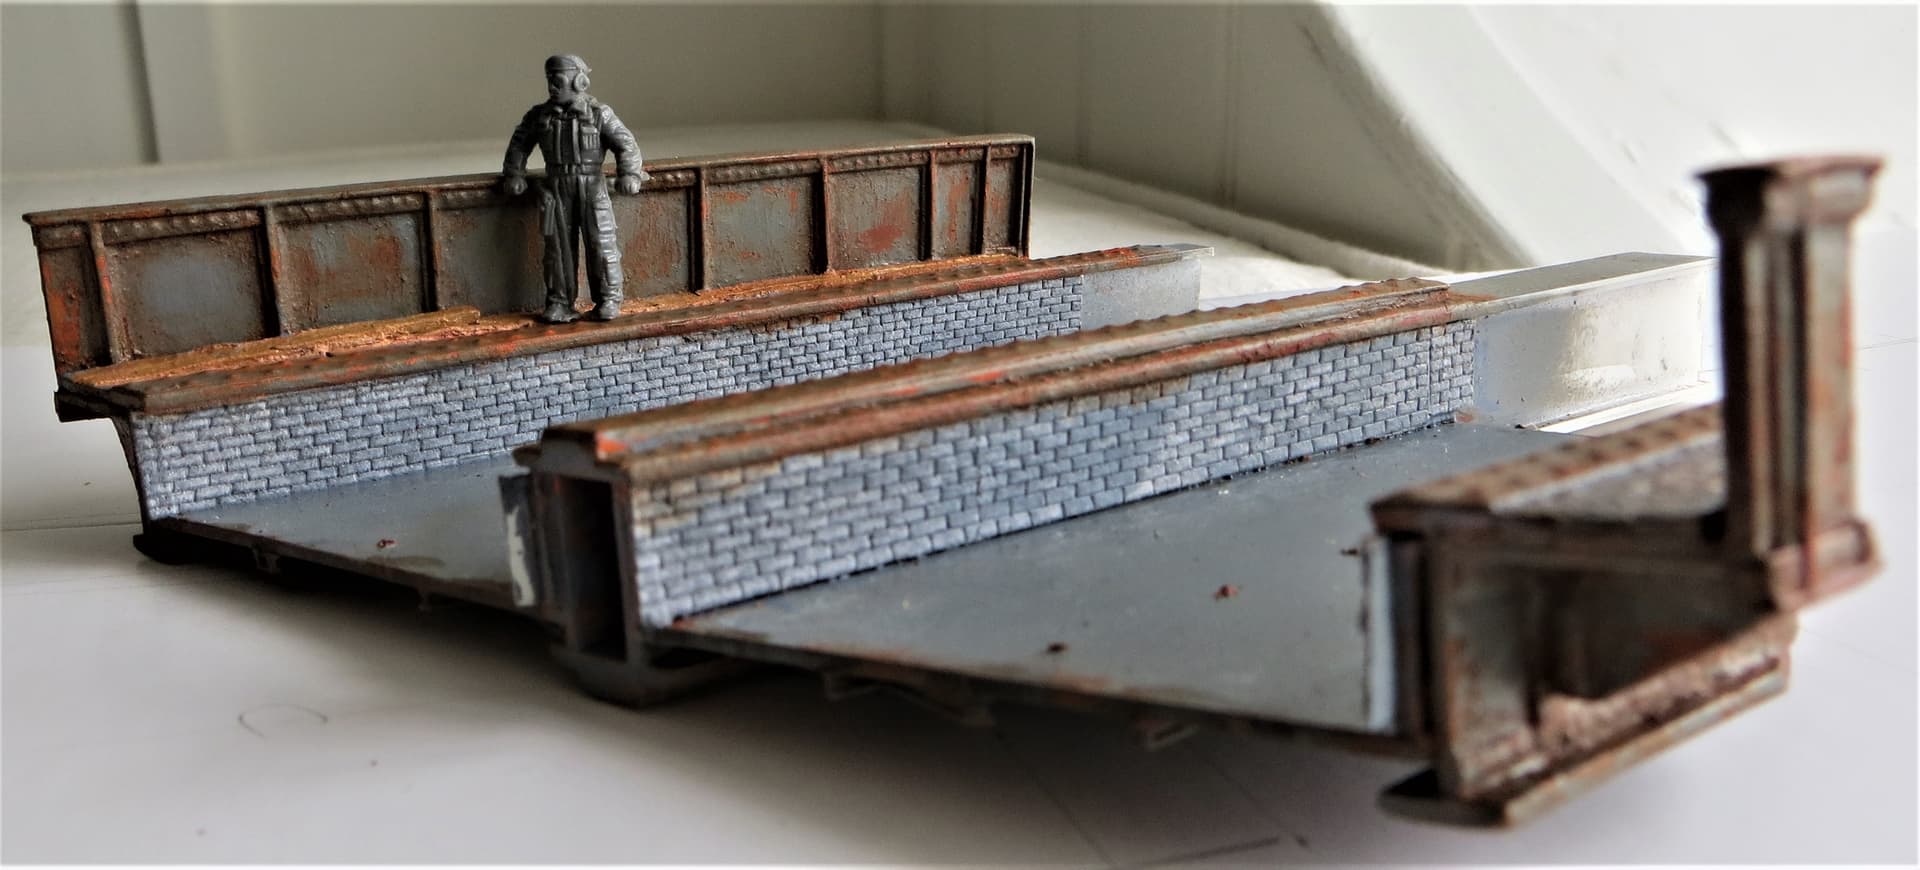
Had a couple of hours over the weekend to play about a bit, . As before, with the bottom of the bridge, I didn’t like the uniformity of the rusted side panels, so had a rethink.
Original panels:
New Panels:
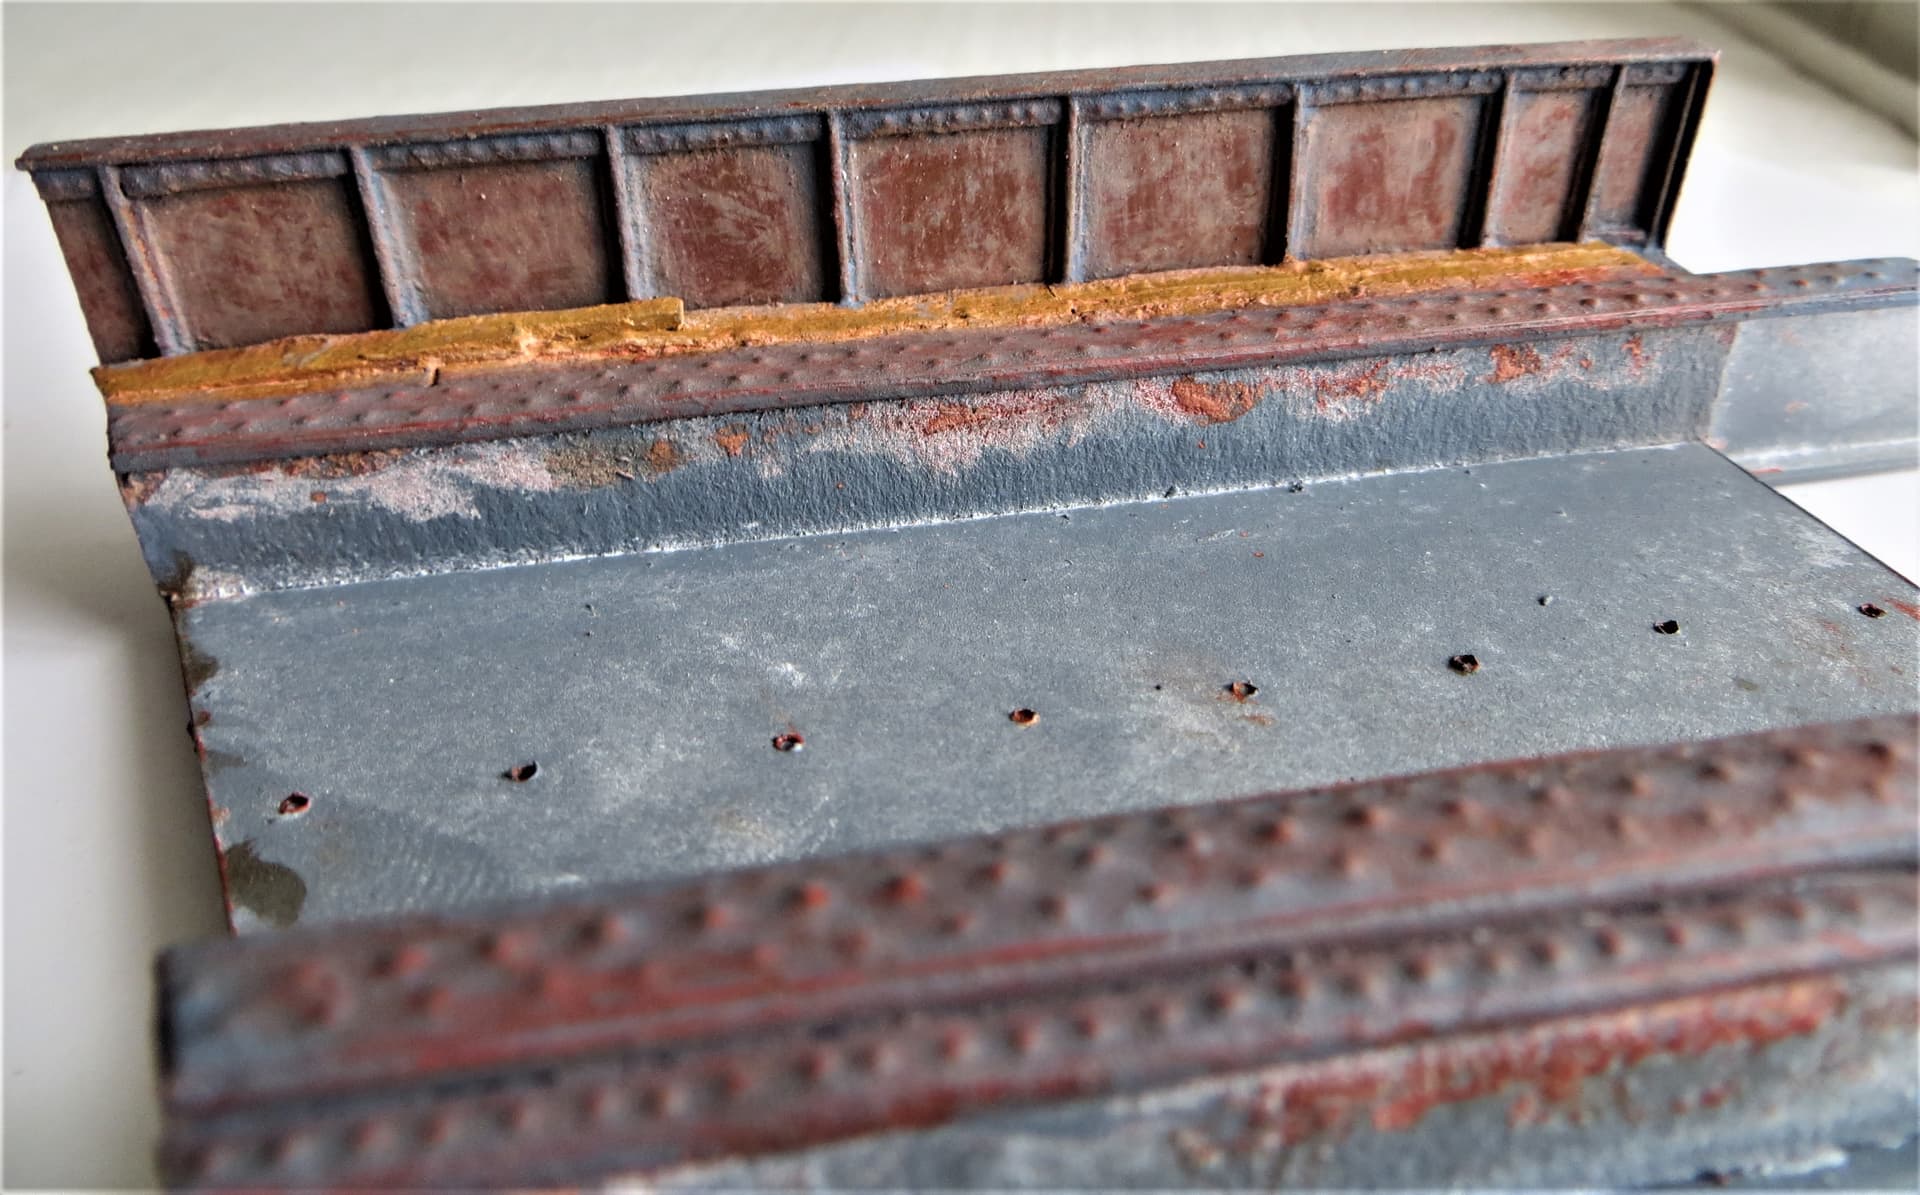
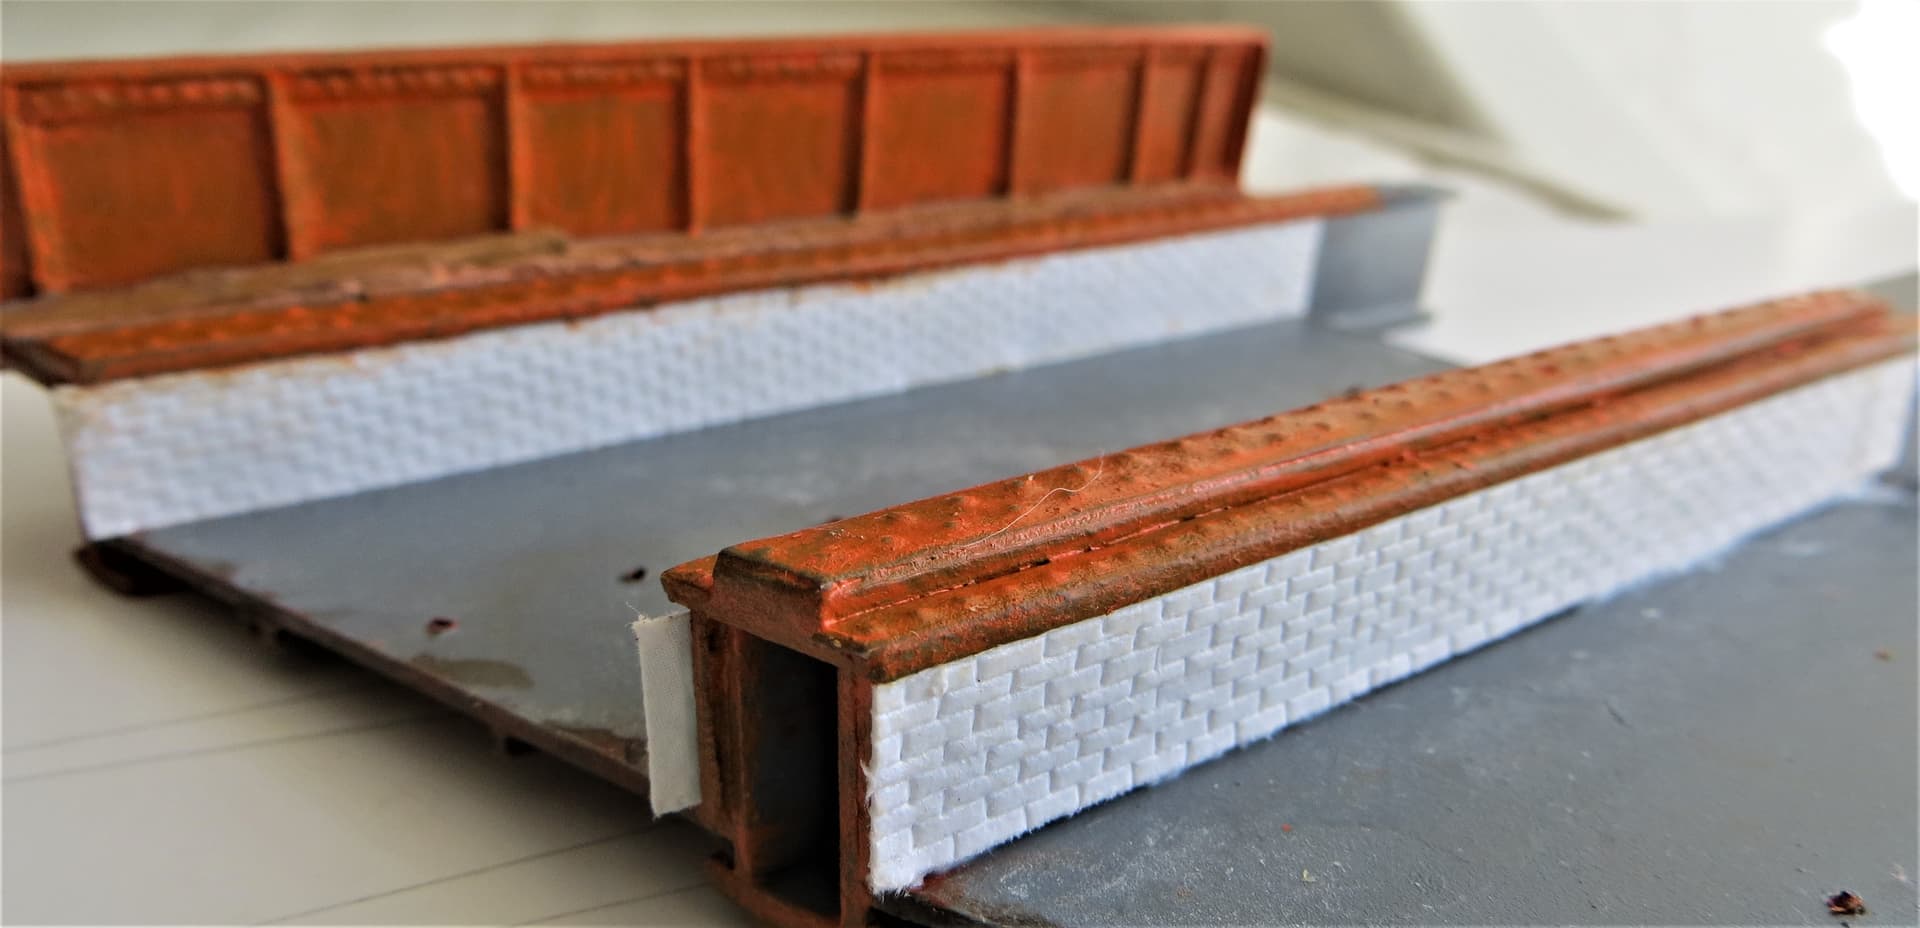
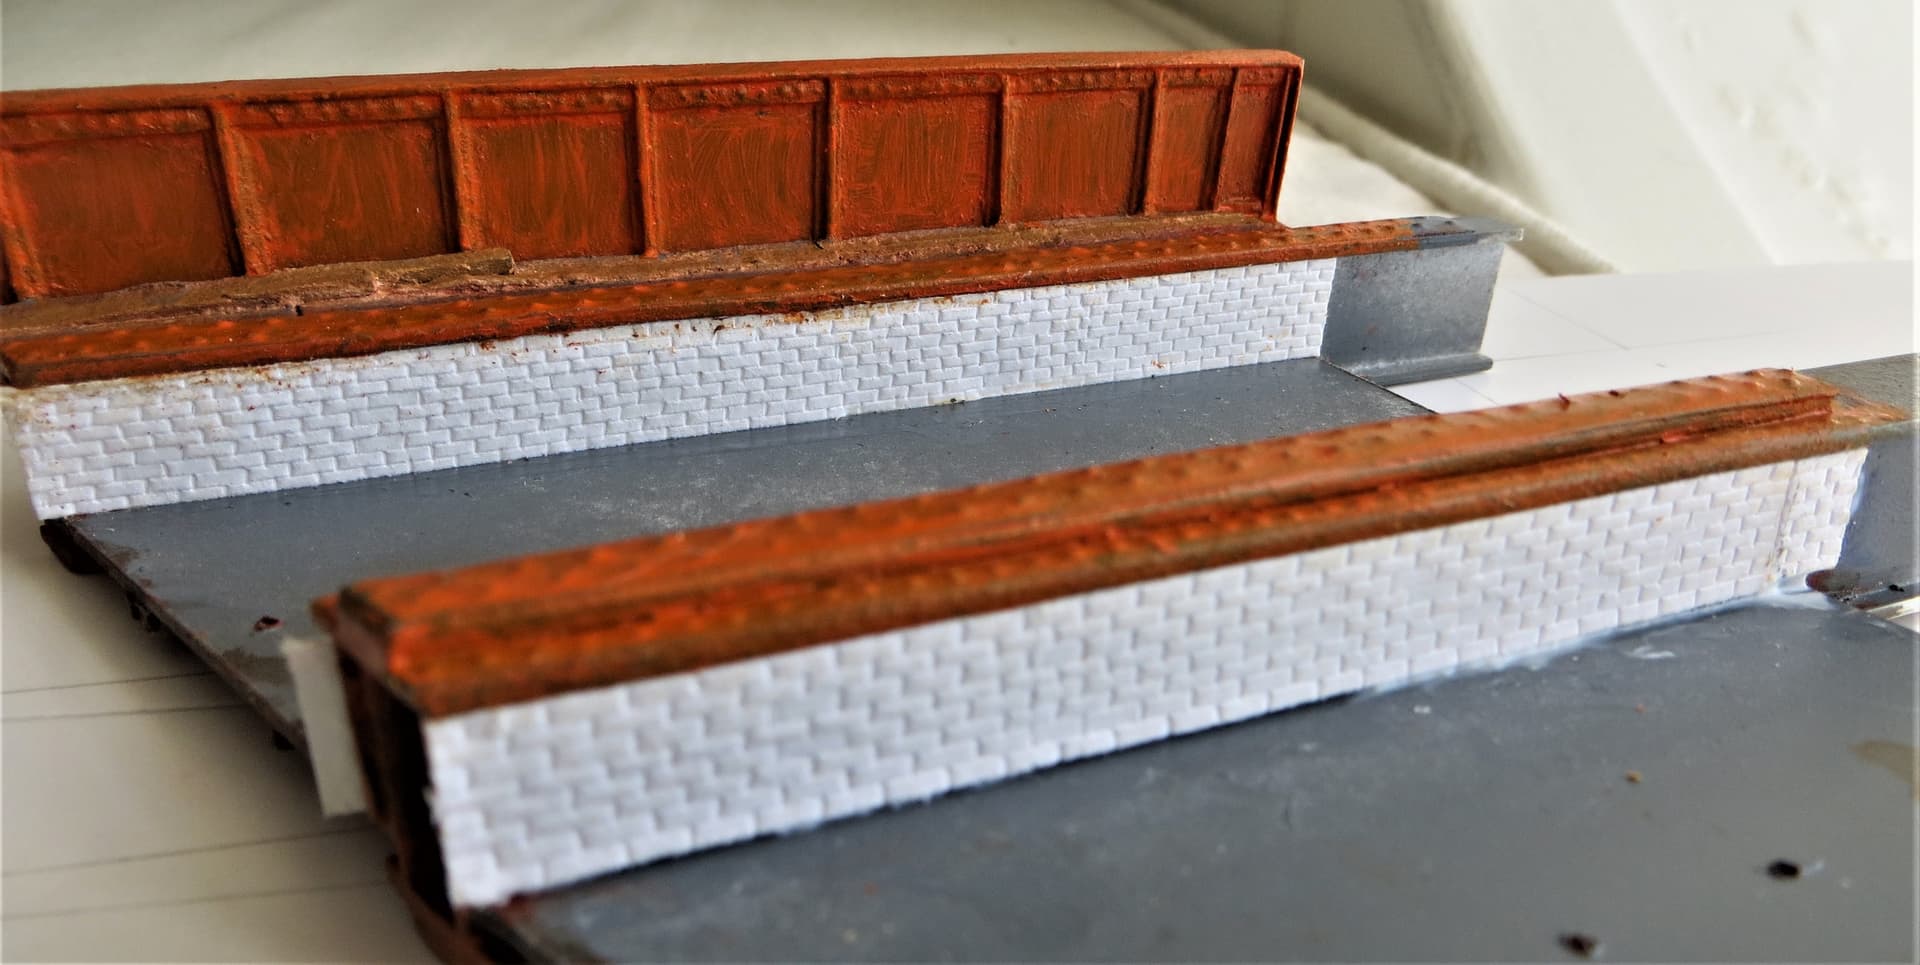
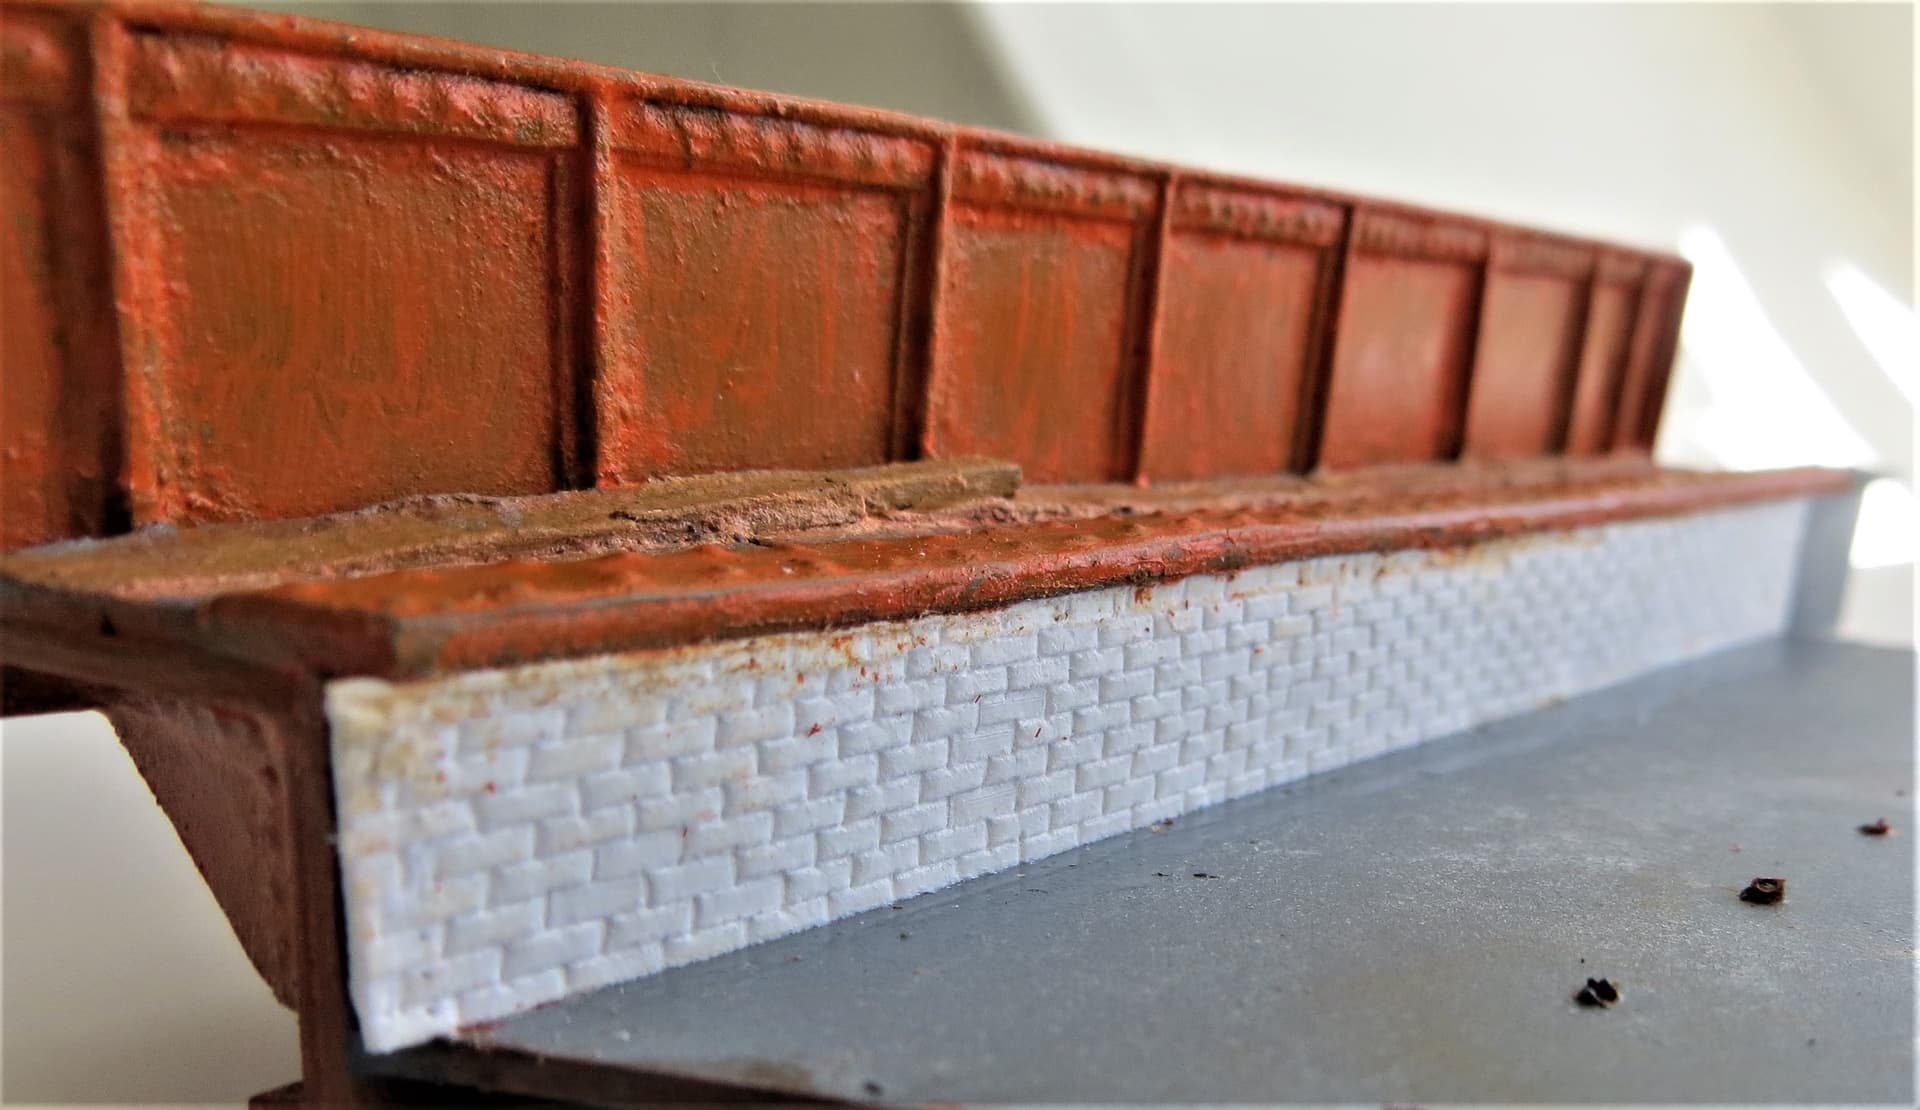
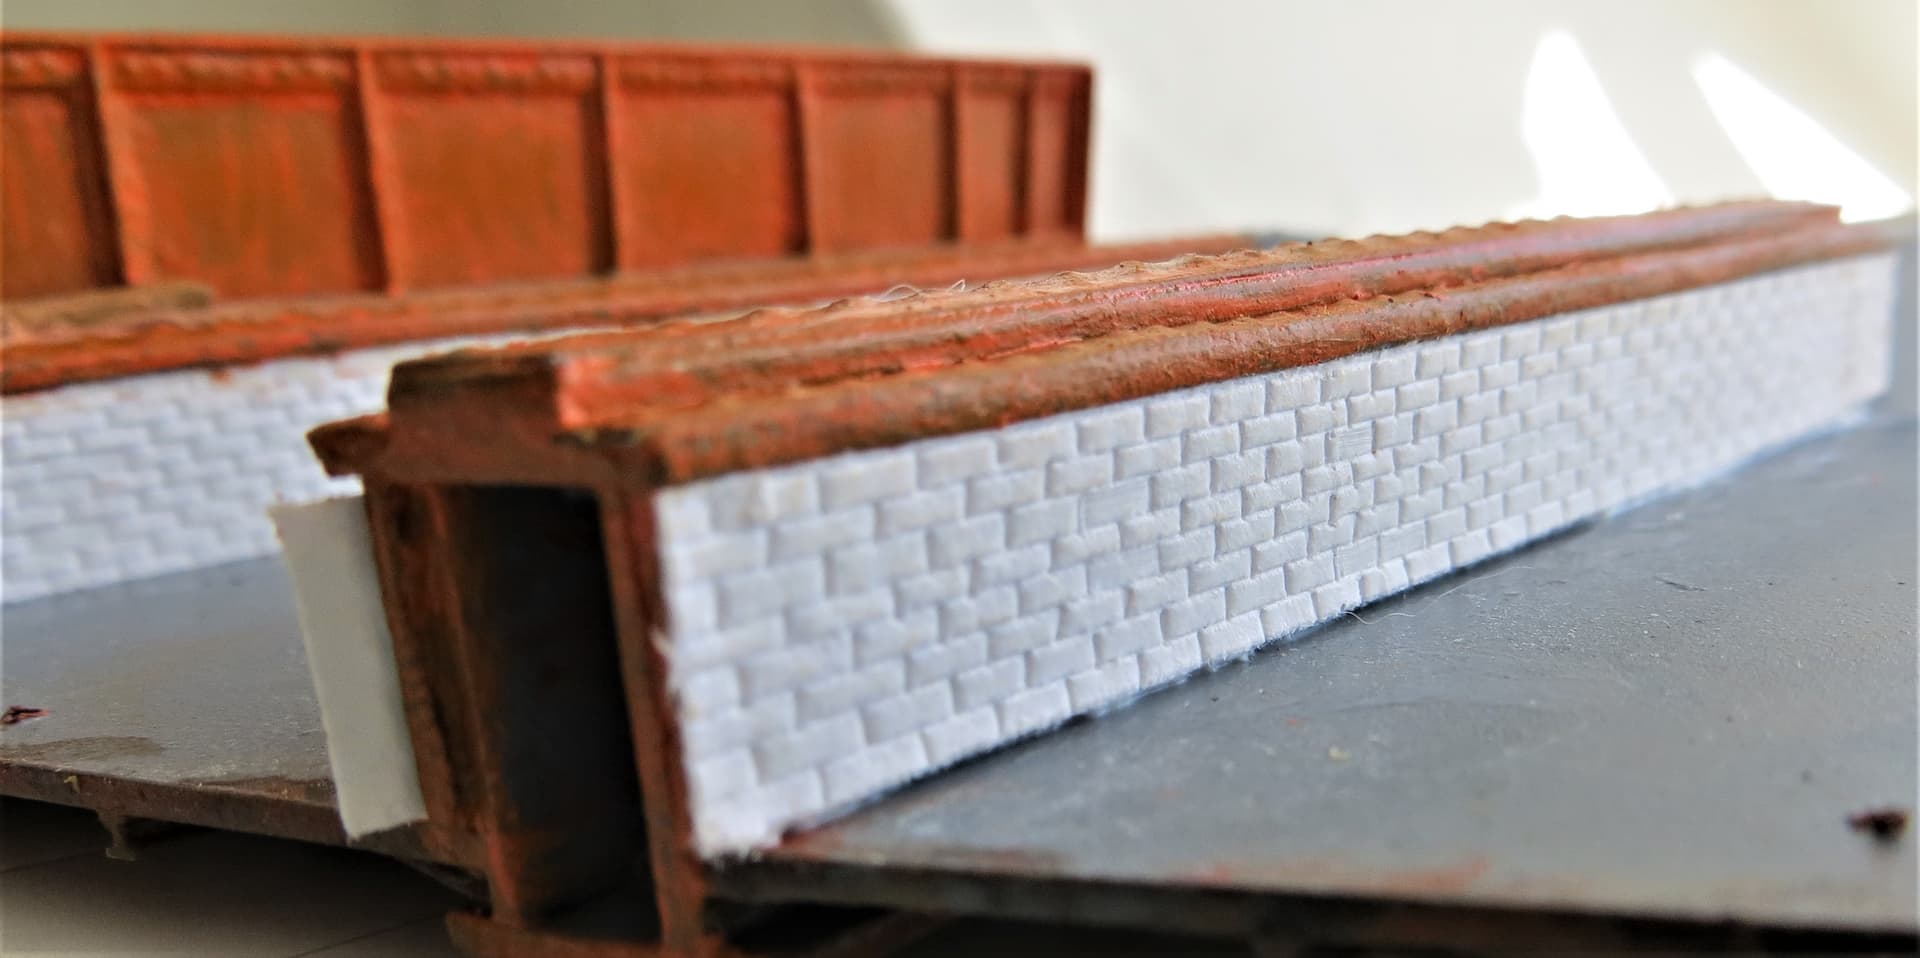
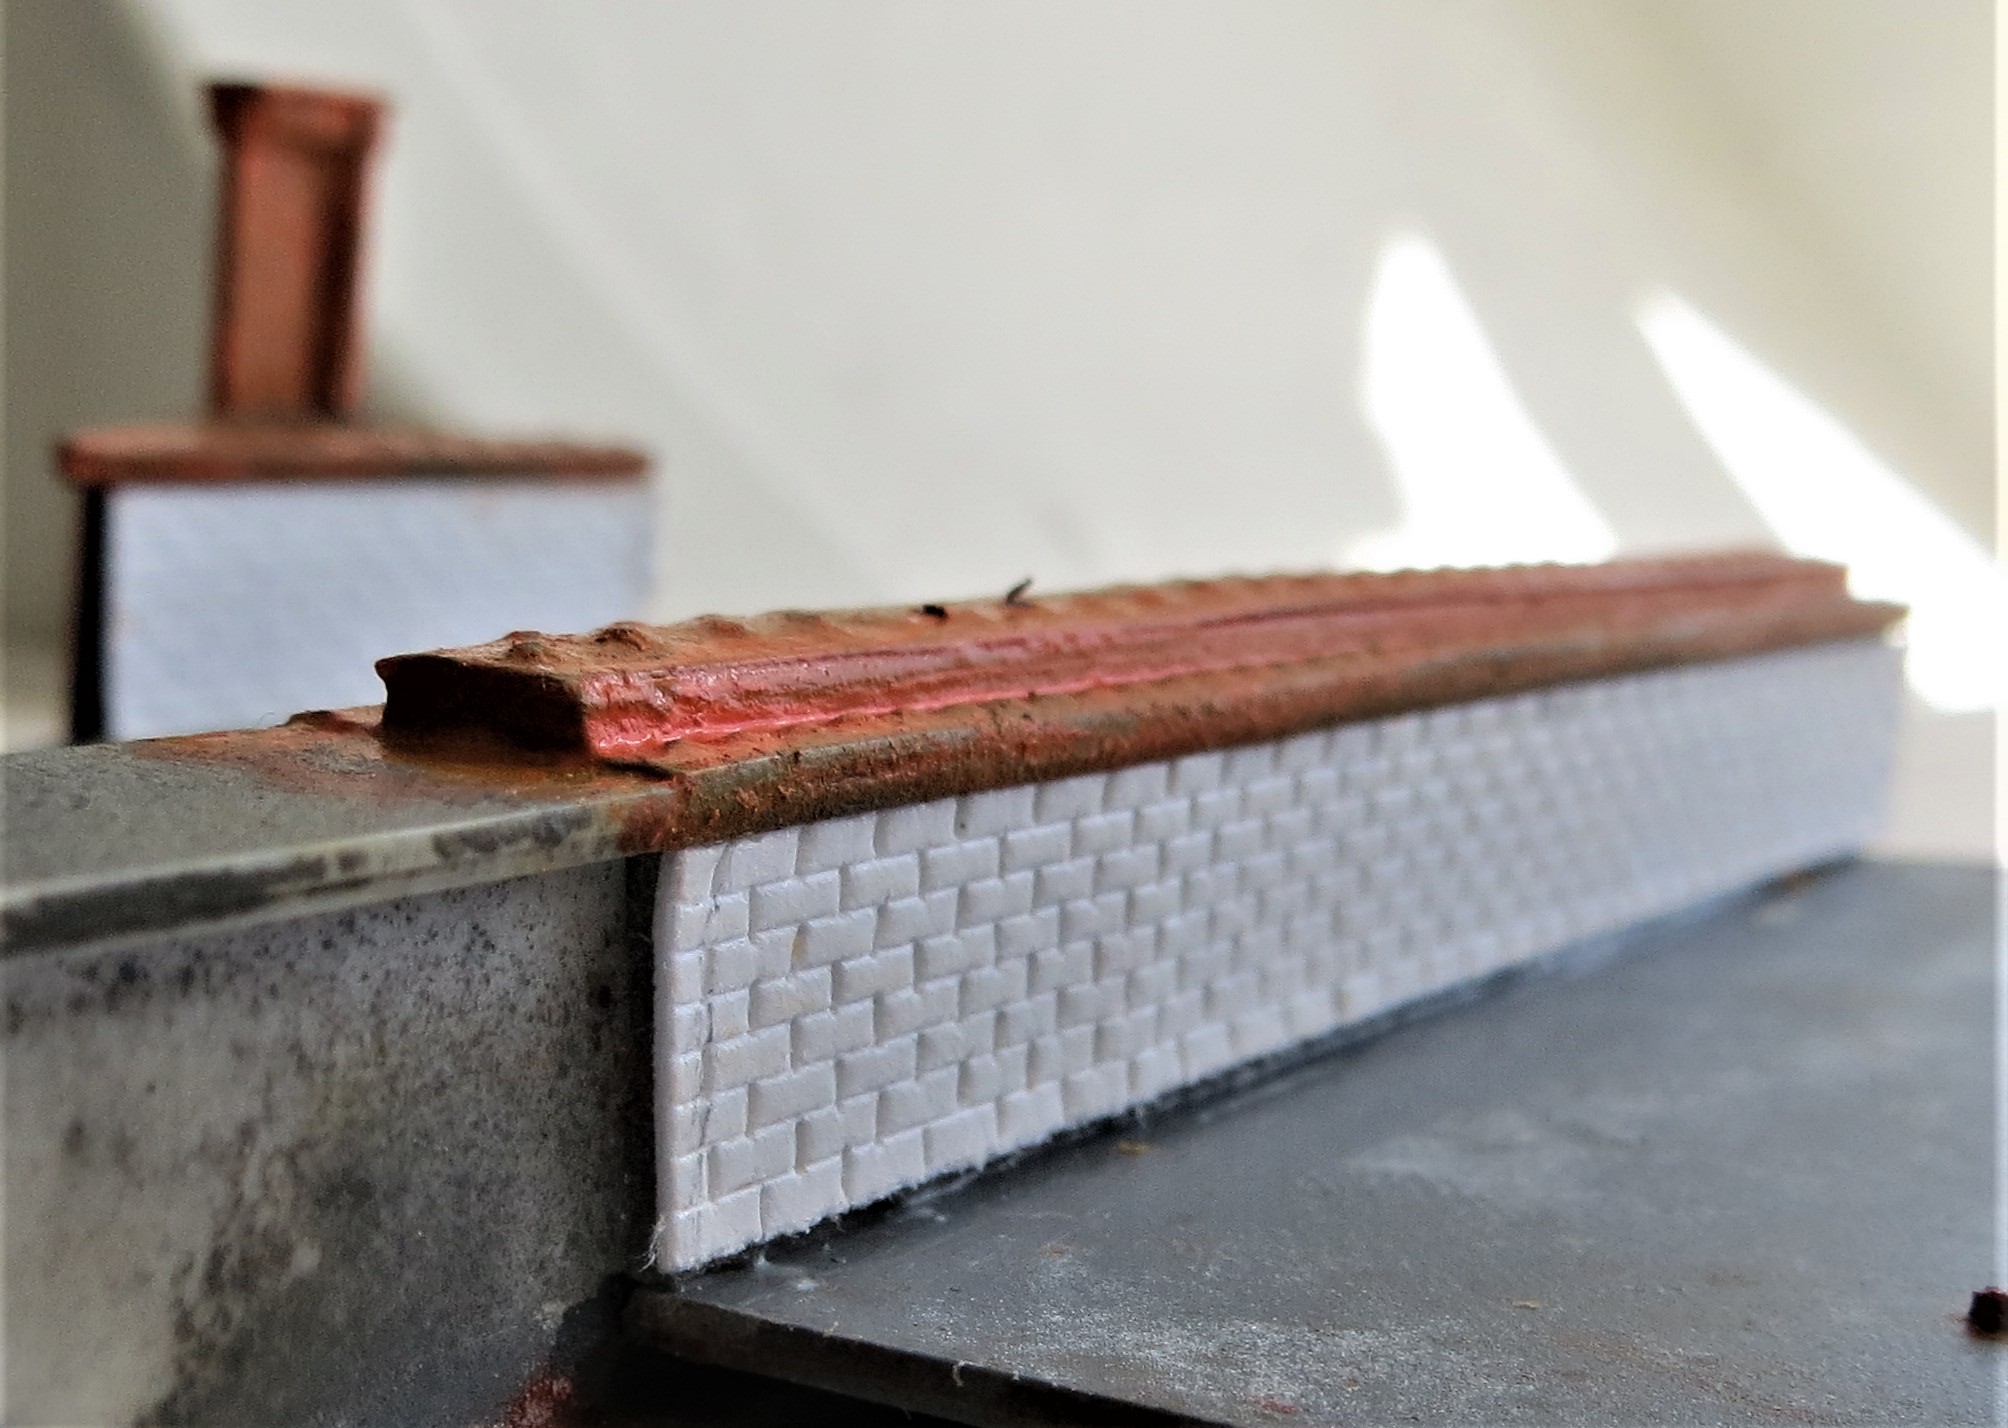
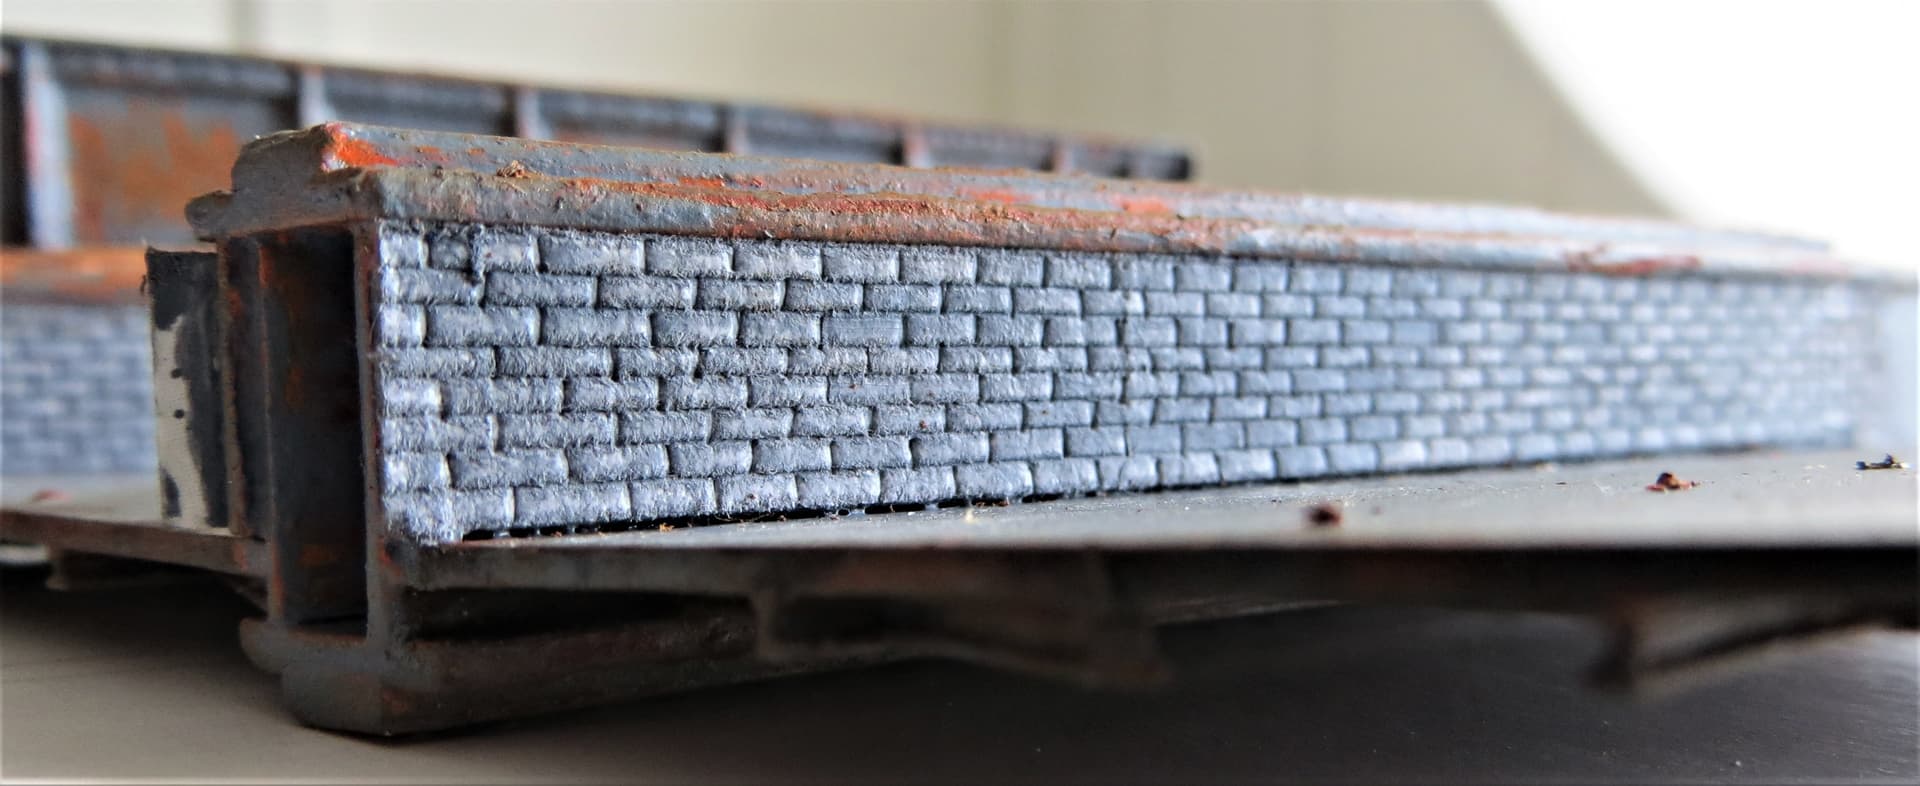
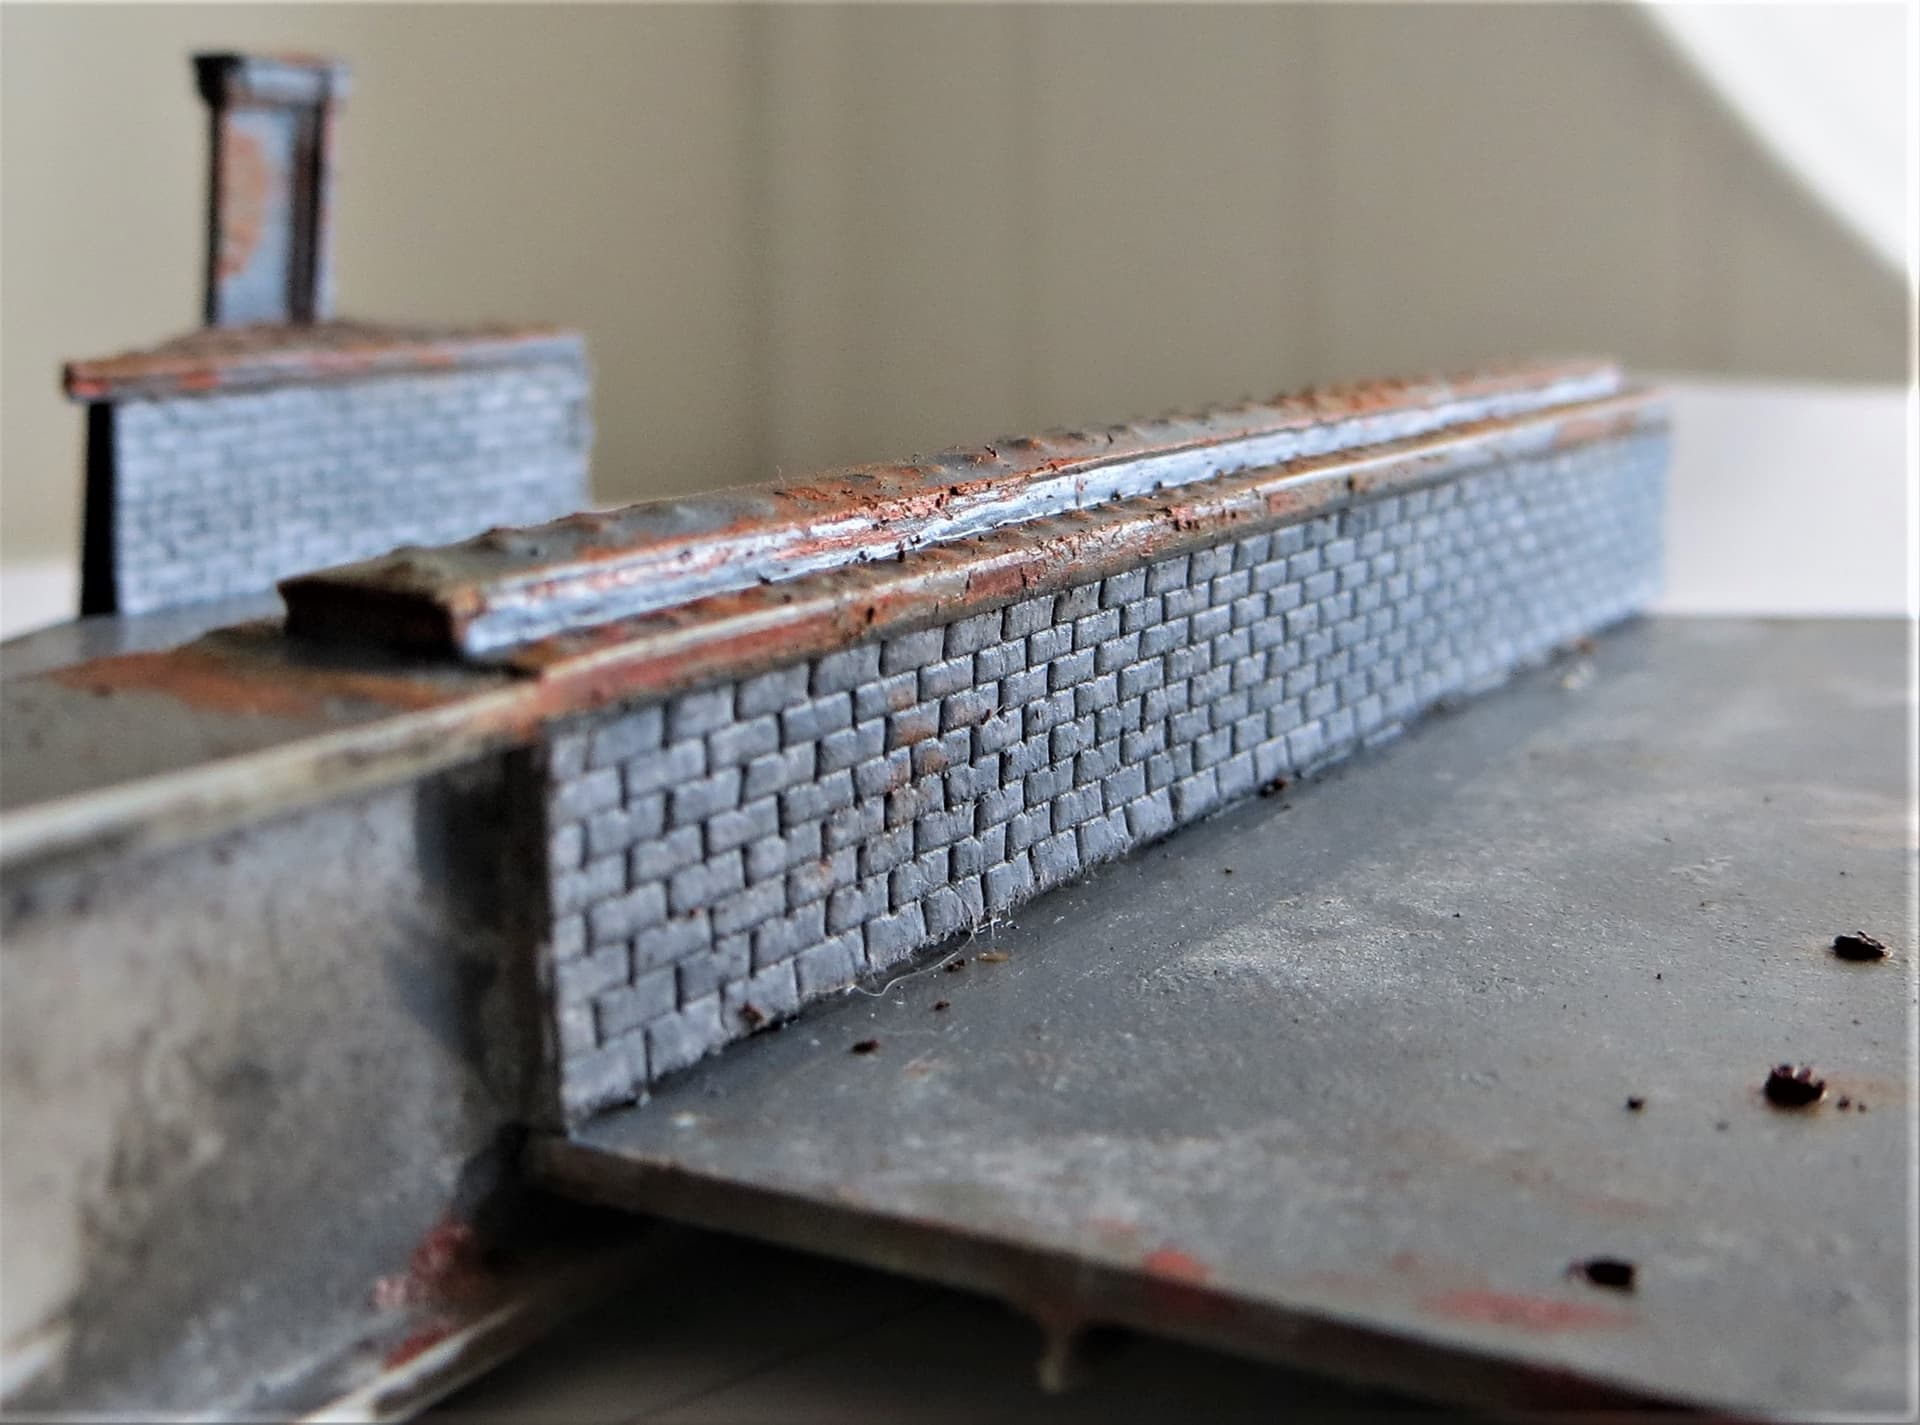
It all needs a clean-up, and I will need to add various washes and highlights. As you can see from the last image above, I’ve also added some brickwork. I decided to go for ‘stretcher bond’ as it’s the easiest and quickest one to create using old greetings cards, . Also, most of it will be hidden under the ballast, probably only the top three rows will be visible.
Some additional images:
Cheers, ,
G
6 Likes
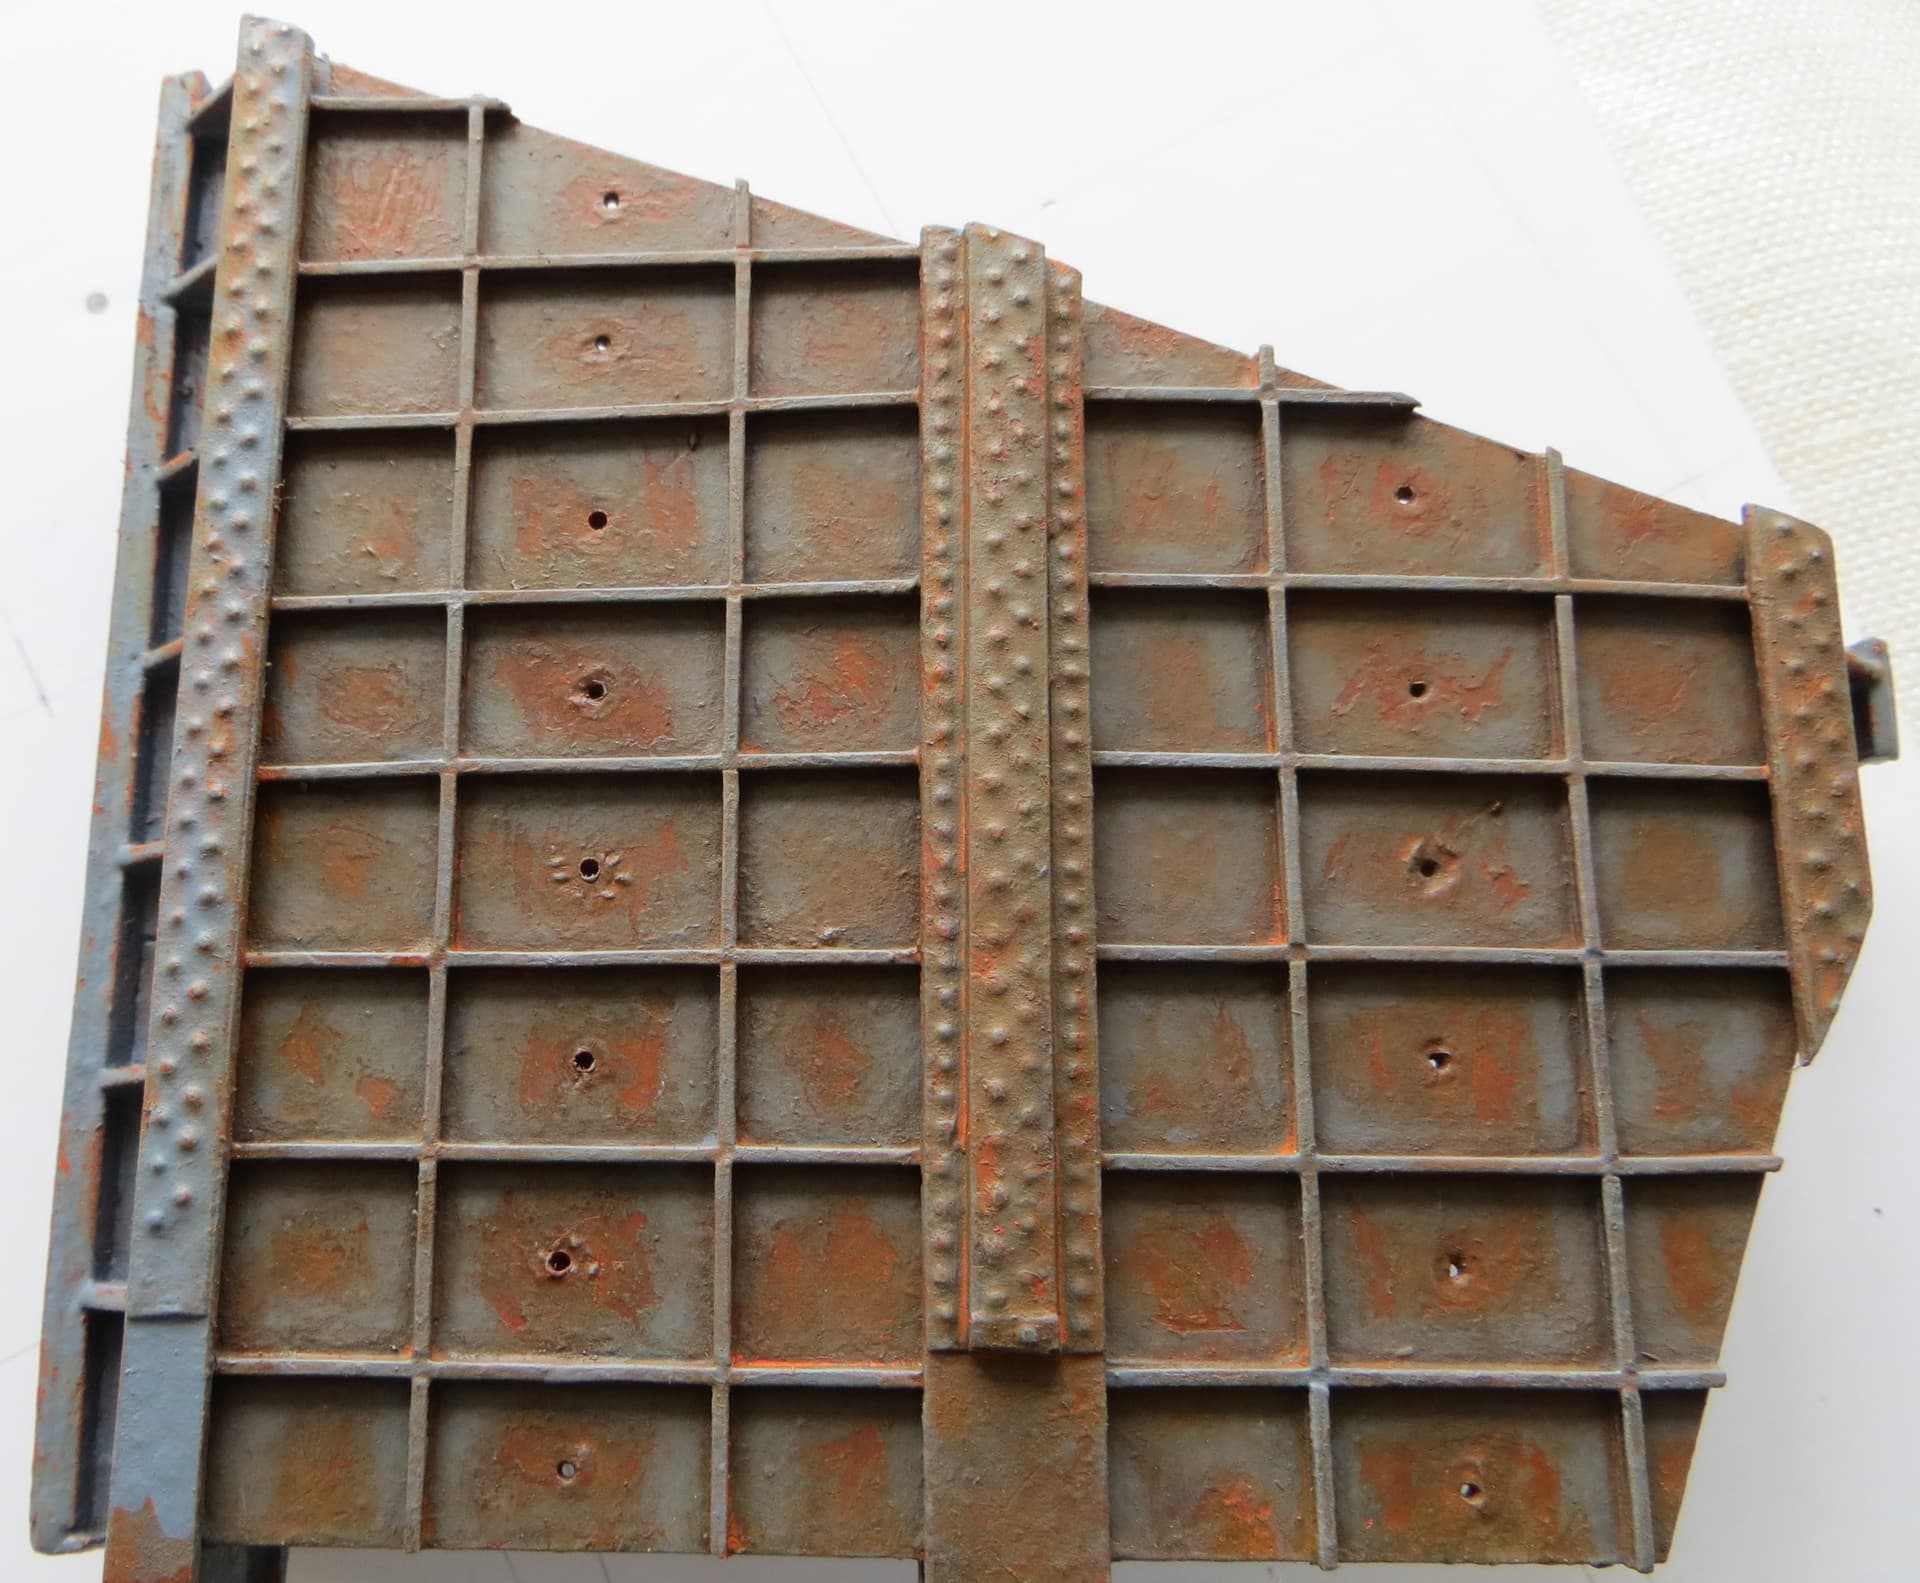
Fascinating process, image 7420 is a beauty. Regarding uniformity-avoidance, you’ve always got vegetation/dead ivy/creepers/moss etc. up your sleeve to counteract that issue where required. Have to say those three scratched panels look a bit too uniform themselves 
1 Like
Mate, I really like how this is going. Some fantastic work/research and effort going into this…
Just a point from me … sent in good faith and as feedback …
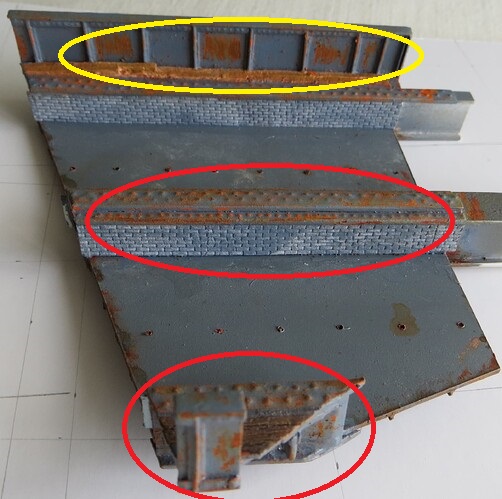
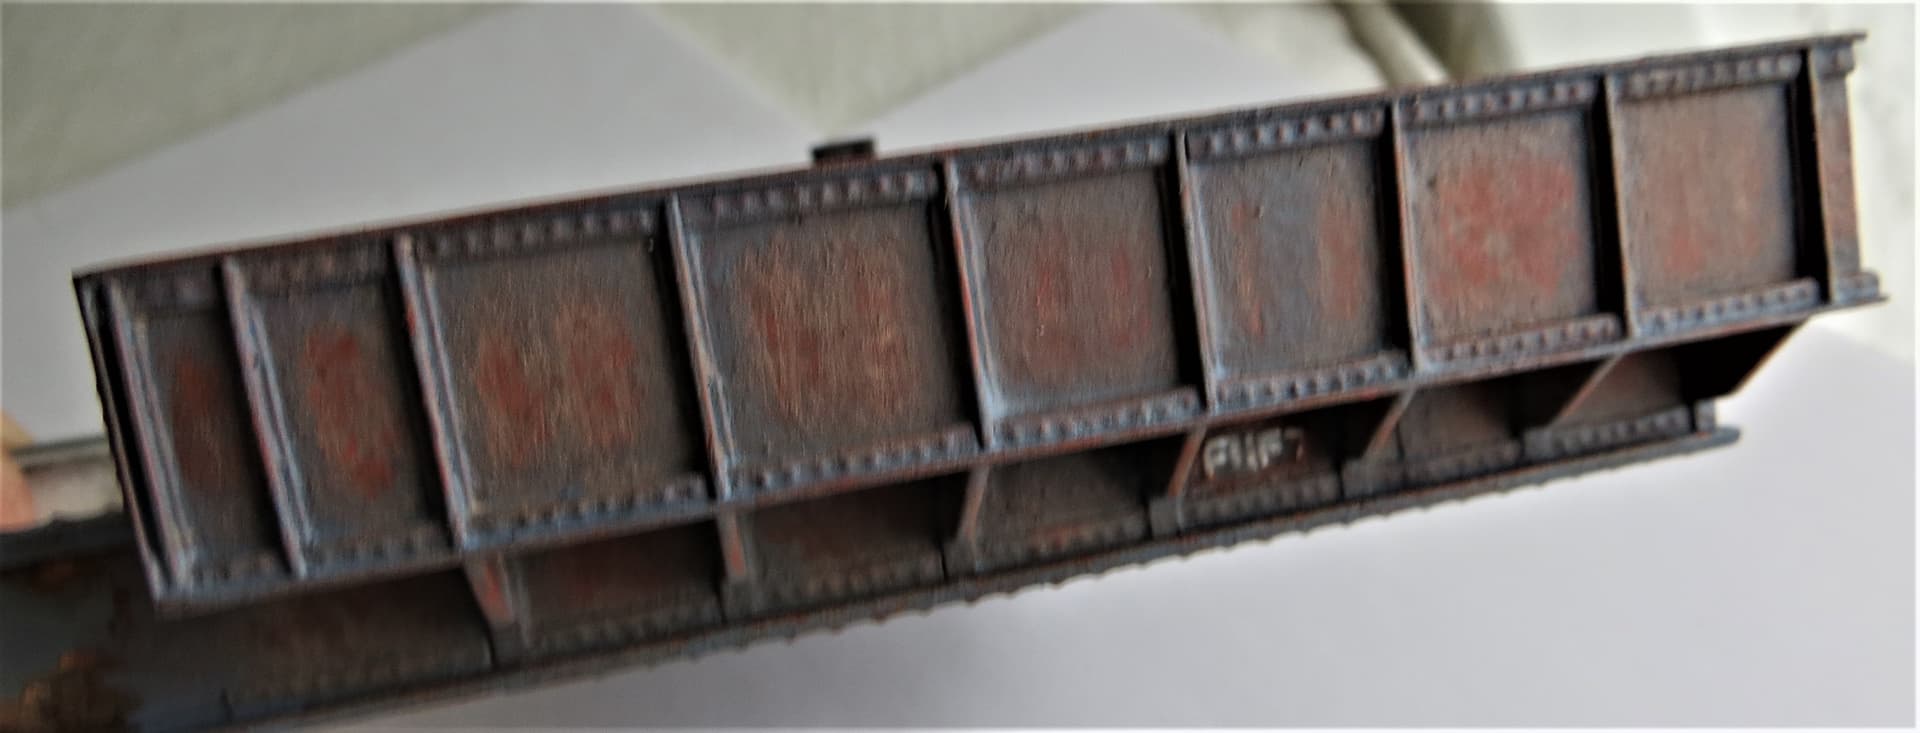
Ref the image above, The 2 red circled areas look superb, and to my eye, they represent the ideal and totally realistic way rust develops and scabs off etc.
The rust patches in yellow one looks a bit to uniform (on both sides) like Tim alluded to and could do with a bit more randomness ? (not even sure thats a word lol).
And the grey overall looks just right. I walked past one like that a few days … Great work mate.
3 Likes
Thanks to Tim and John for their continued help keeping me on track, you both helped confirm my overnight thoughts, .
The more I thought about it the more I wasn’t totally happy with how it looked, , so woke up this morning thinking I’d revisit things, and then I read your posts…so here we go ,
And two for John,  .
.
Hope this is better chaps, , but if not, then please let me have your thoughts, .
G,
5 Likes
Perfecto … and I am pretty sure Tank Commander is happy as well 
4 Likes
It looks much better than the previous installment!
2 Likes
Thanks both, the feedback is appreciated chaps, .
G,
1 Like
Hi all,
Think things are going to proceed a tad slowly as we’re starting to have some 1:1 scale modelling on the house, and I’m struggling to find the quietness to relax and play, .
Anyway, here’s a small update…
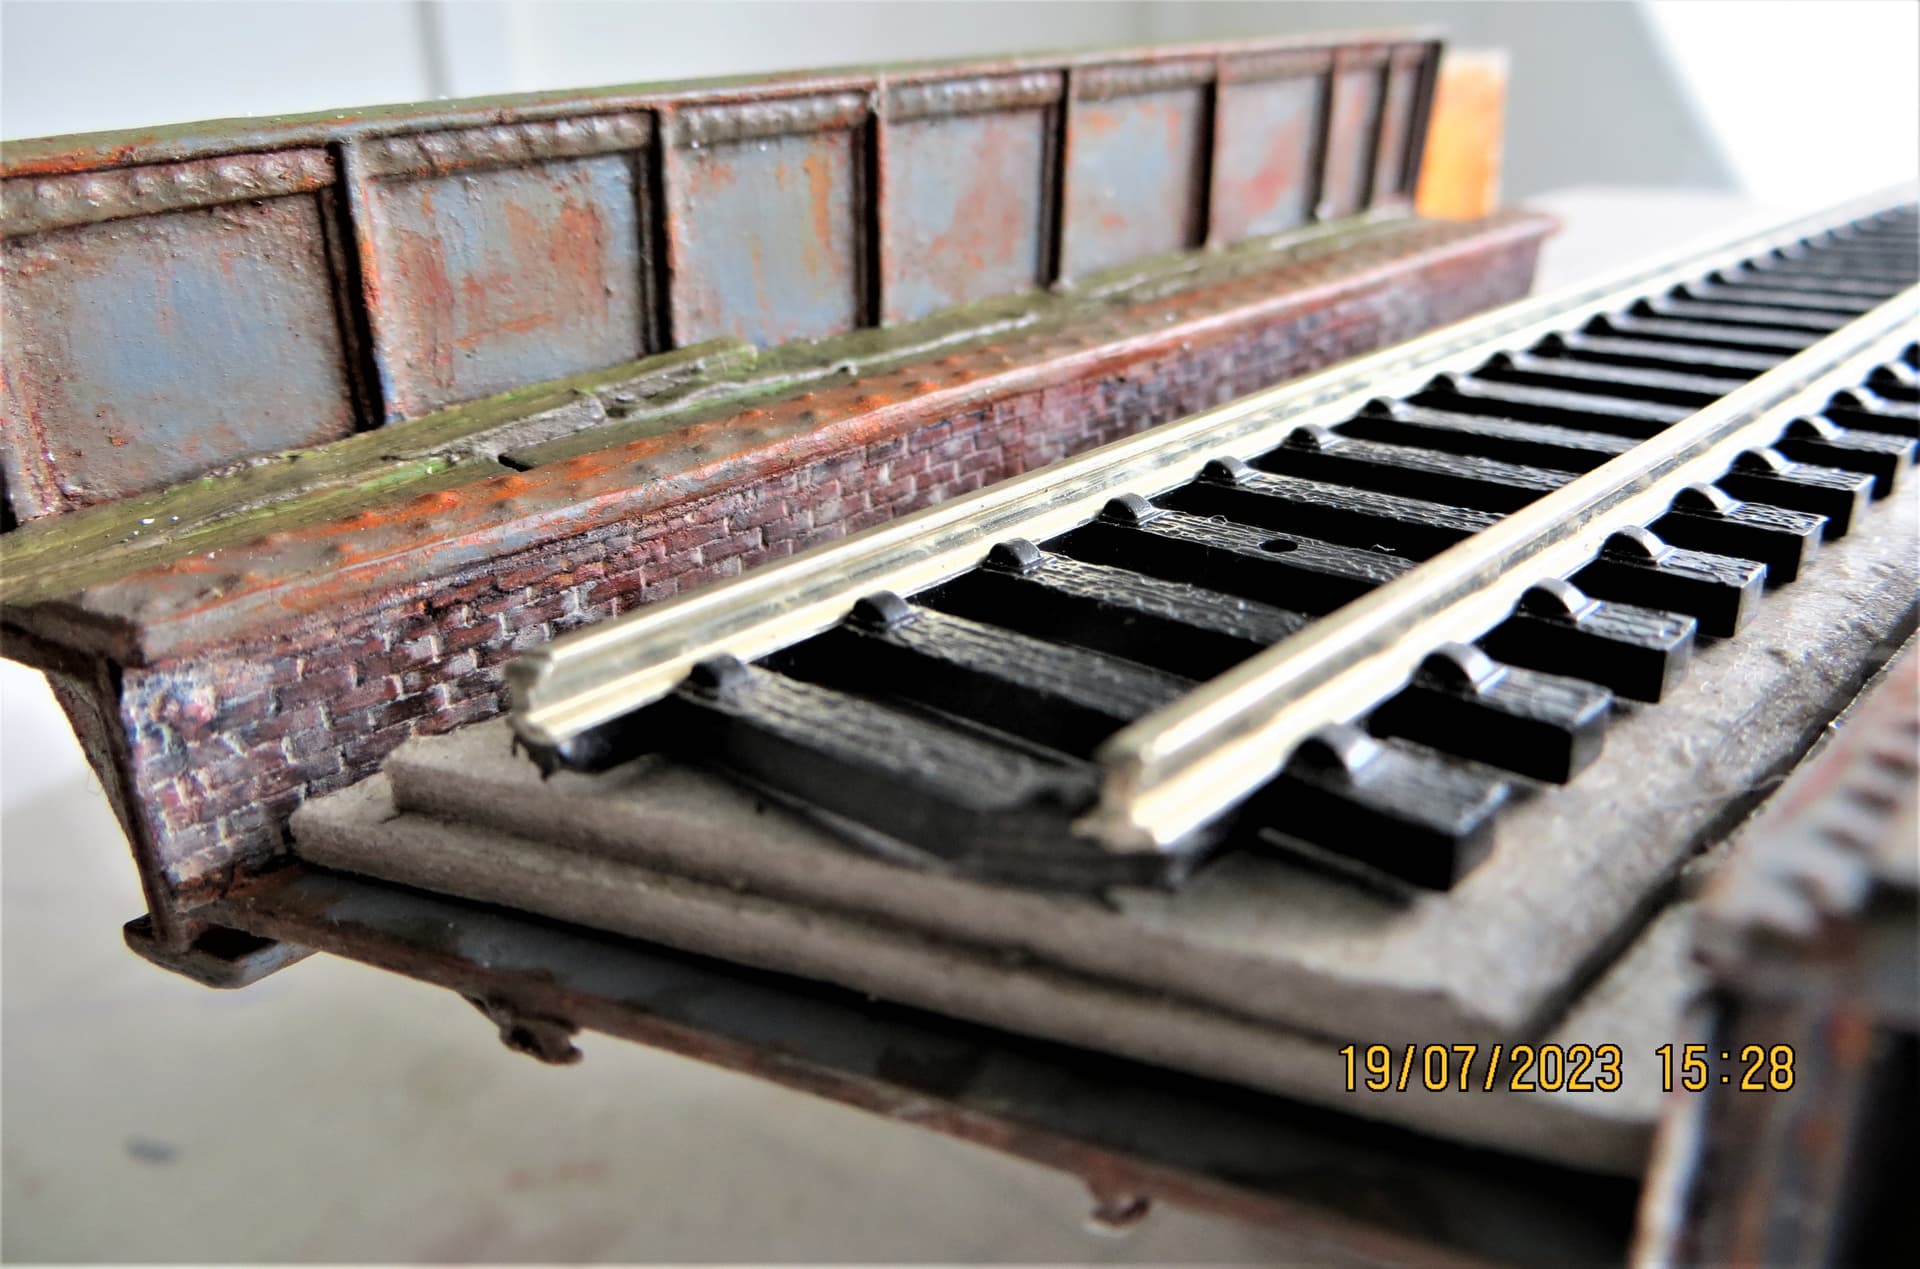
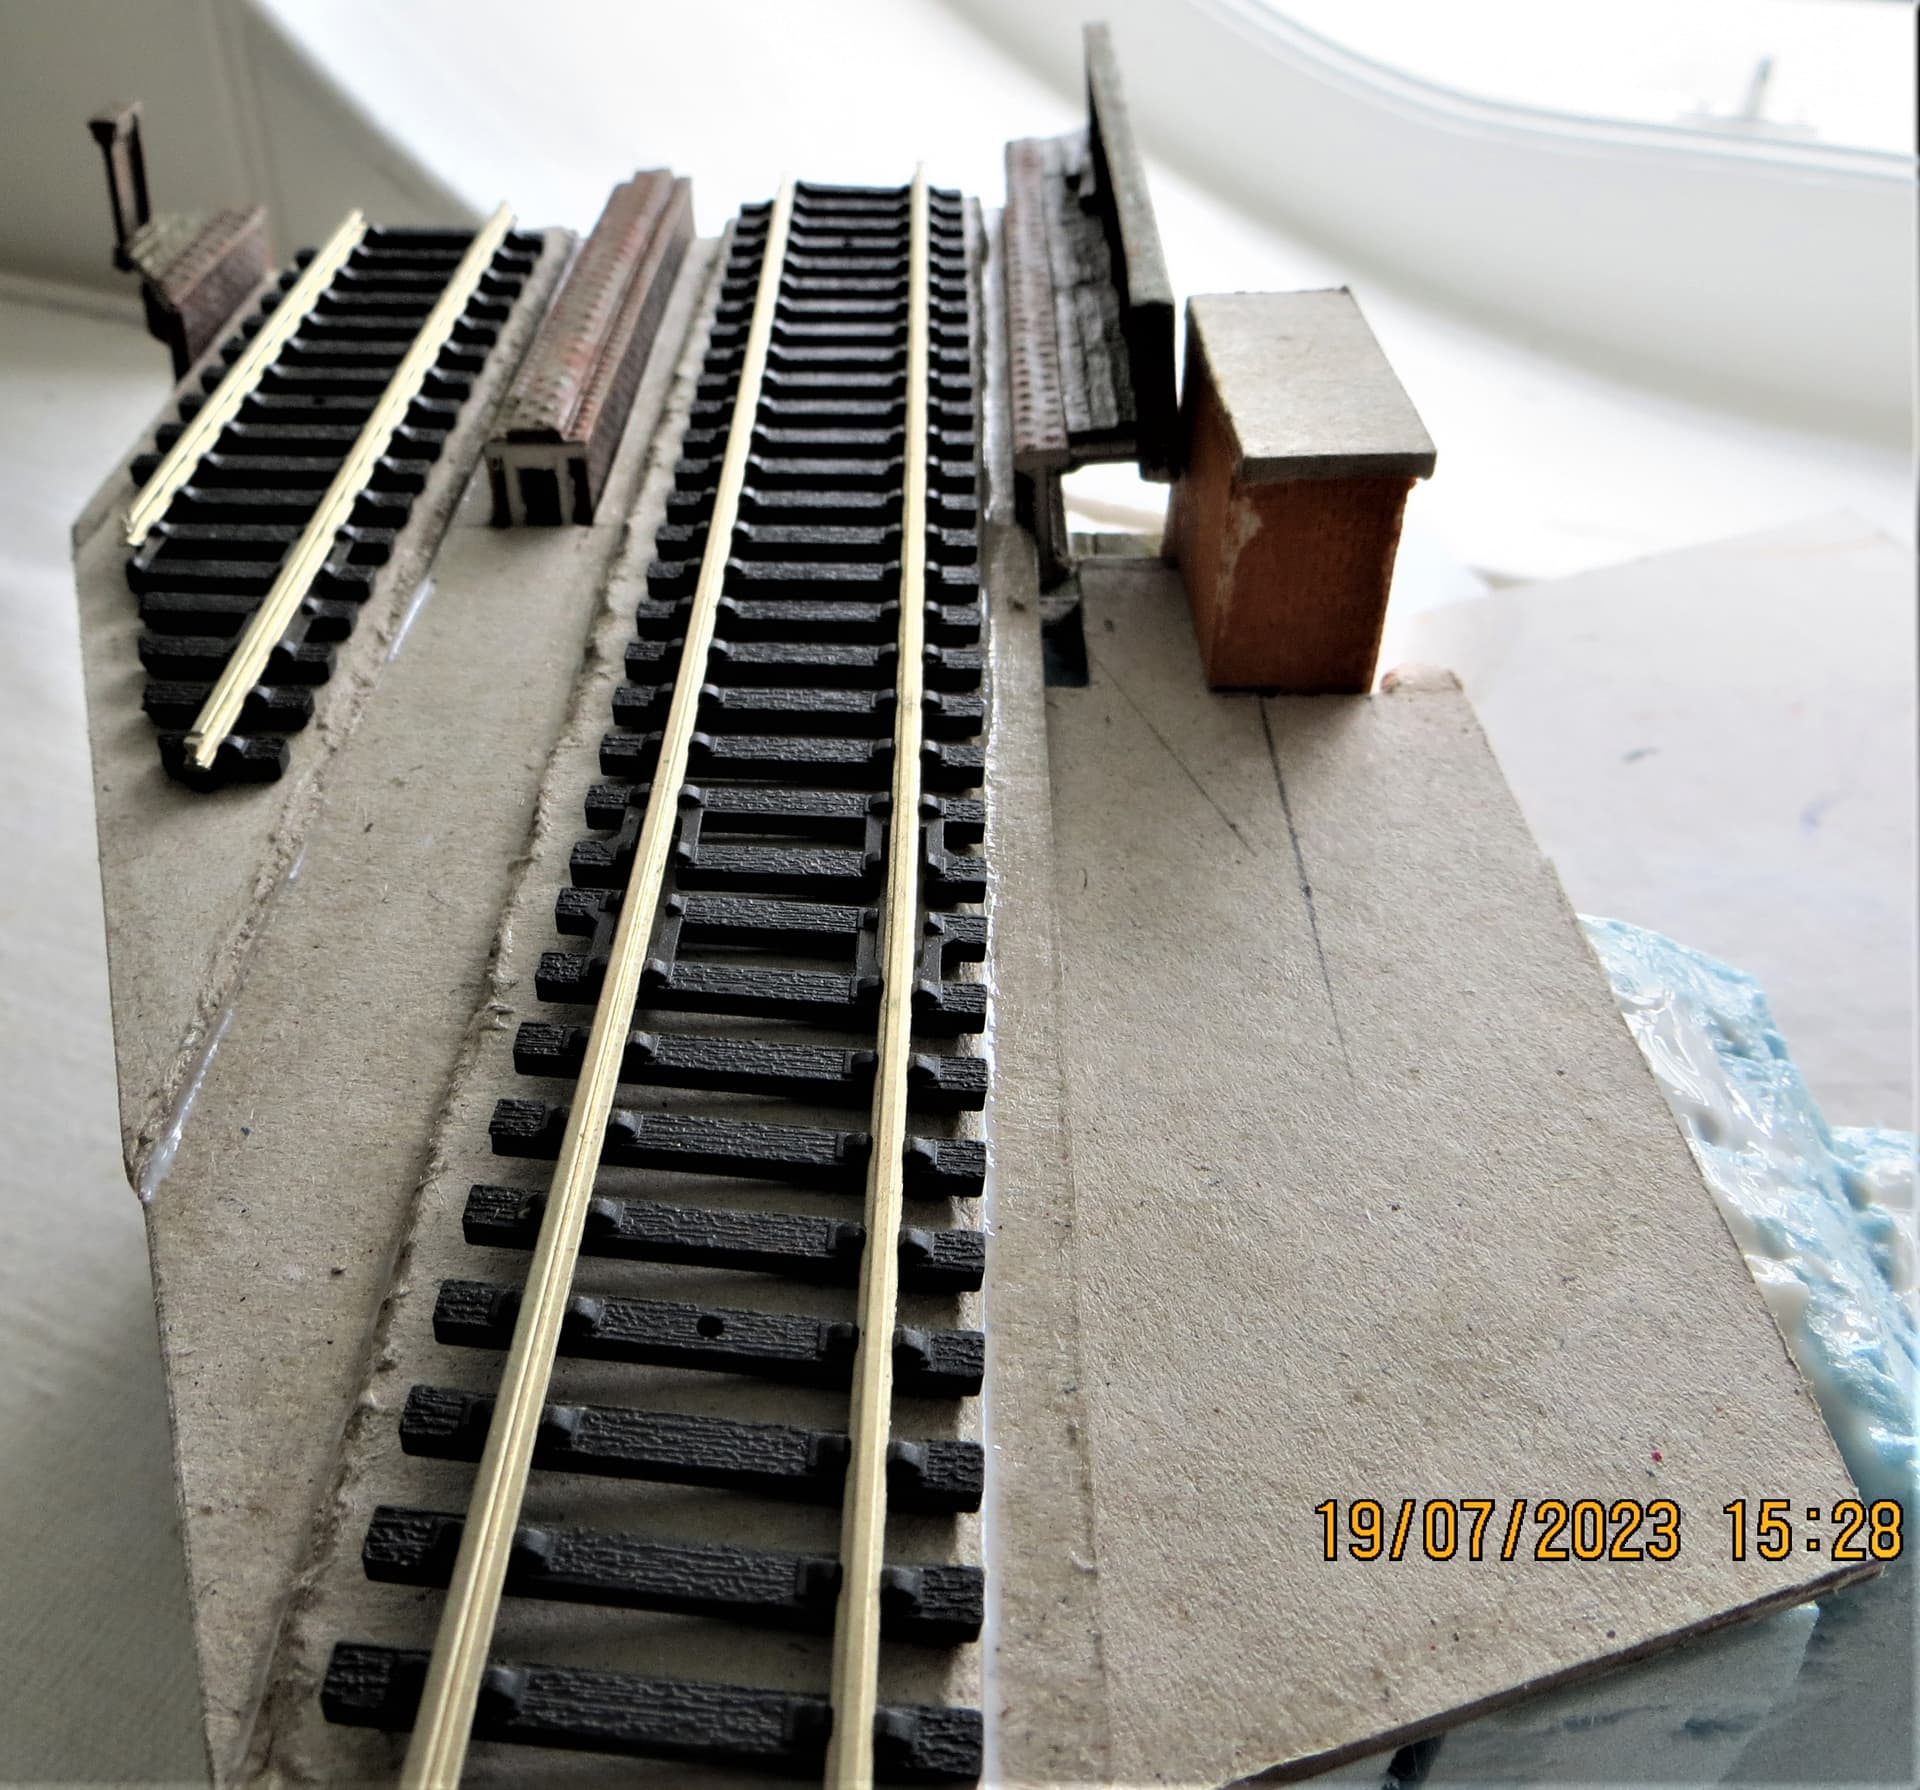
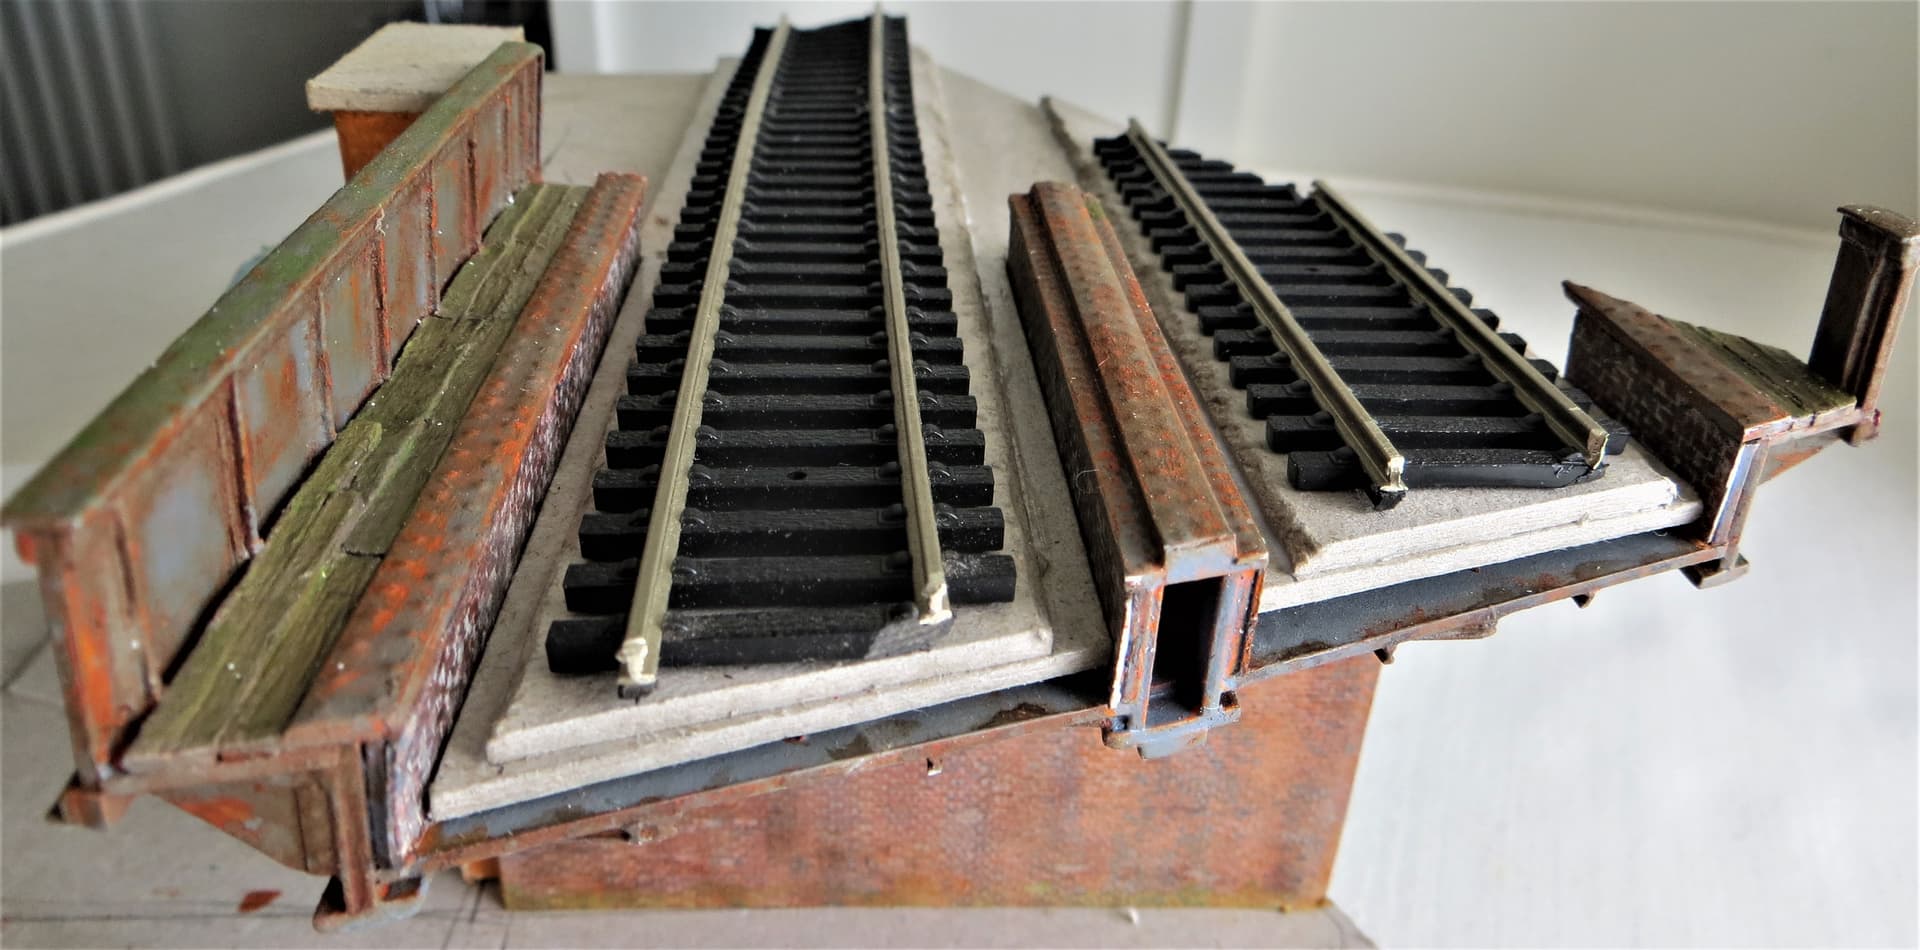
I’ve lined the bridge beams with some homemade embossed card brickwork, and added a separate card track bed, the idea being that this can be removable, thus enbling me to work on both the bridge and rail section in isolation, .
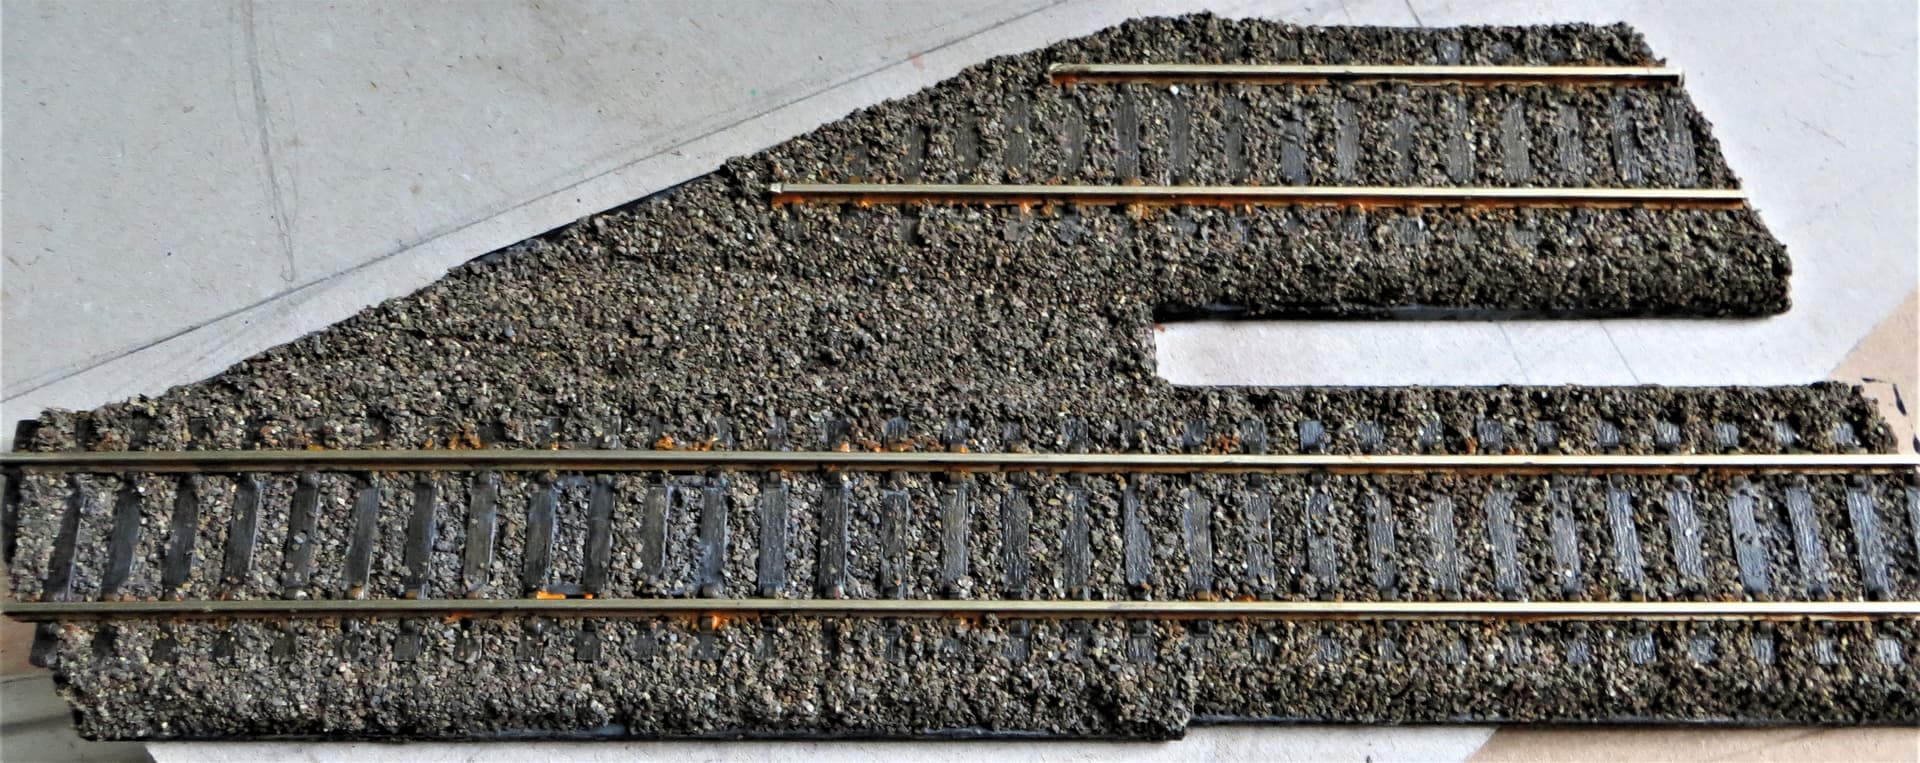
And here’s the card track bed covered in ‘ballast’.
And it temporarily slid in to position on the bridge.
I live quite close to a beach, so for the ‘ballast’ I’ve sieved some of the finer grains and glued them on the card. It all needs fine tuning, cleaning up, painting and weathering, but at least it’s progress, .
Cheers, ,
G
6 Likes
Hi all,
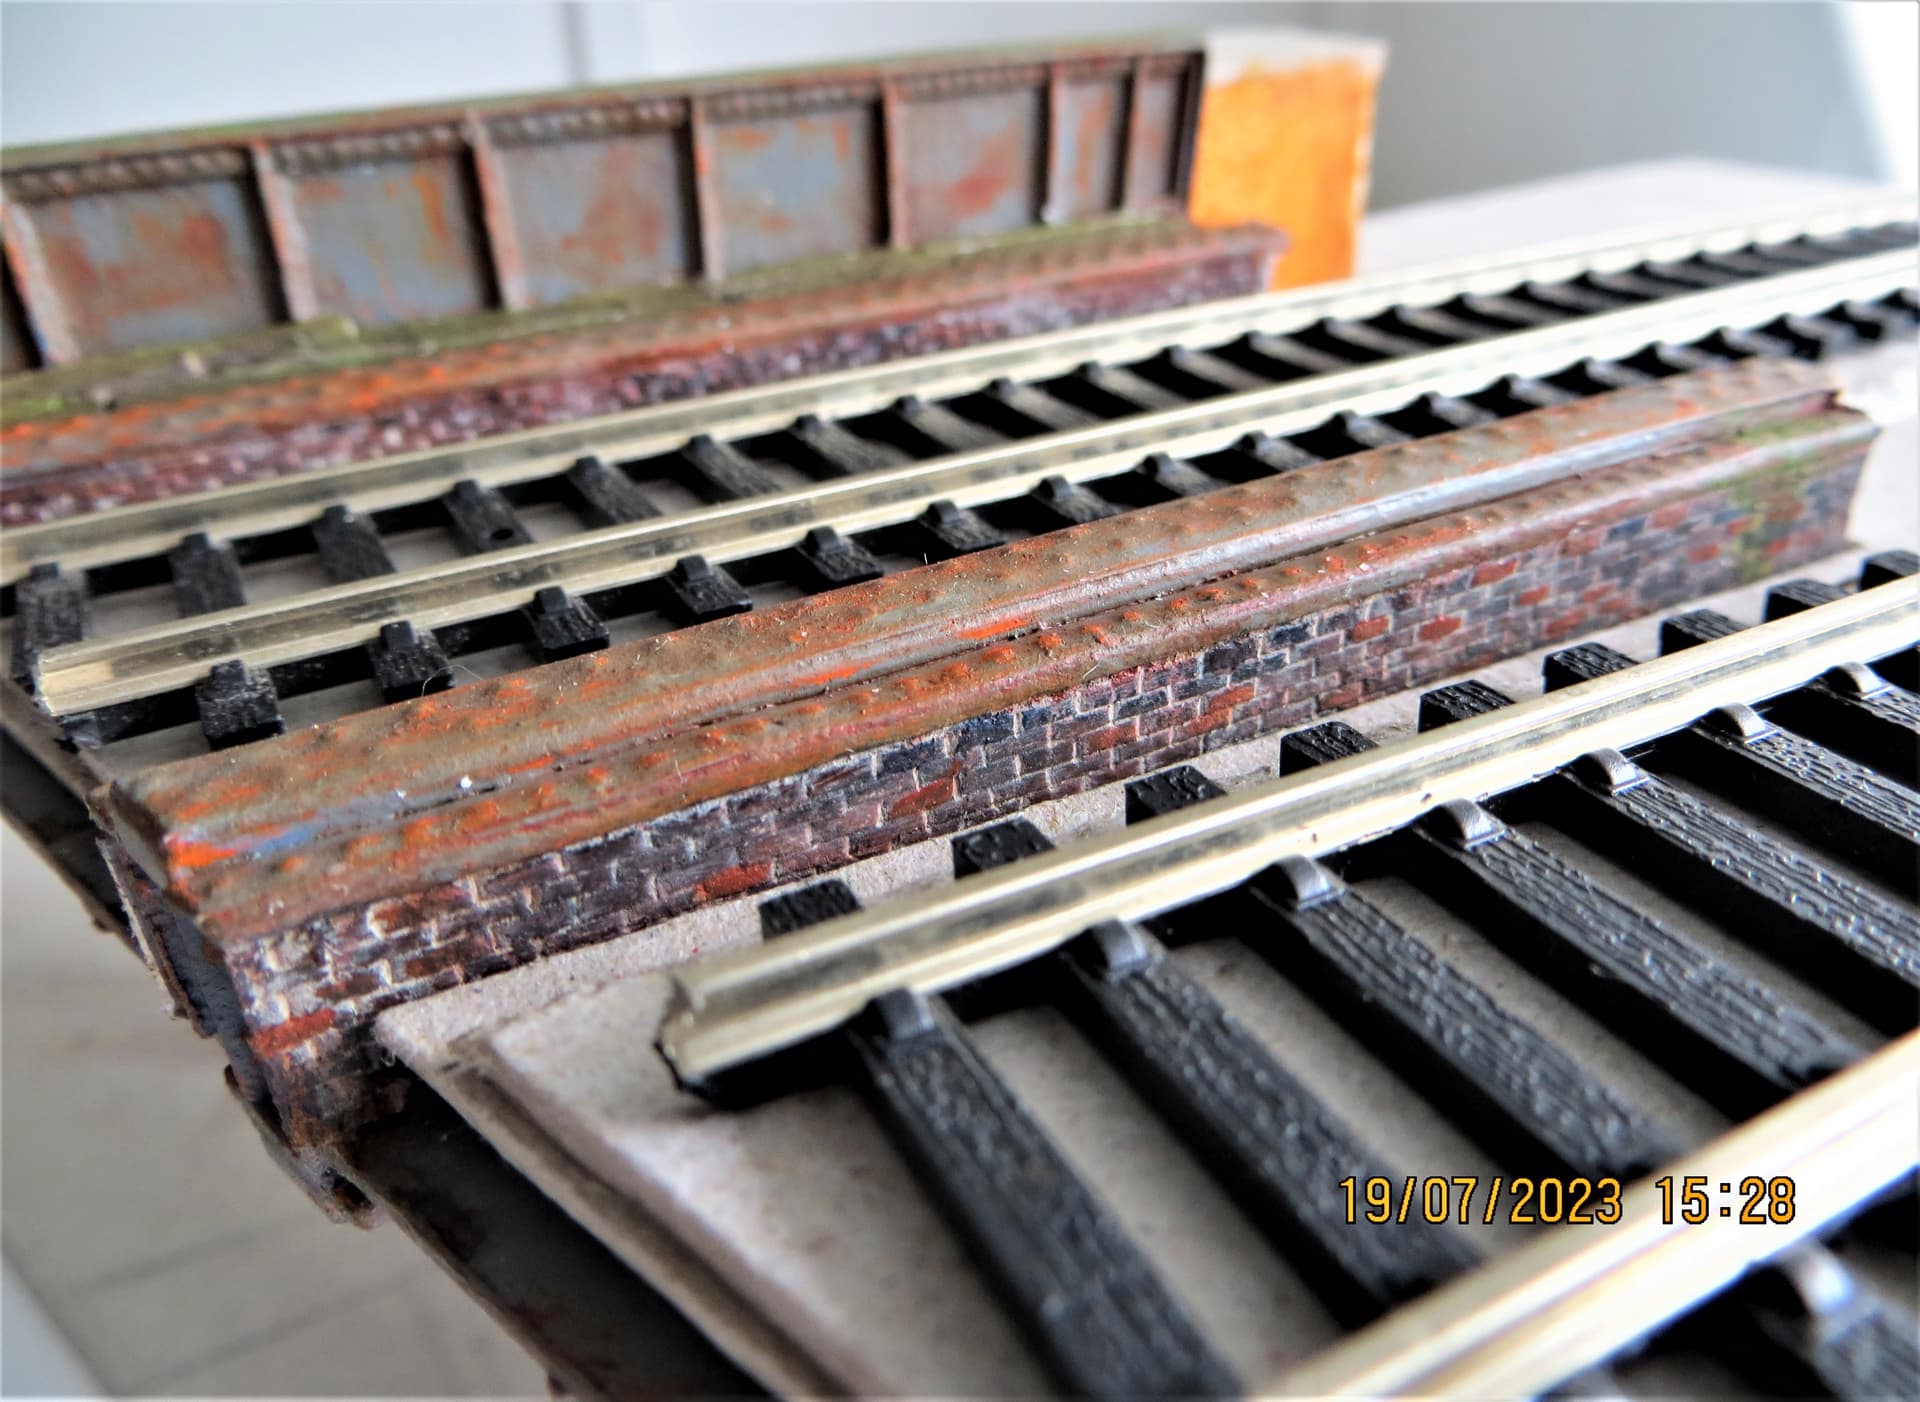
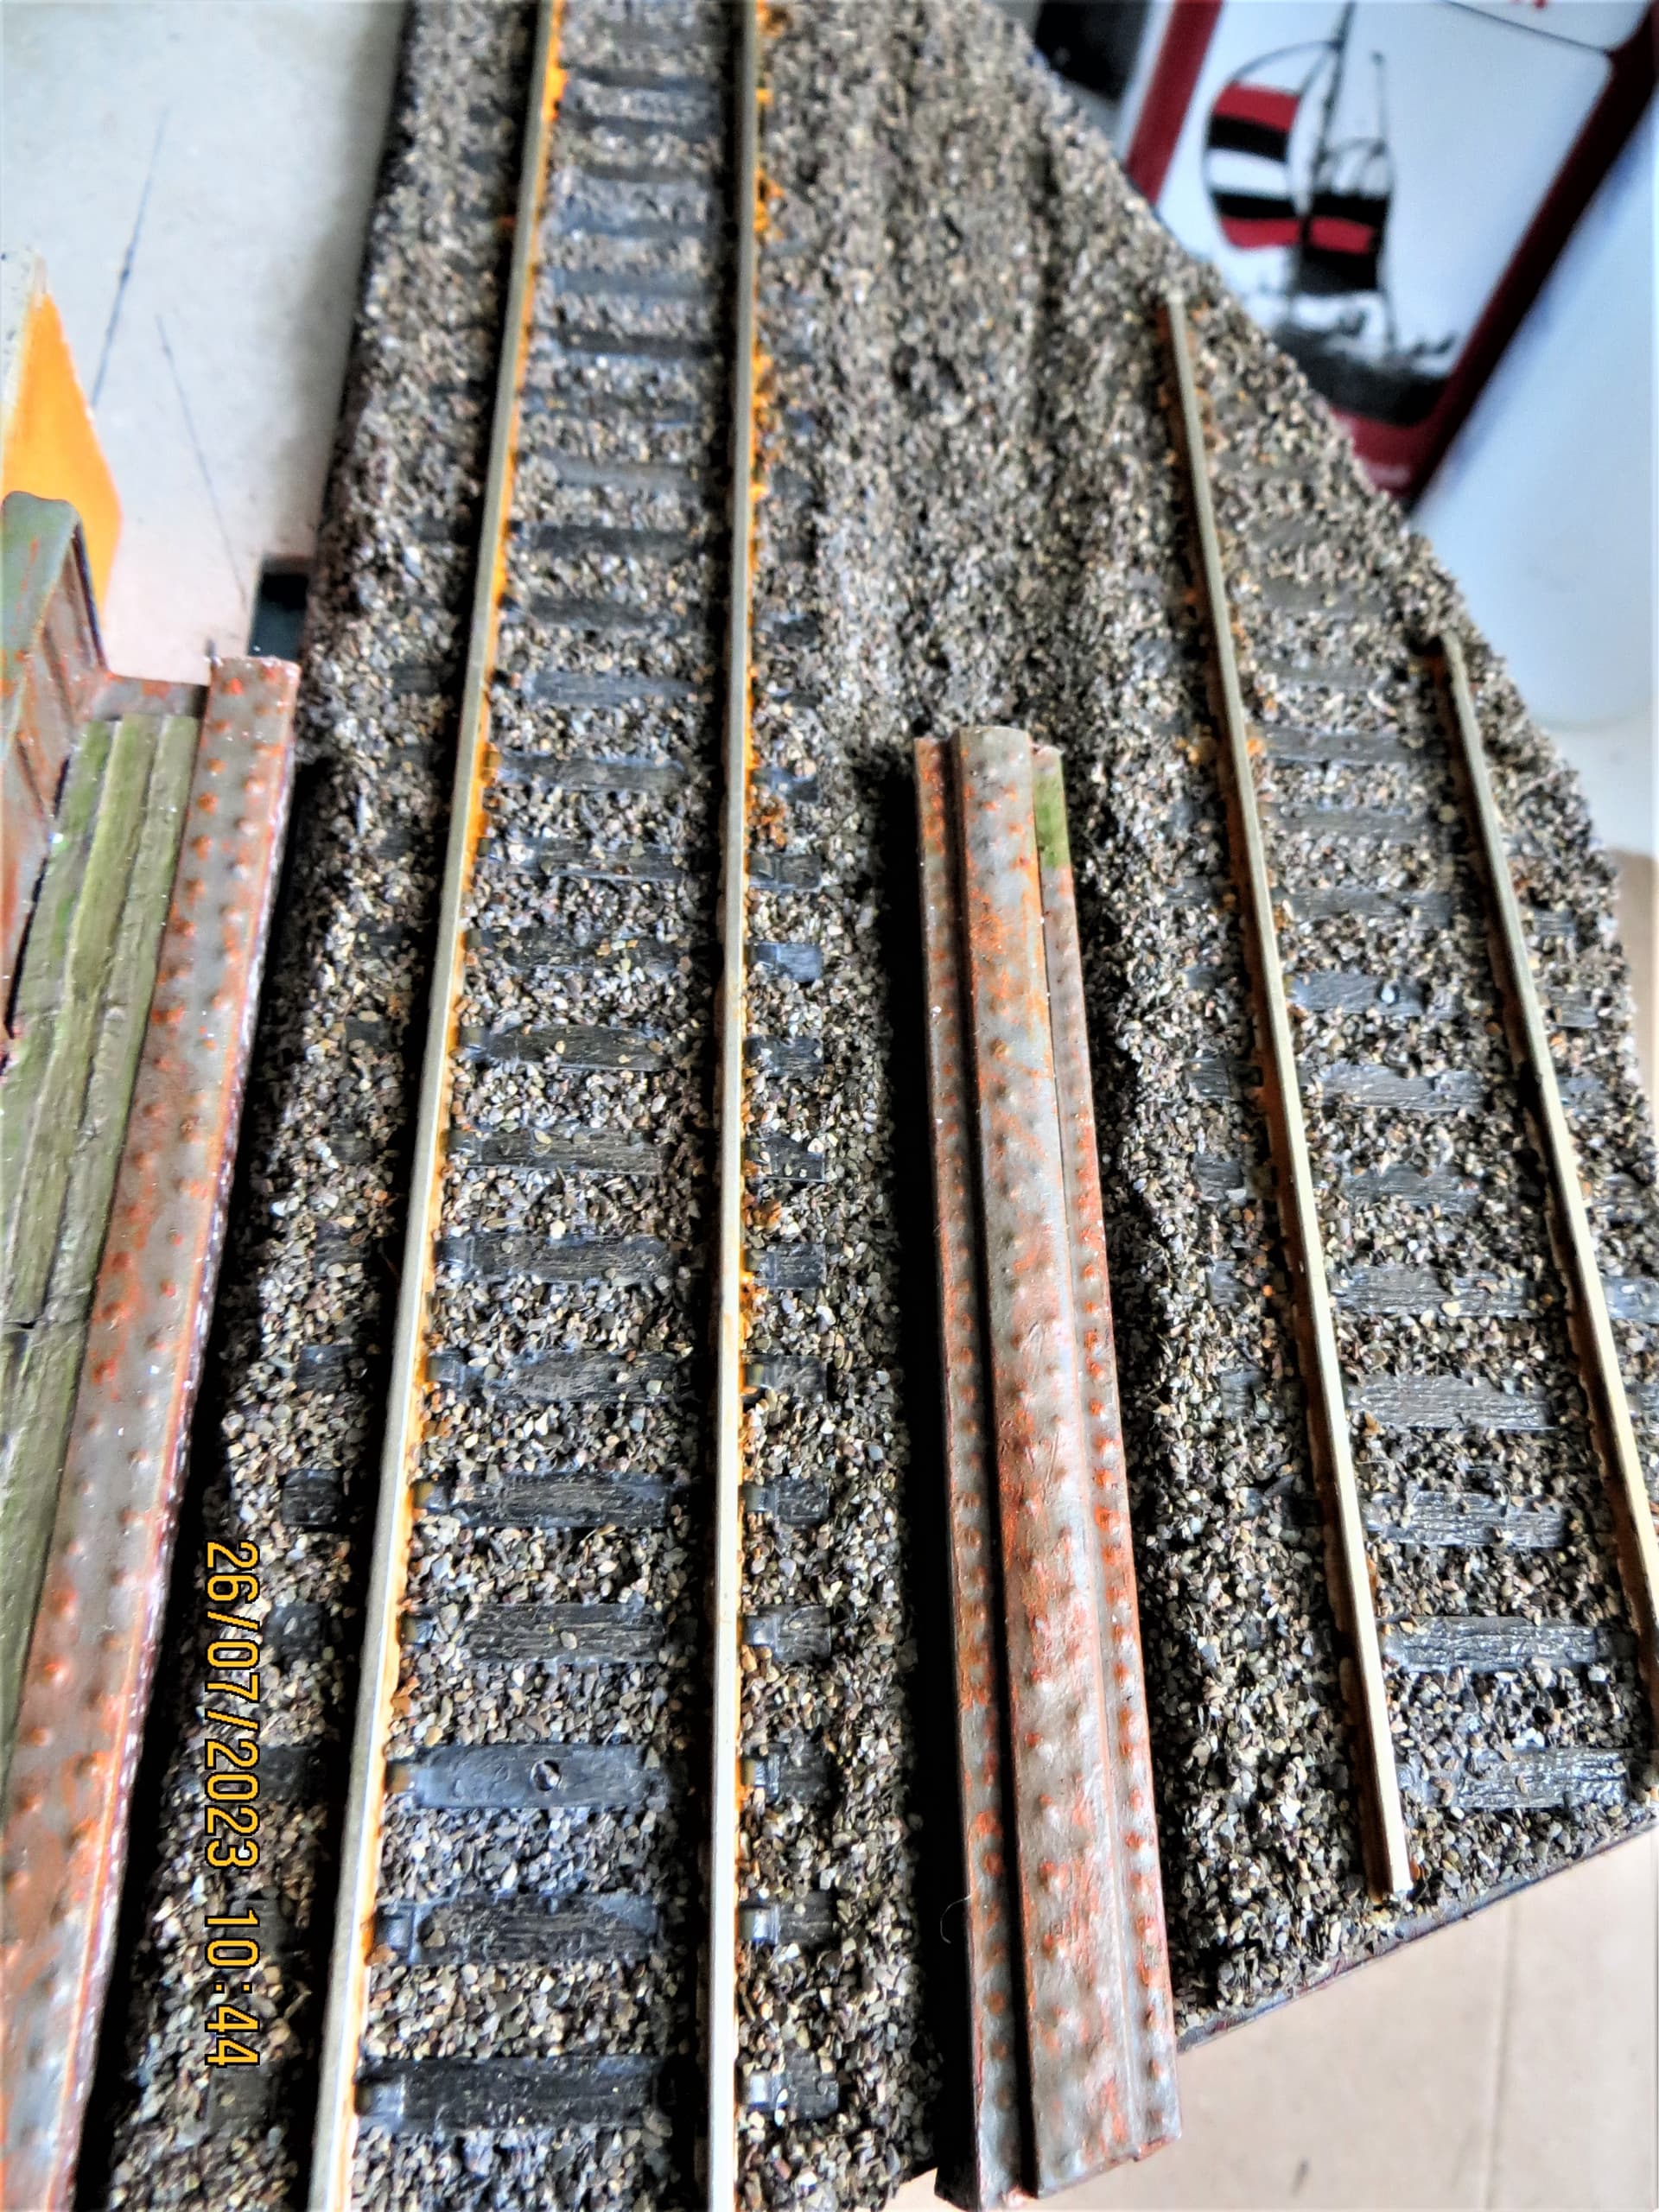
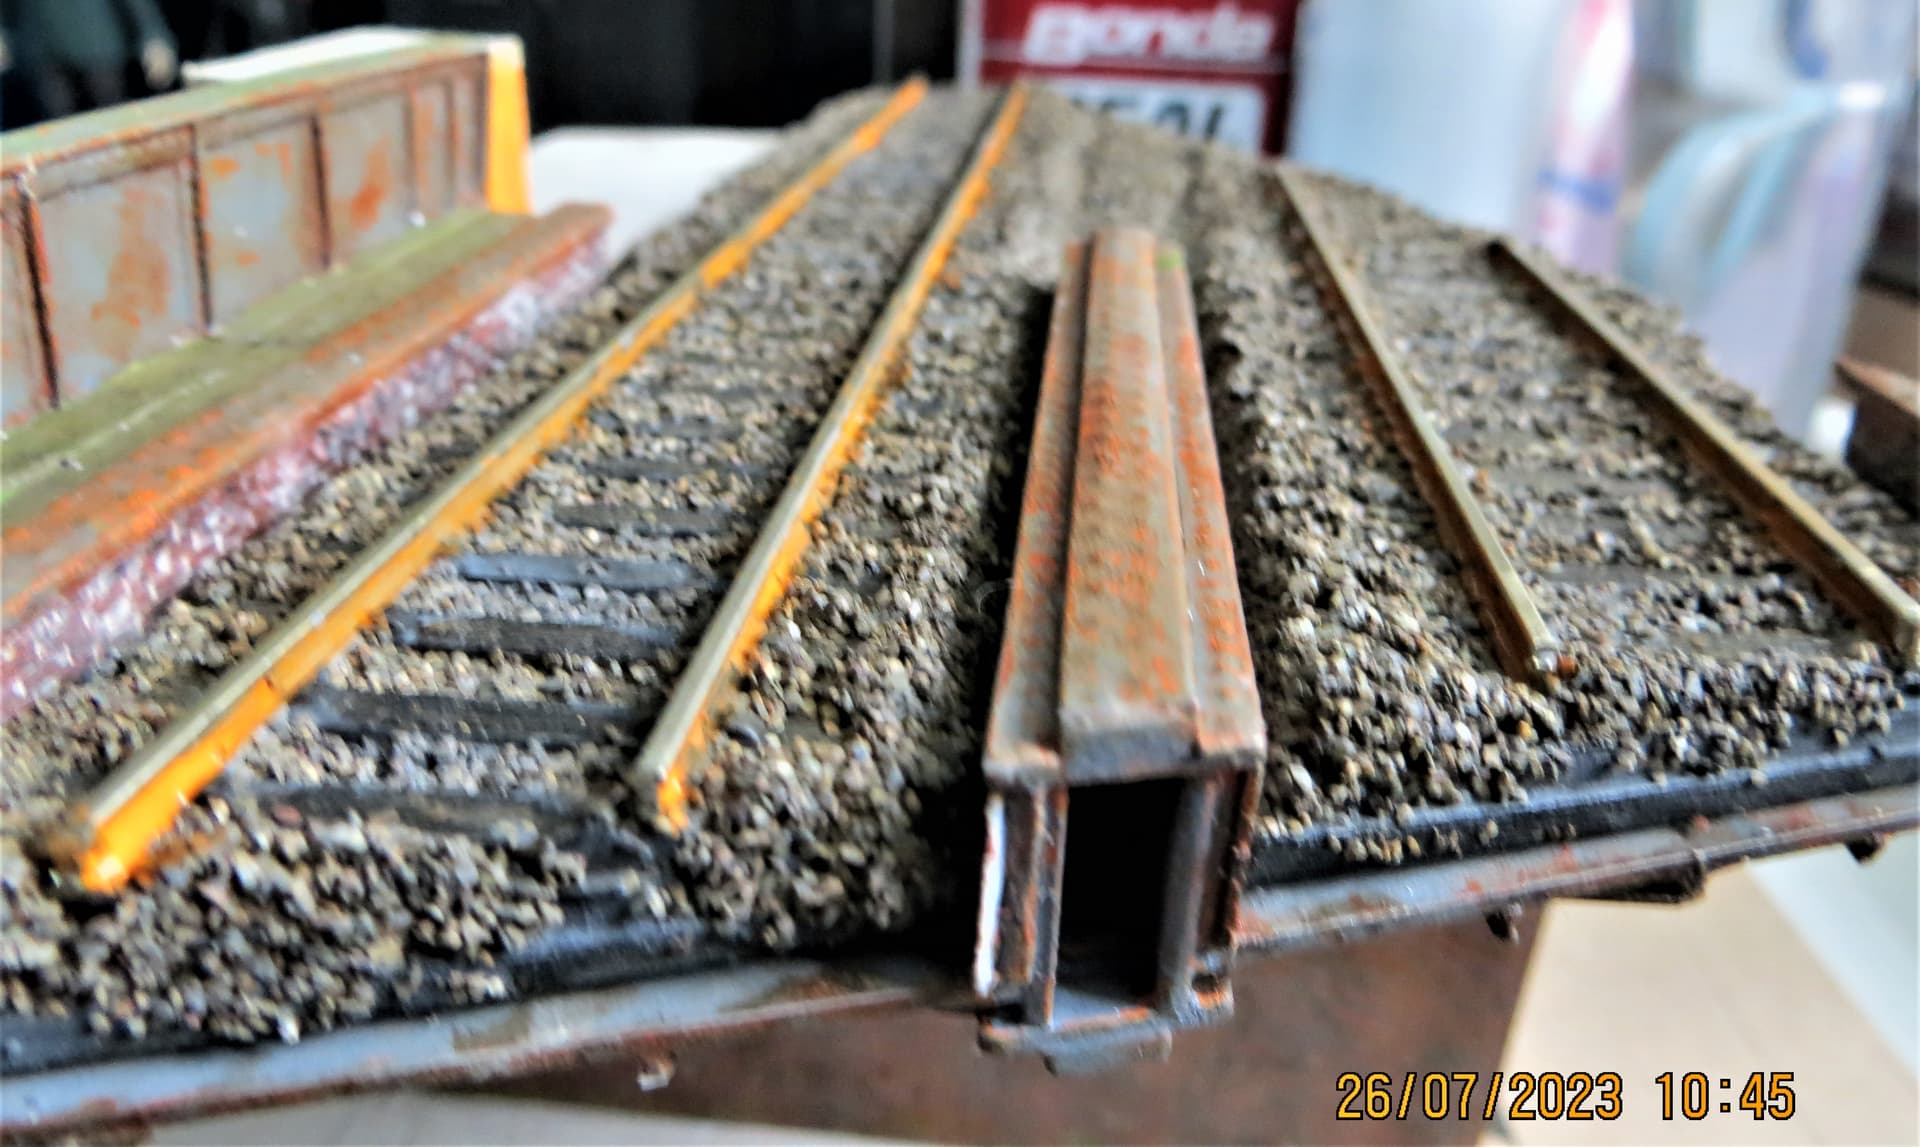
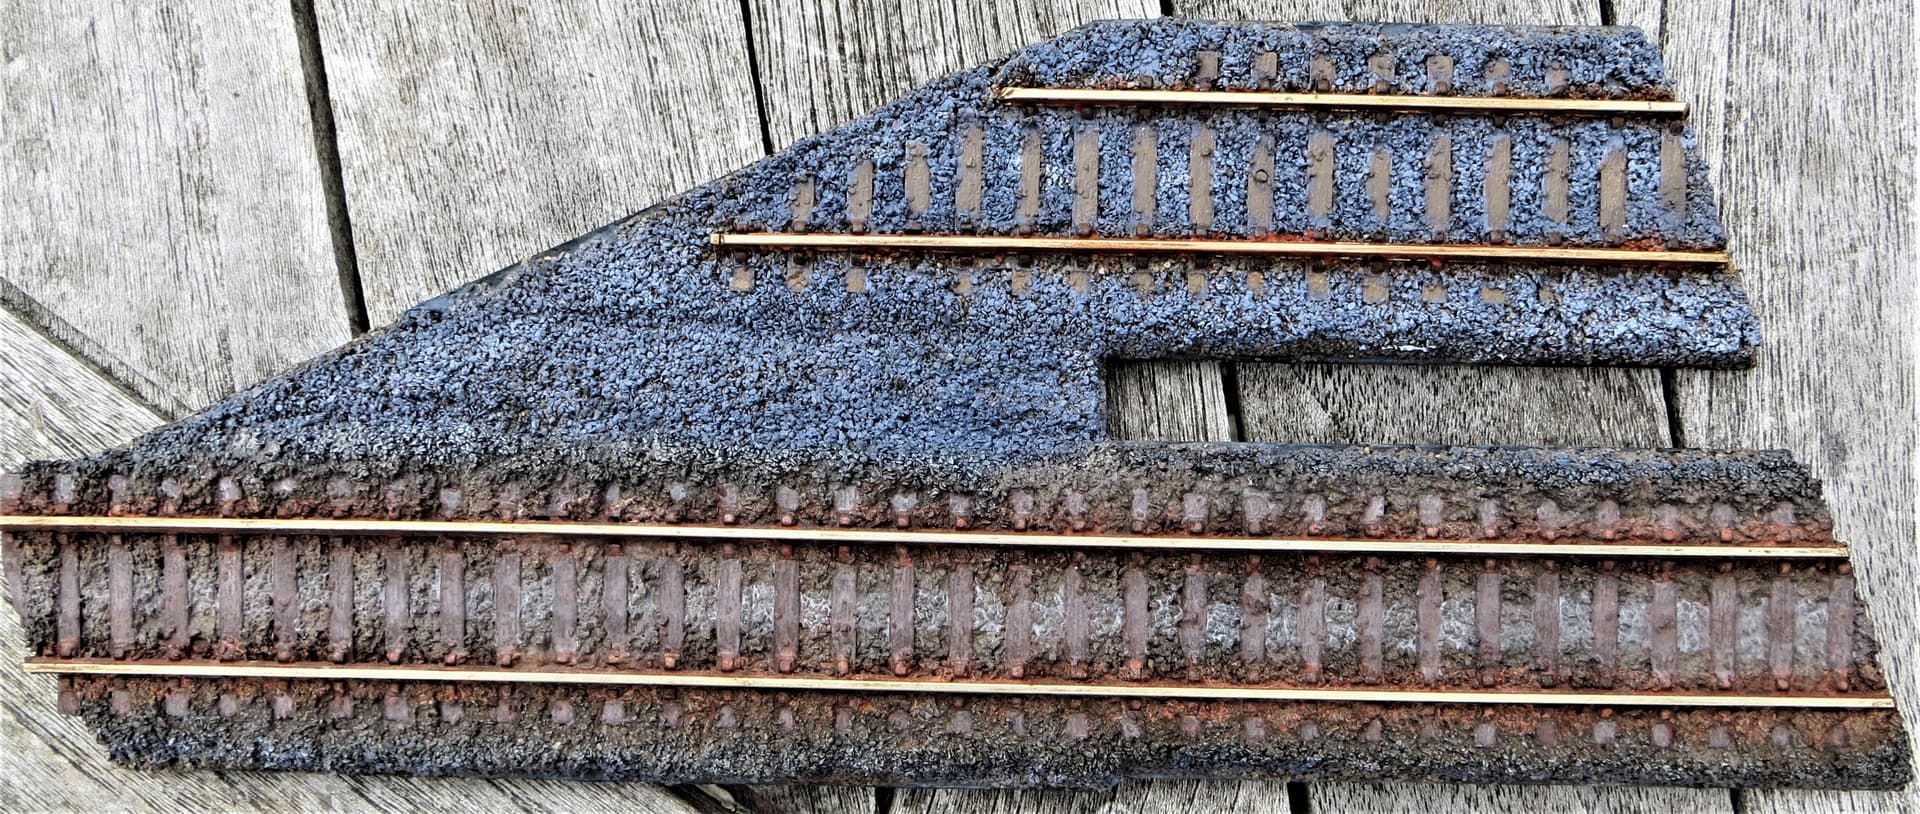
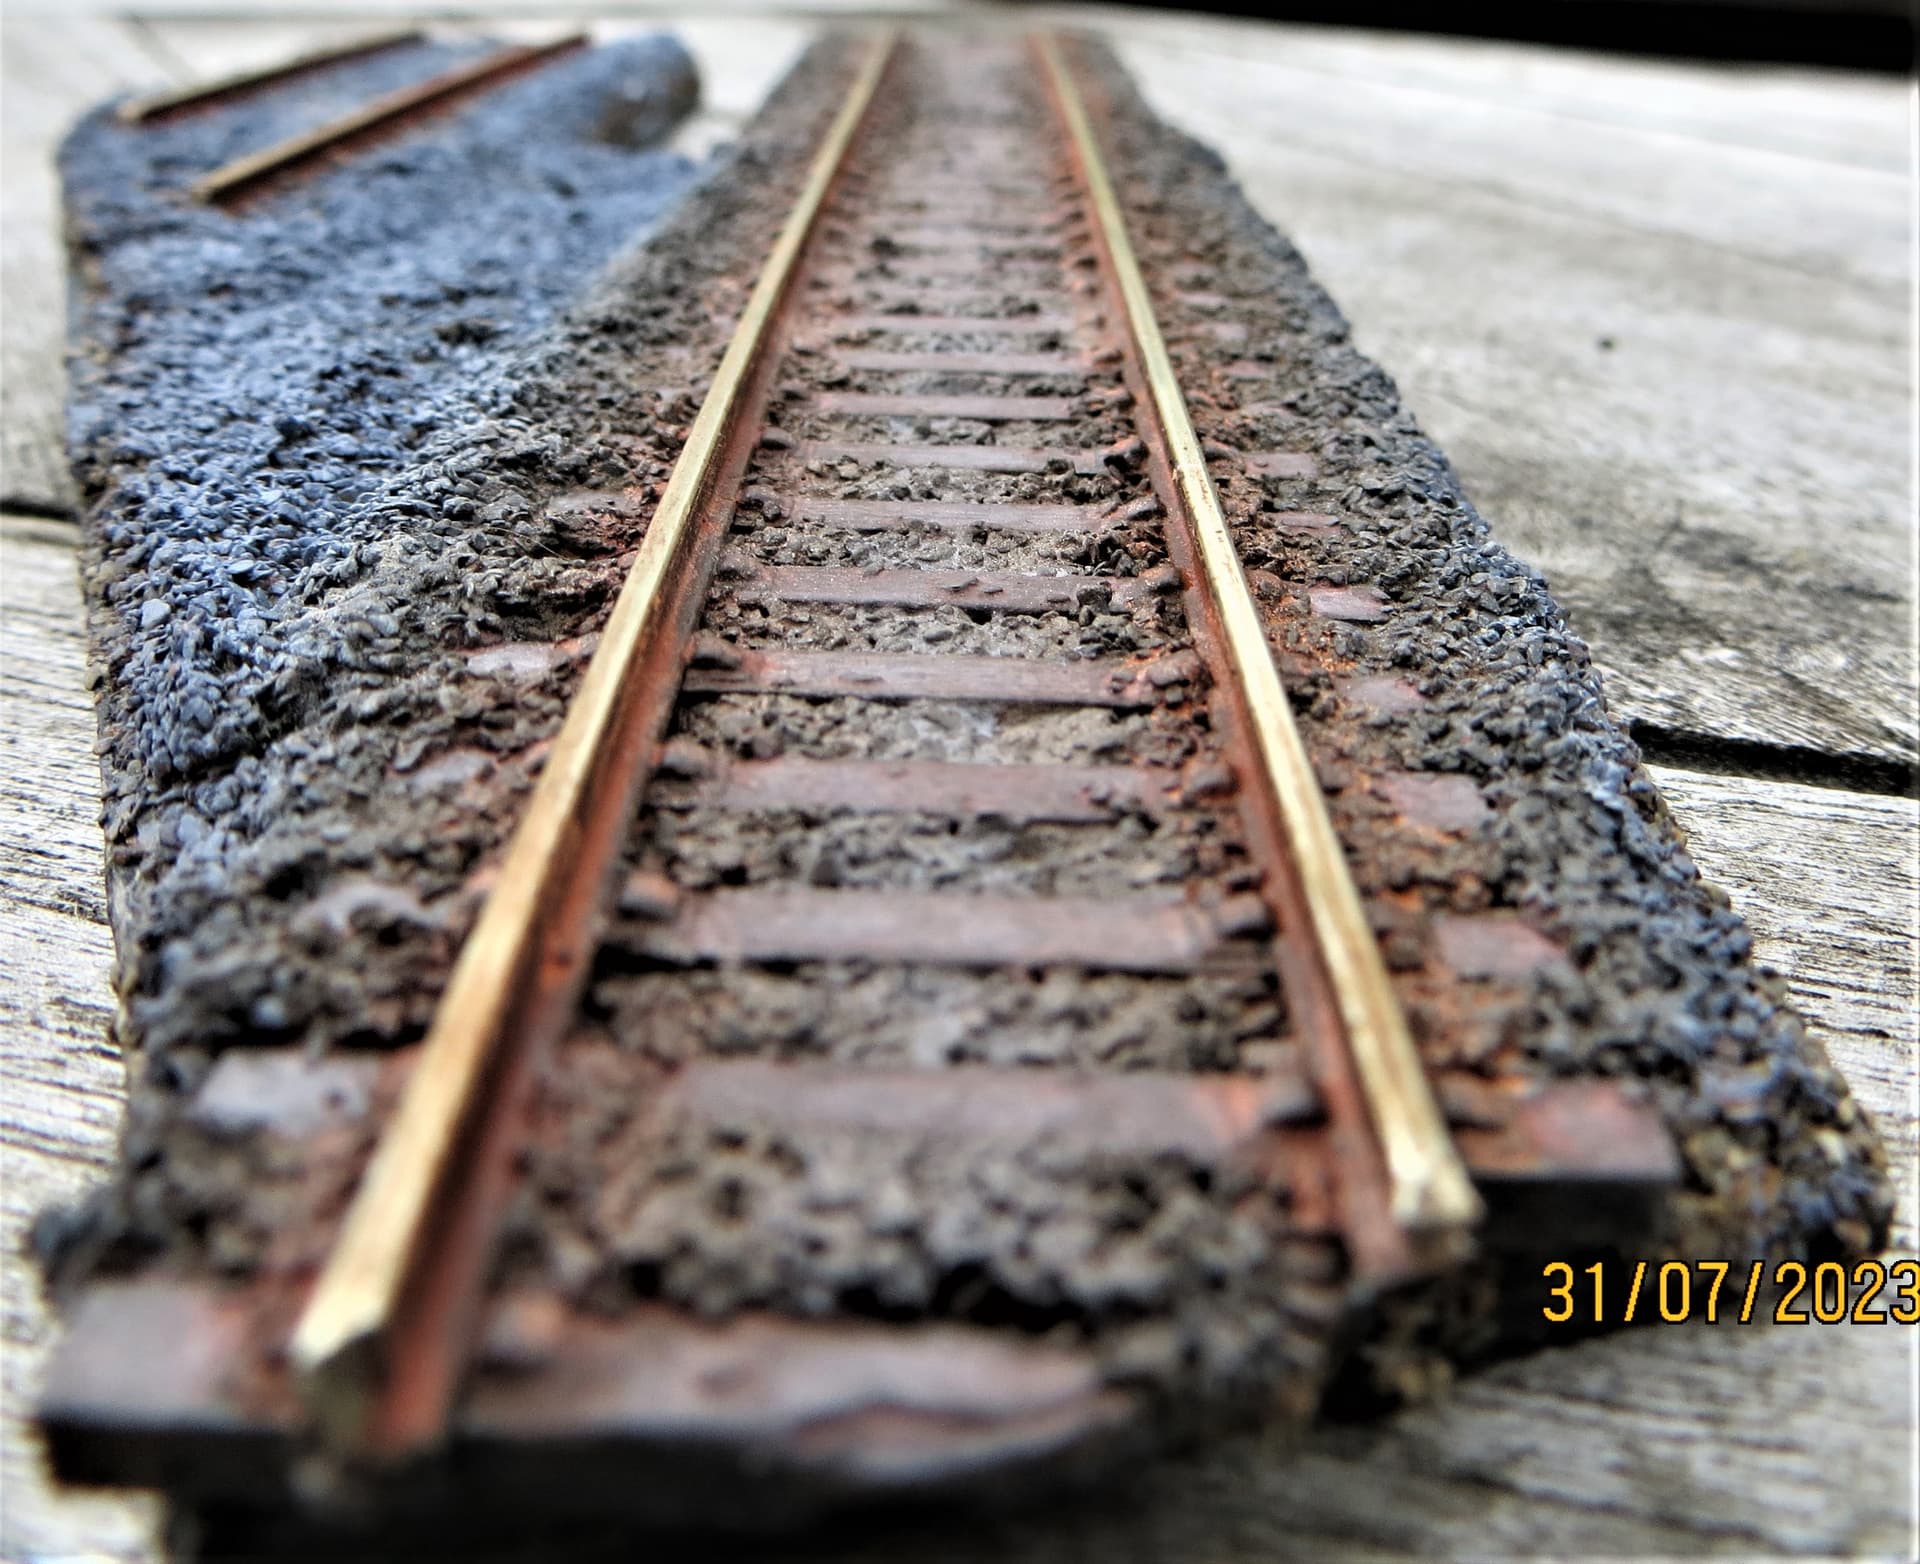
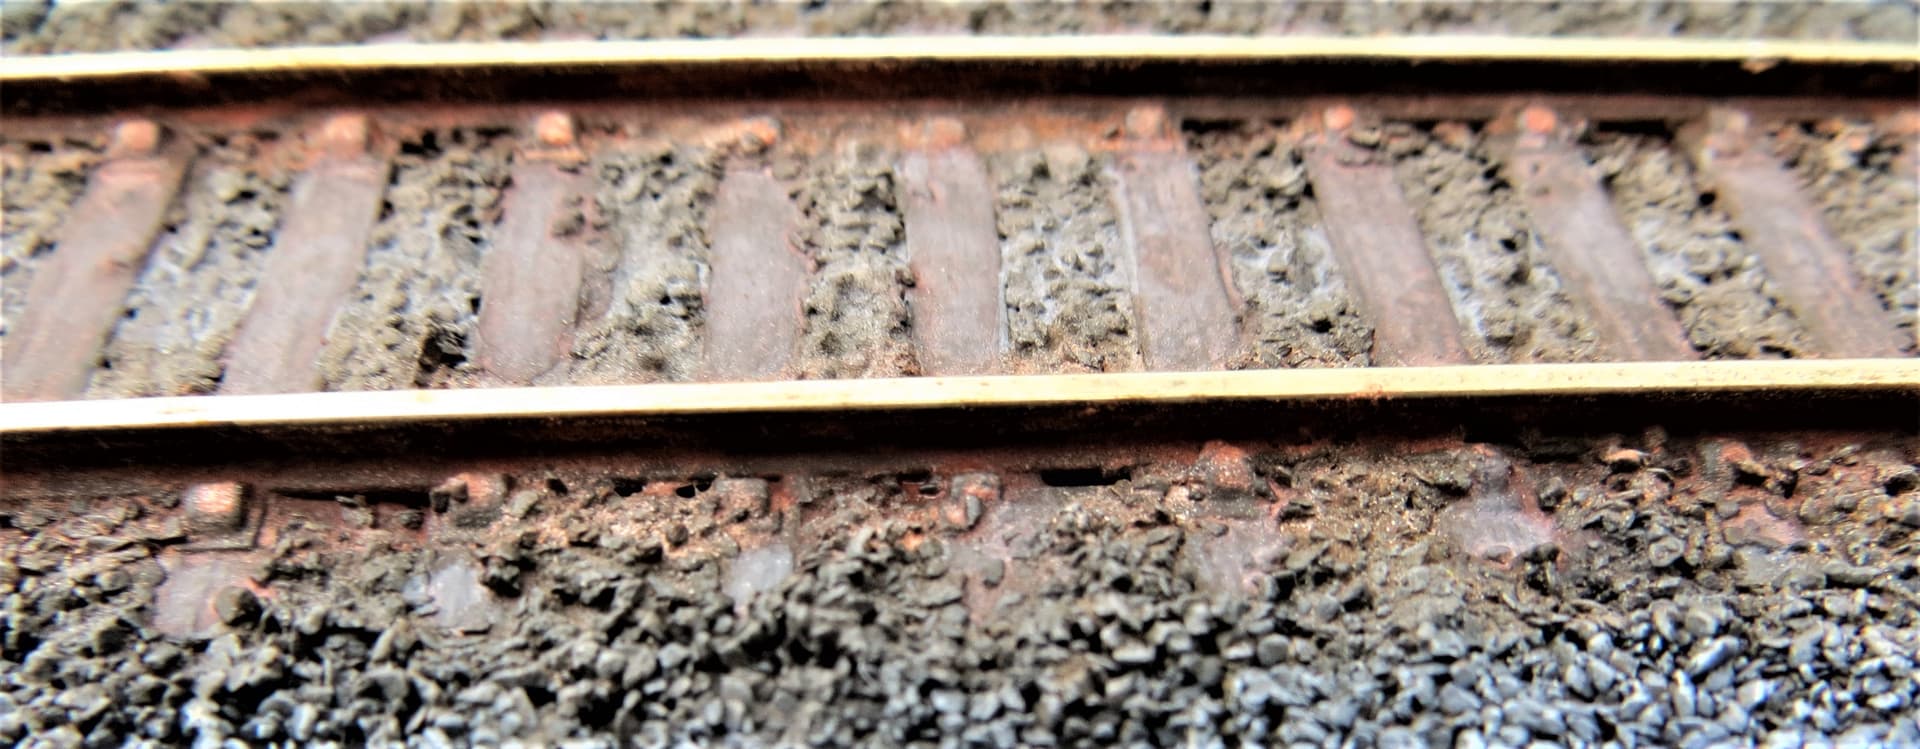
The inclement weather kept the builders at bay today, so gave me the opportunity to start adding some basic colour to the ballasted Hornby track.
It still needs some work, cleaning, painting and adding some flora, before I think it’ll pass muster, but it’s progress, .
Cheers, ,
G
4 Likes
Great start to it G… Those old tracks and the ballast areas were definitely usually covered with crud… We know you will nail the look …
2 Likes
Thanks John, much appreciated, .
G,
Hi all,
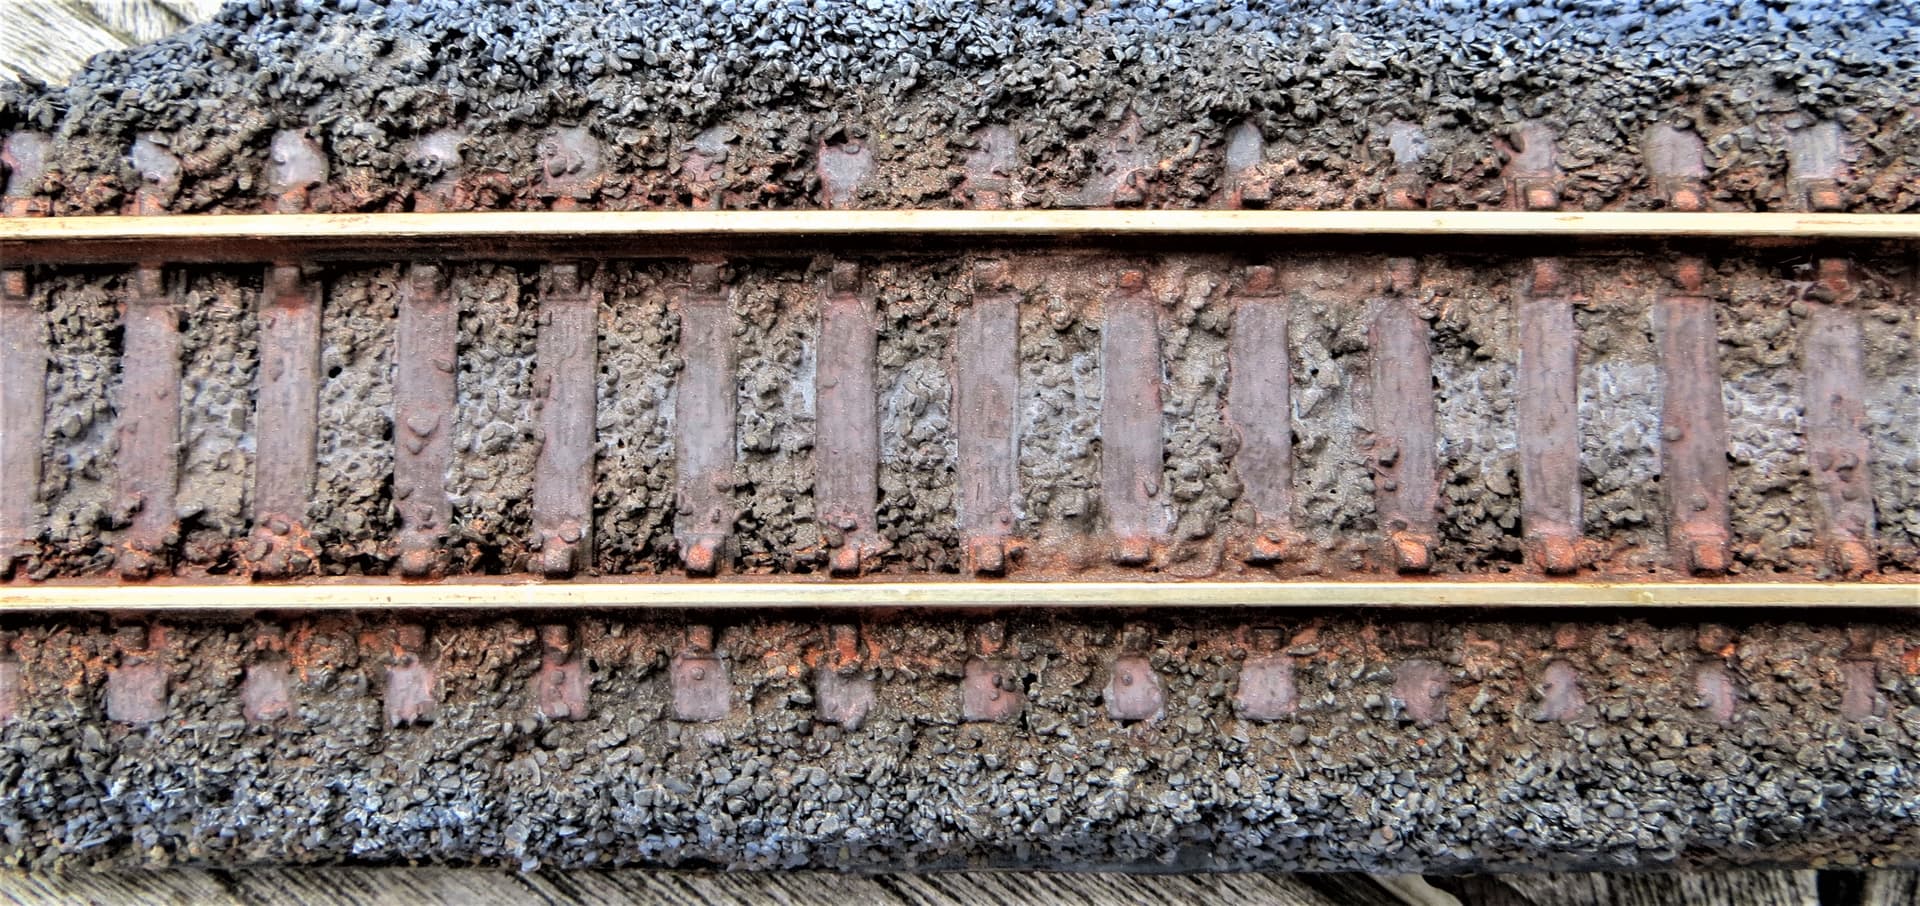
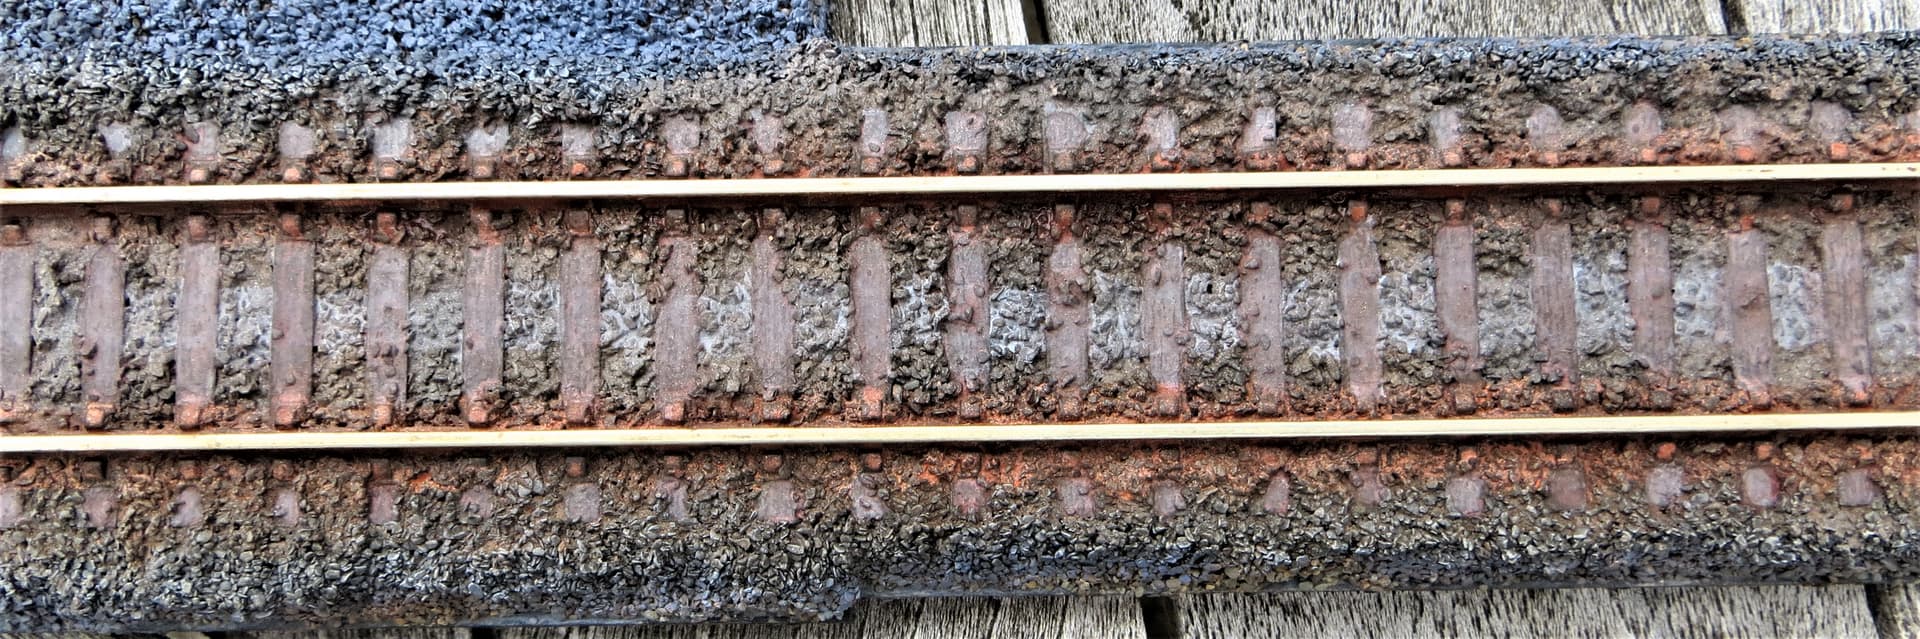
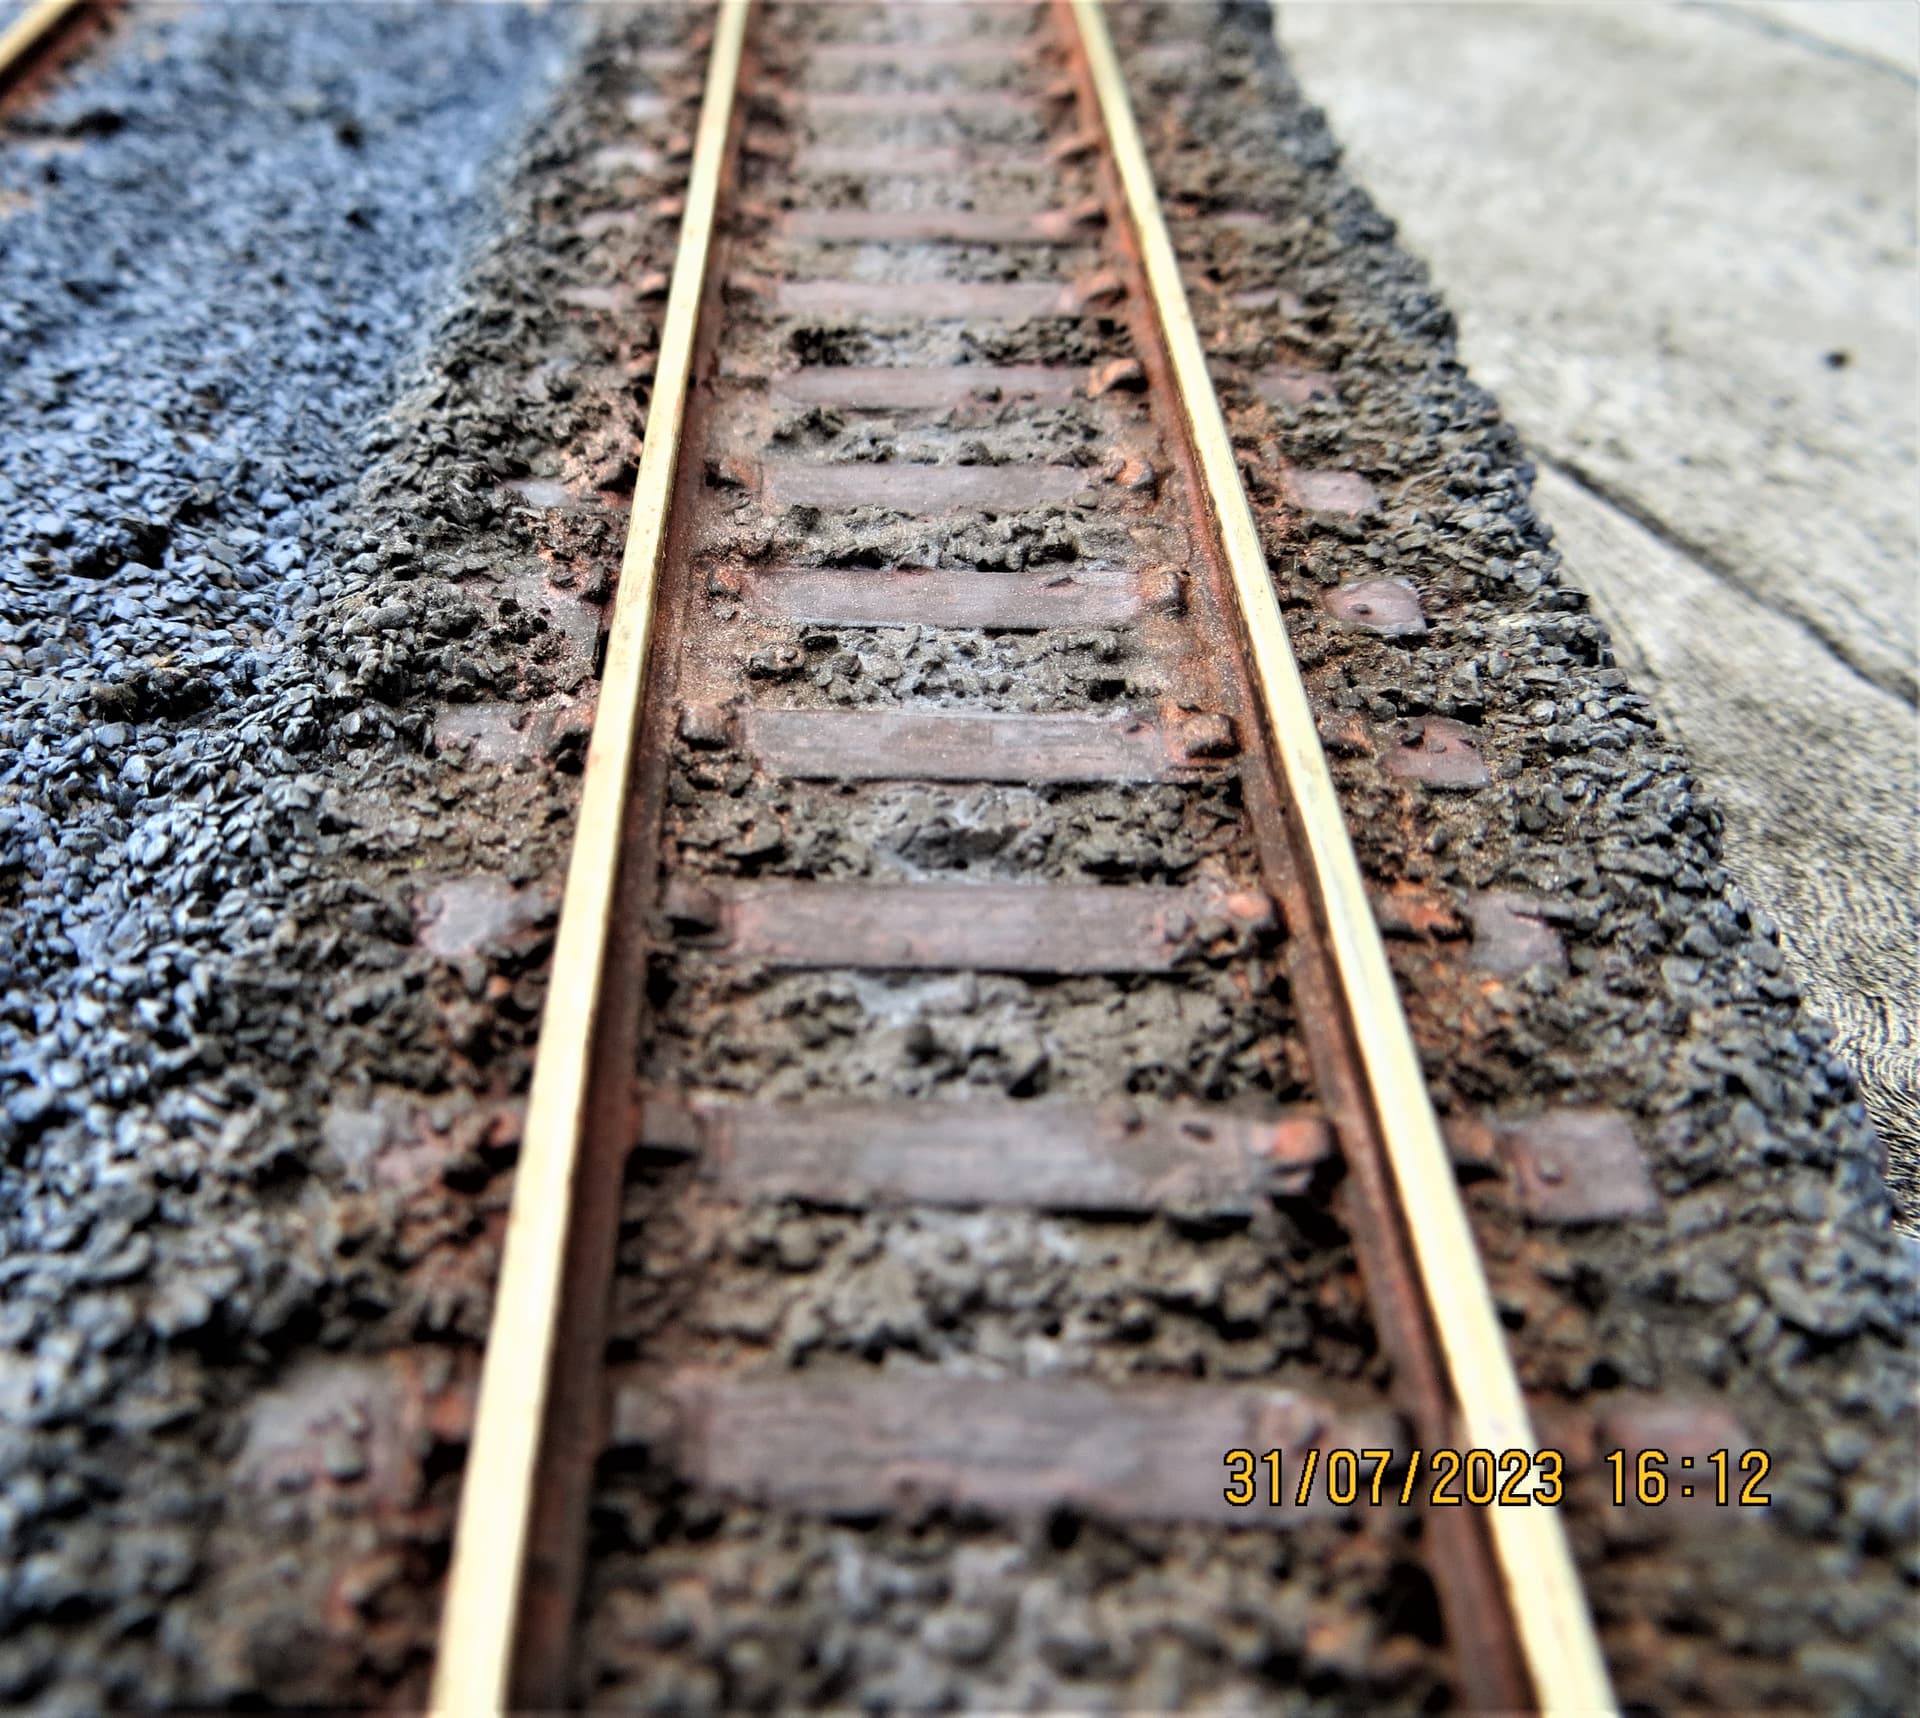
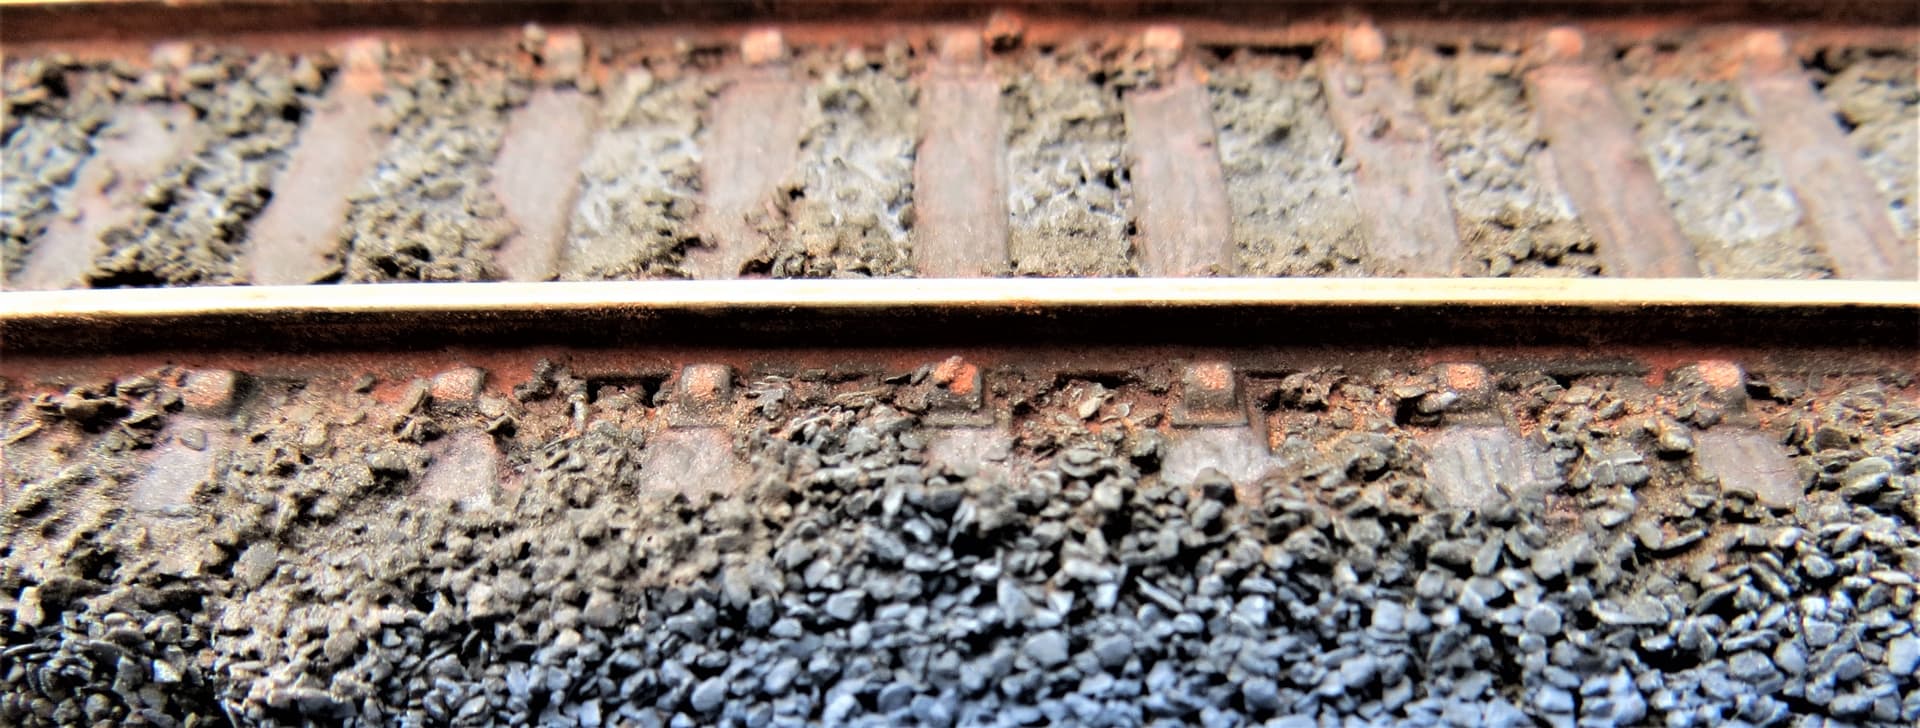
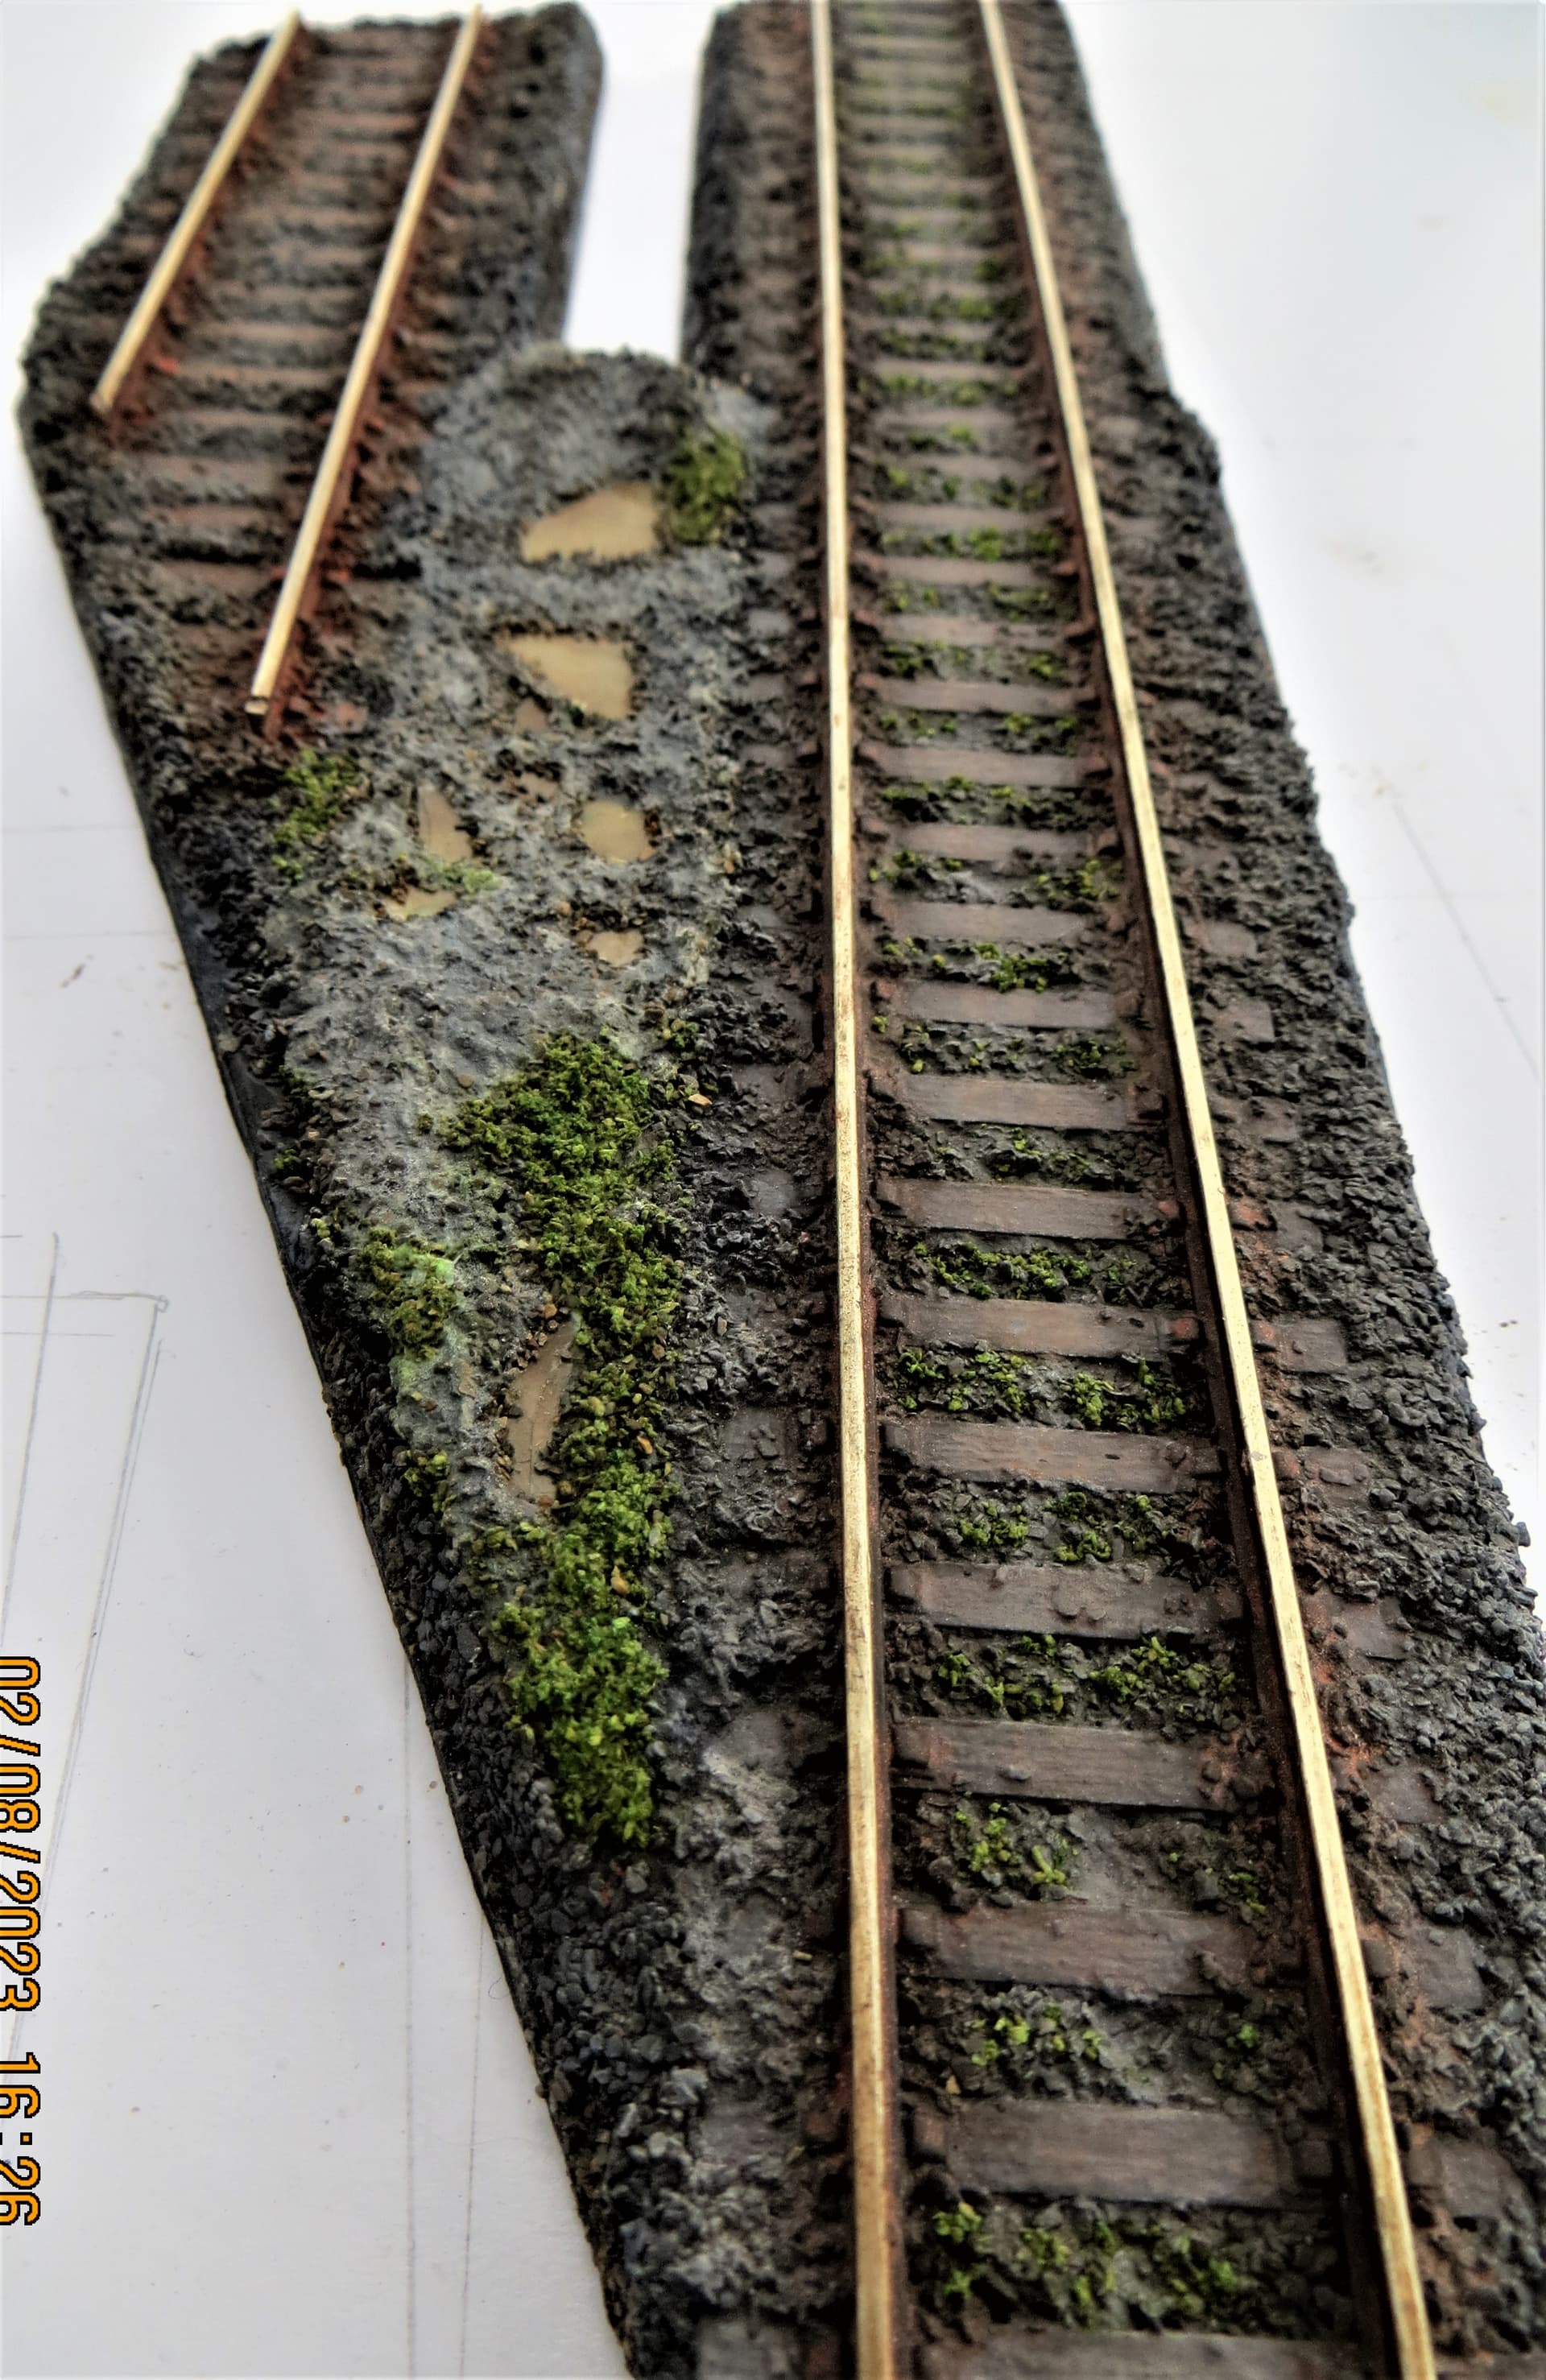
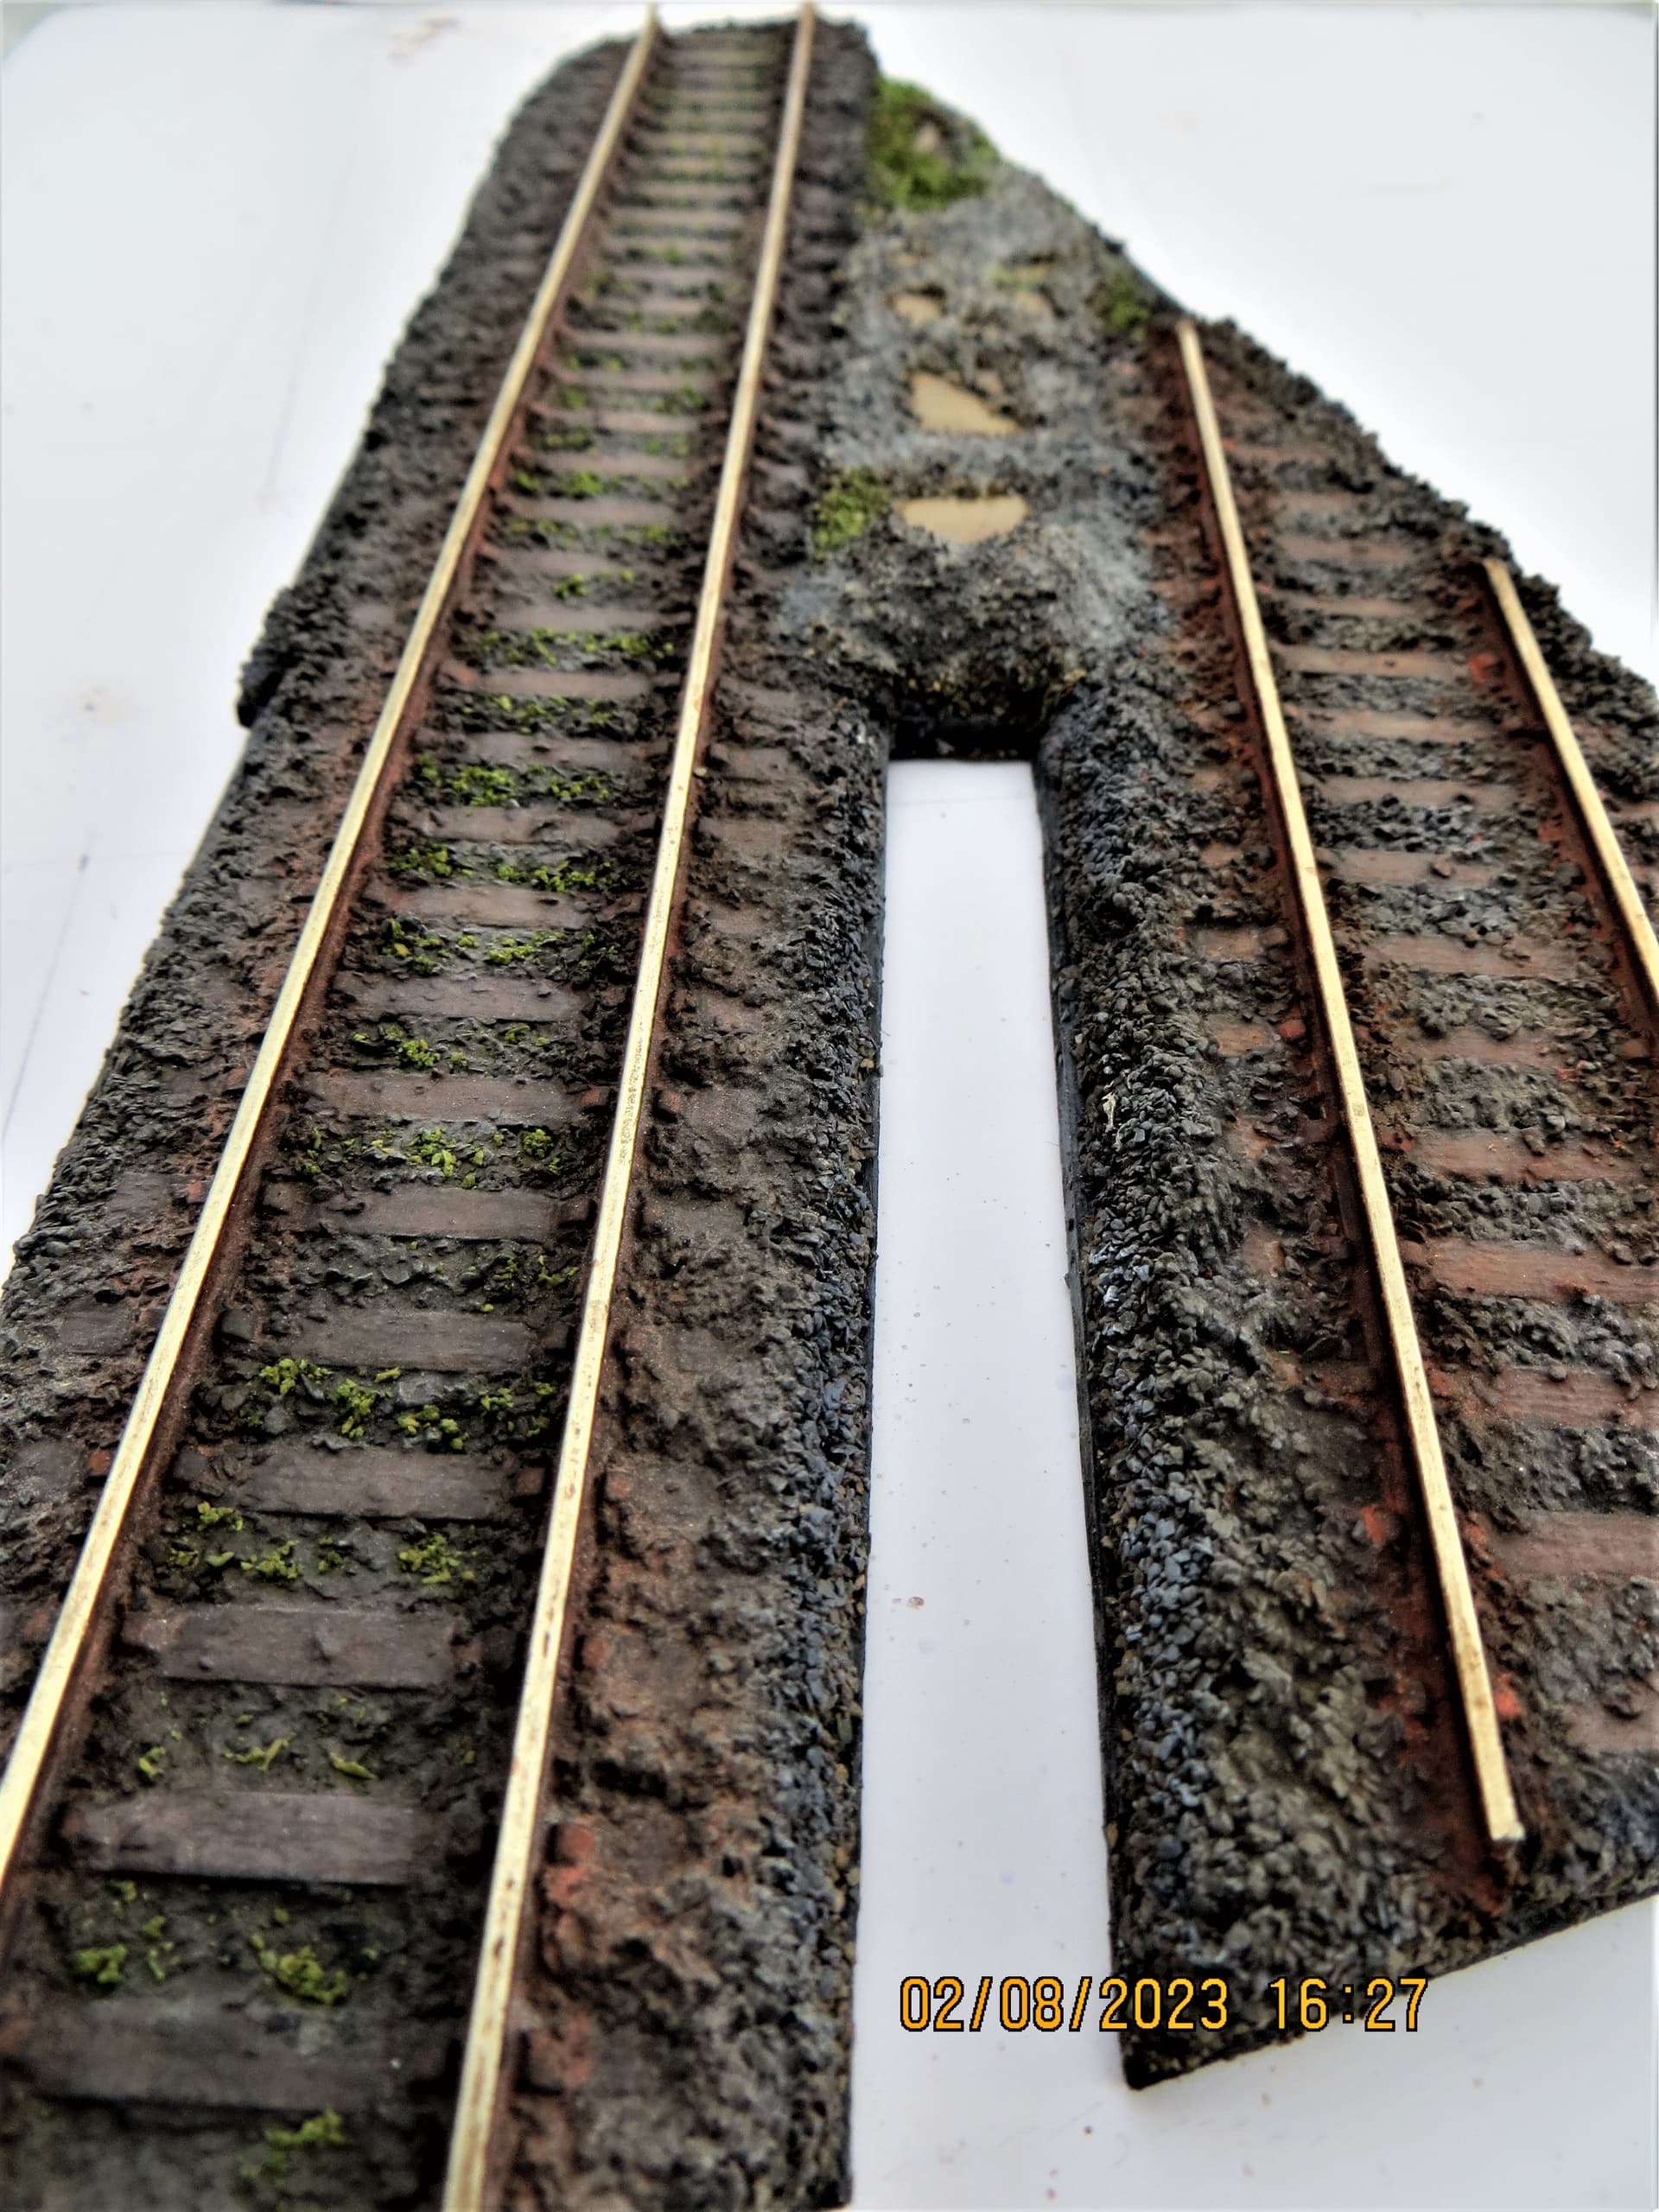
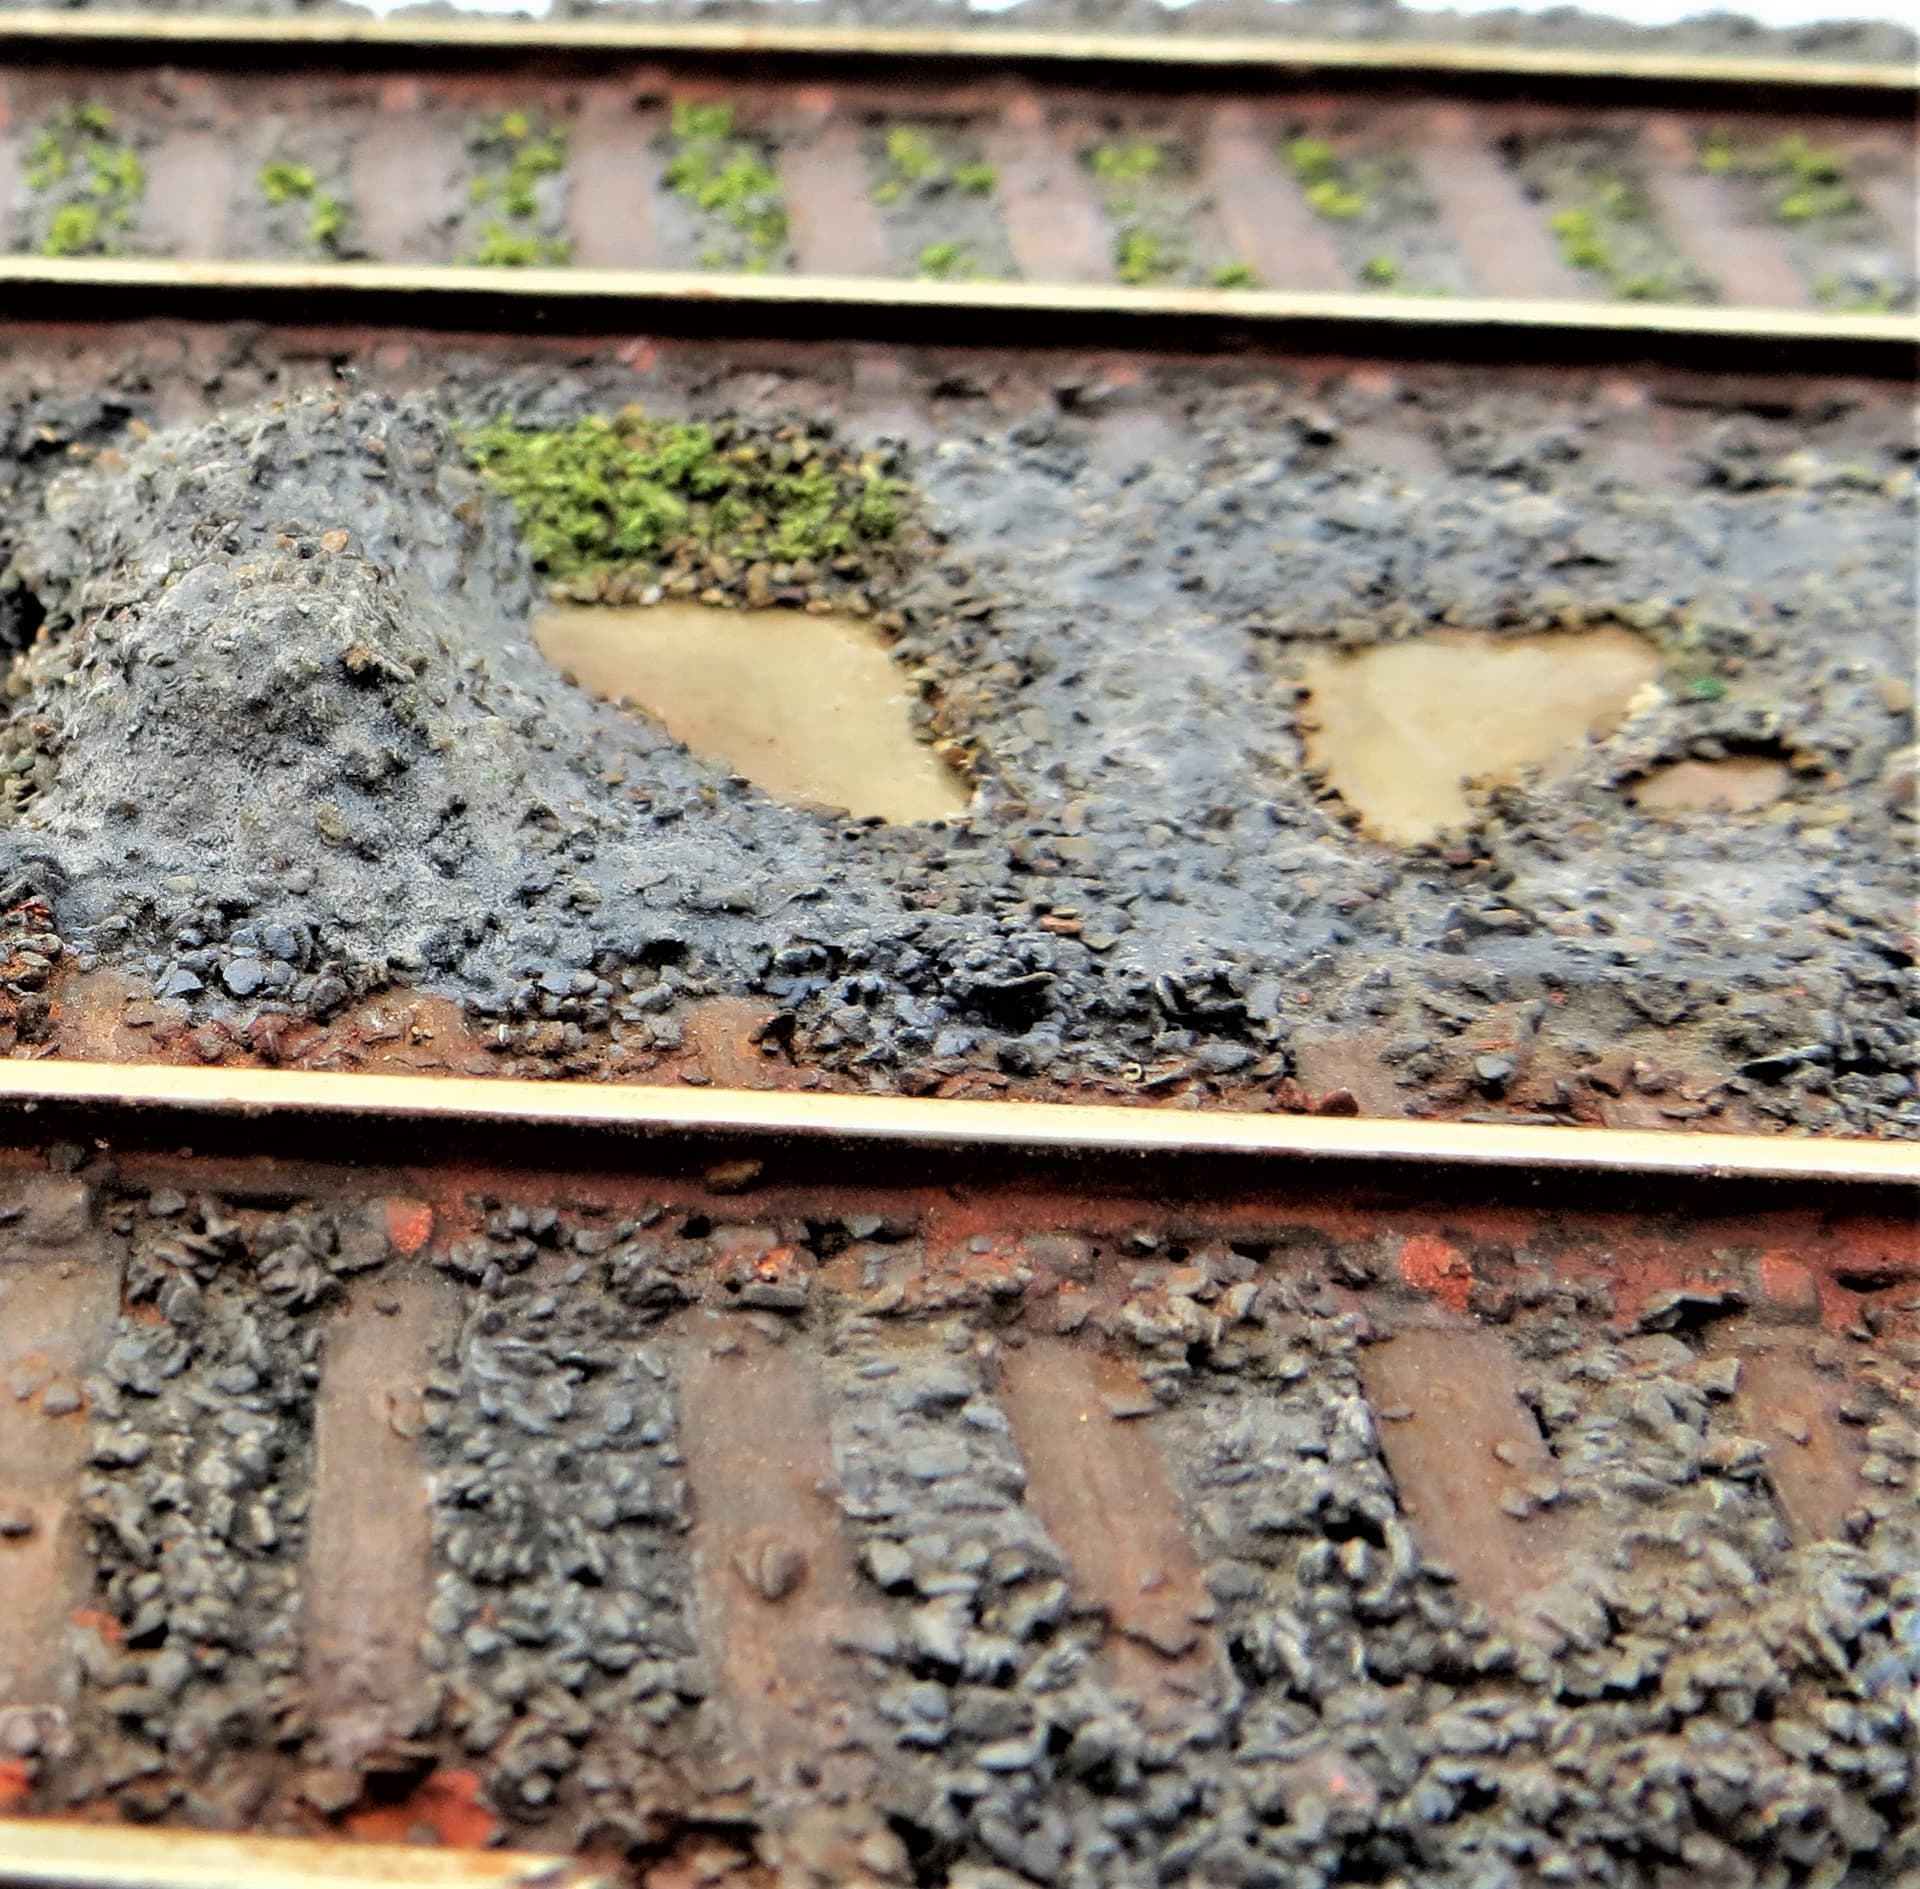
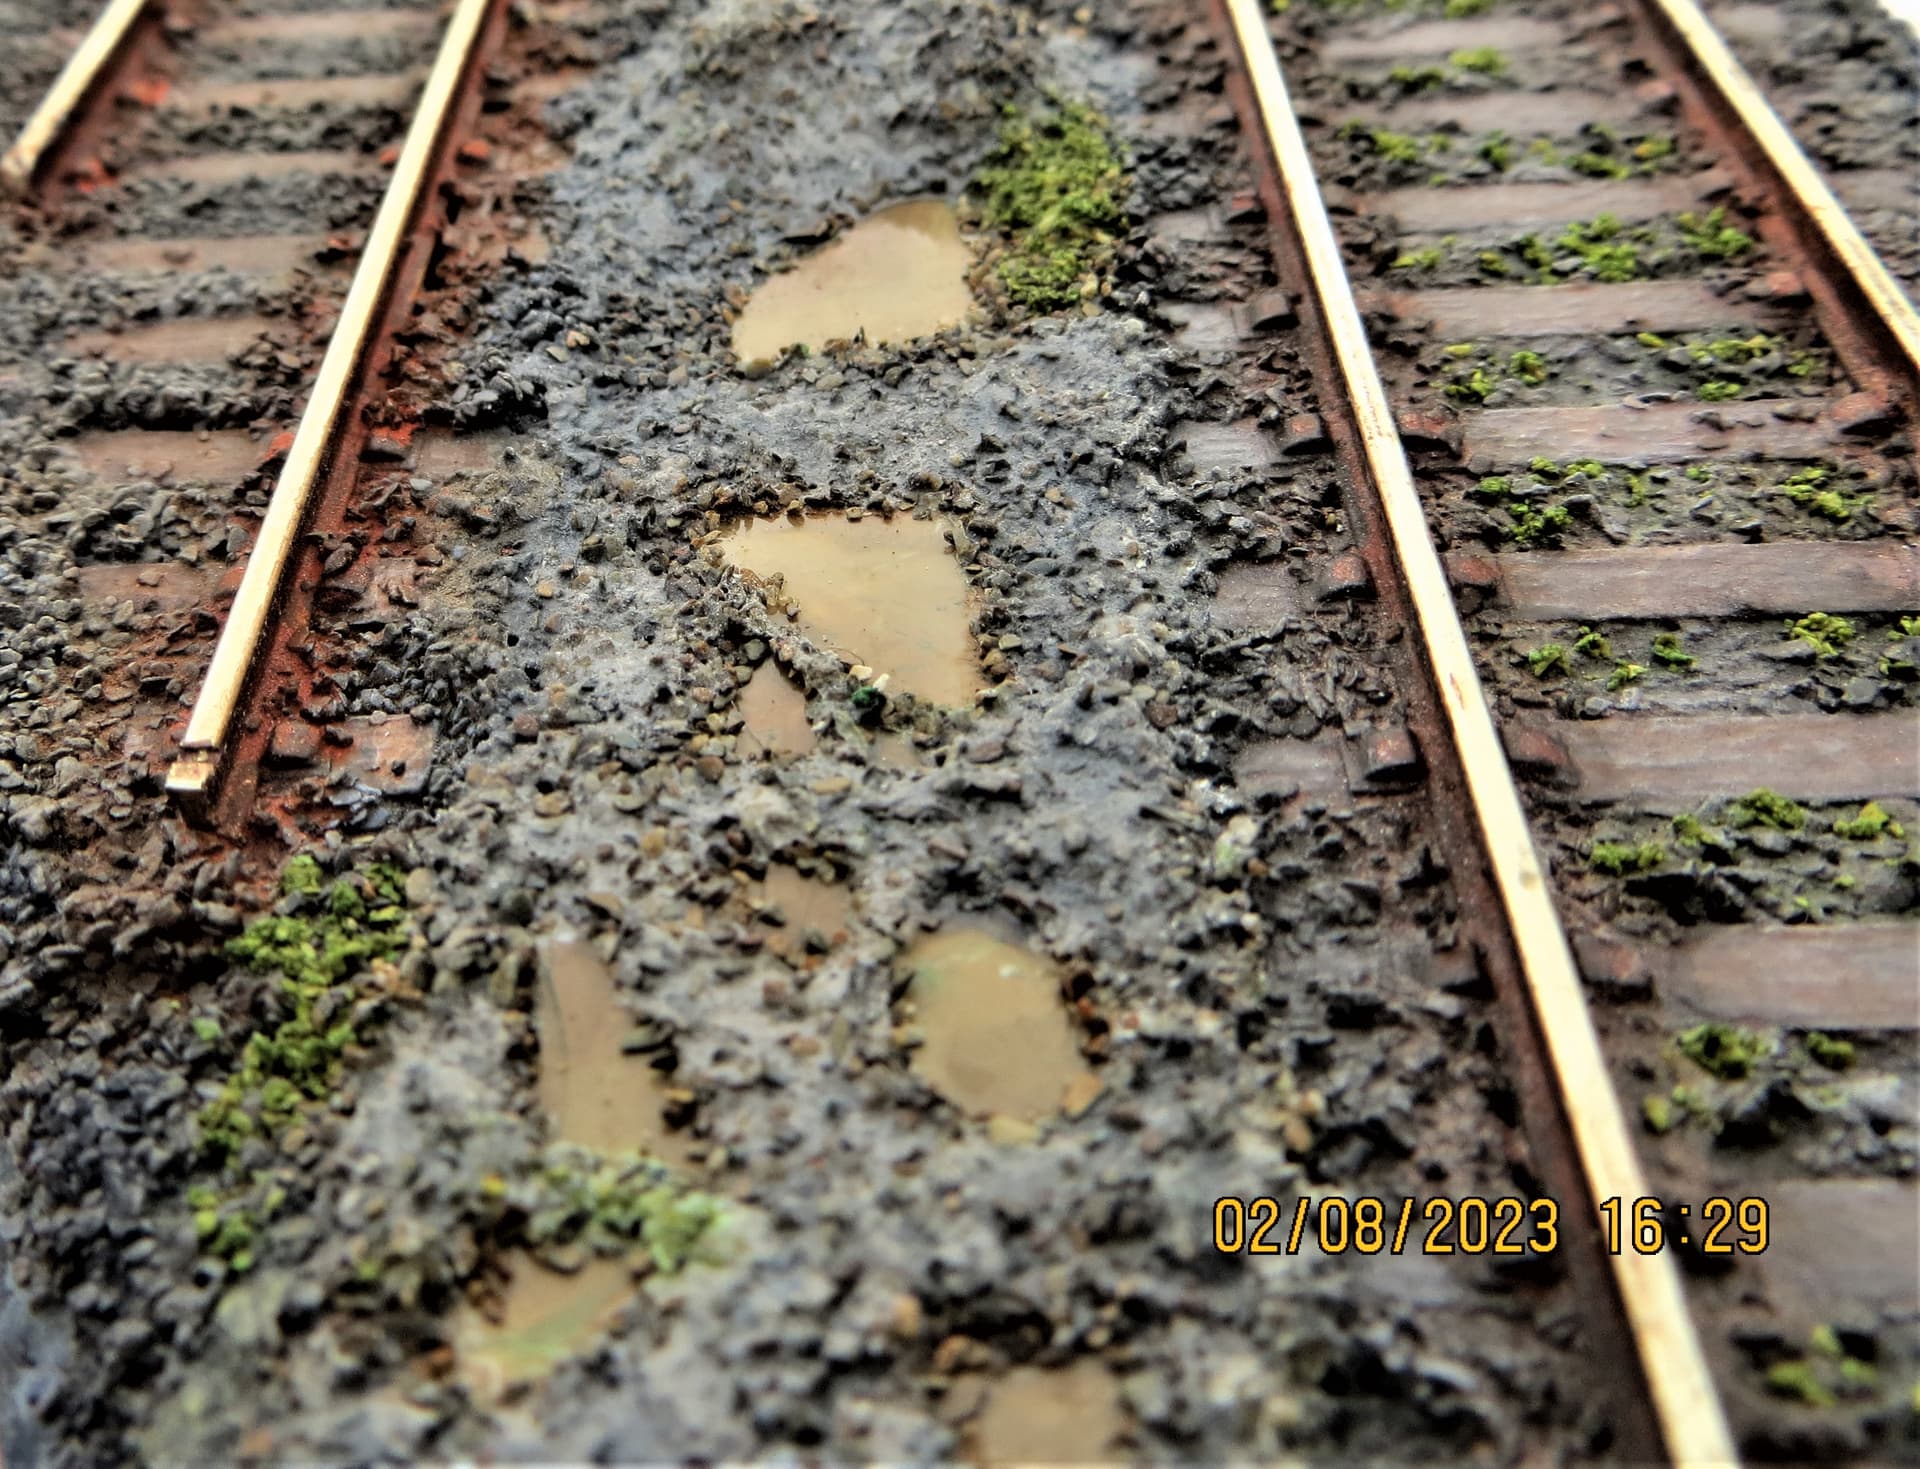
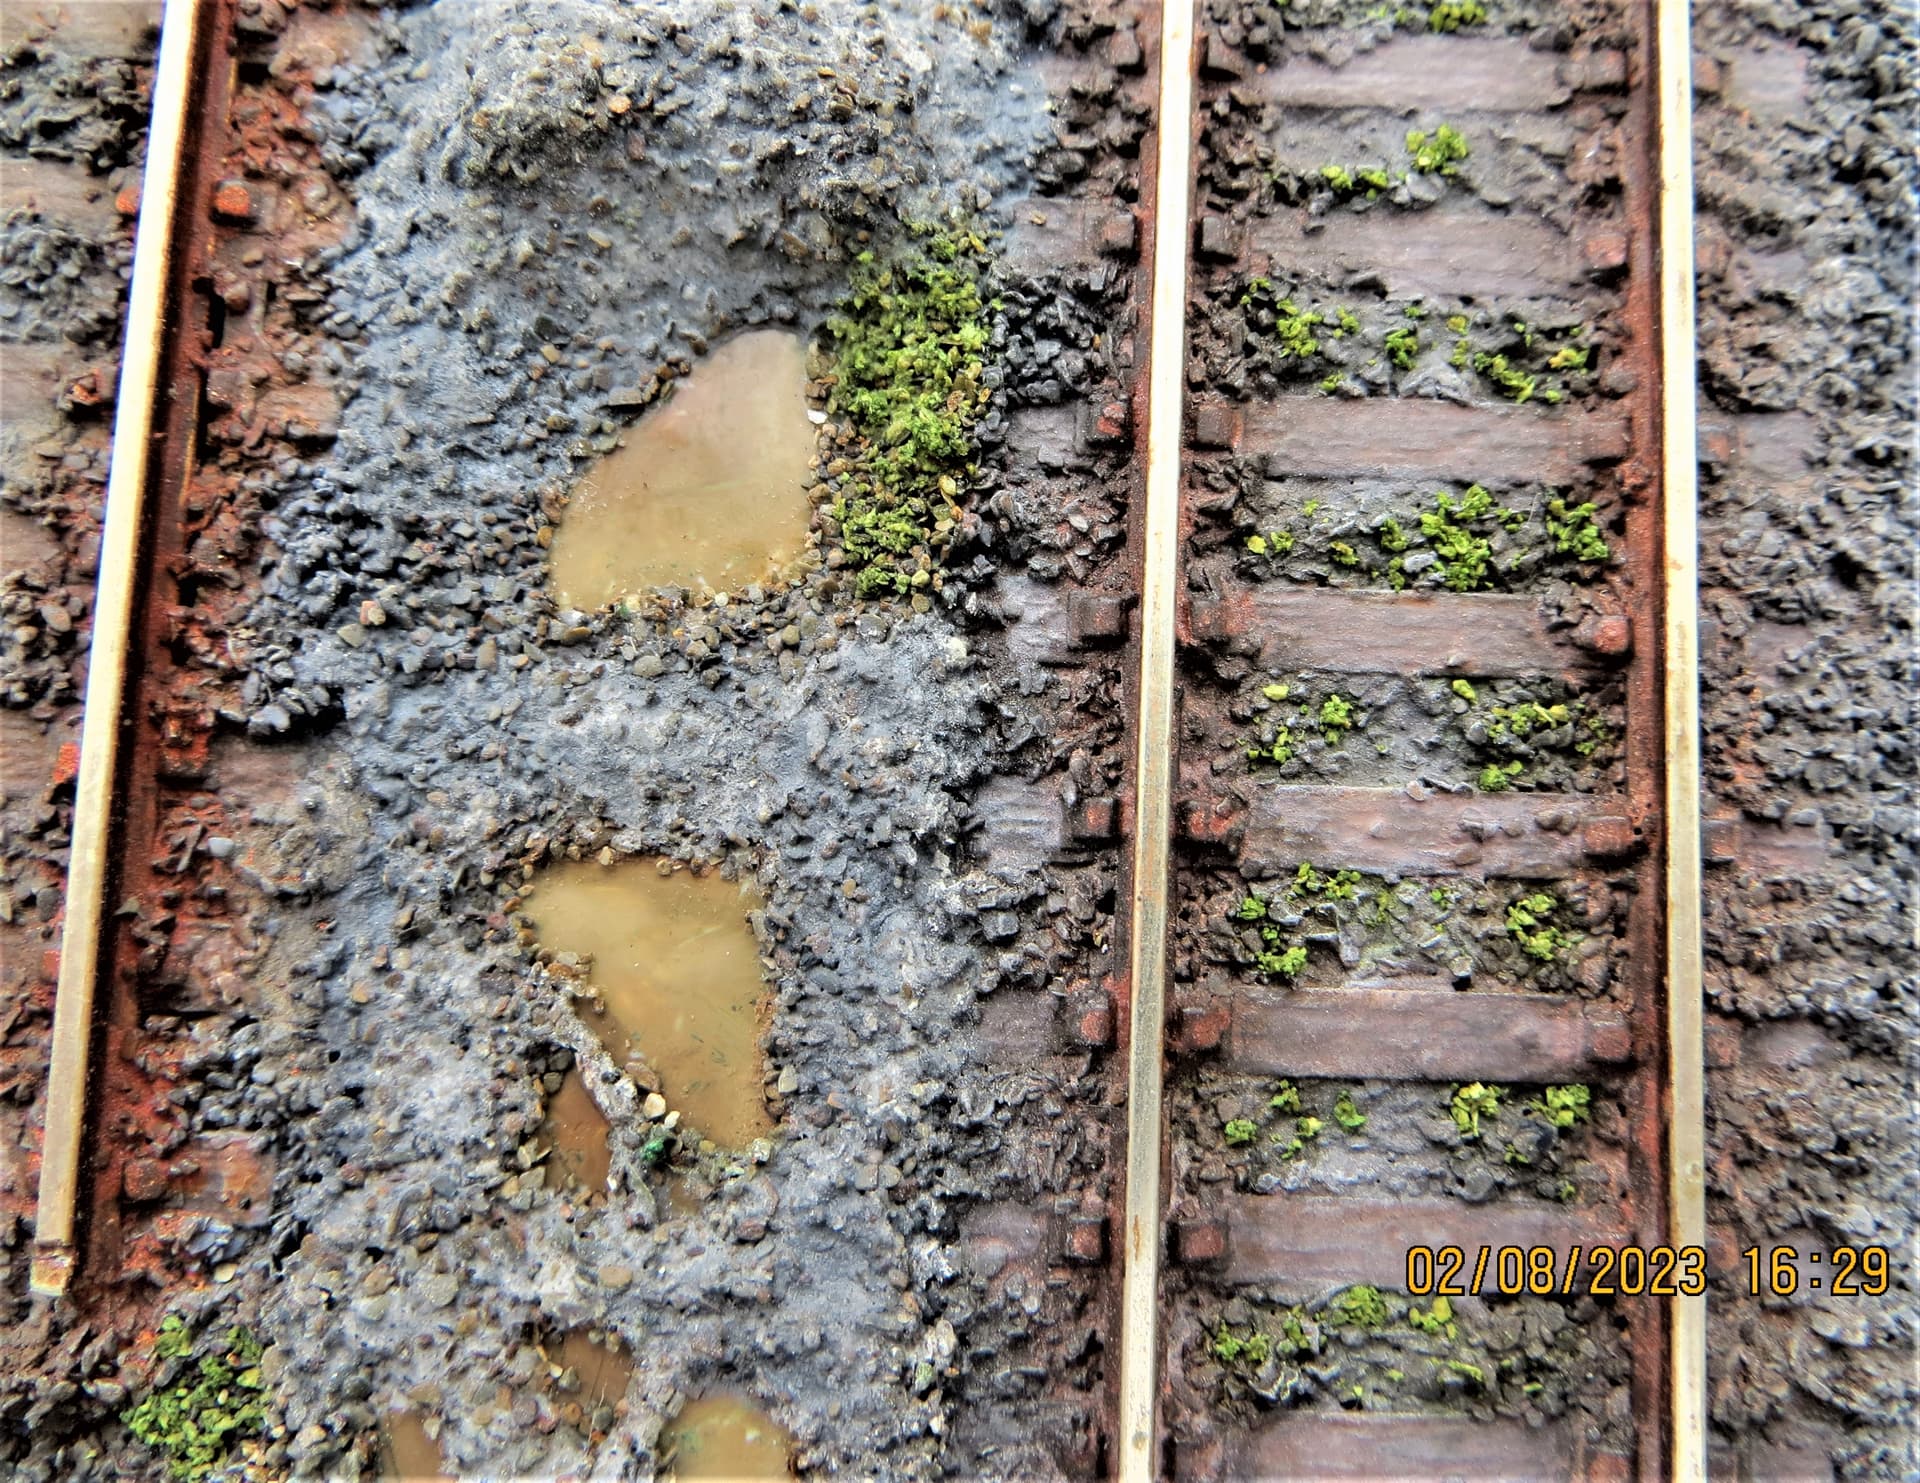
Managed to get some more layers added, a few puddles, and the start of some vegetation.
The short run of track still needs a tad more work to match the other length, and the middle area around the puddles needs washes and highlights before I add more flora.
Cheers, ,
G
8 Likes