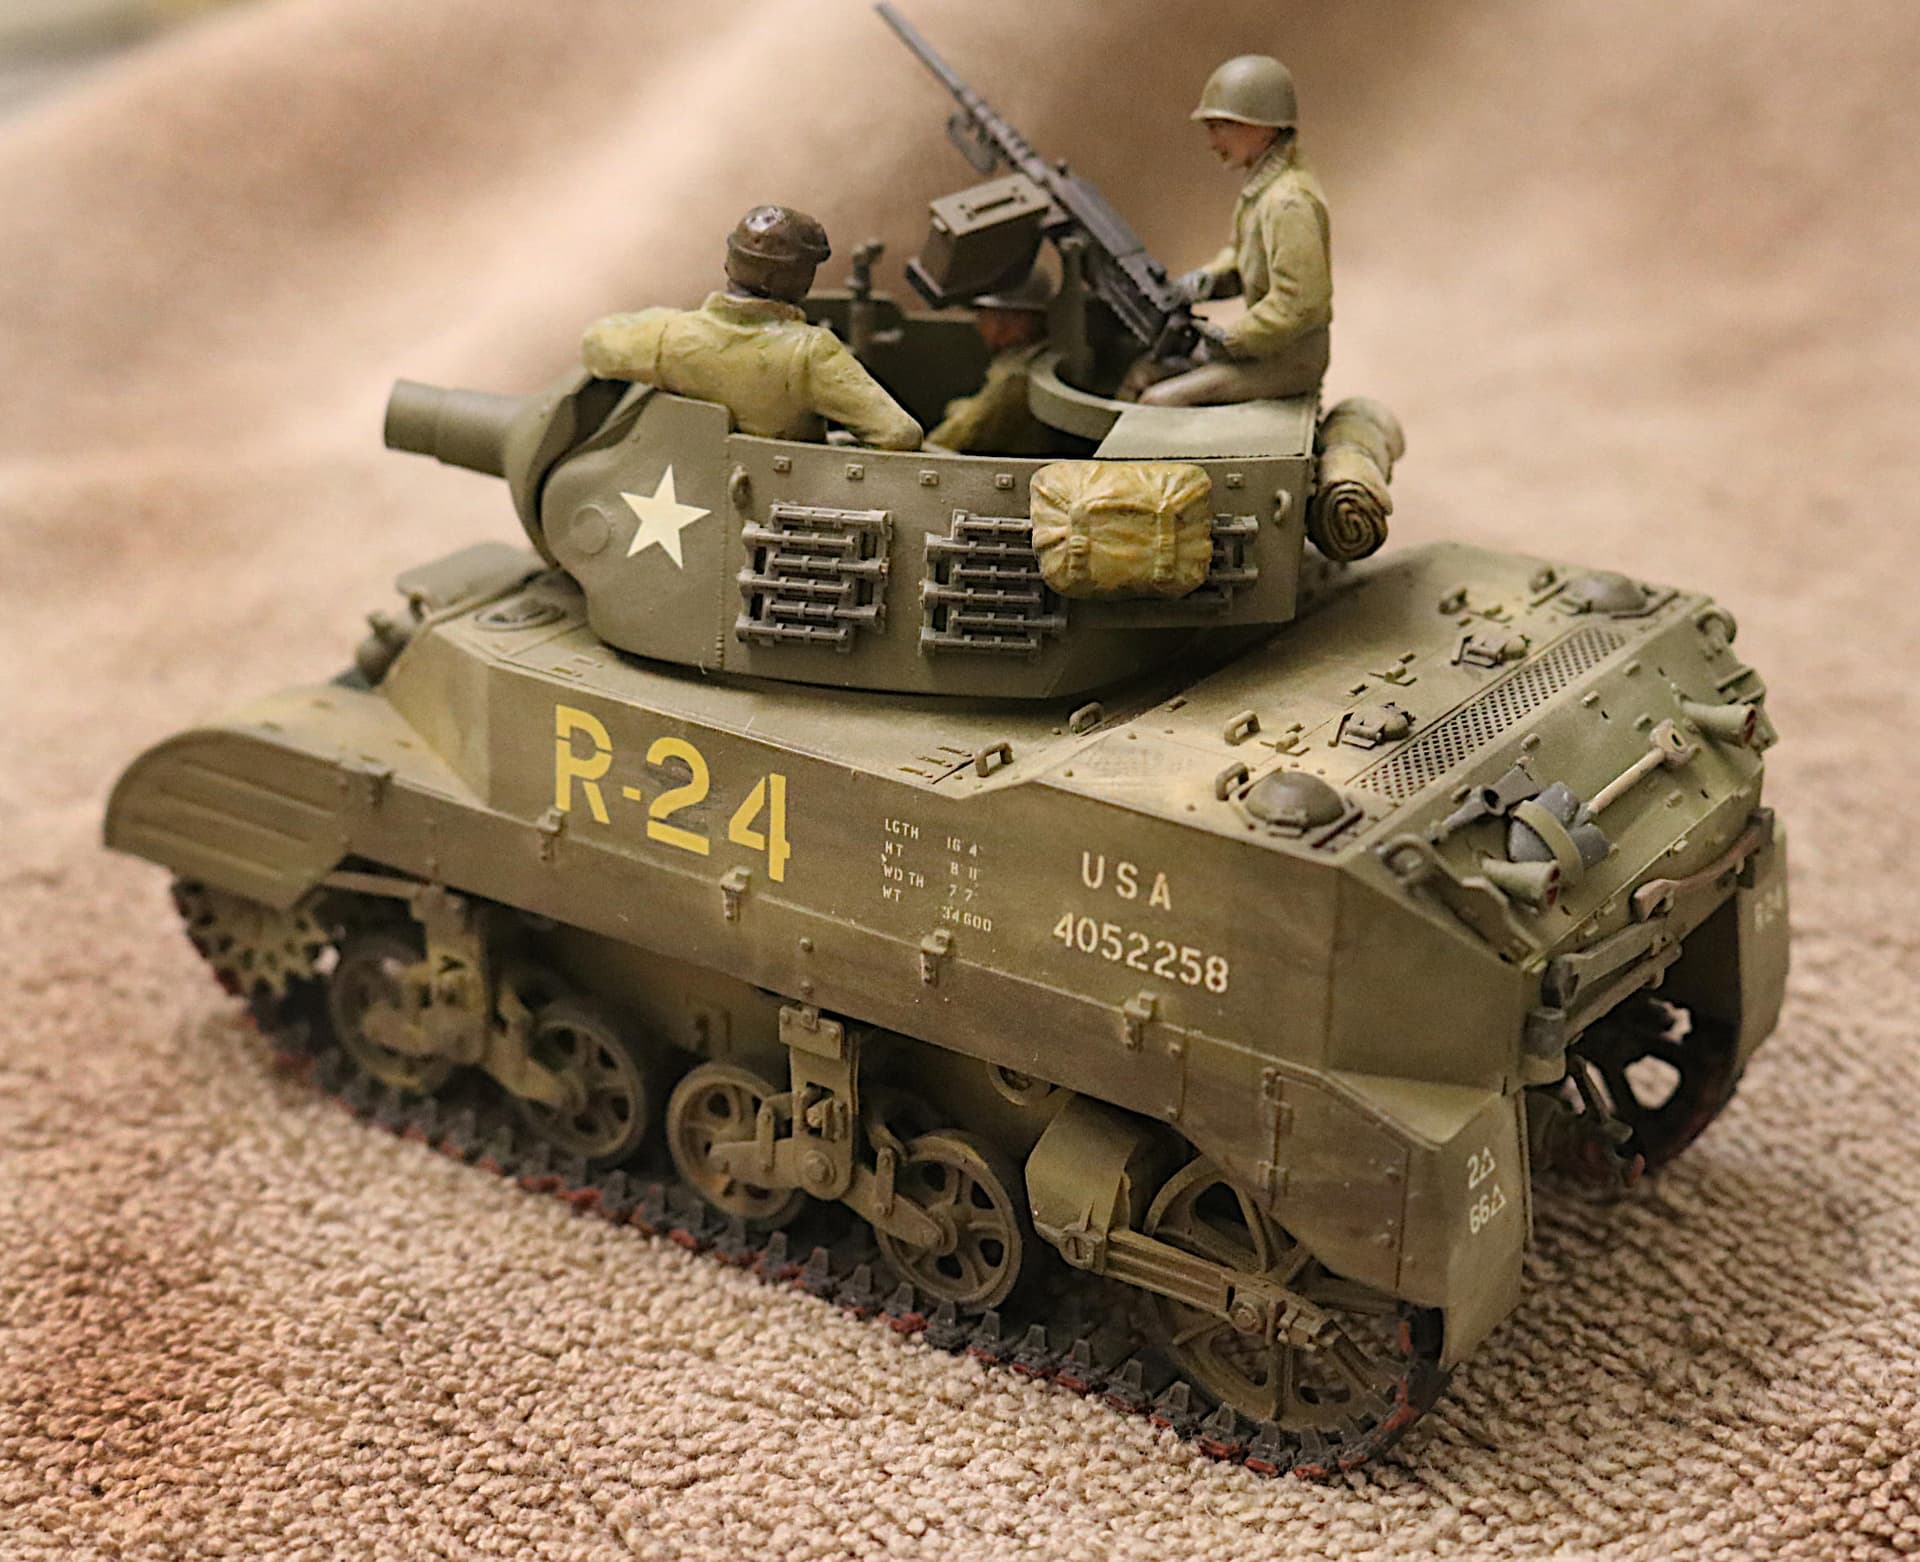
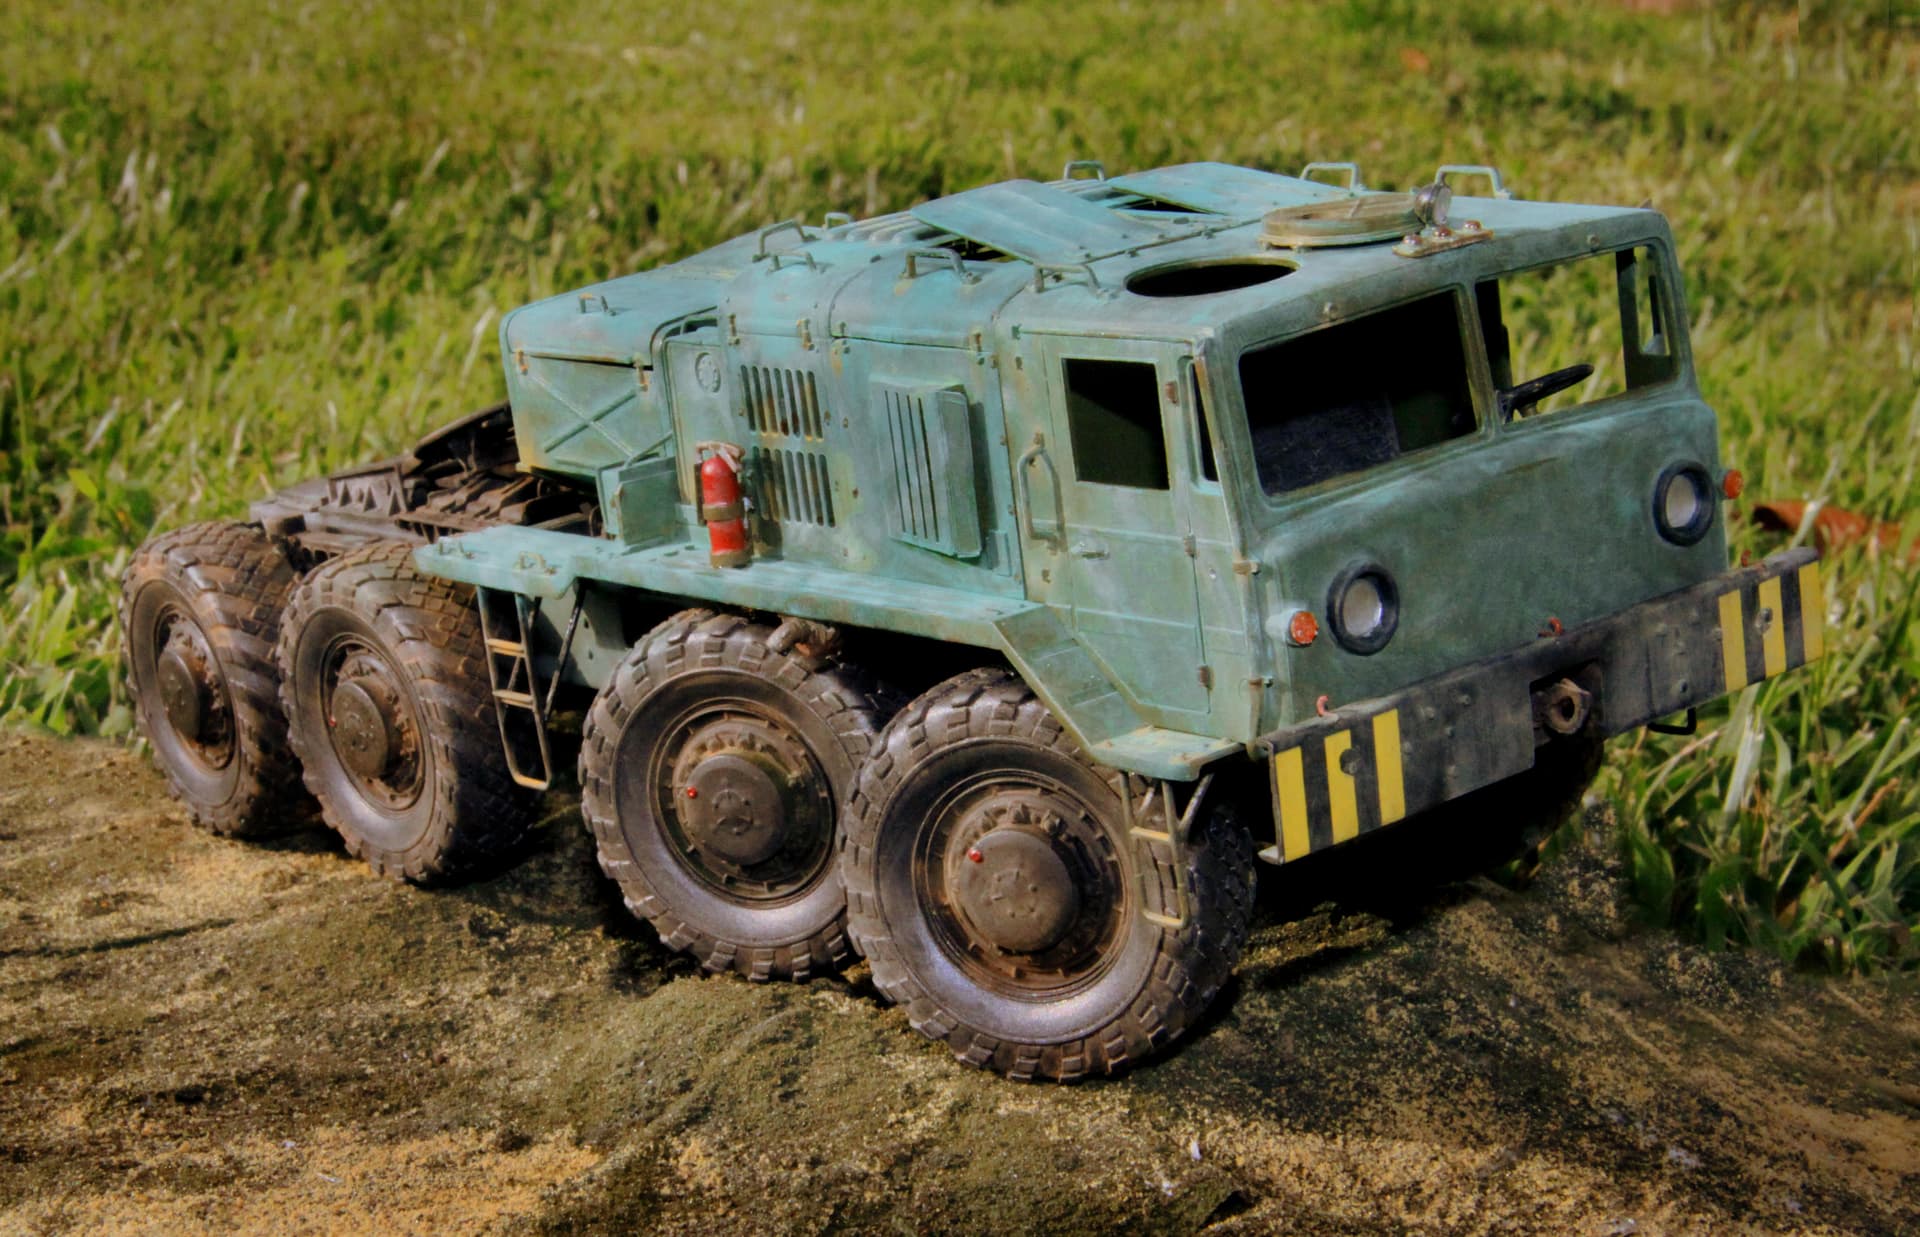
Thanks!! I am going to try blending the dusty effect on the front some more, add washes to the tracks, running gear, tires, and then pigments for the same and the lower hull and I think call it a day!
2 Likes
I’ve had better luck w more and more practice. My first attempt was on a Stug that I had a nice 3 color ‘standard’ pattern on. I just dive on w a basic set of oils w zero thought and as SdAufKla mentioned I didn’t have a color wheel handy. Long and short, yellow oil dots along w blues and some others gave my Stuff an overall greenish cast that I just couldn’t get to lighten up (even considering it was over a semi gloss varnish). So lesson learned. My next attempt was on a solid OD Sherman, I did a few things differently, up’d the quality of the oils, leeched them longer on cardboard, l applied w a toothpick to make the ‘dots’ smaller, limited my pallet to grey, several greens and browns along w white eliminating the chance to mix primaries and get a tint overall that I hadn’t considered.
I believe you asked about the sequence also, my oil work is basically my last. I do major painting w acrylics so do any decals, chipping, dry brushing and detail painting first. Then my varnish, prep my oils, spread mineral spirits then dots, let them sit for a few then spread as noted above. Once I have done those filters and washes I’ll do any other touchups I deem needed and my final step is pastels. One thing I haven’t done yet w oils that I want to try is more of a modulation approach w shades of similar colors over the base. Maybe that’s that Spanish school I’ve seen referred too but executed correctly it’s a nice result to break up any large slab or flat areas.
Thx for the post. I picked up a few more “a-ha’s” reading through the comments.
2 Likes
The two key lessons I learnt were first to put on a clear coat. Otherwise the thinners ‘burns’ through the top coat of paint. Second have a ‘wet’ brush to wash off the oil. Wash off almost to the point where you wonder if there is any oil left on the model.
Let it dry right off then stand back and think about the next step. Don’t rush it.
3 Likes
Your thread has made it over to the “premier” site. Well done!
OK, pardon my stupidity but the expression “dot” in “dot oil filtering” has me fully confused here.
In the Sherman above I would call that more of a “spot transparent wash” for modulating the color and causing some subtle variations in the color.
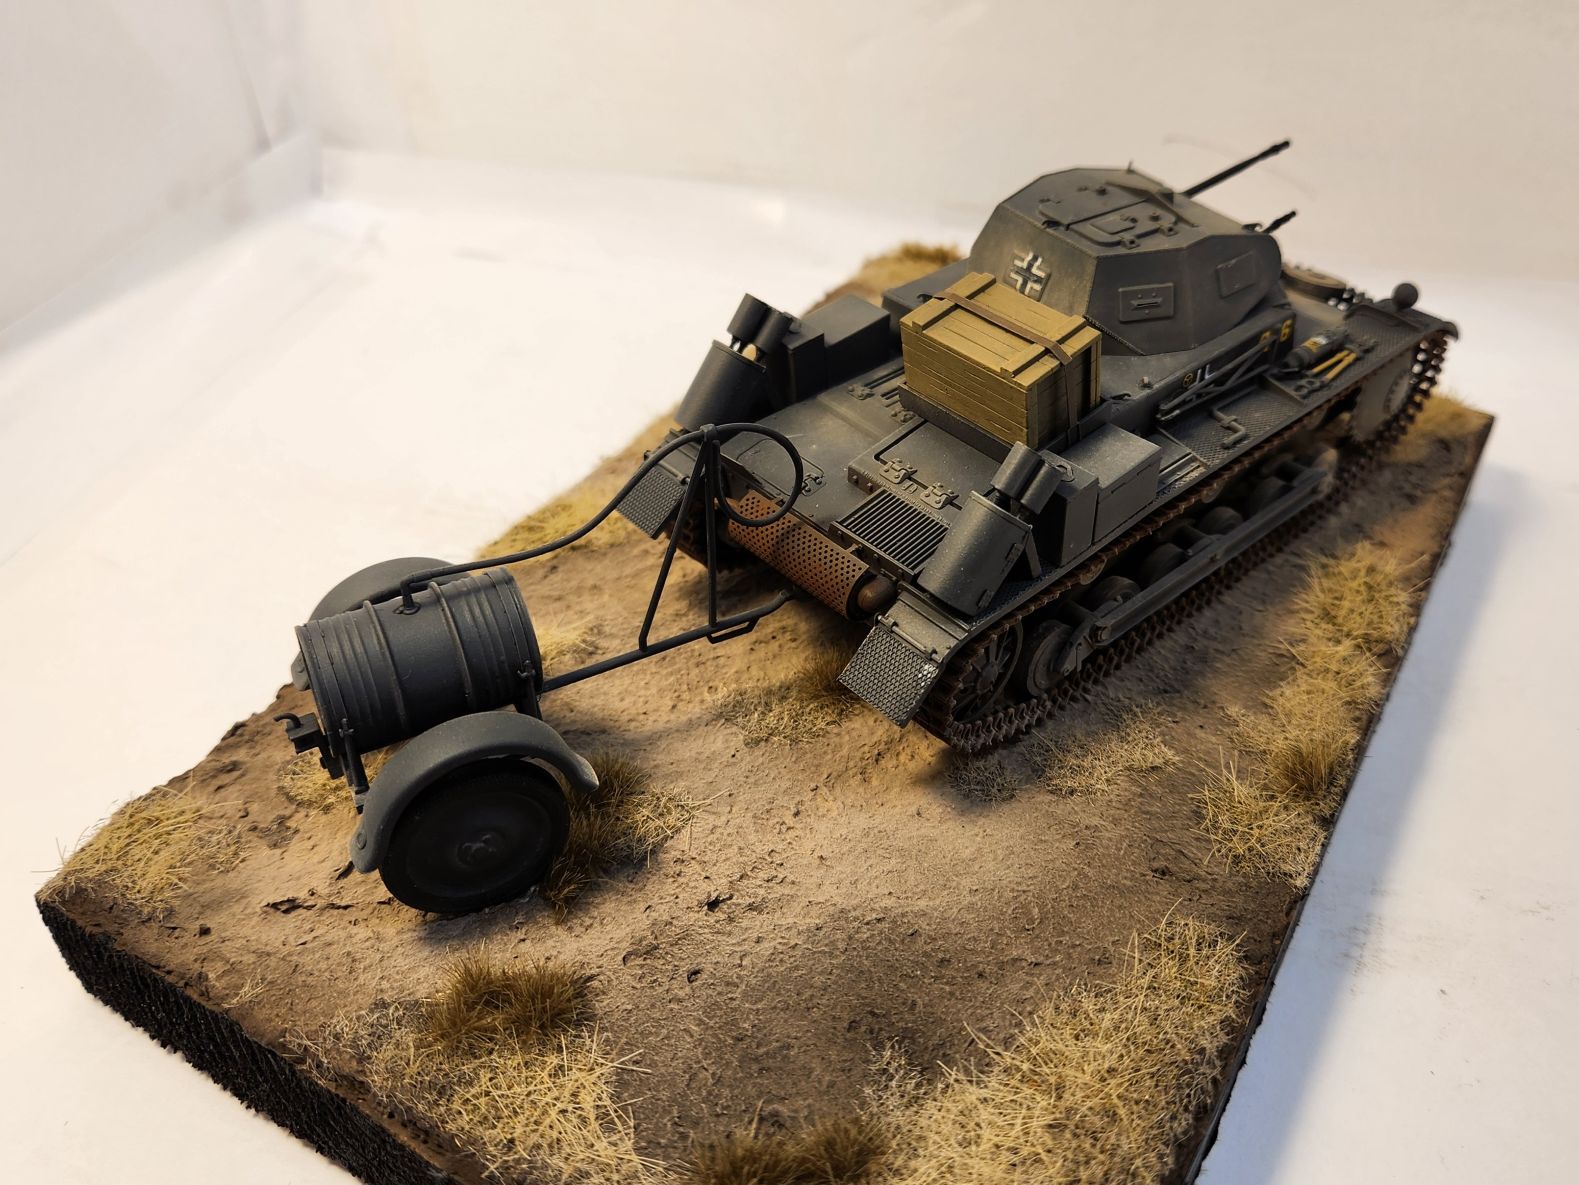
And in Mead’s very nice, very dusty Flak Pz. I that just looks like a nice modulated overspray to create a the dust affect.
Again the use of the expression “dot” baffles me here???
Sorry
At the risk of running a horse that has already been trotted out in one too many races around this track:
My go-to solution is to give the finished model a fine, very dry coat of Matte Varnish. (Tamiya TS-80 rattle can is my favorite.) Then using soft oil pastels (pigments) scrub the pigments into the slightly rough matte surface with a short bristle, stiff brush to achieve a near permanent affect very similar to the “Dot Oil” efforts seen here.
(WIP)


Color Shift/Modulation
Or even this extreme, as seen below: Light Tan & Yellow Oil Pastel dust applied over a black frame & wheels with then a very heavy coating of teal colored pastels over a US Olive Drab base coat for that “super faded” Russian look!
p.s. Except for the last, these are all very easy 10-20 minute weathering jobs.
1 Like
Titanium white is avery strong color andrequires less of it.
The other thing is when people demonstrate this technique its shown with too much oil paint being used . It only requires very small dots to achieve the effect
How does AK Real Color store over time?
I’ve learned that lol, used too much white once and it overwhelmed I now use a tan mixed from white ochre and brown
I’ve found they store well. Now I don’t have any really old bottles but I think it will be at least as good as tamiya
But how do you achieve the Dot affect? Air brush? Flicking paint onto the surface from a brush? What?
As I learned it, you just use a small brush to dab little dots of the oils onto the surface, then use a wide, flat brush with thinner to blend them.
I prefer weathering with paints because in my experience pastels fade and are two fragile. Plus, the finish is more…how do I describe it…deep or 3-dimensional with oils. Pastels can look thin to me.
To each his own. This is where the “art” part of the hobby comes into play.
There are different ways, but most use a brush or toothpick to apply ‘dots’ of oil paint all over the model.
As I said above, people take it overboard and turn the model into a measles case, the result of which I do not like. The base colour is destroyed, not enhanced, and the result really overpowers everything, especially when used in streaking - the result what I call a zebra finish - bands of, to me, unrealistic colour shifts. See this video, especially the turret about 8 minutes in for an example of what I mean:

This is a similar approach but with far less paint and much more subtle effect - but some argue it is not a ‘dot filter’ technique but a ‘localised wash’ technique. I’ll stay out of that argument:

Like many things, these techniques are a personal preference and I am not saying my view is right - it is just what appeals, or does not appeal, to me.
I am NO expert at dot filtering, but I would say he used way too many dots on the turret. It does seem as if the original color of the turret is mostly gone.
1 Like
OK. At least all this makes much more sense to me now. Thank You.
1 Like
I have had a similar experience. The part of the tank got yellow and I was not able to remove it with a brush. This was already the second time. Next time I will use gloss varnish. It was now used directly on the basic paint layer.
Thanks for posting this.
I know the thread is old, and I might not get a reply, but I’m curious, because he doesn’t say anything about in the video: is he putting some thinner on the painted surface before the dots, is he using a brush dampened with a little thinner to spread the dots, or is he just diving in dry? ![]()
I’m trying to figure out how to weather an all white Aerosan Russian snow machine.
Thanks
1 Like
You can try any of those ways. A bit of thinner on the surface prior to putting the dots on can make them spread out a bit though- they might end up a bit runny.
Similarly you can thin the oils by having your brush moist with thinner (or mixed into the oils on your palette). This is handy if you want to go a bit lighter with a very dark or very light color.
In any case once you have the dots on you can blend them with a moistened brush- of course you could do it with a dry brush but it would likely stick to the model more than you want or require. Leaving the dots of oil too long before blending can also leave little stains- so just watch out for that- doubly so on a white painted model!
2 Likes
All of the weathering on this tank is done with pigments.
The tracks are painted in a color close to what German tracks tends to look like after some time infield, and then I simply shake out a series of rust colors and blend them in a bit until I get the metal look I want. Then when that is set I start adding colors that are shades of the base it will be on, so various browns depending on if it is sand, mud, loam, etc.
The vehicle usually just gets a filter to blend the camo (if it is multicolored, in this case I just used a wash of darker gray in some spots). Then I get a large soft brush (makeup brushes are great, but don’t use one that has been in actual makeup – buy a new one), dip it in whatever dust color would be appropriate for the underlying soil, knock off the excess, then lightly apply it over the vehicle with emphasis on the lower parts and front facing areas where dust would accumulate the most.

As this is meant to represent a relatively ‘young’ vehicle I did not wear the tank itself that much beyond the exhaust
which would burn the paint off fairly soon and is very obvious on a lot of tanks. That is simply rust-colored pigments sprinkled on and smutzed around until the Eye-O-Tron registered a nominal ‘rusty’ level had been reached.
On an older tank I tend to use graphic pencils to simulate wear along the edges where plates come together, and where the crew contact the metal regularly like grab handles and around the hatches. Scratches can be simulated with fine pencils as well. I have used Berol Prismacolor pencils on some builds.
There are also ways of simulating other effects such as oil spills and rain marks without resorting to oils. I never got into the dot filter myself as most of my builds stay at the “museum display fresh” level until I decide what kind of base to put them on later, when I do an actual weathering to represent the conditions the base exhibits. I feel oils are very useful in painting figures, though. The drying time is also a factor for many, I feel.
4 Likes
Thank you.
I use pigments a lot myself, so I may use them on the Aerosan, The white finish is just GRIMY in pics, so just looking around for the best method. Gray pigments may be best.
1 Like