I talked with Luis Vargas of Vargas Scale Models this morning. He is currently working on the 3D model for an M777. This is the currently fielded US 155mm towed howitzer that is being supplied to Ukraine. This is Vargas’ first foray into modern subjects and was prompted by their use in Ukraine. The kit will be 3D printed resin in 1:35 scale. It can be posed in-action or in tow. He is thinking of including wire for the hydraulic and electrical cabling vs trying to print those. Vargas usually includes a good variety of gun implements. Combining this kit with AFV Club’s 155mm ammo should allow for a nice diorama.
We’ve waited a long time for an M777. It makes a great load for the soft skin guys, and is enough to give us old cannon cockers a woody…
7 Likes
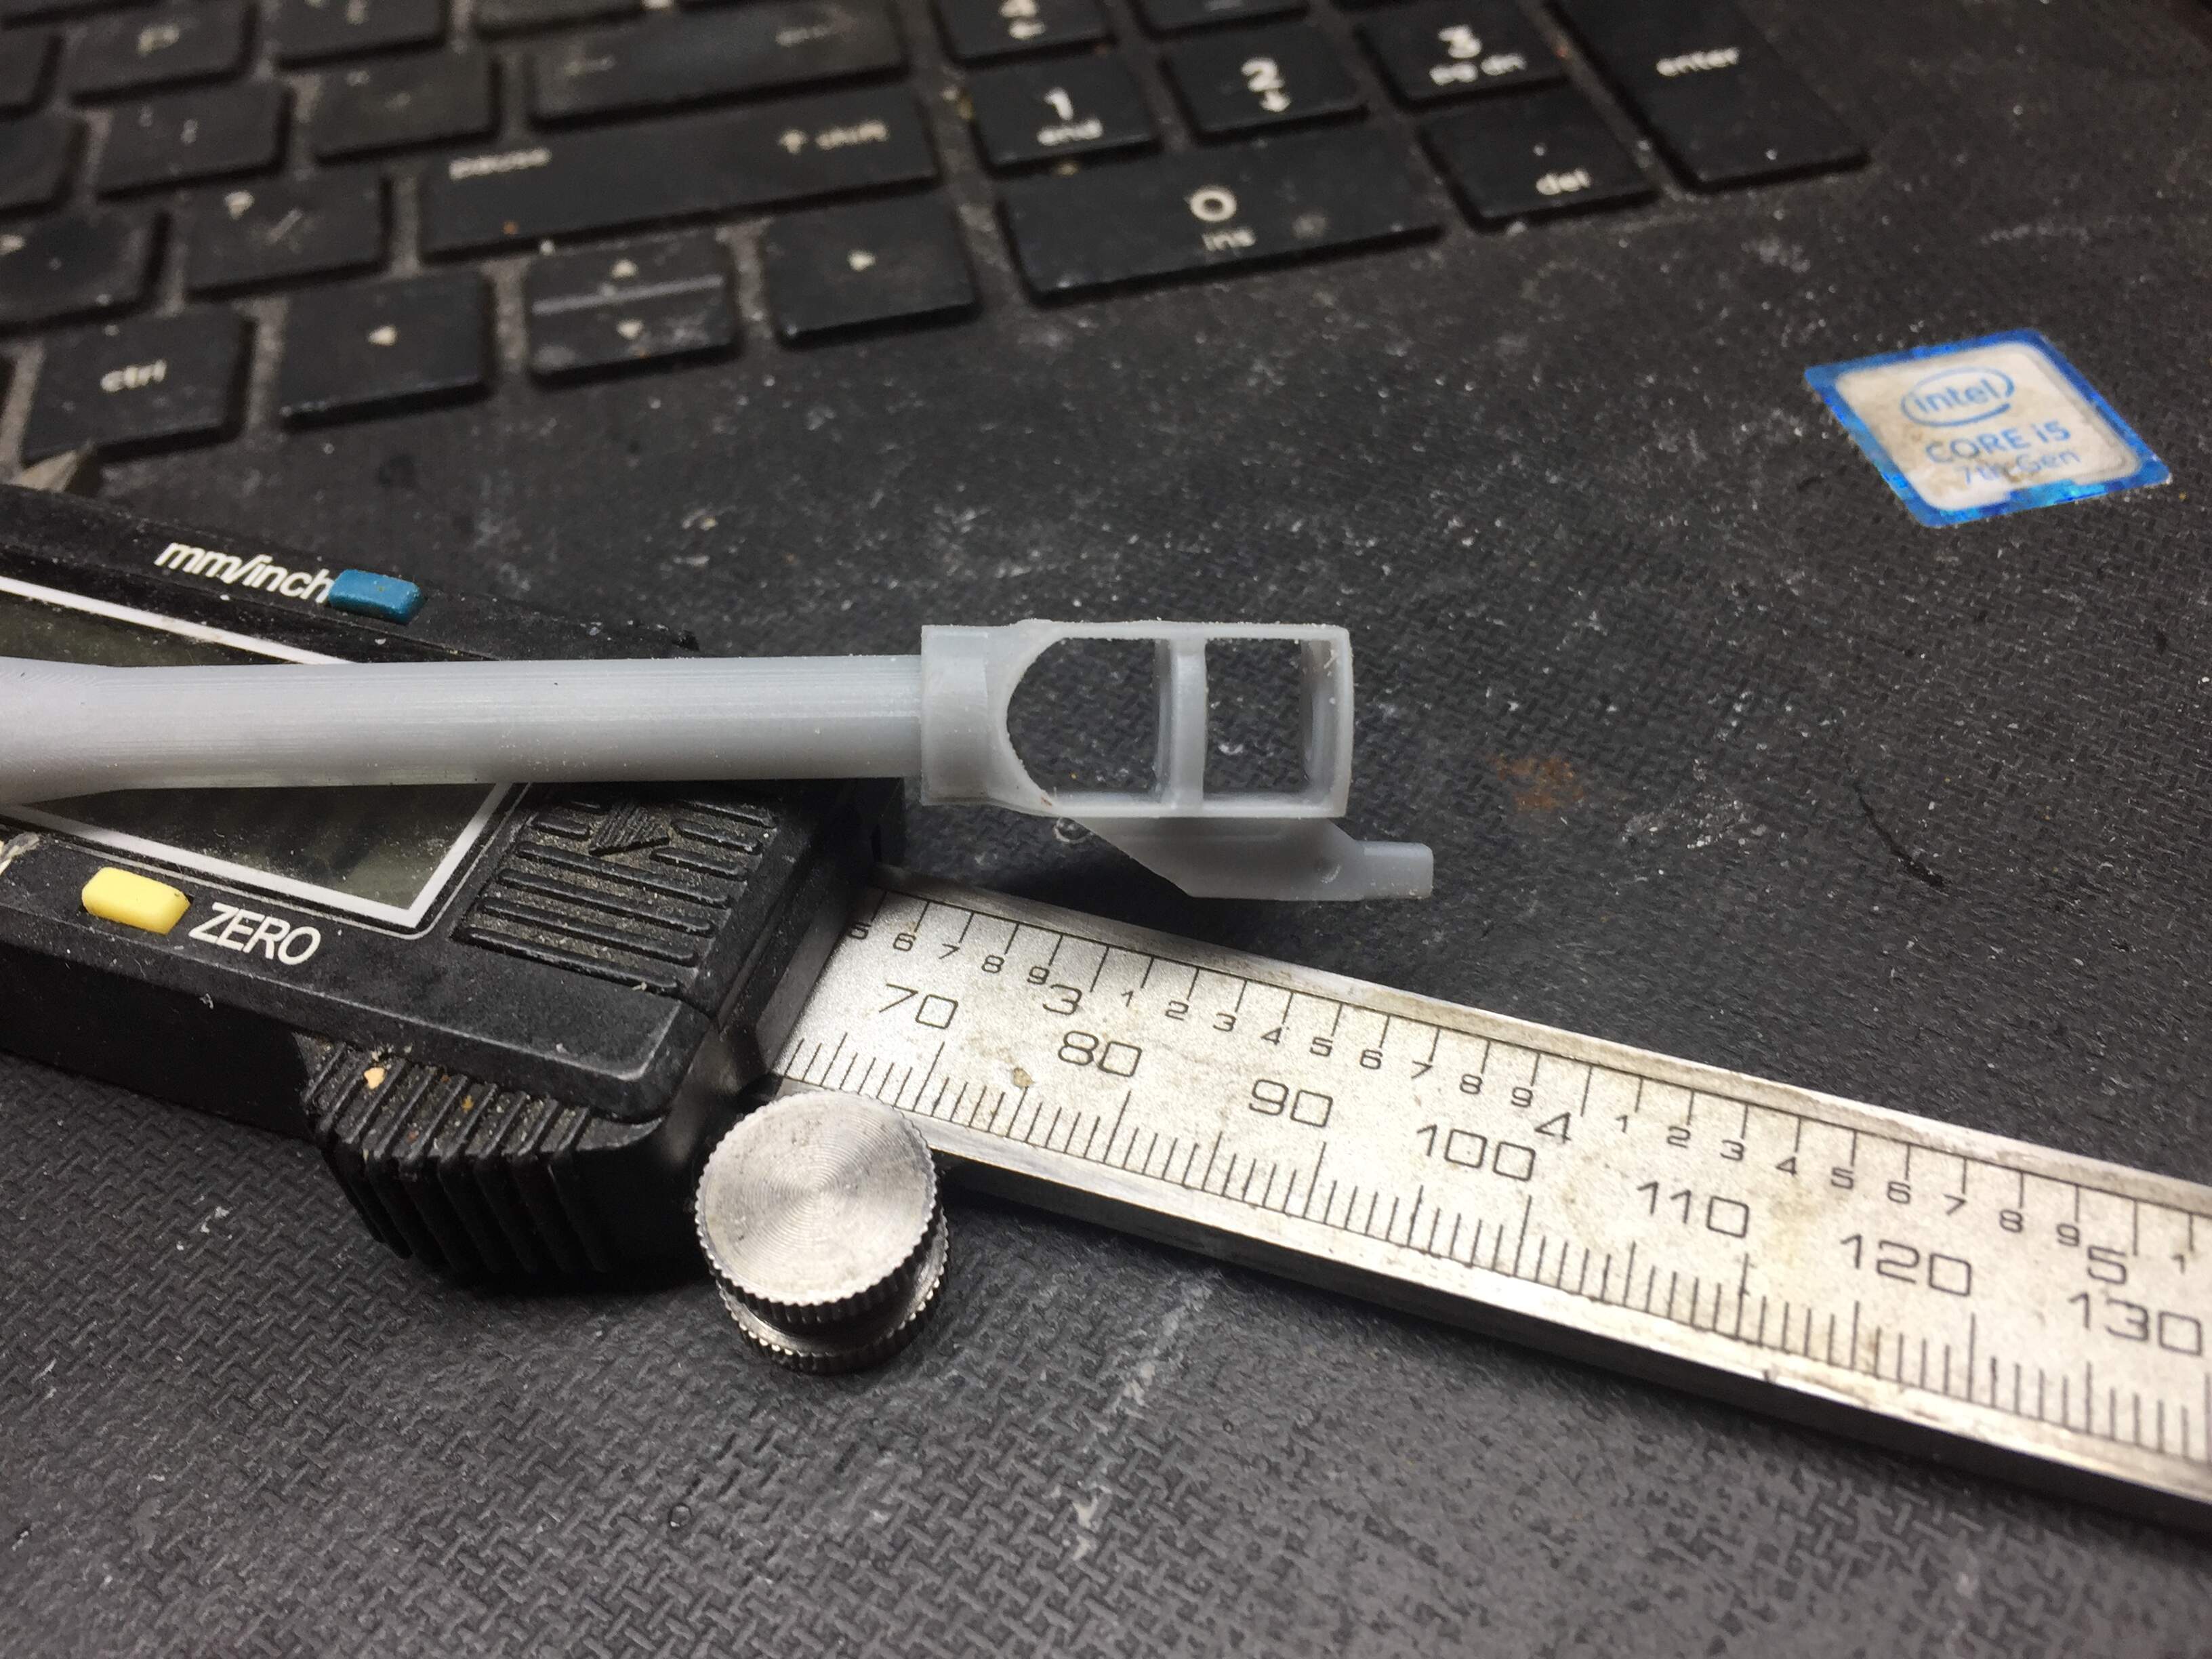
Test print of the muzzle brake
1 Like
That looks pretty nice. I’ll have to keep an eye on this one.
It’s getting there. That middle baffle is a bit thick, but the main thing is that it should almost be directly in front of the curved portion at the rear. Would your friend benefit from my pretty thorough walk around?
18Bravo, I’m sure that he would benefit. I was only able to provide “through the fence” at the Ft. Sill Gunnery Dept photos.
I have also some very detailed walk-arounds. You can tell Mr. Vargas that I am willing to share.
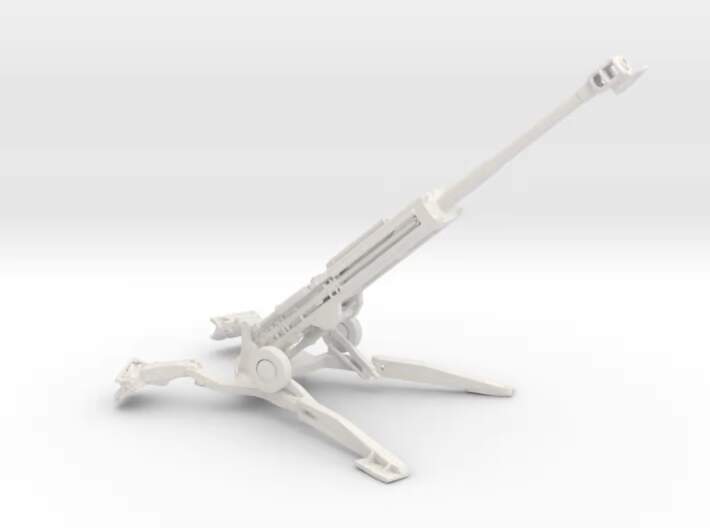
There is a 1/35 M777 on Shapeways. White plastic usually isn’t the most detailed, and I can’t comment on the 3D print quality, accuracy of the M777, or the reputation of this seller.
https://www.shapeways.com/product/2N4ANJ8A9/1-35-scale-m777-155mm-gun?optionId=191684474&li=marketplace
1 Like
From what I have seen, this one looks bad. It looks like someone carved it from frosting; really weak on details.
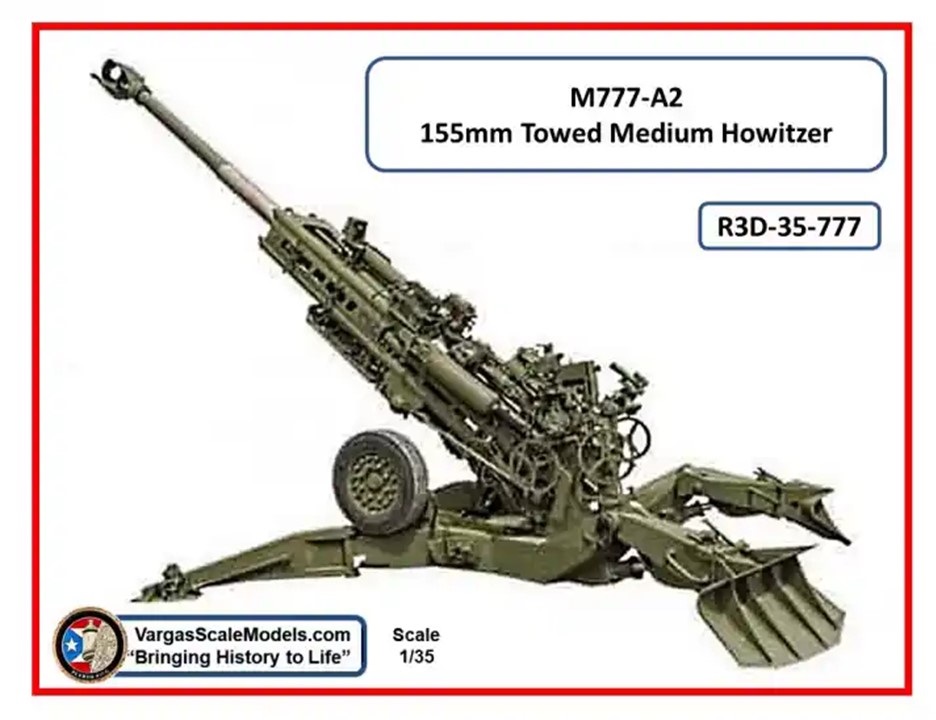
Vargas has released a boxart photo and announced it as coming. If it looks as good as the artwork, it should be pretty nice. I’ll be watching to see how it comes out and probably get one.
It should be easier to build than the one I scratched/converted a few years ago for a customer.
https://cs.finescale.com/fsm/modeling_subjects/f/3/t/162628.aspx
2 Likes
I just send Mr. Vargas my M777 references. he told my that he has 100 pics plus drawings. With my pics he will have now 600. Wonder what Rob Skipper has to offer? Should be a super kit then. 
1 Like
@HeavyArty Yes, the Shapeways M777 looks very simplistic for the high price. We’re all rooting for Mr. Vargas’s M777! 
From the horses mouth:
He’s already got the M777 listed at $74.50
Nice. I couldn’t find a website for him, just Facebook (which I can’t access from work). 
Send him my pics last weekend. Sadly, not even a “Thank you” came back. 
I did not hear back from him either. Reason enough for me not to deal with him. Ever.
Folks pay pretty good money for my walkarounds. I offered them to him for free, and did not even ask for any consideration when his kit comes out.
So folks - you can pay for something that on the ONE part shown already already exhibits poor proportions, or you can wait until one of the major players finally takes up H-H’s or my offer to get a proper kit. It shouldn’t be long. I haven’t been pimping it out as much as I could have because well, I do other things.
1 Like
@18bravo Im currently in contact with him, it took a few days but he responded and seems quite friendly.
I really hope to build up the print someday.
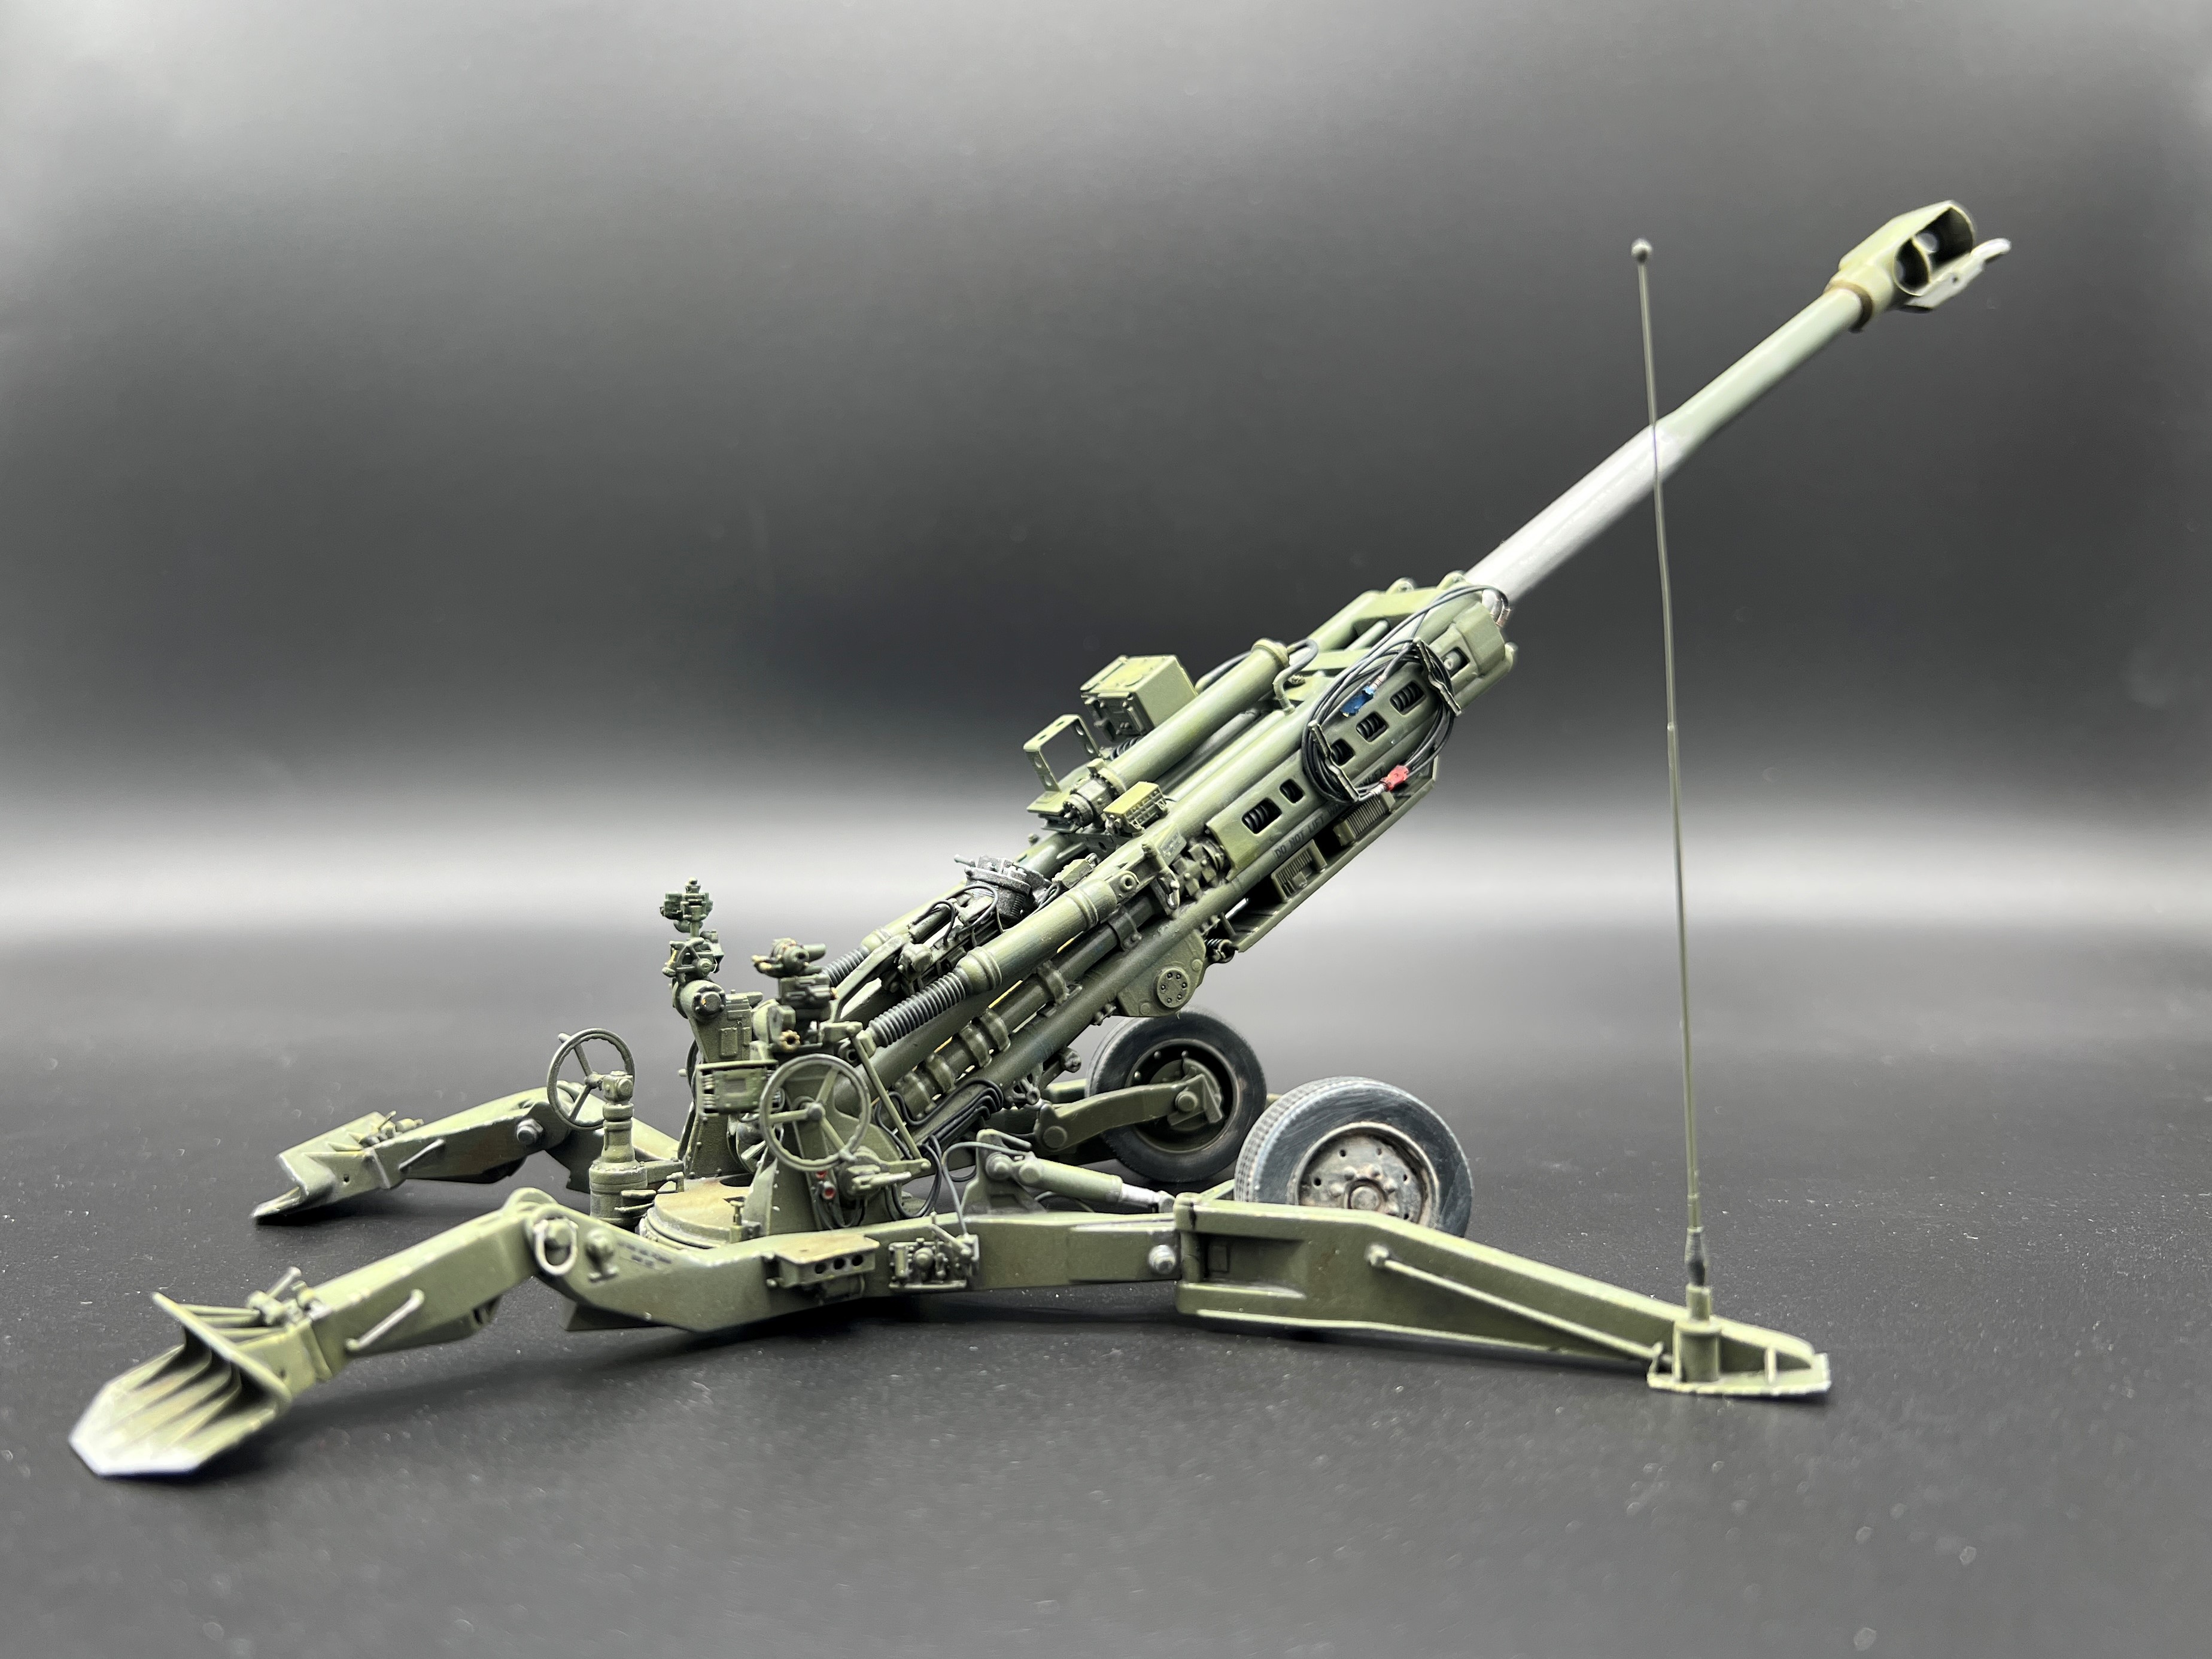
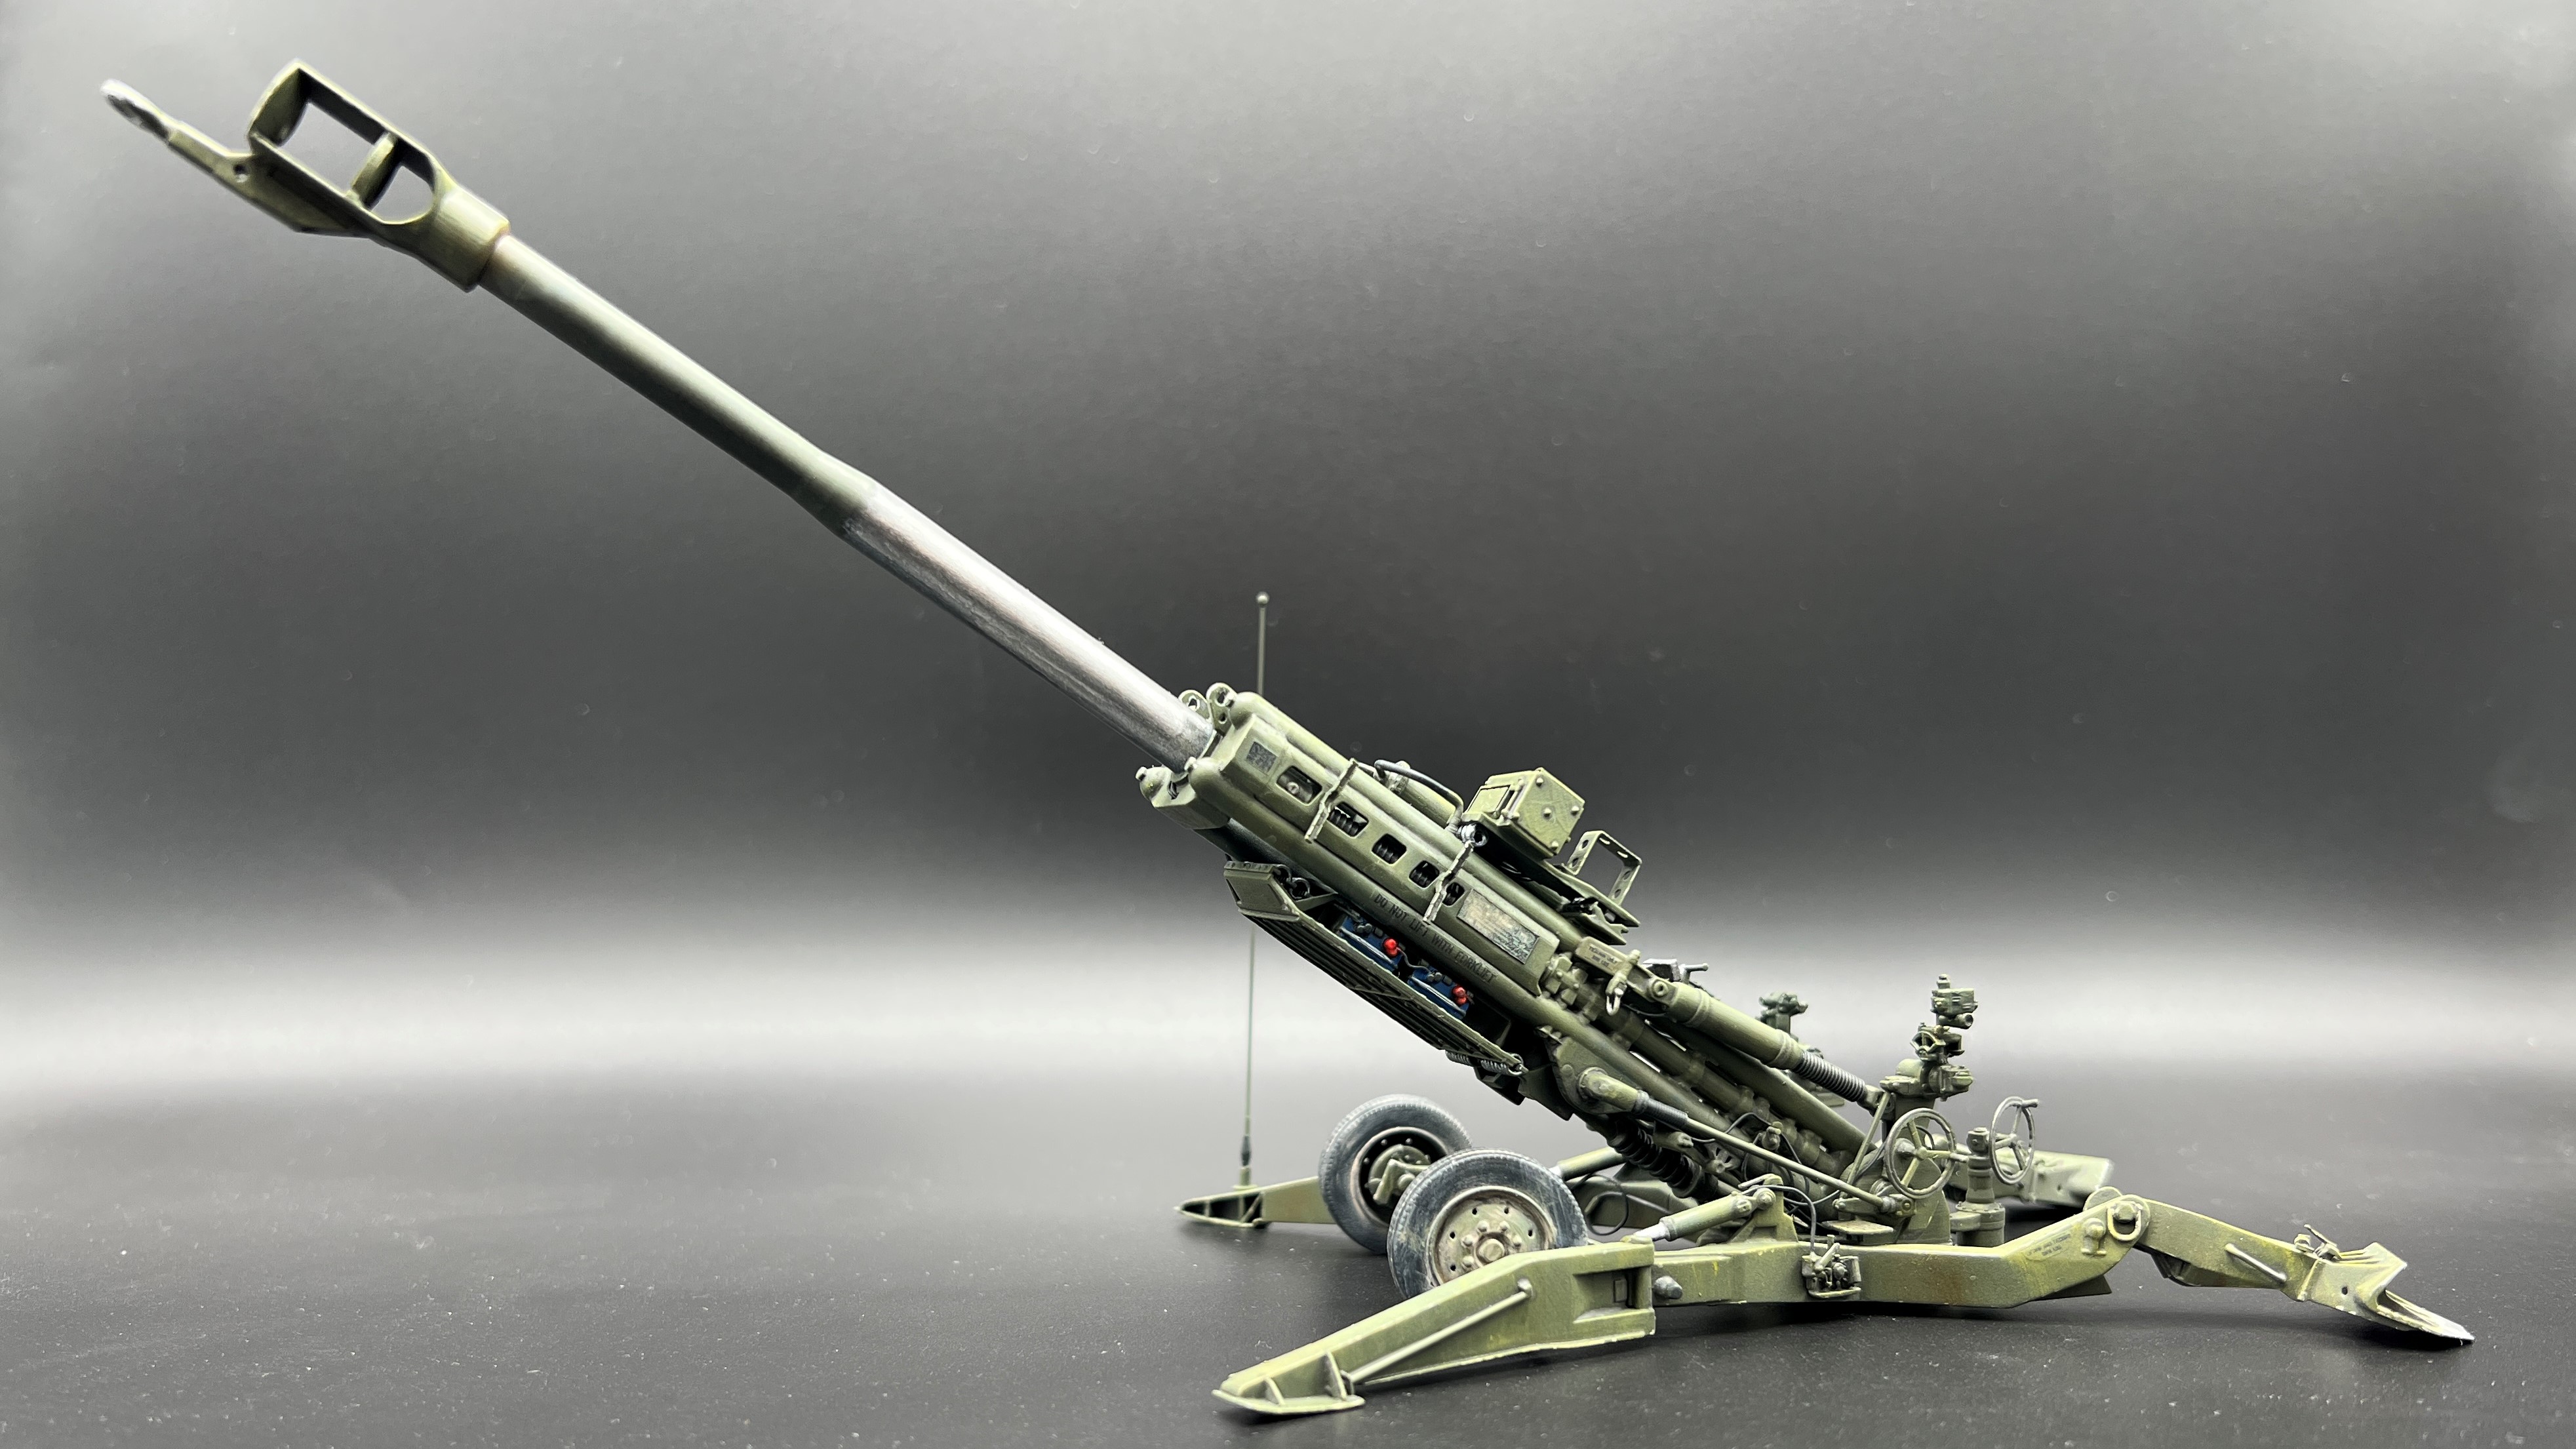
I received mine. Tons of fine detail. I’m struggling with the fitment at the moment. It’s a first run so could be challenges to overcome.
Let me know if there’s anything you’re interested in seeing. I’ll take photos of what you’re interested in viewing.
1 Like
It’s not a simple weekend build; but it is definitely worth the effort. Mine is ready for the display case.
3 Likes
Great work! Looks brilliant.
I finished mine, but certainly doesn’t look as we’ll done as yours.
Questions:
-
how did you do the hoses? I saw part 2 but I couldn’t figure out if those were missing from the box or if those were from parts of spare resin parts.
-
where did you find the decals?
The cables and hoses are lead fly tying wire. It is my go-to for this type of work - easy to bend and cut and stays where it is put. I used .020 and .015 diameter. I routed them using walkaround photos and the cable diagrams in the instructions. The airbrake lines and couplings are from the Aber PE Pneumatic joints, nipples and valves.
The decals are home made from walkaround photos. I created the decals in Word with a stencil font and printed them on my ink jet printer. Send me a PM and I’ll share my decal sheet such as it is.
I clipped the data plates from walkaround photos and printed them as decals. They did not turn out as well as I had hoped. If I had more time, I would have pulled the data plates from the TM, reversed the colors and used those for the data plate decals.
The antenna matching unit is resin from Djiti. I placed this is a bit of Evergreen tubing for a bracket. The antenna is Albion aluminum tubing and silver rod. The safety cap on the end is from dipping it in black medium CA multiple times.
This kit builds up into a great model with a bit of work.