Take no prisoners D - beat it into submission !
2 Likes
![]()
![]()
![]()
1 Like
Thanks for the support guys, definitely some aggressive techniques at play here!
Well, we have an airframe, and considering what I had to work with it has come out ok. A couple of shims, some CA and Sprue Goo, a good sanding session and we will be good to go with primer. Maybe. Hopefully ![]()
![]()
Cheers, D
14 Likes
You are doing an awesome job on this kit, cant wait to see some paint on it. Cheers.
2 Likes
Holy Cow… is that modelling bench or a surgery table. Nice work Damion, seriously!
2 Likes
Excellent job of coaxing it all together D! Plasticard is our friend, and so are clamps, rubber bands, and Tamiya masking tape! LOL
4 Likes
Excellent work!
1 Like
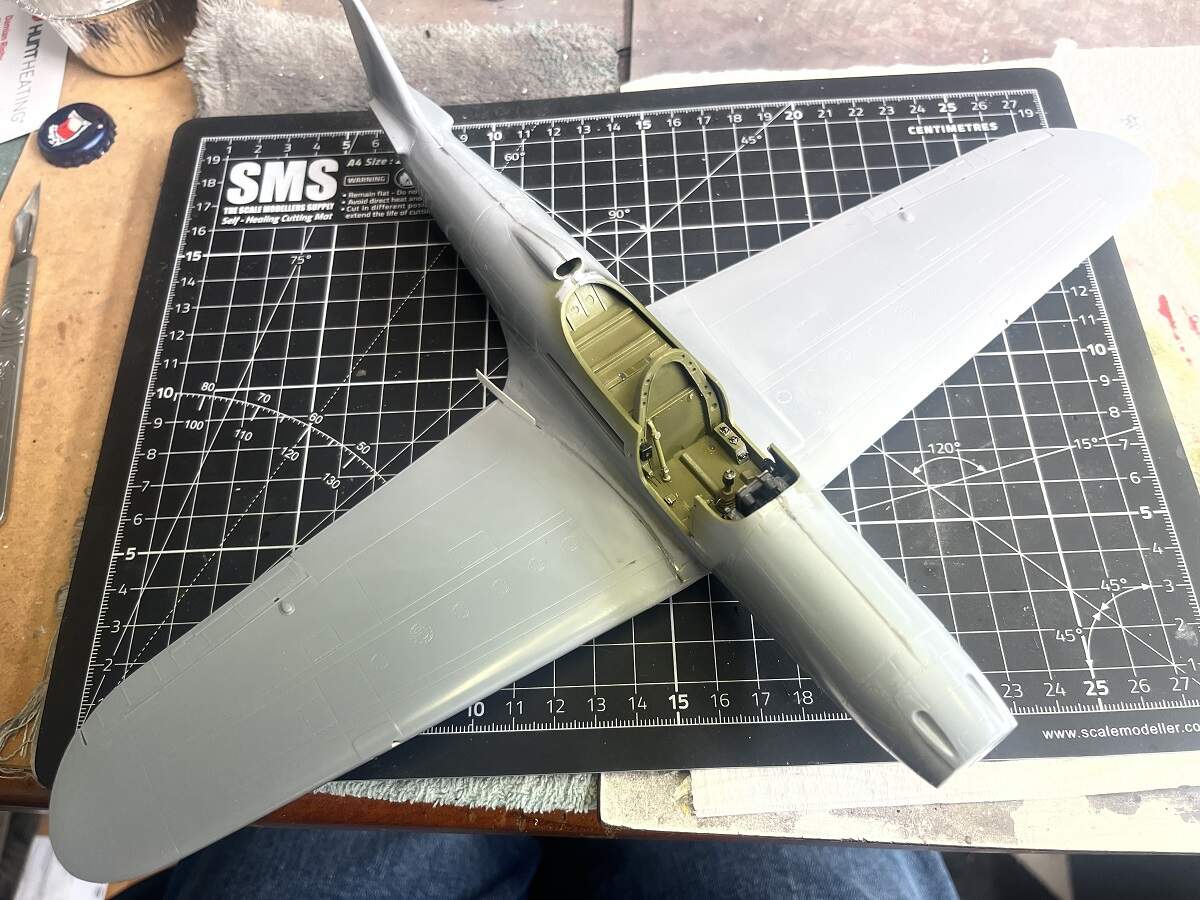
And the great 2023 “War on WIP” begins! Every year I tell myself that I will reduce the WIP list by at least 2 before I start a new kit. Every year I fail miserably, but at least I have managed to stop my WIP list from growing this past year. I count that as a win ![]()
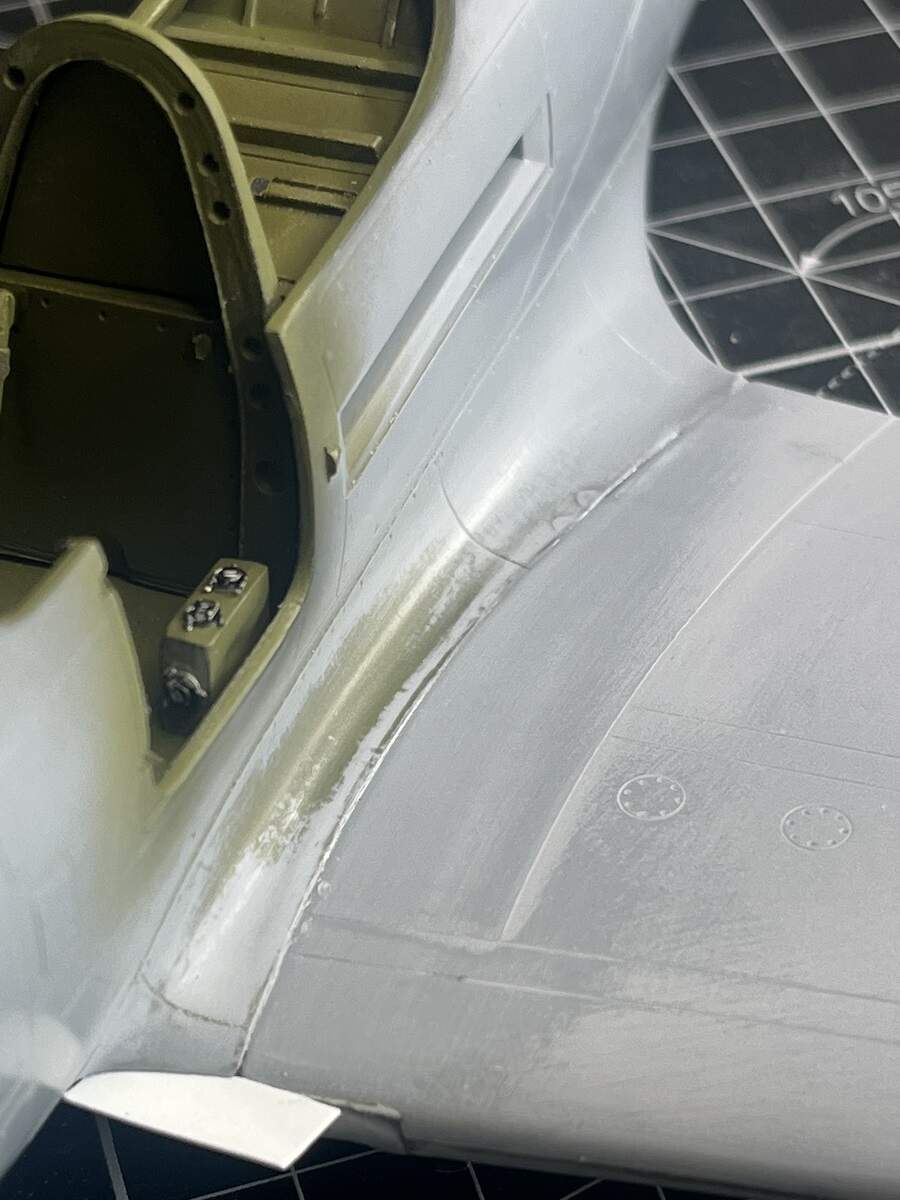
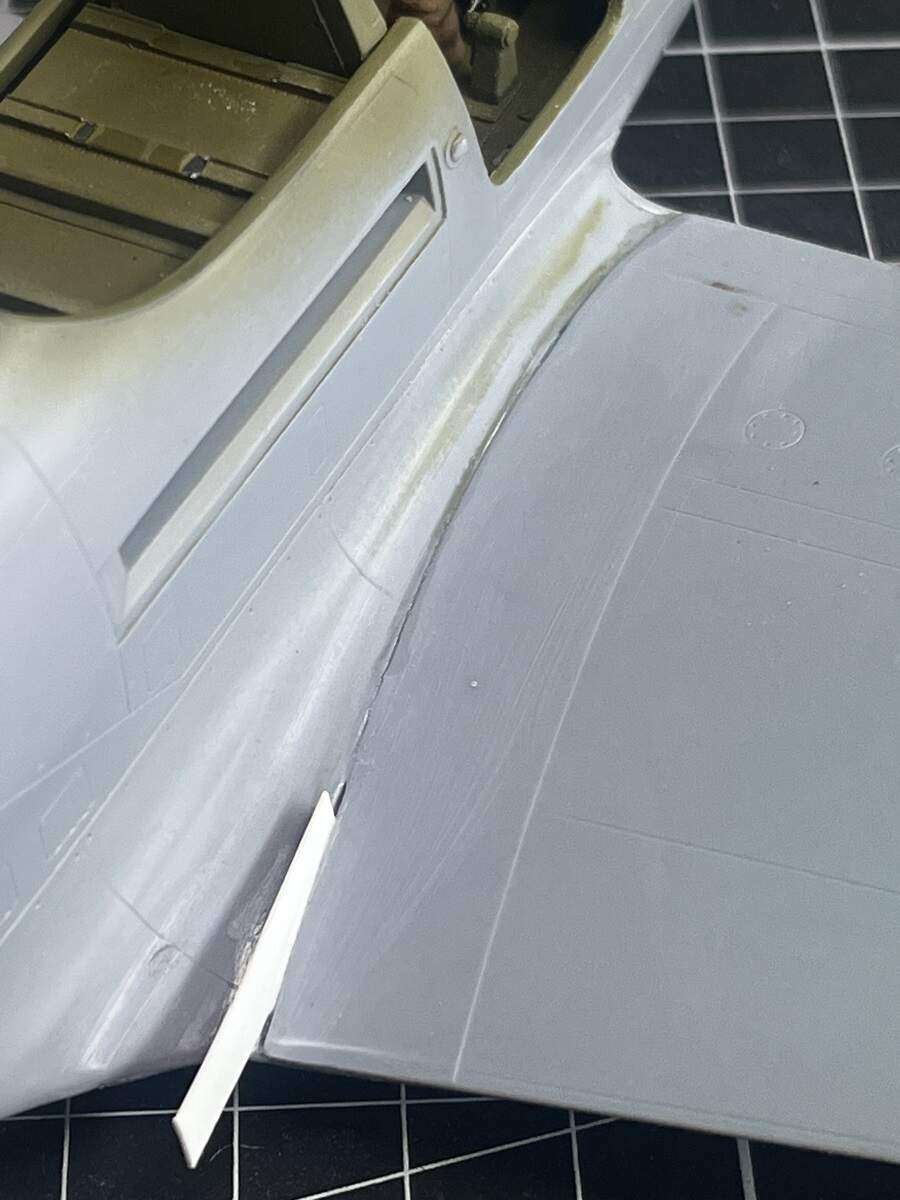
First in the hit list for some special attention will be this build. I’ve pretty much finished the gap-fixery and have just one area to tidy up (the starboard wing root needs one more light treatment with sprue-goo), so next point of order is getting the cockpit clear part fixed in place.
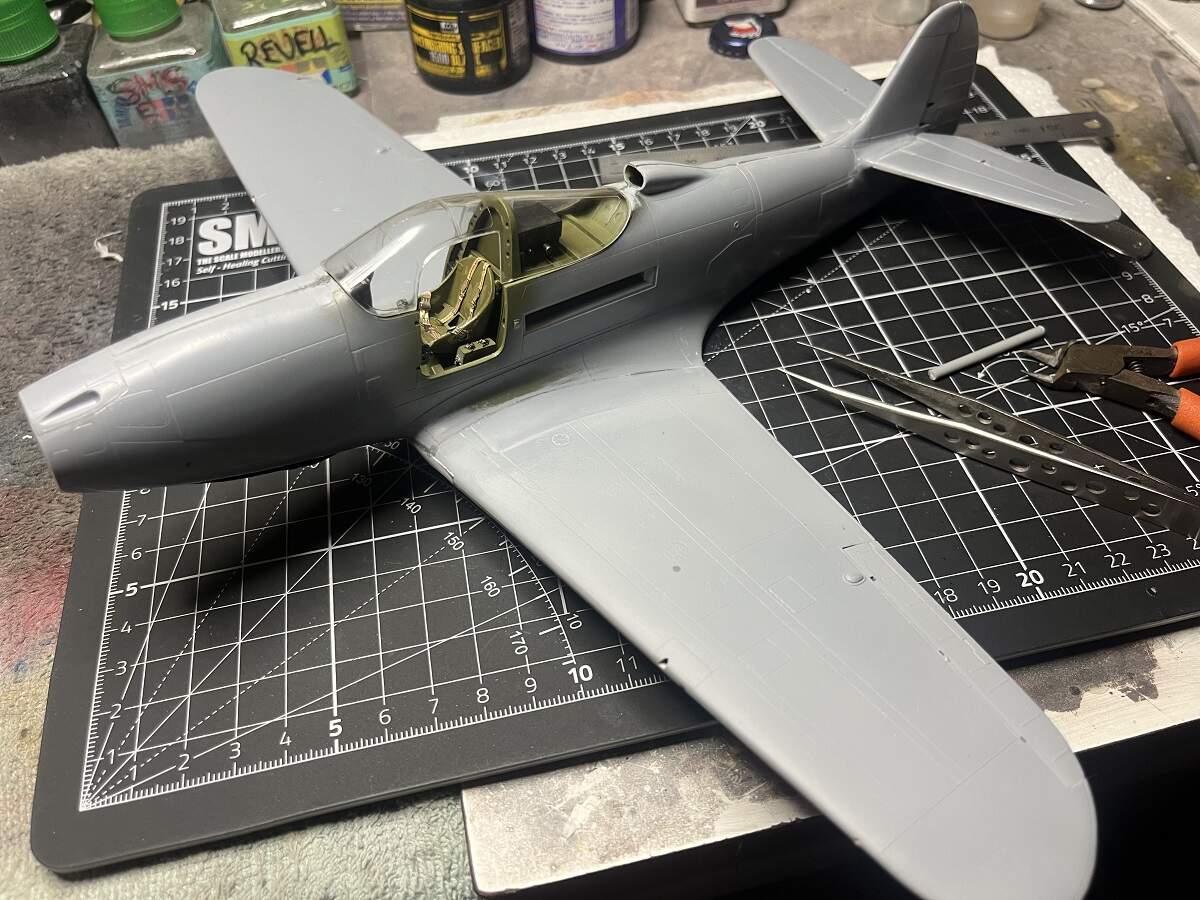
A quick dry fit shows that this won’t be quick or easy. Definitely some work to do both front and rear of the car-door openings.

It seems that the headrest is mounted too high and the clear part is hitting it at the top and wont drop far enough to sit on the deck sides. Rather than trim off the headrest arch, which is front and centre when viewing the kit, I opted to shim up the deck sides a little with some thin styrene strip. Once this is cured I will sand the back end to blend it with the rear curve profile and test fit again.
Cheers, D
10 Likes
After all those annoying fitting problems your Cobra develops nicely, D! The problem with the headrest and the misfit of the canopy is another annoyance. Now that you have used the profiles I wonder if the doors will fit. Or will leave the doors open? At least one?
Just checked the photos of my Eduard Cobra builds from 2020 I also had some problems with the canopy and the closed door but not with the headrest. I had to widen the canopy carefully with my fingers to make it fit properly to the rear cockpit. The fitting of the closed door of the US P-39 is worse than of the VVS P-39. I have one door closed on each build …
Torsten ![]()
4 Likes
Thanks for the feedback Torsten! The shims are about 0.5mm thickness, so hopefully won’t impact on the door fit too much. I will dry fit the canopy taped firmly in place and test fit the doors to see how they look. I’m planning to have at least one door open, maybe both. It’s such an unusual design and worth showing off!
Cheers, D
2 Likes
Argh! The canopy-fuselage mismatch strikes again! Hopefully you can get this one sorted out D! ![]() (And another WIP under control
(And another WIP under control ![]() )
)
2 Likes
Thanks Russ! Nothing my patented blend of delicate manipulation and brute force can’t handle I’m sure ![]()
Cheers, D
2 Likes
HA HA I spit my drink out laughing.
2 Likes
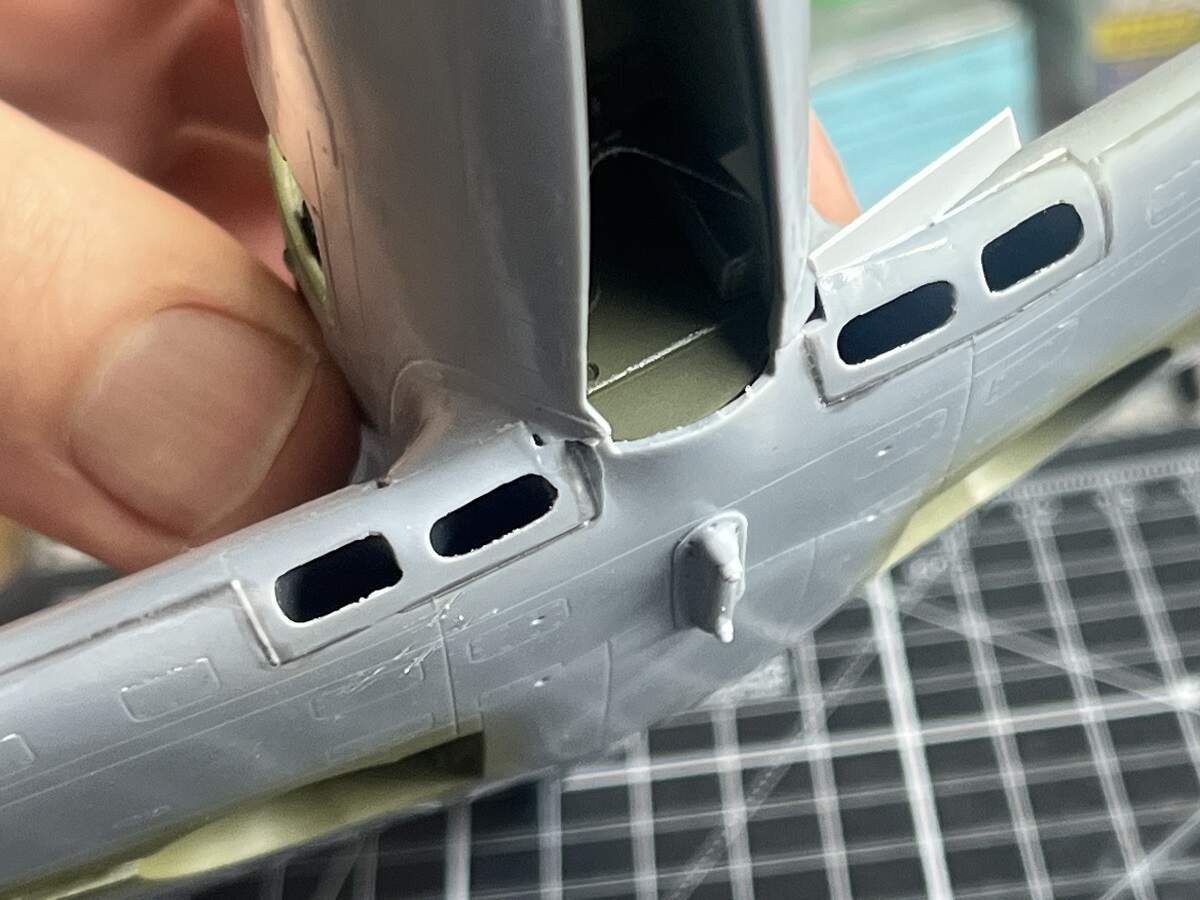
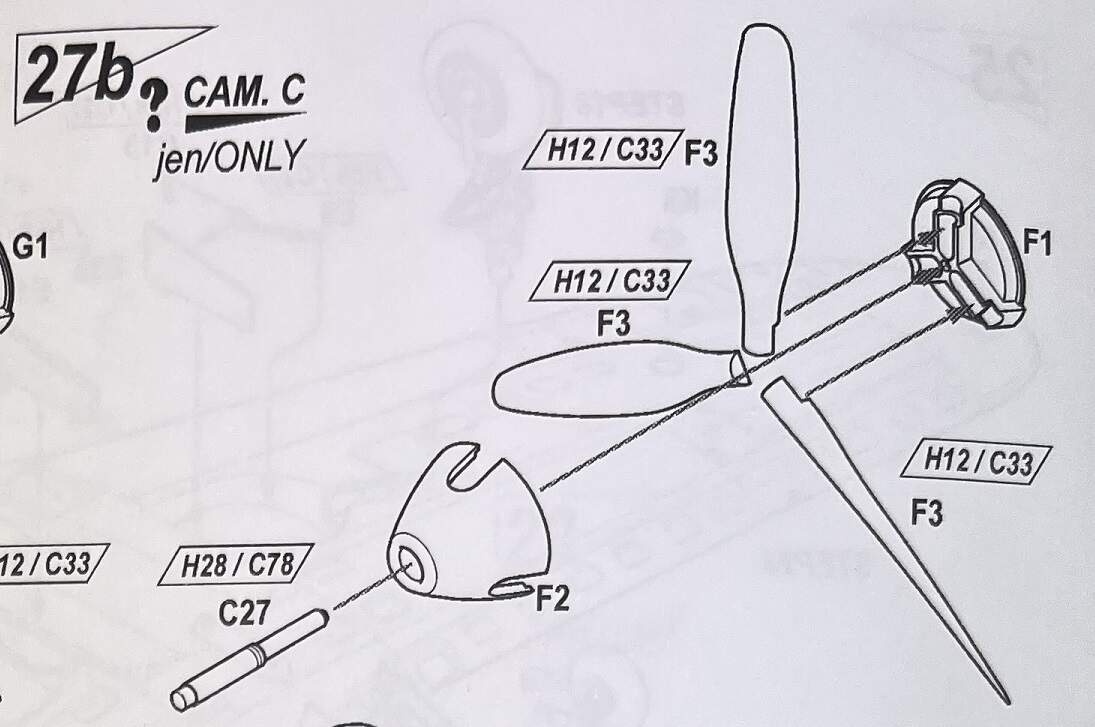
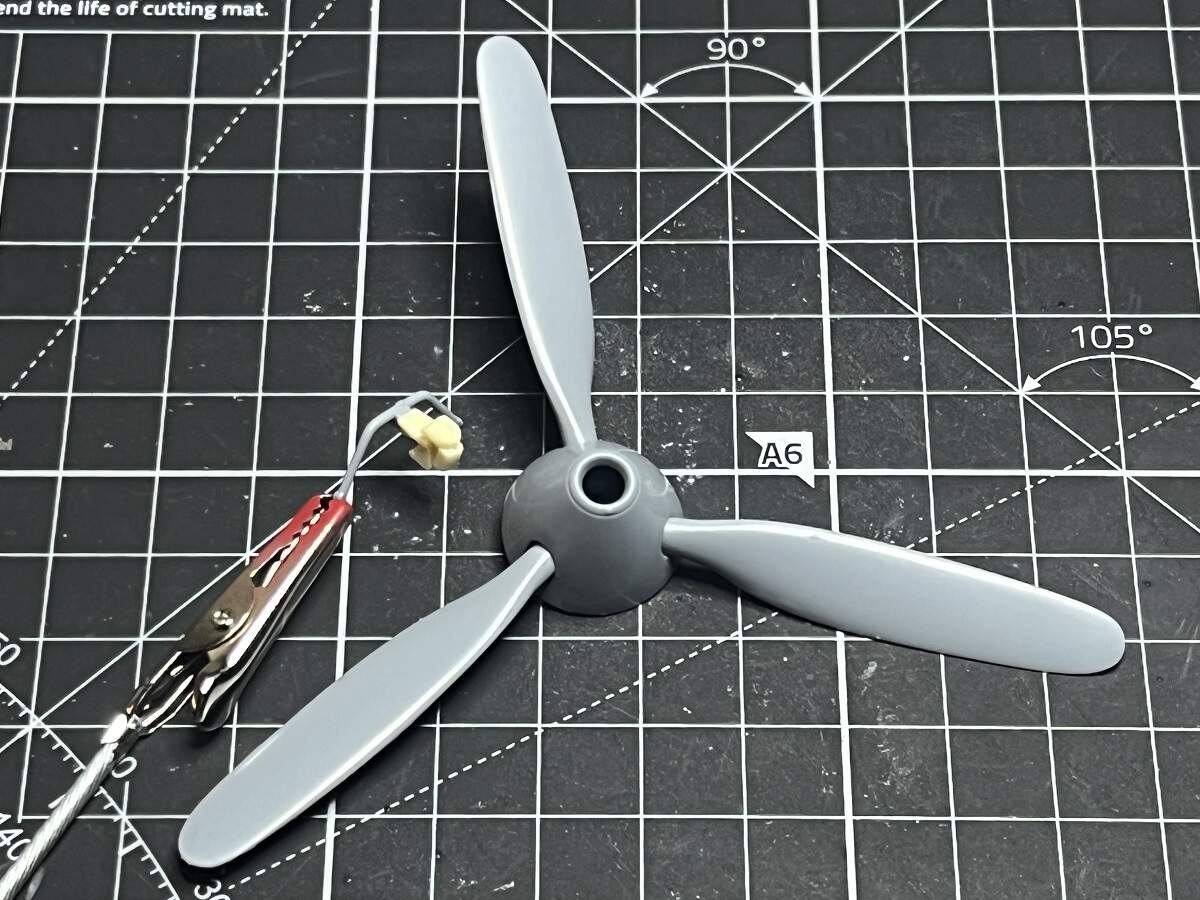
Moving on with some more sub assemblies while I tinker with the main canopy fit. The propellor assembly need a bit of cleaning up of flash and seams on the end of the prop shaft as it sits in a neat cradle in the spinner base to set the correct pitch.
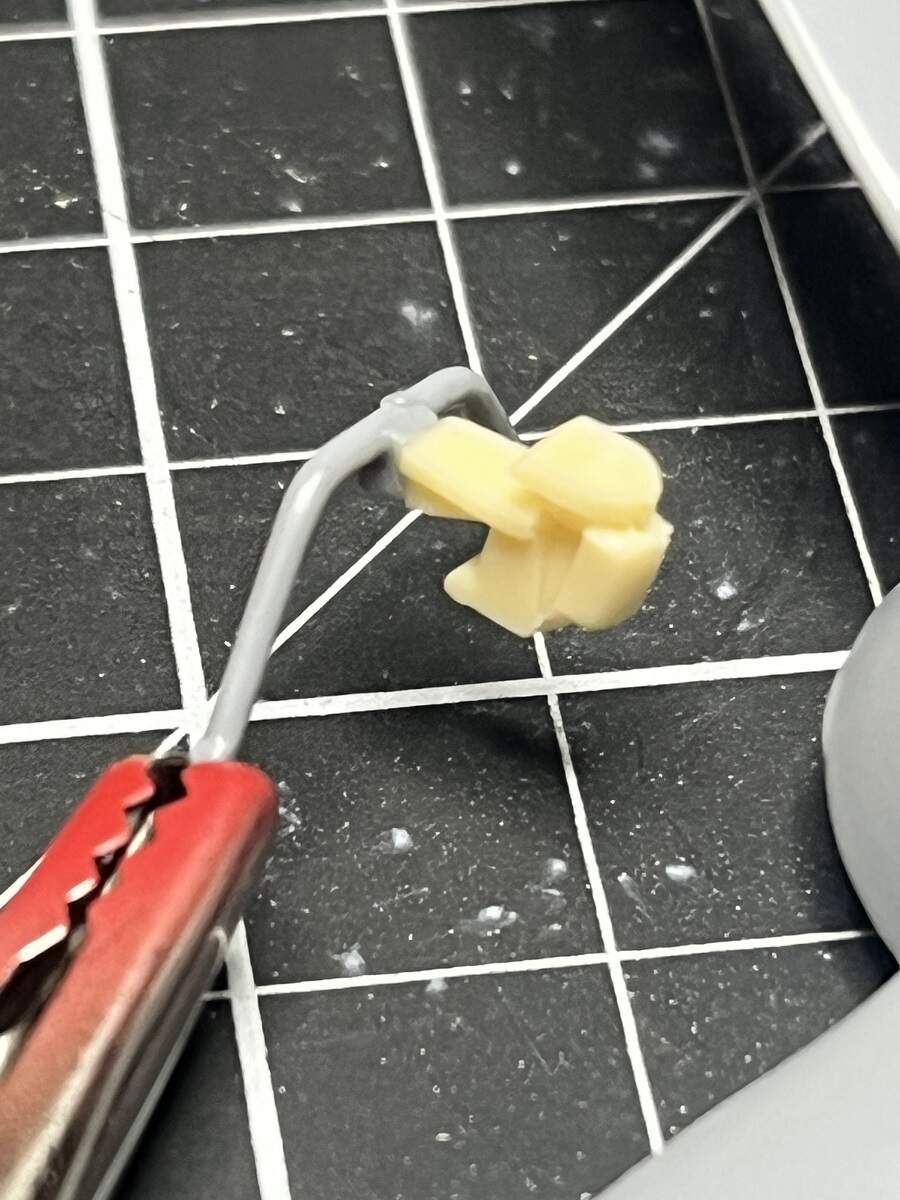
The gunsight assembly is a 3-piece affair with the frame in styrene, the body in resin and the small clear sight.
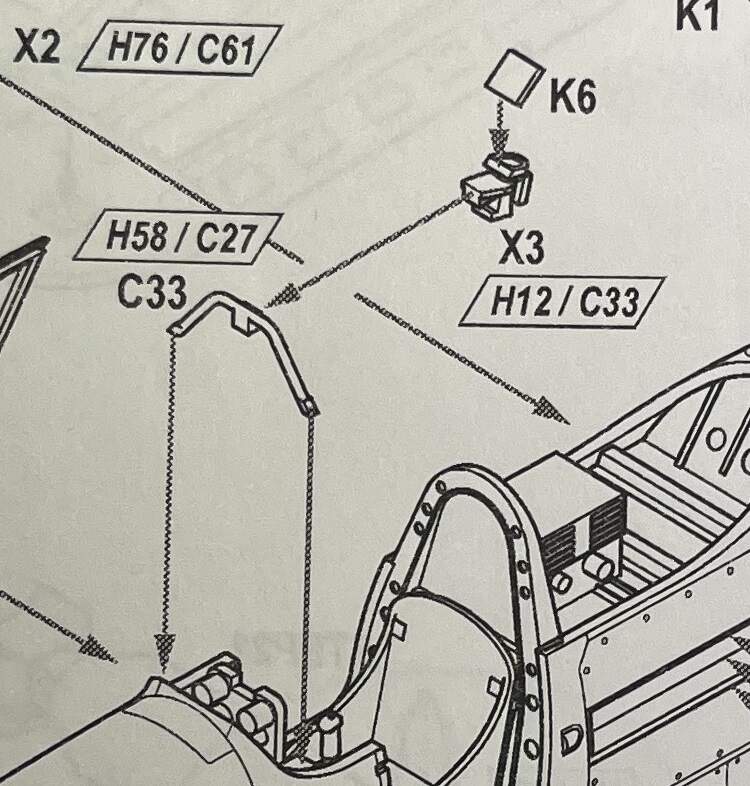
Once the parts were cleaned up assembly was straightforward.
Now this next chapter looks like a whole bunch of fun ![]()
![]()
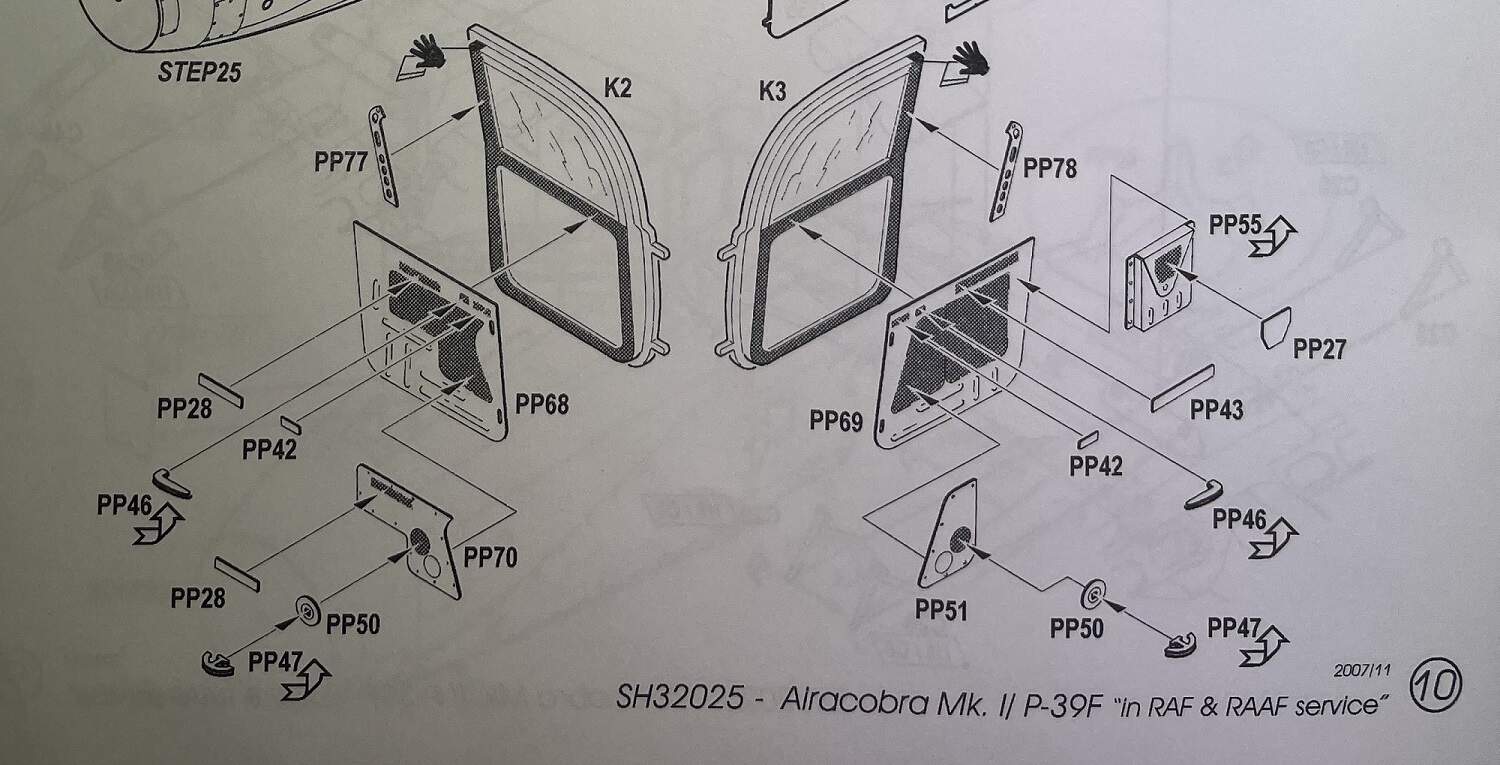
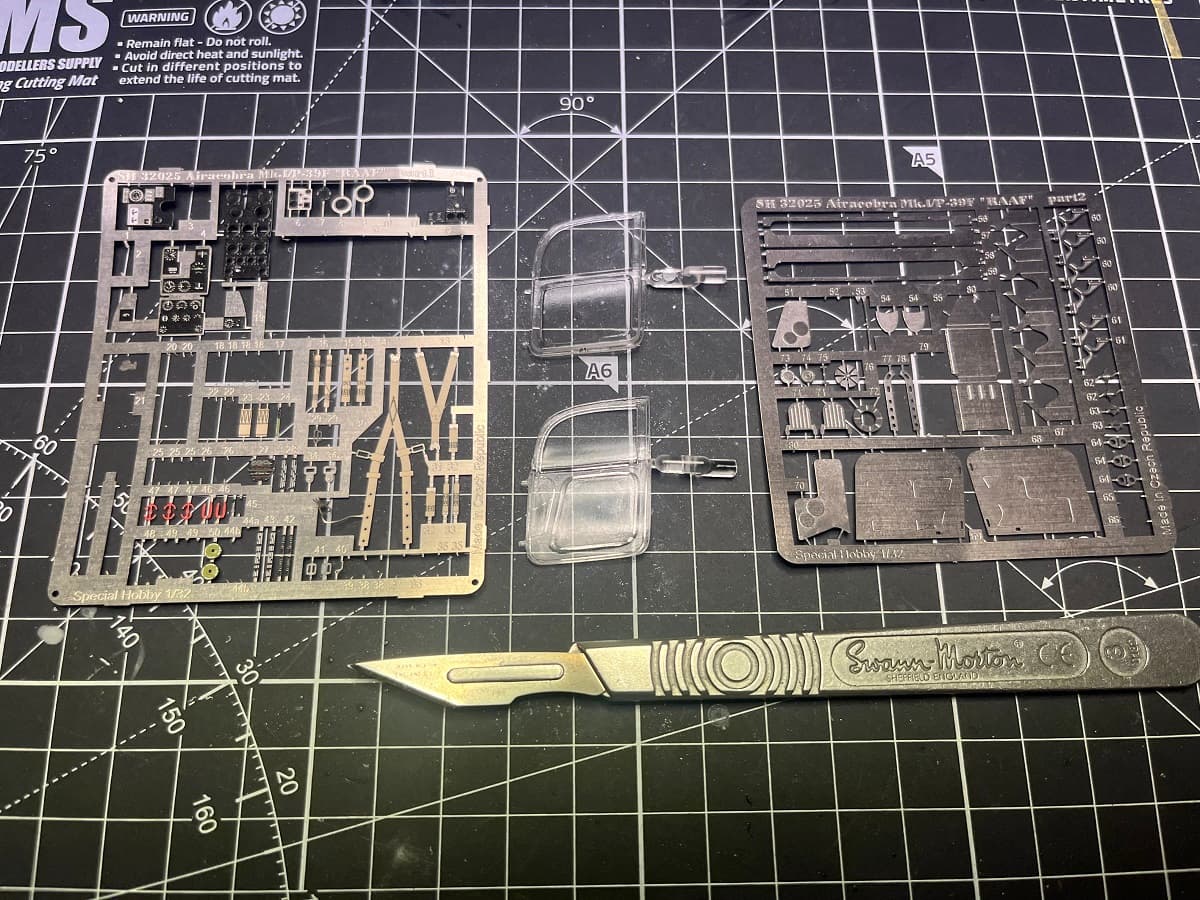
First step will be to mask up the windows so I’m not polishing out scratches for days down the track ![]()
Cheers, D
7 Likes
Let the shenanigans commence!
I will keep count of how many times I slice my fingers or glue them to the parts.
Cheers, D
5 Likes
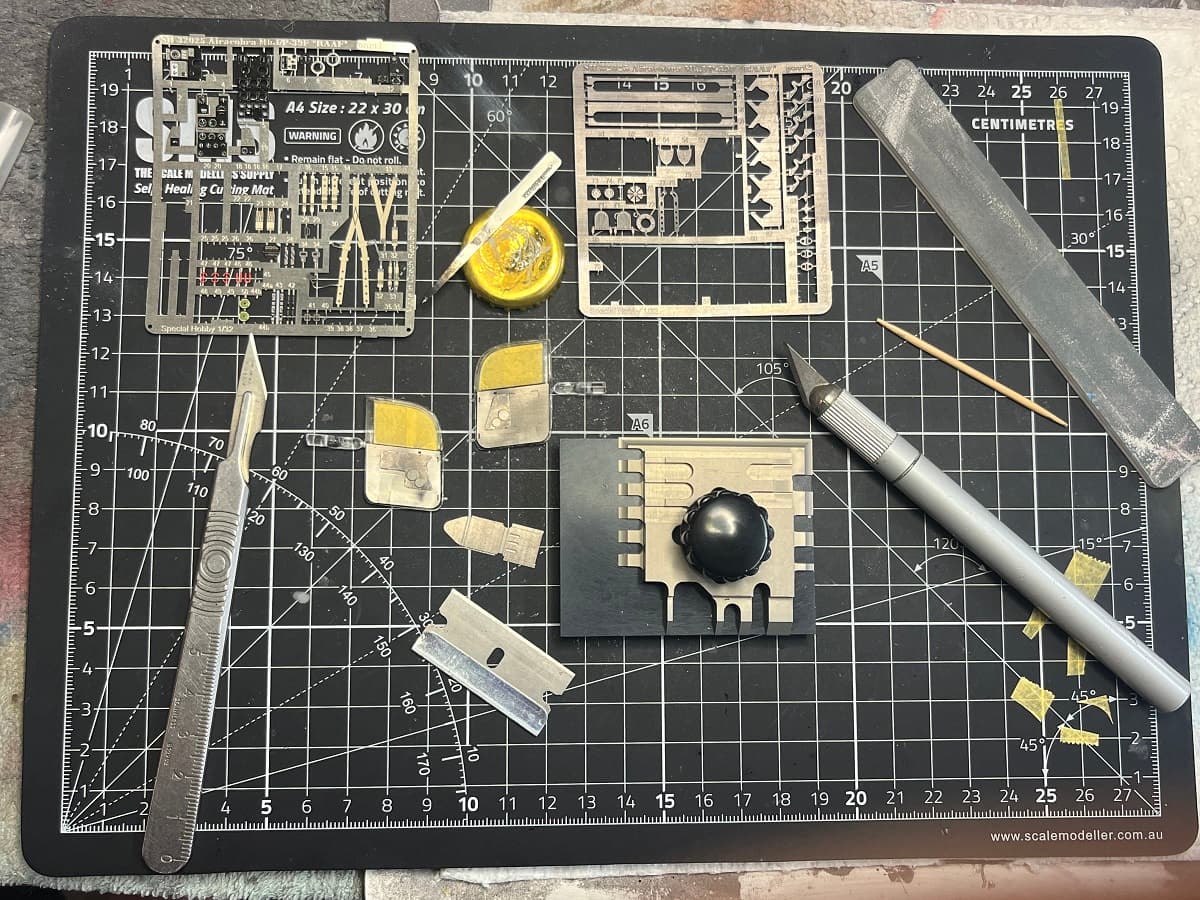
Shenanigans count: 1 minor epidermal incision and 2 unwanted epidermis vs CA encounters ![]()
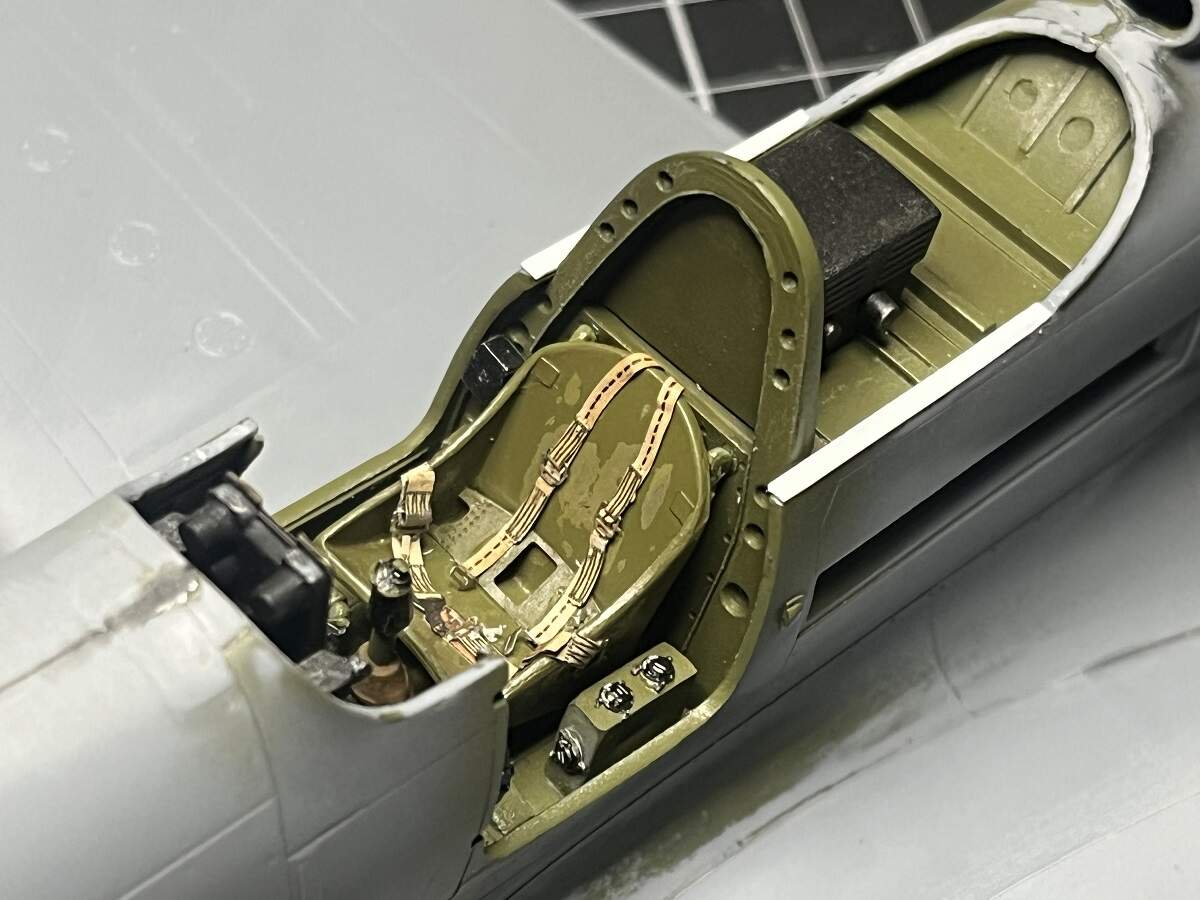
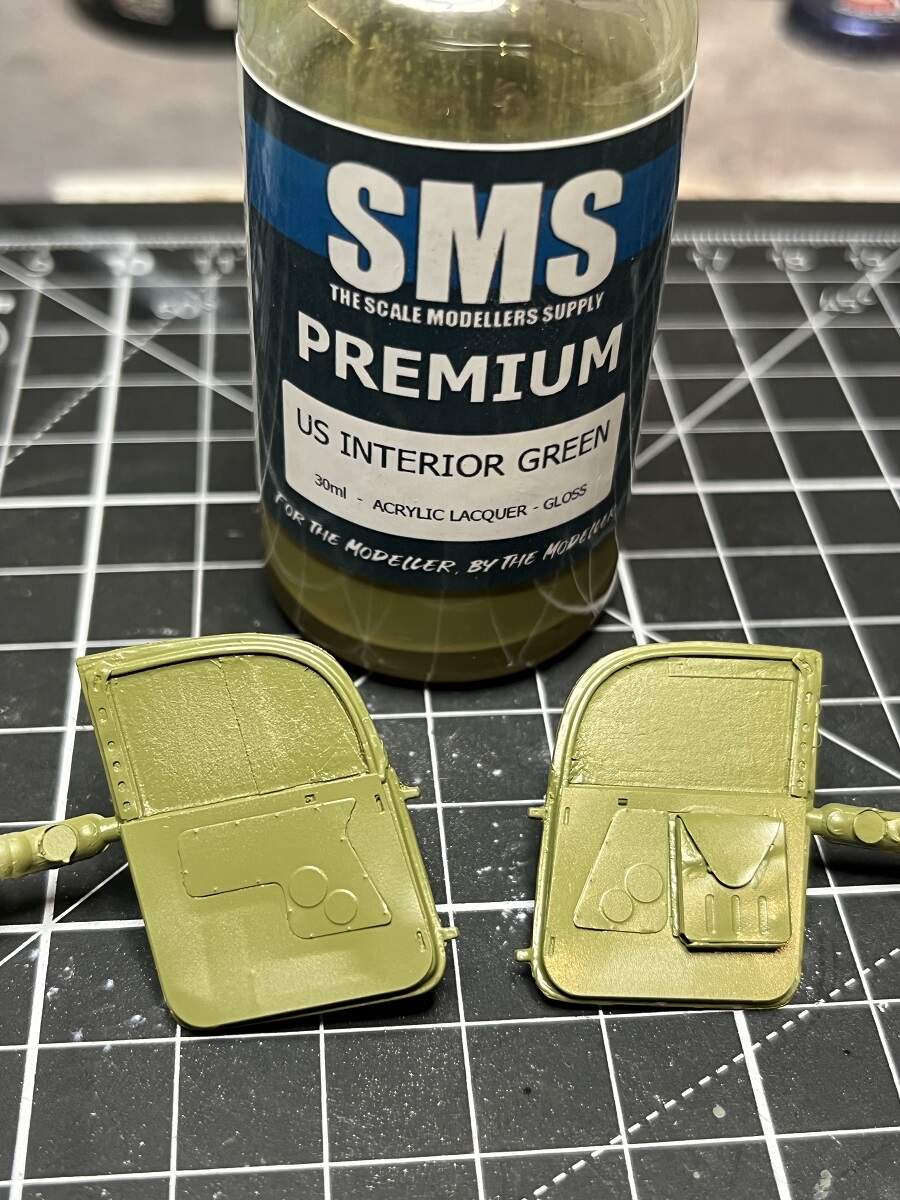
I scuffed up the PE with a fibreglass pen, then primed with MS1500 and shot SMS Interior Green about 15 minutes later. Just love the super fast working times with lacquers.
Cheers, D
6 Likes
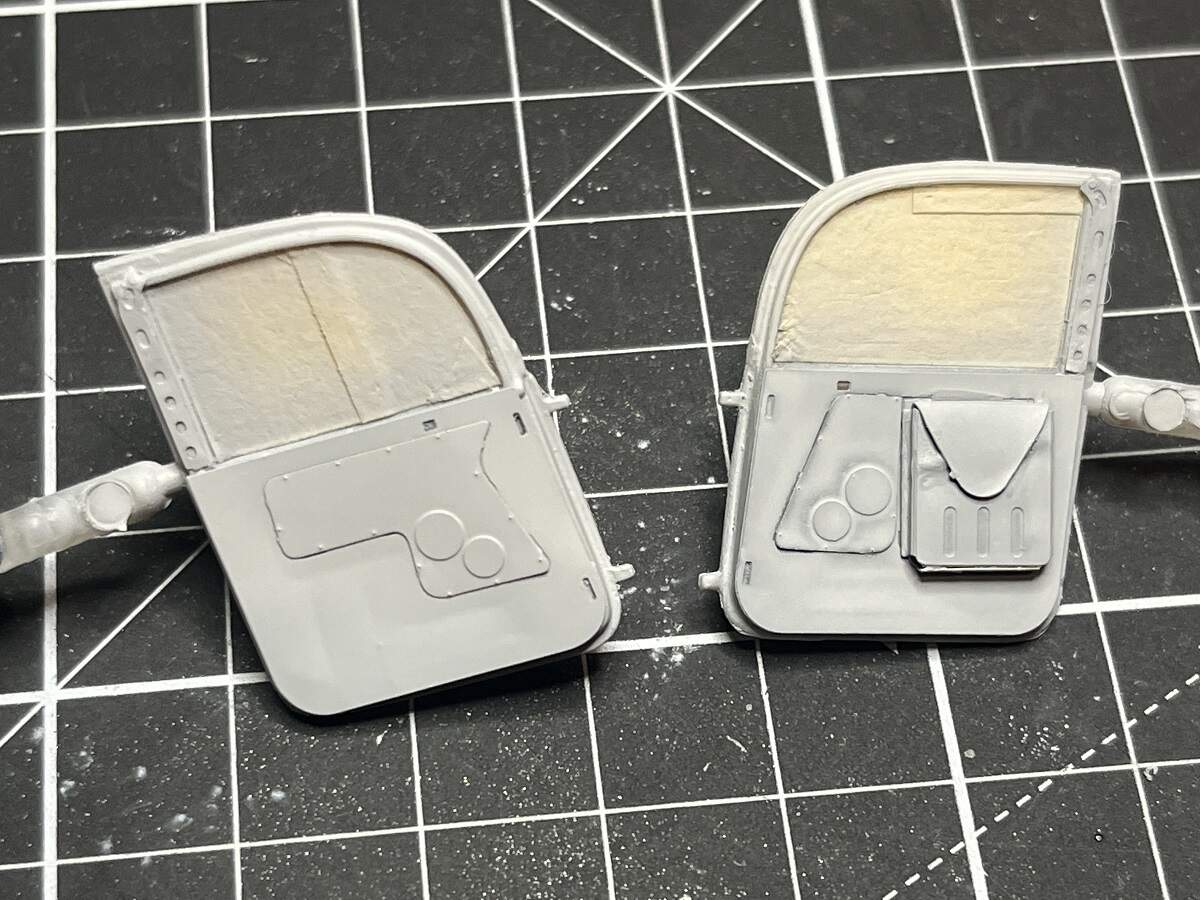
Door interiors assembled, I managed to only lose 1 part to the “tweezer-ping-carpet-monster” which was one of the top red handles. Replaced with a small piece of lead wire.
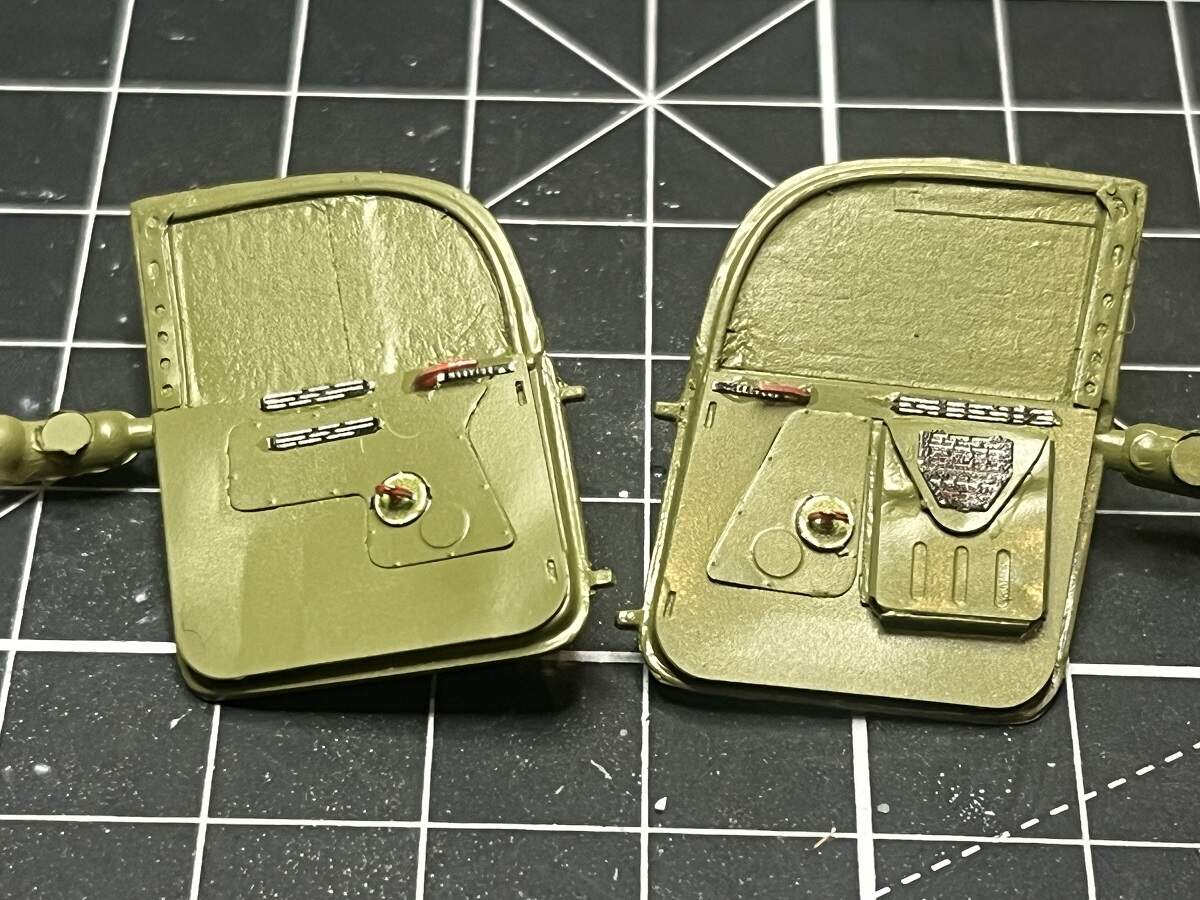
Some oil paint weathering to match the cockpit interior then these will be stashed away until later.
Cheers, D
6 Likes
In for a penny… in for a pound. Great update Damian, love them doors.