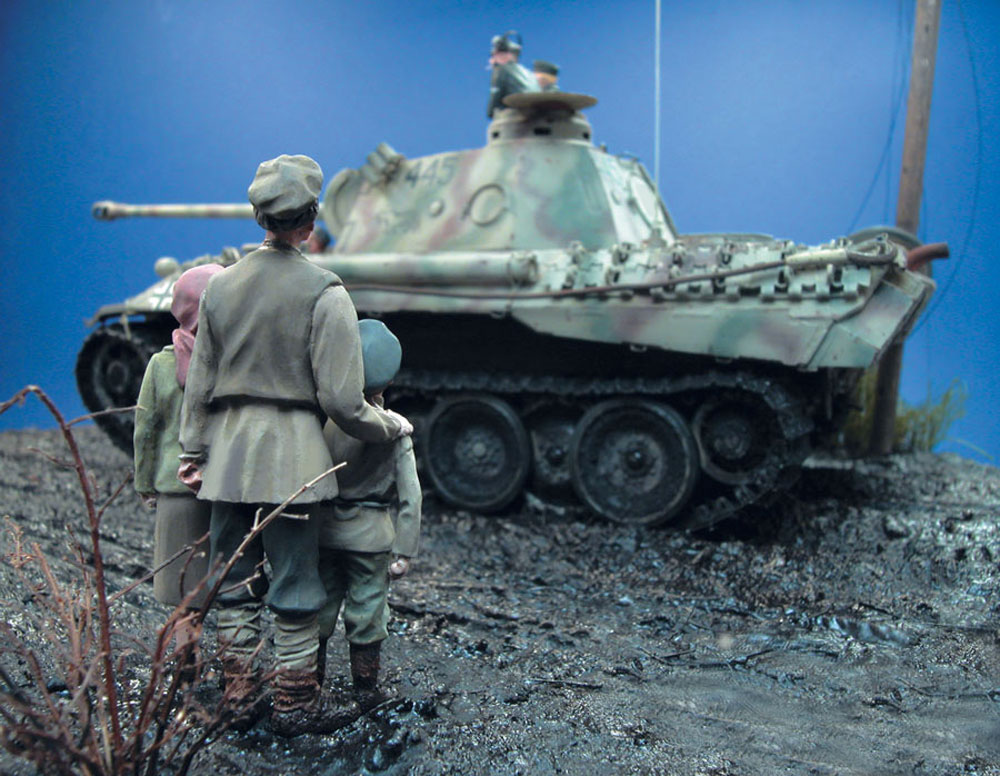
I open this new thread with a realization that goes back to some years when I was still practicing the 1/35. it was in 2006 to be precise! An Ausf. D Dragon Panther. I took a real pleasure to assemble and paint this kit.As usual, the kit is held on a board screwed into the chassis in the center. Painting is easier!

22 Likes
Nice one!
1 Like
Thank
1 Like
Stunning work!
1 Like
Good looking model.
But what do you mean by Spring 43 in the title? Should it be summer instead?
1 Like
Thank you for your appreciations. It’s indeed spring, printemps en français…
1 Like
Great looking Panther. Well done. That mud really looks wet.
Jim
1 Like
Yes, the mud looks quite wet and I will give you the recipe later in this thread
1 Like
The initial run of Panther D’s was delivered to the Army during January 1943, with the original date for the Operation Citadel offensive being early May 1943 – i.e. Spring. That date was put back to early July, in part because of slow production of sufficient numbers of Panthers. So there were some running/training during the Spring, but not deployed in action until Summer. Gerard’s excellent vignette could be interpreted as training/moving into position in May/June…and in Russia, that might be defined as “Spring” ![]()
3 Likes
Ok that makes sense.
2 Likes
Exactly the first Ausf. D Panthers arrived on the Eastern front before the launch of Operation Zitadelle.
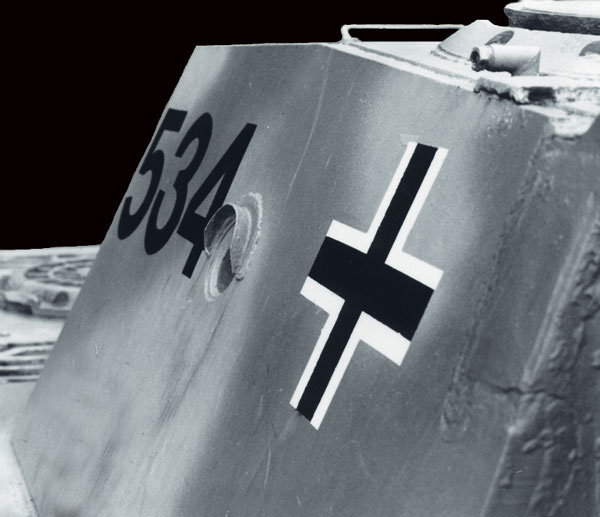
Very few D type Panther survived to the fights of the scond World War.To our knowledge only 2 tanks have escapd to the sword rattlers.The first one in very good conditions is exhibited in Breda your country .The second one is in Switzerland,is late version
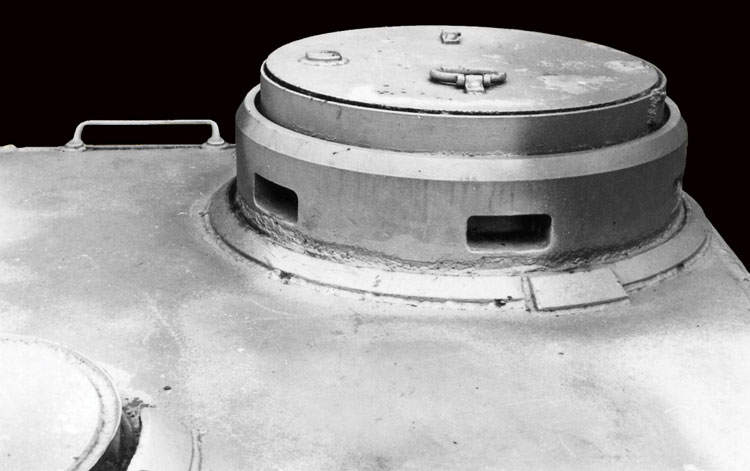
Interesting view of the tank commander cupola.As the Dragon locking latch of the rear hatch is not lke in reality at all you have to do it yours
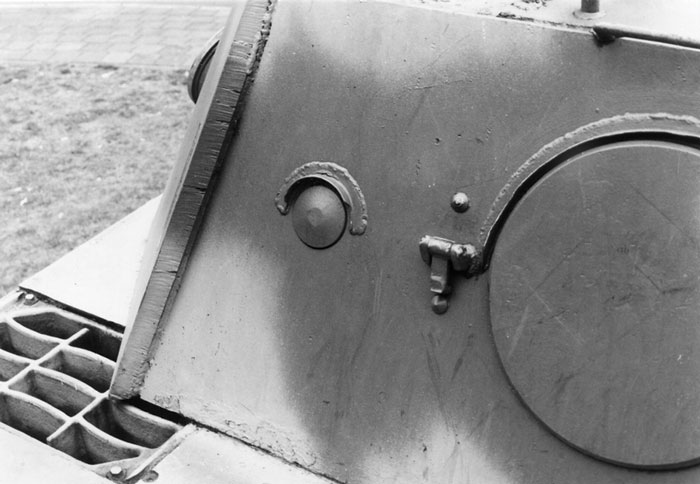

elf with .020" plasticard and some Evergreen round.
8 Likes
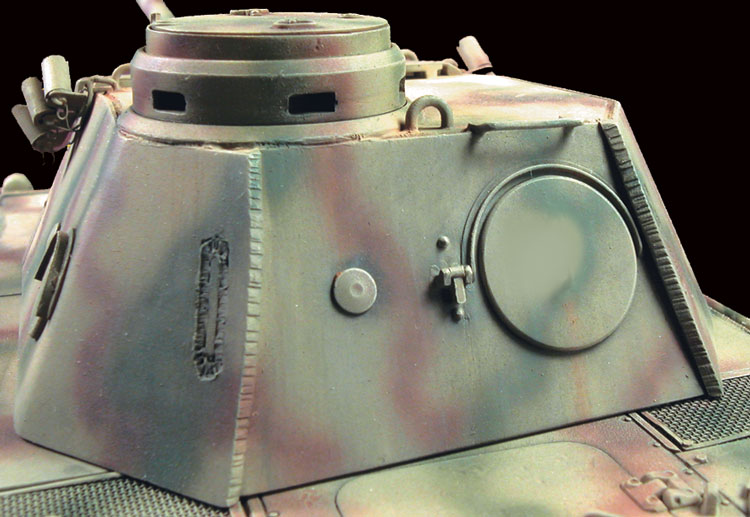
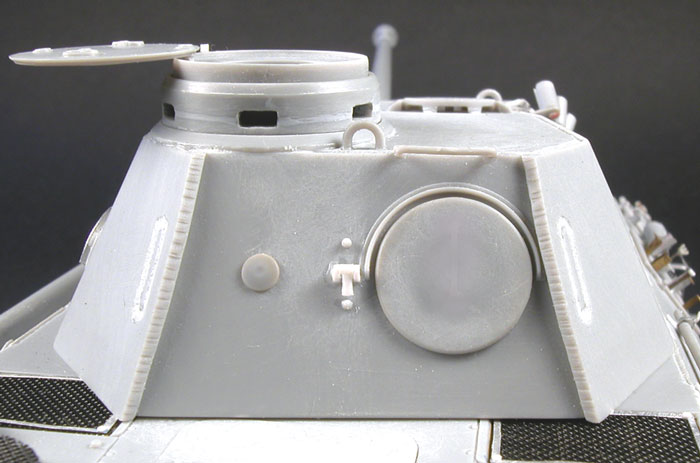
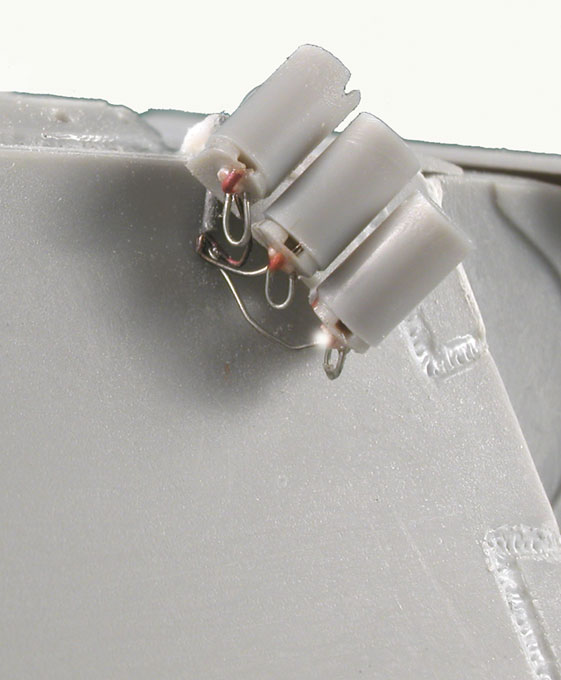
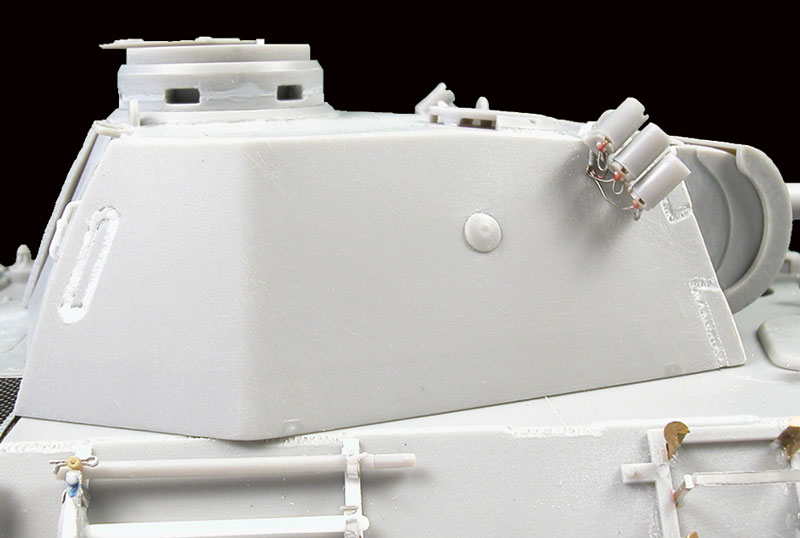
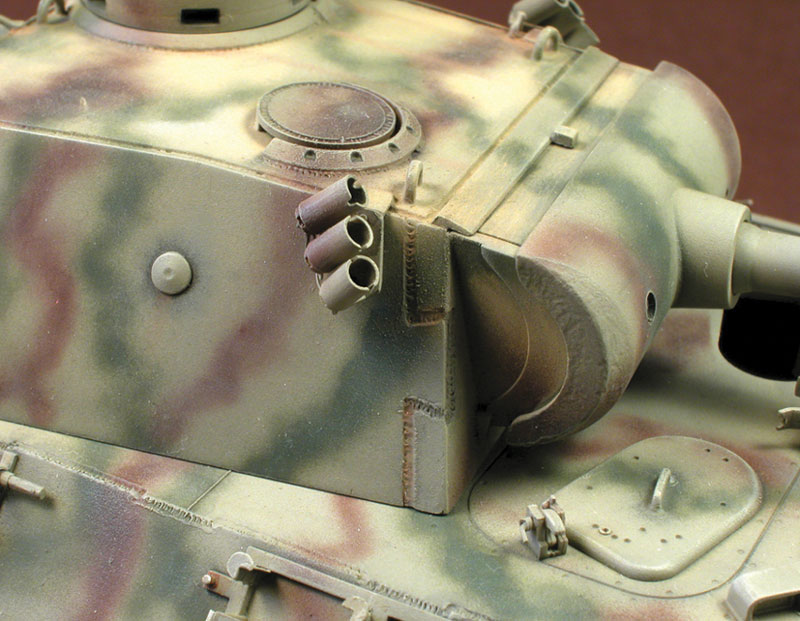
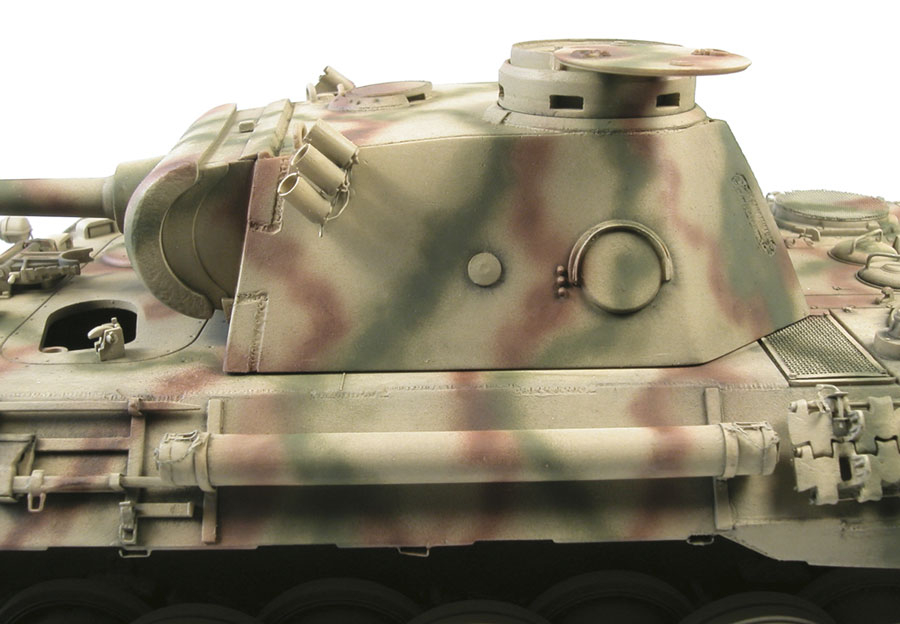
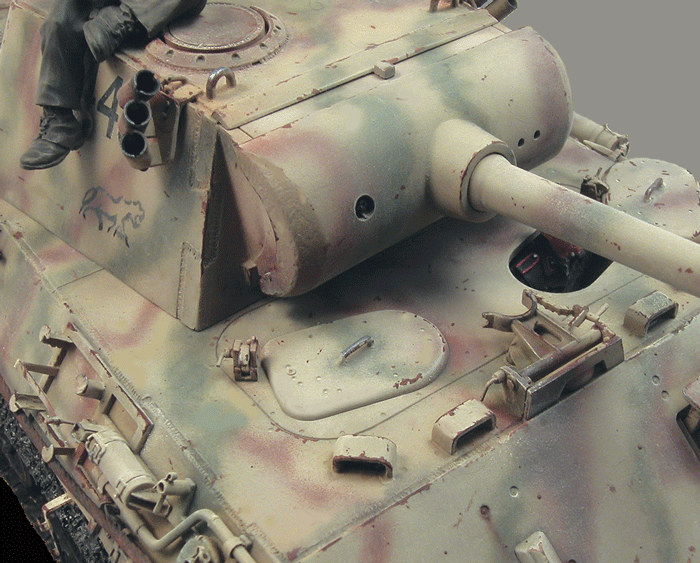
View from above we can see the details added and the improvements brought to the turret,mainly the weldings.Note the stop of thr tank commander"s cupola,the smoke launchers -Nebelwurfgerät- with the firing system made of plasticard andthin electric wire.The support plate of the tubes,Dragon part, is kept but consyderably reduced whit at flat and abrasive paper.
9 Likes
The gutter at the upper part of the communication hatch is redone with aluminium sheet and the three conical rivets are replaced.The right side of the turret is finished .
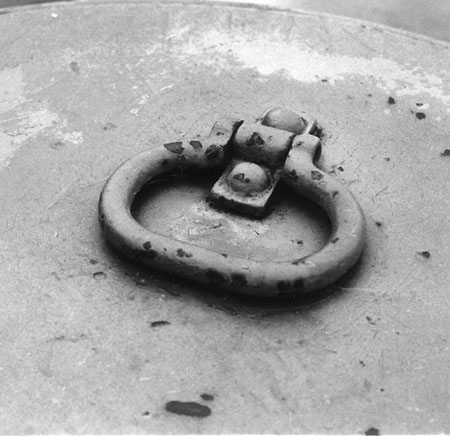
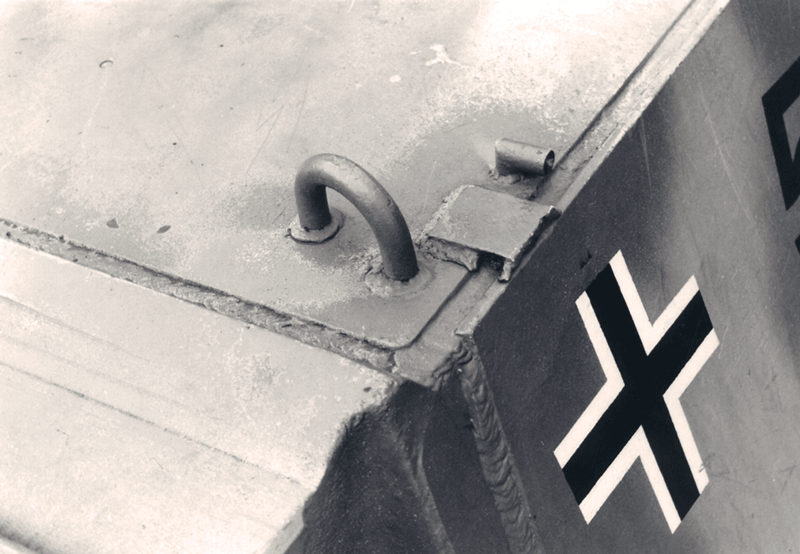
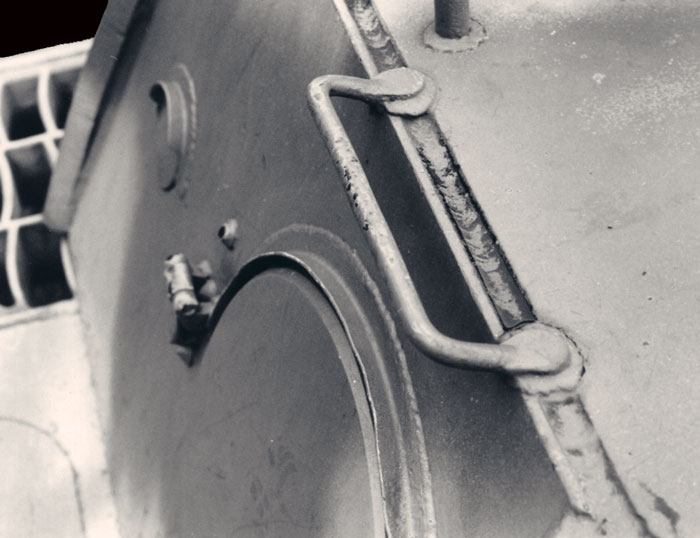
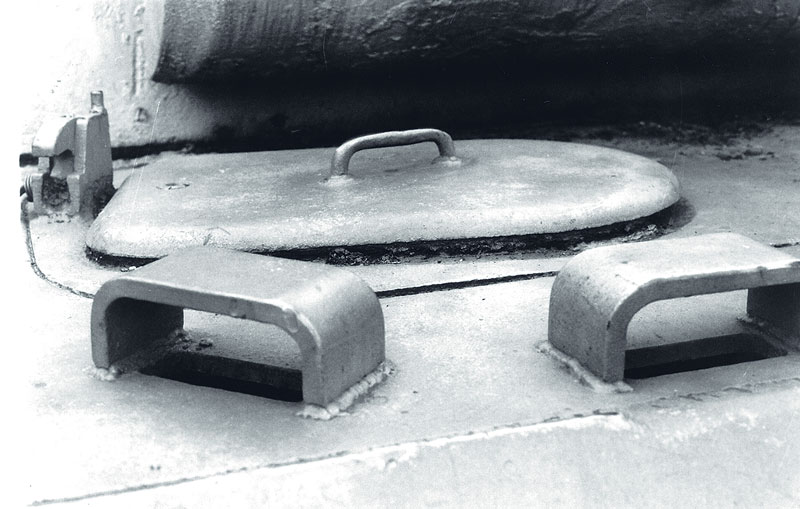
We can see the handle at the rear to hang on or to get out from the inside of the turret , the ventilator and its protecting, the lifting ring , the remaining parts for the smoke launcher, the left side its communication hatch, and the cap eqquiped witha gutter for this version. On the model the tree conical rivet are replaced by some Modelkasten parts ref. A2 “ conical round head rivets”.

6 Likes
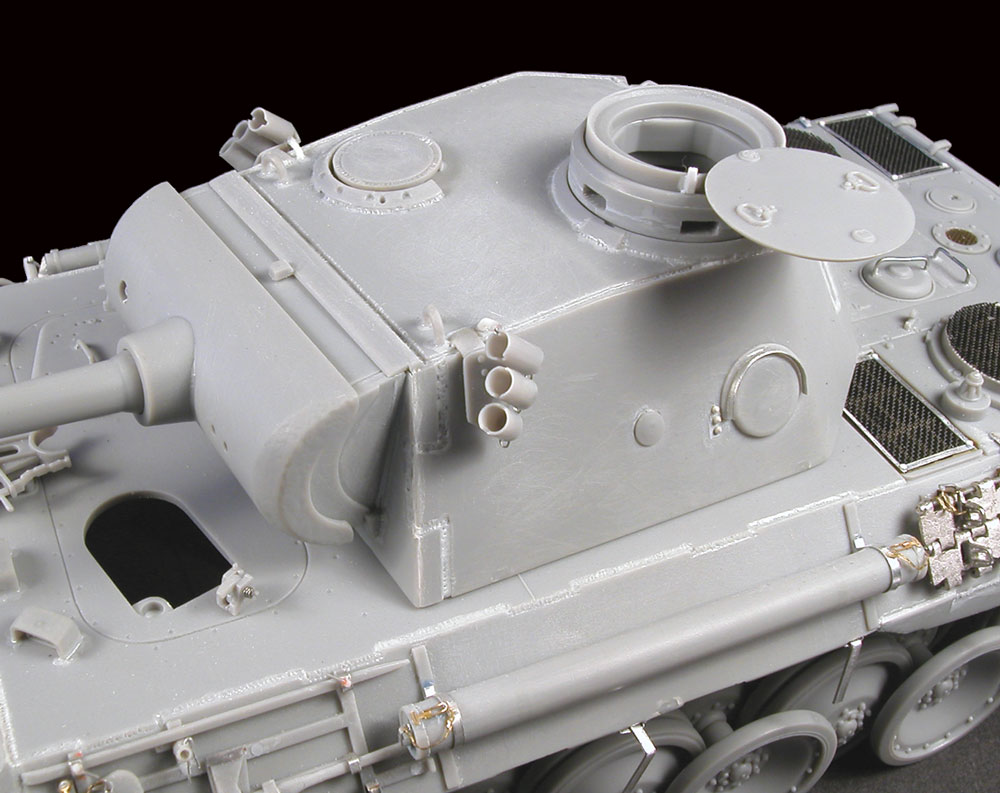
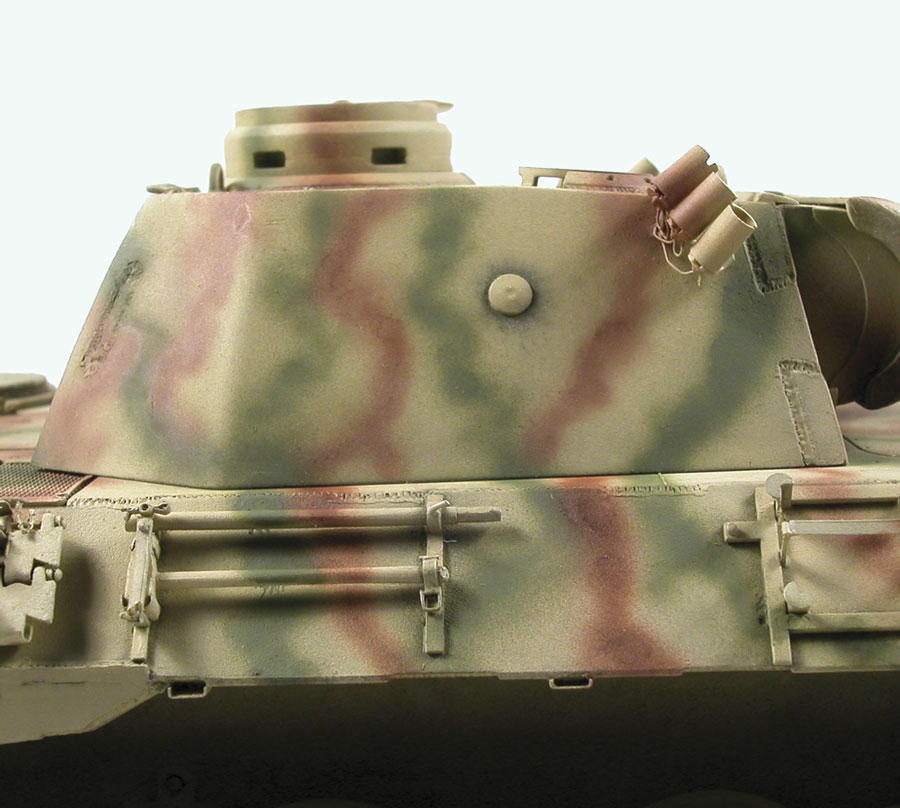
I stay on the turret but for the model, is covered with a Humbrol 187 sand base coat. For the “stripe” type camouflage I used the Professional Aibrush A470 Aztek: Revell 84 for the green colour and Prince August 041 for the red-brown colour.To finish this first strep I applied a Humbrol 33 matt black+Humbrol 29 earth lavis.
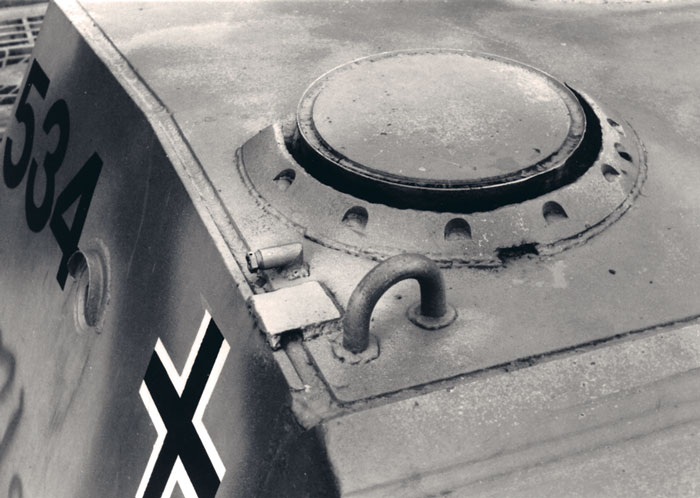
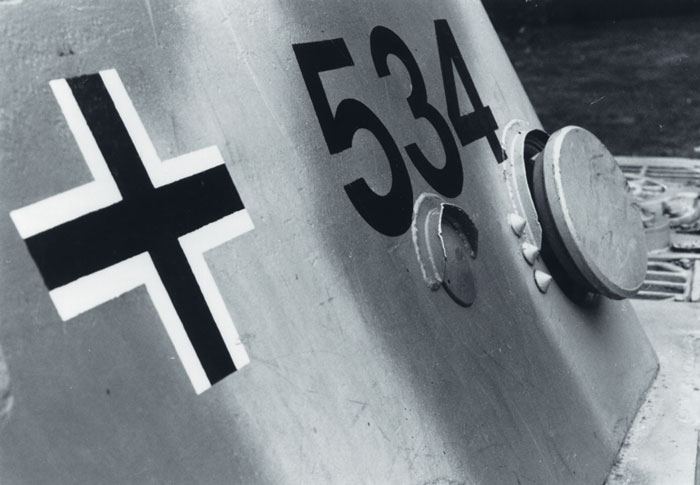
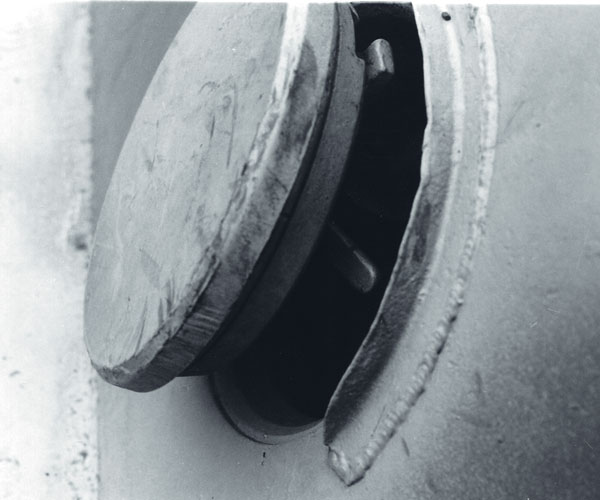
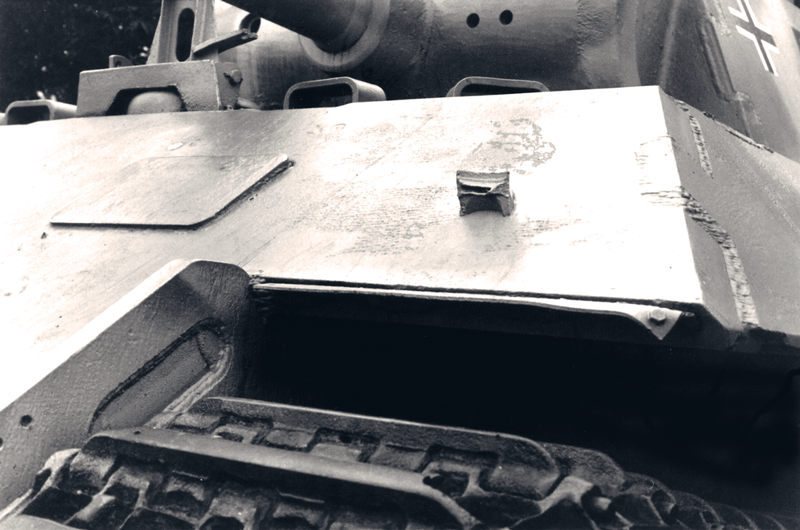
Close up on of the communication hatch.The thickness of the armour is impressive.
The cap of the hole for a close defence weapon is missing. It is protected by a gutter. When it was removed it was linked to the turret by a chain.
7 Likes
I love the weld beads you added, awesome build!
2 Likes
Thank you for your appreciation
2 Likes
Dragon made a mistake with the protections of the episcops because the inside shapeis angular but is reality it is rounded.This mistake is corrected on the Dragon parts with a round file. As these protections are too thick you have to make them thinner from the exterior with the file.Once placed engrave the welding on surround of each protection.
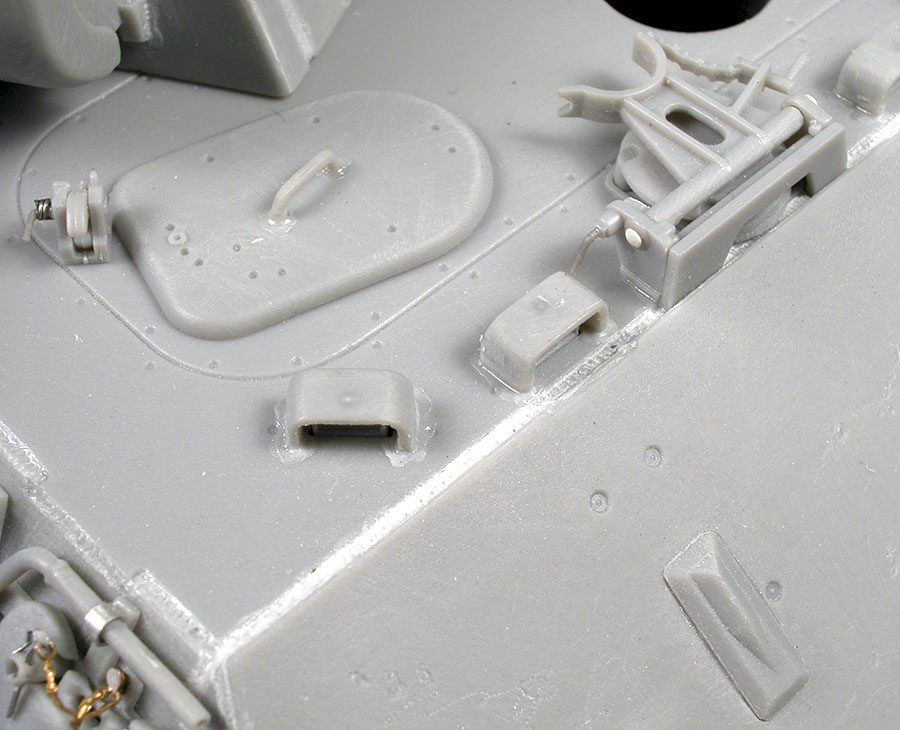
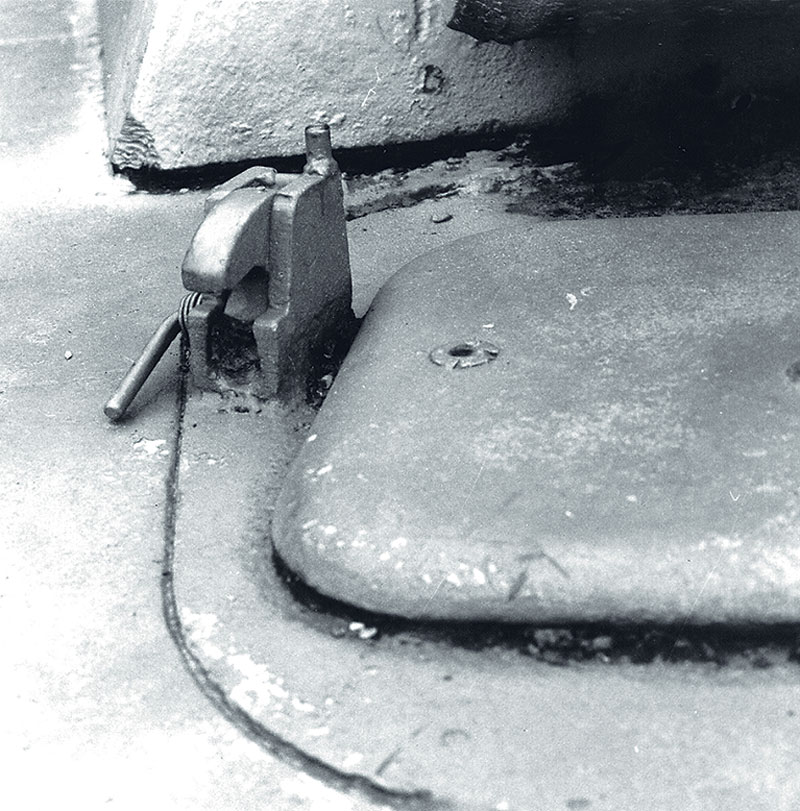
The locking latch of the radio operator’s hatch, the Dragon parts have to be improved by filling in with plasticard the hole
appearing after the assembling of the B15-B17 and B16-B18 parts. Do not forget the axle and its spring.
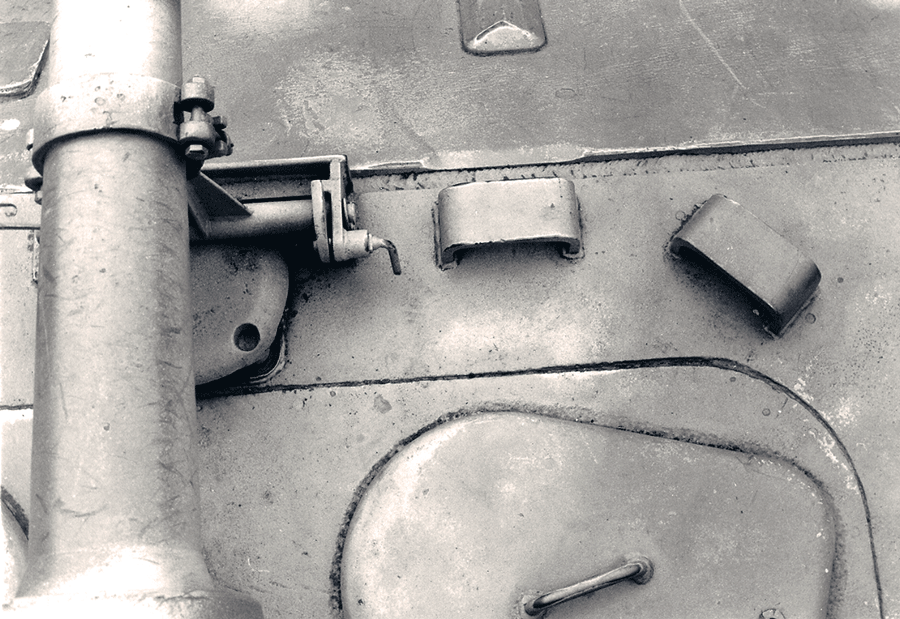
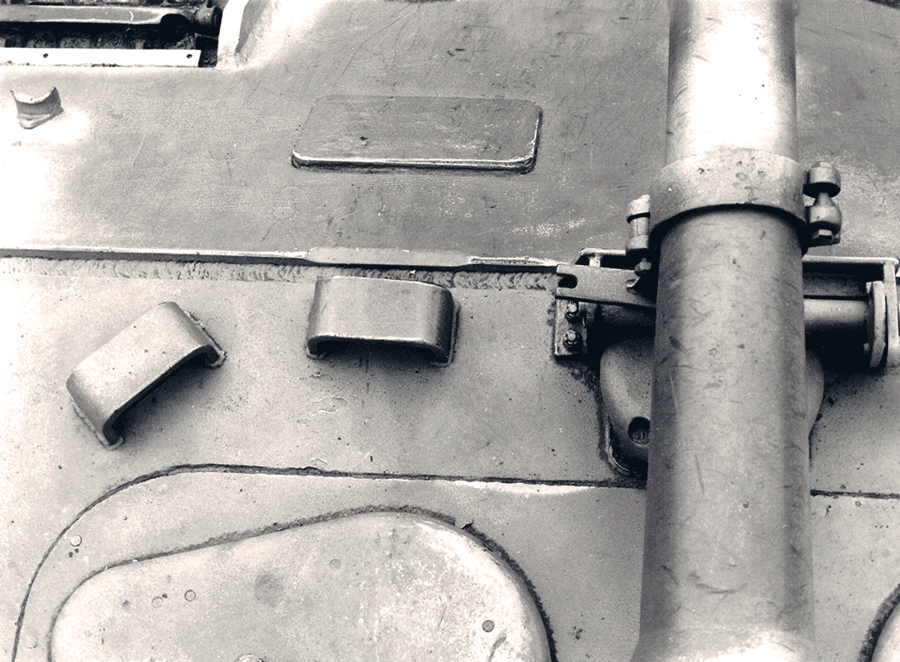
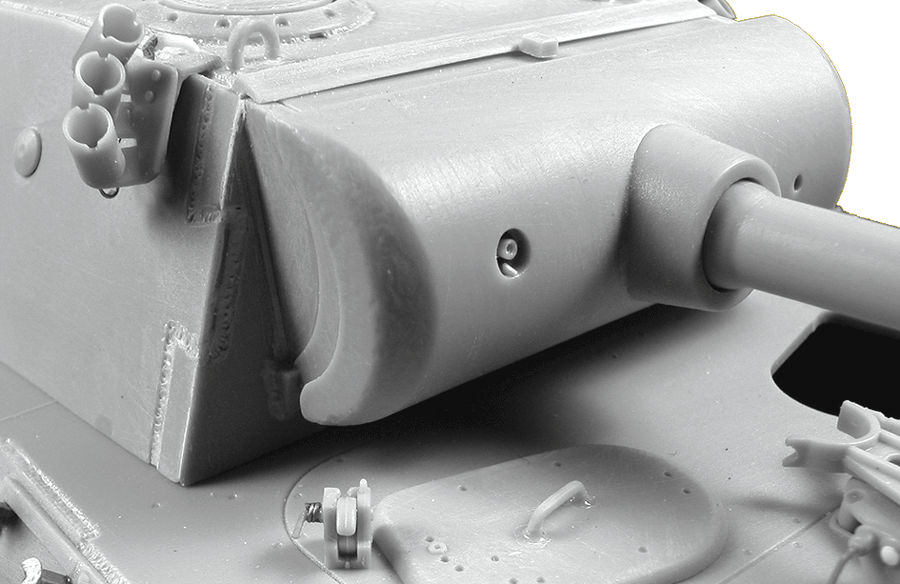
The gun travel lock in travel position. This part is correctly reproduced by Dragon.The axle passing through teh base on each side is simulated withe two discs cut whit a hollow punch (Punch and die) .The locking handle on the side is made of stretched plastic. Under the travel lock we can see the protection of tue ventilator.

10 Likes
Outstanding work Gerard!
1 Like
Thank you
1 Like
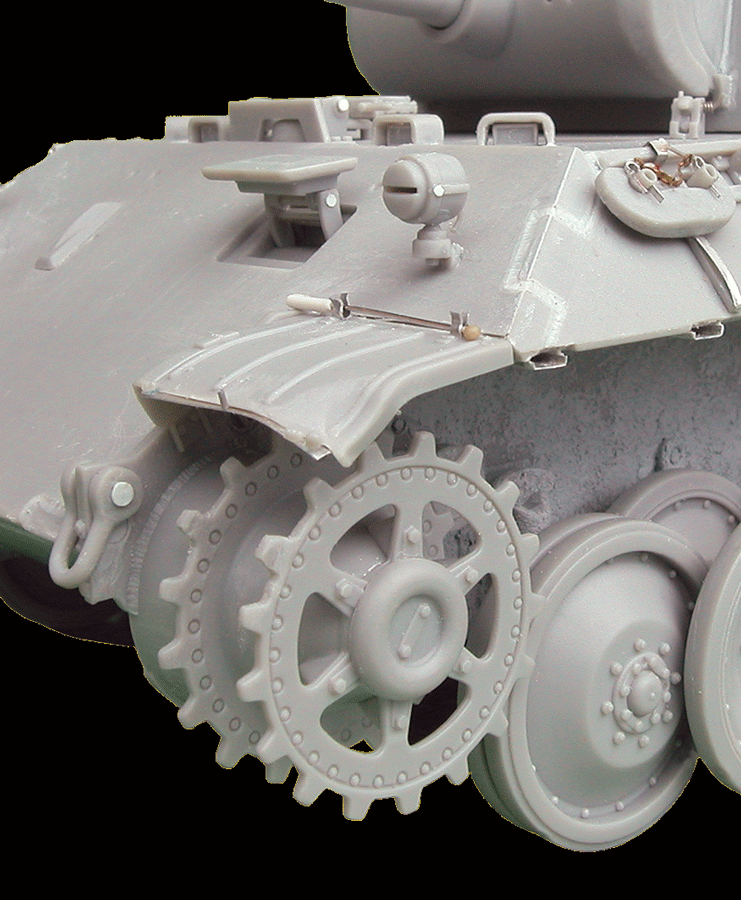
The driver’s and radio/gunner’s hatches with the protections of the episcops at the front.Later only one episcop will equip the G Panther,fixed for the gunner and rotative for the driver.The big clamping ring of the gun tube is in place.On the A type the radio/gunner’s hatche was replaced by a rotative mechanism placed under the casemate.
The gun shield.We can clearly see the shape of the .010" plasticard wedge fixed in the hole of the coaxial machine gun.
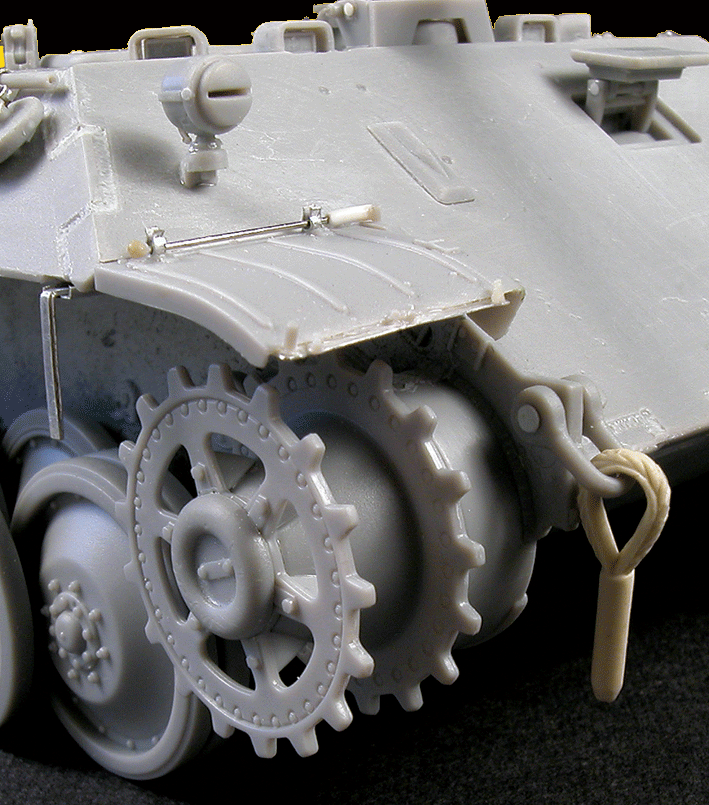
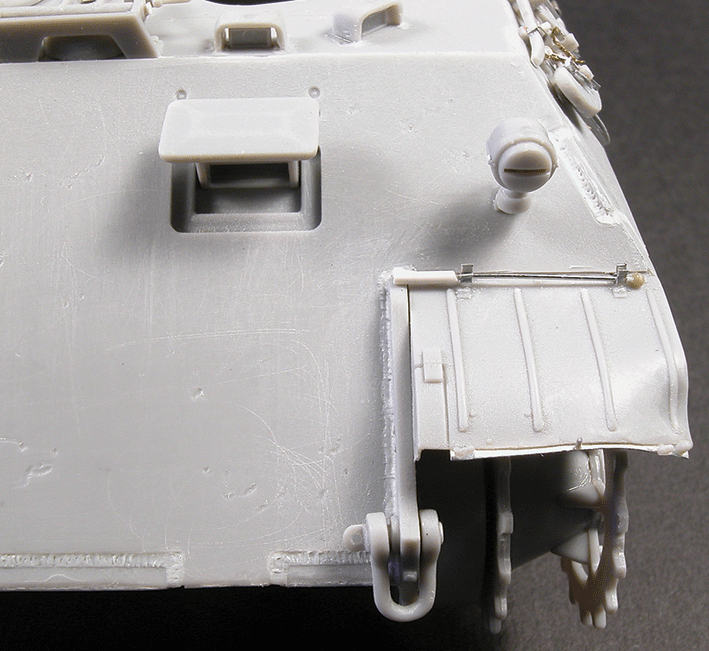
As we chose to realise an early version of the D Panther we equpped the model white the gunner’s protection cover-part J25- and white both Bosch headlights.The driver’s hatch is open.Glue two plasticard discs to simulate the ends of the axle.Wen they are not used the manoeuvring guides are fixedon the mudguard with some clips.These aluminium are shaped on a swing needle. The rod is in wire,its base is cut in some sheath for telephone wire and the ball is in Magic Sculp.The Bosch headlights are very nice. You only have to add thr rivets on the frame and the locking handle at the rear. We can clearly see the improvements brought on this part of the model.
On the machine itself, the pilot’s hatch is blocked by a metal plate. Only one piece of the Bosch headlightbase remains . Note the weldings linking the glacisti the sides.

4 Likes