Update 14 Aug 2024:
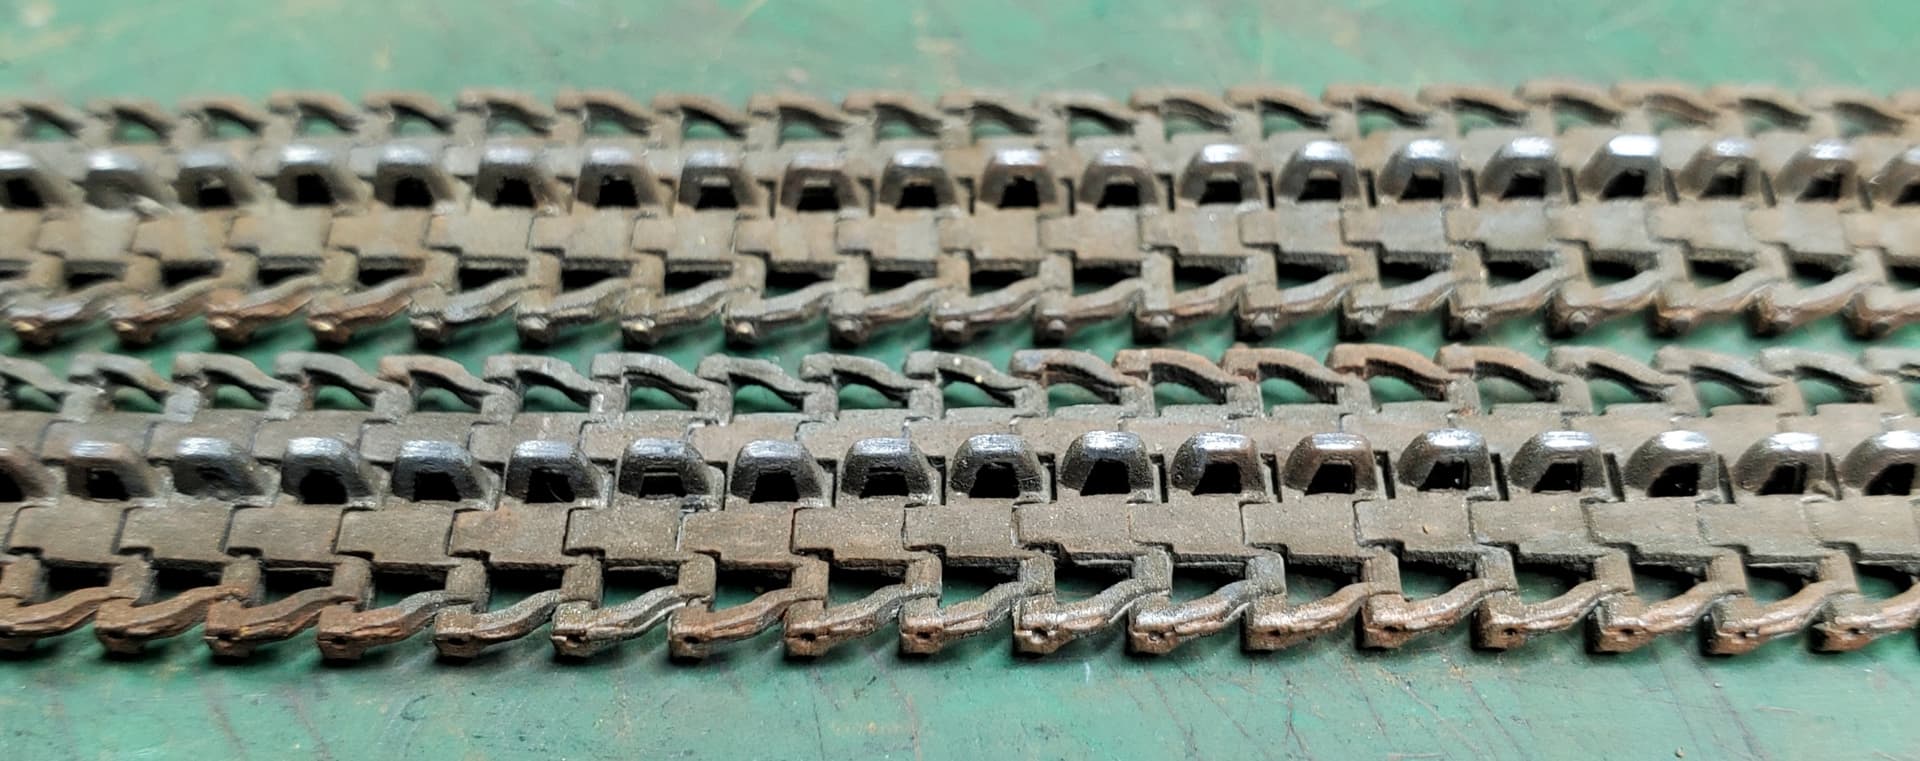
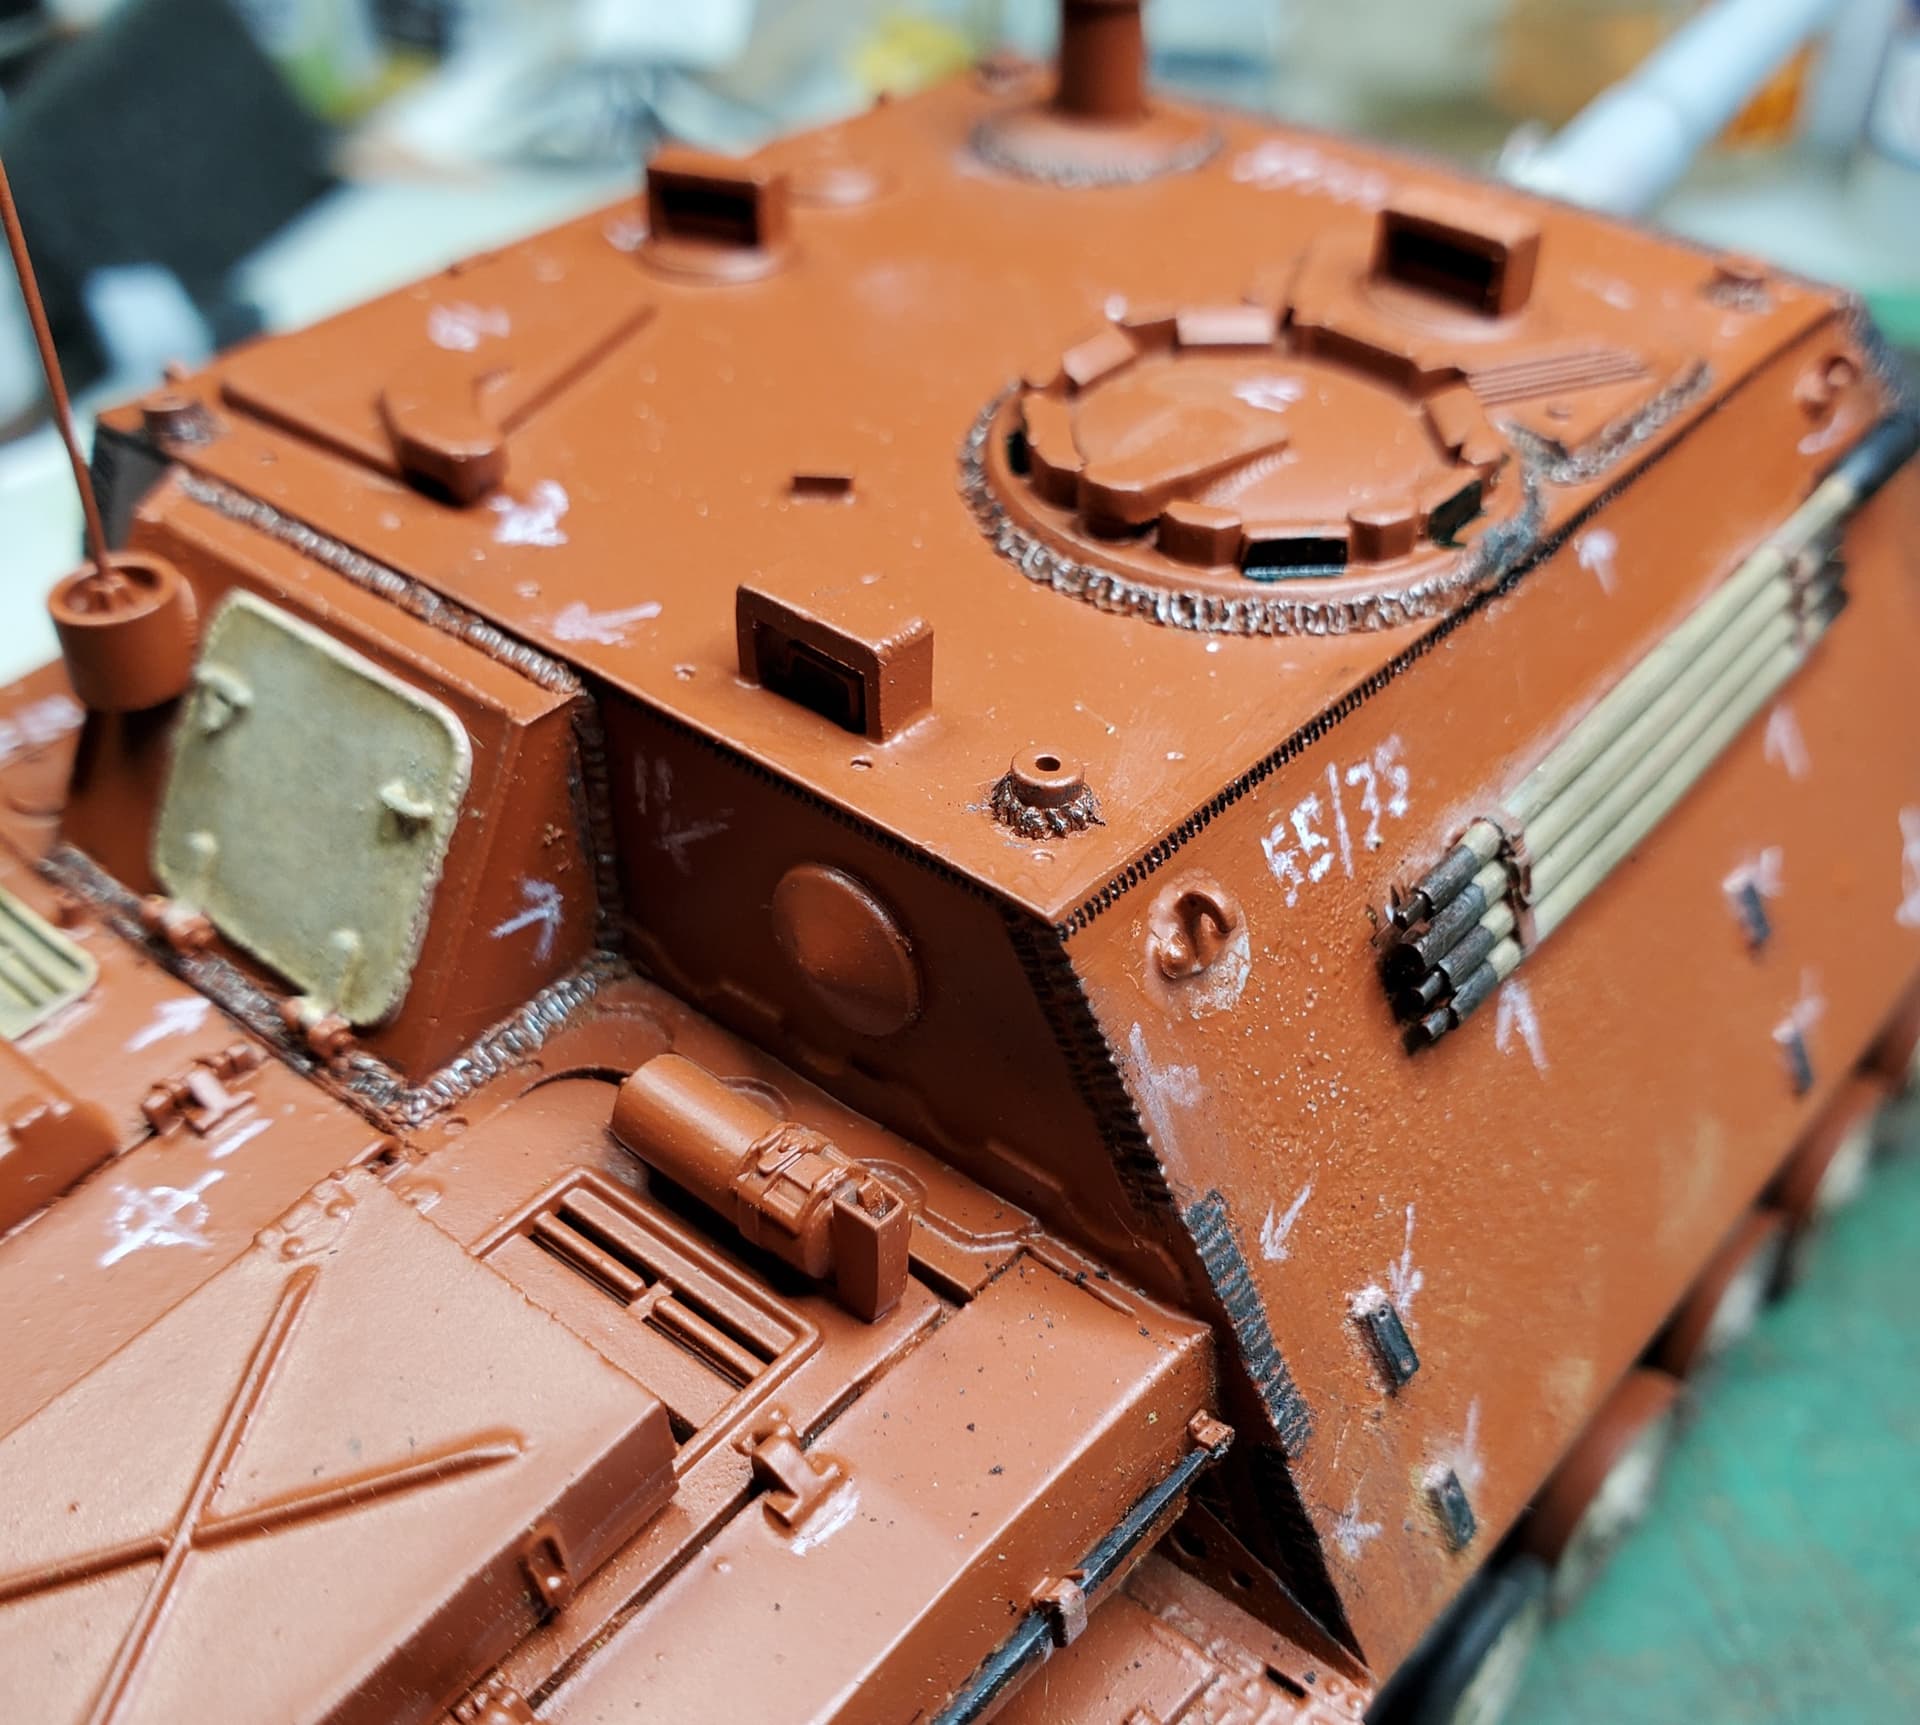
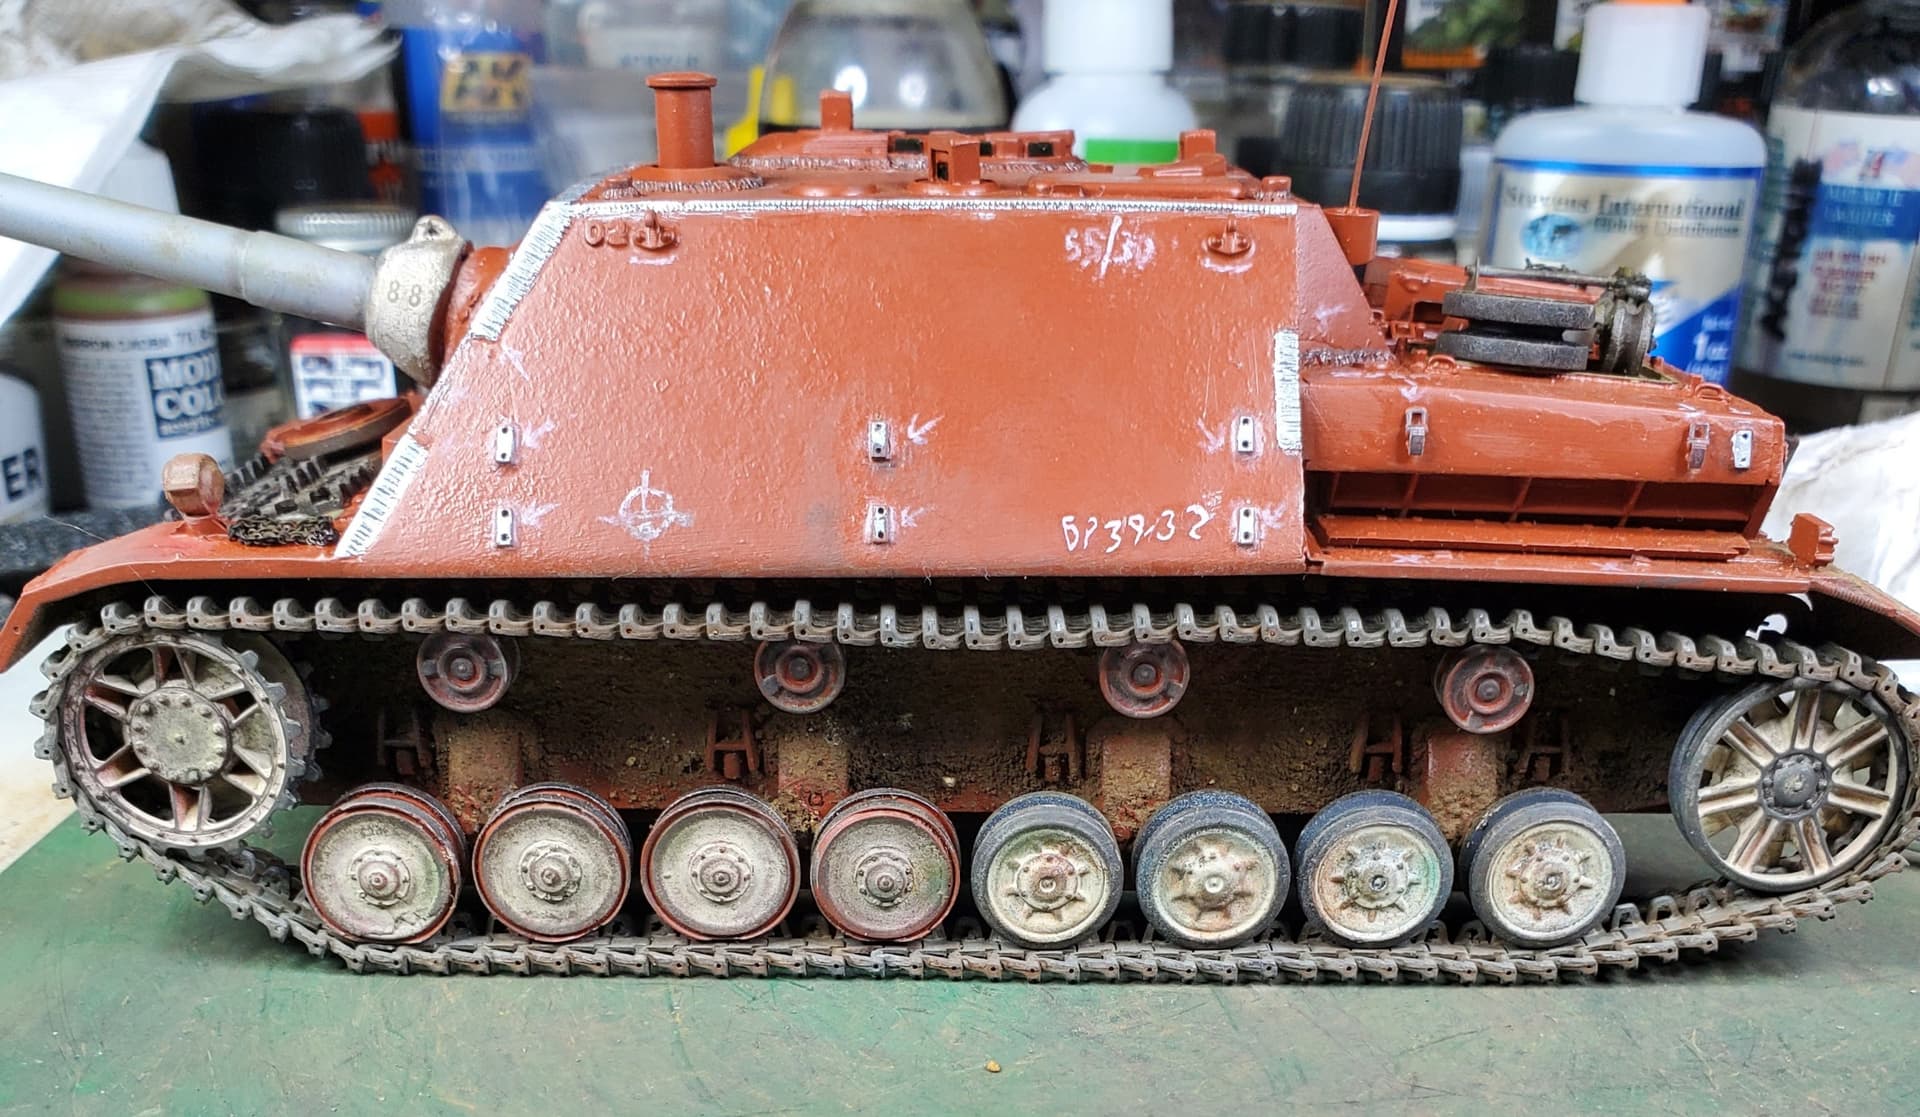
Tracks are in their final look. Shows metal wear to the ‘horns’.
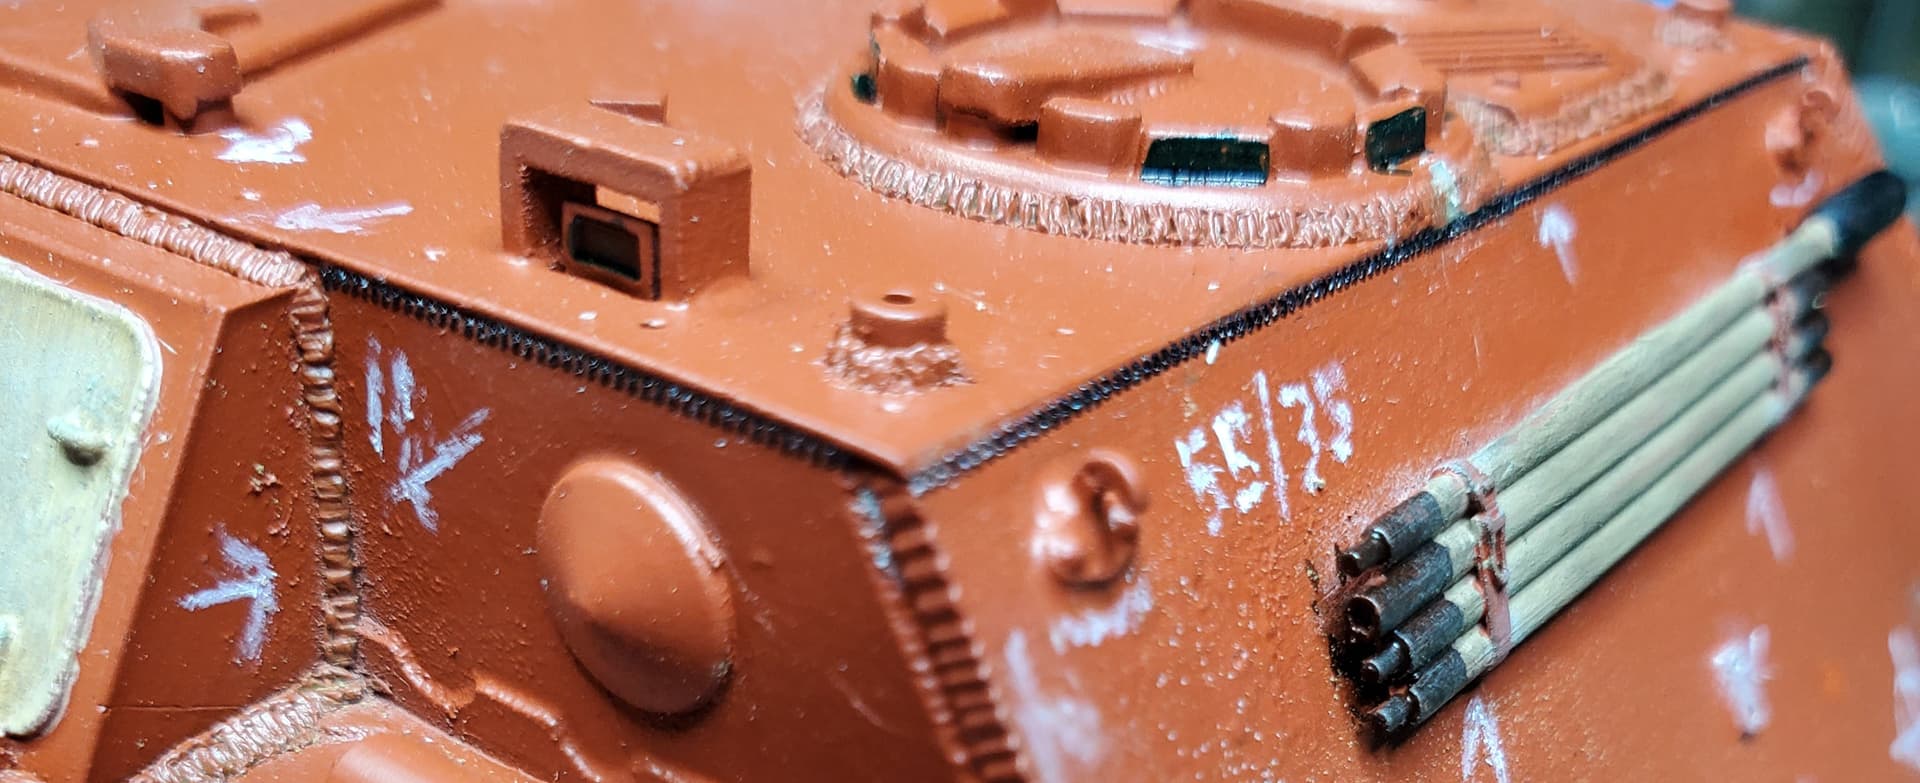
Added resin weld beads (black) along the roof top and front transmission housing armor.
This raised resin weld bead decal set is from Archer, part # AR88005
Update 14 Aug 2024:
Tracks are in their final look. Shows metal wear to the ‘horns’.
Added resin weld beads (black) along the roof top and front transmission housing armor.
This raised resin weld bead decal set is from Archer, part # AR88005
Very nice job on the machine Jack! Really like the paint job especially on the drive sprockets and idlers.
Thanks! Still a lot of work yet to be done!
Upate 15 Aug 2024:
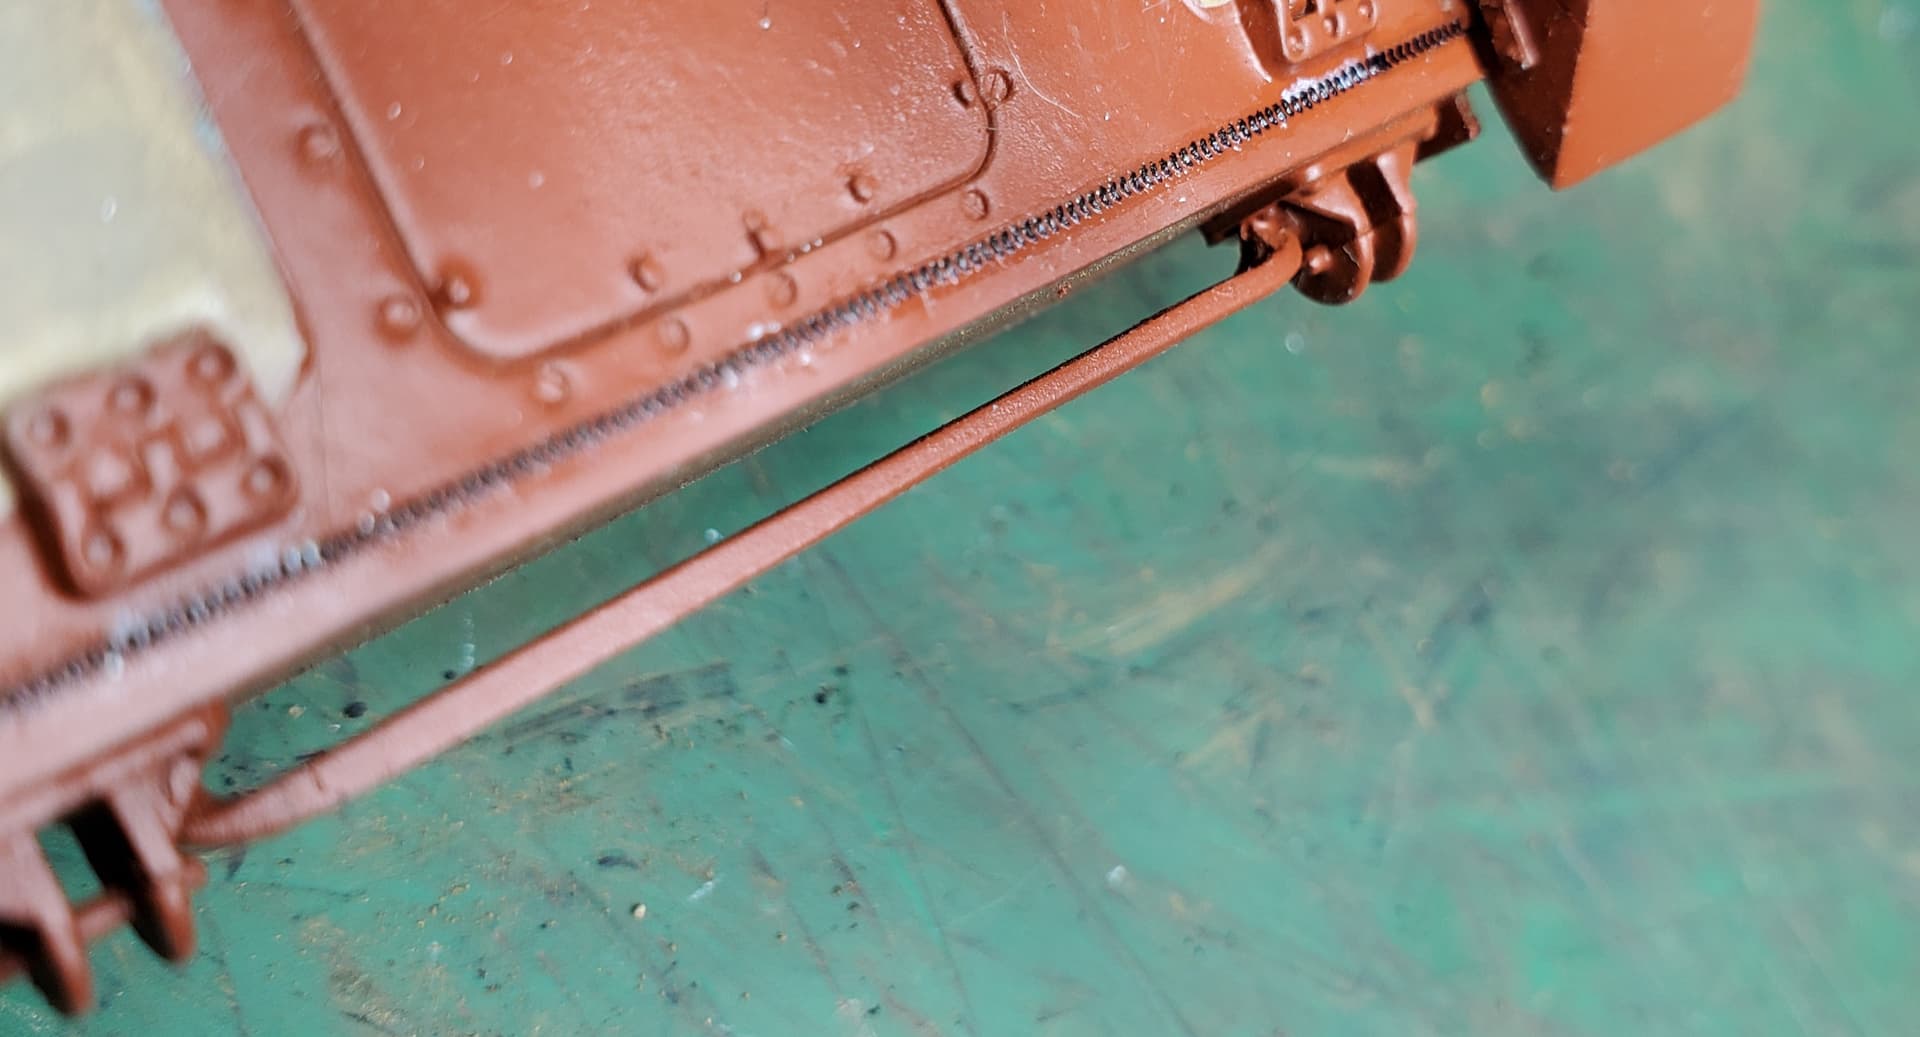
Applied graphite to weld beads and brackets with various graphite pencil hardness with exception to the Archer raised resin weld beads. They were treated to an application of Tamiya’s extra thin glue after a decal set. Weathering/detailing/treatment to these weld beats come much later.
As you said Jack- a ‘fun and unrestricted build’- a lovely way of describing this project. The concept is now being ably borne out by your precise painting, marking and now weathering. I’m very much enjoying seeing you add these various elements to it.
Thank you for the kind words!
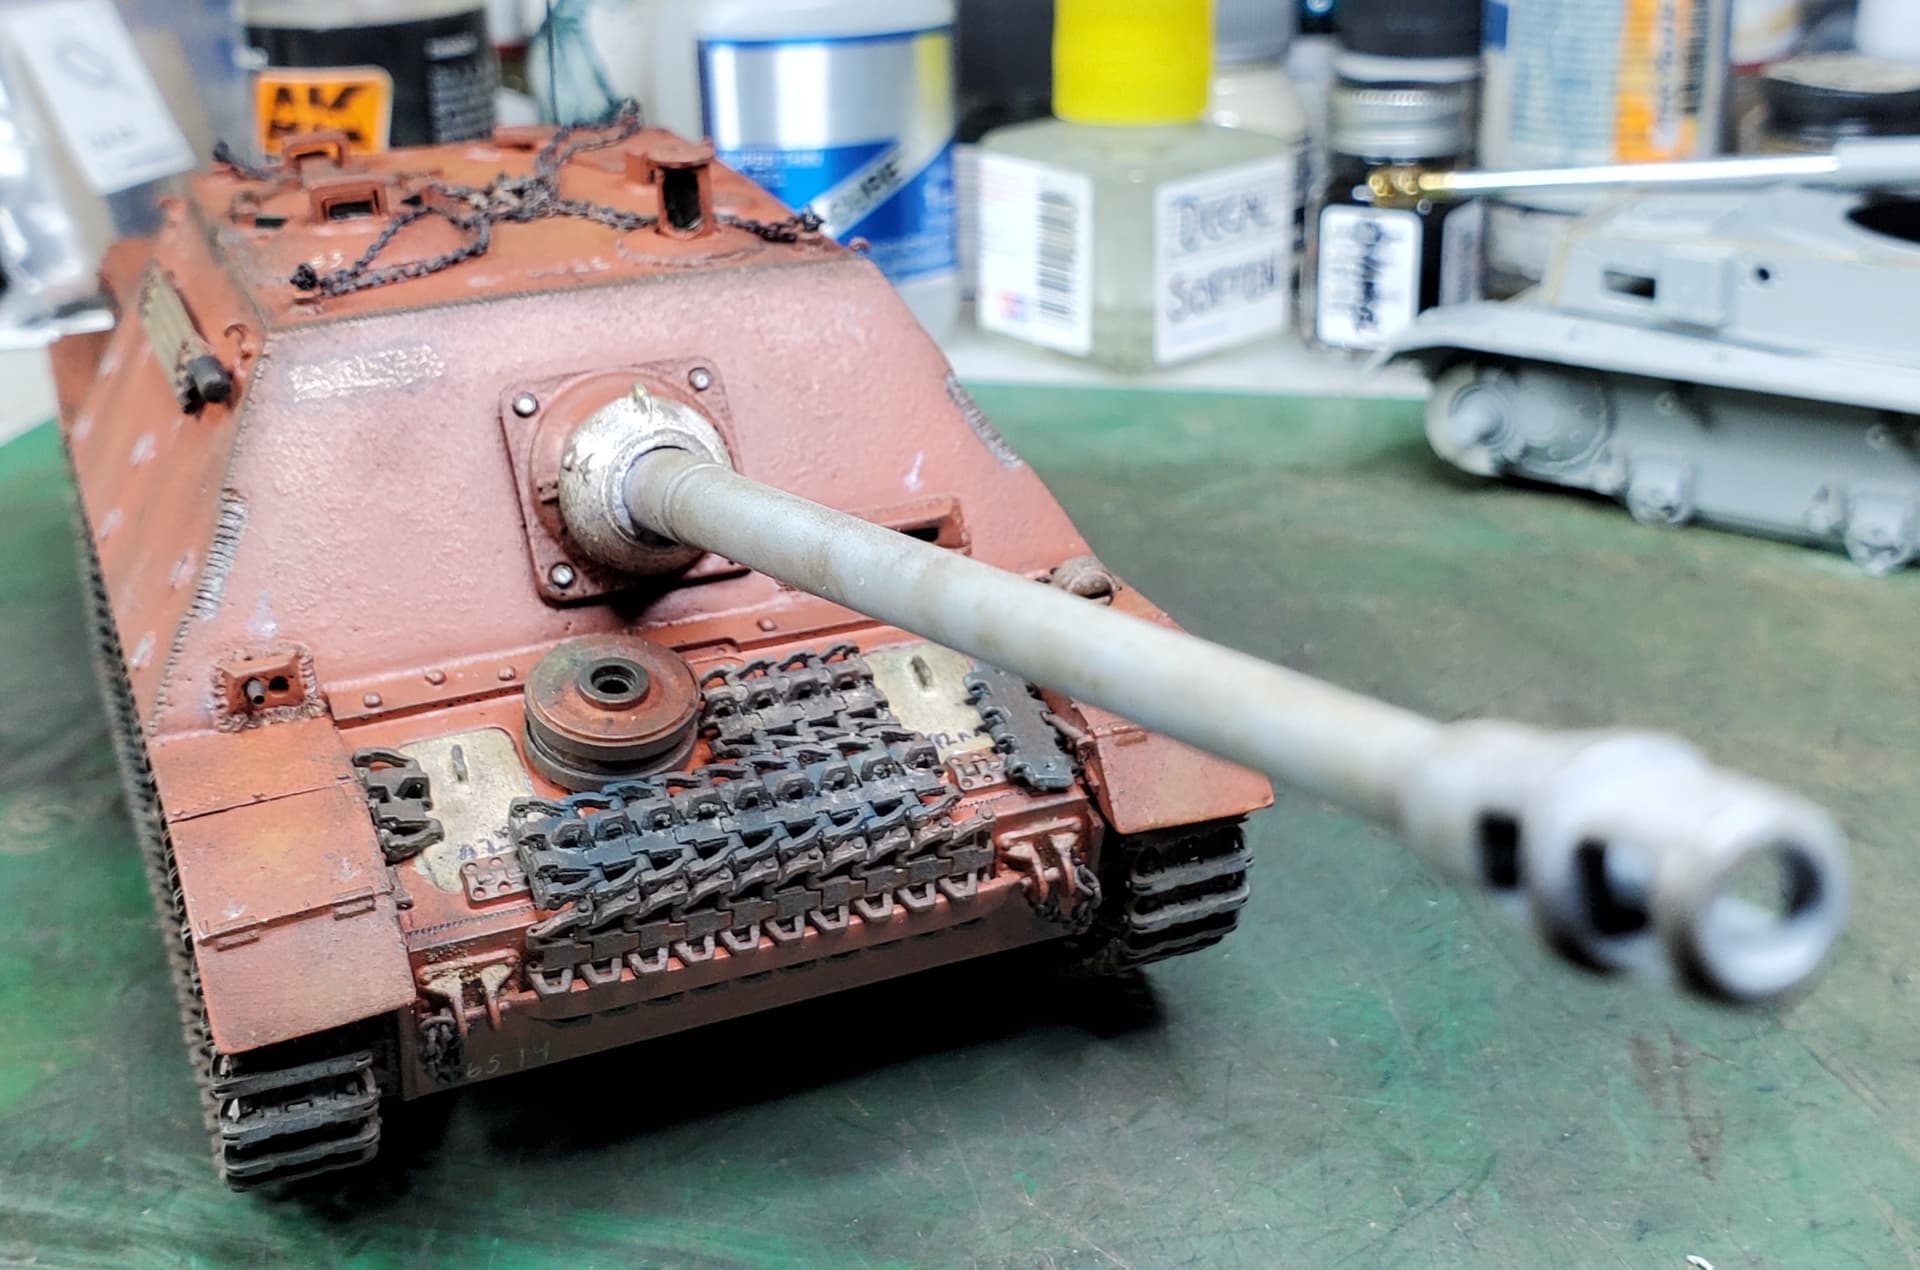
Update 16 Aug 2024:
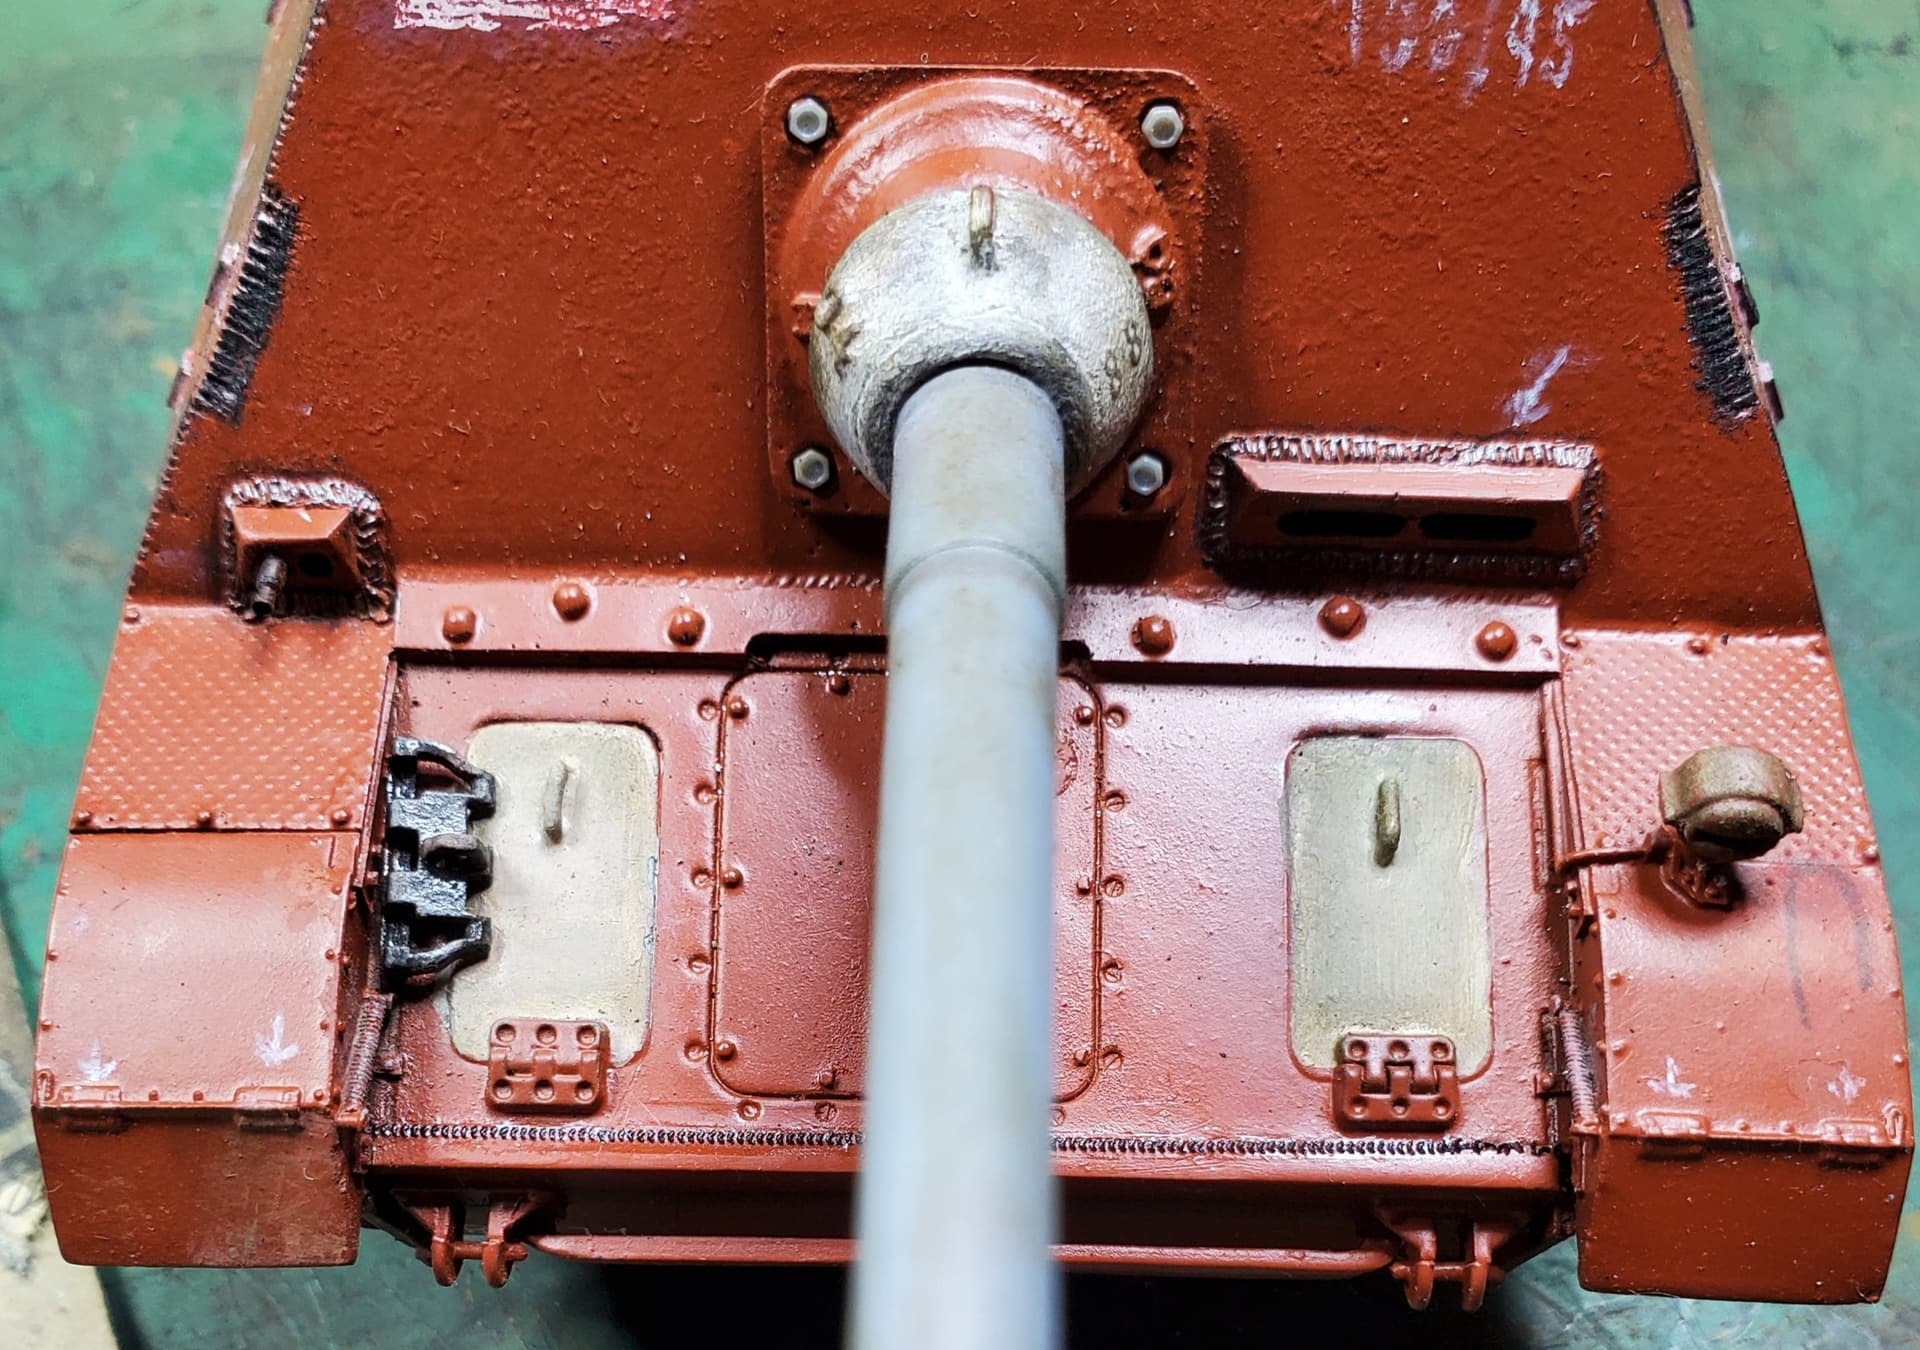
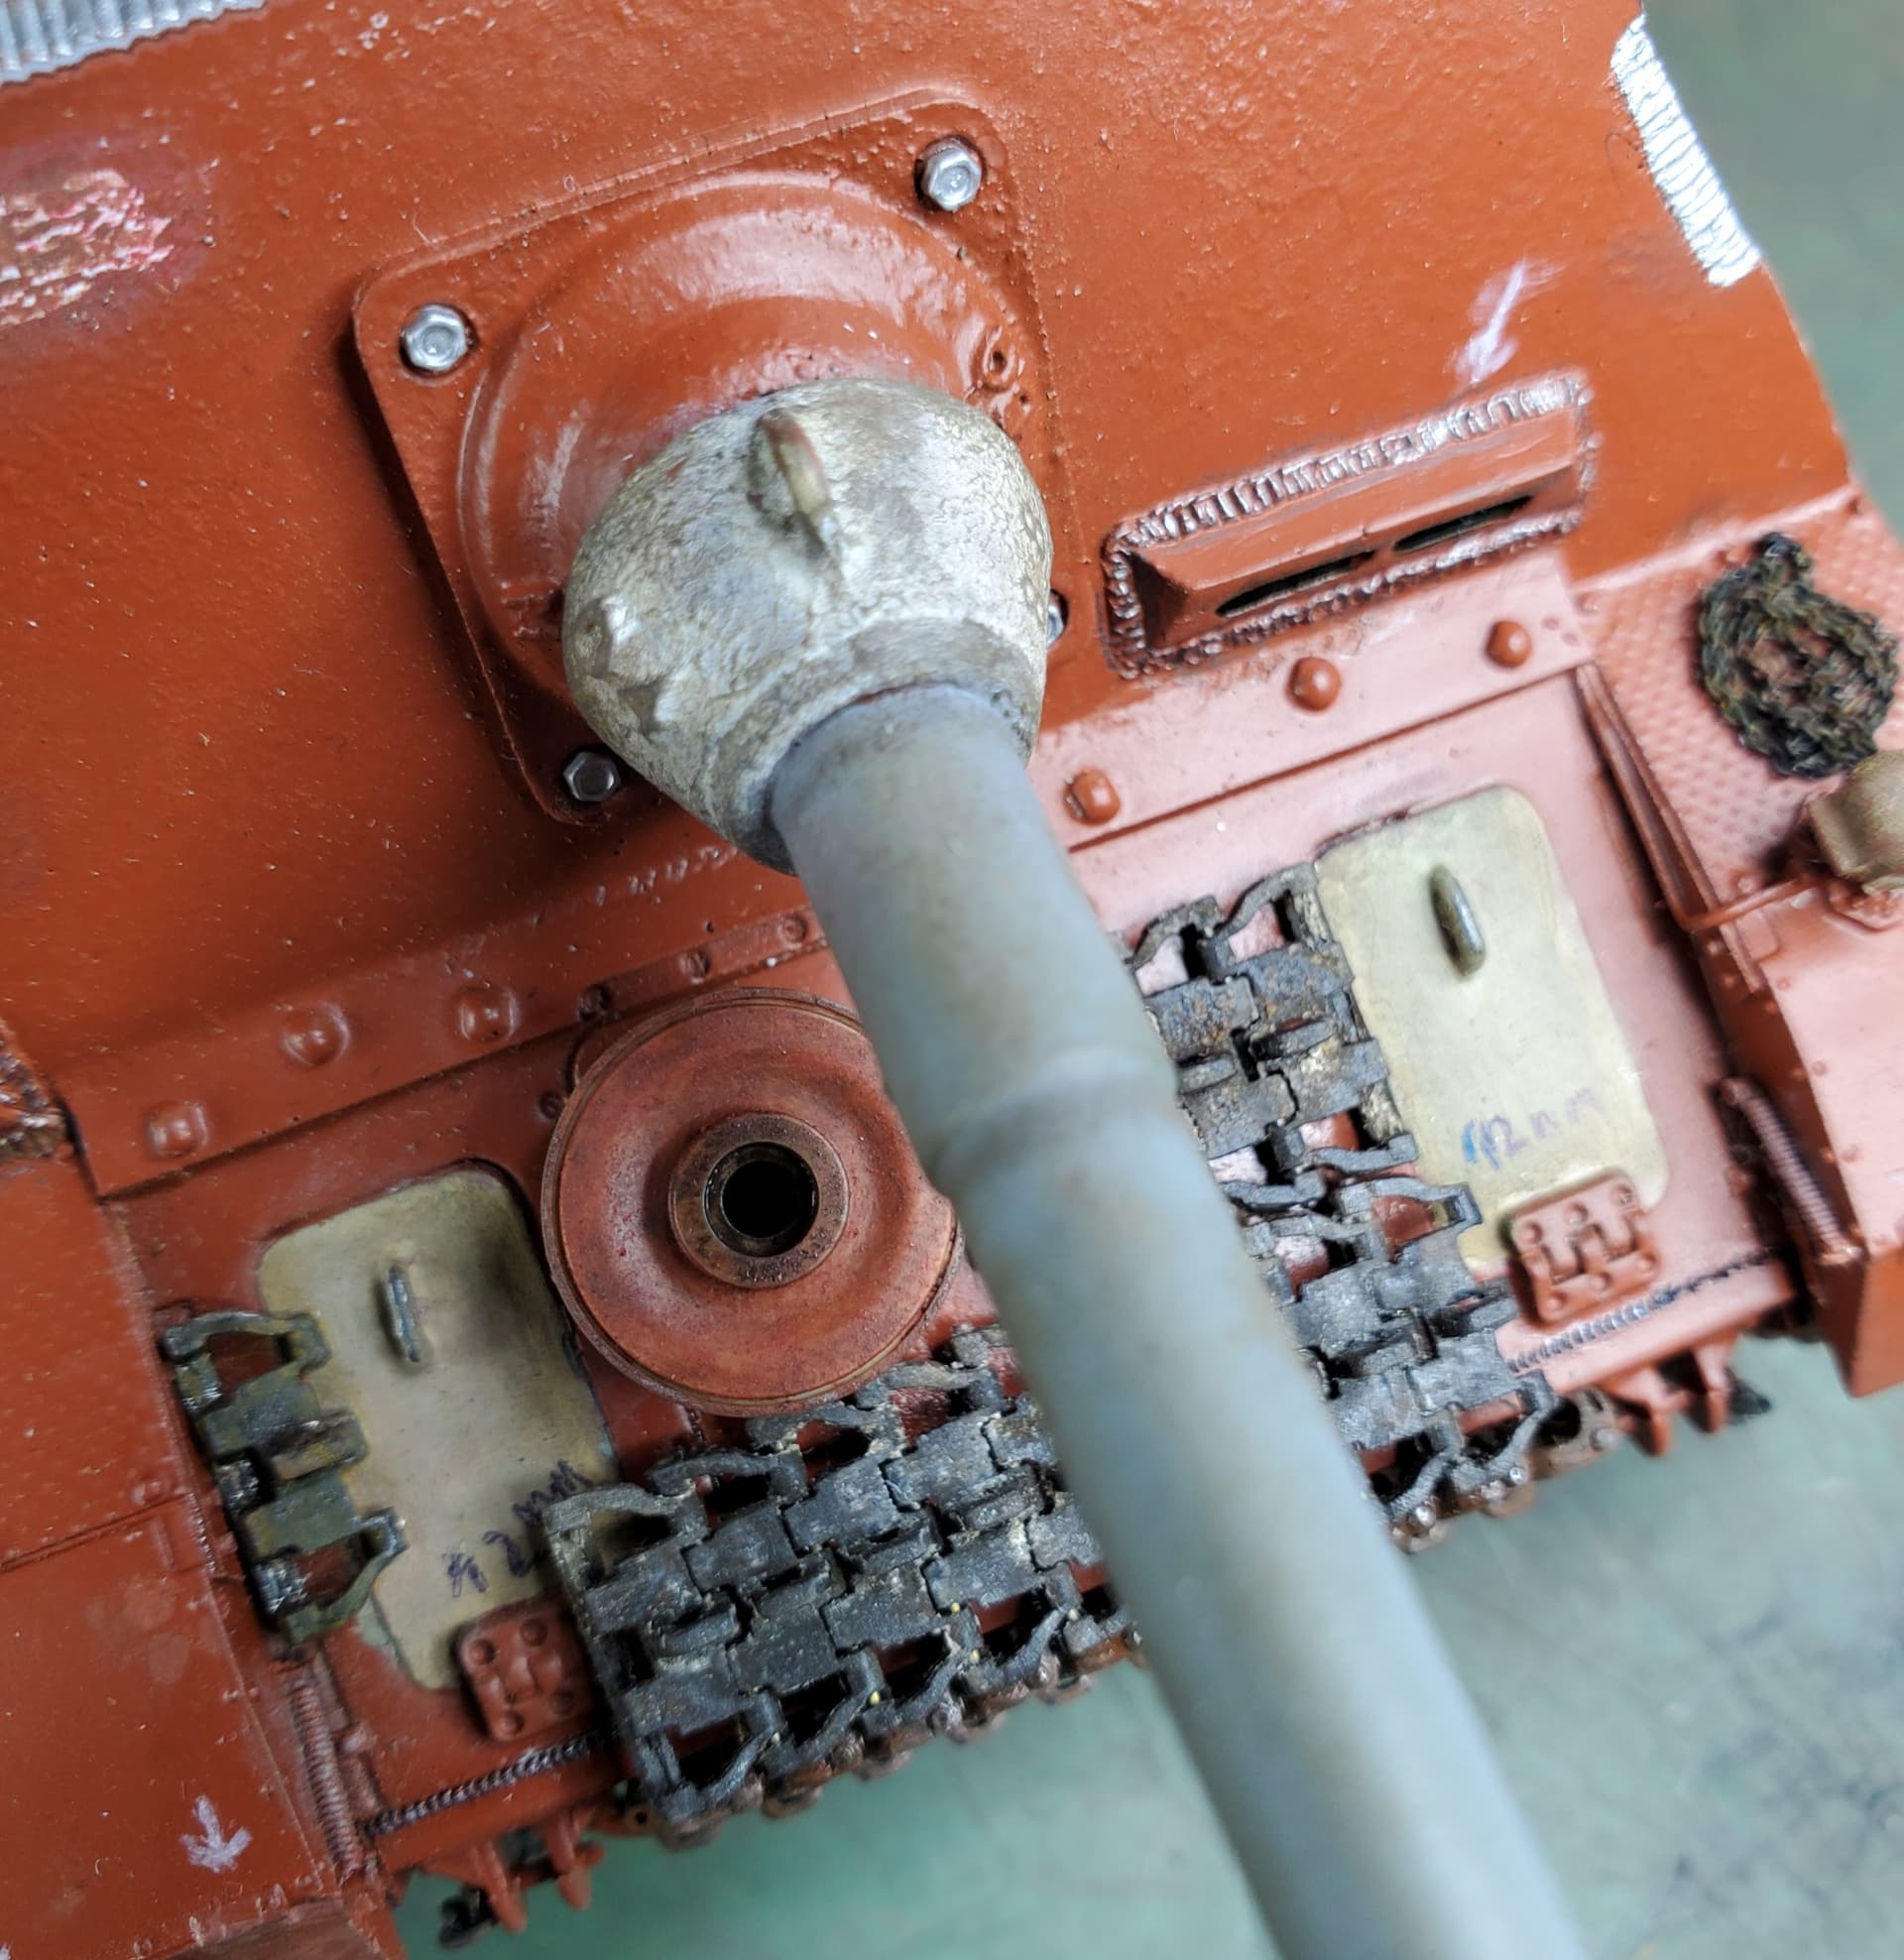
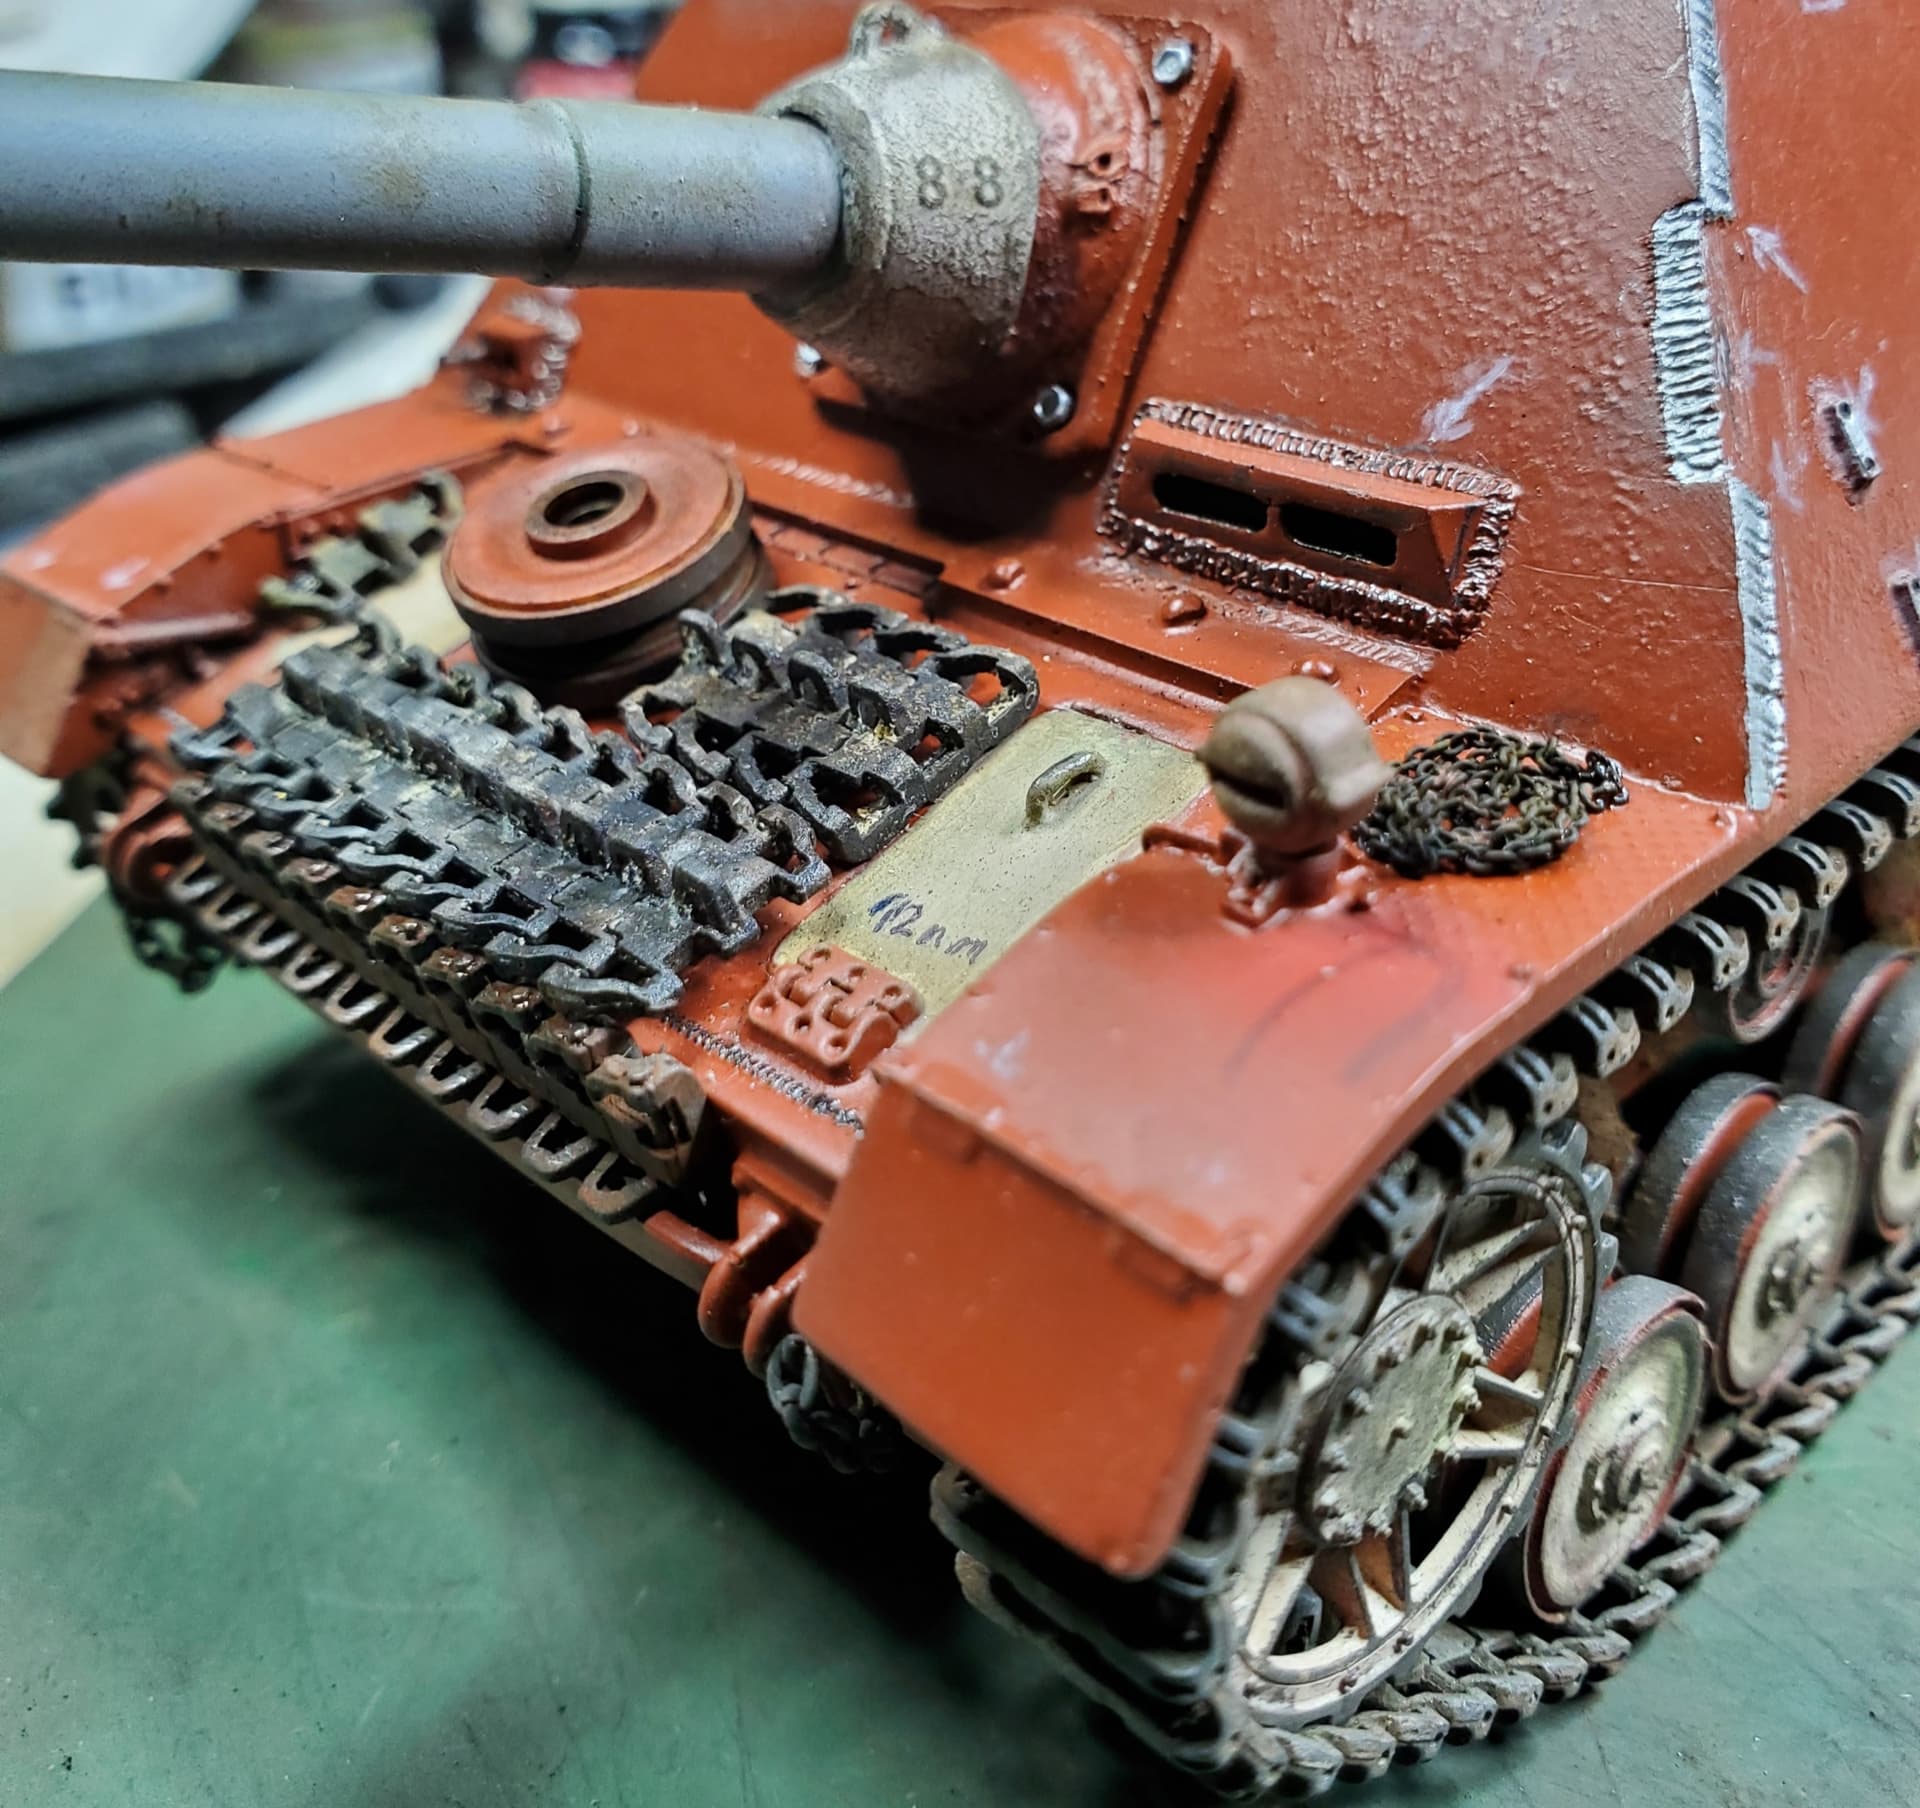
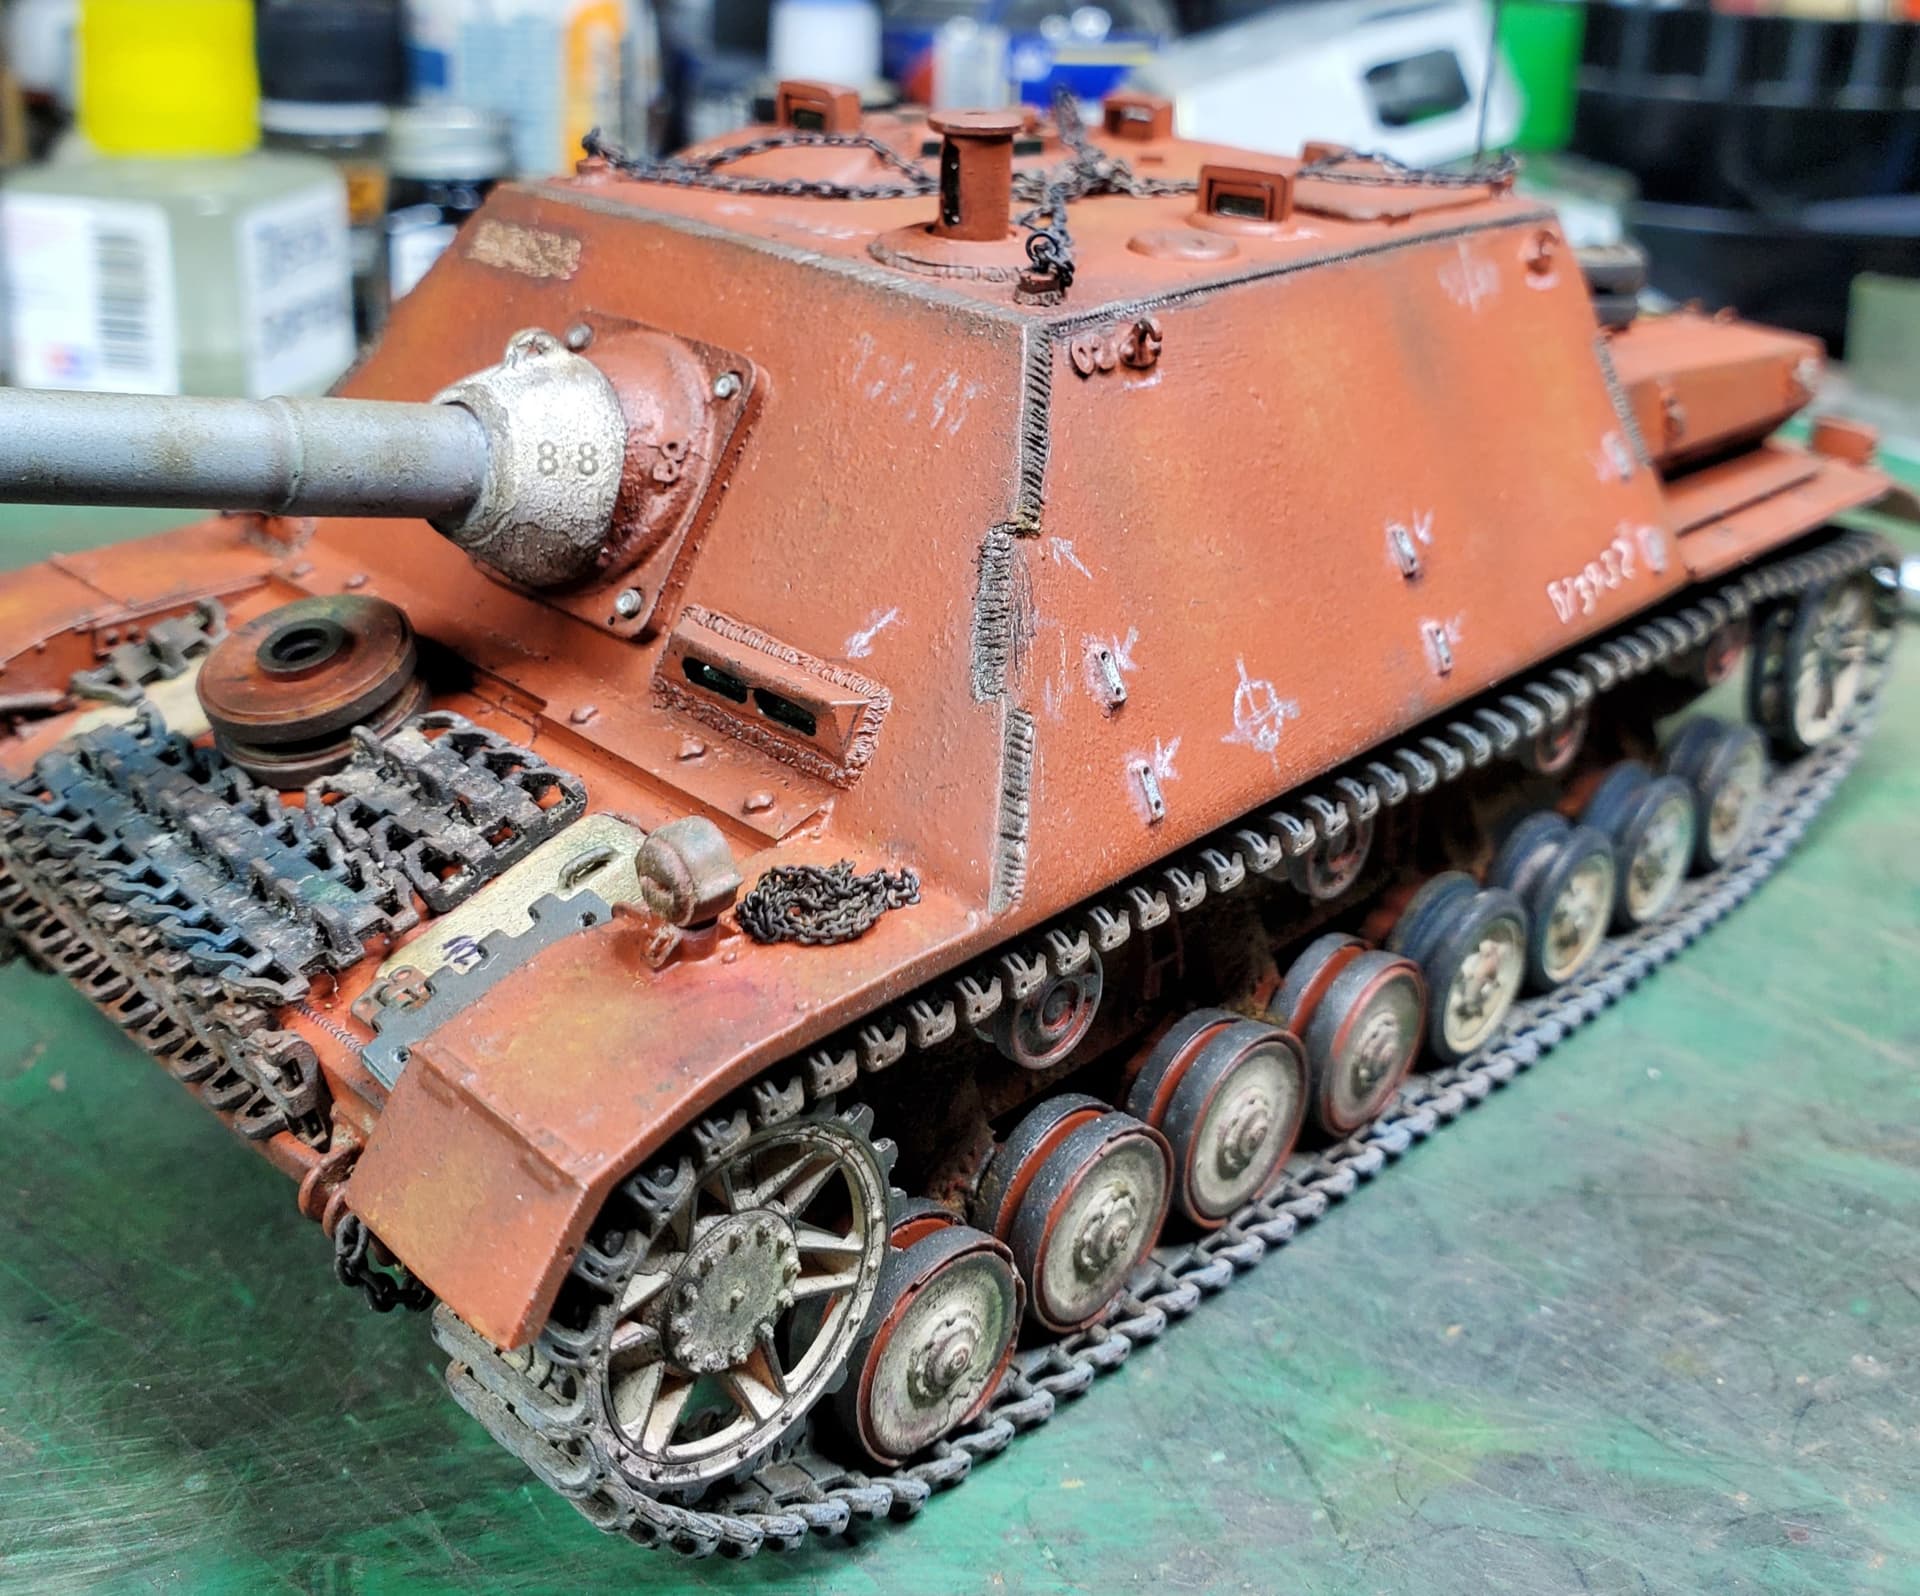
At the front…added 4 bolts to the mantlet/gun housing to structure. Those bolts are from Meng’s resin Nuts and Bolts Set C # SPS-008. Factory steel color to be added later. Painted travel light in an Afrika Korp theme color of desert sand. Applied burnt sienna oils ever so lightly up the length of the gun barrel (worker handling). Speaking of workers, one carelessly left a track link near the transmission access panel (it will be forgotten there).
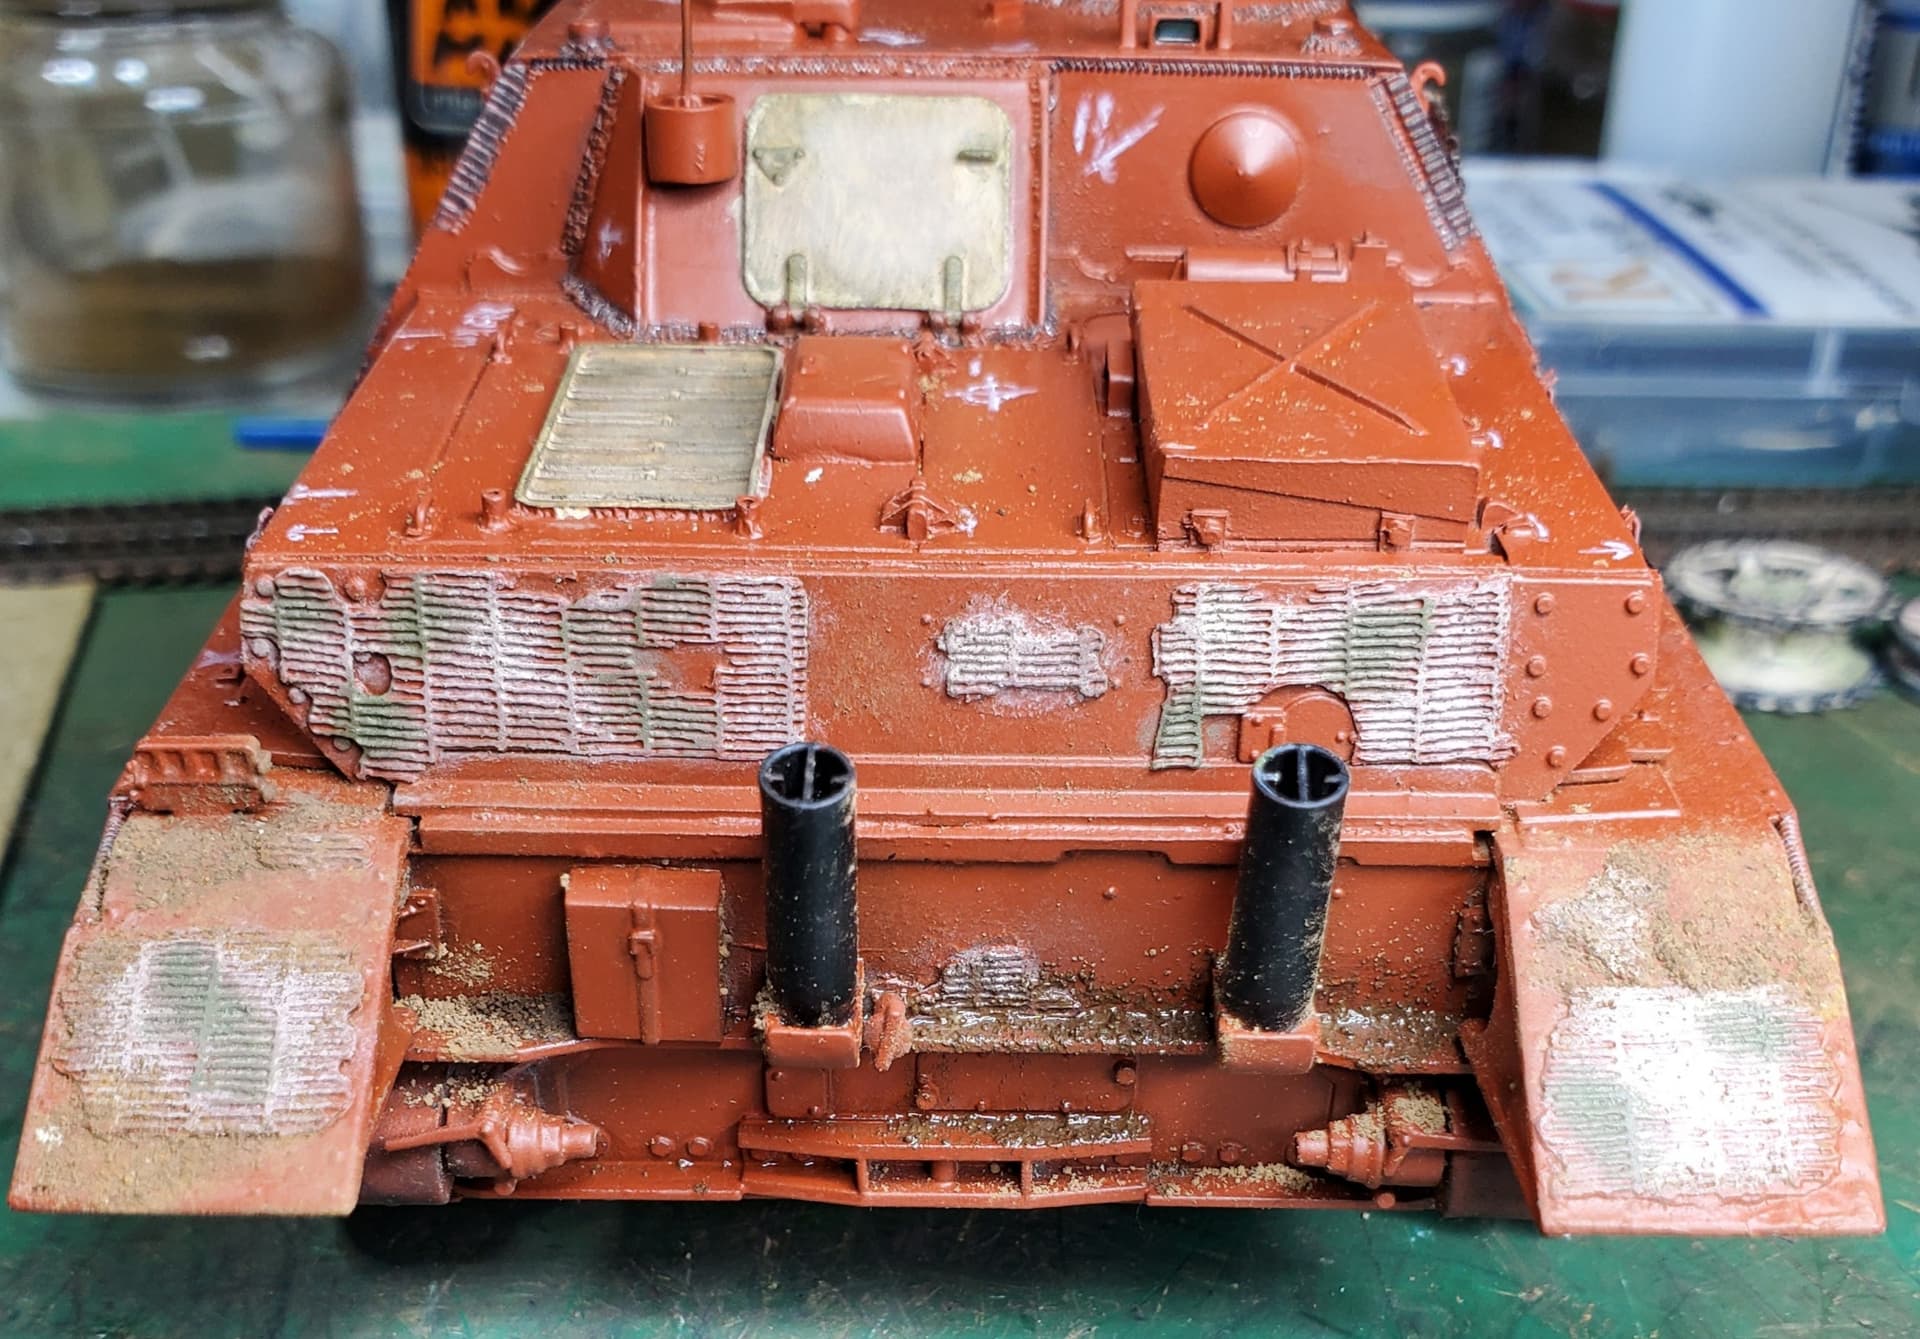
At the rear I feature left over Zimmerit left in the color applied by previous owners…probably a Russian steppe sand/green combo. The Zimmerit itself is of an unknown brass application. Threw on some kicked-up dirt/sand around the exhaust and the fenders. The engine, and vehicle, entry access panels weathered yet again to factory handling.
I like your concept Jack and where you are going with this. All of your additions are very intriguing. Excellent build.
Update 17 Aug 2024:
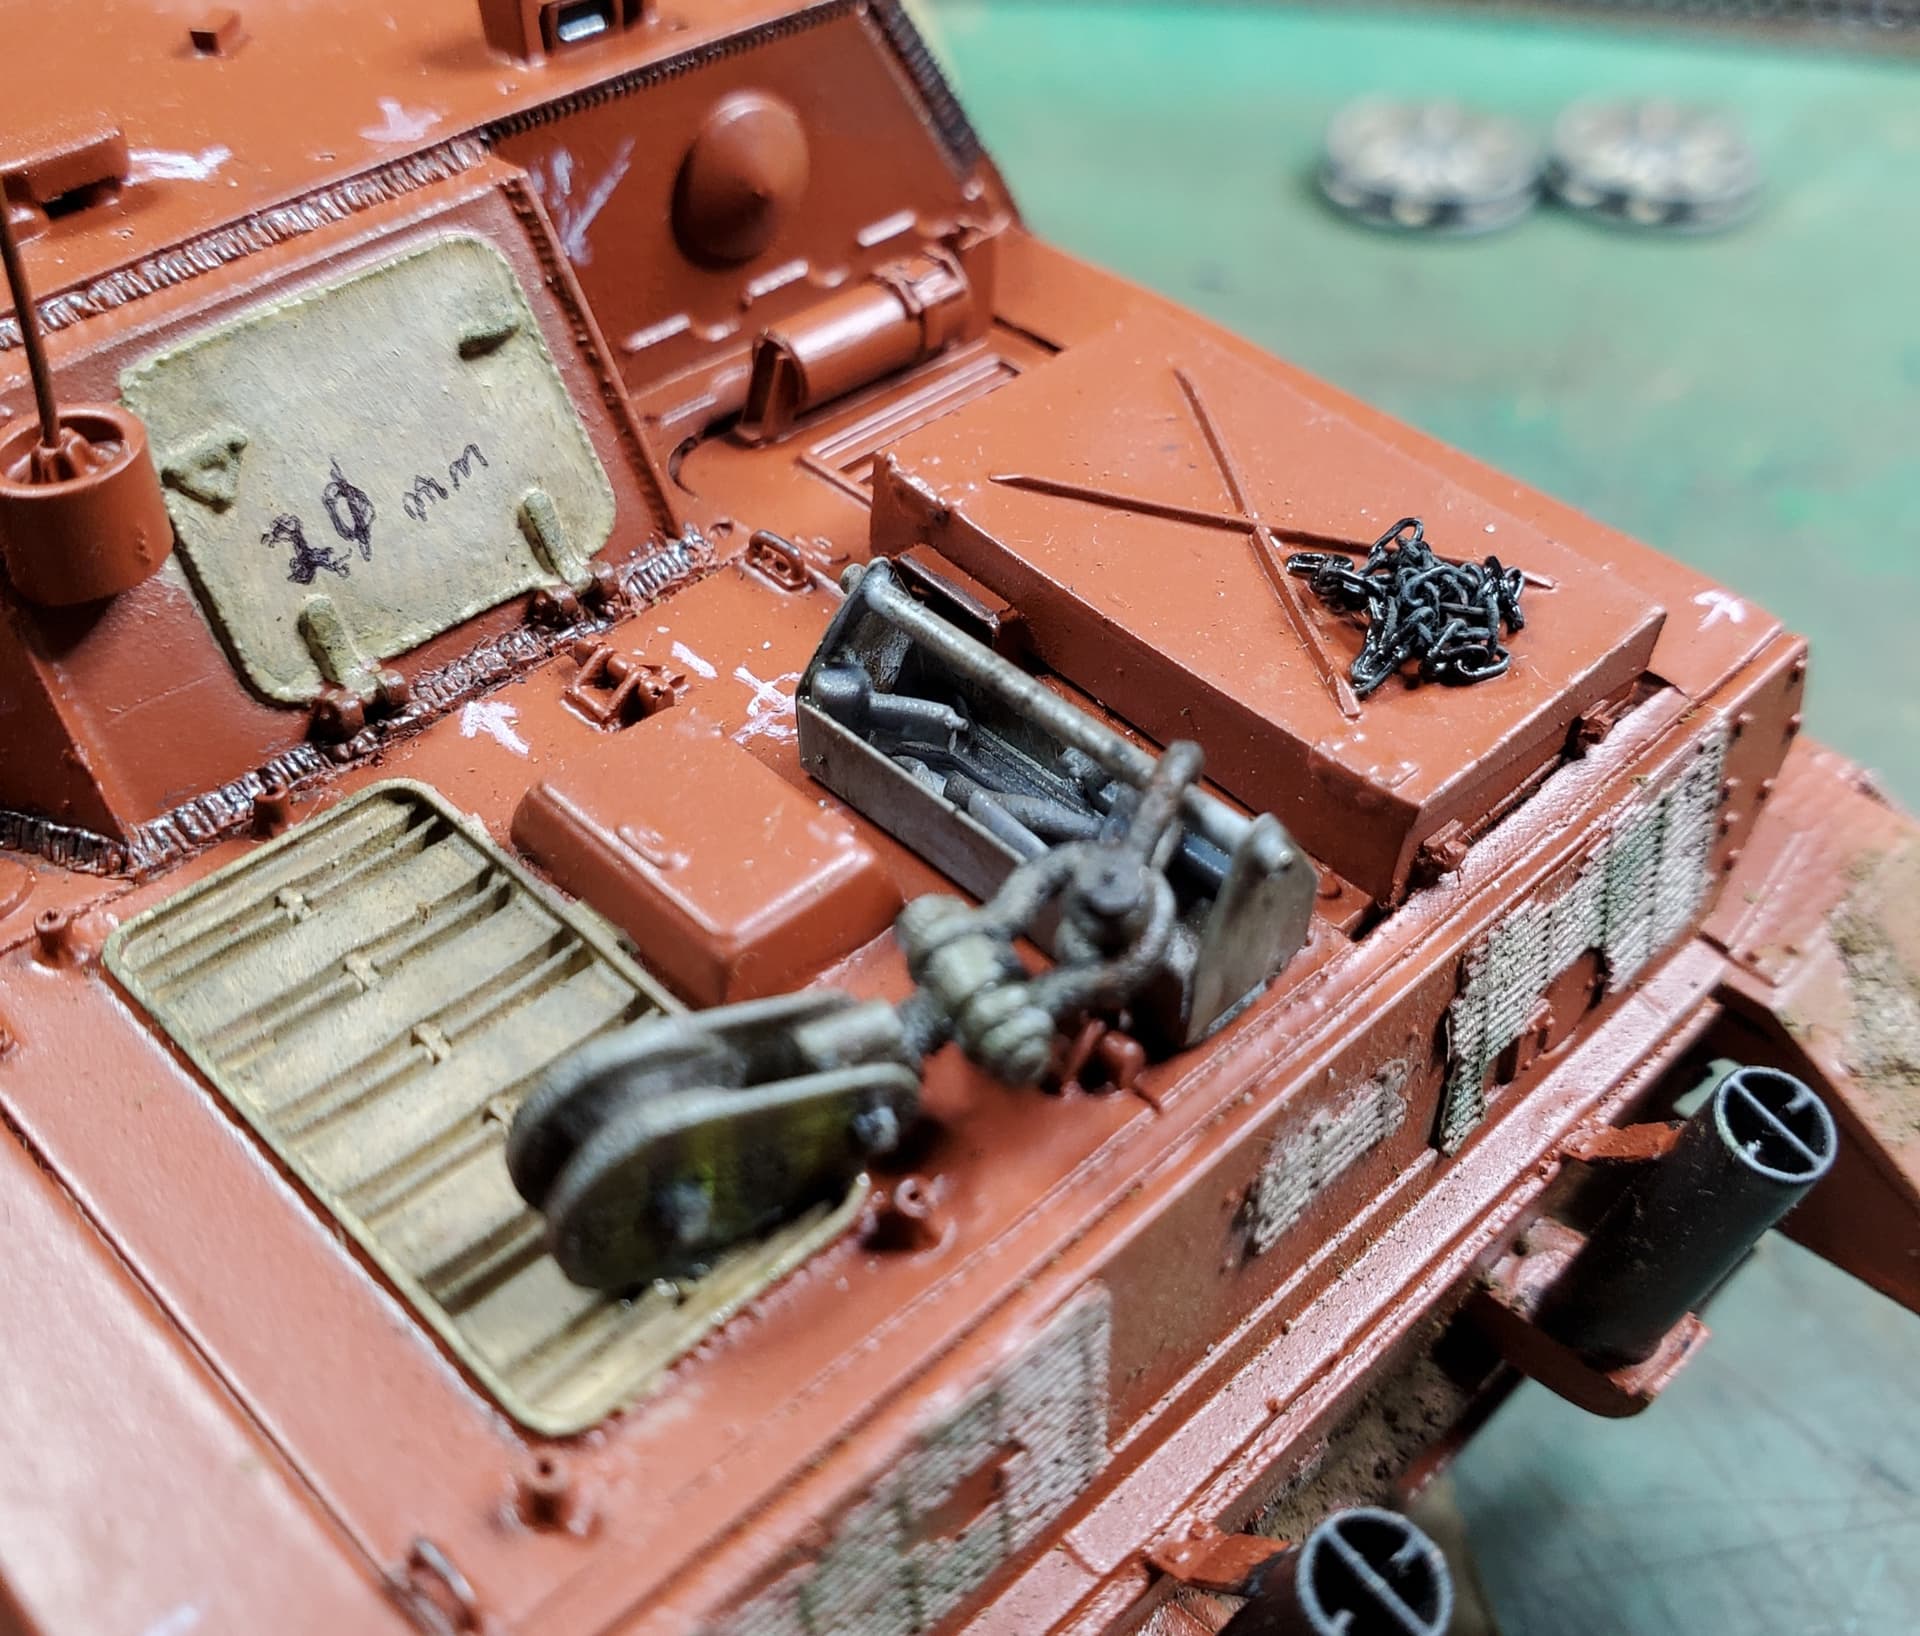
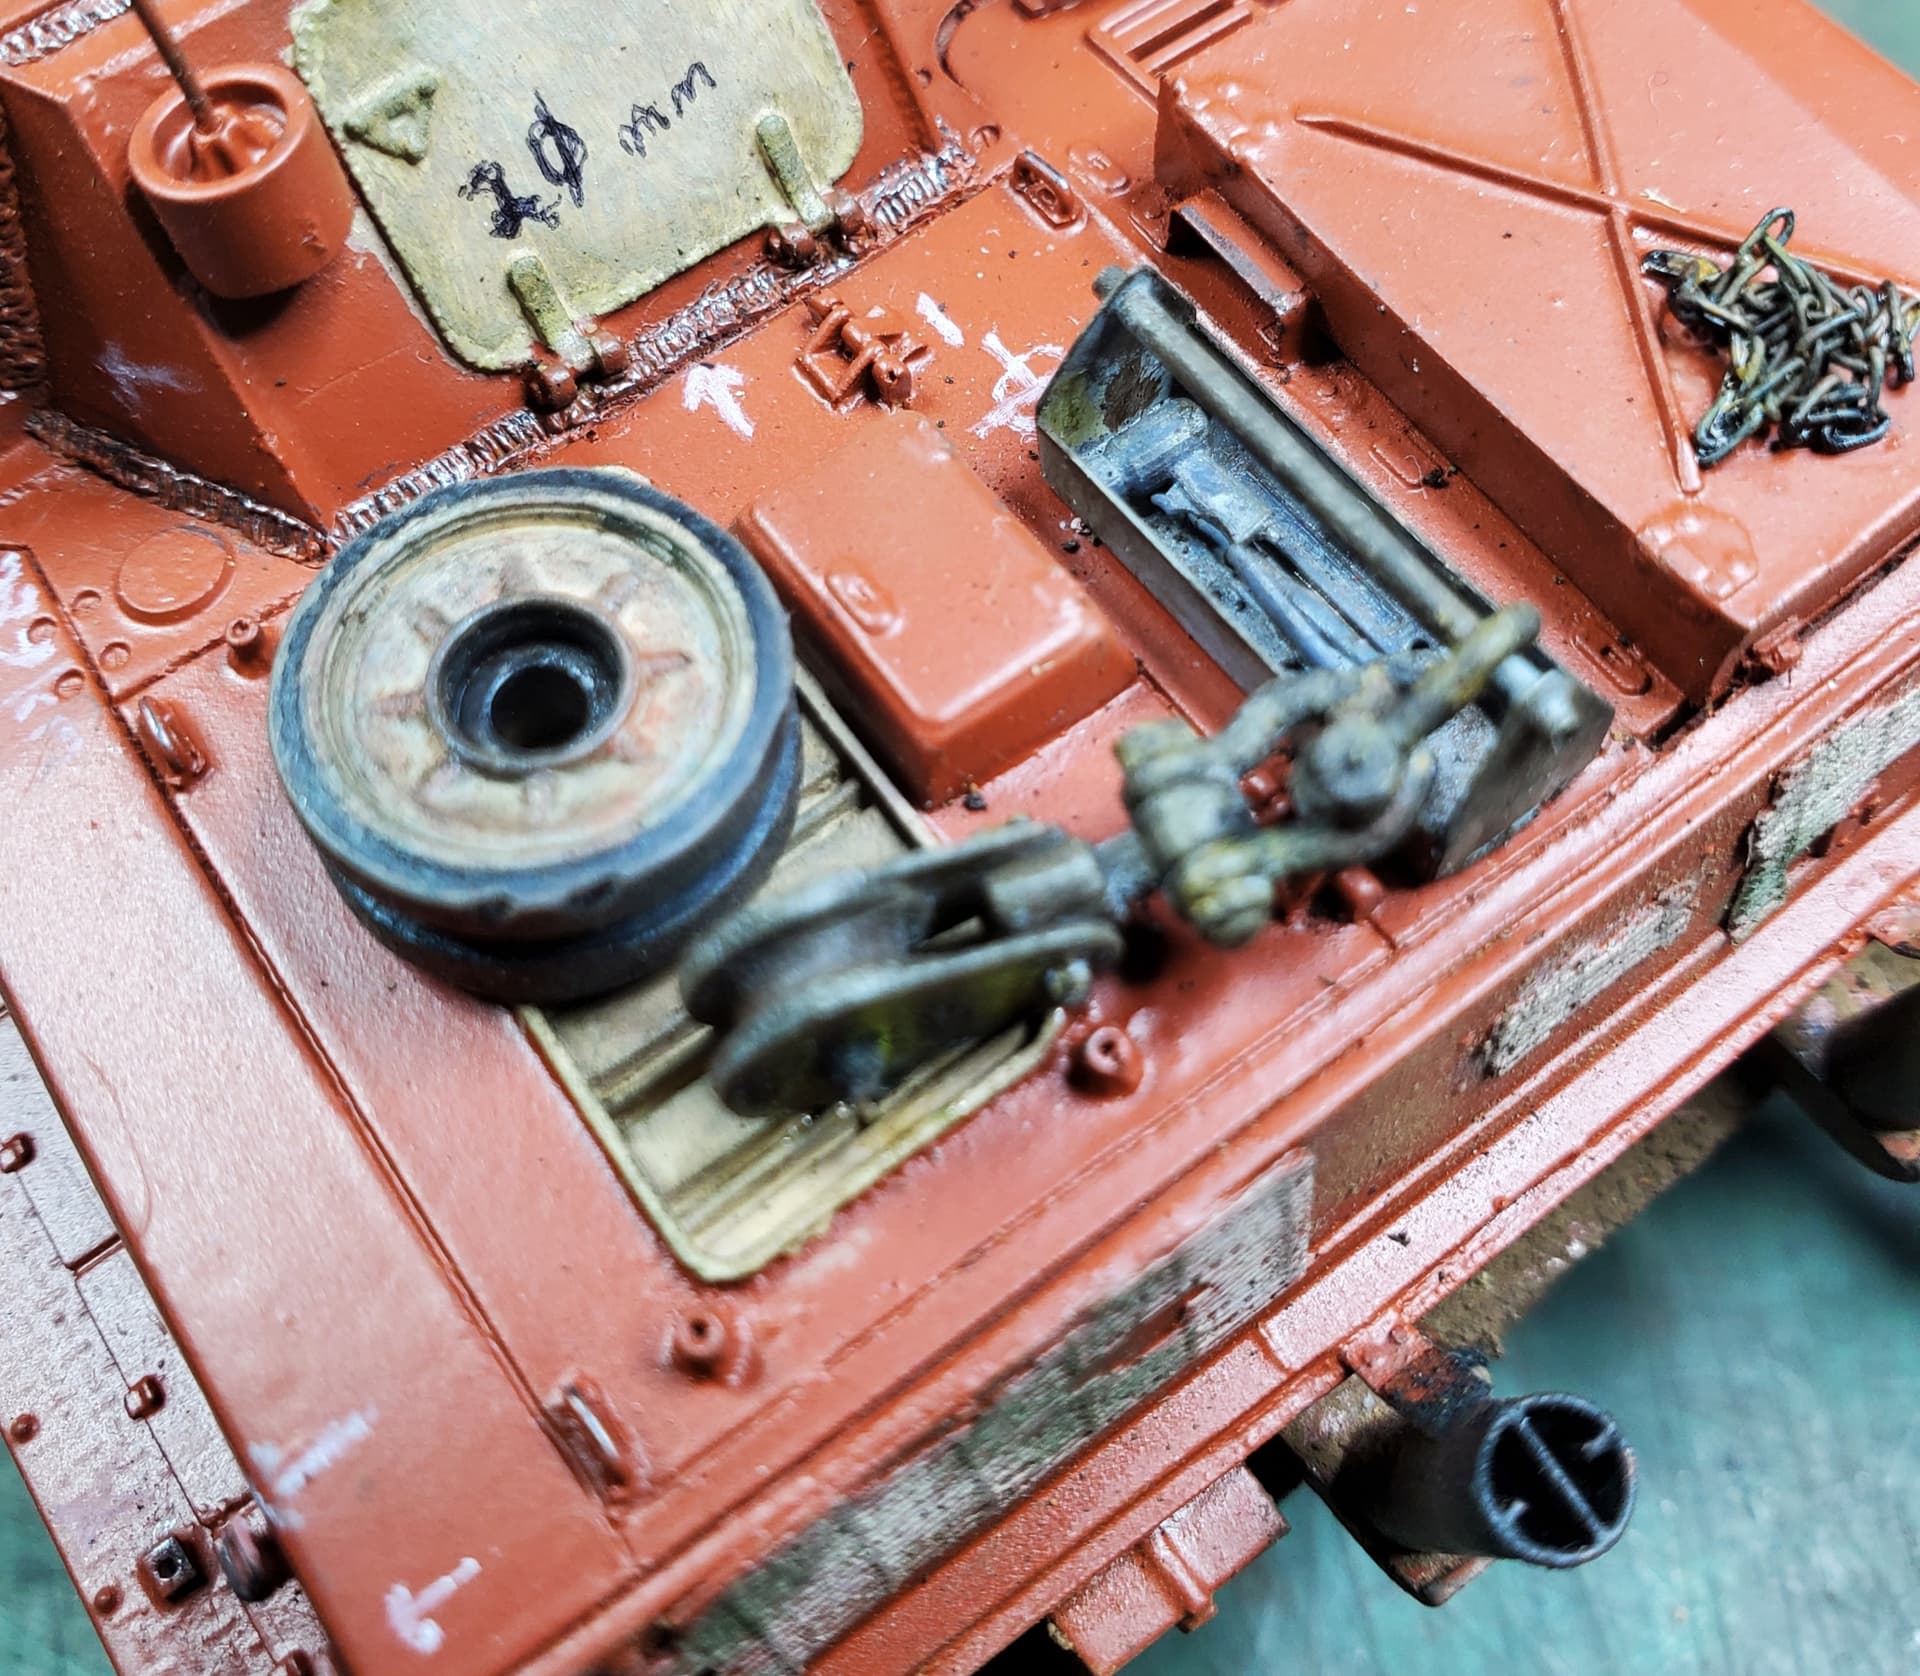
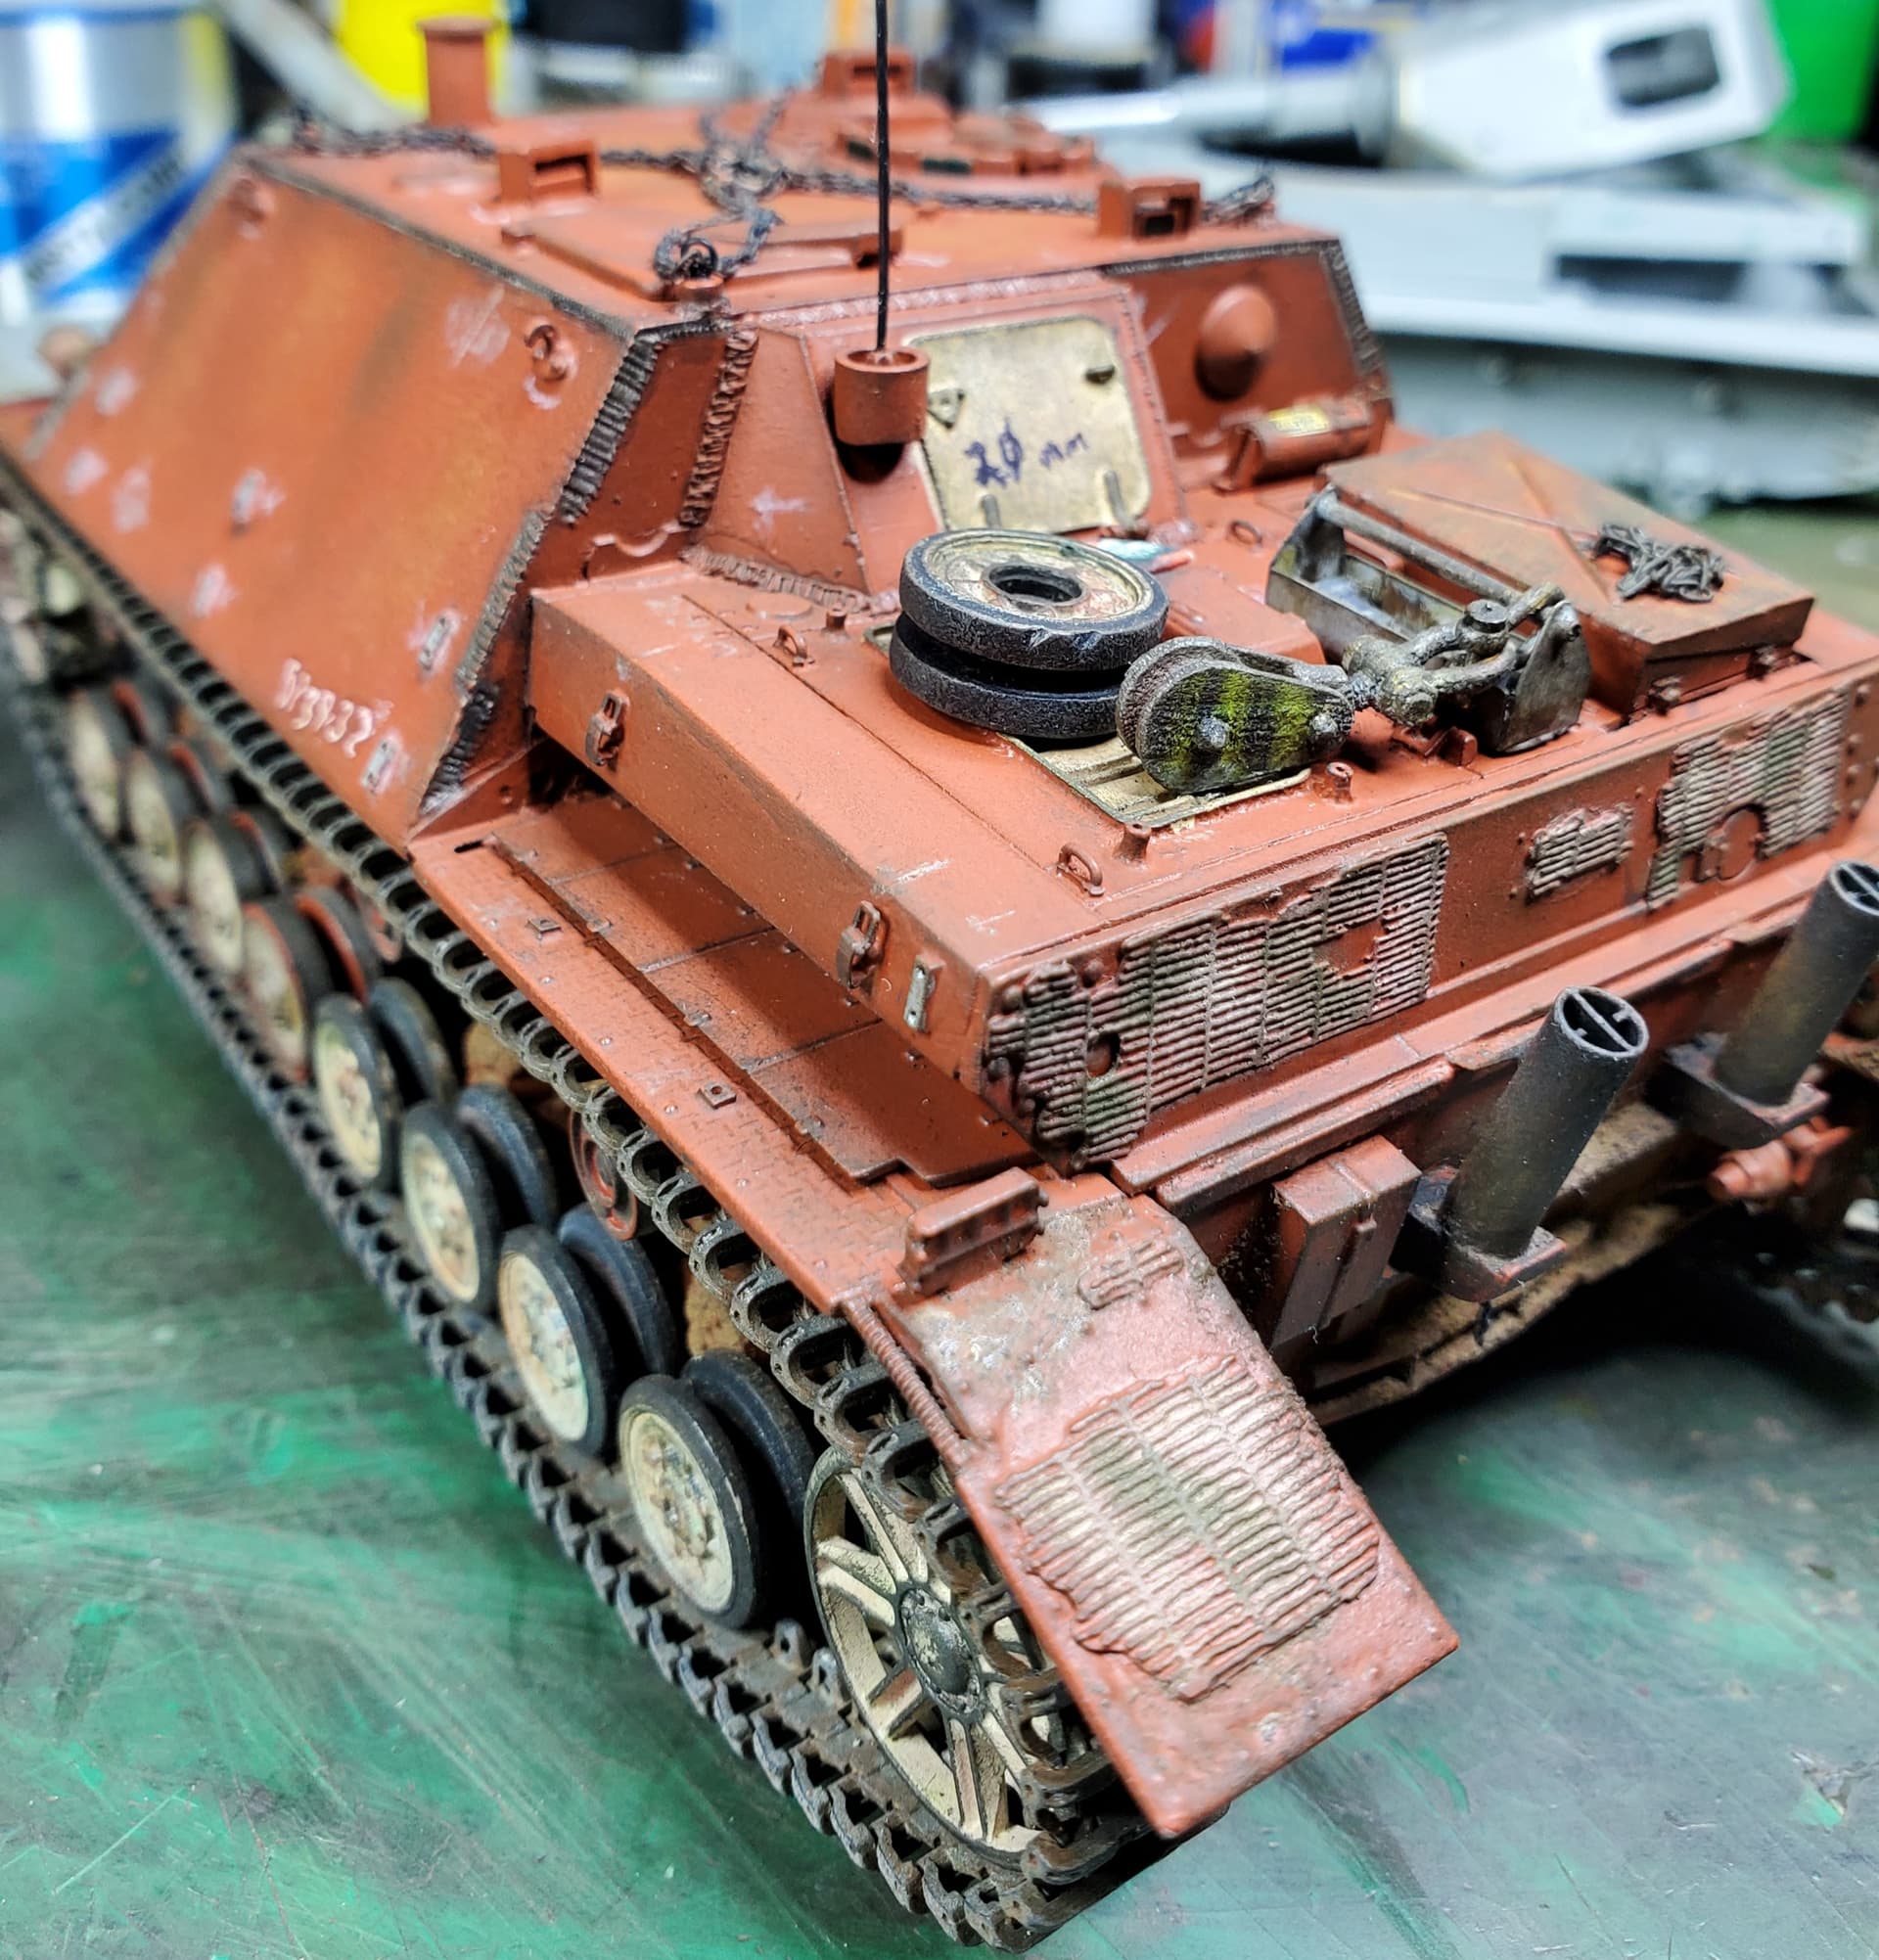
Spare track and retaining chains added to the spare track rack. Industrial factory chain to left fender. Added brake access panel thickness markings.
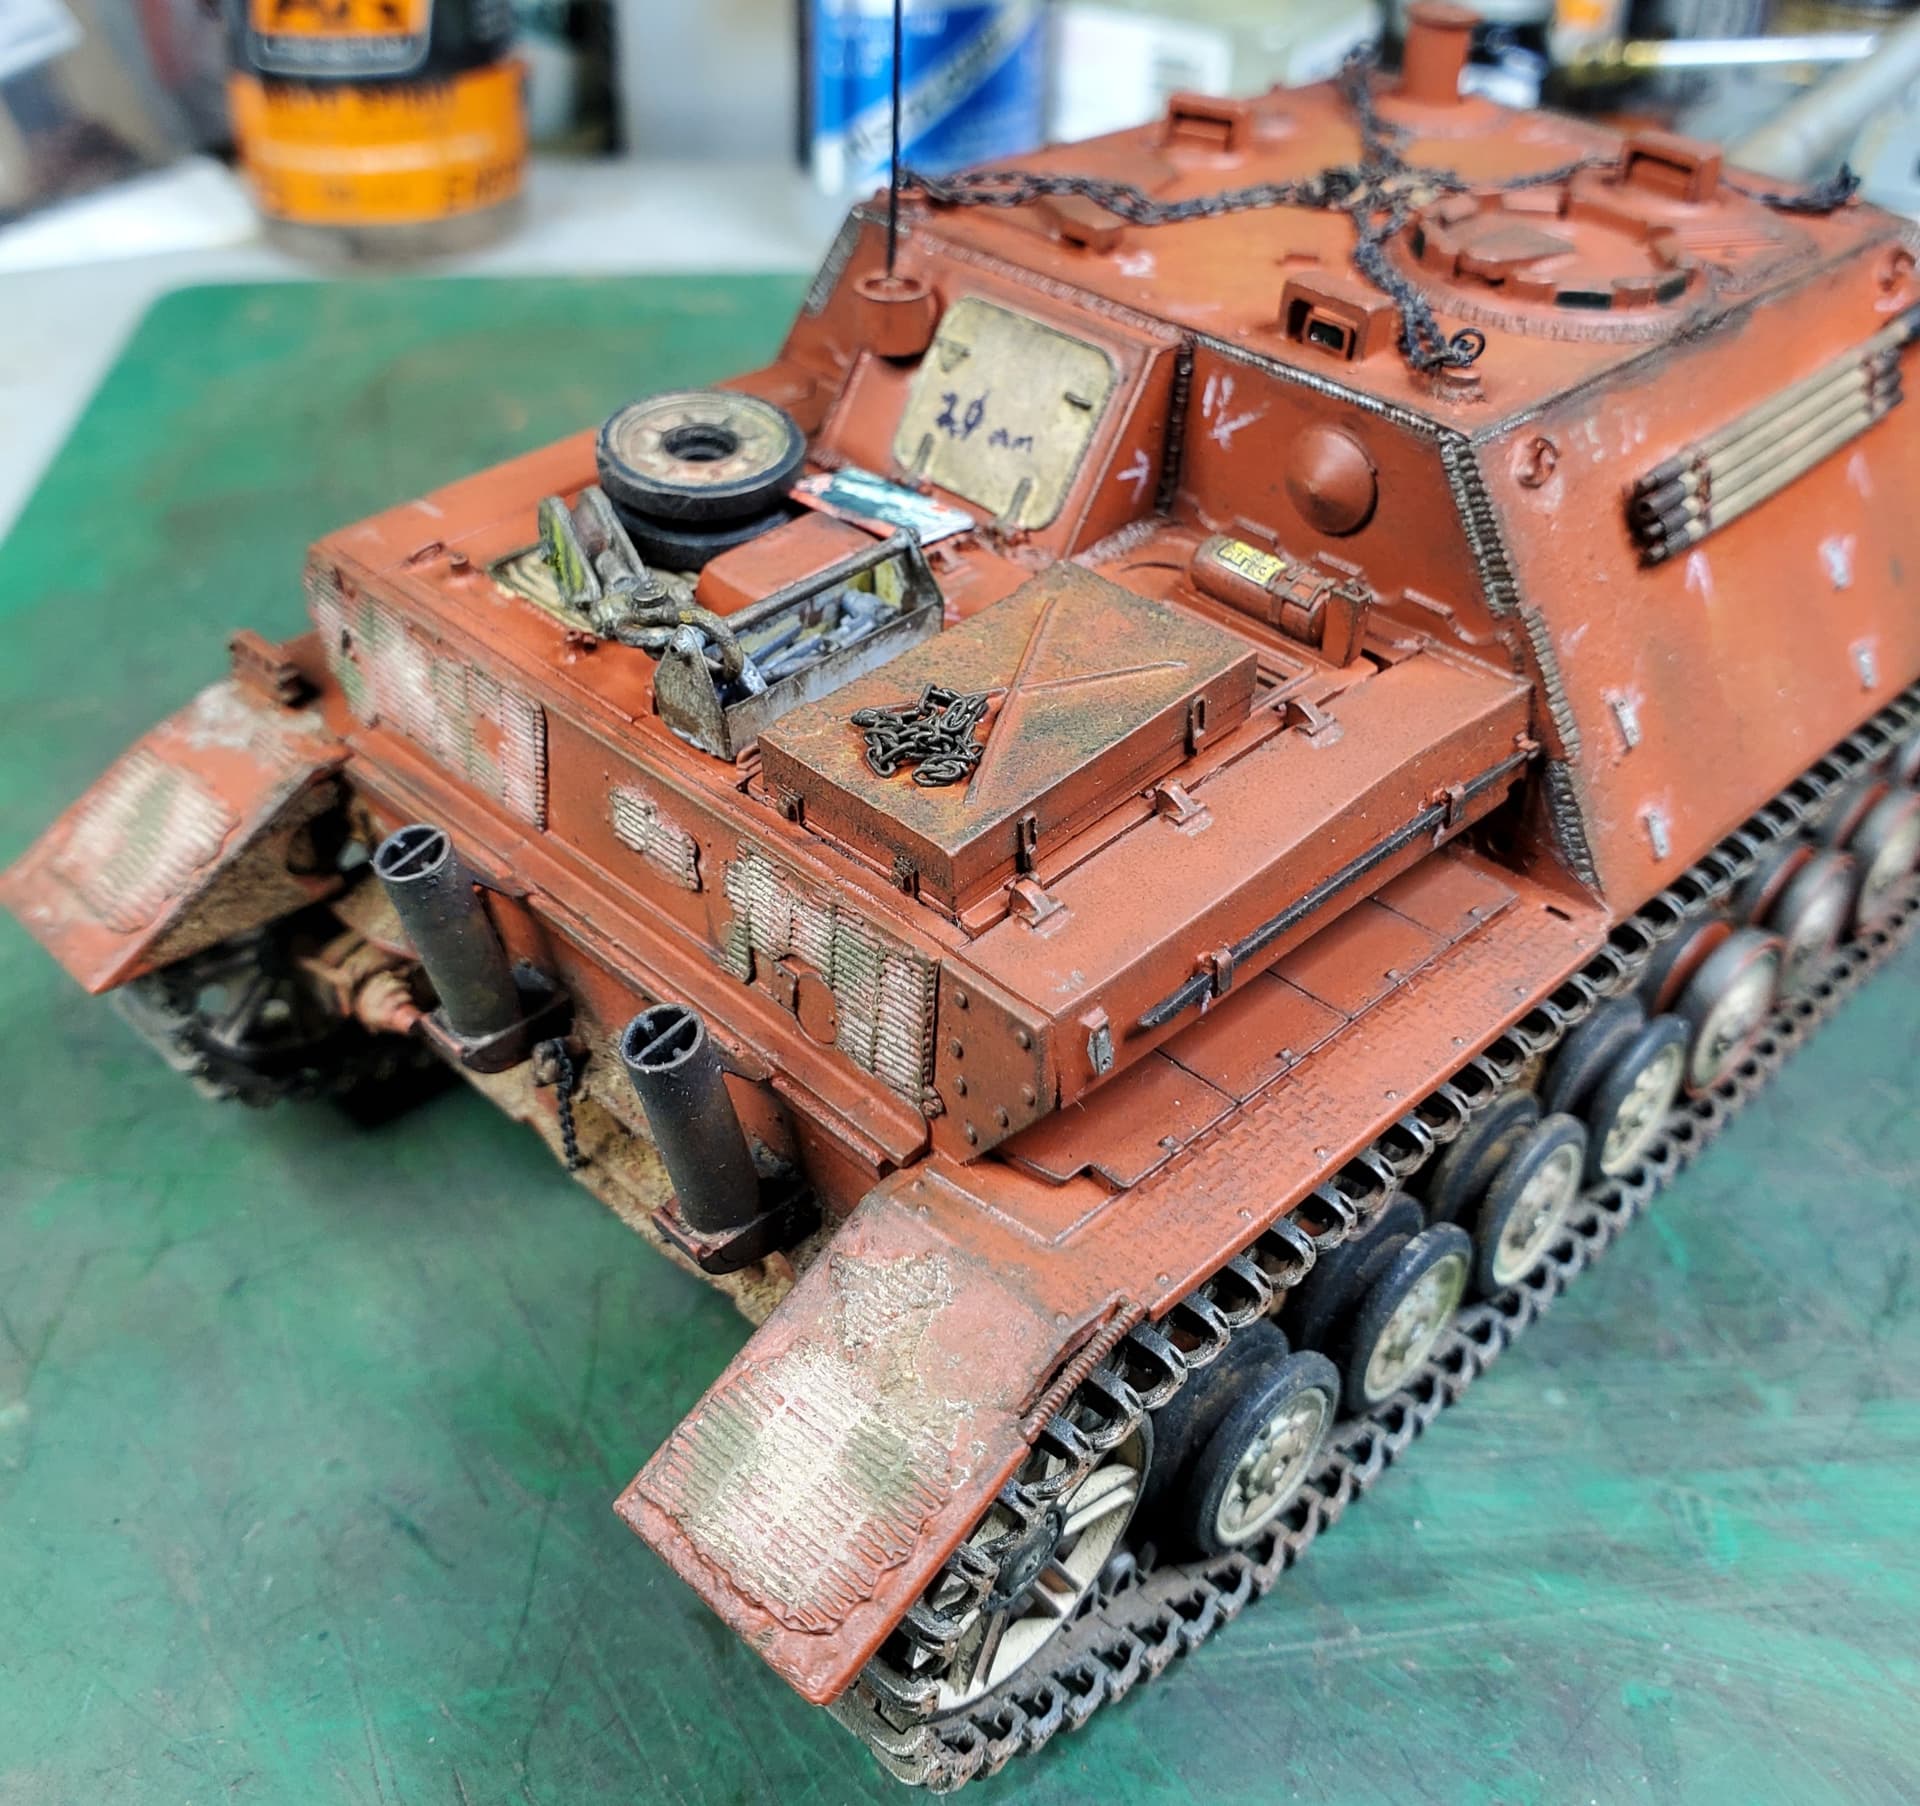
Update 18 Aug 2024:
A little work today at the rear of the vehicle.
Snatch block and clevis from Shapeways 3D. Brass toolbox from Matho Models, item 35006. Tools are from Value Gear 3D resin, set 3512. Industrial chain…spares.
Update 26 Aug 24:
Side view of track install. Will only show slight sag being new track.
New stowage up front in factory temp stowage: spare steel road wheel, spare track links,
Additional spare, and grimy, rubber road wheel.
Just another shot of front stowage.
Update 27 Aug 24:
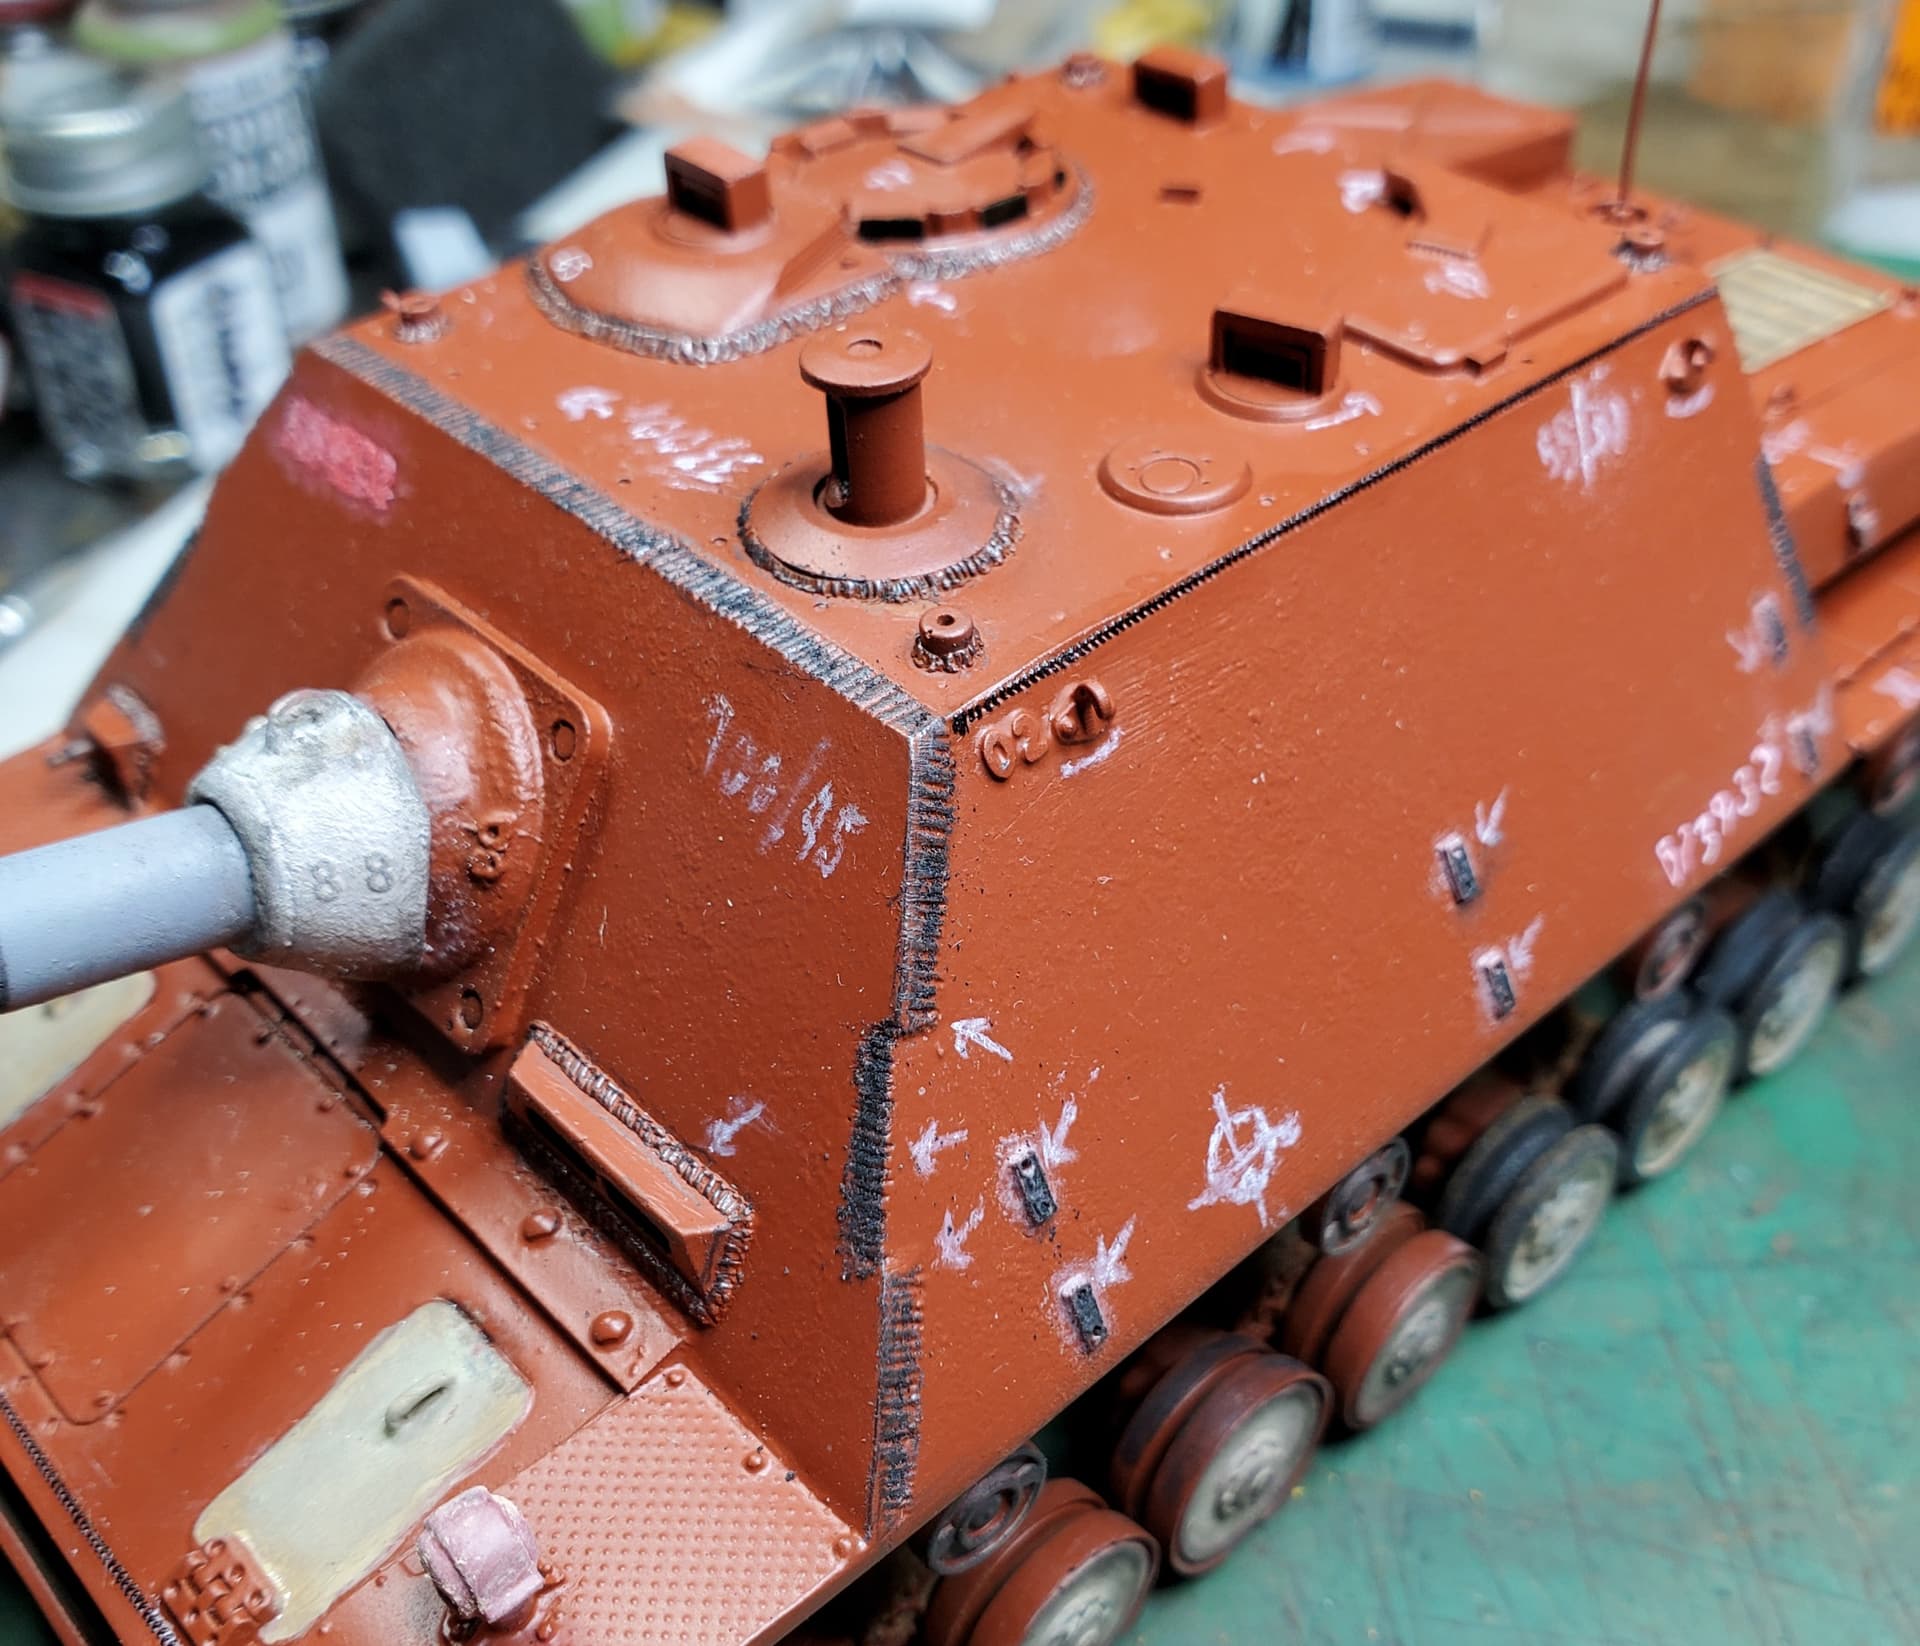
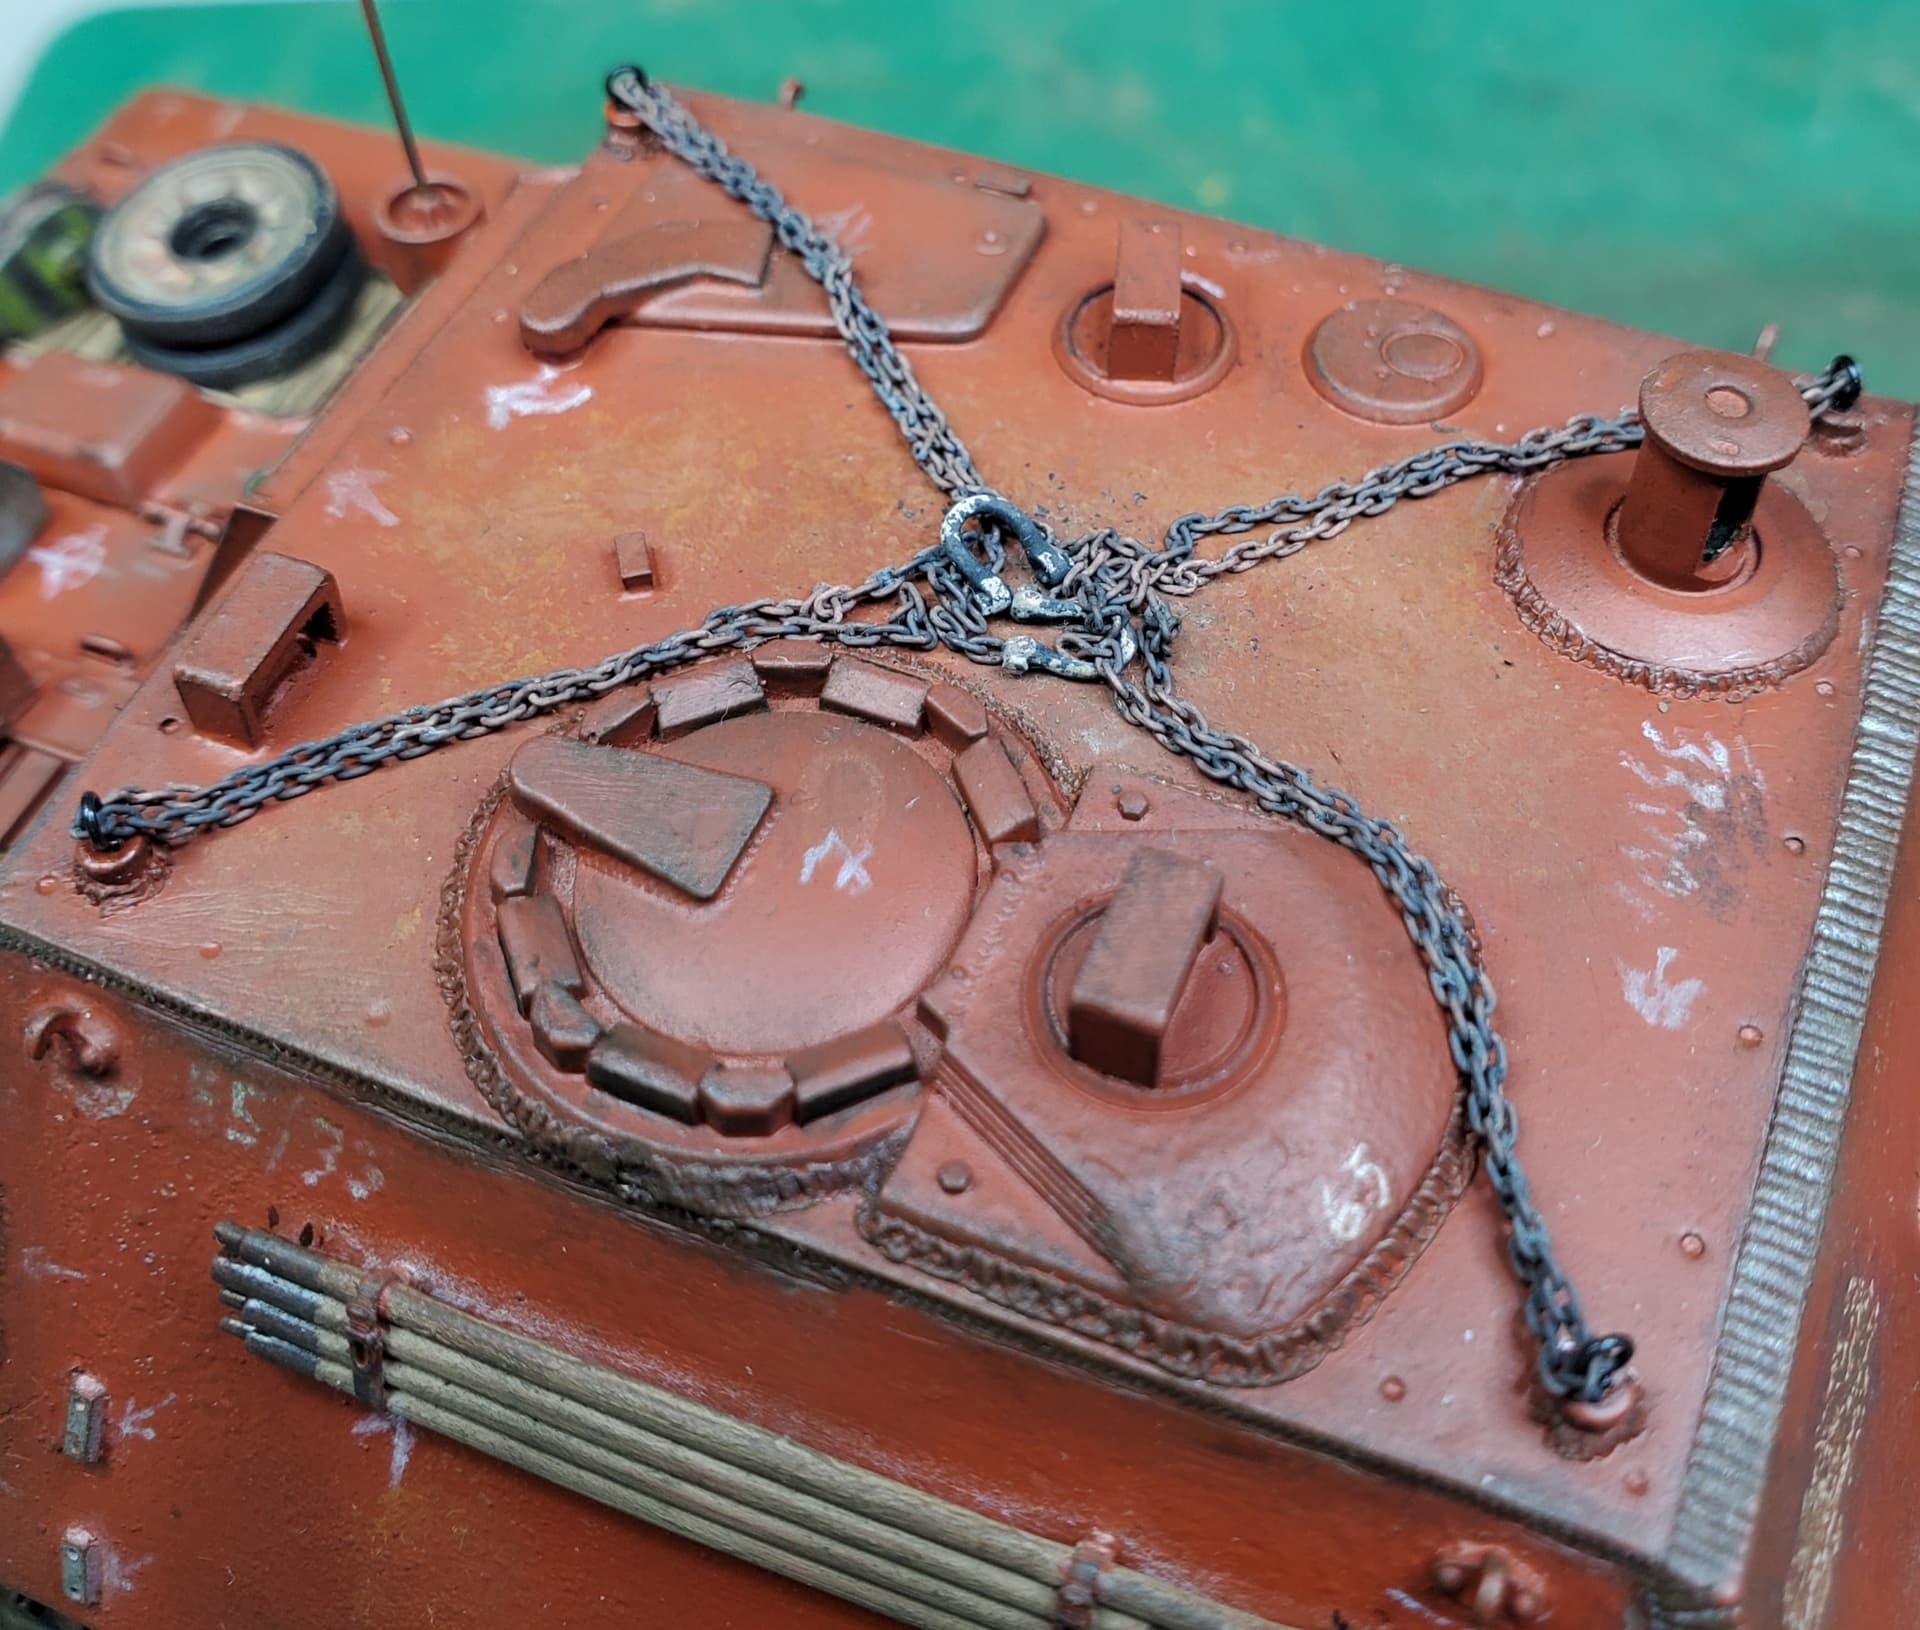
A little bit more weathering today…showing wear, or foot/hand traffic discoloration, or a worker spills a drink/chemical/gas/oil/acid…who knows. It caused a change in the hues on the top and sides. In the upper right-hand corner, the fire extinguisher earns its TETRA decal today. The weld beads also get the shaded slag look in quite a few places.
Update: 29 Aug 2024:
Minor work today, but tedious and time consuming. Added lift rings (Grandt Line Bolts), lifting chains from the spares box, and 2 each brass clevis’s (Cal Scale Brass CS-45). The pieces are not in their final positions…a little bit of touch up paint, weathering, then positioning, yet to come
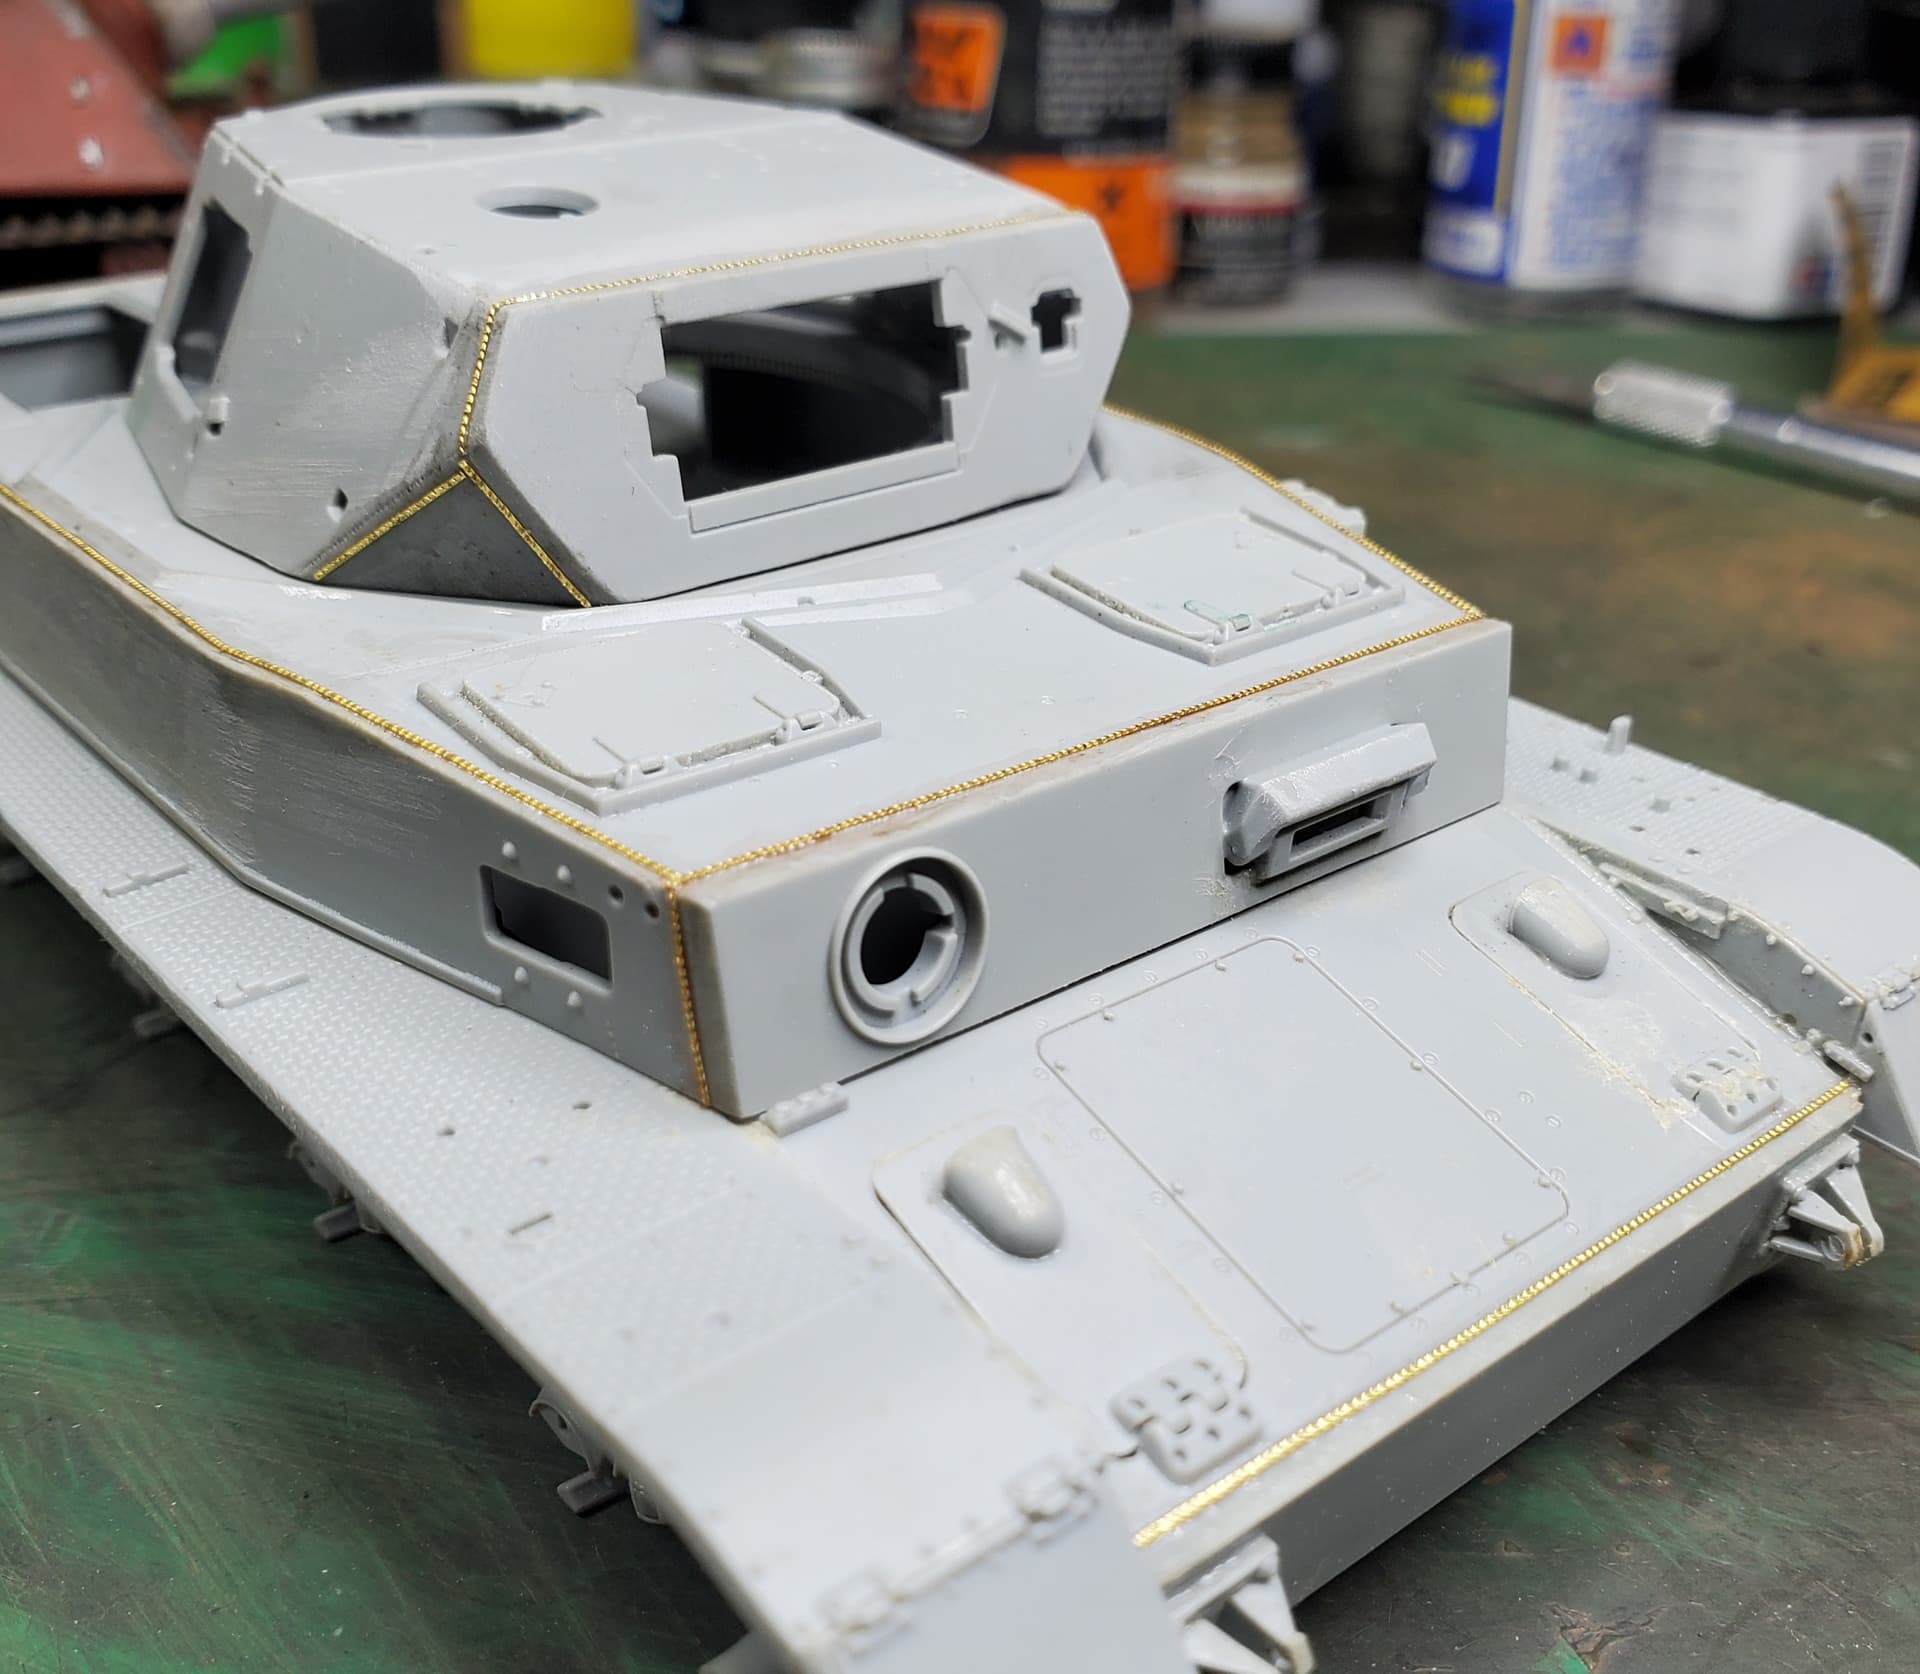
While waiting for a couple of aftermarket goodies to arrive, I ended up tinkering with some Voyager .030 brass weld beads that I superglued to a Dragon Panzer IV’s forward hull front, upper hull front and sides, and the triangular shape of the turret front.
Looks fantastic Jack! Great color variation
Thanks!..lots of work since January of this year, and I’m still not done! Very close however, very, very close to completion.
Hi Jack, I have a load of Voyager stuff but have never seen these .030 weld beads. These are very nice! I’ve been using styrene rod and liquid glue to do my weld beads, but these look exquisite. Very neat and uniform. Are they easy to apply?
Fairly easy, but you have to watch for the highs and lows of the brass. Make sure you look at the pieces from the side to ensure the brass lays flat. I also put superglue on both sides. If you have a small modeling dish, drip some glue into that dish. You would be surprised how long it stays a liquid. I apply the superglue with a small brush…repeatedly dipped with the glue to reduce the overflow. Sure, the brush gets hard, but it directs your applications better.
Update 1 Sep 2024: Other than adding a scale "Signal’ magazine to the back, dull coat, and slight dry brushing, I am calling this build…
FINISHED…DONE…FINITO!!!
Looks outstanding!