Moderator : feel free to move this to a more appropriate category if necessary…
Paraffin Ice
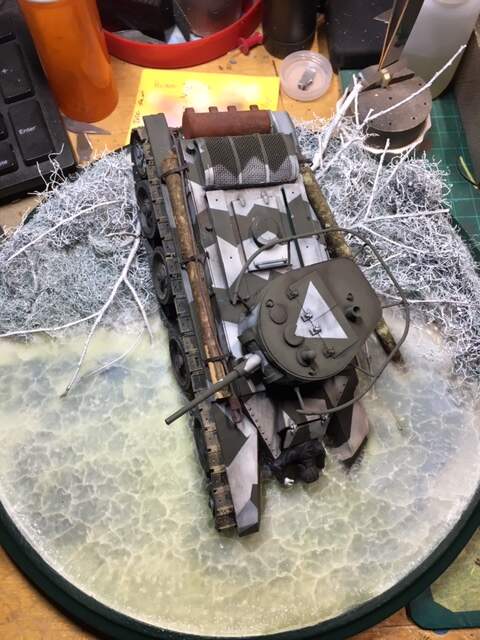
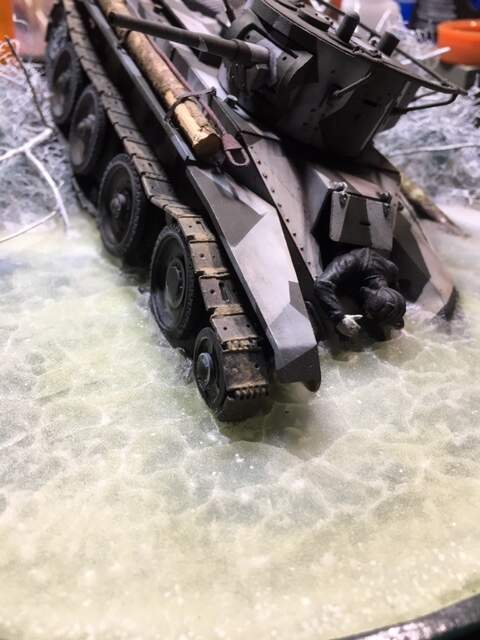
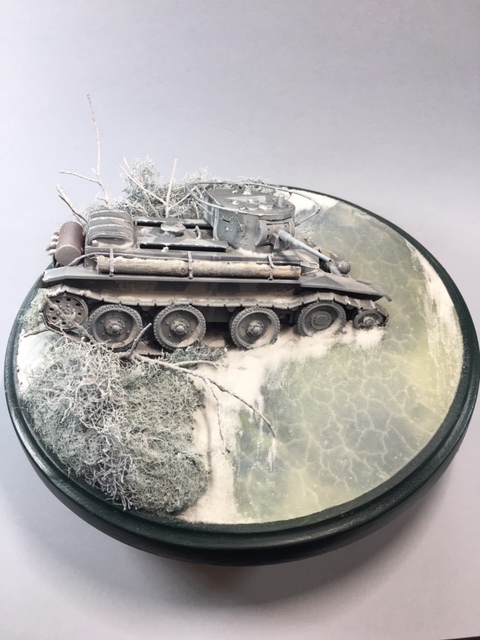
I will give a brief description of the method I have used to create ice using paraffin. The accompanying photos are from a diorama (yet to be named) that I have recently finished.
As with anything liquid and hot, use extreme caution and common sense when attempting this method
Preparing the base
Whatever diorama base you are using you will need to do a couple things prior to ‘making ice’. The area of the on your diorama base that is to be covered in ice must have a lip of approximately 1/4" (0.6cm) to retain the liquid paraffin. A’ land mass’ or out cropping on the interior side of the diorama is fine but the edges of the base must have a lip. I want to keep the depth of the paraffin to a minimum which is why I suggest 1/4" (0.6cm).
area around base should have approx. 1/4" (0.6cm) lip
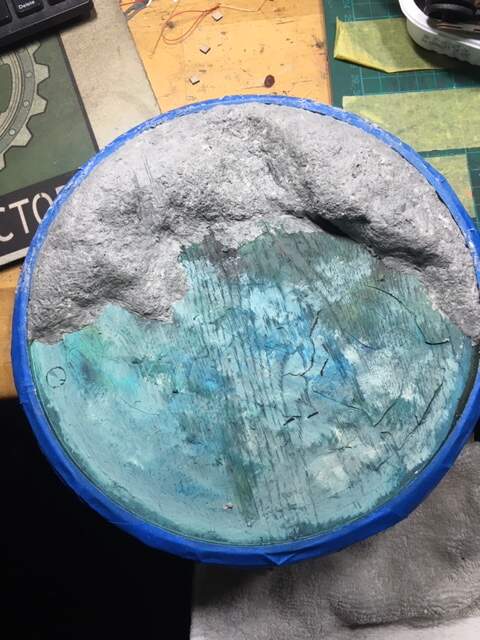
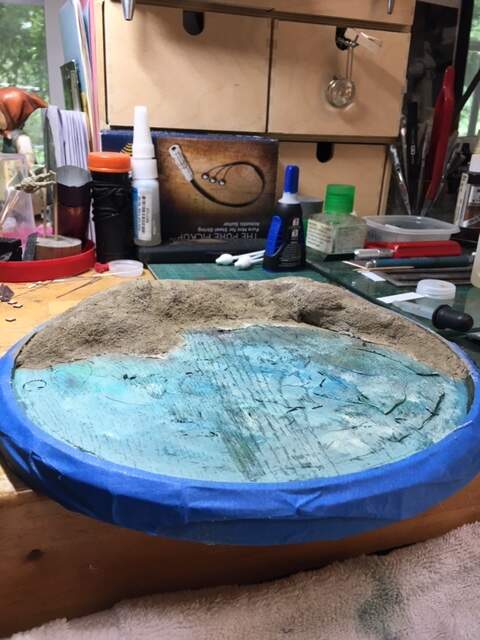
land mass within the base
The area that will be covered in ice should be painted with what ever type color you want to be “hinted” through the semi-transparent ice. A mottled green/blue or a light blue (for a real cold effect)is fine. Don’t spent too much time on this as you can just slosh and brush to get the area covered. Let paint thoroughly dry.
If the ‘lip’ of your diorama is not a part of the base as mine is here in the photos (a routed out base) you will need to seal whatever barrier you have so the liquid paraffin doesn’t leak out. This can be done with white glue or silicon (sparingly) spread along any seams. This is important as the liquid paraffin will flow like water and seek out any opening to drain from. It will be quite messy if the paraffin leaks out over your work surface and could potentially ruin your diorama.
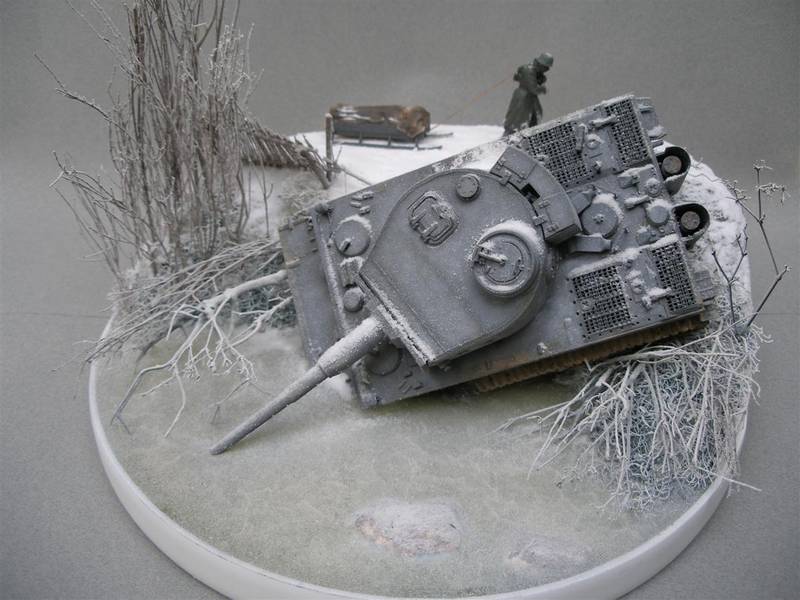
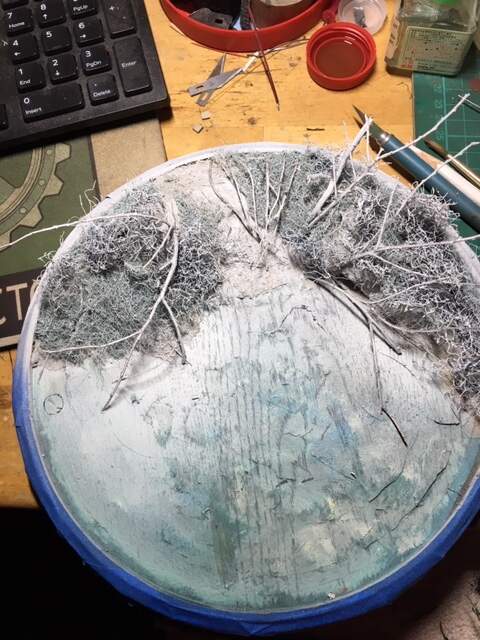
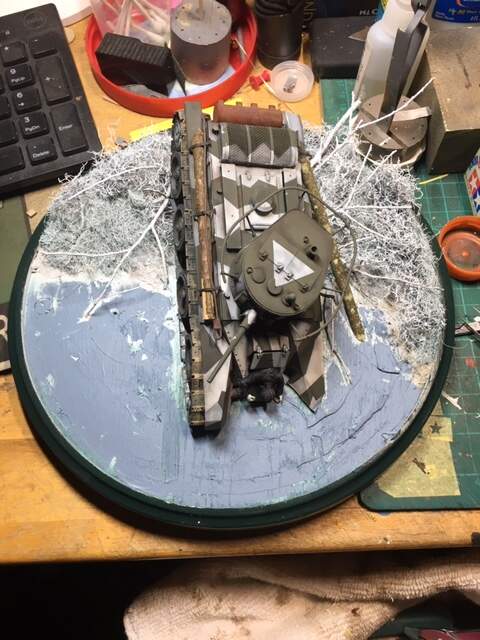
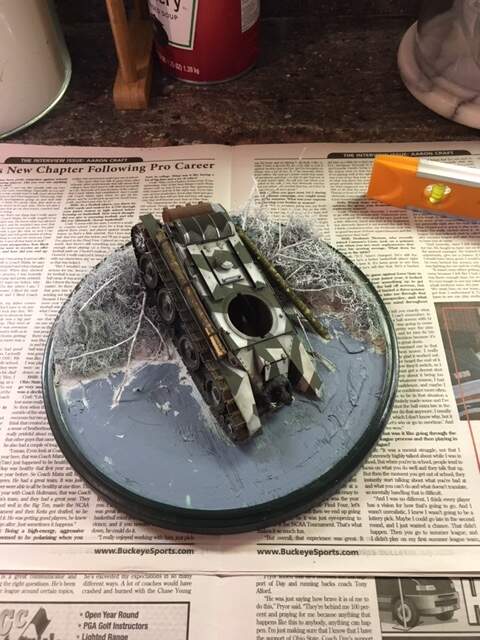
At this point I have added some foliage, dusted with white paint (snow) and adjusted where and how the tank will sit in the ice. The tank is securely attached with a screw from inside to the base
Preparing the 'Ice’
Years ago I went to the craft store and bought a 5 lb. (2.27kgs) block of paraffin, the kind normally used by candle makers.
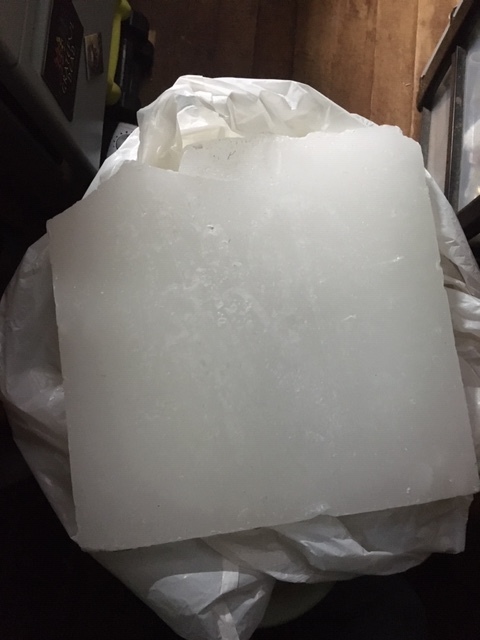
I have made 3-4 dioramas with ‘ice’ and still have most of the original block left. Several candles (non-colored) should be fine for a normal sized diorama.
Break up your paraffin into pieces about the size of the end of your thumb (will help to melt faster) and put these into an old pot that you no longer use for cooking.
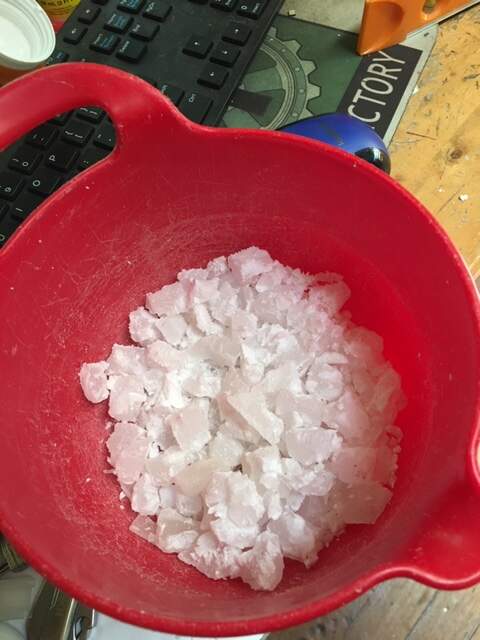
Over a low flame, melt the paraffin.

Depending on the area you are filling you need to estimate approximately how much paraffin you will need ( remember, it is only a 1/4" depth so you really don’t need a whole bunch) but you want enough to complete the dio in one pour so a little more is better than not enough. Add small chunks of paraffin to the pot as needed. You want the paraffin hot and liquid… just to the point of where the paraffin is beginning to vaporize.
Making Ice
Spread newspaper on your work area several layers thick to absorb any overflow.
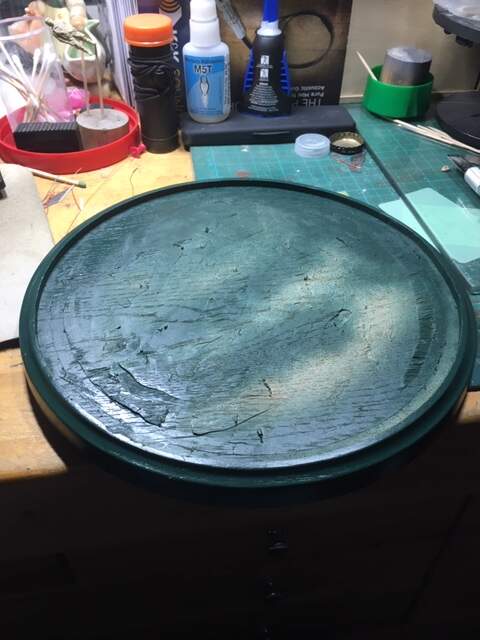
Make sure the diorama base is perfectly level as you are pouring a liquid.
After checking to be sure that all is ready take the pot of liquid paraffin and carefully pour it into the prepared area on your diorama base. Pour enough that it flows level to the top of the lip you have created on the base. It will seek it’s own level against any land mass you have created on the base.
The paraffin remains liquid for a short time but it will take hours to completely harden. Do not move the piece while the paraffin is liquid and could possibly flow or distort.
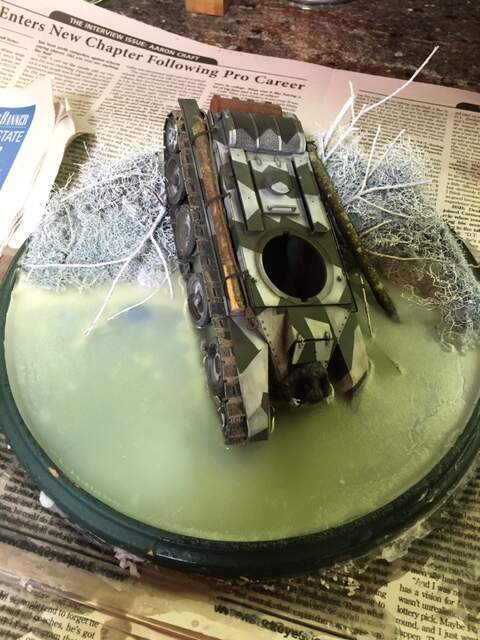

Remember, the top will look hardened but the hot paraffin will remain liquid under the surface for some time. I let the piece sit for at least 30 minutes without moving it and don’t plan on working on it for 6-10 hours. Don’t let the look at this point discourage you, when the paraffin is totally hardened it will look completely different.
You can speed up the hardening time and create interesting surface fractures by putting the entire base into a refrigerator or freezer for several hours.
Well, it’s that simple!
I suggest that if you are interested in this method that you start small and possibly do just a quick experimental attempt to get the feel of working with liquid paraffin. You have ample time to work but it is not infinite as once the paraffin leaves the flame it begins to harden. The key is having everything ready prior to the pouring.
And again,
As with anything liquid and hot, use extreme caution and common sense when attempting this method
I hope this is of interest and that you will give it a try.
Cheers,
C.Reading
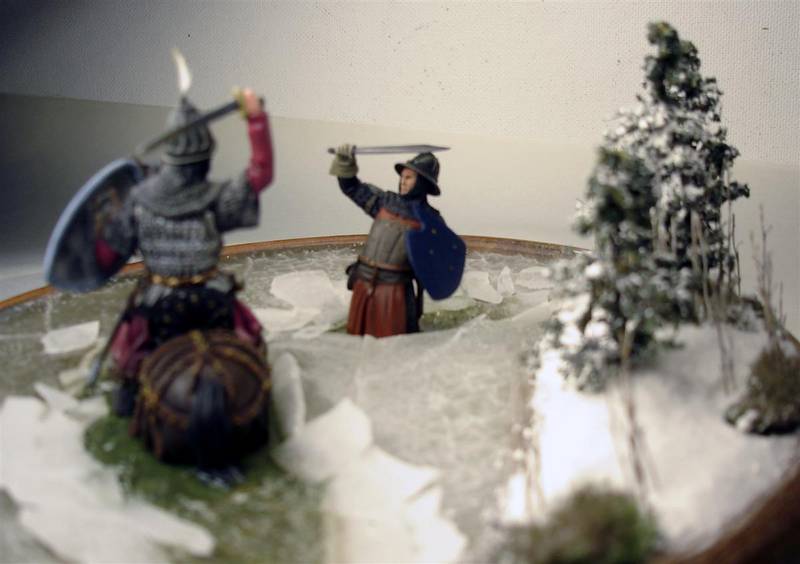
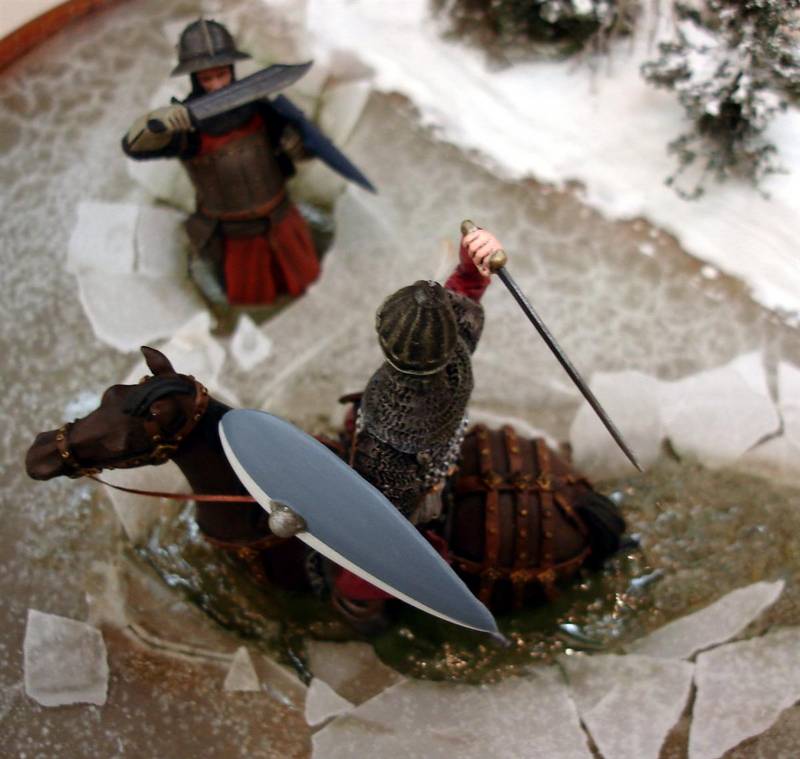
Others I’ve done with this method-