makes PE life much easier …so thanks for the advice …why would manufacturers go to the trouble of machining nice PE parts only to have them burried under a HT carriage to never be seen again? I get the nice grates and fenders and things that totally enhance detail , but not the parts that get burried.
Which buried/hidden PE parts are you thinking about?
Model/Manufacturer?
Sometimes they create PE-parts only because they can
or there was space left over on the sheet or they wanted
the PE sheet to look more impressive.
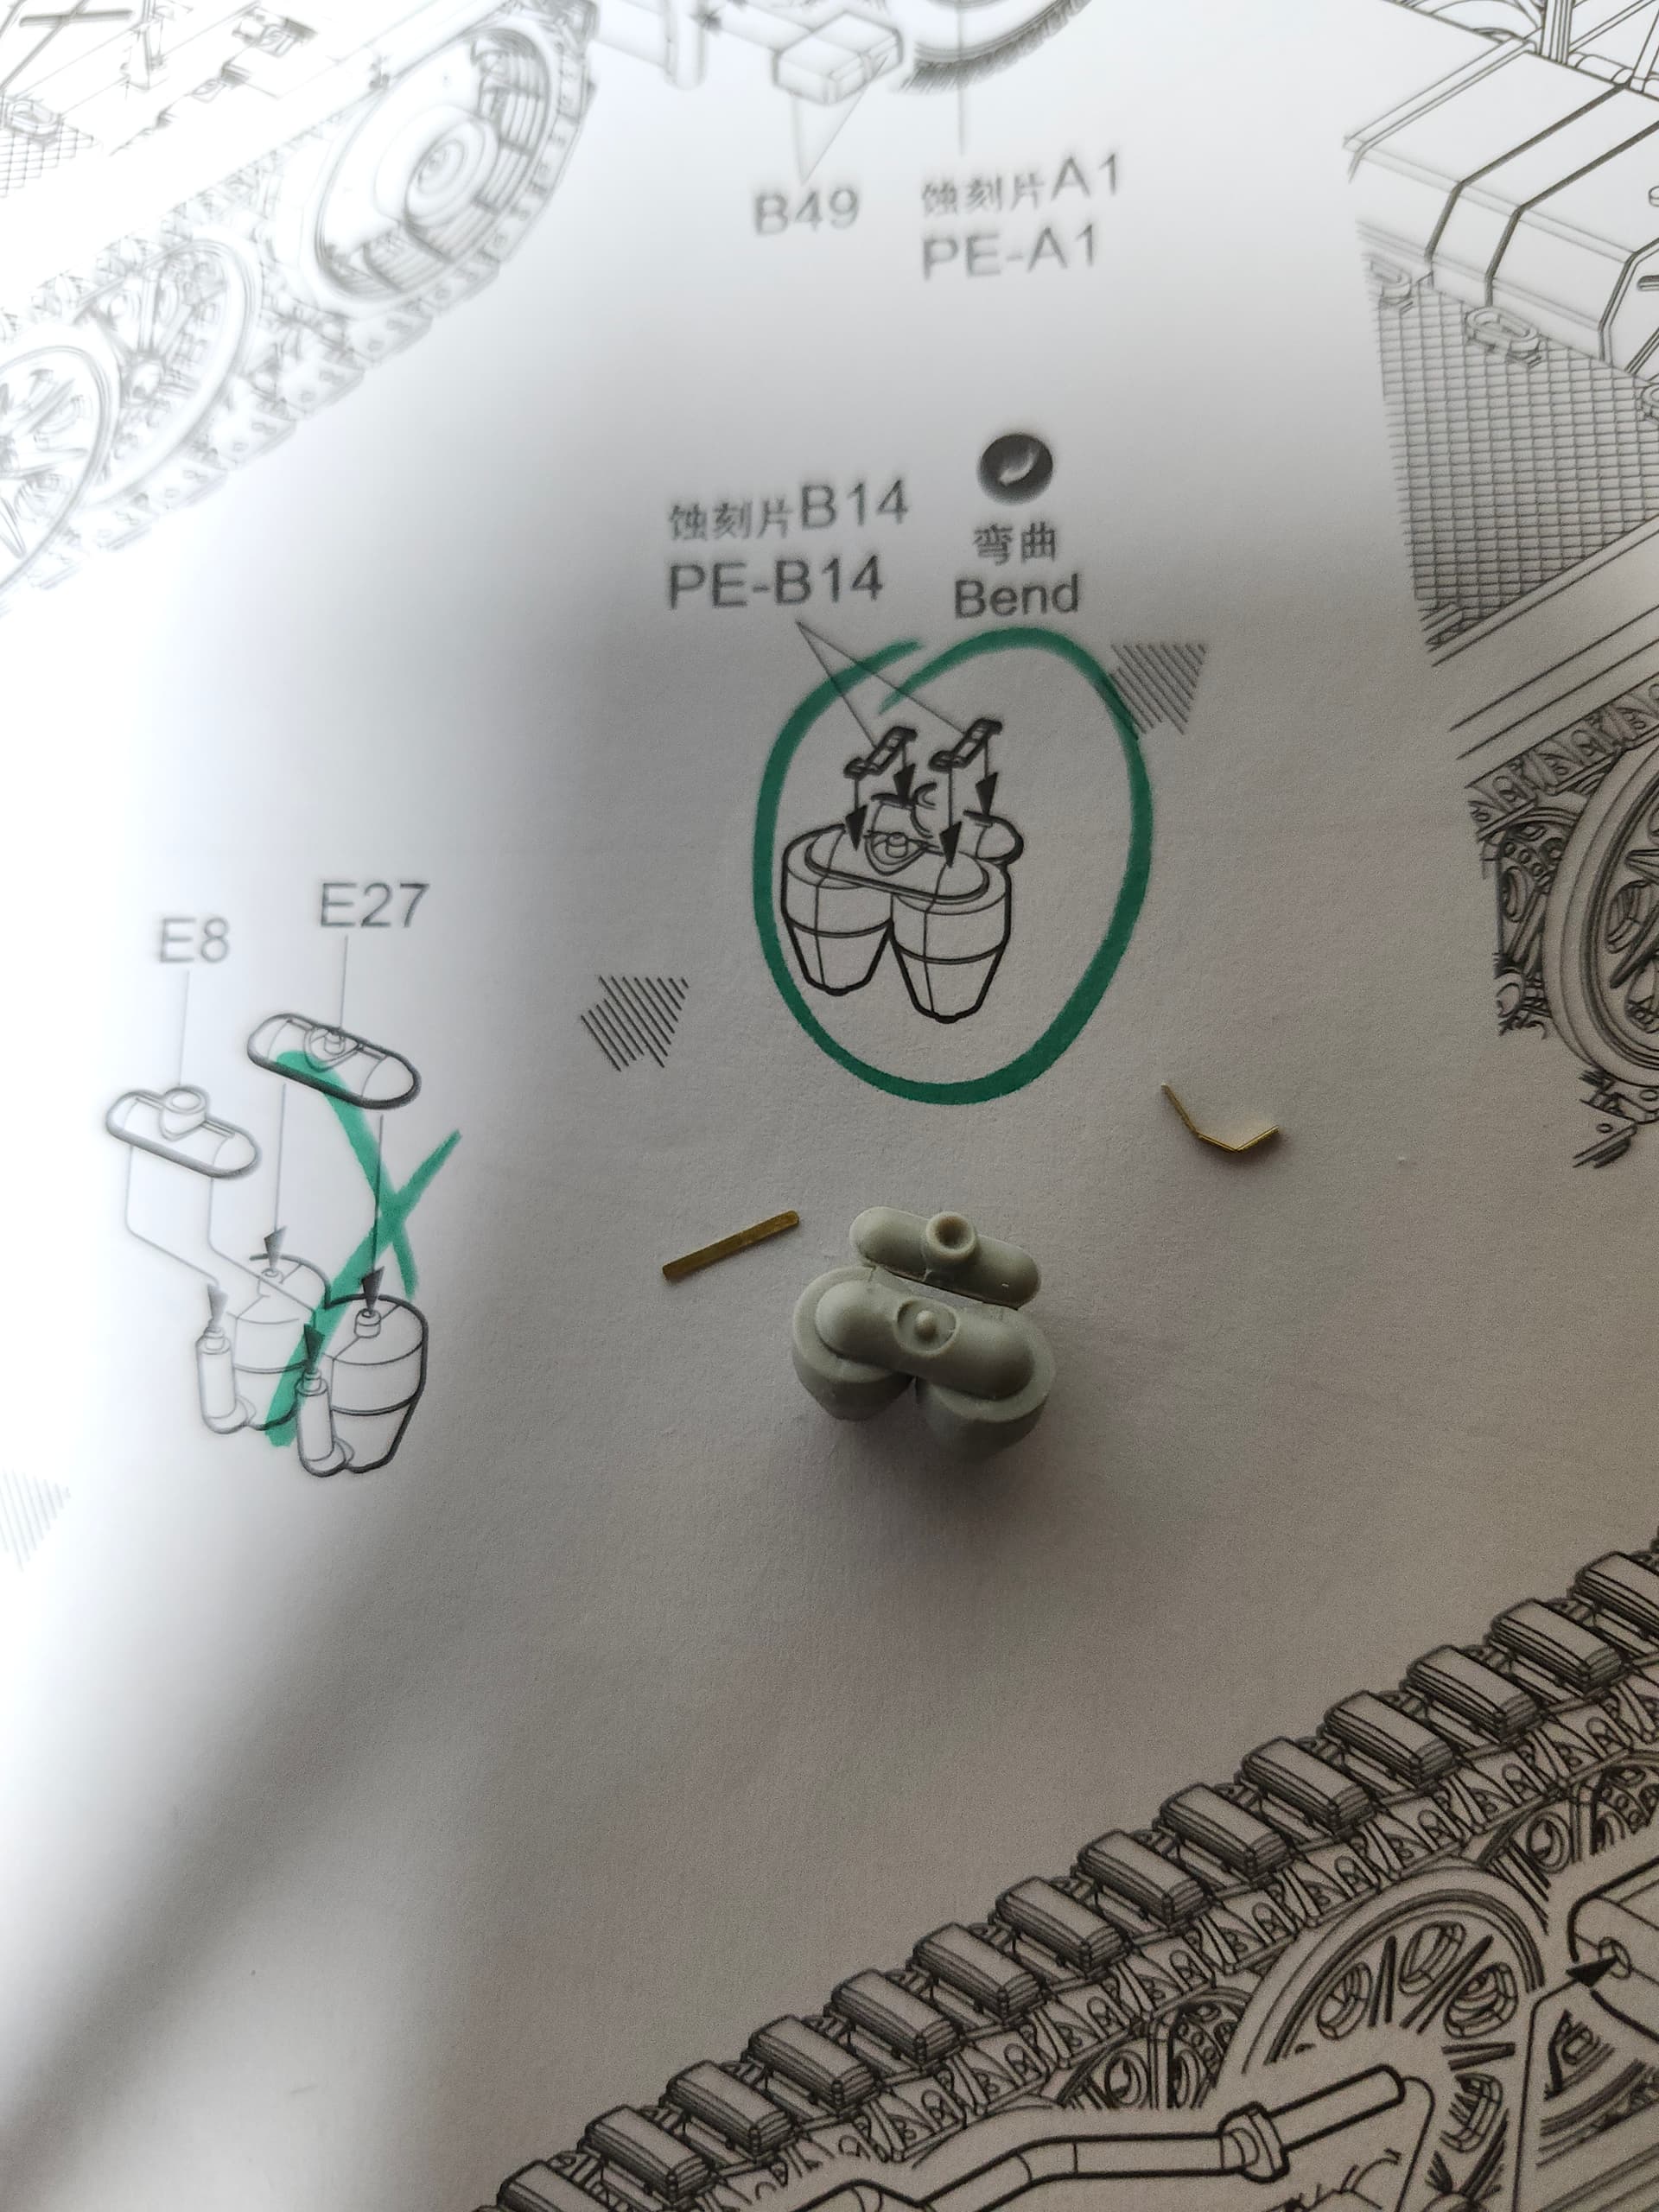
Sometimes there are PE-parts (by definition flat) to represent
round objects such as handles made from round steel bars.
Many modelers, myself included, enjoy building detailed, accurate kits, and that includes areas of a model that may never be seen. So some manufacturers cater to this detail oriented group. As well, there may be some parts that the manufacturer decided couldn’t be molded properly in styrene and thus decided to use PE.
PE is a mixed bag, sometimes the best material to use and sometimes it’s not. All depends on your preference, many people only use select pieces from a set. There are many modelers who like to know it’s there even if you can really see it. Build what works for you and don’t sweat the small stuff about how others are enjoying the hobby.
This is why studying the kit and the PE before committing to using the PE can be really important. A lot of times the PE parts are no better (or even very poor) replacements for kit details.
I seldom build anymore that I don’t source whatever PE might be available for the model kit, and that’s quite often 2 or even 3 or more PE sets by different manufacturers for the same model. I’ll select and mix PE to get the best parts available. Even doing this, though, it’s quite normal to find that none of the PE parts are any improvement over the kit parts or details.
As you use more and more PE, you’ll find that you also start to accumulate lots and lots of leftover PE parts. Many times you’ll find that you can dip into this stash of leftovers to find details that are useful on other builds or bit and pieces of PE parts that can be modified for use. PE nuts, screws, belts, buckles, tool clamps, etc. along with screens, grates, etc. can be re-purposed across many, many different subjects.
The answer would be the same if asking about plastic parts in the same places, as Jon provided.
As others have alluded to, my question would be “Why would manufacturers go to the the trouble of making PE parts that are absolutely worthless while omitting parts that would be excellent candidates for PE replacement?” There seems to be a cult of sorts that wants more and more PE on their models, I guess because they love bending and soldering.
Nowadays, you are lucky if a third of the items in a PE set are worthwhile (accurate and better than the kit part).
From what I’ve seen - from the 1990s, but especially lately - is not so much that the PE designers provide pieces to add detail but simply to replace what came with the kit. The last several sets I’ve bought (or considered) included parts that were downgrades to the kit but omitted items that could clearly have improved the accuracy of the base kit.
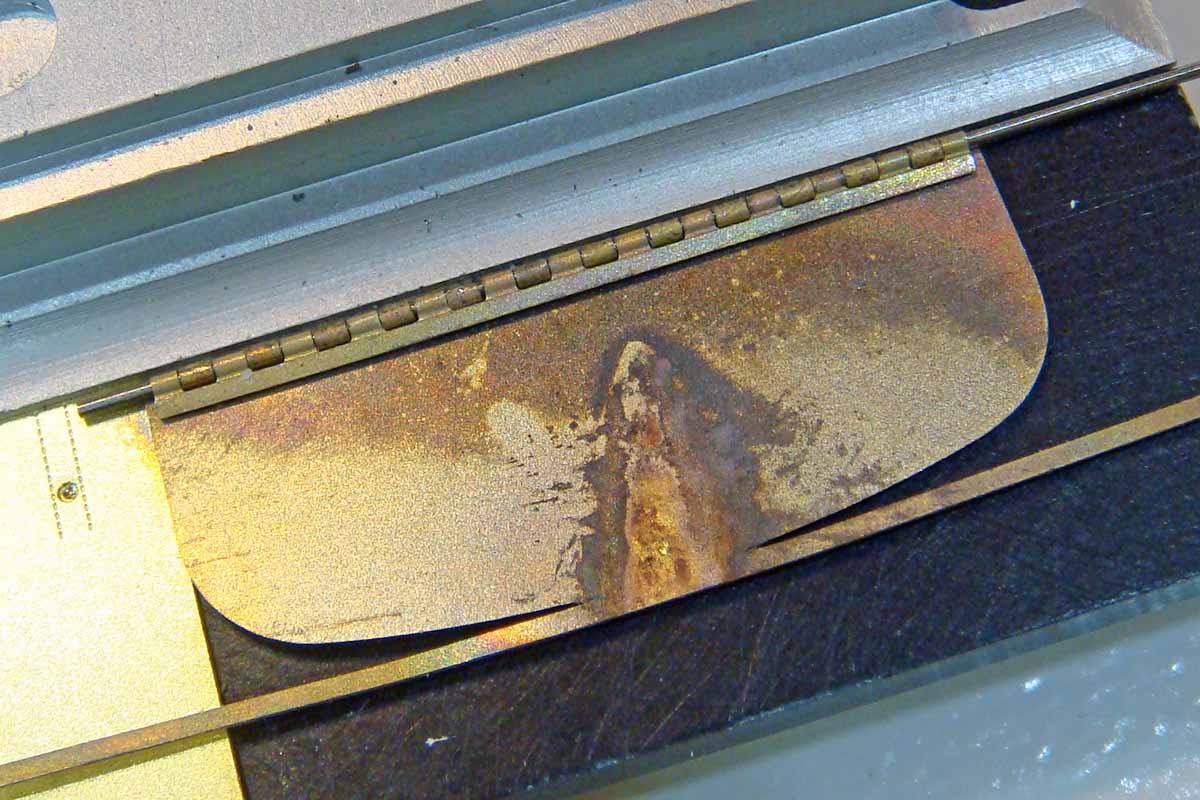
Clamp the strap under the edge of your bending brake. Make the first bend at the start of the curve at 90*. While still clamping the part in the brake at the 90* bend, press a drill bit against the part and the edge of the brake. Now bend the 90* leg down over the drill bit.
The length of the leg and the diameter of the drill bit used will determine the radius and length of the curve that you create. The trick will be to make such curves on both ends of the part. For this you might need to hold the part sideways under one of the finger of the brake and make the second curve in the gap between that finger and the next one.
BTW, this is the same basic technique to making hinges. Bend the hinge barrel around the appropriate diameter drill bit after doing the pre-bending.