
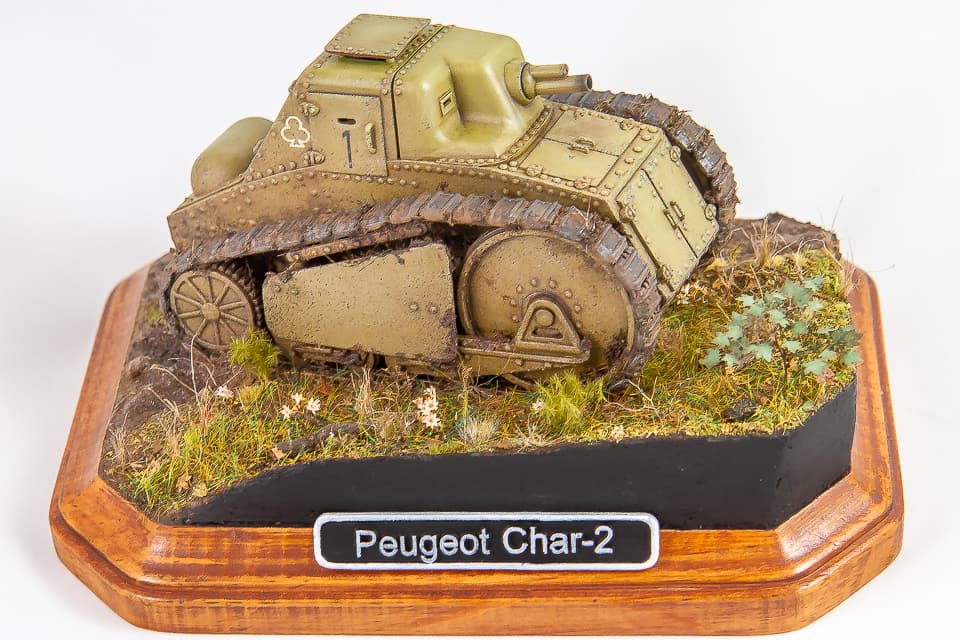
I recently completed my first fully 3D Printed kit, right on the heels of completing a long 2-year full resin brown water navy project. I bought this kit at the Vargas Table at the National IPMS show in Vegas a couple of years ago and have been looking for a good reason to try my hand at a quick build (due to the few parts it has). I really do like the subjects Vargas has to offer, which seems to focus on rare WWI to interwar vehicles that were actually built (no paper tigers). This Peugeot Char D’ Assault C-2 really called out to me due to its uniqueness and history toward the end of WWI.
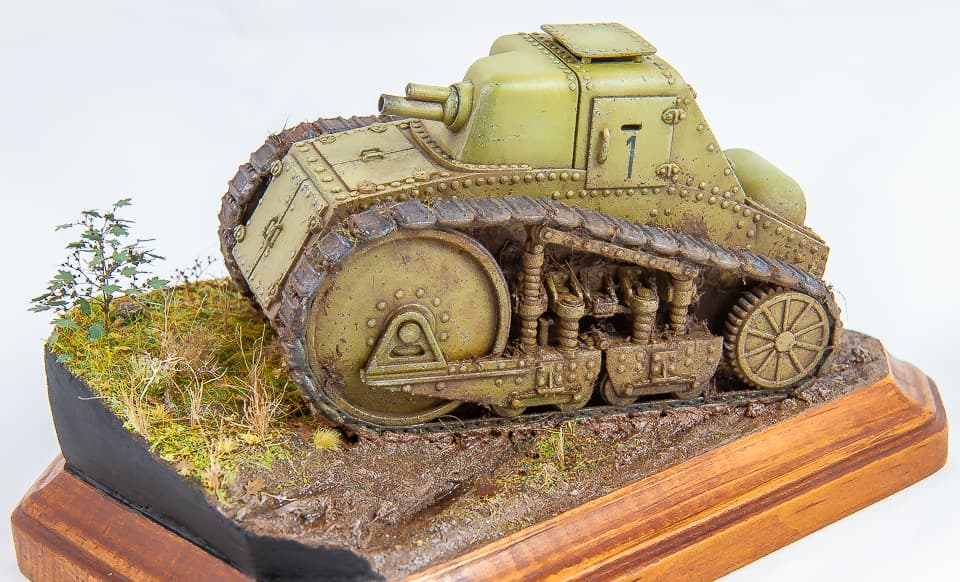
Construction went together well minus a couple nuances that I suspect are typical of 3D printed subjects. The left side skirt was warped right out of the box. I thought about heating it up to correct it, or even cutting my own using the part as a pattern, but then I thought why not leave it off so one could see all the suspension detail on that side. With that issue resolved, the main issue was dealing with the horizontal lines left over from the 3D printing process, especially between the bolts. So yes, the low part count meant it was still a fast build but much of the time saved went into sanding those lines away. I have now built two 3D printed Vargas Kits (the other is my unfinished Romfell Trailer) and they were both the same concerning these horizontal lines. The kits were bought at the same time so maybe that batch had more lines than typical 3D printed subjects. I saw recommendations simply use a good primer to overcome them, however those folks have either not built kits with this depth of lines or do not care the lines remain. I spent three separate primer/sanding sessions to get them the way they are now, which still is not perfect… In the end, I wanted to keep this as a quick build and a test mule for weathering so was content where I stopped. I mostly used JB Weld 2-Part Epoxy for attaching the various parts.

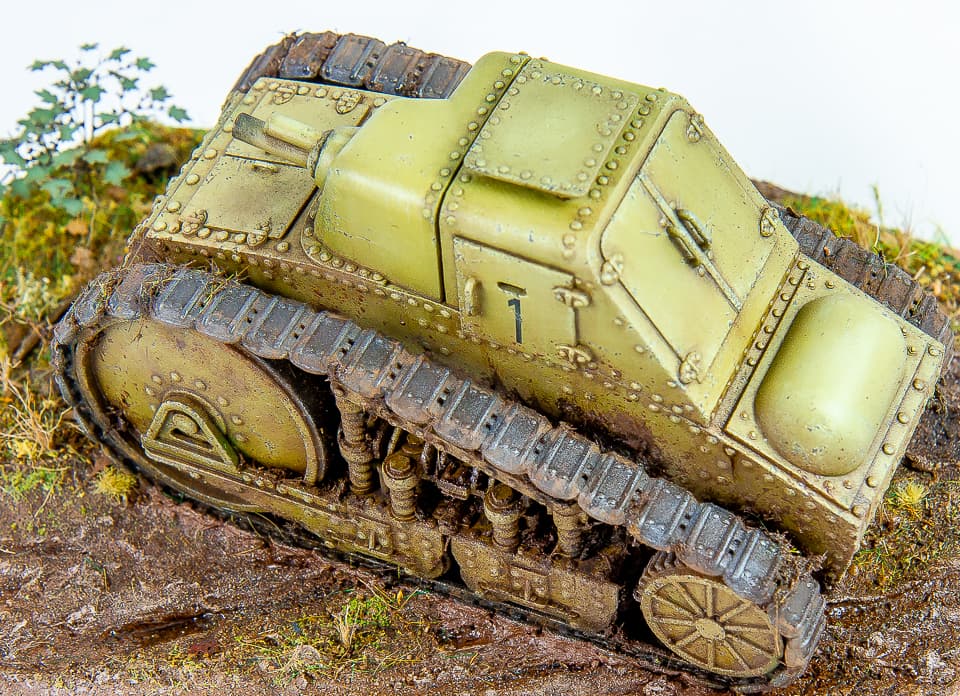
Concerning the base paint, I did some research to figure out what was an acceptable color but found there was not a lot out there on this subject. The one-color photo that is popular on the web appears colorized so doubt it is accurate. In the end, I decided to go with a khaki/dark yellow type color using Tamiya Acrylics, thinned with Mr. Color Leveling Thinner. I later sealed it with a 50/50 mixture of Tamiya Clear Gloss/Matt to create a semi-gloss seal for future weathering. However, I did add a couple of drops of Tamiya Clear Yellow and later Green as a filter to modify this base coat. The tracks were painted Vallejo dark brownish gray mixture and then dry brushed using steel pigments.
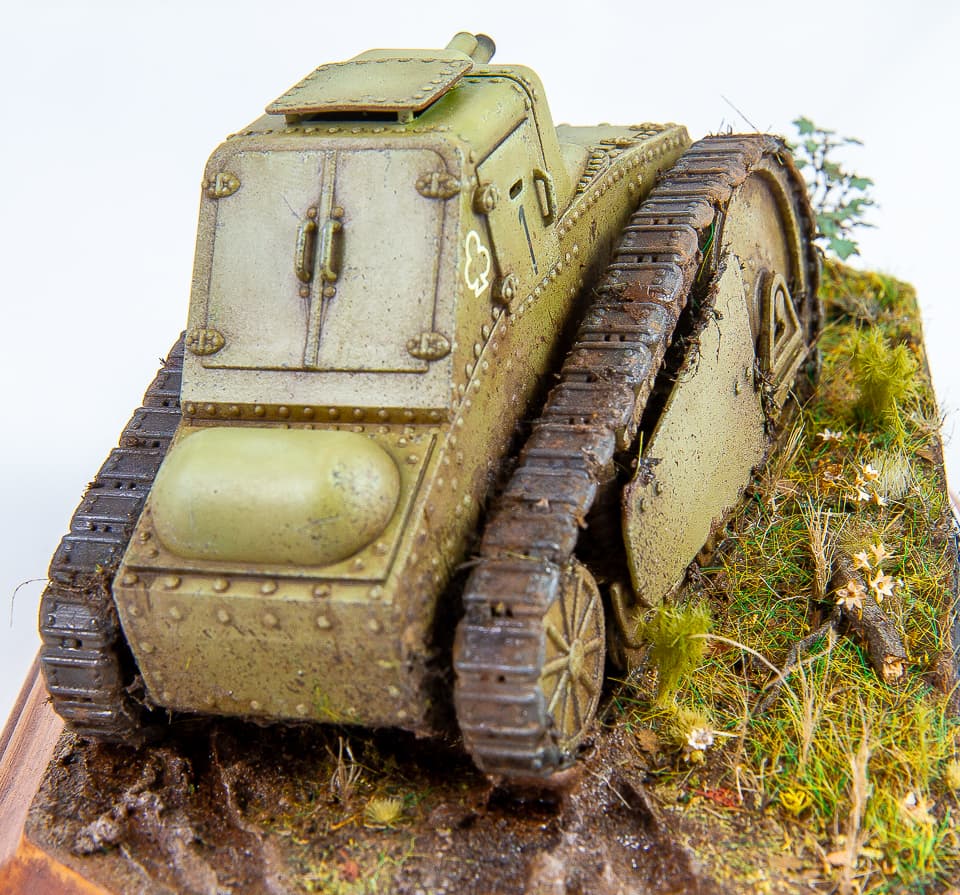
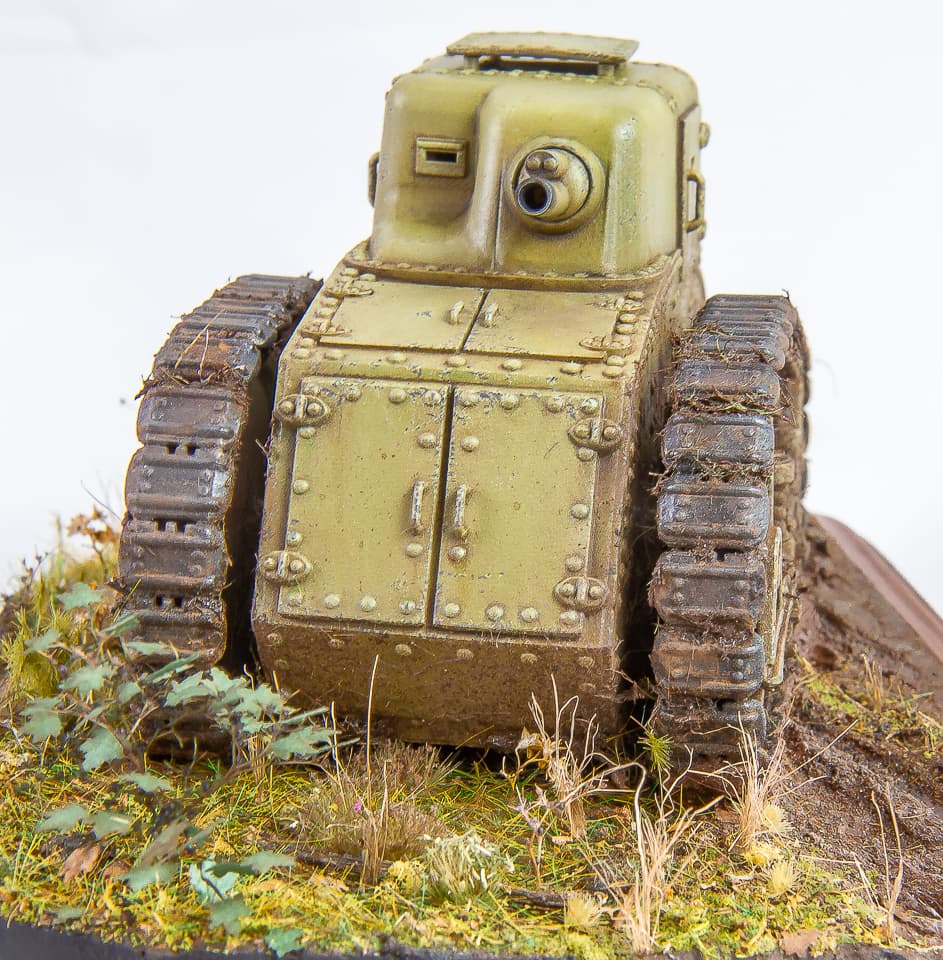
Weathering is the typical dark-brown enamel wash, cleaned up with a slightly damp brush. I then used diverse colors of oil paints (dot matrix techniques) for even more filters, followed by Oil Paint Rendering techniques shown by Adam Wilder and Rinaldi. I used both lighter and darker oil paints to simulate paint weathering, darker corners along panels, and highlights for upper surfaces. Did some two stage chipping using sponge and/or small brush technique using Vallejo acrylics; first with a lighter shade of the base coat, followed up with a dark grayish brown painted inside the lighter chips. Next comes the dirt and grime, which I dabbed onto the tracks, running gear, and even flicked onto the hull using a combination of the Vallejo Acrylic Mud products and separate thinned enamel paint for variety. I mixed some earth tone pigments, static grass, and other organic debris with these products to make it thicker where needed.

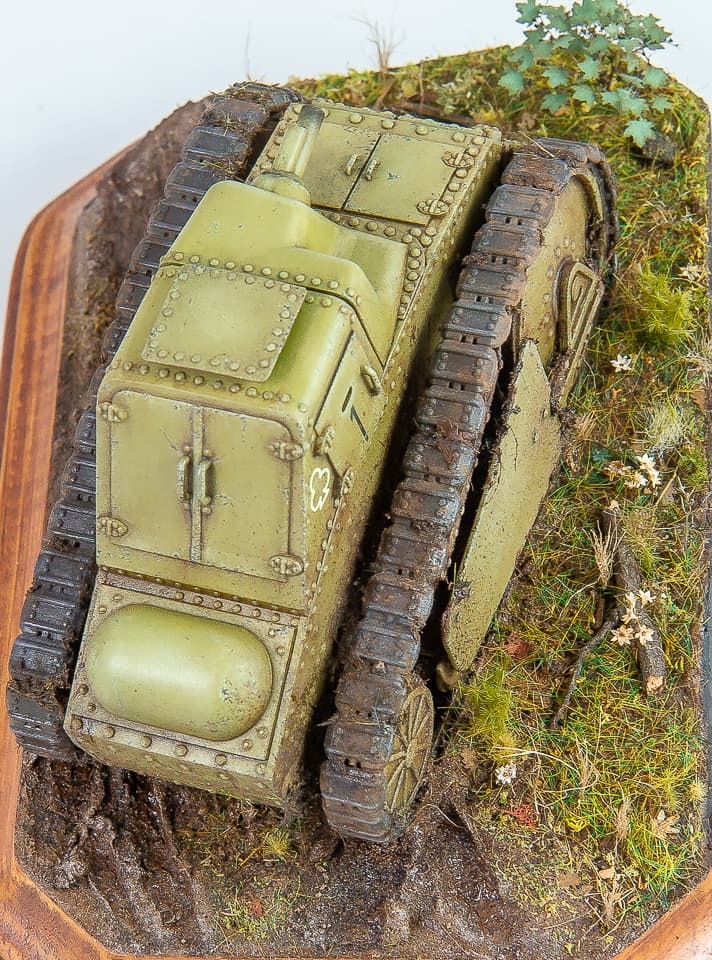
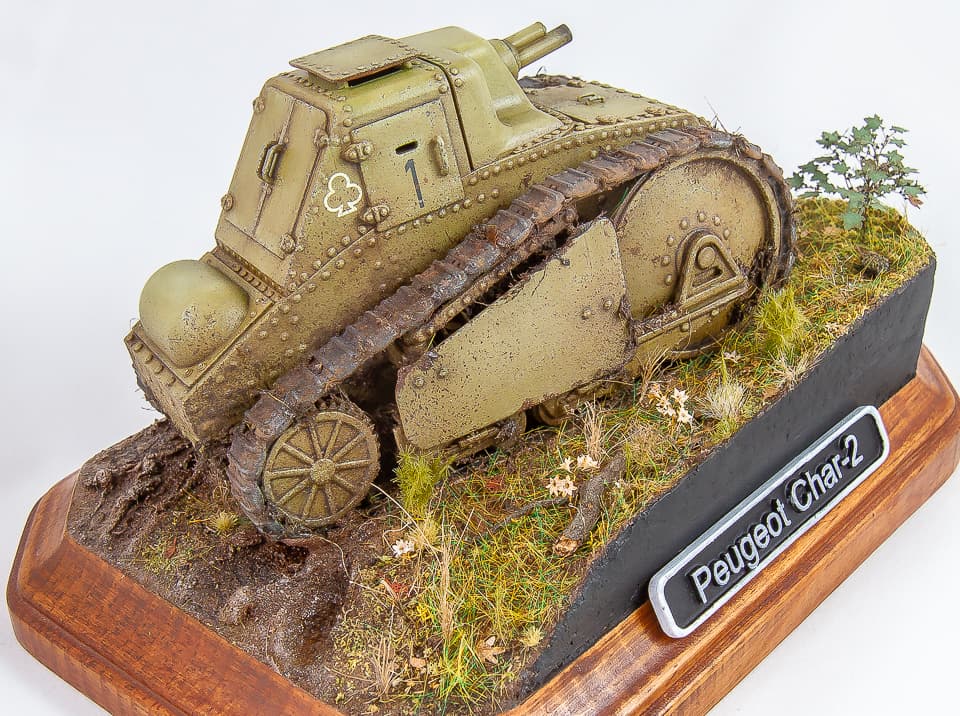
For the small simple base, I wanted to try some new techniques (due to its small size, this build was more for a test bed for the groundwork and vegetation). I have been wanting to try out some of the new VMS products and had some of their “Smart Mud” in the stash. After going thru their tutorial on YouTube, I mixed it and spready it out evenly across the small wooden plaque; using angled Styrofoam on one side to create some angled relief. I normally use celluclay for ground cover but I was pleasantly surprised at how easy this is to use and is perfect for a small scene like this. It also is a lot less messy than celluclay or other plaster products. After spreading the dark-brown mixture across the base/Styrofoam, I sprinkled a mixture of small to fine sand and other organic debris to make it more realistic, while also simulating a country road along one side. I used scale tires and the vehicle tracks to simulate tracks in the road and where the tank is turning off. At first I wanted to keep the tank separate from the base so I can finish them independently. However, the only way to really make this vehicle to be in the mud (and not floating on it) was to finish them with it embedded. This VMS product dries super hard and is the only thing holding the tank in place. Not saying that would work for all subjects, but it does for this size vehicle. I gave all this a dark-brown wash and later dry brushed lighter earth tones before adding static grass and a variety of other foliage. This scene ended up also being a “test mule” for the foliage as I wanted to experiment with some other products in my stash. Some was made from seafoam with individual paper leaves glued on, taller weeds were also seafoam. I also used a punch for some leaves while other leaves were from various premade products. Finally, I brushed on some AK Wet Effects and/or clear gloss to simulate wet tire tracks in the mud and wetter areas of the vehicle.