That’s a good suggestion, I’ll do that. ![]()
1 Like
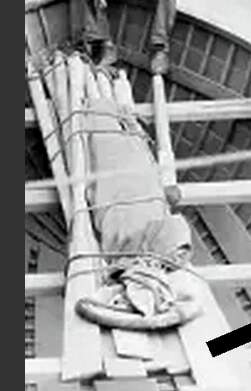
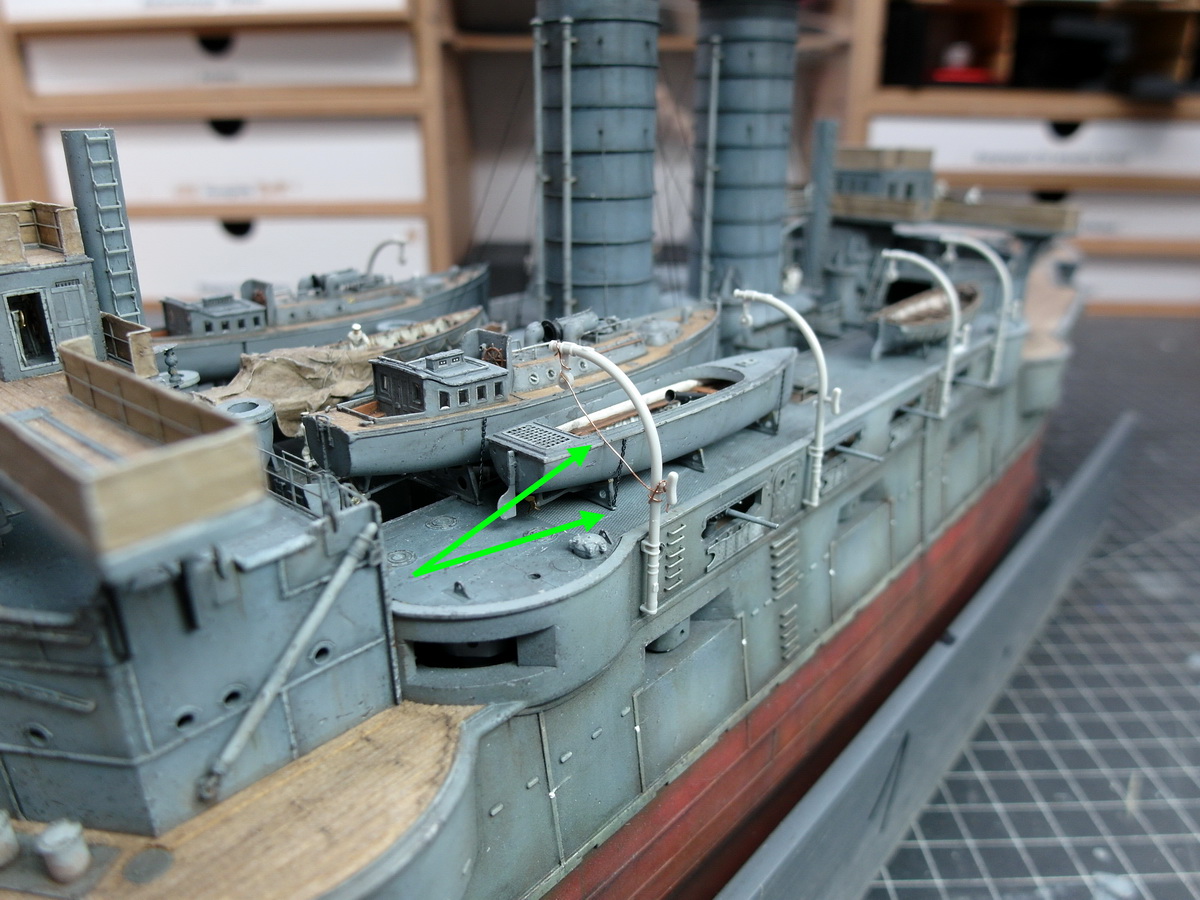
I took Uncle Heavy’s advice to heart and secured the oars.

And this is what it looks like now on the Mikasa.
And with that, I wish you all a wonderful and peaceful Christmas.. ![]()
16 Likes
It just gets better and better. Seasons greetings to you and yours.
1 Like
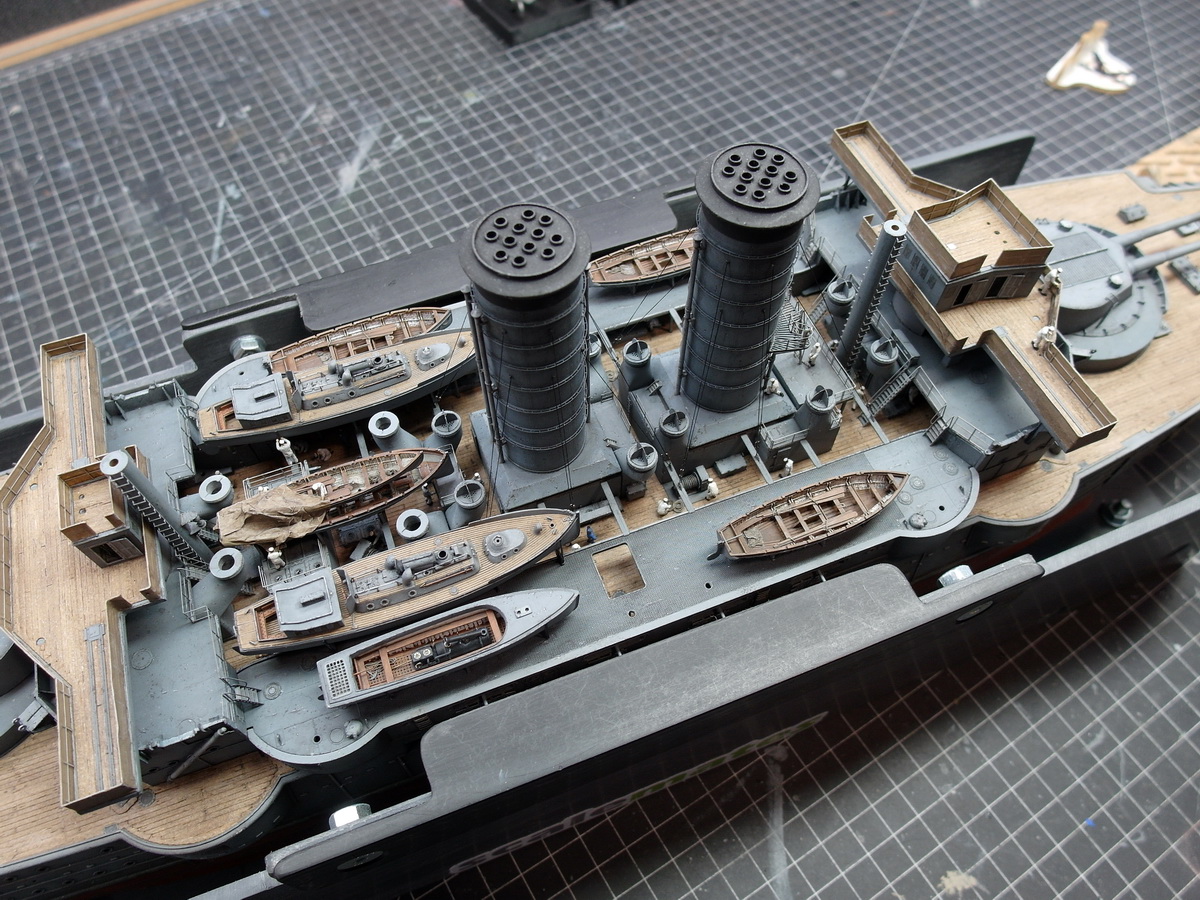
Those life boats and tenders are a thing of beauty !!
3 Likes
Thank you so much for the praise. ![]()
I’ve slightly opened up my assembly jig again to determine the positions of the launch and cutter.
To do this, I removed the davits from their injection-molded frames and inserted them into the designated holes. Then, using a small strip of styrene profile, I positioned the boats at the same distance from the outer edge of the hull.
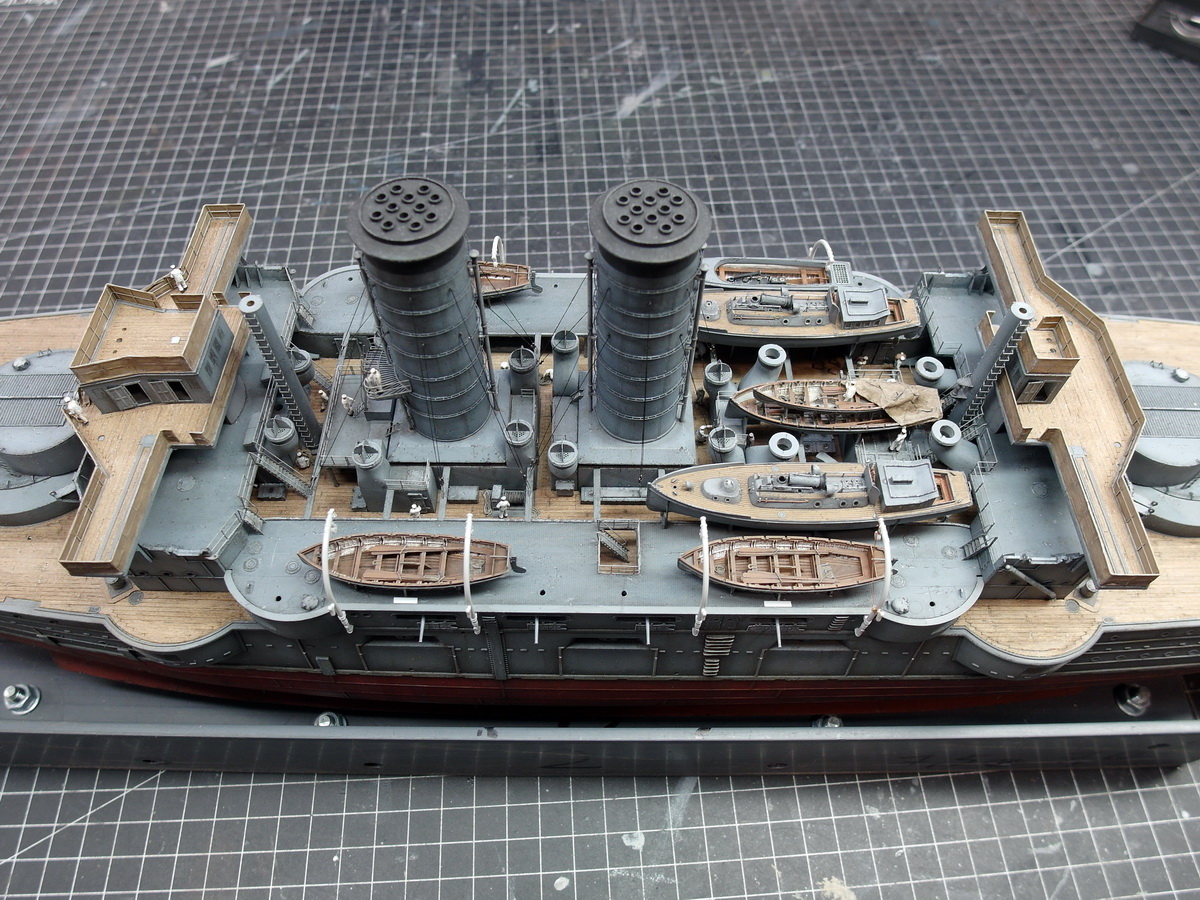
So far, it’s looking pretty good. It’s definitely a tight fit, but I can get all the little boats in place. Before I secure them, though, I’ll make sure everything is perfectly aligned.

I simulated the rope of the pulley system with a wire, and it fit quite well on the cutters.
However, this doesn’t work with the barge. The arrow shows where the rope hits the stop and the barge has shifted backward. Here I need to raise the davits or modify the pulley system.
And so the ship continues to take shape.

14 Likes
Hello everyone.
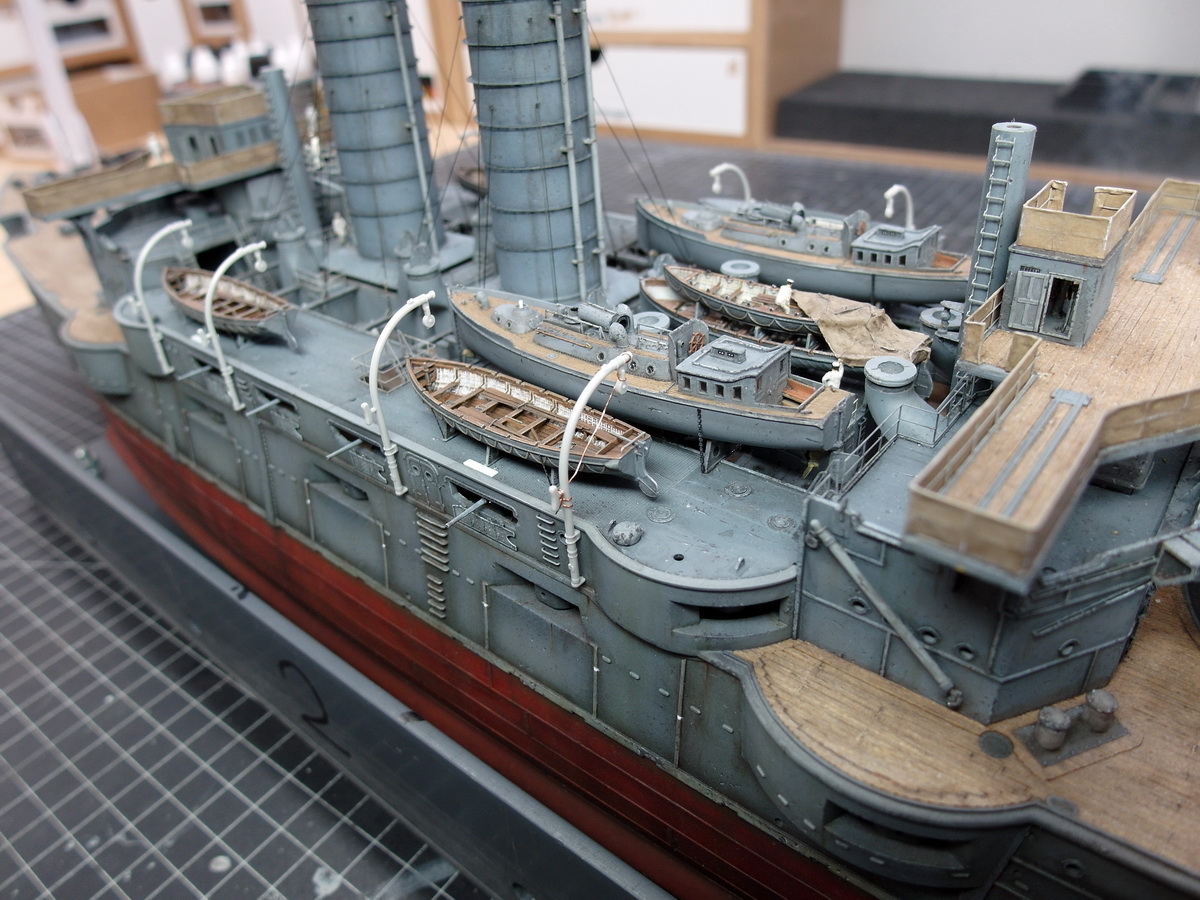
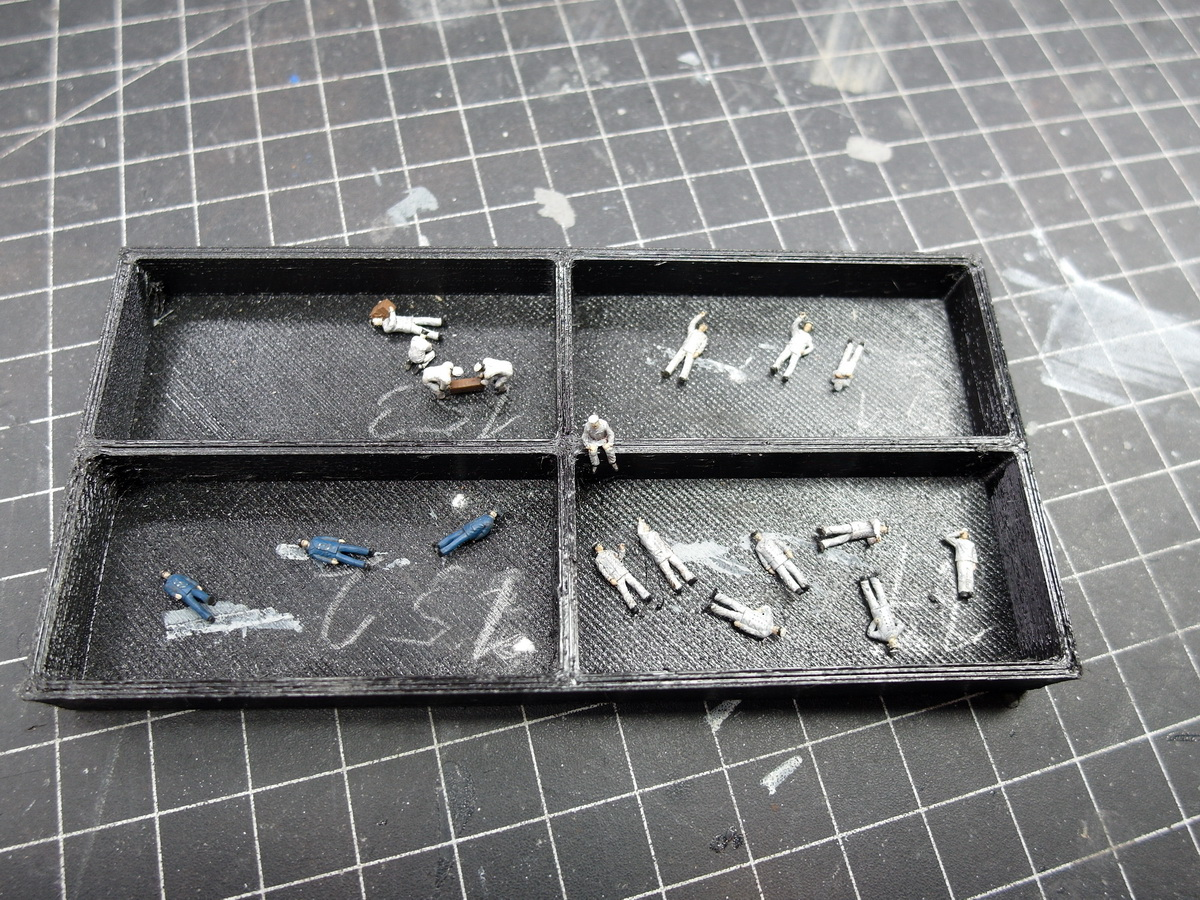
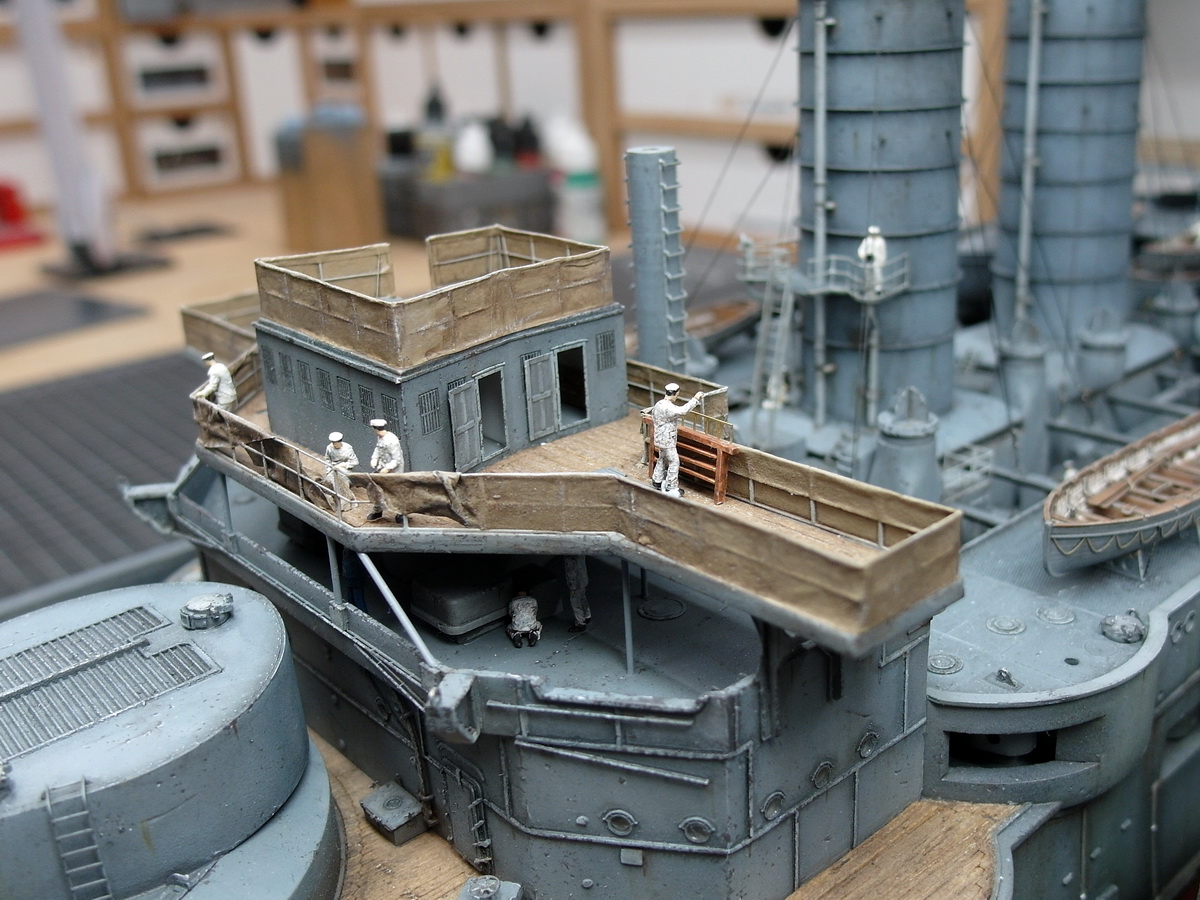
I used my time off to recruit even more crew.
They’re actually members of the German Navy. But as soon as they received a nice new styrene flat cap, they started speaking Japanese. ![]()
So I’m further increasing the number of available figures.

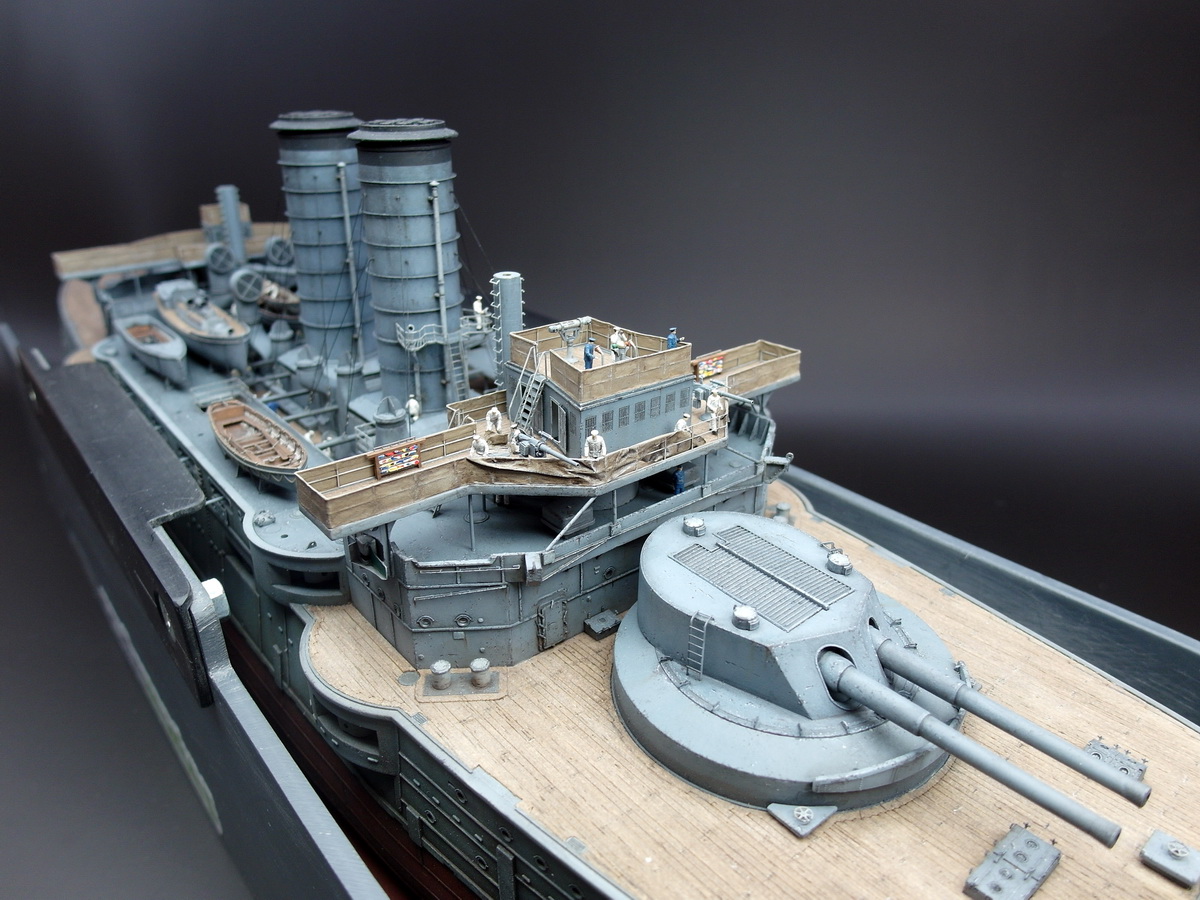
Everyone dressed up and ready to board the ship.
I remembered the words of user dafi from a German forum, who spoke of group formation, and I hope I’ve implemented it adequately. With a group of sailors talking amongst themselves.
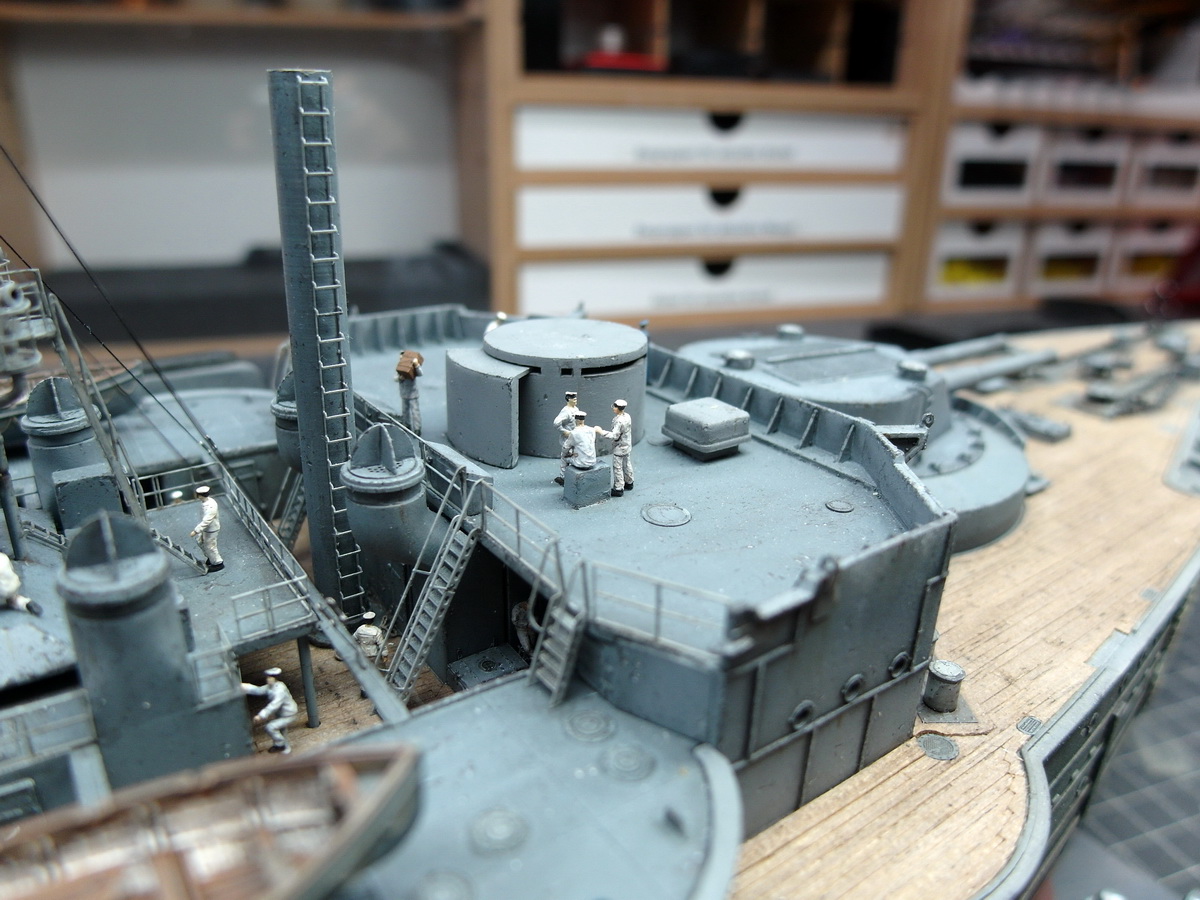
What could the boys possibly be chatting about as soon as the officer turned his back on them?!
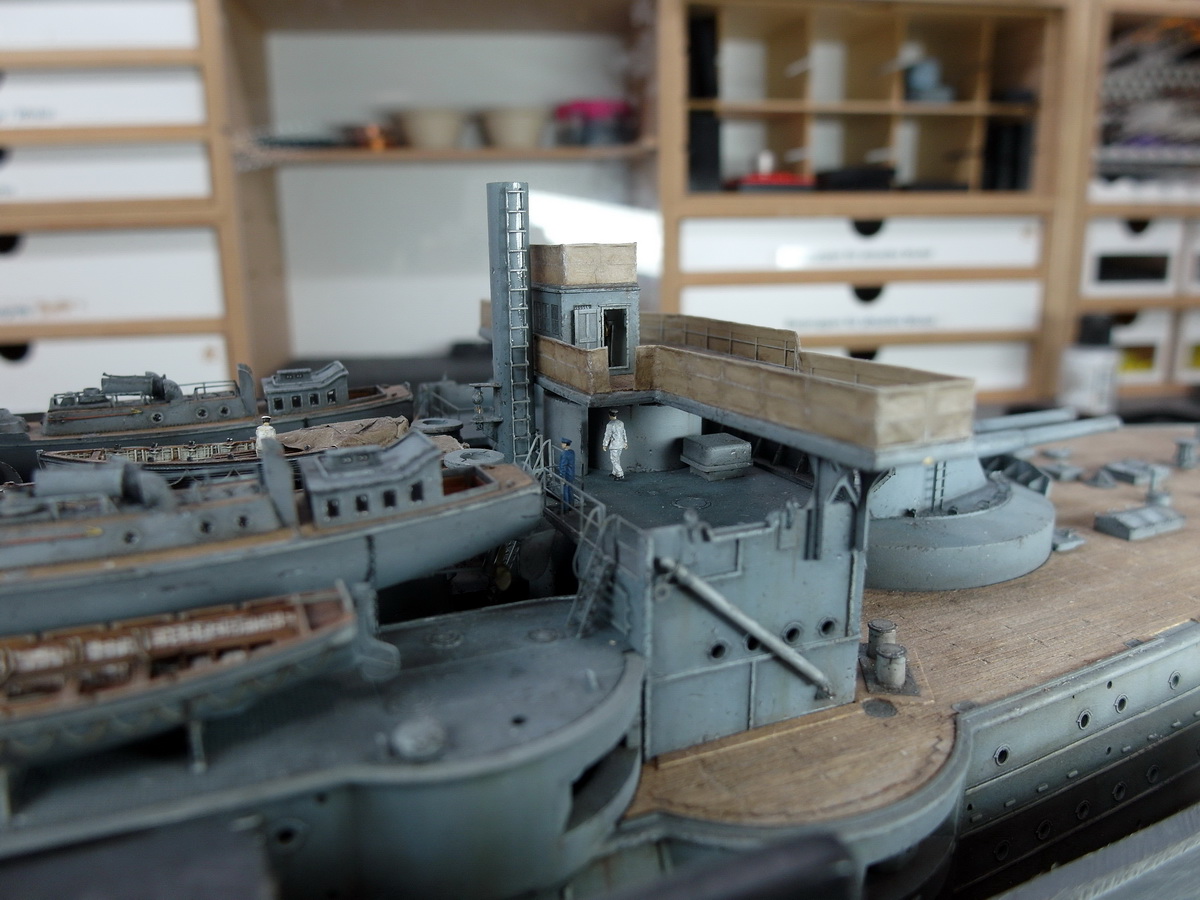
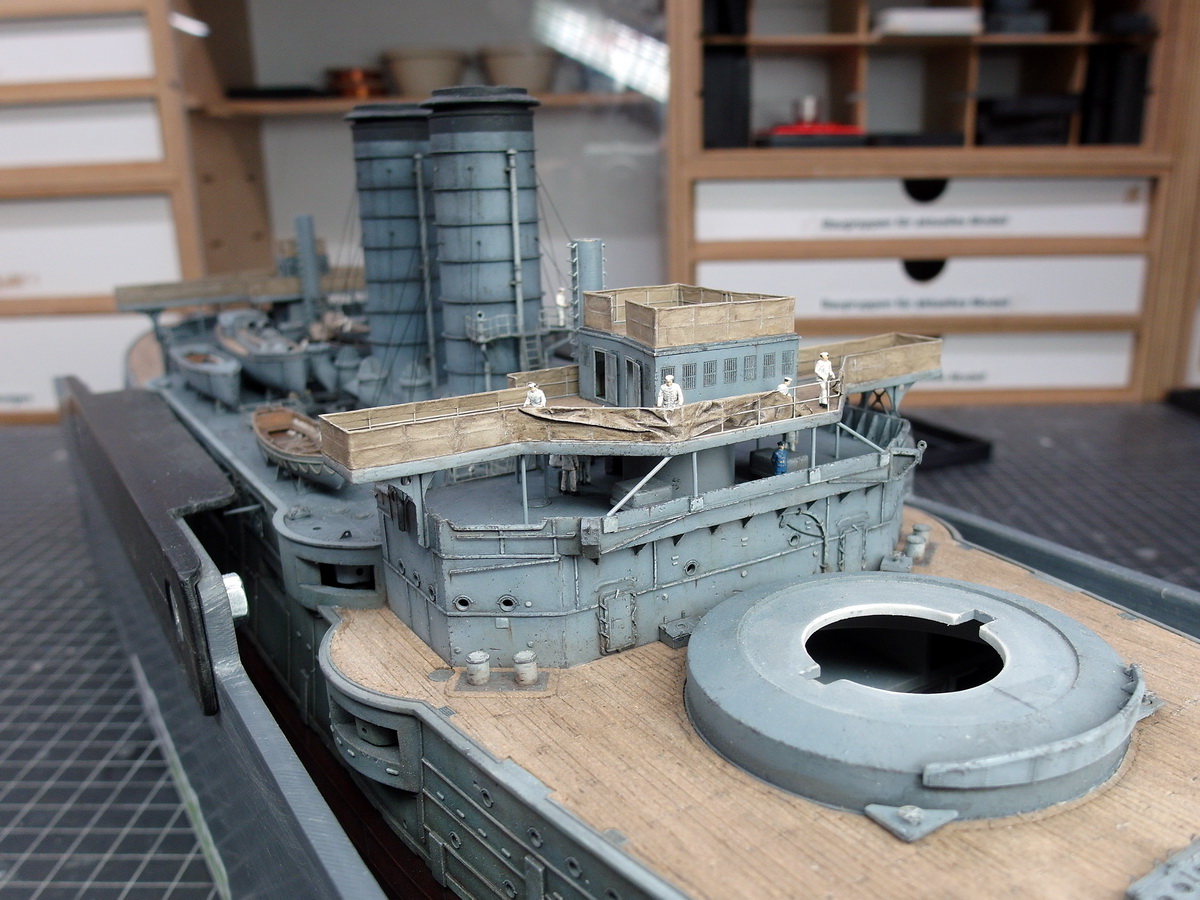
Something needs to be repaired on the fan cover, and a sailor is bringing more equipment to the storage lockers.
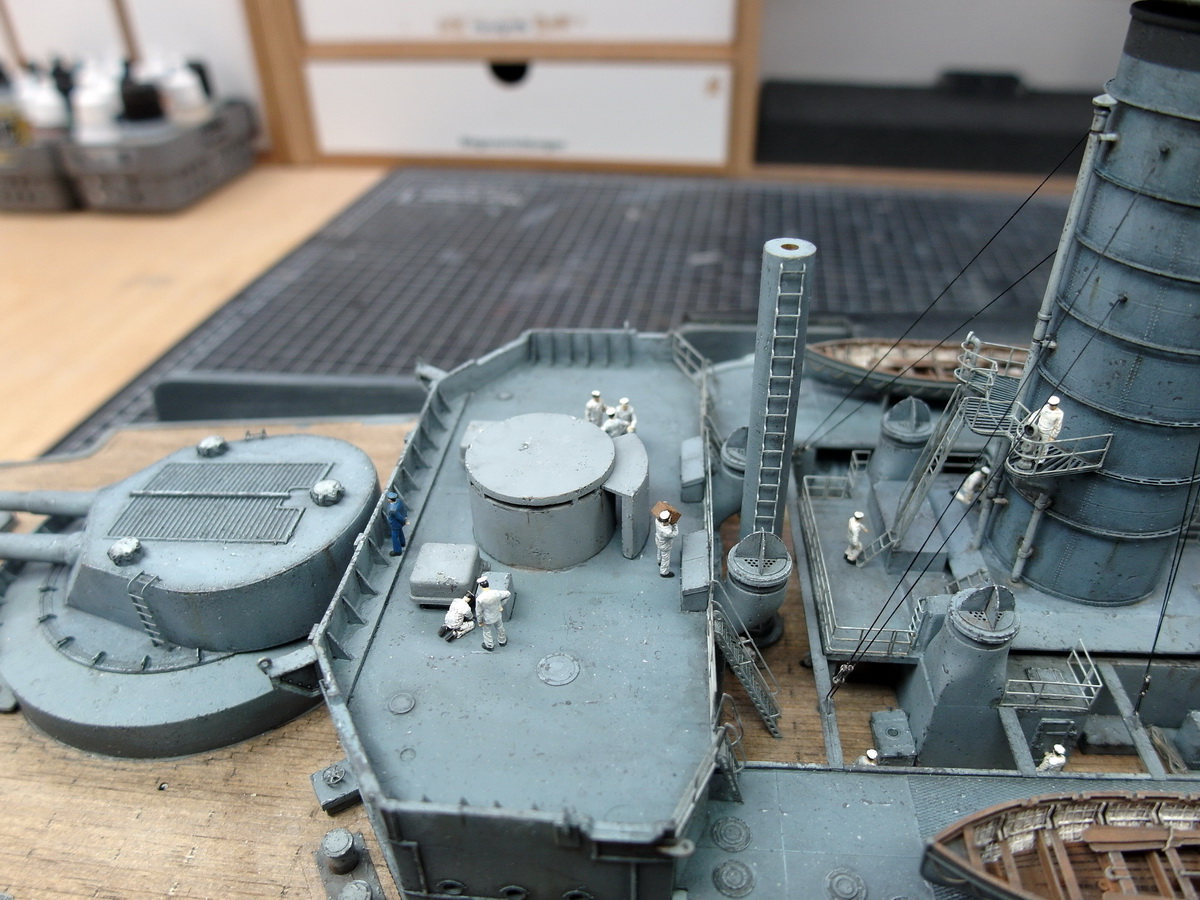
An officer steps out of the armored command post and the sailor gives a brisk salute.
At the stern, a sailor goes into the control station, and an officer keeps an eye on the boys working in the pinnace.

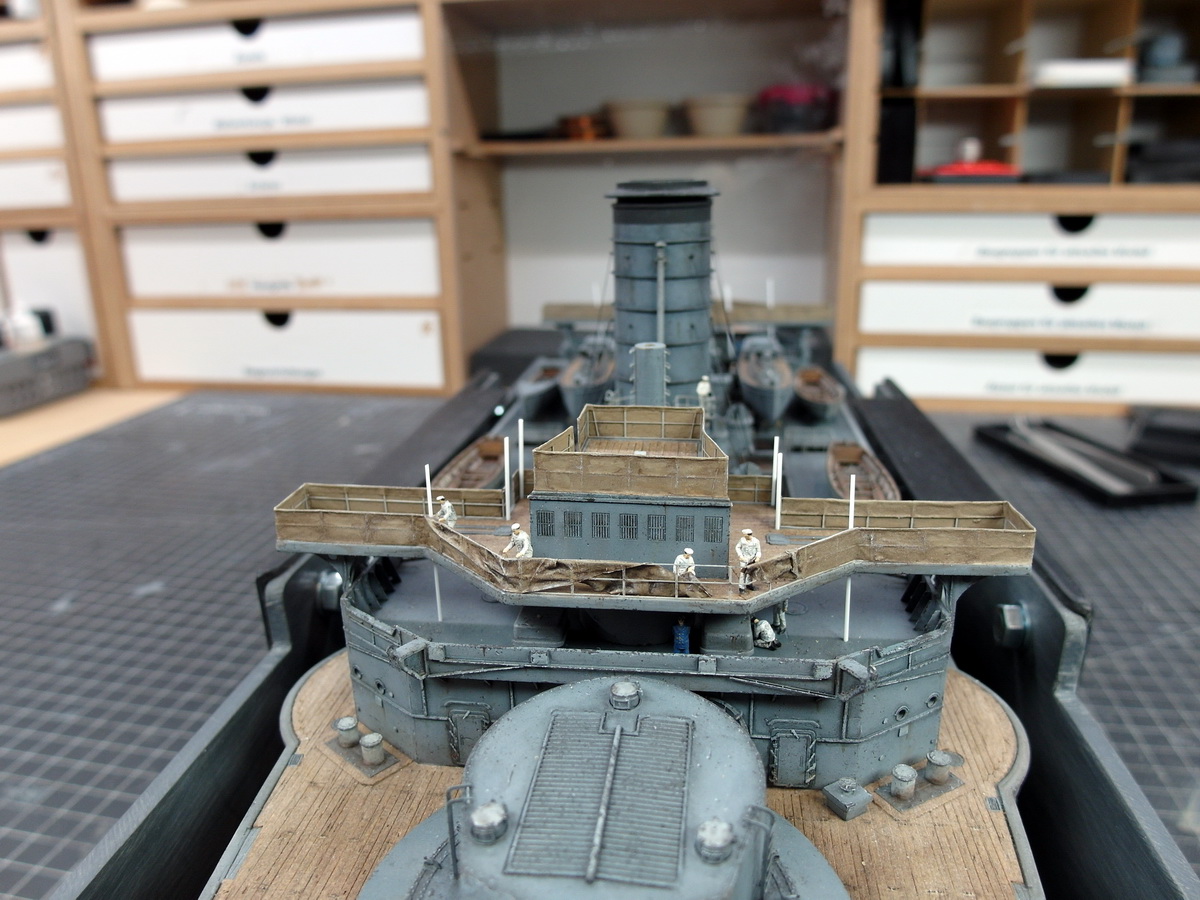
I’ve already distributed the figures on the lower deckhouse, so now the upper bridge with the cams can finally be installed.
I would have difficulty reaching those spots afterwards, so that’s how I did it before.
Even these figures are barely visible afterwards, but again they give the model depth and a touch of life. The good thing is that I could easily use the DKM sailors with their incorrect clothing.
16 Likes
It’s beautiful! Would you please send me one of your magical caps that would allow me to instantly speak Japanese? ![]()
![]()
5 Likes
It worked perfectly for me.
I put on the hat and I could swear like a trooper in Japanese. ![]()
I’ll send you one.![]()
9 Likes
Happy New Year, everyone!
Let’s get our glue out again in 2026 and, above all, stay healthy so we can continue our wonderful hobby.
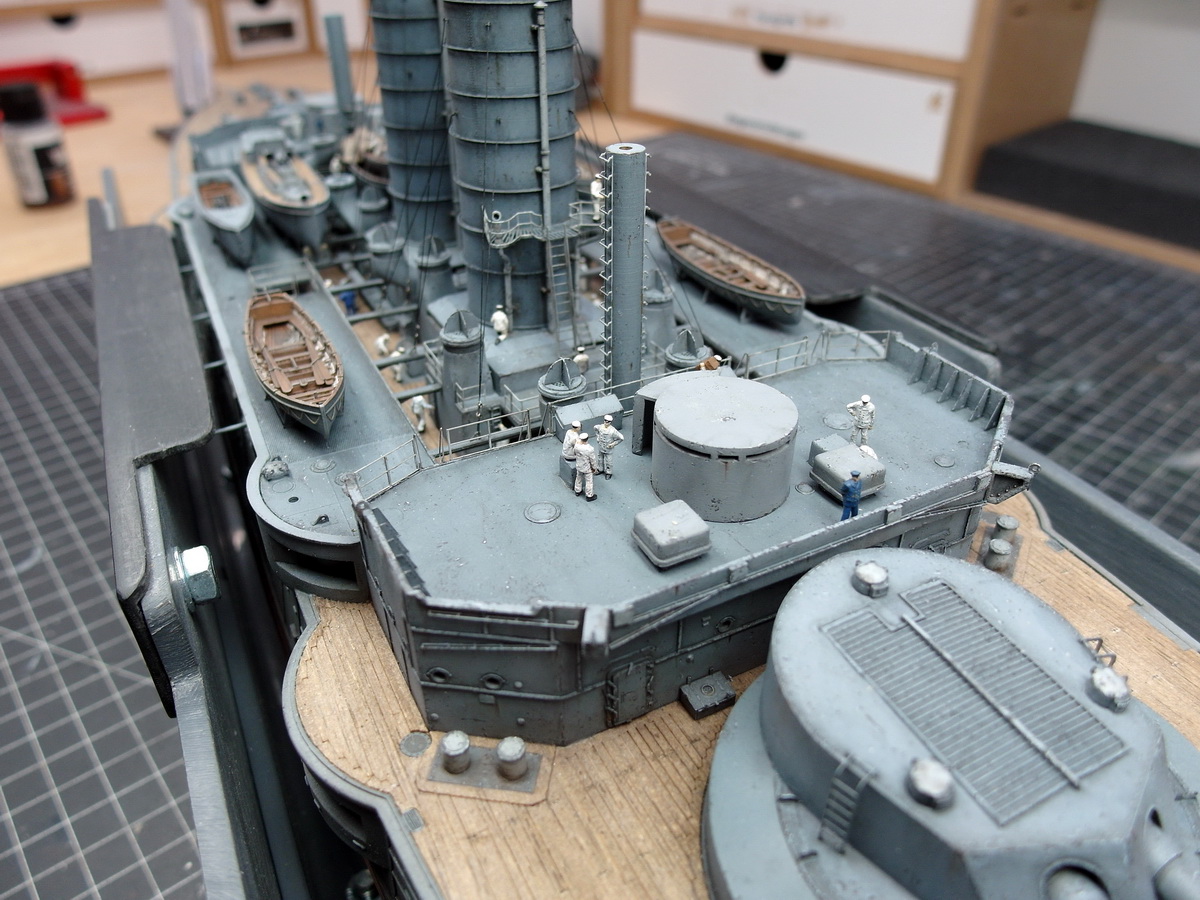
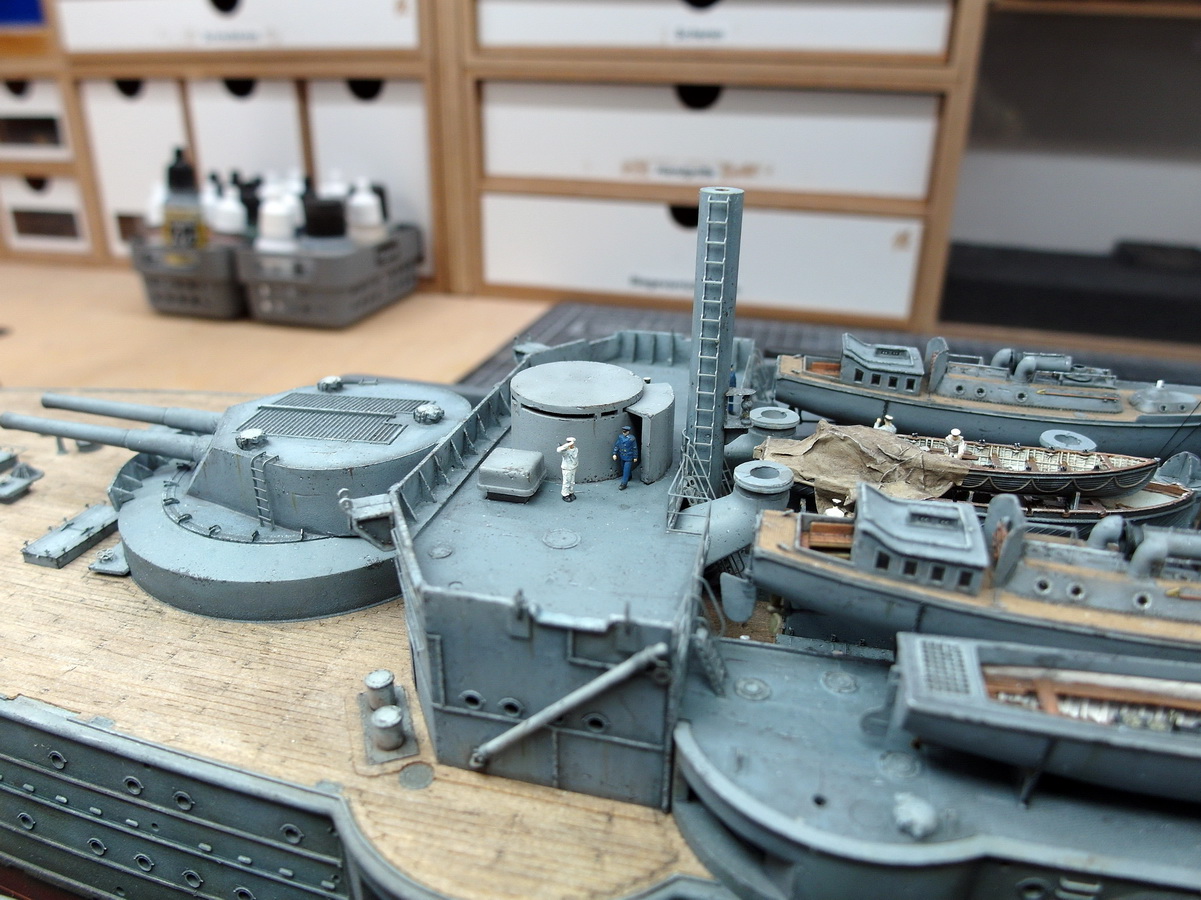
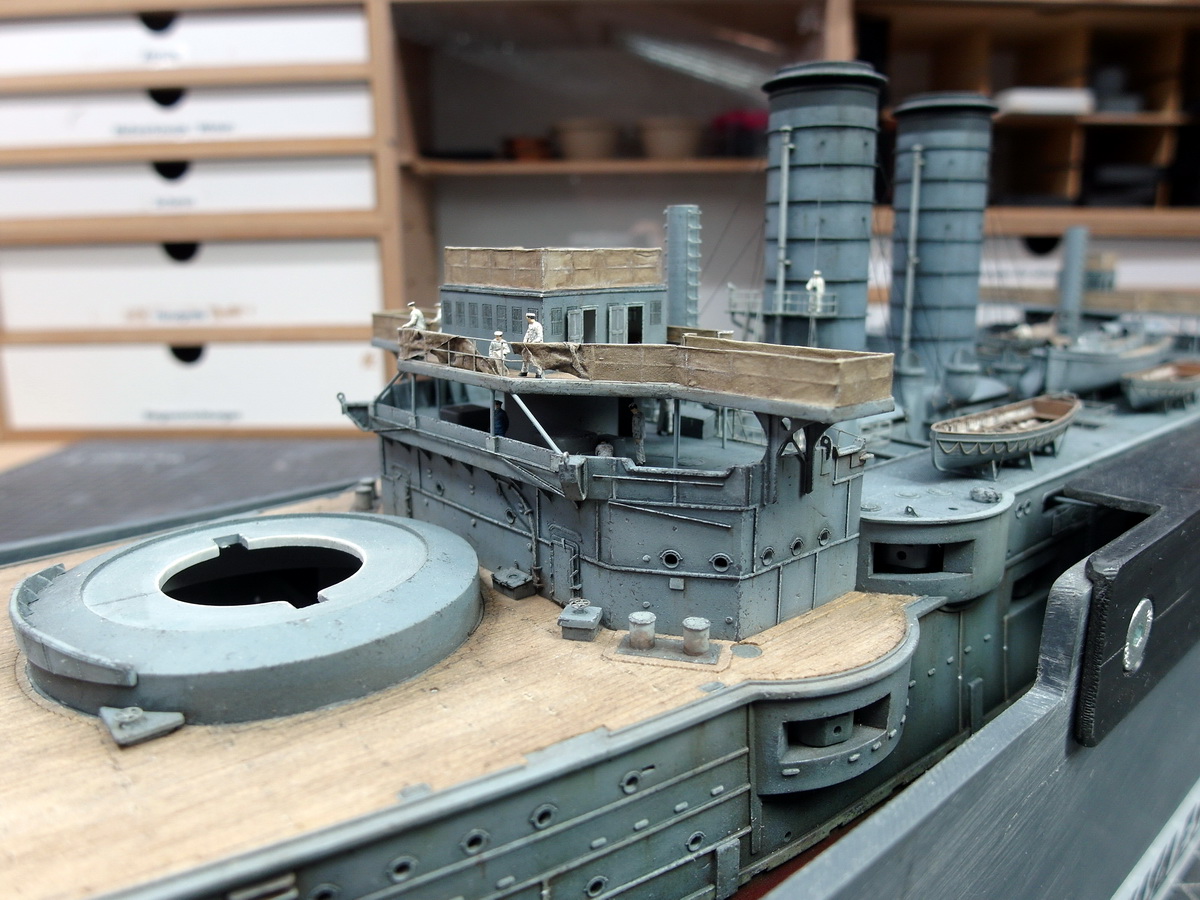
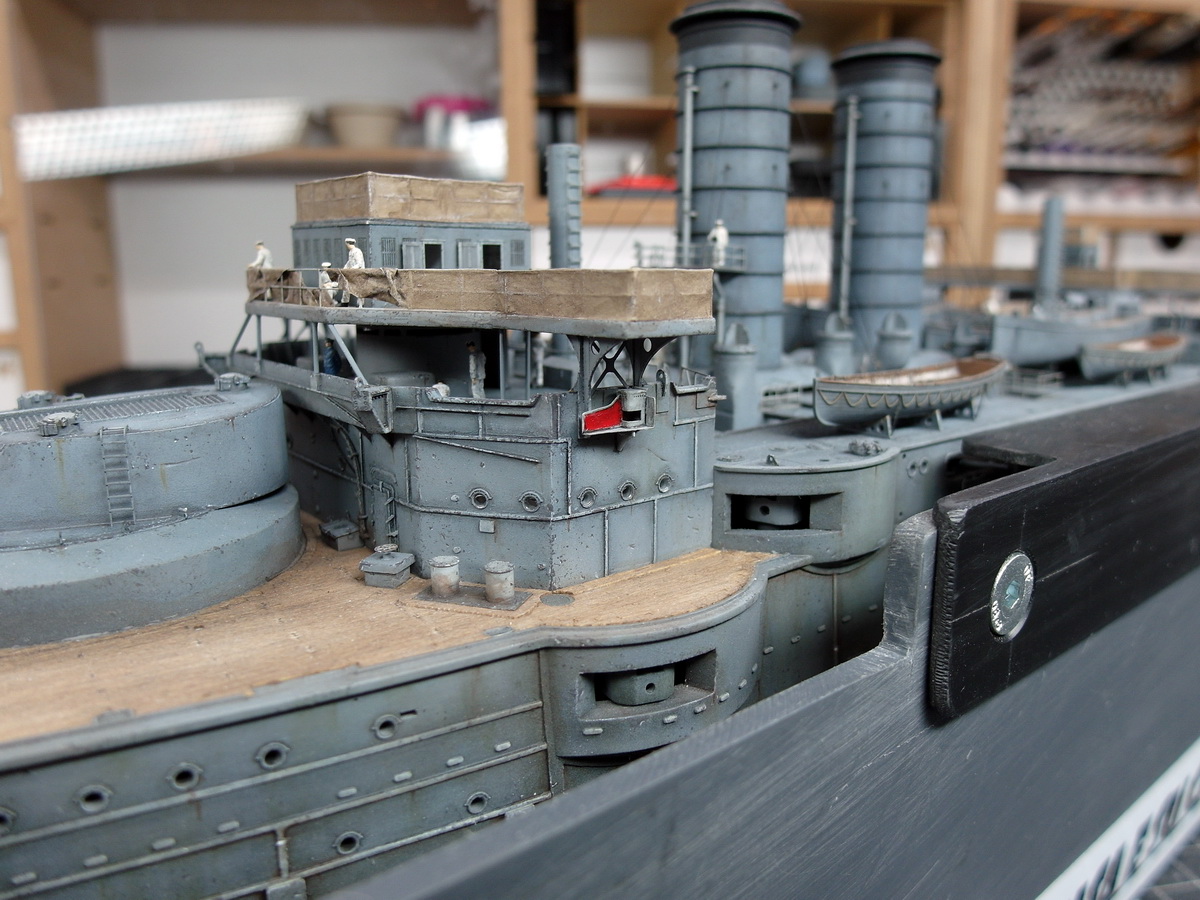
I used my day off to tackle another tricky task.You might remember that I wanted to do things differently than planned when mounting the posts that support the bridge on the bridge deck. First, I glued the bridge securely in place yesterday and let it dry thoroughly until this morning.Then I pushed the posts through the holes I had already prepared.
The profiles at the top were cut to size, and that was it. A little brown paint, and you can’t see them anymore.
Then I attached the support pillars at the front. That was a bit tricky, to be honest, but it worked. Thanks in part to my assembly stand, which allowed me to lay the model on its side again and made the job much easier.
And so the bridge and its supports are now in place.
It wasn’t easy to align all the support pillars perfectly straight and parallel to each other.
I really like working with the team below me.
The posts still need to be aged, but I’ll do that this weekend.
14 Likes
Nice work on the support pillars. It is funny, little operations like this can be a bit of work, and they are only really noticeable if things are off-kilter!
2 Likes
Thanks, Tim.
That’s true. These little details on this ship are extremely challenging. I’ve never thought about the next steps so much as I have with this model. The effort is much greater than I expected. But this extraordinary ship is worth it.
6 Likes
Looks fantastic with all the crew in those areas now …. adds a new dimension to it implying lots of movement around the decks.
1 Like
Your comments always motivate me, Johnny, and that’s why I’ve just finished this prototype.

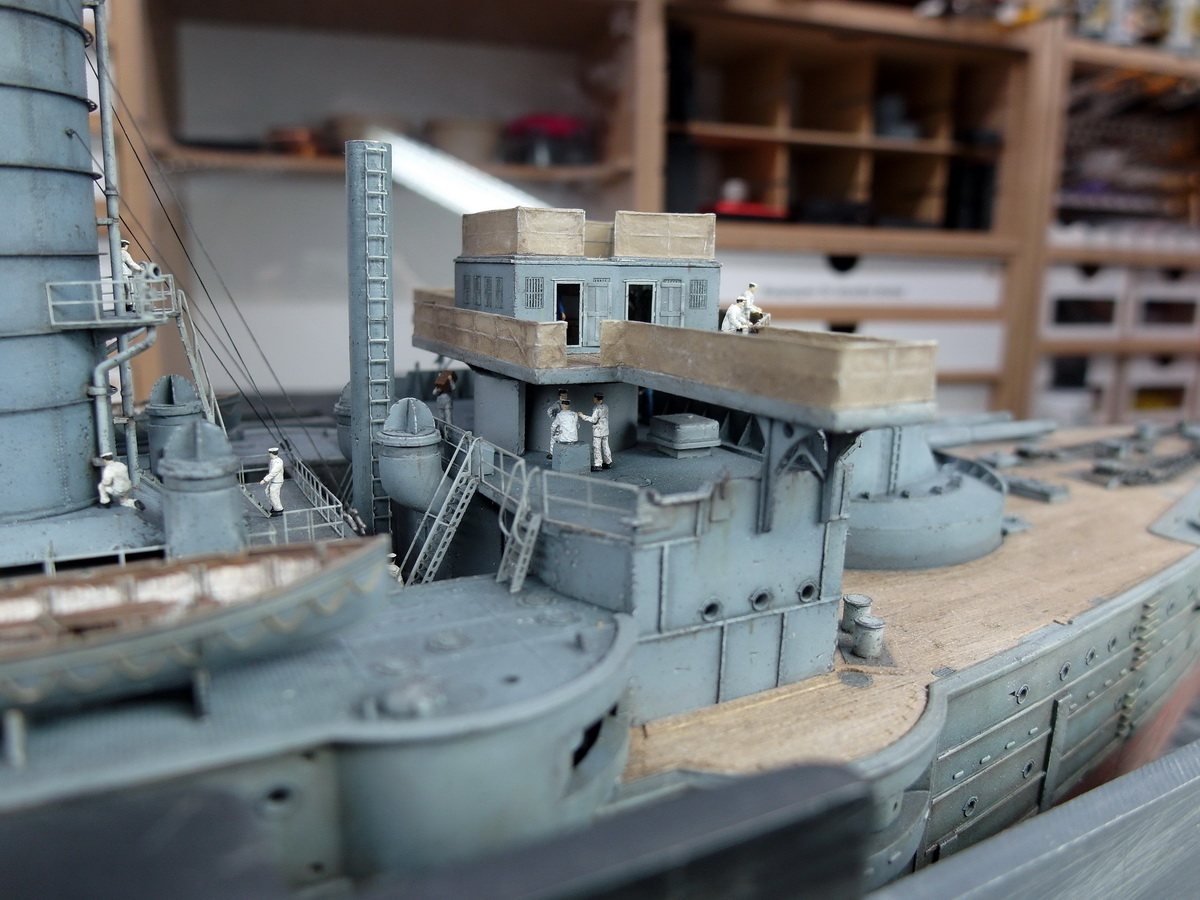
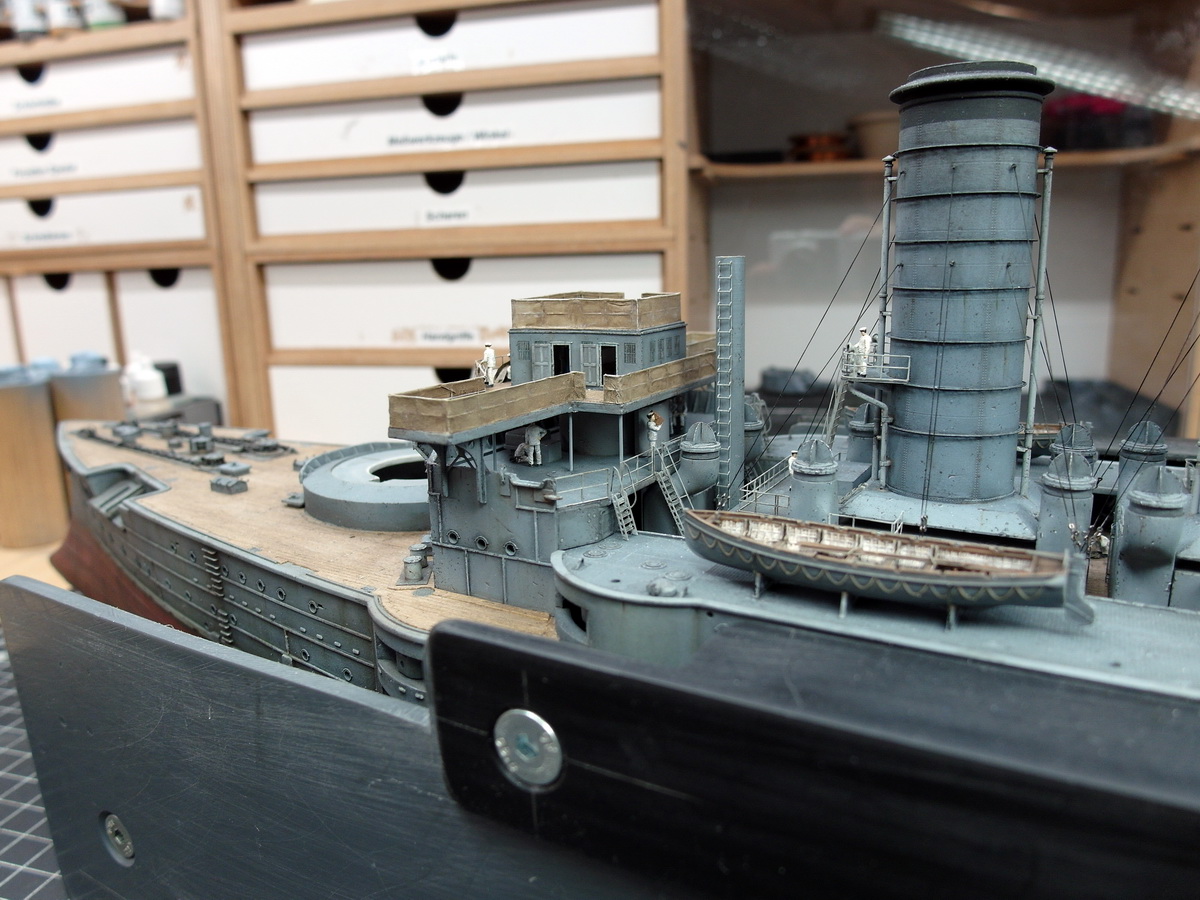
I’ve finished the bridge and its girder and am now starting to add more details.
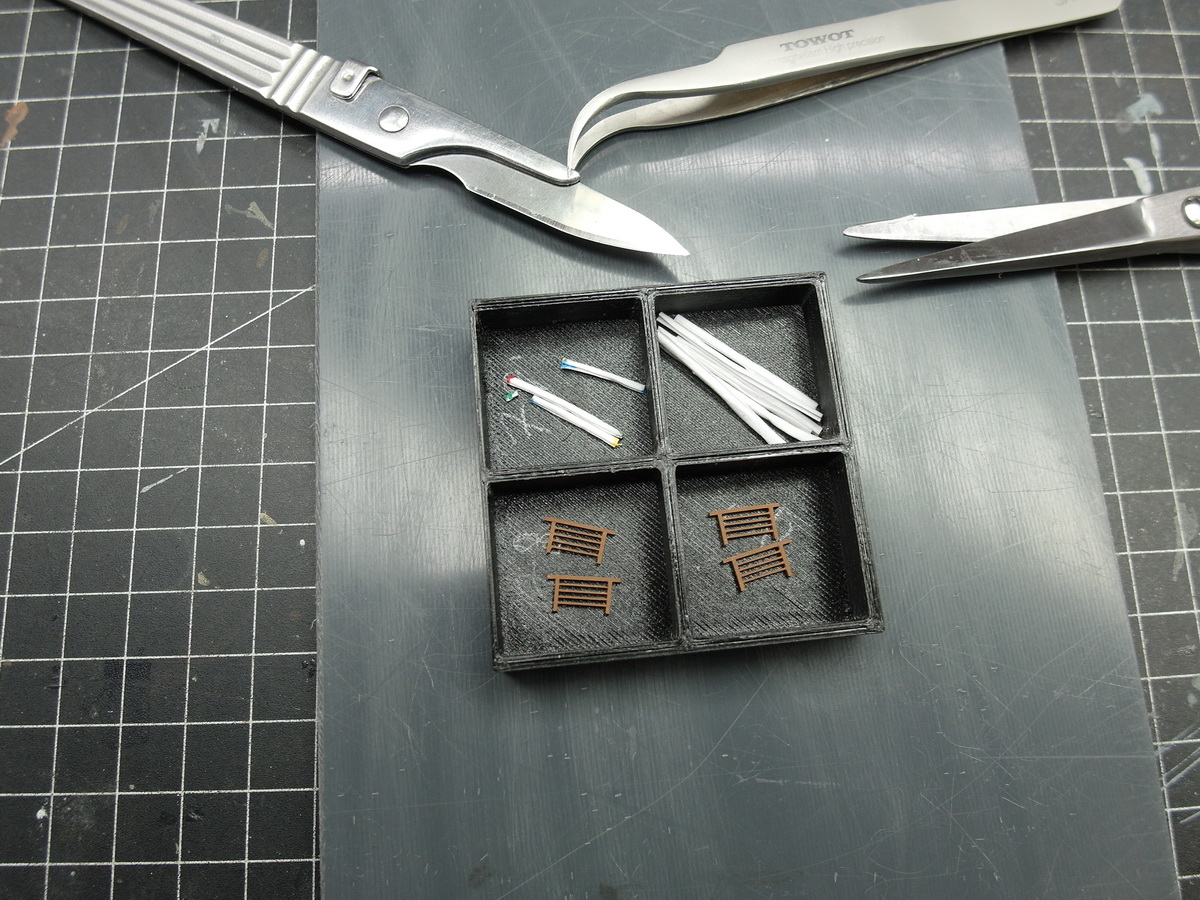
First, I’ll take care of the signal flags.
For this, I’ve built a small wooden cabinet out of styrene to store the flags, which I’ll probably make from tissue paper.

I’m toying with the idea of having a figure here later, holding one of the signal lines to raise a flag, something like this…
Now I have to build four of these little cabinets first, I’ll keep you posted.
8 Likes
That added feature is brilliant and super attention to extra detailing … ![]()
3 Likes
Many thanks, Johnny. ![]()
I have mor from that.
Today I completed a small but exquisite detail, exactly as written.
But let’s start from the beginning. The forward bridge building was still missing some colored lights—the navigation lights.
Port…
And starboard…
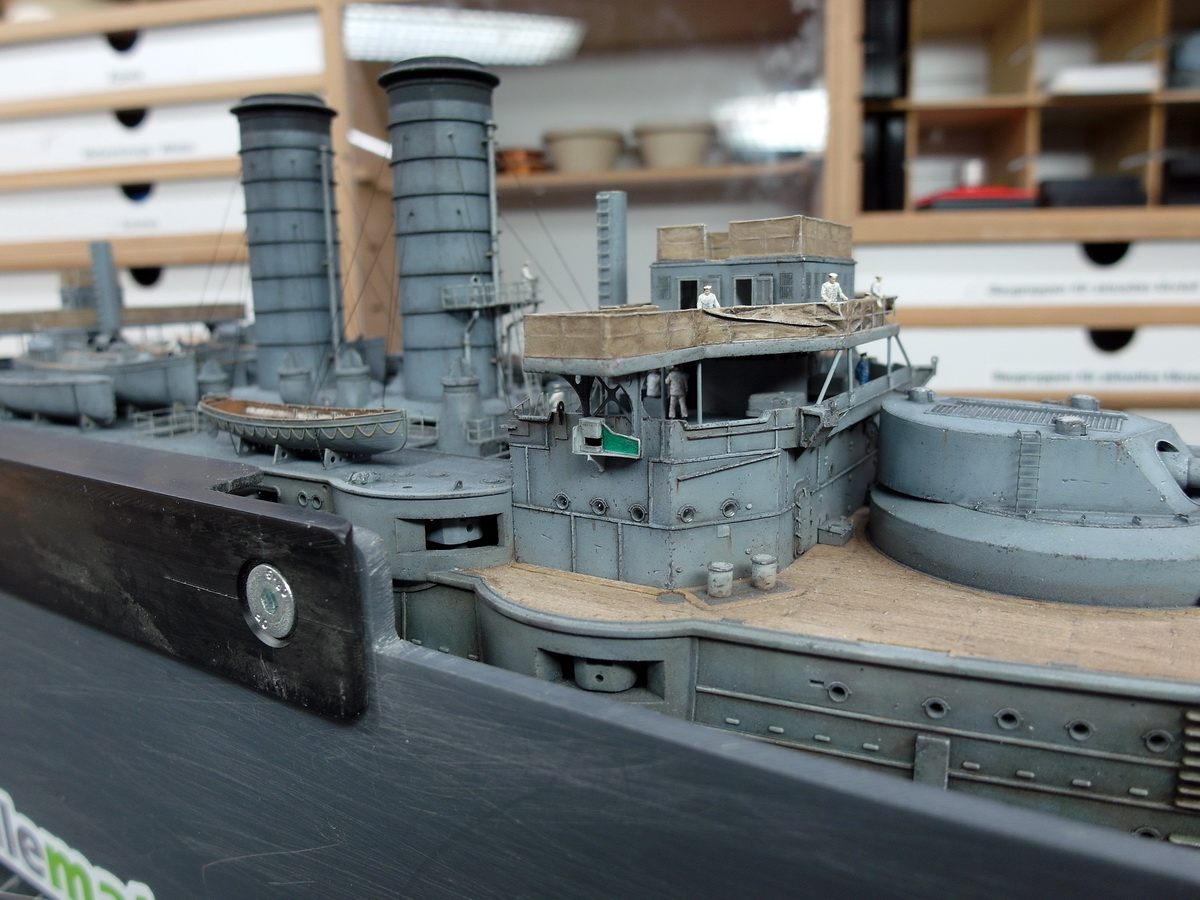
Now I could finally get to work on my shelves. First, I cut a lot of profiles to size.
Painstakingly glued together and painted brown. I folded long strips of tissue paper using an accordion-like technique, colored the ends, and then cut them off. That’s how each letter was created.
Here you can see A to E.
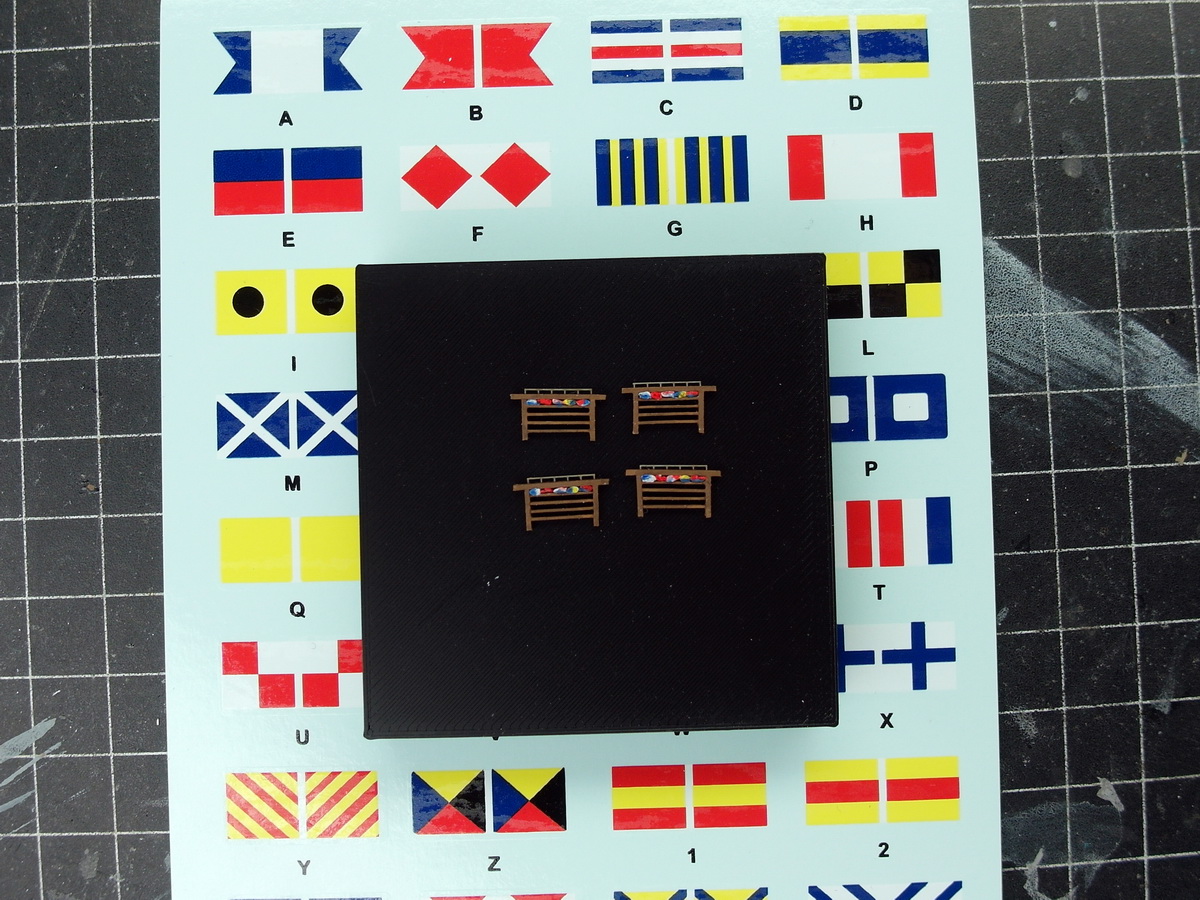
I couldn’t get more than five in a row, so in the end there are only 20 letters on the shelf. Please forgive me. ![]()

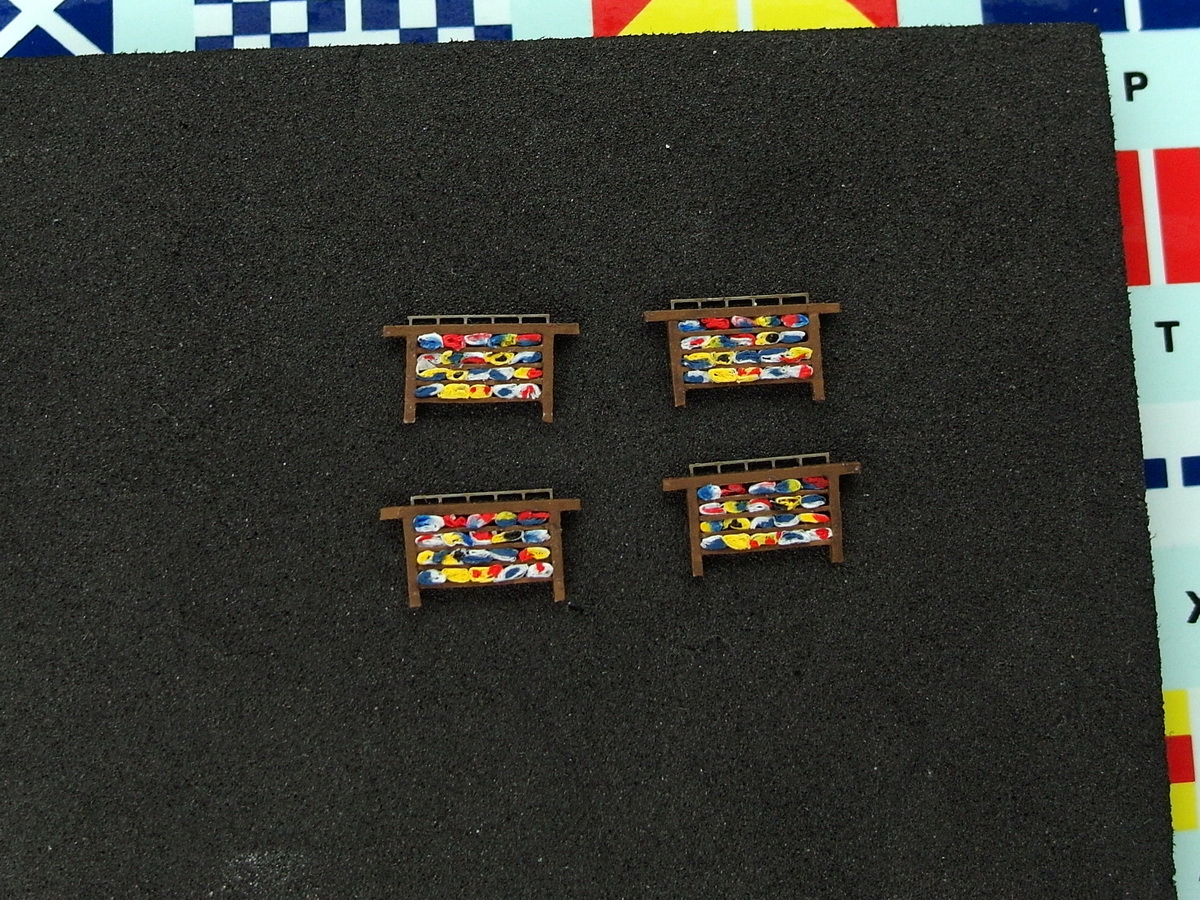
Then I set it up on the object of my desire to test it out and let it work. I really like it.
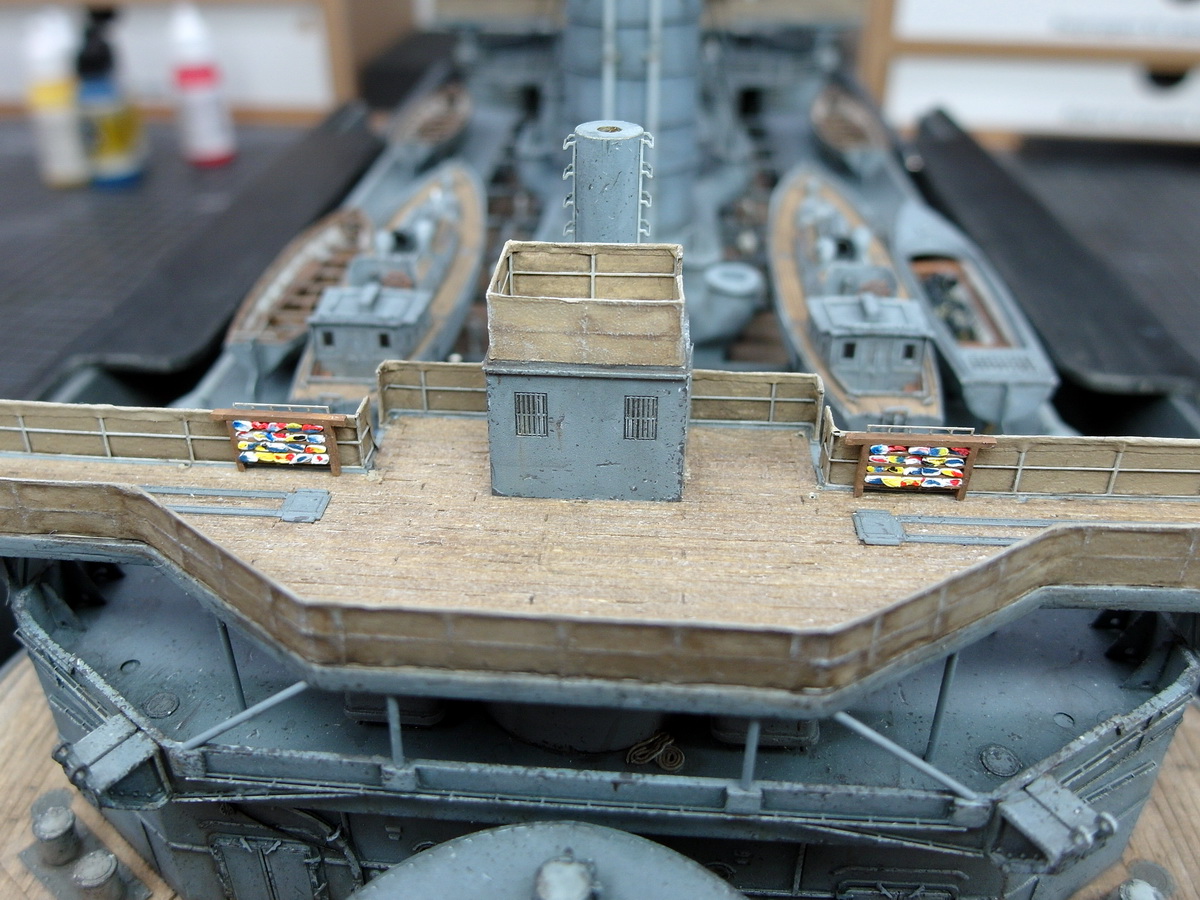
And I also made the attachment points for the ropes flatter. They were still too high for me.

Successful Sunday. ![]()
16 Likes
Nice to read that, Tim.![]()
Of course they’re in the correct order. Otherwise, where would the image of German thoroughness be?! It does annoy me that not all the signal flags made it in. ![]()
![]()
4 Likes
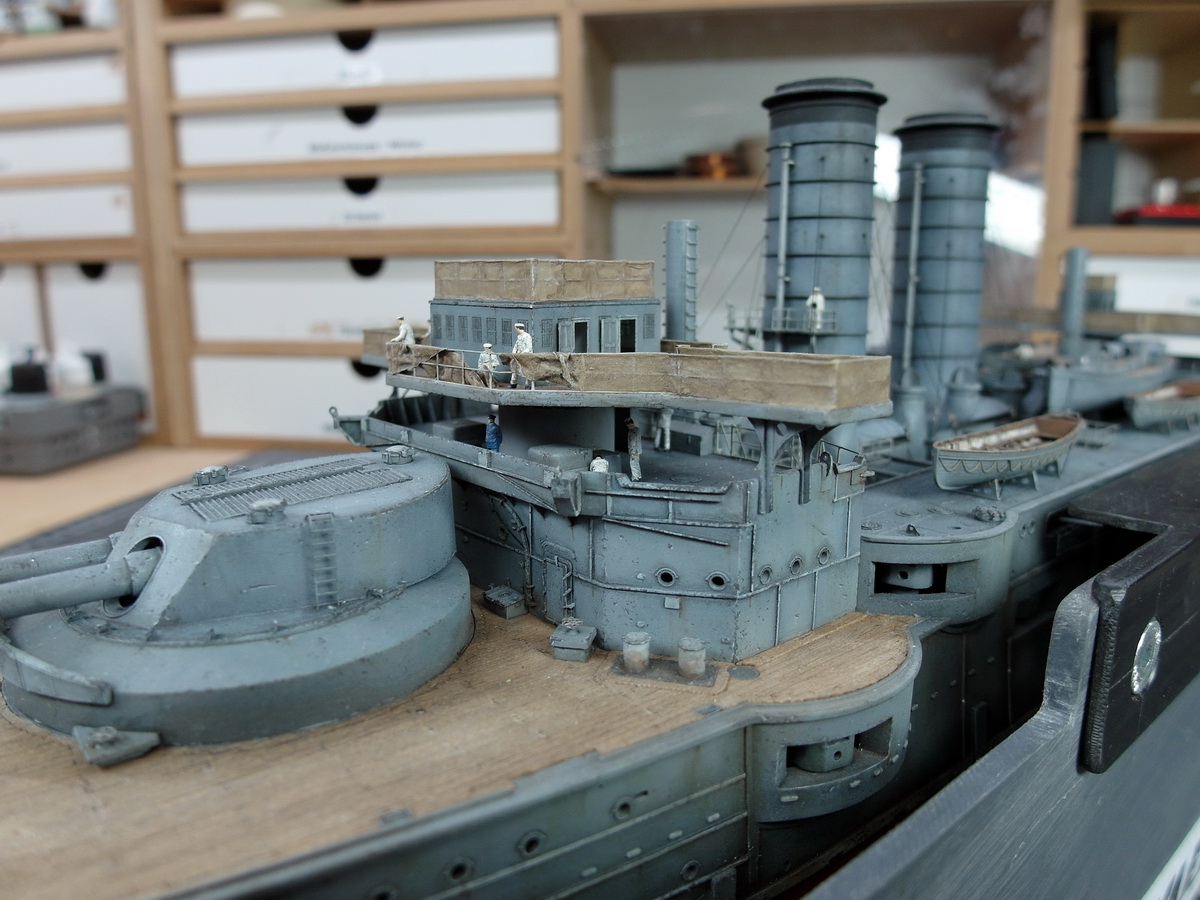
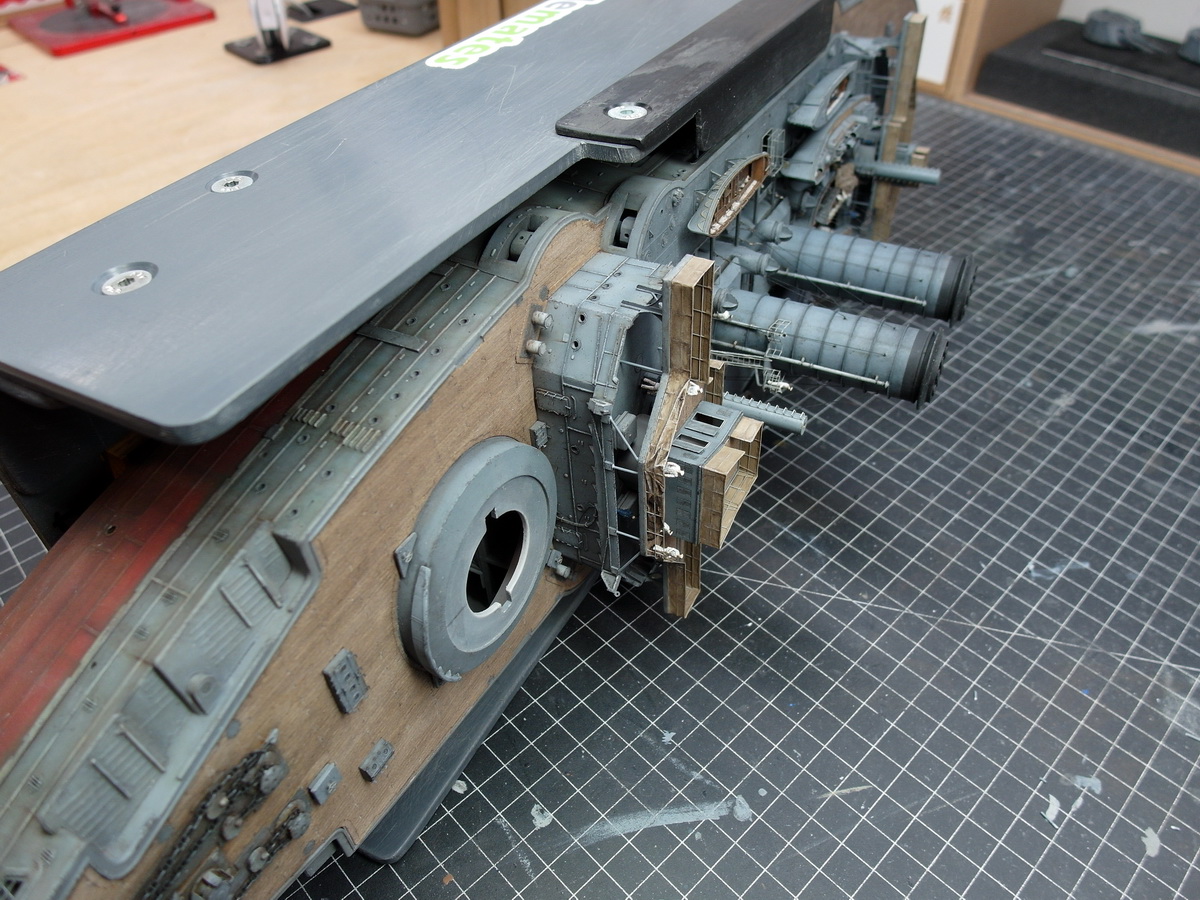
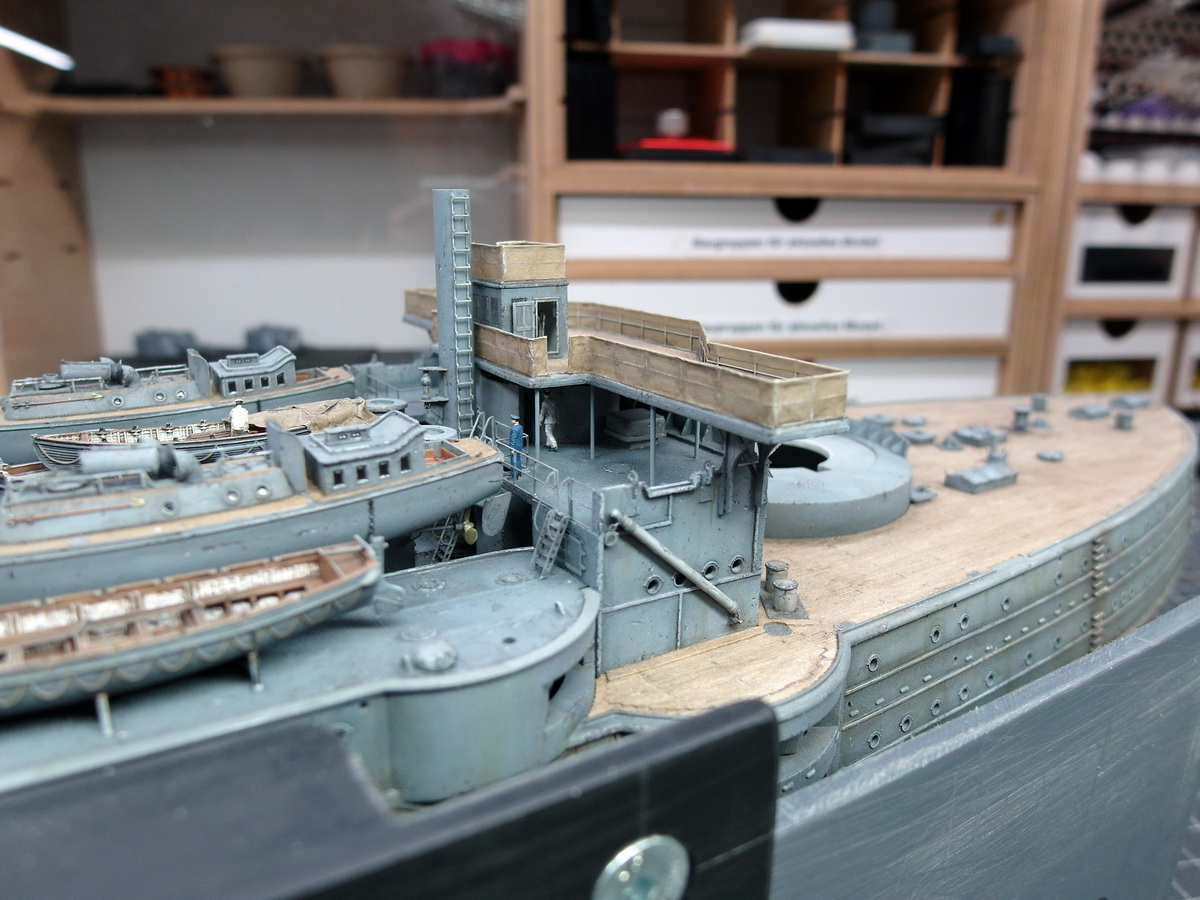
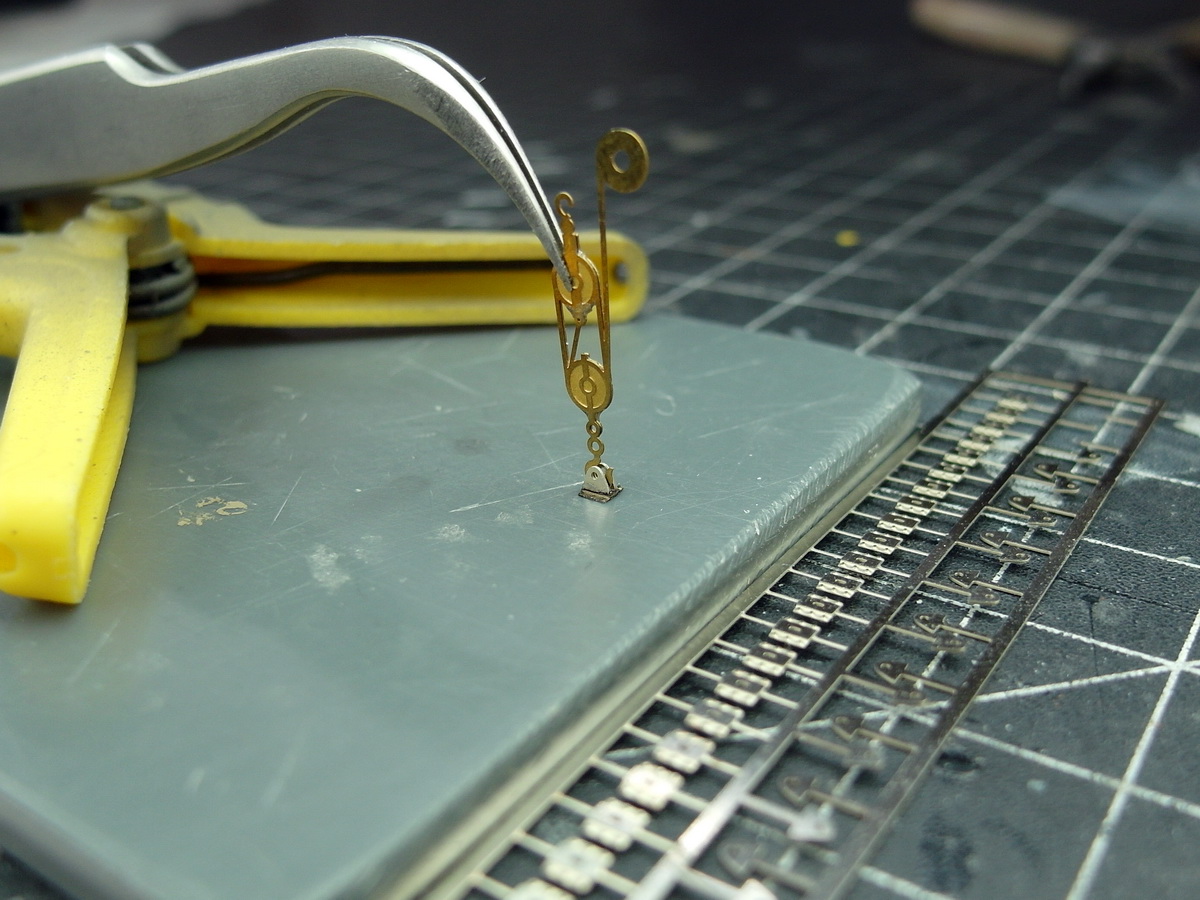
Next, I tackled the crane boom and the wind vents.
I’m actually installing the crane boom very early on, for two reasons.
First, this allows me to finish the work on the amidships deck, and second, I want to put the upper part of the masts in place as late as possible. On the Mikasa, they are much taller and more delicate than on the Bismarck, making the model quite unwieldy.
And so I got started.
First, I created a mounting for the pulley on the boat deck. This consisted of two deck eyes and a base plate. The nice thing about this was that it gave me a little more leeway when aligning the crane boom. The hook could be moved up and down a bit in the bracket, which simplified things.
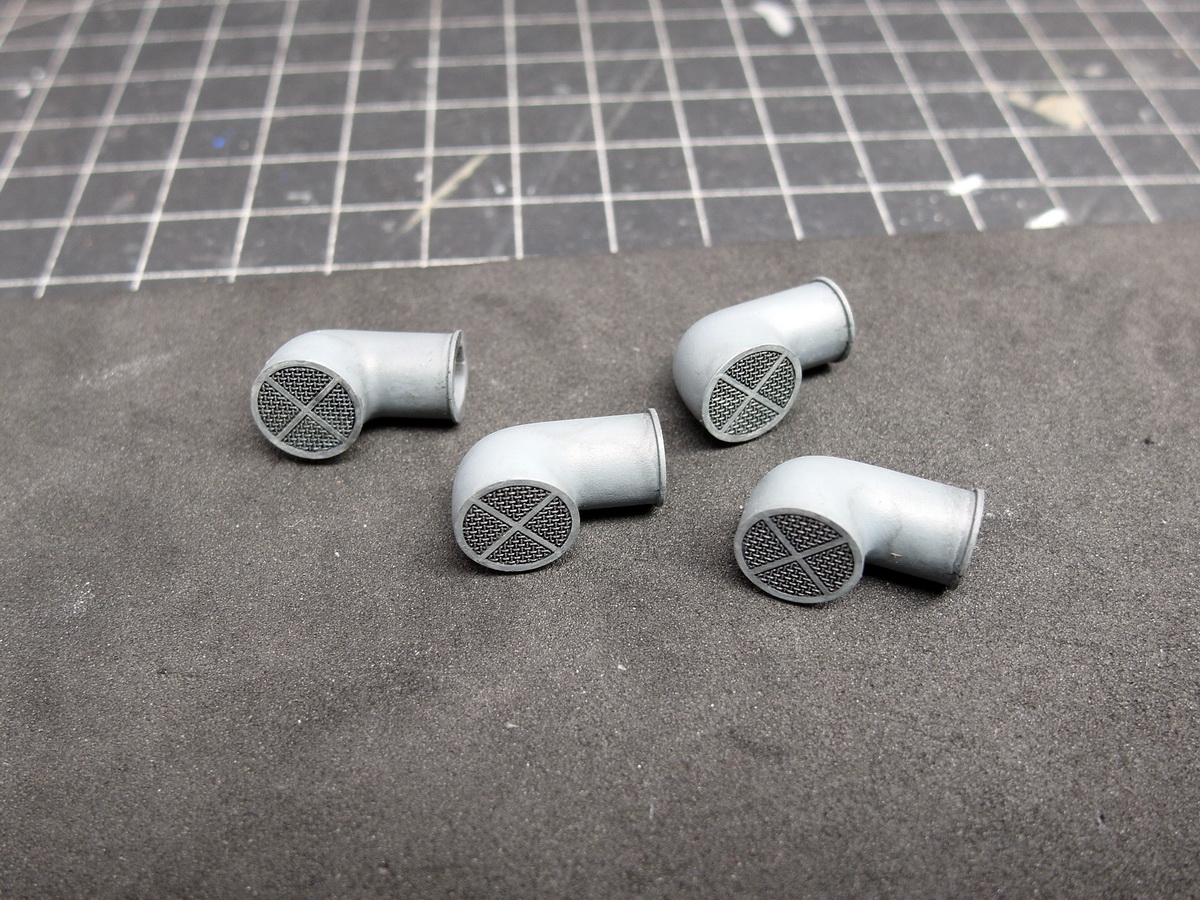
Then I assembled the missing wind vents.
And without further ado, let’s get all that stuff onto the model.

The crane boom is placed on a support.
And the pulley system can be conveniently parked on the deck.
It’s a damn tight fit, but it works.

14 Likes
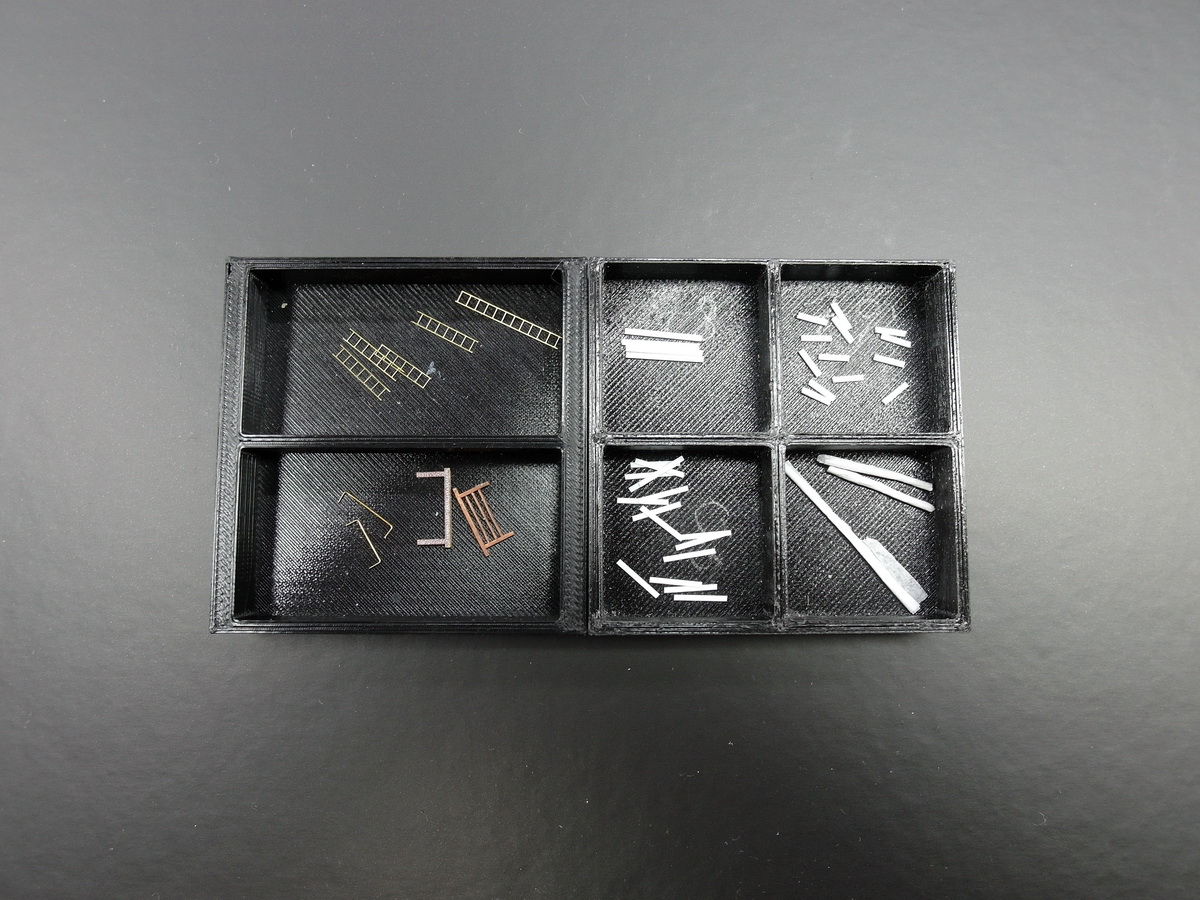
Okay, a quick update for the weekend.
And here’s the material you’ll need.
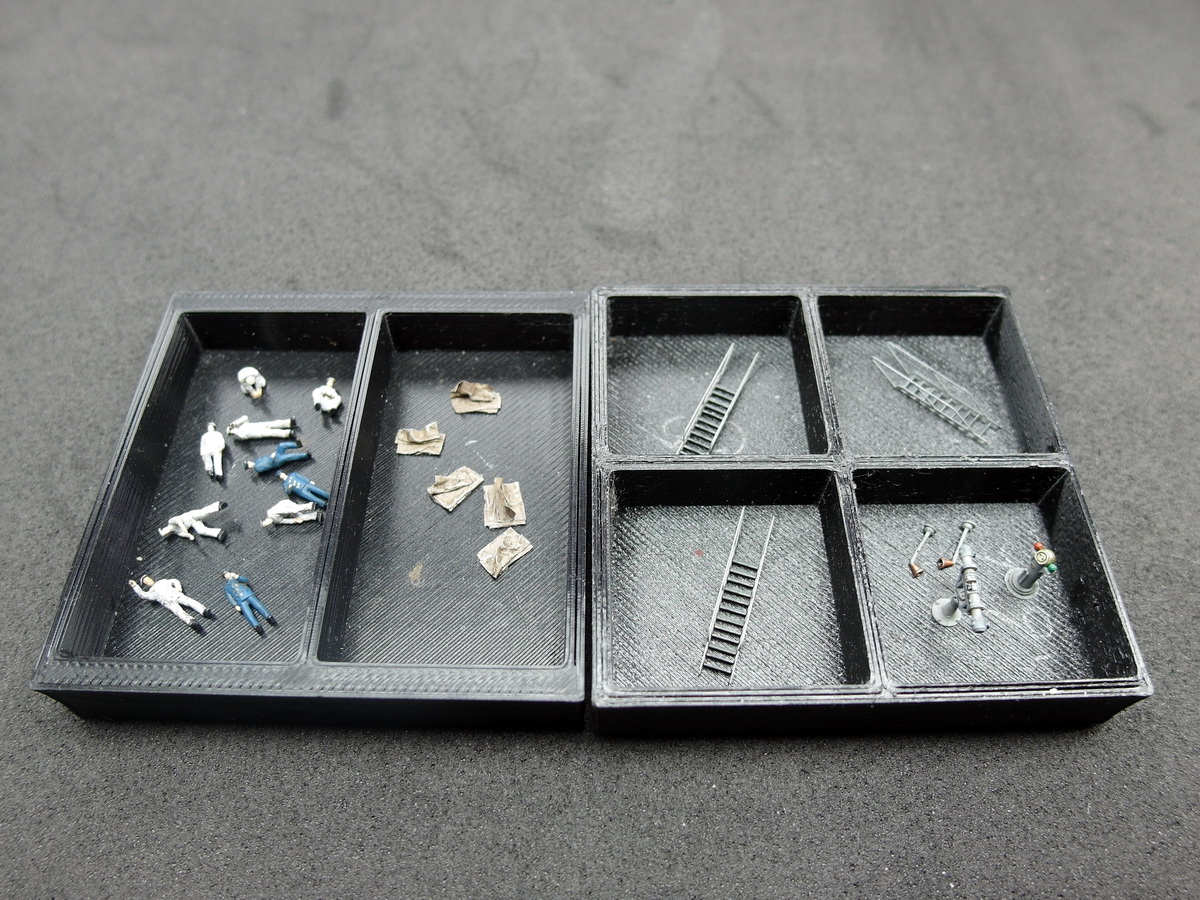
Curtain up:
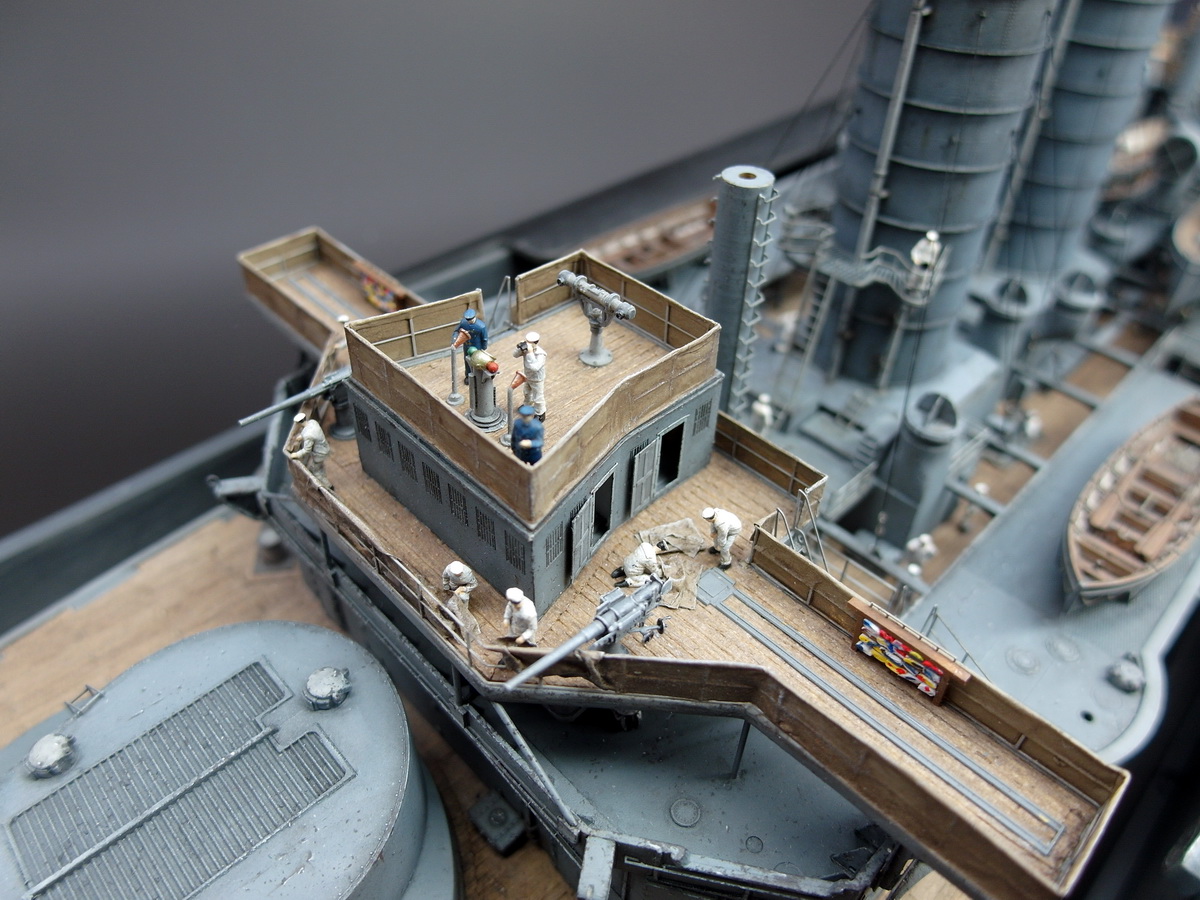
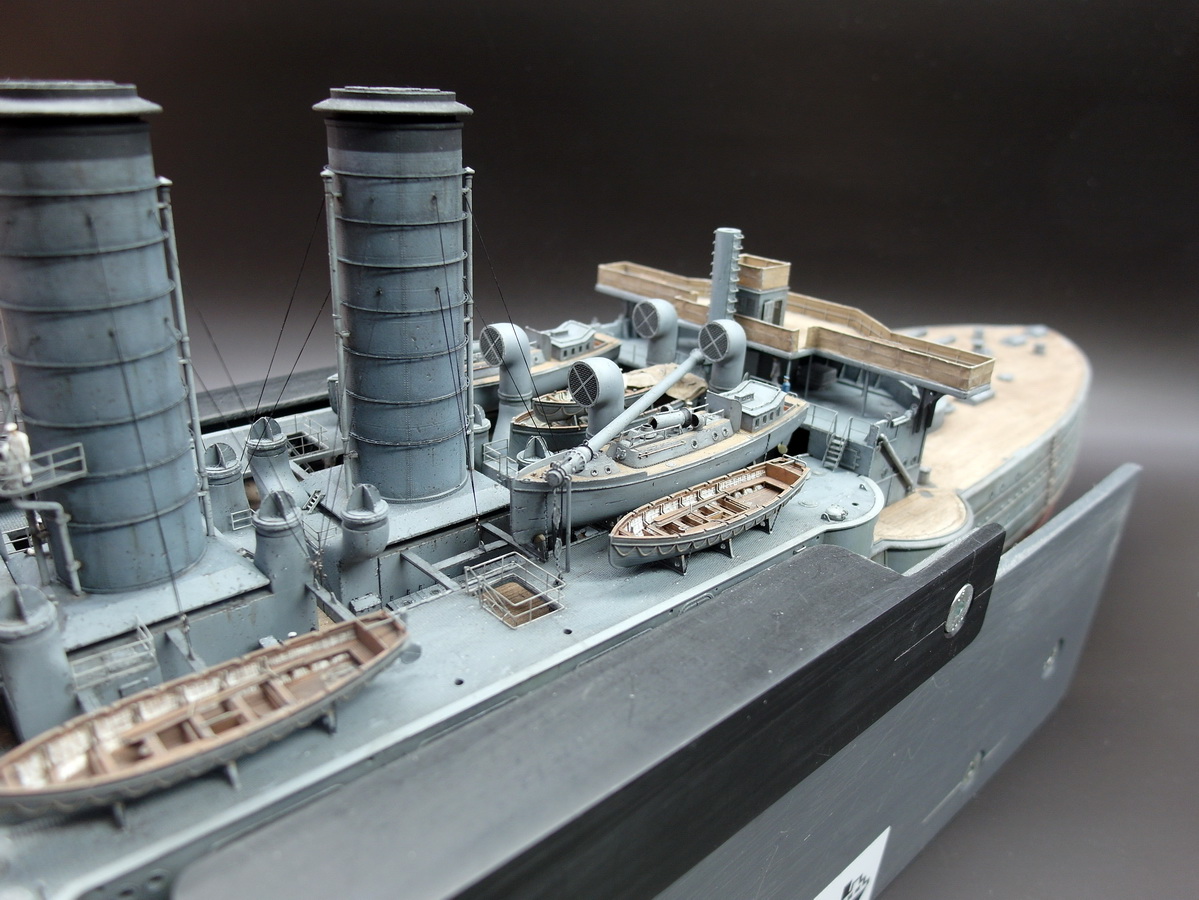
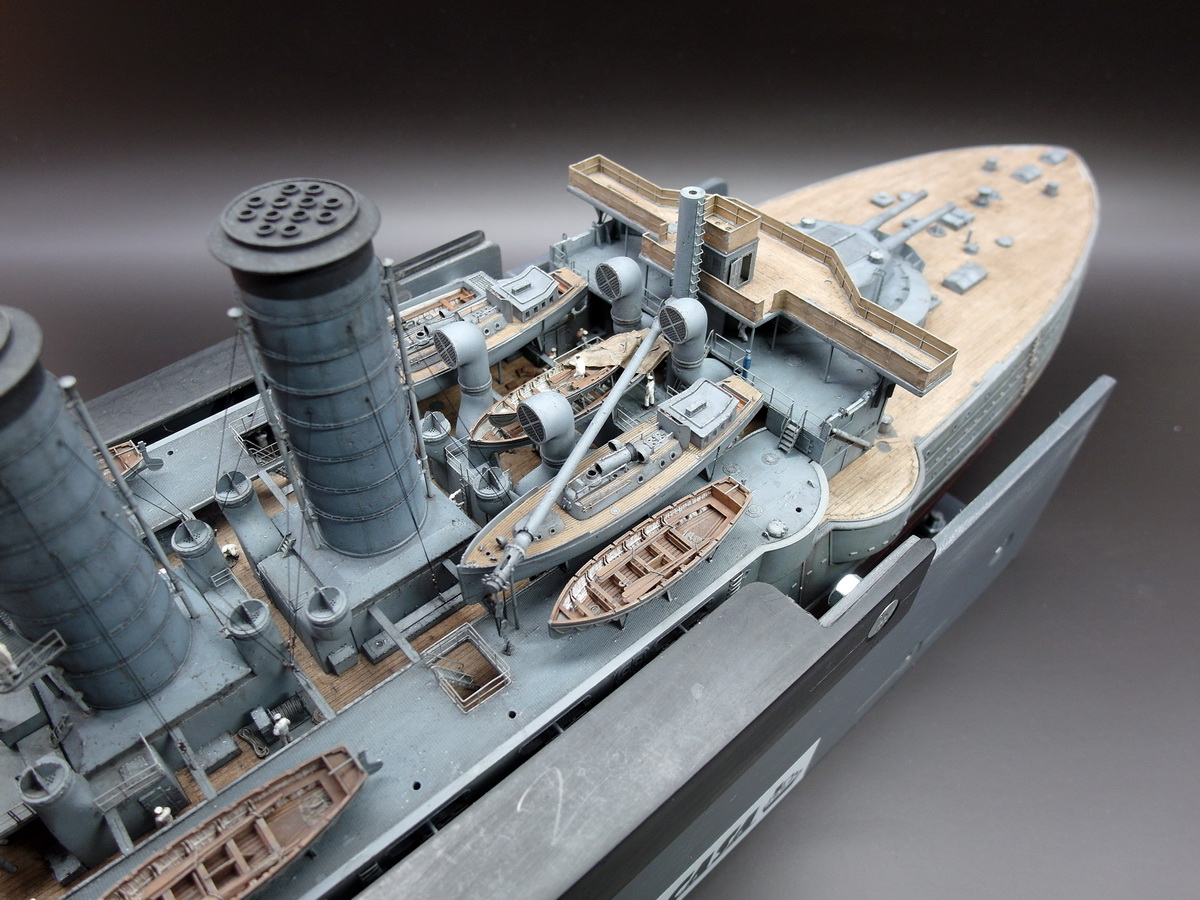
The crew folds up the excess tarpaulins for storage. An officer supervises the work from above.
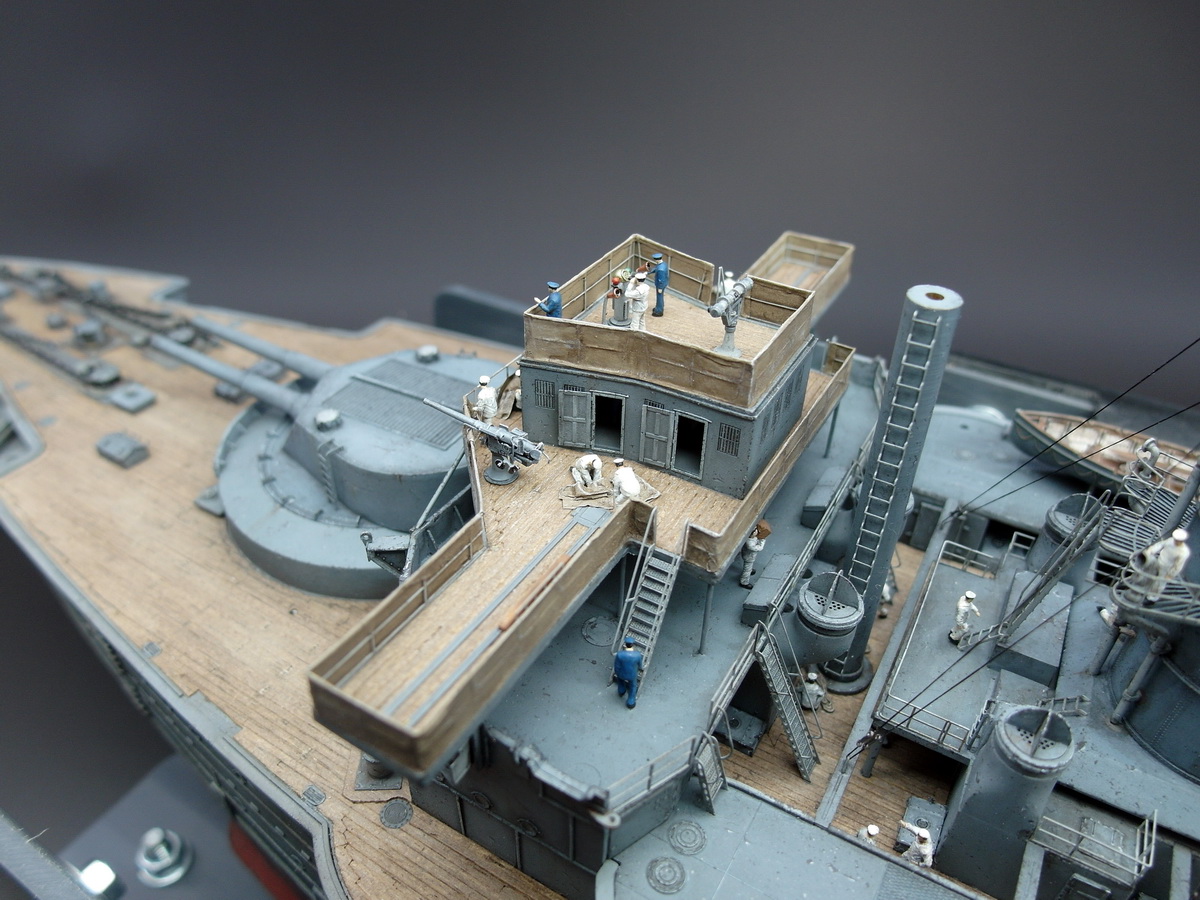
Finally, my compass, into which I had put so much work, could also be placed on the model.
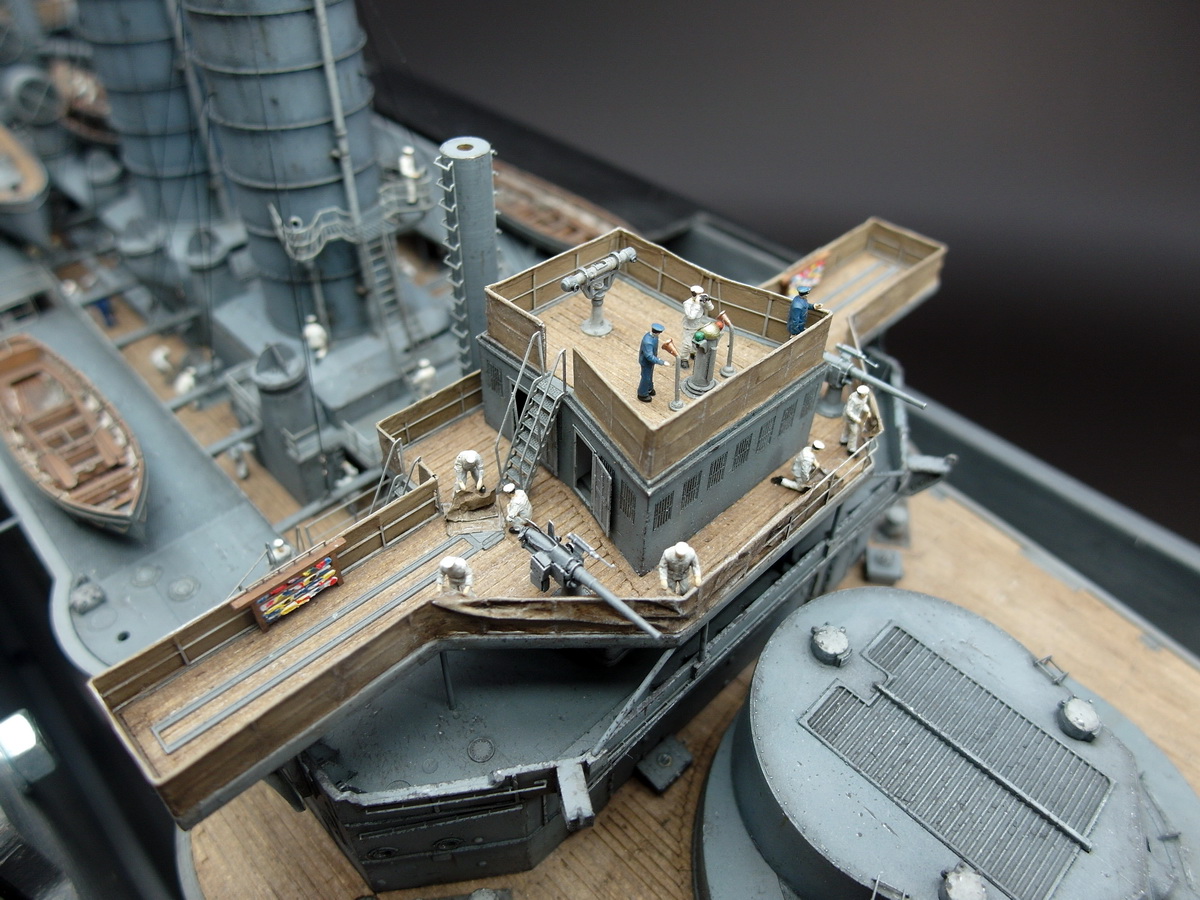
There’s not much to see of his brother in the wheelhouse.

And the first 12-pound naval guns were also allowed to take their places.
The front bridge is now complete, except for the searchlights.

13 Likes