Thank you both so much and also my condolences for you tank.
Yes Johnny, I also see model building as a kind of therapy for myself. Everyday life returns with strength and that’s a good thing.
I also missed the exchange with this excellent community.
So back to work.
4 Likes
Jorg, my deepest sympathies for the loss of your mother. ![]()
Your Mikasa build will be a great way to keep your thoughts on track and also a great way to honour your mother.
I also would say on the other hand that it is good news that you and three other family members have beaten cancer and wish you all the best in your recovery.
4 Likes
My thanks to you too for the consoling words, Russel.
Then we want to follow our words with actions and continue building.
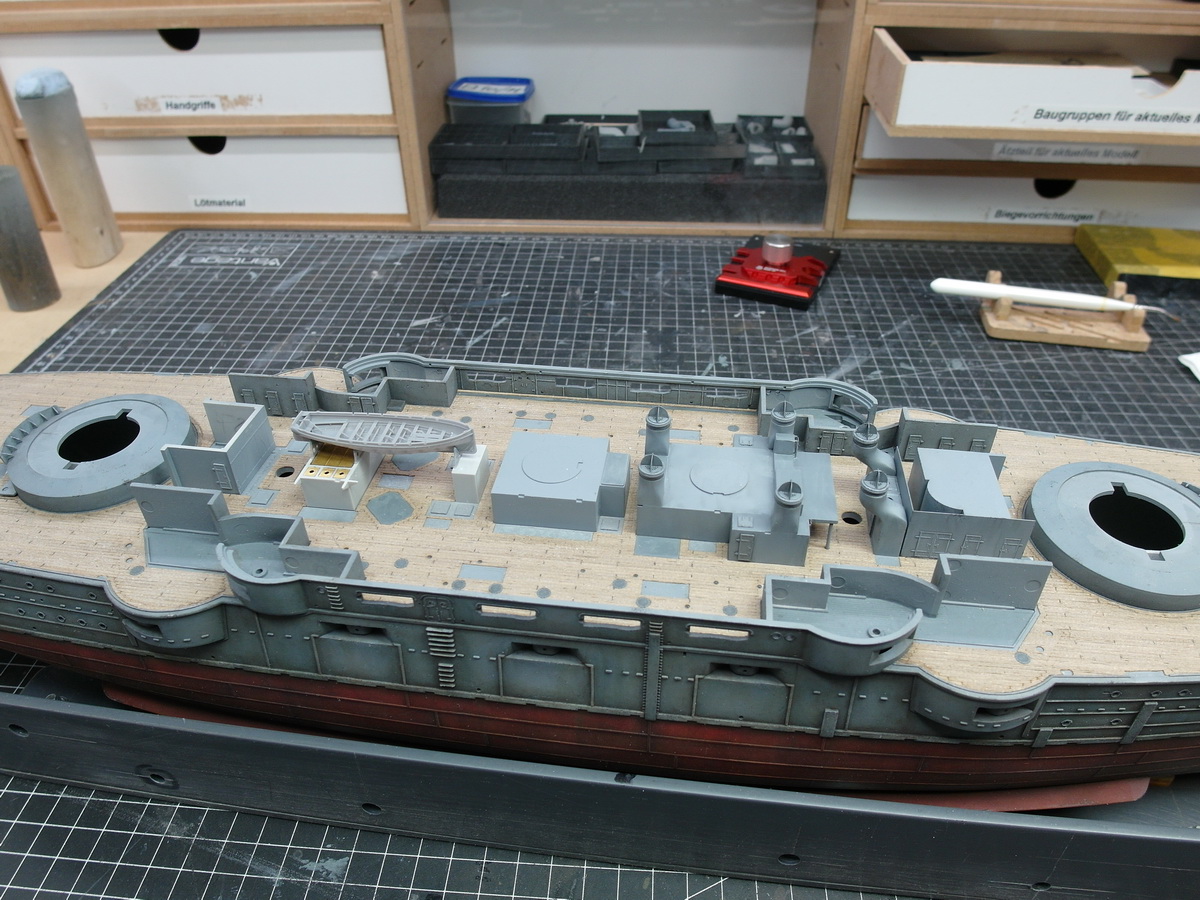
Let’s get to the internal structures.
All relatively simple, geometric structures. Neatly sanded and primed.

Added a few doors and hatches to make the monotonous surface more interesting.
However, I am entering into an area of historically unprovable assumptions. Only the pictures of the museum ship show the inner deck of the Mikasa. But that certainly doesn’t have much to do with the original ship.
So I allow myself some artistic freedom here, such as the railing, which is only placed here for customization. It is not documented historically. But it made sense to me, as you could get to the platform at the chimney via the gallery.
And a ladder should also be attached to the component, otherwise how would you get up to the front gallery!?
And that’s how this came about.

We continue with the first 32-foot rescue cutter. A dream detail.
However, there is a small problem with the cradles. They are usually not in the places where they come onto the superstructure. That’s why you can see an unsightly gap between the cradle and the cutter, see arrow.

Nothing that couldn’t be corrected with thin Styrene strips.

Now the boat is lying neatly in its cradles again.

And so the inner deck is slowly taking shape.
11 Likes
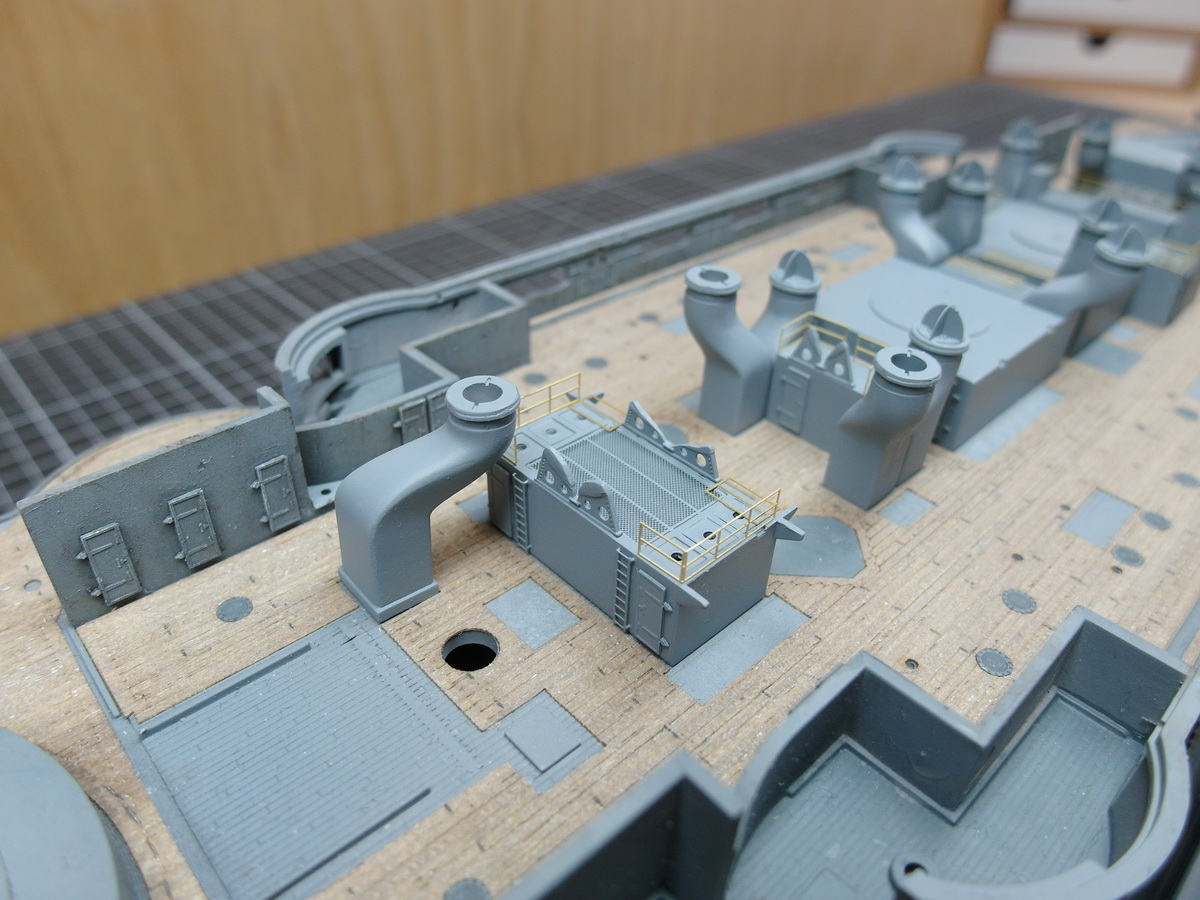
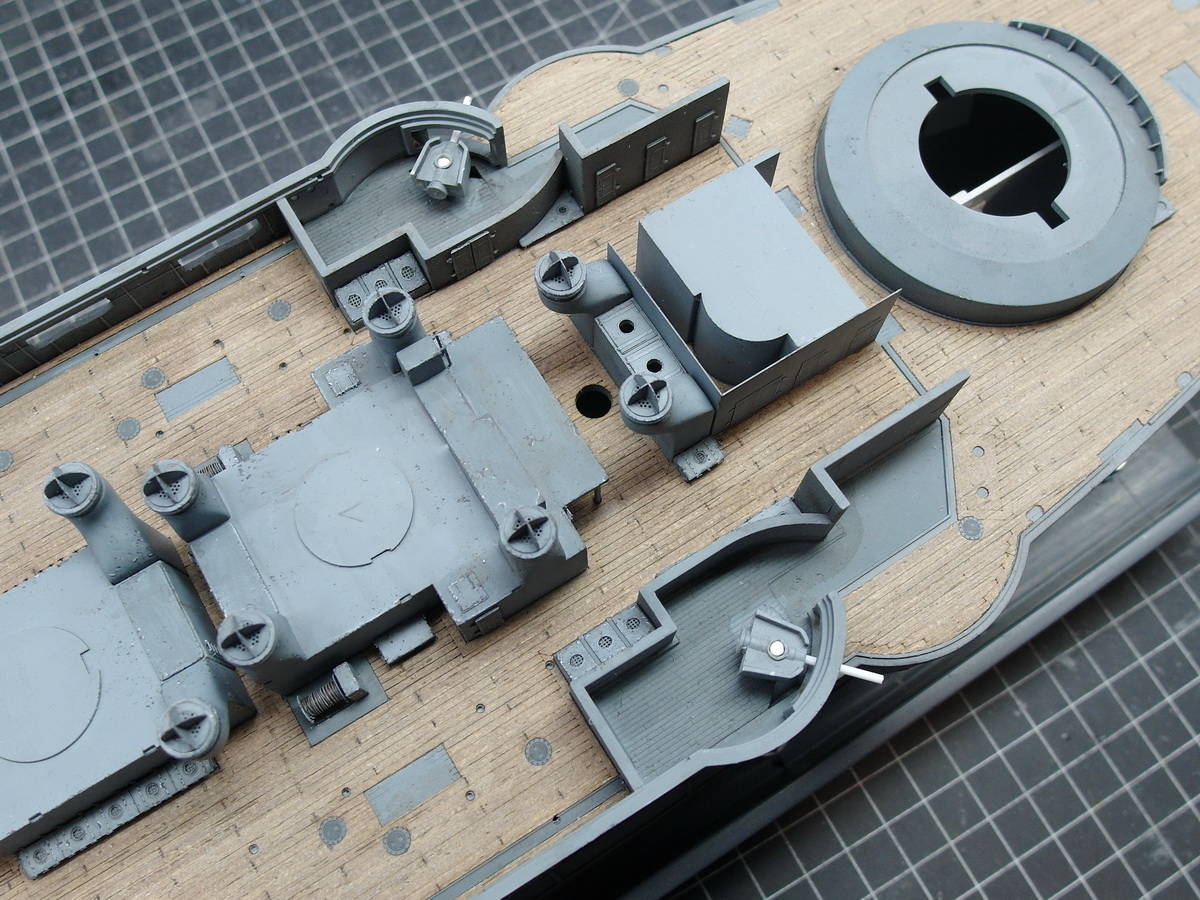
Let’s move on to the internal structures and fans. The deck is slowly filling up.
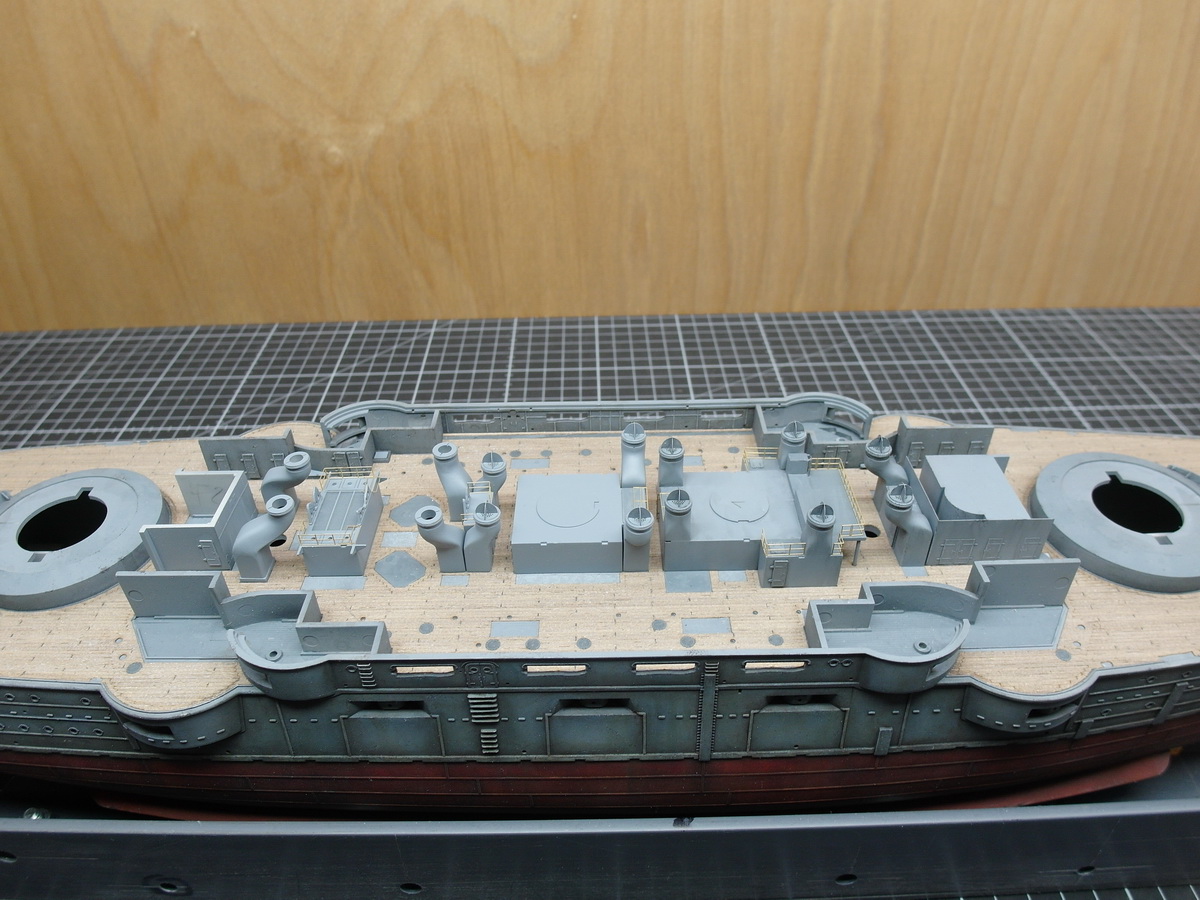
One thing bothered me. Two box-shaped structures were squeezed between the two main houses.

Seems completely illogical to me and cannot be seen on many models, including those from museums. And that’s why I don’t use it, the corridor remains open.

Especially since a small platform can be seen on both deckhouses. Probably to get to the funnels.
That’s why I won’t install the boxes, but will attach a ladder and a railing here.

I further refined the superstructure that accommodates the rescue cutter.
The doors are from the MK1 set, the railings are from the model’s original etched parts set.

And the ladders come from the leftover box.

I’m starting to like it that way

11 Likes
I think the boxed shape structures are something not permanently installed. They could easily be something that the researcher-photographer responsible for gathering reference for the model might have seen/photographed during his visit at the museum. I would have left them off too.
The scale allows for some very nice details to be represented and noticed. Very nice, clean build. ![]()
![]()
1 Like
Many thanks gtdeath.
That’s why I love this scale so much. But when I see how much space my Bismarck needs to stand, I wonder whether the 1:300 scale wouldn’t have been smarter. But be that as it may, 1:200 is awesome.
I also think that someone once thought these boxes were the original equipment. There is currently an air conditioning system there.

Even with good intentions, you can’t sell this as an original. ![]()
9 Likes
Jörg, my sympathies for your recent loss, and best of luck to your wife - I’m gratified to hear that she is beating that bastard cancer!
I have been thoroughly enjoying watching your fantastic Mikasa come together, and have been greedily soaking up details. My sister in law recently gave me the Hasegawa 1/350 version and your build will be a great reference once I begin! ![]()
3 Likes
Thank you very much for that, Tim.
Yes, we are looking positively into the future again.
I’m very pleased that you like my construction report and want to use it as a reference.
I’m really excited to see what you’ll conjure up with your Mikasa.
1 Like
Jörg,
my sympathies as well, and all the best for all of you for the future!
Great to see you back here, your fantastic modeling skills, but as well that finding the motivation to work on the shipyard again is a sign that things generally move in the right direction again after a hard time.
The work you are showing here is fantastic and inspiring! Very nice updates indeed!
All the best and cheers
Jan
2 Likes
Thank you very much Jan for the encouraging words.
I also think that everything is slowly turning around for the better and that is enough motivation for me to return to the craft table and exchange ideas with you again.
1 Like
And off to the next etched part battle.
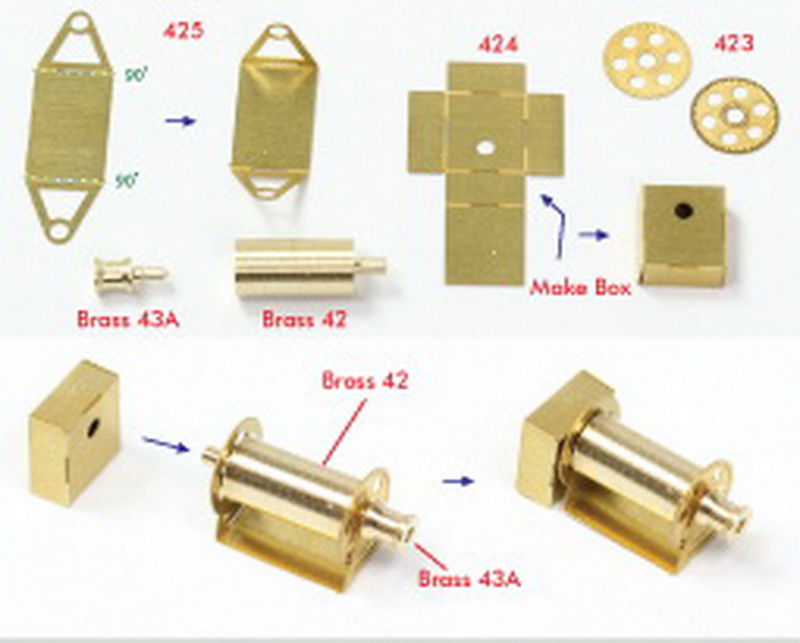
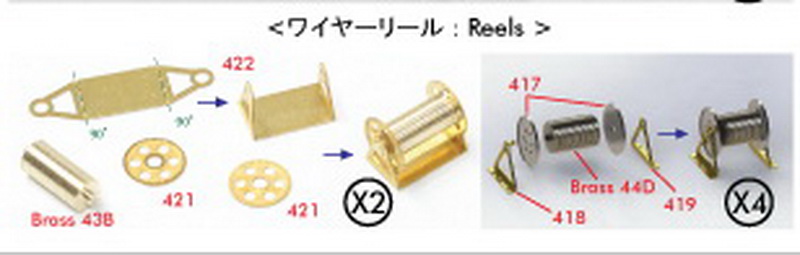
A lot of small boxes had to be bent and soldered. I also got a smaller bending aid, which makes such delicate things easier to handle.
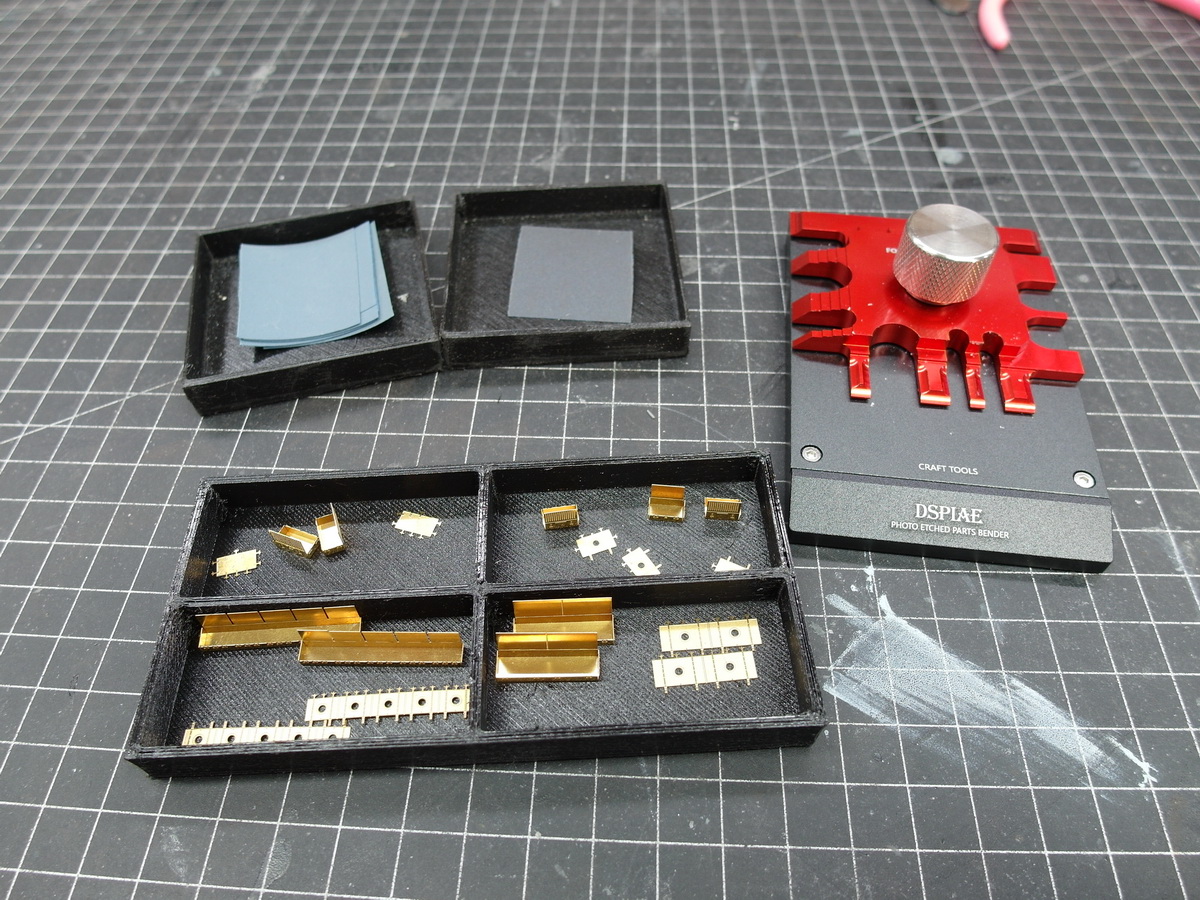
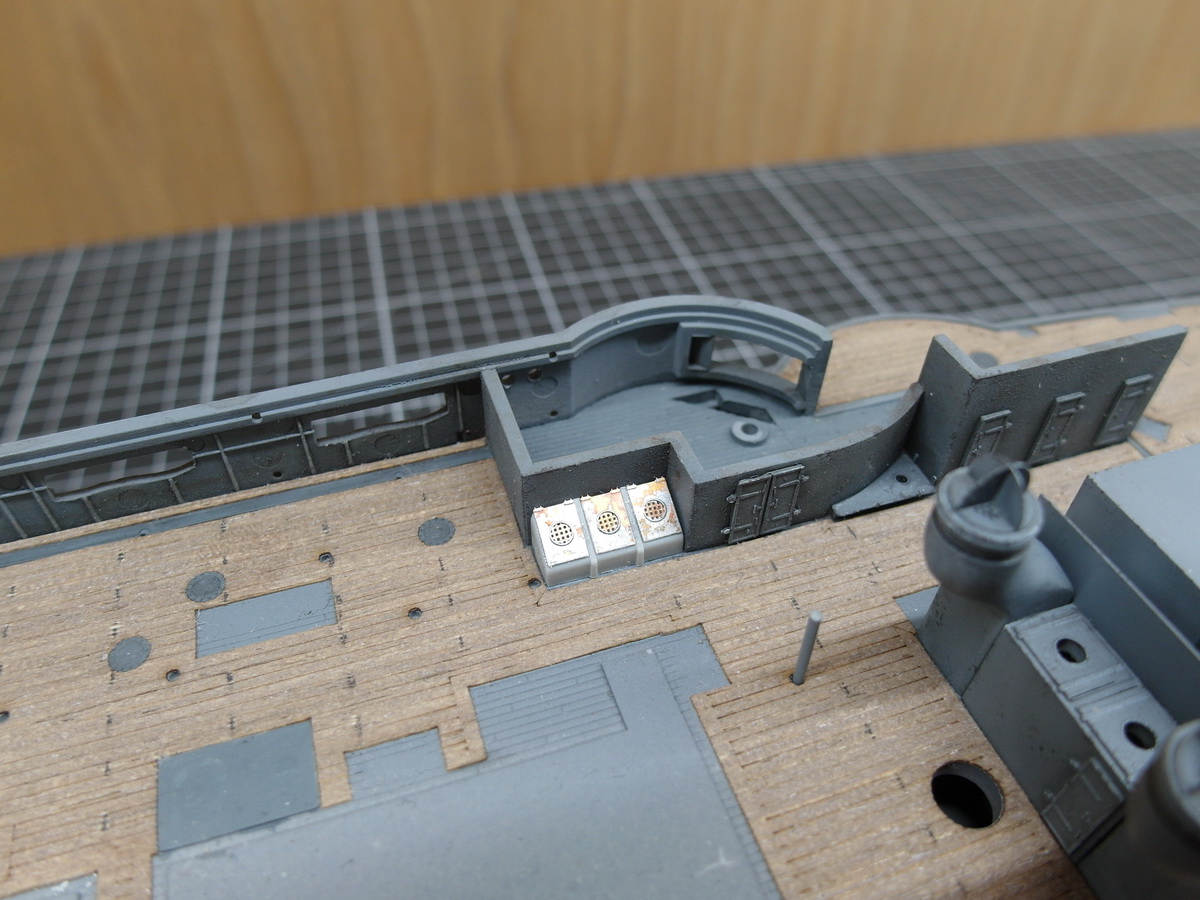
The first error in Pontos’ sentence is also quickly identified. The component of the box that is supposed to be attached to the front superstructure is unfortunately faulty. It would result in a box whose dimensions would not fit into the recess in the wooden decks. I checked the Pontos set what felt like a hundred times but unfortunately without success.
That’s why the KA sentence saved my butt.
The slightly simpler lid was underlaid with cut-up etched part gratings and glued to the original component of the model
Then brought to its position for inspection.
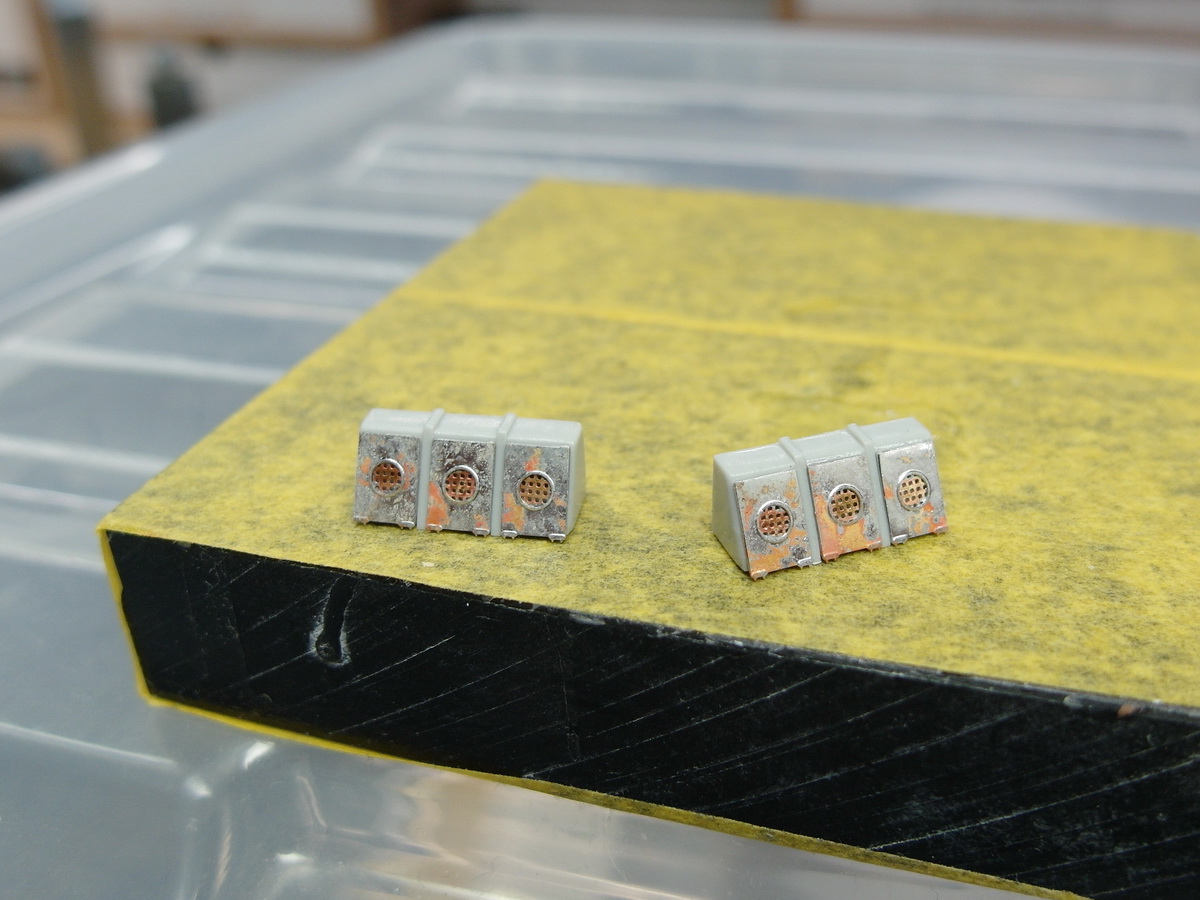
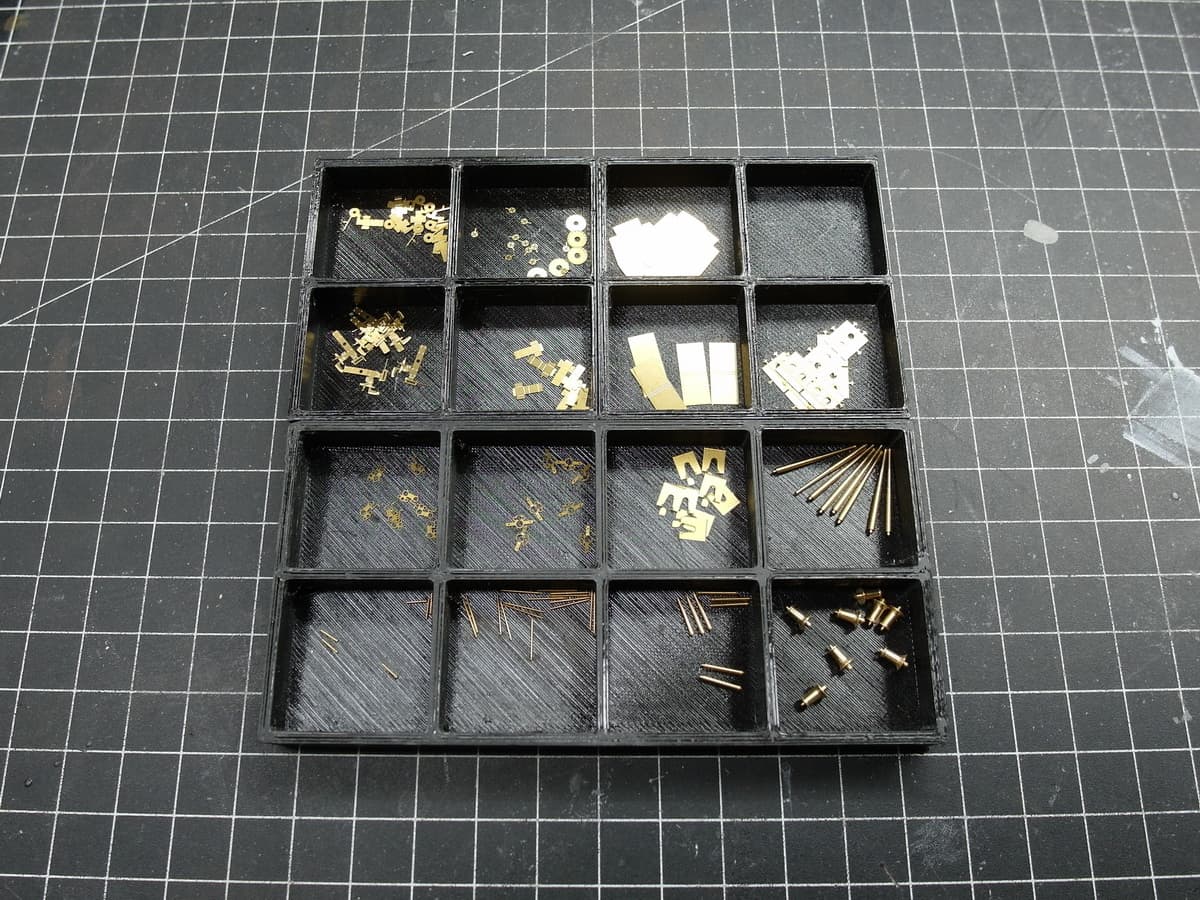
Little by little, the internal structures and boxes are made and collected in my printed organizers to be aged afterwards.

I made a few improvements to the winches.
The large one did have a small cabinet included, I think a distribution box and the drive for the winch, but without any structure on the outside.
The little winch would even be complete without everything.
Nope, not like that…
So I did a little handwork and gave the big winch hinges and a closer made of thin lead wire. The little one got an upright box that functions as a closet.
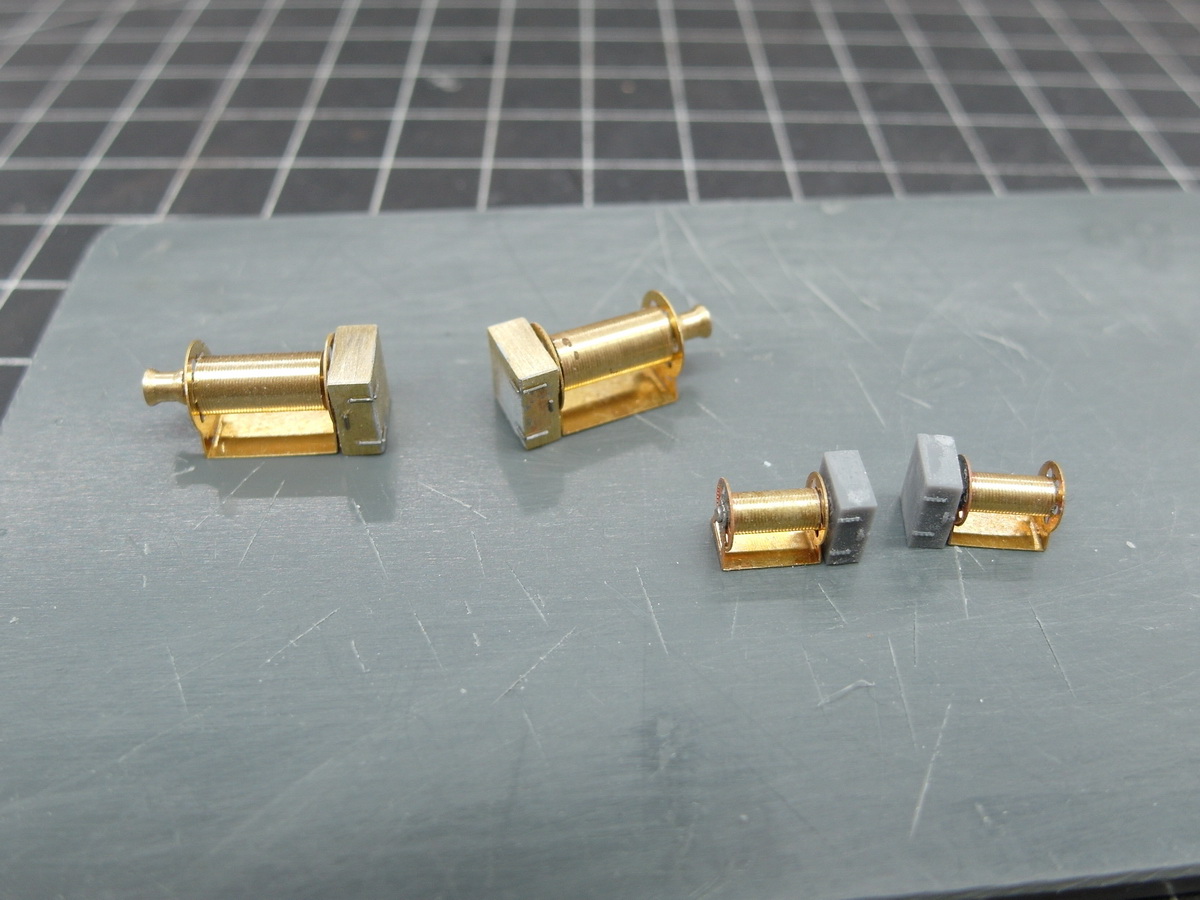
Still aging and with lead wire wrapped around the drum…

Better.

And so everything could get on deck.


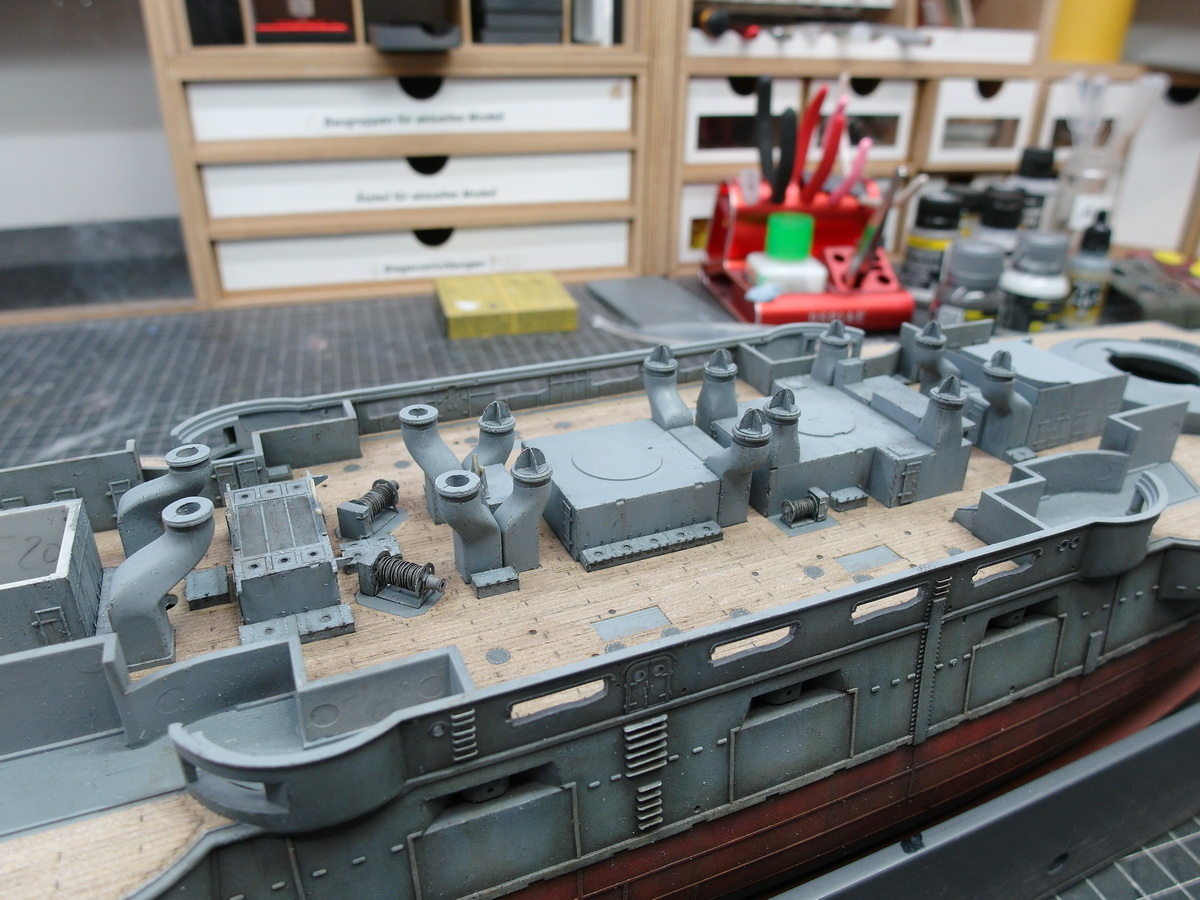
13 Likes
Looking very very good. Those extra additions totally change the realistic aspect for each part.
1 Like
following this, as I just started the Hase kit.
already wishing someone did the correct mid deck bits for it…
1 Like
Wow, Jörg,
simply outstanding!
Great work!
Cheers
Jan
3 Likes
Thank you all.
A lot of things come from my imagination when I build things on the deck, Bozothenutter. Unfortunately there is only very little information about the ship.
So your model maker.
It took a while to get going here, but I’m only slowly getting back up to speed.
I’m still very busy trying to get our family’s everyday life back to normal. But it will. ![]()
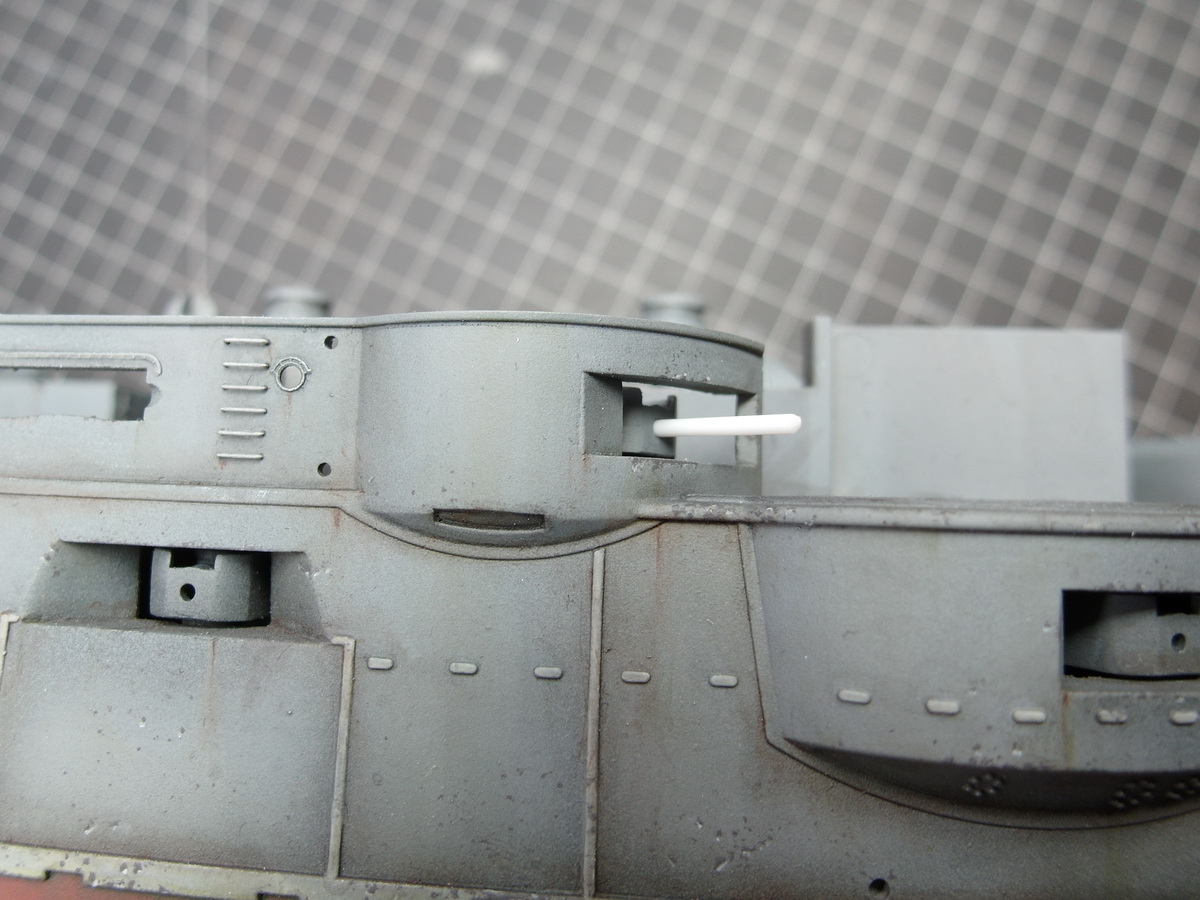
Next up were the 6 pounders. While trying out the cannons in their casemates, I had the feeling that something was wrong with their position in the kit. And this was confirmed to me by a user from the “Modelshipworld” forum.
The shots of the cannon body are incorrect.
In the first picture you can see that the axle is not at all in the middle of the casemate opening.

So I closed the original holes and created a new axle with a profile.

Made another spacer.

And the cannons can take their place.
I like it much better this way.

Now the pipe is where I think it belongs. There is a profile as a dummy in the opening.
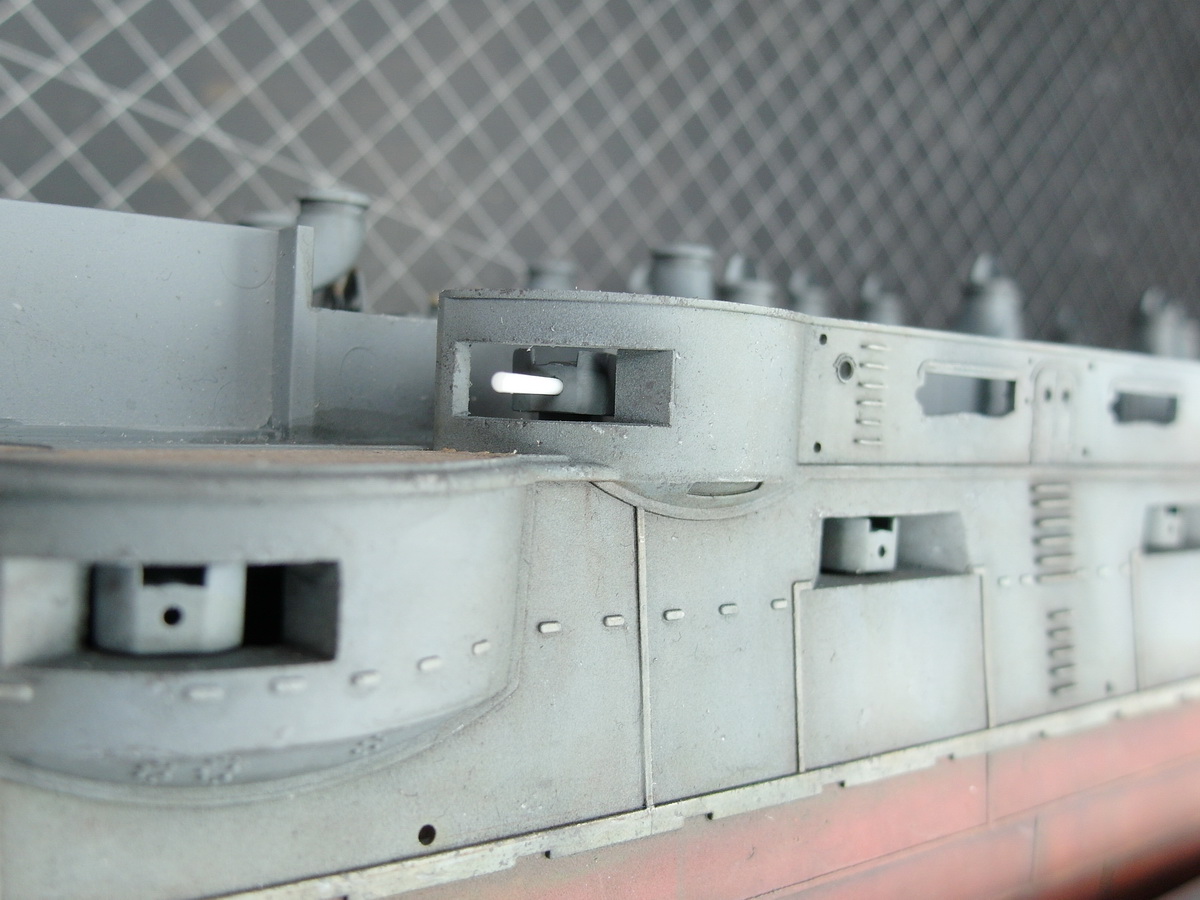
And thanks to the spacers, it’s also great in the vertical position.
11 Likes
Hello everyone.
I have a little update for you.
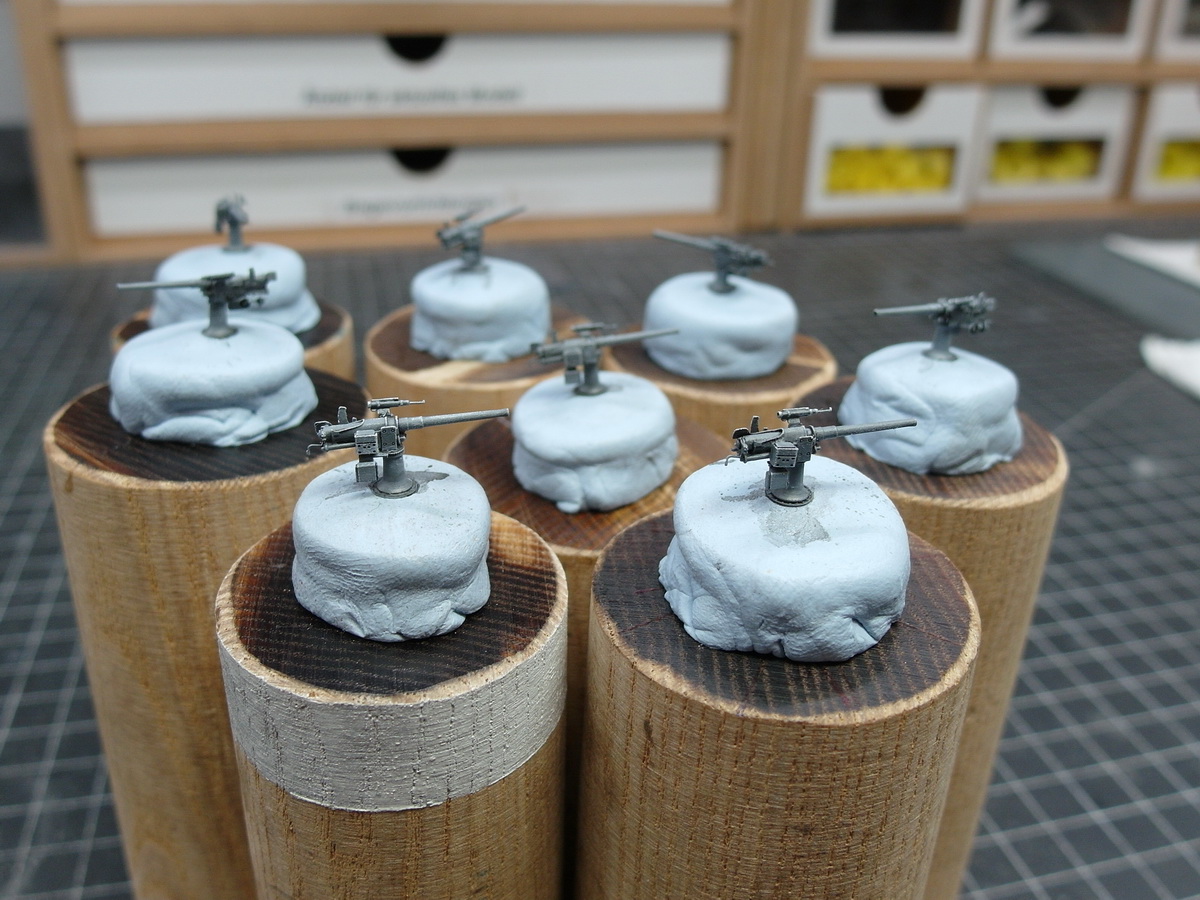
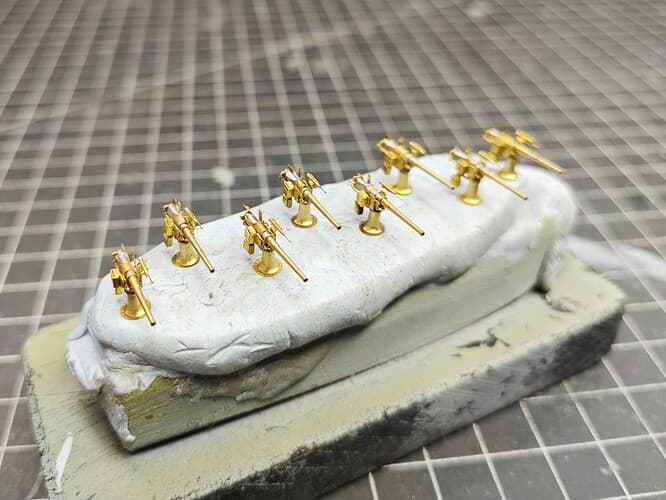
We’re getting to that QF 12 pounder 12 cwt naval gun.
There are eight of these to build, with 14 individual parts per gun.
First I solder the gun barrel. Just holds up better.
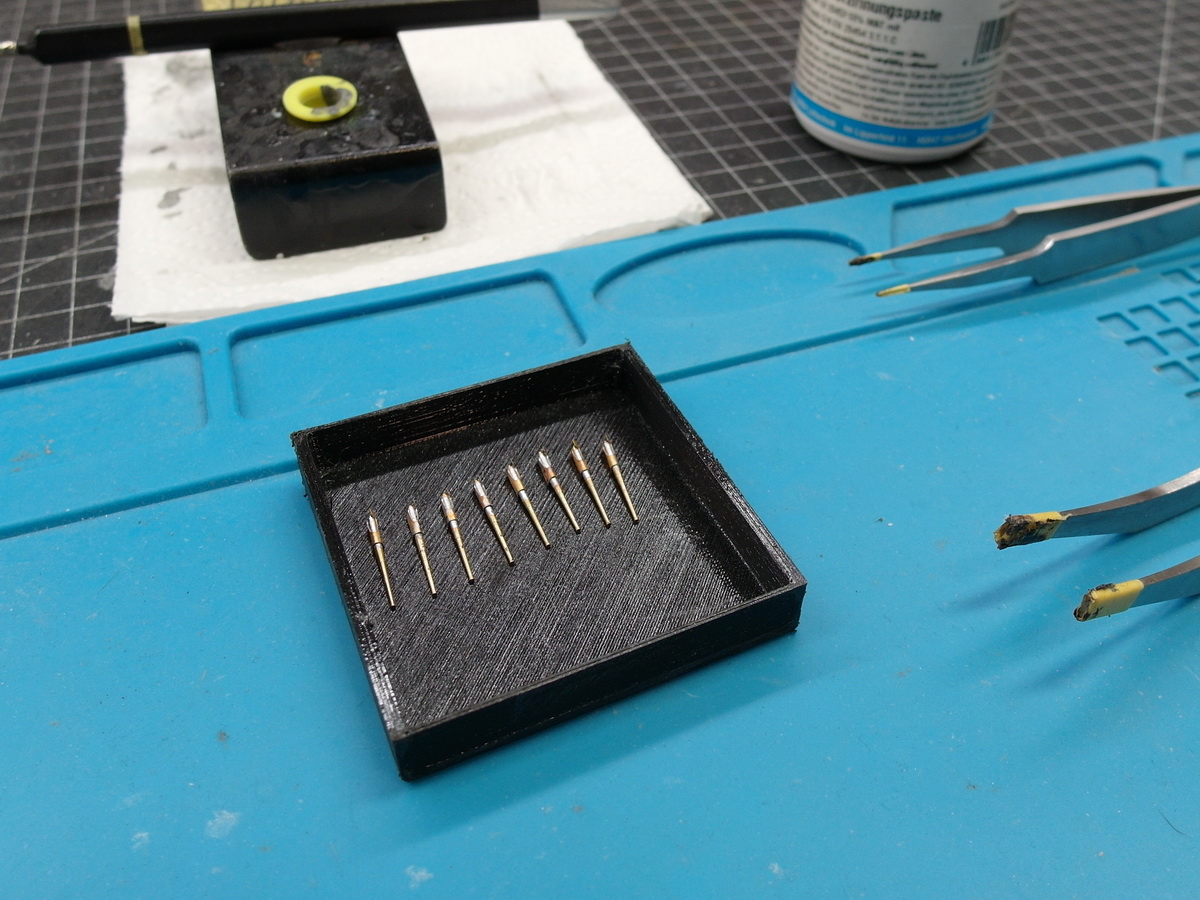
The rest is then attached with superglue. What a fumble.

But as always with Pontos, fantastically detailed

Painted and aged, they look so good.

I have to make eight more of these for the upper deck, sweat.
13 Likes
They are some really nicely detailed guns … and well built as well ![]()
1 Like
Back in the early 1980s I was on a tour of the (then) MOD(PE) ranges at Eskmeals, which was in origin the Vickers private test facilities from the late 1800s. Sitting in the corner of a hanger, but mounted on a baseplate compatible with their Mobile Mounts (turretless Centurions) was an immaculate Anti-torpedo boat gun, I think a 1902 47mm Vickers 3-pdr QF. It was resplendent in glossy battleship grey with highly-polished brass furniture; particularly the elevating and firing mechanism which was a brass handgrip in the form of the stock of a flintlock pistol butt bolted to the breach. I don’t doubt that in “as delivered” form “Mikasa” would have had lots of shiny metalwork as common in that era.
1 Like
Yes, that’s right, it’s really a shame to dress them in mouse gray. I also believe that the brass was polished to a high shine when delivered. But in wartime there is no room for beauty.
We continue amidships with the deck above the casemates. I put the guns aside to concentrate on the next Pontos puzzle.
The deck is covered with two large brass pieces, which look fantastic and greatly improve the deck.
So far so good.
Above you can see various small parts that are missing from the deck. In addition, the first sailors will take their positions in places that would be difficult for me to reach later.
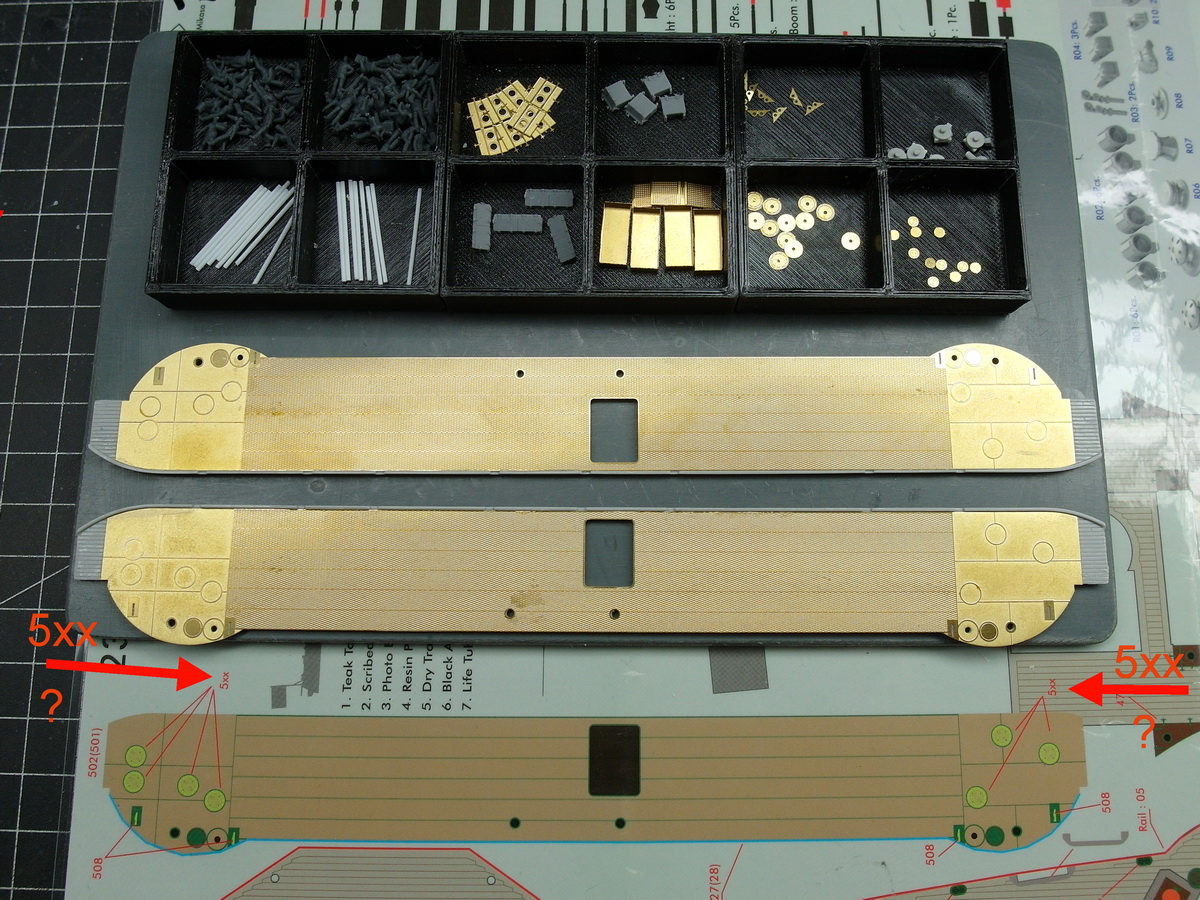
But to the new mystery of Pontus.
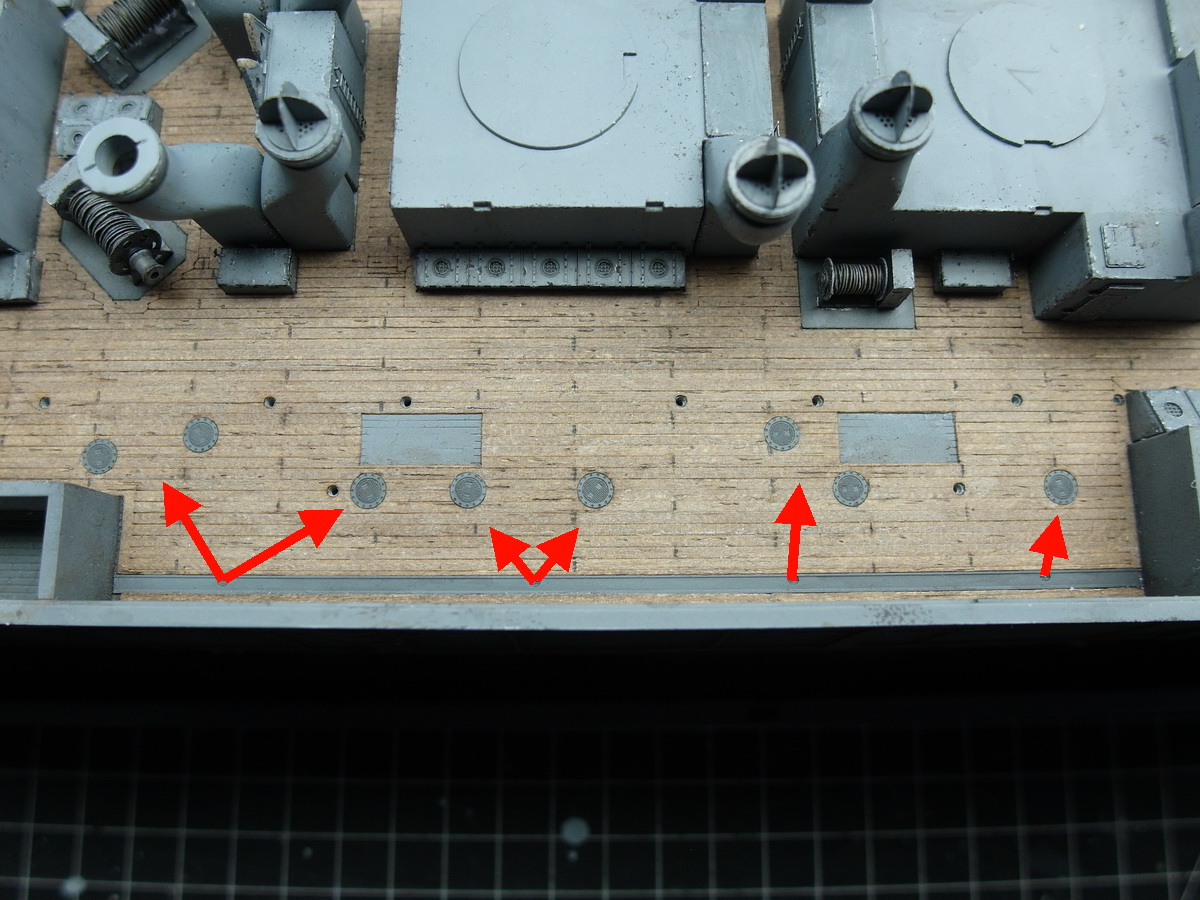
It’s about the coal hatches. I have already distributed 22 of them on the main deck. You have number 495.

As you may notice, these hatches can also be seen on the deck above. Only here they have the number 5xx. However, this number does not exist on the Pontos boards.
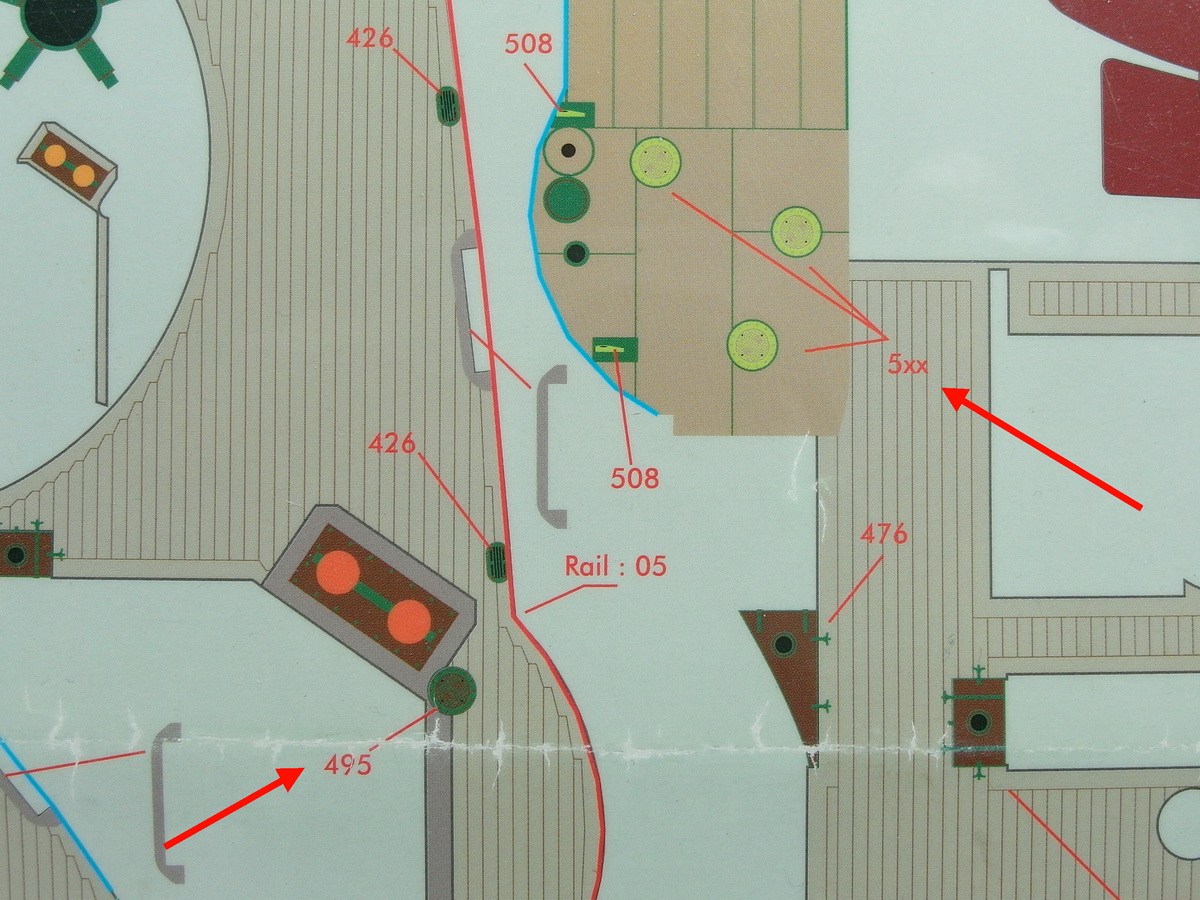
This time too I checked all the circuit boards several times. But I can only find the hatches with the number 495, which of course I installed completely.
Maybe someone who has already installed the Pontos set can give me a tip. I’m at a loss.
Of course I already have plan B, but I don’t want to carry it out until none of you can solve this puzzle for me.
6 Likes