No idea about the hatches… I am sure you will get to the bottom of it … The Pontos set does look good though… Really adds so much extra detail.
2 Likes
It’s become plan B Johnny.
I still have the etched parts set from KA Models. They also have coal hatches, but they are too small.

And I don’t use the 3 pounder guns from Pontos but the 3D printing from Micro Master.

So I have the too small hatches from KA and the lower flange of the Pontos guns. When put together, they create a fomidable coal hatch.

I’m really happy with that. And by the way, I put the deck together loosely. Fits perfectly even before sanding and looks really great.

8 Likes
Very clever fix. You would never notice the difference ![]()
1 Like
This is going to be amazing when done.
1 Like
Thank you all.
Finally, we’re continuing. The break lasted quite a long time. The reason: I had to make the remaining eight cannons.
It was a bit scary.
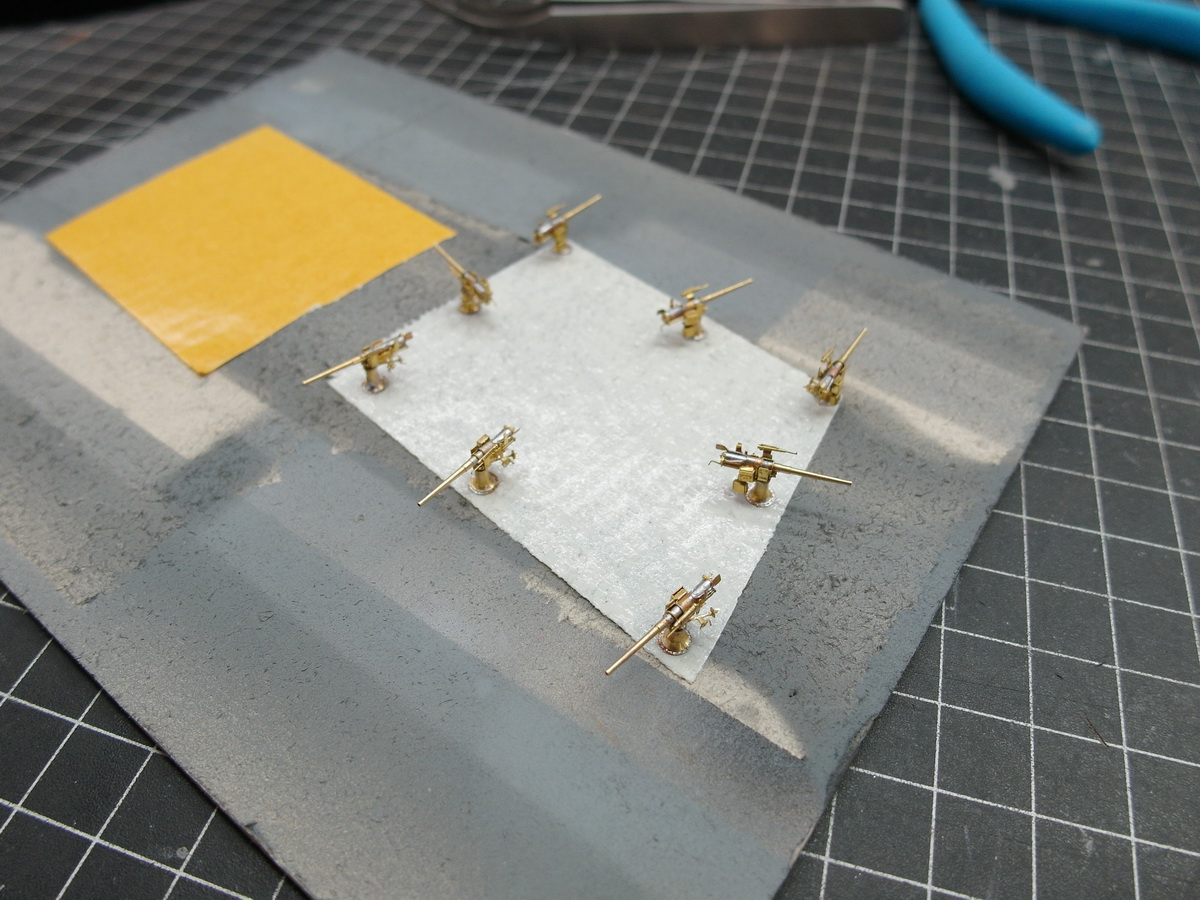
Nonetheless, I finally finished all 16 naval guns and am glad I don’t have to do any more.

And now I’ll show you the reason why I made all of them. A user in another forum pointed out to me that the guns were a little too high. That’s why I sanded down the carriage on the second slide a little so that they could look out of the middle of the opening.
The remaining eight will be distributed on the upper decks and it doesn’t matter.

Let’s move on to the next conversion. Again, I liked the MK set better than the one from Pontos. Since I will be showing all the gun port covers open, I thought the rope shown was very nice.
What I changed are the hinges. Since they fold down when open, I simply replaced them with a narrow piece of profile.

This is what it looks like for me. I used a slightly lighter grey to accentuate it.

And attached to the gun ports.
These are the first external structures. Since it is inevitable that the gun barrels will stick out here, I wanted to have them attached already.

And so the eight 12 pounders could take their place.

A few boxes are still missing.
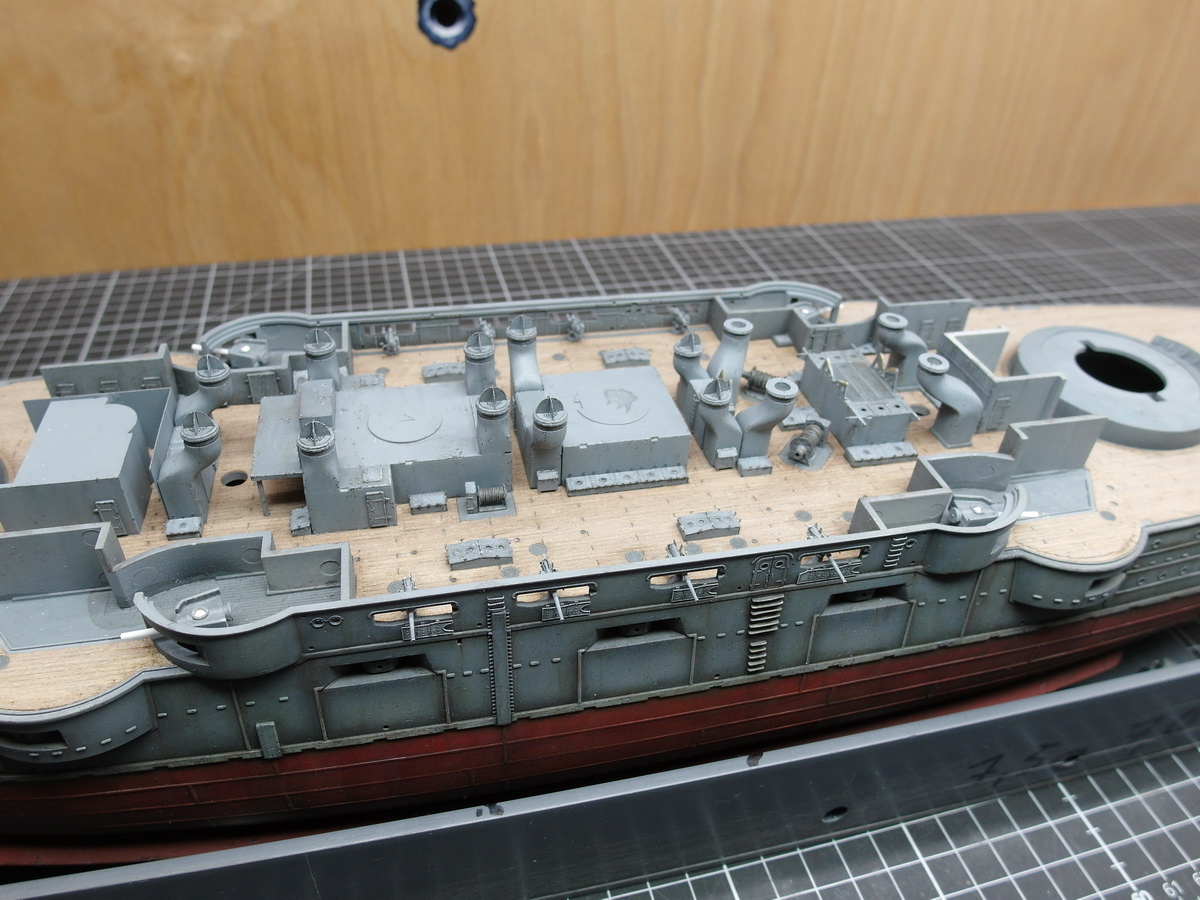
And so I am quite happy with the position of the guns.

Now they urgently need the protection of my sheet pile wall. After applying the clear varnish, I will screw it to the dry dock tomorrow. I am curious to see if I will tear it down again before the construction is finished. ![]()
10 Likes
Stunning work. The attention to detail is amazing!
1 Like
Absolutely. I could not agree more! Great job.
1 Like
Great update and glad you are back … that is superb detailing and tremendous work. It looks amazing.
1 Like
Thank you gentlemen for the nice comments.
Another litle update. To protect my model from further harm, I wrapped it up nicely.

This should protect it pretty well from any carelessness on my part. ![]()

7 Likes
On to the next construction phase.
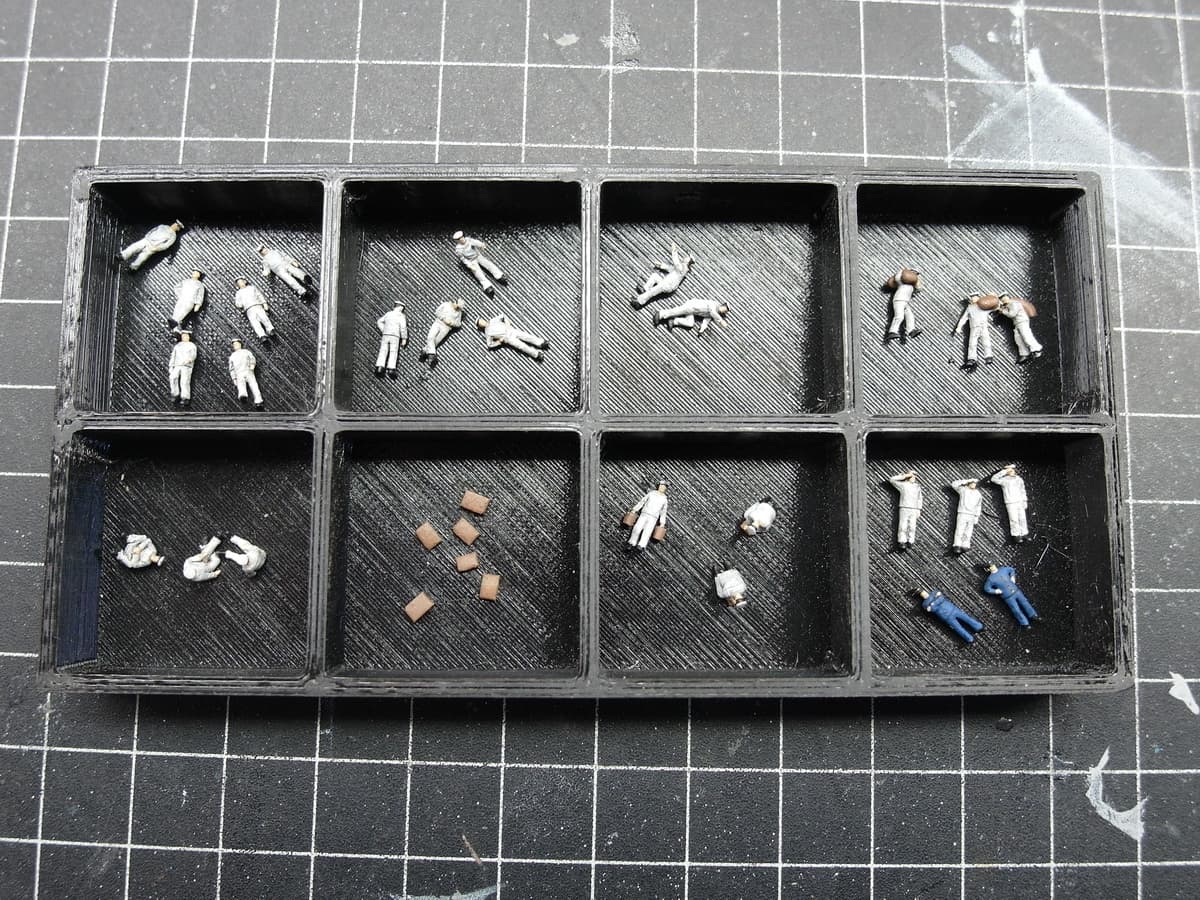
The plan is to breathe a little life into the deck in the form of a crew. And this is where the next 3D print comes into play. This time I’m using the figures from ION Model, which I won in a competition with my Bismarck.
After an initial inspection, the quality is excellent.
Then I started looking for photos showing IJN sailors in their uniforms, like the following image:
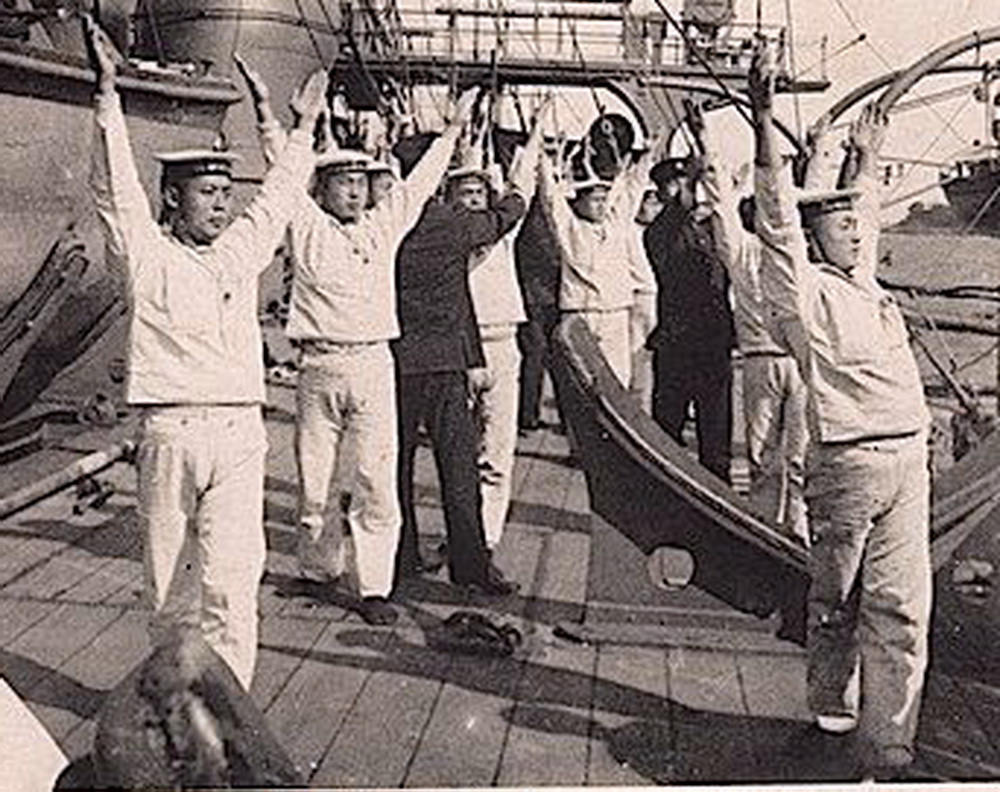
Wow, much easier to paint than the DKM guys.
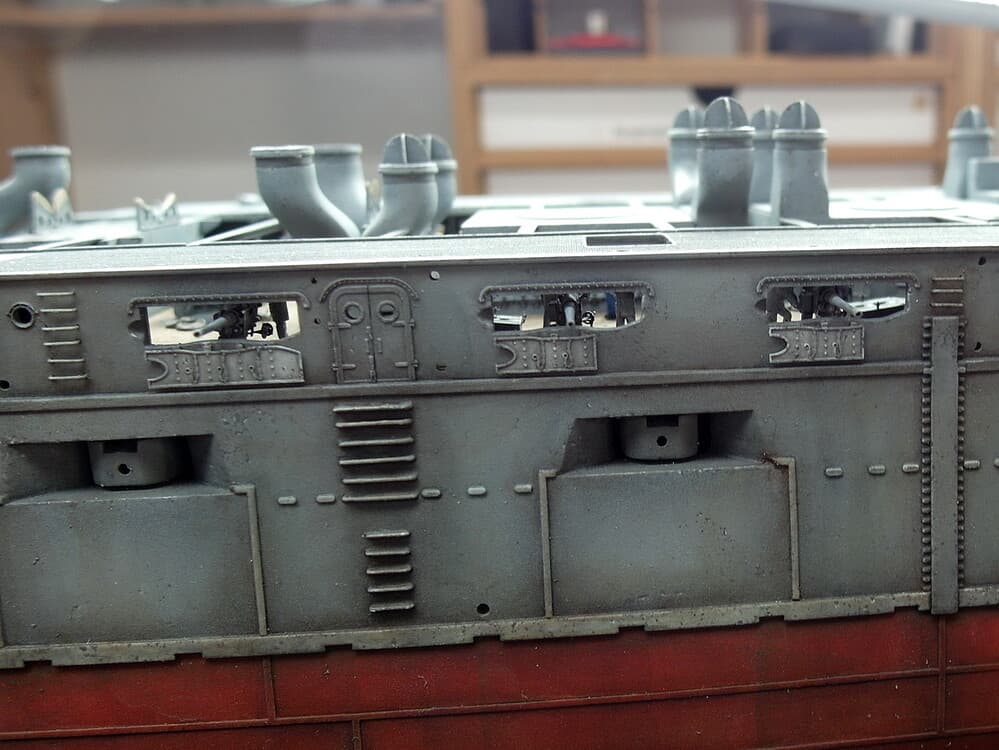
I had a few leftover Kriegsmarine sailors and wanted to use them to save on figures. The first ones were supposed to go behind the gun ports, where they’re almost invisible.
So I shaved his head and punched out flat caps from styrene. A small dot of superglue on the top hair, and the Japanese sailor is complete.

Painted and ready to go on deck.

To the cannon sailors, ahrrrrg…

Fire free…

And so the lid can go on.

And the deck portside

Aged and found to be good

You don’t see much of the figures, but that’s how it’s supposed to be. The hint of the sailors at work below deck adds depth to the whole thing.

12 Likes
…and it does add depth, definitely!
Just brilliant!
Cheers
Jan
2 Likes
Very clever and adds so much viewable detail giving it all a sense of movement. Nice.
1 Like
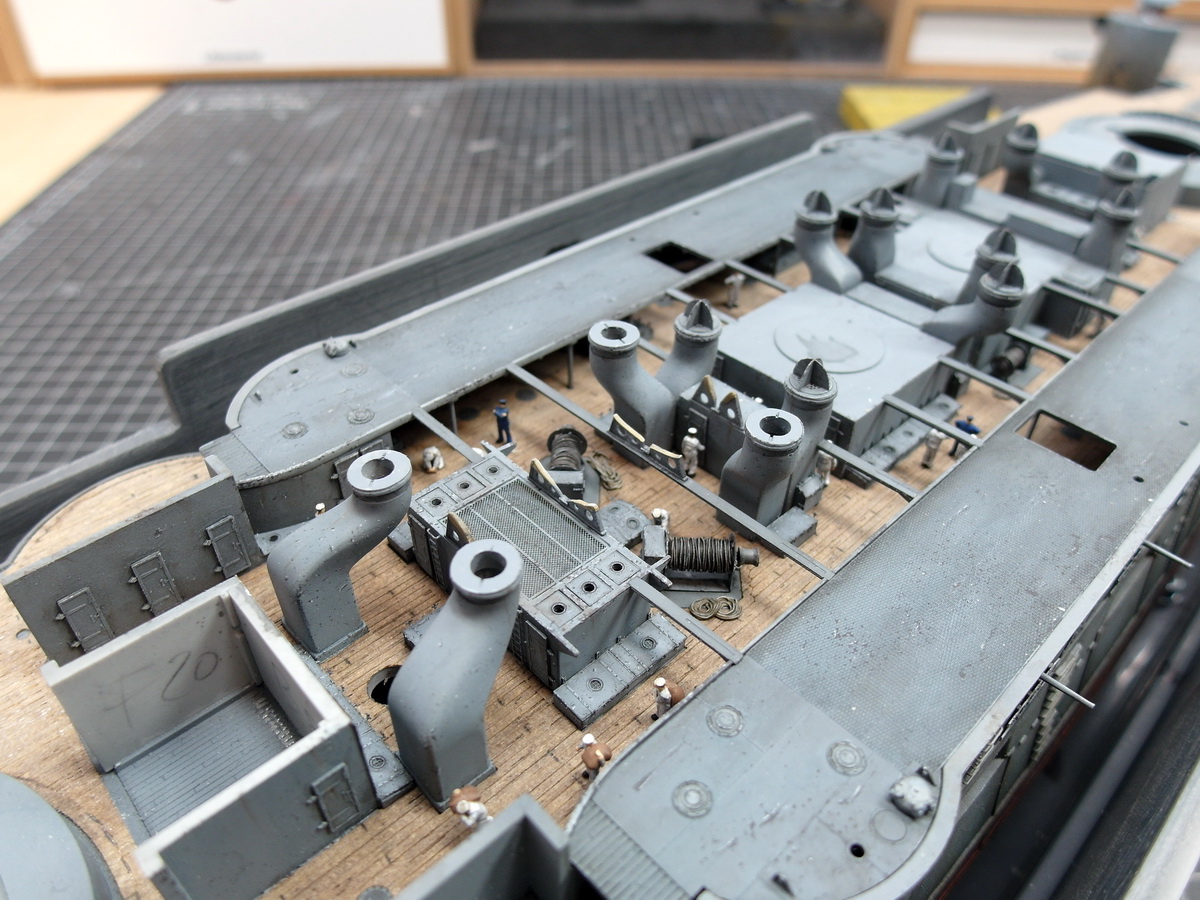
Let’s move on to the support structures that connect the boat deck and the internal superstructure.
I soldered these to ensure maximum strength for these delicate T-beams.
After testing it, everything seems to be fine.
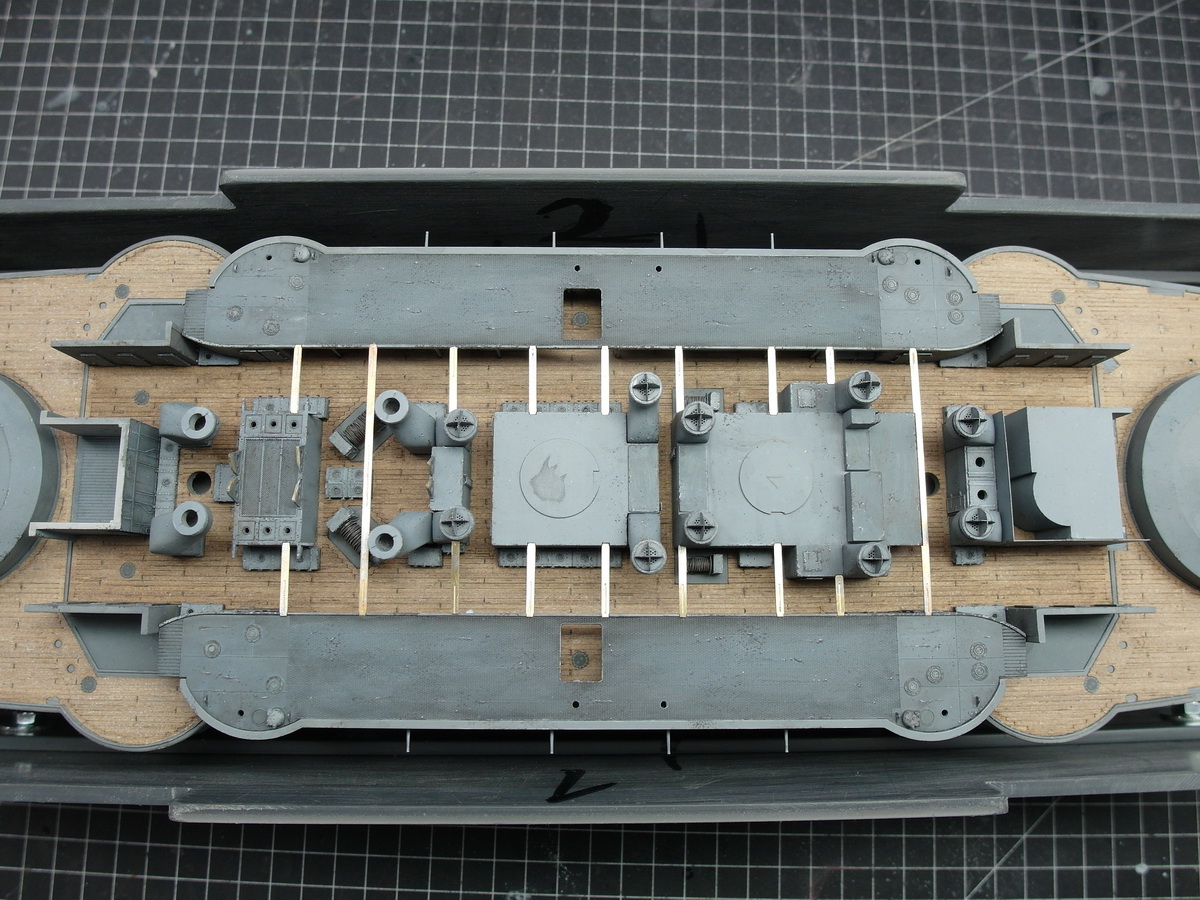
Only this connection needs to be slightly adjusted. It’s only provided by Pontos; it’s simply missing from the original kit, and it would create a large gap. Therefore, there’s no offset for it in the model, and the length of the component needs to be exactly right to ensure proper attachment.
New sailors have taken up their duties.
Get to work with them immediately.
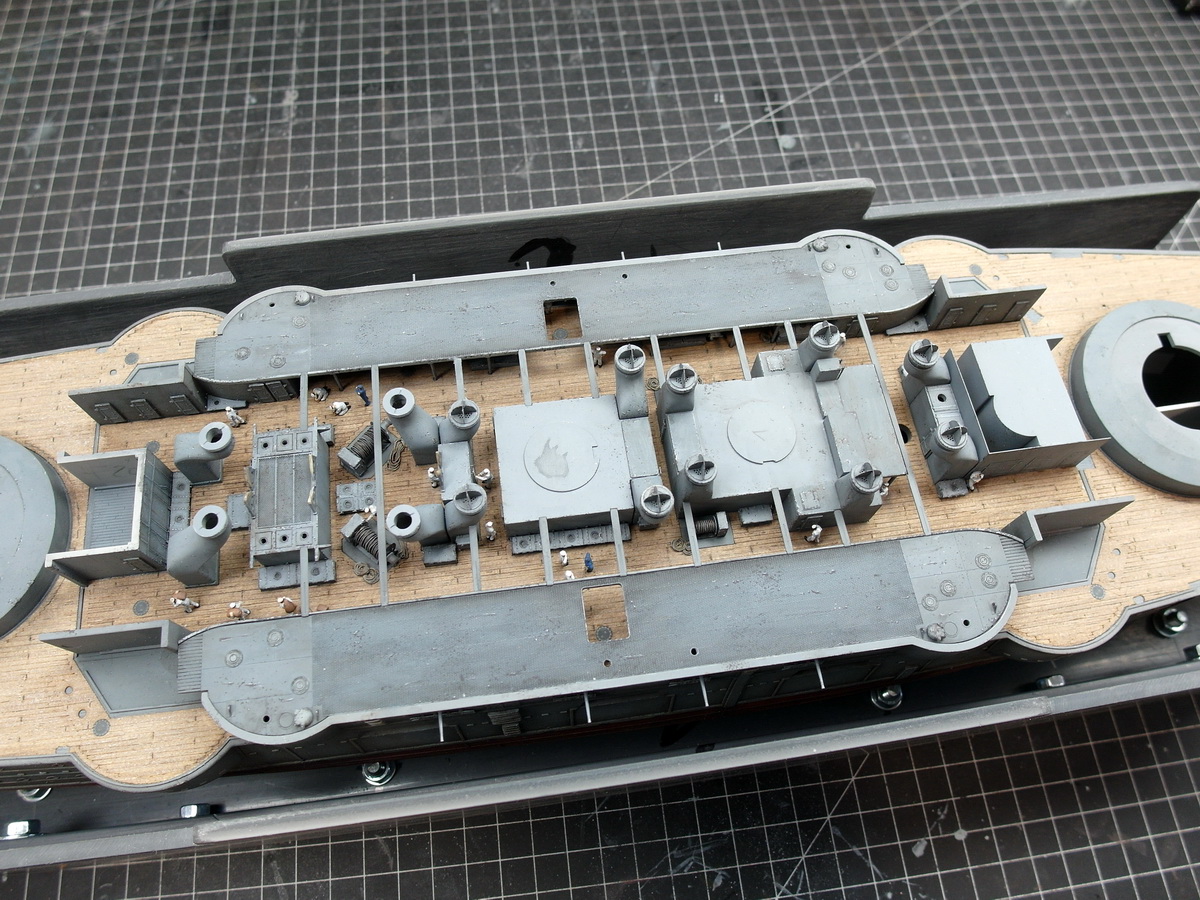
Spread nicely on the deck.
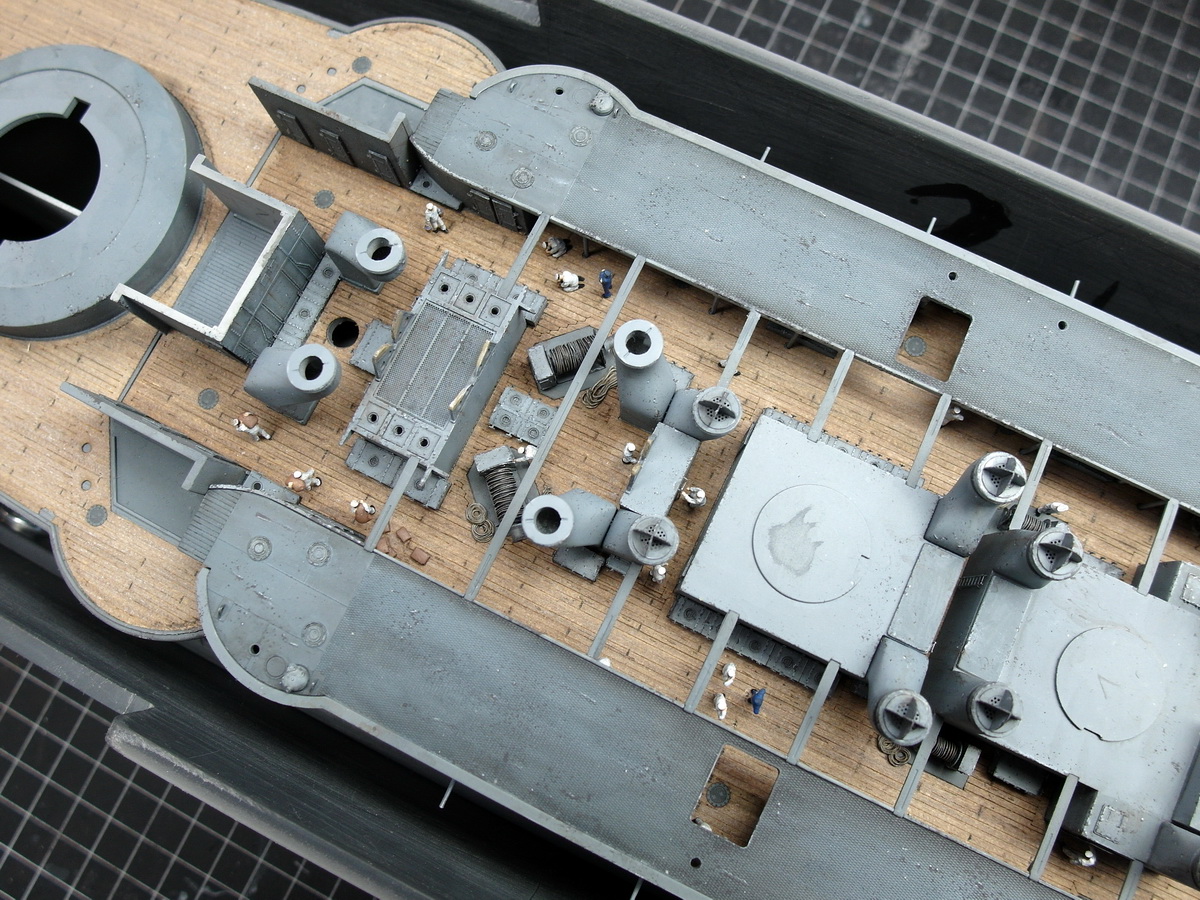
Provisions have to go into the belly of the ship and the first sailors have to scrub the deck under the supervision of an officer.
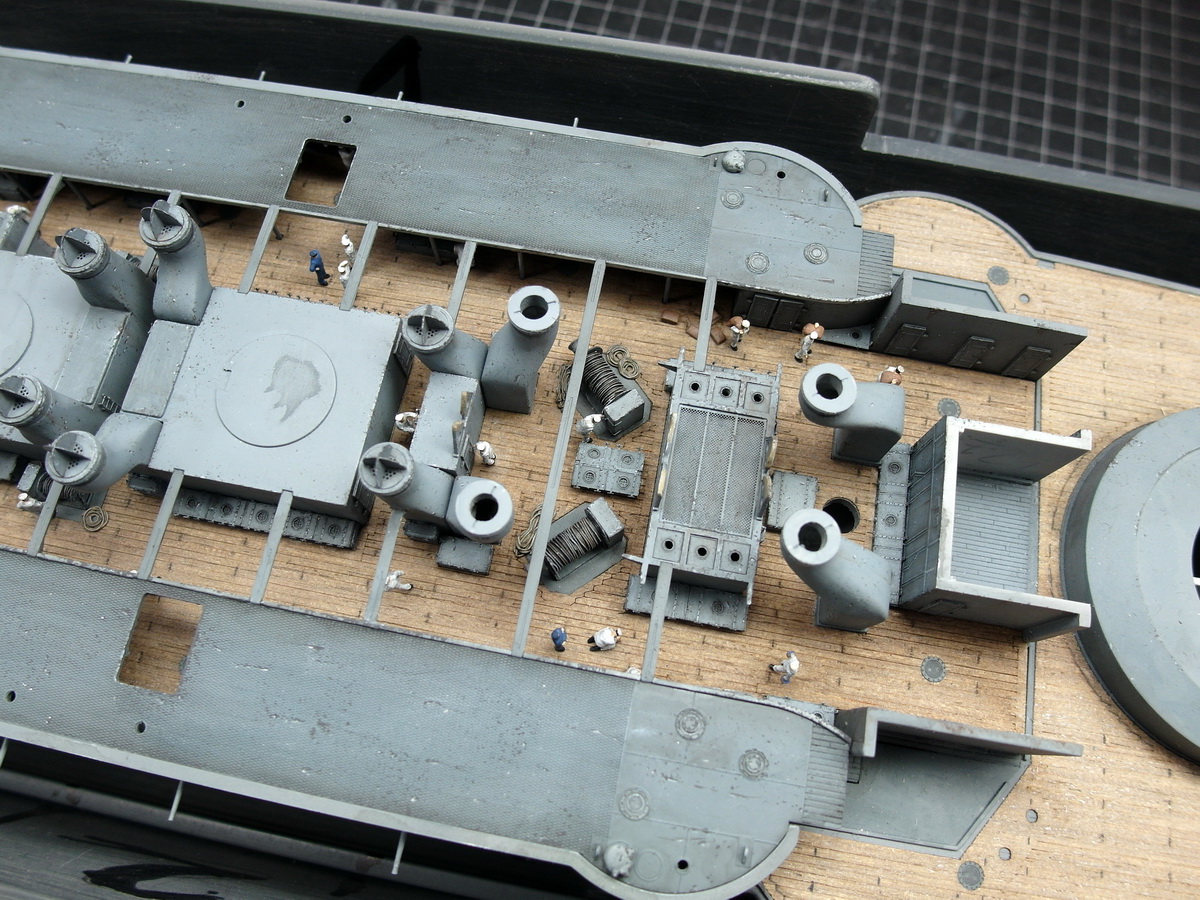
A sailor climbs the ladder to search for the missing funnel.
Afterwards, I opened the dry dock again to see how it all looked through the gun ports.
I think it looks very lively.

12 Likes
Love the detailing that you’re putting into this. Really amazing work
2 Likes
Jörg, great work with those secondaries!
The finish on the hull looks great too… my apologies if you have already done so, but can you share with us your painting/weathering materials and techniques?
5 Likes
Thank you both very much.
Sure, I’d love to. I’ll write a short post about it right away.
But first, a quick update.
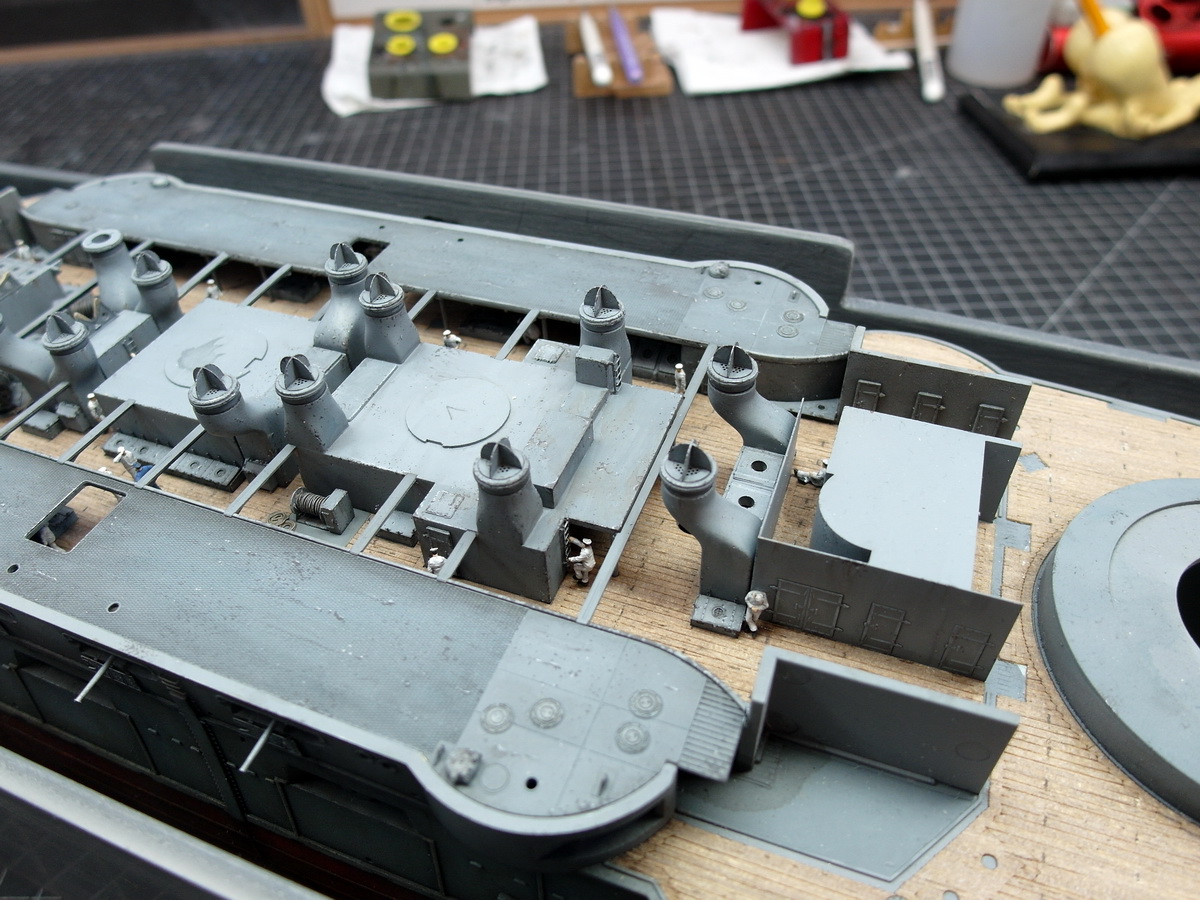
We continue with the preparation of the next internal structures.
The MK set also clearly wins the race for the funnel chimneys over the Pontos set.
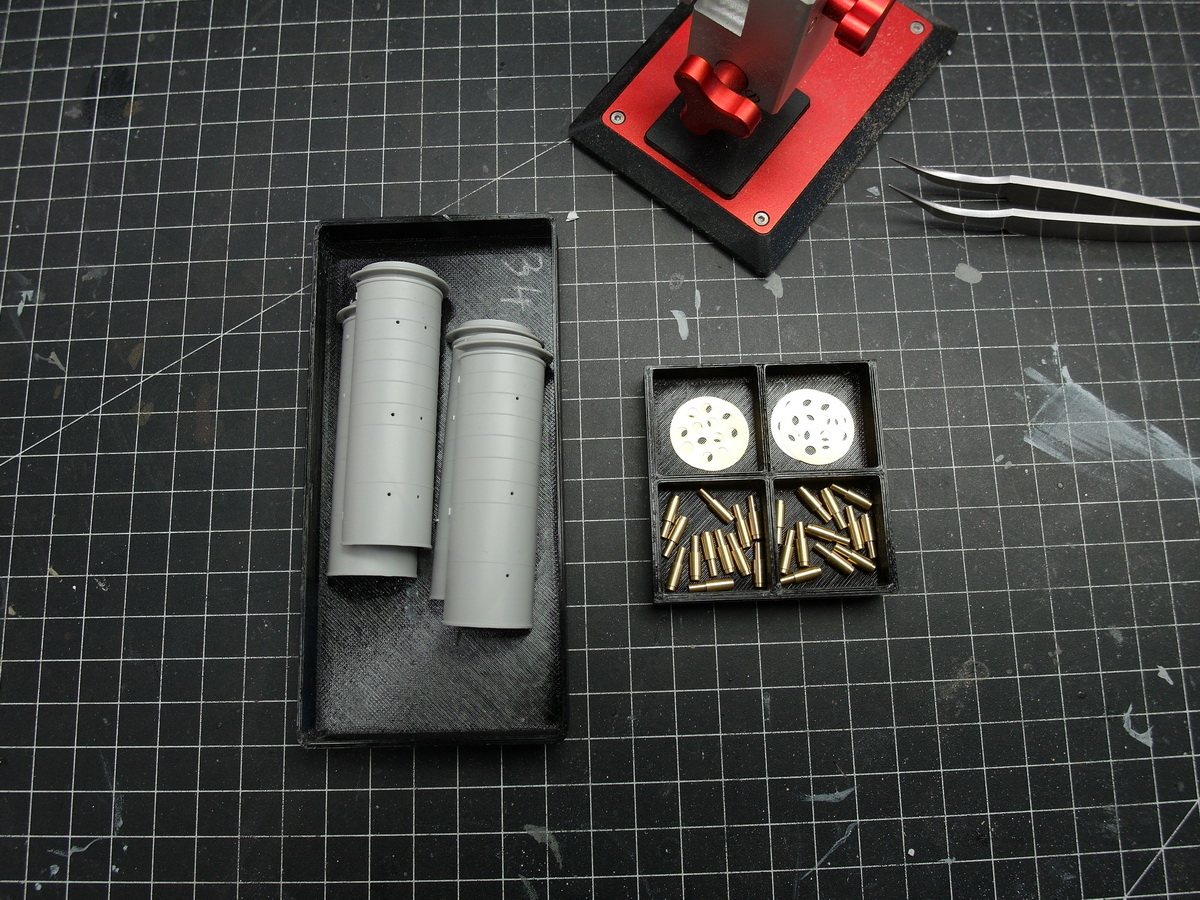
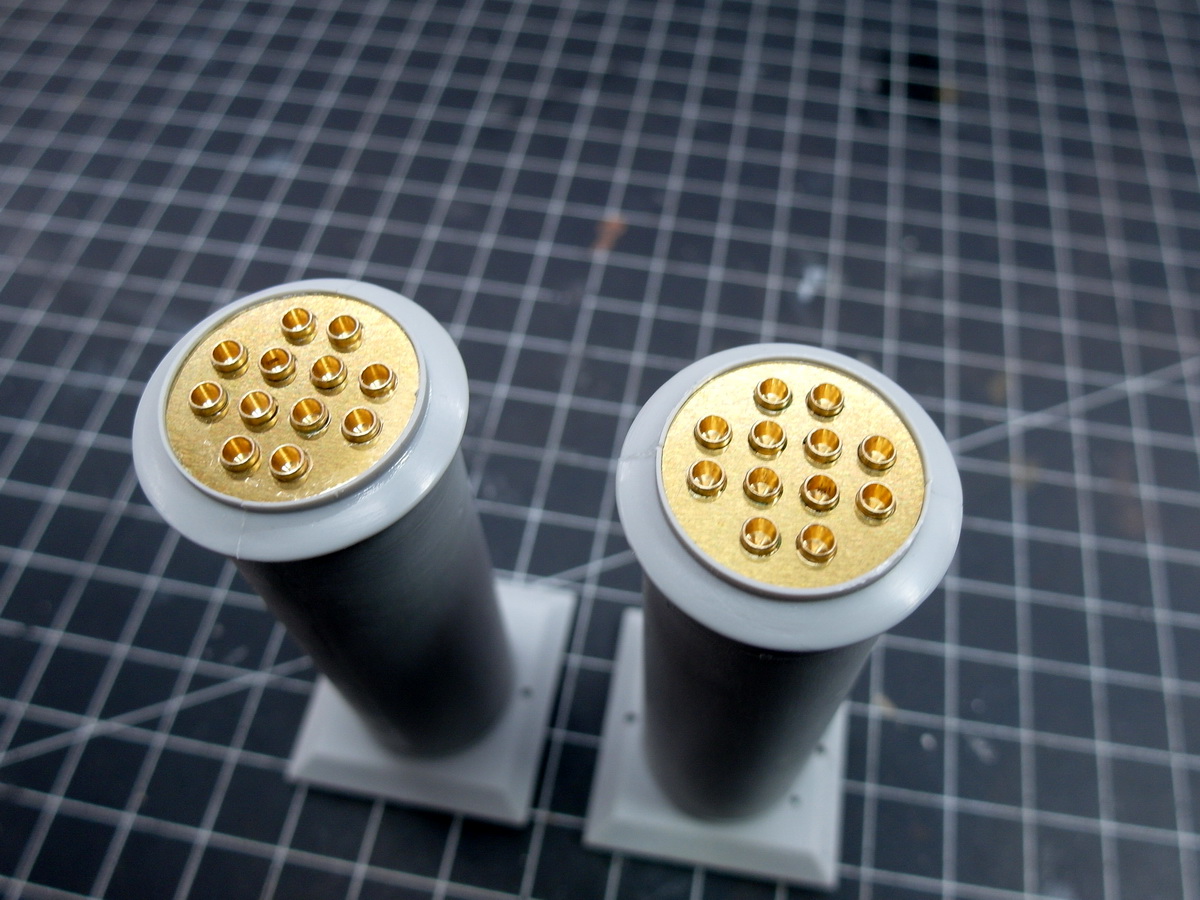
The brass sleeves look excellent. Here too, Pontos had no improvement to offer for the original component.
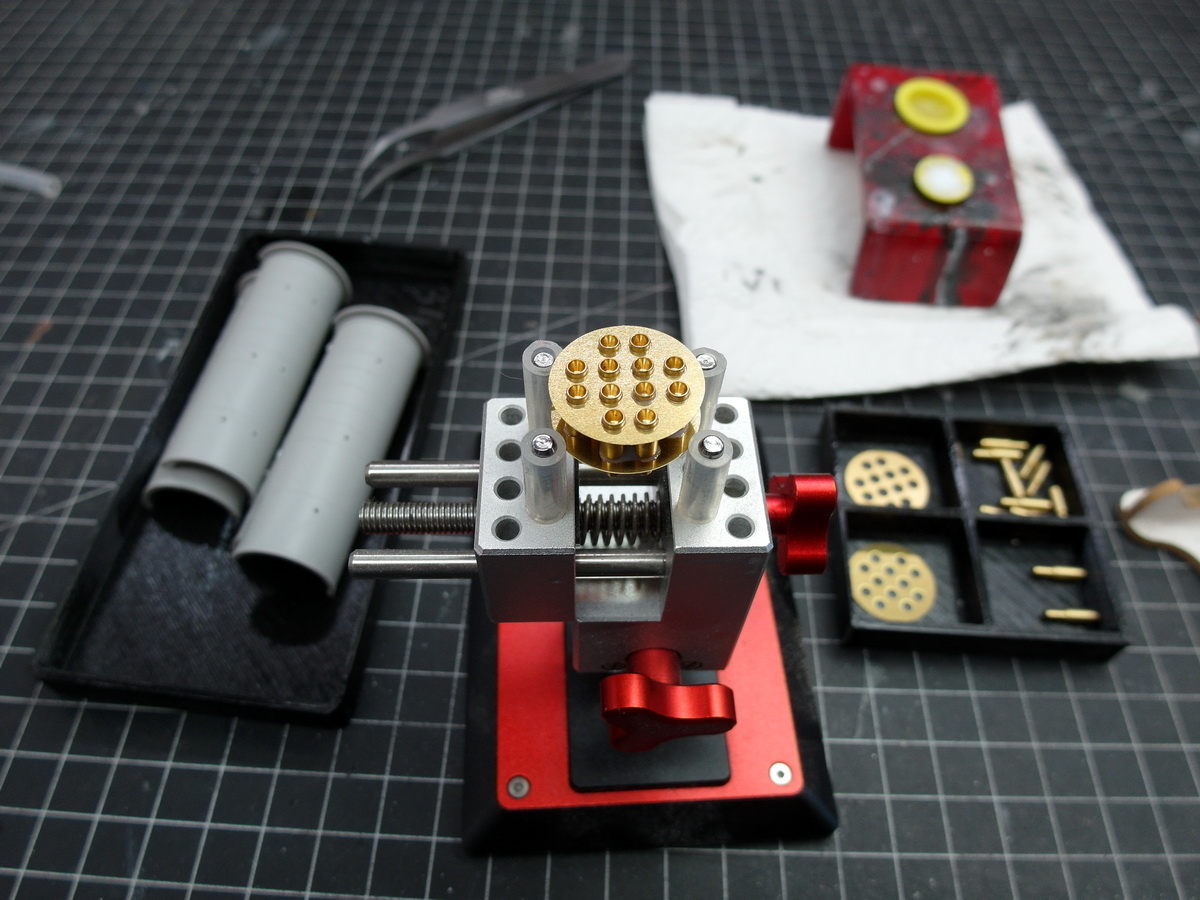
I’m amazed at how well the MK set is performing. The extra expense was definitely worth it for me.
The fourth cradle for the pinnace has also been adapted and installed.
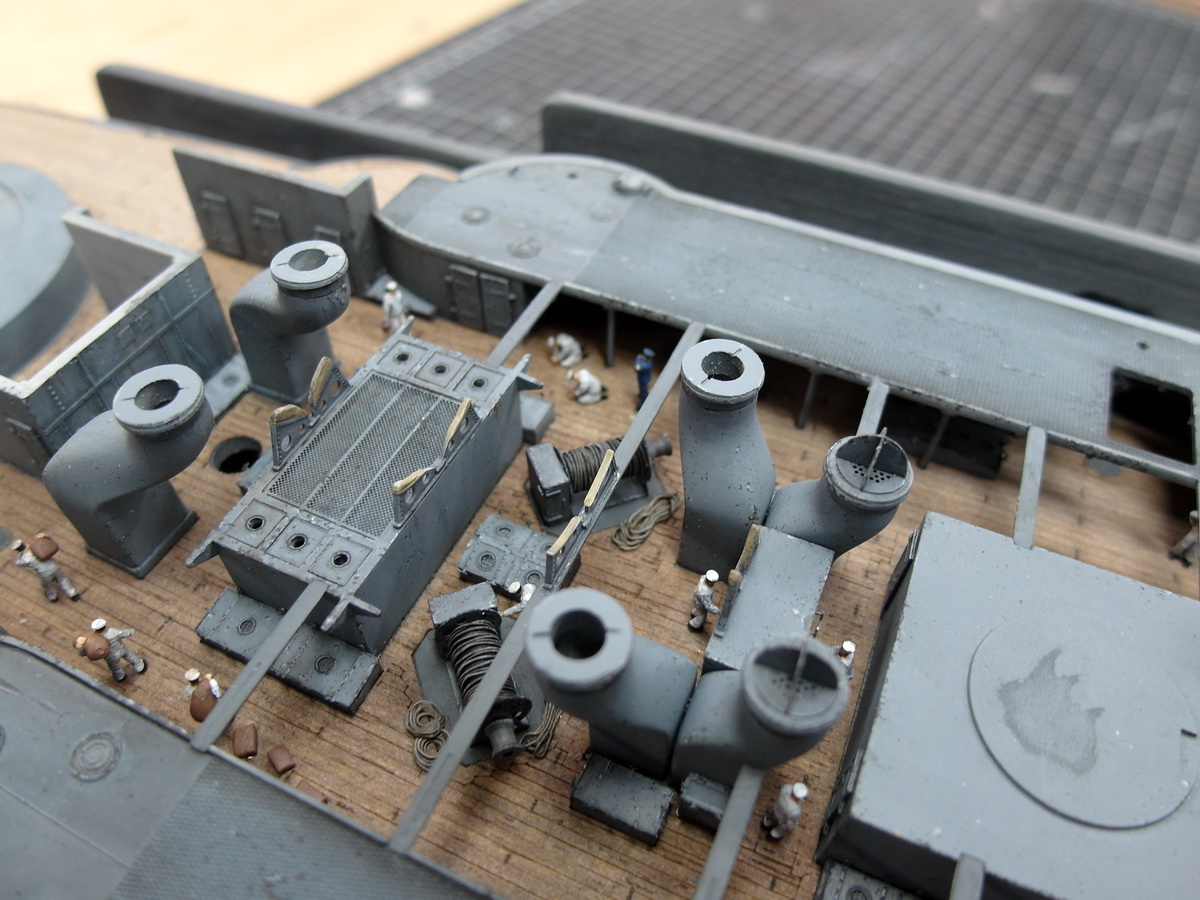
And so the boat can take its place.

Which brings me to my next dilemma. Micro Master’s boats look so incredibly good that I’m considering leaving the boat cover off. ![]()
10 Likes
I agree - don’t you dare cover that gorgeous boat! ![]()
2 Likes
100% agree. Would be a crime to cover that detail.
1 Like
I’m glad you see it that way too. ![]()
Okay, guys, Tim asked me about my process for painting ship hulls.
So I’ll try to show you how.
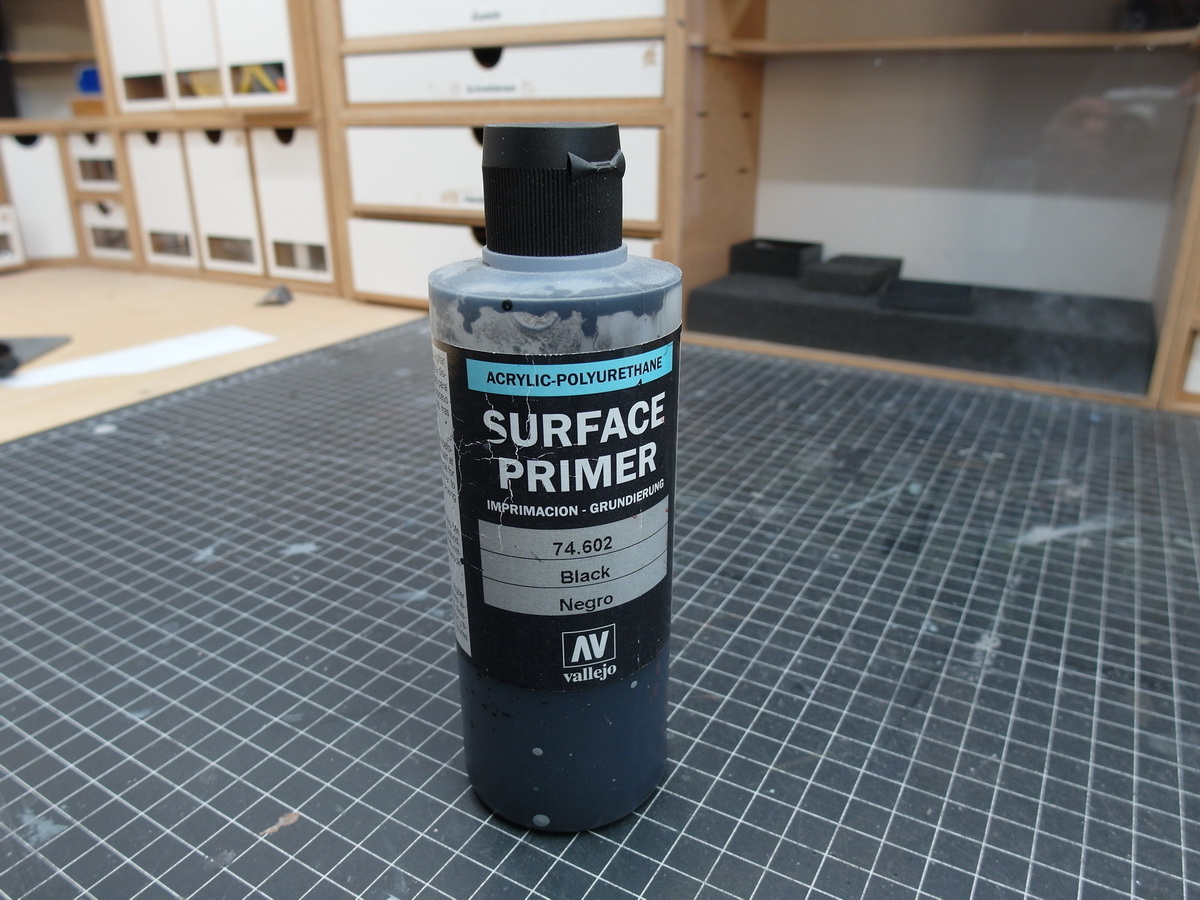
First, the primer. This one uses a fairly light product so that the subsequent pre-shading looks good.
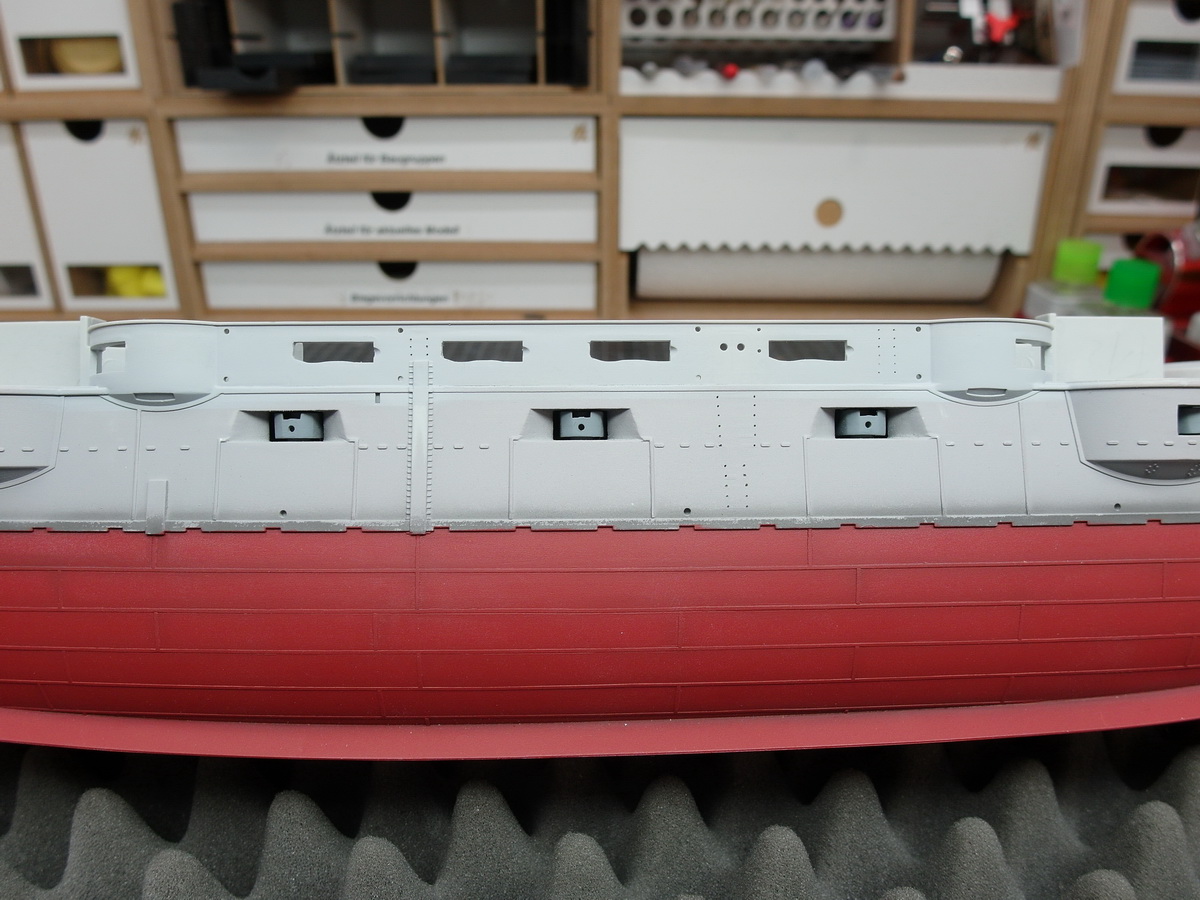
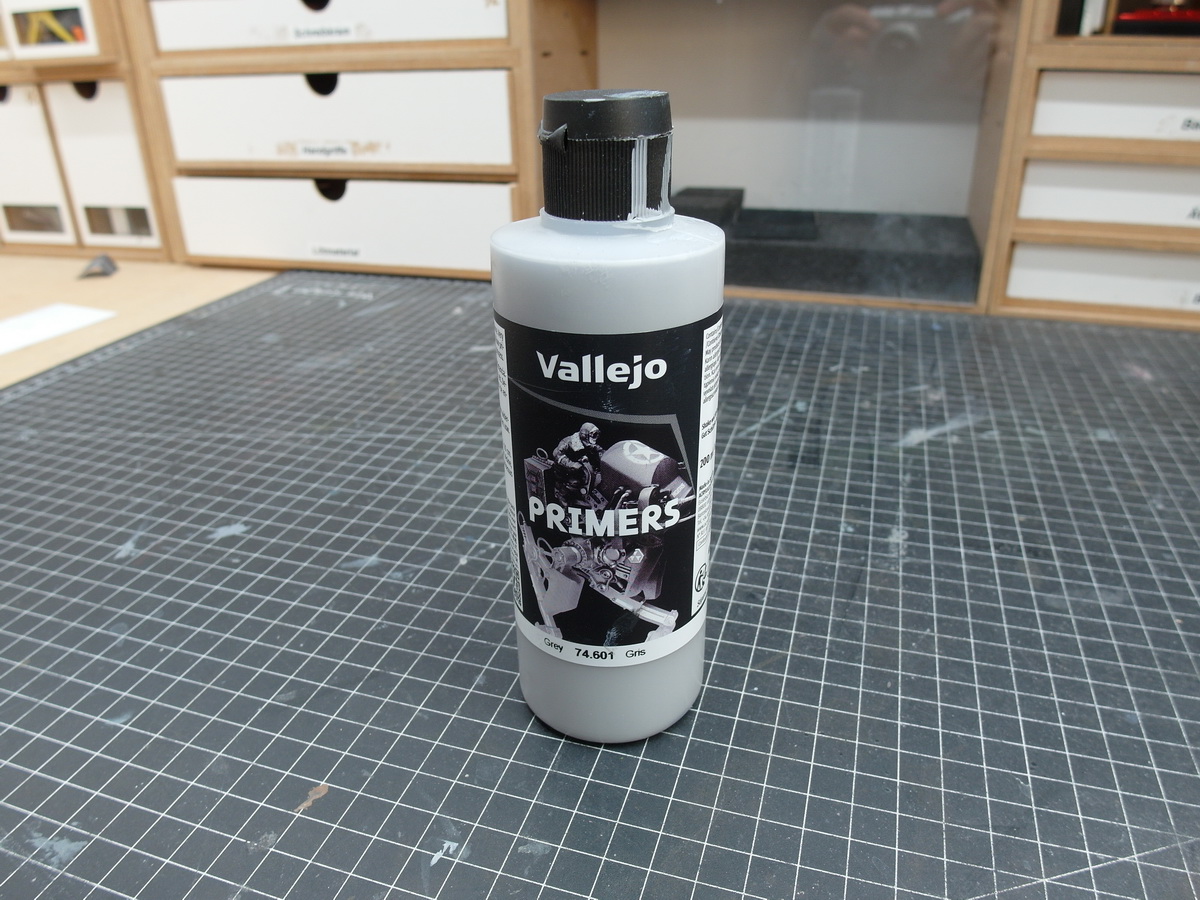
I use Vallejo primers. They provide excellent coverage and create a very good surface for the subsequent painting process.
Next comes the preshading.
Since no picture of my hull in this state exists, I created the whole thing in Photoshop. You can see that I blackened out the recesses and protruding surface structures that would cast a drop shadow.
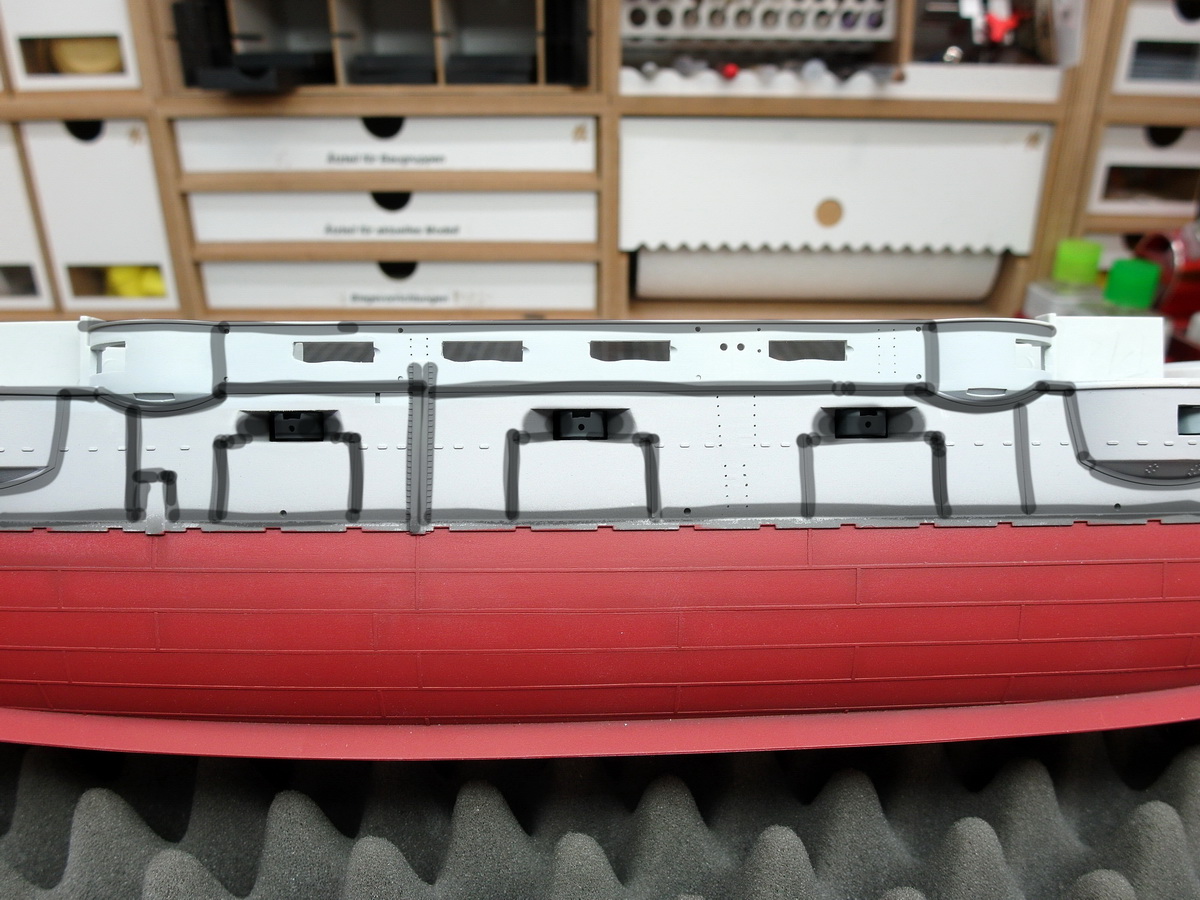
I do this with a black primer. However, you can also simply use black paint instead of the primer.
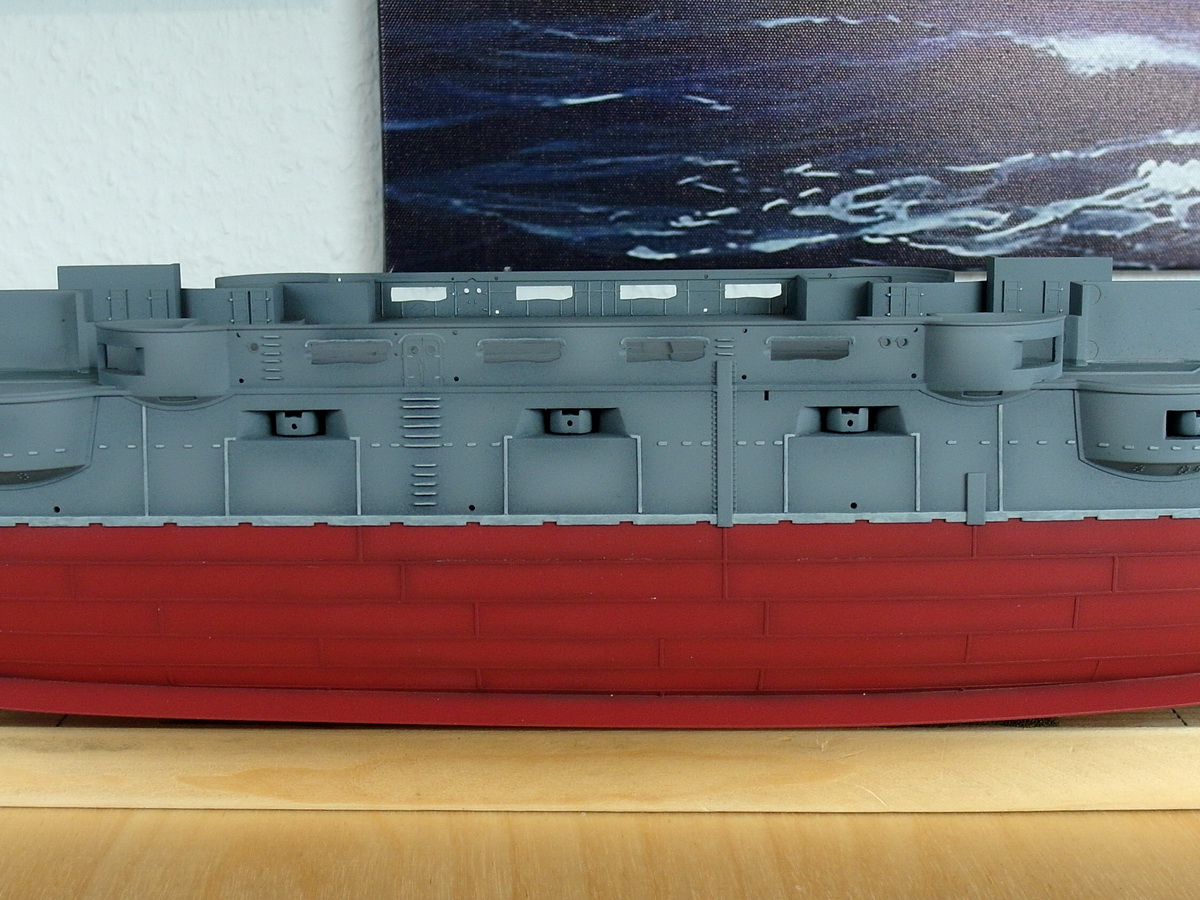
Now I paint the hull with the base color I want it to have. Be careful not to apply too many coats, otherwise you won’t be able to see much of the pre-shading.
If you’ve done everything correctly, the black will shimmer slightly through the paint, creating an initial sense of depth.
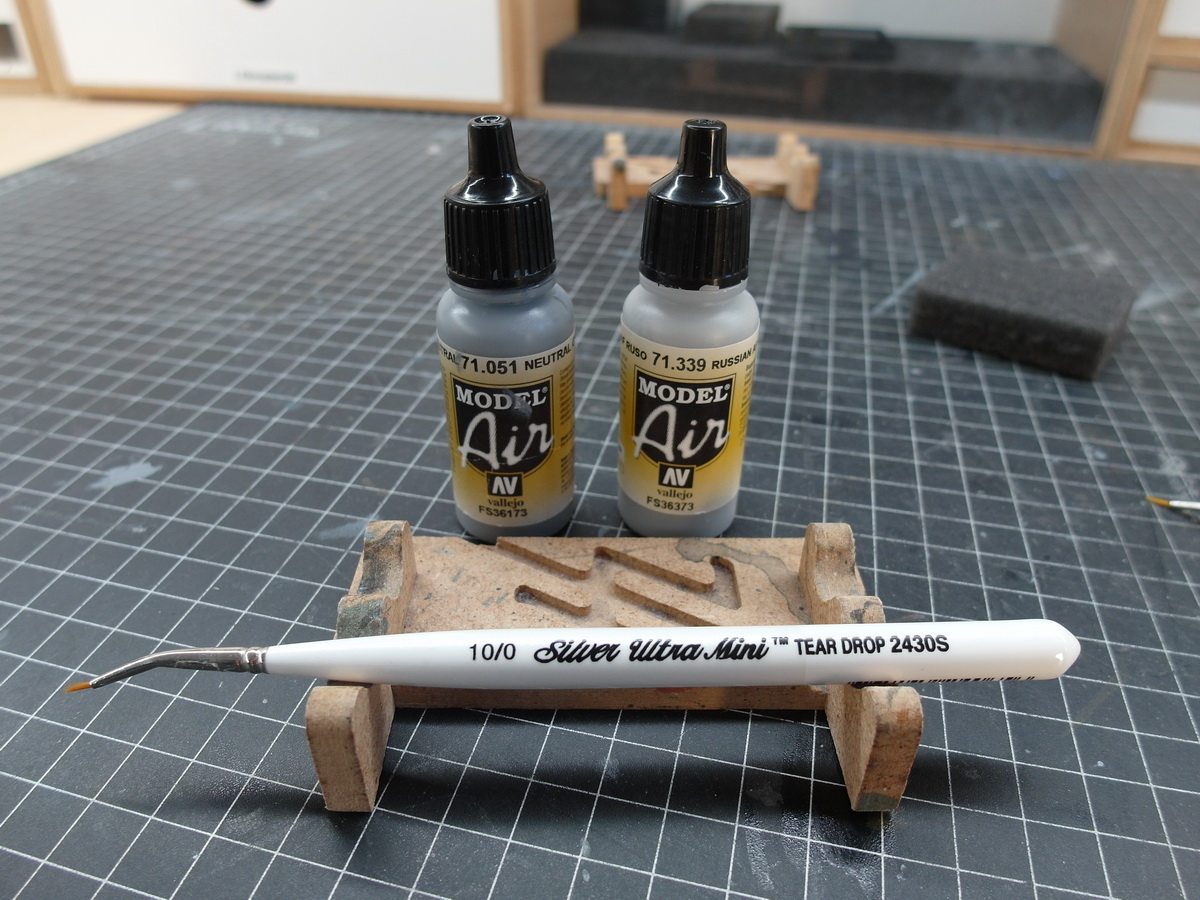
After that, I’ll focus on the fine structures that protrude from the hull. Using a fine brush and a lighter gray than the base color, I’ll highlight them. It’s advantageous to use an angled brush here. This makes applying the paint easier. If you use water-based acrylic paints like I do, you don’t have to worry about making a mistake. If you immediately remove the mistake with a little water on the brush, it will be done without leaving any residue. However, the prerequisite is always that the previous step is completely dry.
Once that’s done, you can continue to increase the contrast.
Next, filters are applied. Like washing, this is nothing more than heavily diluted paint. For my gray hulls, I usually use a blue and white filter.
What does a filter do?
It breaks up evenly painted surfaces and makes them more vibrant, thus varying the base coat. It’s also used to add different shades of color to specific areas. For example, I use a green filter in the waterline area to depict algae growth. Finally, it’s also a wonderful way to lighten or darken surfaces.
You apply the filter by first applying a small amount to the area to be treated with a brush. Then, using a flat brush dipped in water and wiped on a paper towel, spread the filter over the surface. It’s similar to how you would when varnishing wood. Spread the color with up-and-down brush strokes and then partially pick it up again.
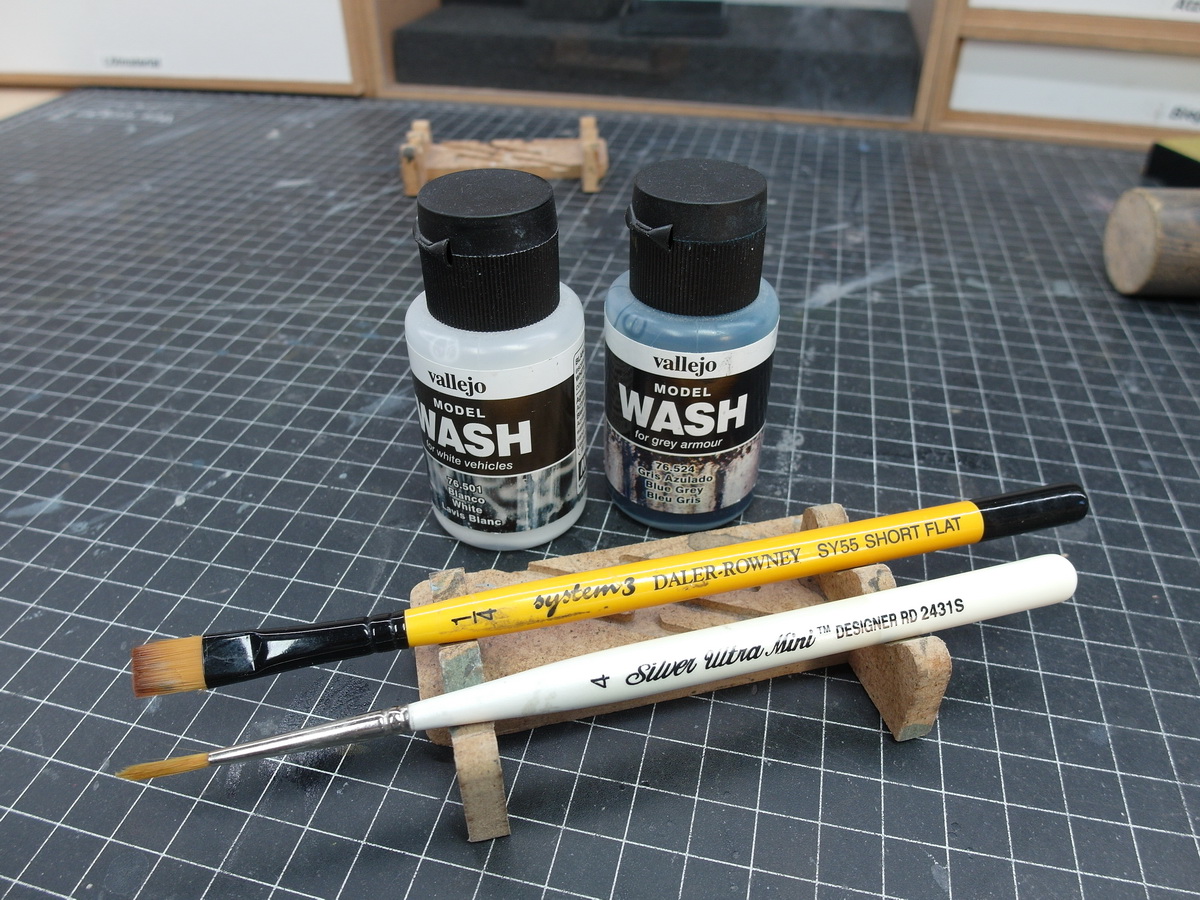
After the filter is thoroughly dry, you can move on to the wash. These are the same colors used for the filters. It’s important that the color of the wash must always be darker than the base color. You want to enhance the depth effect.
For gray surfaces, I use these.
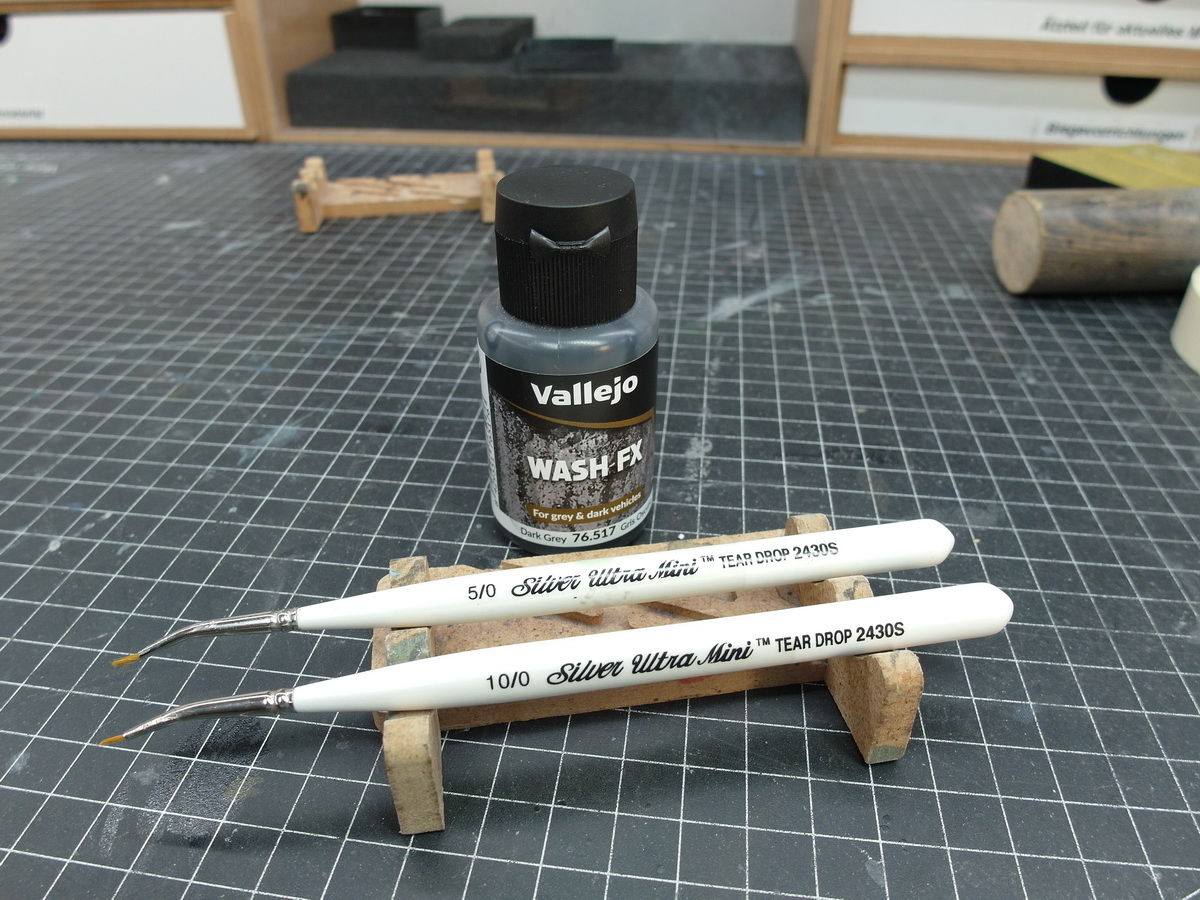
Apply the paint to one edge of the hull. Due to capillary action, the paint will run along the edge. Remove any excess paint with a clean, damp brush.
The paint will then remain in the corners and grooves, and the darkening in these areas will create a further depth effect.
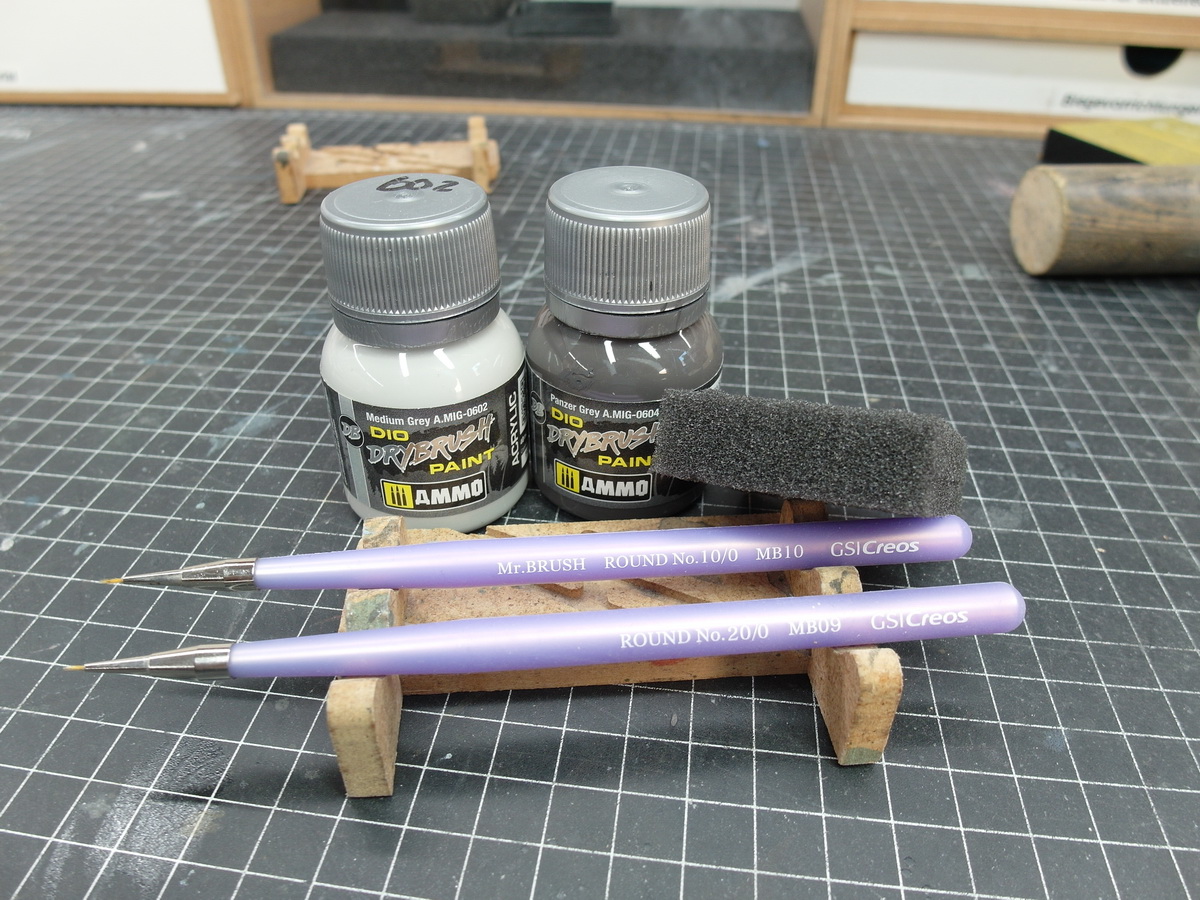
Moving on to dry brush painting.
I used to use oil paints for this. Now, however, the market offers products that are easier to use. I now use MIG drybrush paints, which I’m very happy with. However, they’re the only products I have that aren’t from Vallejo.
I don’t want to advertise this company here. Yes, I’m very happy with Vallejo, but it’s more about the compatibility of the individual paint products. That’s a given if you stick with one company. It’s not necessary, of course. But you should test beforehand to make sure there are no unwanted reactions between products from different companies.
Okay, so you need the paint, a piece of cardboard, and a flat brush.
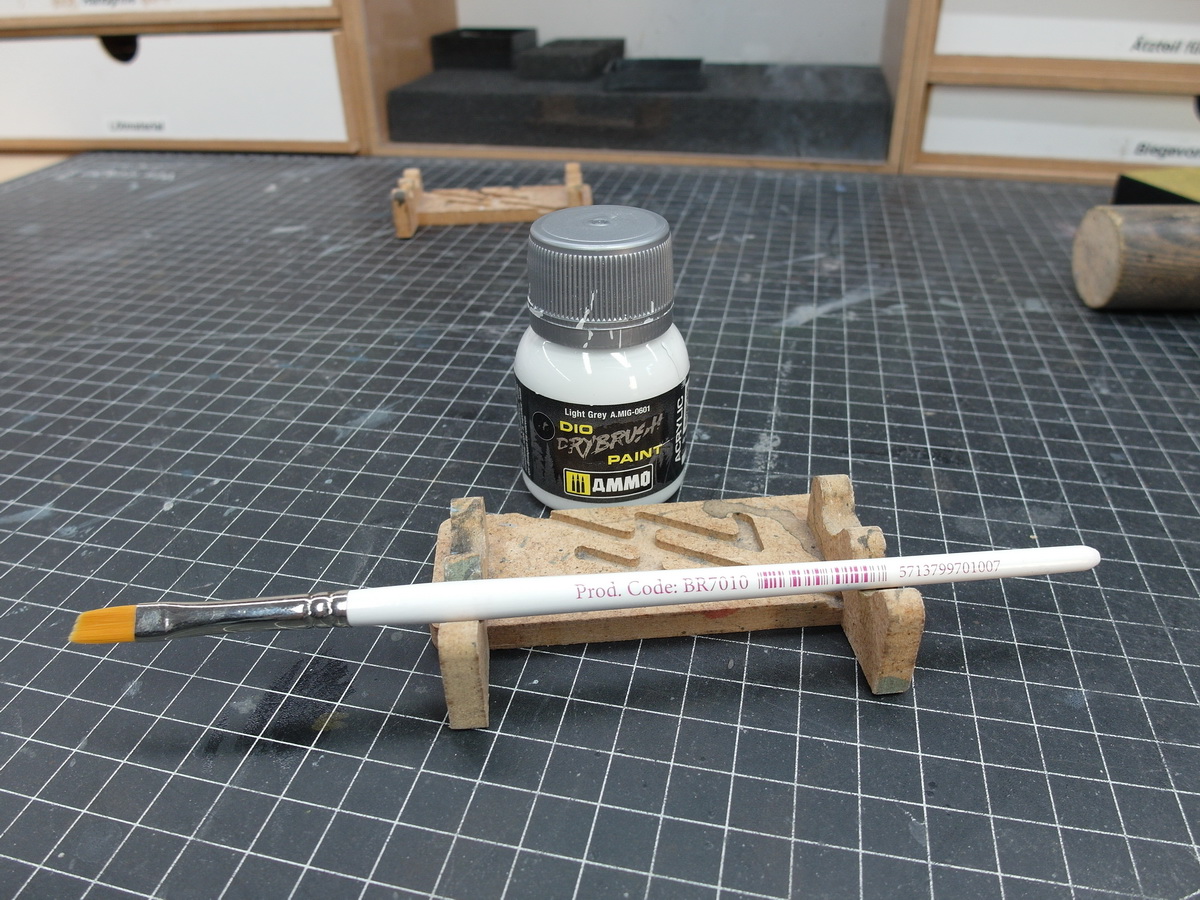
Then, pick up a little paint with the brush. Then, wipe it off on the piece of cardboard until the brush no longer transfers any paint. Then it’s ready for dry brushing.
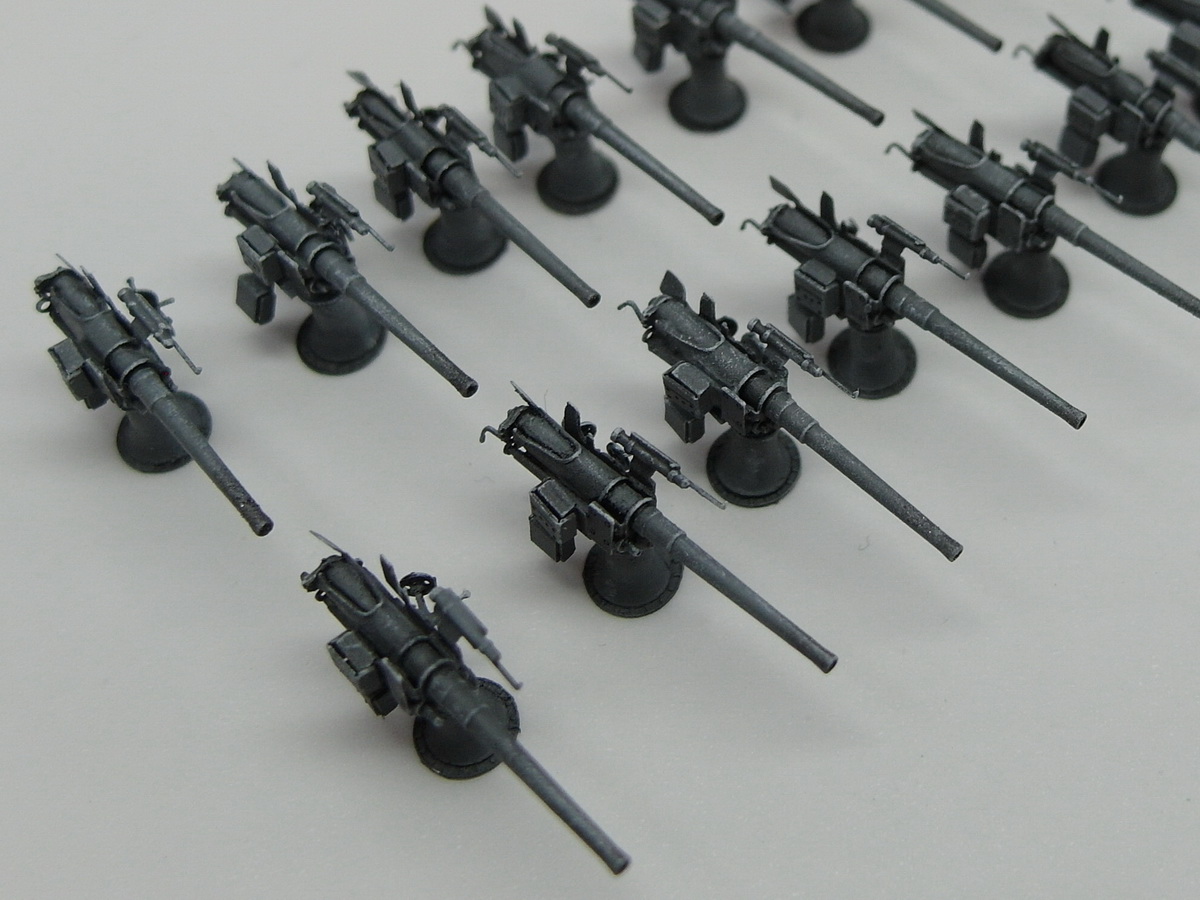
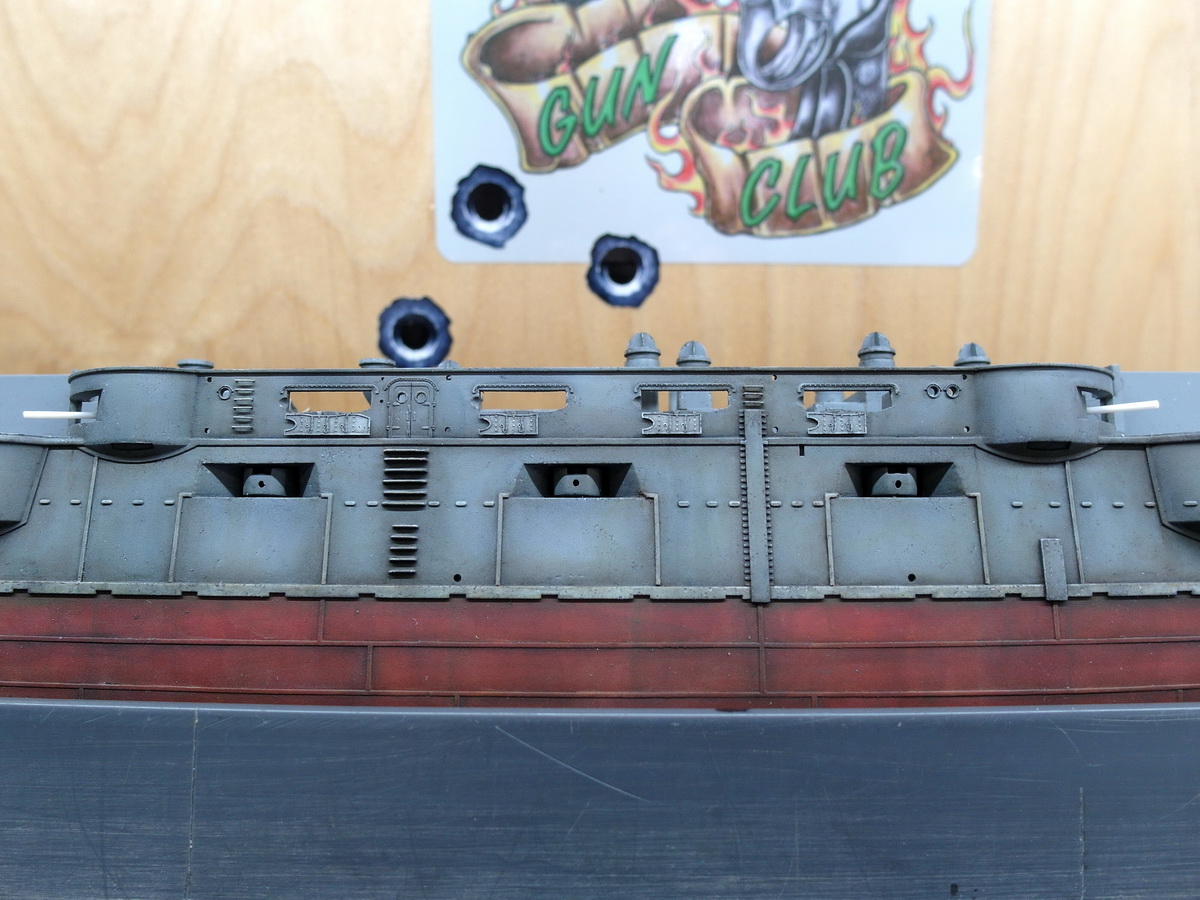
Now, take the brush and gently brush it over the component. The brush won’t transfer paint to smooth surfaces. It will, however, transfer paint to edges and protruding structures like rivet heads and the like. Like here on my guns.
Once that’s all dry, the chipping can begin.
I also use MIG’s drybrush paints for this. You’ll also need a sponge or foam pad, your finest brushes, and the cardboard you used earlier.
There are a thousand different approaches to chipping. You also have to consider the scale you’re doing it for. With my 1:200 boats, I proceed as follows.
First, I pick up a little paint with a sponge. I then dab it onto the cardboard until almost no more paint is visible. Then I dab it onto the hull of my boat. Proceed carefully; less is often more. Don’t be afraid of making mistakes here either. You can remove them with a brush soaked in water while the paint is still dry.
Note that you can do less on smooth areas than on edges and protrusions. Experience has shown that paint chips off the original more quickly here. Then continue with the fine brush, irregularly distributing small, differently sized dots across the surface. I also draw longer strokes along the hull, for example, where it may have scraped along the fenders in the harbor.
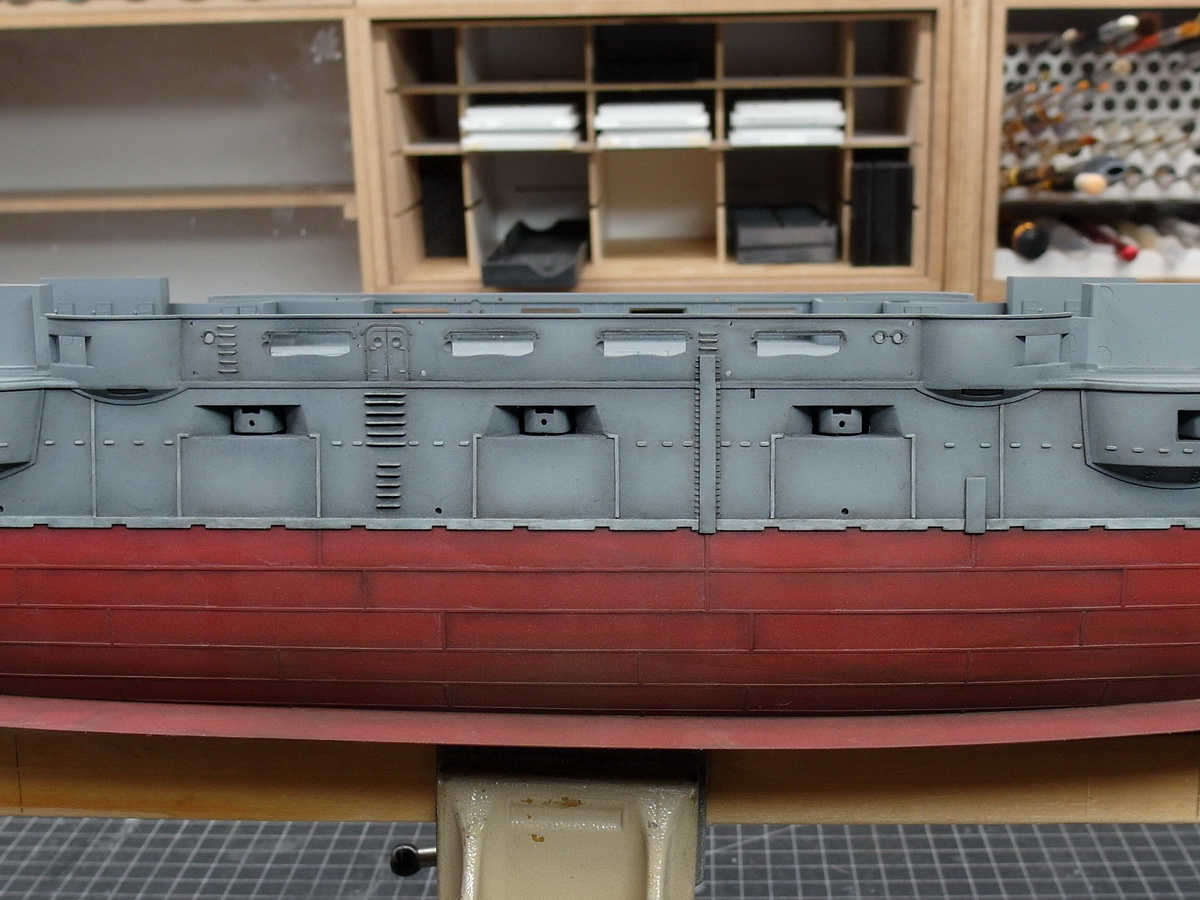
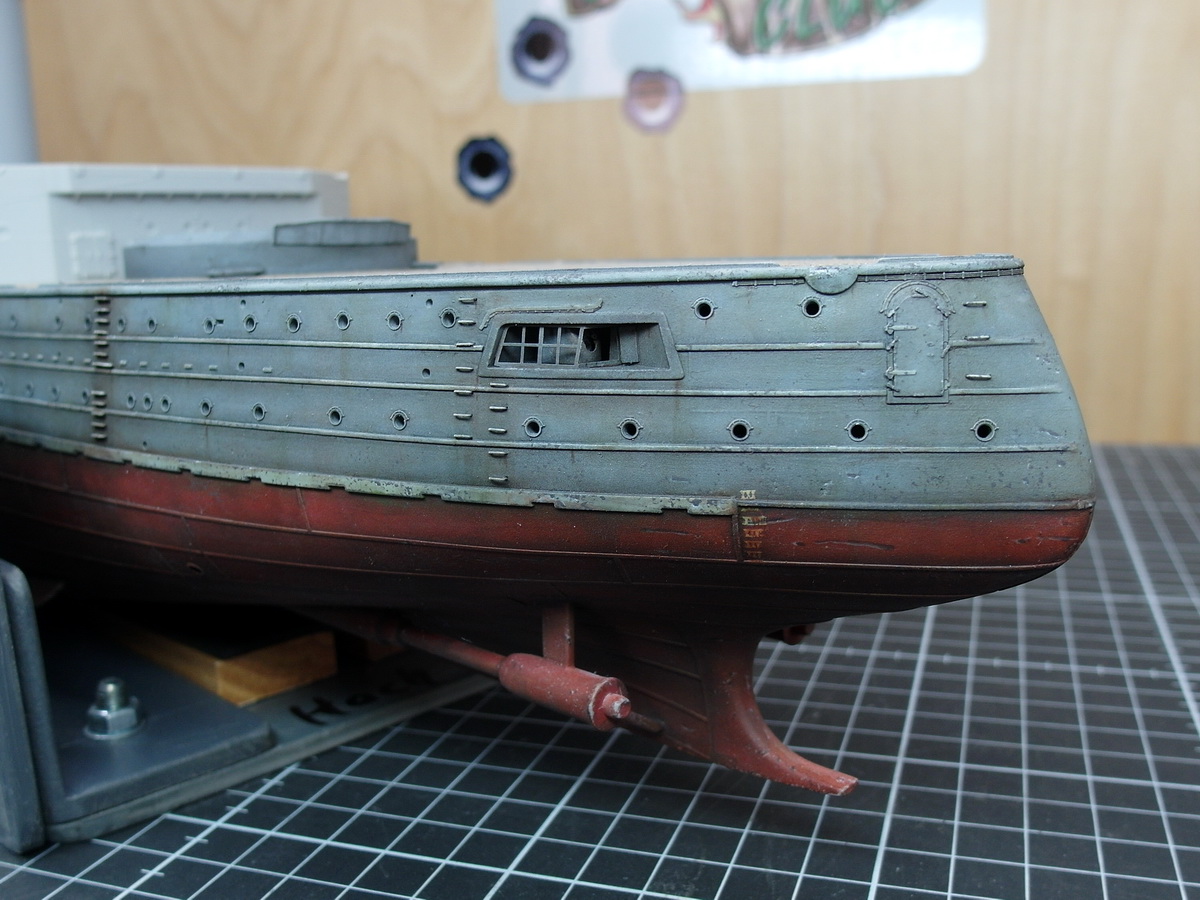
Finally, I add highlights with a very light gray. These are along the gray lines or dabs. Like here at the stern of the Mikasa.
This really takes a bit of practice. You should definitely try it on an old model. Or paint a piece from your scrap box.
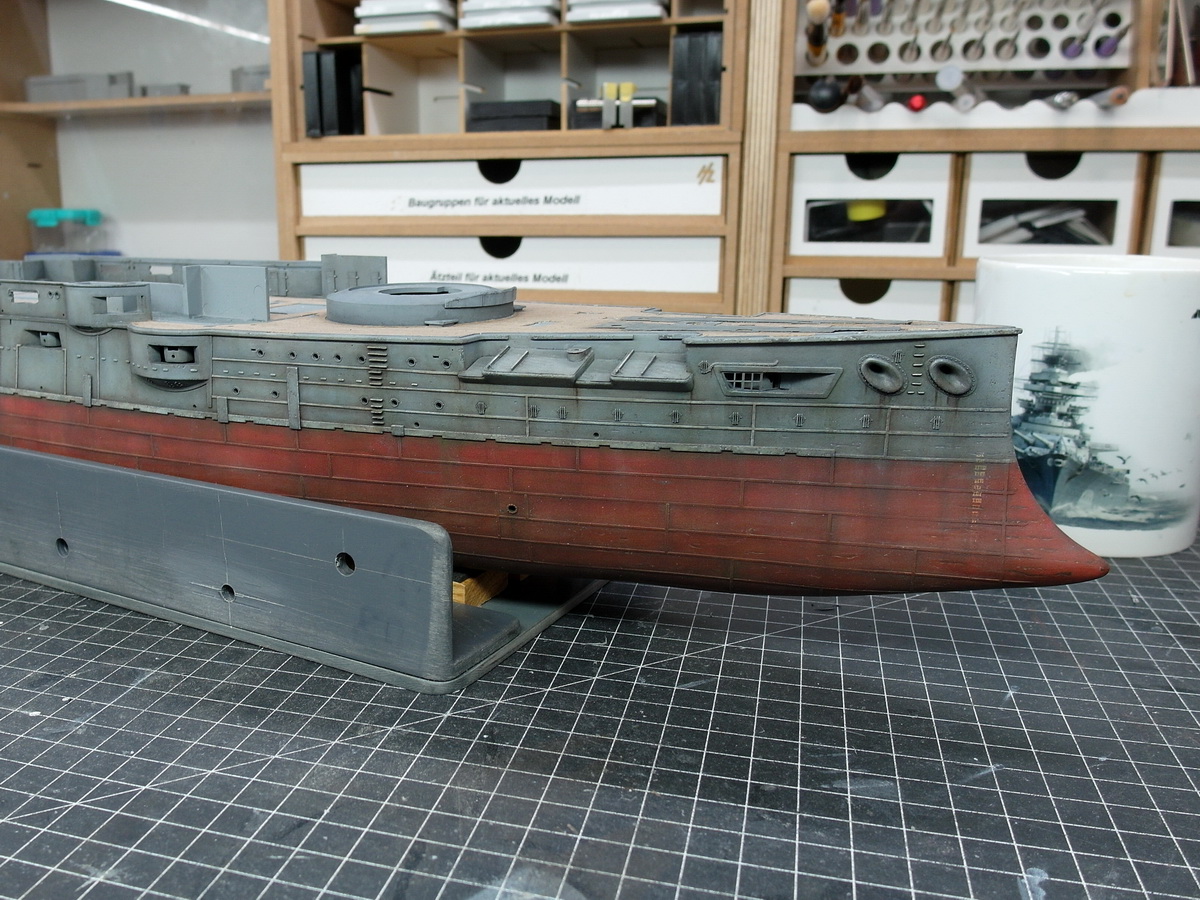
After that, your hull could look like this…
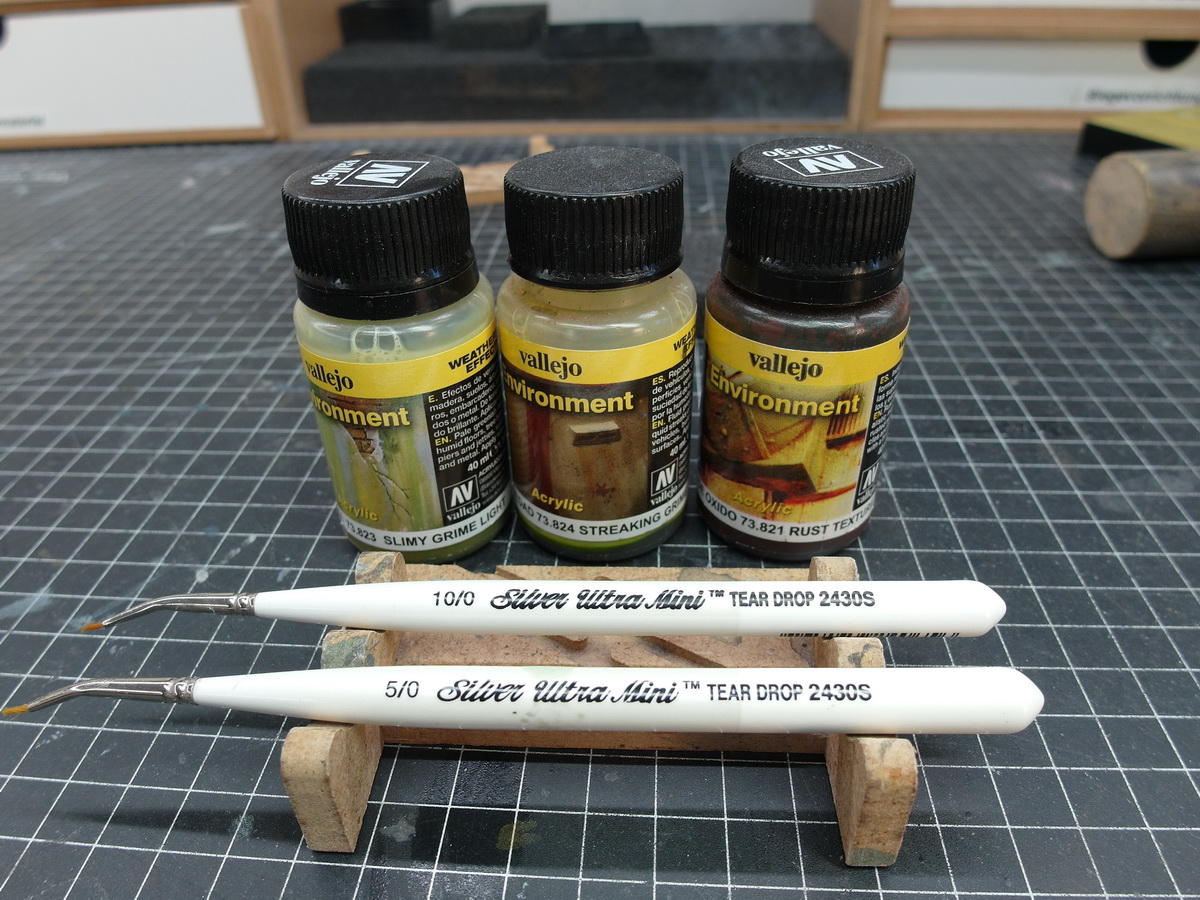
Let’s move on to the final step: fading.
For this, I use Vallejo’s special environment colors. They’re available for all sorts of applications. I’m using the three shown below.
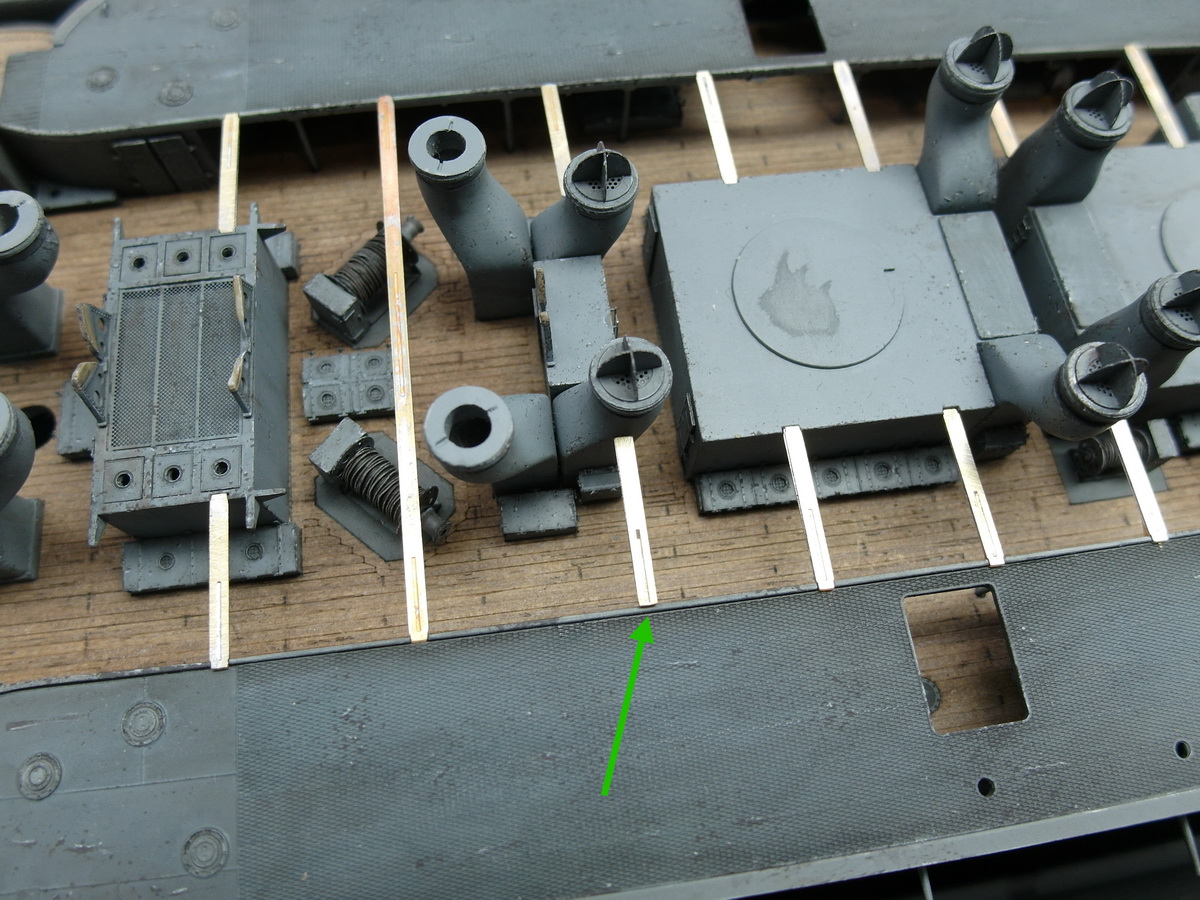
Now I add a little more paint to the smaller brush and draw a thin line downwards. Then I wet the slightly larger brush with water and draw it along the previously applied paint. This makes the line thinner and thinner as I go down, allowing me to adjust the direction again. See the green arrow.
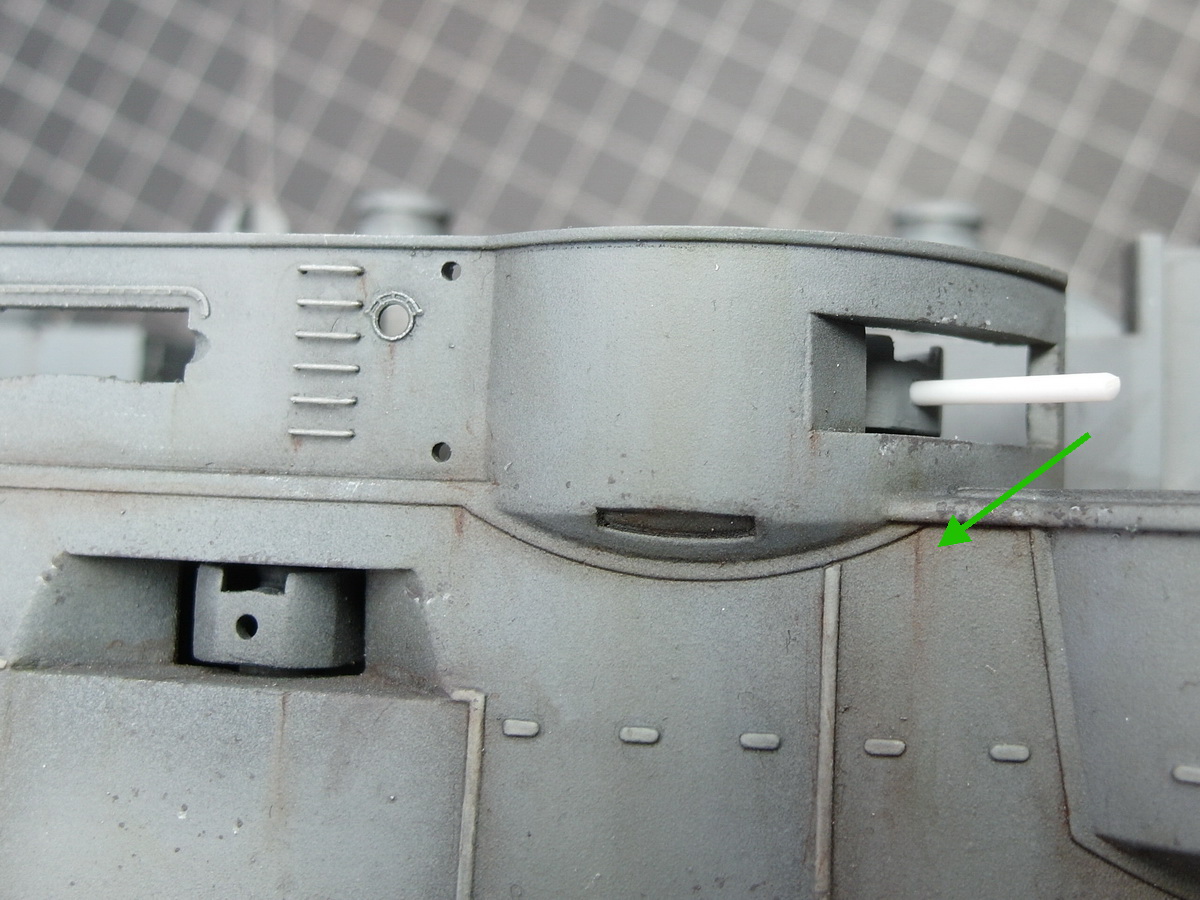
This is how I gradually add streaks of dirt and rust to the hull. In the end, it looks like this on the anchor fairleads.
I hope I was able to give you a little insight into aging ship hulls. If you have any questions, feel free to ask.
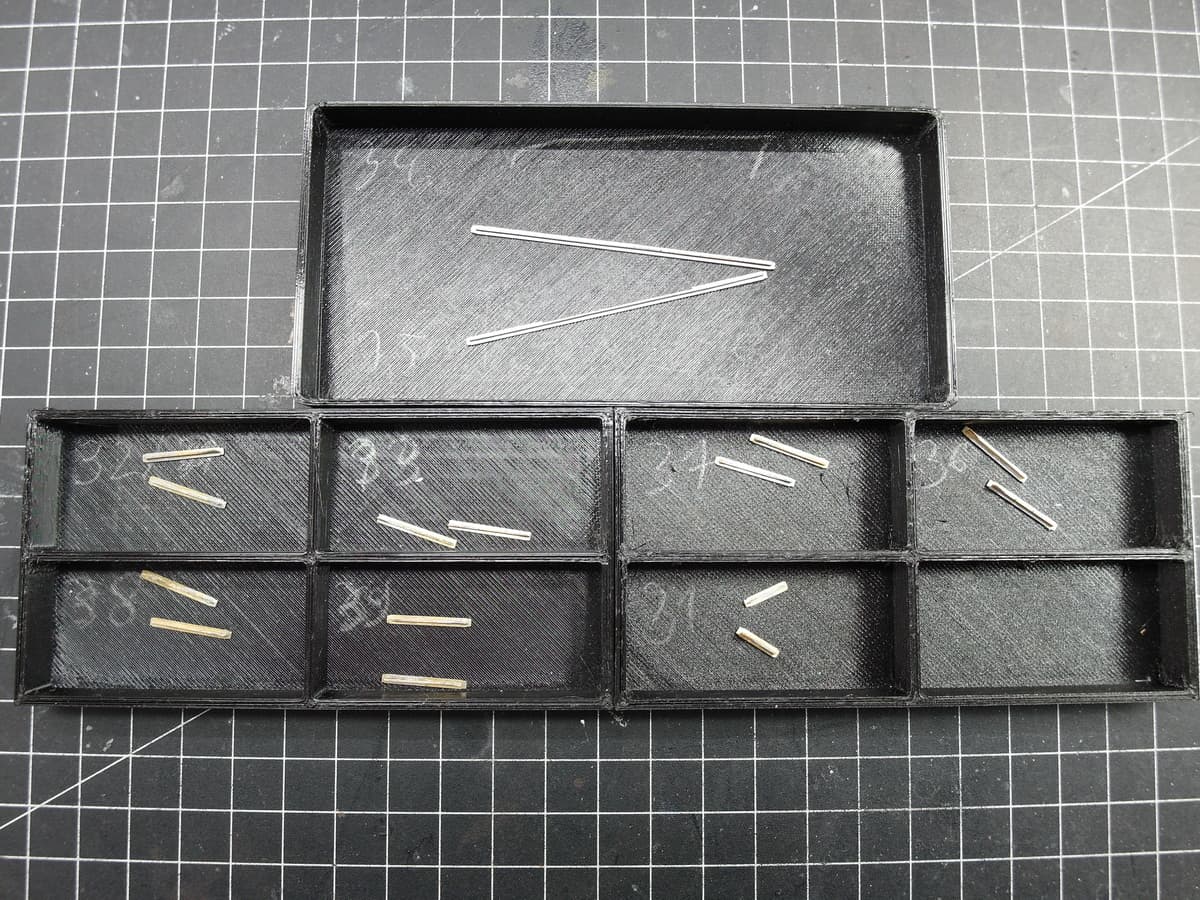
Oh, one more thing.
I always create a color key for each model. This way, you won’t get confused later on when you wonder what filter I used at the beginning.

10 Likes