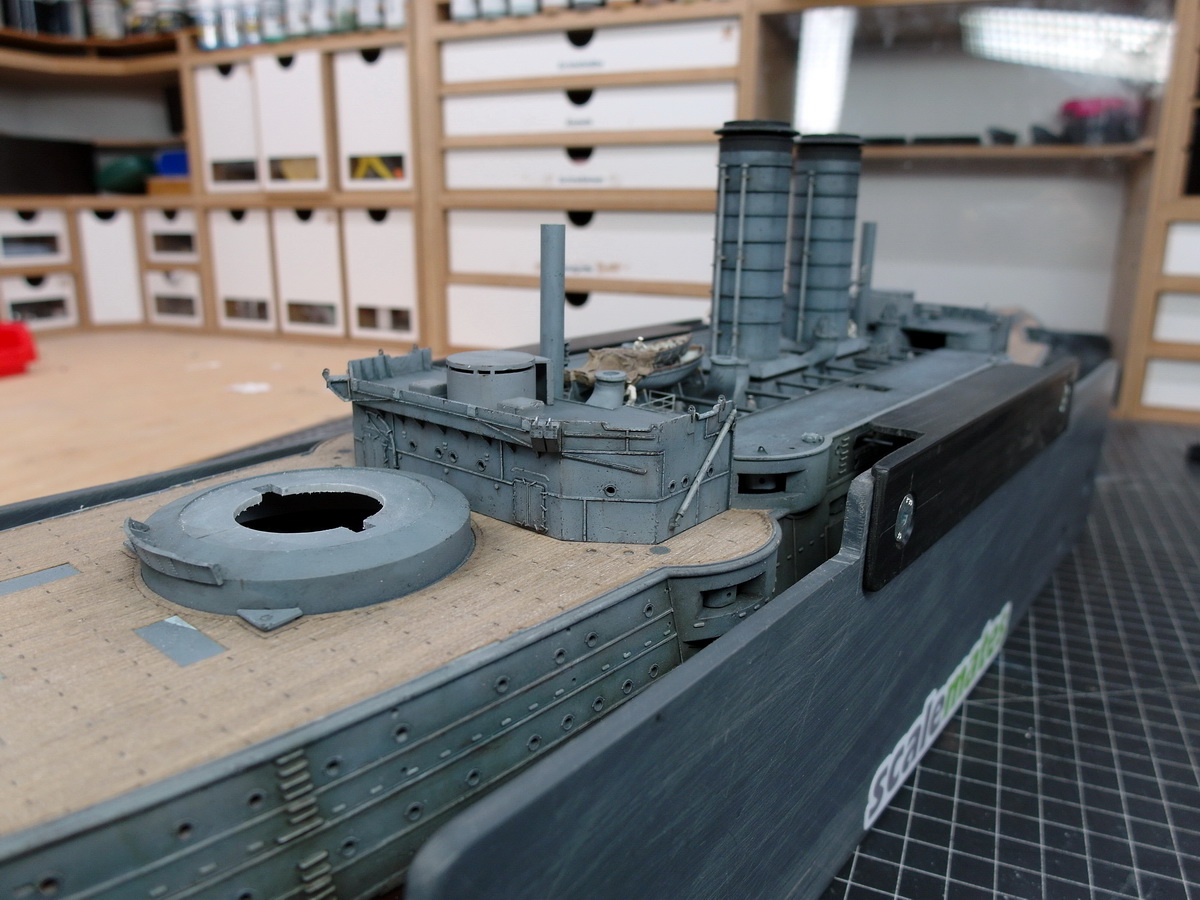
Okay, let’s move on to the masts and pause for a moment with the bridge houses.
I noticed the really tight space in which the masts have to be installed.
Once the ladders leading from the bridge house to the deck are installed, there’s hardly any room left to properly secure and align the masts.
There’s even less space toward the stern.
That’s why I decided to attach the lower part of the masts in front of the bridgehouses. It’s nice that the lower mast is then split in two, so it won’t be a problem in terms of height.
I also noticed the very limited surface area where the mast connects to the deck. I consider this a problem. Especially since I’d like to take this model to one or two exhibitions. A little more adhesive surface would be helpful.
So I decided to make it larger. This was done using an M4 washer. I drilled it out to the appropriate size and reduced its thickness. I then soldered it to the bottom of the mast.
Primed…
…and painted and placed in the holes on the deck for testing.
I quite like this so far. This should significantly increase the strength of the masts on deck and make aligning them at right angles easier.
9 Likes
Today, it was all about properly securing the masts to the deck. I’m always a little nervous before such important steps.
That’s why preparation is key to ensuring everything goes smoothly. That’s how I did this small plate that serves as a support for the stop angle.
By placing it on the bridge house, I can quickly check the angle of each side of the mast. This is important because the time window is very small. I use superglue with a long setting time, but it still has to be done quickly.
I won’t keep you in suspense, but it worked. I laid some more rope next to it and had a sailor check the ropes.
And everything went smoothly at the rear as well. Phew…
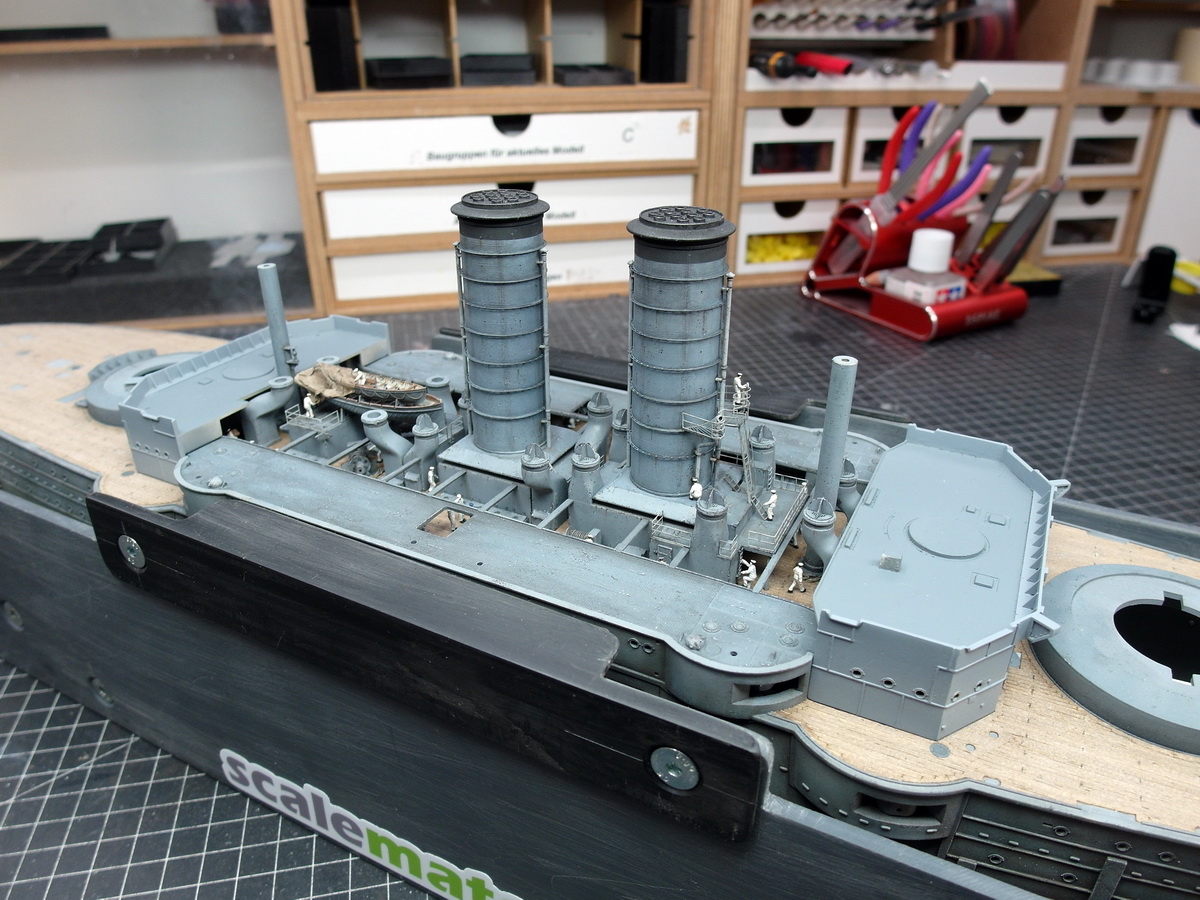
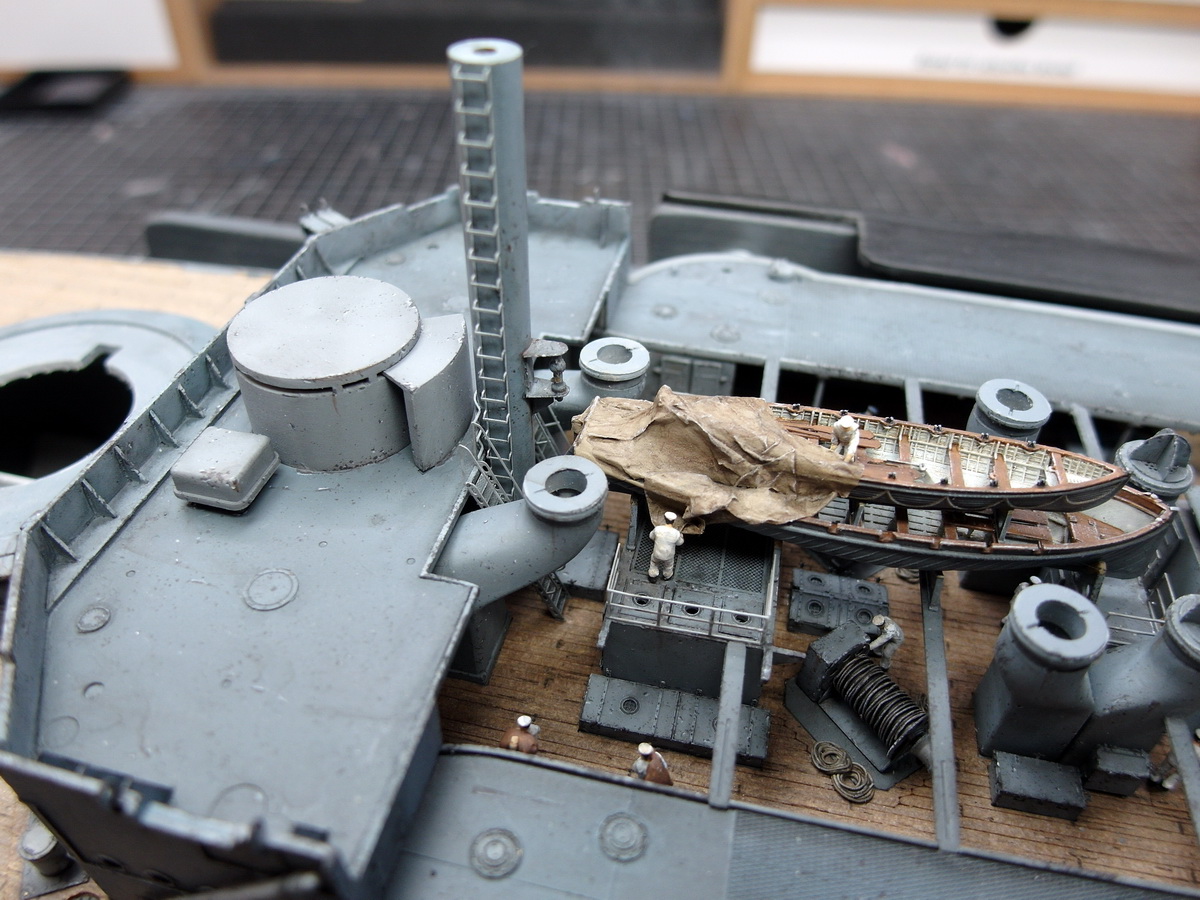
The deck amidships is slowly filling up.
Now I can continue working on the bridge houses.
14 Likes
I really like the sailors working with the boat cover. It highlights the nicely detailed boats and adds lots of life. 
3 Likes
Those masts look solid and dead-on straight! They do seem a little short, though… 

1 Like
Continues to be a super build with sweet detailing
1 Like
Thank you so much, guys.
Tim, are you kidding me?! 
Now that the short masts are firmly anchored to the deck, I can return to the bridgehouses. First, I soldered additional attachment points for the rigging. It’s simply the best way to hold.
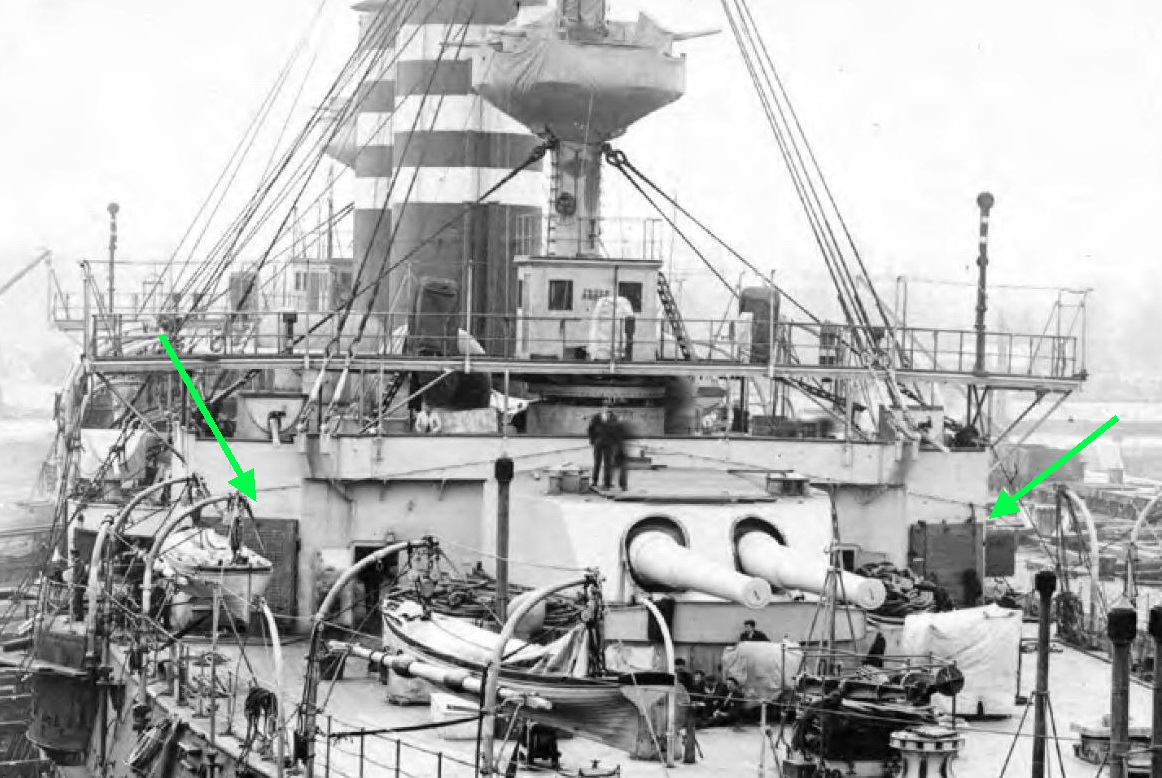
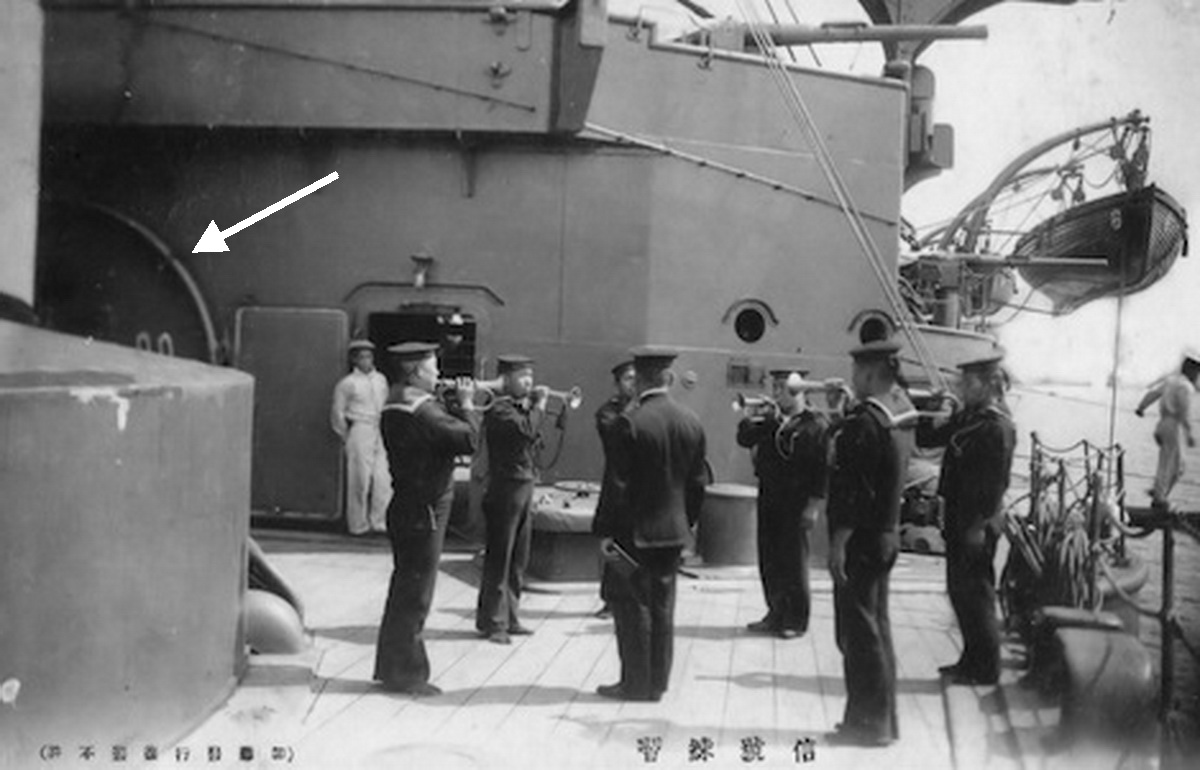
After that, I did a little more research. There aren’t many original images of the ship, but I did find something interesting.
In the following image, I noticed two dark squares. Look at the green arrows.
In my opinion, these can only be the gratings of the accommodation ladder. Since I will be showing my ship at full speed, as usual, they will also have to be stowed there on this model. But that will only happen after I have attached the bridgehouses to the deck.
What I am already doing is attaching the corresponding davits. I have identified them in the following pictures. Rear bridgehouse…
And the implementation by me.
And at the front. Strangely, my image editing program didn’t allow a green arrow. So a white arrow points to the davit.
Note that the davits point to the right and left.
Great, I love searching for details like Sherlock and then adding them. 
11 Likes
No, at that stage of construction they’re still flaccid…

Cheers,
M
1 Like
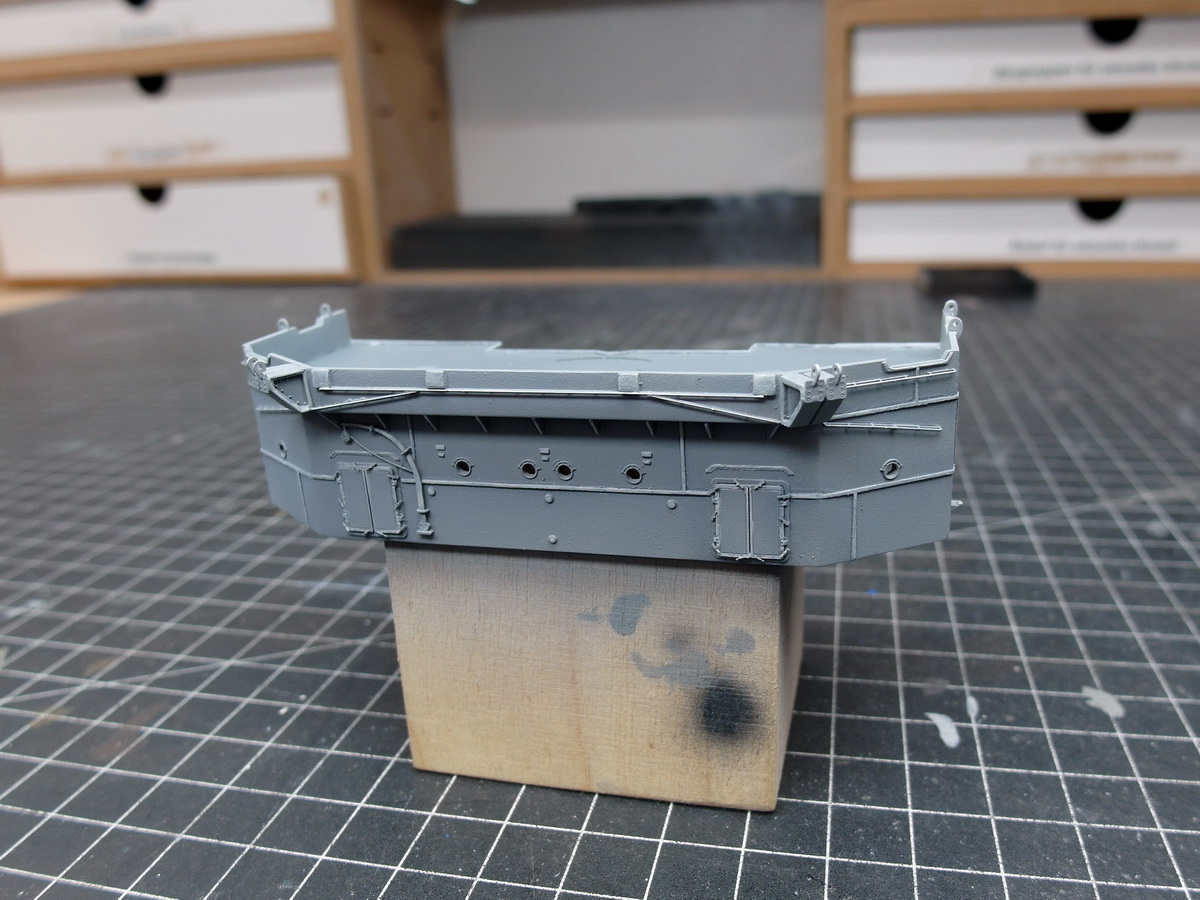
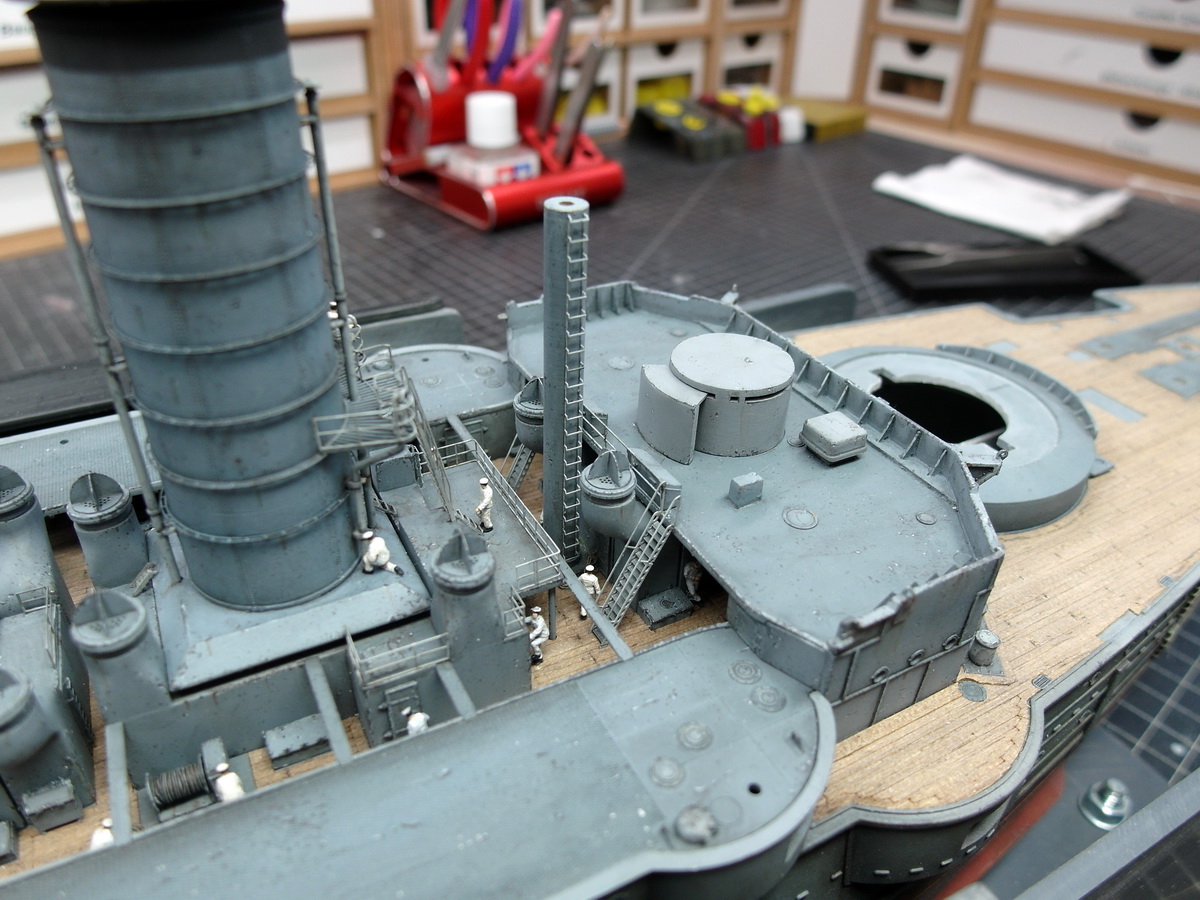
Another little mini-update to round off the weekend.
The only thing missing were the support poles for the awning, and then the base coat could be applied.
The protruding details such as profiles, davits and the like are accentuated again with a light grey.
In combination with the preshading, this creates a fine first contrast
Now I can start aging next week.
11 Likes
After a short break, I’m continuing.
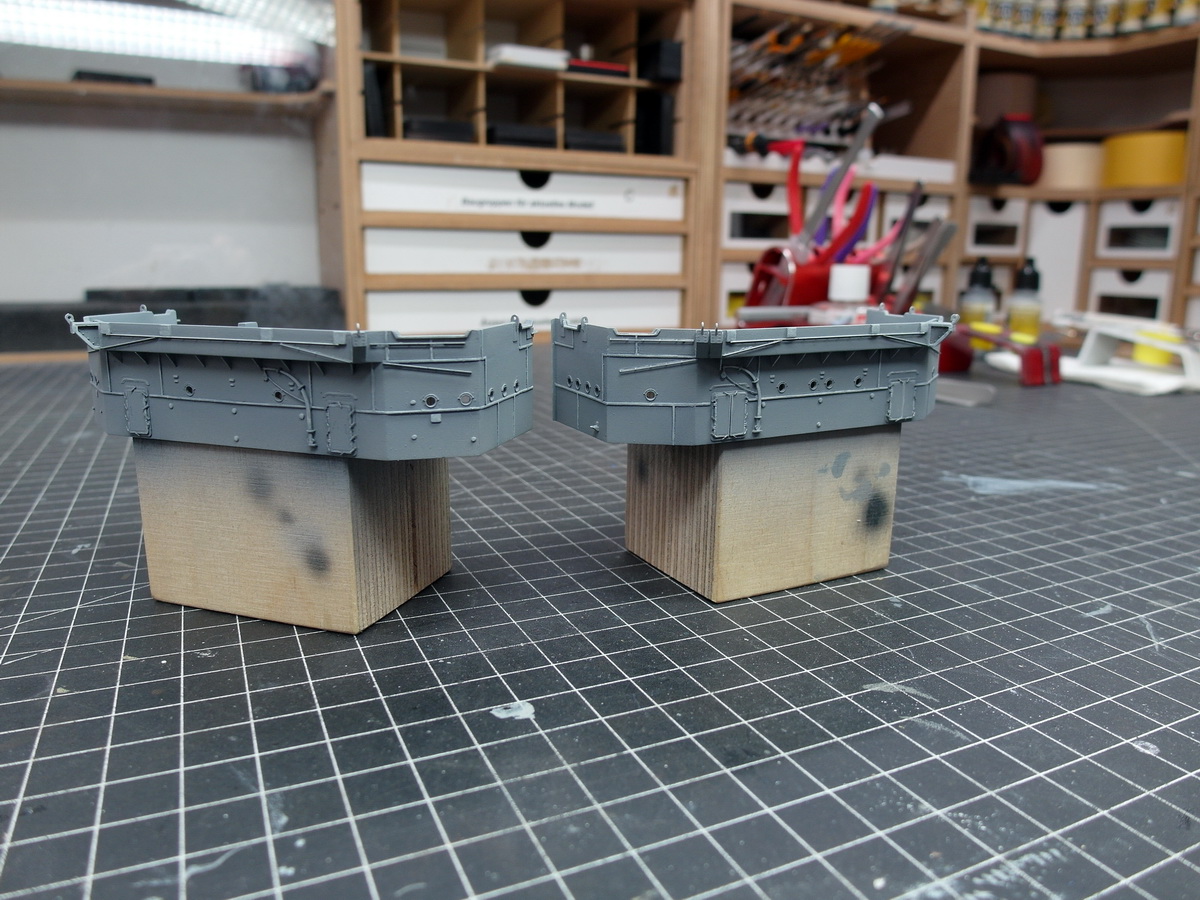
The lower bridge houses are finished weathering and can be put on the deck for a test run.
Now I have to think about the most logical way to proceed.
I think the rear bridge house is not glued to the deck yet.
Because directly behind it the steam pinasses come onto their cradles.
It’s probably better to have a little more room for my fat fingers.
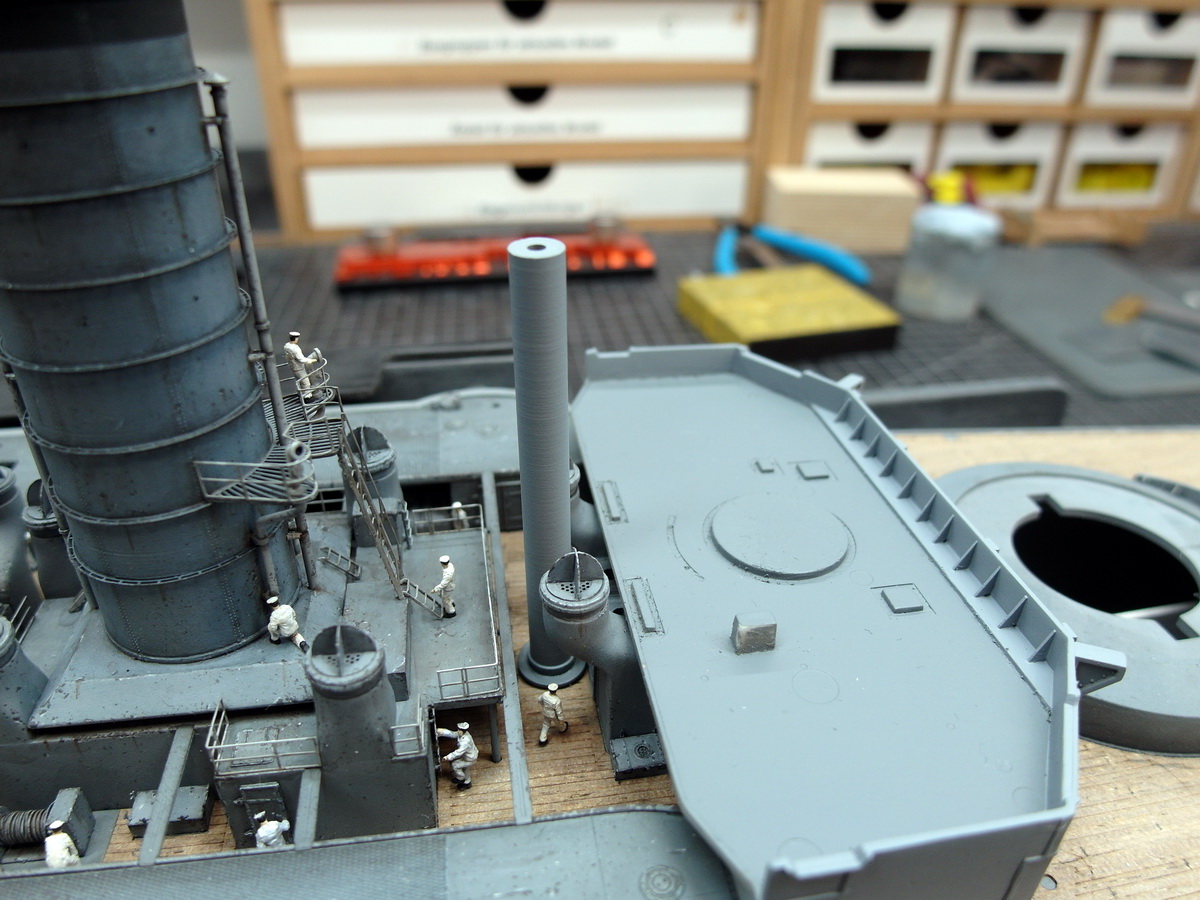
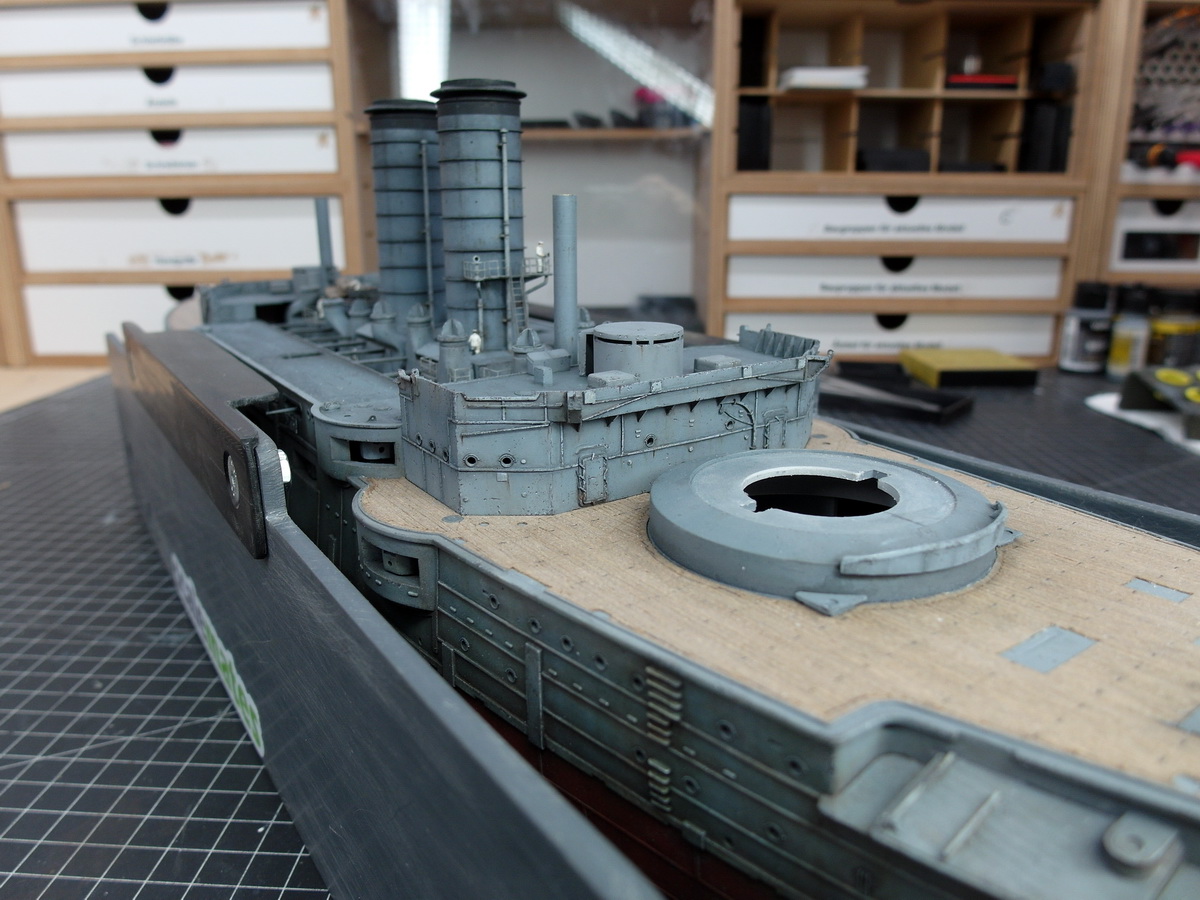
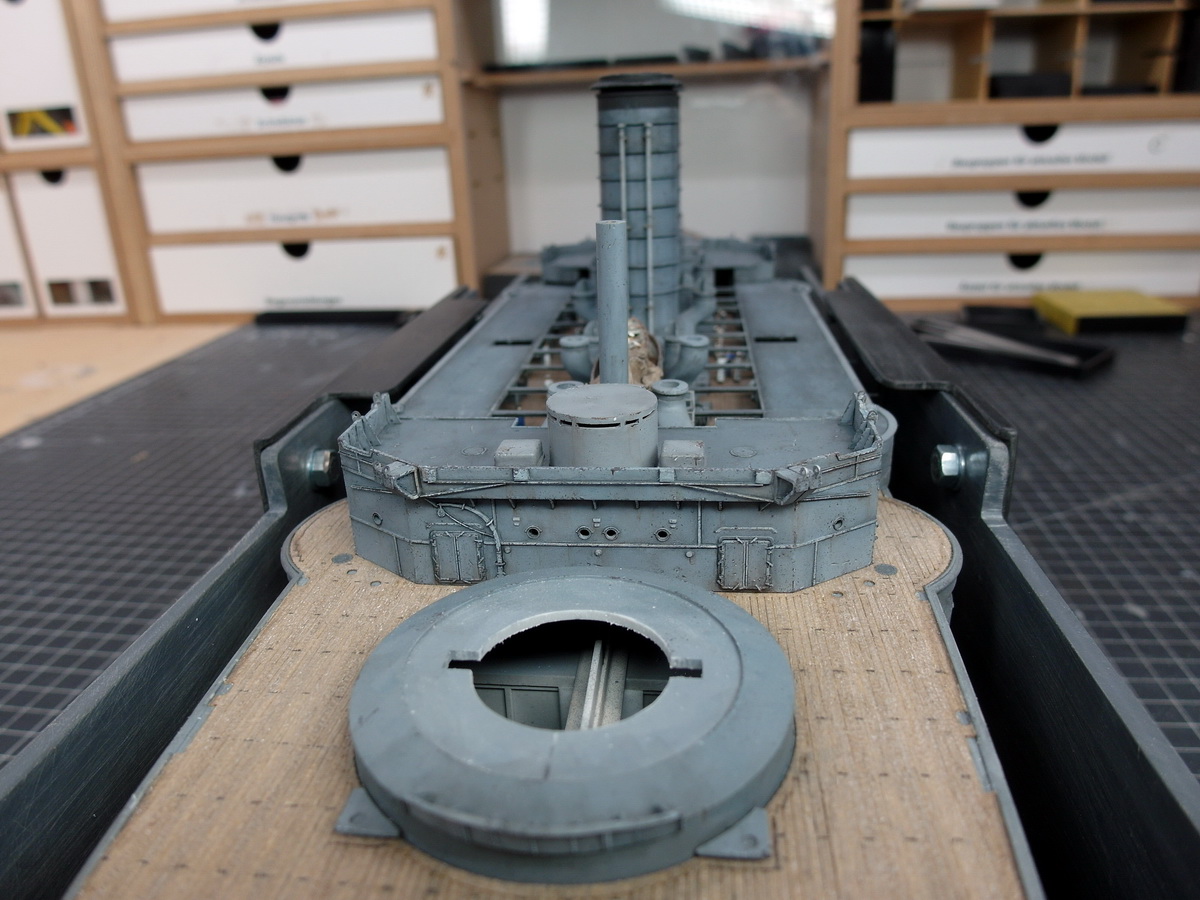
For the armored control center, I lined the entrance with a profile. It was clearly too thin.
And there isn’t much space in front of the bridge houses up to the tower.
So I’ve already fitted the lower parts of the tower into their barbettes and made them move freely. They were practically impossible to move.
And I’ve also prepared the lower ladders that belong on the mast.
9 Likes
Scale thickness of the forward conning tower armour should be just shy of 1.8mm. For the rear conning tower it’s only 0.5mm.
Cheers,
M
1 Like
Okay, thanks for the info.
My thickness is 1.5mm.
However, I did that on both the front and back. So it’s a small mistake, but it can’t be changed.
2 Likes
Not a big deal anyway, but I thought I’d offer the information for any future reader who might wish to use your excellent thread as a guide for their own build.

Regards,
M
2 Likes
Very well thought out, Mister M. 
2 Likes
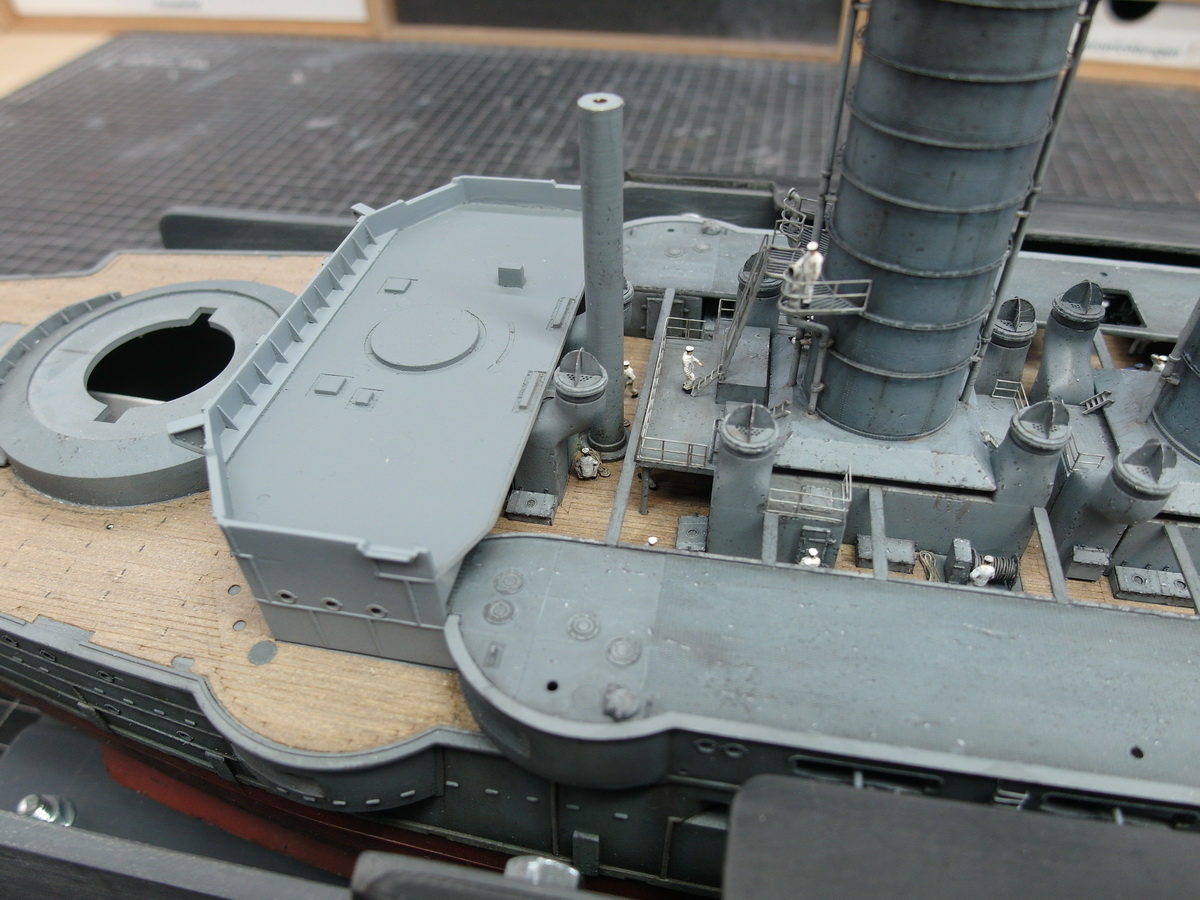
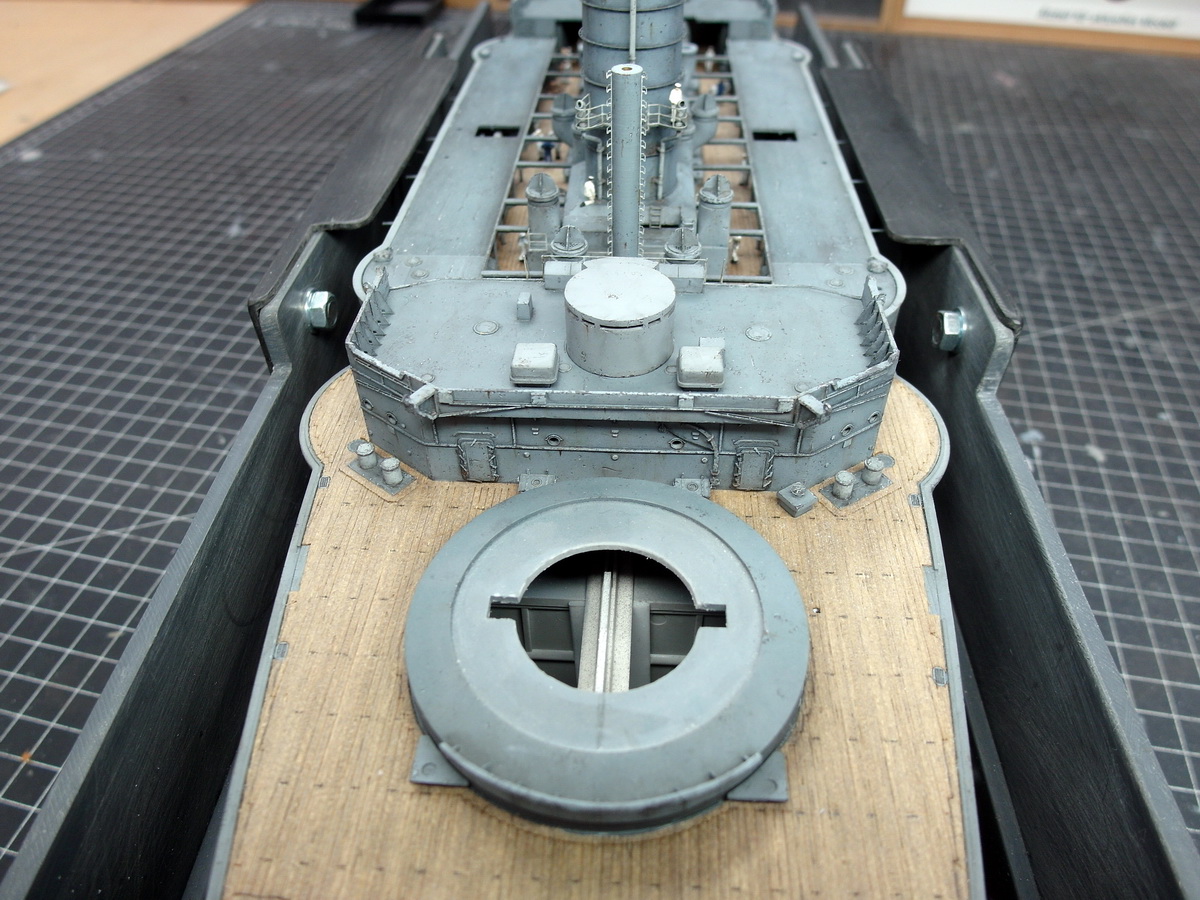
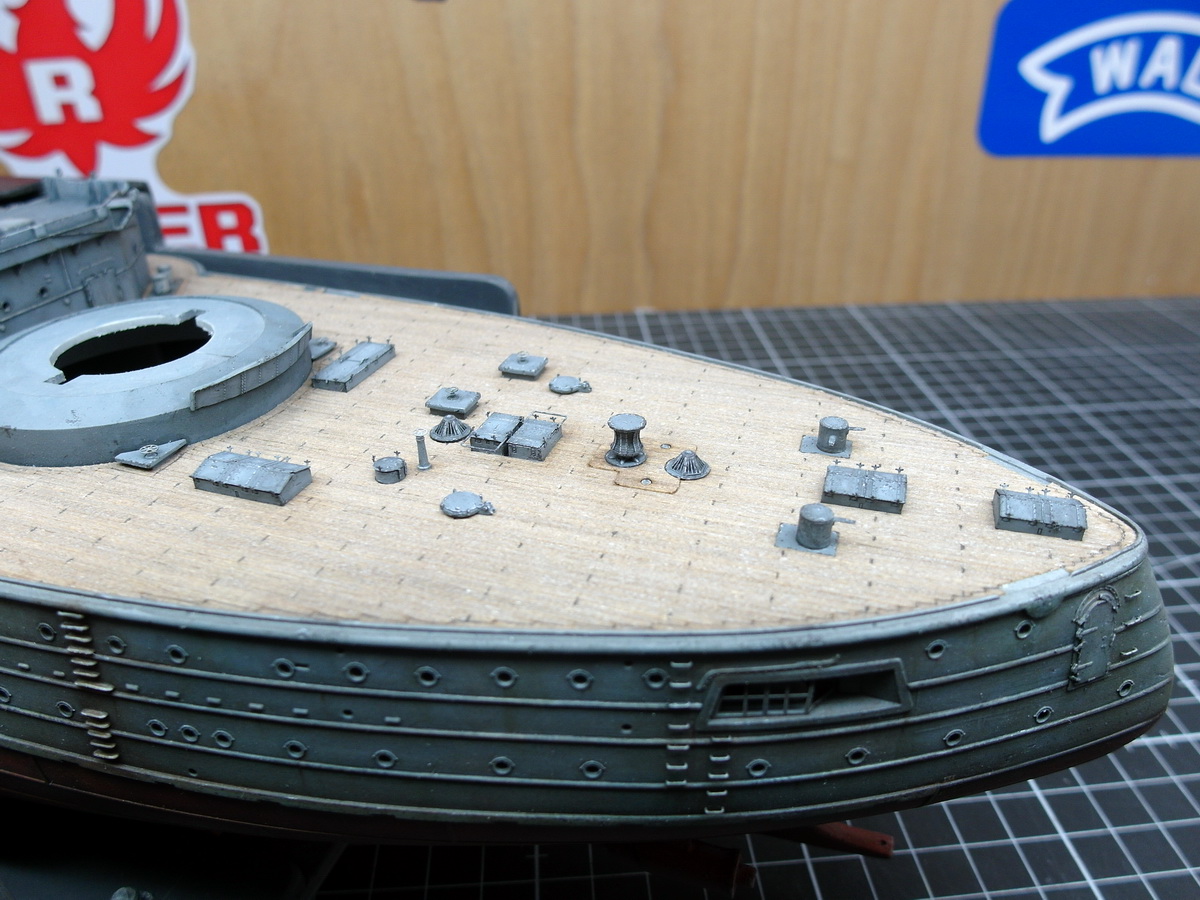
Just another small update that I had to do before moving further toward the bow.
I was still missing the bollards and other small items that would go directly in front of the bridge houses.
These are now also attached to the deck.
This had to be done so that I could install the companionways that lead to the main deck.
This means the inner area is almost complete.
And so the bridgehouse was glued in front of the steam pinnaces towards the stern. Otherwise, it would have been difficult to install the companionways behind the pinnaces.
Now I can start with the anchor area at the bow and have cut everything I need out of the boards.
9 Likes
Today we’ll continue without much ado.
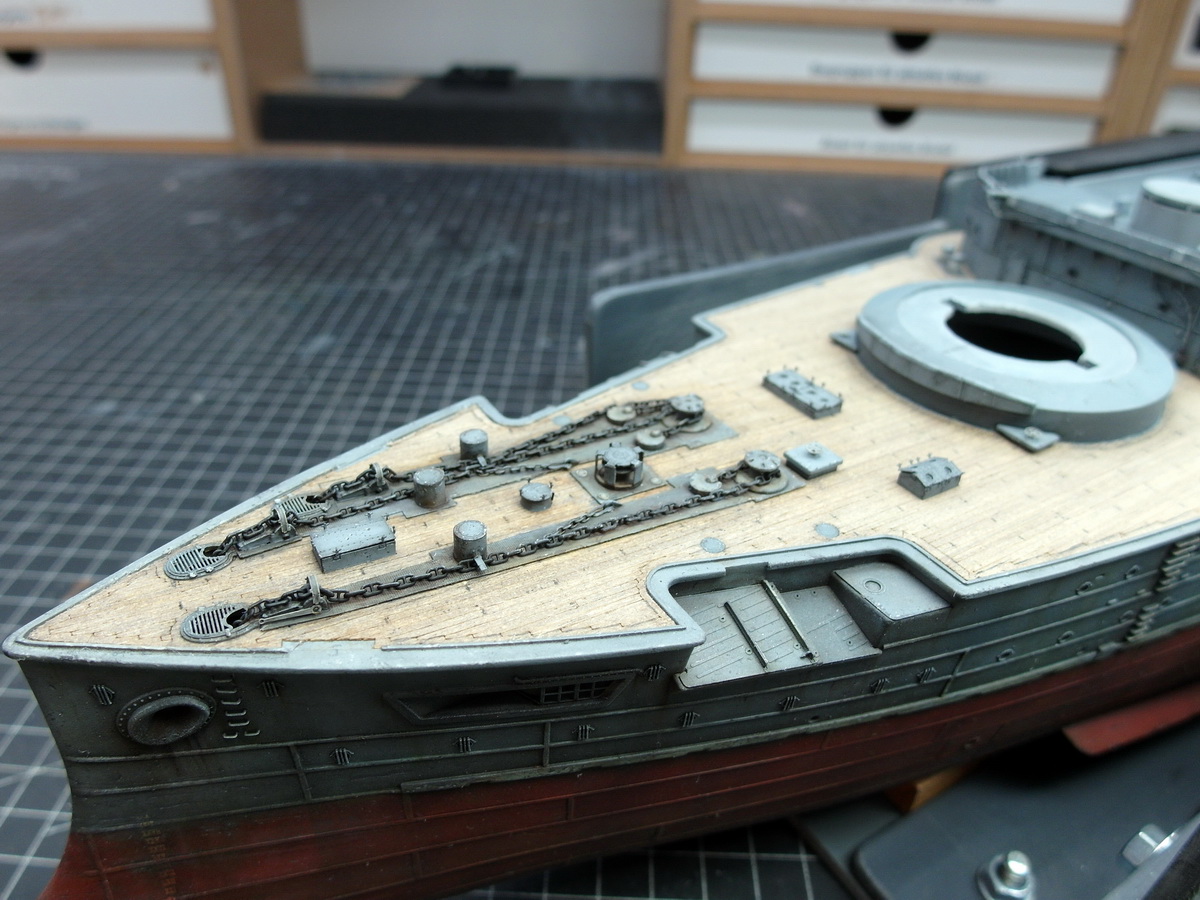
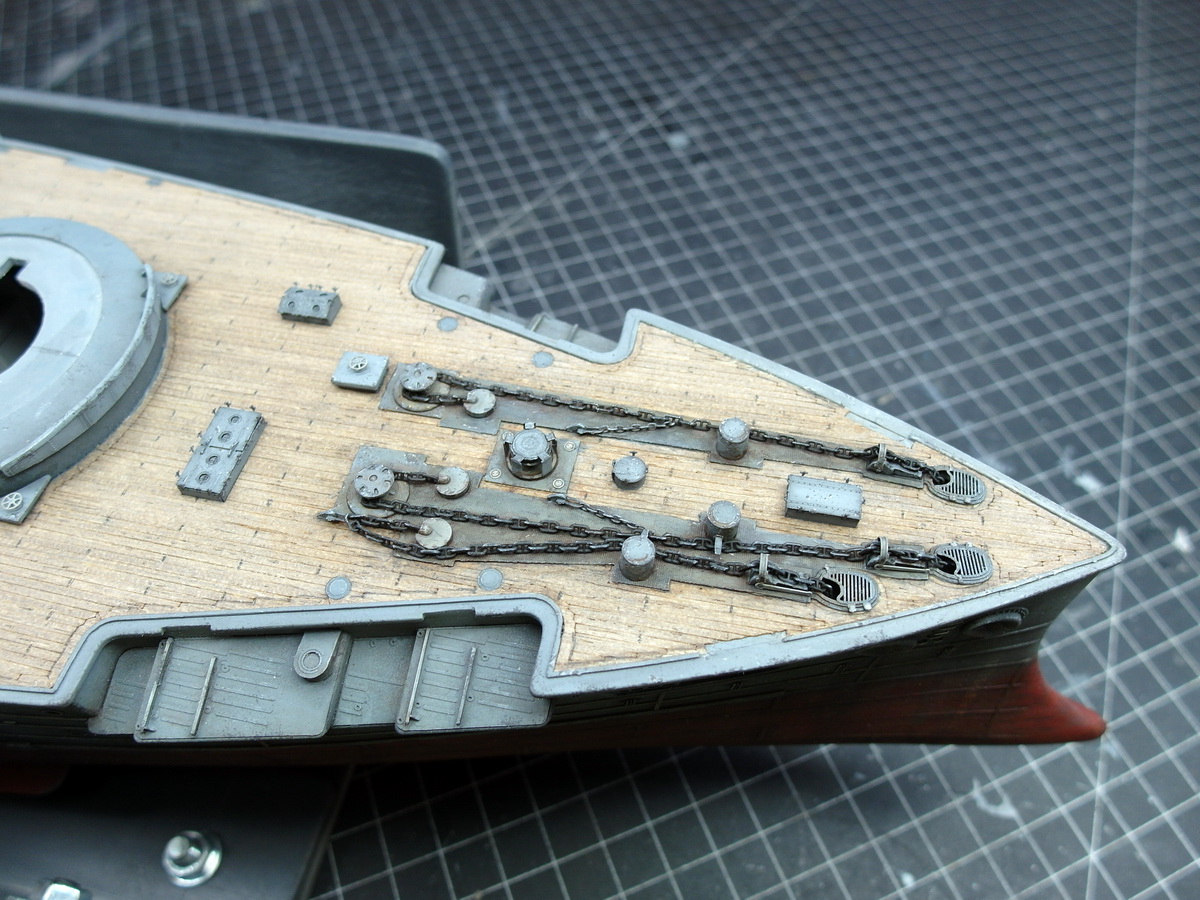
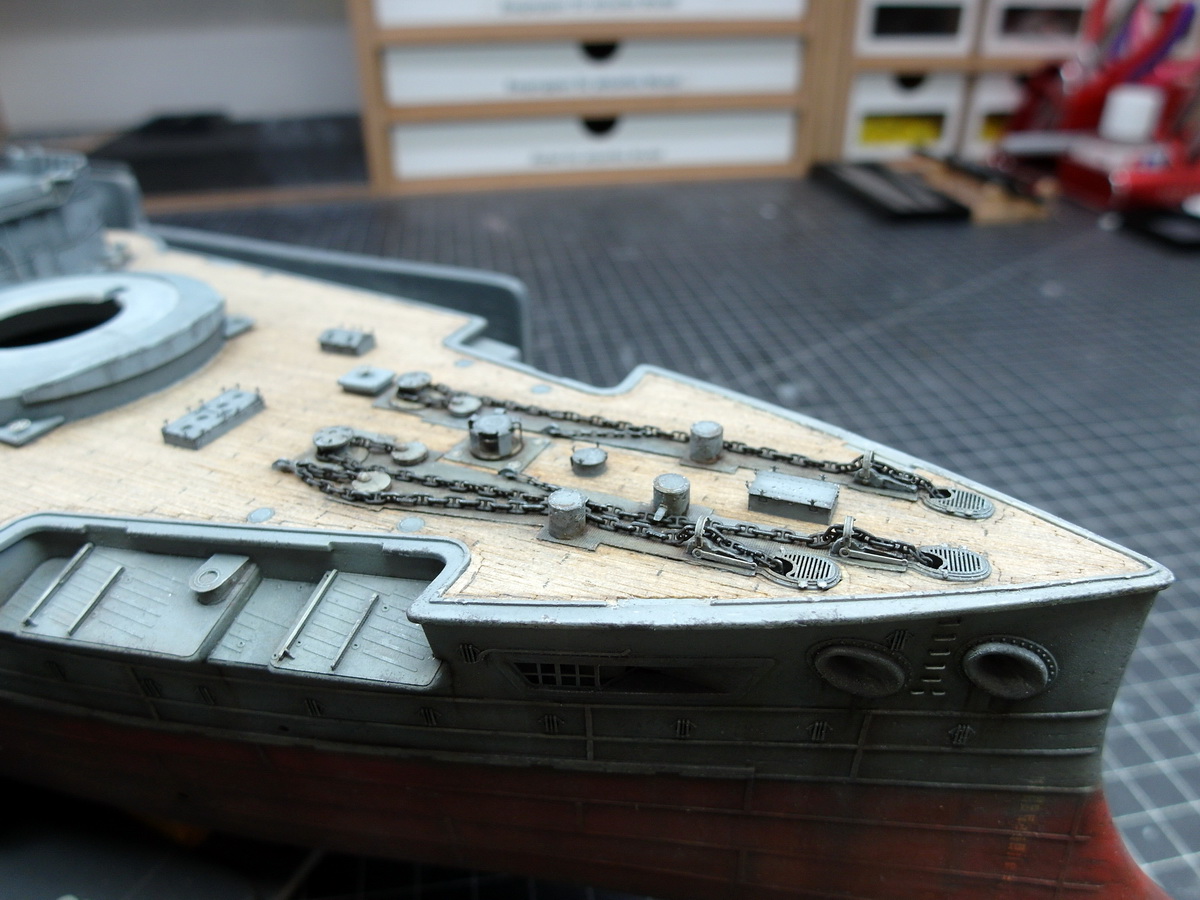
I had time over the long weekend to finish the anchor section.
That was fiddly. 
In this area, the Pontos set was used exclusively. KA failed to score points here.
Of course, double-link chains had to be purchased again.
It’s disappointing that two very expensive aftermarket kits like KA and Pontos don’t consider it necessary to include proper chains. 
12 Likes
Hi Jorg…
I agree, ship anchor chains are often overlooked by manufacturers, but yours do look great! 
3 Likes
Thanks, Russelle.
Let’s continue unspectacularly.
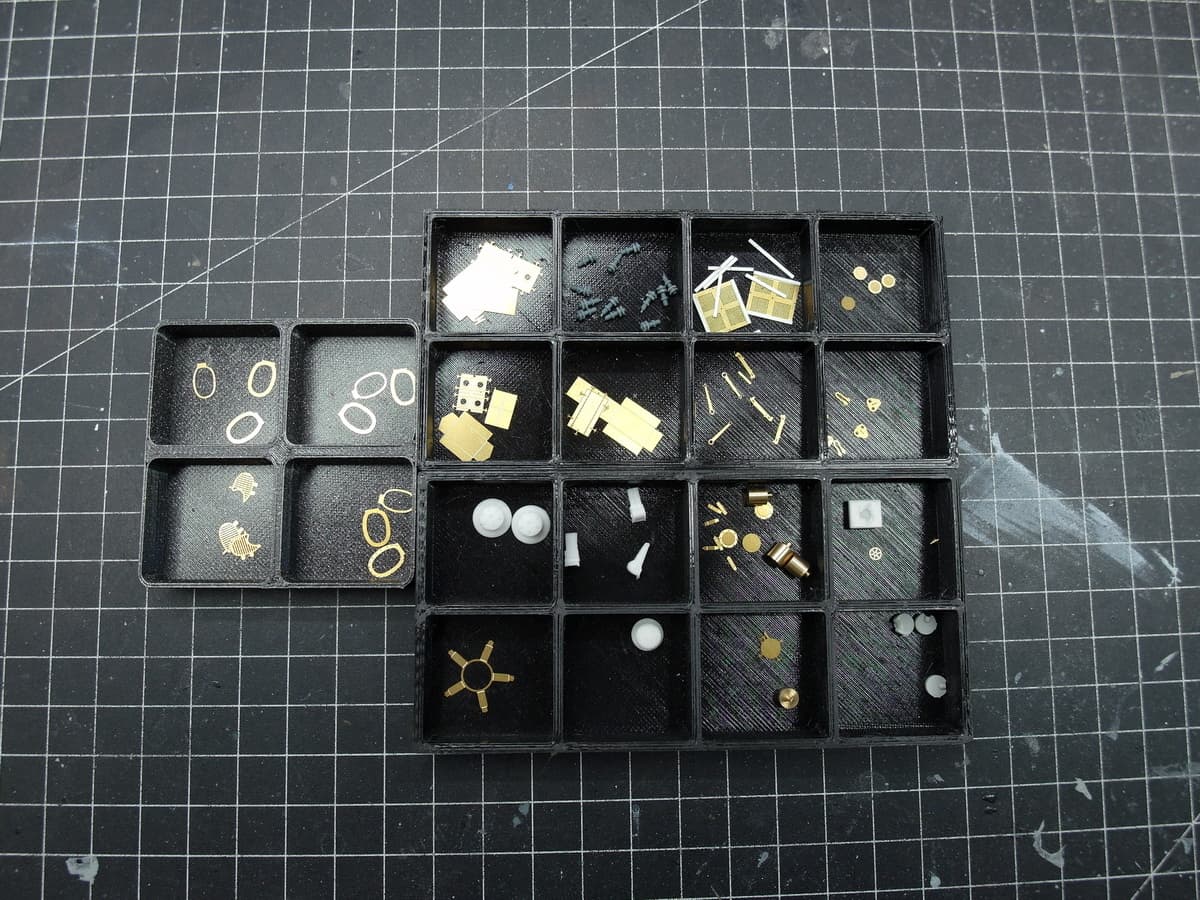
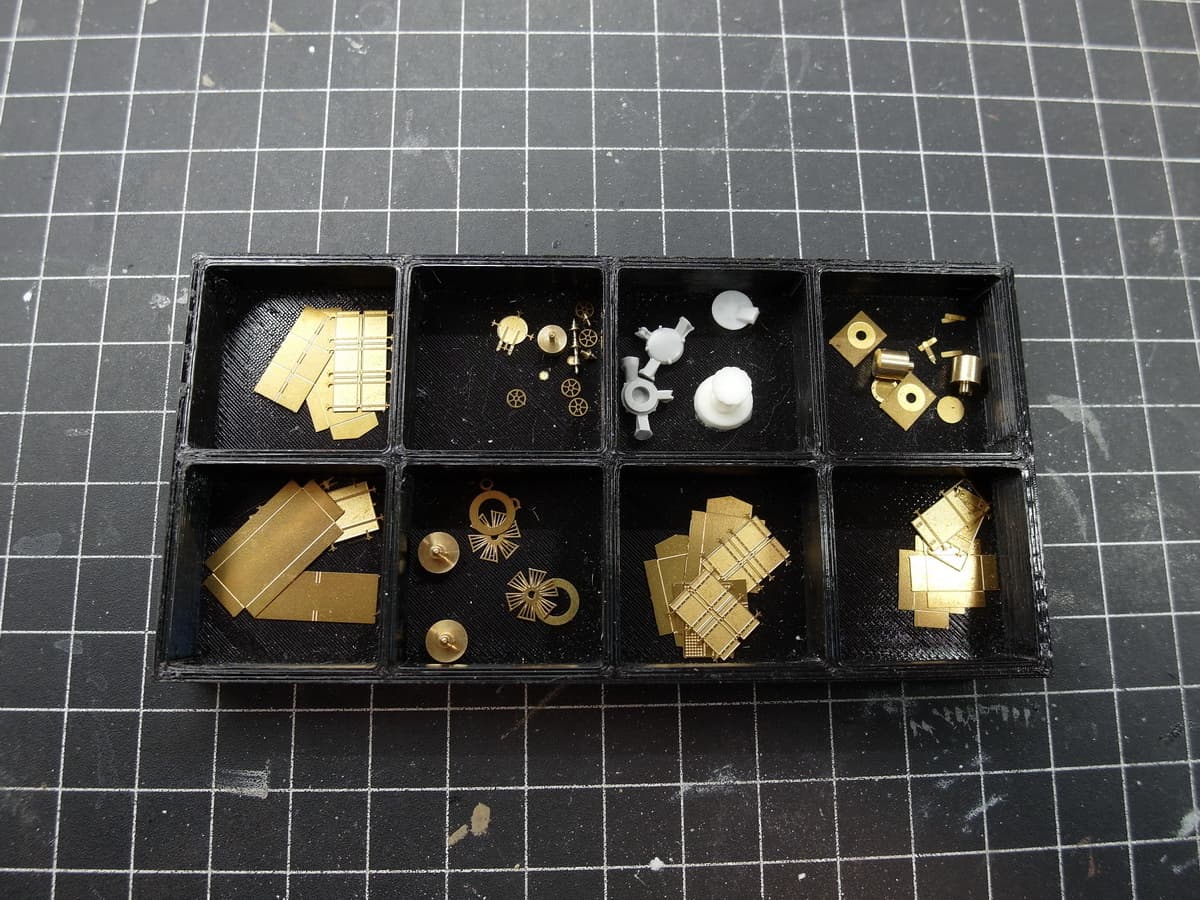
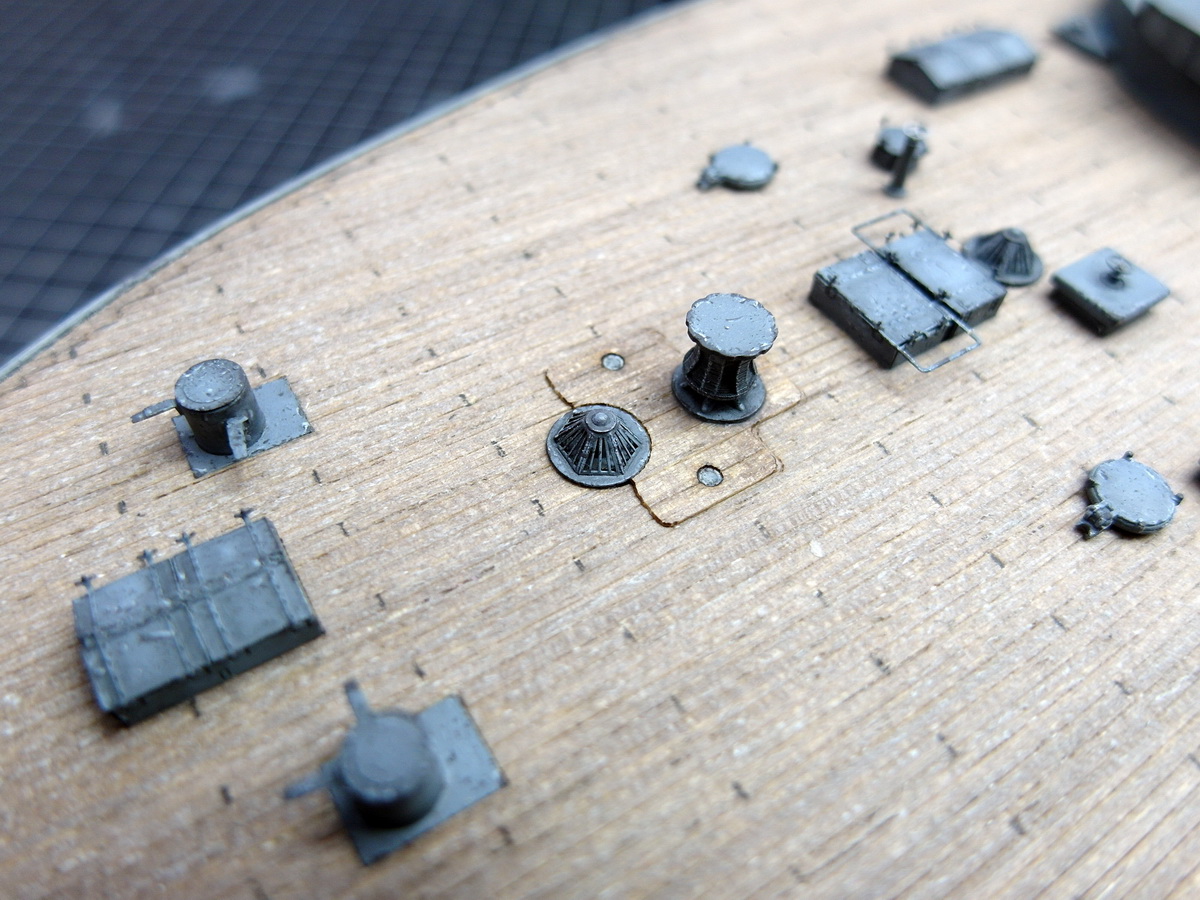
We’re still missing skylights, handwheels, and a winch on the main deck at the stern.
First, another small collection in my printed organizer.
Nothing complicated, so straight to the result.
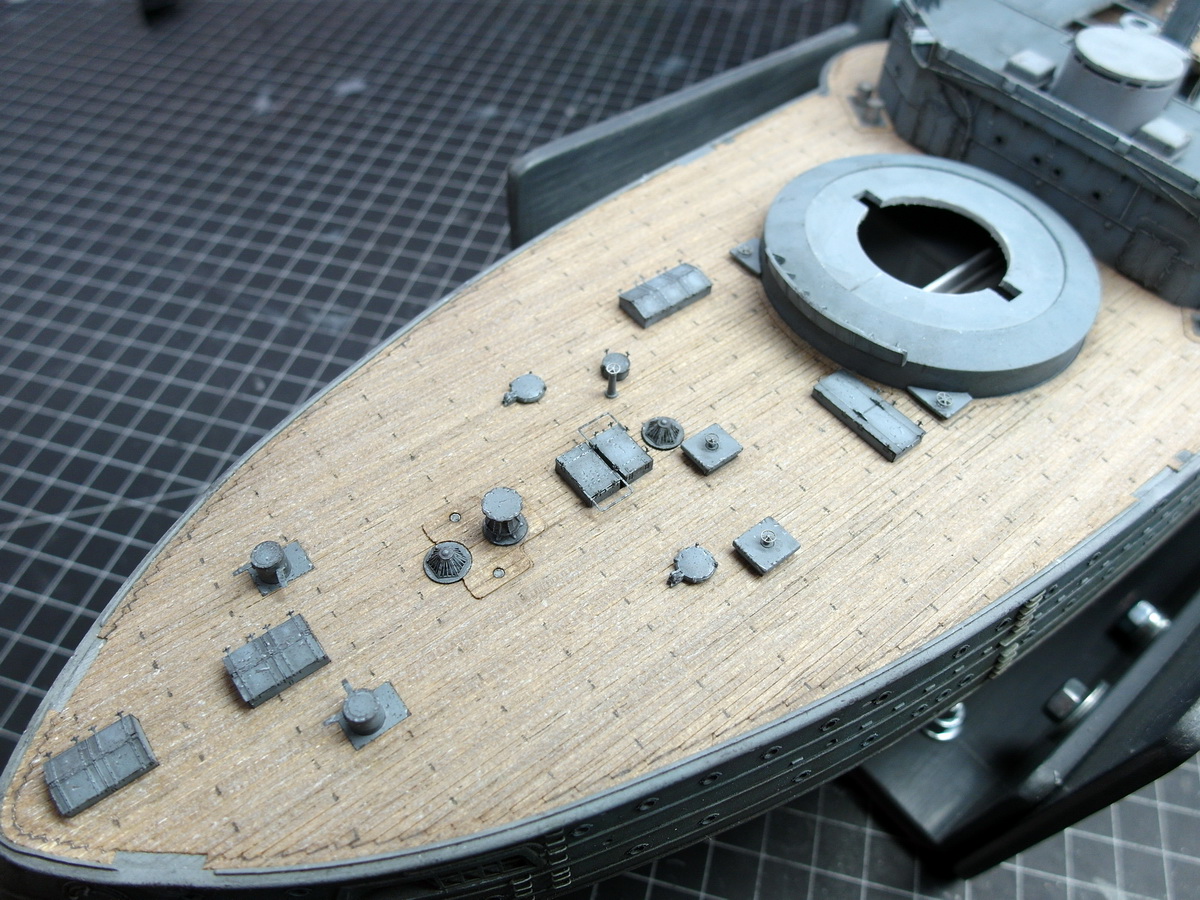
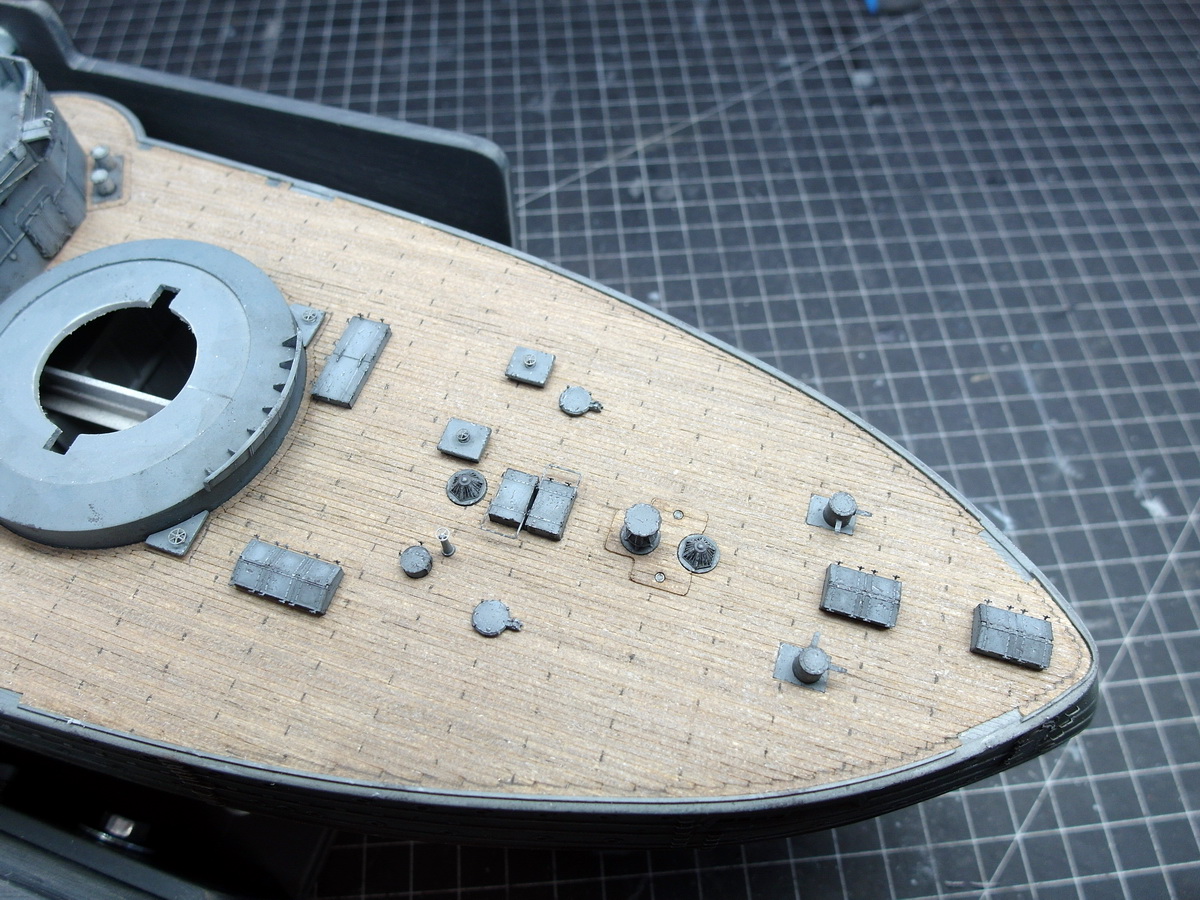
The deck continues to fill, both front and back.
The small stuff on deck is now roughly completed.
I would like to show you this wonderfully detailed skylight a la Pontos again in a close-up.
That’s what sets these kits apart. Molded plastic can’t replicate that.
8 Likes
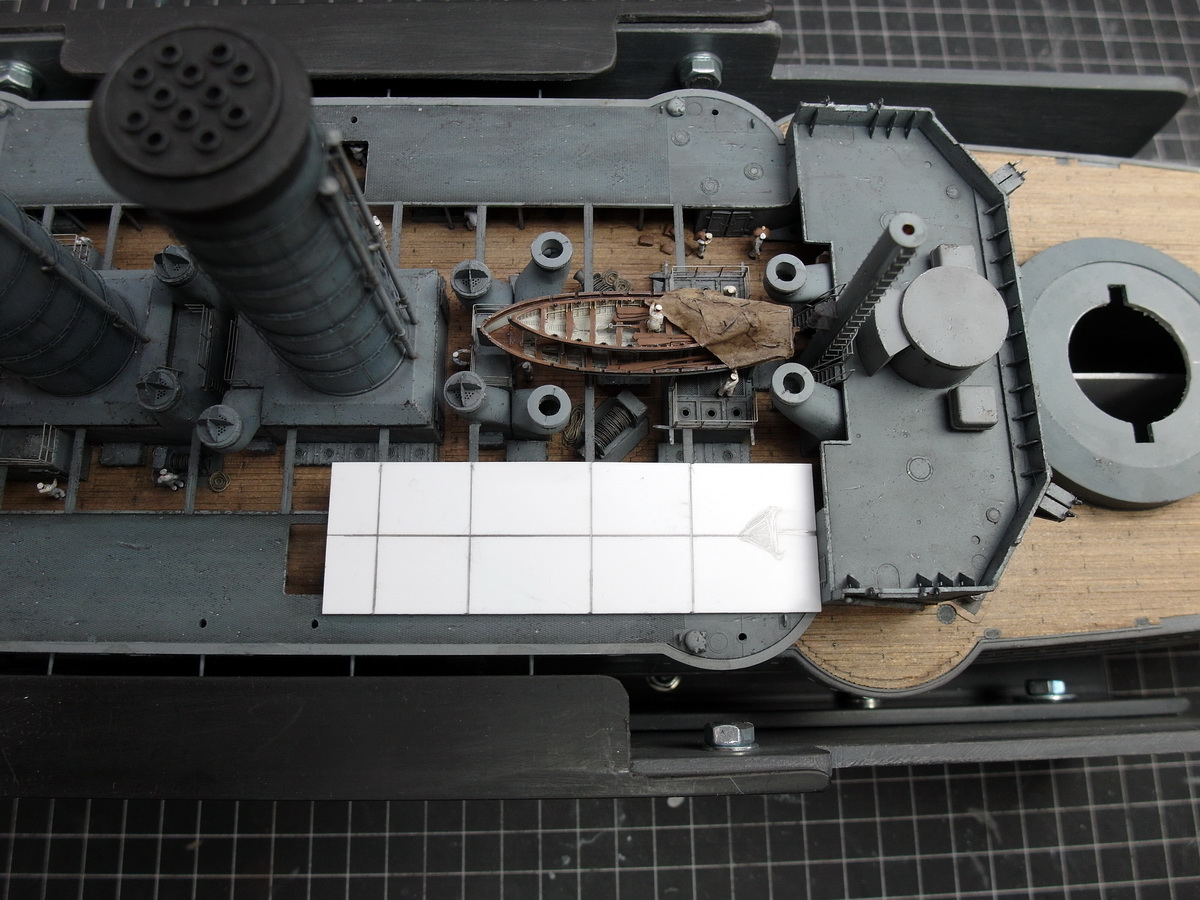
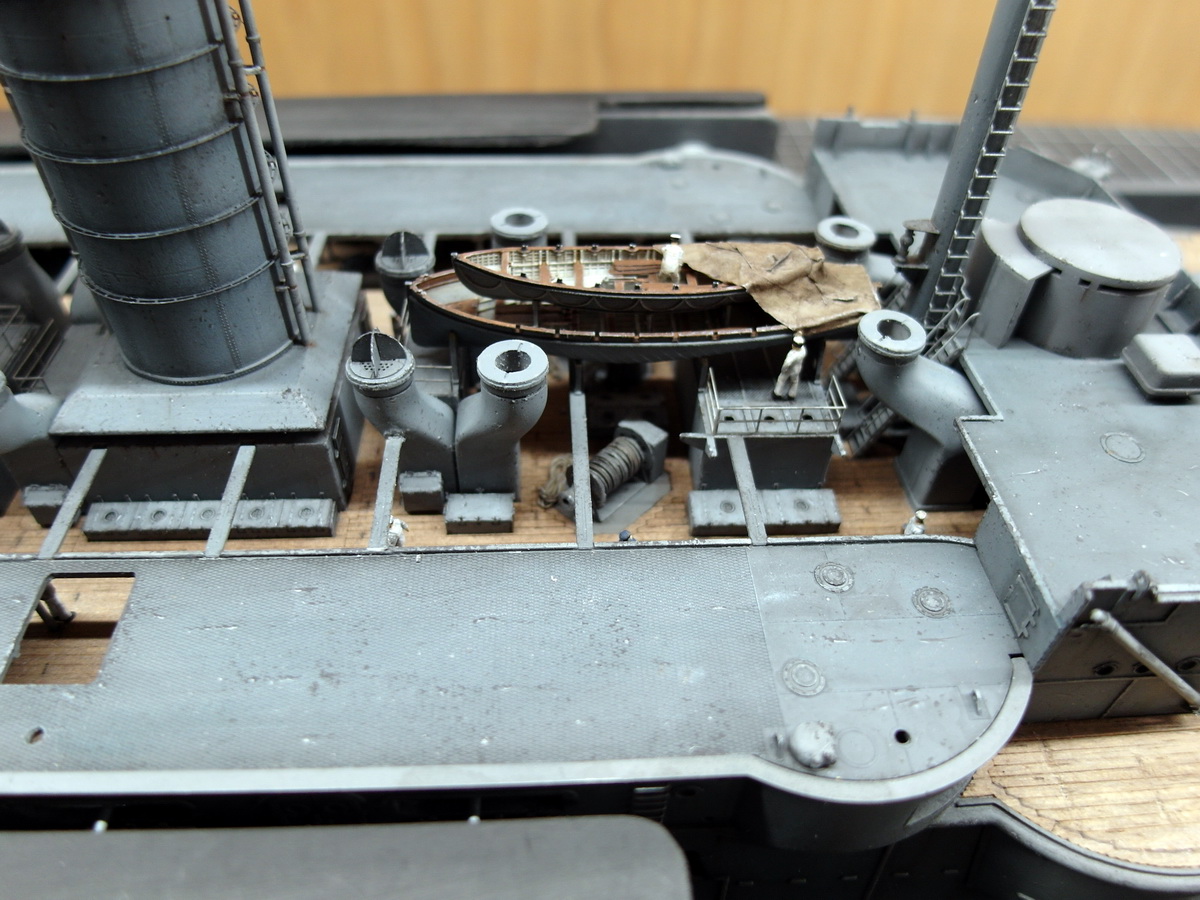
And immediately, I have the next nerve-wracking construction phase ahead of me.
But I was particularly looking forward to this part. I’m starting to incorporate a miniature marvel of 3D printing technology into my model.
The 50-foot steam pinnace. 
But first, I have to get it into the cradles and onto the struts.
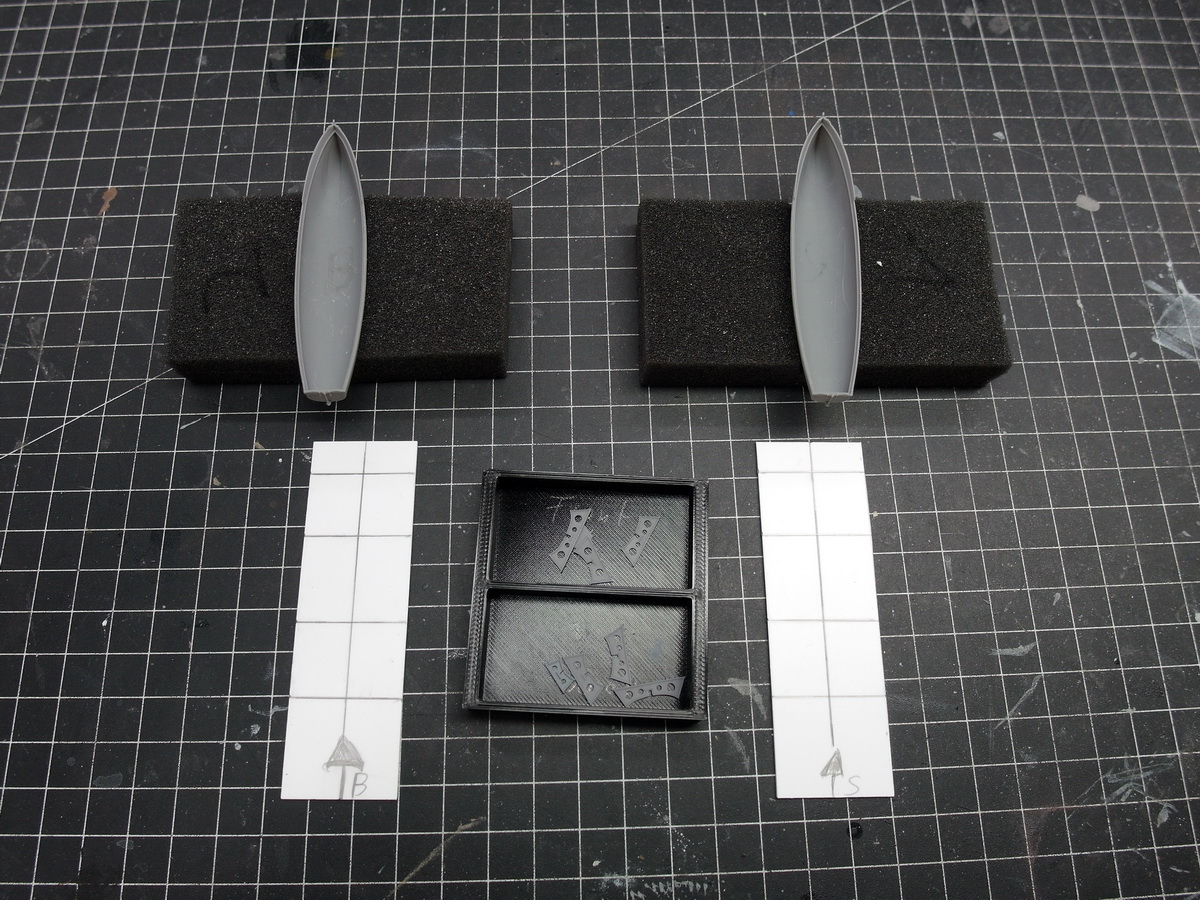
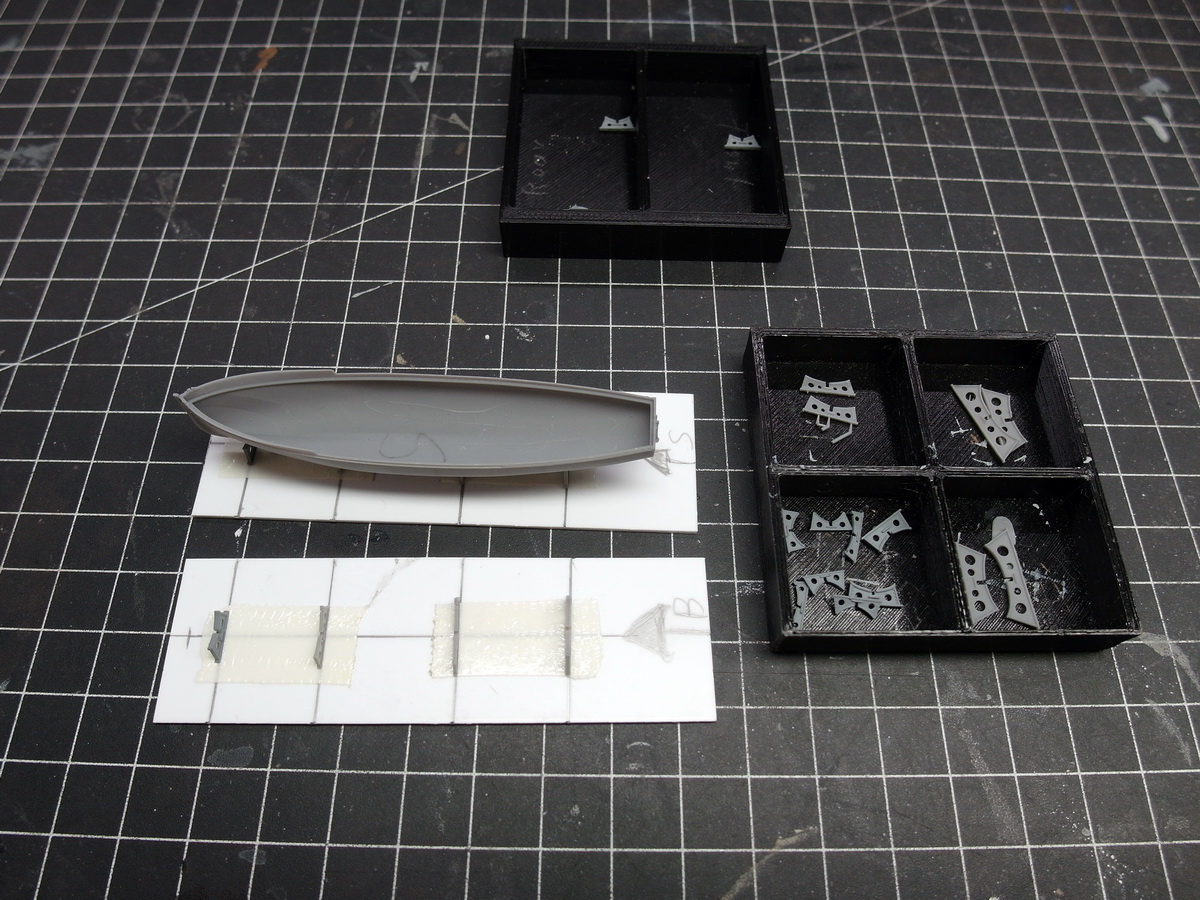
I made a jig for that.
One each for the starboard and port sides. The stripes aren’t exactly evenly spaced on the two sides, and I have to take that into account.
I now glue the cradles onto the gauge and can then align and change them easily without damaging the now quite delicate Mikasa.
For example, the distance to the access to the higher deck is important, as the pinnace’s rudder extends quite far out. And toward the bow, I have to pay attention to the funnel rigging.
I have the same problem with the cradles as I did with the cutter amidships.
They don’t fit where they were originally printed. And besides, only three were planned. But the pinnace rests on four struts, so I need one more cradle. It’s nice that four boats will be hanging from the davits at the stern later, so I can repurpose the cradles.
Then I took out the profiles and adjusted them. It’s better.
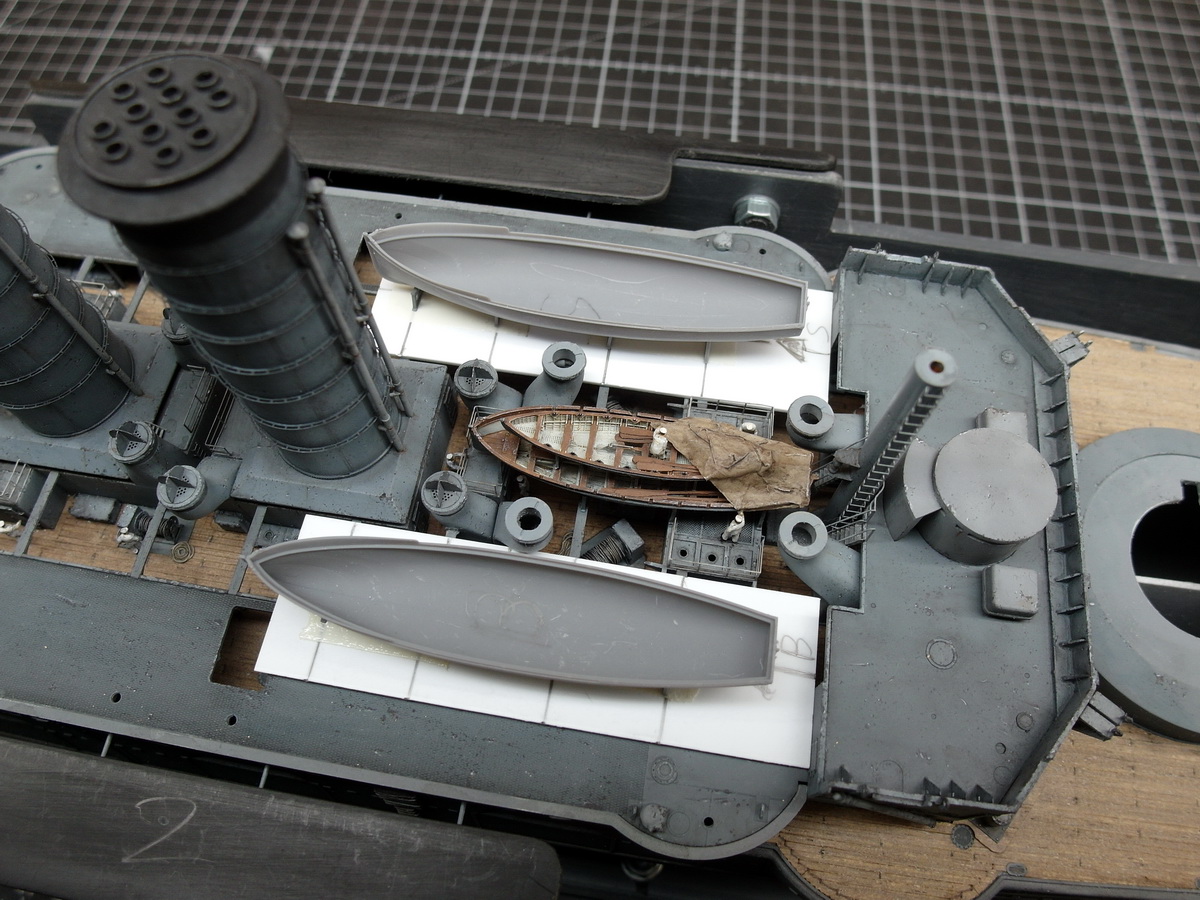
And so the first pinnace could be placed in its cradles and placed on the deck for testing. You can see a faulty print in the hull. This has already been claimed, and I’m getting a new one.
In front of the boat, you can see a thin round rod. This is supposed to simulate the funnel rigging. You really have to think of everything. At least you should try to, so you don’t end up on your backside in the next step. 
11 Likes
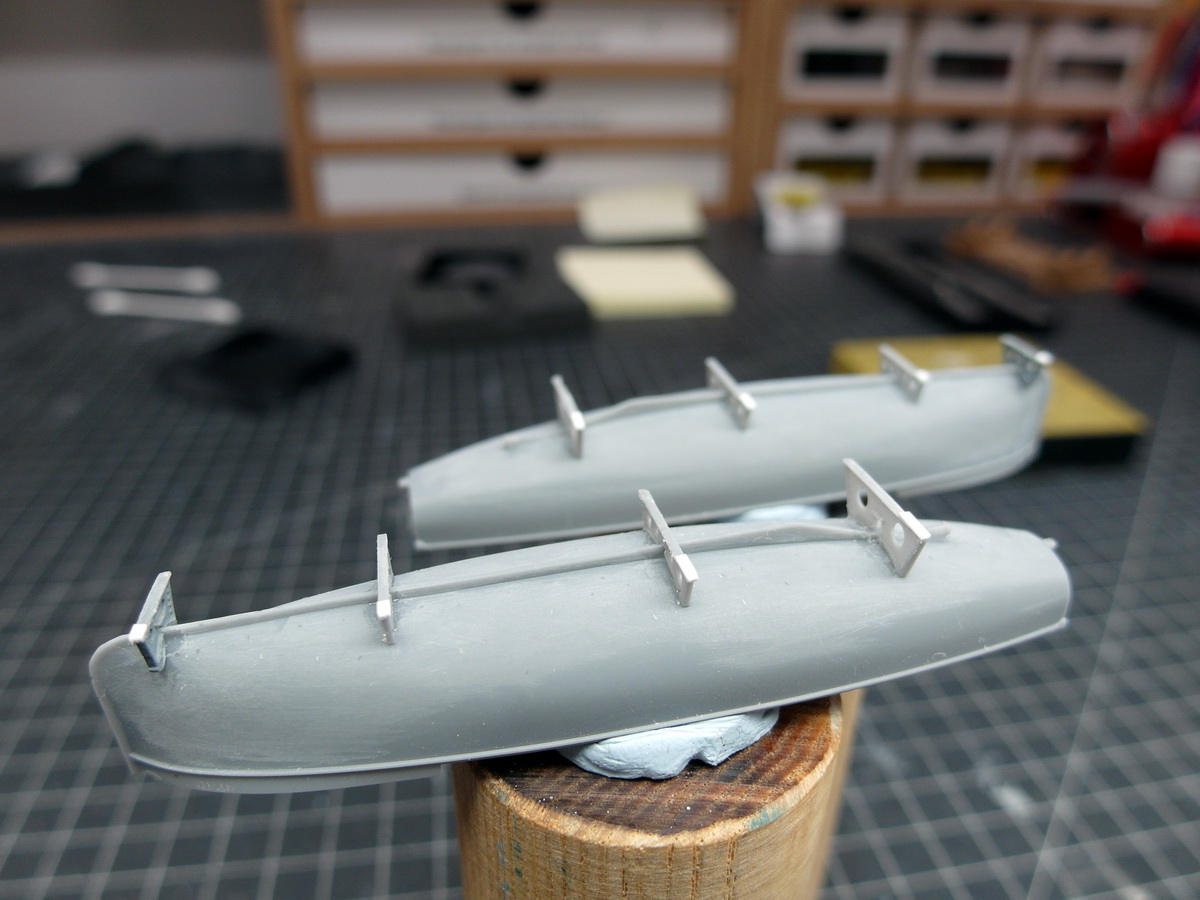
I didn’t do much last week, as it was my wedding anniversary and I was traveling with my wife.
But the pinnaces have come a little further.
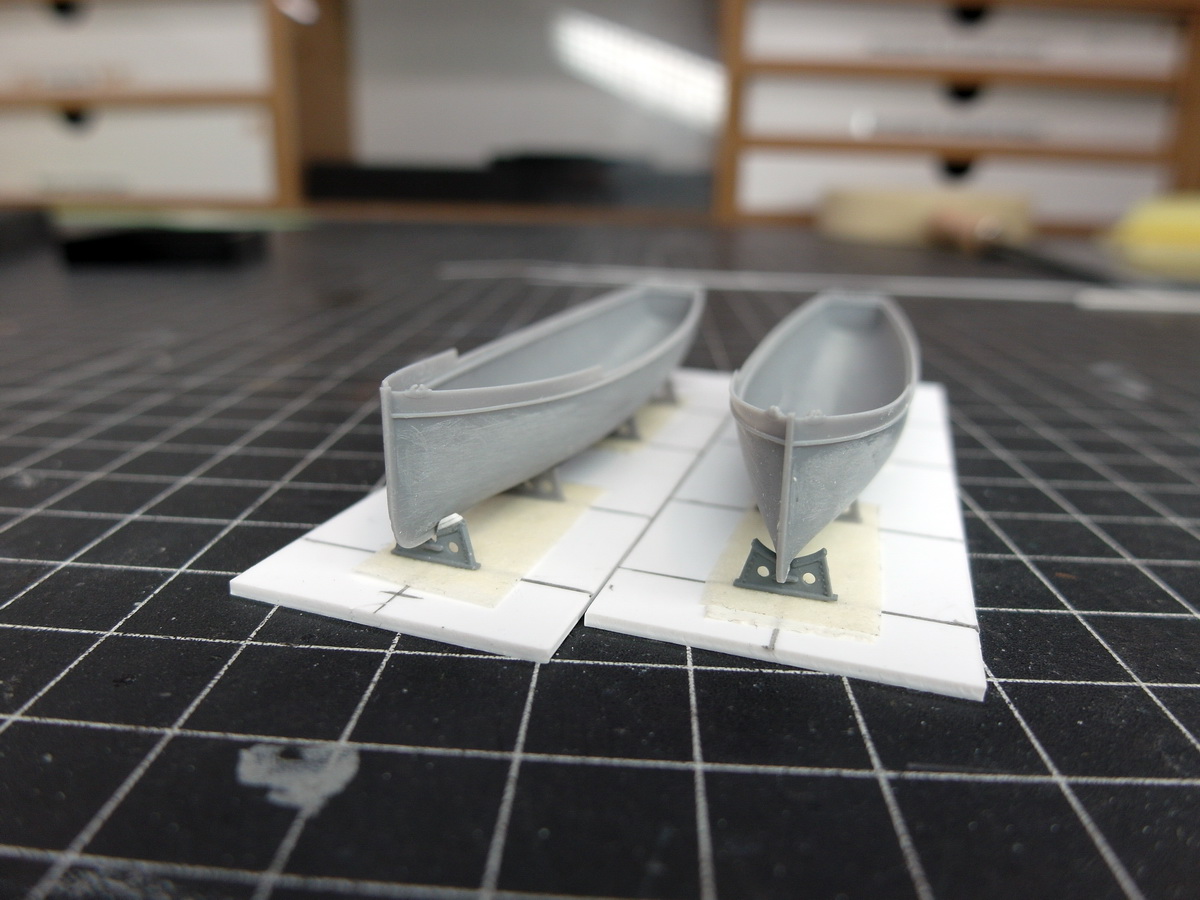
First, we had to negotiate this small edge on the upper deck.
I solved this by padding the front part of the cradles with a little styrene.
Fits quite well.
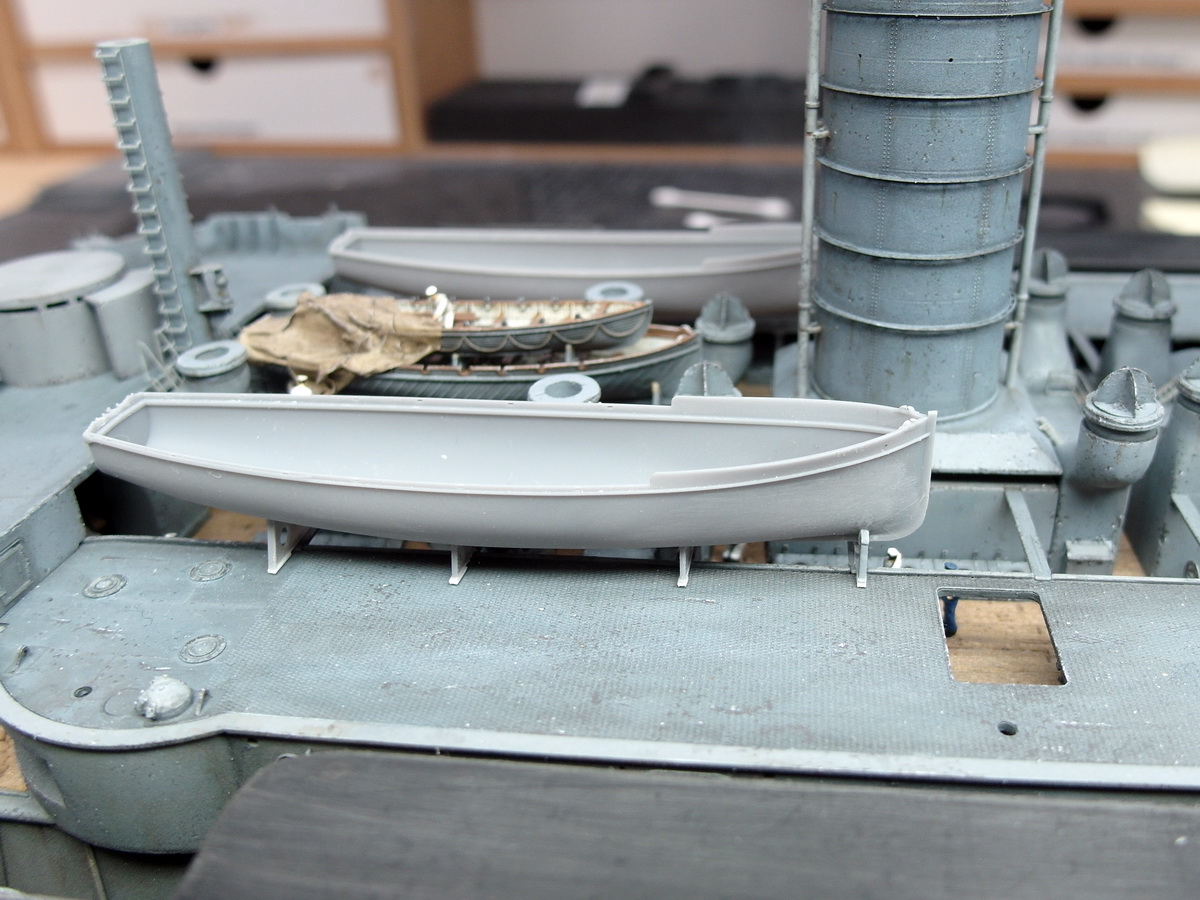
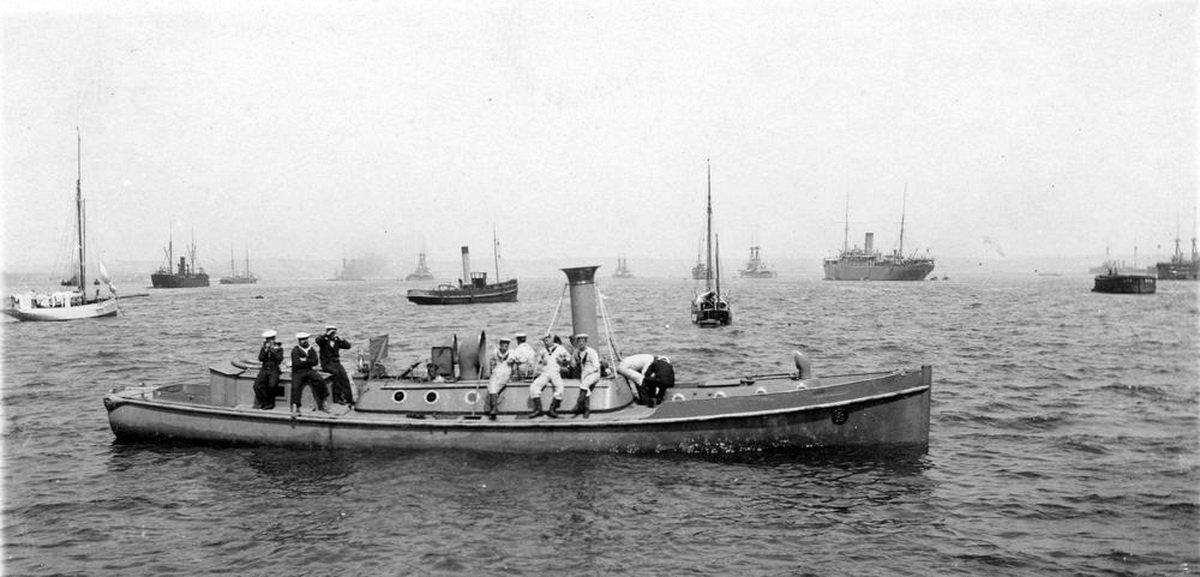
Afterwards I did a little more research on steam pinnaces and found this pretty good site with lots of pictures.
Steam-Pinnacles,-Pickets-and-Tenders
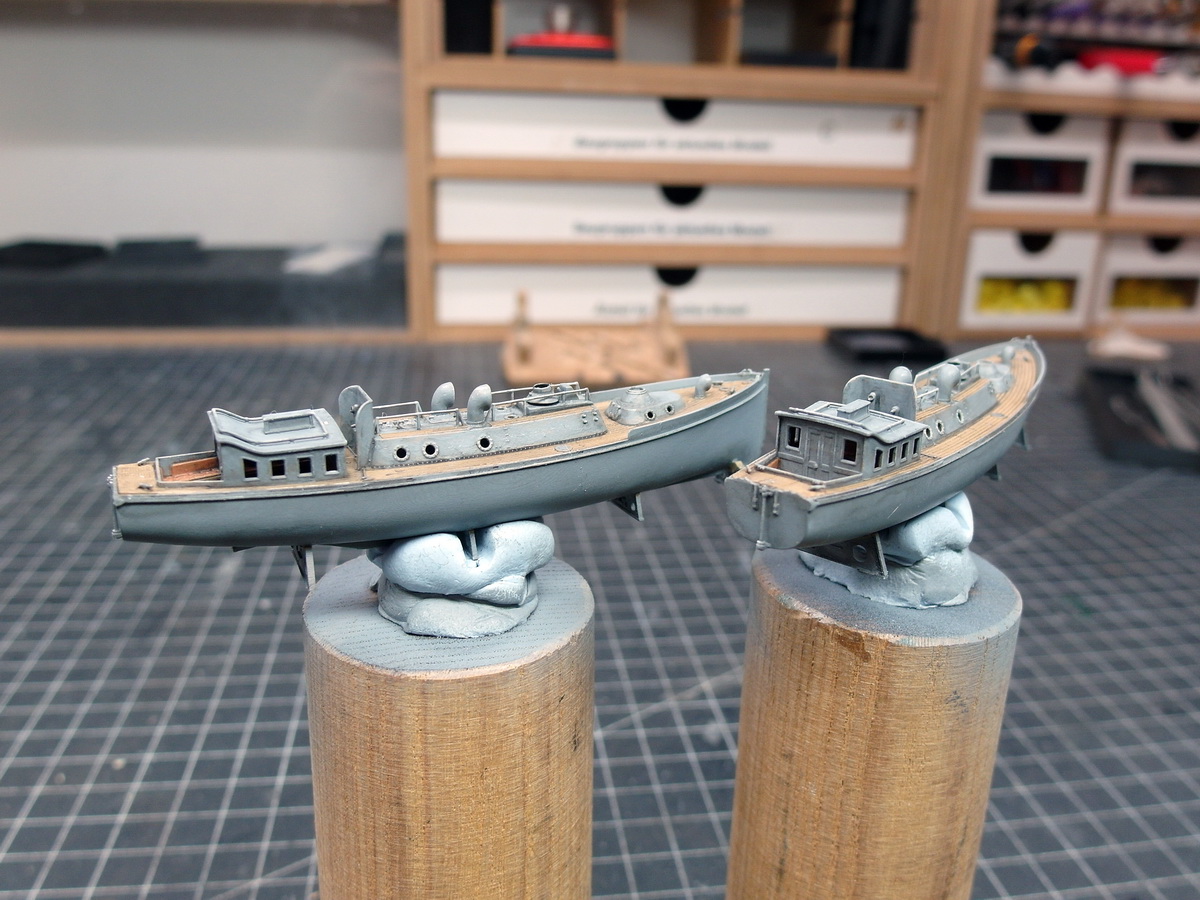
At first I wasn’t quite sure about the color scheme of the little boats, but then I found this rather simple model on the site.
So I’ll be able to encase them in the simple gray war dress, which is my favorite.
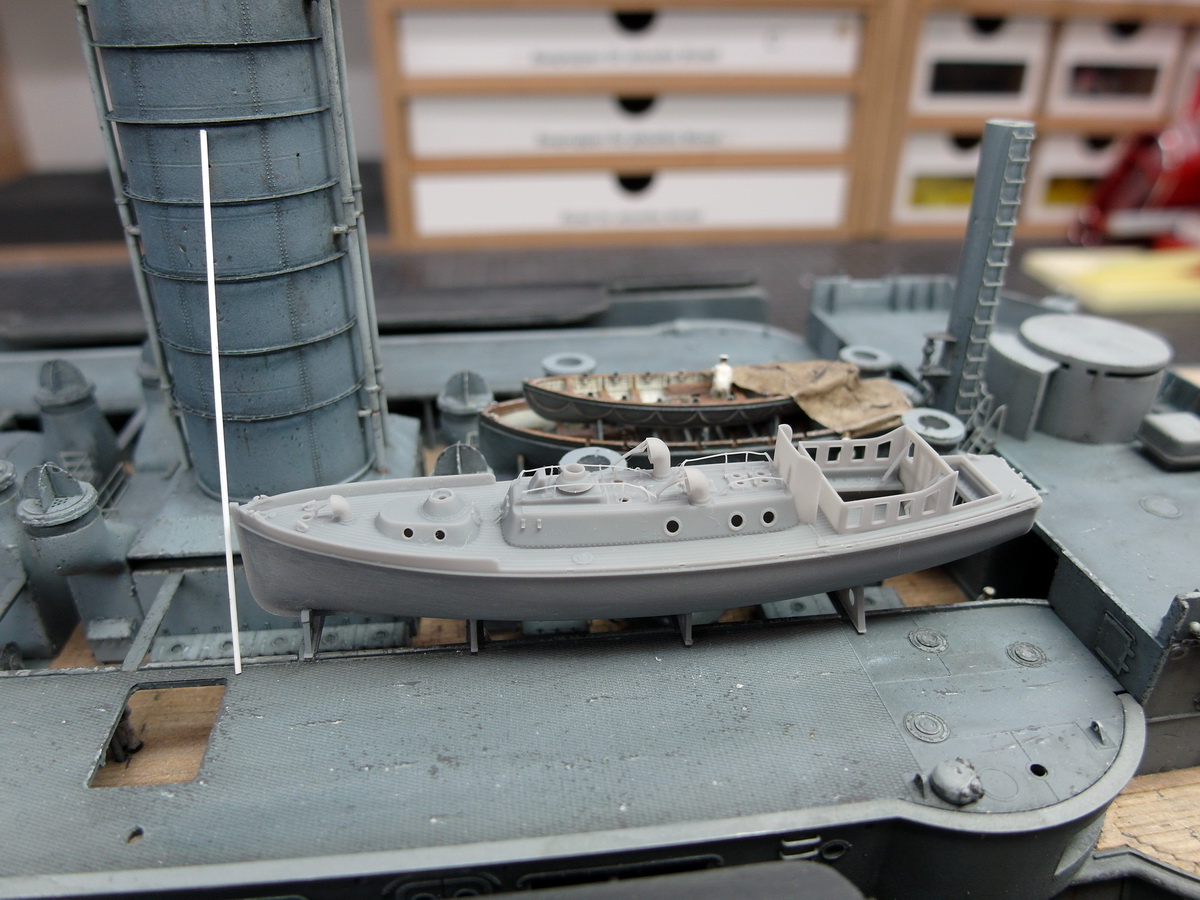
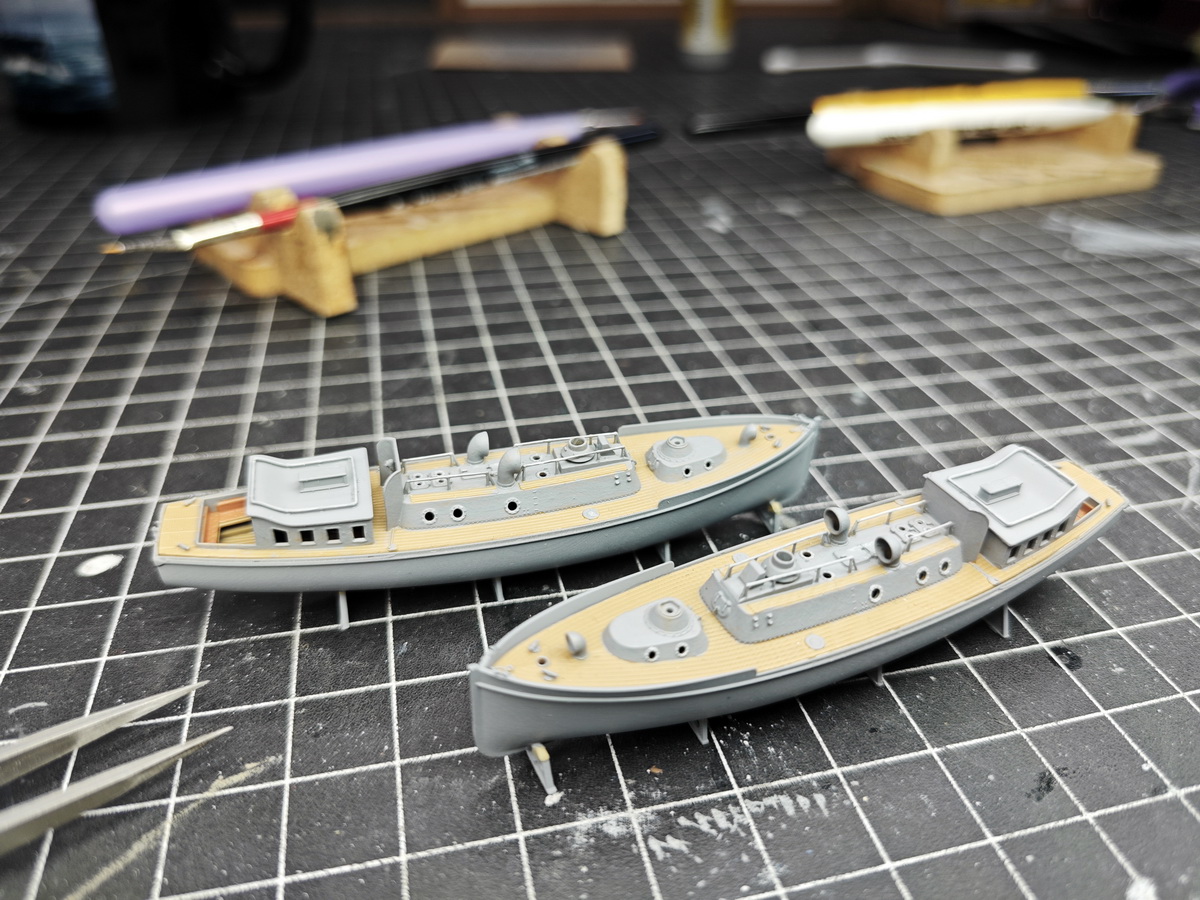
Then I’ll apply the base color. A real test of patience with these highly detailed little gems.
Then the obligatory aging.
First washing and dry painting.
Man, these boats look great.
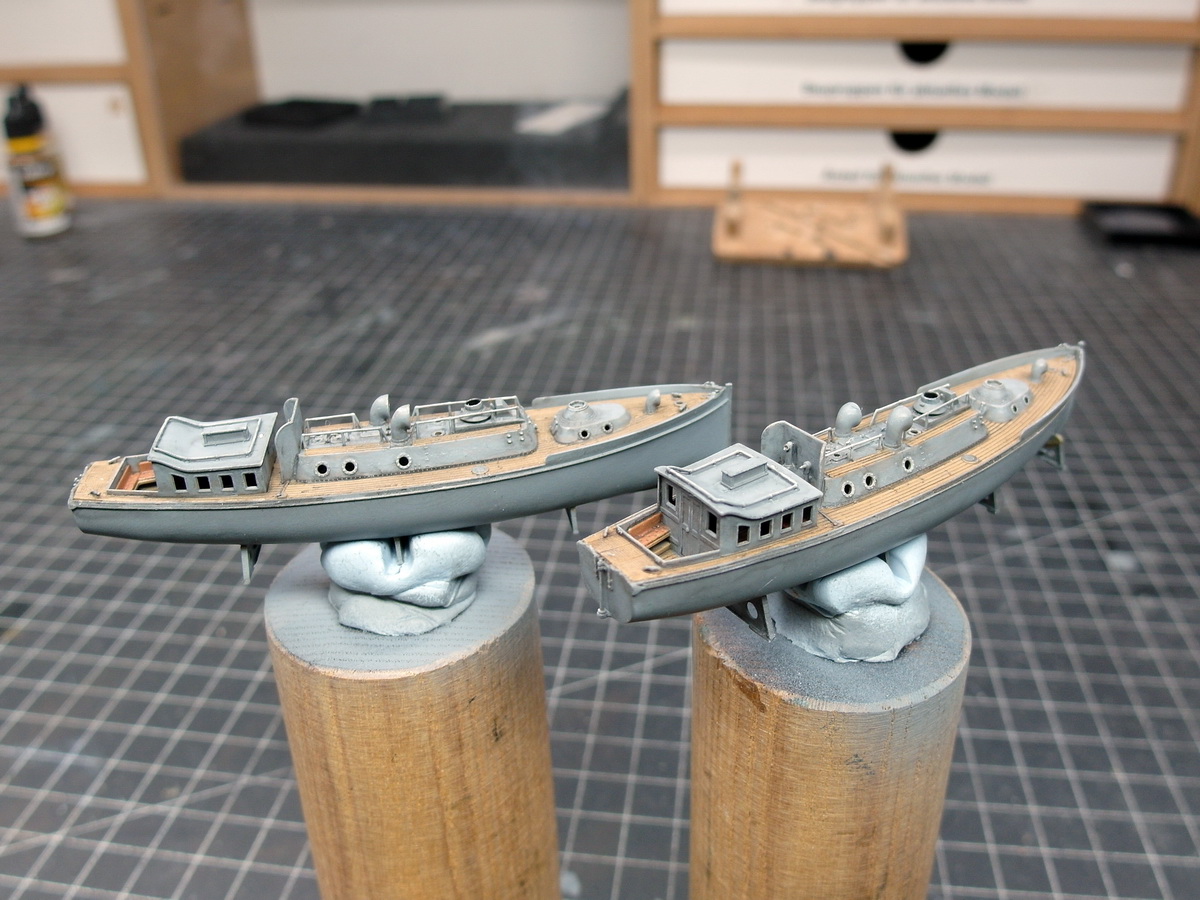
Finally, the small pinnaces were put on the deck again for testing.
16 Likes
They look great and perfectly weathered.
1 Like