Just beautiful work all around- I am really enjoying this thread. Thanks for sharing.
RT
1 Like
Jörg ,those little pinnaces are beautiful little models in their own right. Thank you for these posts - I continue to enjoy this awesome build!
1 Like
Happy anniversary Jörg! ![]()
2 Likes
Thank you all so much.
And thank you for the kind congratulations, Russelle. ![]()
2 Likes
Ahoy, landlubbers.
After a short creative break, I’d like to return with a mini update.
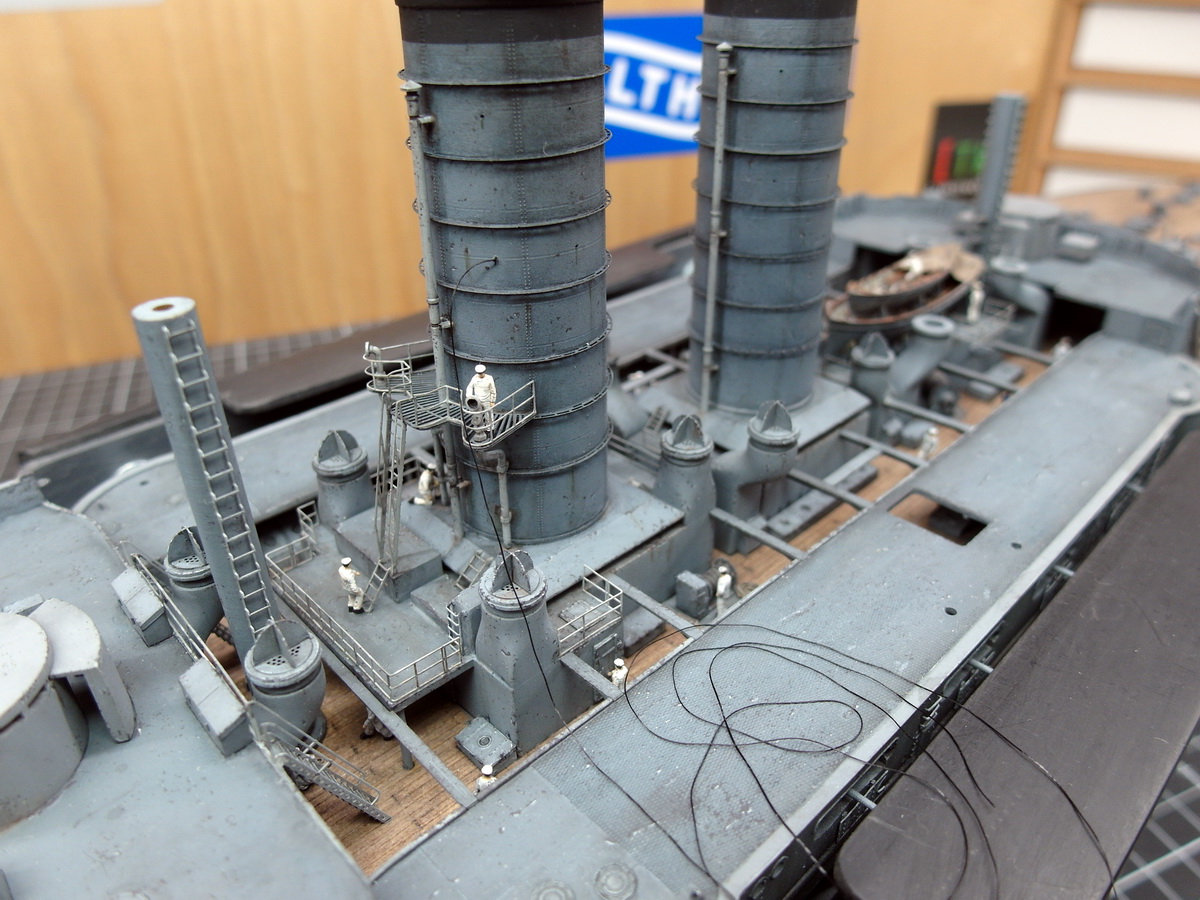
I’ve pushed the pinnaces back again because I first have to take care of the funnel’s shrouds.
I’ve given this a few thoughts. Rope tensioners definitely need to be installed; anything else would be illogical.
How can I best do this without too much effort?
Here’s my solution:
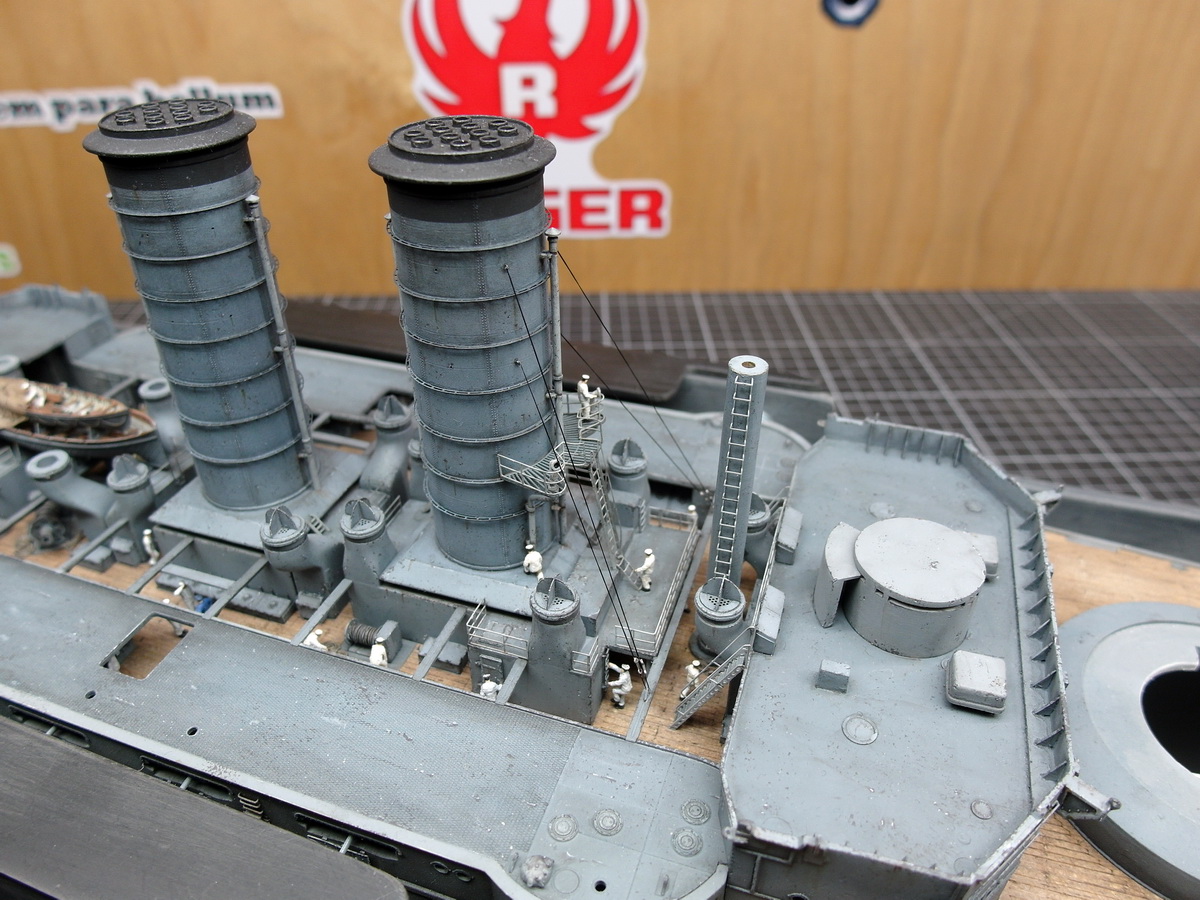
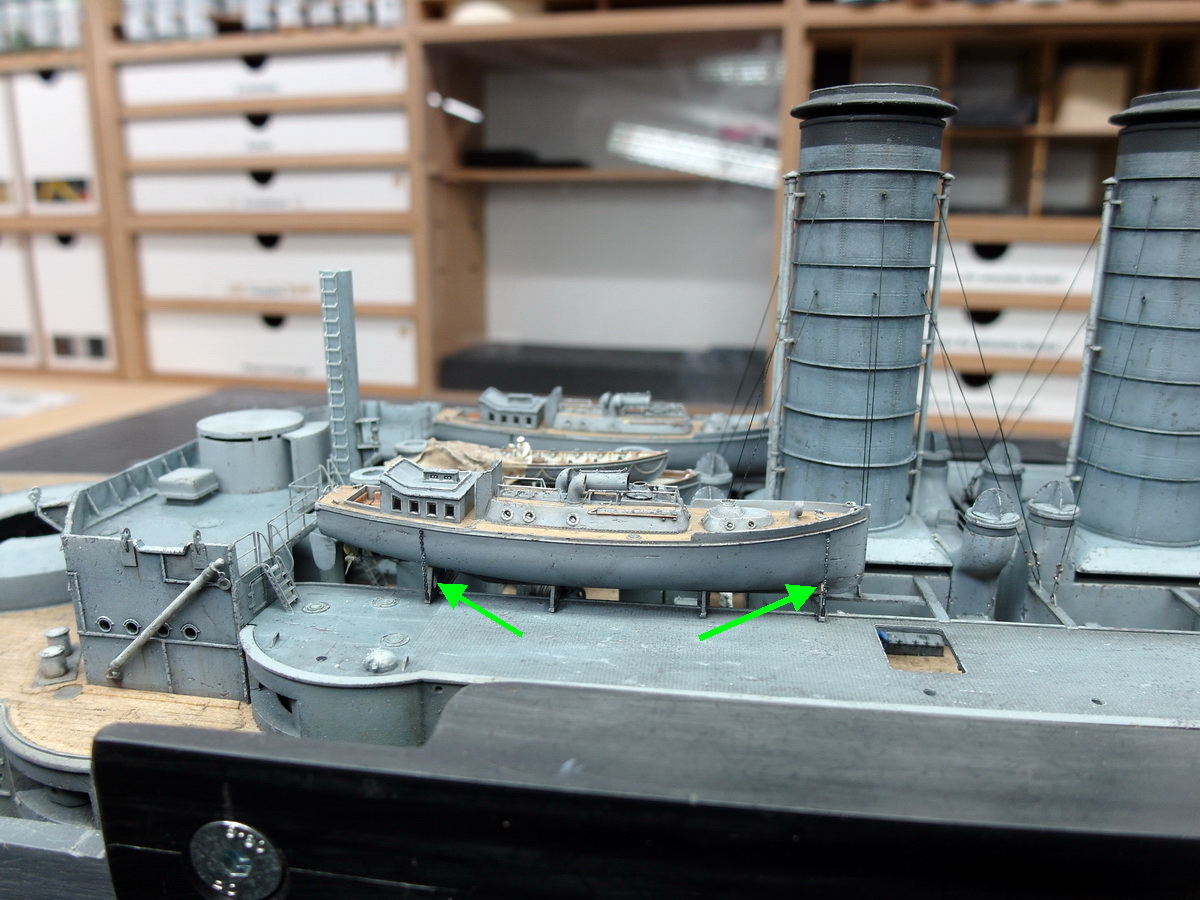
First, I cut stanchions into small pieces. The green arrow points to pre-cut stanchions in a scale of 1:200. I want to use them as rope tensioners. The yellow arrow shows some in a scale of 1:350. They’ll serve as eyelets on the funnel.

First, the rigging twine was attached to the eyelet and glued into the lower hole of the funnel. It’s working very well so far.
It’s important for me to always use enough twine. This simplifies the whole knotting and threading process. Being cheap isn’t cool here.
Then I thread the yarn through the two holes in the cut-off railing support.
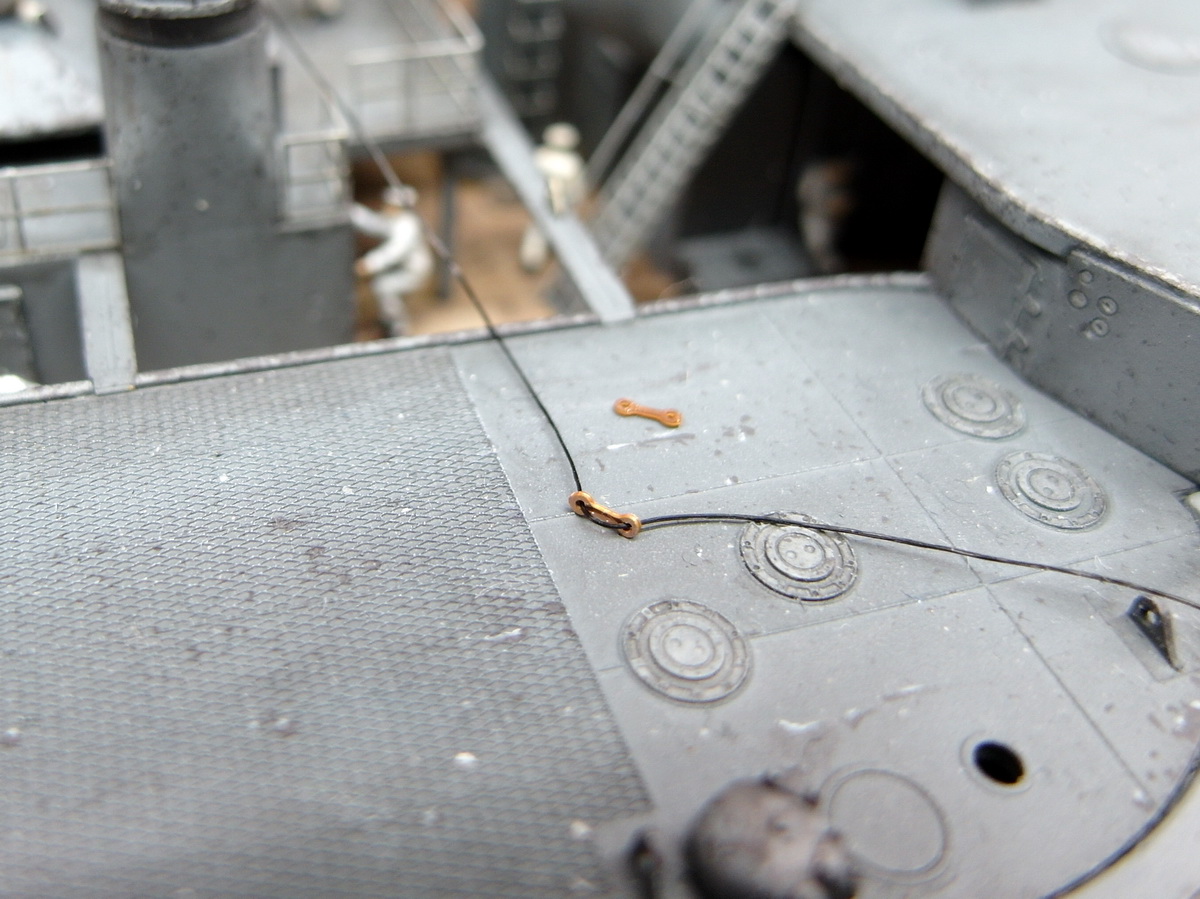
The yarn is passed through the deck eye and the second rope tensioner is put into position.
The first piece of rigging on the funnel is finished. Painted with aluminum paint, the thread running along the outside of the rope tensioner is almost invisible.
I’m happy with that and can now focus on the next pardunes.
13 Likes
I could never even attempt to do such a fine ship model but I really am enjoying watching how you bring this to life little by little.
Keith
5 Likes
Very nice, Keith.
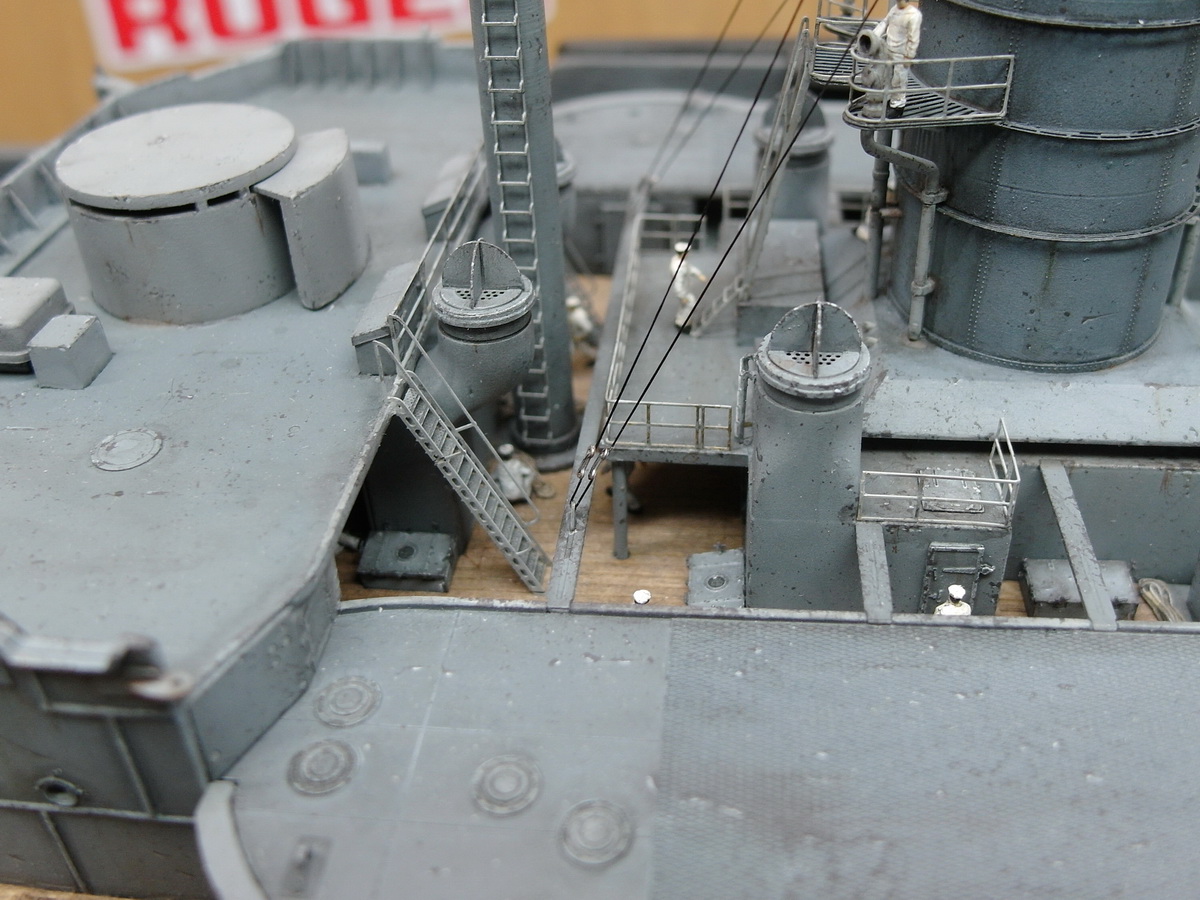
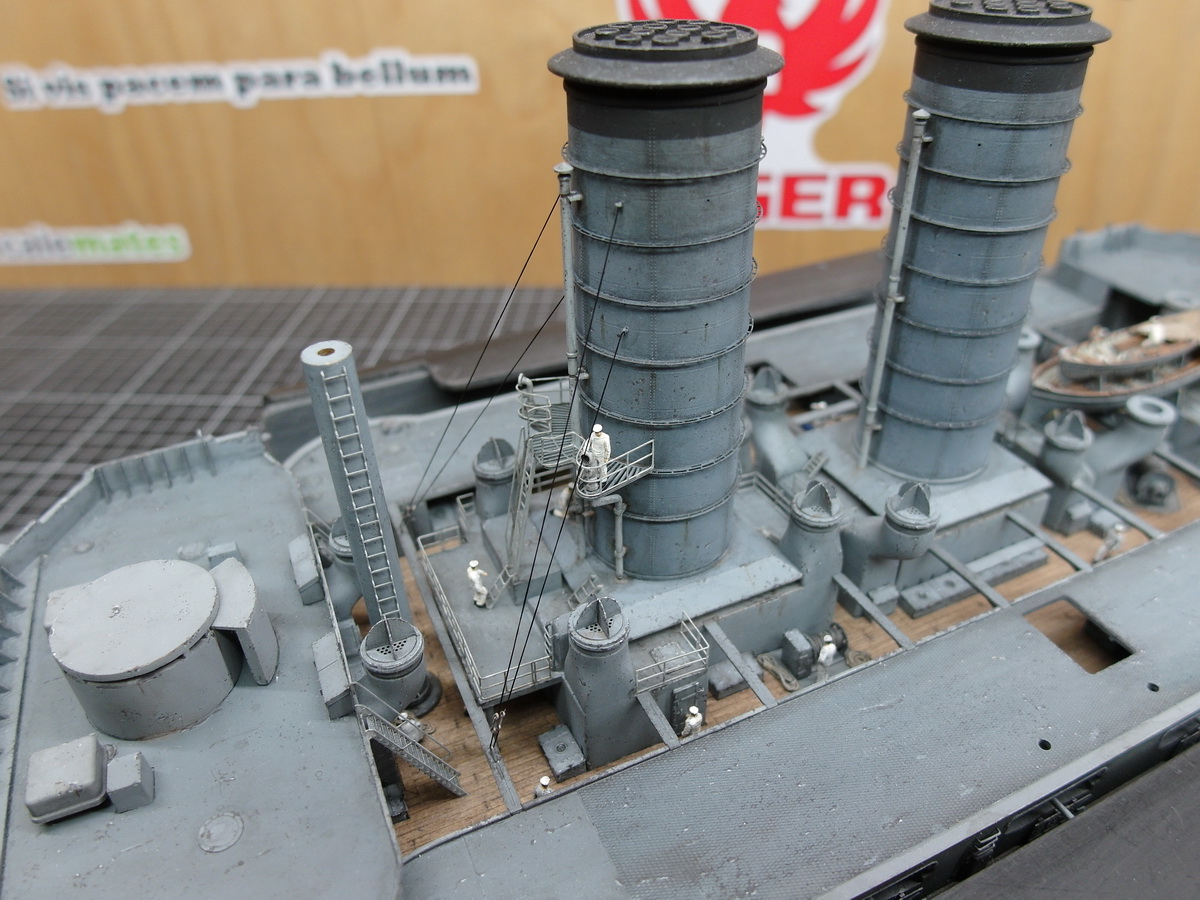
Then let me show you the next little piece of the puzzle.
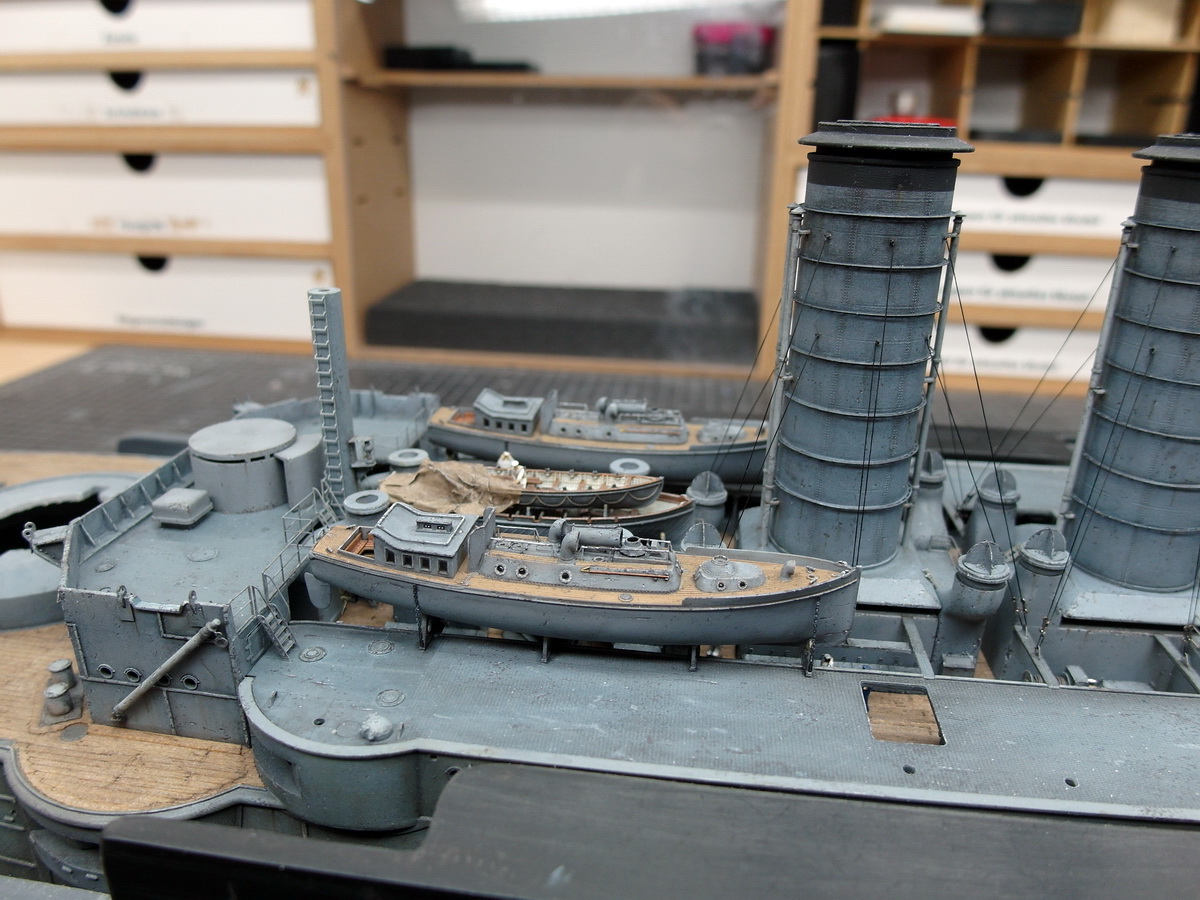
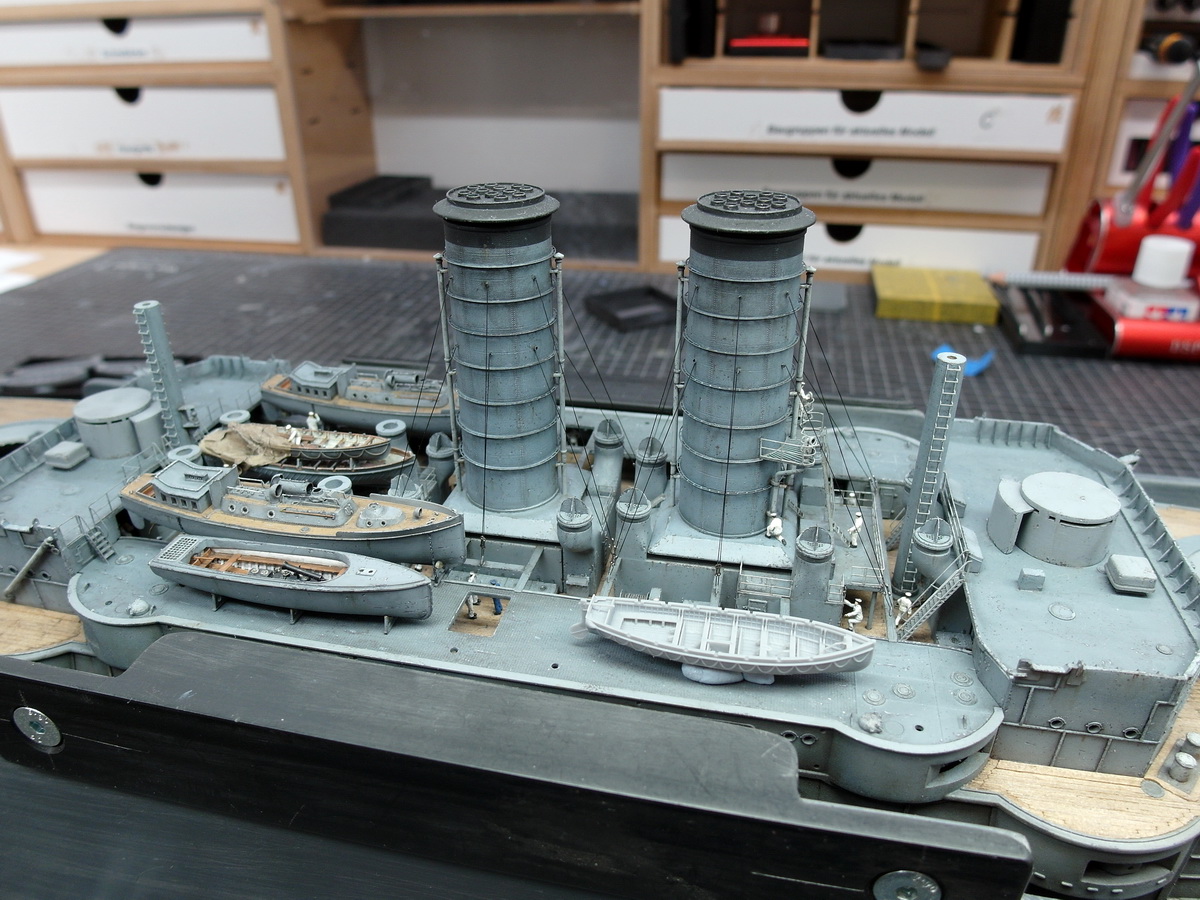
Today just two pictures of the finished guyed funnels.
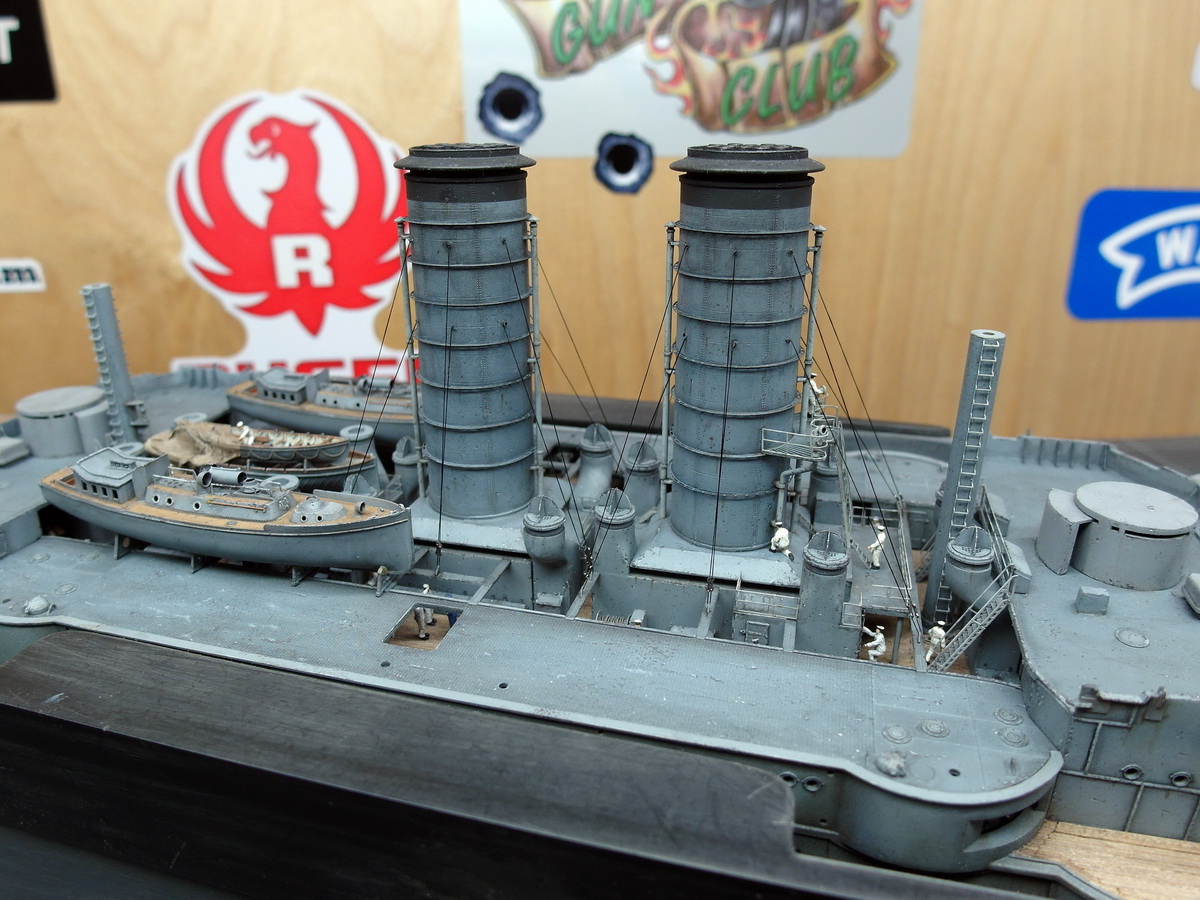
This completes the first piece of rigging work.

Now I can devote myself to the pinnaces again.
12 Likes
It keeps getting better ! Lovely work on those funnel guys.
3 Likes
Many thanks again, Johnny.
This weekend, I had planned to finally finish the pinnaces.
The funnels had already been laid down and installed, but there were still a few small items missing that I wanted to add shortly before the end to avoid tearing them down again.
Two more boat hooks scratched on each pinnace and the portholes glazed.
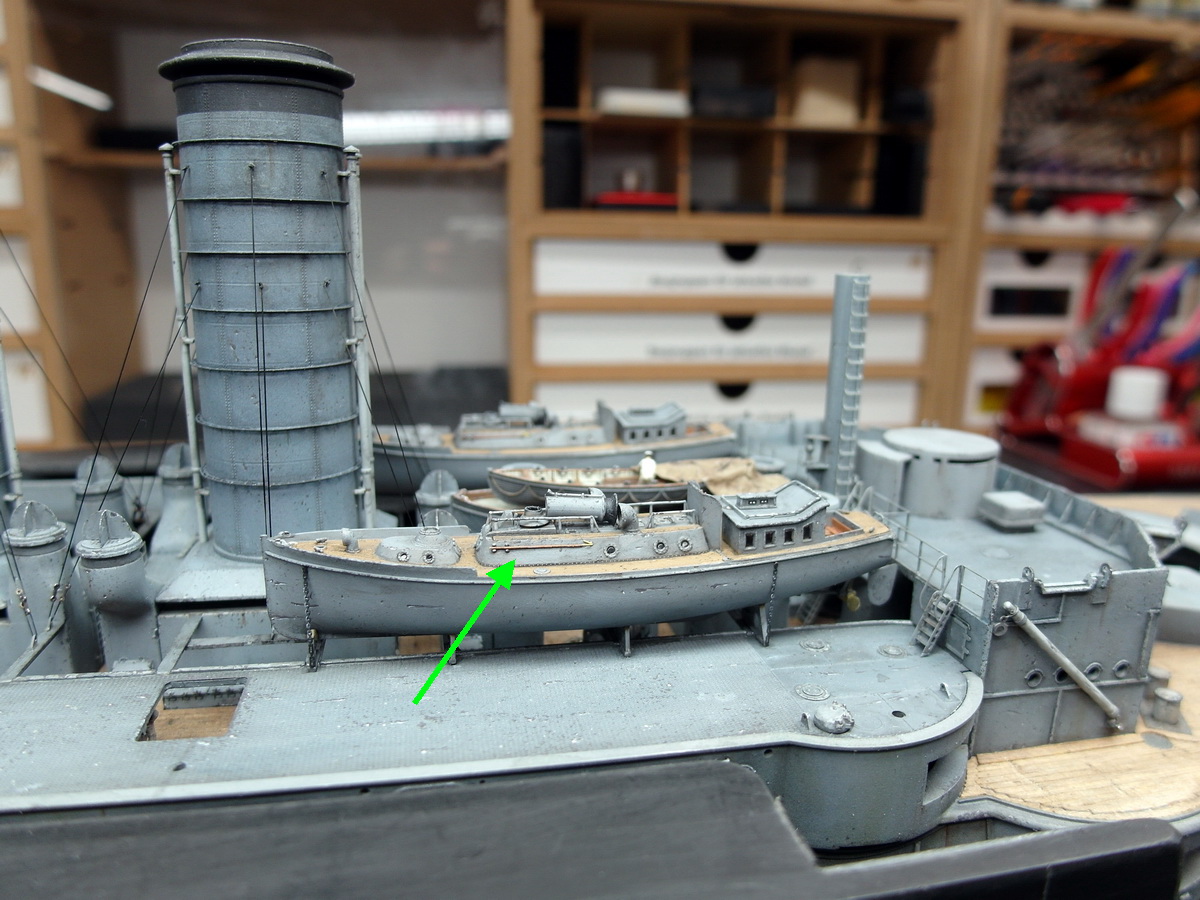
A chain hoist is installed to secure the boats.
Railings and companionways mounted on the foredeck.
I need to refinish the deck where the pinnaces rest. During all the adjustments, I scratched the paint surface and had to patch it up. I’ll have to go back to that.
Slowly life comes into the place.
A new sailor has also started his service.
He checks the tension on the pinnace’s chain hoist.

14 Likes
Let’s move on to the next yawls: the small steam launch.
I haven’t found a 3D printer for this one, so I guess I’ll have to do it myself.
Originally made from the box, the boat really doesn’t look anything like it. First, I removed the rough outline of the engine and the bulky center bar of the upper section.

Then I inserted a grating floor. The Bismarck’s former bridge wing was trimmed and fitted. Cheers to the etched parts grab bag. And I removed the suggested grating at the rear.
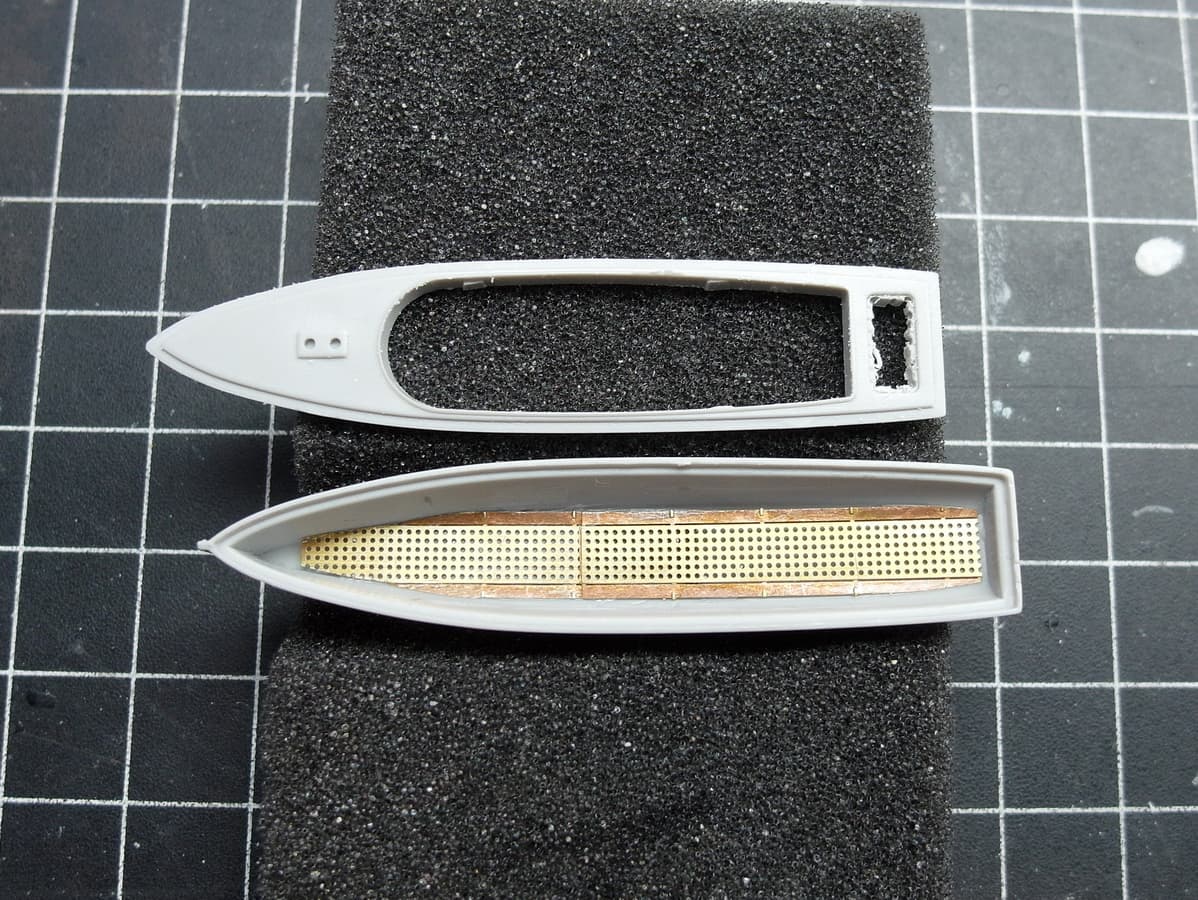
Now I made a bench seat and glued in the ribs from profiles. I attached an etched grille from the KA set to the rear.

We still need a boiler. It’s also only rudimentarily represented in the original, so there’s room for more. A small profile should represent the engine and its cylinders. A few flanges on top—you can never have enough.
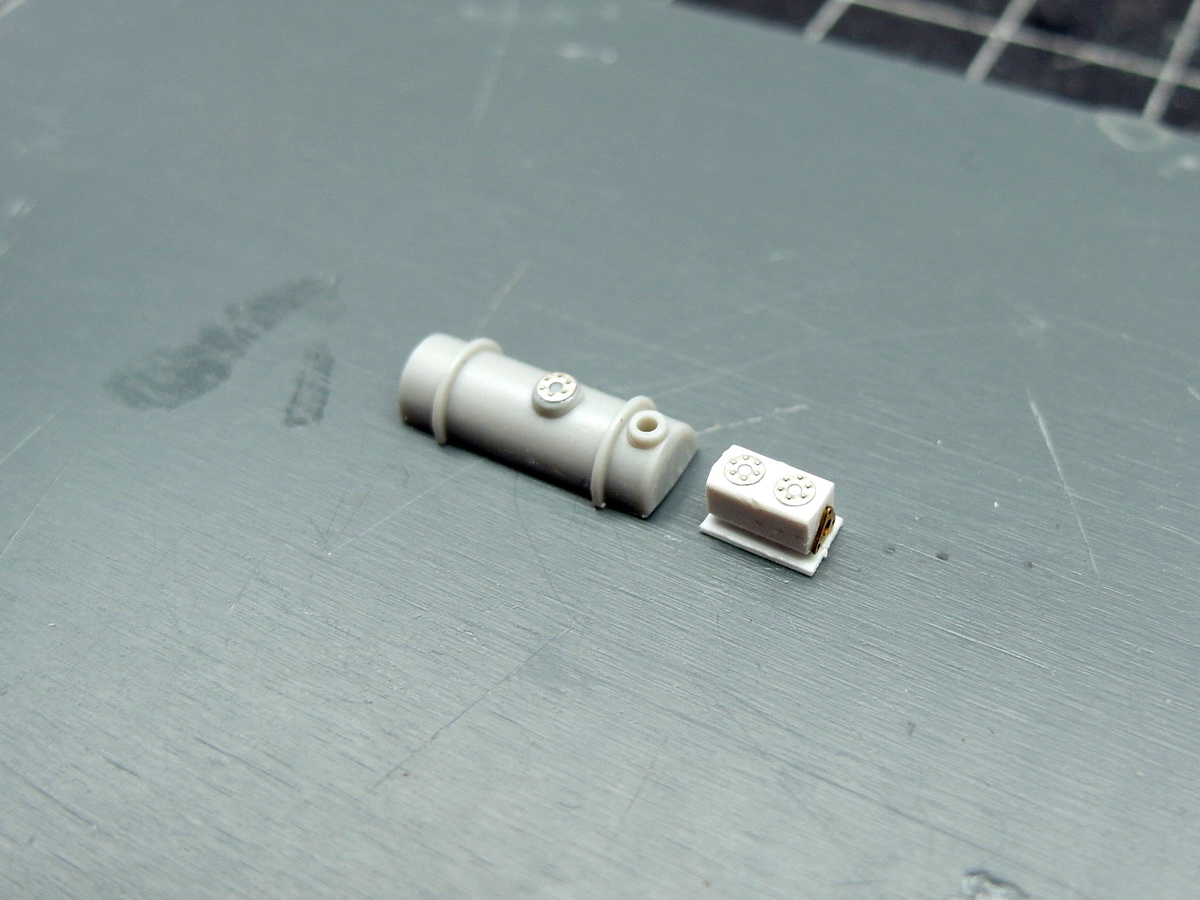
Then, little by little, more details were added: piping, a handwheel, and a support for the tilting funnel. A small instrument panel at the front rounds it all off. Everything is then mounted on a styrene strip for easier handling.
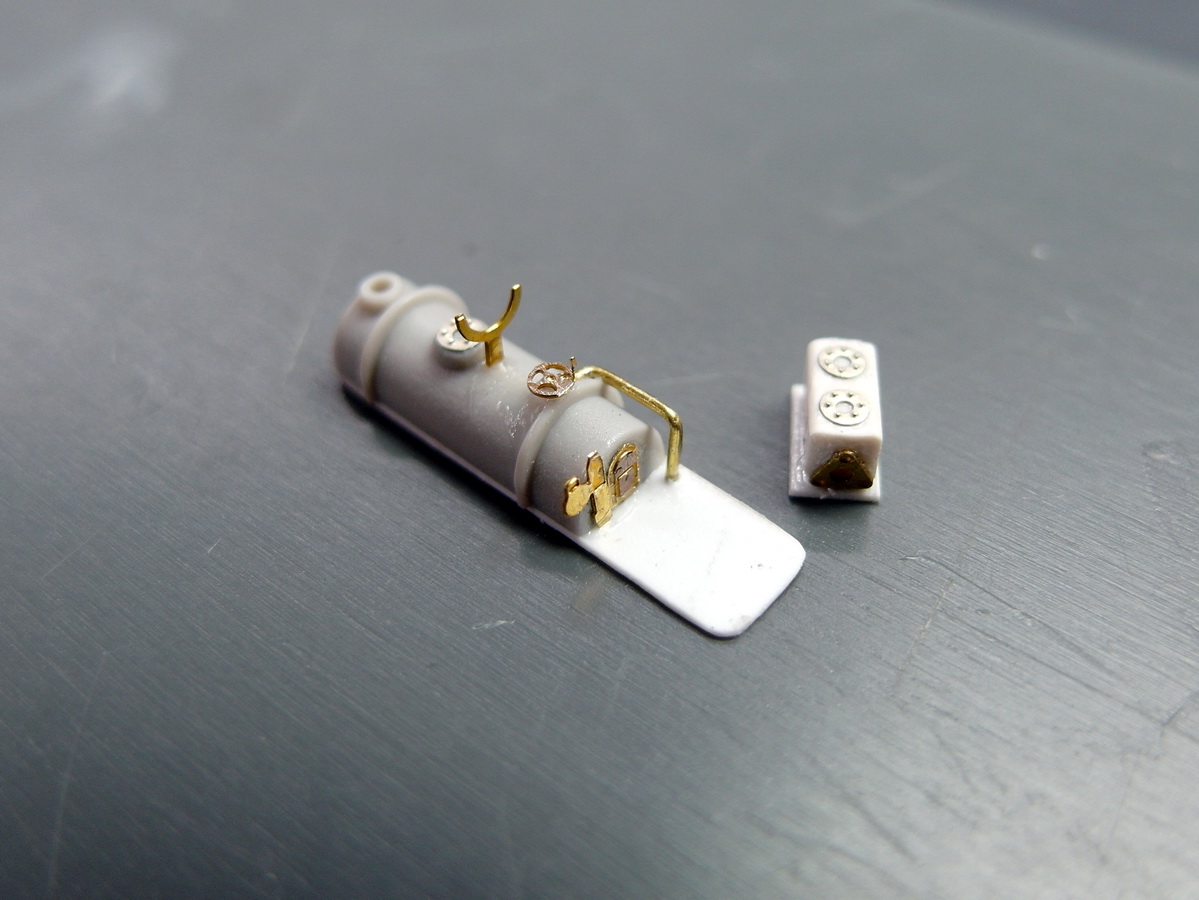
More piping and a second handwheel. It never hurts.
And then I am quite satisfied with the whole facial expression.
Let’s put the whole thing in the little boat. Let’s put the funnel in for a test.

Ferrules are really great for small funnel.

So far, so good.
Now we’ll apply the paint, and then we’ll add the small parts like the propeller and rudder.
13 Likes
As always, Tim, excellent work!
1 Like
That’s some excellent work Jörg … Lovely little addition.
1 Like
Many Thanks.
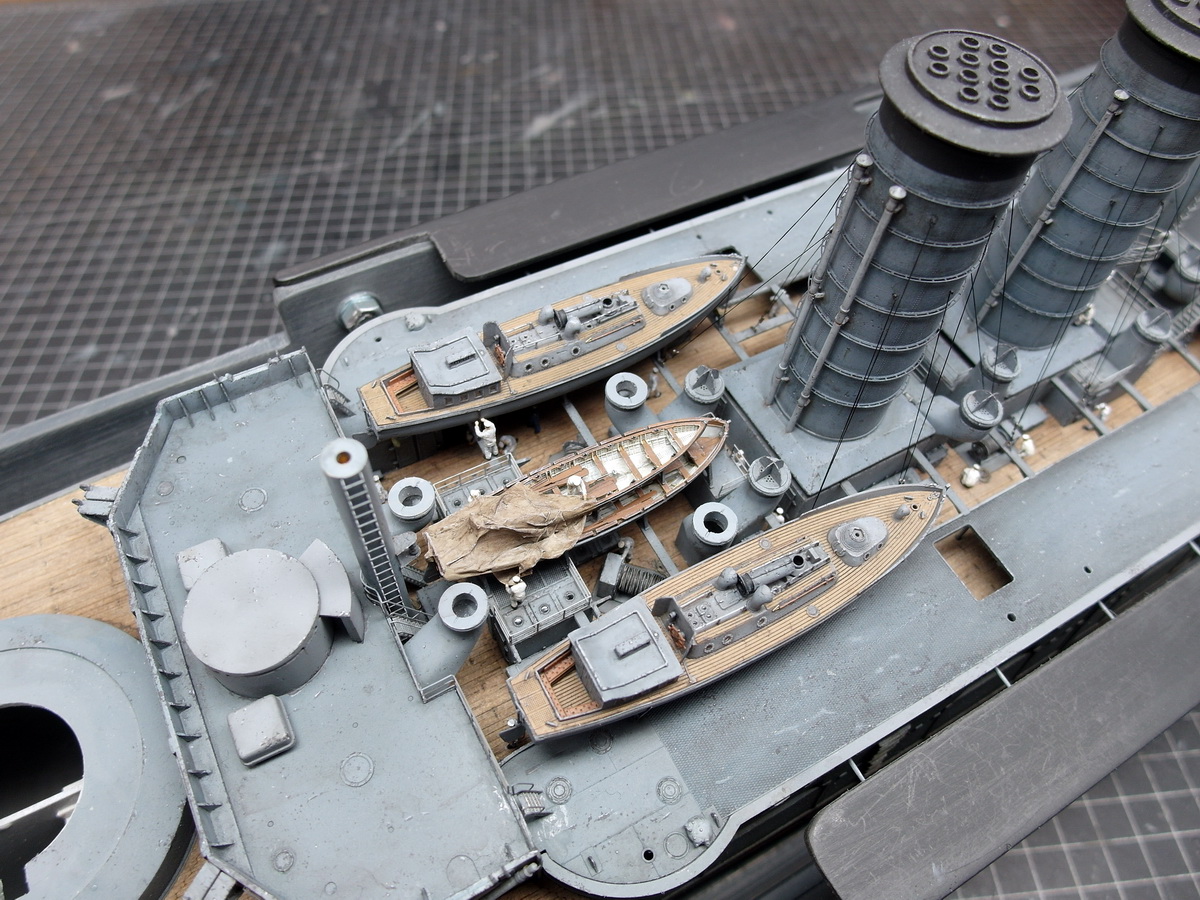
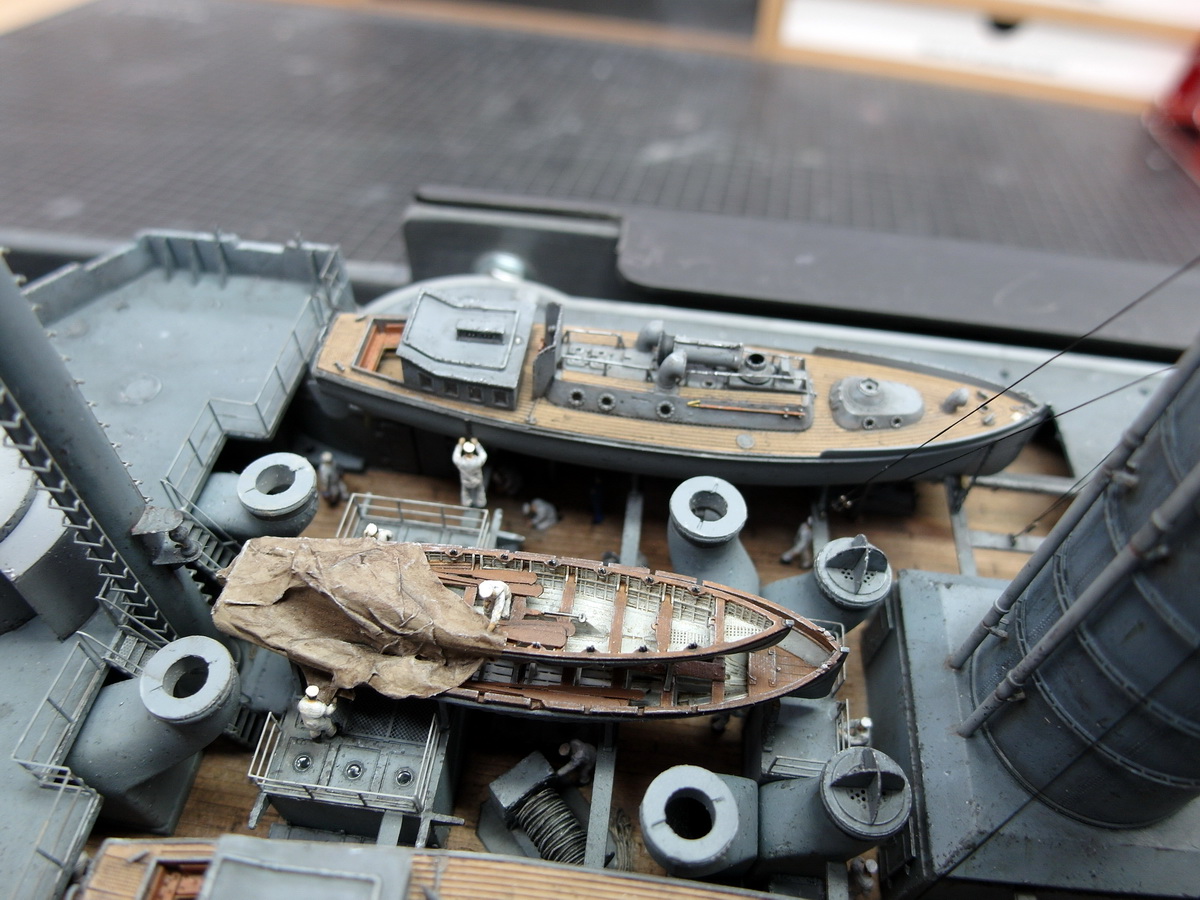
Today, the entire machinery arrived in the barge.
Placed on the deck in its cradle for testing.
The space is very limited and it is damn tight.
Since the davits are still missing, the barge isn’t secured yet. The chain hoists for lashing it down aren’t attached either.

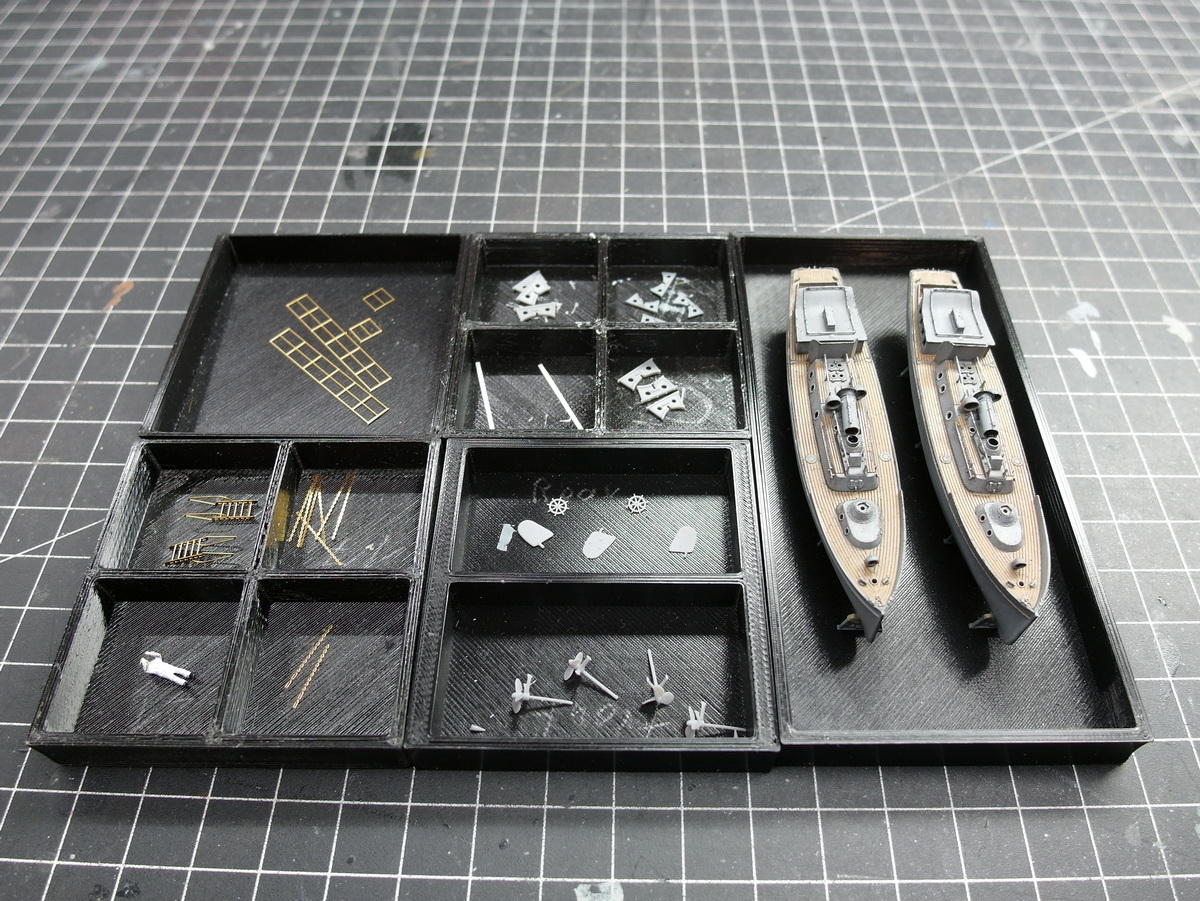
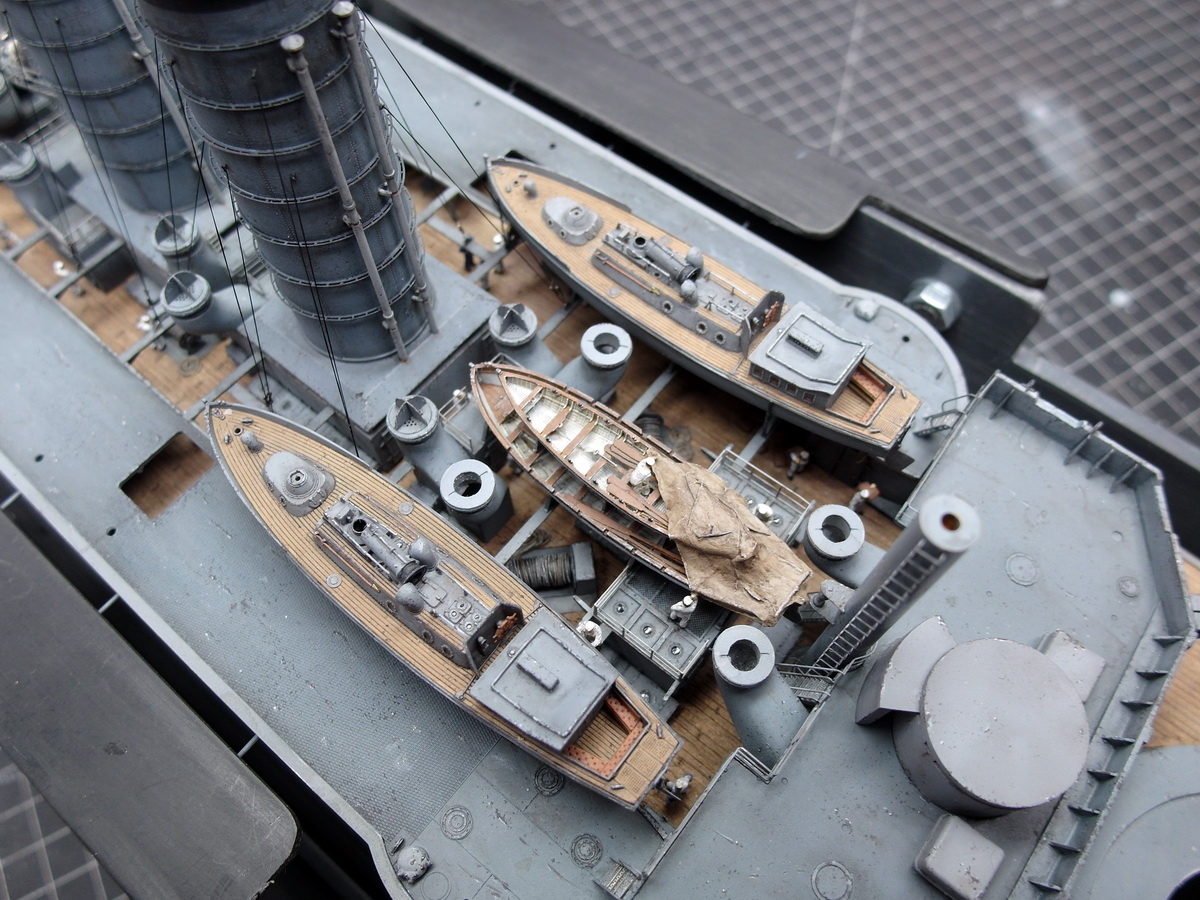
The next cutters are again 3D prints.
The shape of the Mikasa is slowly taking shape.
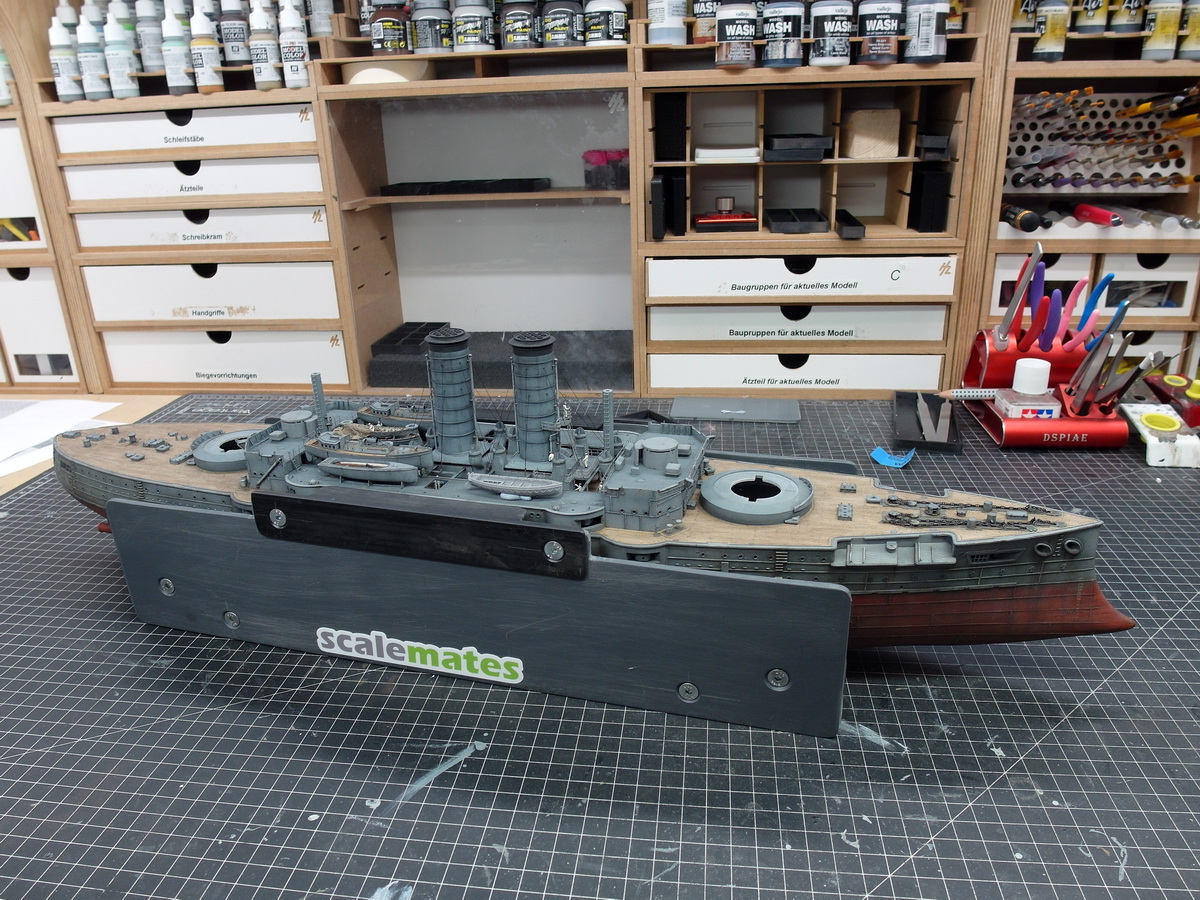
11 Likes
That hull weathering still looks amazing.
1 Like
Great, Johnny, that you like my model so much. It makes me proud. ![]()
I pushed the next cutters back for now, as the davits are missing and I can’t determine the optimal position. The steamboat isn’t glued down yet either.
So I started on the rear bridge. I was a bit apprehensive about this construction phase. You might remember that I removed some of the profiles on the bridge houses because I wasn’t sure everything would fit in the end.
But first things first.
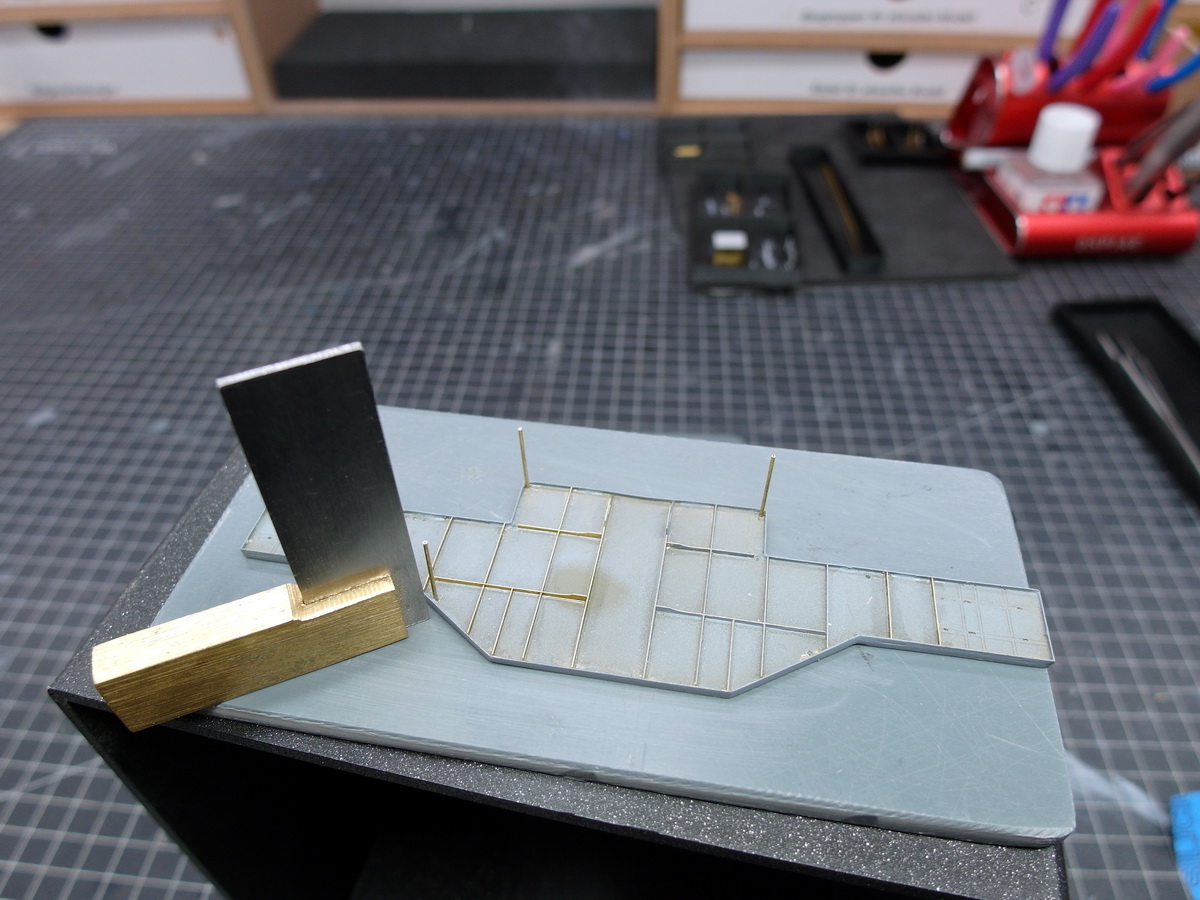
First, I laid the wooden deck while I could still exert pressure on the plastic part.
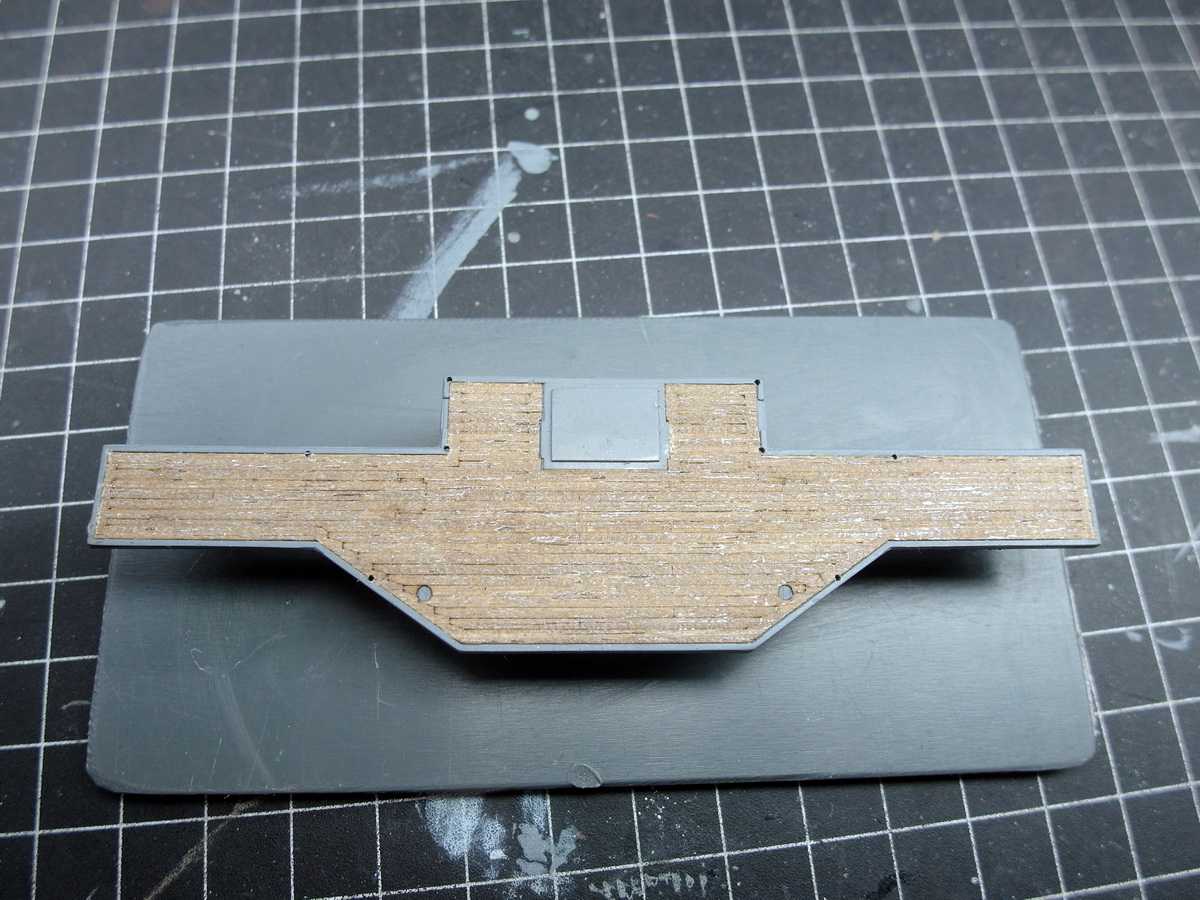
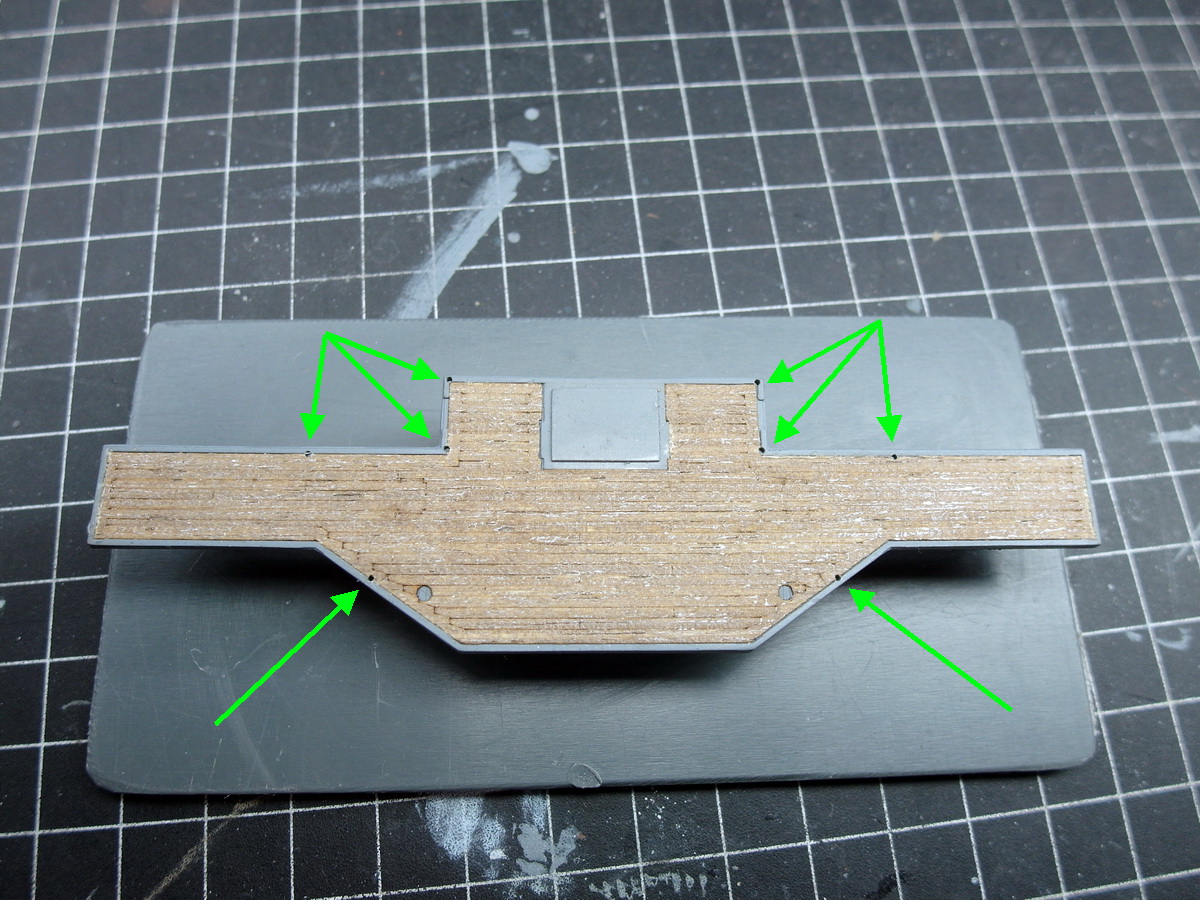
This will stop once the underside has received its large brass component with the gusset plates.
After everything had thoroughly dried, I wanted to attach the posts that support the bridge on the bridge house. They were originally made of plastic, but I immediately rejected that idea. I cut some out of brass to give them more stability.
Attaching them, however, turned out to be a real test of patience.
After testing the bridge, I realized, no, not like that. It’s completely unstable.
So I’m starting from the back. I drilled holes for the posts so I could push them through from above later.
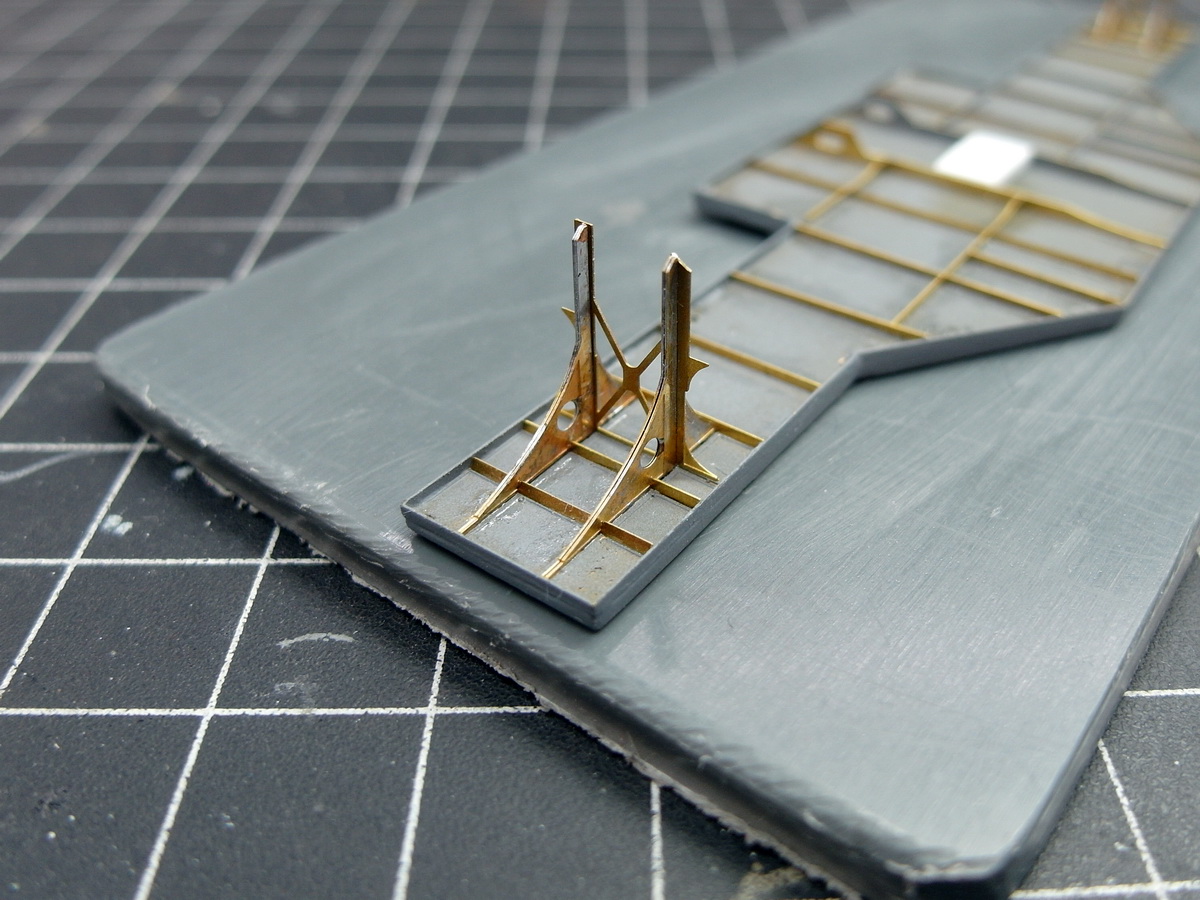
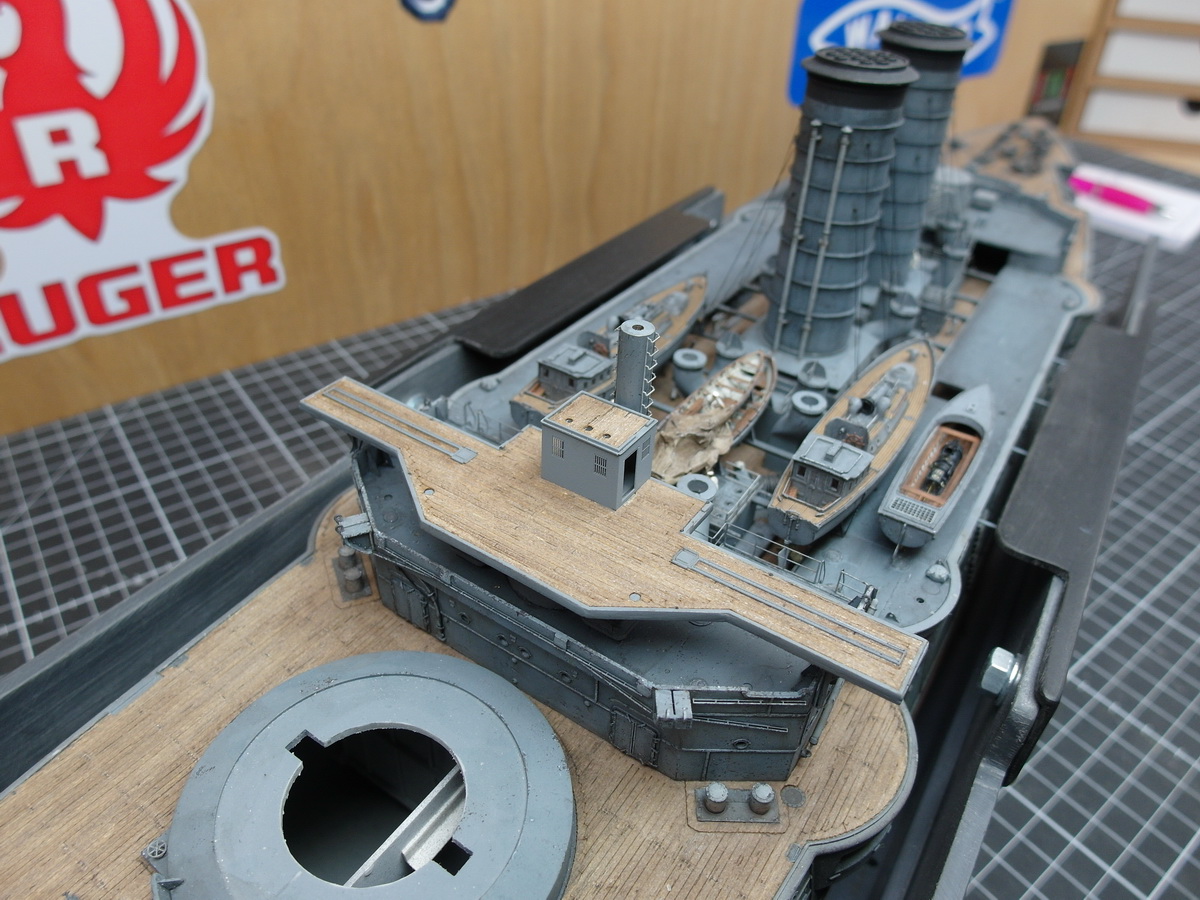
Next, the outer support structure was attached. What a delicate construction phase. But it looks so good.
After I had completed that satisfactorily, I had to carefully tape everything off to avoid dirtying the wooden deck with the primer.

The base coat is applied, and then the moment of truth. Does everything fit?!
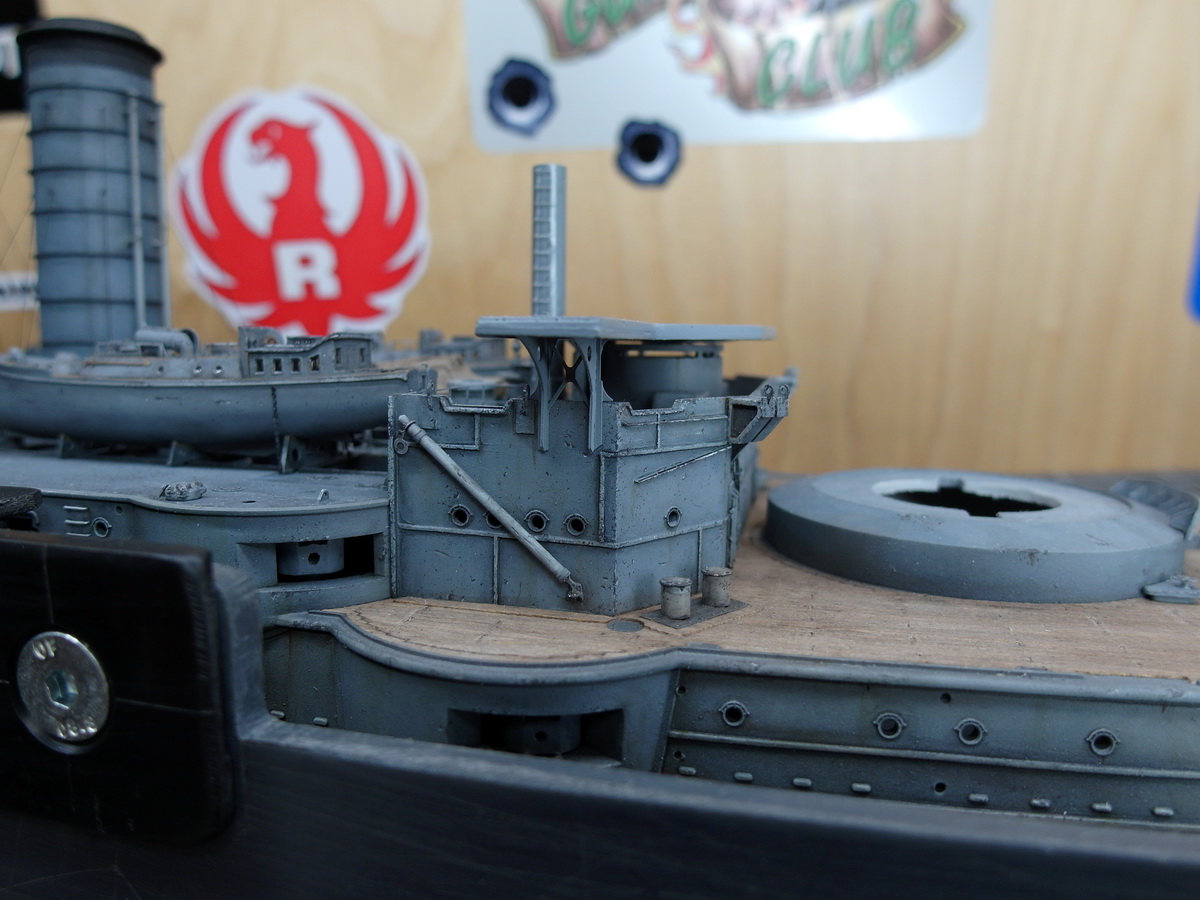
And you see, yes… everything fits together perfectly. So I wouldn’t have had to remove the profiles at all. It would have been close, but it would have worked anyway.
Still, she’s confident.
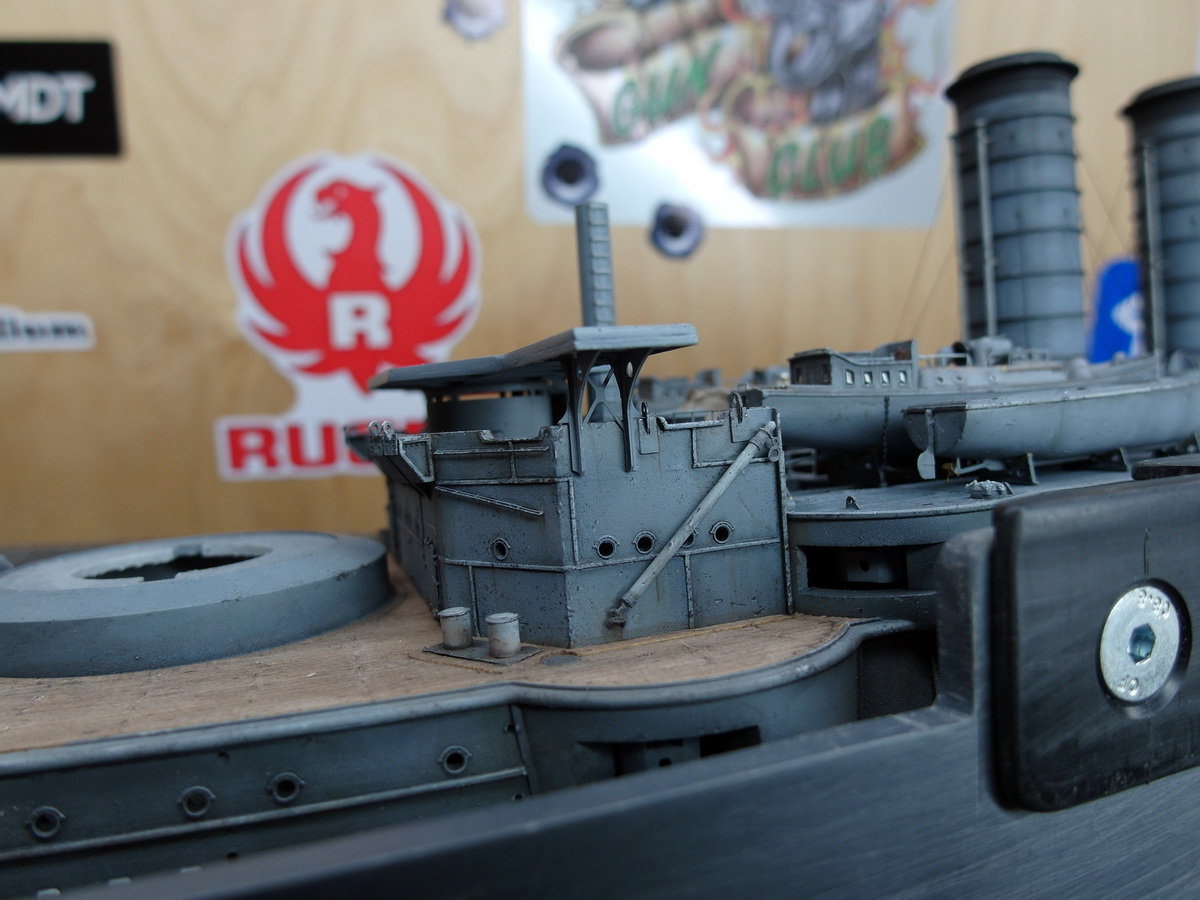
I’ve already soldered the little bridge house and placed it on the deck for fun.
Very nice.

14 Likes
It just gets better watching this work of art develop.
5 Likes
Jörg,
apologies for my long silence.
Your work is absolutely astonishing, great to see Mikasa taking shape!
Your barges and installing alle the machinery is absolutely impressive! Fantastic work, really brings things to life!
Rear bridge is looking fine, too!
Cheers
Jan
2 Likes
Just wanted you to know that I have cleaned off a spot on my mantle that you can store this ship. I look forward to the time it arrives. ![]()
3 Likes
Guys, thank you so much. ![]()
I’m thrilled that my ship is so well-received, but what hurts me is the price I have to pay for it. Greg, please tell me the exact dimensions of the mantelpiece so I can order the display case. ![]()
And that’s why I’m hurrying to get Mikas finished quickly.
Since I’m on vacation, the bridge is a little further along, and I don’t want to keep that from you.
6 Likes
You’ll have a long wait, Barrow Dock Museum haven’t got a Mikasa and say they have first dibs…
![]()
M
1 Like