Hello everybody!
I’m starting a project thread in which I would like to tackle model(s) of the Cadillac Gage V-100 Commando armored car, also known as M706 in the US Armed Forces, also called a “duck” from what I heard.
In 2008 Hobby Boss issued a styrene model of this AFV in 1:35 and this made the Verlinden resin model somewhat obsolete. In 2020 it was joined by the model of the M706E2 variant - this variant had an open roof and was used by the USAF for air base security.
I have bought the Hobby Boss kit as soon as it appeared, but right on it was clear, that it has some problematic areas, mainly on the interior. When the M706E2 appeare I have bought it too, hoping it would improve some of the problems of the original kit - which it did, but I have also had more references and I was able to spot more problems. For a long time I thought how to fix them and for a time it seemed an interior kit from a Czech company called MMK, that I finally bought could be a solution here. But after getting the MMK kit it turned out that there are still to many problems here for my liking. Then I tried to correct them old school like - with a saw and lot of filler.
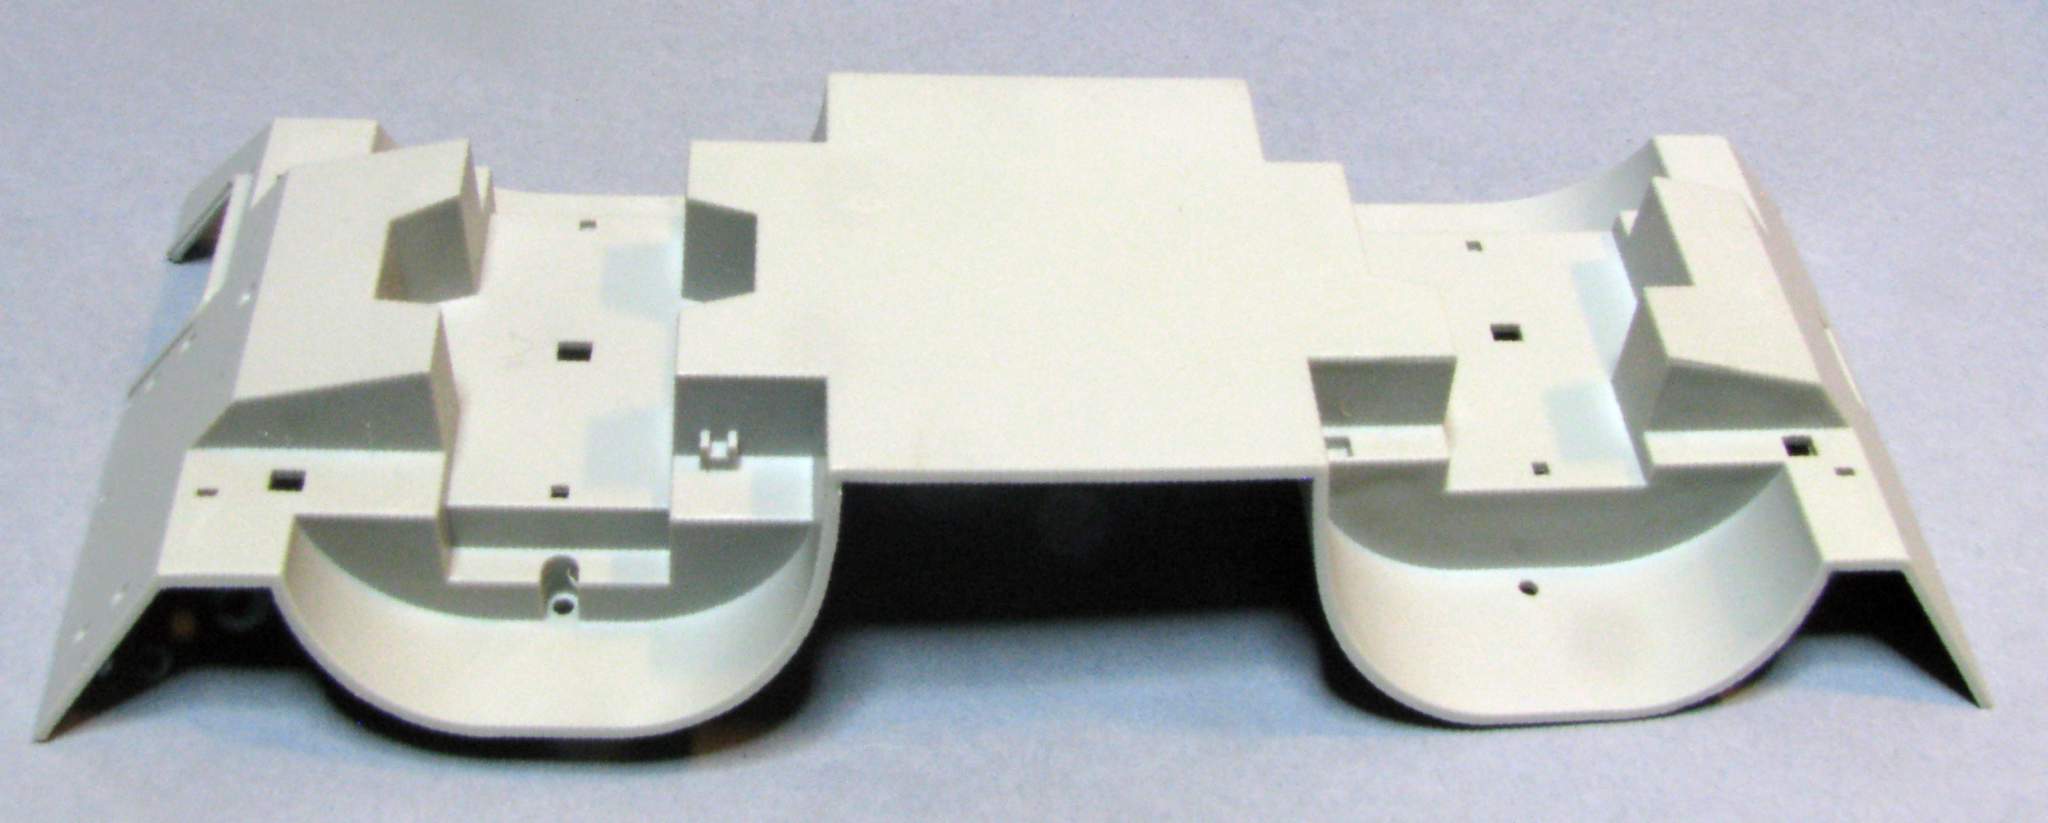
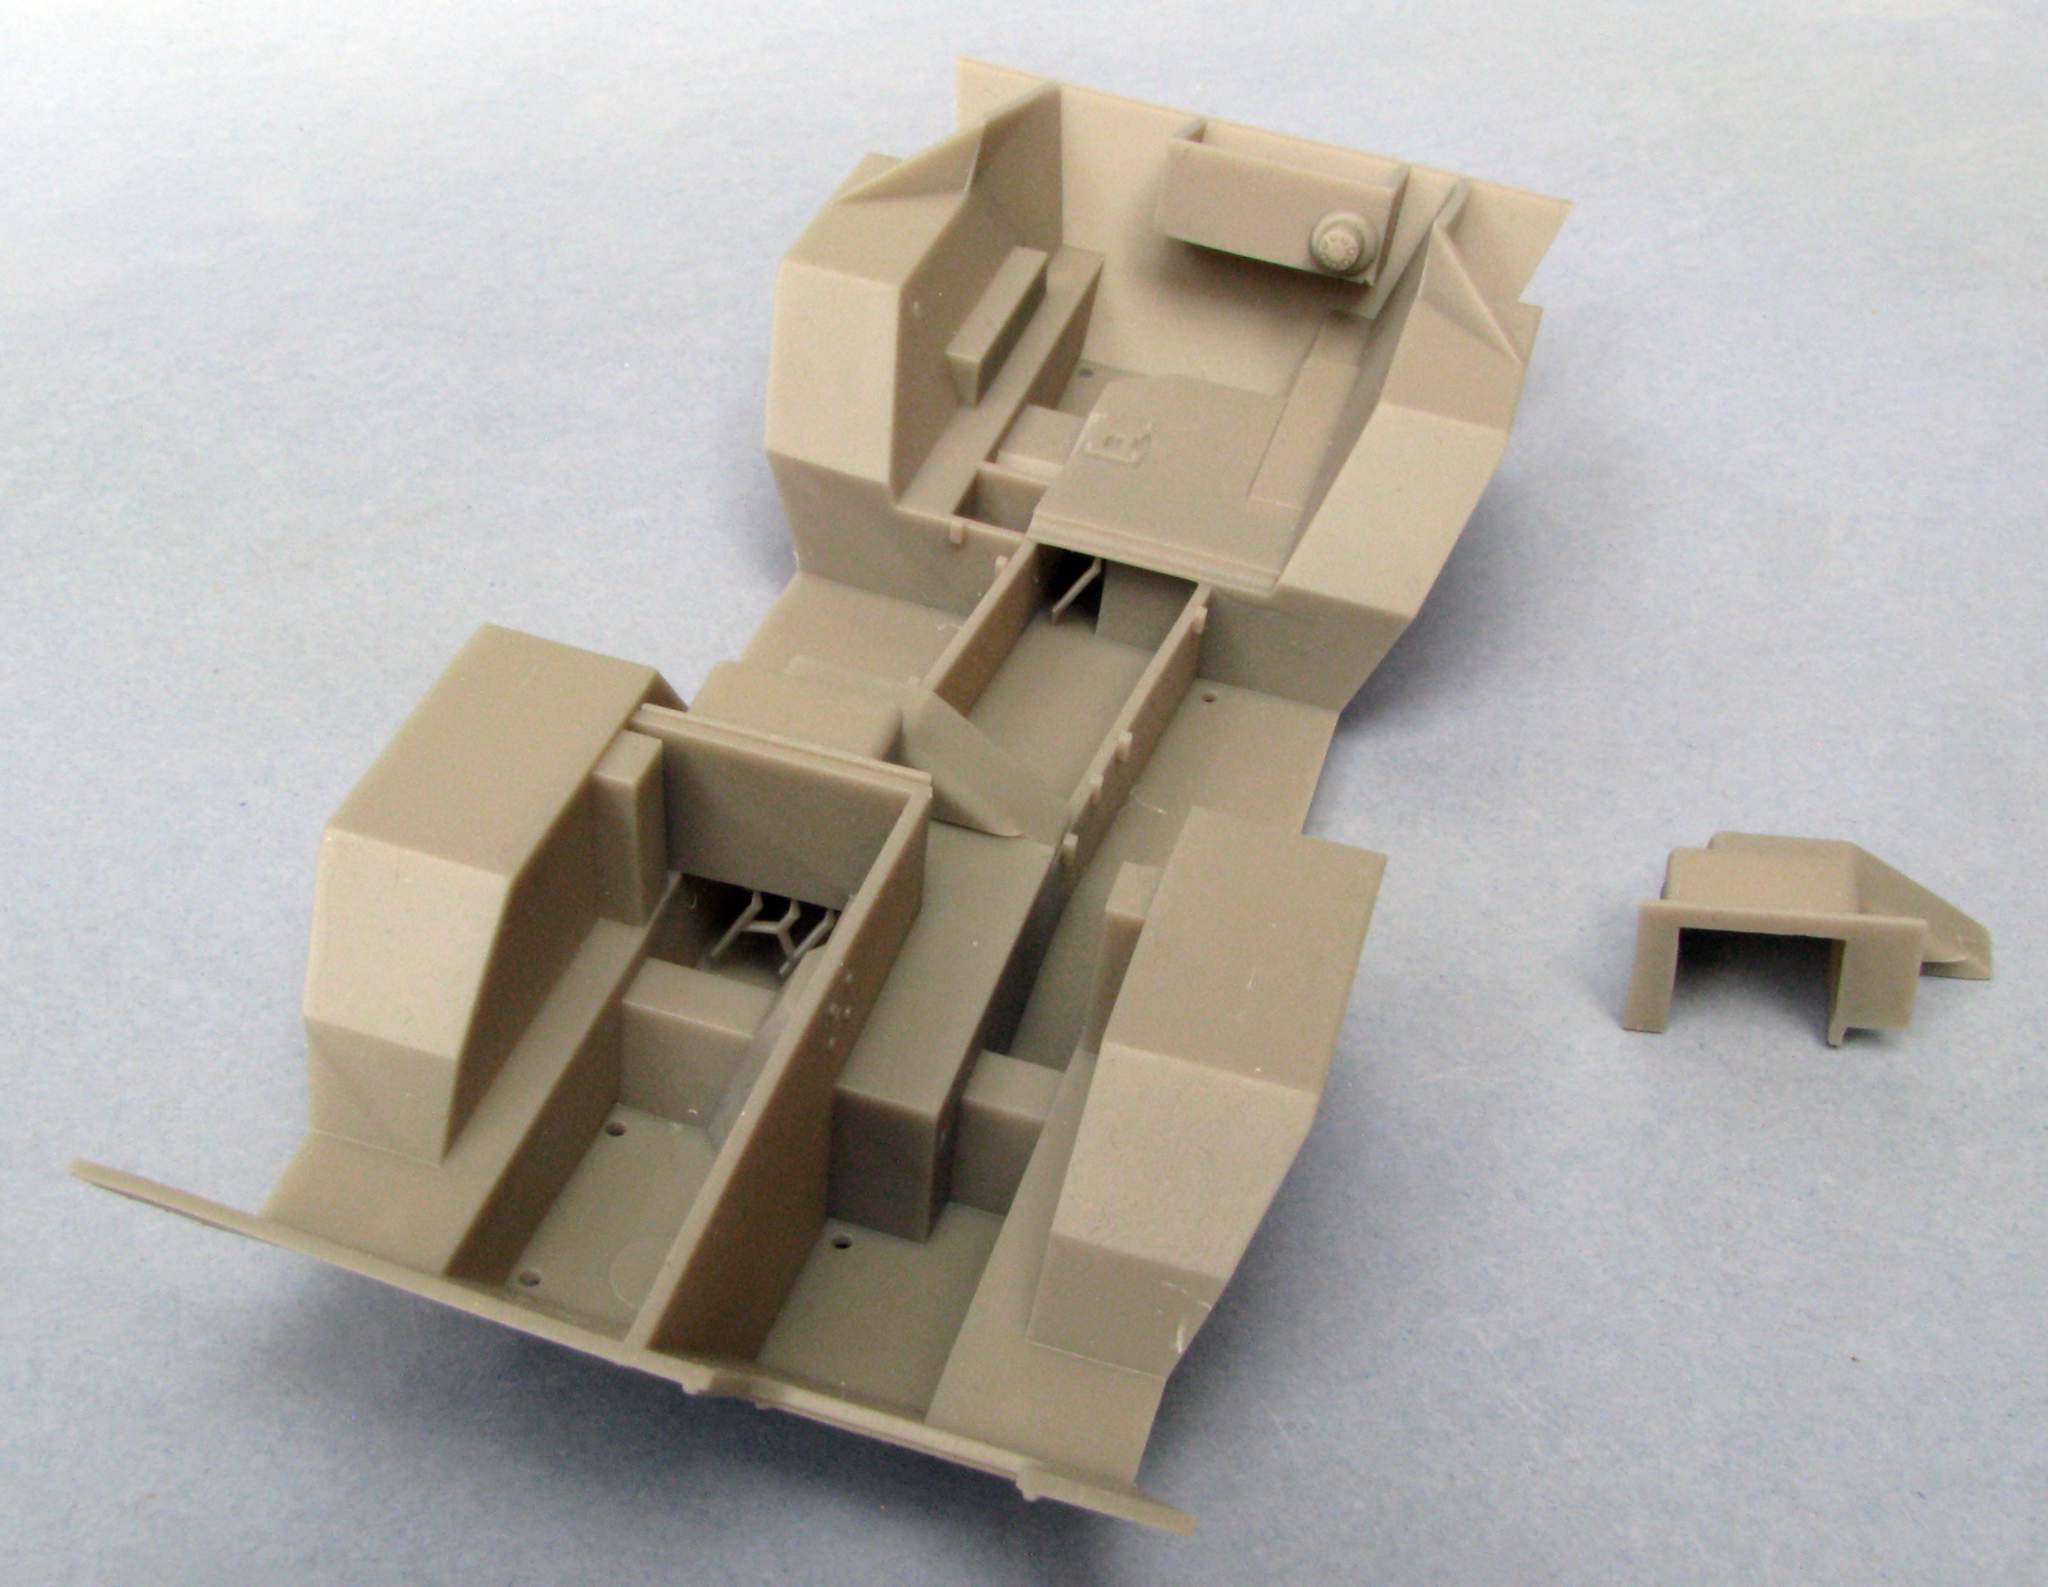
Now in the rear of the vehicle it might even work, but the fron was to complicated to tackle this way. That’s when I decided to redraw the whole chassis in 3D to be able to finally 3D print it, especially since I got a lot of help in form of photos of the rear thing from the people in the USA who owned vehicles like that. So recently I got my 3D prints and that’s why I’m starting this thread today. Here is what my parts look like:
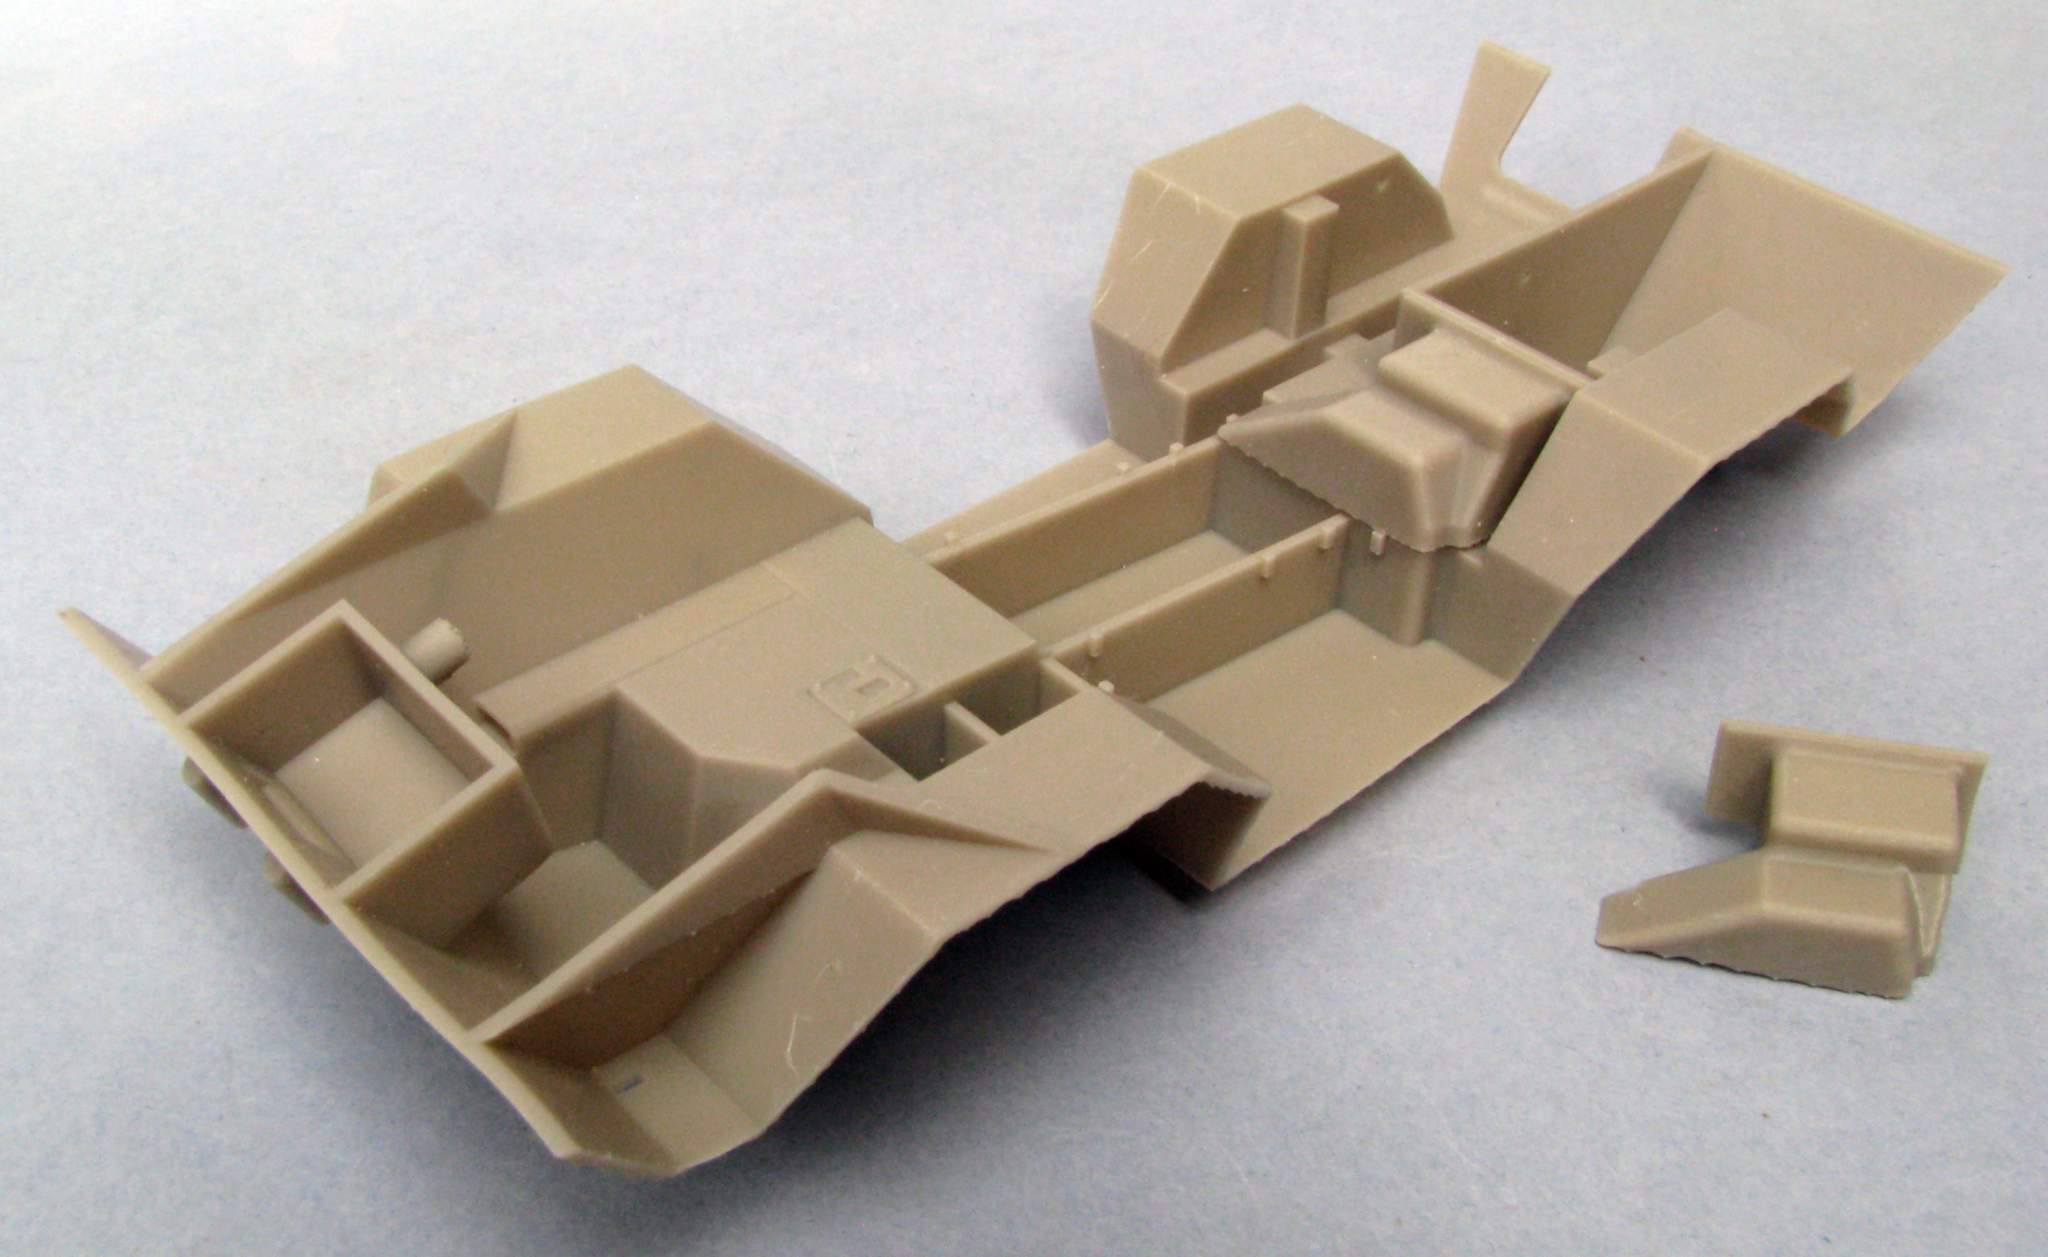
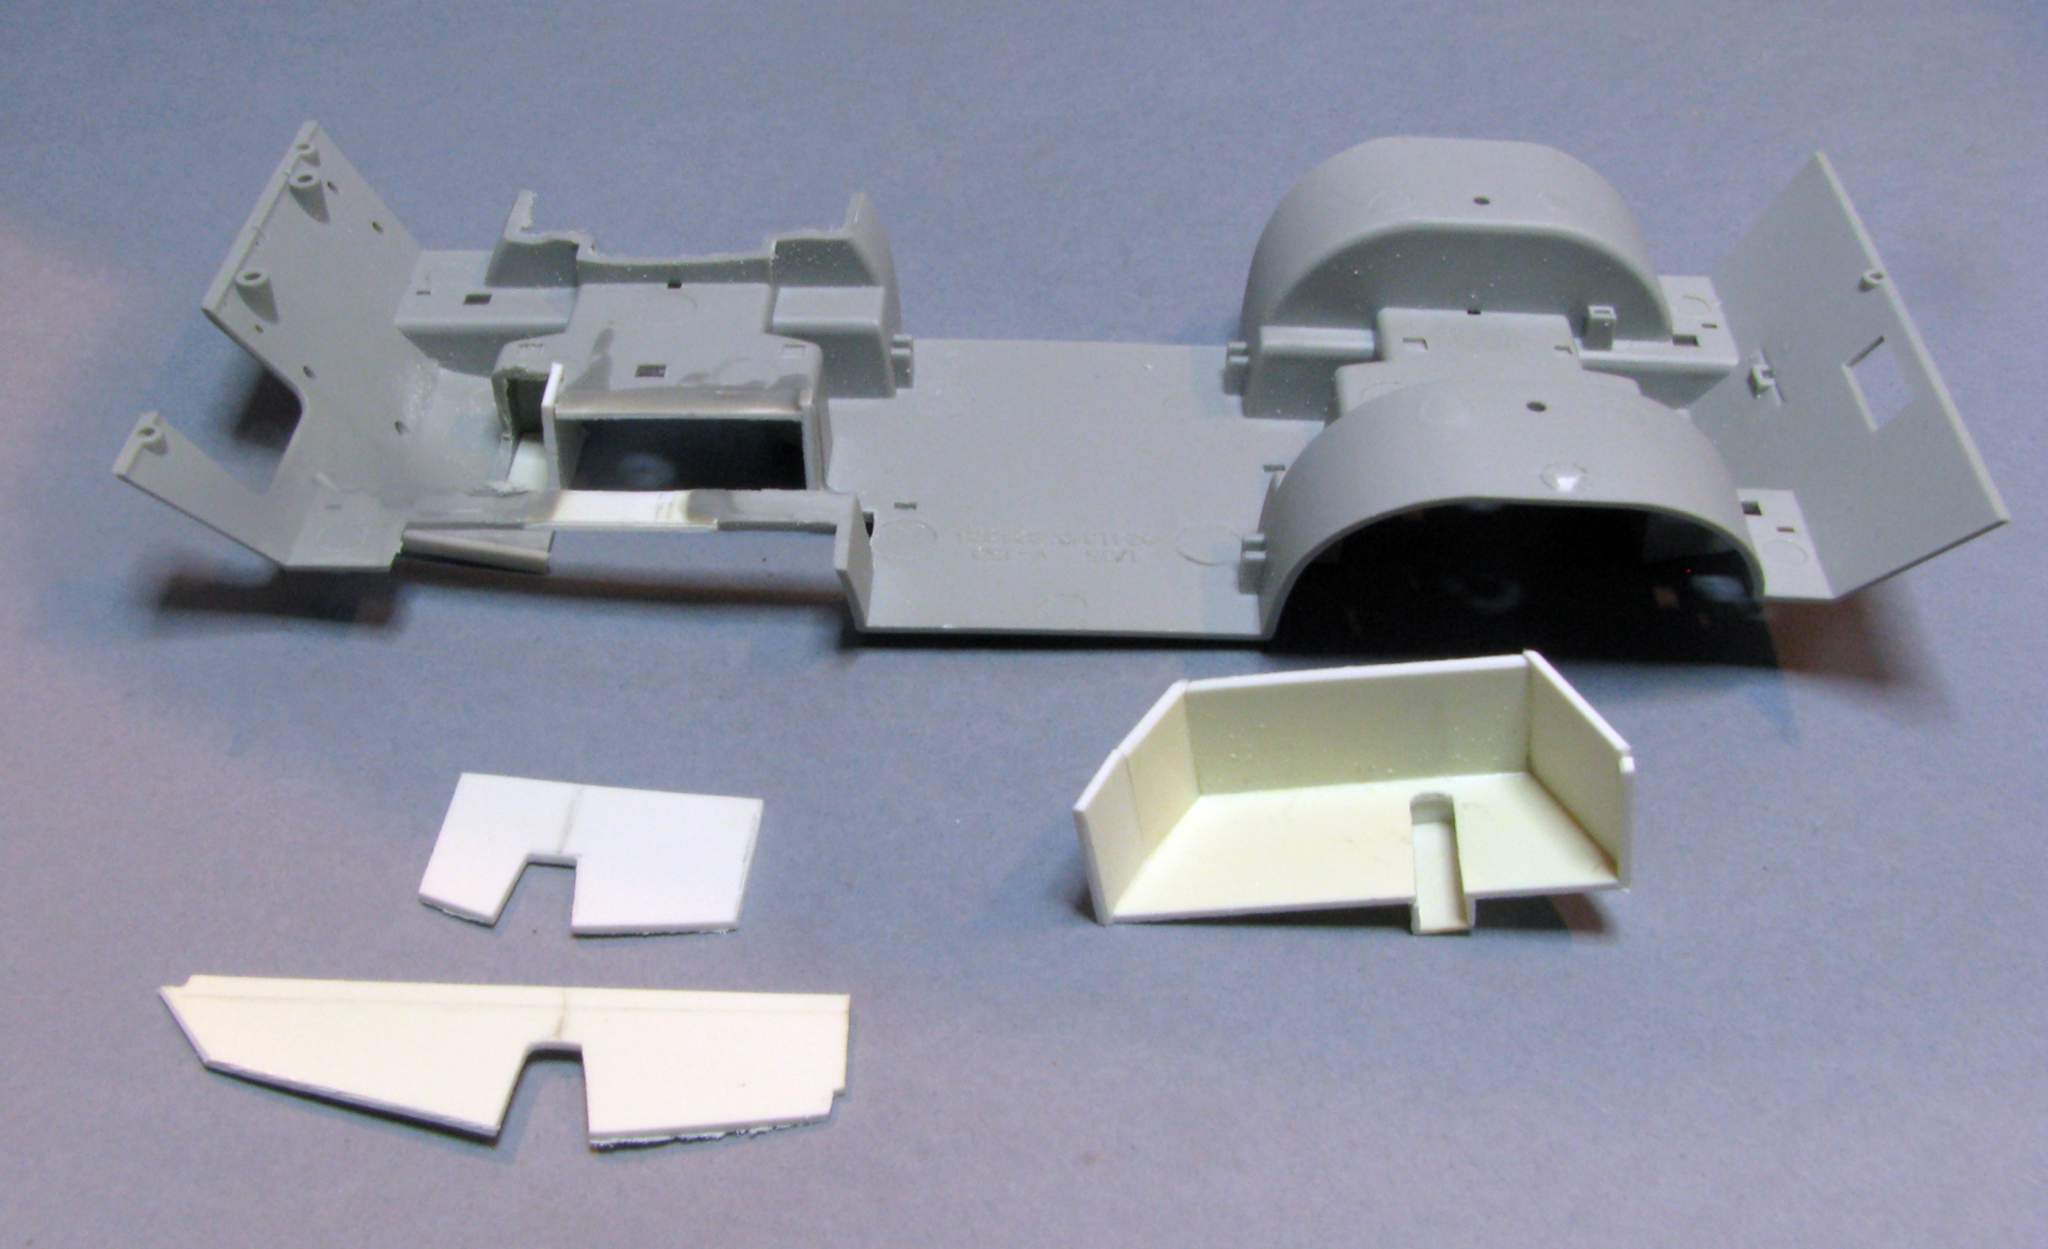
On the right there is a spare transmission cover. I plan to build the tunnel and tool box covers from styrene plate
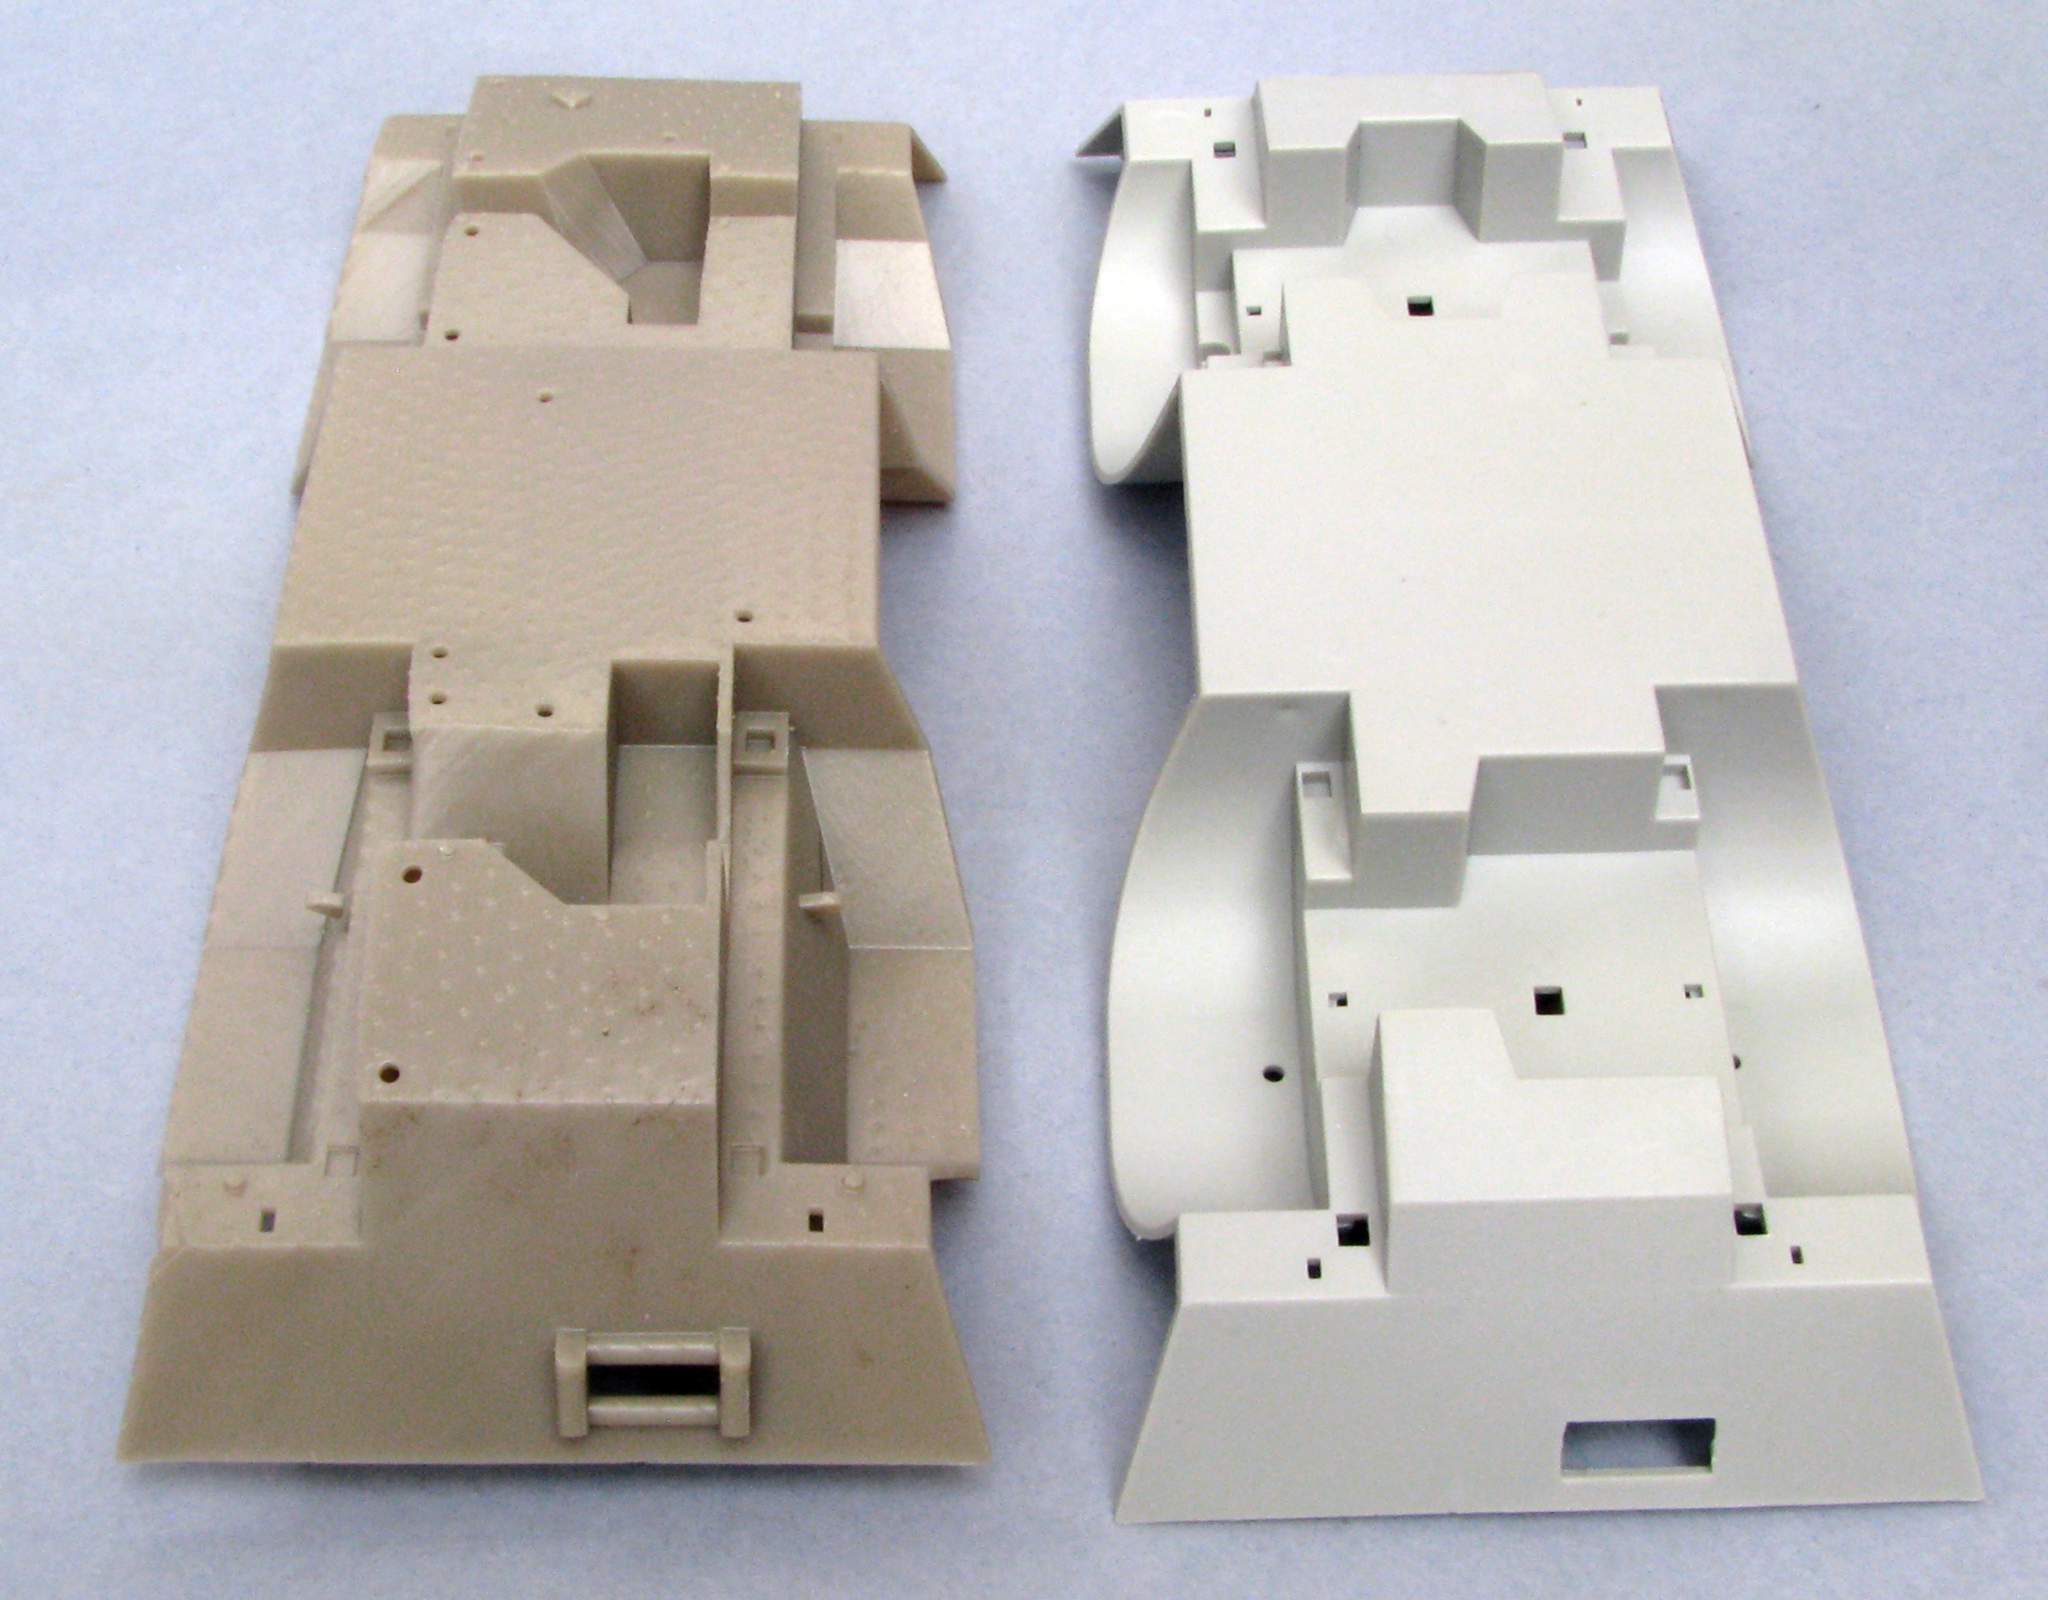
The most important question here would be: Does it fit? Did I get the dimensions and angles right? Luckily it doesn’t look too bad:

As you can see there are lots of marks on the underside, where the support structures were attached. There are also some holes my printer said were necessary, that now have to be plugged, I plant to do that with a styrene rod:

Worst fit is in the rear - looks like I missed about 1,5mm of height here, I plan to correct it in the next version.
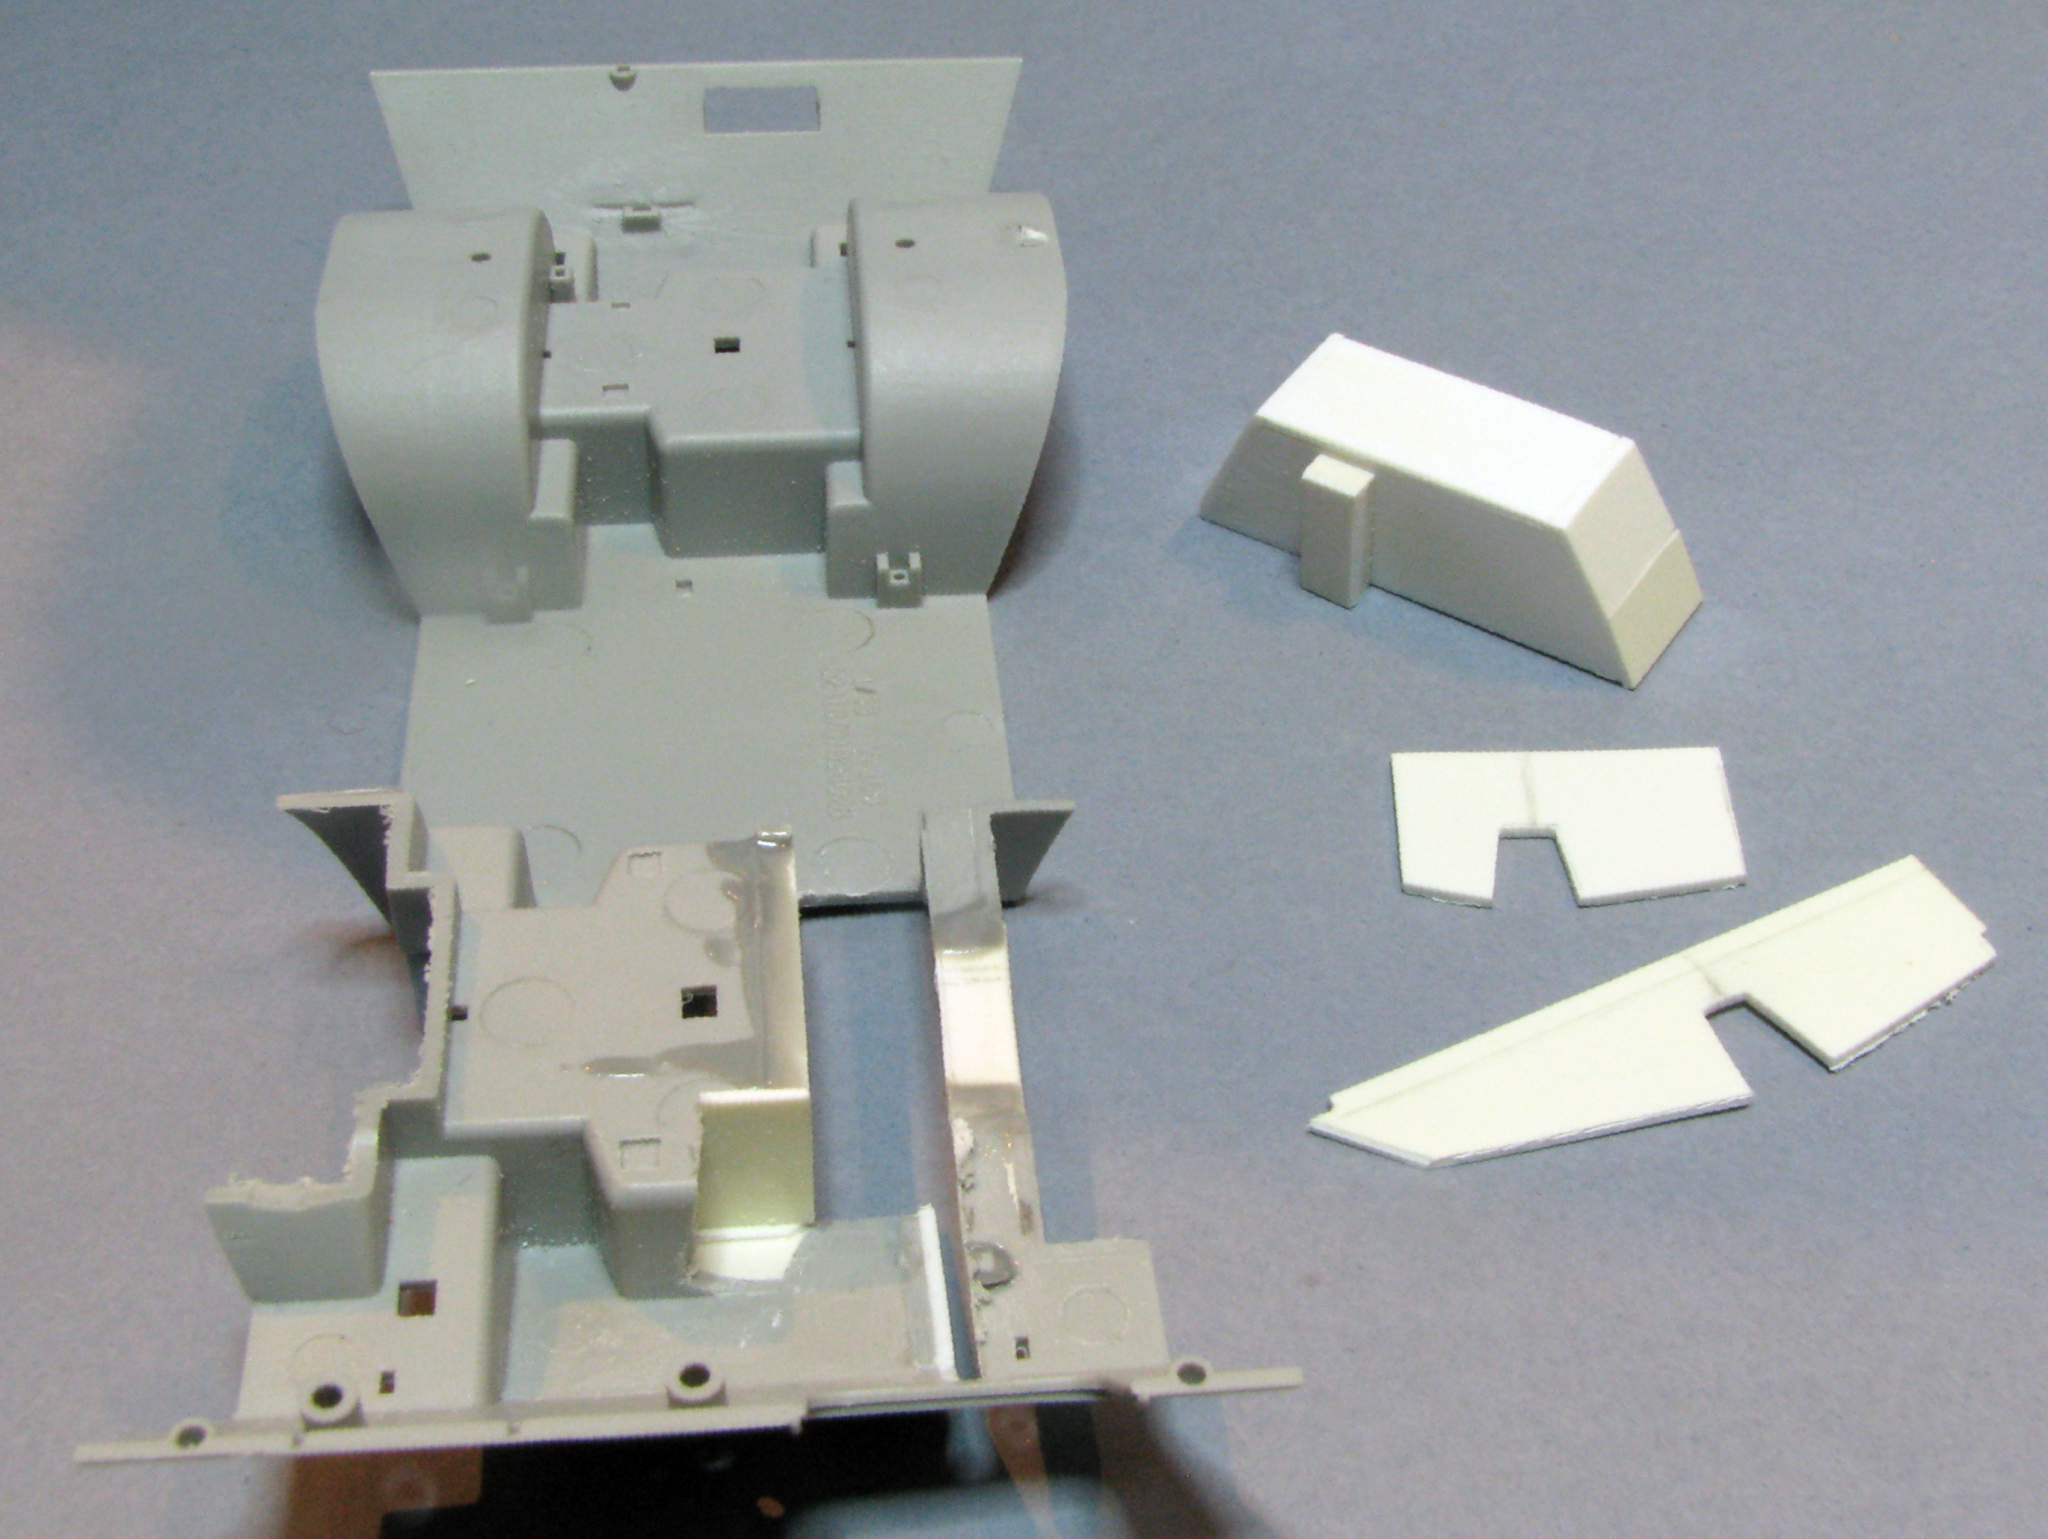
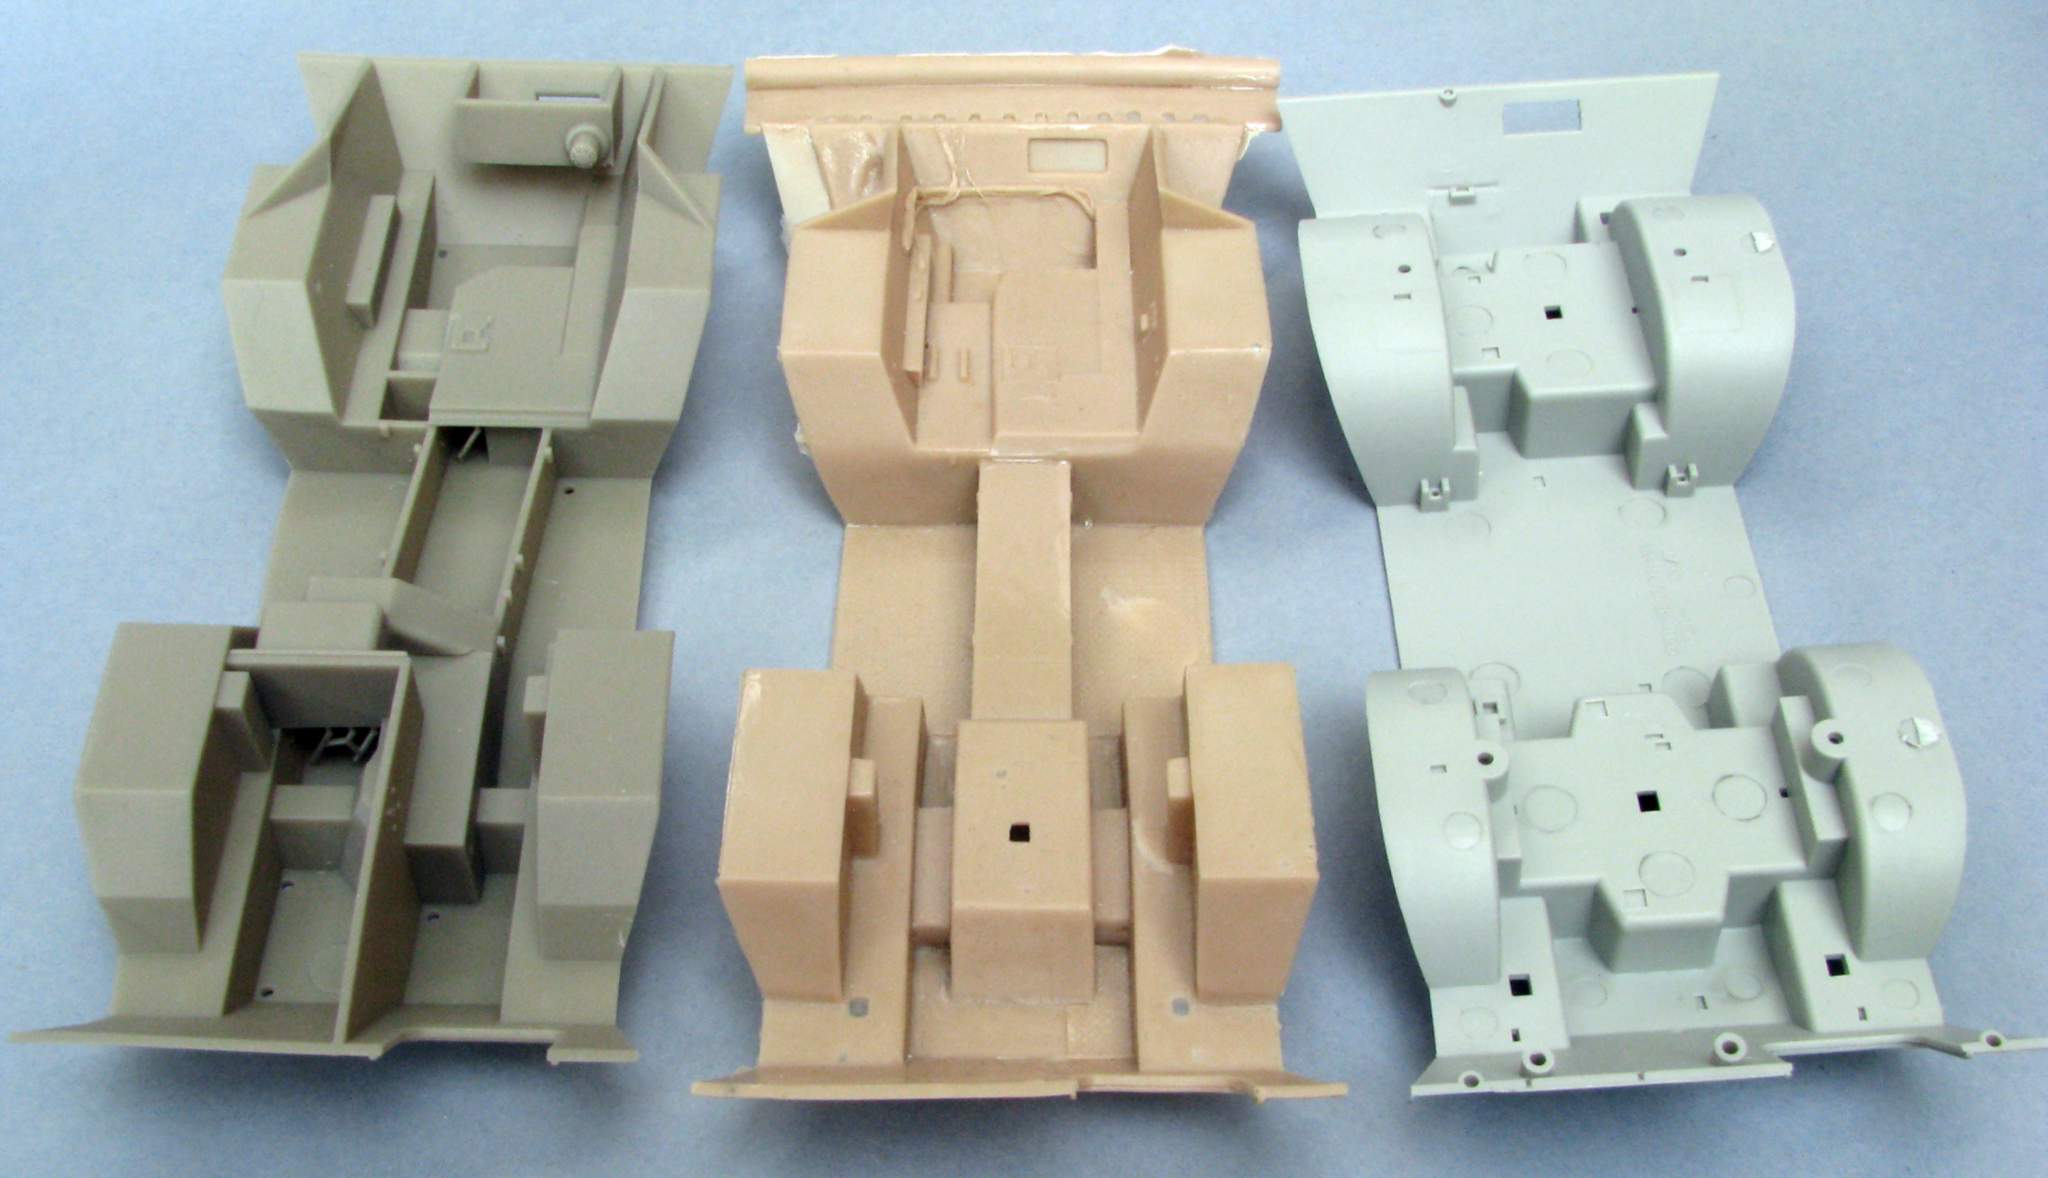
Here is a comparison between my part (in the left portion of the photo below) and the Hobby Boss kit part:
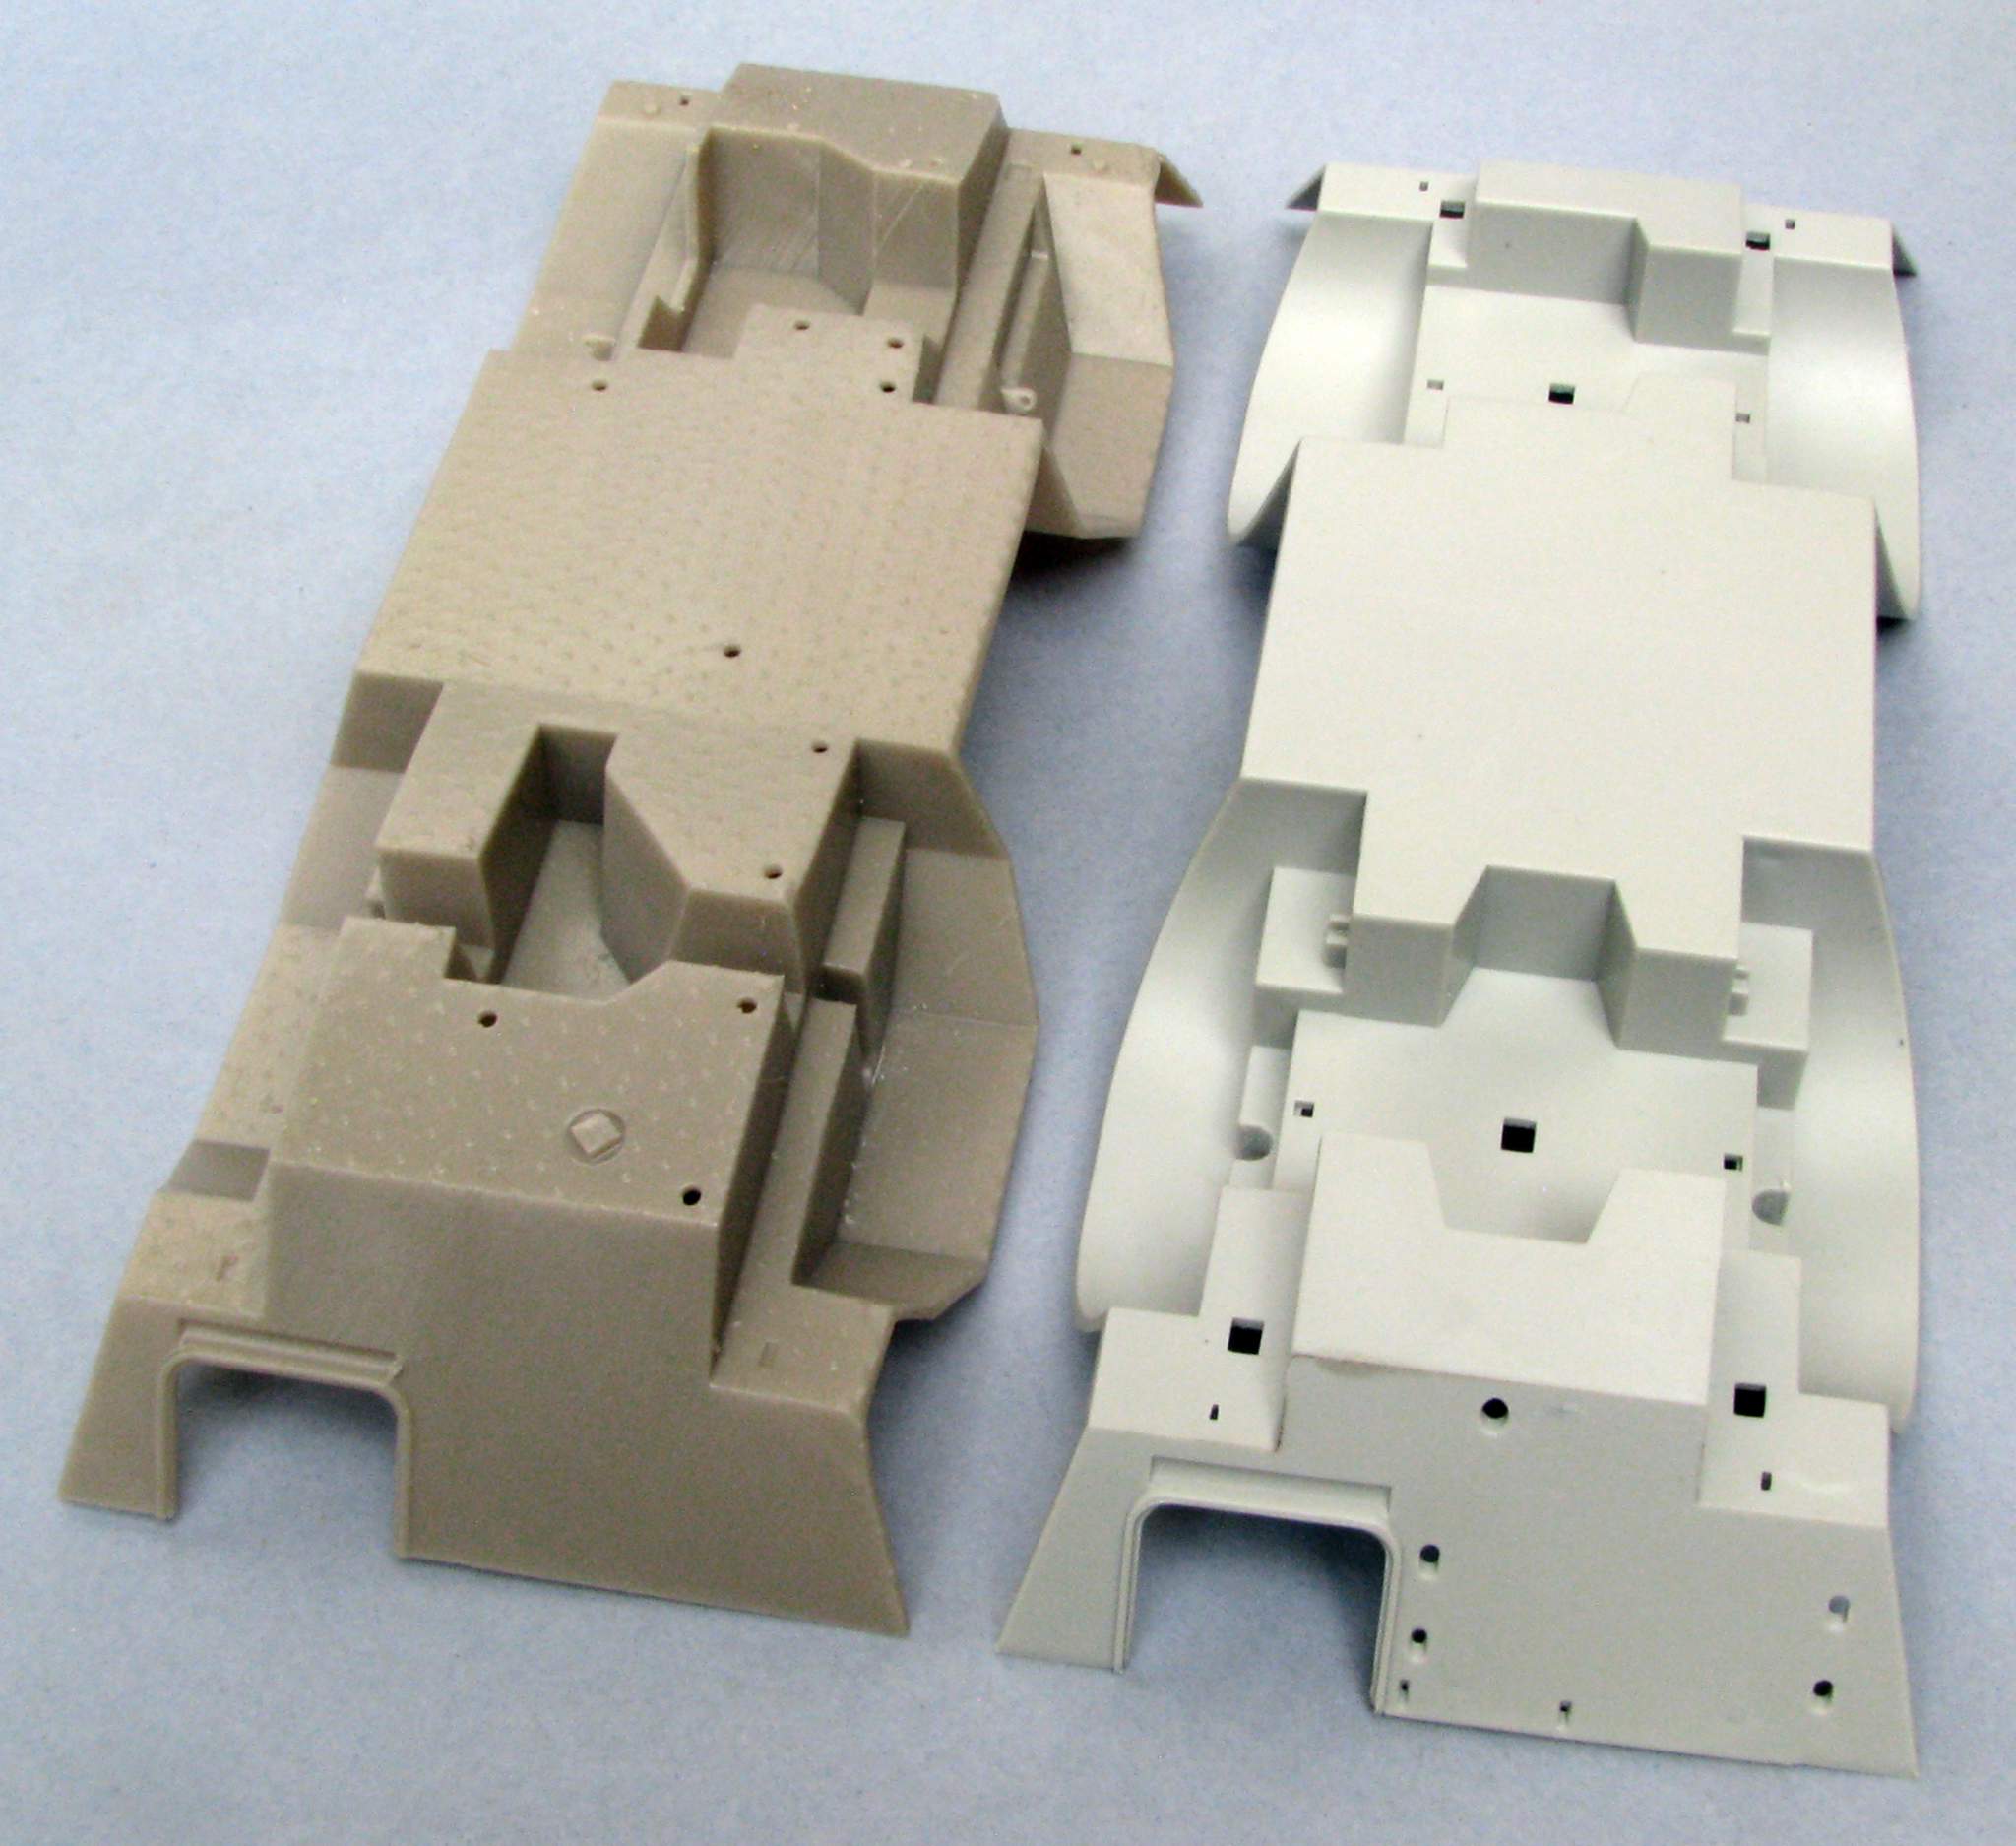
And one more comparison, from the left my part, the MMK chassis and the Hobby Boss kit part:
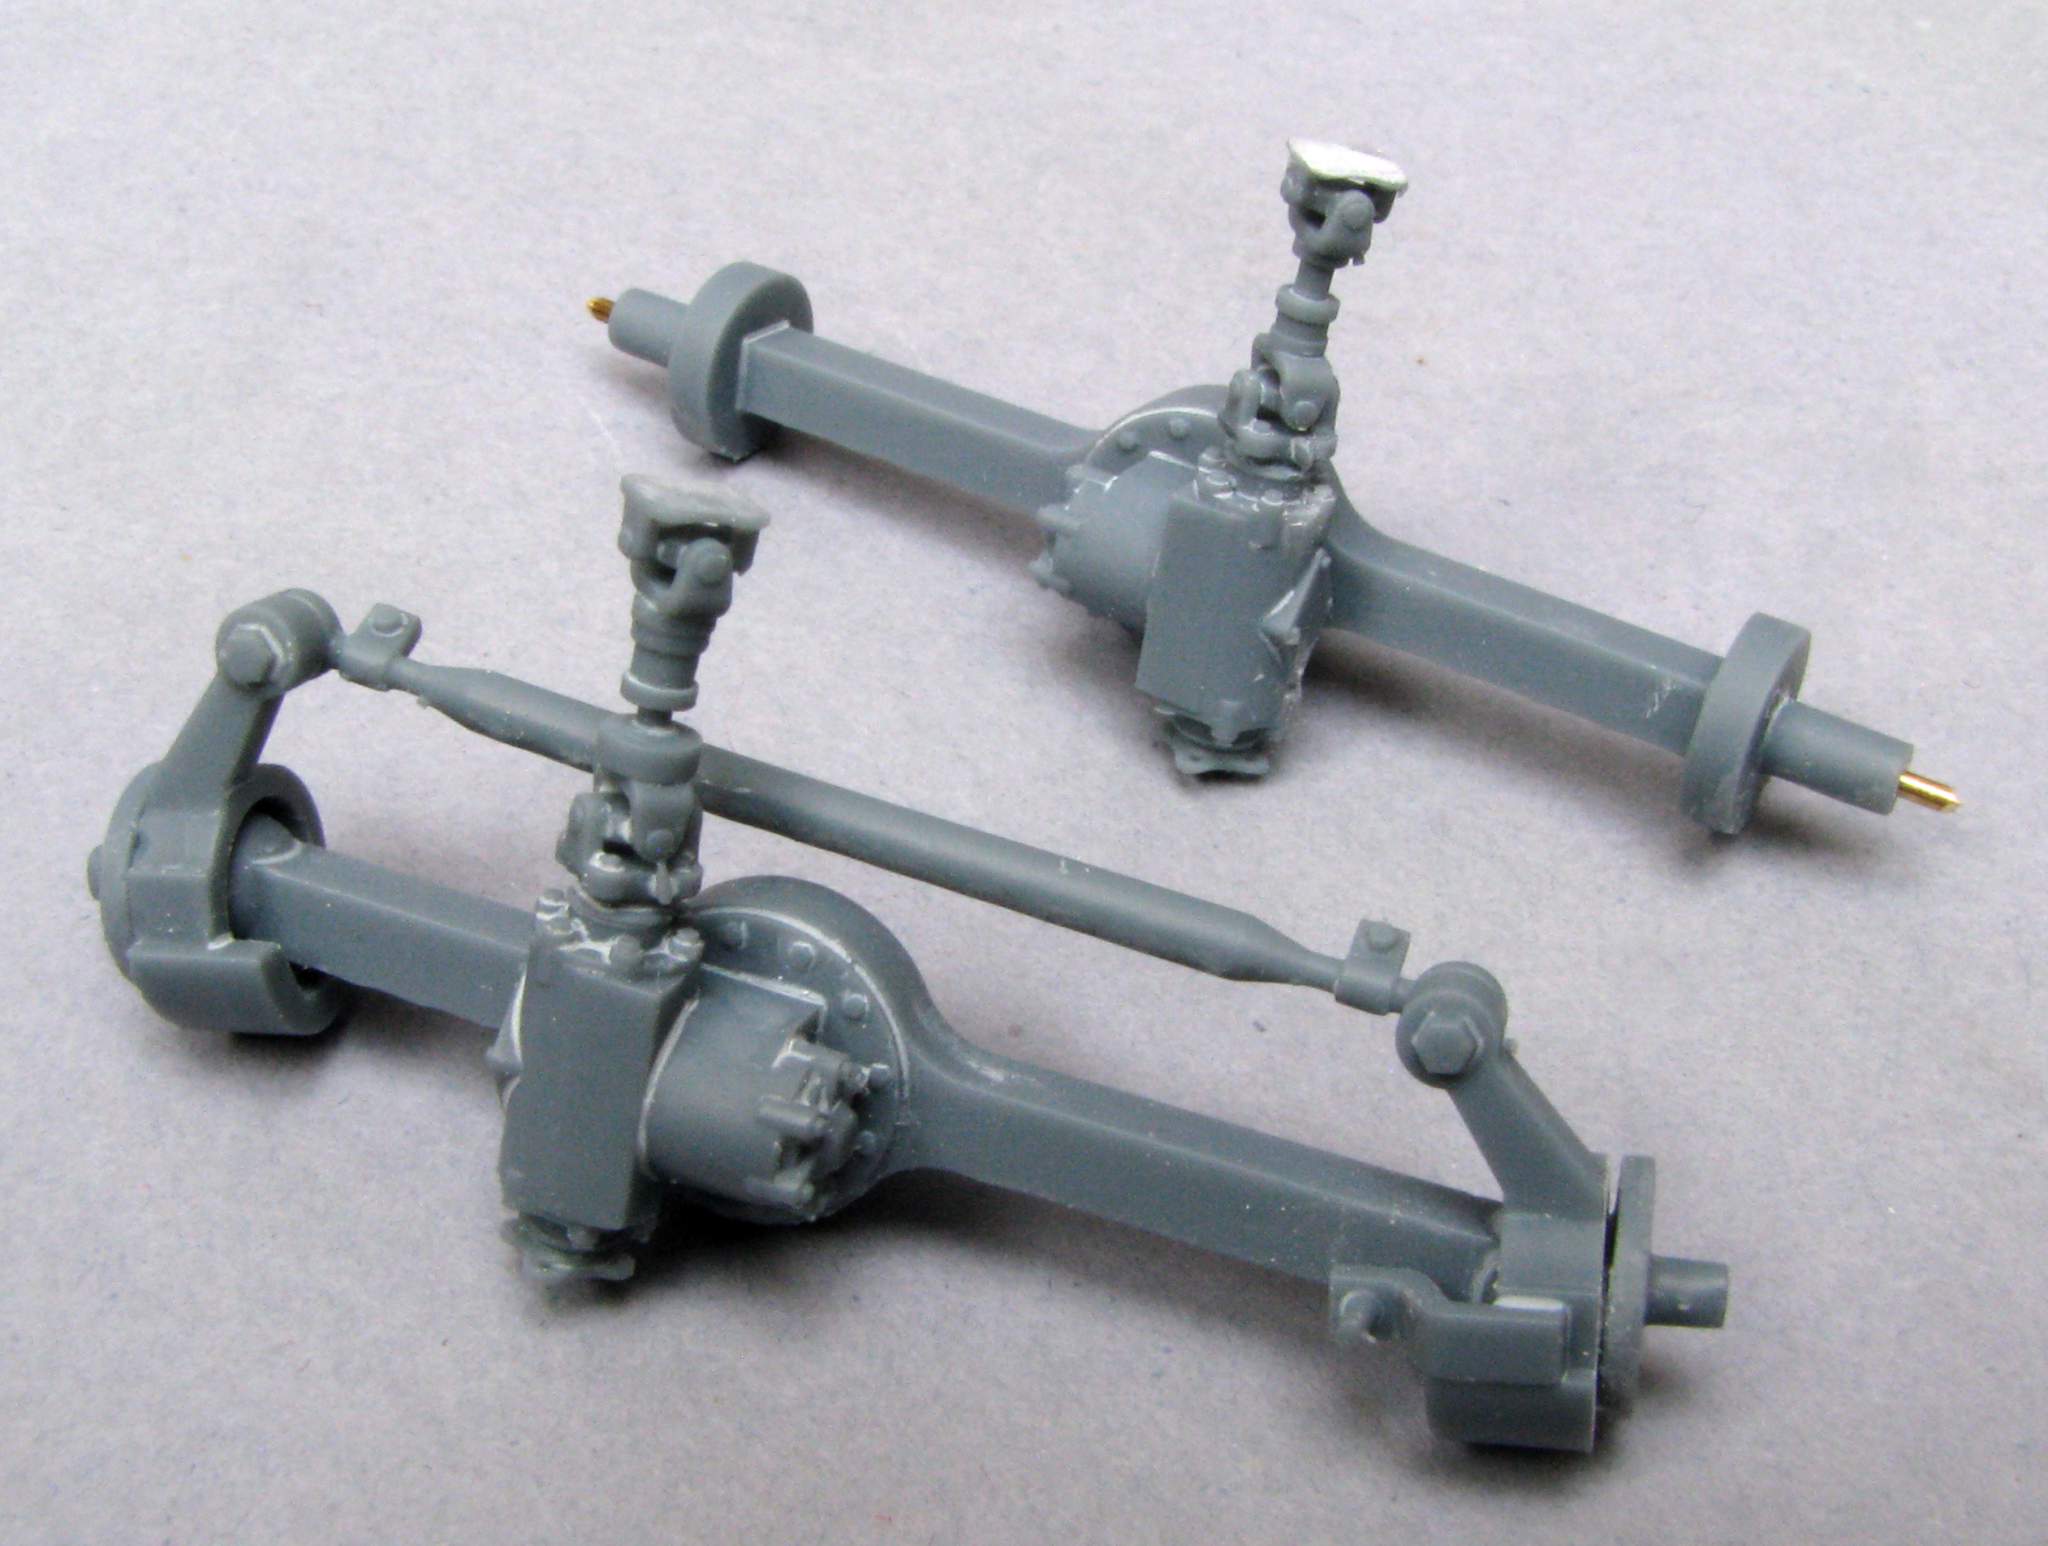
Right after starting my work I noticed I will also need new axles, because the kit parts are dramatically wrong. Below also photos of the axles I drew up and got as a 3D print:
Rear axle:
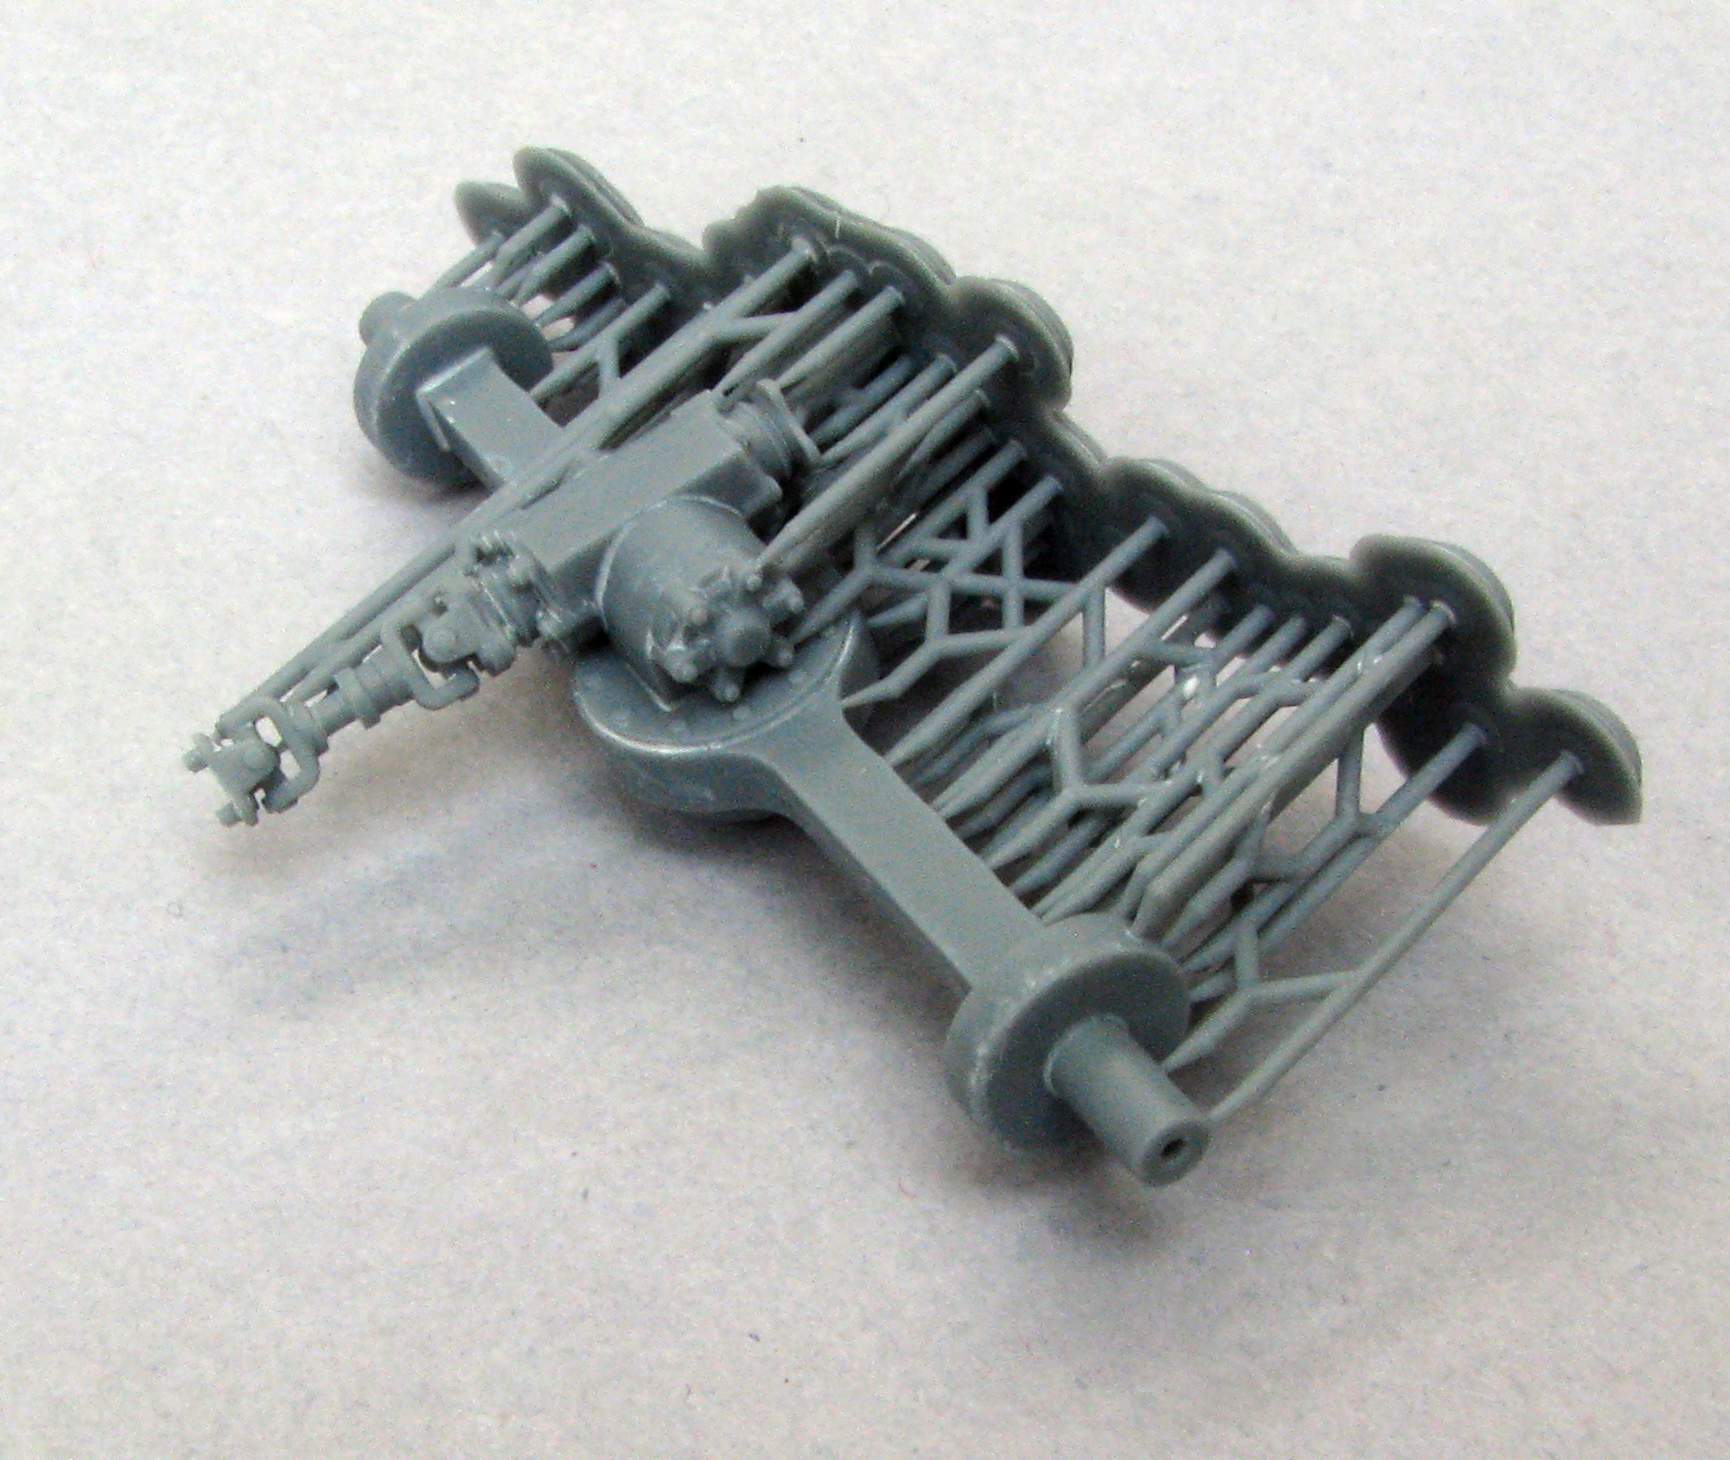
Front axle:

Both axles have a hole running straight through to allow me to stiffen them with some steel wire, to avoid the axles bending under stress and temperature. Additionally the front axle will be poseable to show the wheels “steered” to left or right (the Hobby Boss doesn’t allow that).
So that would be it for the first time - thanks for looking and have a nice day
Paweł