ProModeler F-117 Stealth Fighter

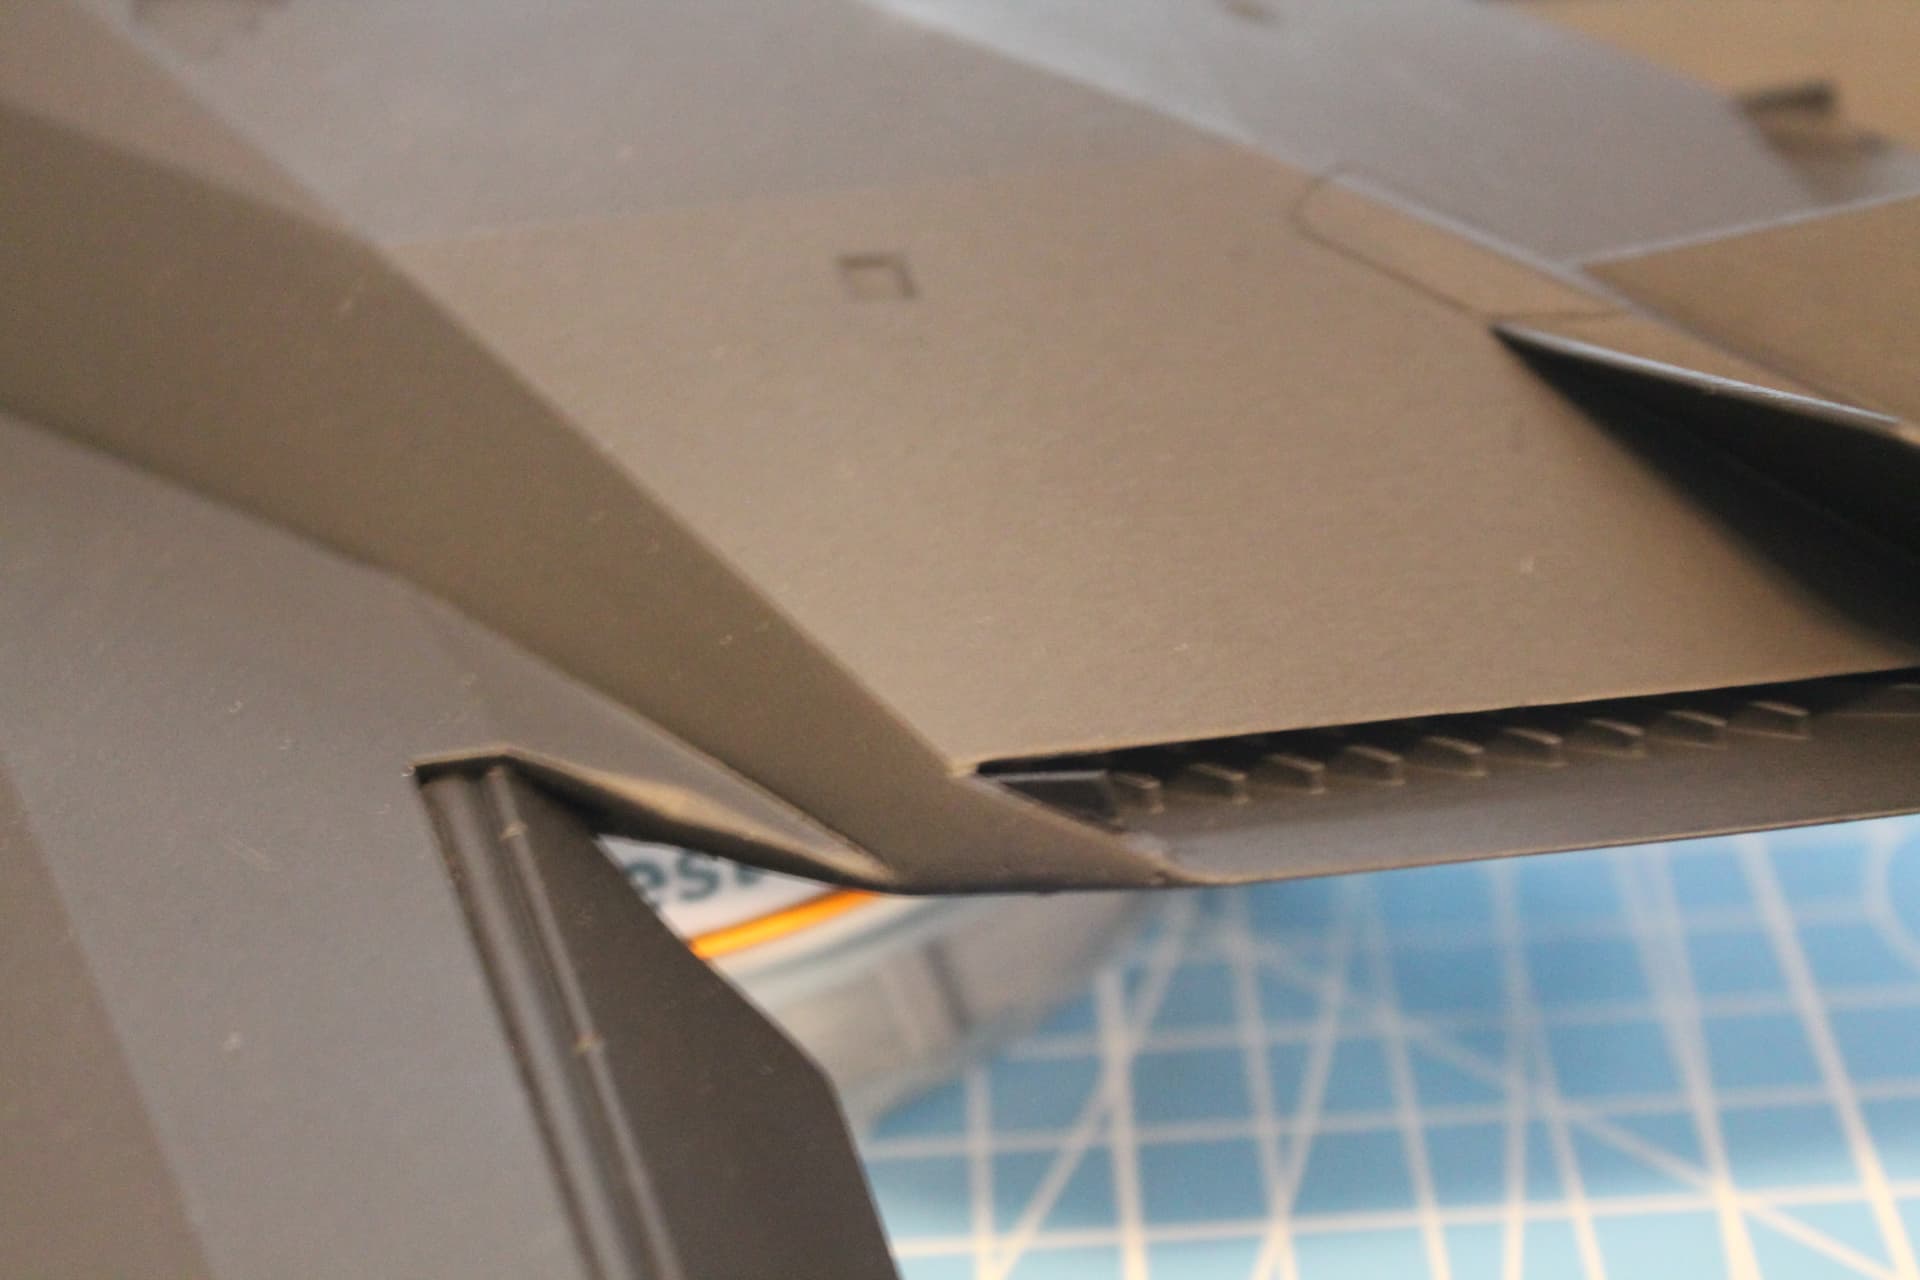
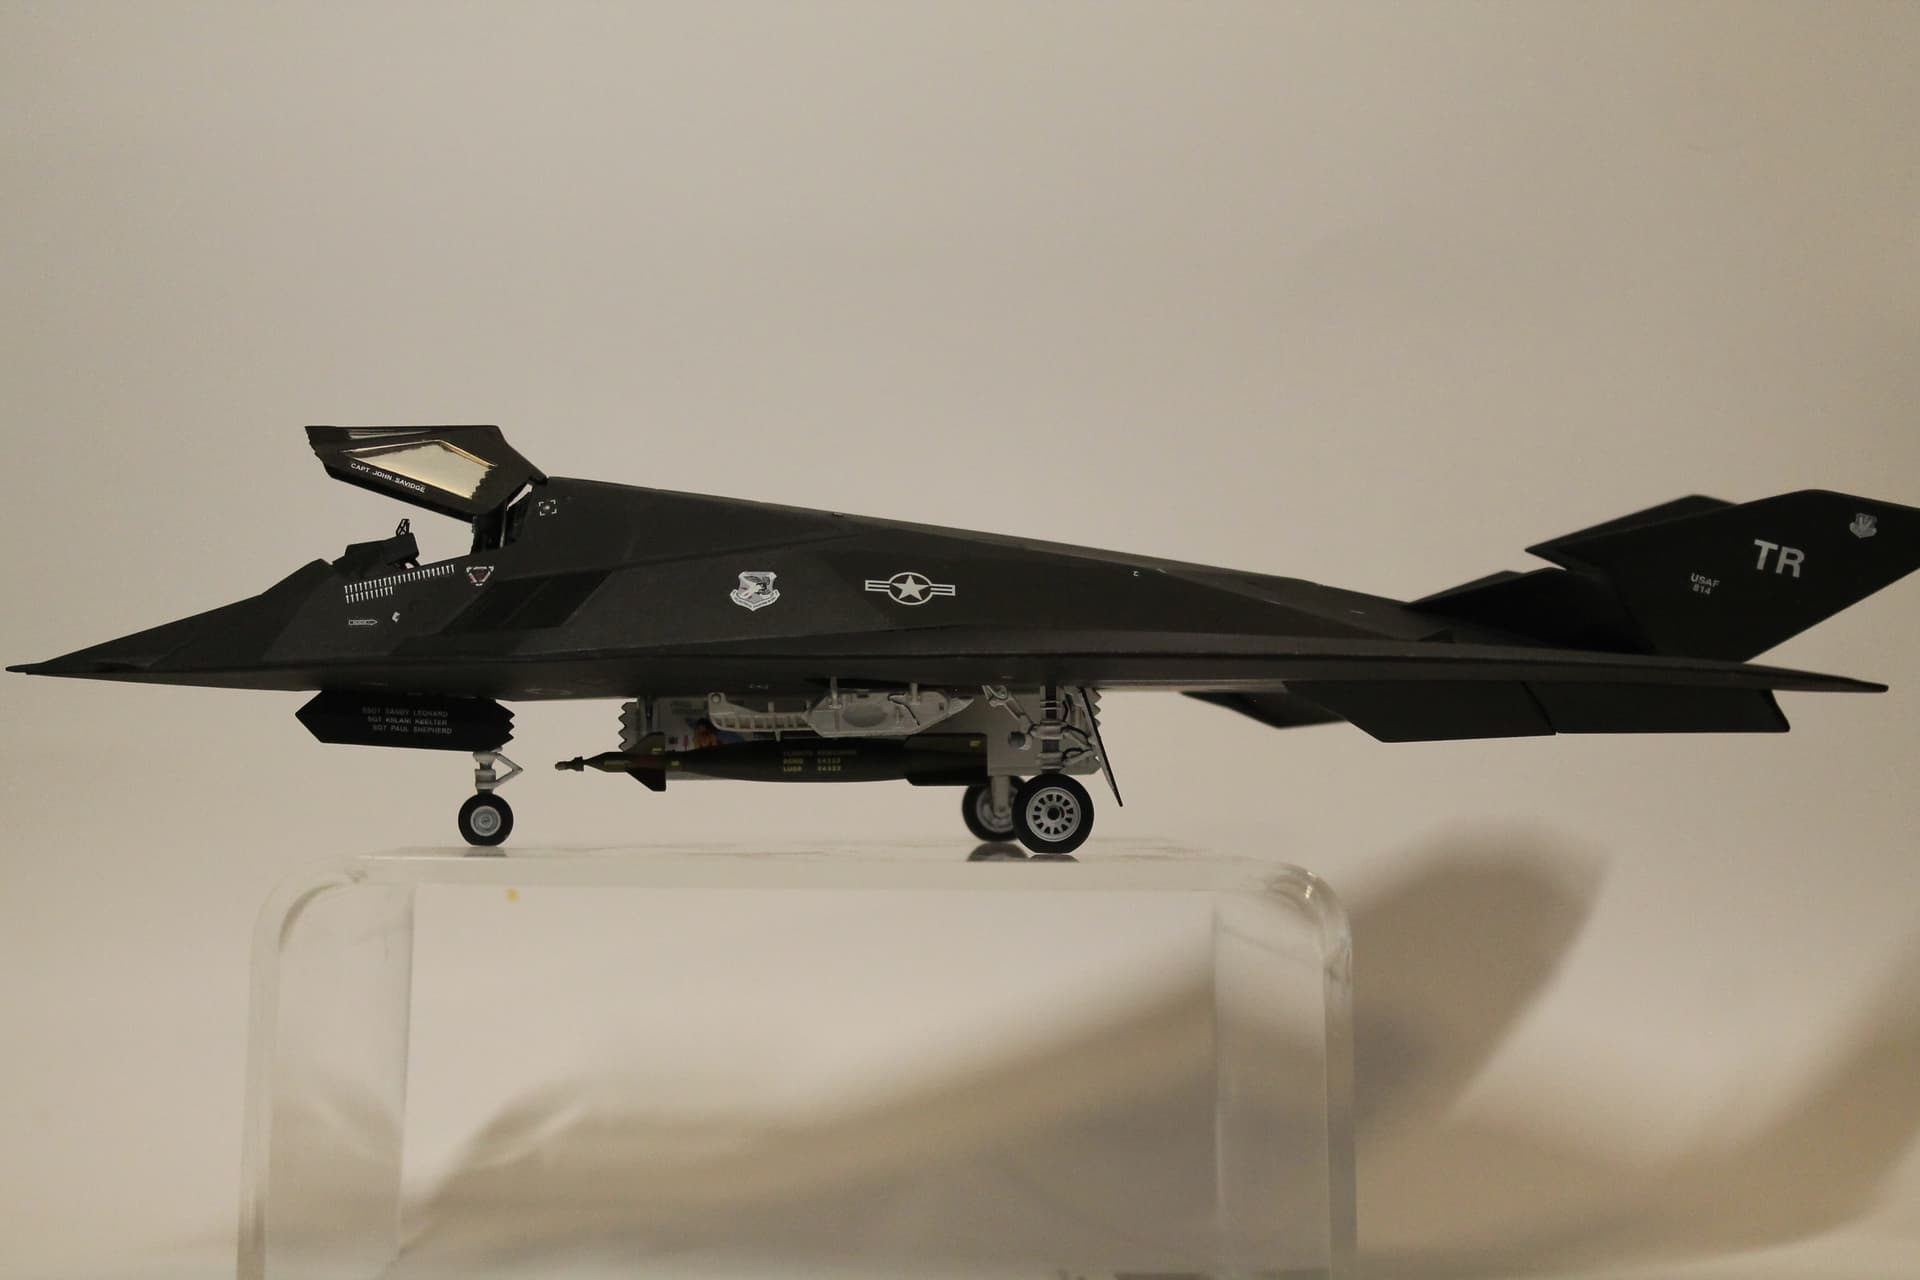
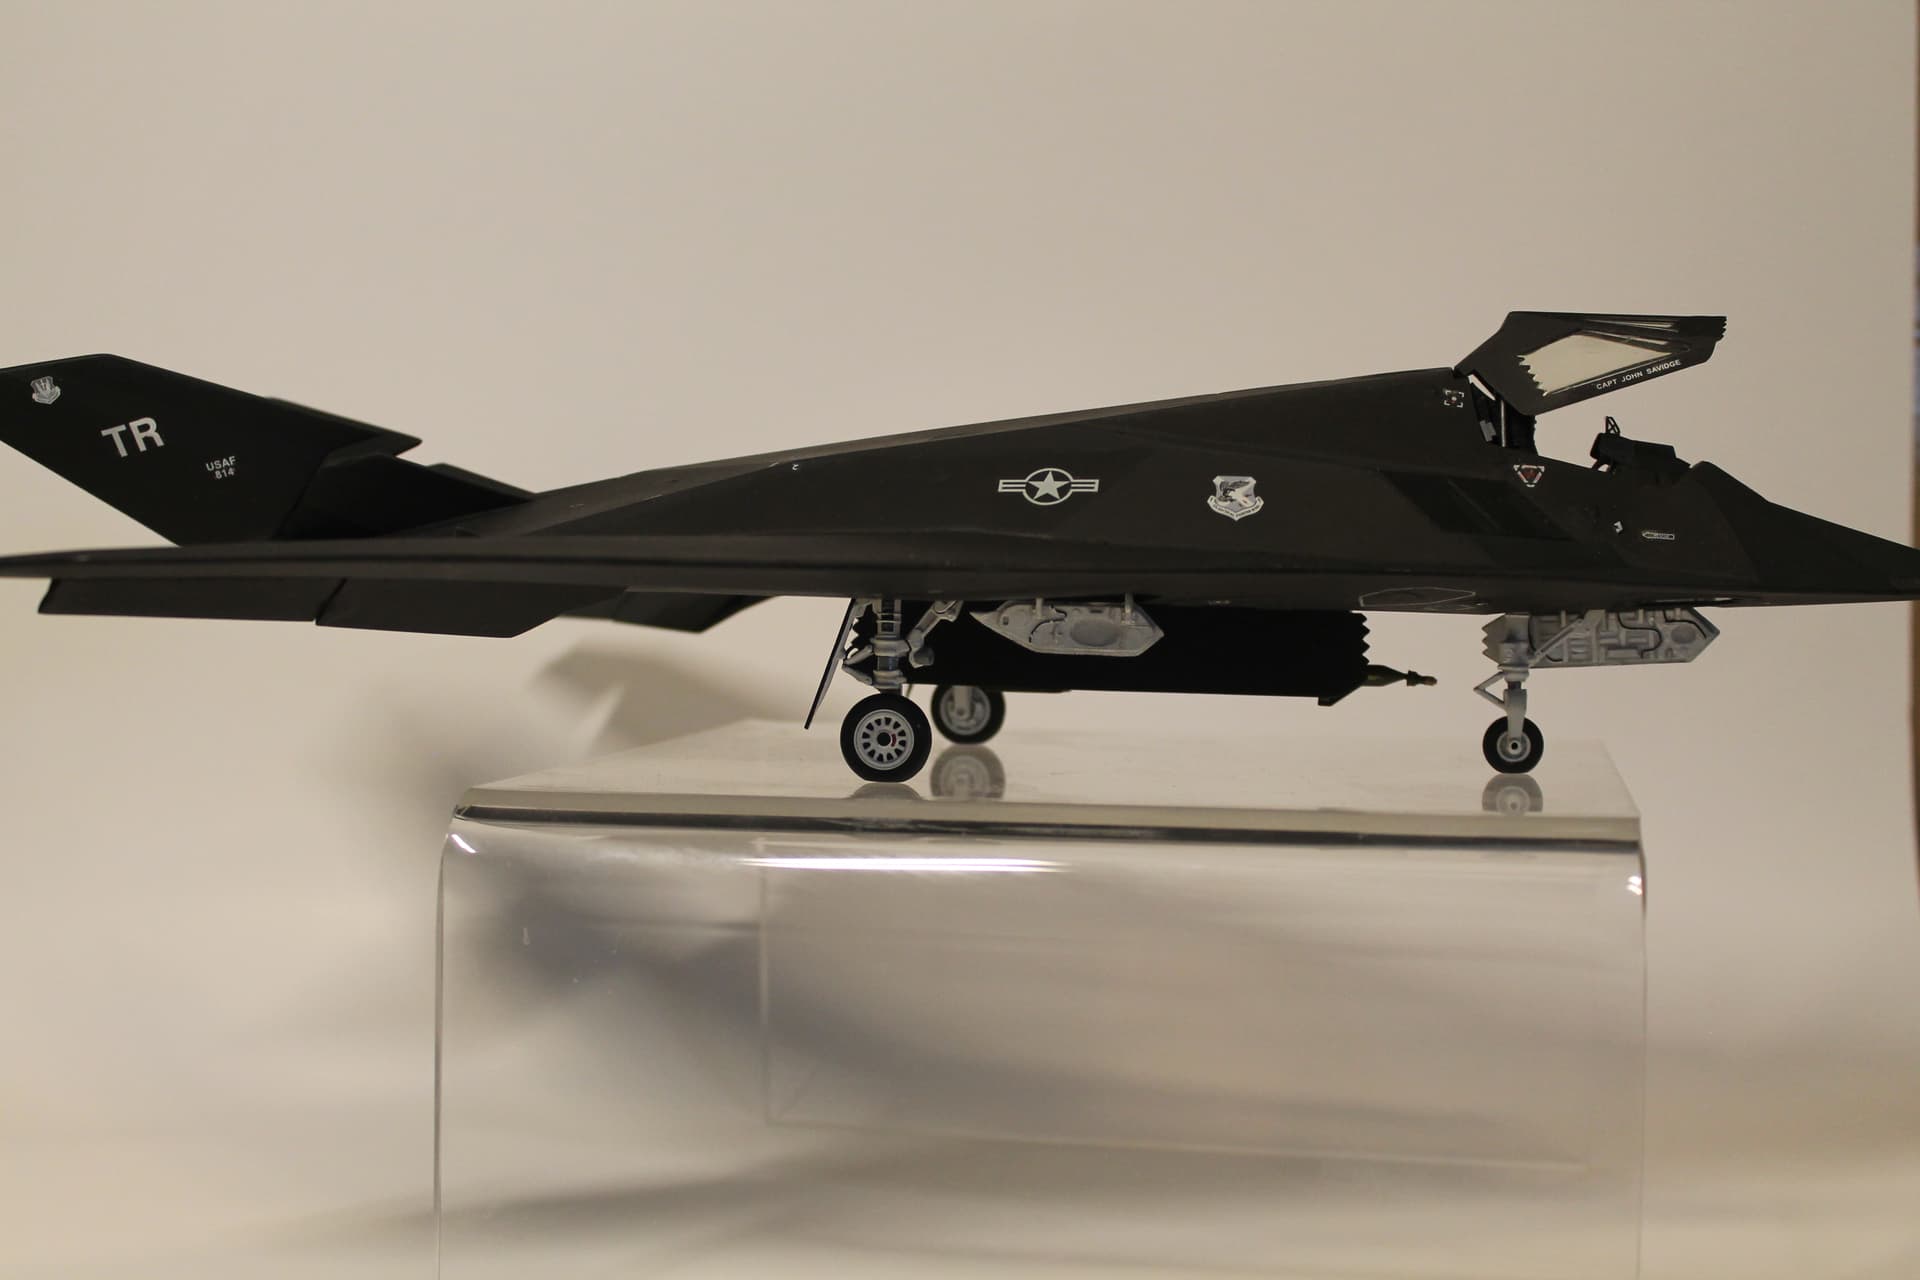
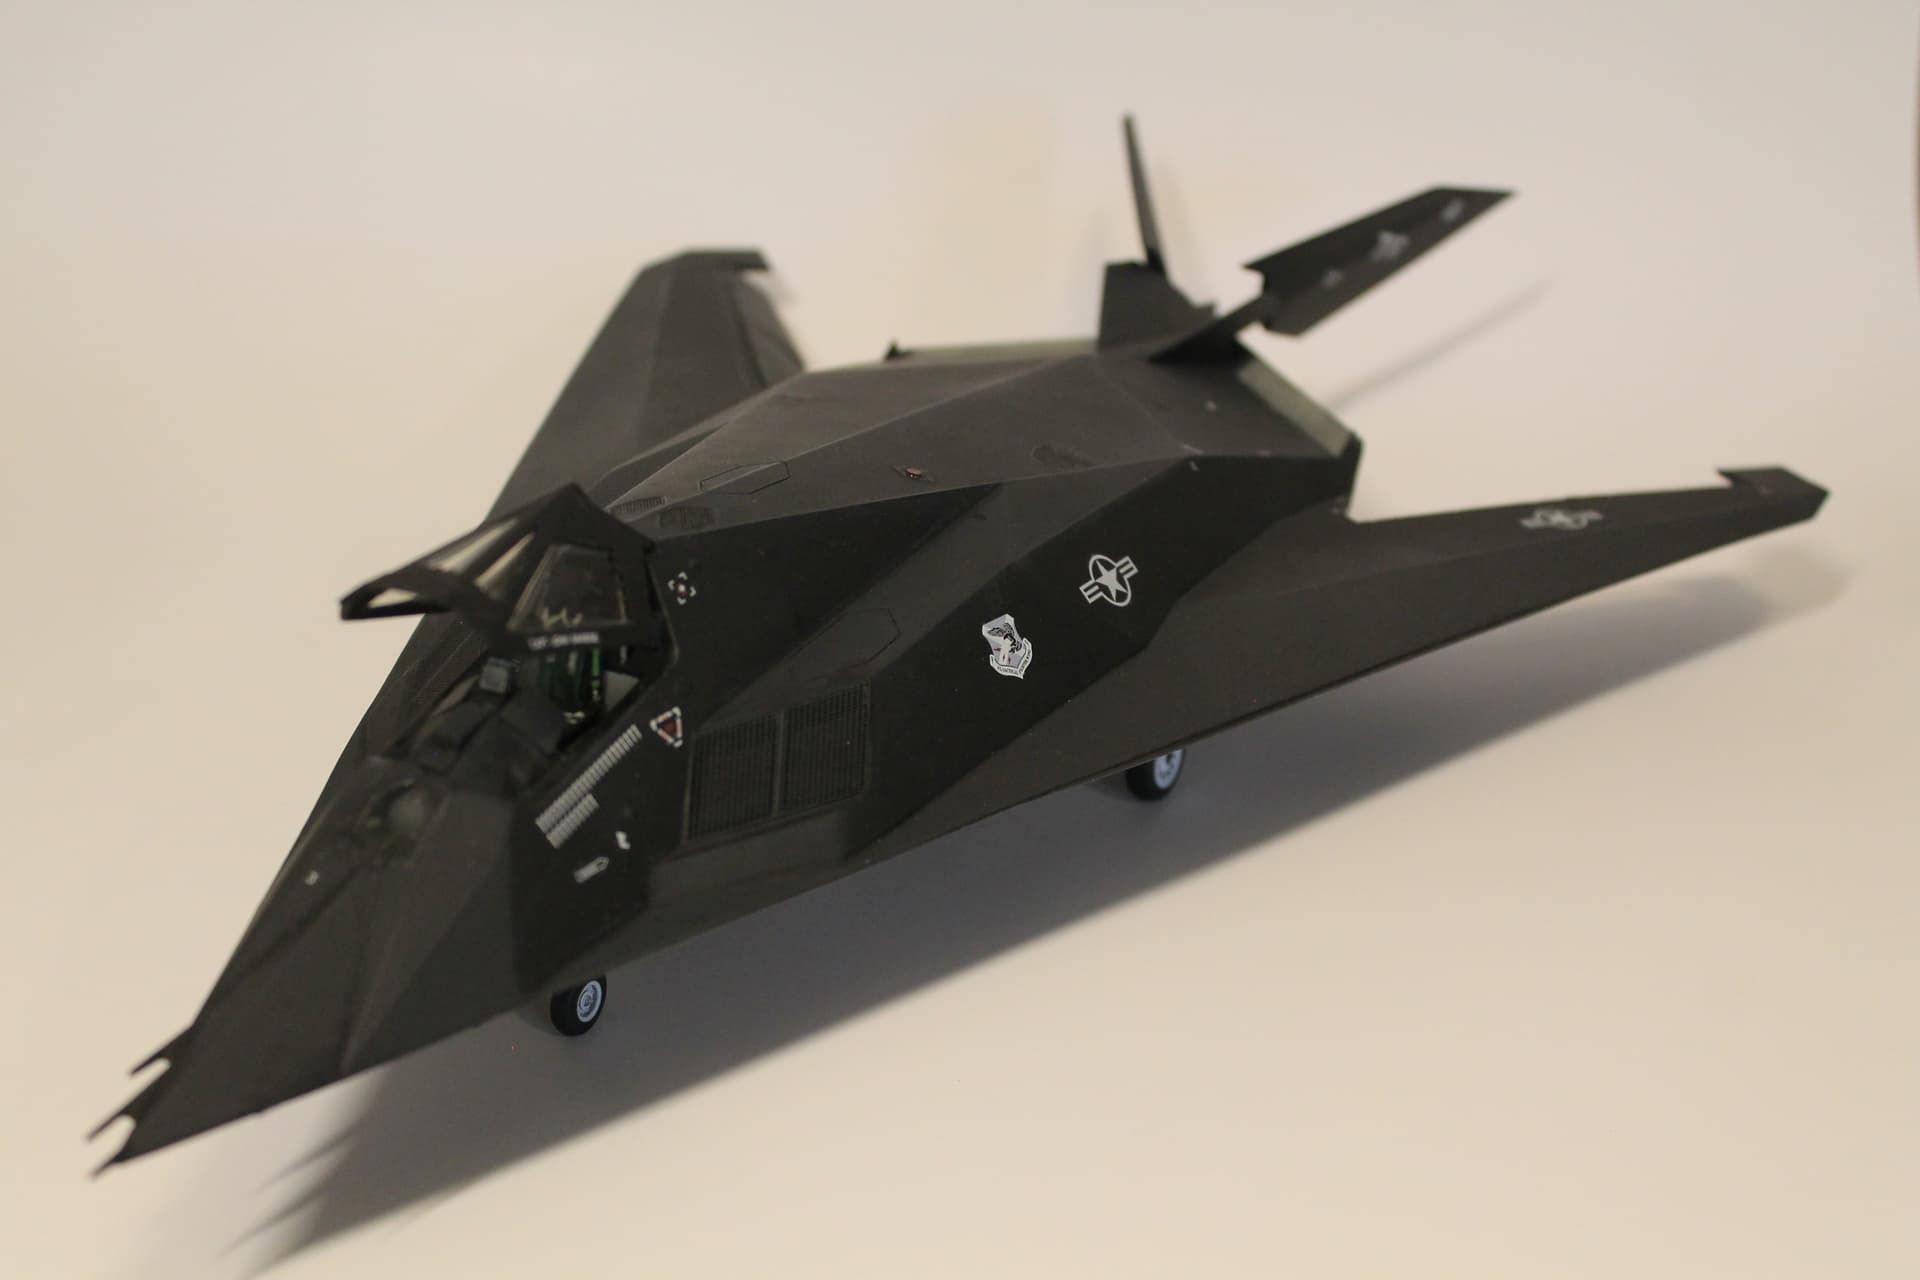
Monogram originally released their F-117A in 1991, then reboxed it under their ProModeler label in 1995. The main difference being the addition of the weapons bay. I don’t remember when I acquired this kit, but it is safe to say that it has languished in the stash for a very long time. Due to its age the kit suffers from a number of inaccuracies, poor detail, and a lot of fit issues.

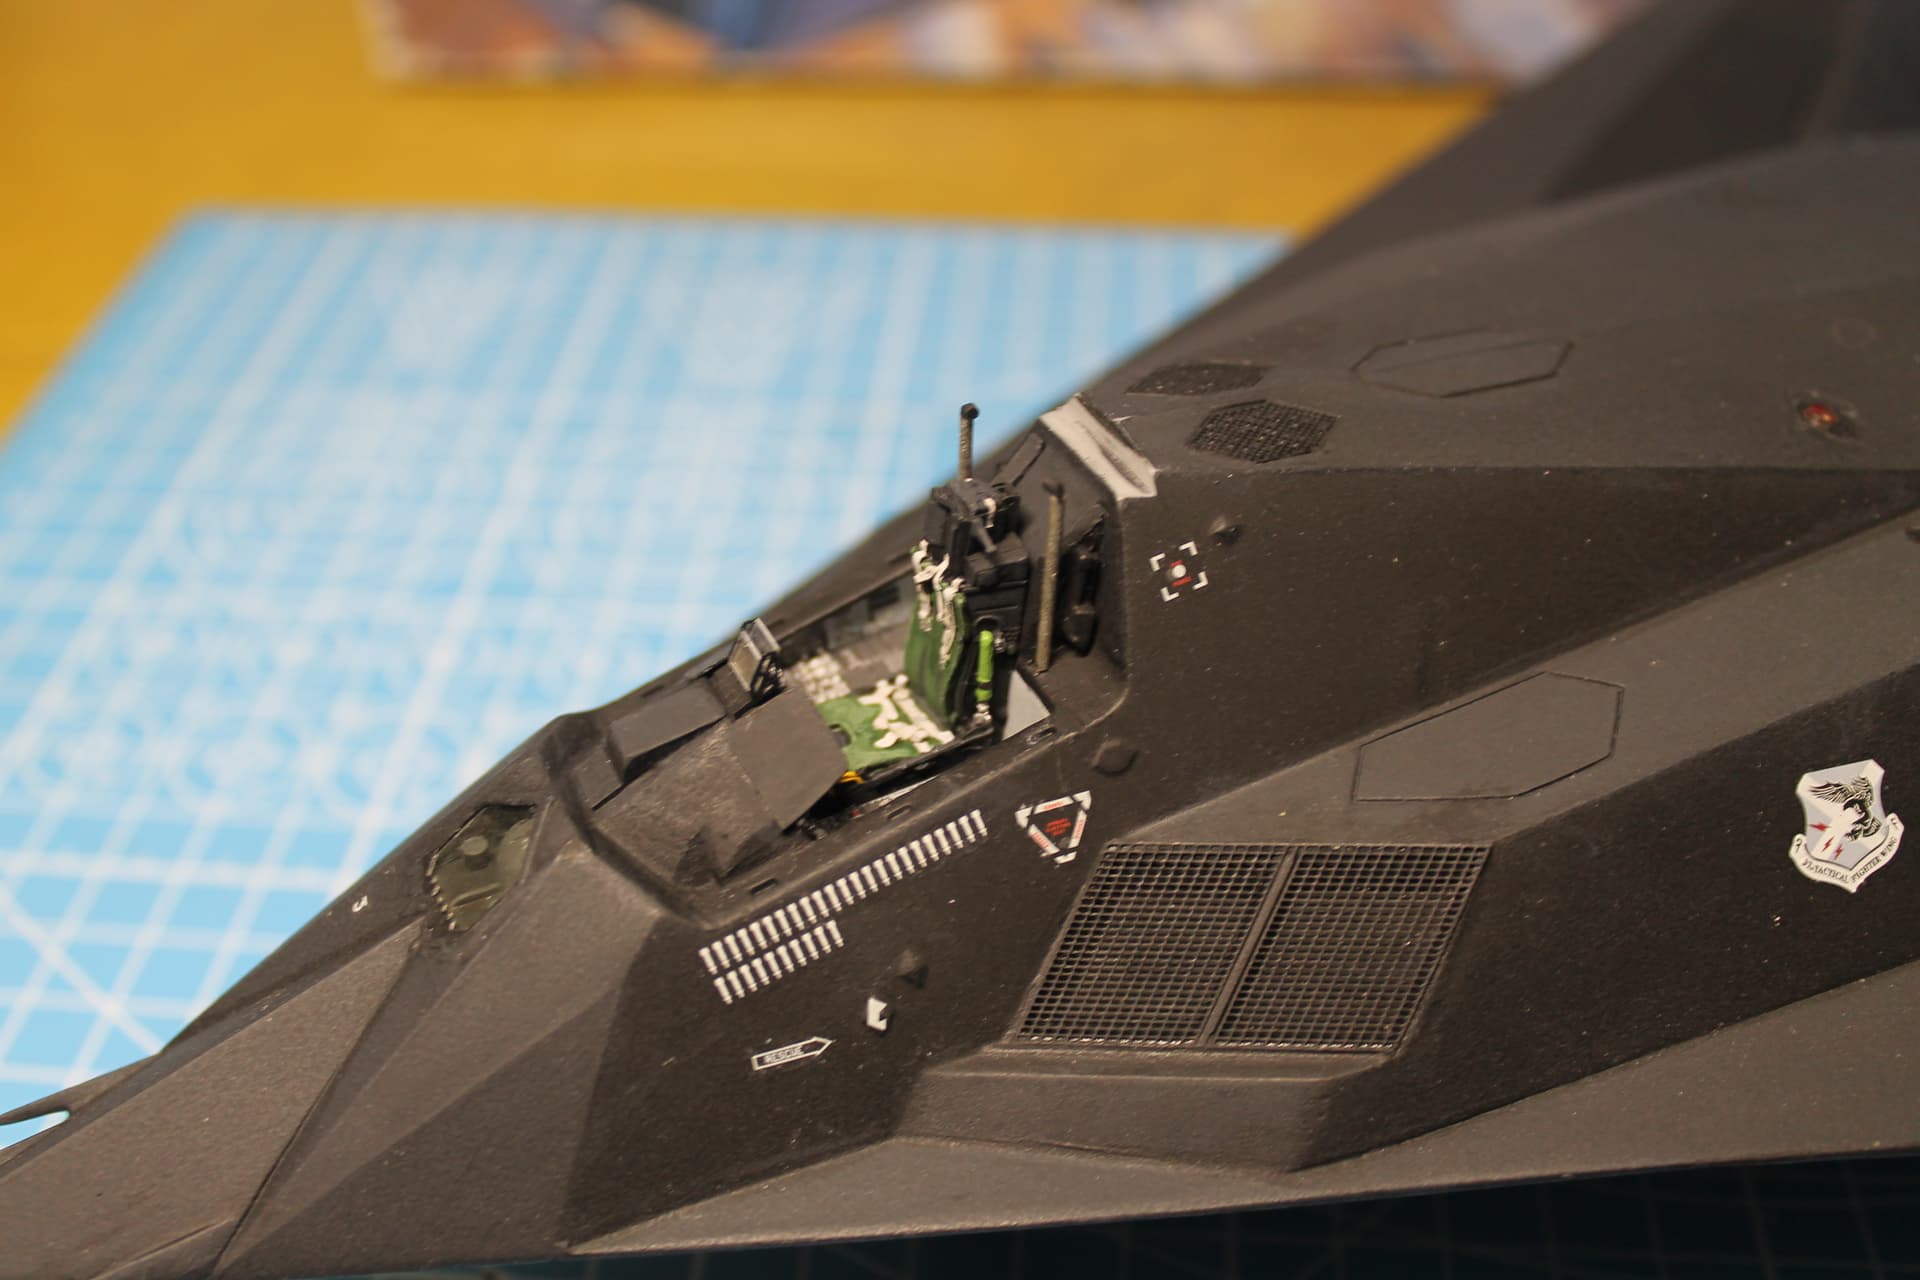
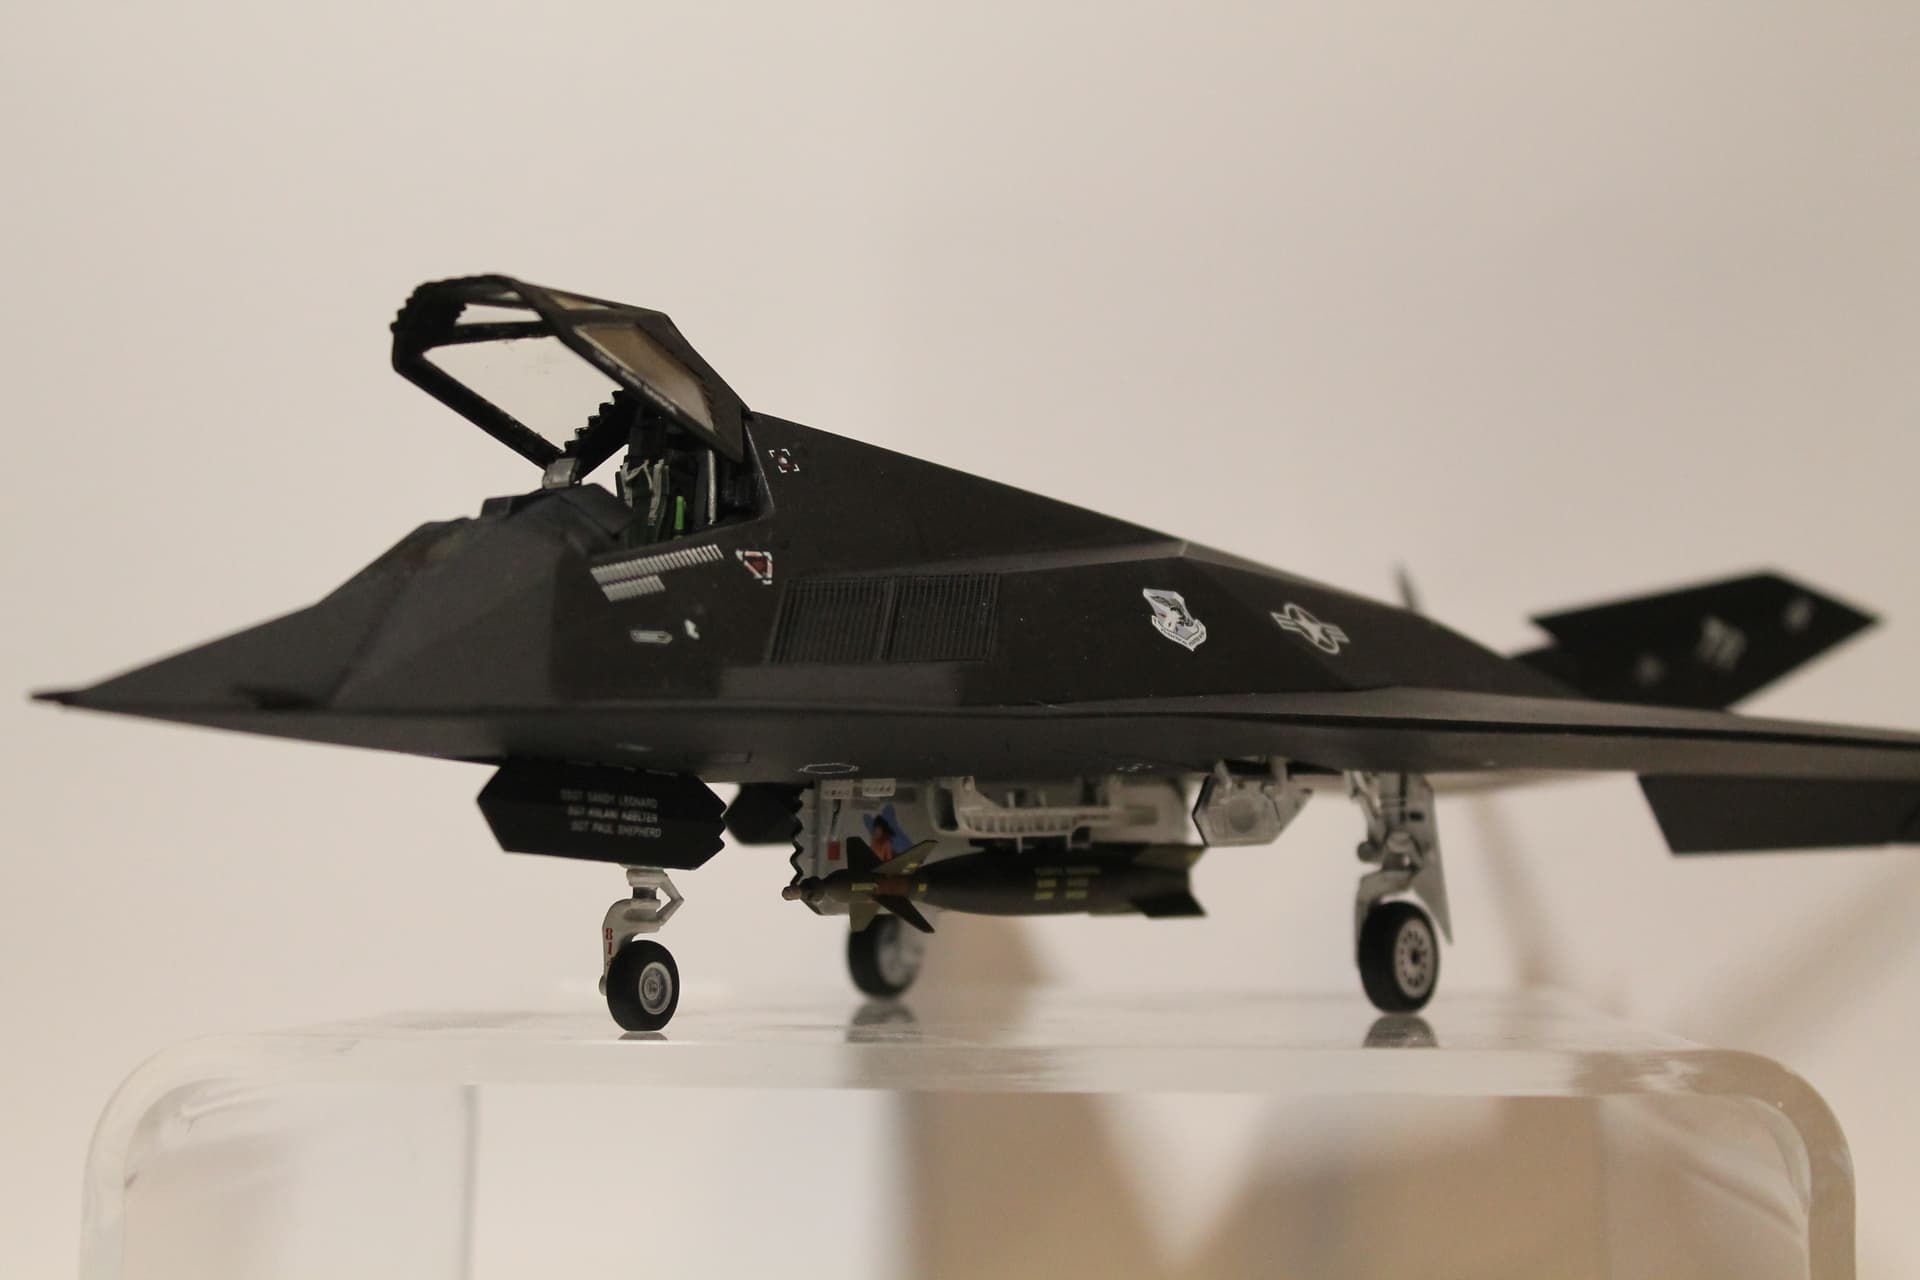
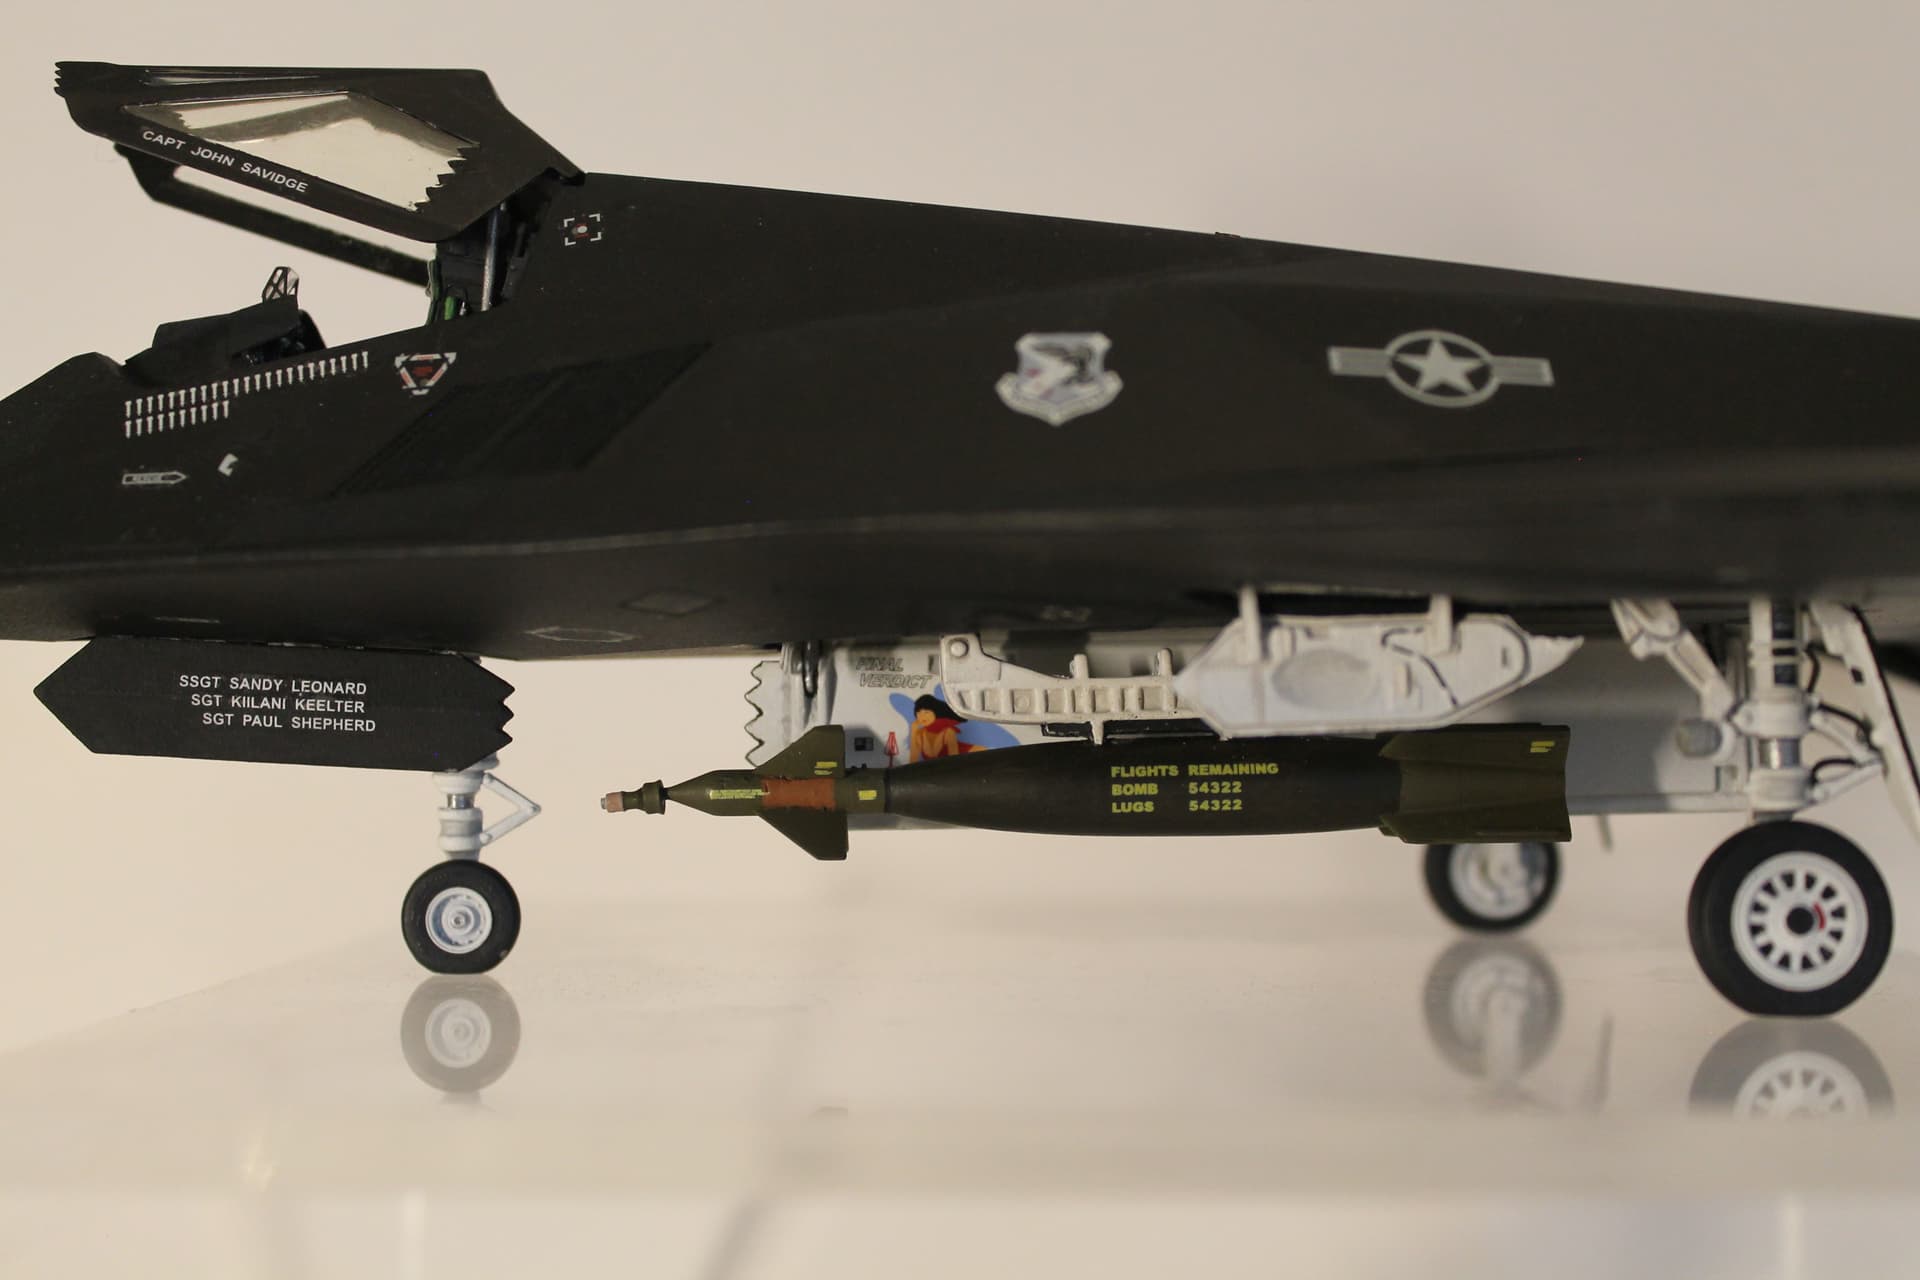
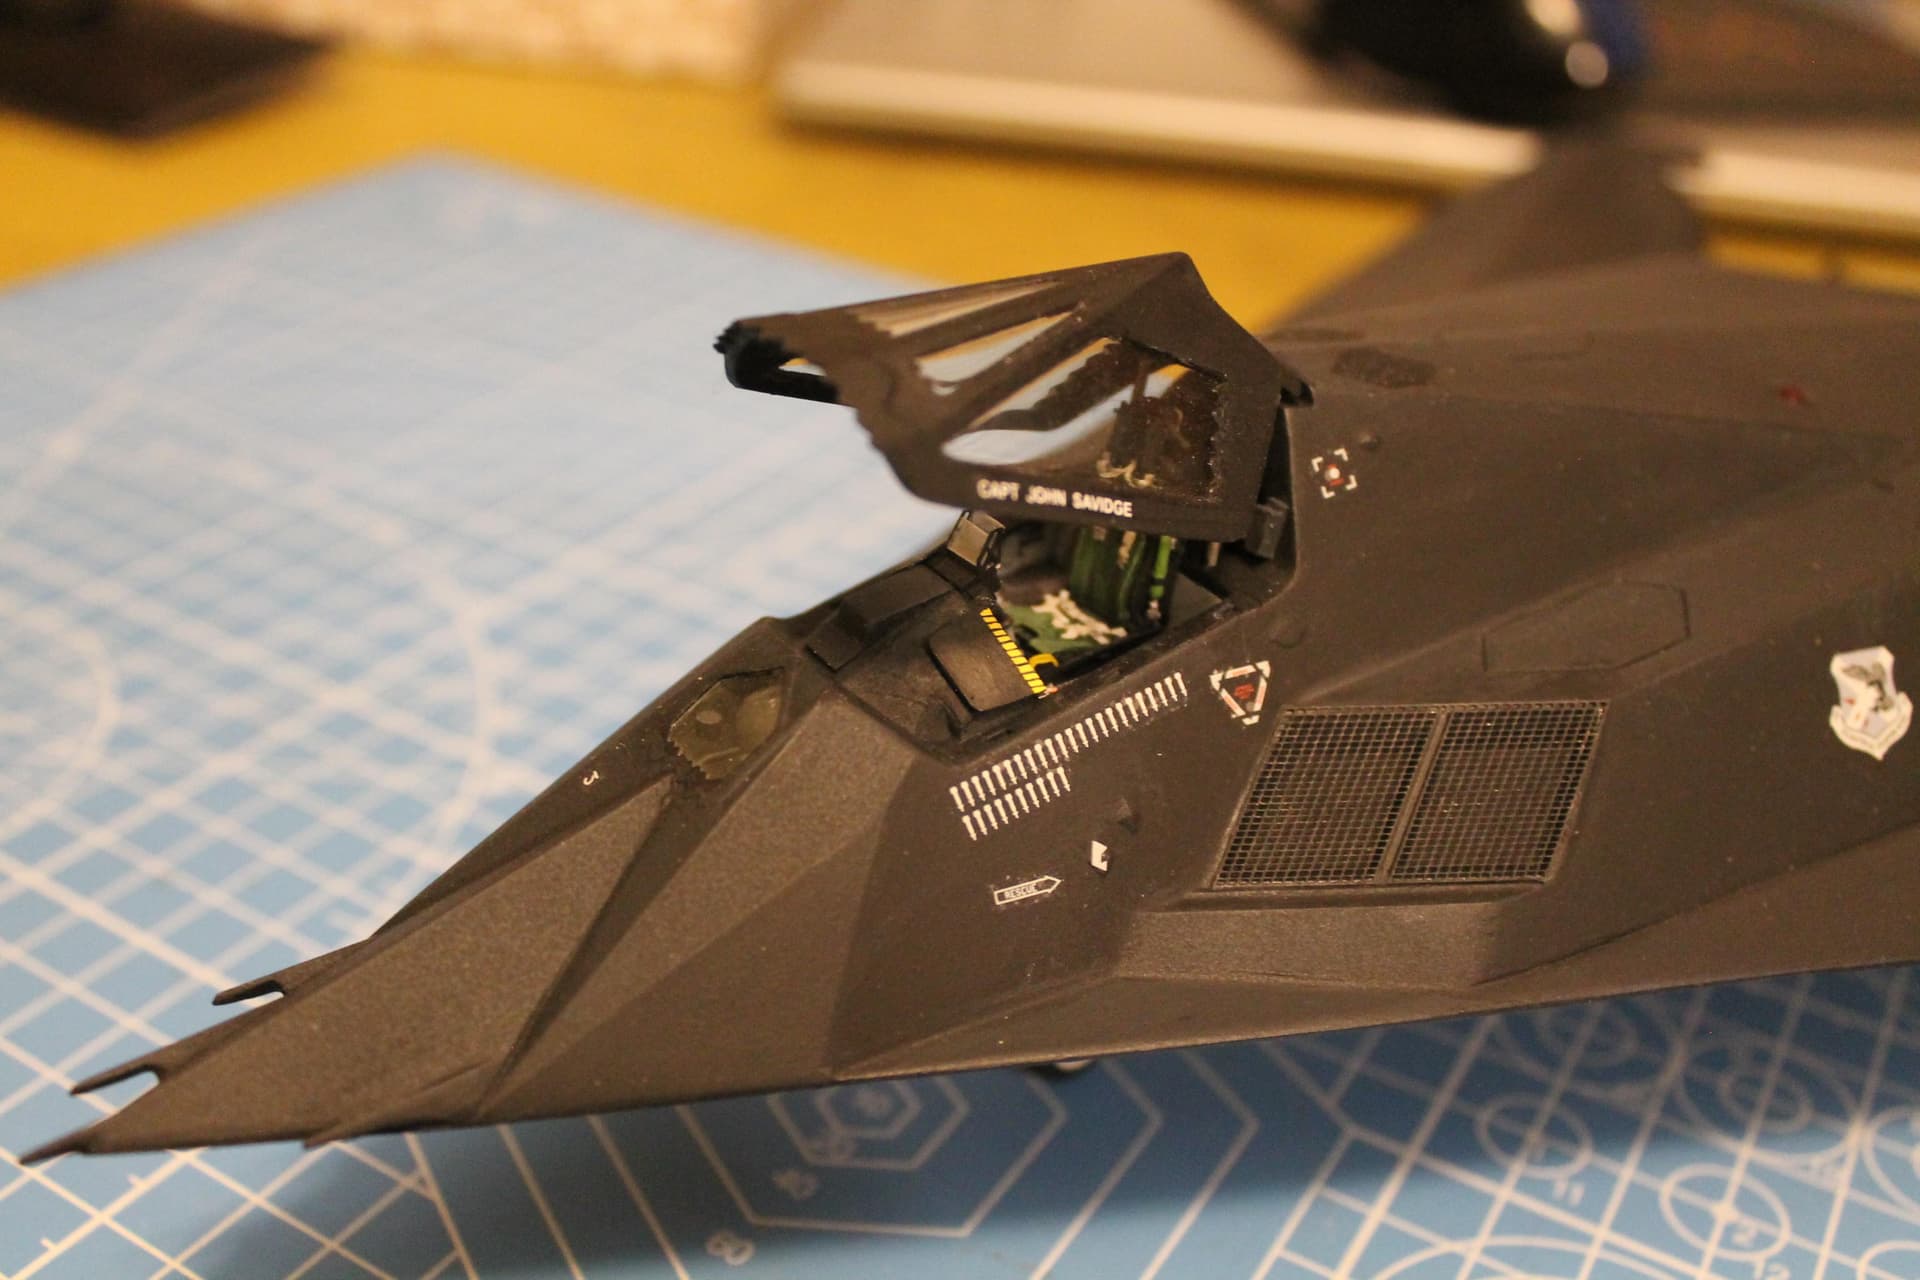
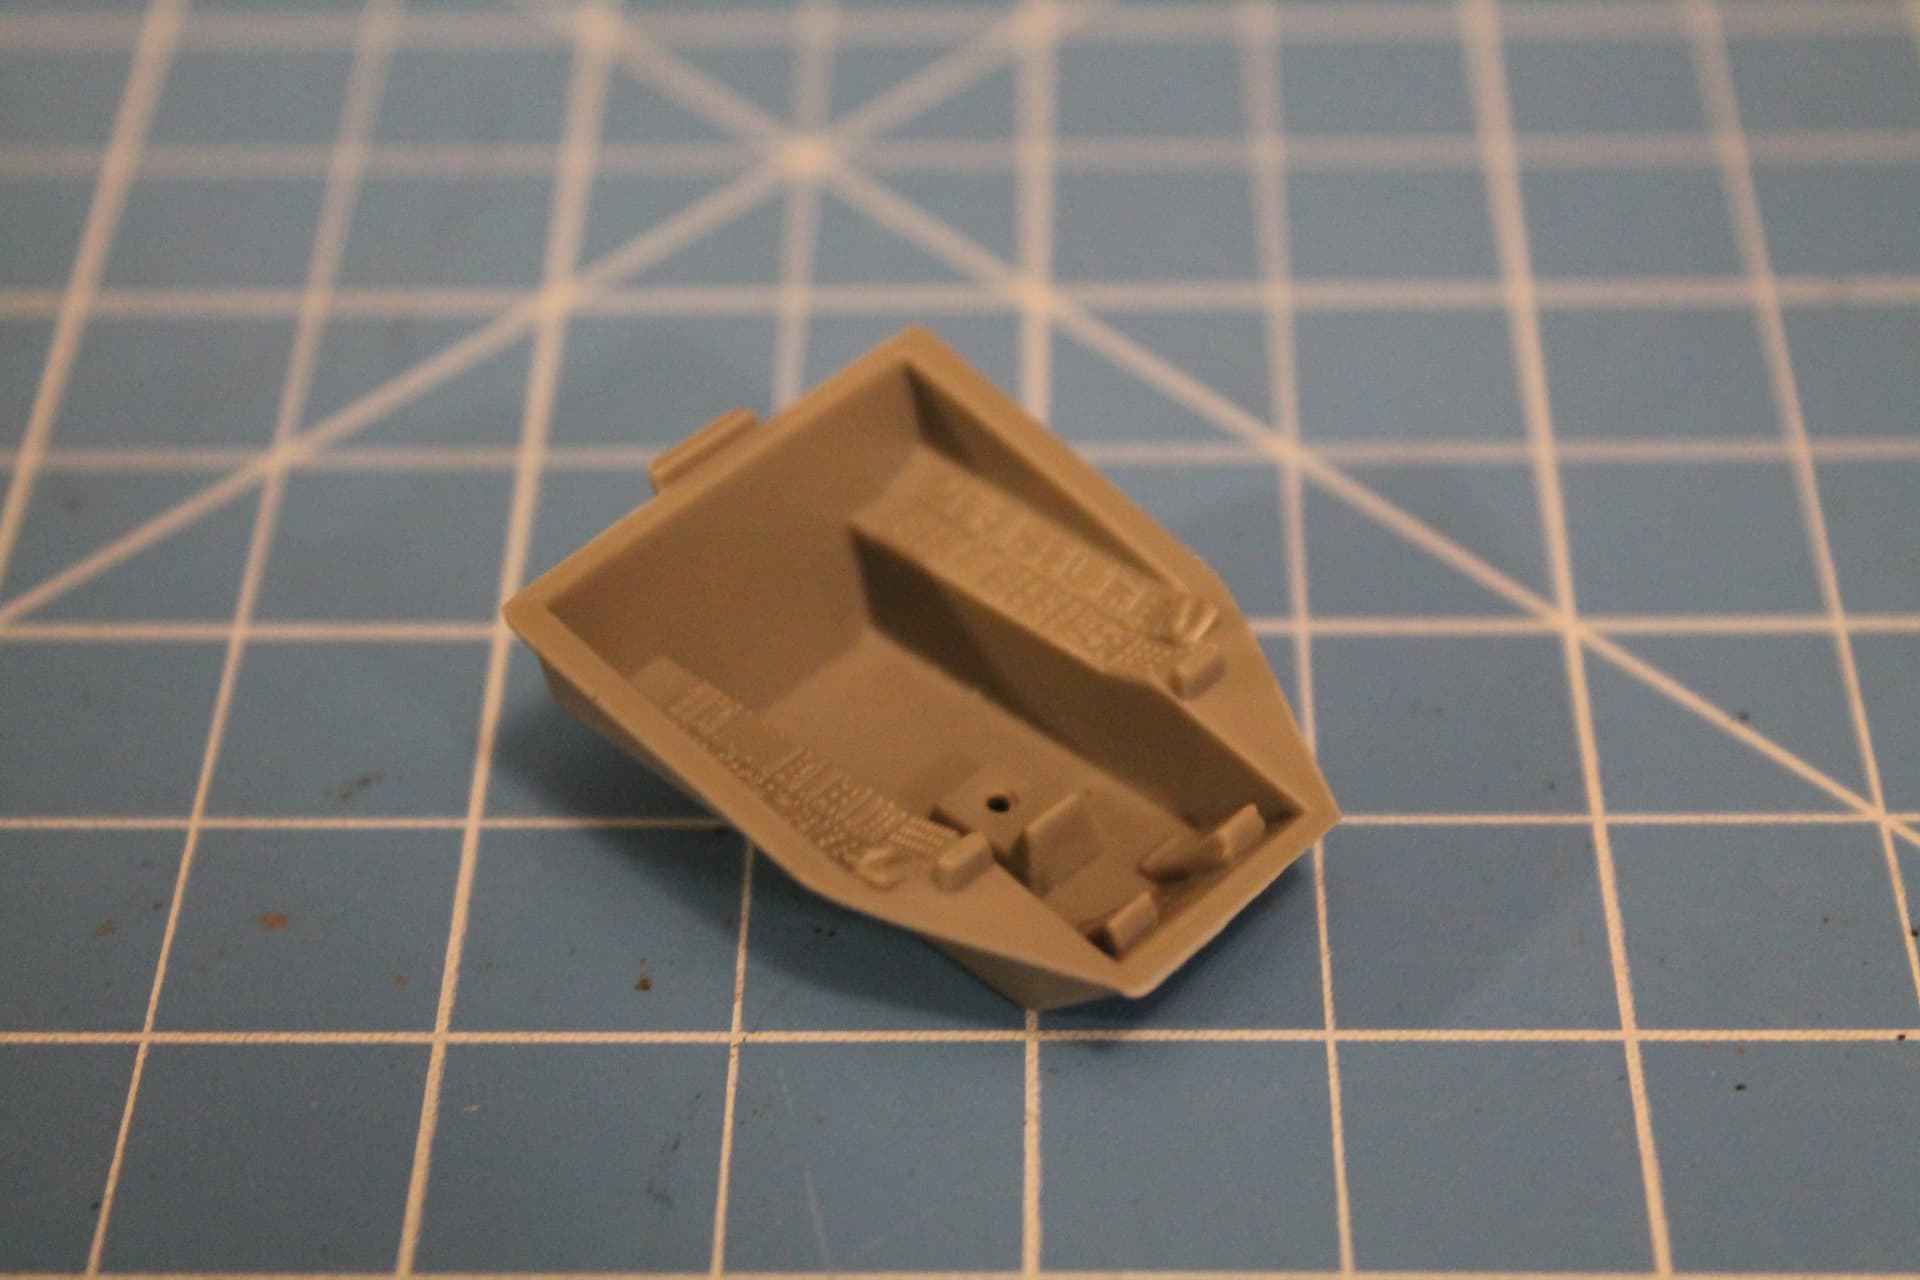
When I dusted off the box and decided to build this kit, I thought it was going to be a quick build. After looking it over I chose to improve what I could and live with the rest. I spent most of my time on the cockpit. It was undersized and the detail, what there was, was soft, making painting difficult. I started by purchasing the Quinta Studios 3D printed decal set.

WRFa9E91

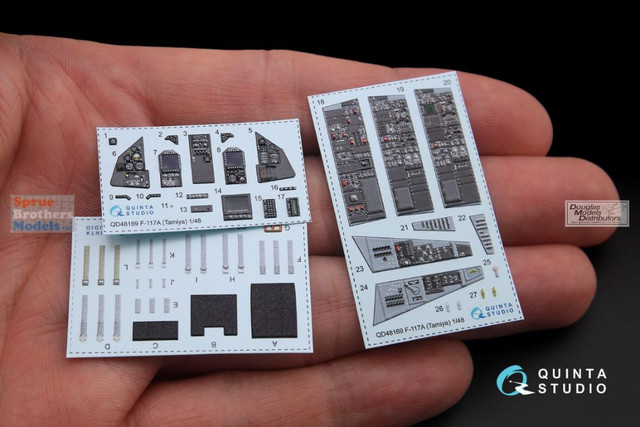
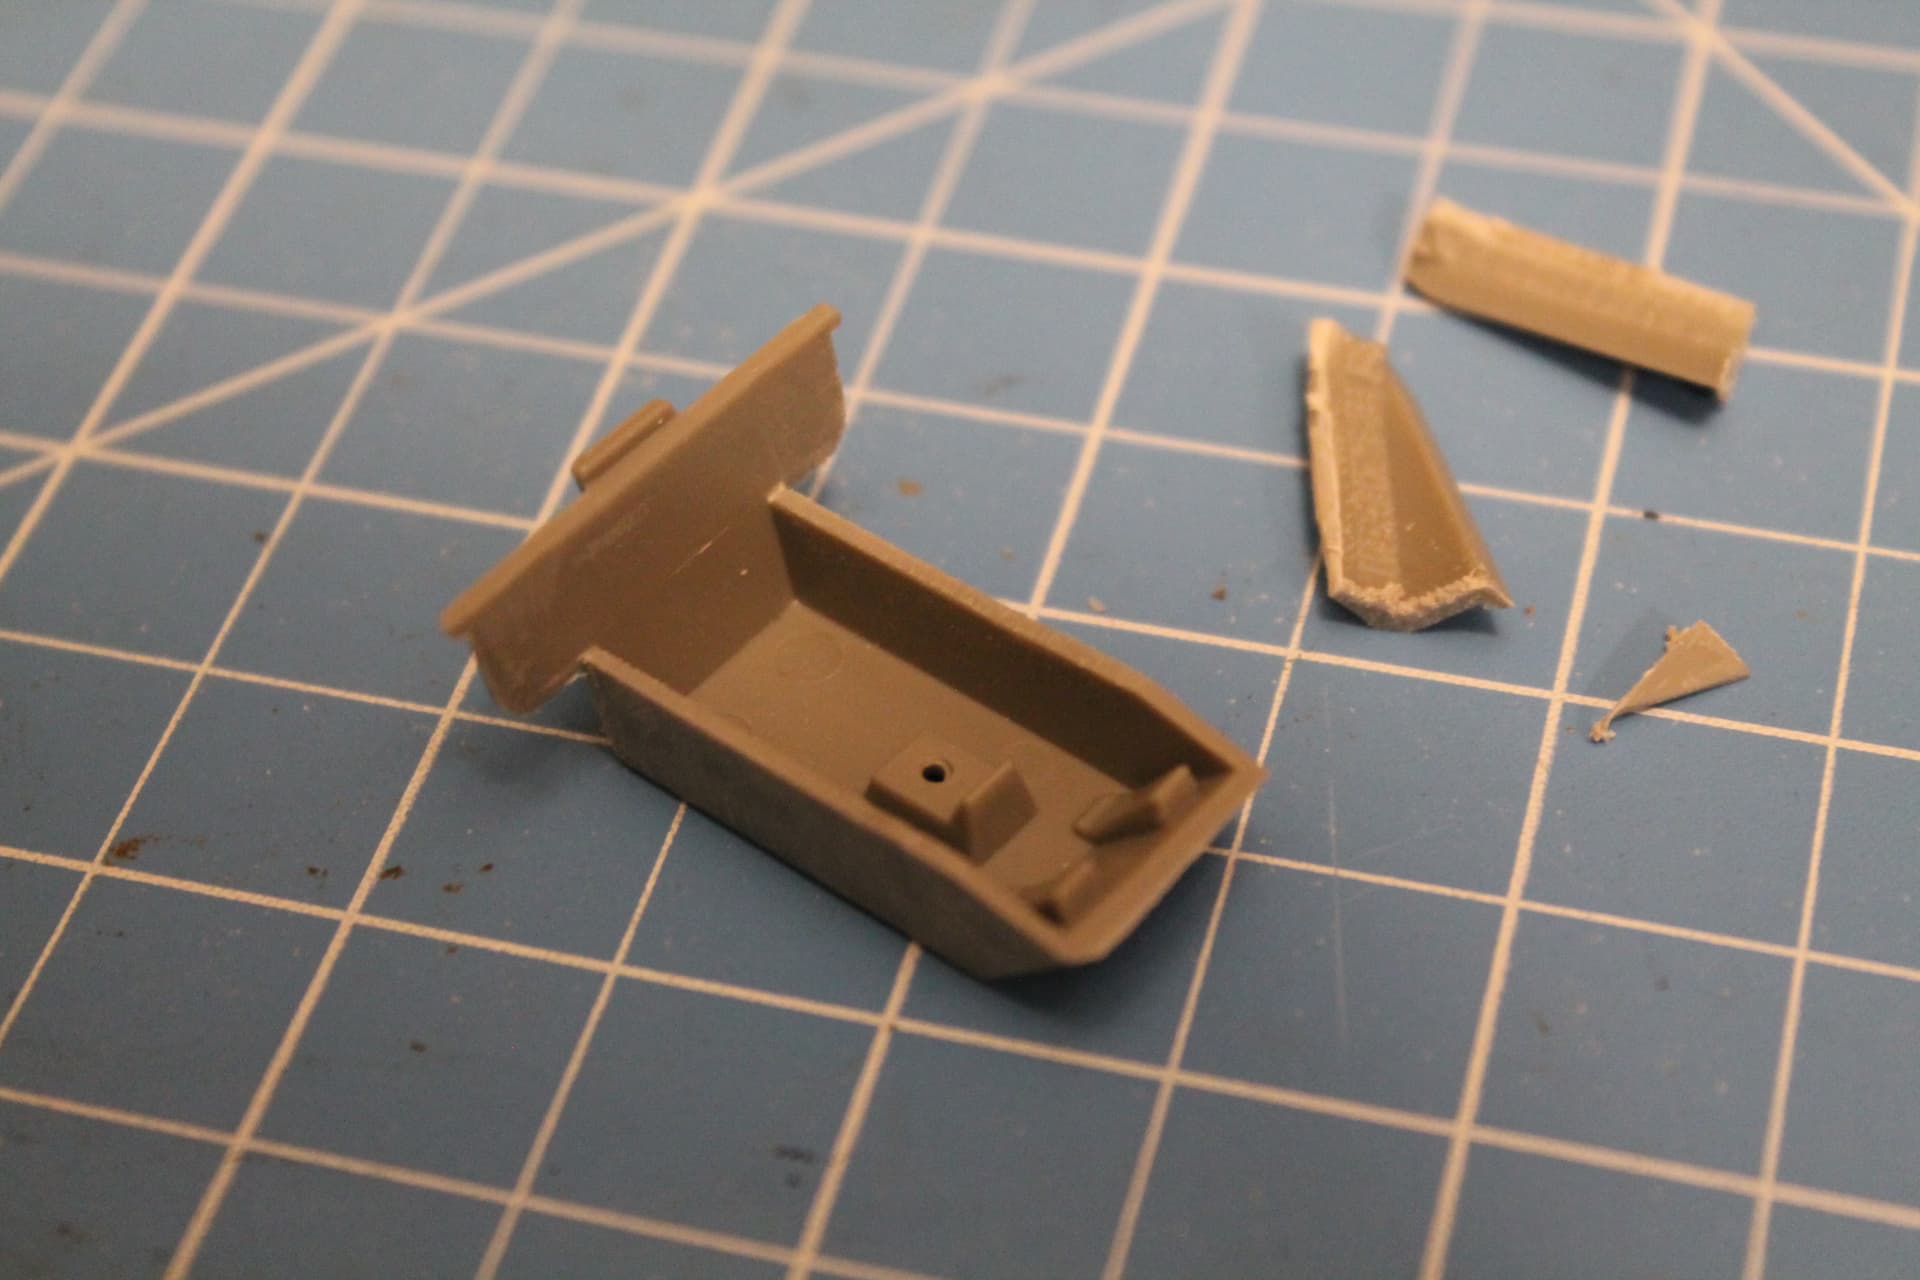
It is designed to fit the Tamiya kit which is a much better option if you want to build a F-117. I started by enlarging the cockpit tub.

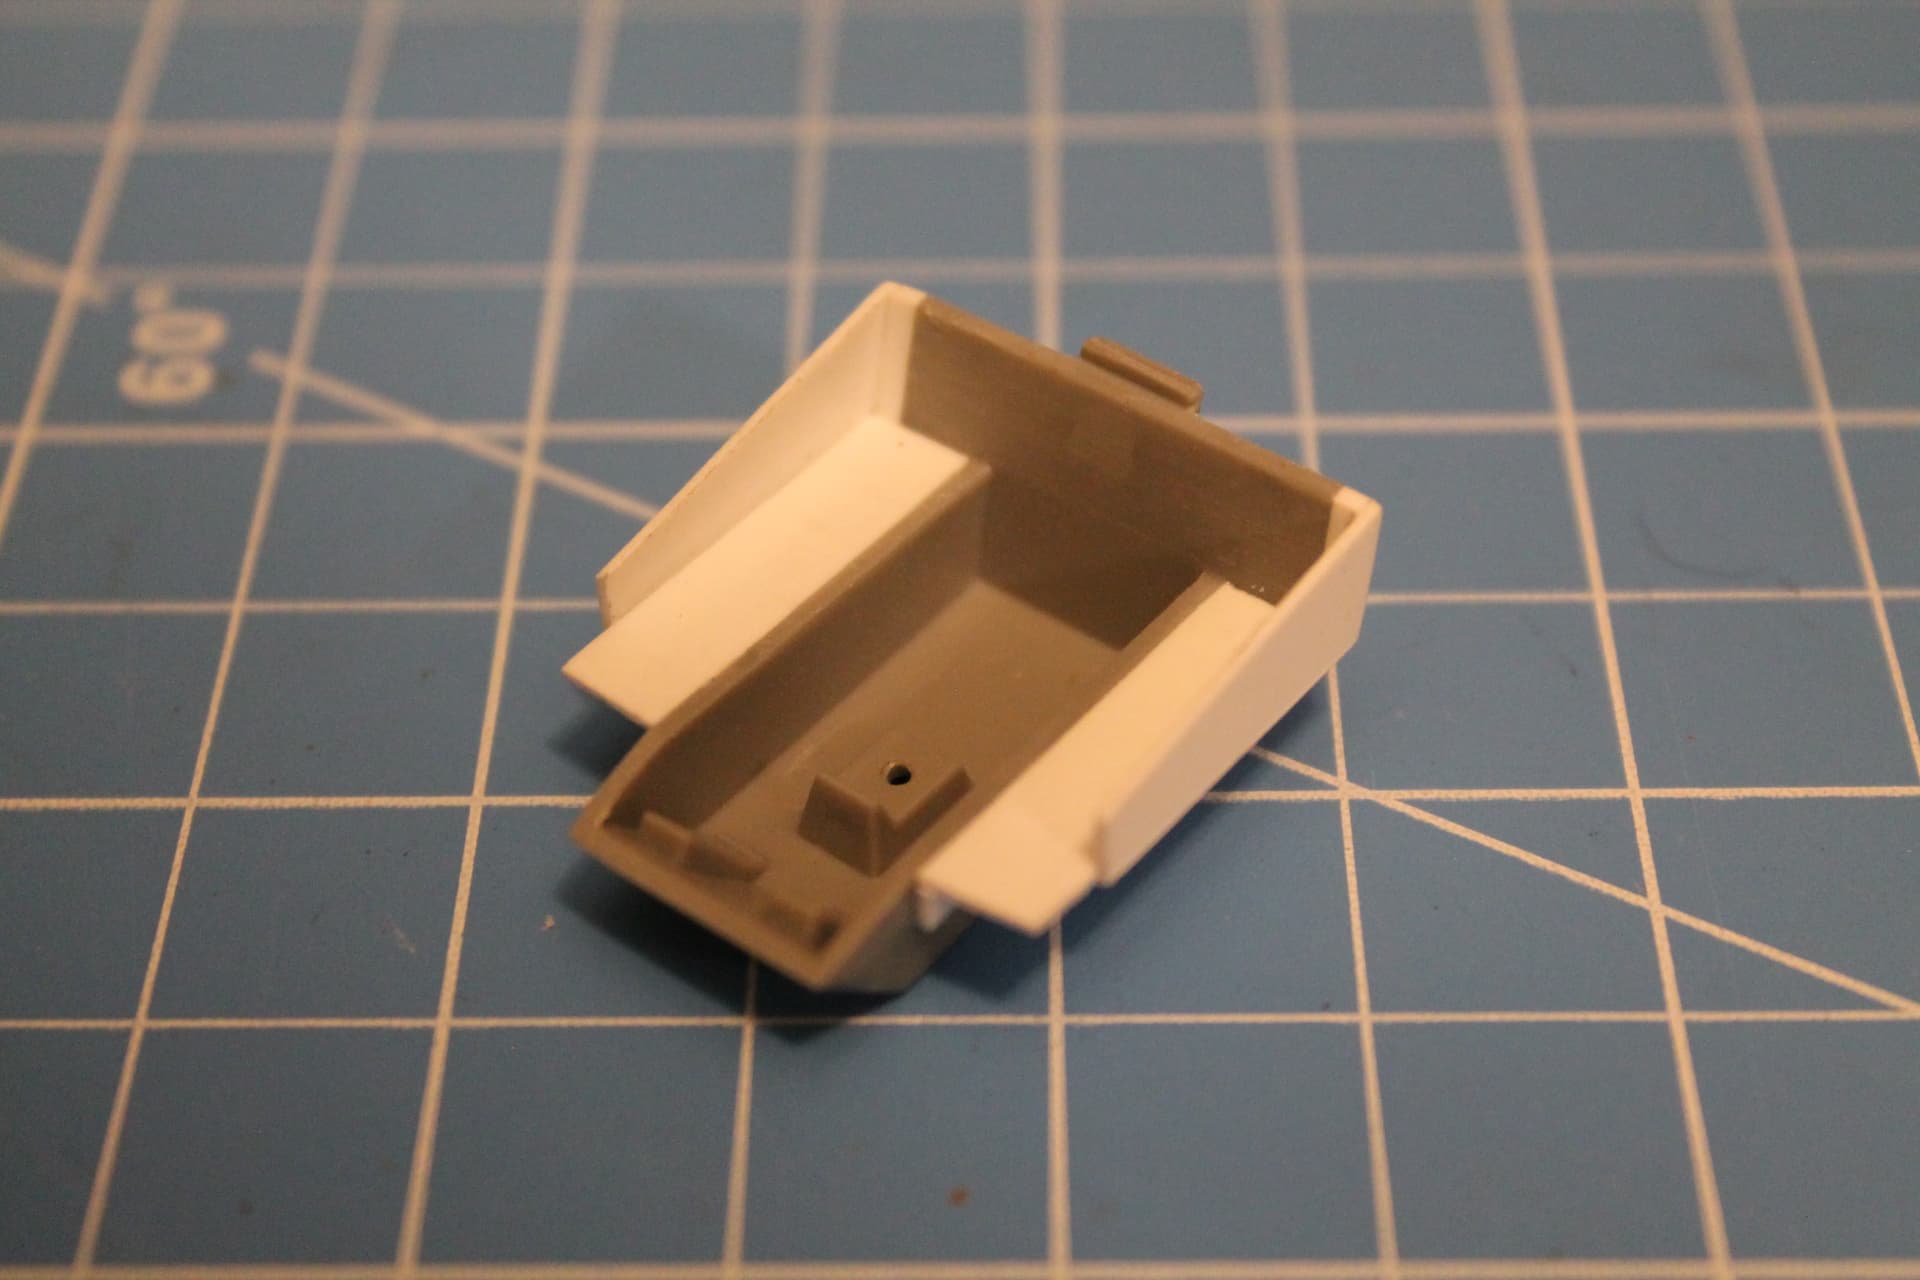
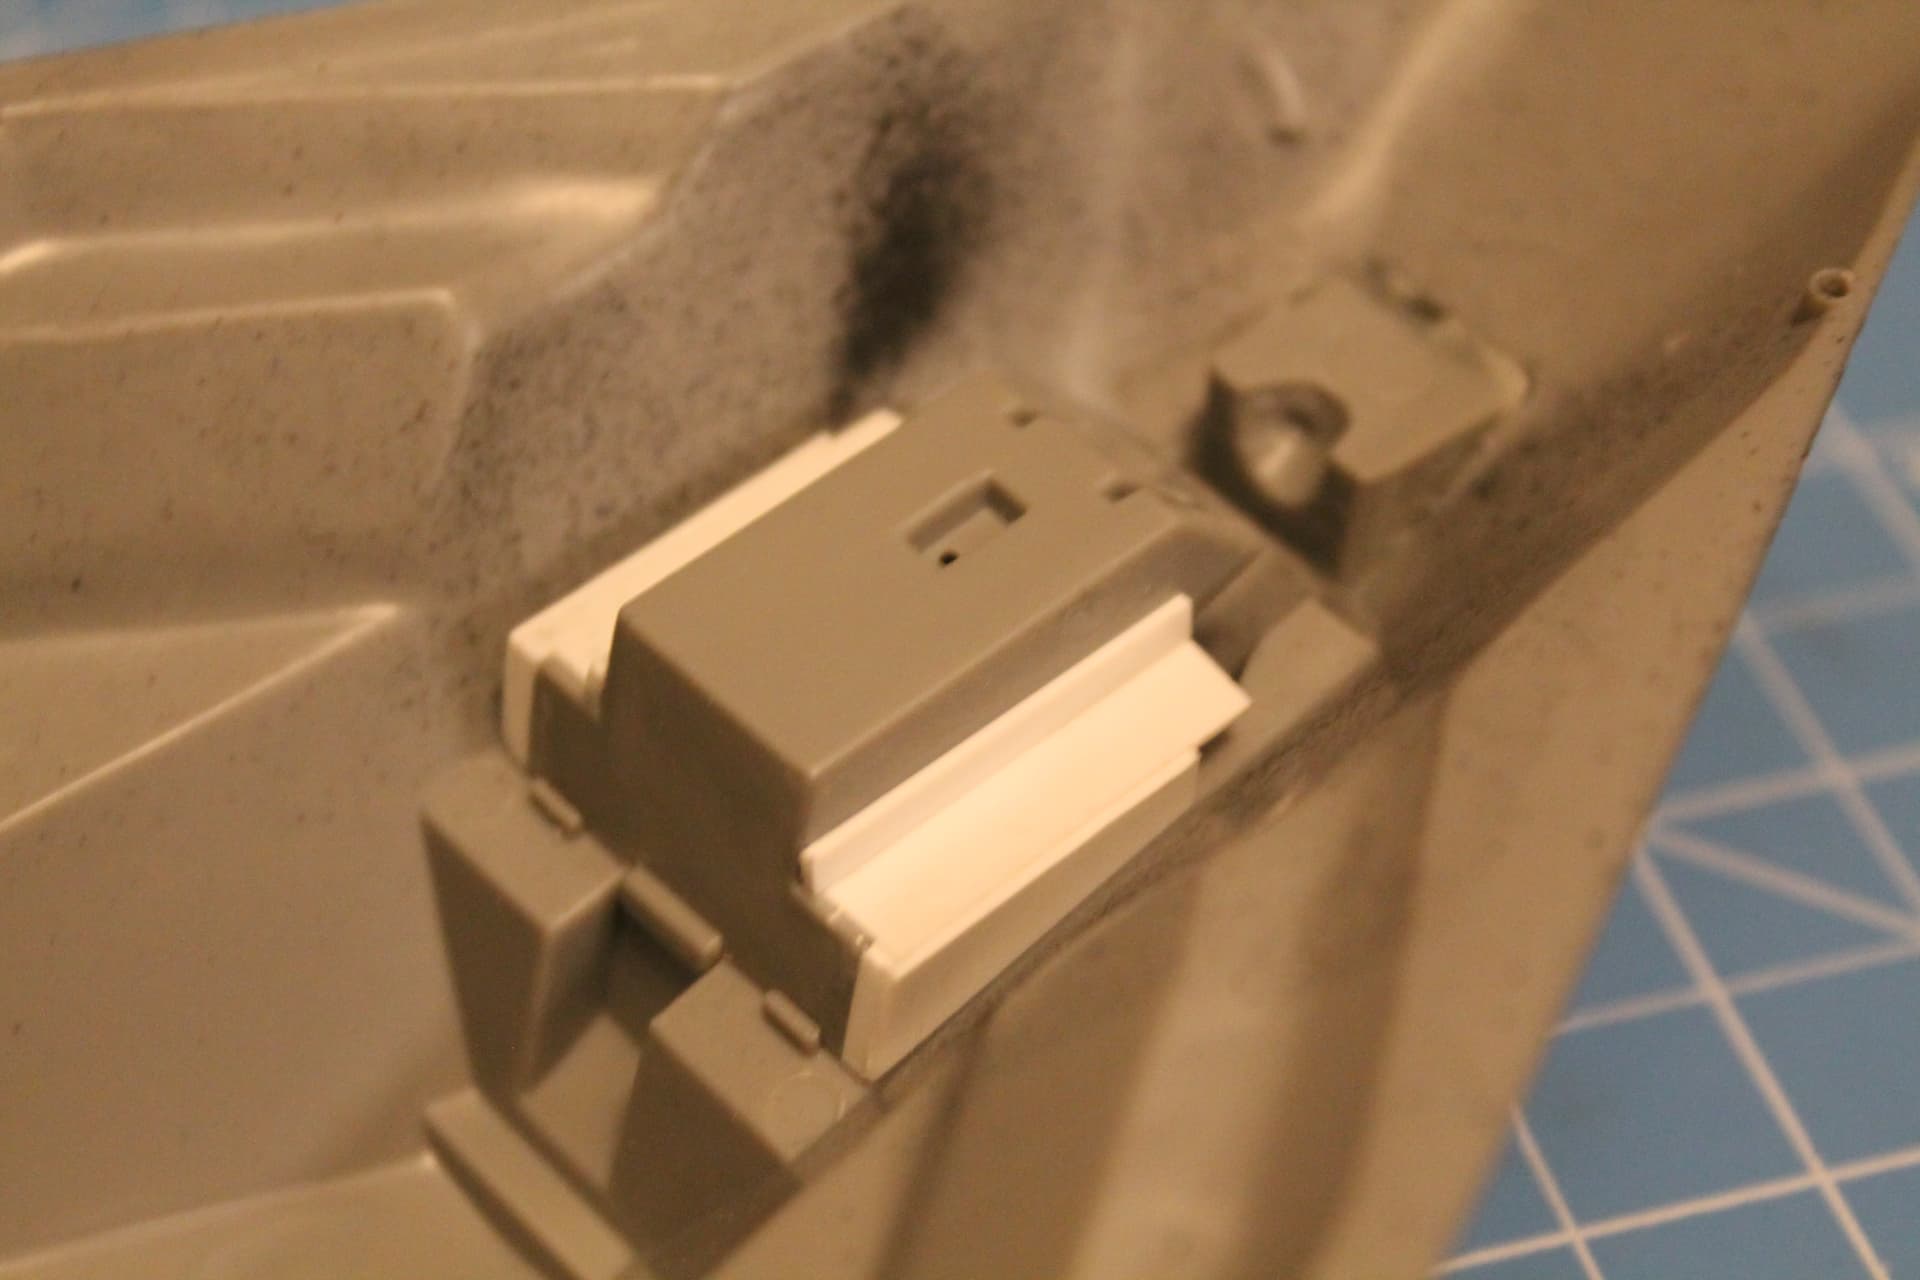
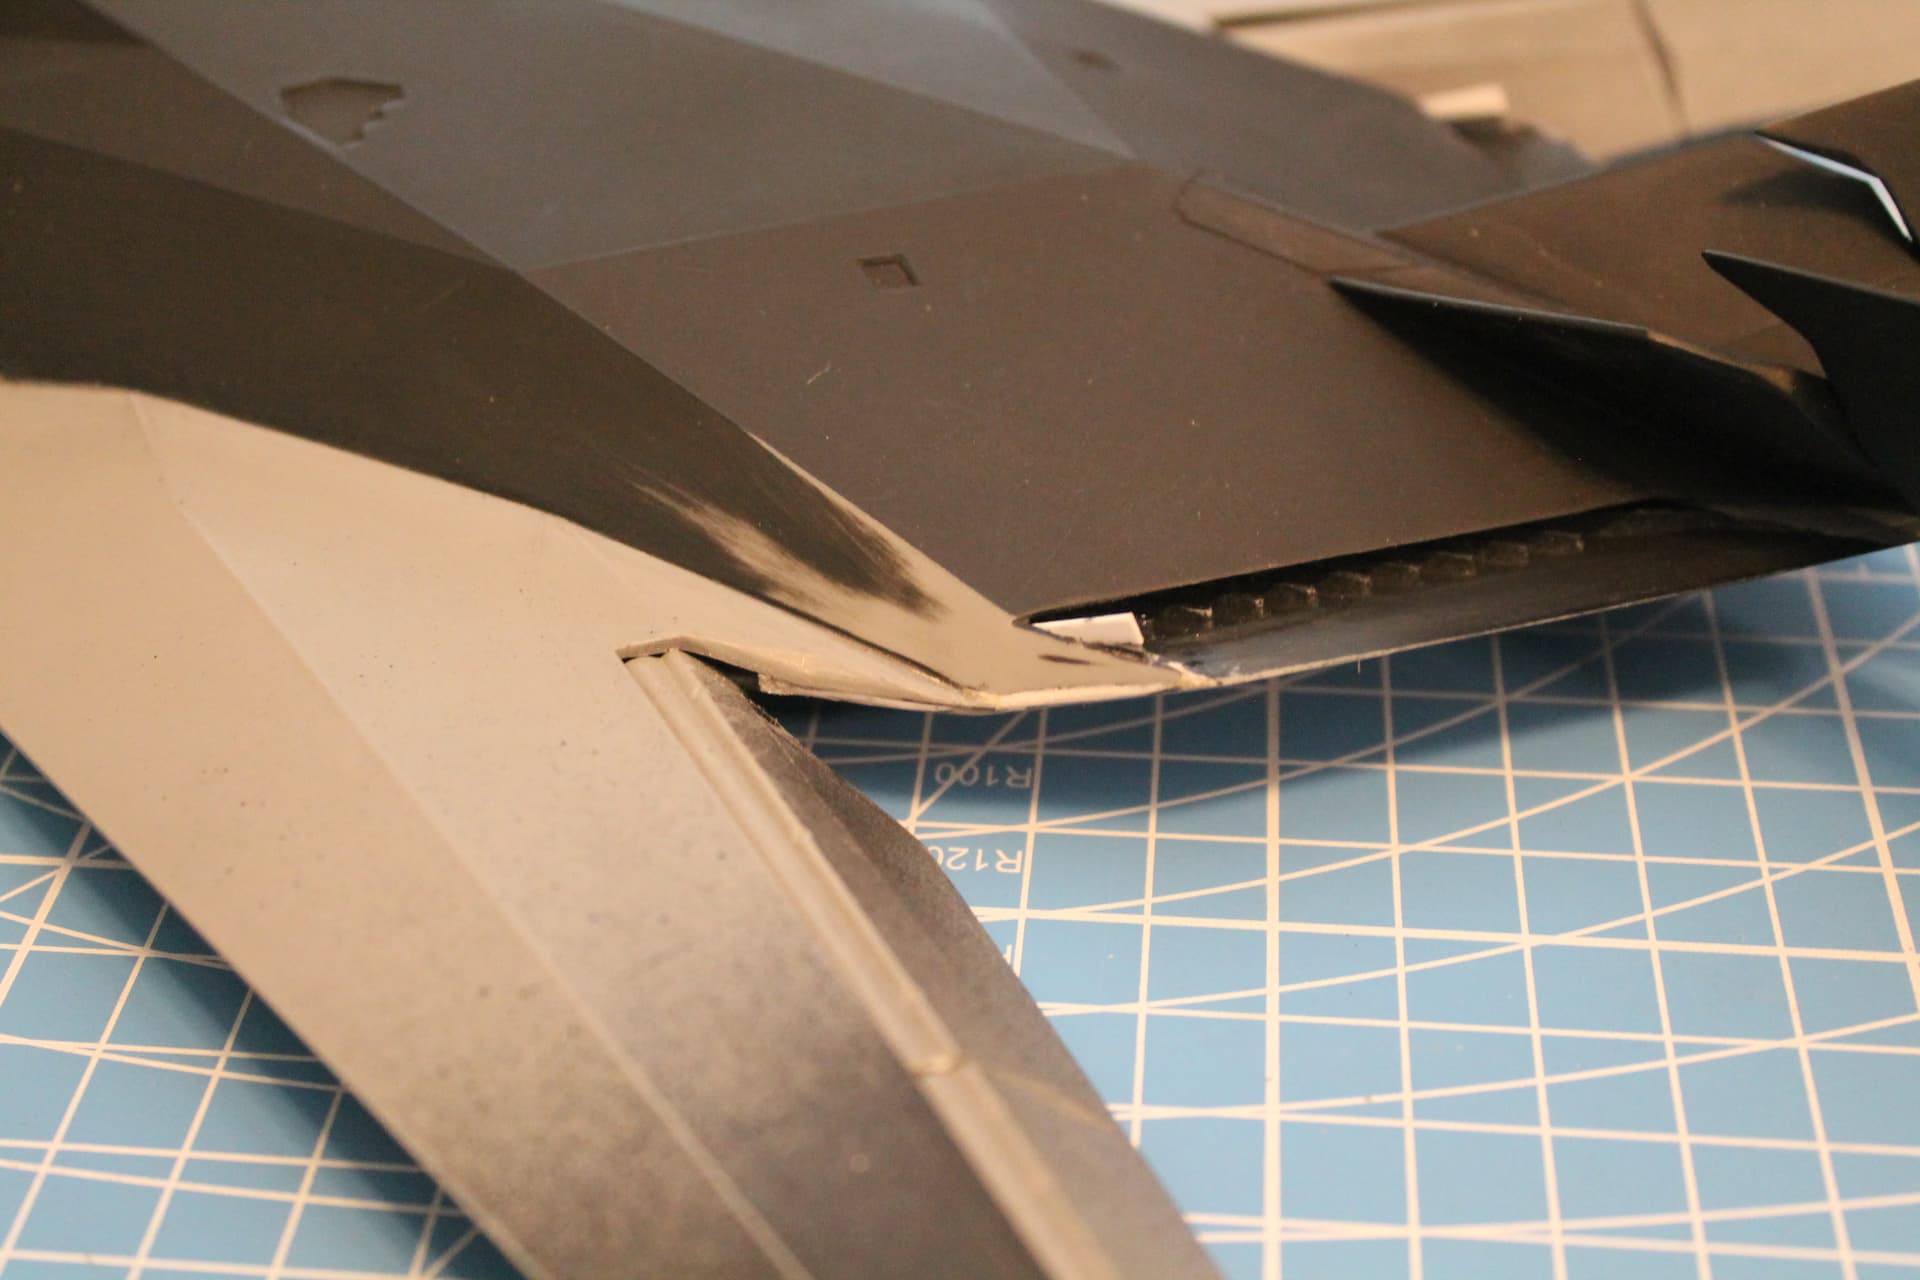
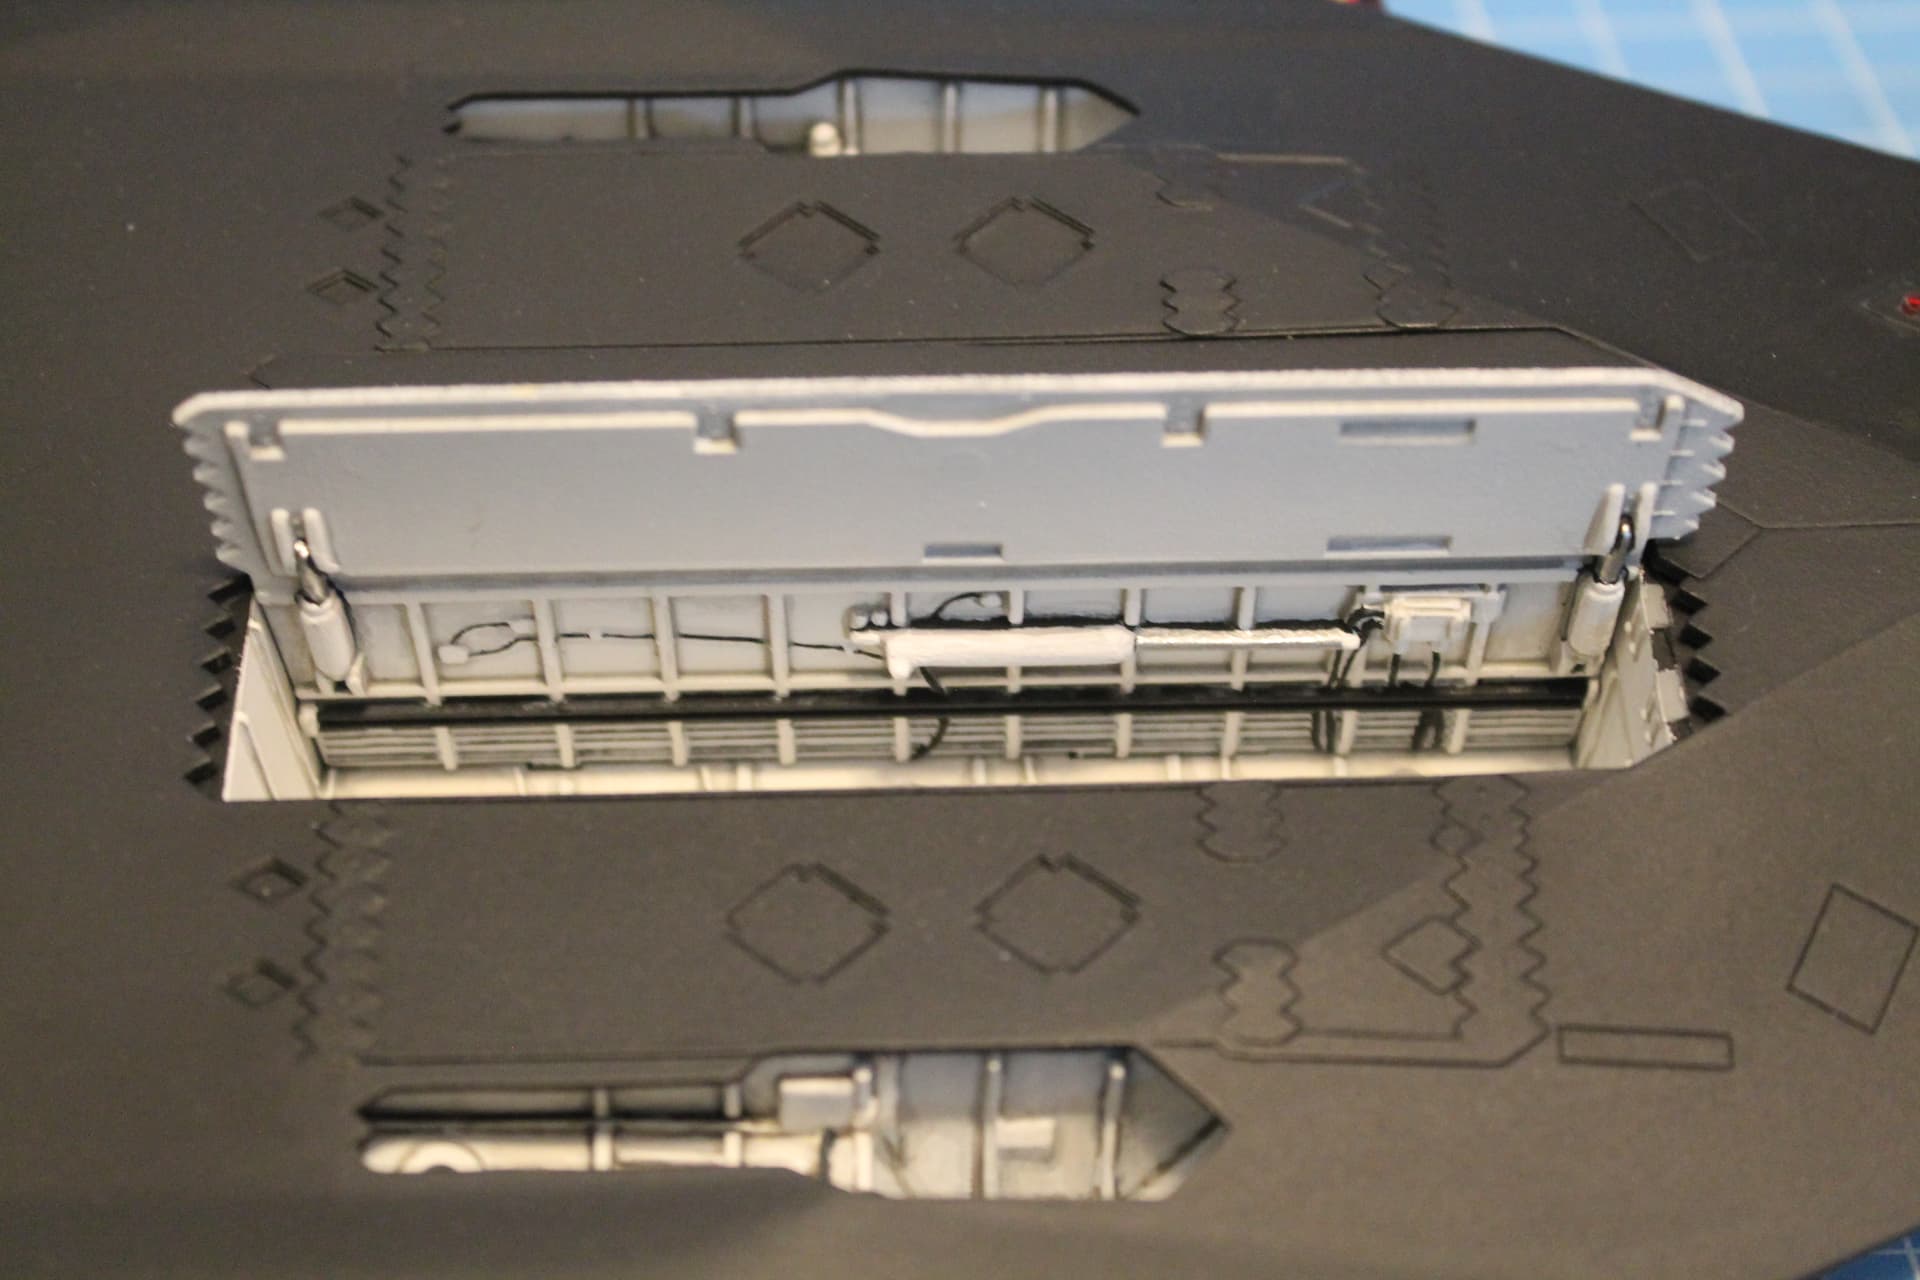
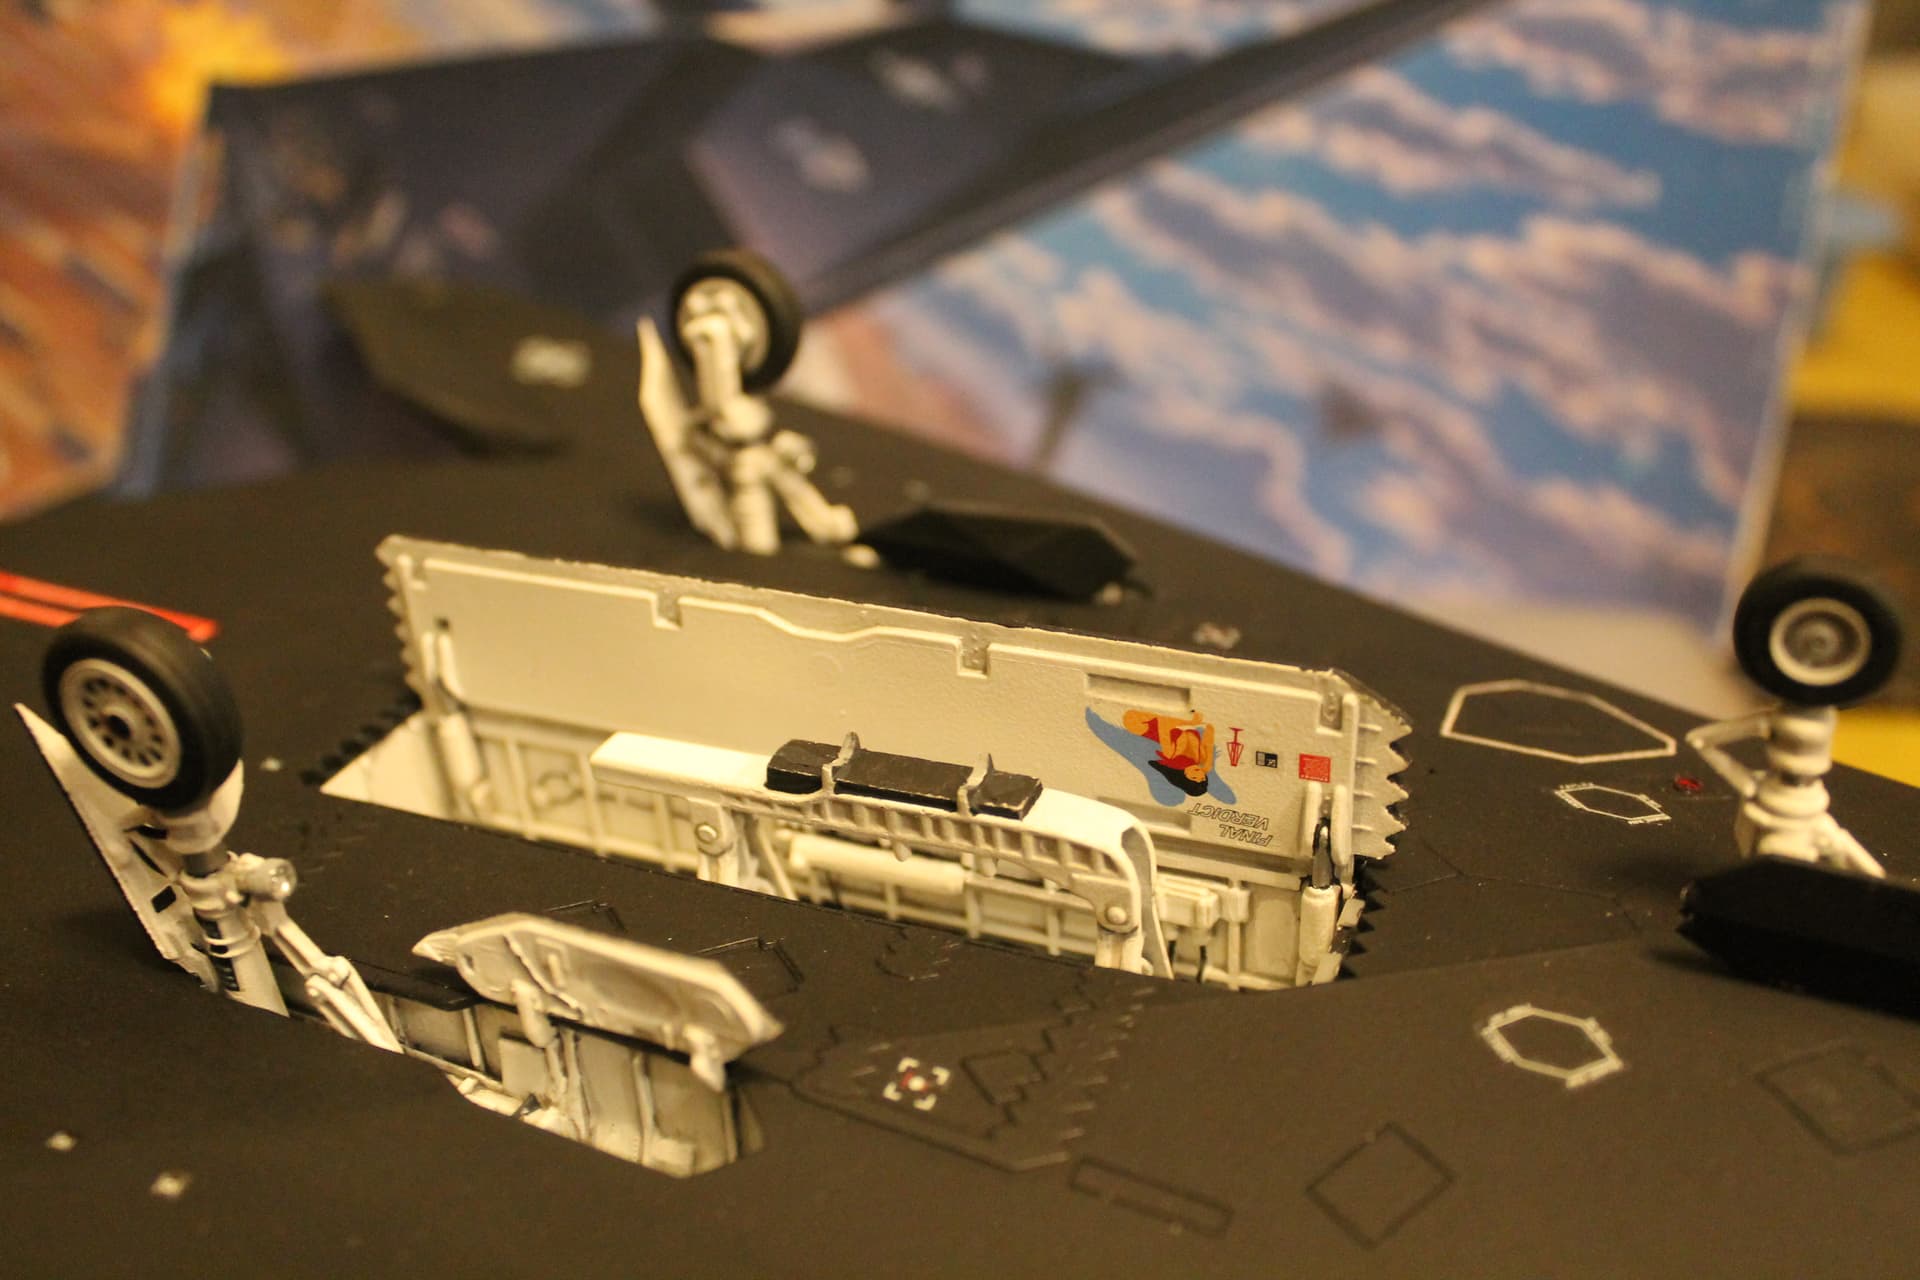
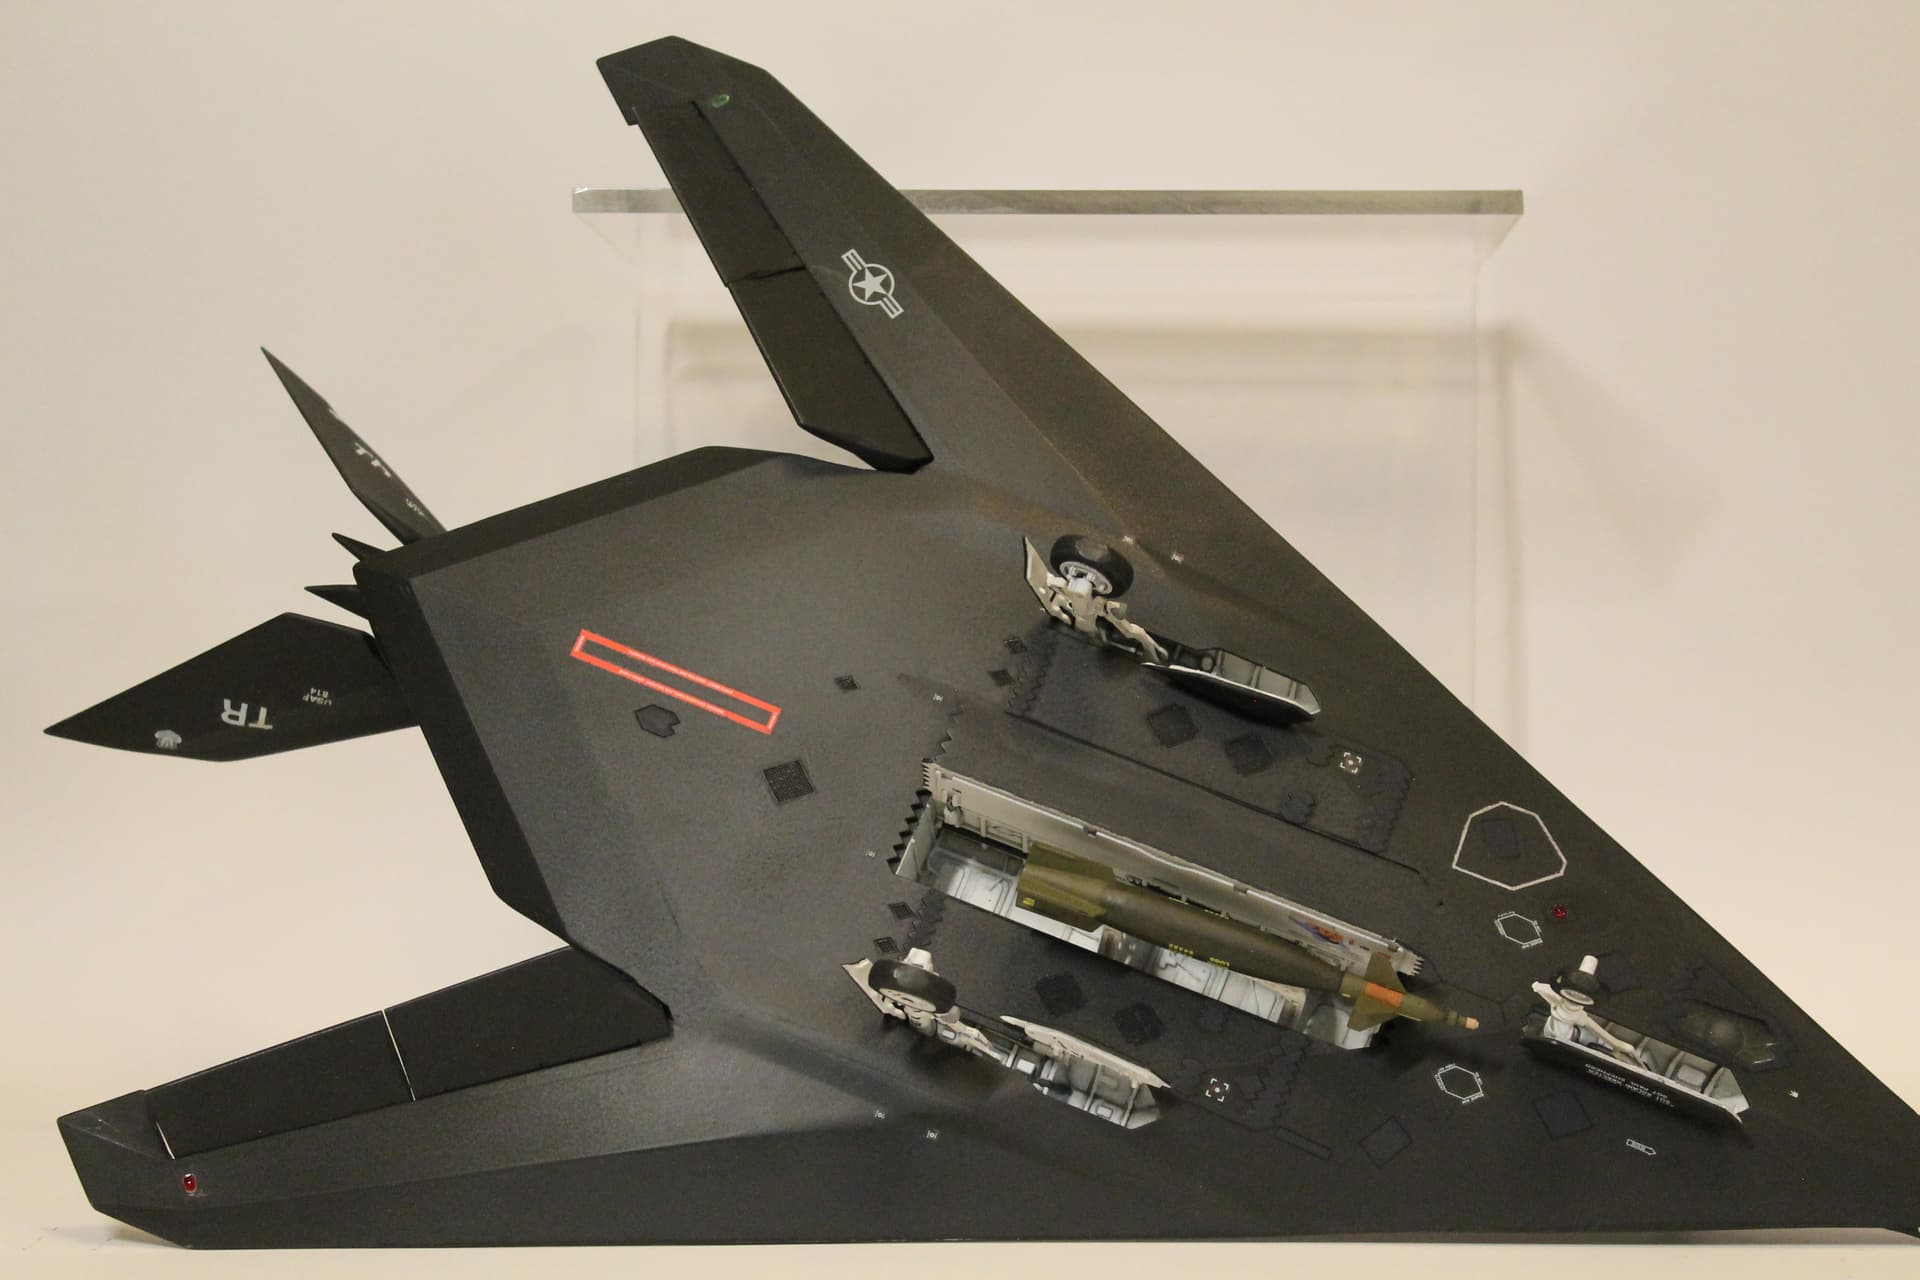
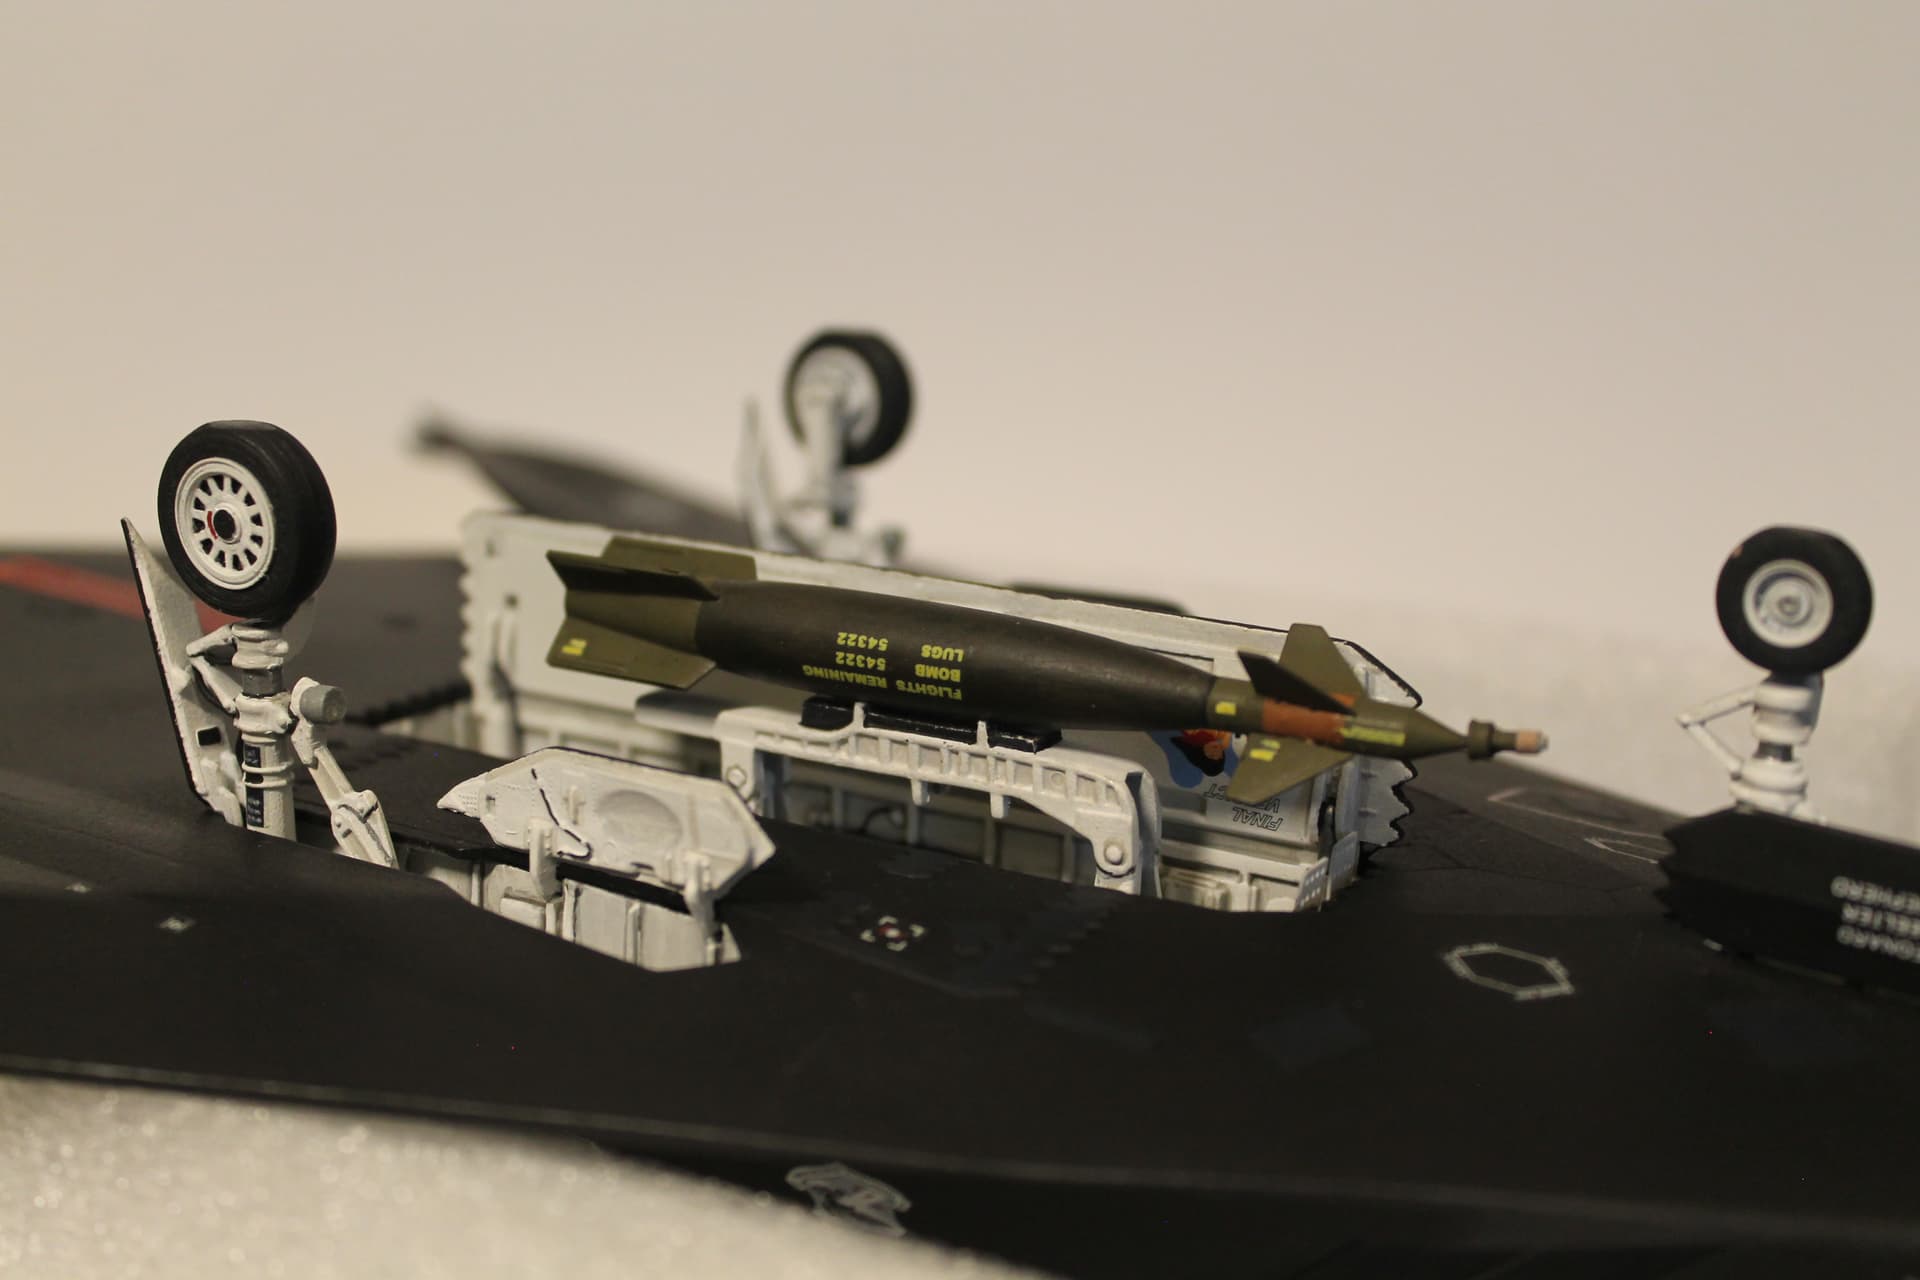
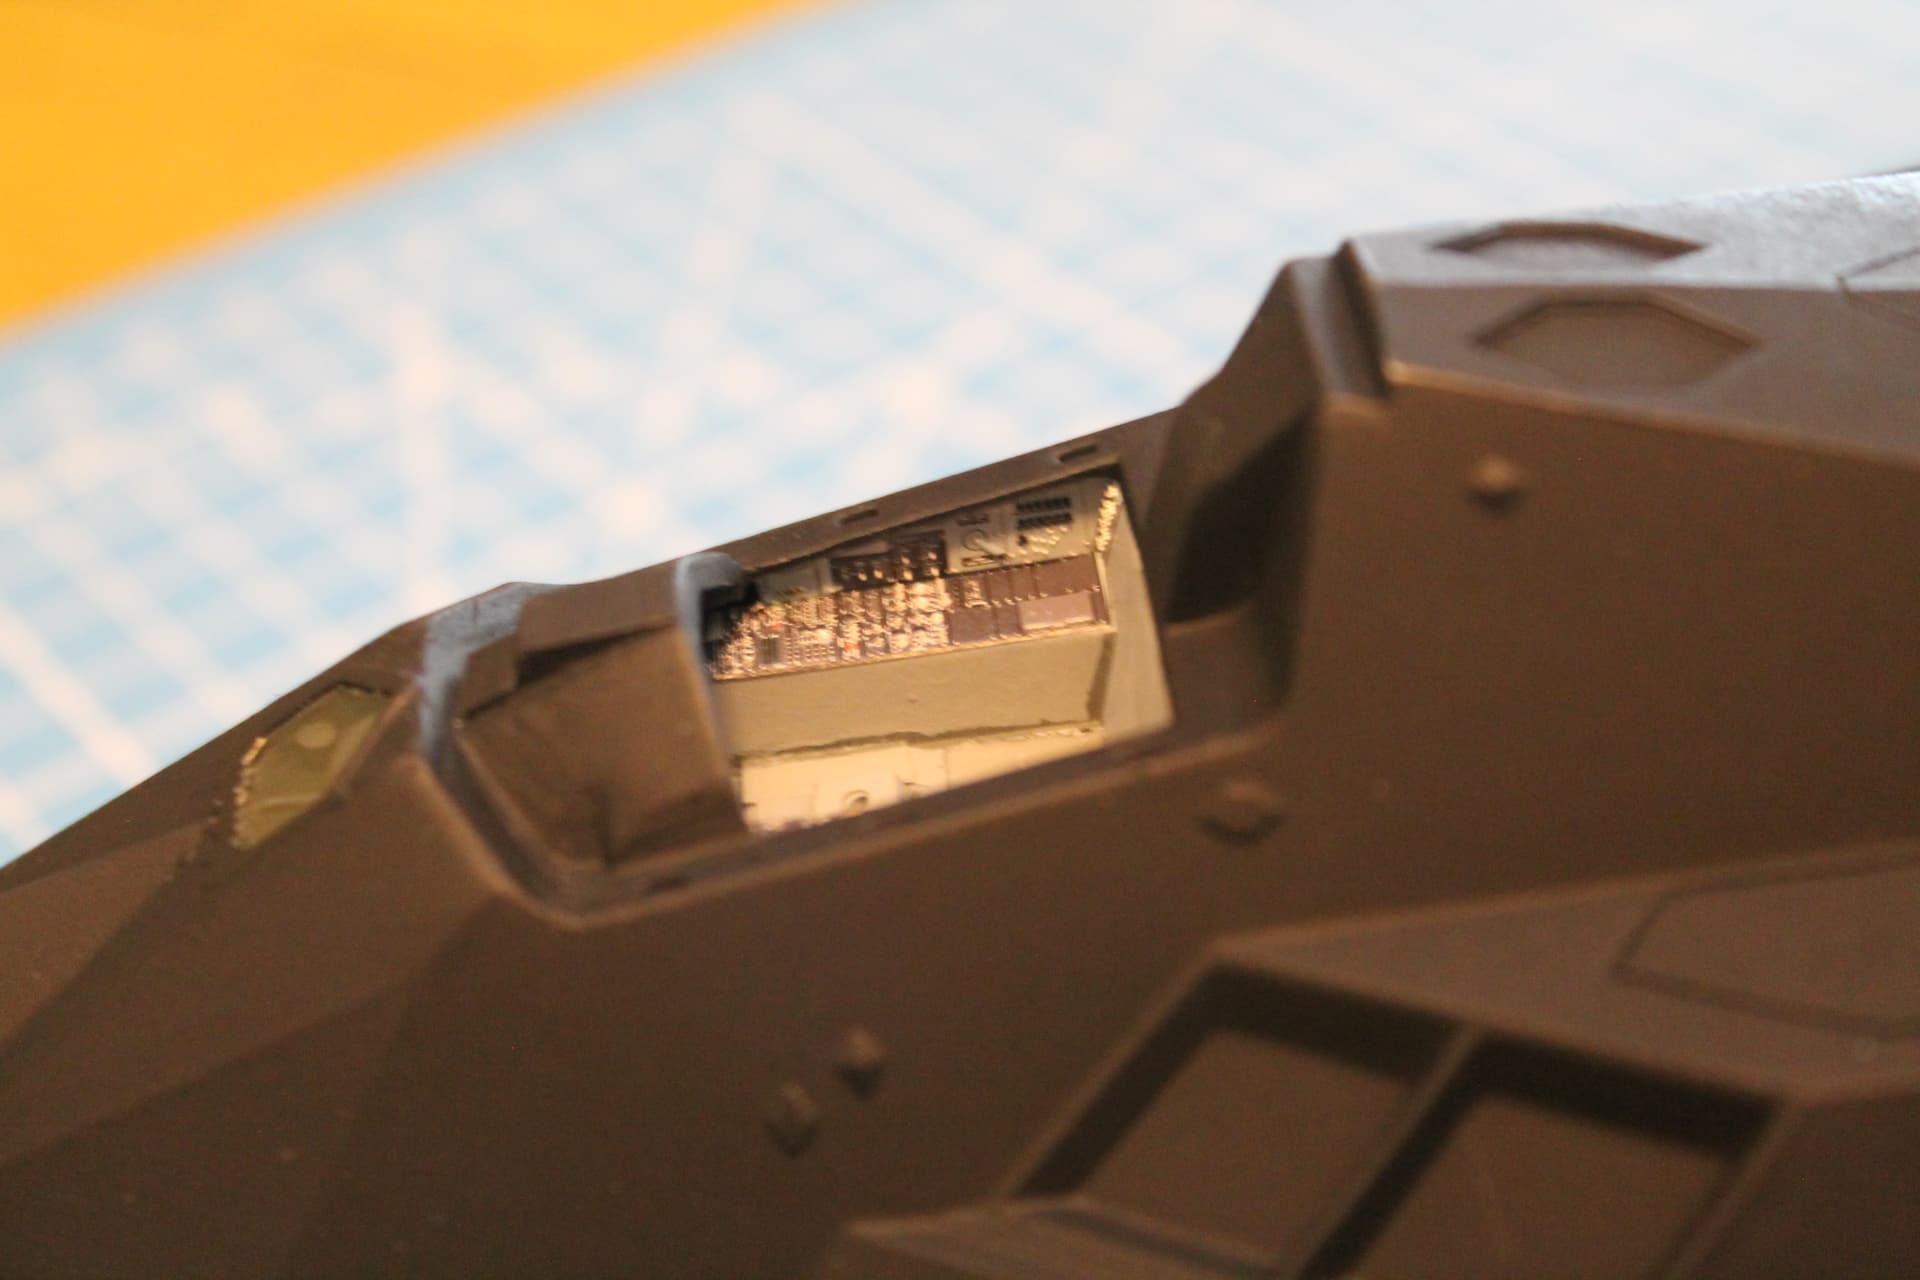
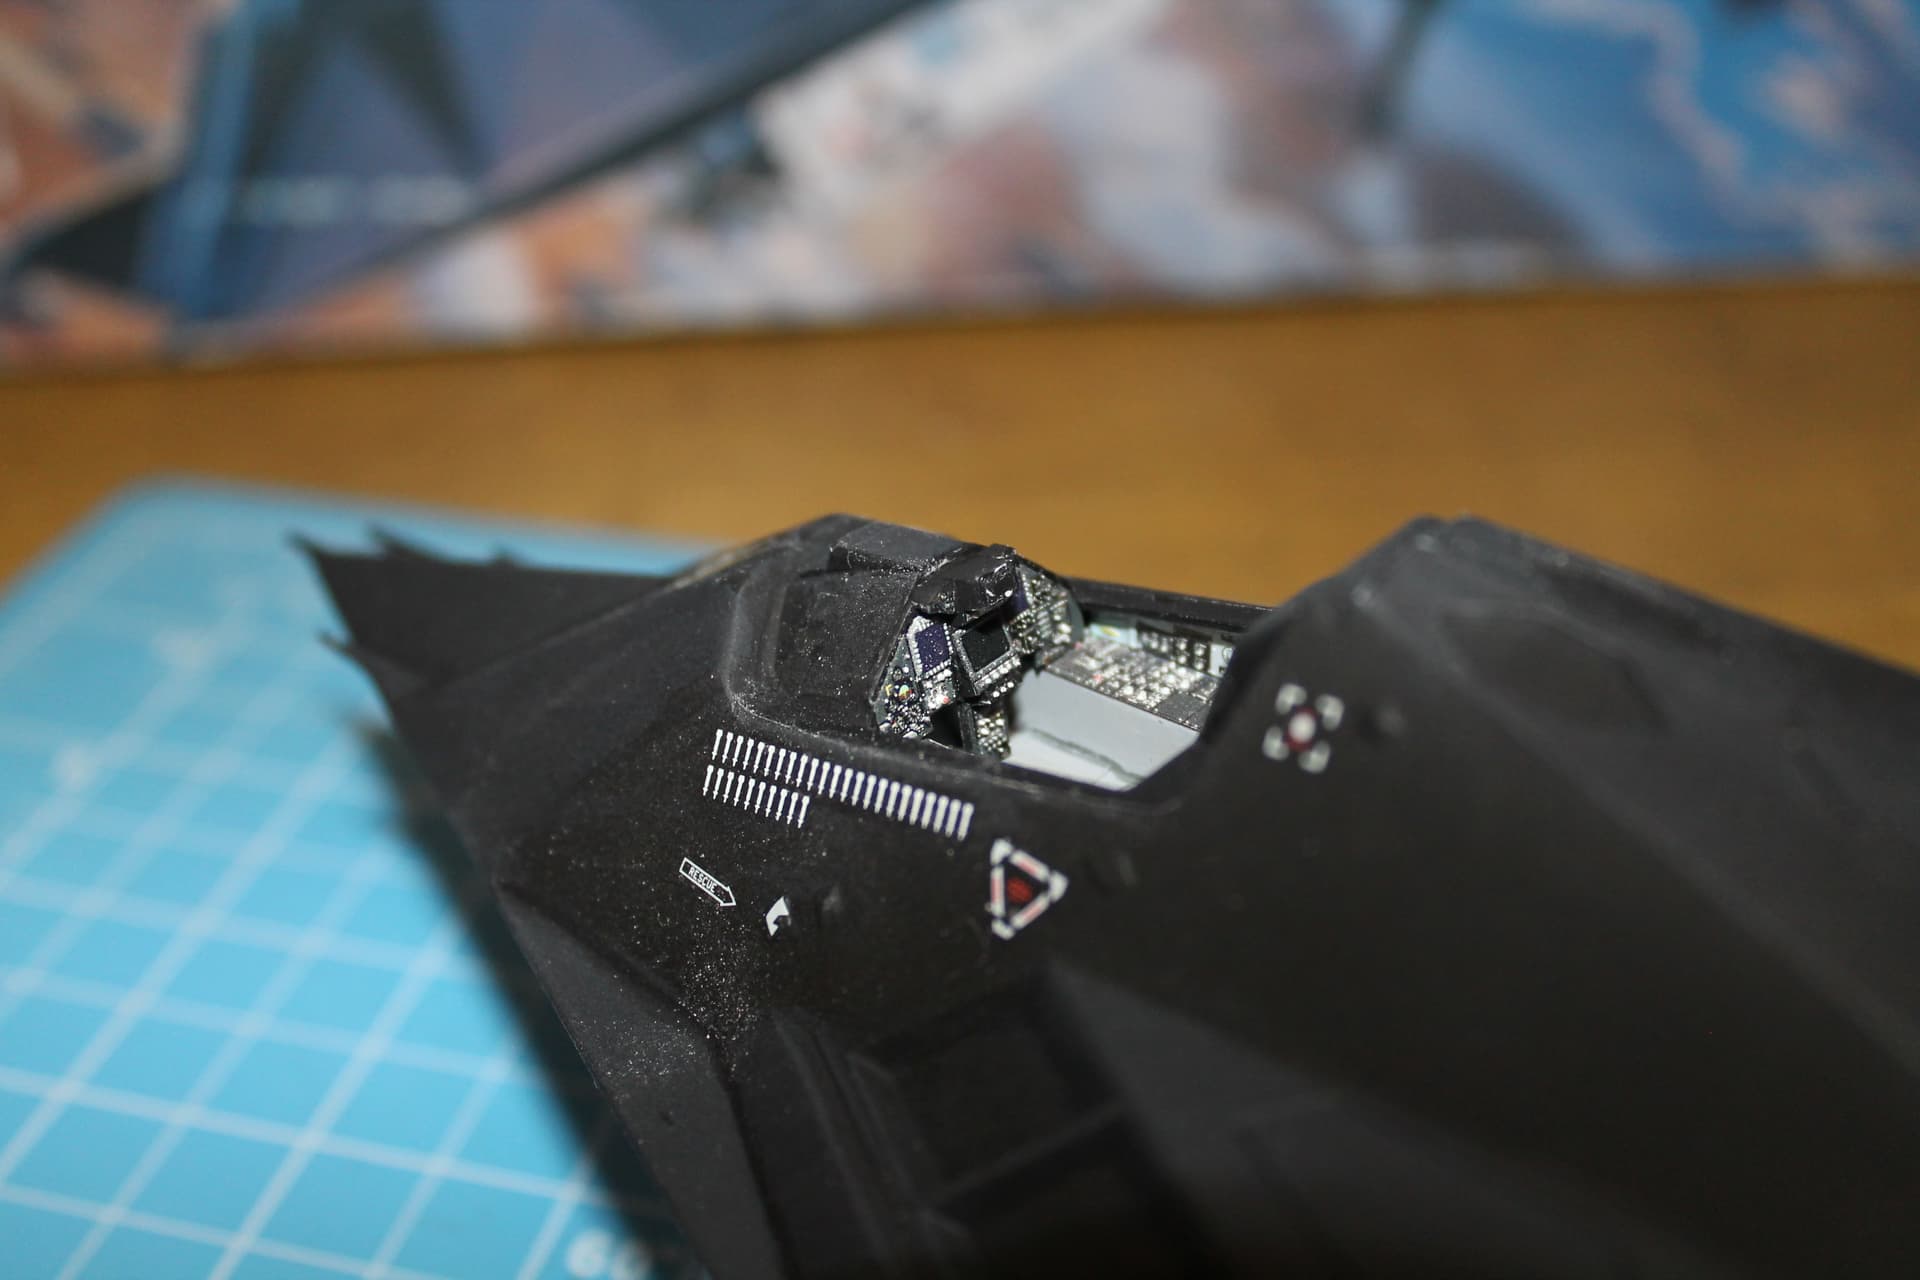
The last photo shows the tub test fitted in place. I was concerned that it would interfere with the nose gear bay and the fit of the upper and lower fuselage halves. Luckily it did not. The next photo shows the side panel decals installed, a big improvement.

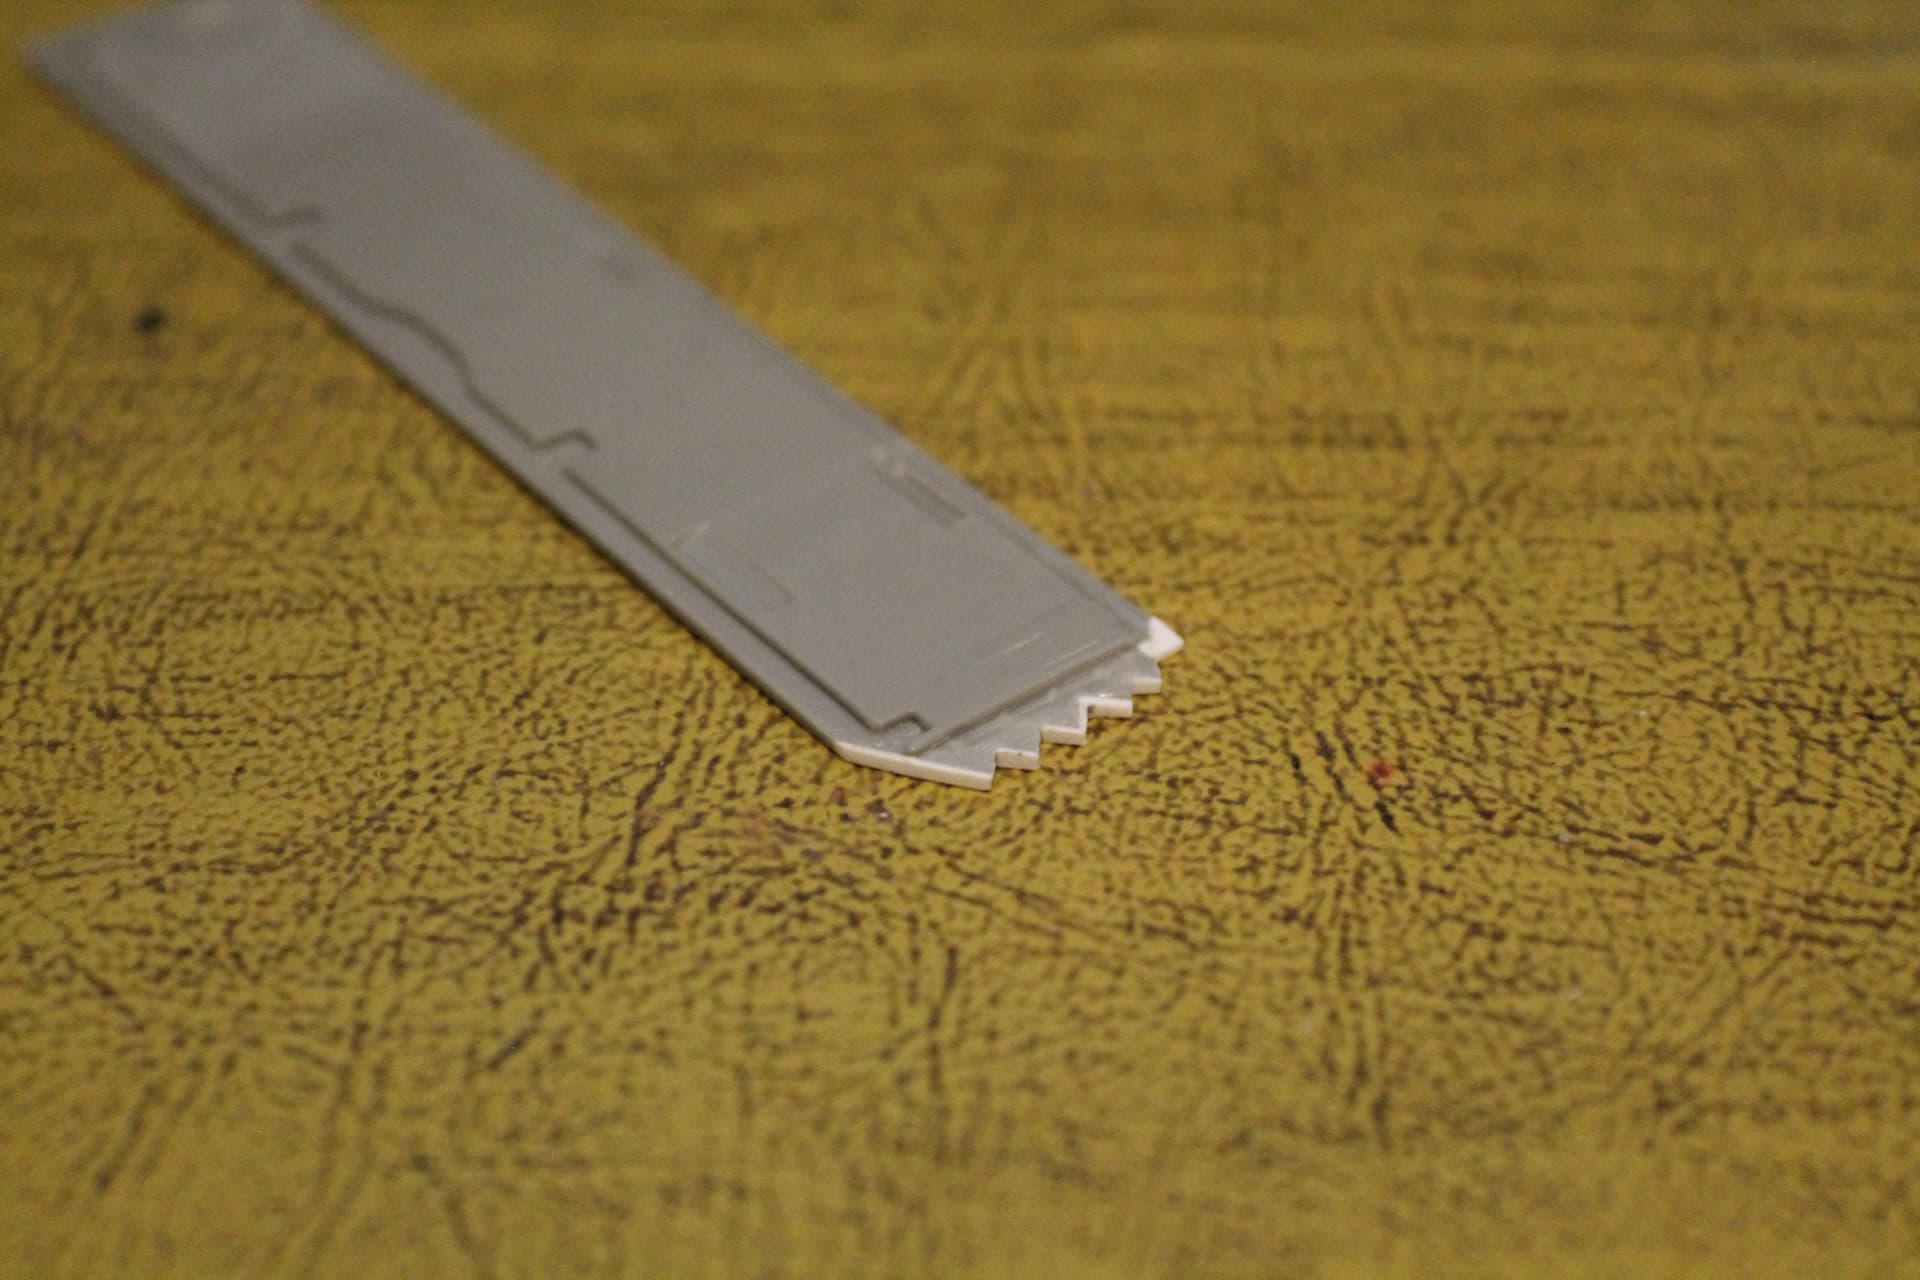
The biggest challenge for me was the instrument panel. I started by downloading and printing a page from the Tamiya kit’s instruction sheet that showed the panel. It needed to be sized to fit the Monogram cockpit and I had some help from my son in doing that. He’s more computer savvy than I am. The next photo shows my template and the original part.

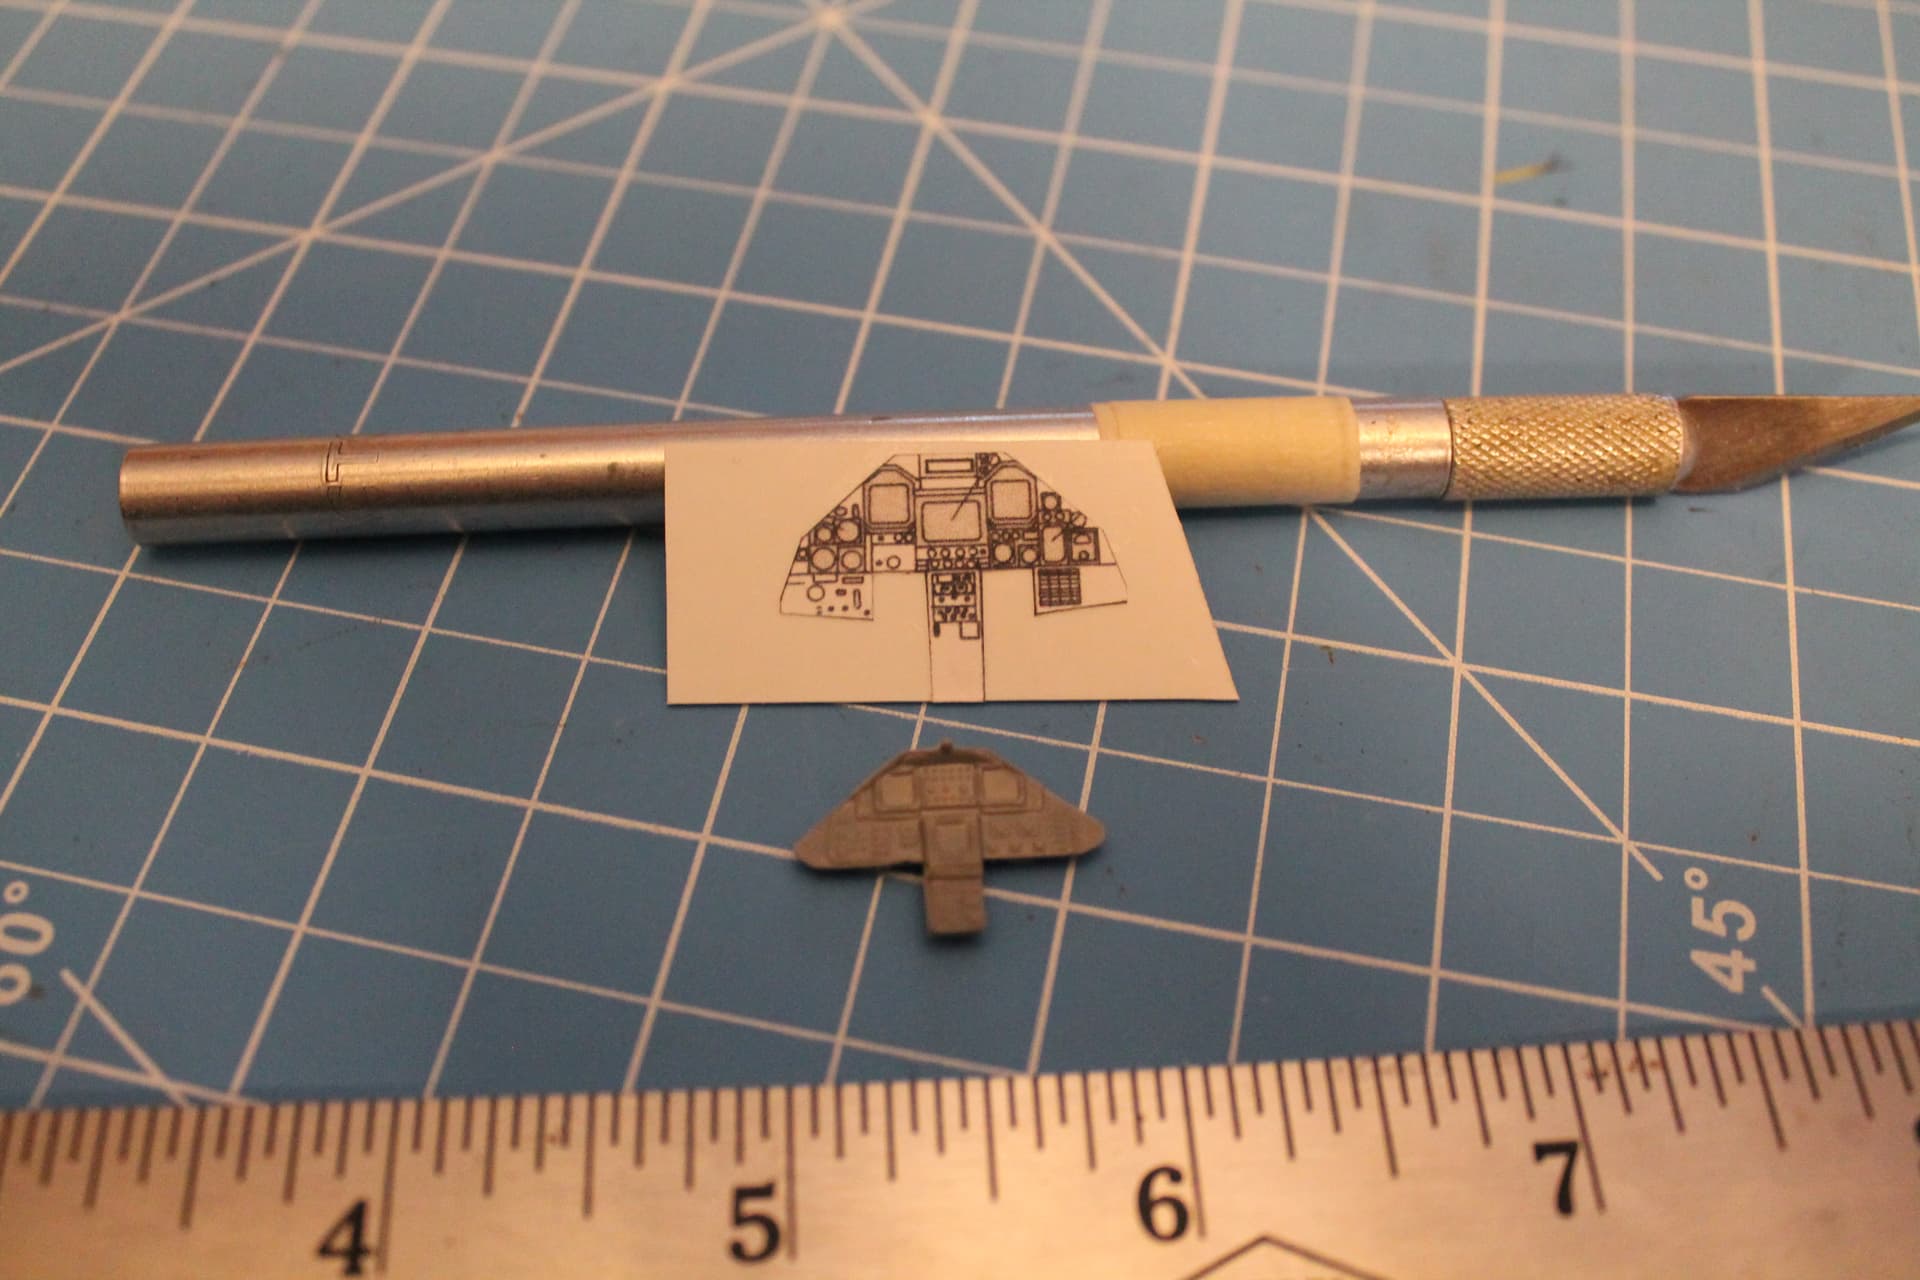
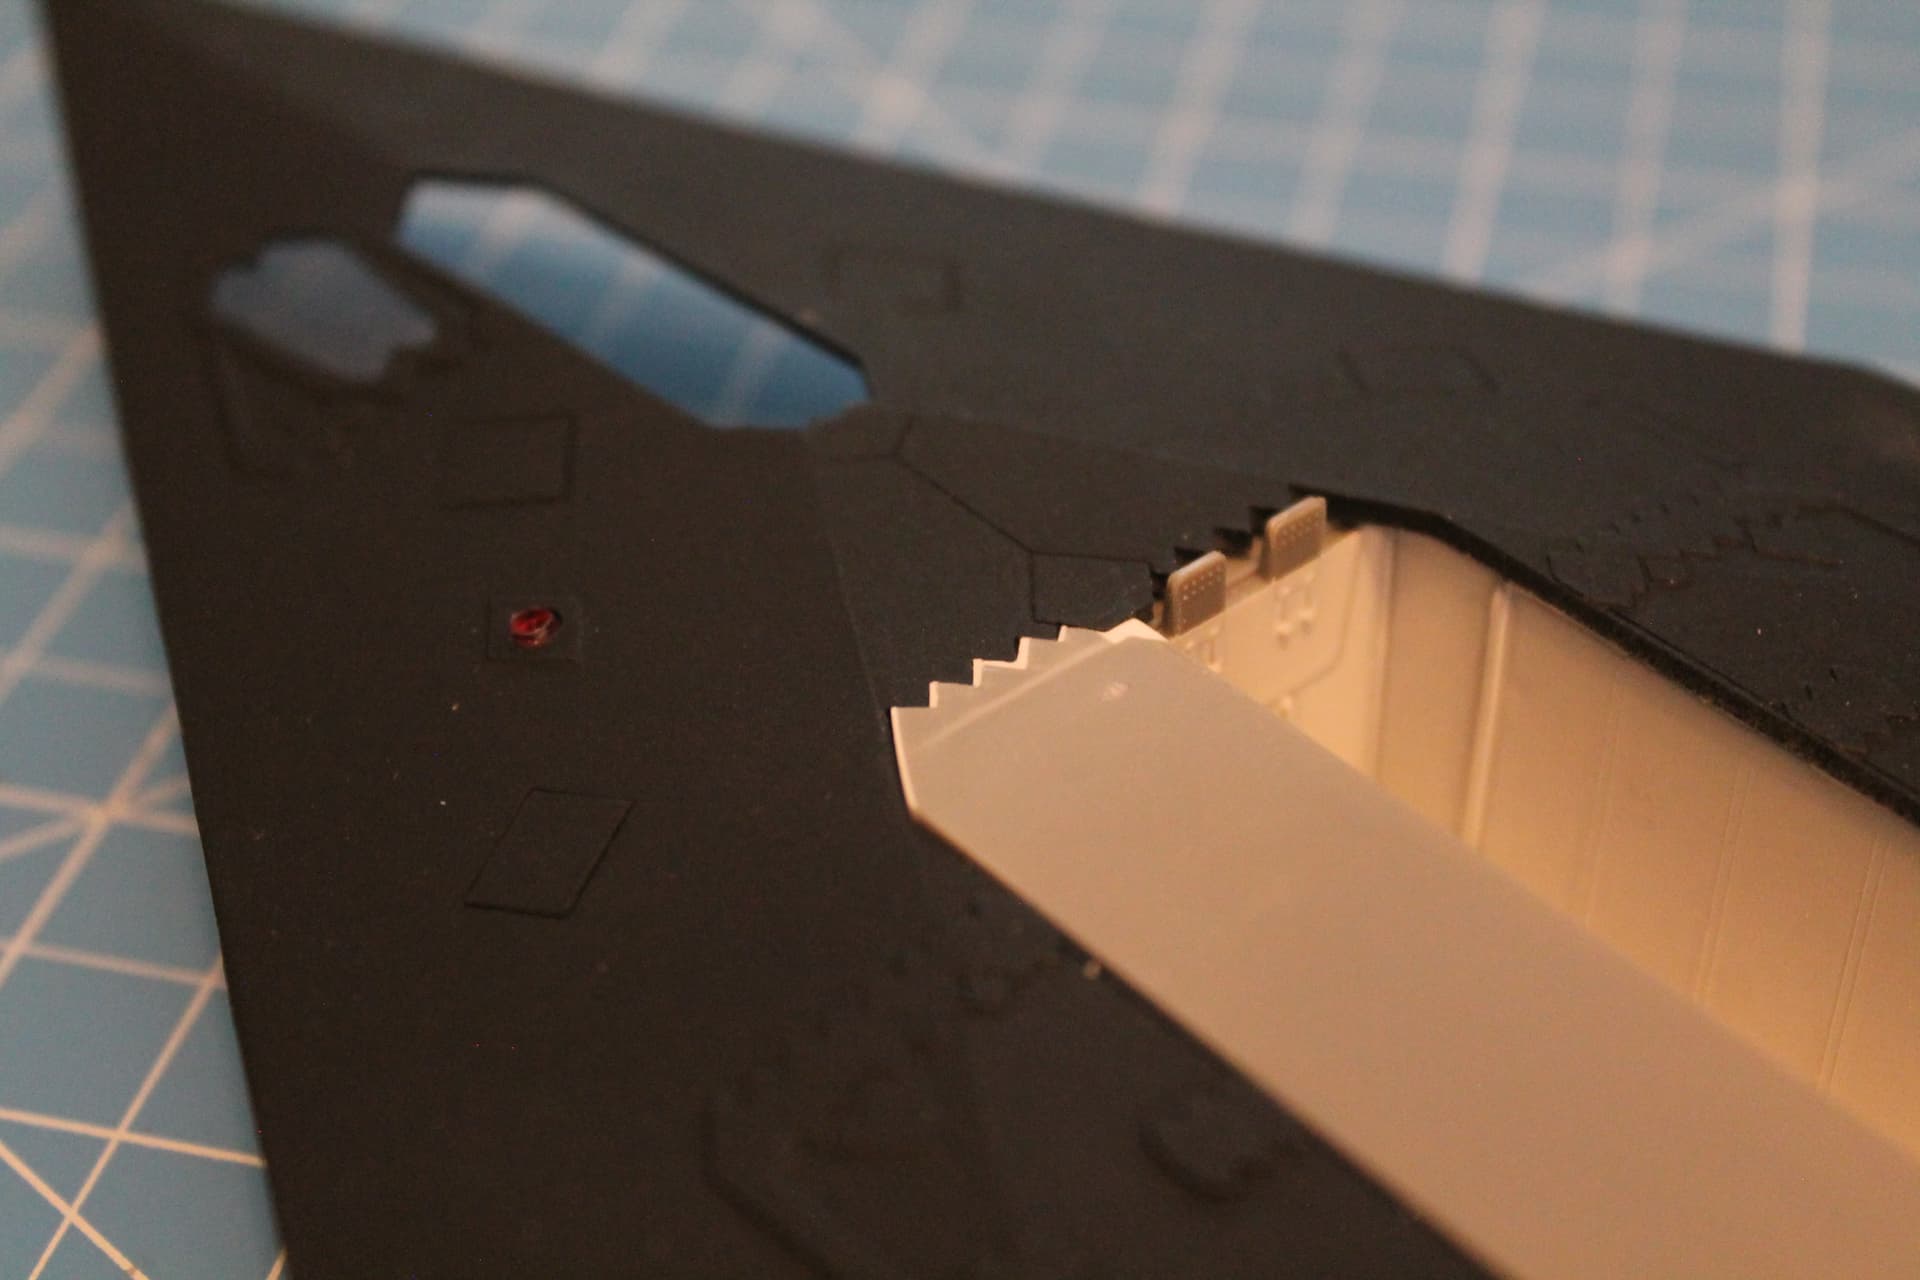
I used the template to cut a panel from sheet plastic. Some raised detail needed to added to it before starting to apply the 3D decals.

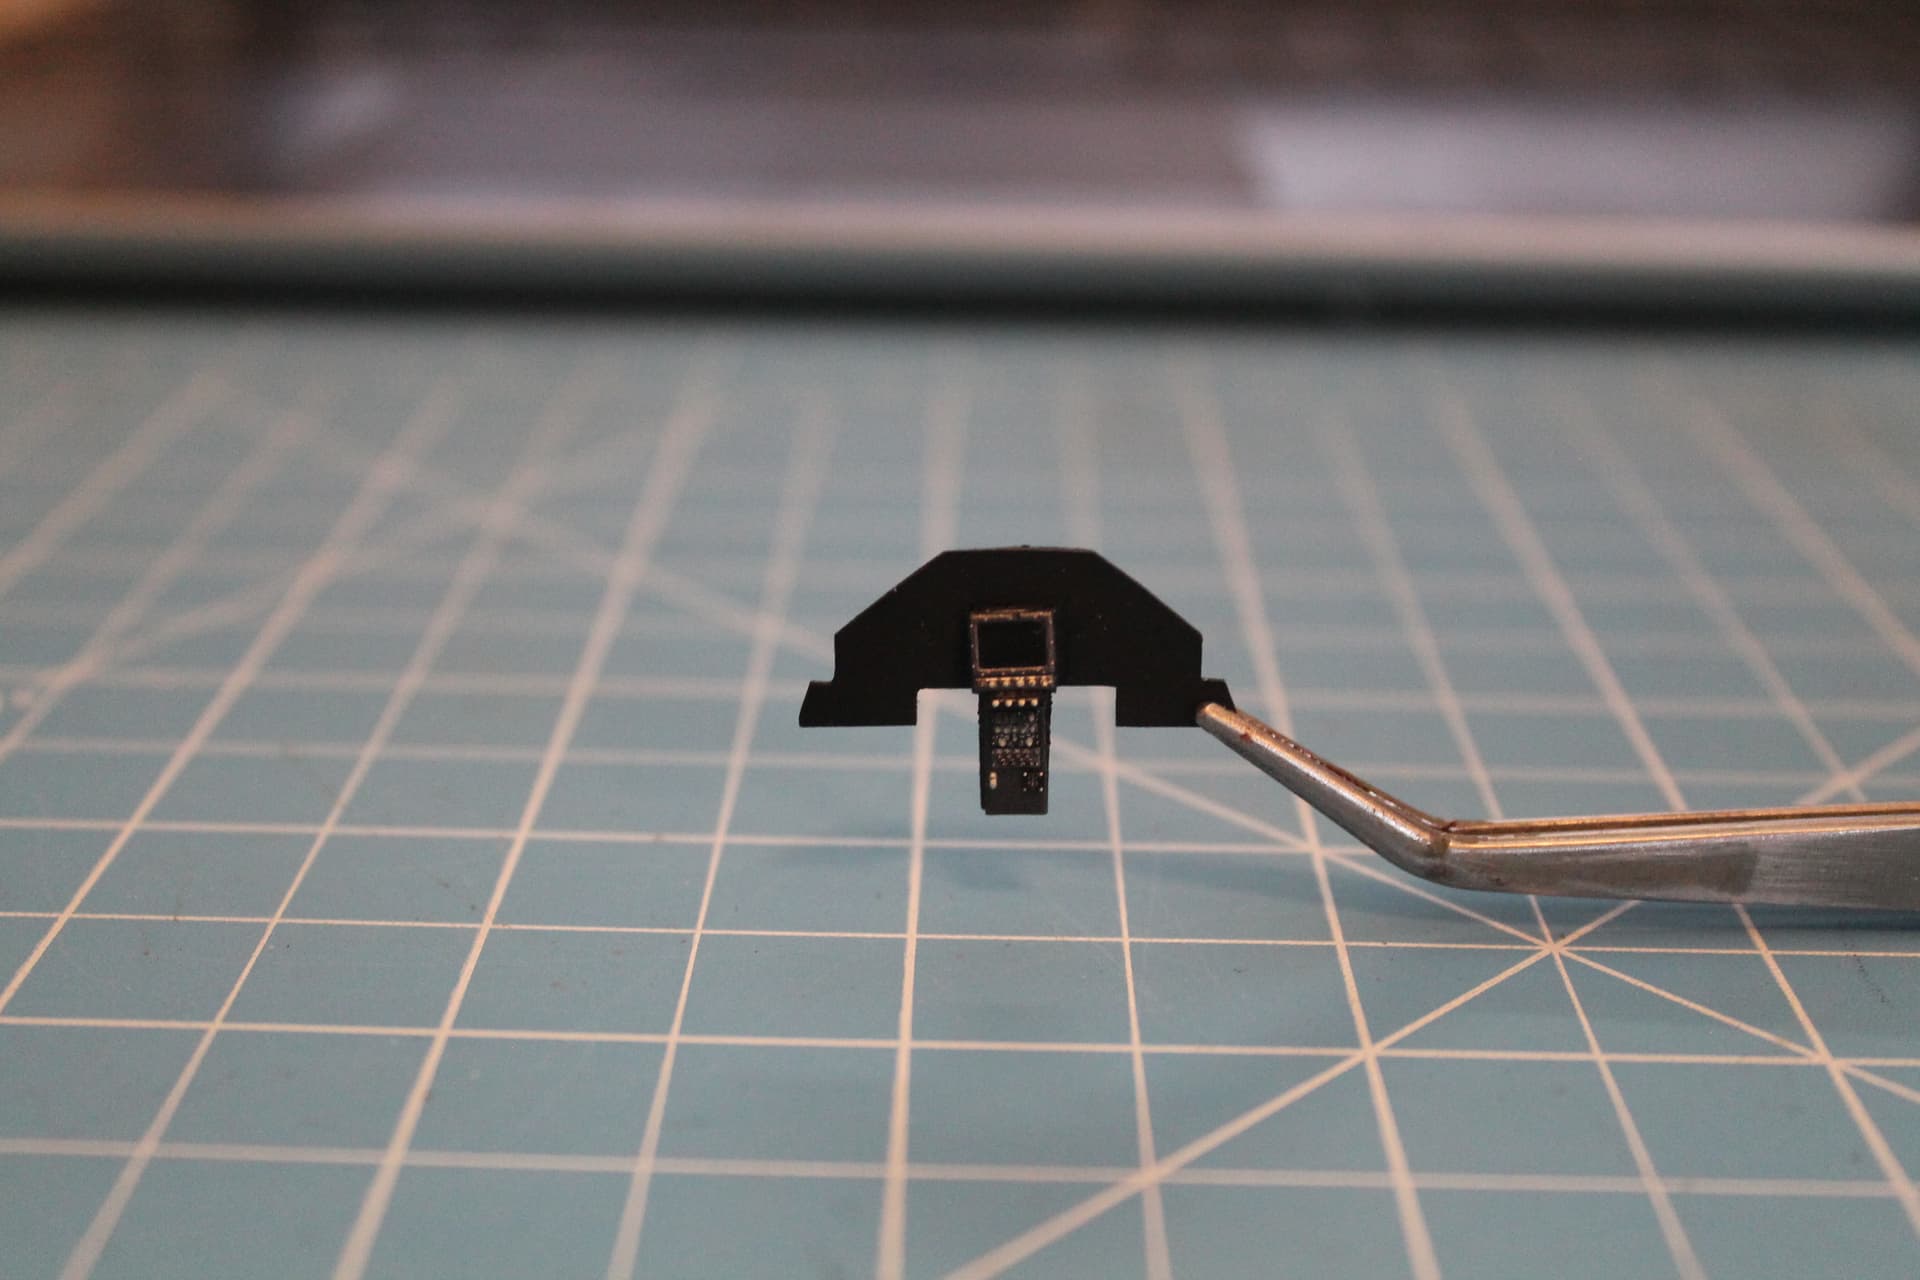
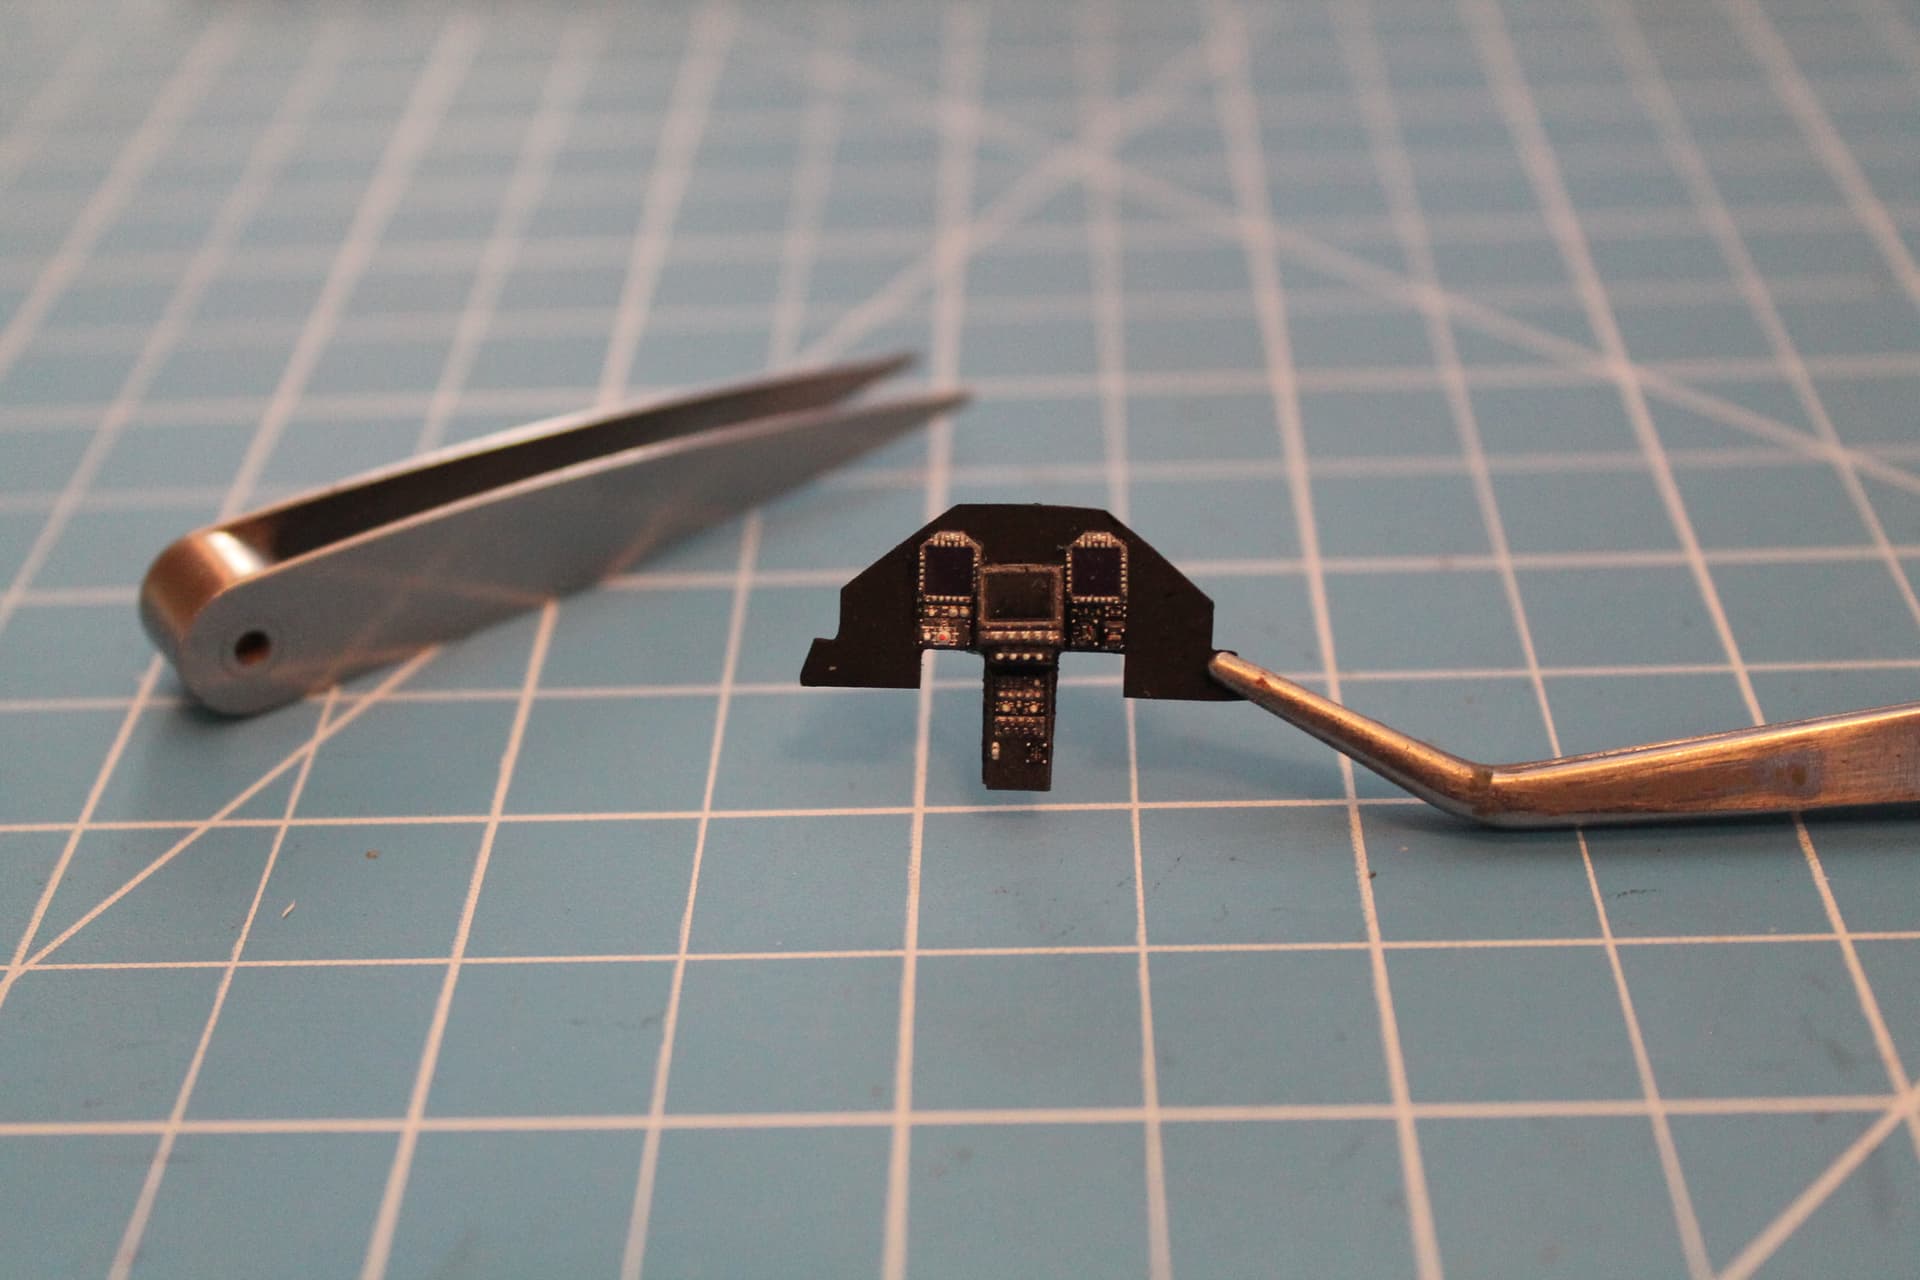
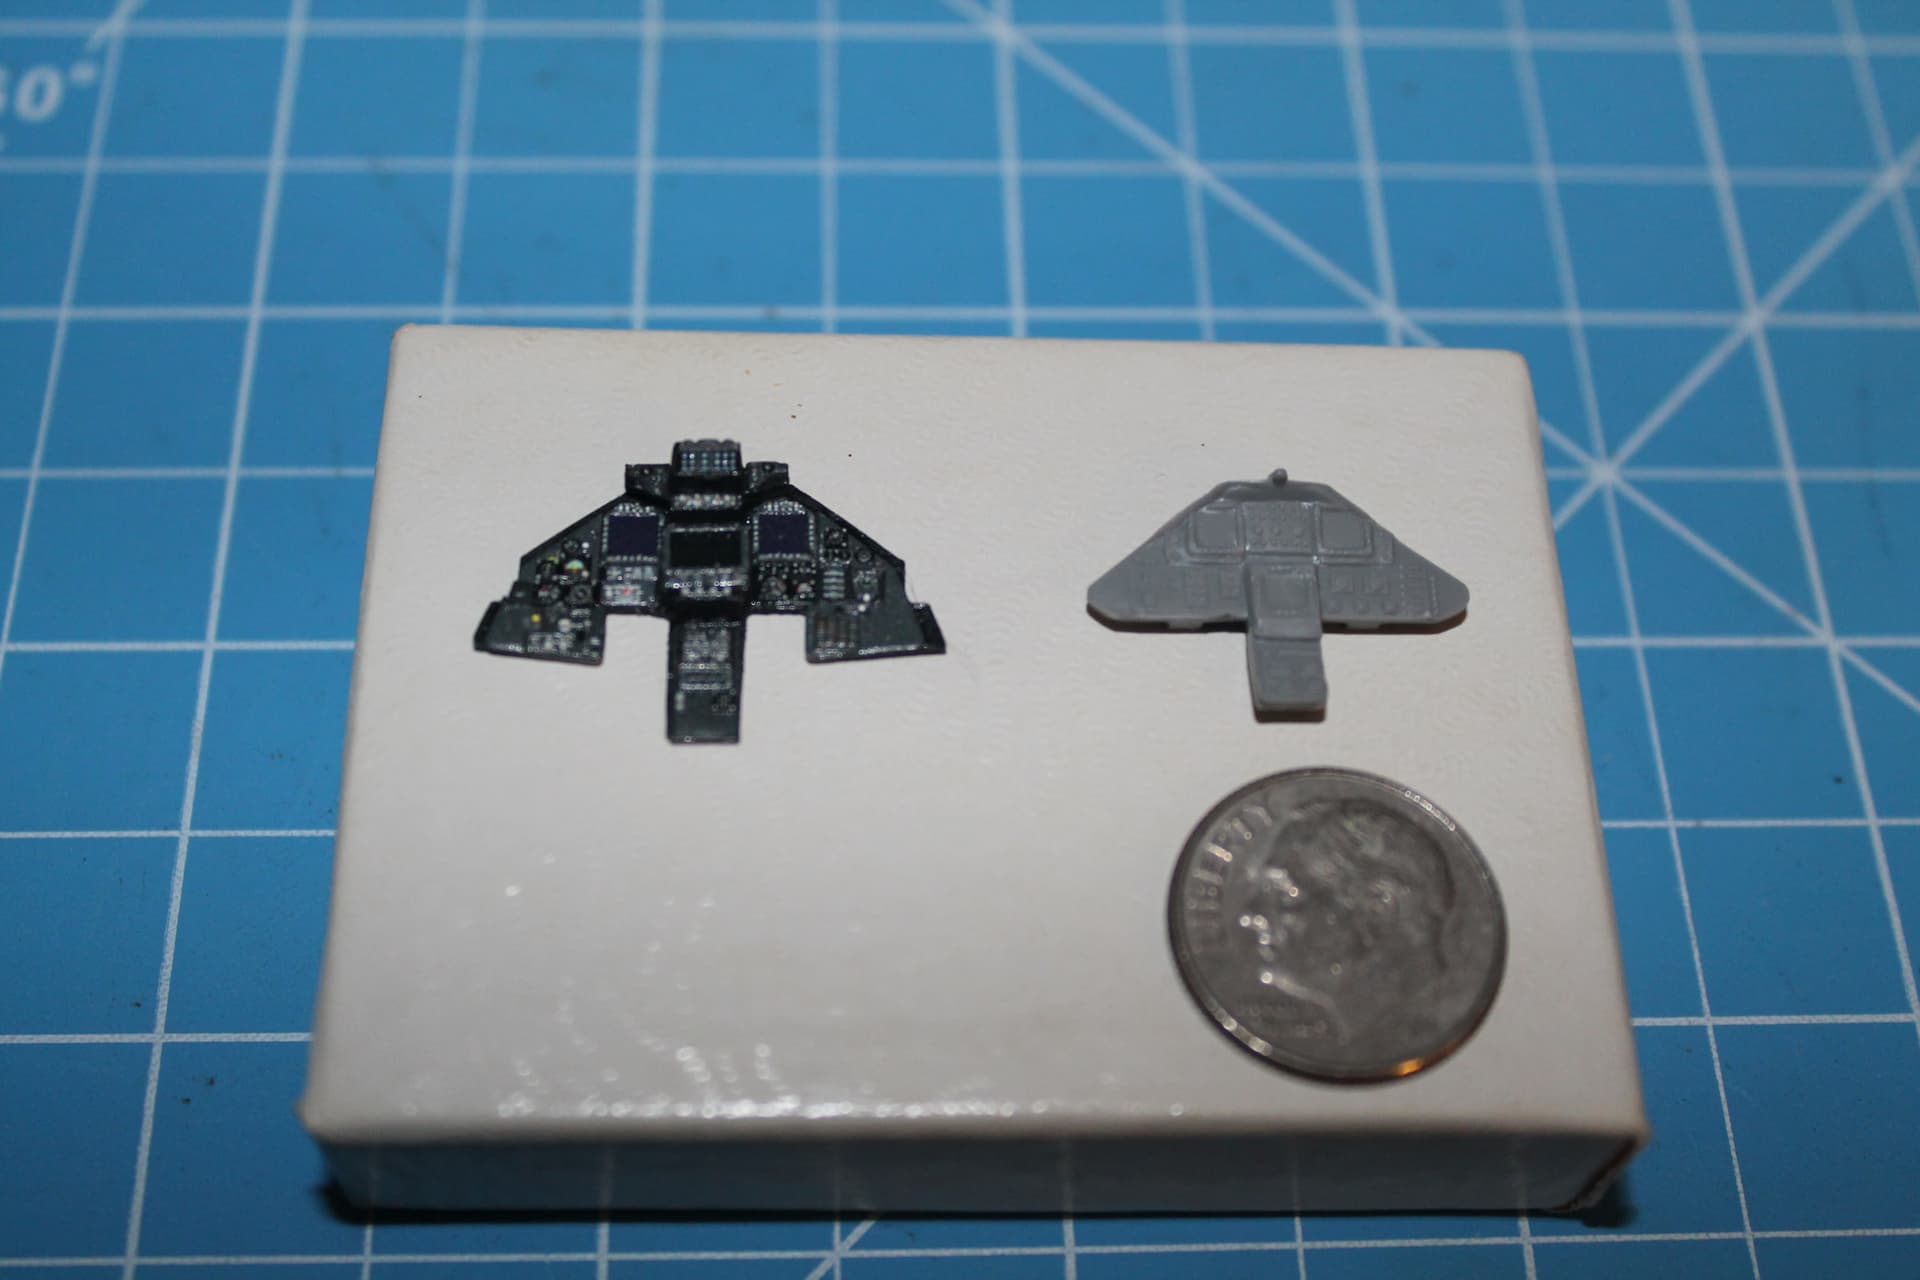
In the next photo you see the difference between the finished panel and the original part.

When I test fitted the paper template to the cockpit, I realized I needed to build up the cockpit coaming as well.

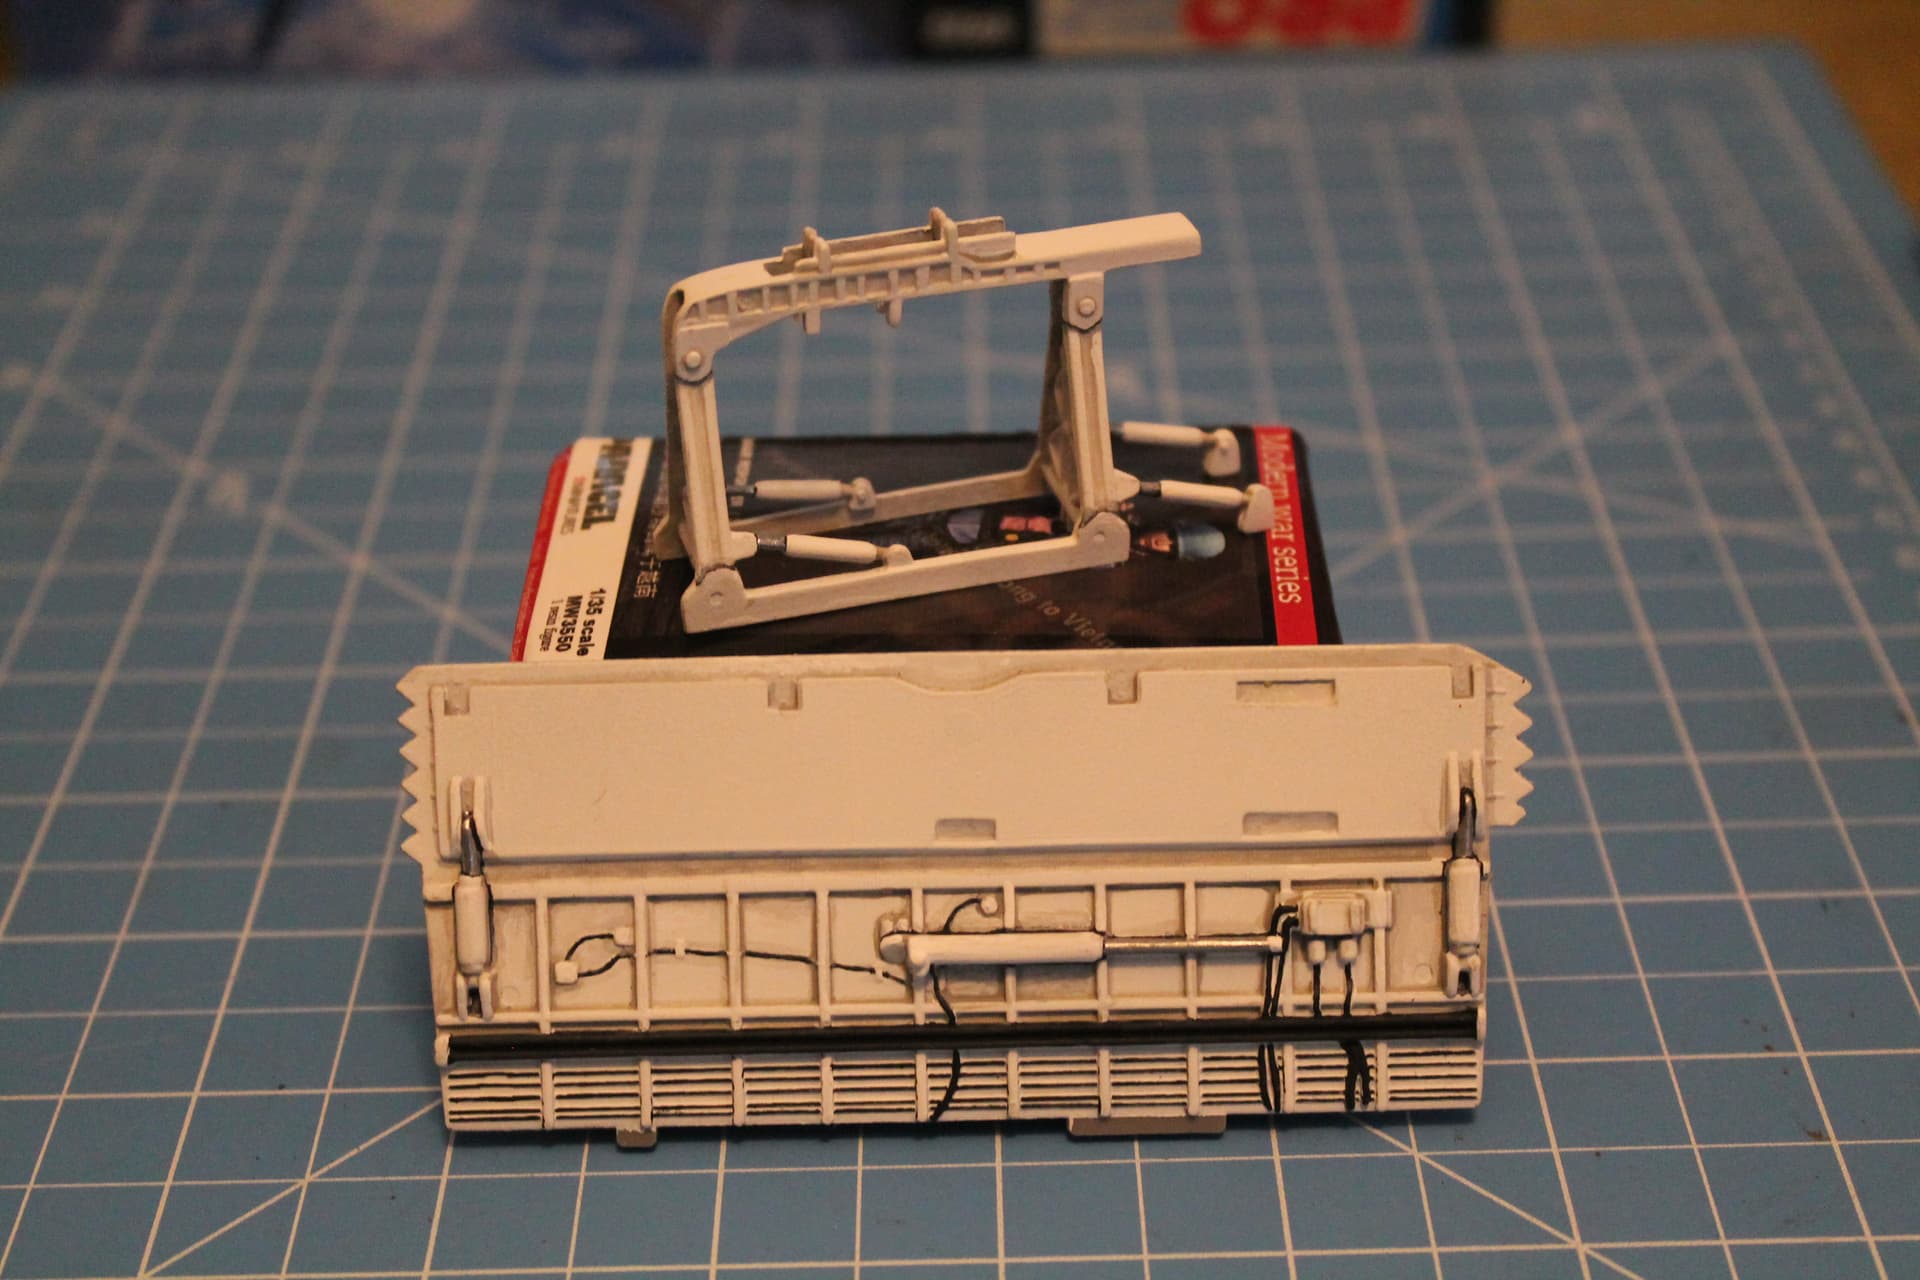
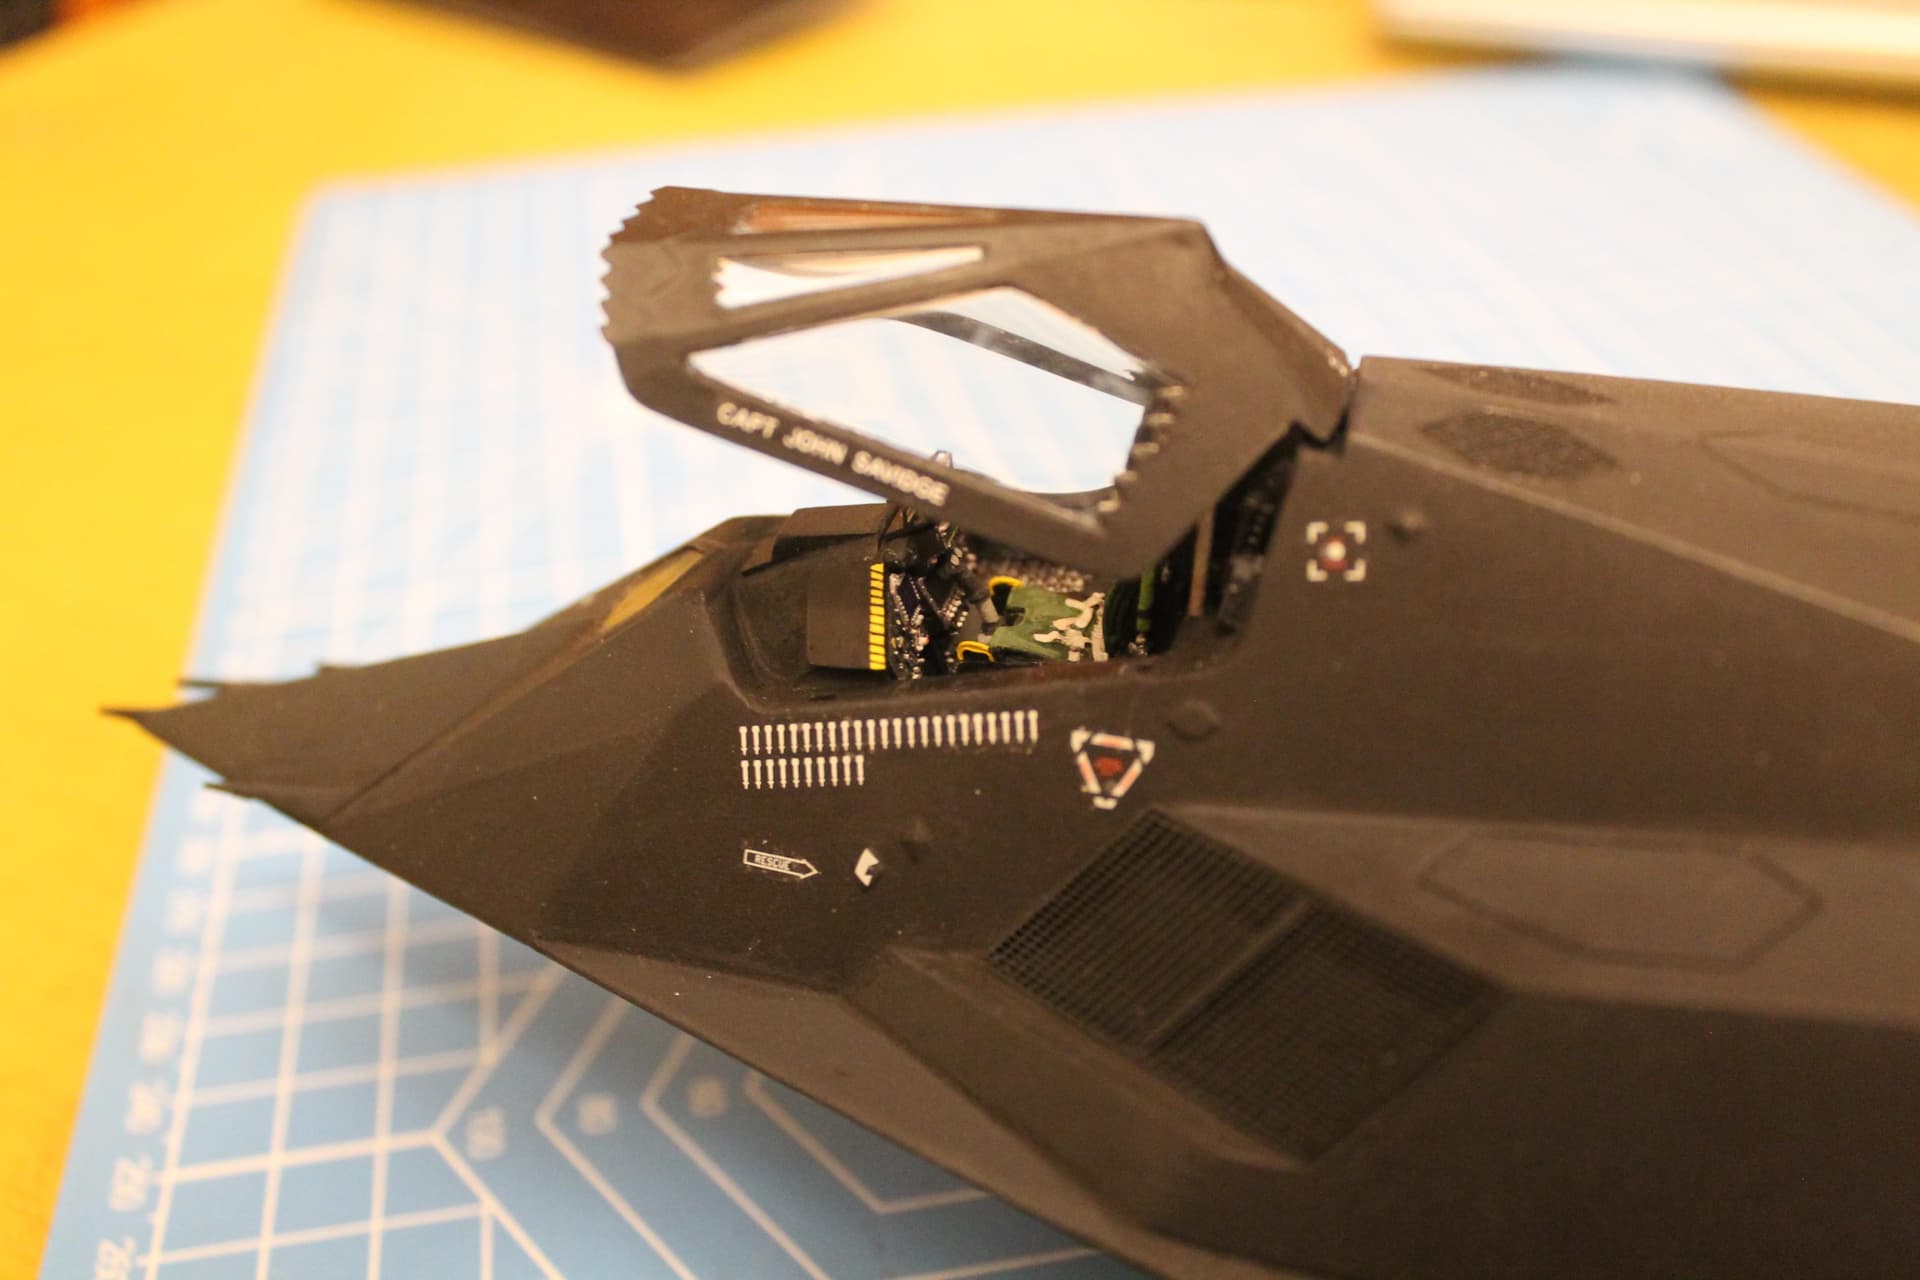
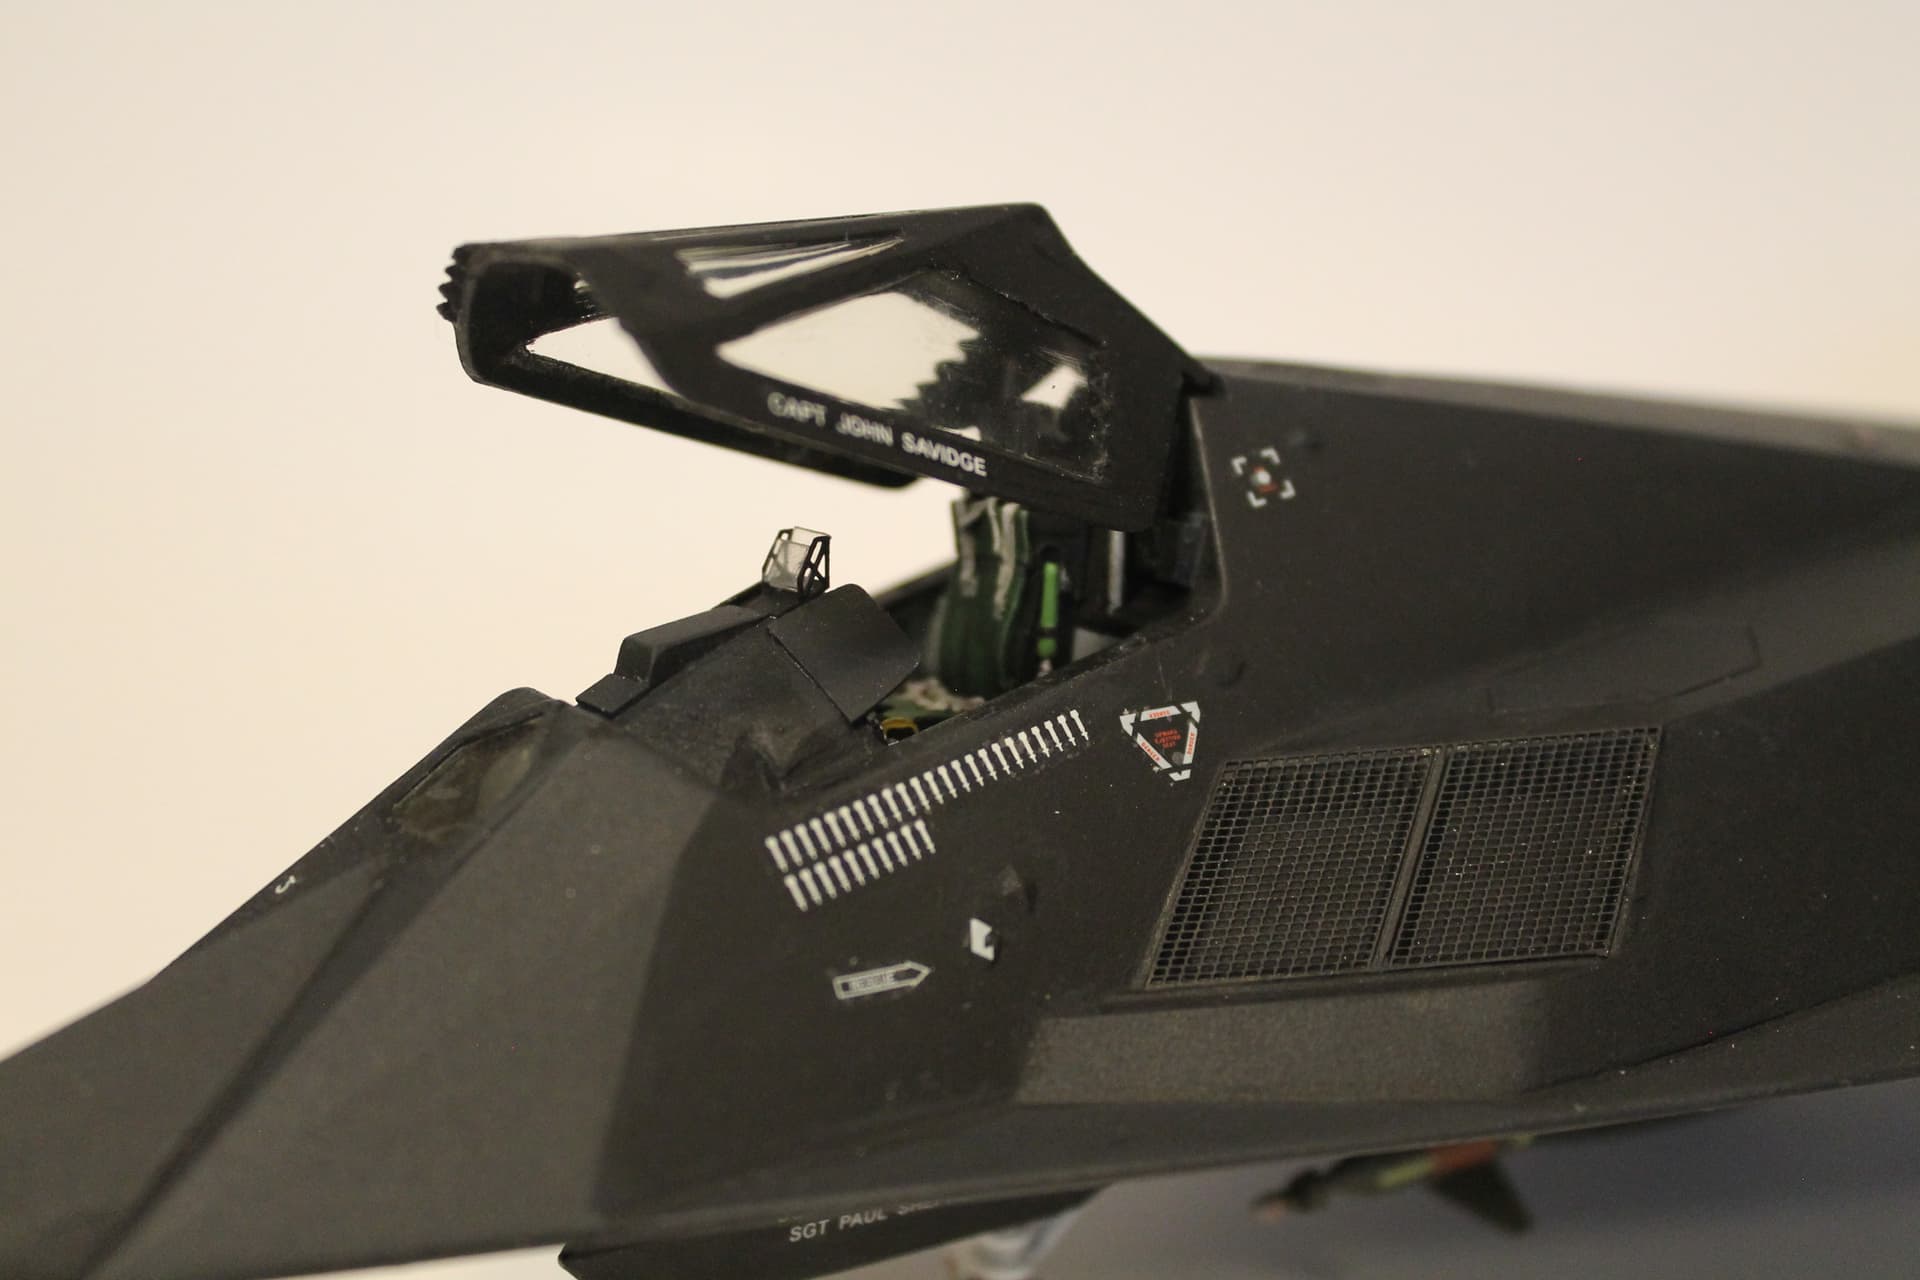
This last photo shows the panel installed, and the base for the HUD added to it.

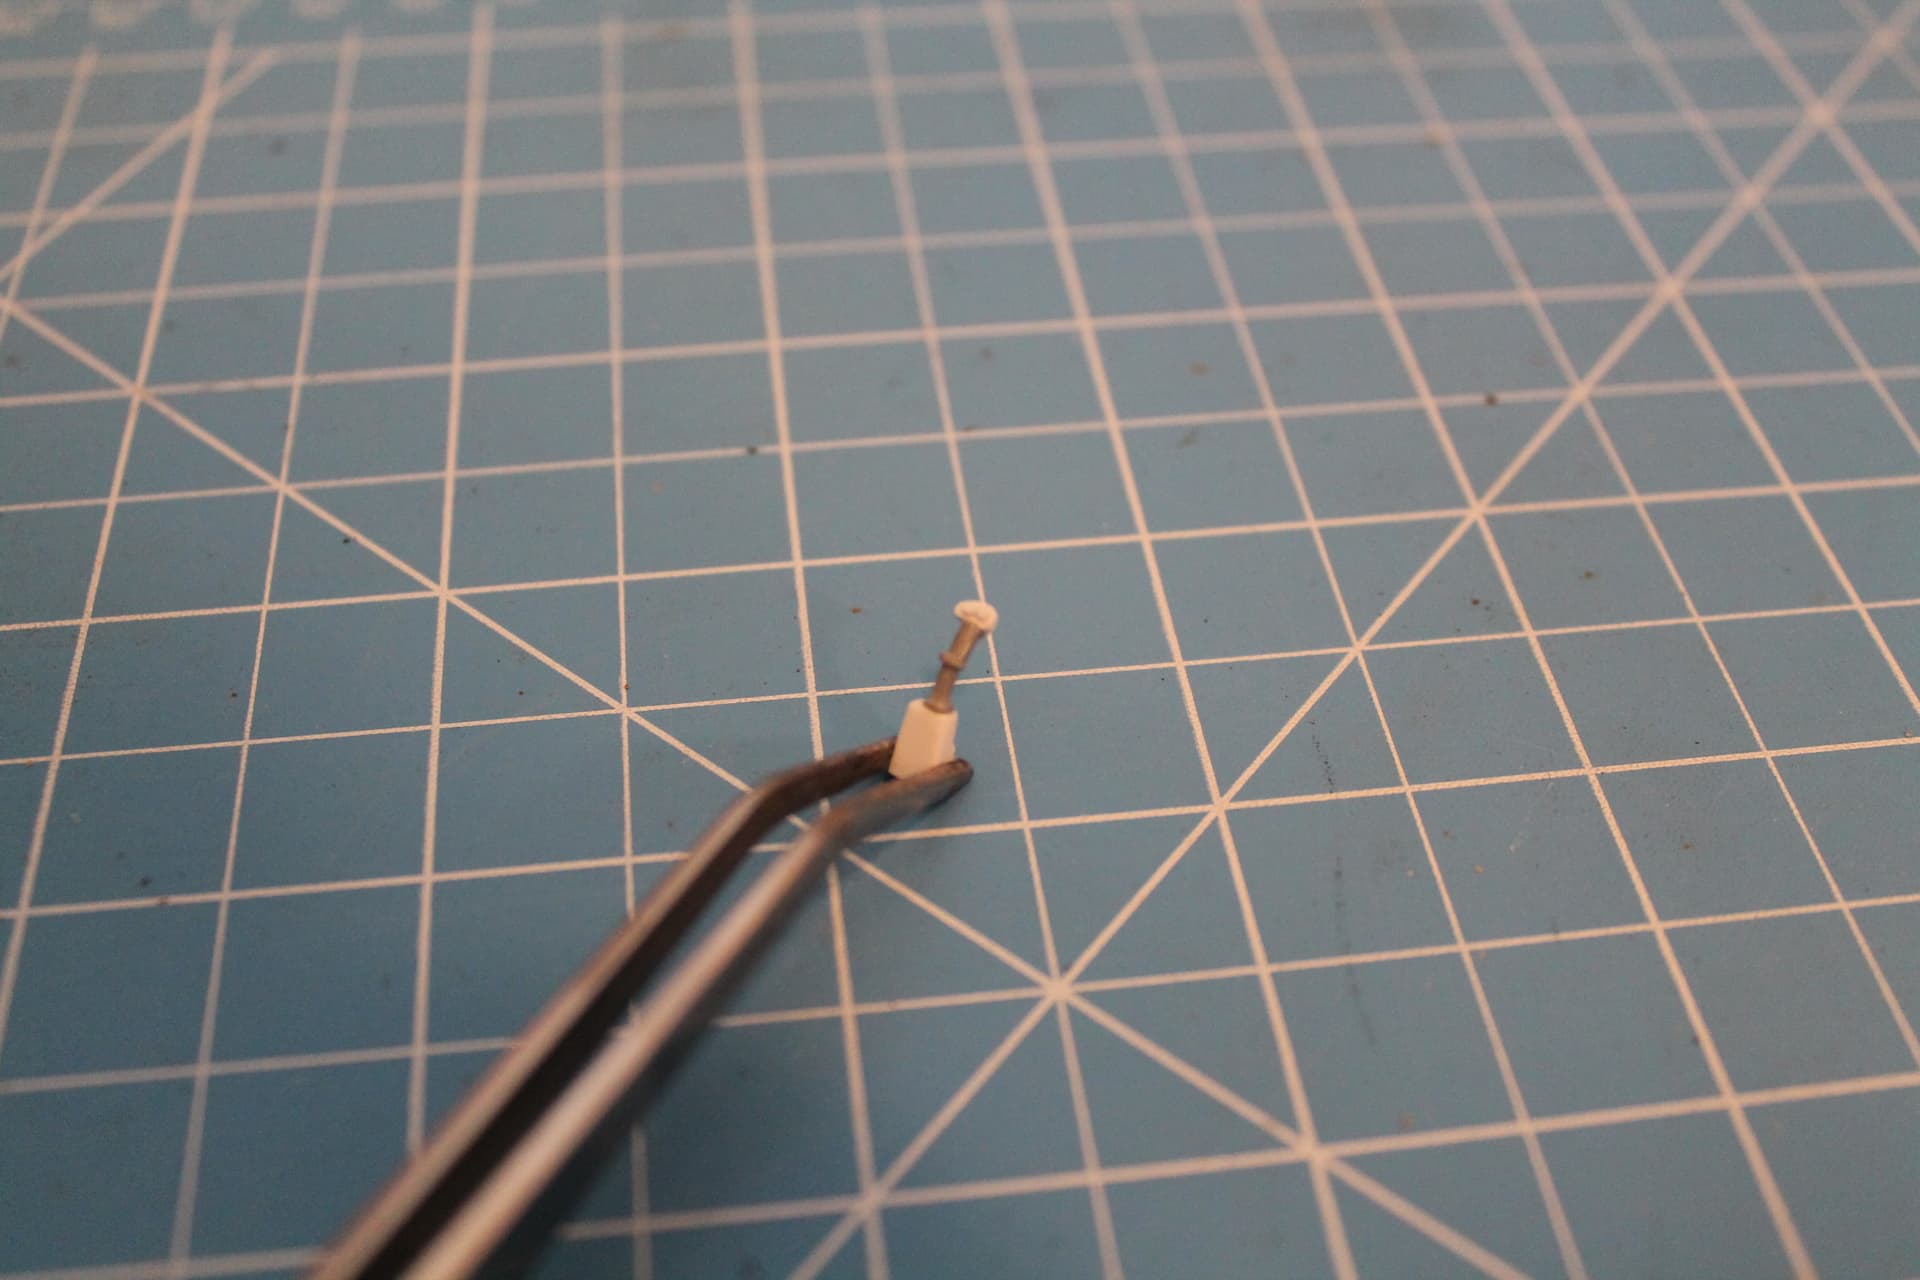
I also corrected the control column to make it more acurate.

Well, that’s all for now. More to come. Thanks for looking.

12 Likes

The kit was designed to have both weapons bay doors open and both ‘trapezes’ extended. I decided that I would only have one bay open with its weapon deployed. Each door was molded as one piece with the center bulkhead. I cut one door free and removed much of its interior detail. I found that I needed to added a bunch of shims to the doors front edge to get it to fit proprly in the closed position.

This next photo shows the door in place.

The two gray squares at the front of the bay are supposed to be air deflectors. I removed them and made my own. The next photo shows the painted door/bulkhead and the trapeze.

I later found out that the long open area in the bomb rack was supposed to be solid, so I used some square stock to fill it in.

Photos of the F-117 show the flaps lowered when on the ground and the kit gives you that option. However the flaps do not fit in lowered position which necessitated some modification to the lower wing halves. The worst fit issue was around this area when joining the fuselage halves together. The photos show before and after.

The last photo shows the weapons bay and the landing gear wells installed.

Thanks for looking, questions or comments are welcomed.

12 Likes

I only have a few more in-progress pics. The kit includes a small, but crowded, PE fret. Unfortunately it was steel rather than brass. This made seperating the parts extremely difficult. Most were for the various screens, like those over the intakes. Some were detail parts for the ejection seat. Two were for the HUD. They were to be attached to a rather clunky looking clear part. I decided to try a different approach. First, I cemented the two PE pieces to a small rectangle of plastic and painted this assembly. In the past, I’ve found that PE, clear parts, & super glue can be a recipe for disaster. This time I had a ‘lightbulb’ moment, and used 5-minute epoxy to attach the clear parts to the PE supports. It worked like a charm.

The epoxy was applied in small amounts using a toothpick. It had just enough tackiness to hold the clear part in place and enough working time to allow proper alignment. The final result looks much better than the kit supplied clear part would have. Looking at photos I realized the canopy woud have sat too low in the open position. So I removed the supporting pistons and made longer ones from plastic rod. The next photo shows the Aires ACES II ejection seat in place and the cockpit complete.

The last photo shows the landing gear and weapons ‘trapeze’ installed.

The kit’s wheels were poorly detailed and the tires way too ‘bulged’ for my taste, so I used a set of resin replacements from Reskit. I also added a few improvements to the main gear legs.
That’s all for now. the final installment will be of the completed model. Thanks for looking.

8 Likes

Here is the finished model. The decals were from Caracal and depict “Final Verdict”, a bird that participated in 33 missions during Desert Storm.

The GBU-10 Paveway II bomb is an Eduard item from their Brassin line. It came as a pair and decals for the markings were included. You can choose between two different seeker heads, the one I used has the protective cap on it.

Well that’s all. It was a challenge, but I’m glad I took it on. I tried a few new things and I’m happy with the end result. It may not be 100% accurate, but it looks like a Nighthawk and that’s all I ask. Thanks for looking.

13 Likes

Very nice. The extra detailing and surgery really adds to it all :+1:

2 Likes

Thanks, much appreciated.

1 Like

Stellar work mate. Well done! The F117 is one of my favorite planes but I haven’t gotten the courage to work on my Tamiya kit yet

1 Like

Awesome work, matey!
That office needed a whole refurbishment, excellently executed.
It is quite surprising how limited the payload is to maintain stealth.

Thanks for sharing.

1 Like

Thanks very much. The Tamiya kit is a better option. :beer:

Thank you. Any external stores can severely affect an aircrafts stealthiness. Even the much newer F-35 has a small internal weapons load. :beer:

7 Likes

I decided to make a small modification to the Nighthawk. There are two hinged antiglare shields on the cockpit coaming. Originally both were shown extended on the model. I changed one, showing it folded back. I did this to make the cockpit detail more viewable. The first two pix show the change, the last shows how it was before.

Thanks for looking.

13 Likes

Beautifully done

1 Like

Thanks very much.