Black.
Here are some real world examples:

If the part is clear, you can paint the backside of it black to give it some depth, similar to what you see here:

Ken
Black.
Here are some real world examples:
If the part is clear, you can paint the backside of it black to give it some depth, similar to what you see here:
Ken
Great bit of information here guys as I too have wondered what’s best way to paint these parts. I like the two SMS colors offerings. A single bottle can last a lifetime for these tiny parts. Thanks Reynier for sharing this.
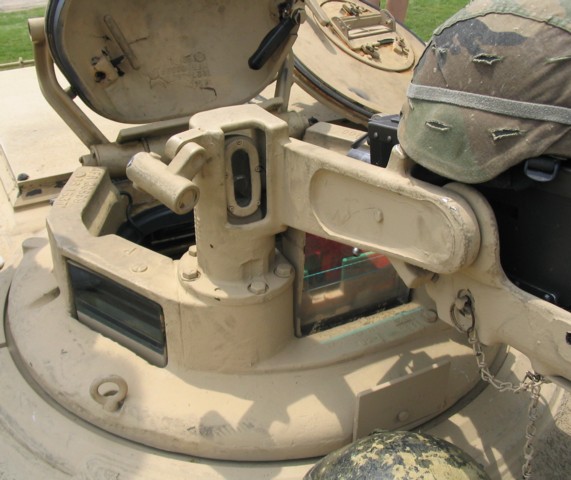
It depends ![]() And with that I mean: on your preference as much as on the real thing. I don’t see the added value of clear periscope parts myself, and generally fit them before painting, don’t mask them, and just paint them along with everything else. But if you do like the idea of clear periscopes, then painting the inside face black may just work well — though at the same time, the inside of the model will be dark anyway, so you probably won’t need to paint anything to get the periscope to look dark on the finished model.
And with that I mean: on your preference as much as on the real thing. I don’t see the added value of clear periscope parts myself, and generally fit them before painting, don’t mask them, and just paint them along with everything else. But if you do like the idea of clear periscopes, then painting the inside face black may just work well — though at the same time, the inside of the model will be dark anyway, so you probably won’t need to paint anything to get the periscope to look dark on the finished model.
As I mentioned, though, my own preference is to paint the visible side matt black and then put on a layer of graphite from a pencil. Try it, if you don’t like it you can always just repaint it in a plain dark colour ![]()
Because somehow model companies got it into their heads that periscope faces are blue. Long ago, I only recall this from Tamiya, but over the decades several other kit manufacturers have started recommending it — I’m guessing by simply copying Tamiya rather than thinking about it for themselves.
Tons of modellers do it for the same reason, I wager. There are a great many, even ones with a lot of experience, who would be totally lost if you took away the painting instructions that came with the kit they’re building. Just think about the very common question of, “What is the Humbrol equivalent to the Tamiya XF-123 that’s recommended in my kit’s instructions?” They never wonder if XF-123 is accurate in the first place, let alone which model paint they might use to replicate the colour of the real thing, but only which model paint matches the other model paint.
My method is to paint the back of the periscope chrome silver, and then use two coats of Tamiya clear blue or clear green on the other side. Fit it into place and then go round the edges with Tamiya black panel liner.
A friend of mine - @MartinBird87 uses silver/prism nail inserts on the back of his. It’s a very cool look.
Martin that Stryker looks fantastic!
Thanks! Digital camo gave me a headache ![]()
I hear that! Almost drove me insane when I did an M1 Panther crew. Yours looks great
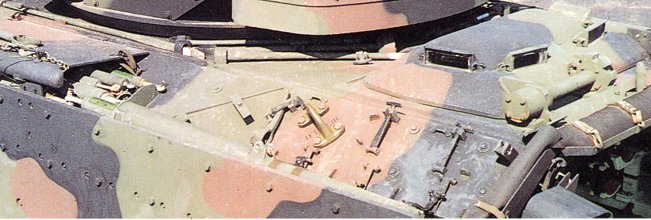
I have a method that looks efficient enough and can be utilized both on old kits with solid hyposcopes and on modern kits with clear ones, already painted of the outside color of the tank.
I cut stripes of appropriate width (1 to 2 mm, for example) from a sheet of tiny transparent plastic, then I paint them on the back with black or sort of dark grey-metallic purple (or what the photos of the real subject suggest), preferably with enamel paints.
Then I cut them into rectangular pieces as long as the hyposcope glasses have to be.
ThenI glue these pieces on the model hyposcopes keeping the painted side on the back, so the surface seen from outside is fully gloss and smooth.
I use a small amount of white glue to keep these stickers in place, more or less as if they were decals.
Of course, no trasparence or iridescence effects are obtained with this method, but it is quick, easy and of fairly good effect.
I used the AFV Club ARD decals to replicate the Thermal Sight coating on my M60A3 build.
It came out pretty nice. And I did paint the cupola glass in black with gloss clear over it.
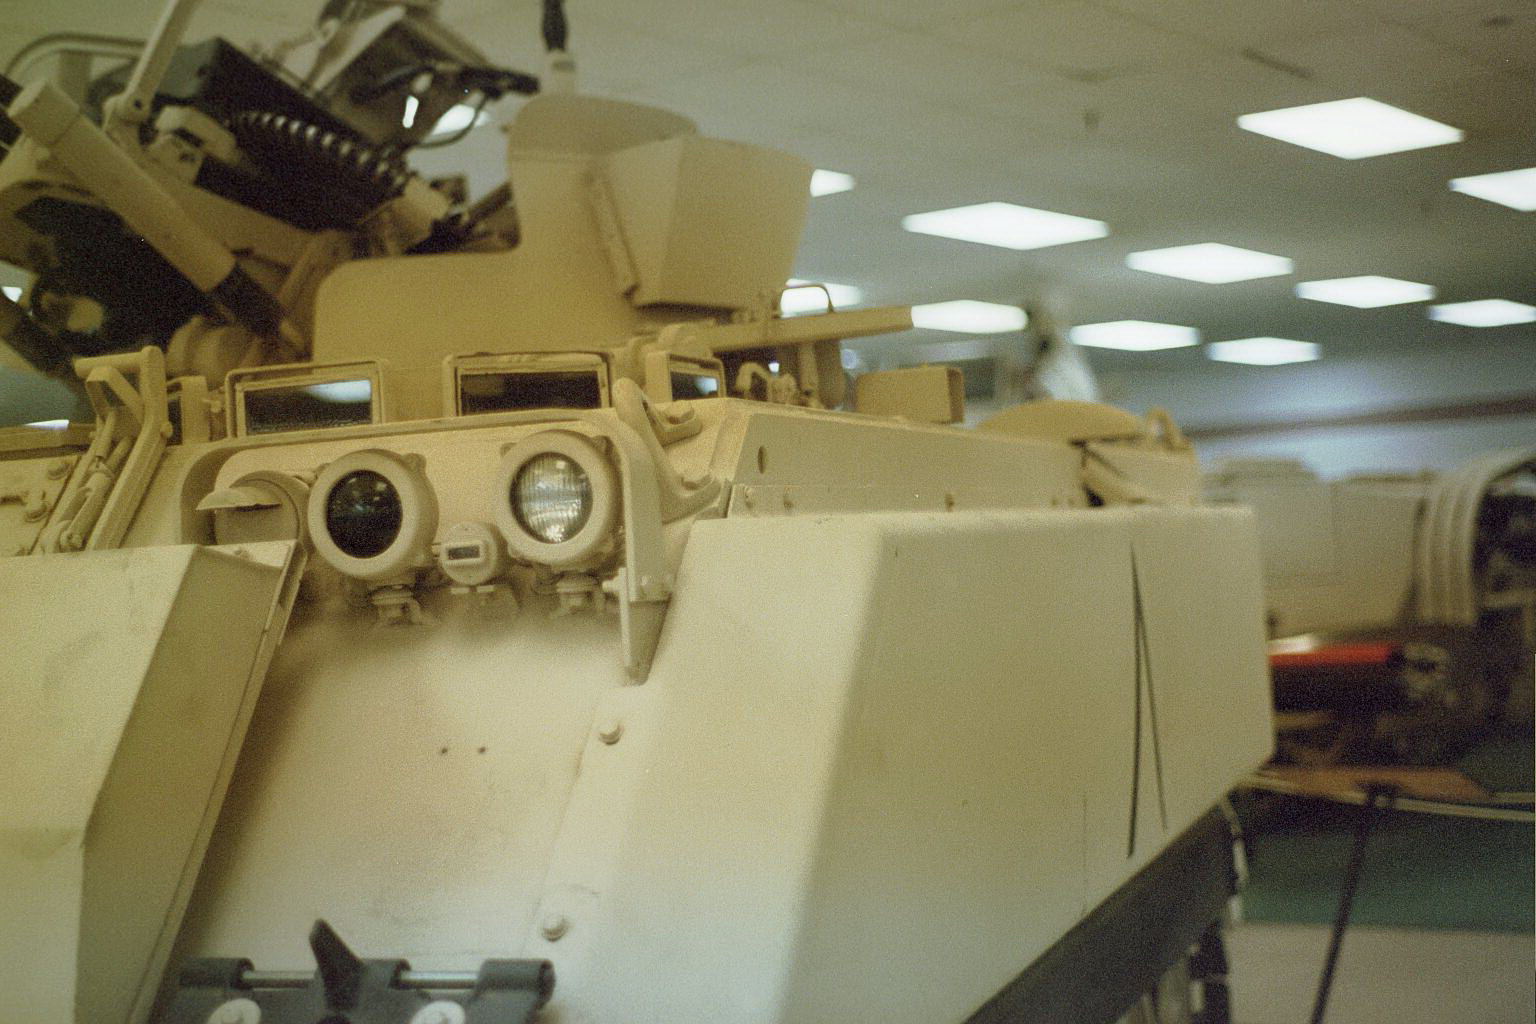
I don’t know about this kit but many nowadays have clear molded periscopes that fit into the holders much like the real things. I would say that painting before installation, and installation after exterior vehicle painting, will be easiest and give the best results.
I agree that it’s probably best to mask the lenses and paint the whole body black, olive drab, or grey. If you think color will be visible paint the interior lens and leave the exterior unpainted.
KL
What nationality is that jacket?
KL
Kurt I have always gone with silver and then black and finally when installed I add colour to the external lenses; is this the wrong approach?
Swedish:
I mail-ordered it from an army surplus store in Sweden when I was in need of a new jacket, and can’t say I regret it.
There is no wrong approach in modelling as long as you’re happy with what it looks like.
Hijacking my own thread to ask for advice on how to color the number plates next!
Paint overall white and use Tamiya panel liner black to “paint” the plate.
Paint plate in white and overcoat with black, then with the finest grit sandpaper you have gently run over the lettering to reveal the white undercoat.
Nice tip. I would improve it by sealing the white with some varnish so the sanding would be less aggressive to the paint.
Olivier
If it gives you the effect you want, it can’t be wrong!
KL


