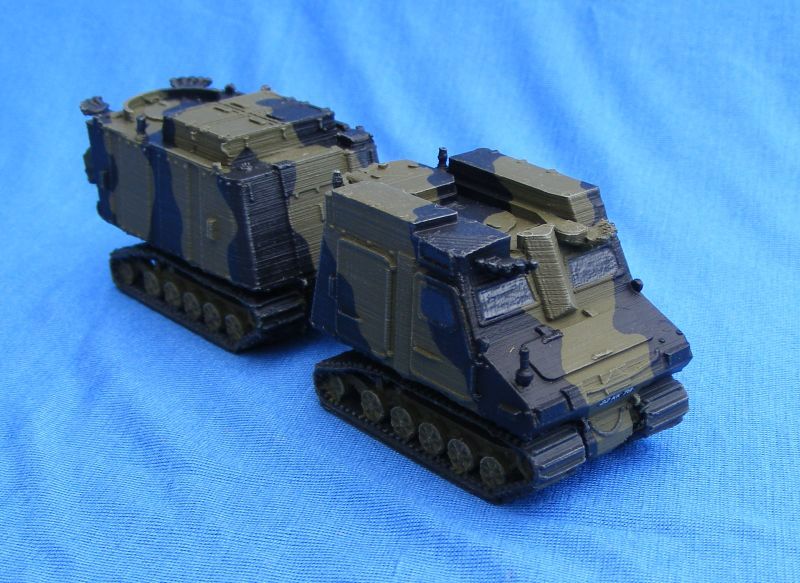
I imagine this is one of the most-asked questions in relation to 3D printing … how to remove noticeable print lines from vertical surfaces of a 3D printed model. My subject is a 1/76-scale model of the BV206 all-terrain vehicle, which I have just acquired. The quality of the model is very good, but an initial coat of primer has revealed horizontal print lines over all vertical surfaces. Had these been ridges, they would be simple to sand back. However, they are actually very fine recesses, so will need to be filled before sanding. Can anyone suggest the easiest (and cheapest) method to achieve a completely smooth surface?
I was using a little Mr Color Leveling or lacquer thinner to loosen it up a bit. The Leveling is better obviously but pricey and not always available at my LHS. Plus you could add a leveler/retarder if needed. The lacquer thinner is smellier as well so you will need to vent.
I usually do a 50/50, but sometimes I’ll go up to 70 on thinner. Just like any medium, get it to that milk consistency.
Thank you both for your responses.
Your suggestions confirmed what I was told earlier today.
I have yet to venture into the world of 3D printing, but I have
built several kits in 1/72 and 1/76 scale that have been produced
by this method. The ones I am used to have been printed in an
opaque light grey material, and have been generally free from print
lines.
However, the two items I am currently tackling are printed in a
translucent green material, and the ridges are particularly
noticeable. Could this be linked with the chosen material?
No doubt removing the lines on a 1/35-scale (or larger) model
would be relatively easy, but the panels in my scale are very small,
making the task all the more difficult.
SLA, or resin does leave print lines. Unless the printer has the ability to print lower then 0.02mm. Then the lines will pretty much disappear depending on the orientation of the part and an undercoat.
Different resins will also affect the final print due to exposure times.
Time is the factor with any 3D printed kit. Print the kit at 0.05mm per layer and it is quite quick to print but will leave noticeable lines.
Print at 0.02mm, takes a hell of a lot longer to print, but the quality is much better.
Pin marks are where the supports have not been removed while the resin is still raw. Once cured, the resin is very brittle and will leave a pin mark if the support tip is a large size.
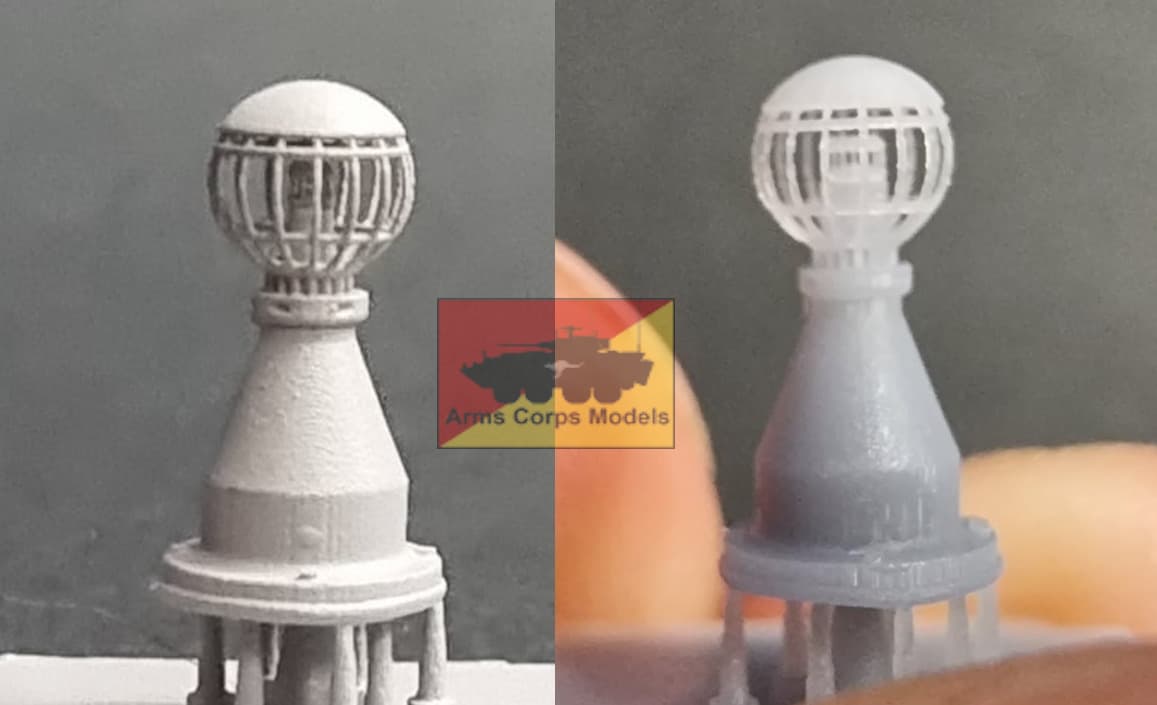
The image here is an AS1 Wind Sensor in 1/35th. Printed at 0.02mm per layer and is 8.2mm from the base to the top cap. The image on the right is the raw cured part, and the left is undercoated with Tamiya fine. This took 1 hour 45 to print on a Anycubic Photon M3 Plus, with basic grey resin. At 0.05mm it would fail as the cage is too fine to print at that resolution. If it did print, the time would be around 50 mins. But the layer lines would be much more prominent.
I don’t disagree with you. I really think the effect is minimal. At 0,02mm, it is quite smooth, the ridges are almost non existence with a coat of paint, even without primer. I feel like the ridges help to make the paint cling on better.
Here is one of my 1/32 print. It is 6.5cm tall actual size, partially painted with 1 layer of Vallejo water base paint thinned. Yes, its print lines are visible, but very minimal. With the complex details of this one, I think even at smaller scale like 1/76, it shouldn’t affect the textures too much.
In my opinion printing bands are quite hard to remove at any scale and show a poor printing work (low quality or quick job), unless it is a subject you really need, I would look elsewhere.
I just counted. I have 26 completed 1:35 3D printed models in my display cases and one more in primer in my WIP box.
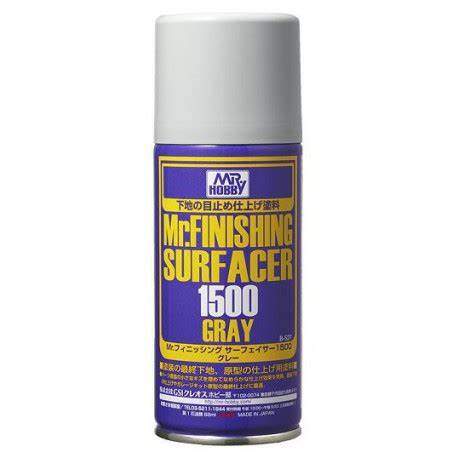
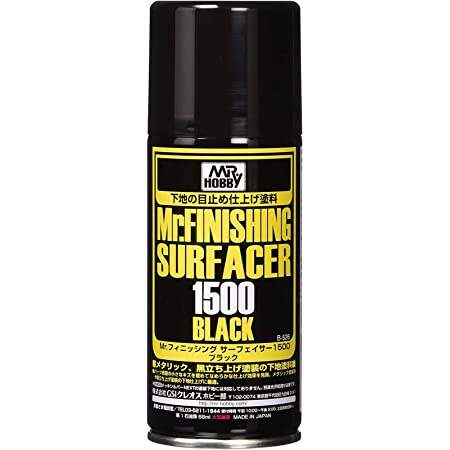
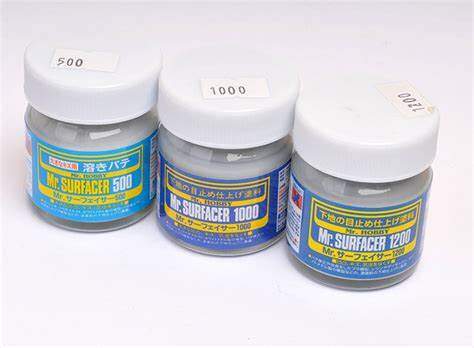
A good sandable, self-leveling lacquer primer is your new best friend. The enamel primers I’ve tried, don’t seem to cure well on the resin - they stay a bit sticky. The acrylics I’ve tried don’t adhere well to the resin. I have successfully used inexpensive lacquer rattle can automotive primer from the nearest auto parts store. It is cheap and works. However, my go-to is Mr Surfacer lacquer primer in rattle can. I prefer Mr Surfacer primers because they come in multiple grades that can be matched to the severity of the print lines. They adhere tightly to the resin, are sandable, and self-leveling. Mr Surfacer comes in multiple “grits”: 500 is the thickest, 1000 is my most used, 1200 is used for minor print lines, and 1500 black is an excellent general-purpose primer. For most kits, one wet coat of Mr Surfacer 1000 does the trick. If I can still see print lines, I break out the sanding implements and sand out the remaining lines. If the print lines are extensive or in areas that I can’t sand, I’ll add a second wet coat with Mr Surfacer 1000.
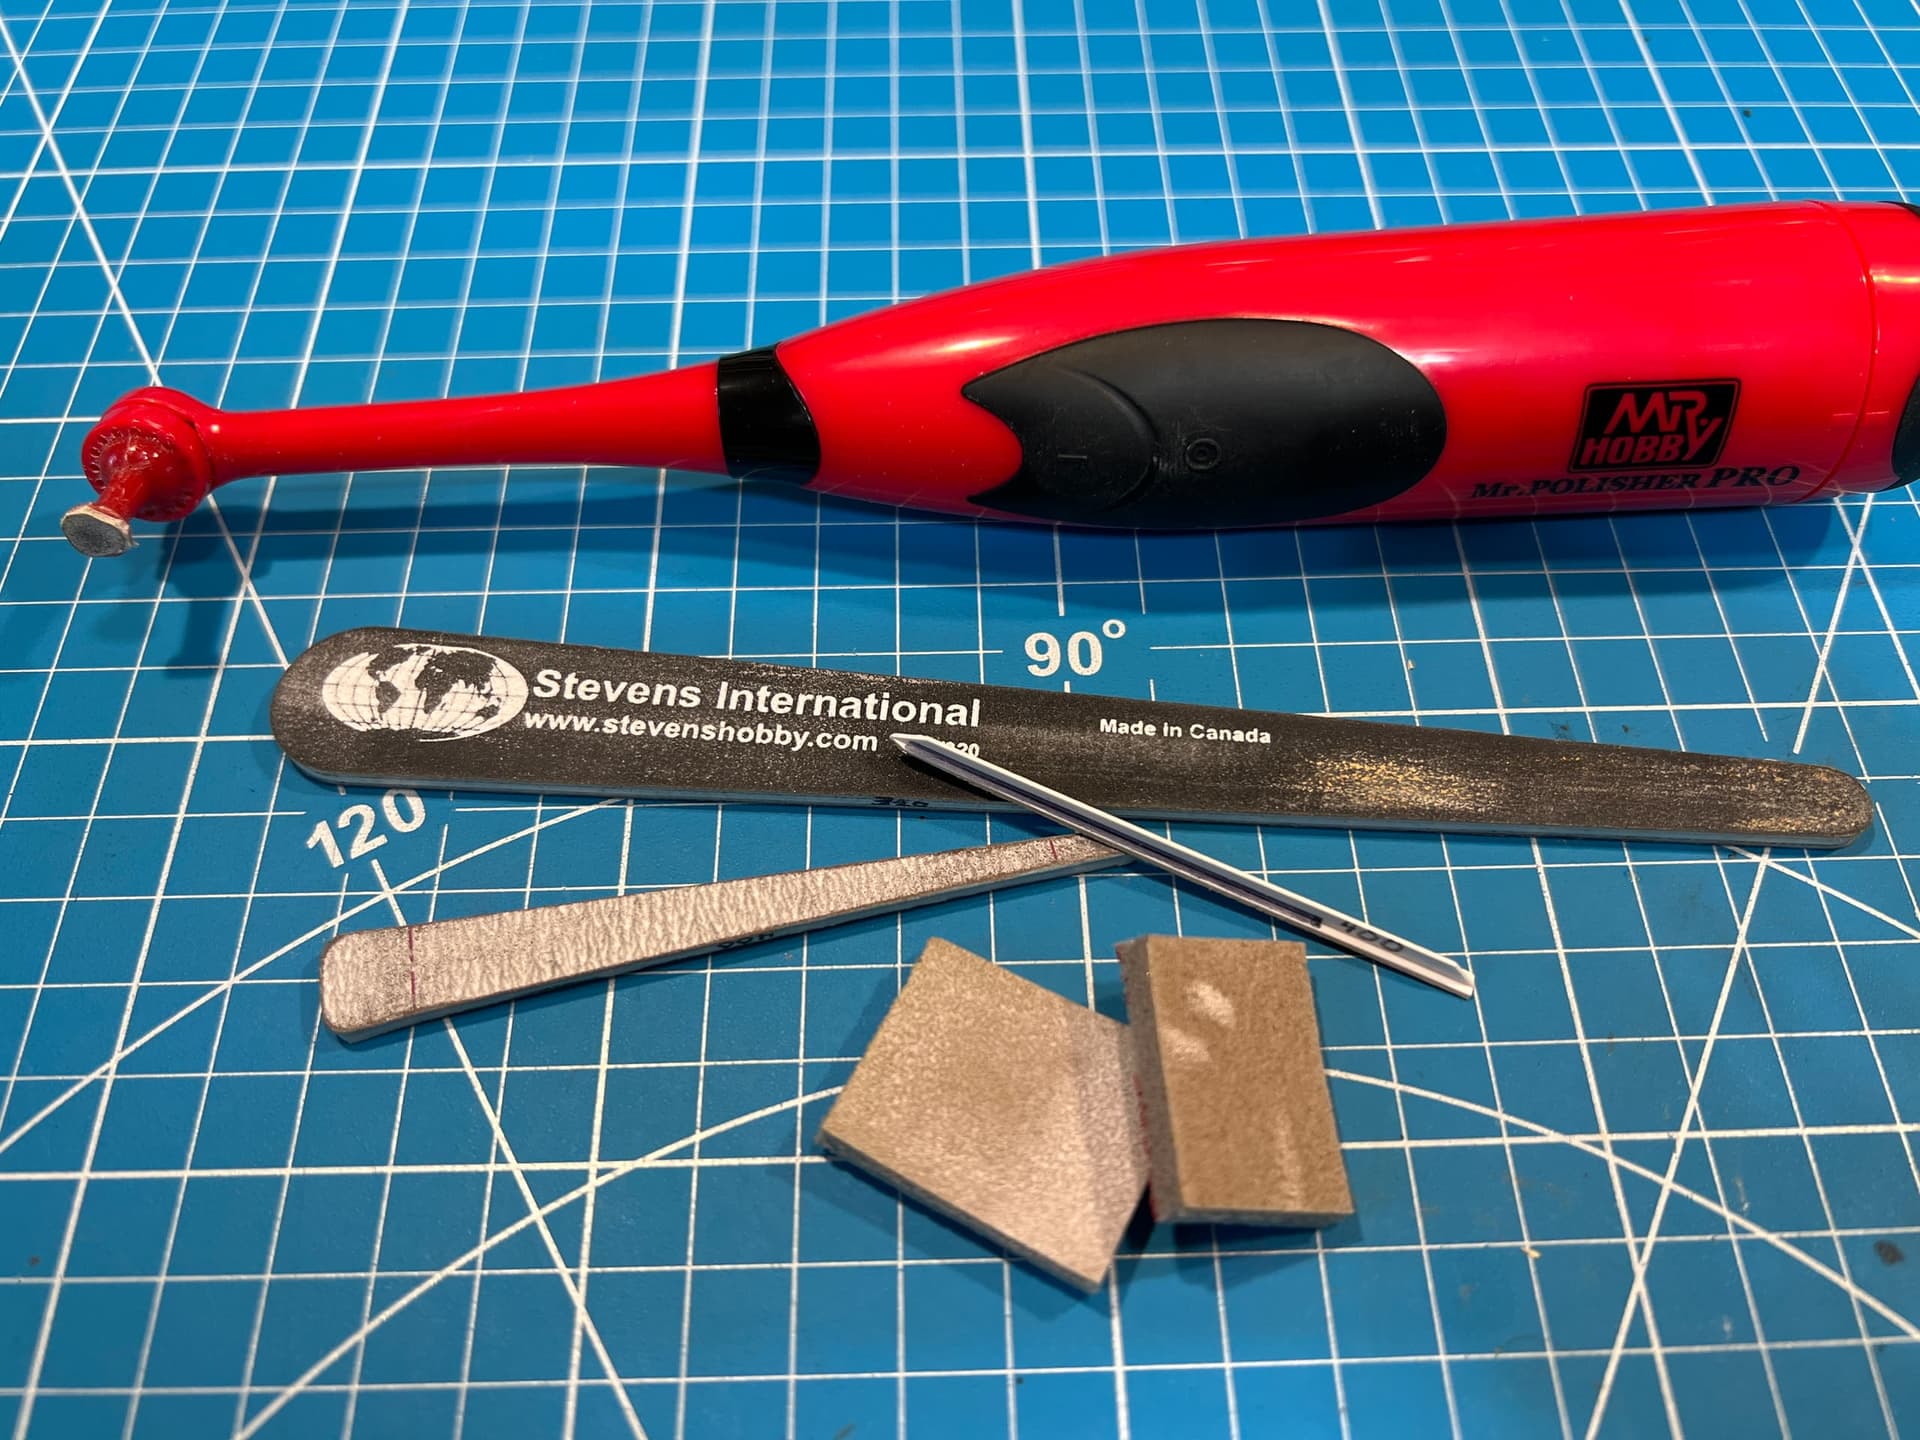
I use a variety of sanding implements: sponges for curved surfaces, normal sanding sticks, mini-sanding sticks, and I make my own micro sanding sticks from narrow strips of Evergreen strip with 400 to 600 grit sandpaper glued on. I love my Mr Hobby sander. I’ve modified the head by epoxying a push pin to it. This provides a smaller sanding surface and gives it an offset for tighter places.