Greetings everyone,
I thought I had already posted a topic on my Renault R35 from Tamiya in the past.
But I couldn’t find it on the new forums here.
Maybe on the old forums…
Anyway, I have been working on my Renault R35 that I had build months ago.
And with the airbrush painting the model didn’t go very well.
I’m constantly having trouble with airbrushing.
While it was going to well in the past.
So I don’t know what’s wrong now.
Maybe back to basics and start to learn all over the beginning?
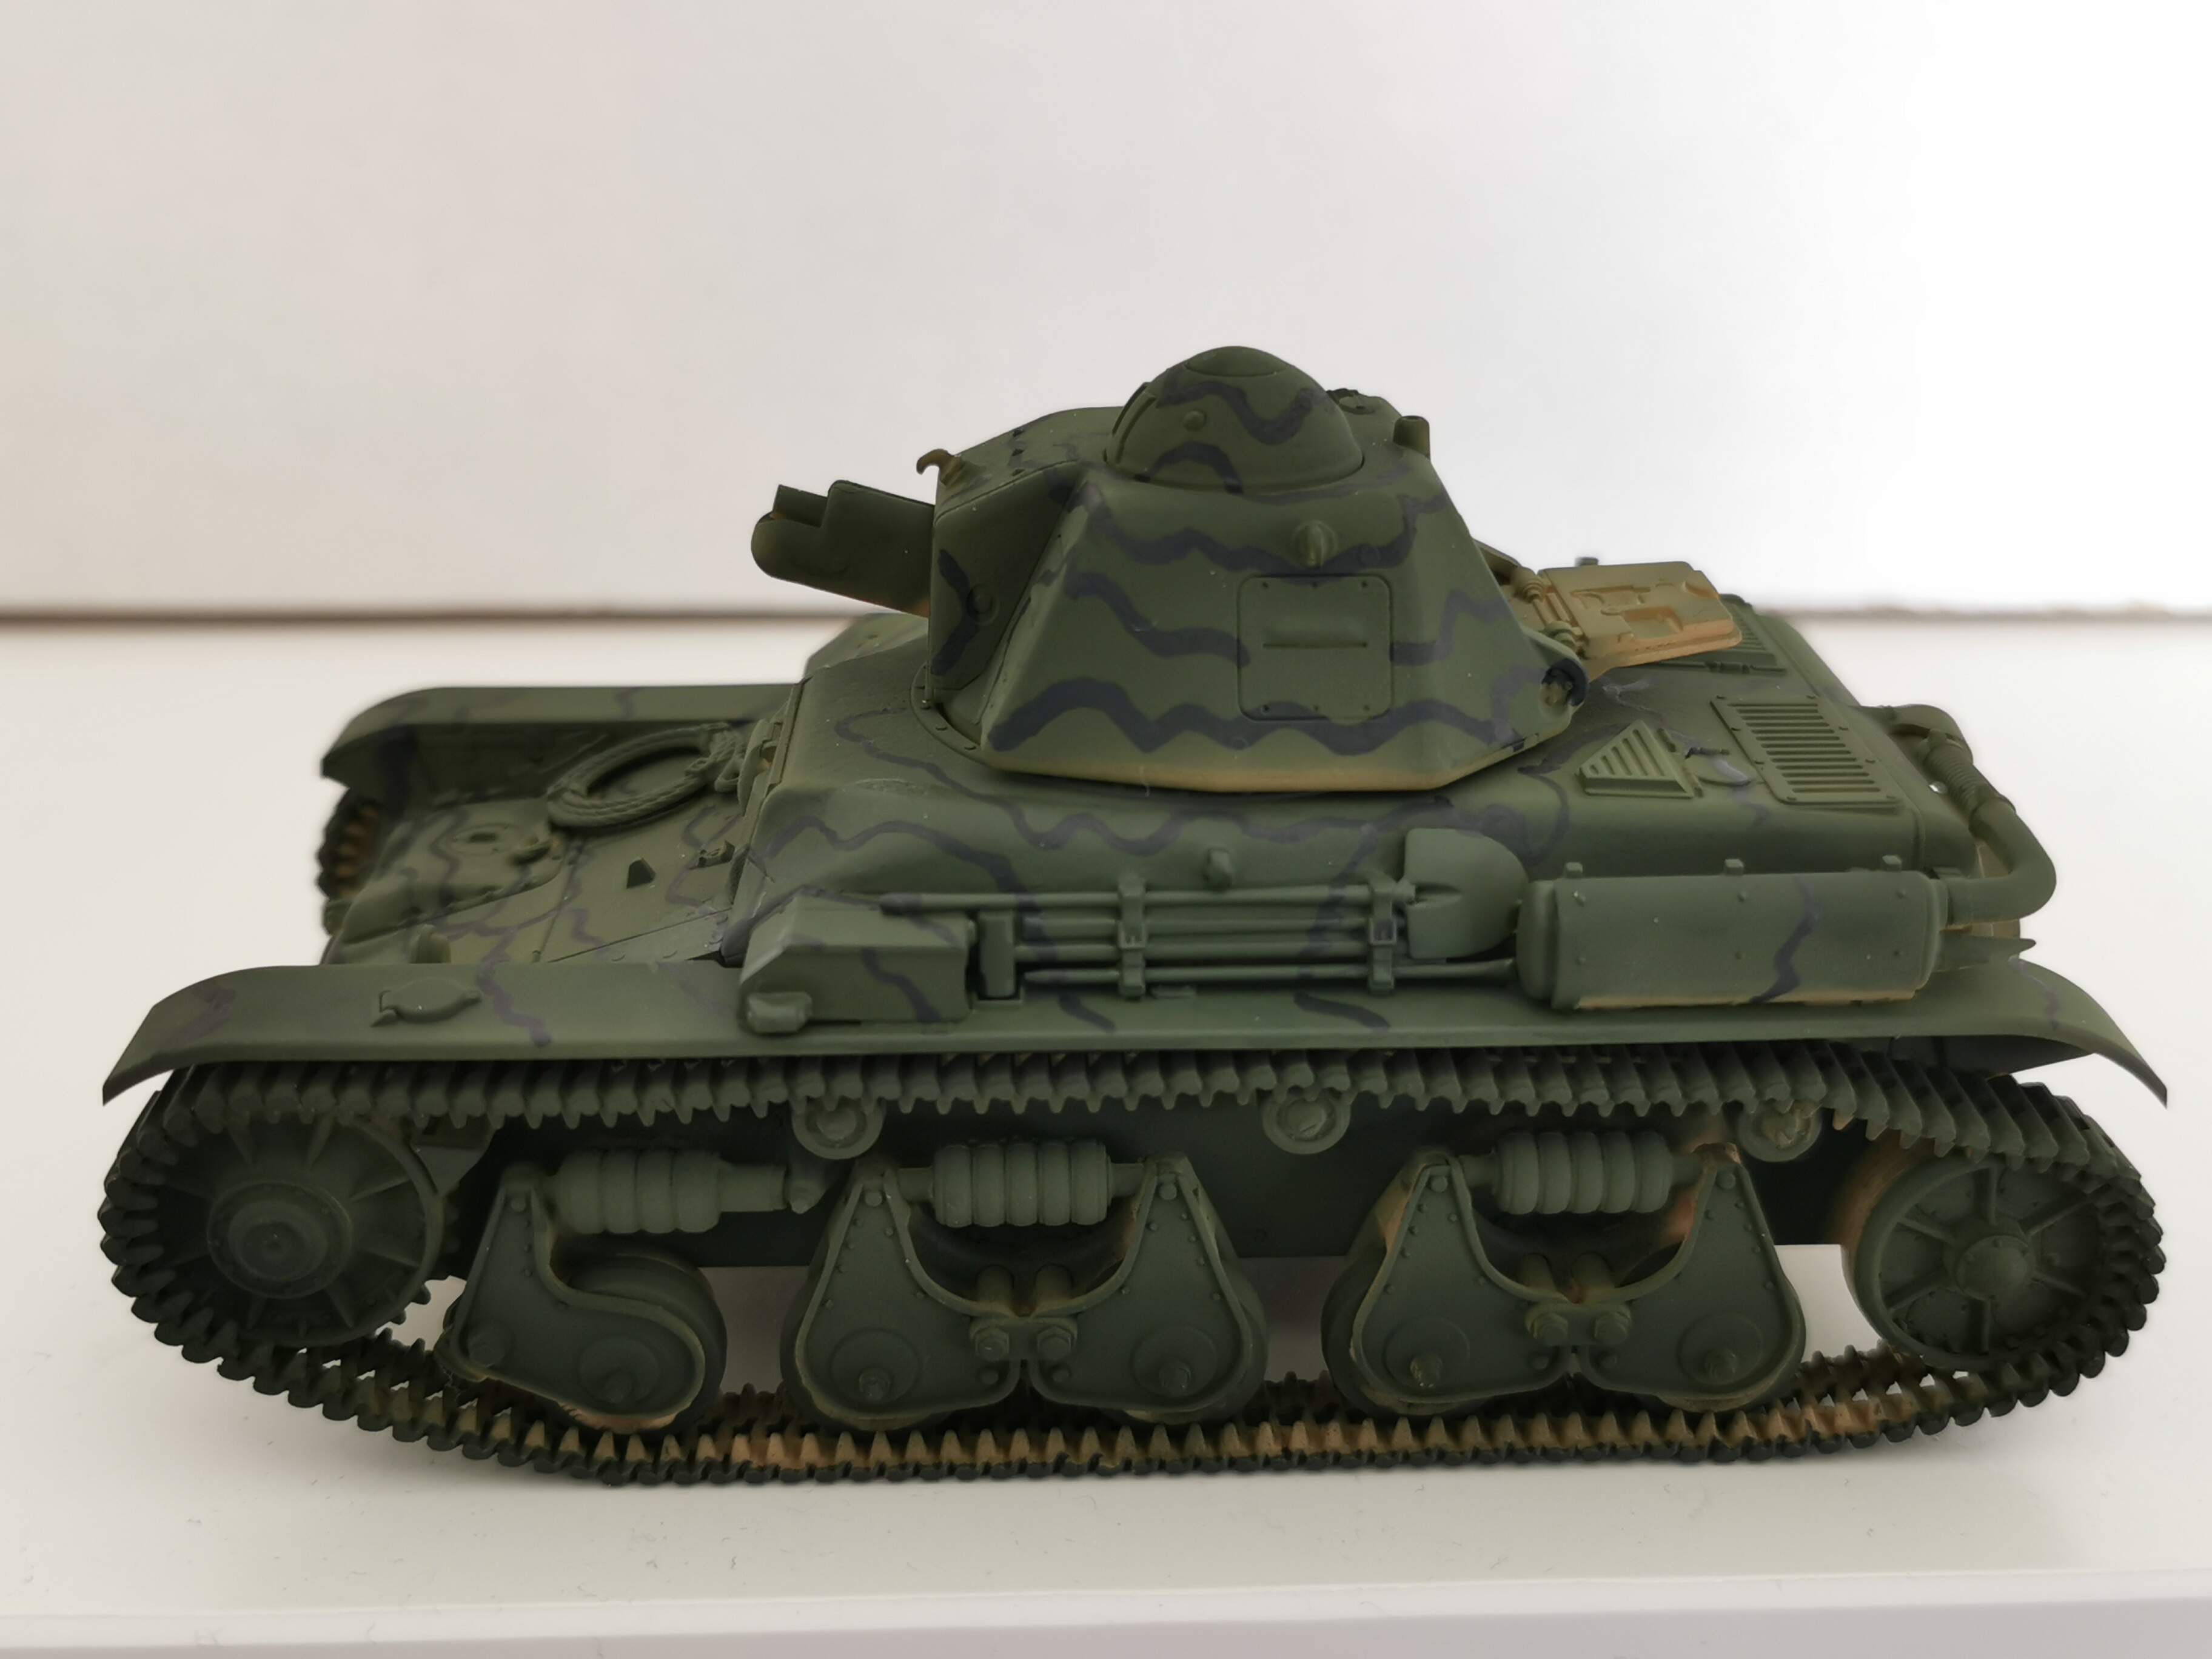
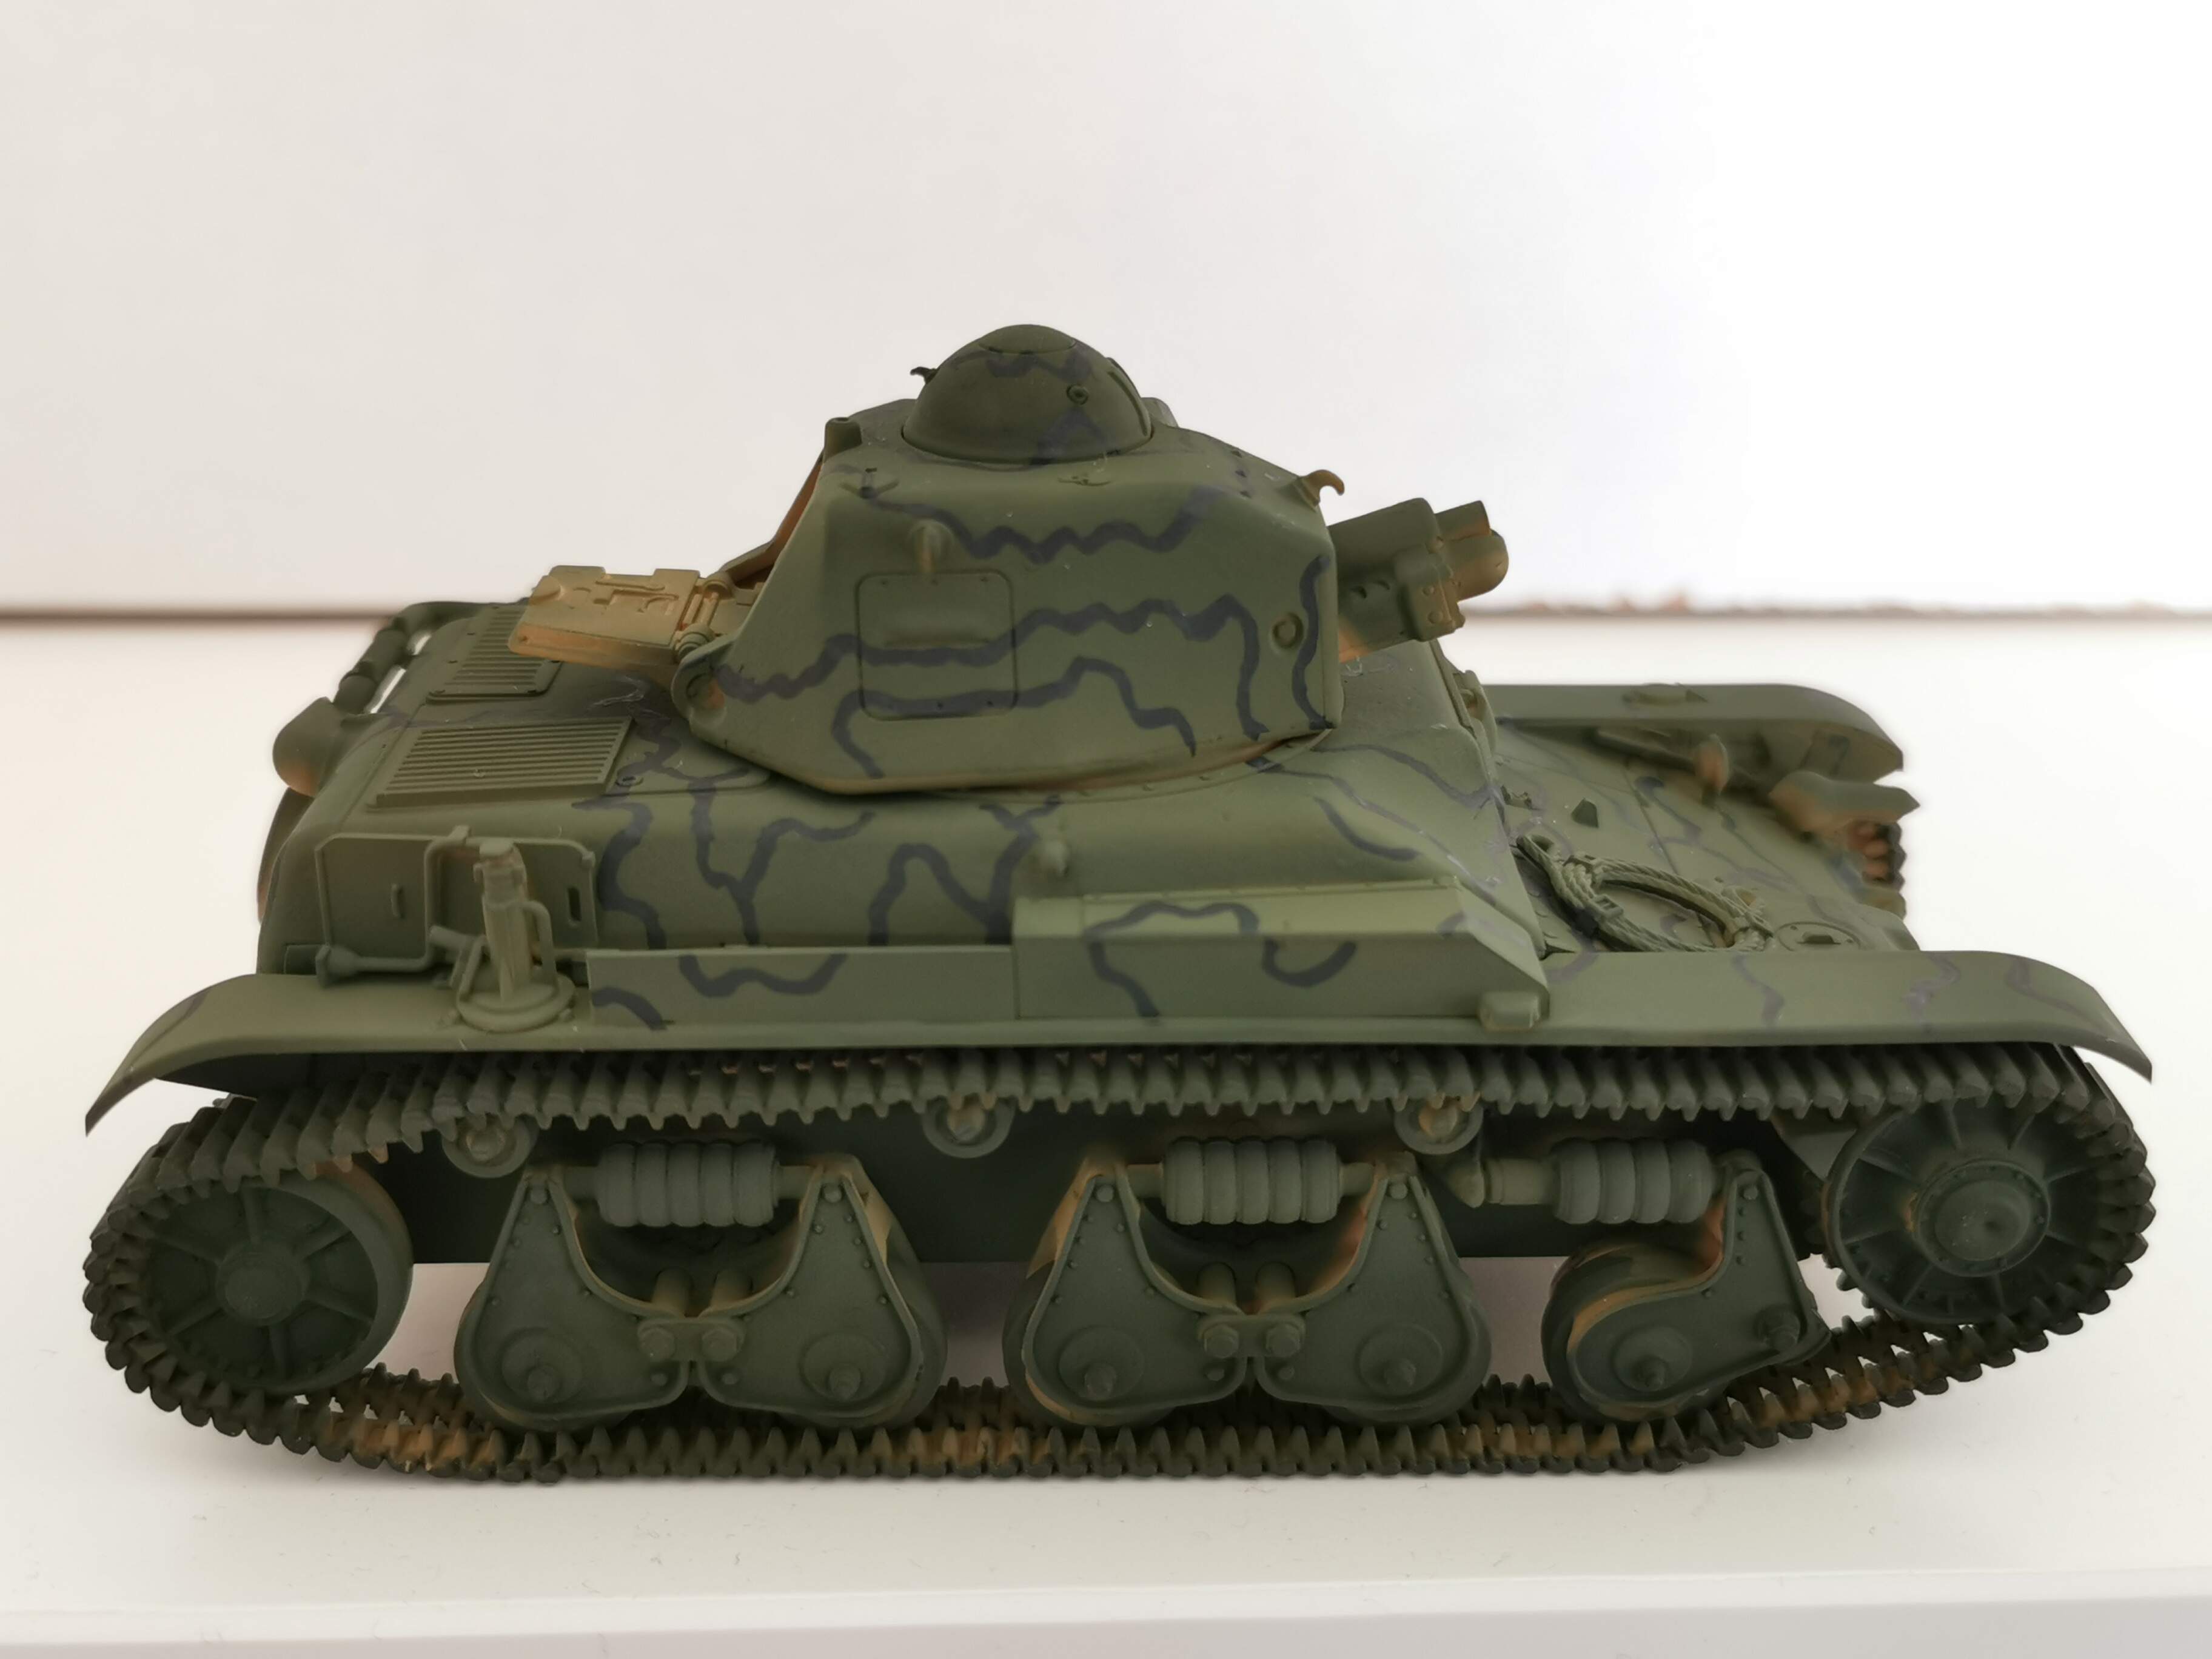
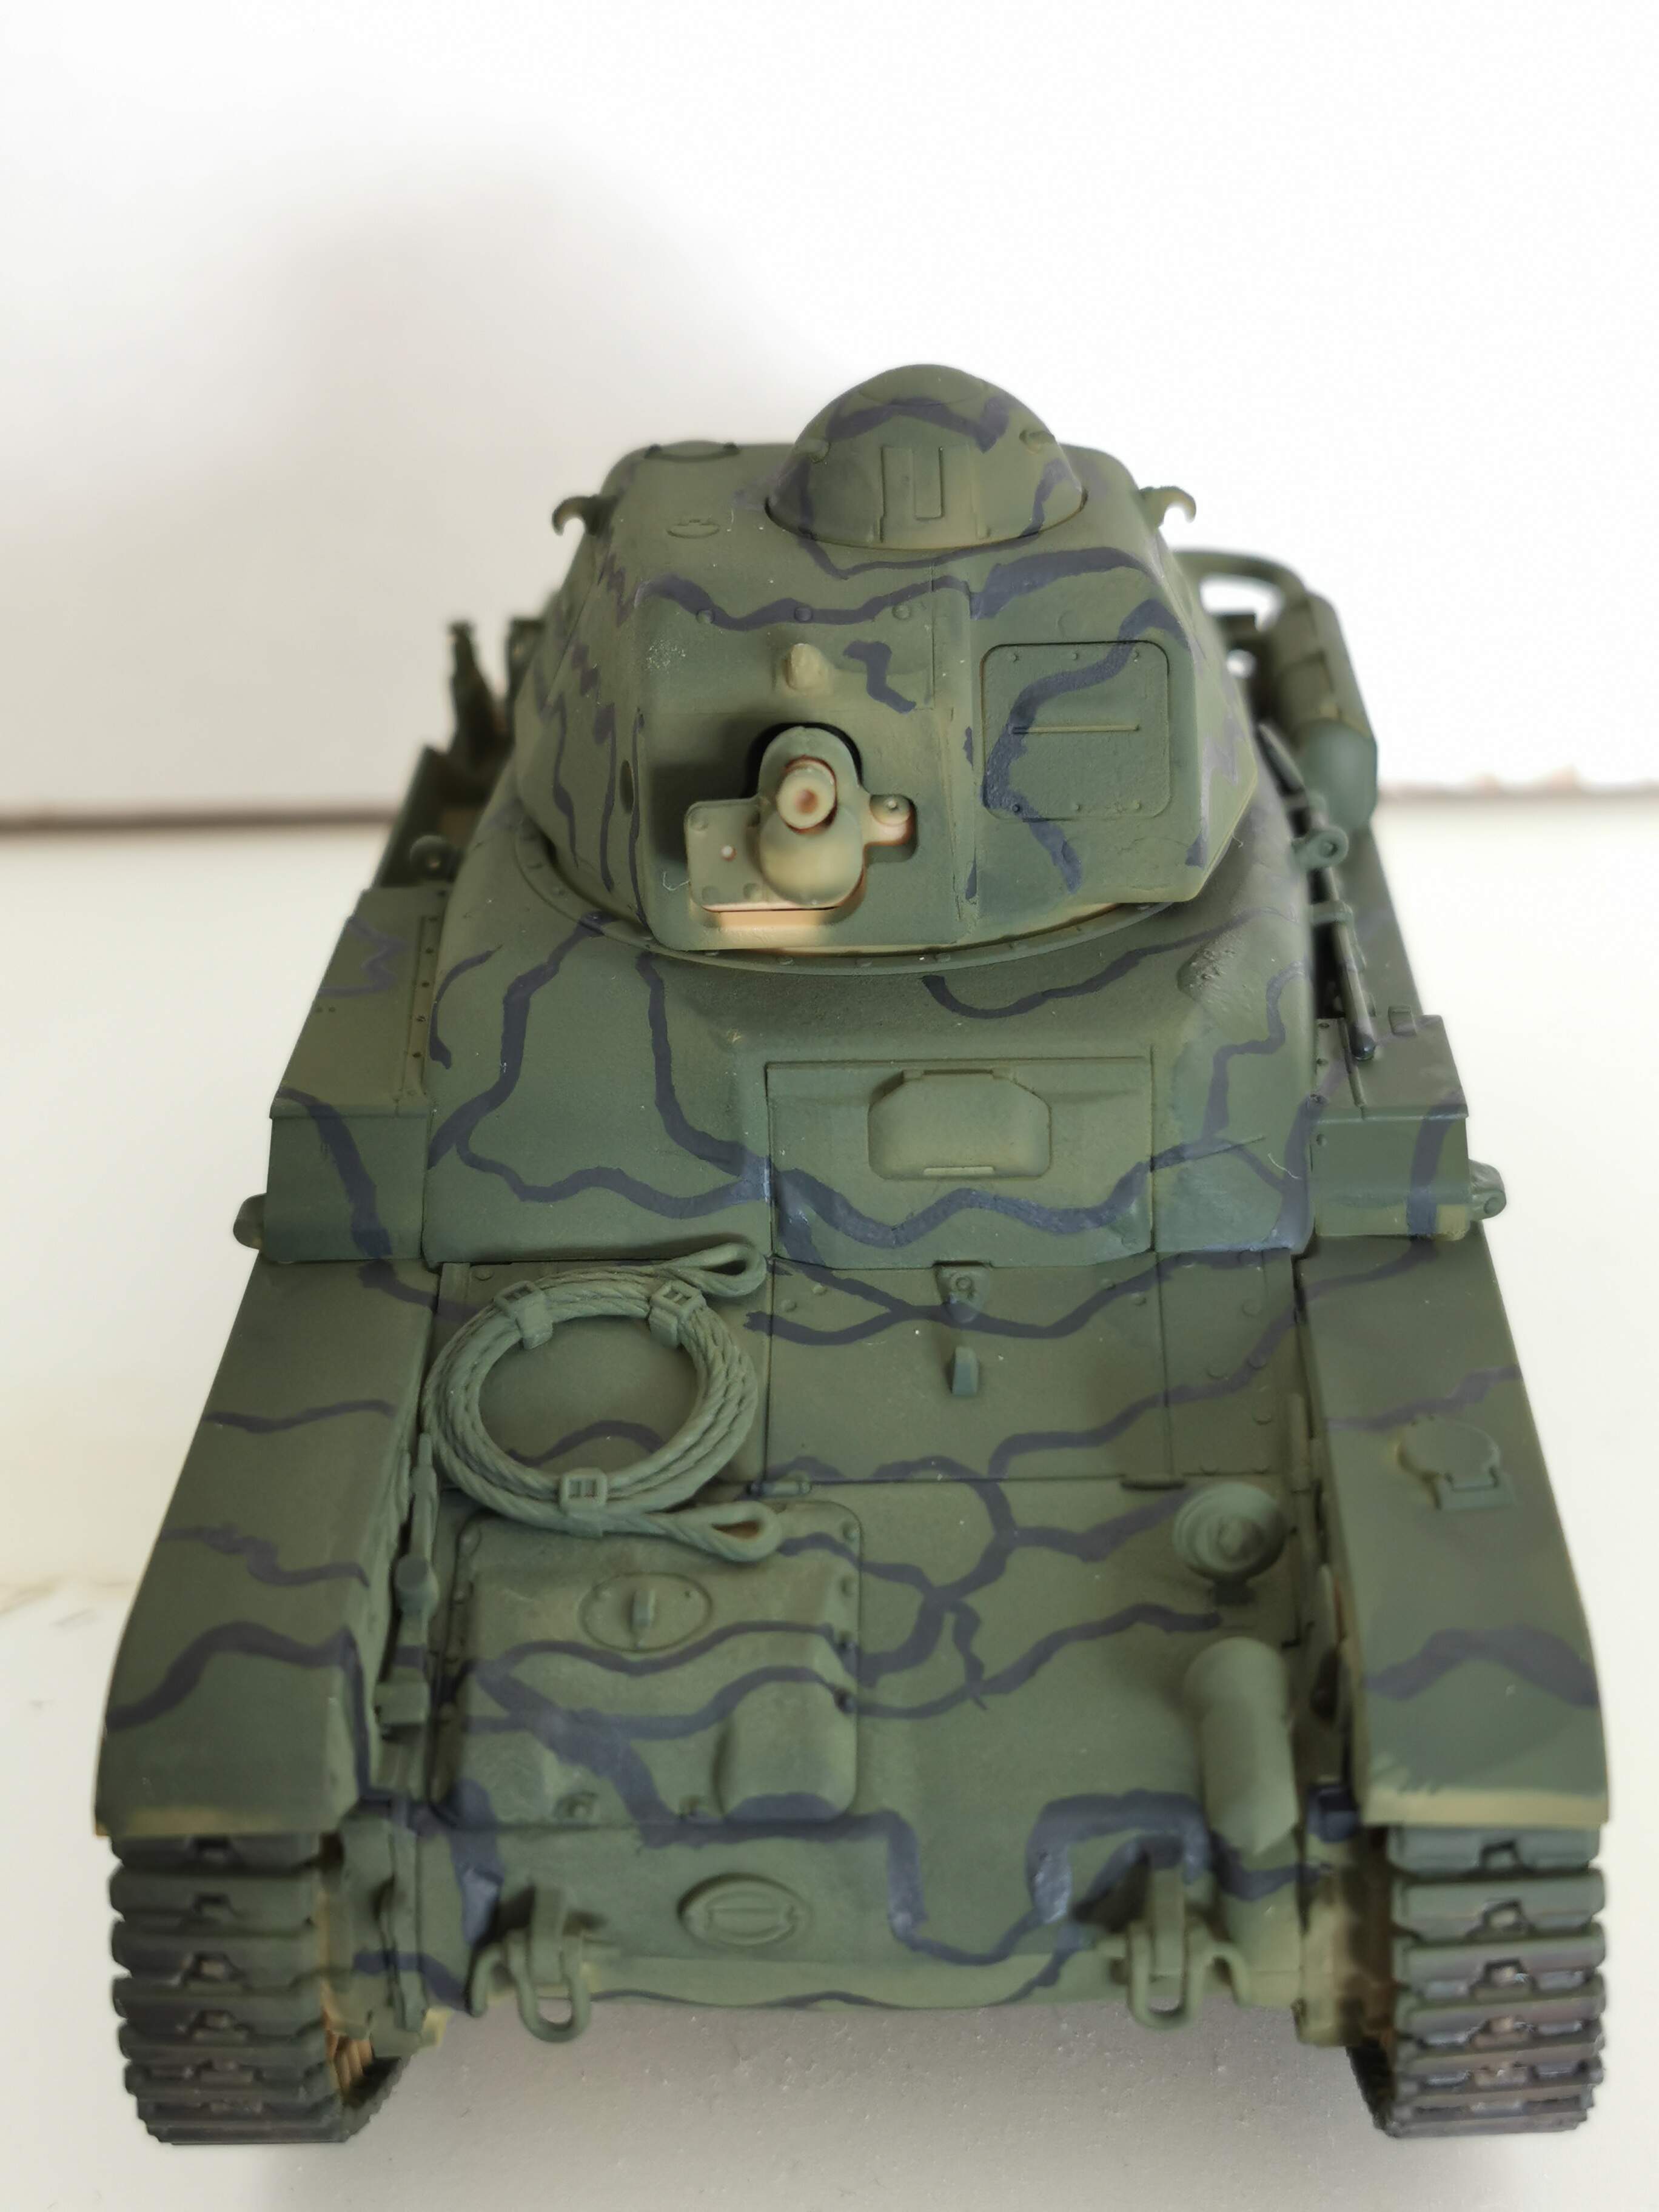
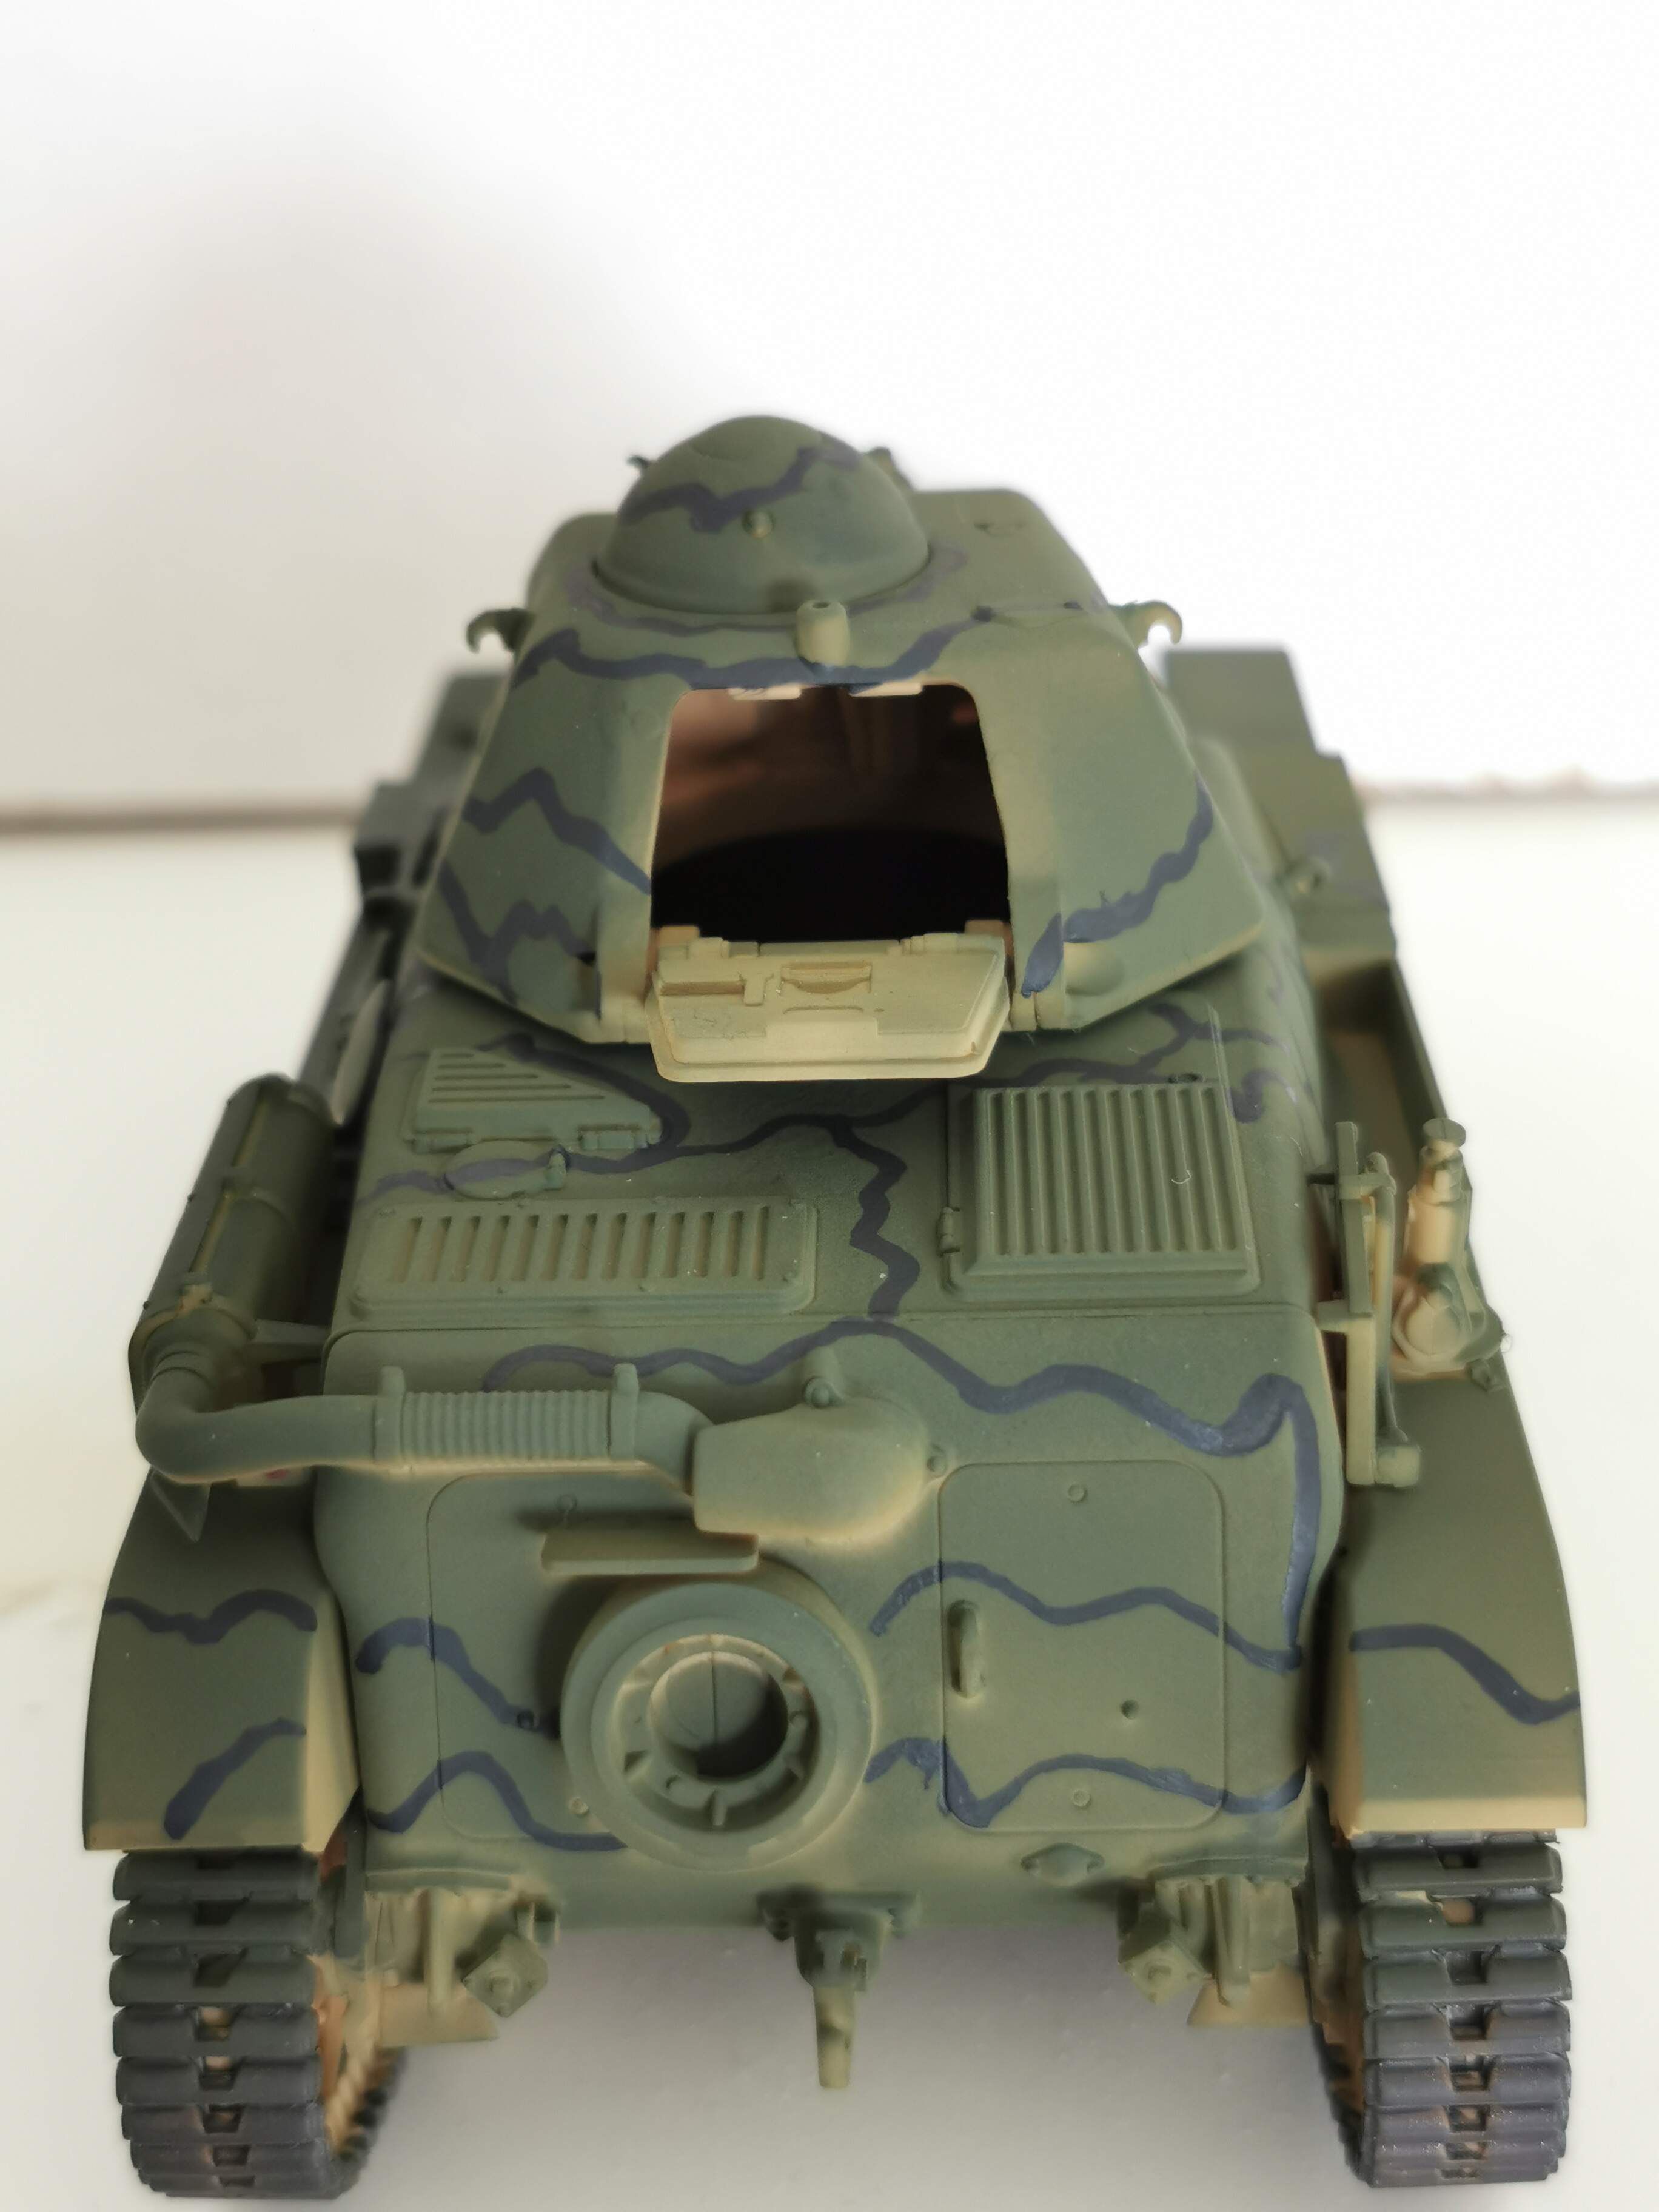
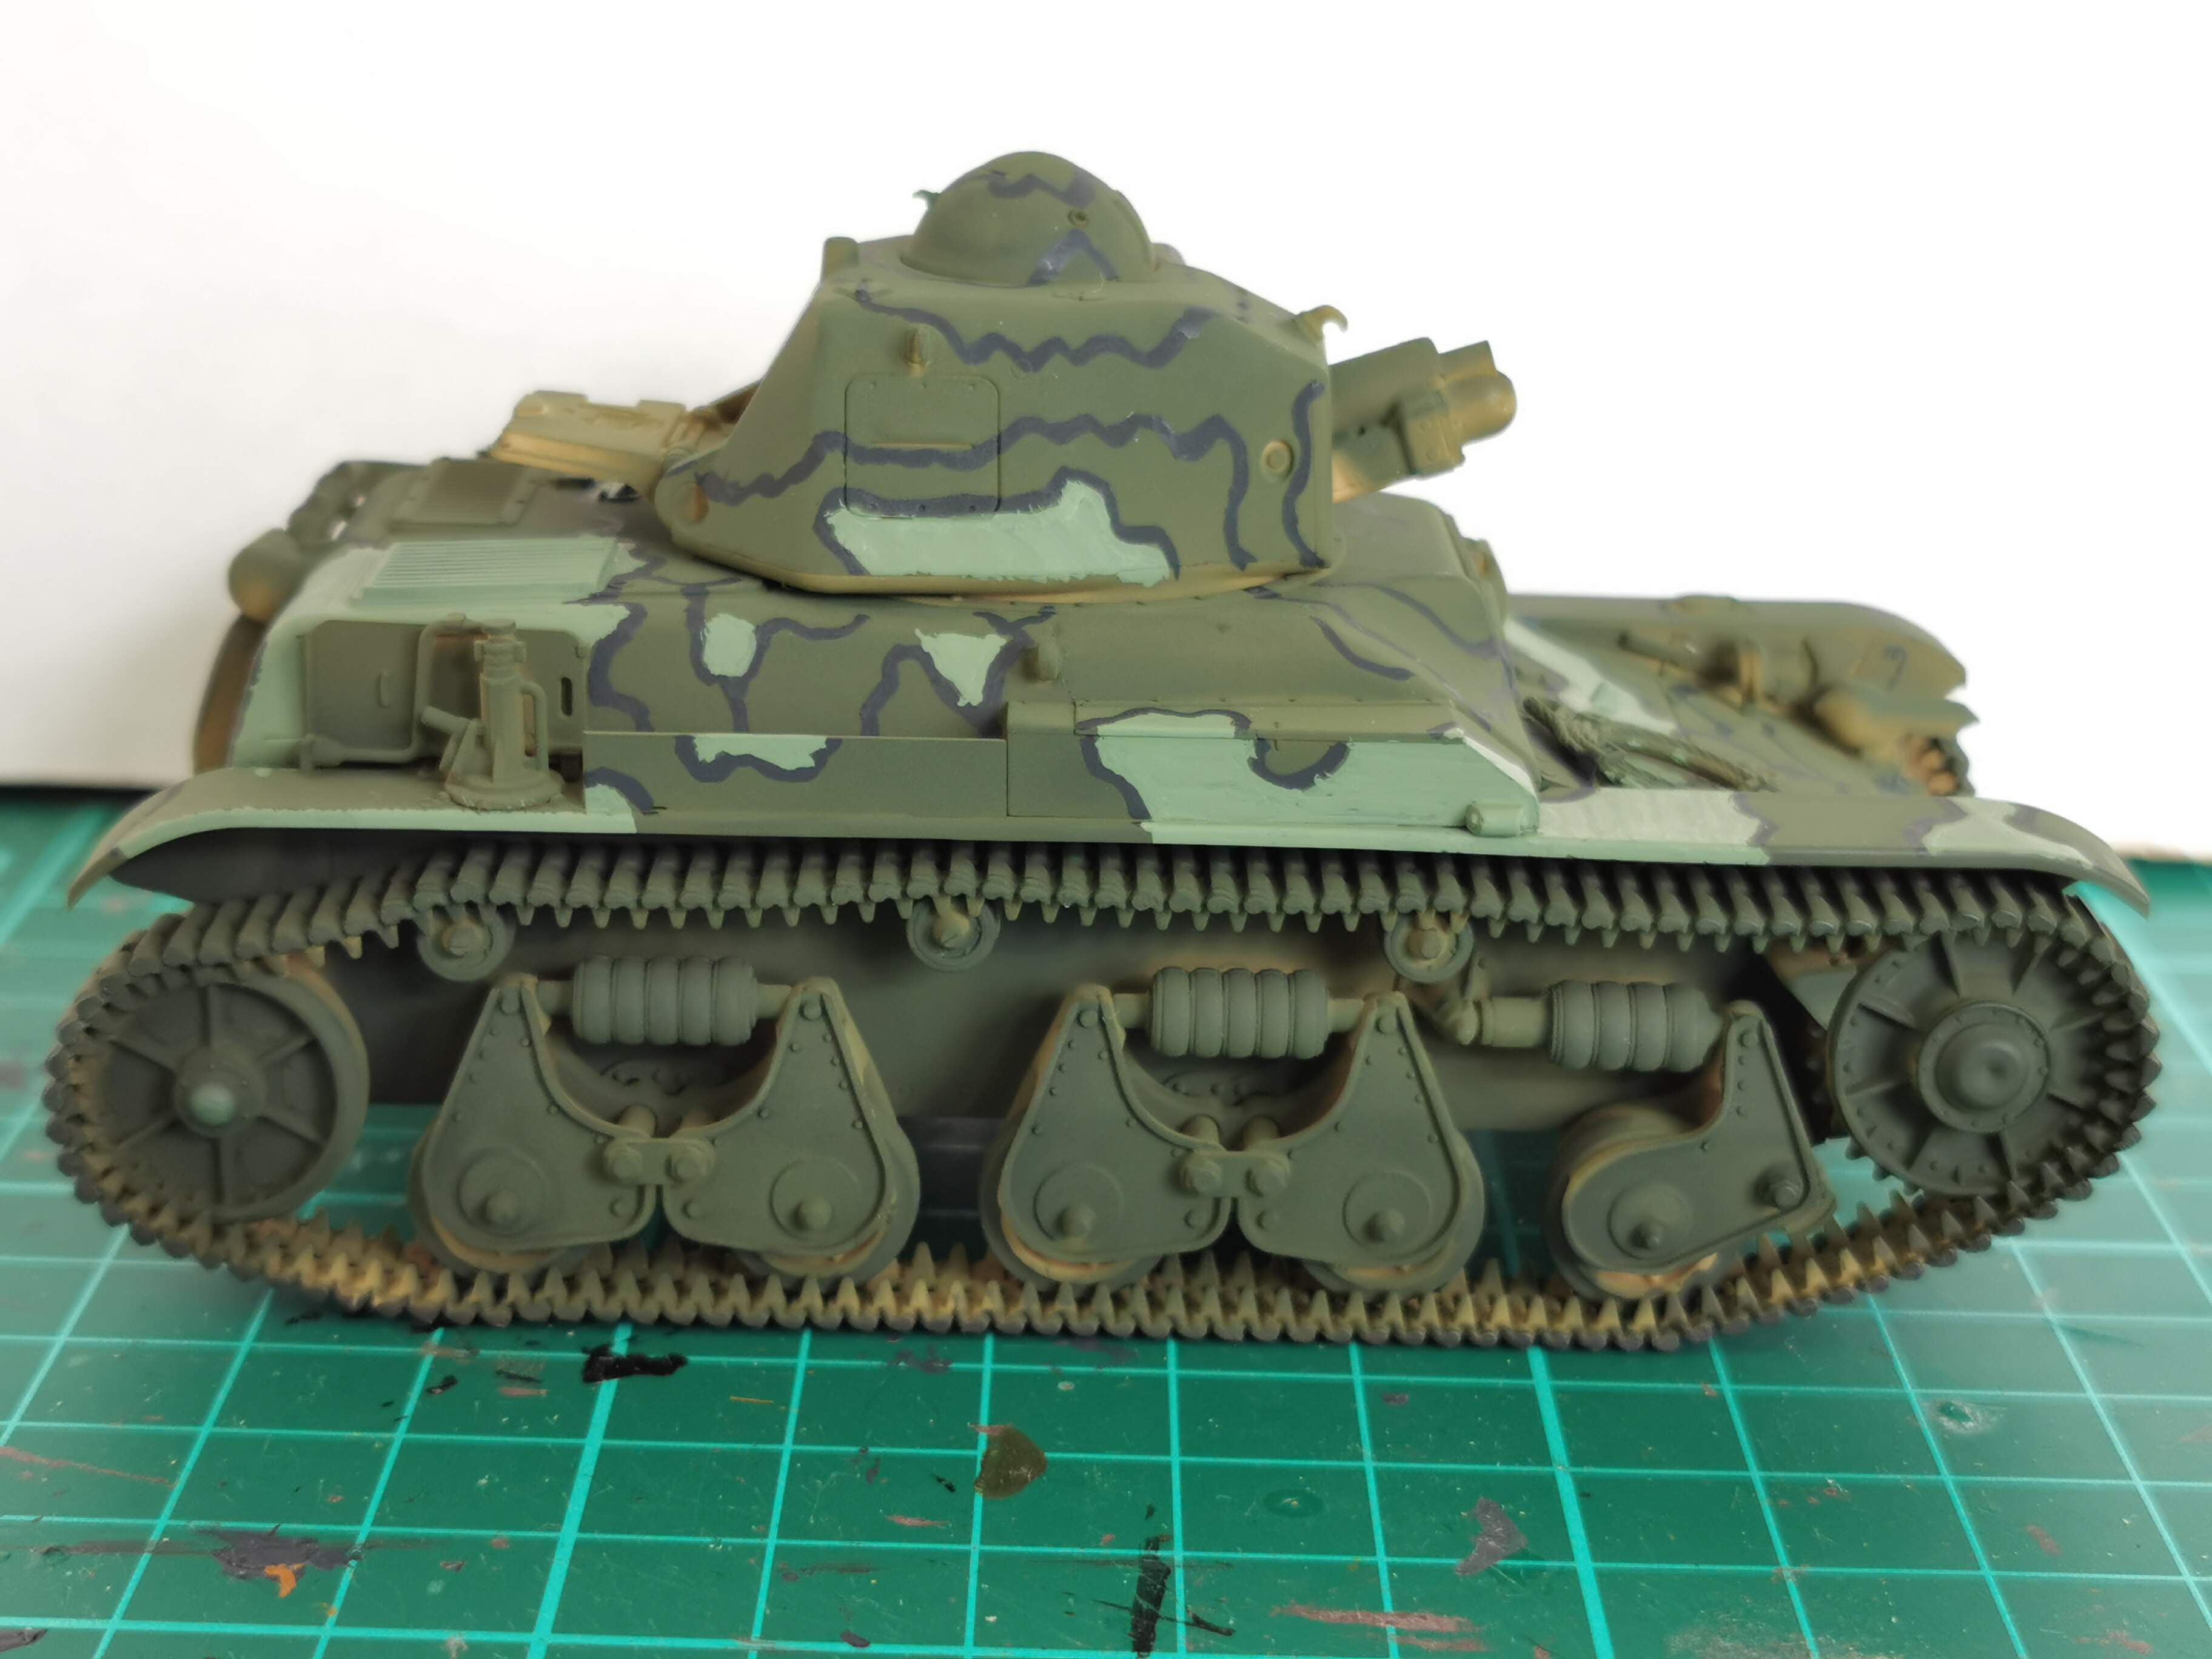
Anyway, today I was done with constantly struggling with airbrushing and I decided to go for handpainting the model.
And I’m already pretty proud of myself what I have achieved today with just a few hours of work on the black demarkation lines of the camouflage scheme.
It’s also giving me more satisfaction now.
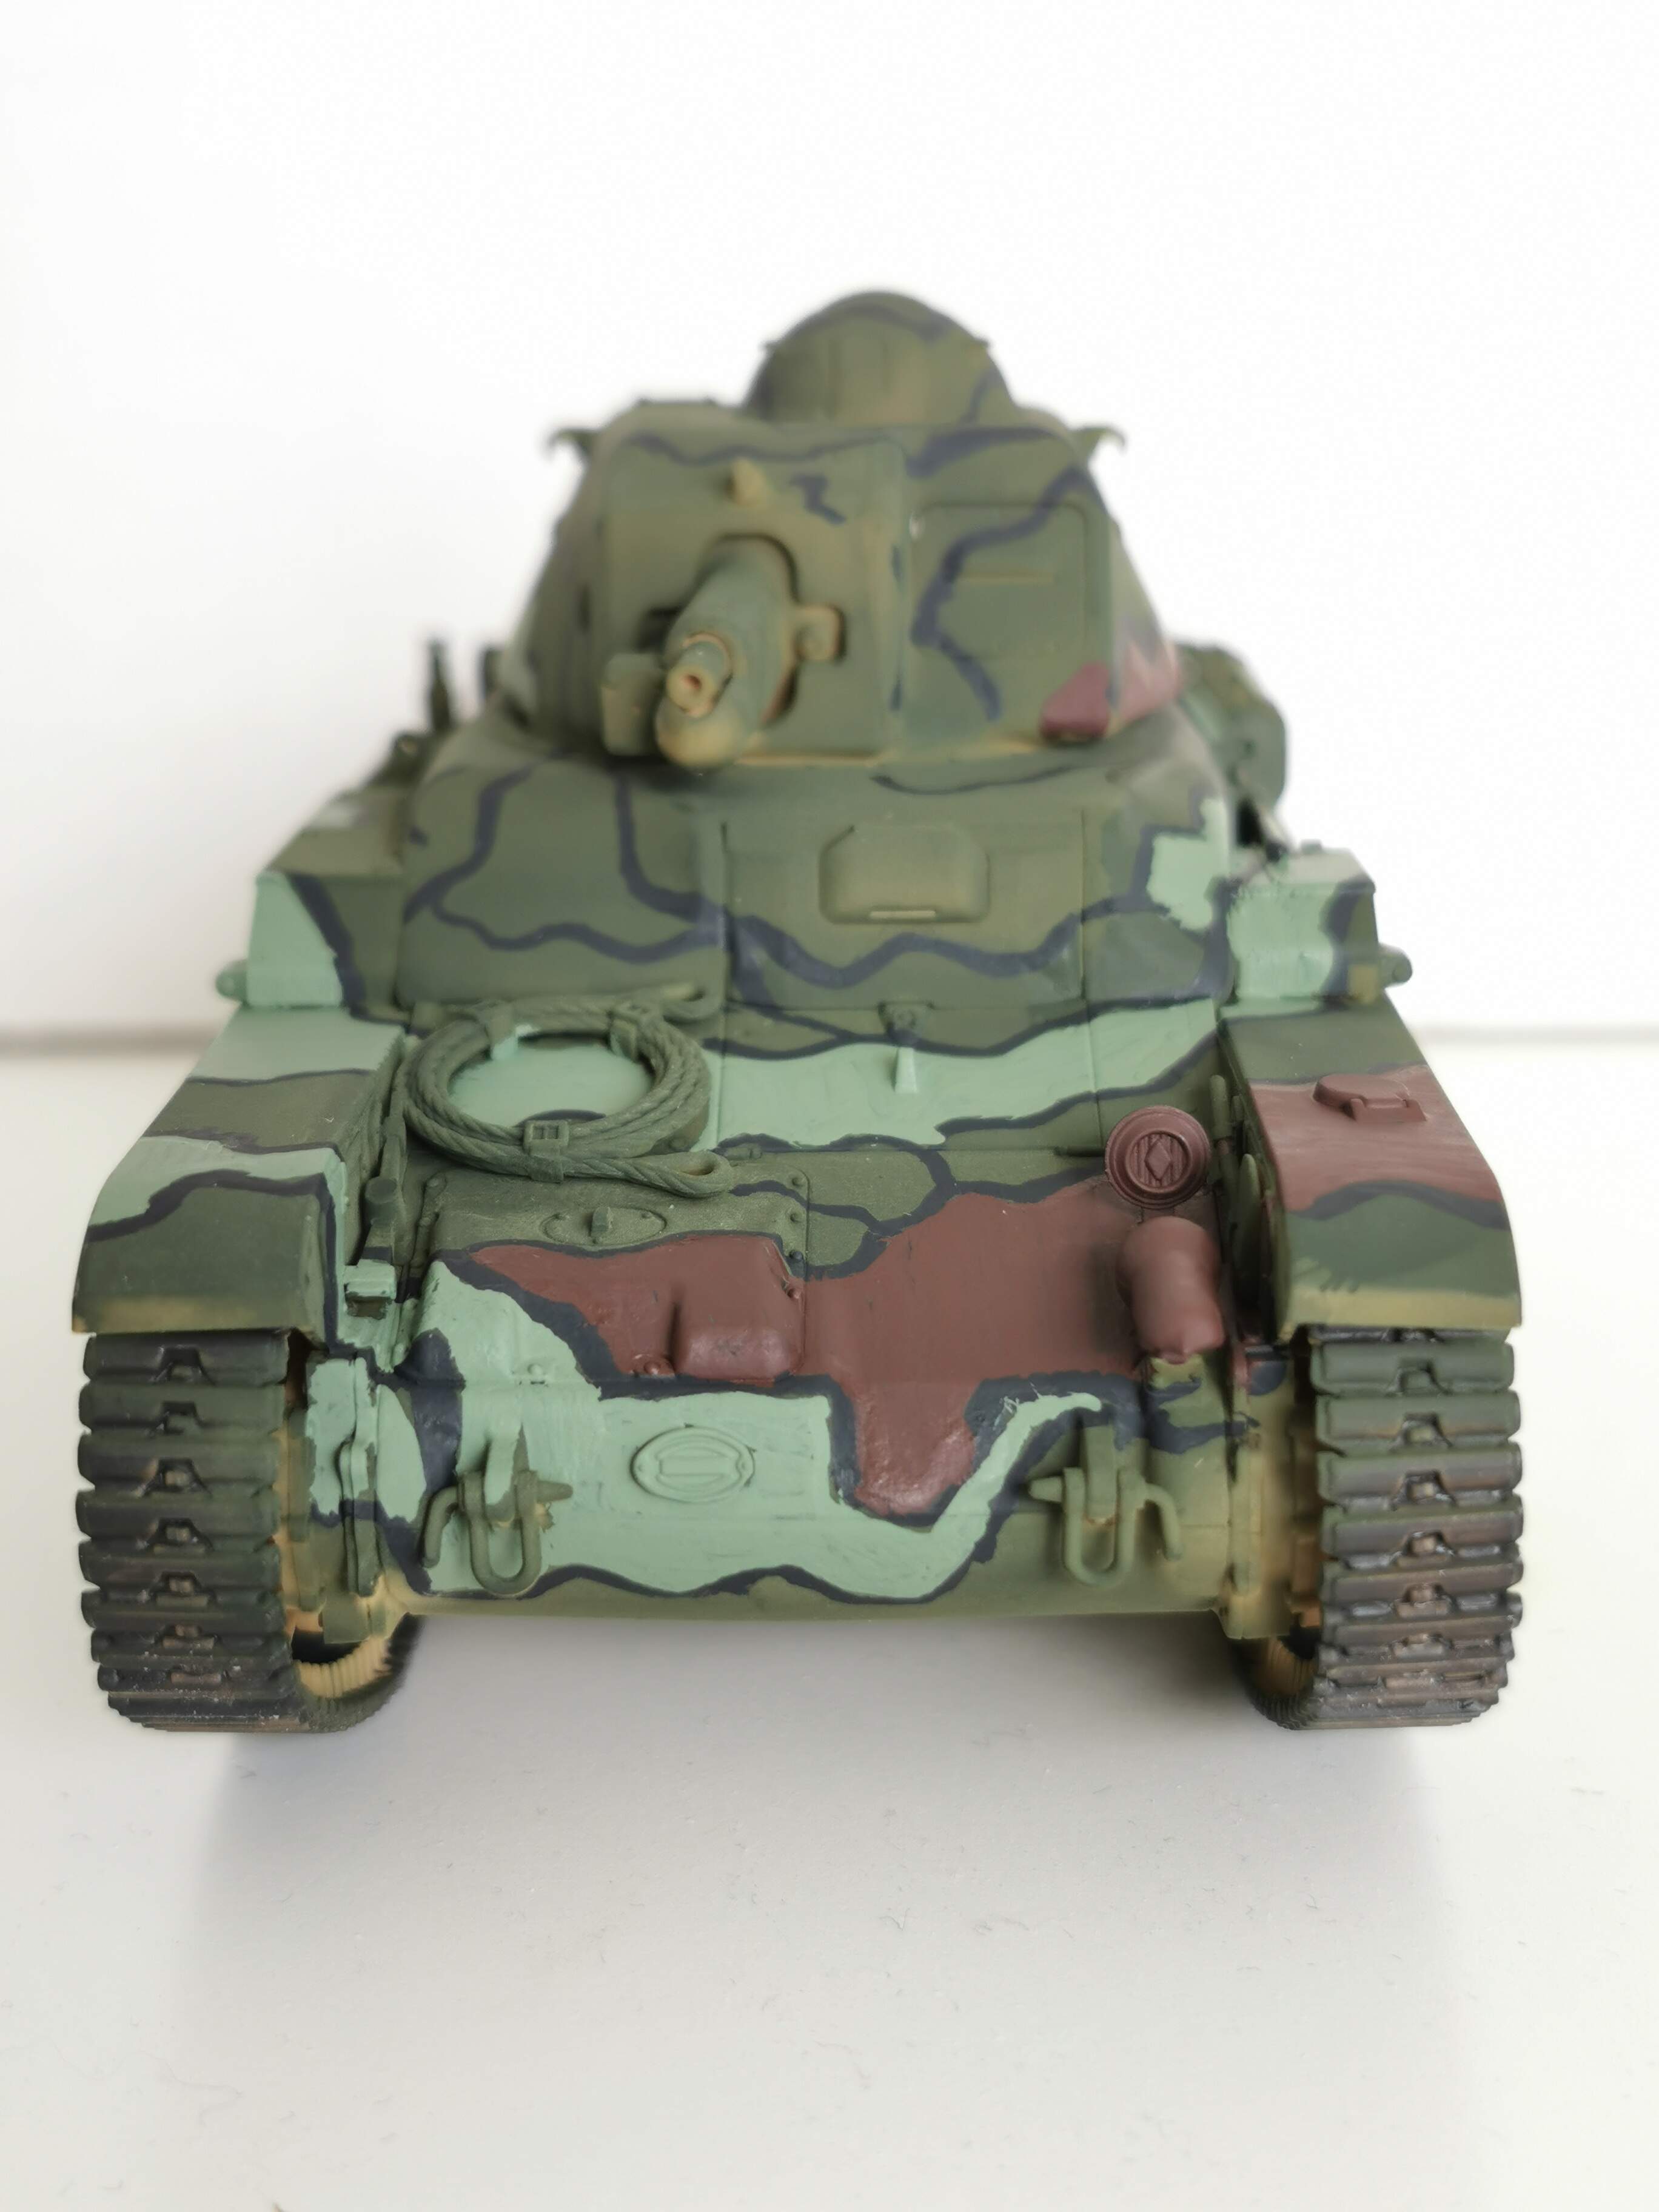
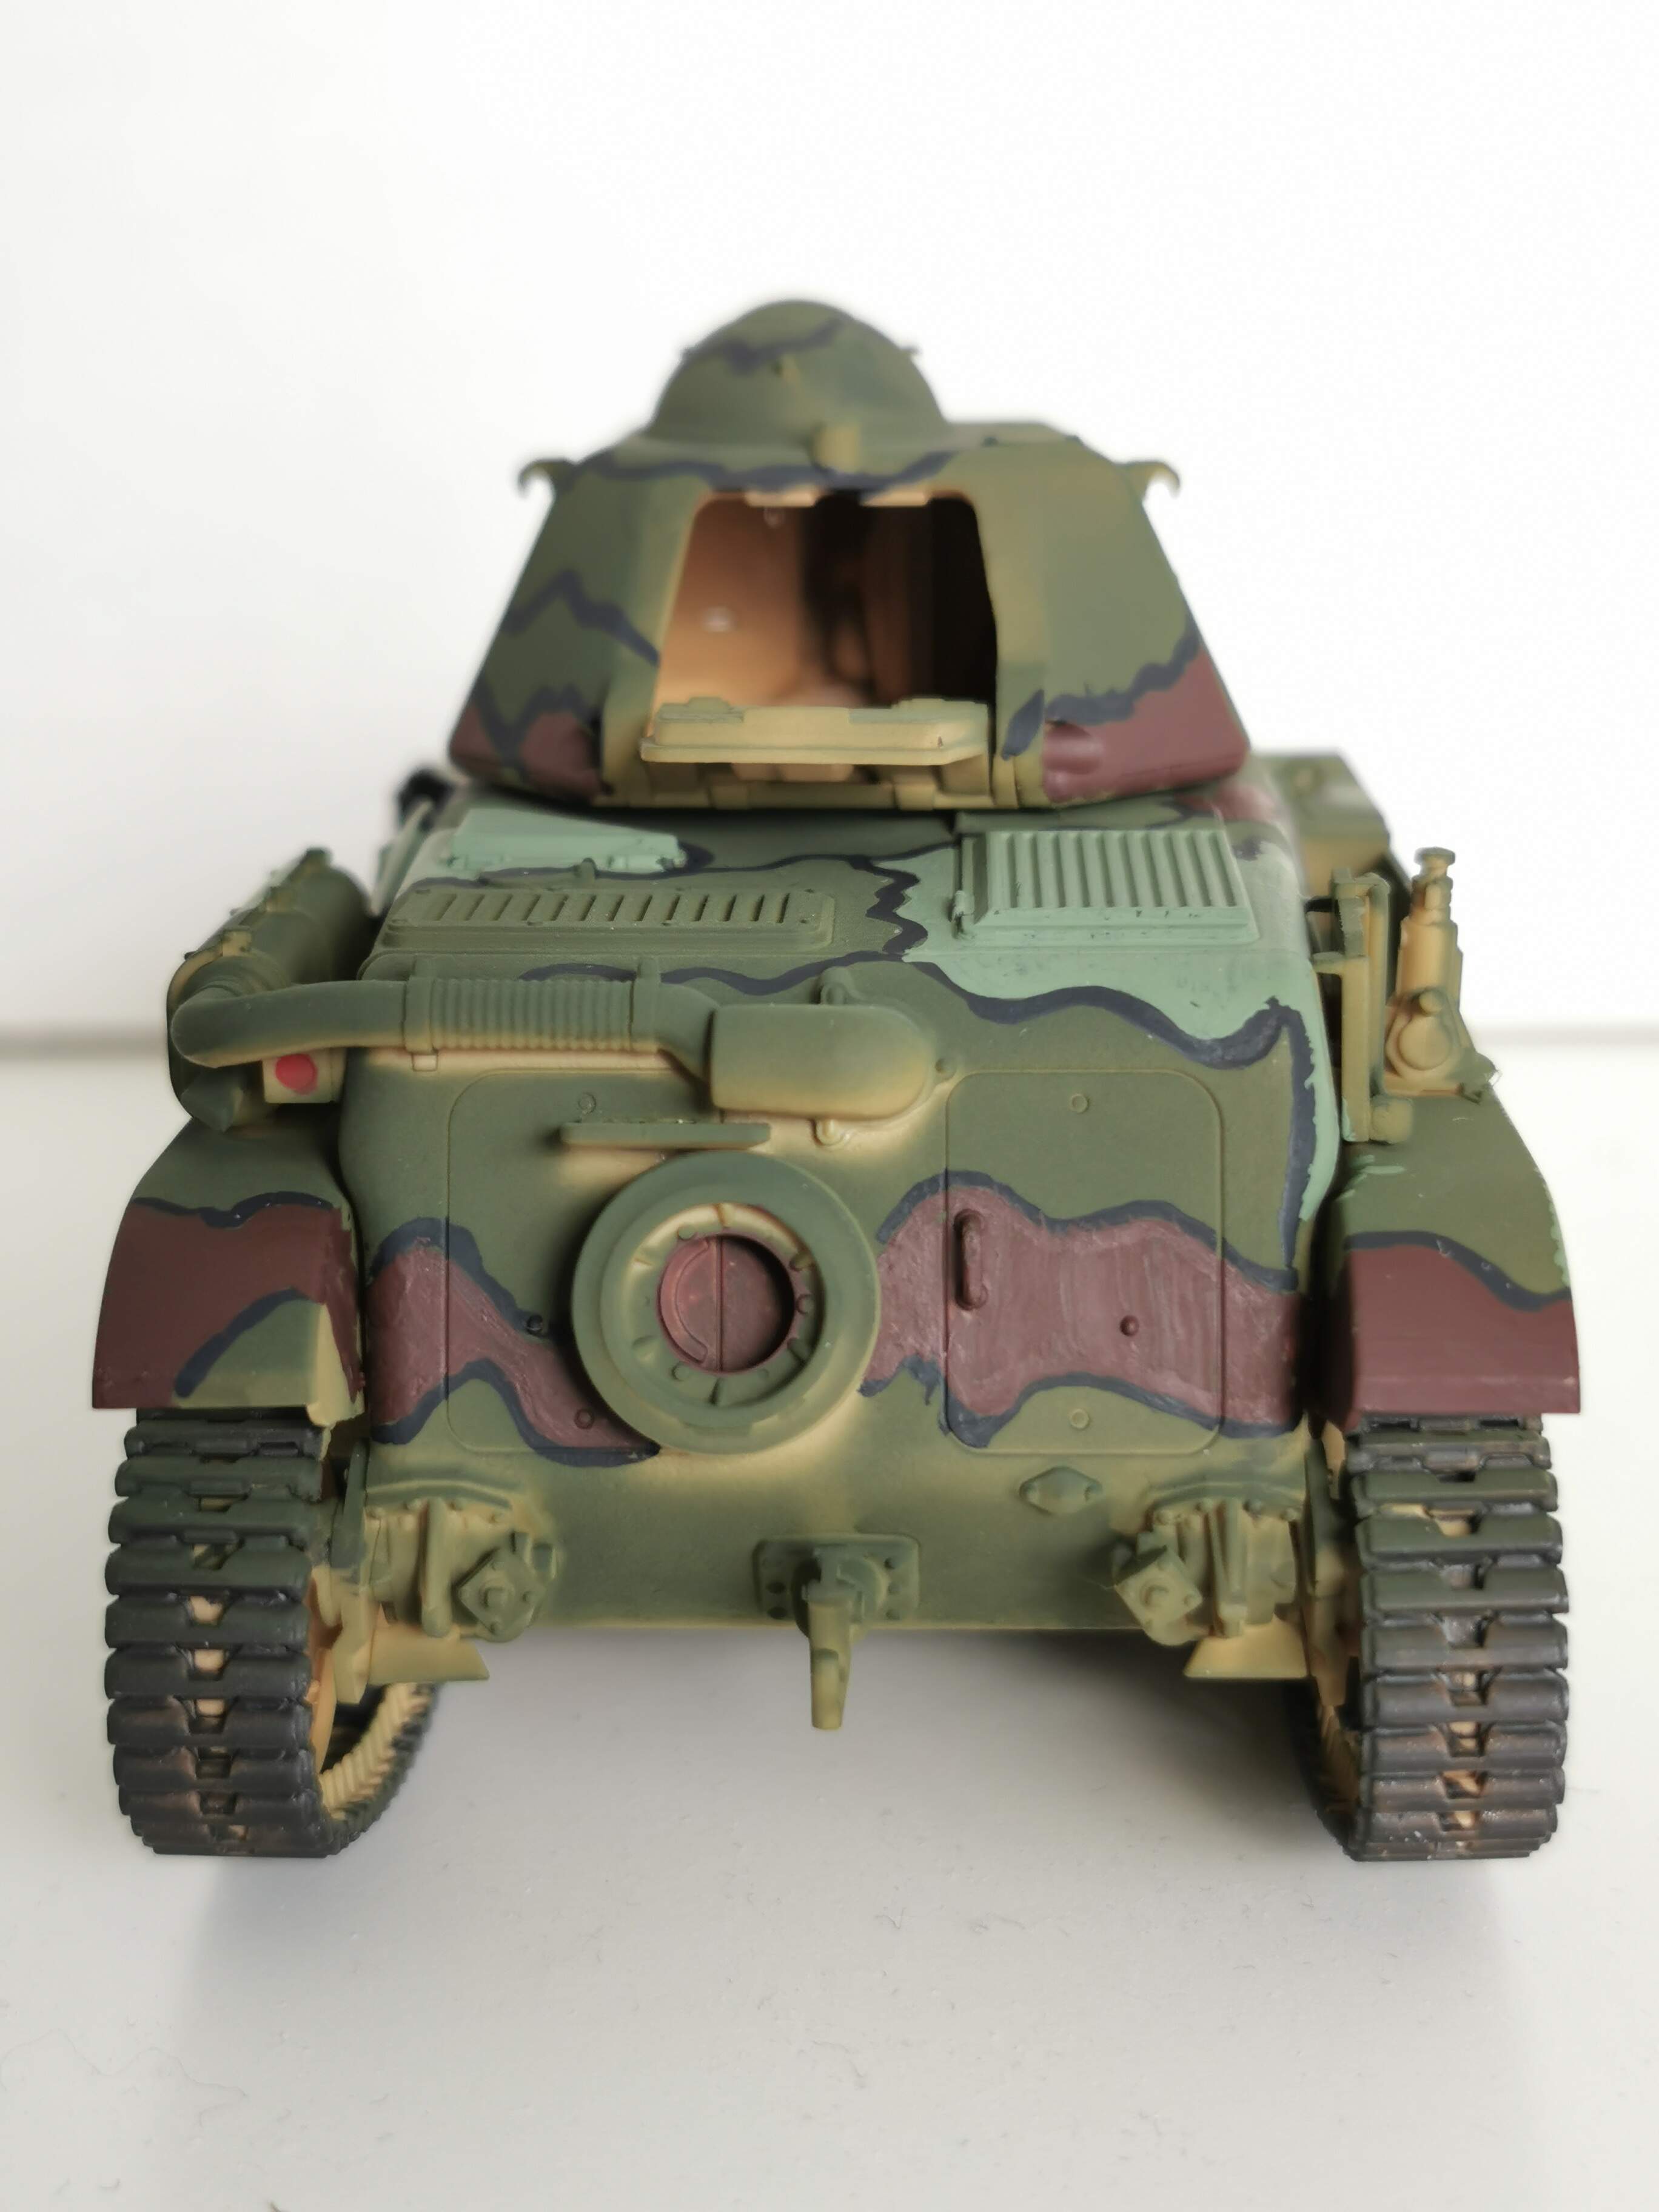
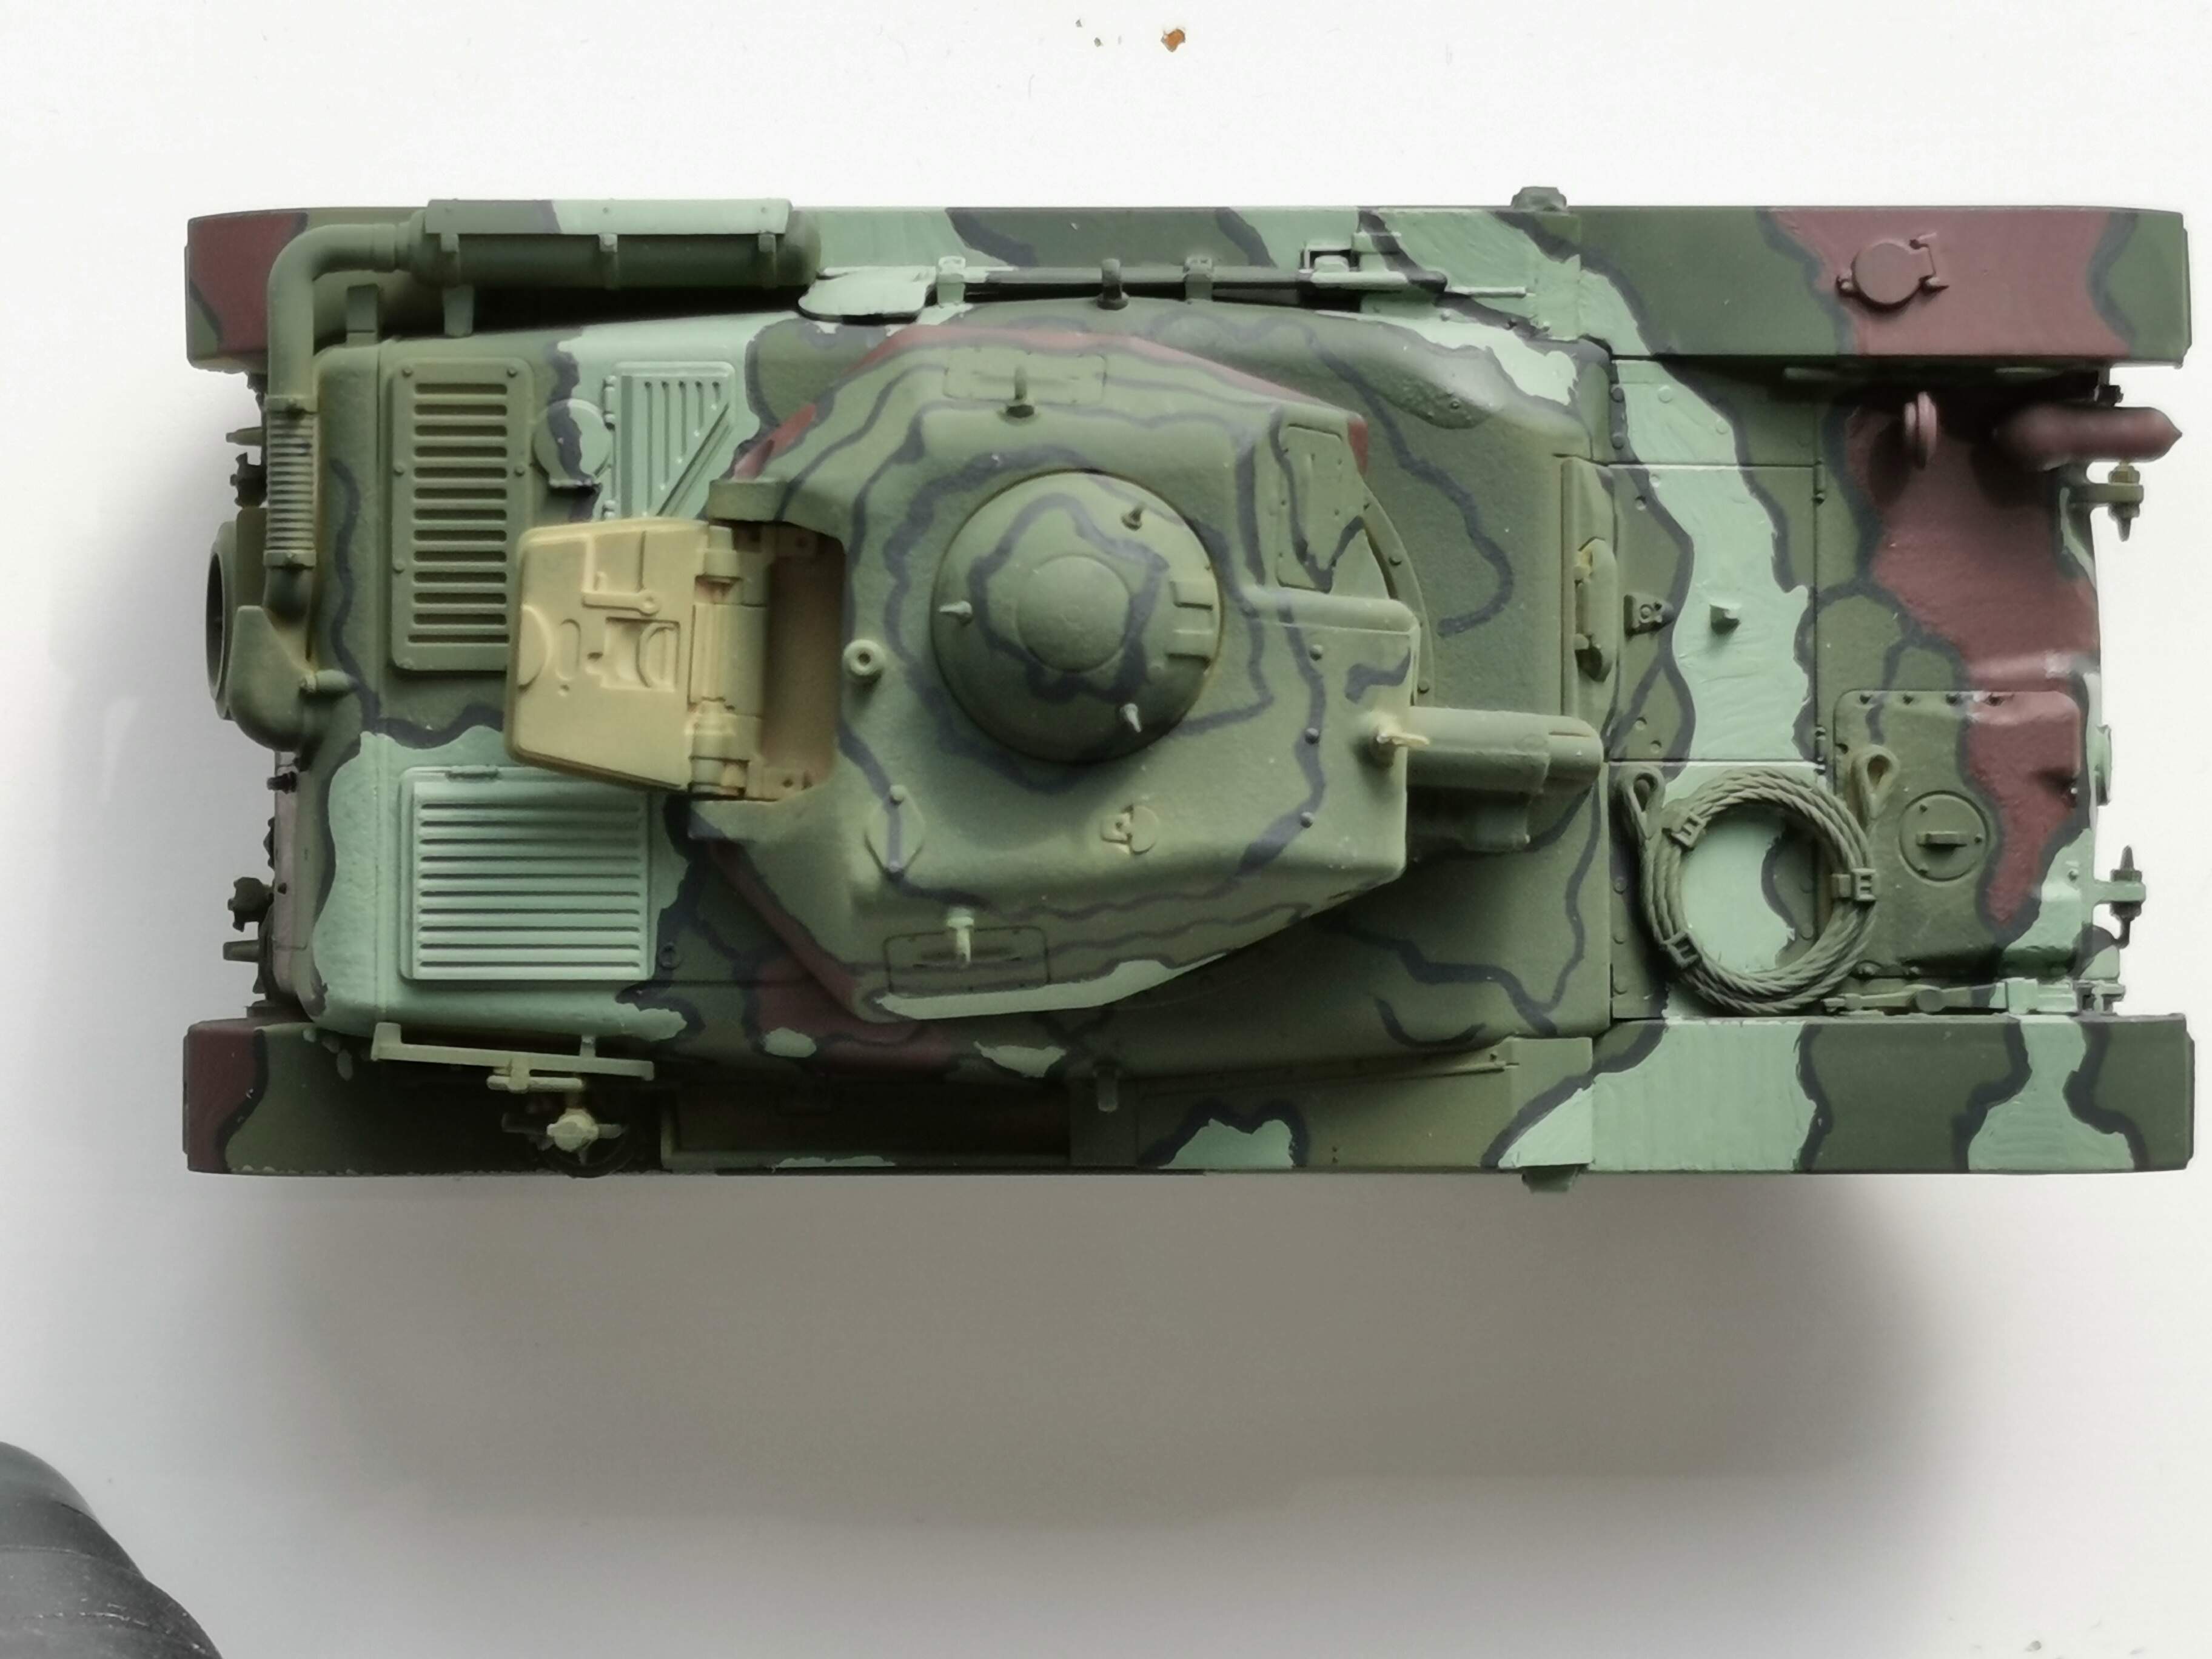
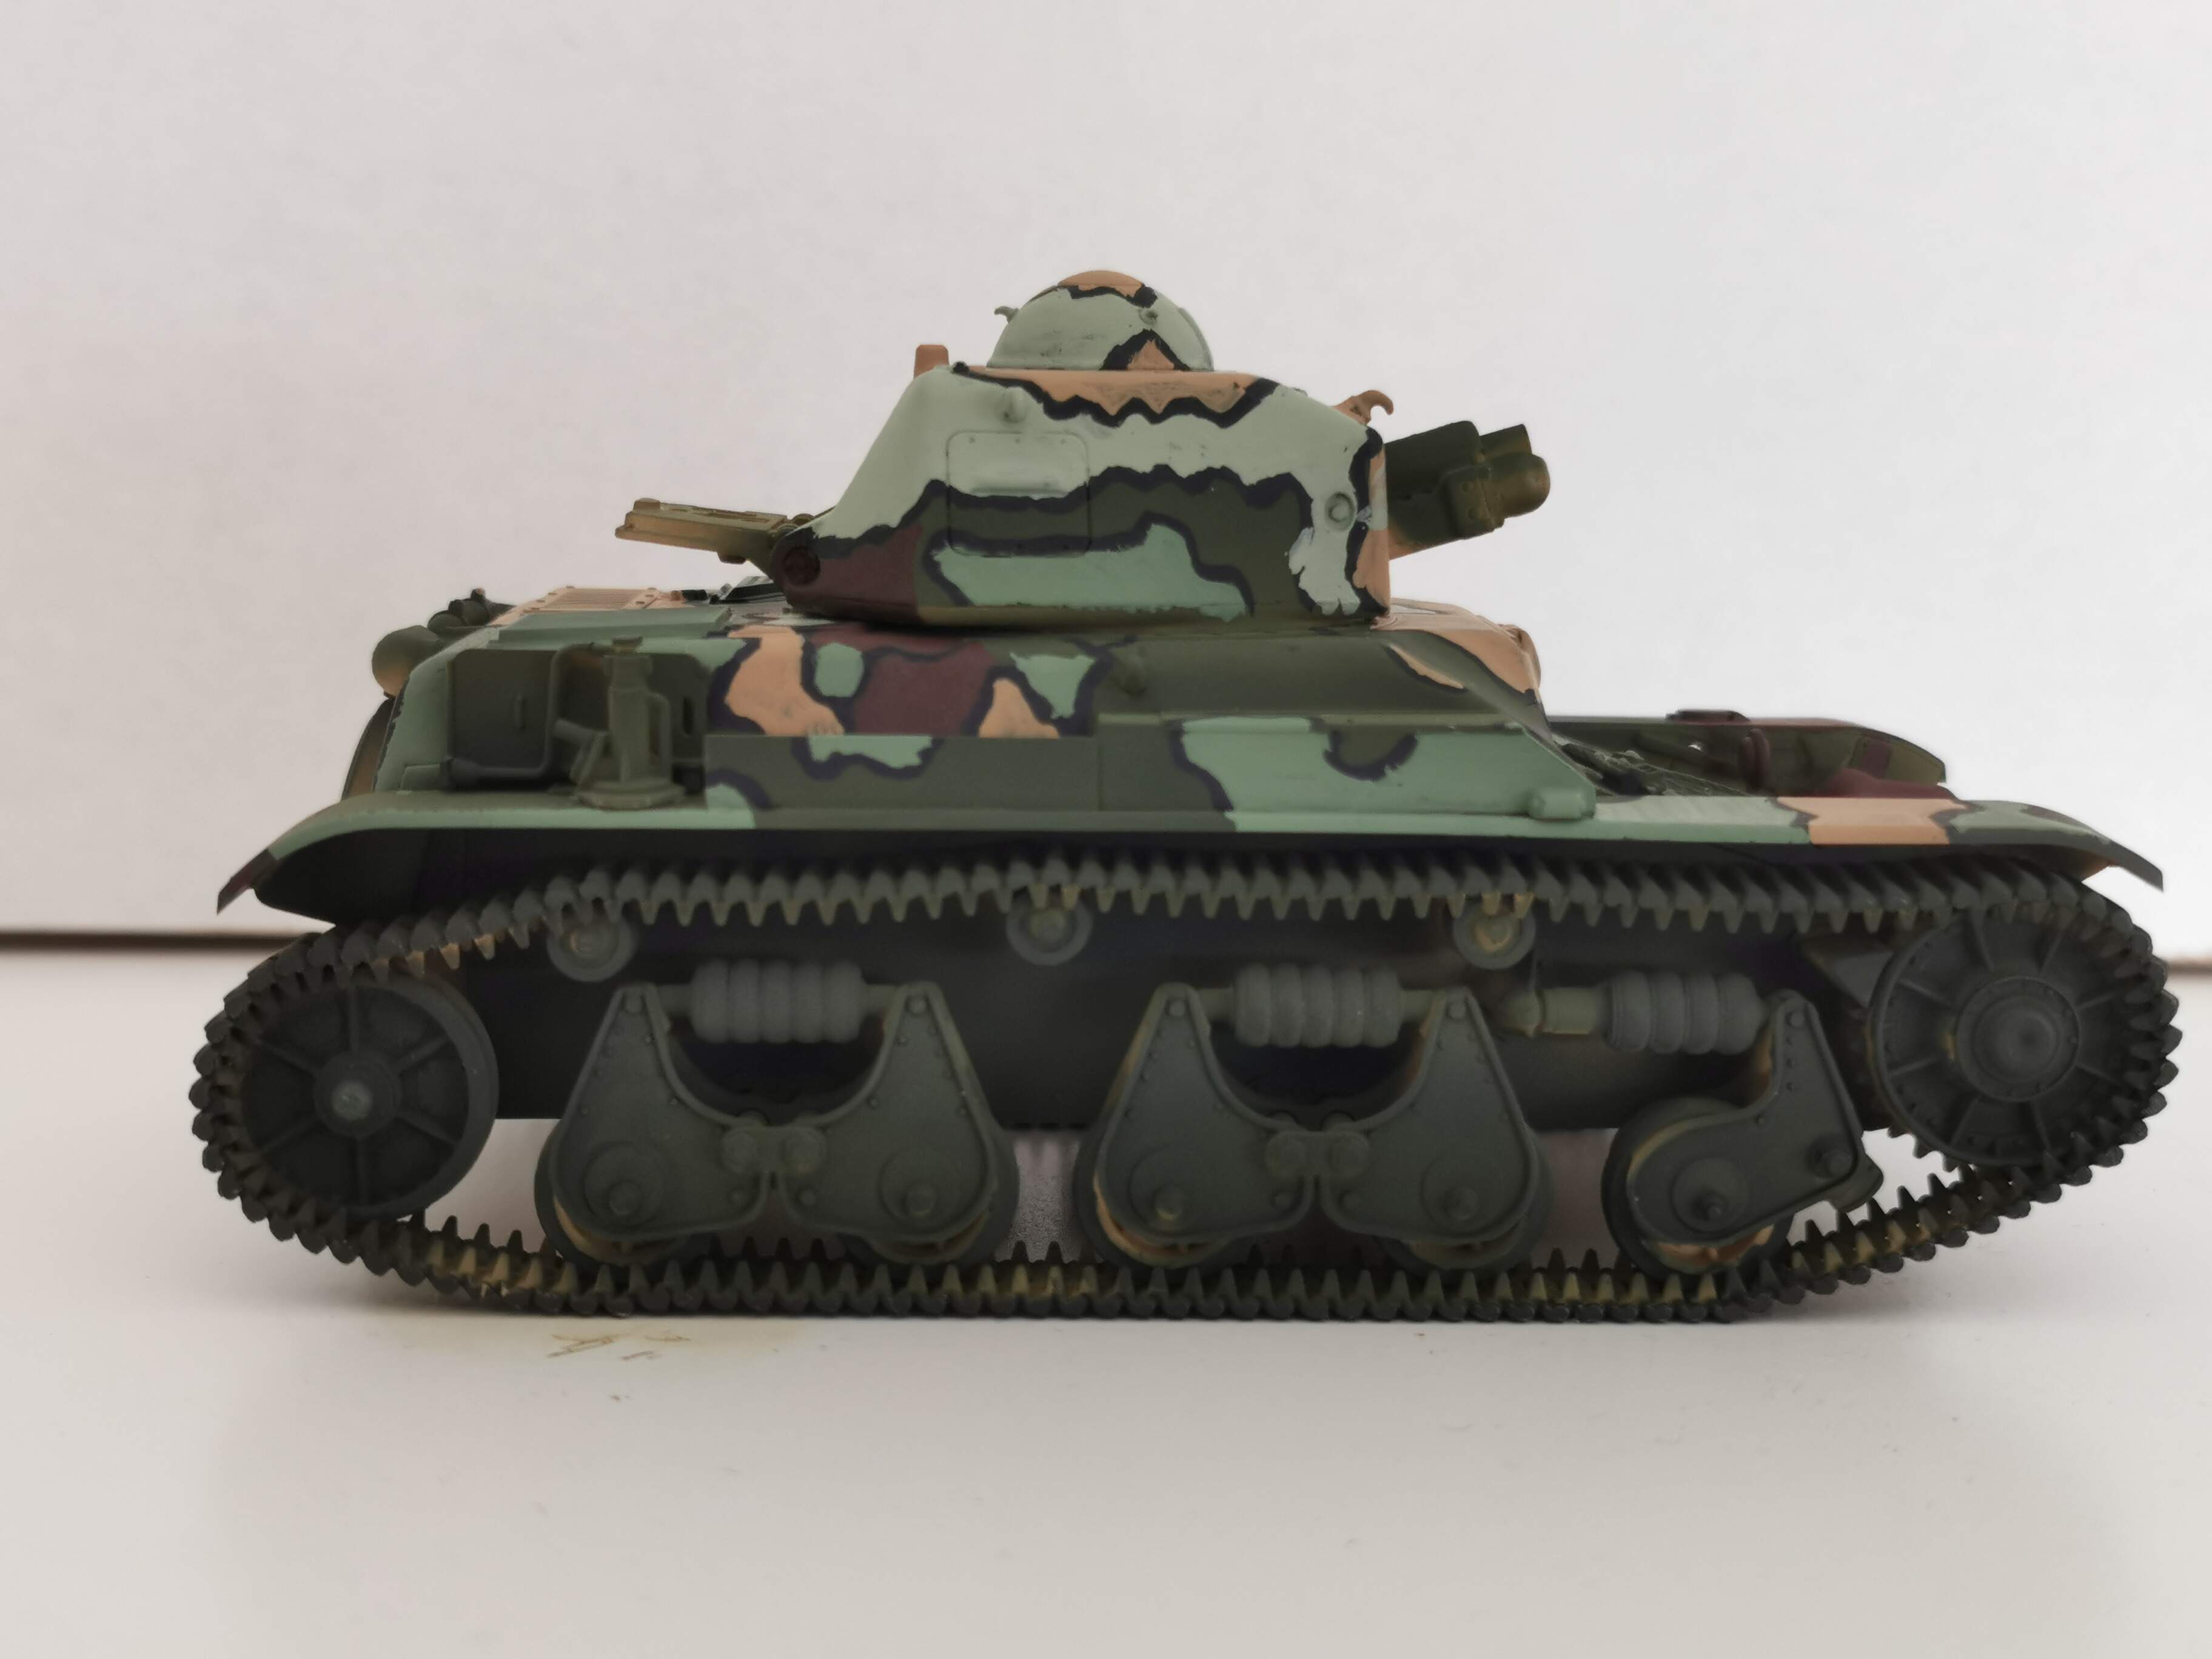
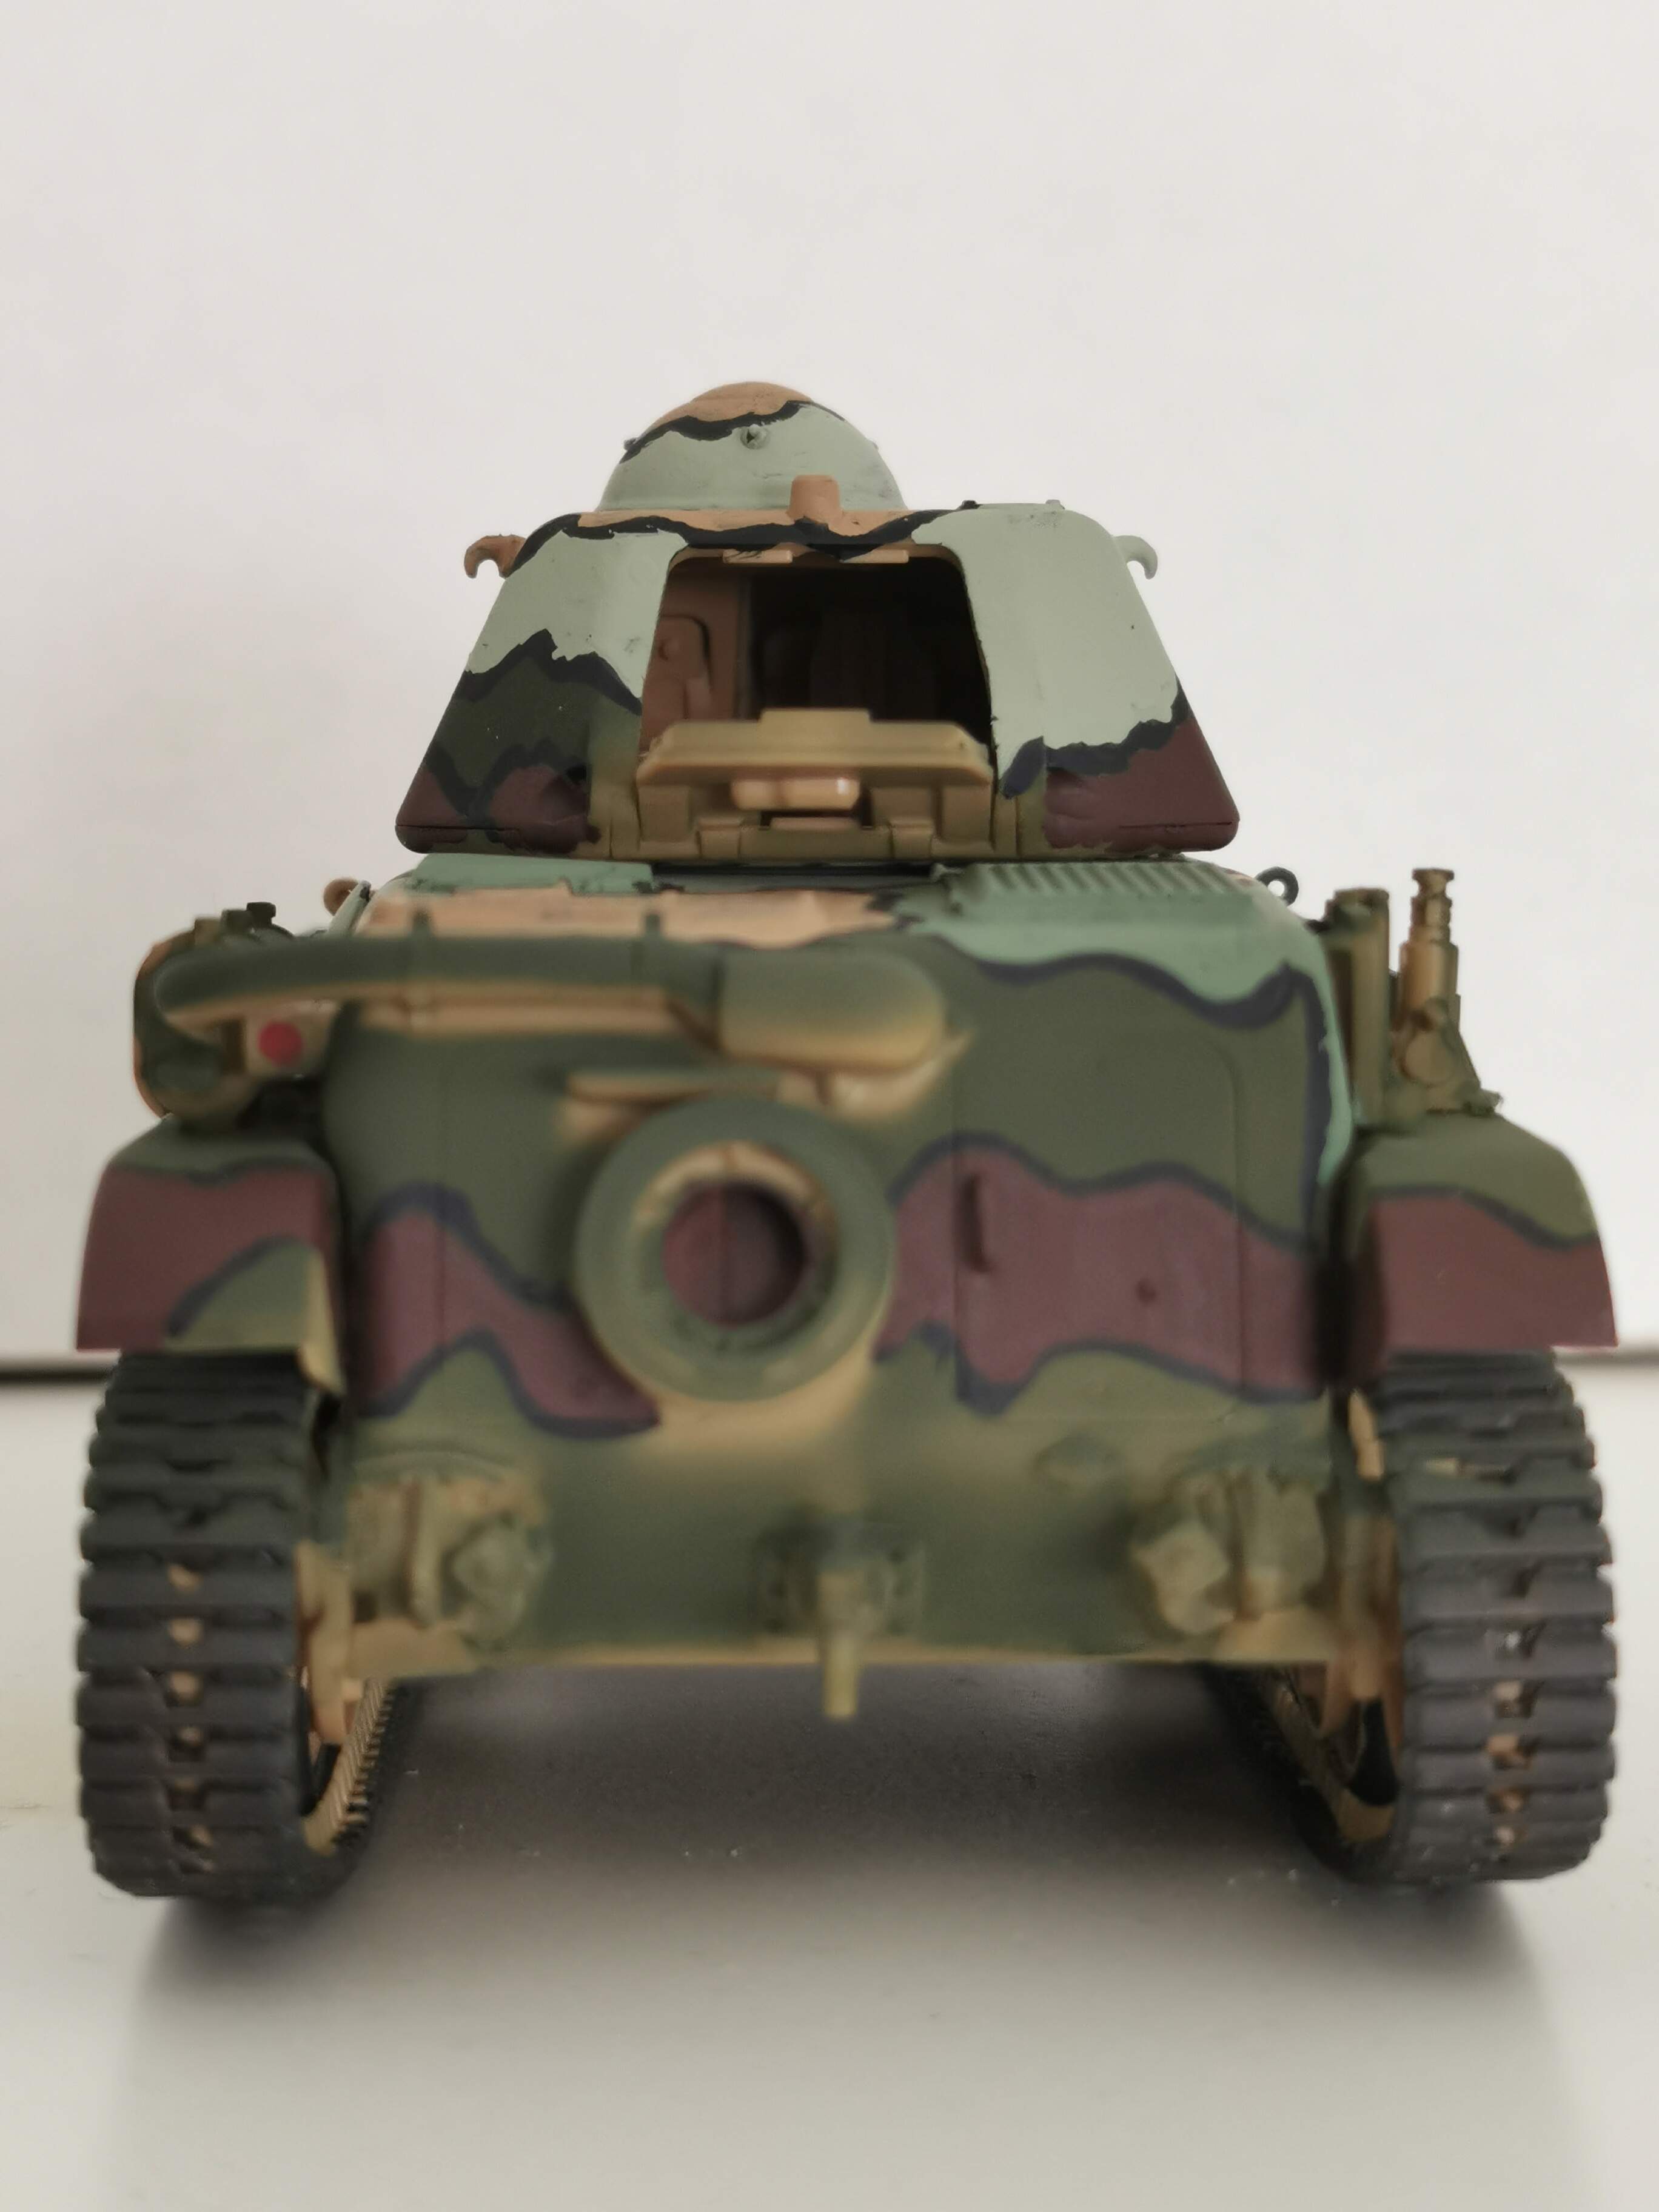
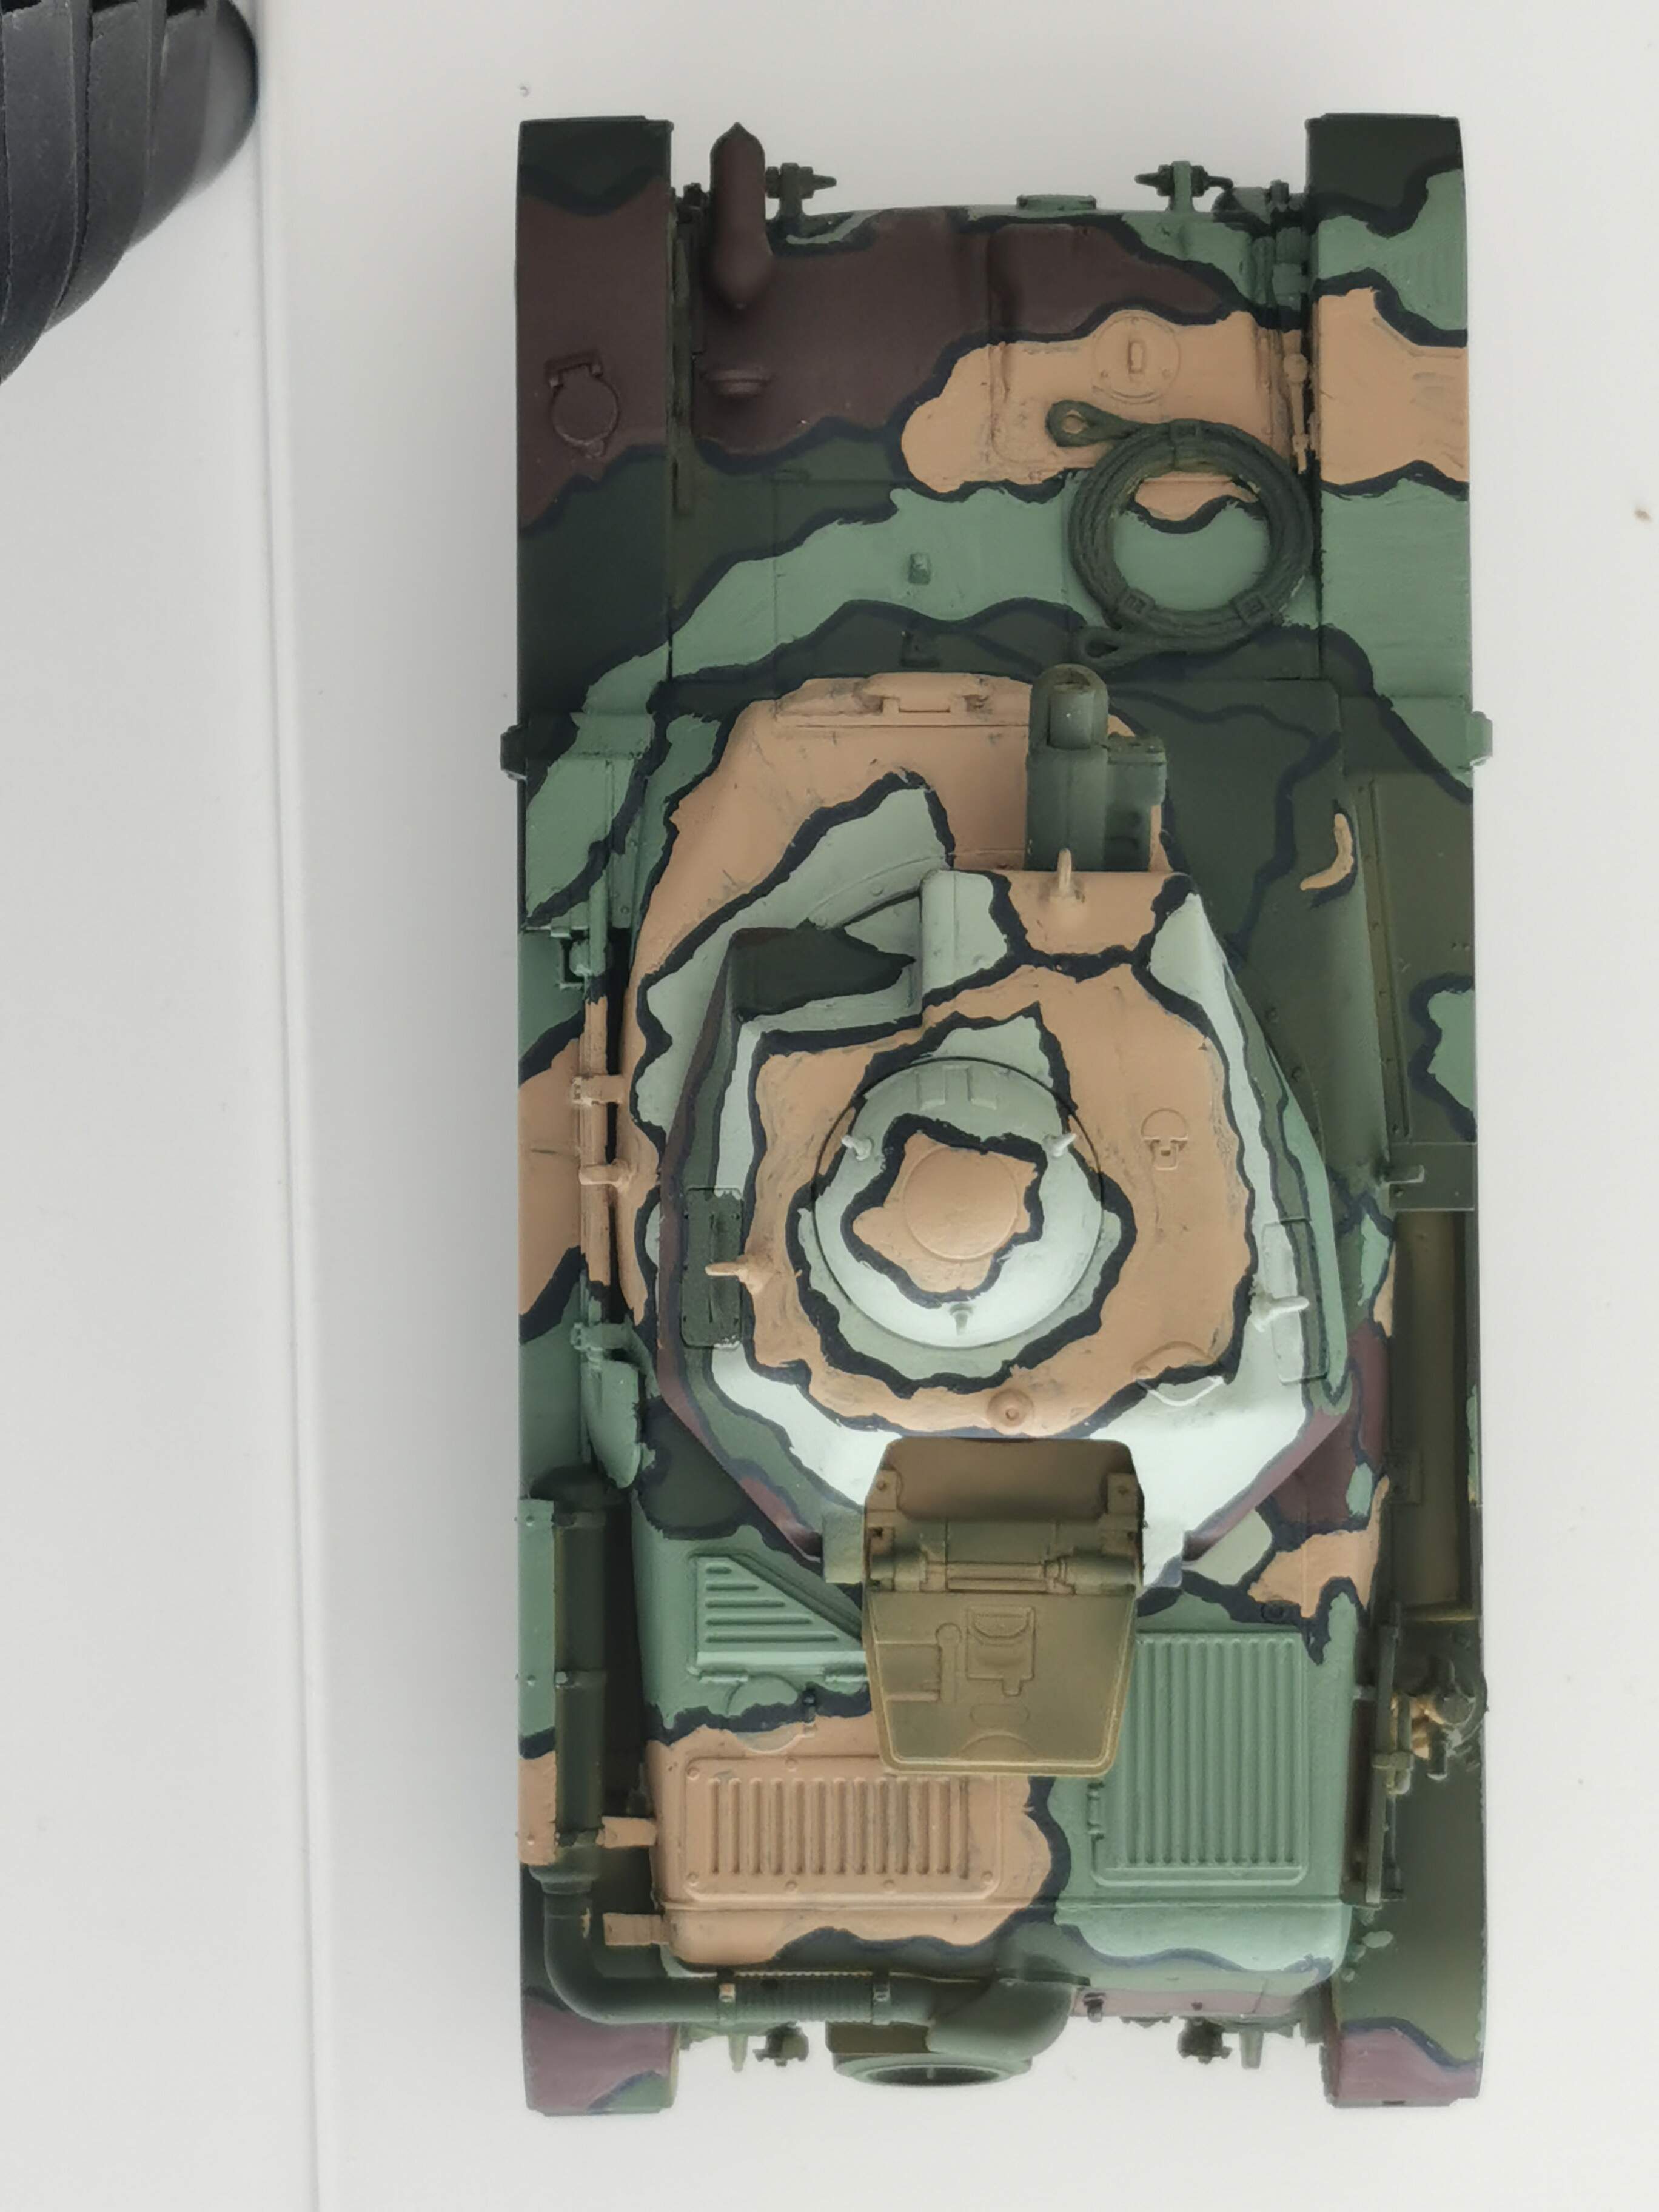
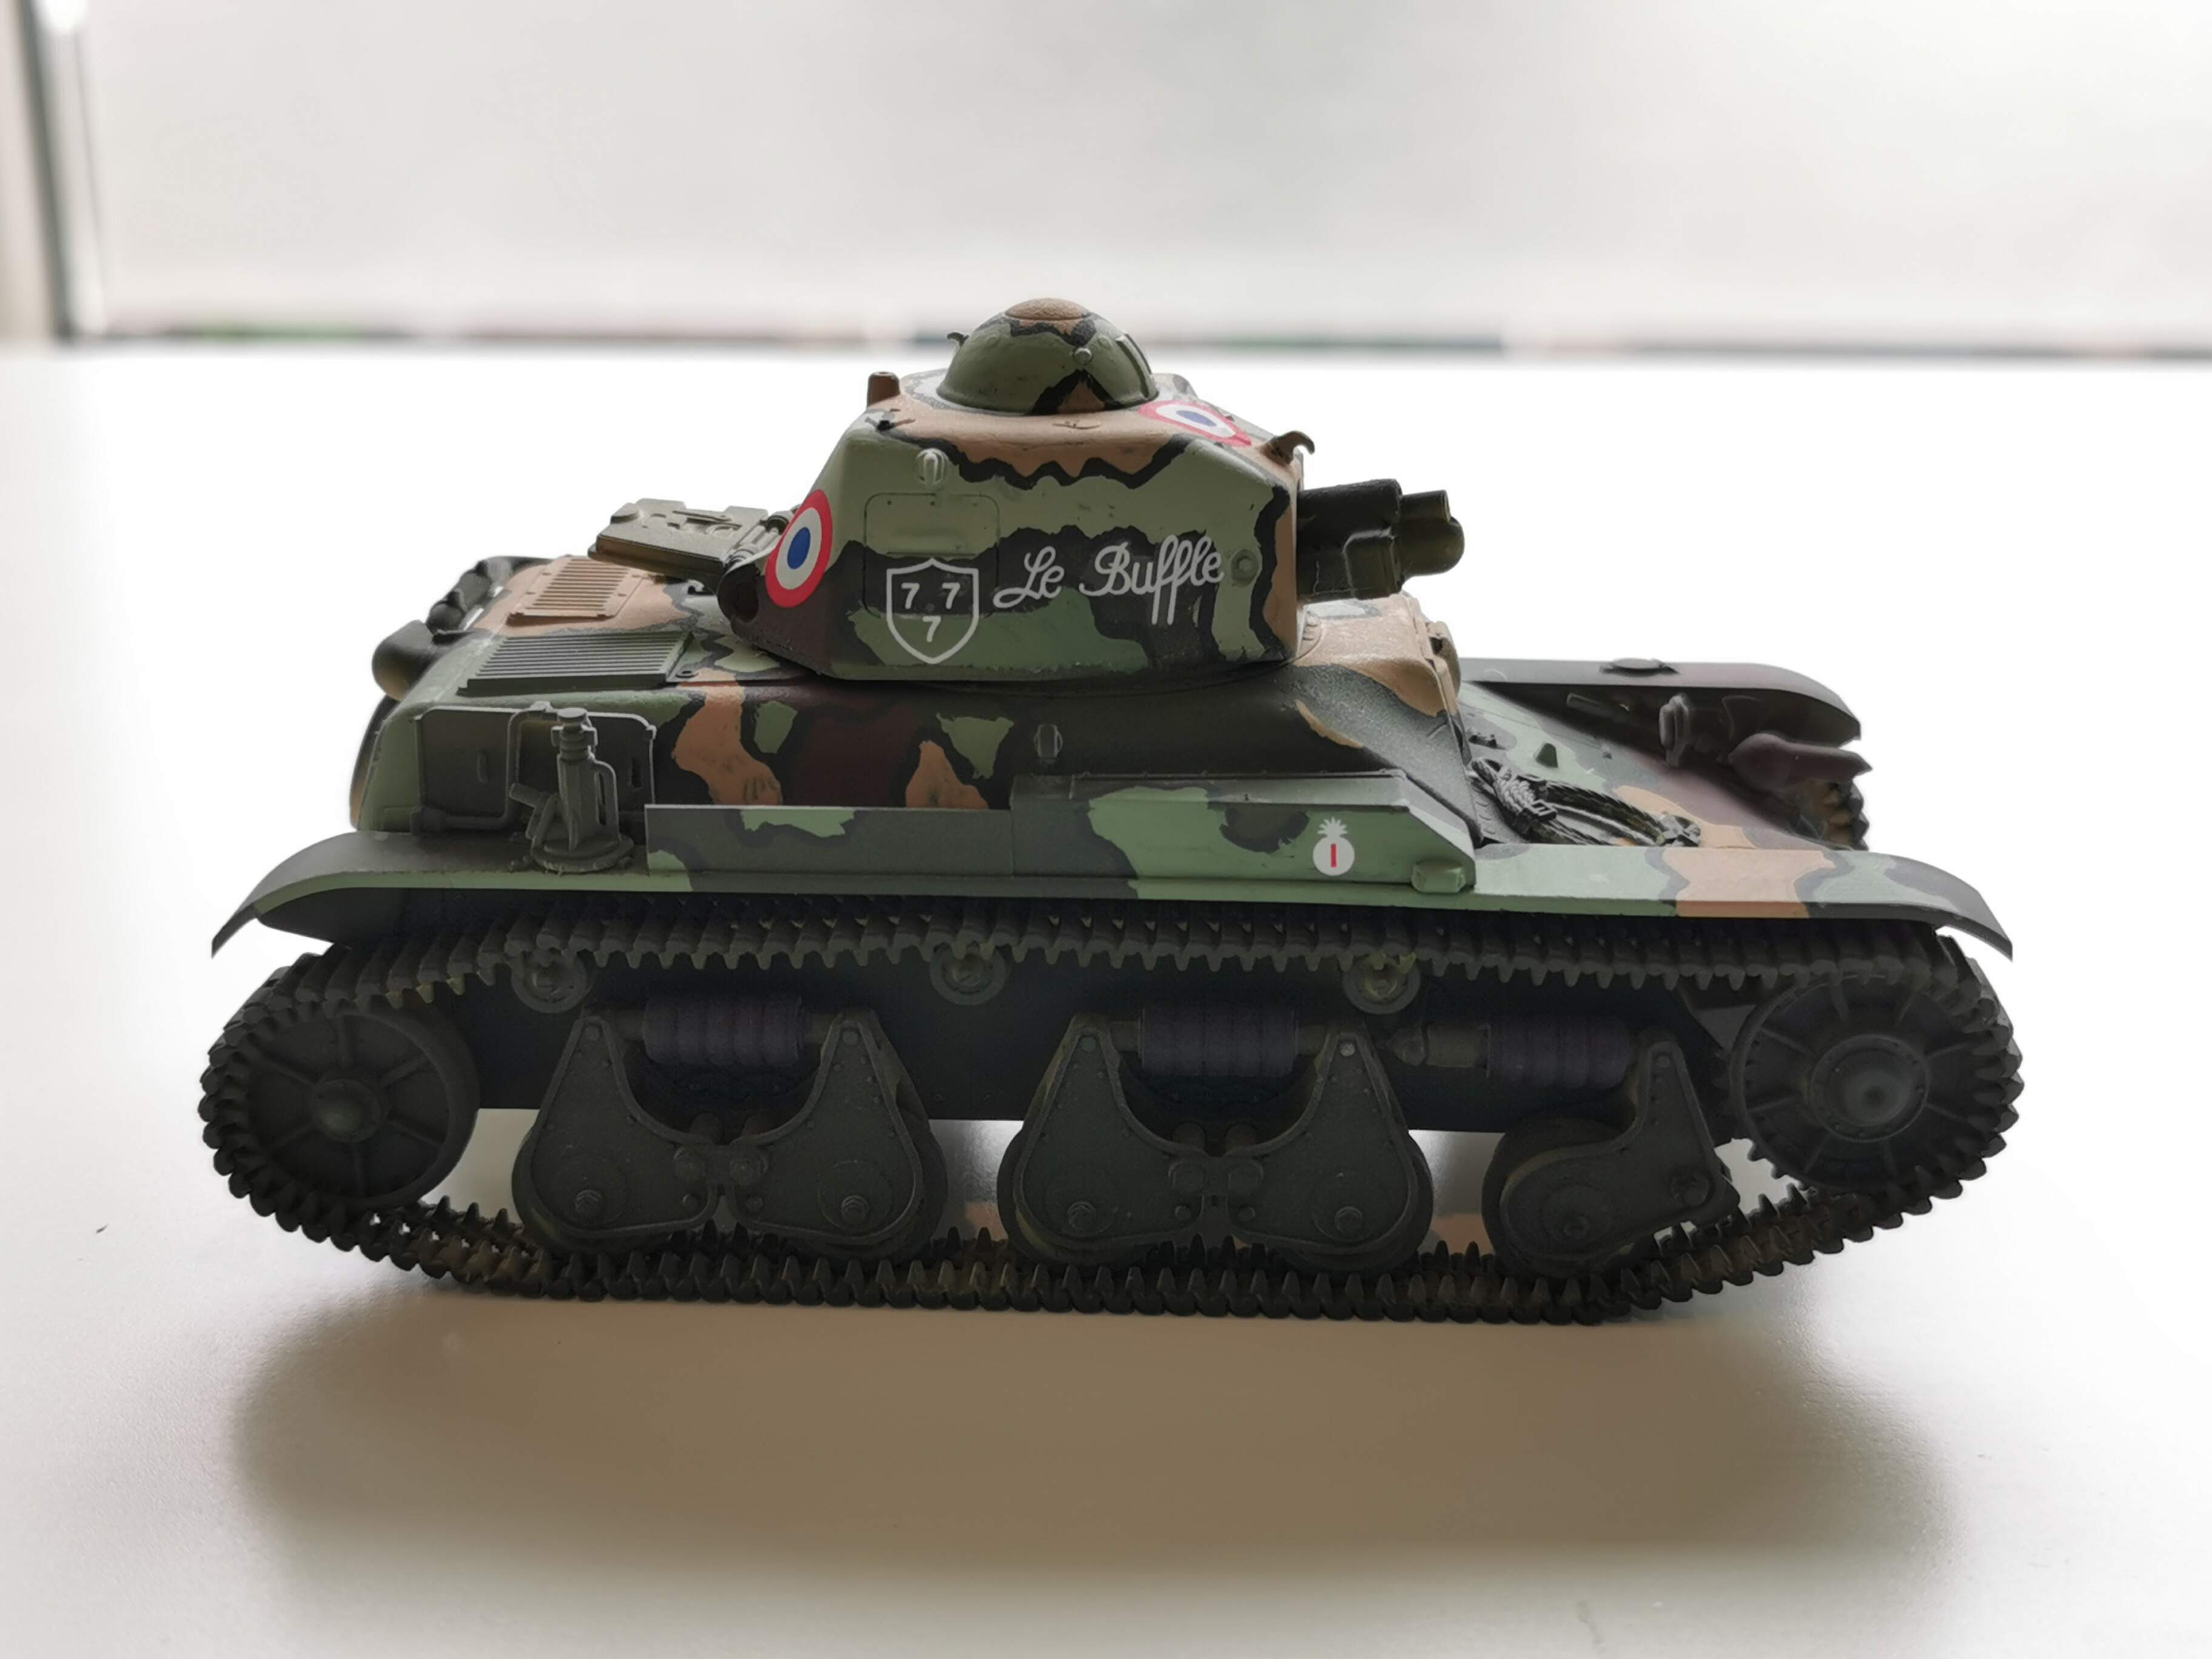
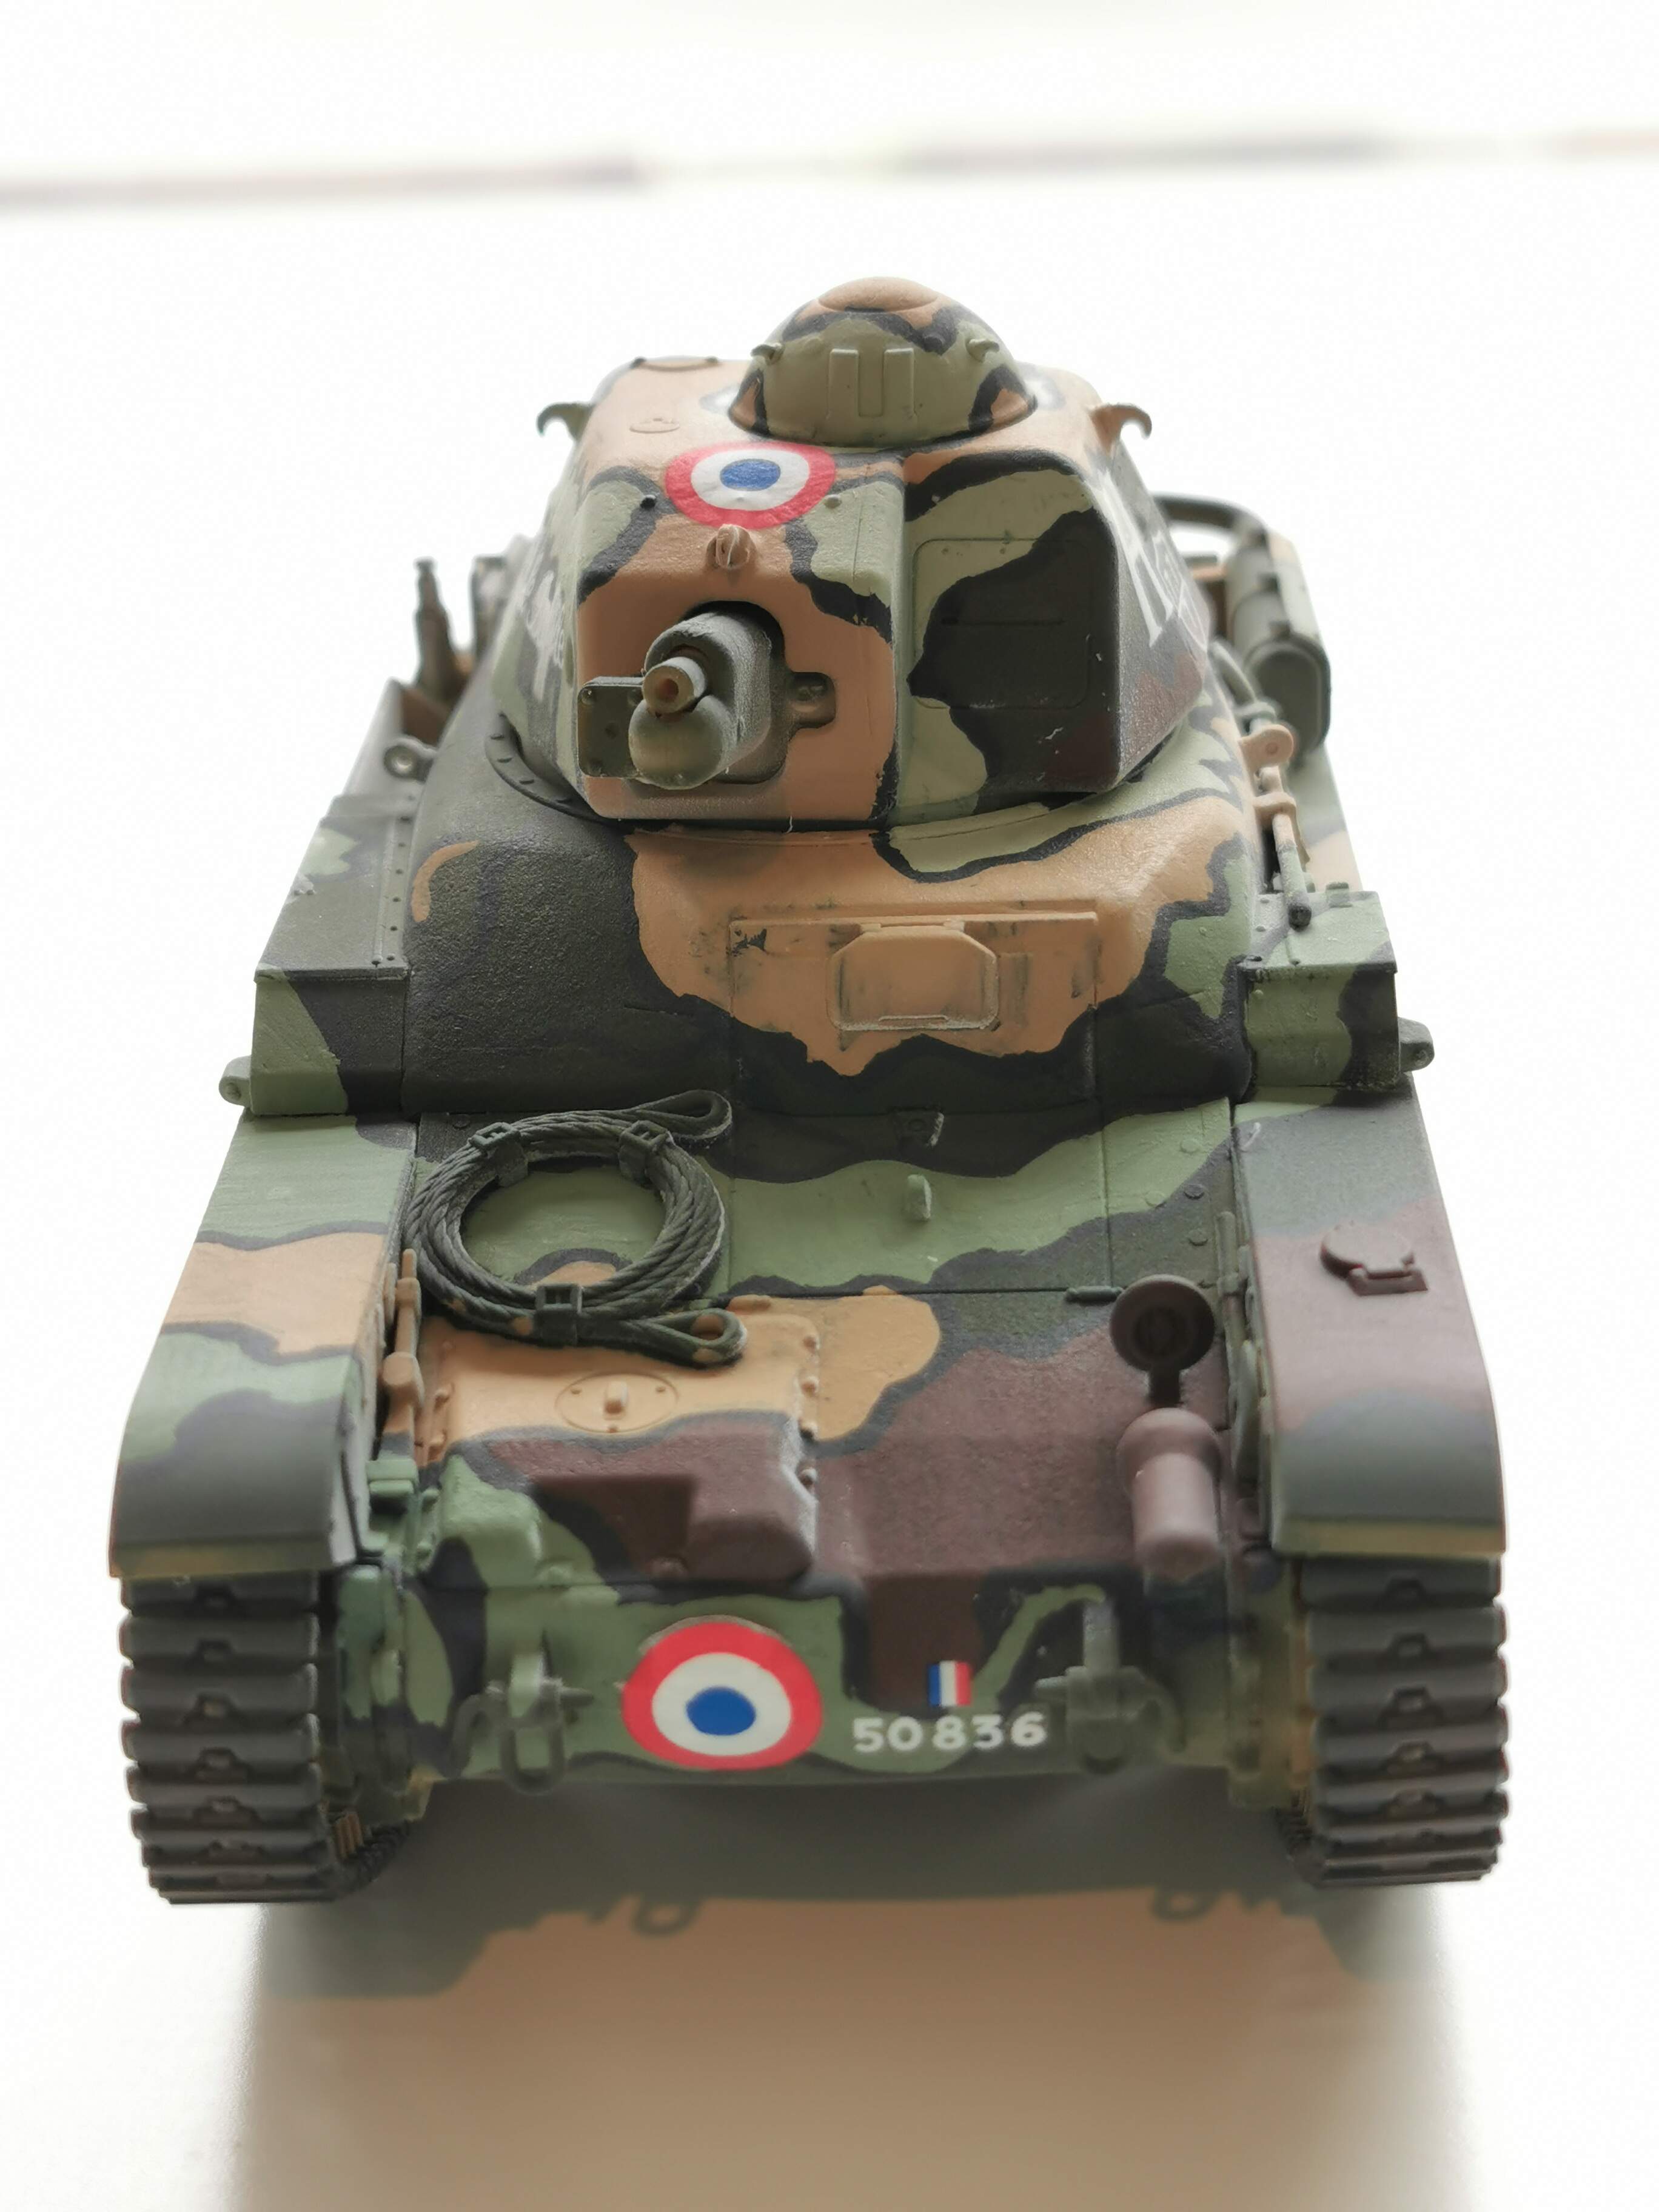
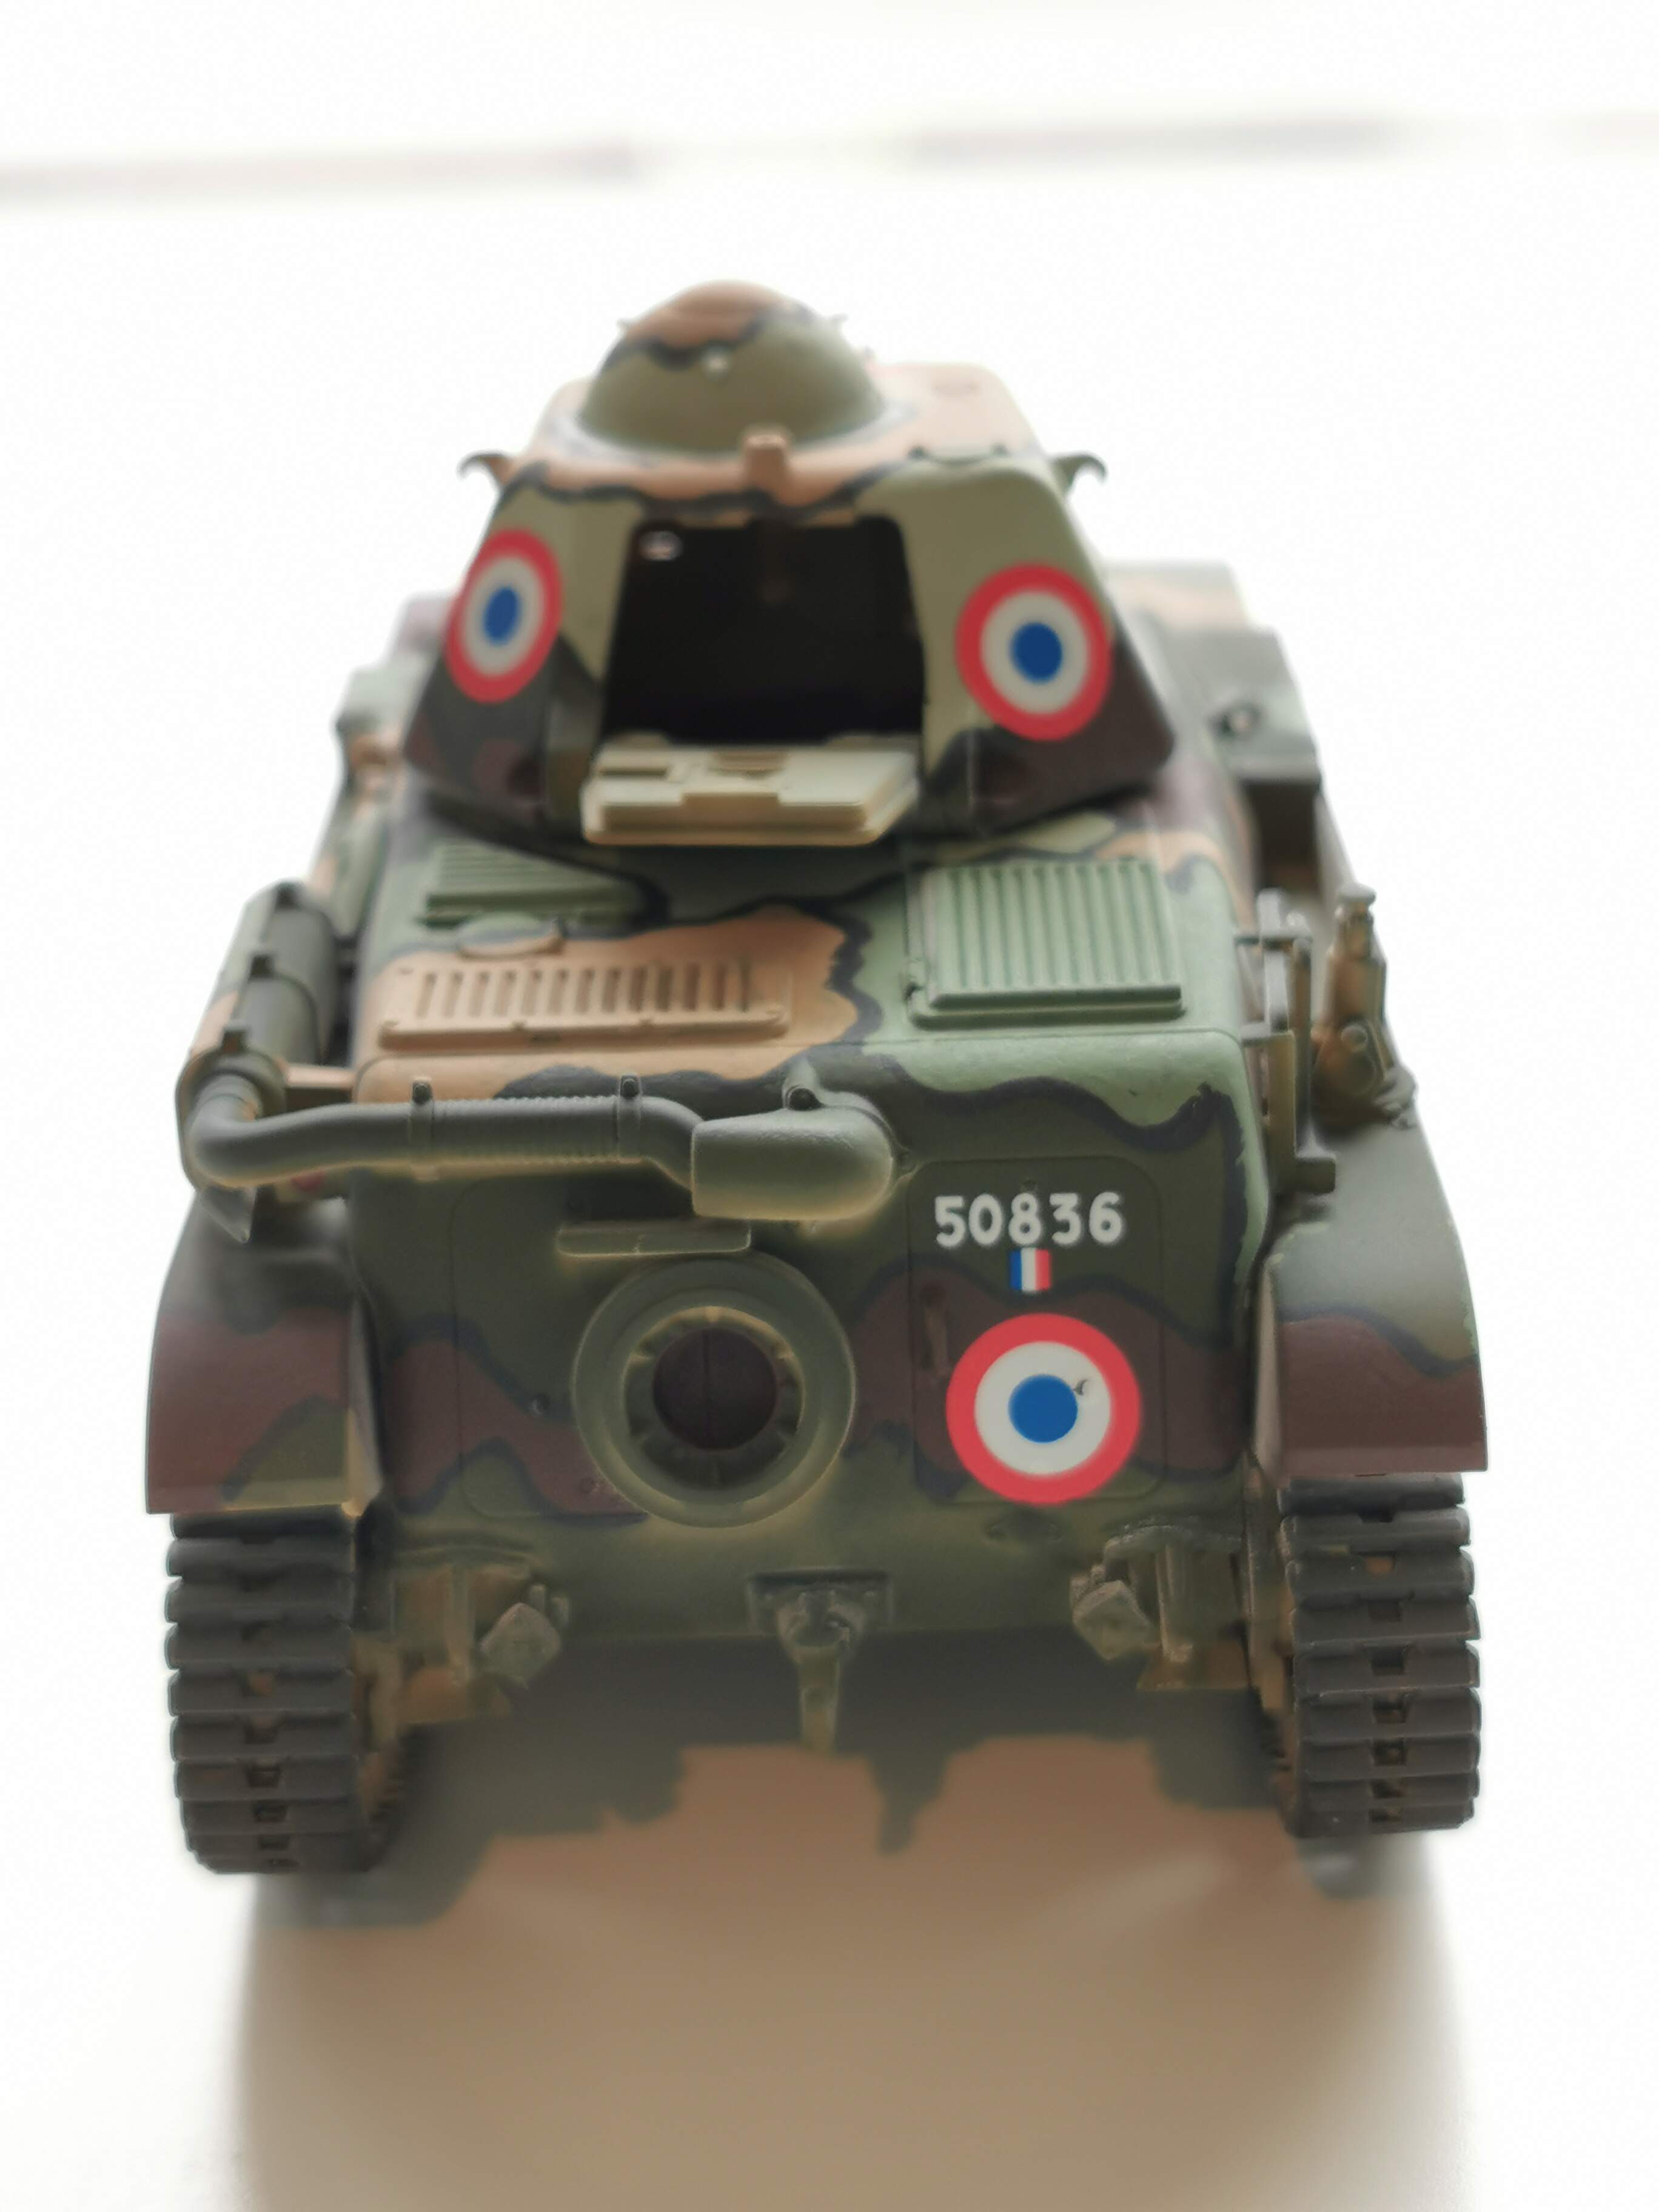
Here are the photo’s:
The 5th photo of mediocre quality, I know that.
But I don’t really know why my smartphone camera on my Huawei P30 Pro does that.
It has and had one of the best smartphone camera’s that were on the market.
So I don’t really know why some photo’s are higher quality then others.
Enjoy the photo’s. 
6 Likes
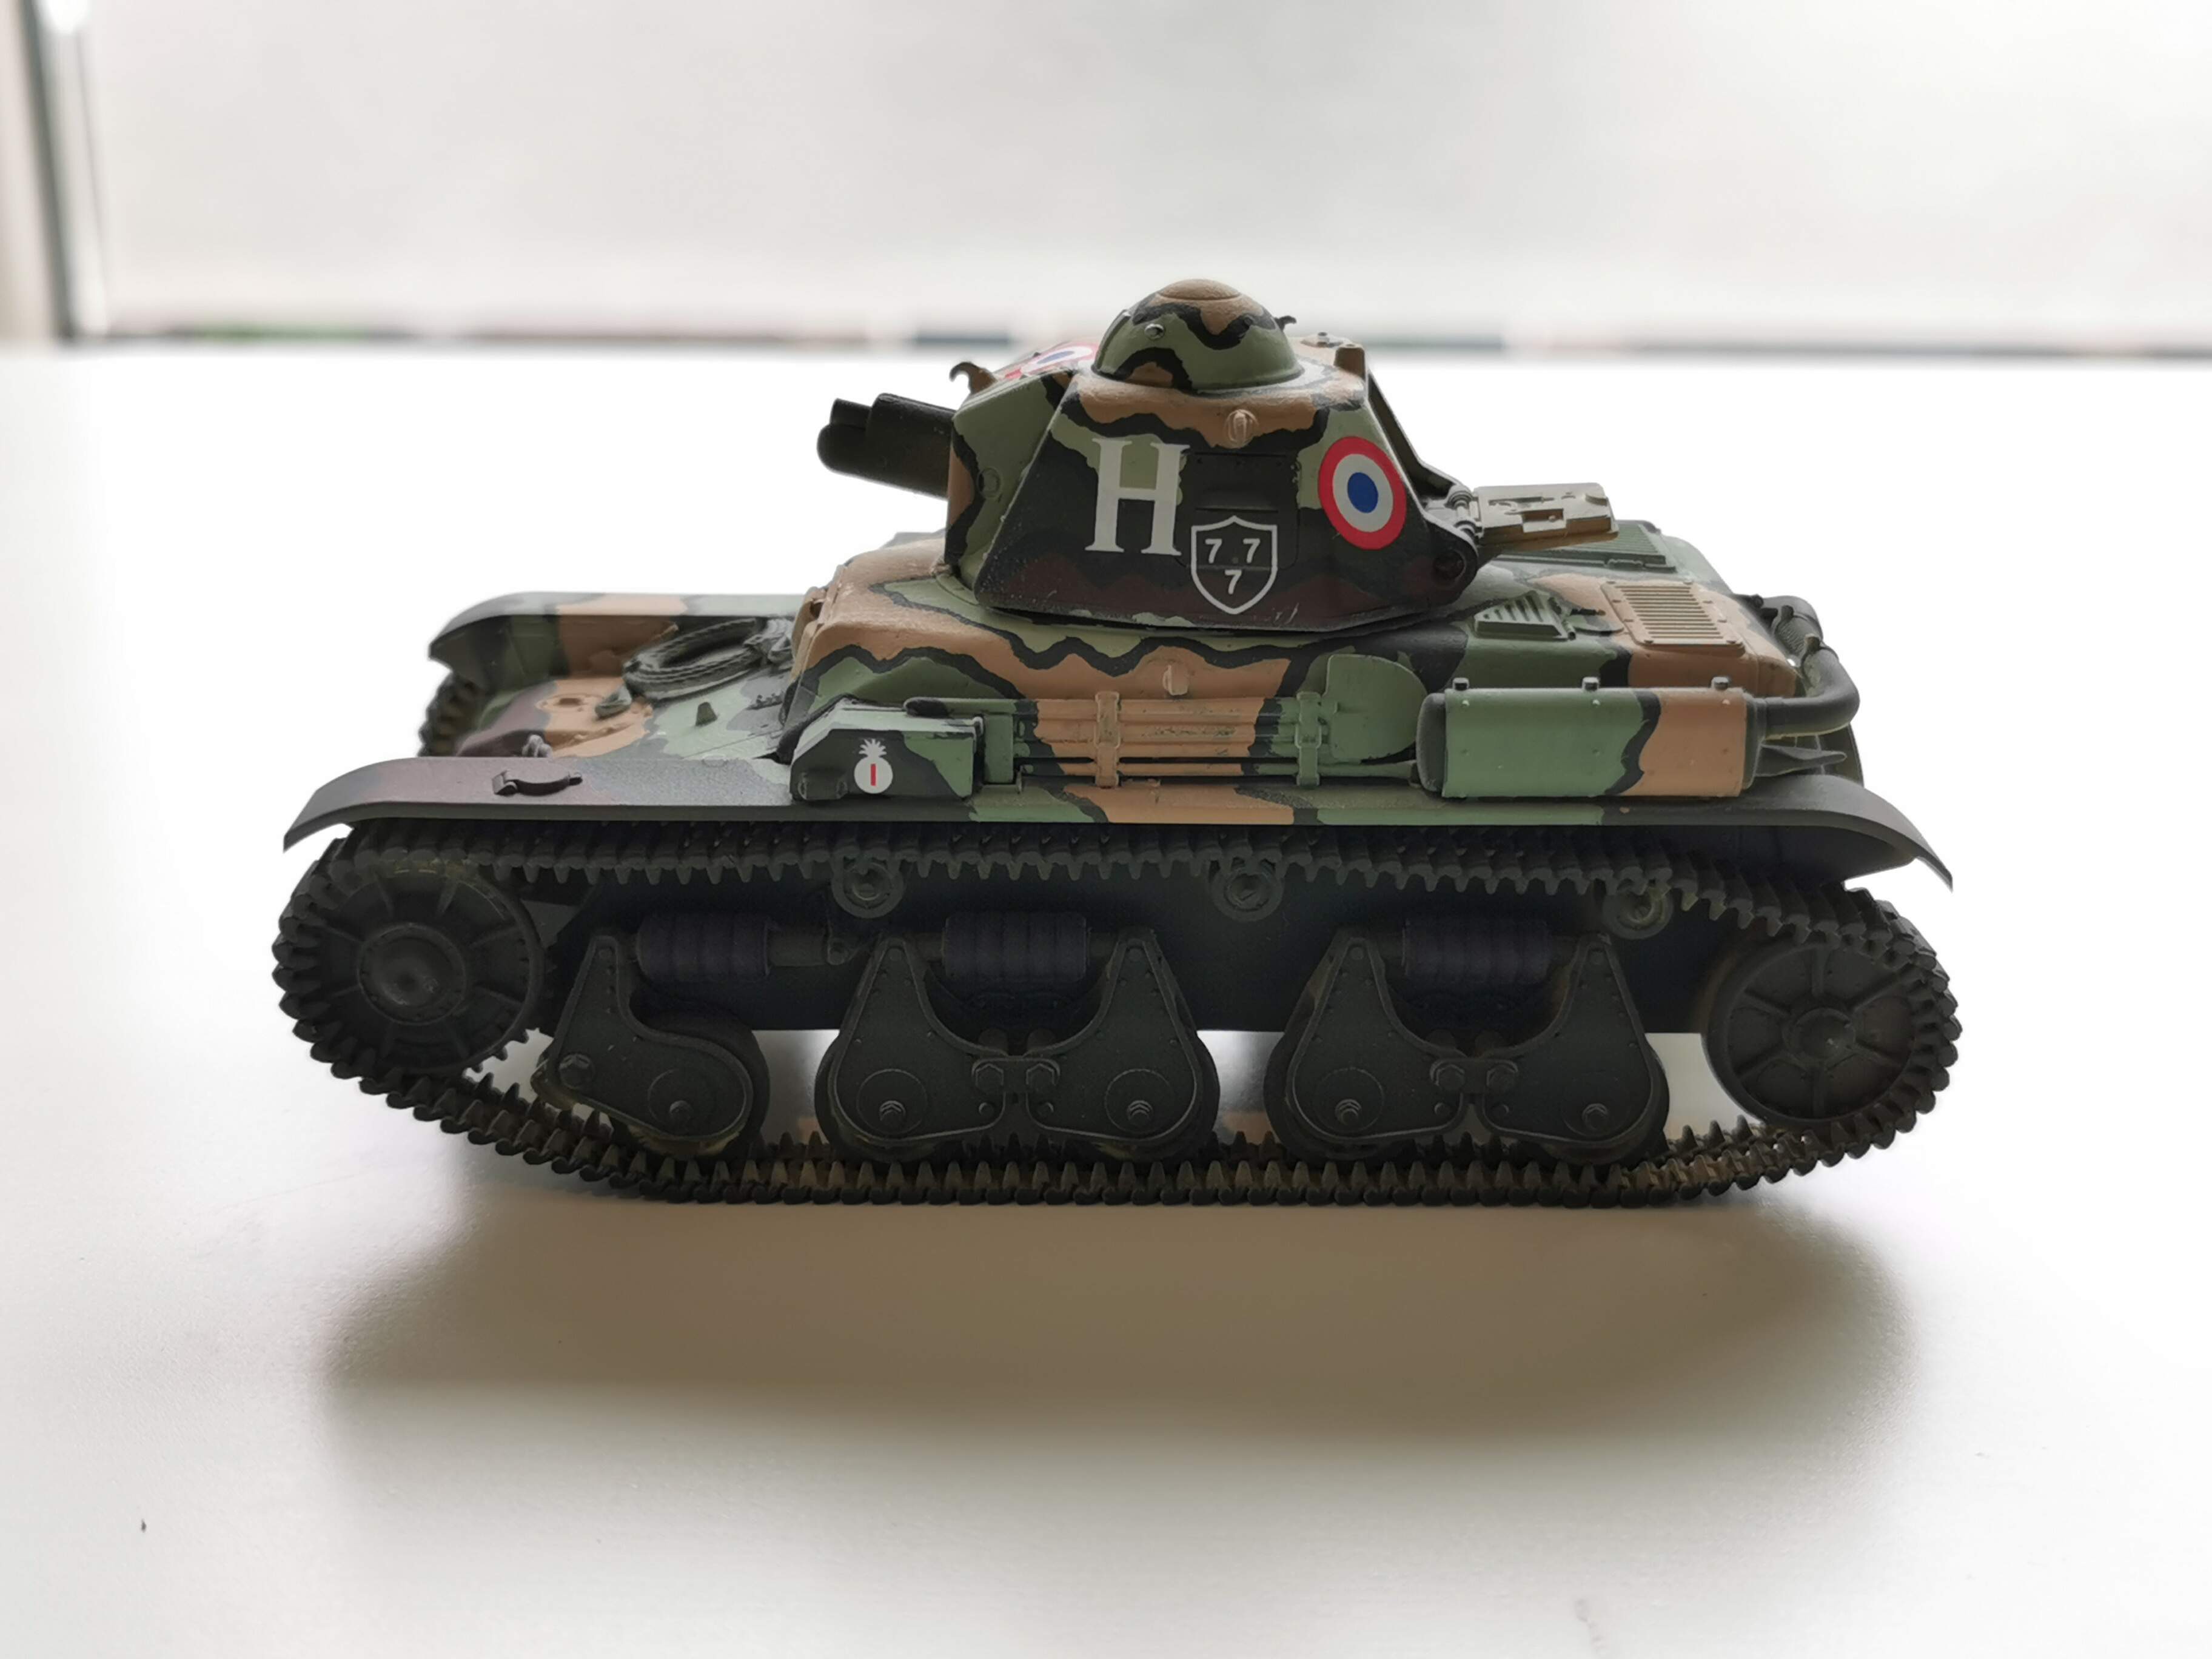
Here is an update on the painting of the project so far:
I started with applying the Cockpit Green color as it was the first color from bottom to top to apply.
The idea was to start from the bottom of the tank and the bottom color.
Working my way up with constantly going a level up with the color.
And then from the less used color to the most used color building up the camouflage scheme.
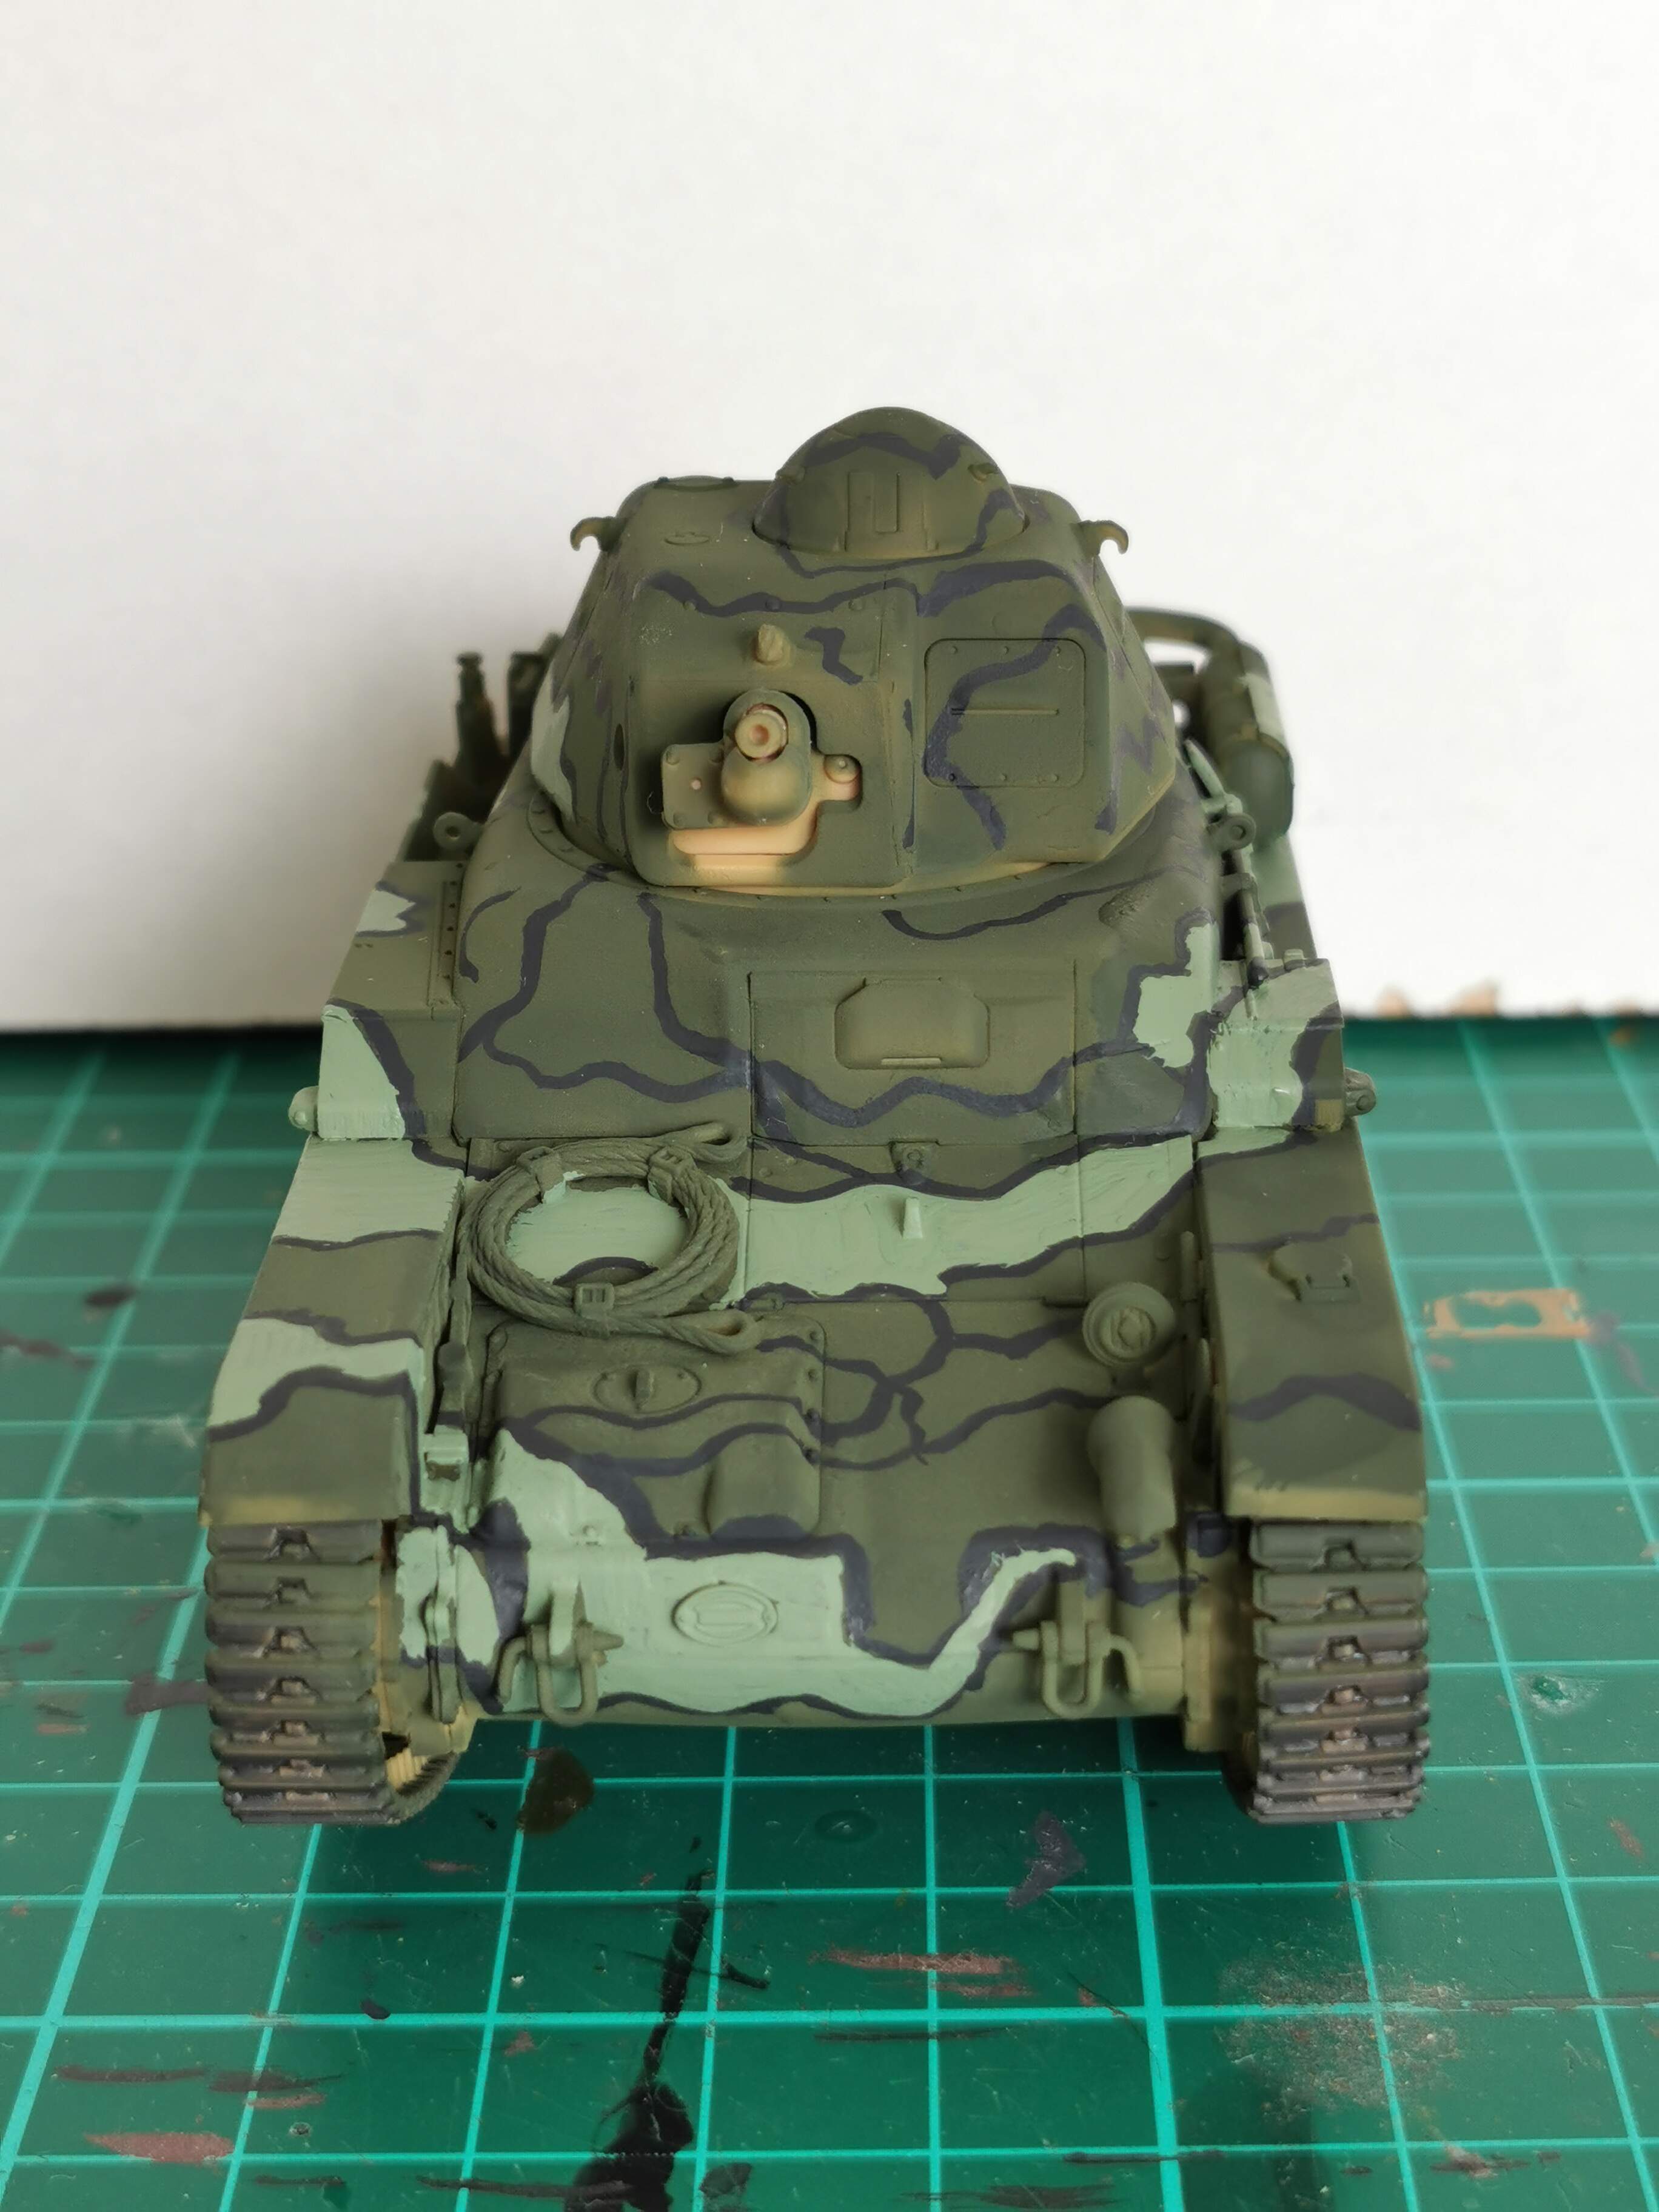
Next I applied the Hull Red color.
The story behind this was, that I wasn’t feeling like doing a lot of painting again on the model.
But I had planned to do just that.
So I decided to work on the less used color, since I didn’t have so much energy and concentration left.
And it turned out it was the right choice to do so.
As I was really satisfied of making that choice.
And last but not least for this update.
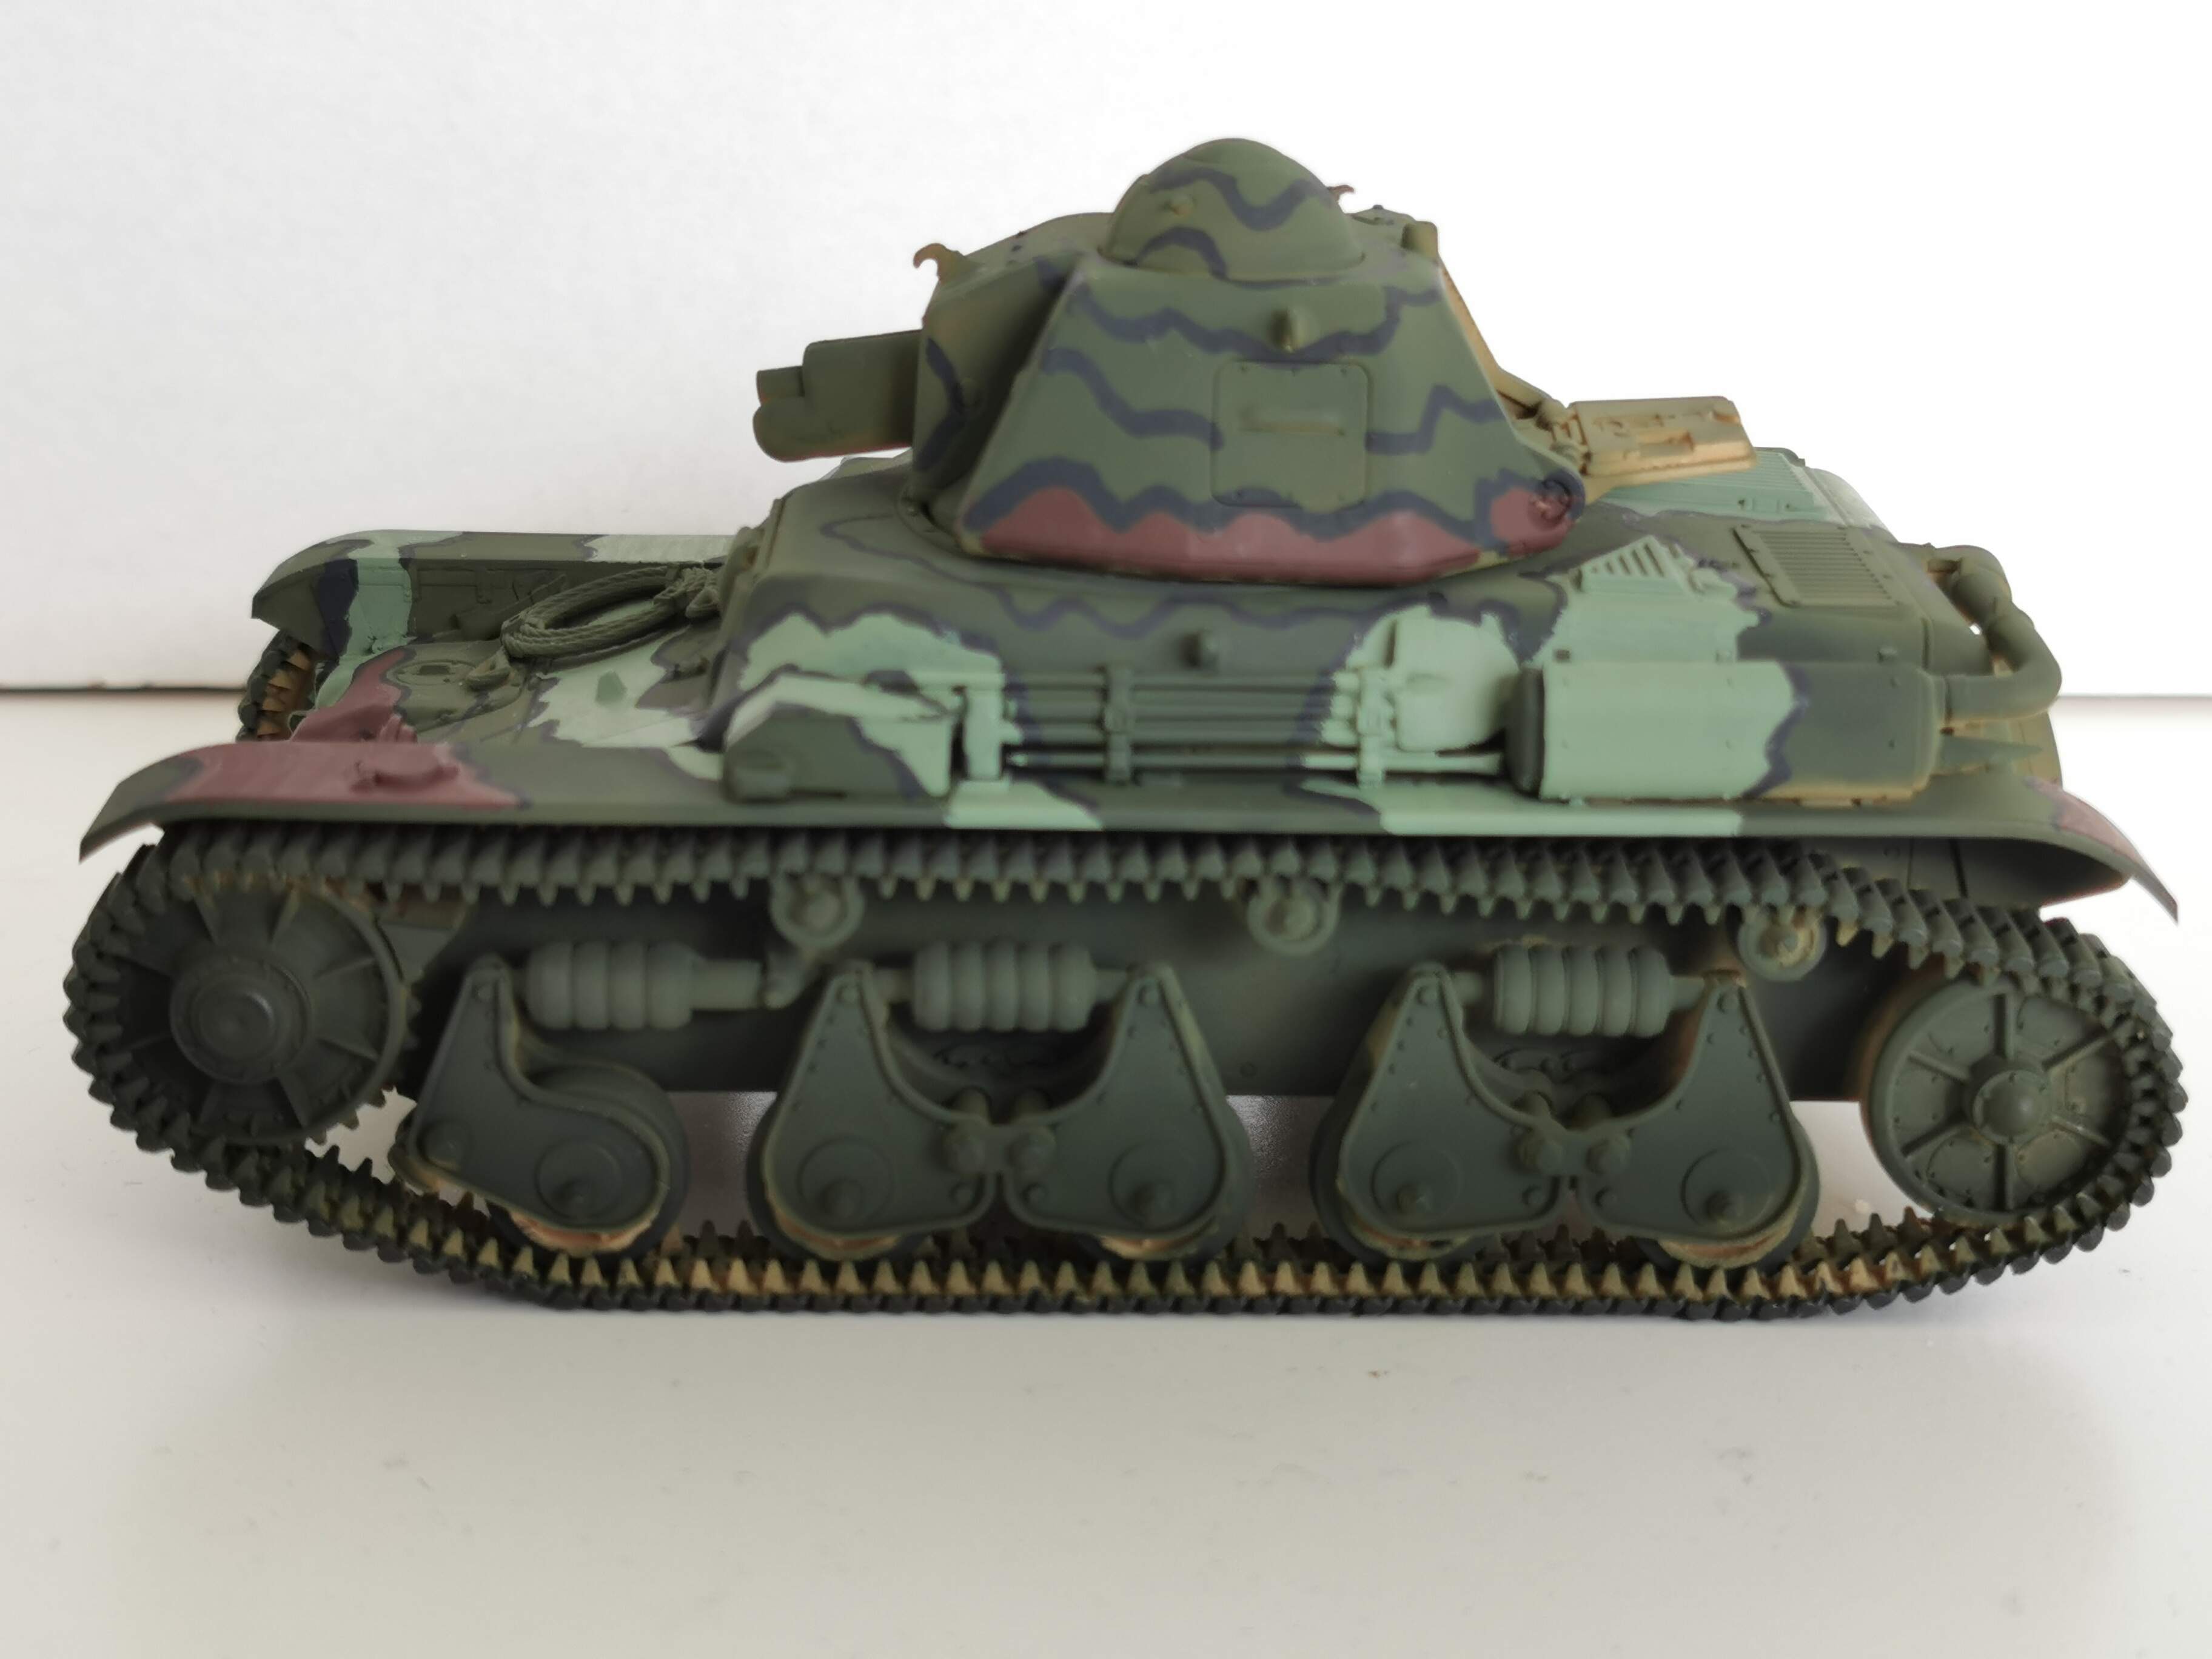
I have applied the Desert Yellow color today.
It is one of the most used color on the vehicle as you may be able to tell.
However I’m not fully satisfied with the result.
Ass you may see brush strokes and imperfection everywhere with this color.
I don’t really know what happened with applying this color.
Maybe I wasn’t focussed and concentrated enough?
Maybe something with the paint?
However I think I have learned from this experience that using different brush sizes would be making a huge difference.
And that considering which brush size is best for which spot of camouflage to apply is an important step of handpainting camouflage schemes.
Let me know if you like more regular updates or more irregular updates with bigger posts. And with much more information to share.
I’m glad to read your comments in this post.
2 Likes
Perhaps I missed it in your post, but you don’t say what kind of paint you are using.
However, I would suggest that the key with acrylics is to use multiple thin coats to get good coverage. Don’t try to cover the area in a single coat, but rather use two, three or even more thin coats. Let each coat dry completely before putting on the next to avoid lifting the partially dried paint and making blobs.
As an example, the light “mud” color camouflage on this Universal Carrier Mk. I has been brush painted using Vallejo Model Colors. In this first photo, you can see the results of THREE thin coats. These were applied using a 10x0 sable liner brush.
In this next photo, you can see the chipping, also done with Vallejo Model Colors.
These acrylic paints were also thinned well for brush painting and the same 10x0 liner brush was used. After the chipping, washes, streaking and rust staining were done with artist oil paints thinned with mineral spirits.
Here’s the final finished model on its base.
When brush painting water-based acrylics, be patient and take your time. Don’t try to cover the areas in one coat. Multiple, thin coats with good drying time in between will produce good coverage without building up thick layers of paint.
1 Like
I’ve used Tamiya acrylic paints on the whole model.
I’ve also watched some videos on YouTube about brush painting the Tamiya acrylic paints.
They have said that you can get good coverage with one layer of paint.
But just don’t go over it again with the brush when it is still wet.
I think I’m going to try this technique with the final color to put on to complete the camouflage scheme of the tank.
It took me a lot of work and hours/time to apply all the different colors and with the painting within the black demarcation lines.
Anyway, thx for your comment.
You can get good coverage with on layer but Tamiya paints really should be thinned fairly heavily for brush painting. This also thin build up the reduction of brush marks, and heavy build up. I used to brush paint everything and would do 3-4 thin coats, I now airbrush and much prefer it. I painted my whole T-54 in about 20 mins which would have taken hours of brush work. The nice thing about the AB is you don’t have to wait hours between coats.
That aside the R35 looks good
1 Like
Tamiya paints are arguably some of the most difficult to brush paint. They are quite quick to dry, so if they’re over-brushed, the brush will often pull up layers of the just previously applied paint that has started to skim over. The results are blobs and heavy brush marks.
They can also be challenging to thin, so they also tend to be brushed on too thickly, again leaving visible brush marks.
Considering that you’re using Tamiya paints to hand brush, I have to agree with @Mead93 that you’ve done a very good job.
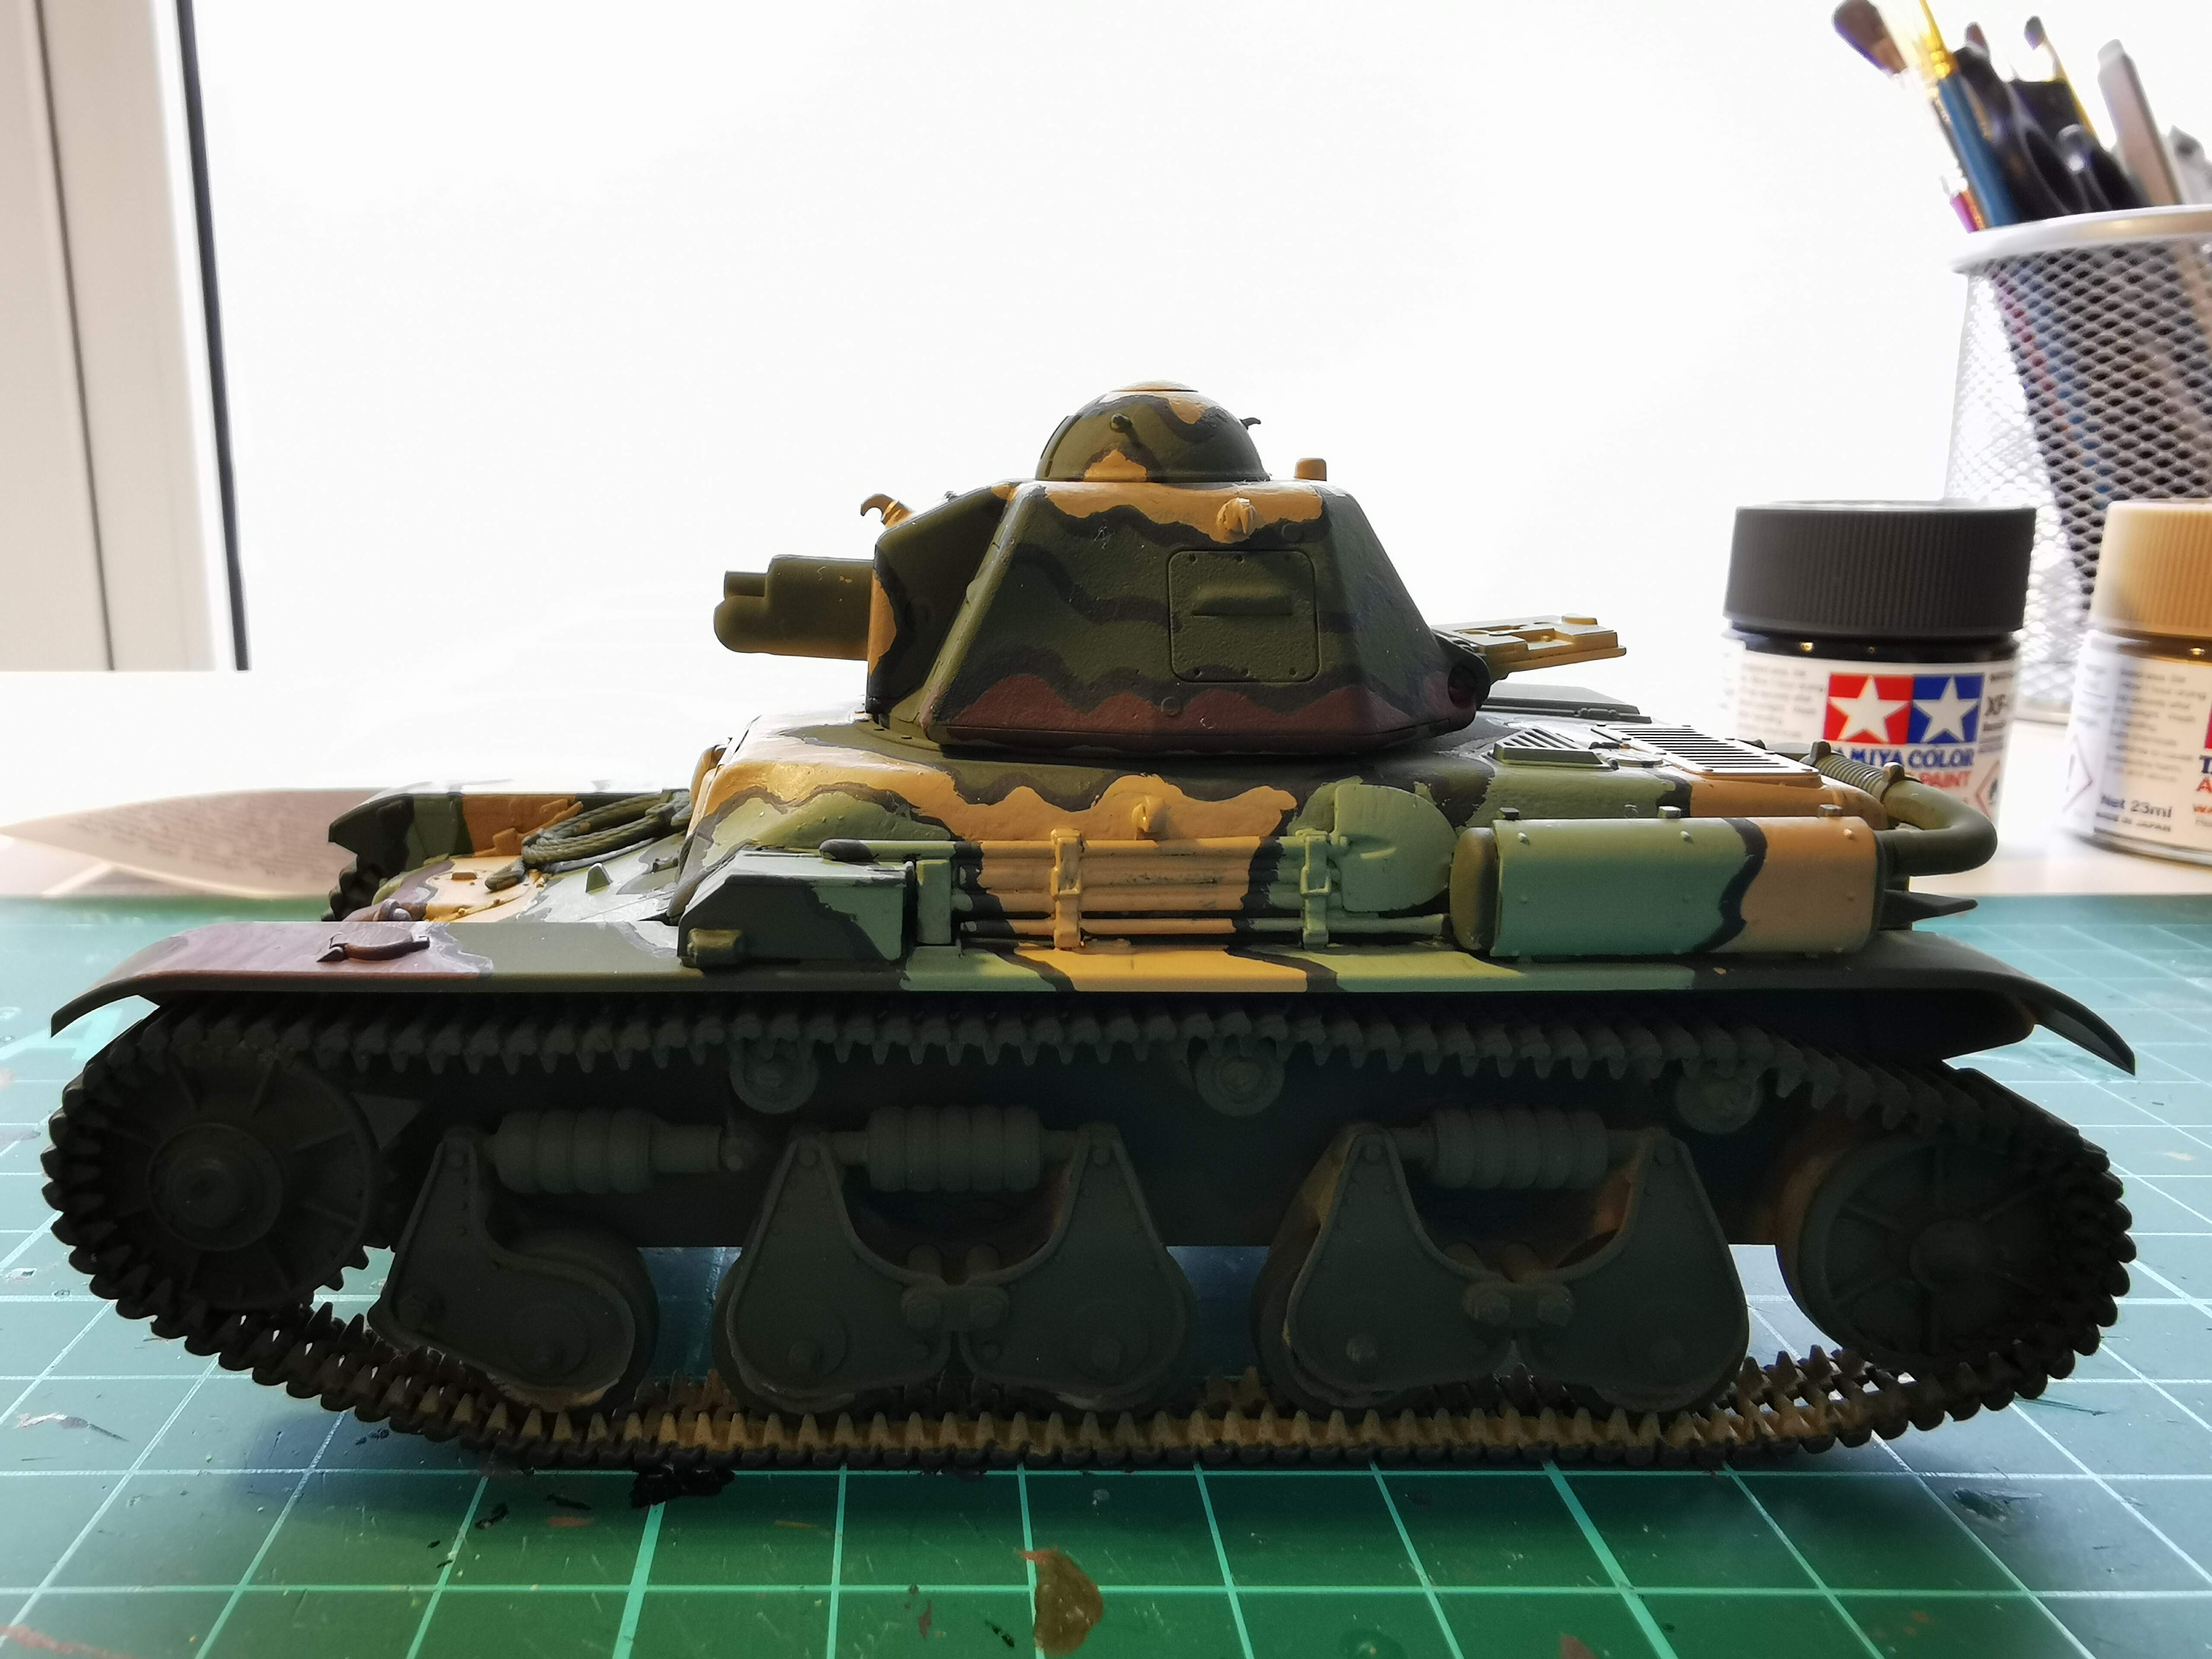
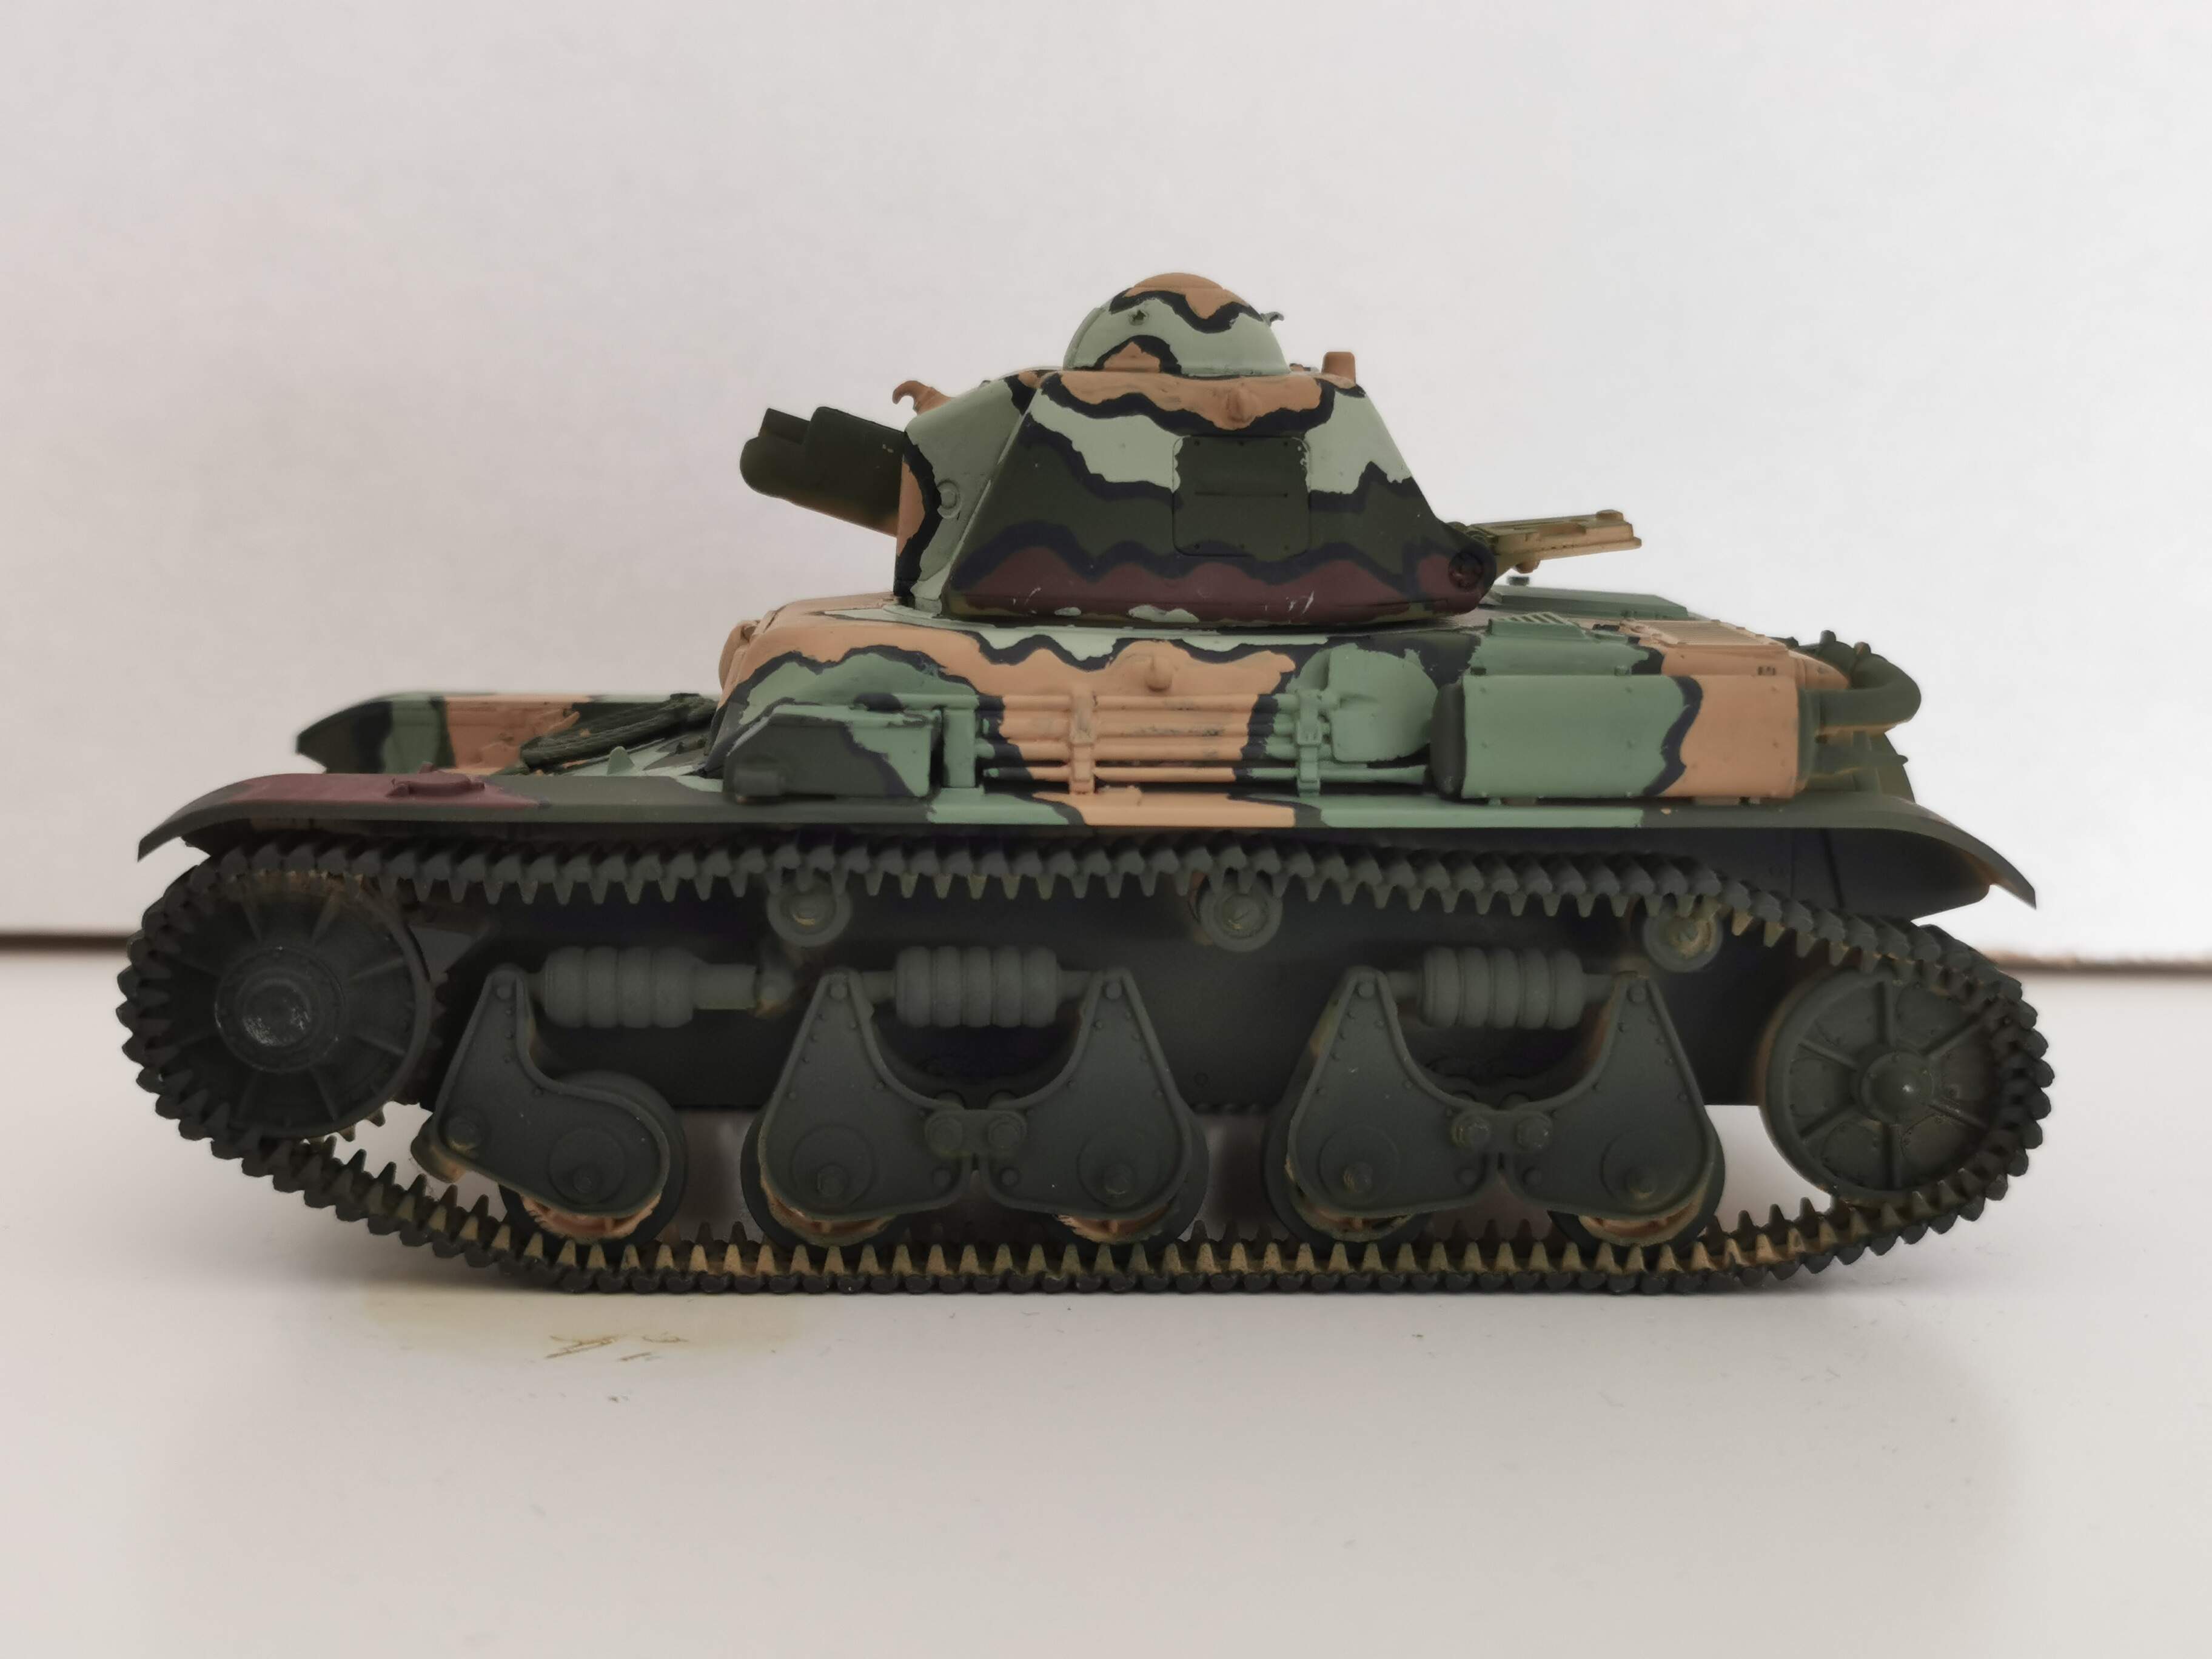
Latest progress I made with my project:
I have painted on the last color following the painting scheme of ‘Le Buffle’ Sky. I believe it is XF-21 from Tamiya.
4 Likes
Thank you for your reply and your tips.
I’m also airbrushing now, but with this project I had some really serious problems.
I don’t know exactly what the problem was.
It could be the thinner paint mixture.
It could be something with my airbrush, I don’t really know.
I hope to test things out tomorrow.
Thank you for your compliment, really appreciated.
What issue were you having airbrushing? If you describe it we may be able to help
Thank you for your compliment.
Really appreciated.
I’m thinking it is important to have enough paint in your brush.
And that it is important to clean the brush regularly with in my case airbrush cleaner.
And I’m now often shake the bottle even between bringing on the paint on the places I need to.
Also, in my experience.
The paint dries somewhat leveled.
I mean, it flattens out.
Most of the paint seems like a very thick layers, but most of it vapors? away and leaves a nice even surface without brush strokes.
At least they aren’t that visible.
Again, thank you for the compliment much appreciated.
1 Like
That will be quite a story to tell, so take your time to ready through it carefully.
It begun with mixing the paint.
I followed the formula that I had seen on YouTube by someone of two parts thinner one part paint.
So as I had followed this formula and put it into the cup of my airbrush, the paint came out to thin.
And the paint begun to run all over the place.
So I tried to thin my paint one part thinner one part paint.
But this seemed to thick, because the spraying pattern wasn’t very consistent.
I believe it even had splatters of paint coming out.
I also forgot on some occasions to turn on my spray booth.
And I also had some times I forgot to turn on the compressor again.
So I wasn’t very focussed at that time.
But even so, later on when I had a more focussed feeling.
I still had the same issues haunting me.
So that was the reason why I decided to fully brush paint the rest of the model.
And that I’m much happier with this now.
It sounds like the paint mixture the first time was probably correct. You’re looking for fairly thin layers, it sounds to me like either your pressure was too low to properly atomize the paint, you were spraying too close, or you were pulling back too far on trigger. You really want a fine mist coming out, and I find it’s good to always keep the airbrush moving
Thank you for reply.
I’m going to watch video’s on YouTube using the YouTube client FreeTube to learn more about airbrushing.
I’m realizing now that there is still so much to learn and that there are still so much that I don’t know.
But what I should know.
Maybe you are right about the thin layers and coats.
But how do you explain that I did spray my models in one go ealier on when I was airbrushing?
Thanks again for your reply. 
You can certainly do it in one coat if you want but I wouldn’t recommend it. Doing it in many thin layers allows you to build it up slowly. This does a few things, it limits chances of mistakes becuase you are doing this slow. This allows you to notice things going wrong before you have thick layer of paint and adjust. Second you can more advanced techniques like tonal variation, pre shading and post shading, etc. This is nearly impossibly if you just flood the model with one thicker coat.
The nice thing abut airbrushing is that you don’t have to stop and wait for coat one to dry. When I say multiple coats I mean for example you do the turret then the hull than back to the turret, etc. Not that you do a solid coat and let it dry for days before you do another
Thank you for replying so shortly.
It is very interesting to read this, because I didn’t look at this this way.
This asks for more trying, testing and more research.
Do you have an old kit lying around that you don’t like. If so i found when I was learning (and I still am) that practicing new techniques on an old spare kit worked wonders. The panzer 3 I built when I aaa 10 or so now has about 15 different colors on it lol
Don’t really have an old kit laying around anymore that I can use as a test subject.
Here is an update on the project.
It has been a long time since I have worked again on this project.
The weather got in the way, time shortages came in the way as well.
So I only realize now how much backlog I got.
I even didn’t update the Sd. Kfz. 9 Famo topic, and when I wanted to update.
I saw I didn’t even make photo’s of the new progress.
Have some catching up to do.
Anyway, here are the photo’s on the project how it is now:
I even wanted to throw all the ‘trash’ away of the project.
And I checked if I had all the photo’s of the box art, because I want to keep that.
To only realize then, I wasn’t yet finished with the project.
I still have the figure to build and complete and put into the tank.
I celebrated to early. 
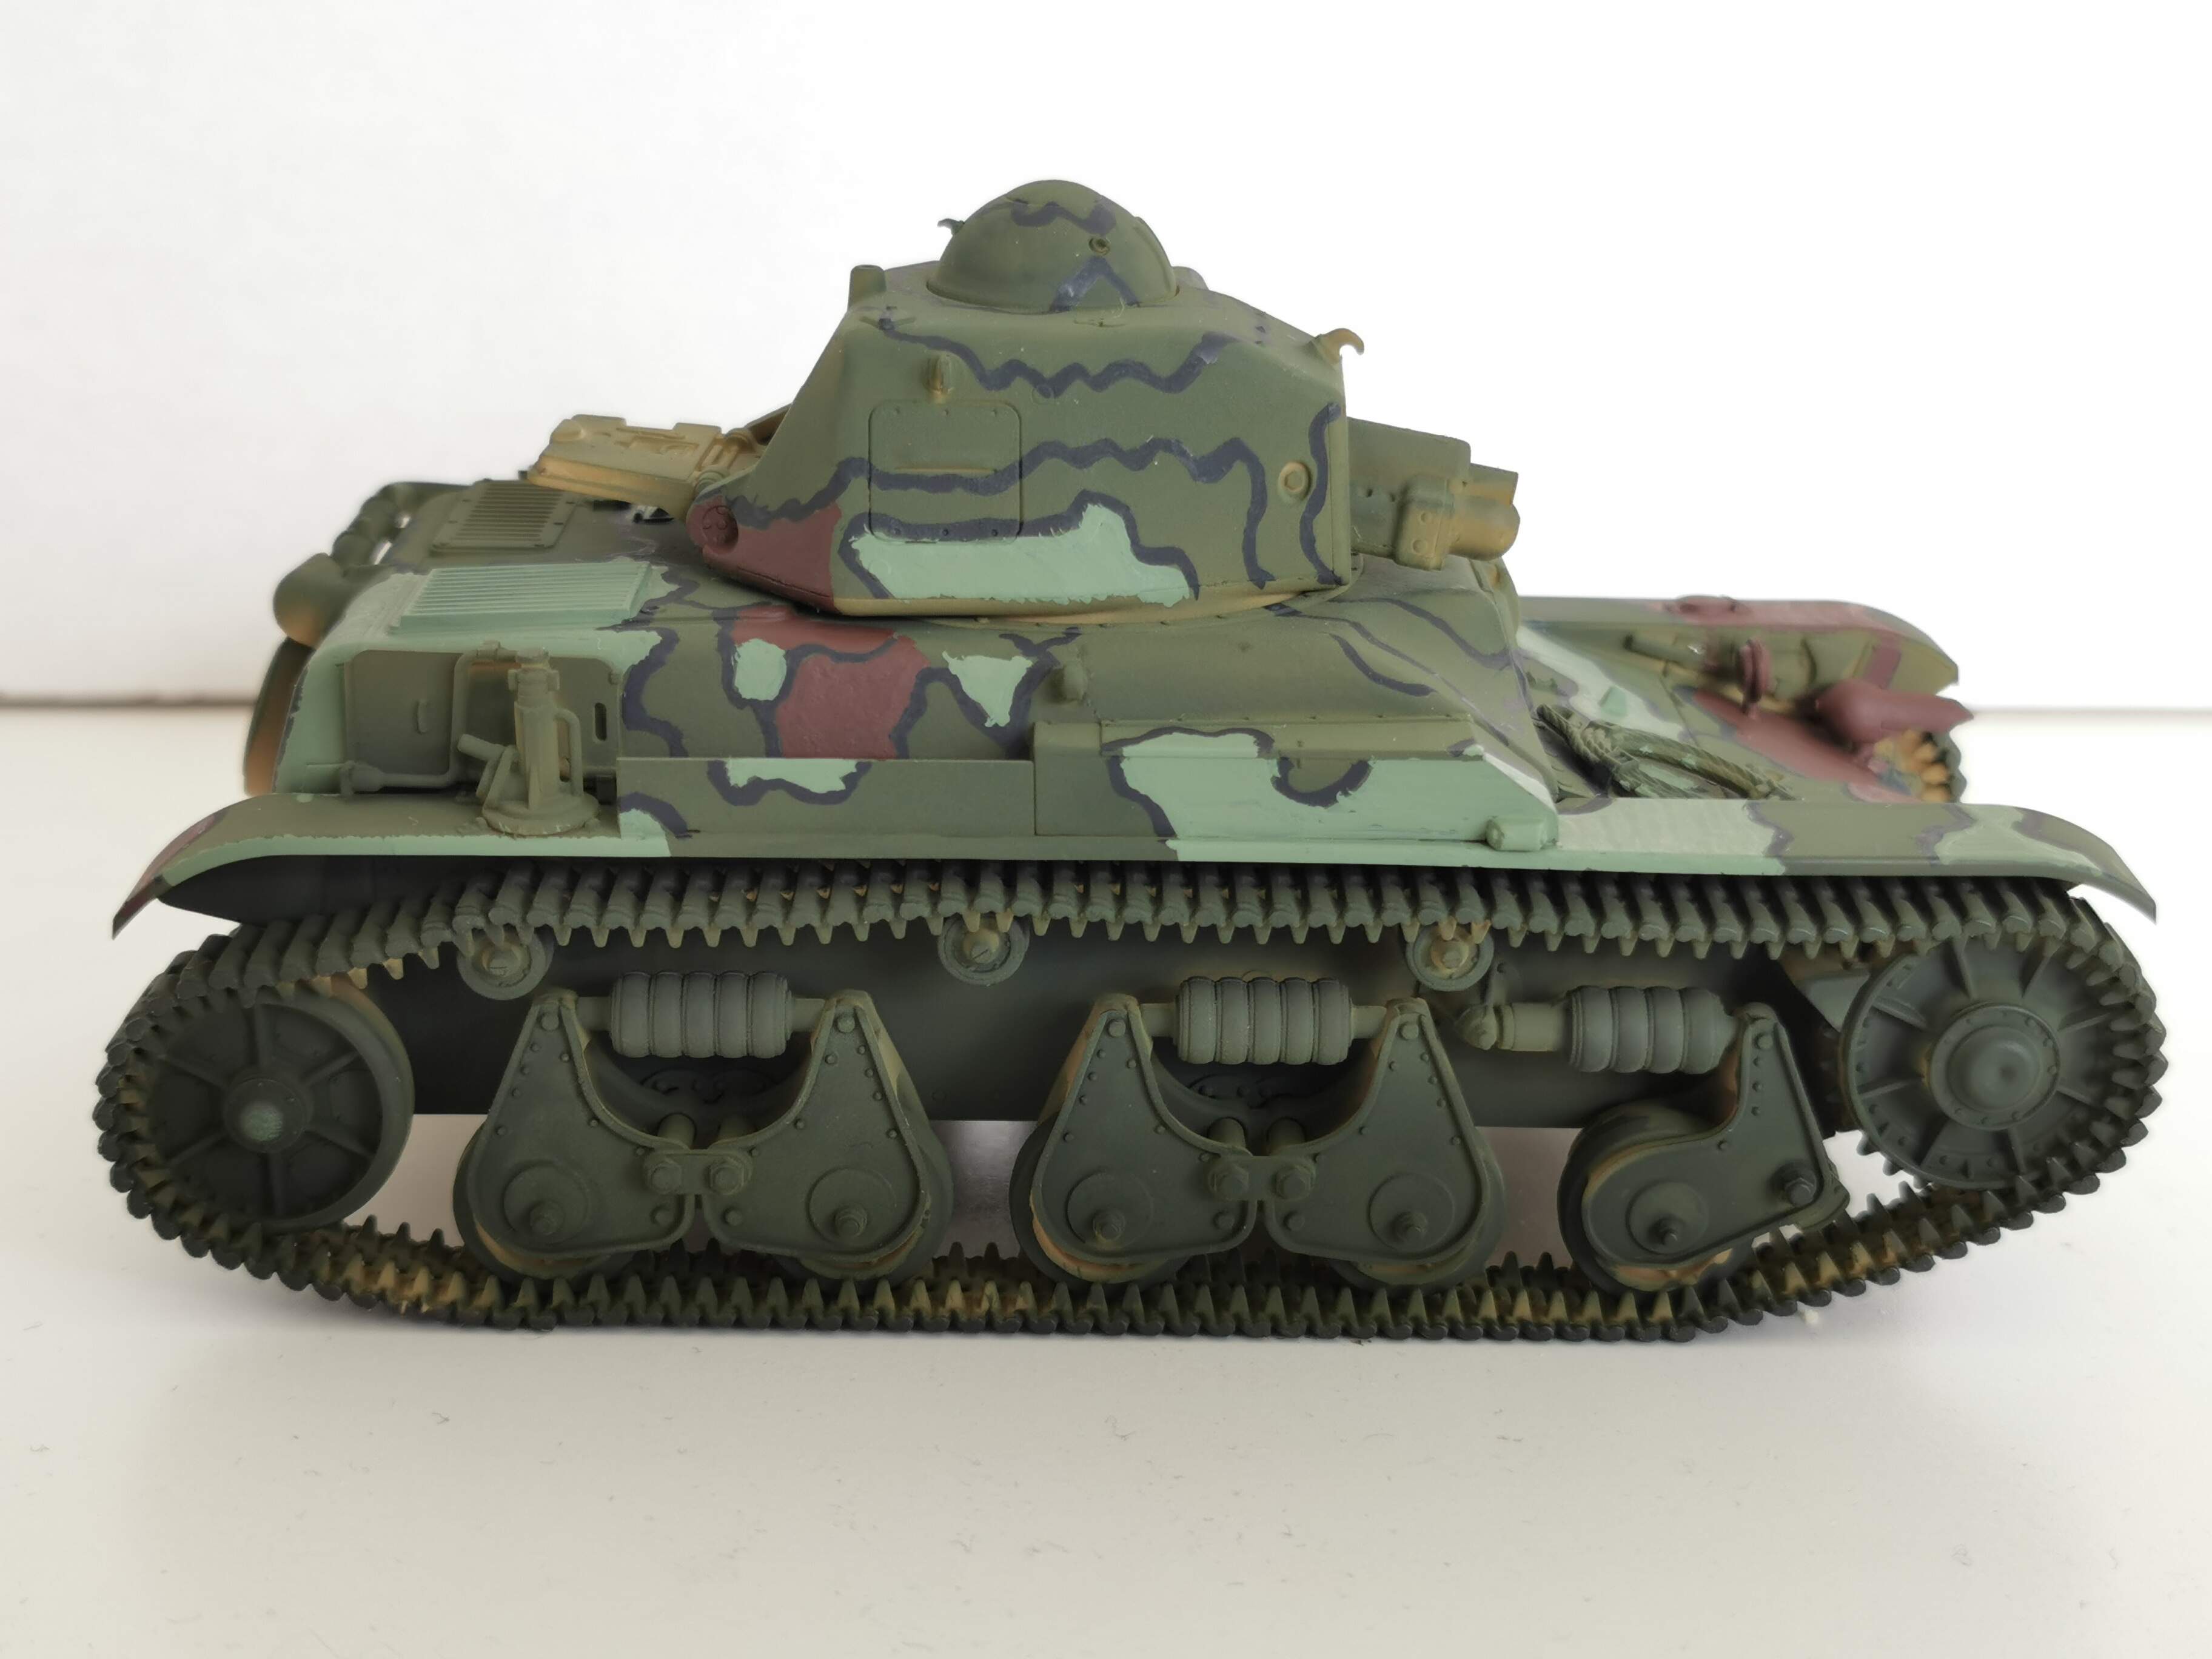
I must say that I’m pretty happy with how the paint job turned out.
It was my first experience with Tamiya X-22 Clear and XF-86 Clear flat.
If I’m remembering the names correctly.
They were vernishes or something to seal my paint job and decals.
So for a first time, I’m pretty happy with how the paint job result turned out.
Have a good week and hope to update more soon. Or later 
6 Likes