Yes, it is. As for the parts being faceted, I’m not 3D expert, although I can design simple stuff. But I’m reminded of the formula for determining the area of a cone. I believe it comes down to assuming a cone’s length (not actual) height, can be thought of as the result of an infinite number of tiny triangles going from the base to the tip. If you can imagine the cone being made of faceted triangles getting smaller and smaller until they essentially just become line segments - perhaps you can make the facets on the sponsons smaller and smaller until they “disappear,” or at least are small enough to be smoothed out easily be hand.
7 blades but along with only 2 engines?
I’m playing with Fusion to see what I can do. I only have an FDM printer so I don’t think I’ll ever be able to get close to a usable print that won’t require a ton of tweaking.
I’ll keep playing, I really thought F3D could just convert it.
No, that is not correct. The CH-53D has two engines, but only 6 blades. The CH-53E has seven blades and three engines.
2 Likes
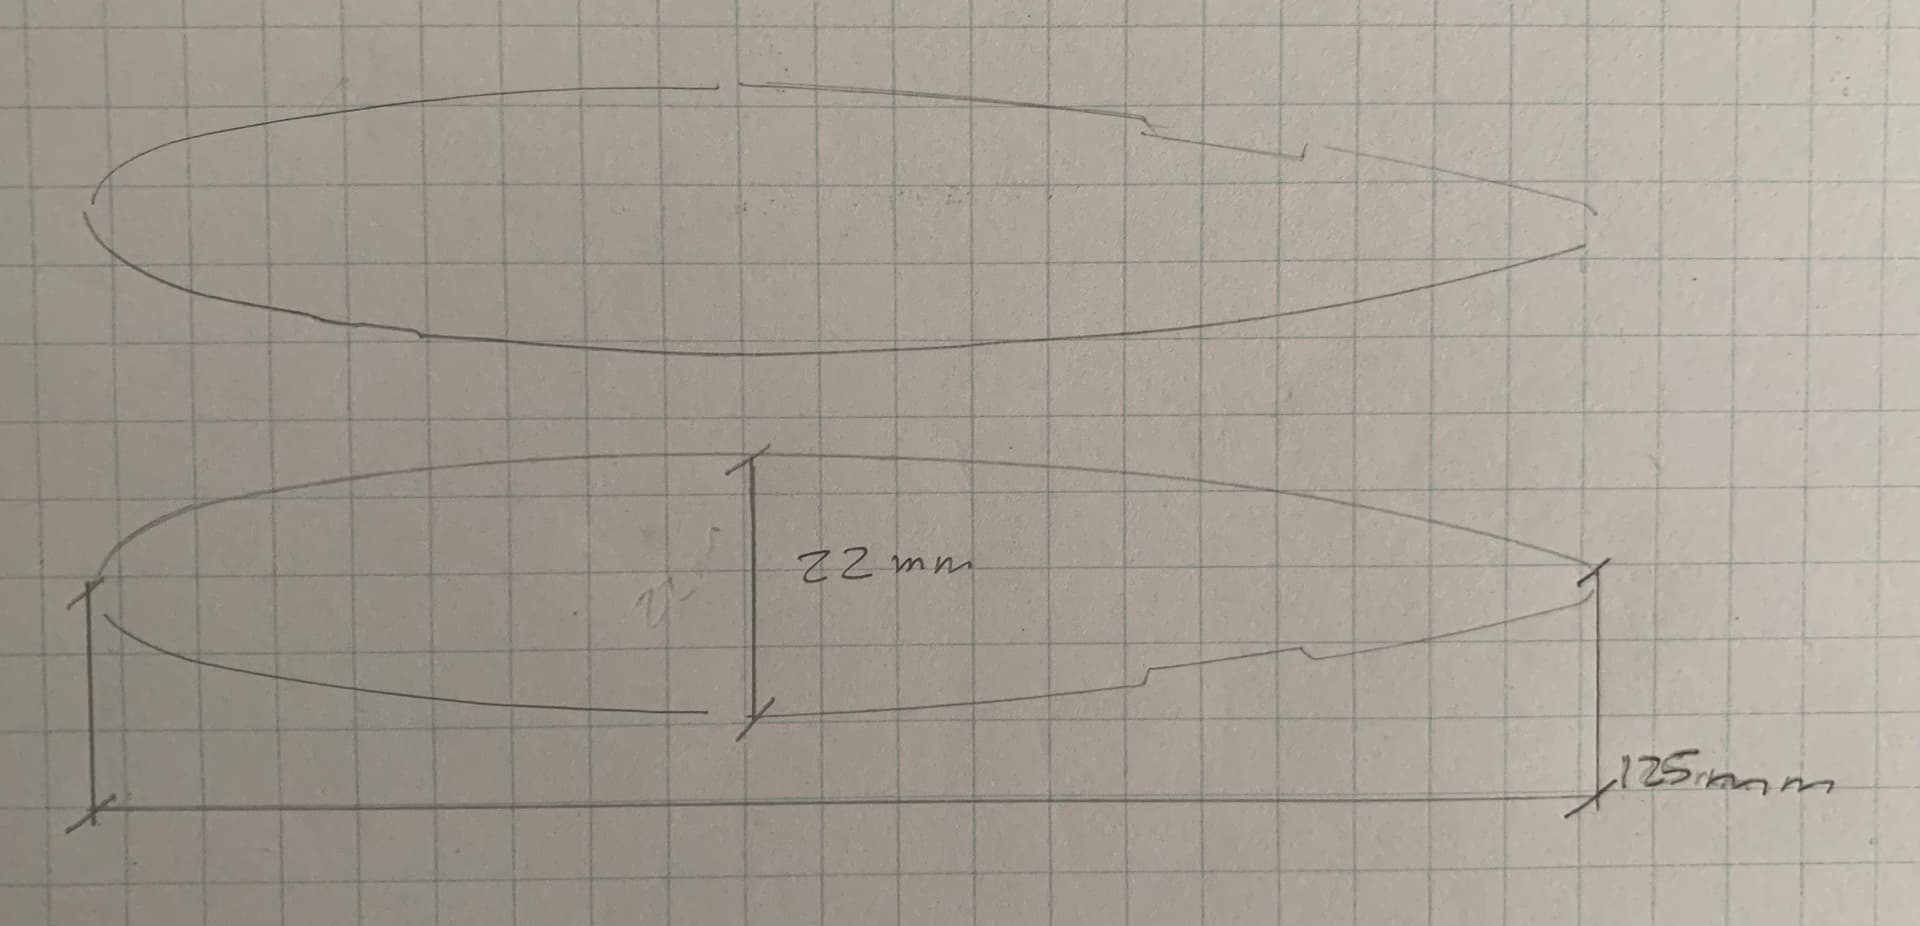
What I need is a scale drawing or some known dimension so I can properly scale the parts for printing.
Edit: I’ll use this

1 Like

LOL, thank you!!

I’ll use the wheelbase, seems to be the same throughout.
That should work as the basic fuselage didn’t change among different models. The above diagrams come from the Sikorski Archives site. It has lots of great info and pics on all the different H-53 models.


To my eye, the downward slope should start before the second window. I couldn’t get the whole sponson in one shot (I didn’t imagine anyone would actually do this) but you get the idea…


The sponsons come in sections if you want to model that.
Or some panel line/rivet detail:

Seven bladed rotor head, which Reskit already offers:
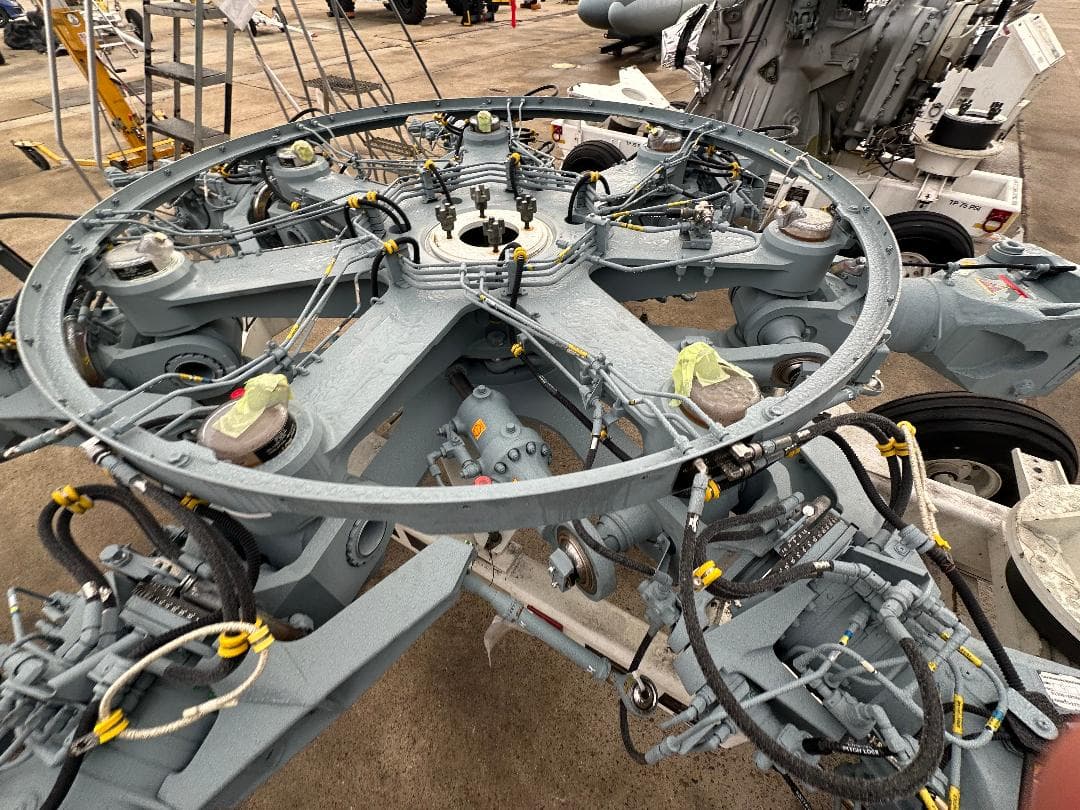

All photos compliments of my walk arounds. I may go to Coronado again soon for another. Have to see how much time I have left. Have enrolled for school again.
2 Likes
That is not exactly true.
Length
A/D nose to tail is 67’2”
E nose to tail is 73’3”
Width
A/D tank to tank 23’11”
E tank to tank 23’9”
Height is the same to the top of the main rotor head but tail height and total tail rotor height is different.
The wheel base width and length are the same.
1 Like
It’s a decent start. I will try to take some measurements this weekend to help dial it in.
Actually, you made my point. I didn’t say overall length. The basic fuselage stayed the same, that is why the wheelbase stayed the same. The E has a different, wider rear horizontal stabilizer and tail, which makes it six inches longer overall and slightly taller at the tail rotor.
Also, the E is two inches narrower due to the differently shaped sponsons. The fuselage is the same width as the earlier versions.
I think length is part of the shape but whatever. Also everything behind the rear wheels is different.


Thank you for the images. If you ever de-spru the bits it would be cool to get some pics on a solid background so I can 3d scan them in.
For the time being I’ll try and learn F3D so I can shape what I have. I may cheat and just physically shape after printing if I have the material.
Maybe we should ask ResKit to see if they’re interested in making a conversion kit.
I’m thinking @HeavyArty was thinking “airframe” but typed “fuselage”. I’m sure the airframe structure is the same throughout.
Unassembled ok or is built better?
Assembled would be the easiest and possibly eliminate potential errors but I certainly don’t want you to build anything prior to actual build time.
Unassembled could also work if there’s a need to have something to build rather than a huge bolt on piece.
Both would be perfect I suppose.