Thank you Rob! 
Fyi I hope to have this kit done by August 2021 so i can enter it into the 2021 IPMS national convention in 'Vegas! So I have 9 months to finish the build.  It will be a tight squeeze time wise but I hope to make it!
1 Like
Awesome work, Ezra! Very nice recovery from all the destruction 
The details are looking great!
Thanks guys! Ive made what i think is pretty good progress, I have completed the fairwater minus painting. After about 23 hours spent building and detailing I think it looks very good! I hope to start painting it in the next 2 or 3 days!


So my next update will be the fairwater fully painted and hopefully decaled!
5 Likes
Have a quick important question to ask anyone if they know, Should I put the 245 decal on the fairwater sides or leave it off? I have a real pic from WW2 of the Cobia with the 245, but I also have photos of it today without the number. What would be more accurate?
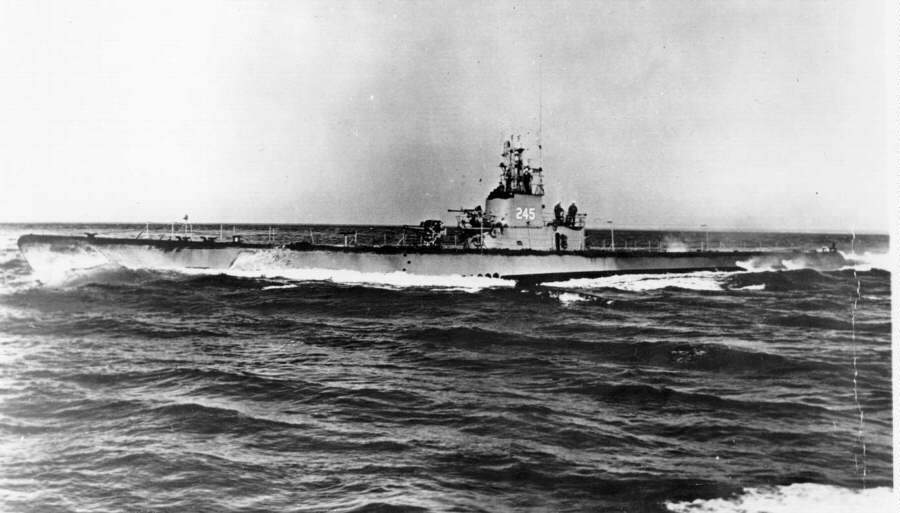
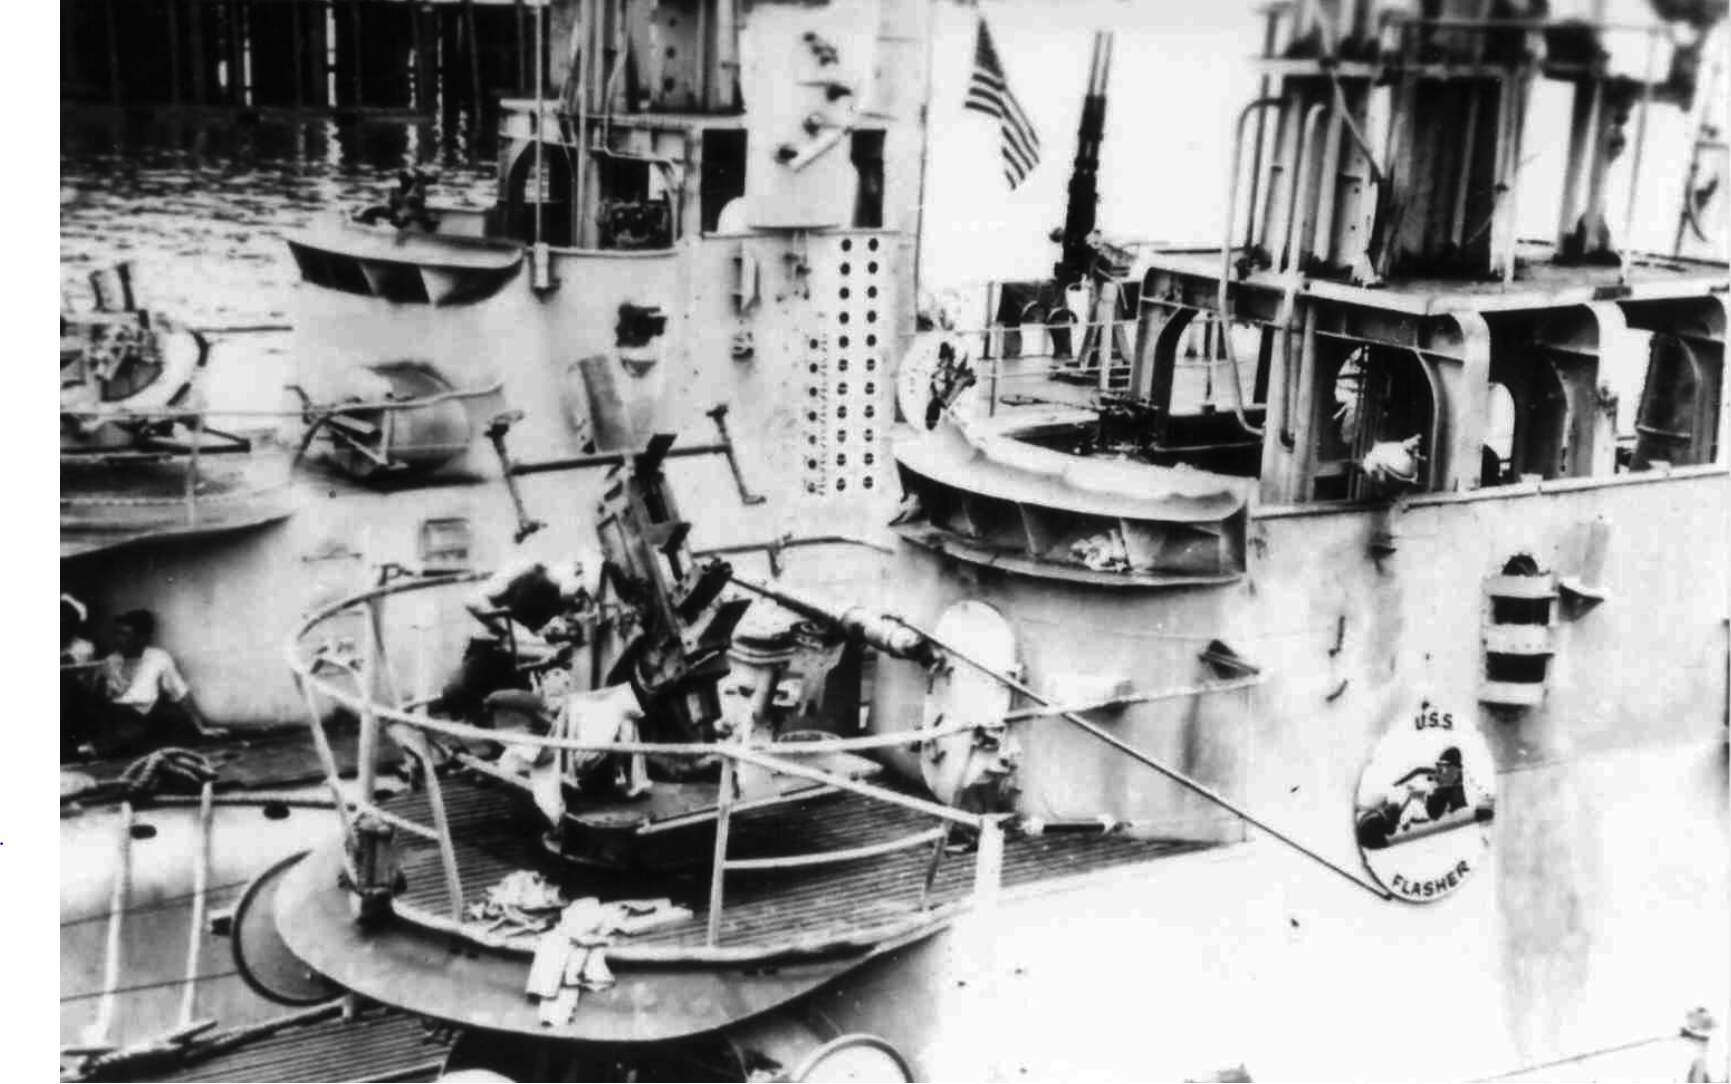
It depends. During sea trials, it would have been painted on the sail as shown. During war patrols it would have been painted out. While in port the number might have been painted on , but more than likely not. Sometimes temporary numbers were painted on that did not even correspond to the boat’s real number. Instead, the boat’s round mascot emblem would have been hung on the side of the sail. They were painted on discs and hung on little hooks or on lanyards.
Post war the numbers were painted on the bow in black, but much smaller. Then later they would appear in white on the sail again and also the bow.
You can see two of the emblems hung on the sails below:
Okay thank you Rob, what i will do is spray a lighter gray then what’s on the sail just where the numbers were so it looks like they were painted out like you said and hope that little difference doesn’t get covered by the following weathering.
Okie so I’ve finished weathering one side of the Cobia so in a couple of hours I will start the next. The weathering was done using oil paints and a enamel light rust wash, the chipping was done using a paintbrush by hand. The only thing left is to apply some tiny speckles of rust on the sides. The wood weathering was done by dry brushing wood colored paints onto the wooden areas.

6 Likes
Ezra,
Looking good, I like the weathering and cannot wait to see how you apply it to the starboard side.
David
Ezra,
great work on your sub!! What you did to the sail is just amazing, and your weathering looks spot on to me. That slightly lighter grey patch is clearly visible, a very nice idea and adds to your build.
Looking really good!!
Cheers
Jan
Thanks guys! I think once i weather the other side a little more I will stop work on the fairwater till I have painted and start weathering on the hull. (A month at least…) All thats really left on the hull is to rivet the whole hull (Im currently about 30% done) As well as drill out some more holes on the stern. Ive given up the idea of drilling out all the deck holes because you wont really be able to tell in the end.
Coming along nicely I see!
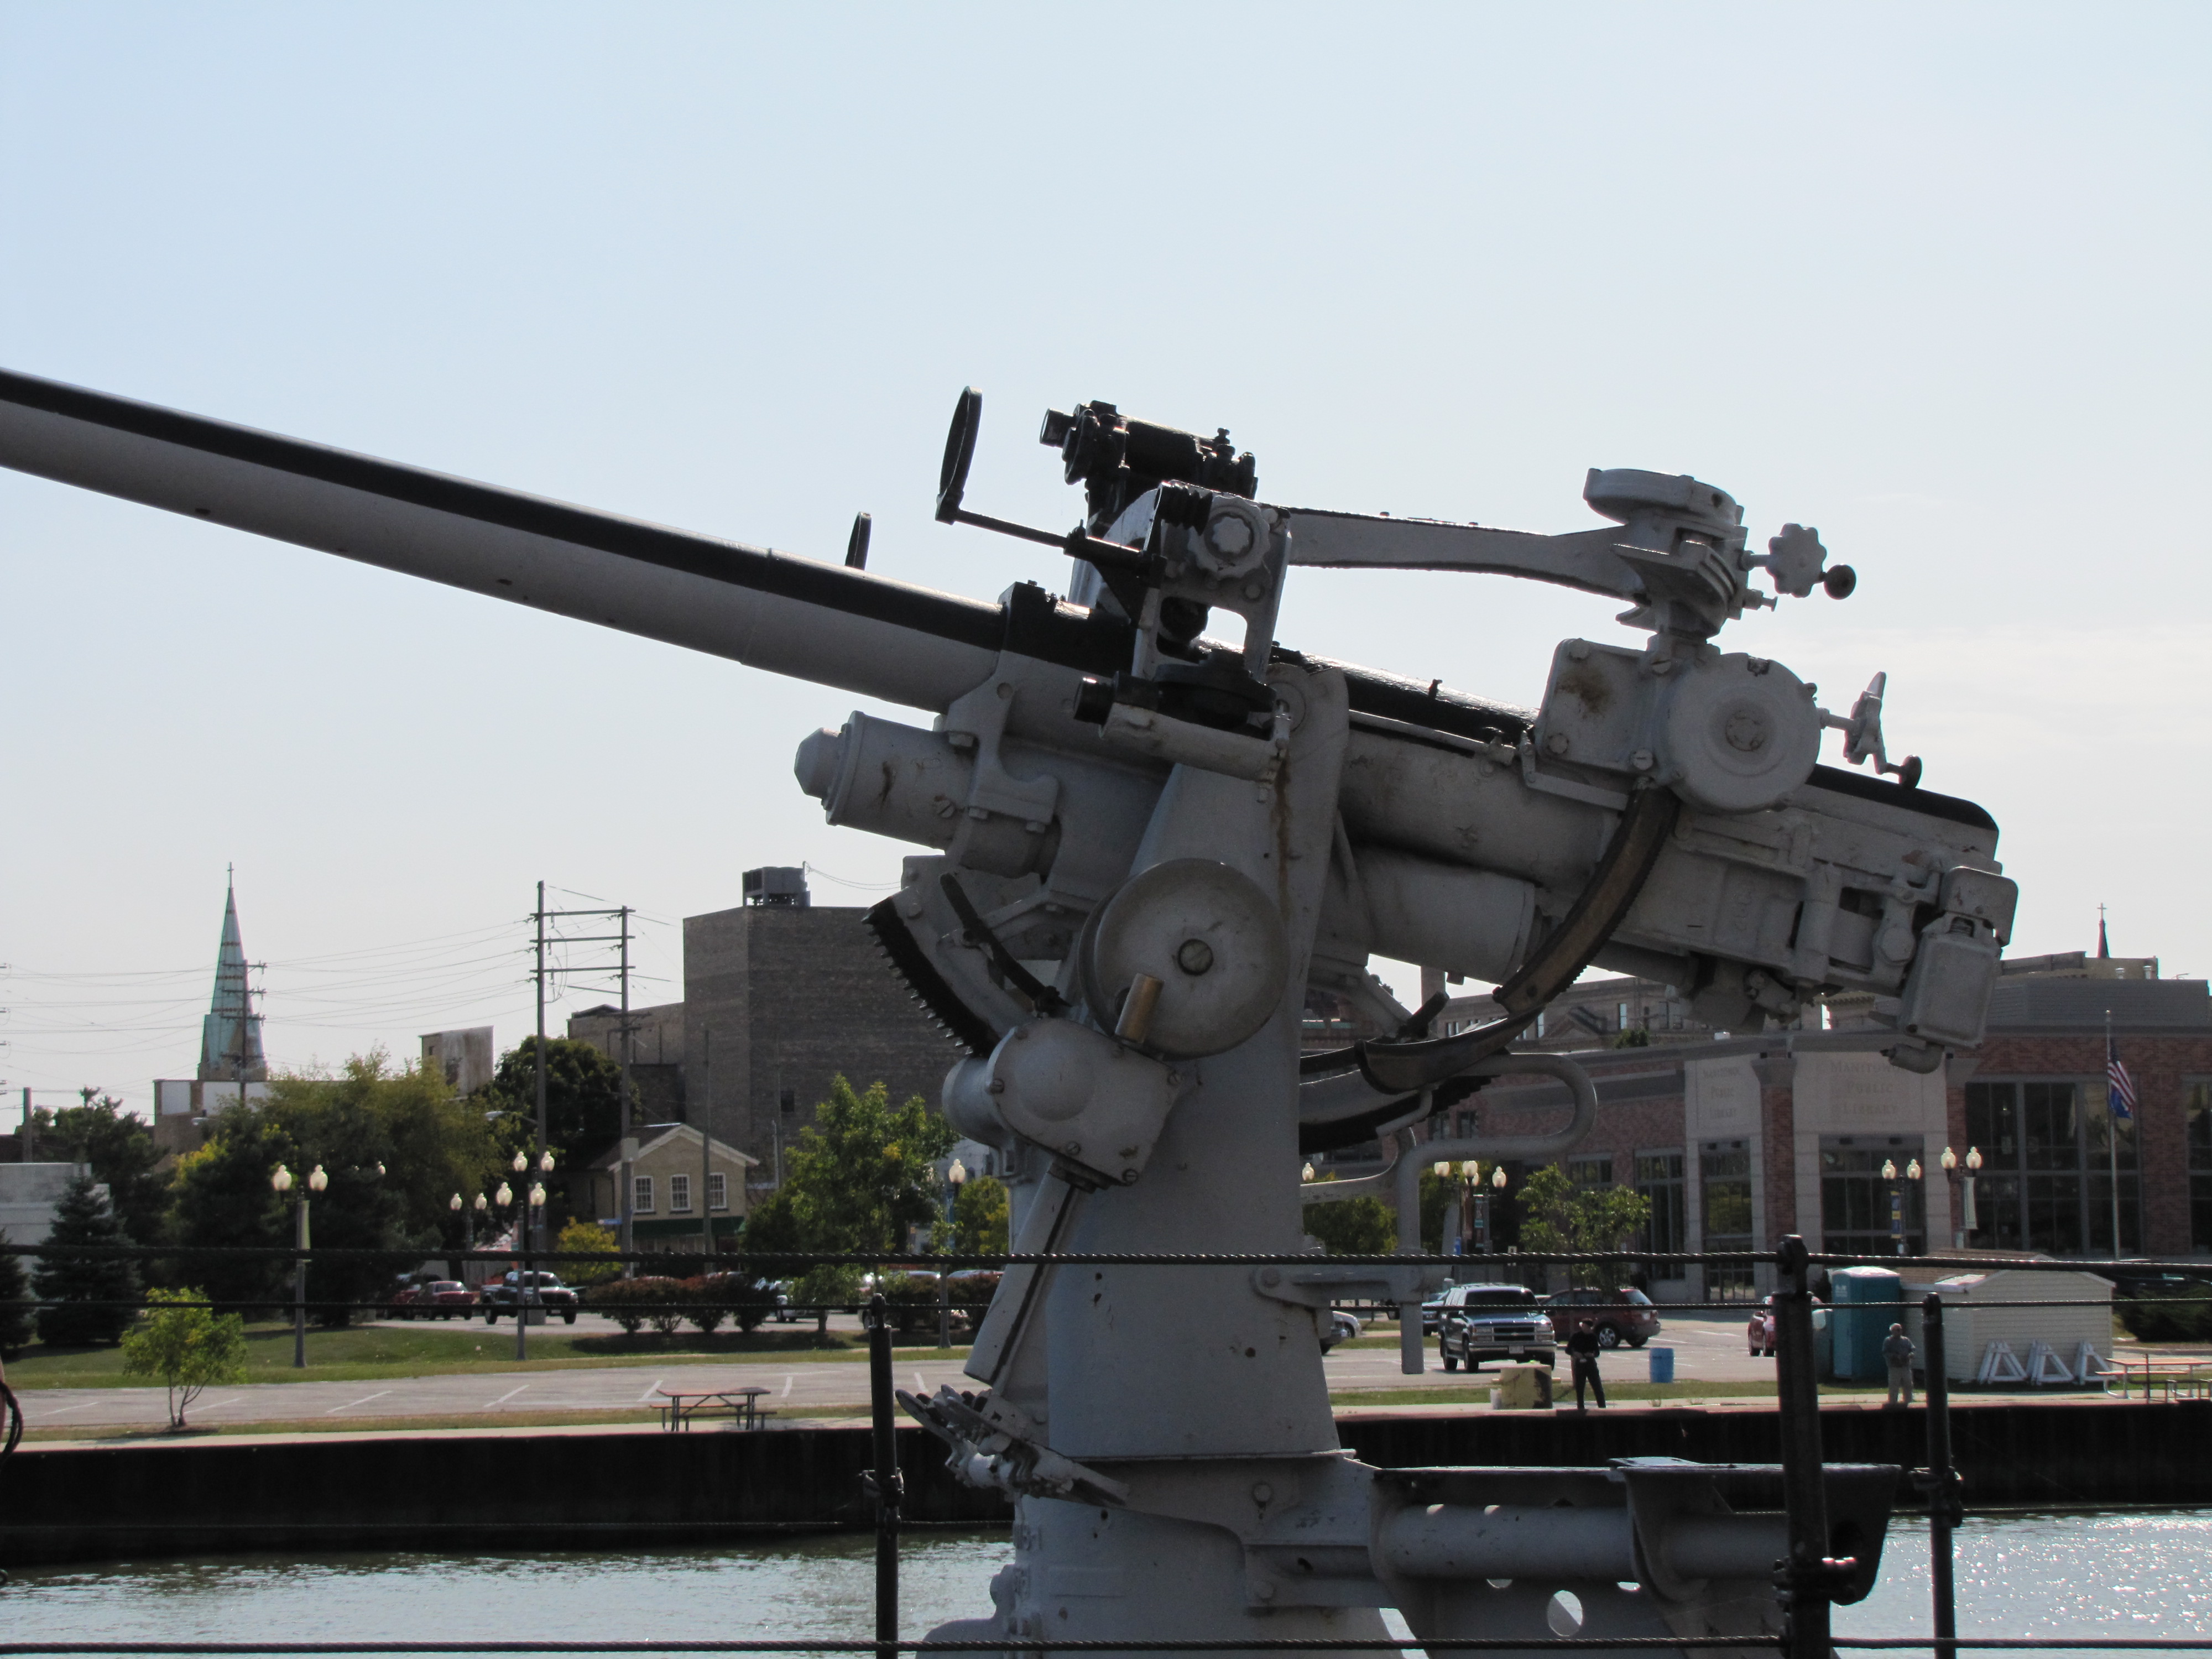
Thanks everyone! Okay so my nautilus models Mk. 19 3" deck gun arrived today, Im fairly happy with it. It makes a good base for the gun but it needs alot of work because the resin is either bent or broken or covered if flash.


Also a fair amount of scratch building is needed to replicate handles and what not.
I also have some great photos of the mk.19 on the Cobia I’ll post later.
3 Likes
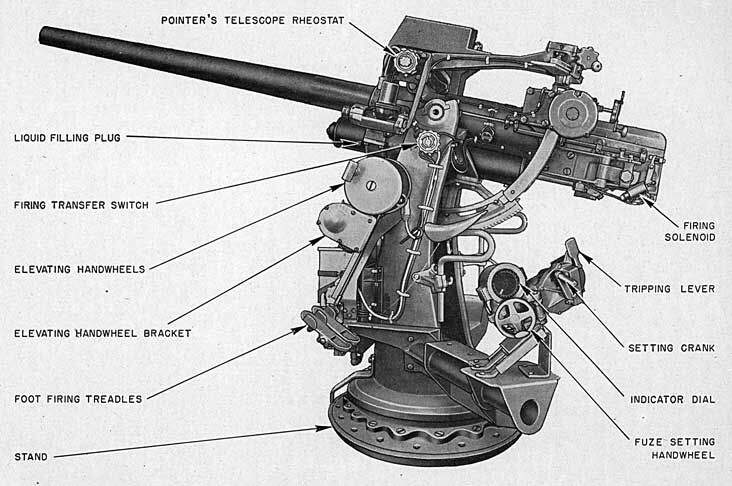
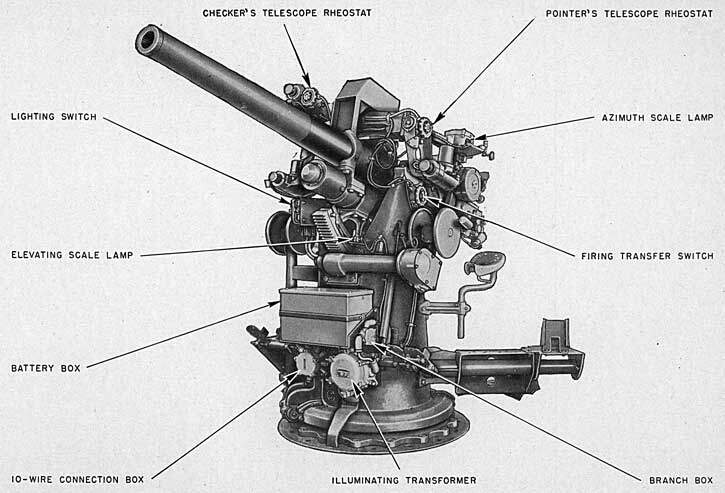
So… I bought the wrong deck gun… i bought a Mk.19 but I really should’ve bought a Mk.20 as in those drawings from my last post. So Its scratch building time! The first thing I did was remove every molded on…detail… more like shapeless blobs, anyway so after doing that I applied some primer and sanded some seams then I started cutting and replacing and adding parts to the gun. Luckily I still had the 4" gun from the kit so I was able to salvage a bunch of detail parts from it as well as 18bravo is kindly donating some PE as well. So with that I think I can build a fairly accurate Mk.20 3" deck gun.


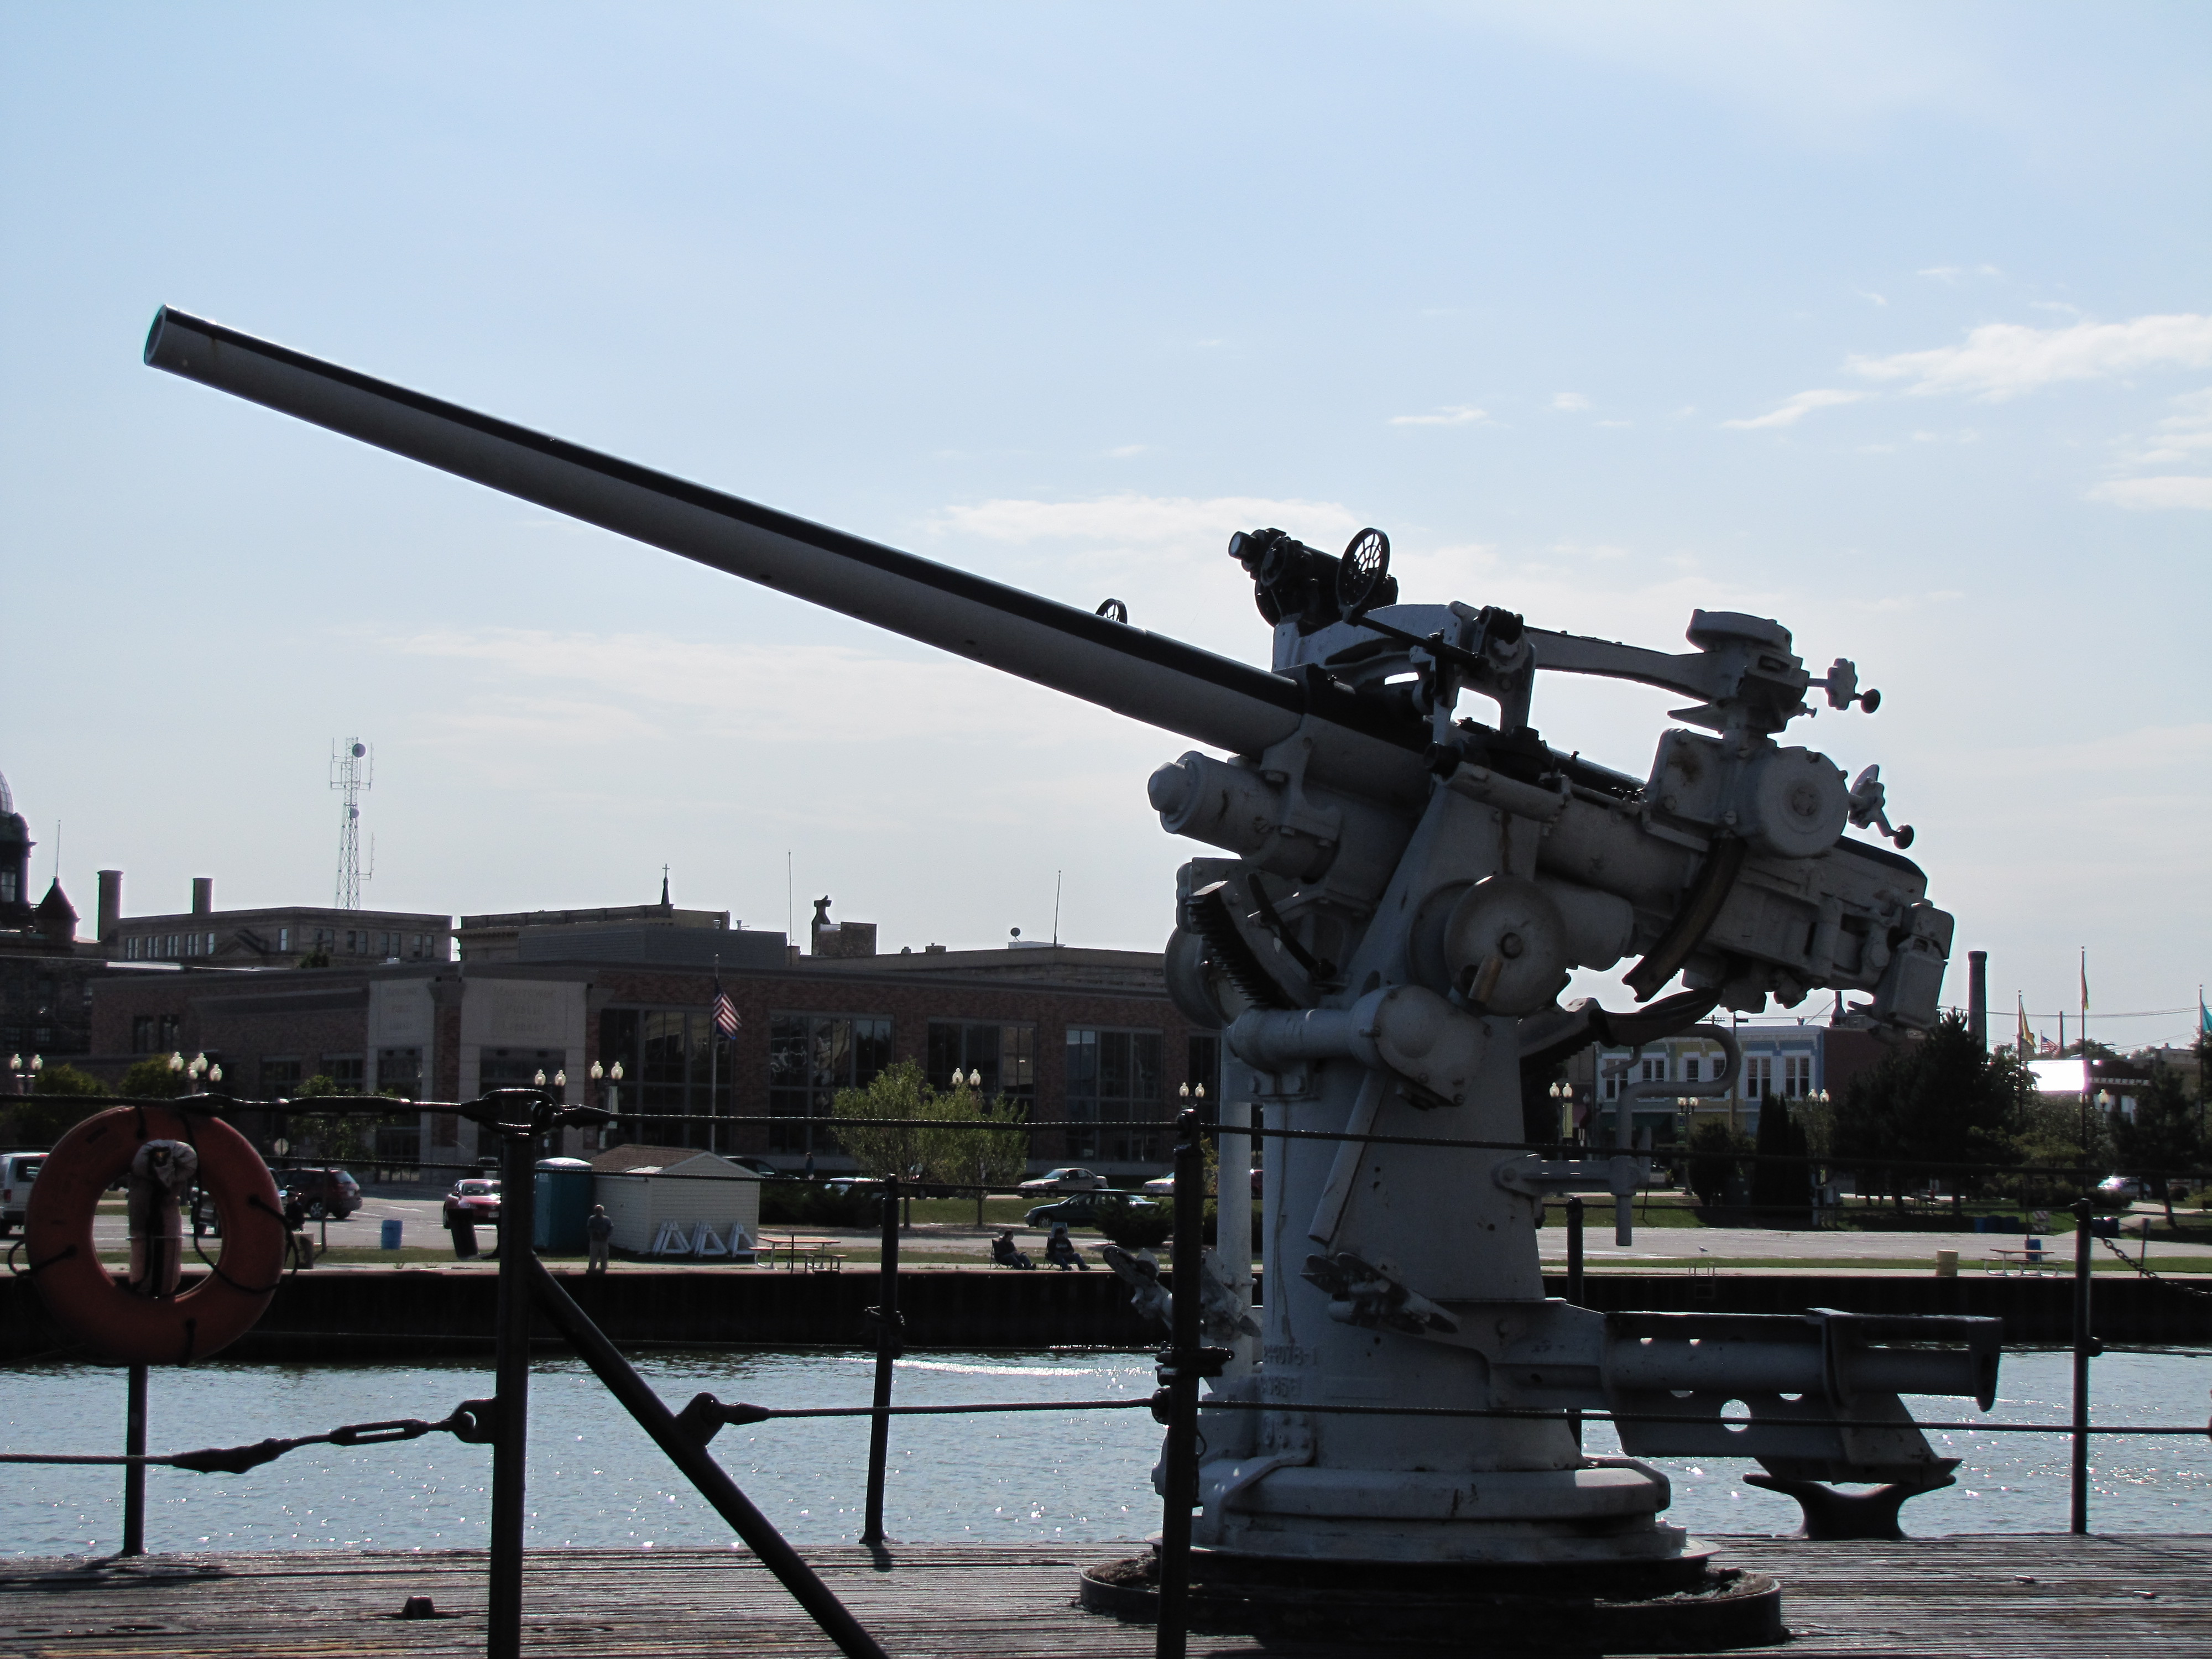
The Gun on the Cobia
3 Likes
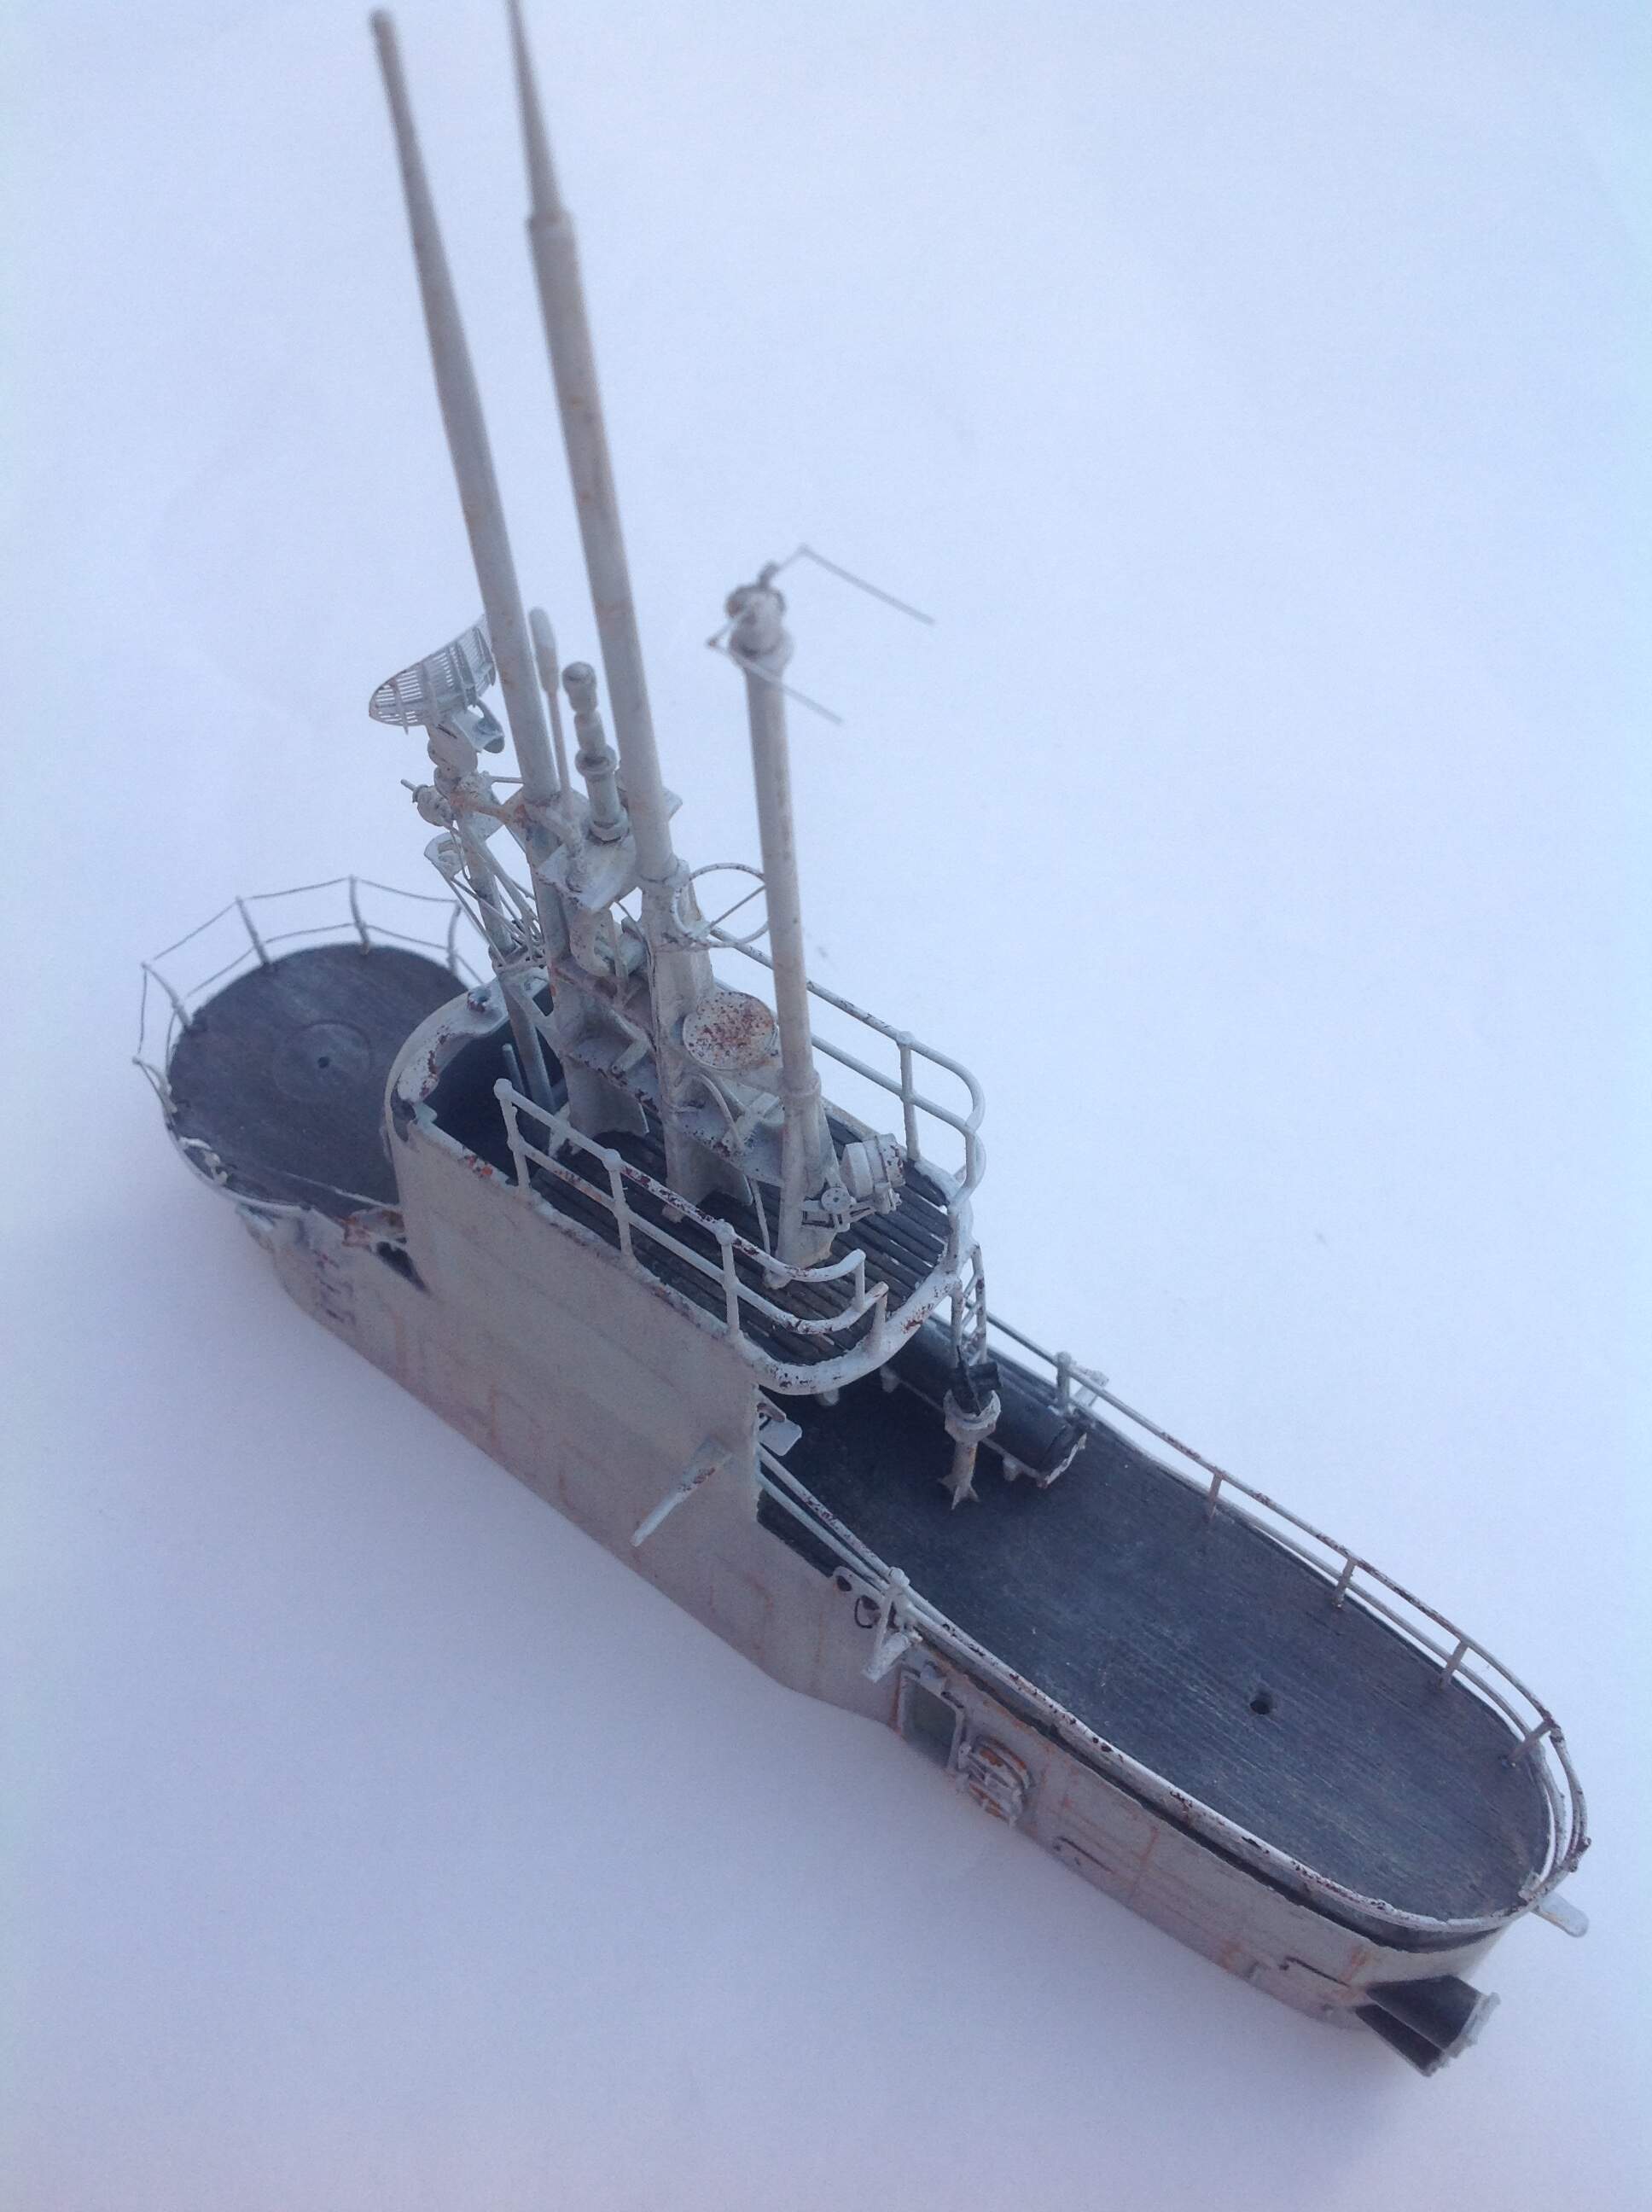
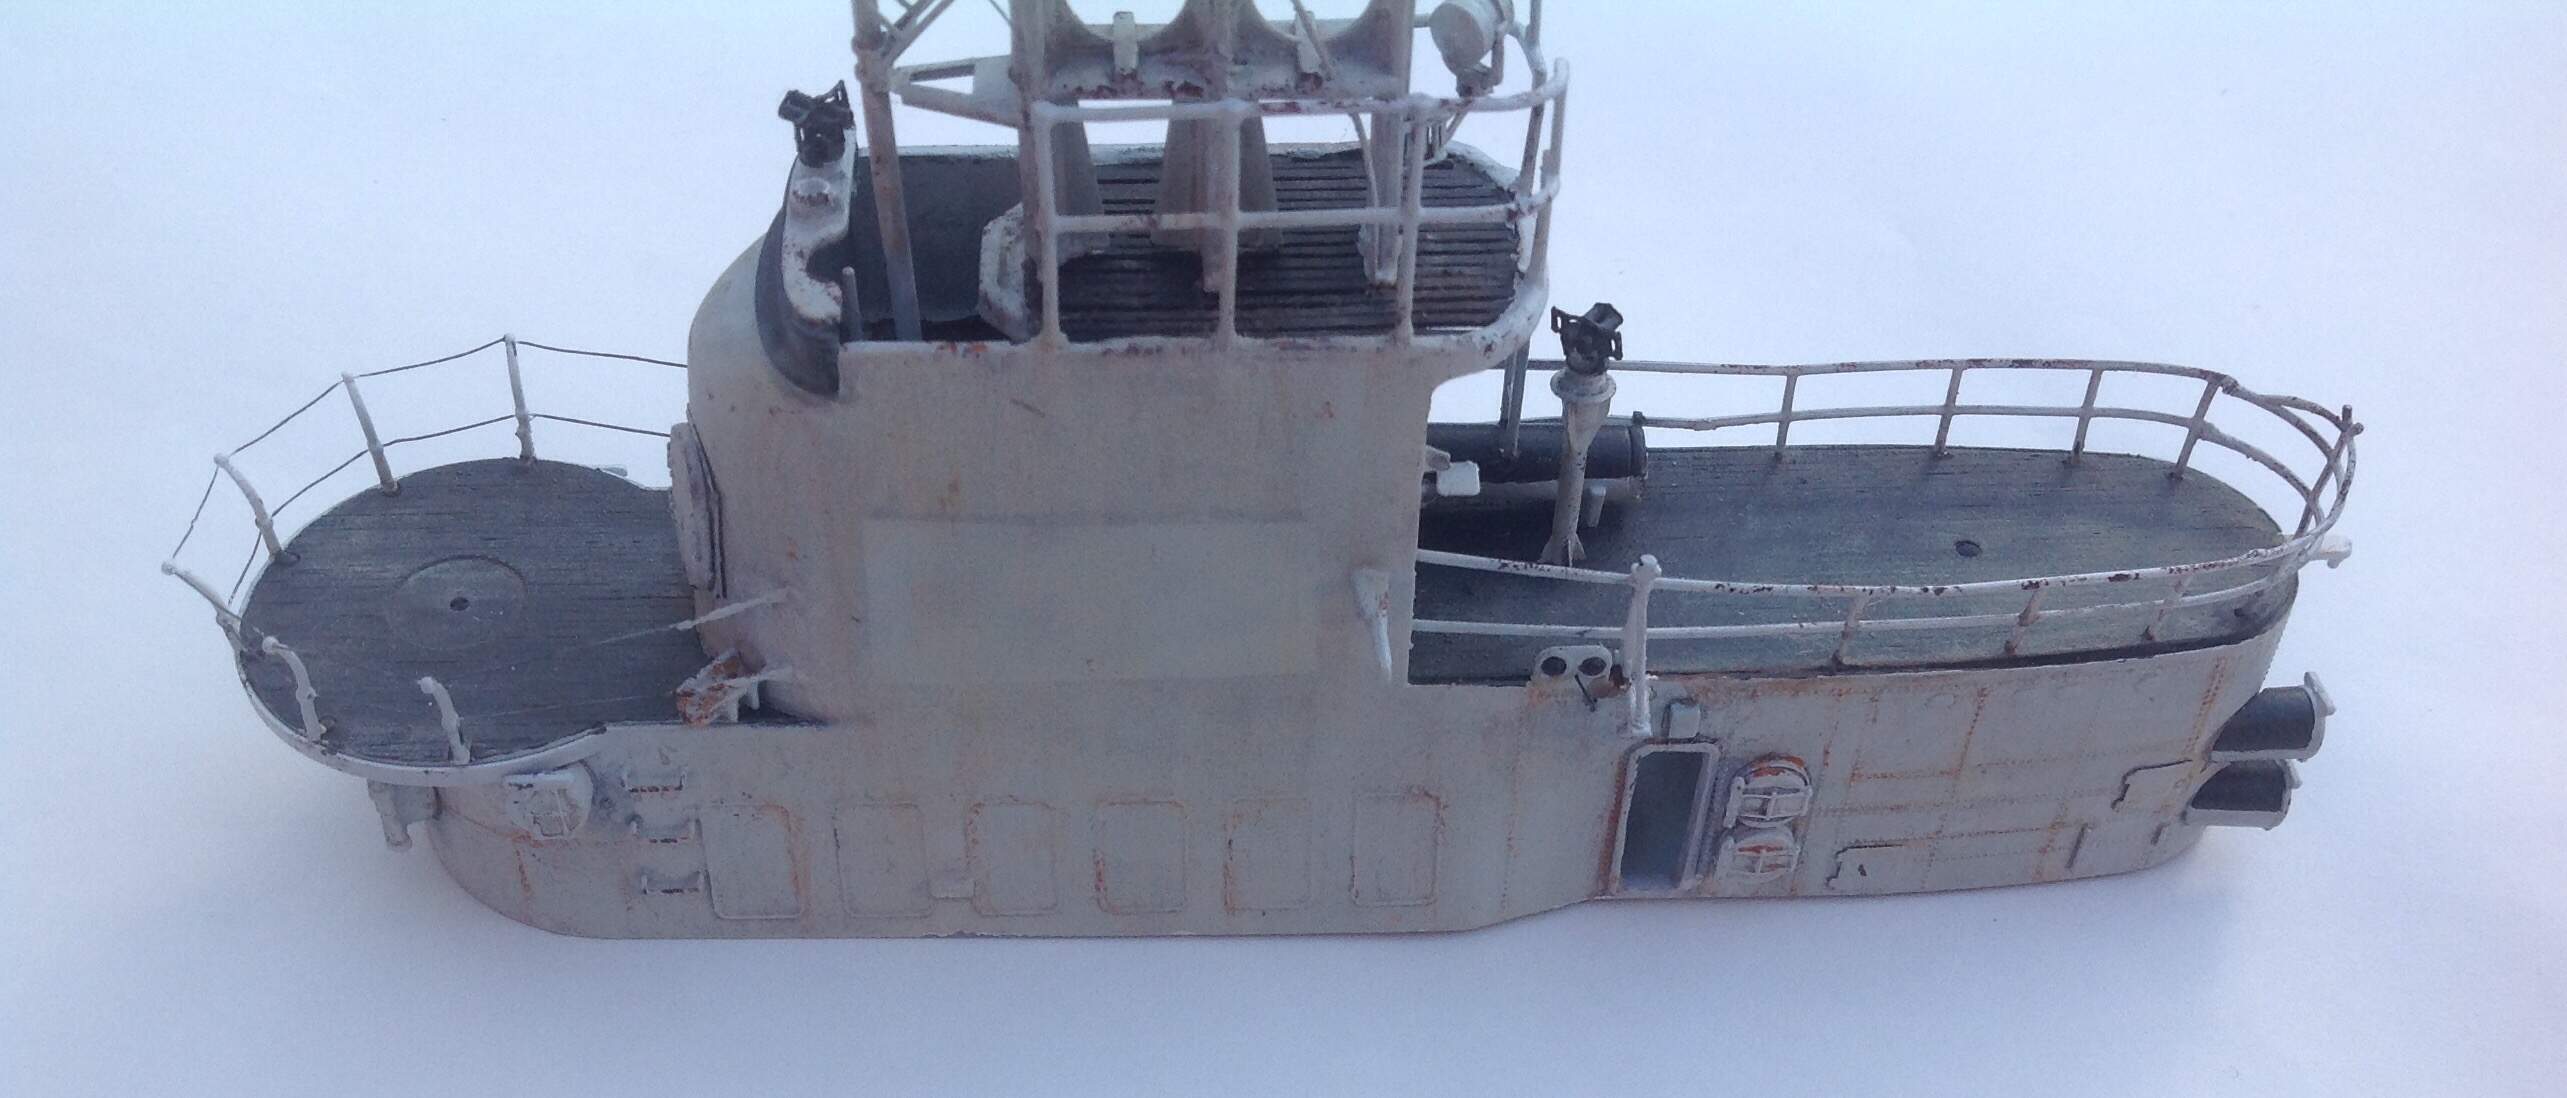
A bit of a rework done on the fairwater. I wasn’t happy with how the repainted area looked, I felt like it was a little to stark so I went and started airbrushing very thin layers of the base gray over the fairwater sides. Then I did some weathering over it and I’m very happy with the results. You can just barely see the repainted area which was my whole idea. Im also happy with how the weathering looks on the wood decks.


2 Likes
Ezra, Its looking really good!
1 Like
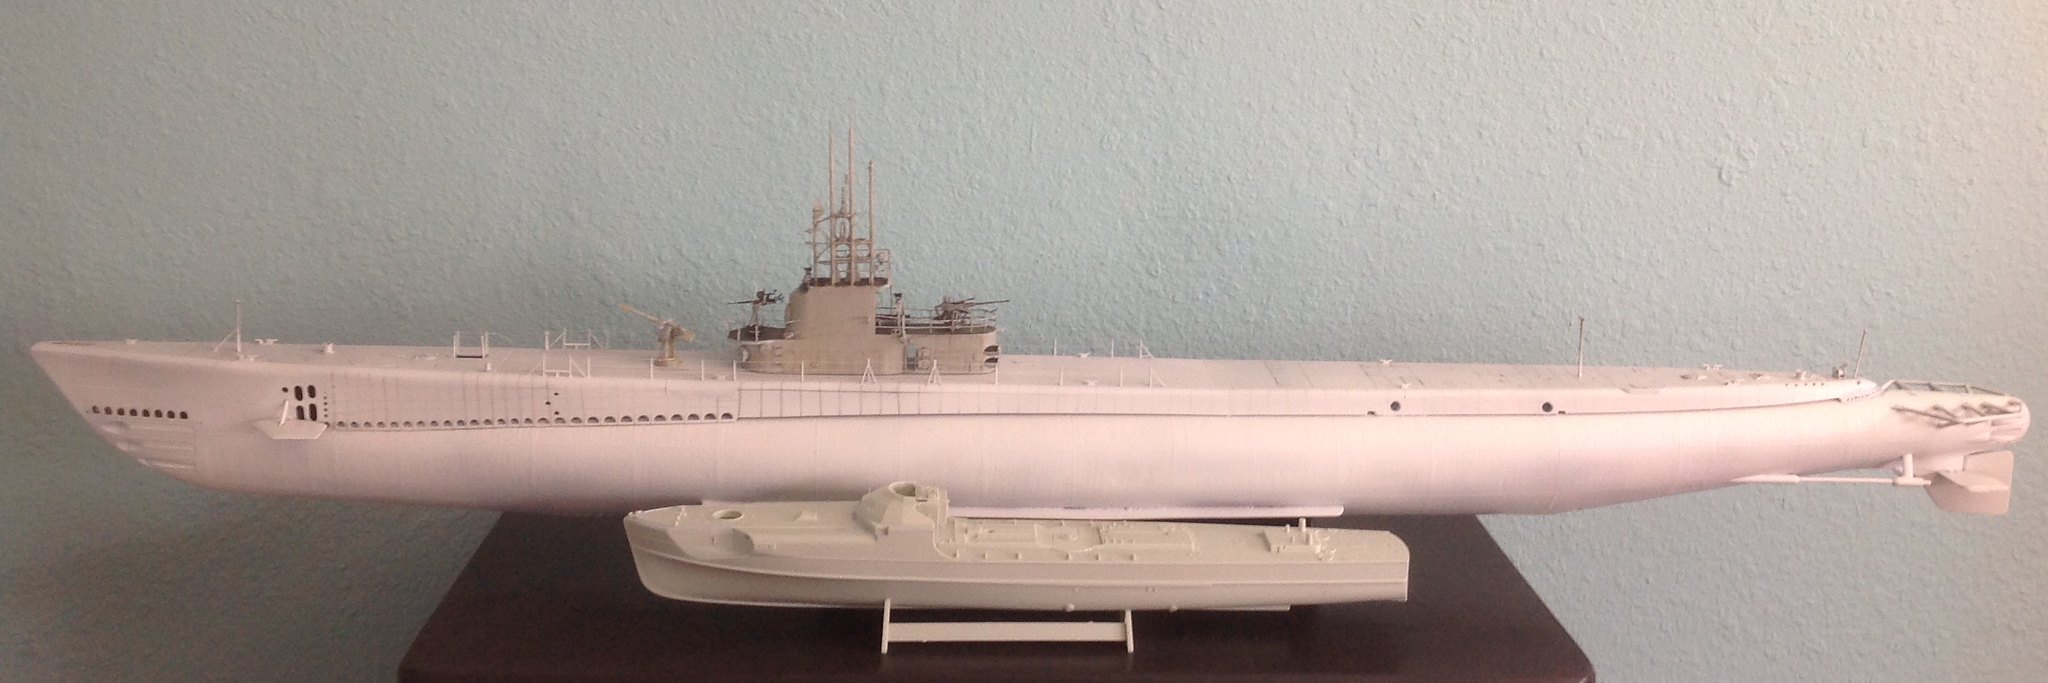
A quick update/ size comparison with my 1/72 S-100
2 Likes
Quick update, no photos this time but I have about 70% of the right side of the Cobia riveted. I just have the front to do then the other side then drill some more holes then… paint!!!
1 Like
Ok some progress has been made, all the rivets on the right side are done! The micromark rivets I used look pretty good although they were very fragile and thin. The rivets on the rear dont really show up because I shot some primer over them. In a couple days I hope to get to the next side! ( In the meantime I may do some small oil canning in between each rivet row to have them stand out a bit more.)


6 Likes