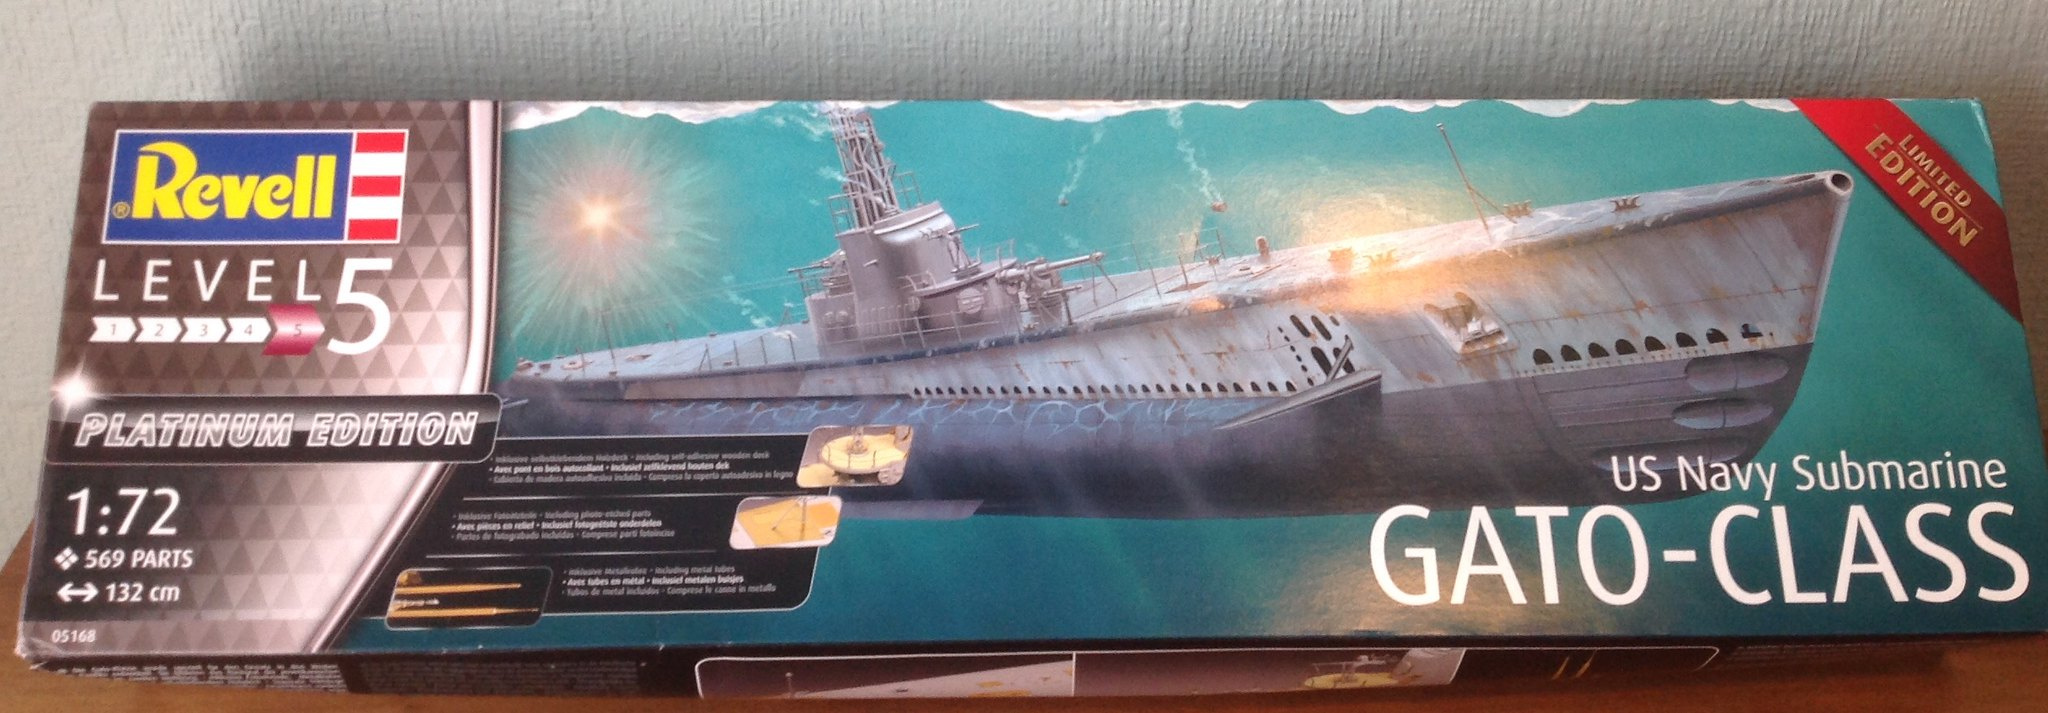
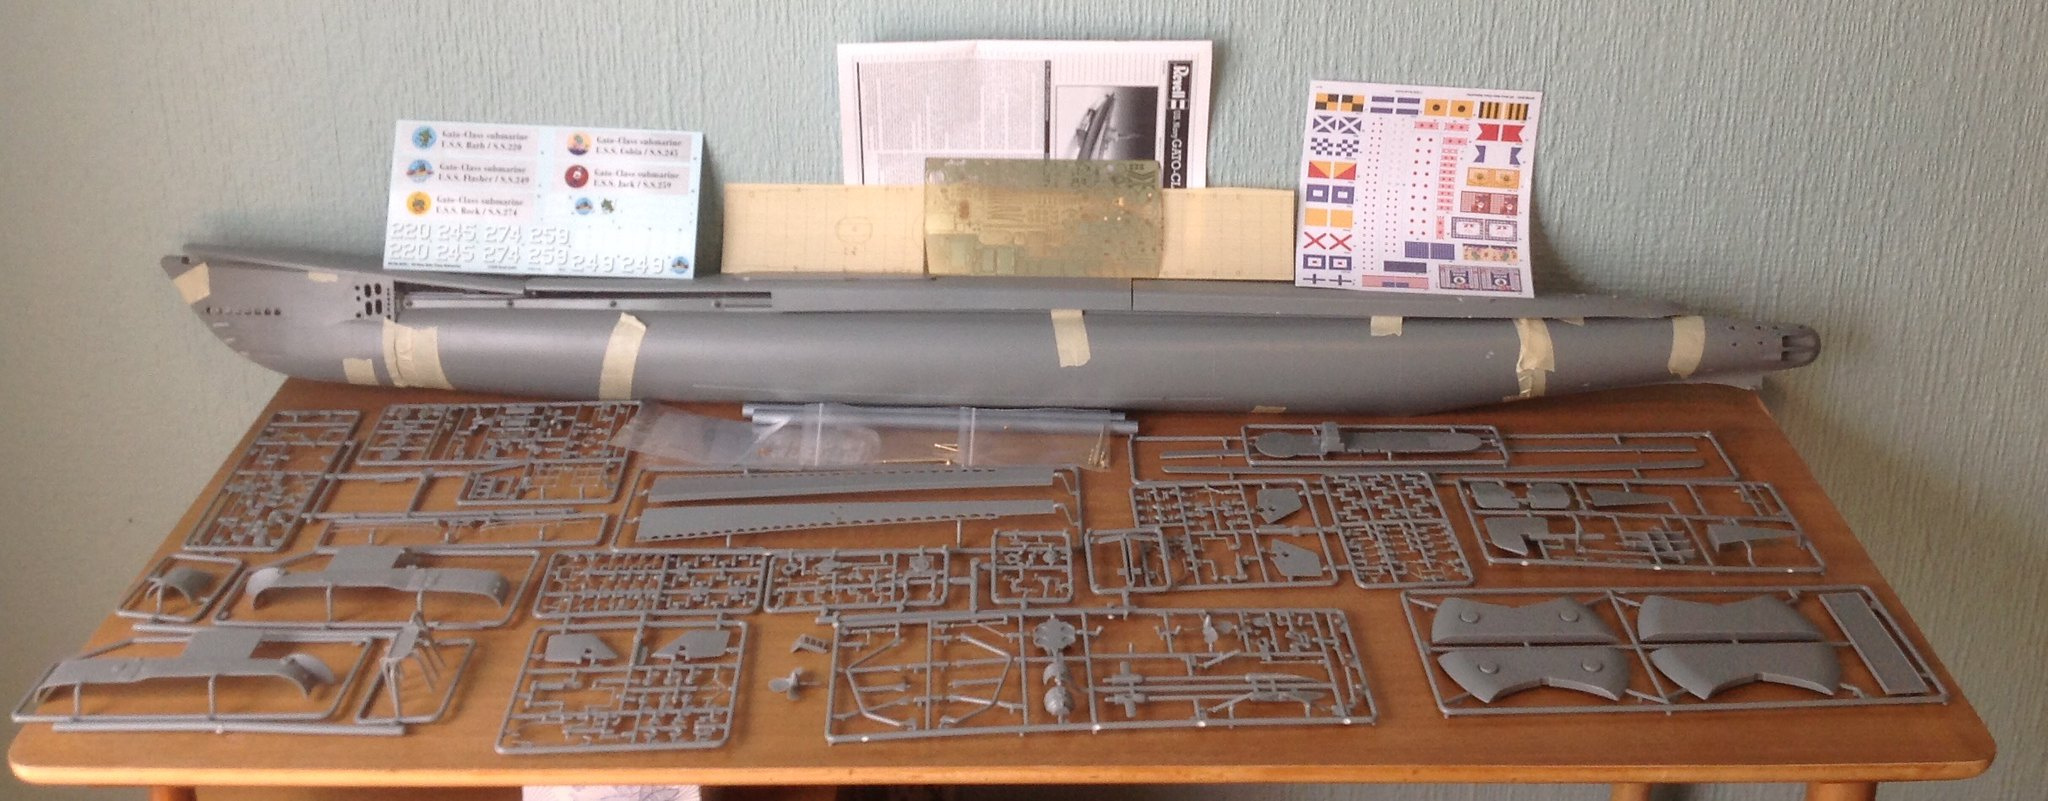
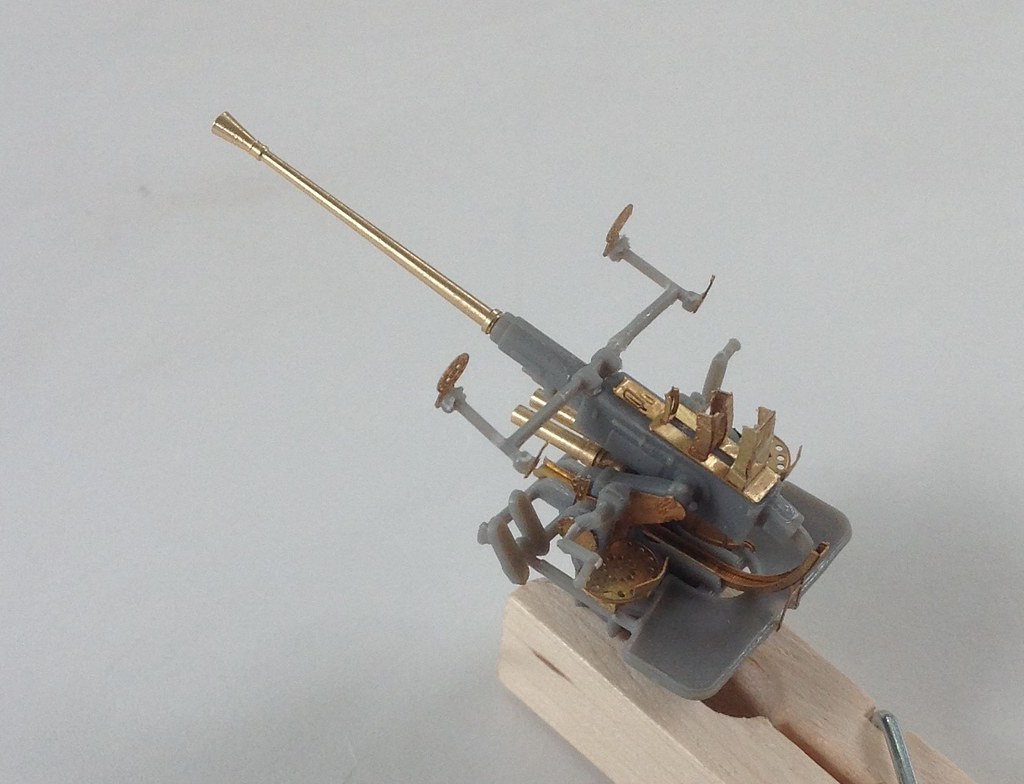
Okay,Here we go! The Revell 1/72 Gato is a kit i’ve wanted to build for years and now I’m finally build it! I’m not building it out of the box, I’m going to rivet and oilcan the whole ship as well as drilling out all the flood vents on the bottom as well as PE and a wood deck. My only problem with it is so far is i’ll need a bigger workbench…  The parts are very nicely molded with only a little flash, but the wood deck and PE parts really bring it up to the next level. I think ill start the the build with the 40mm Bofor.
5 Likes
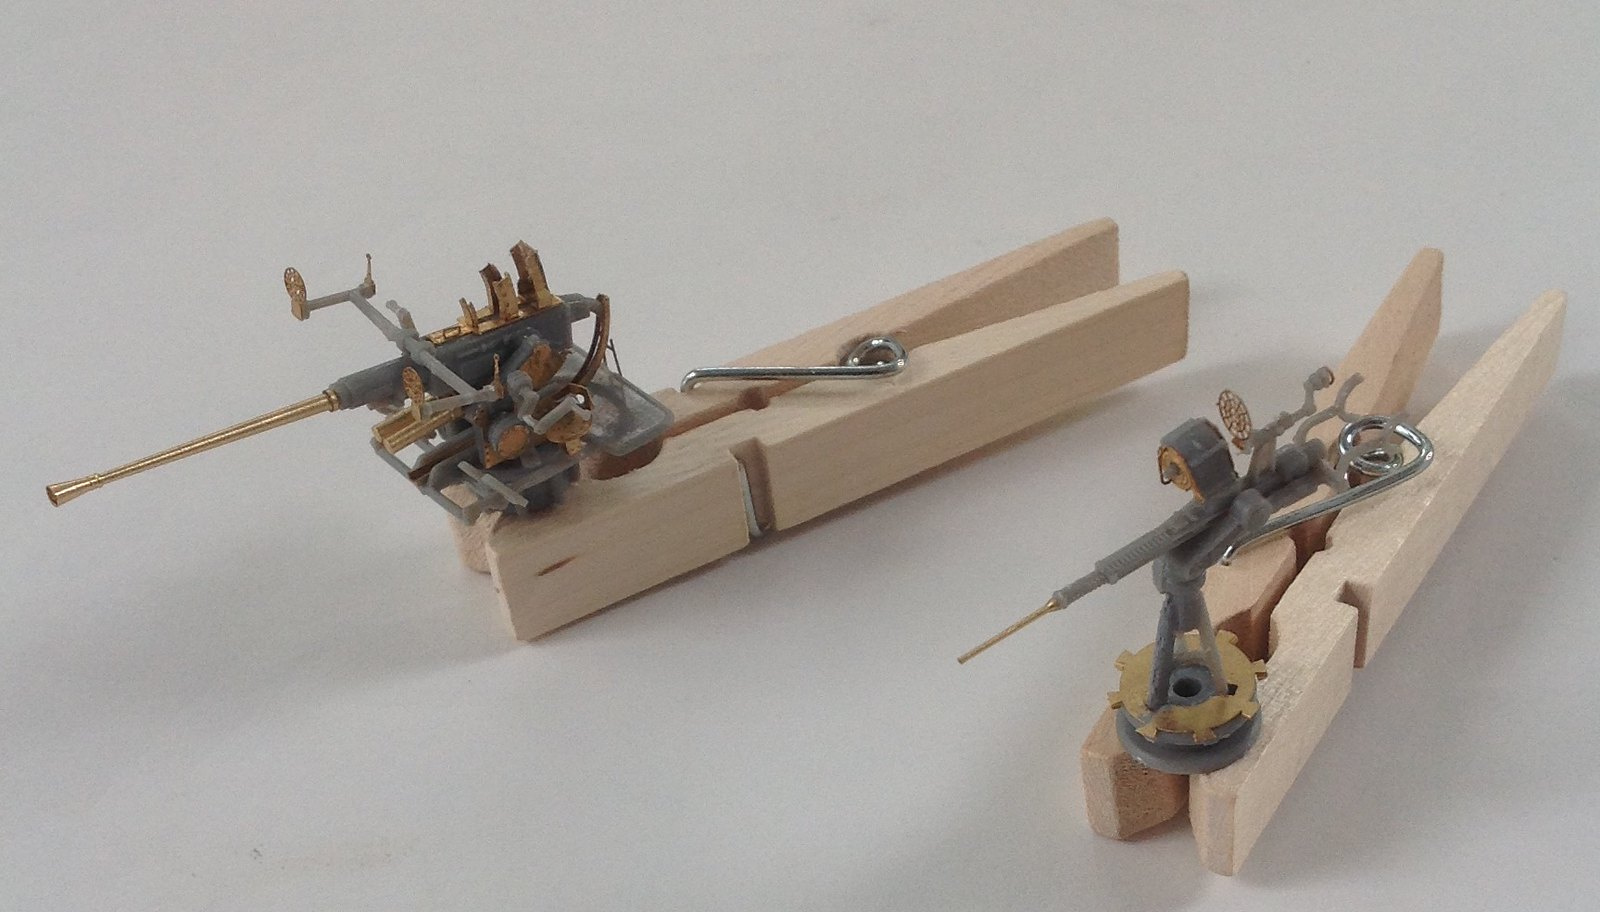
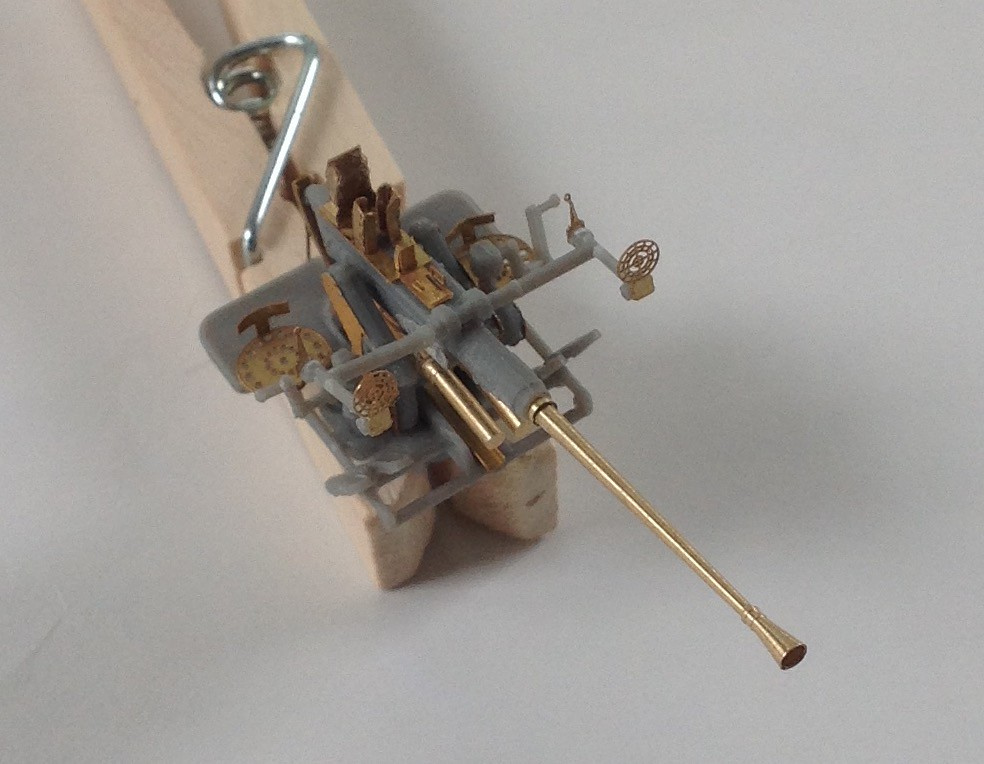
First update! the Bofor and orly are built and waiting paint! The kit parts were passable but with the PE they look a treat! !


5 Likes
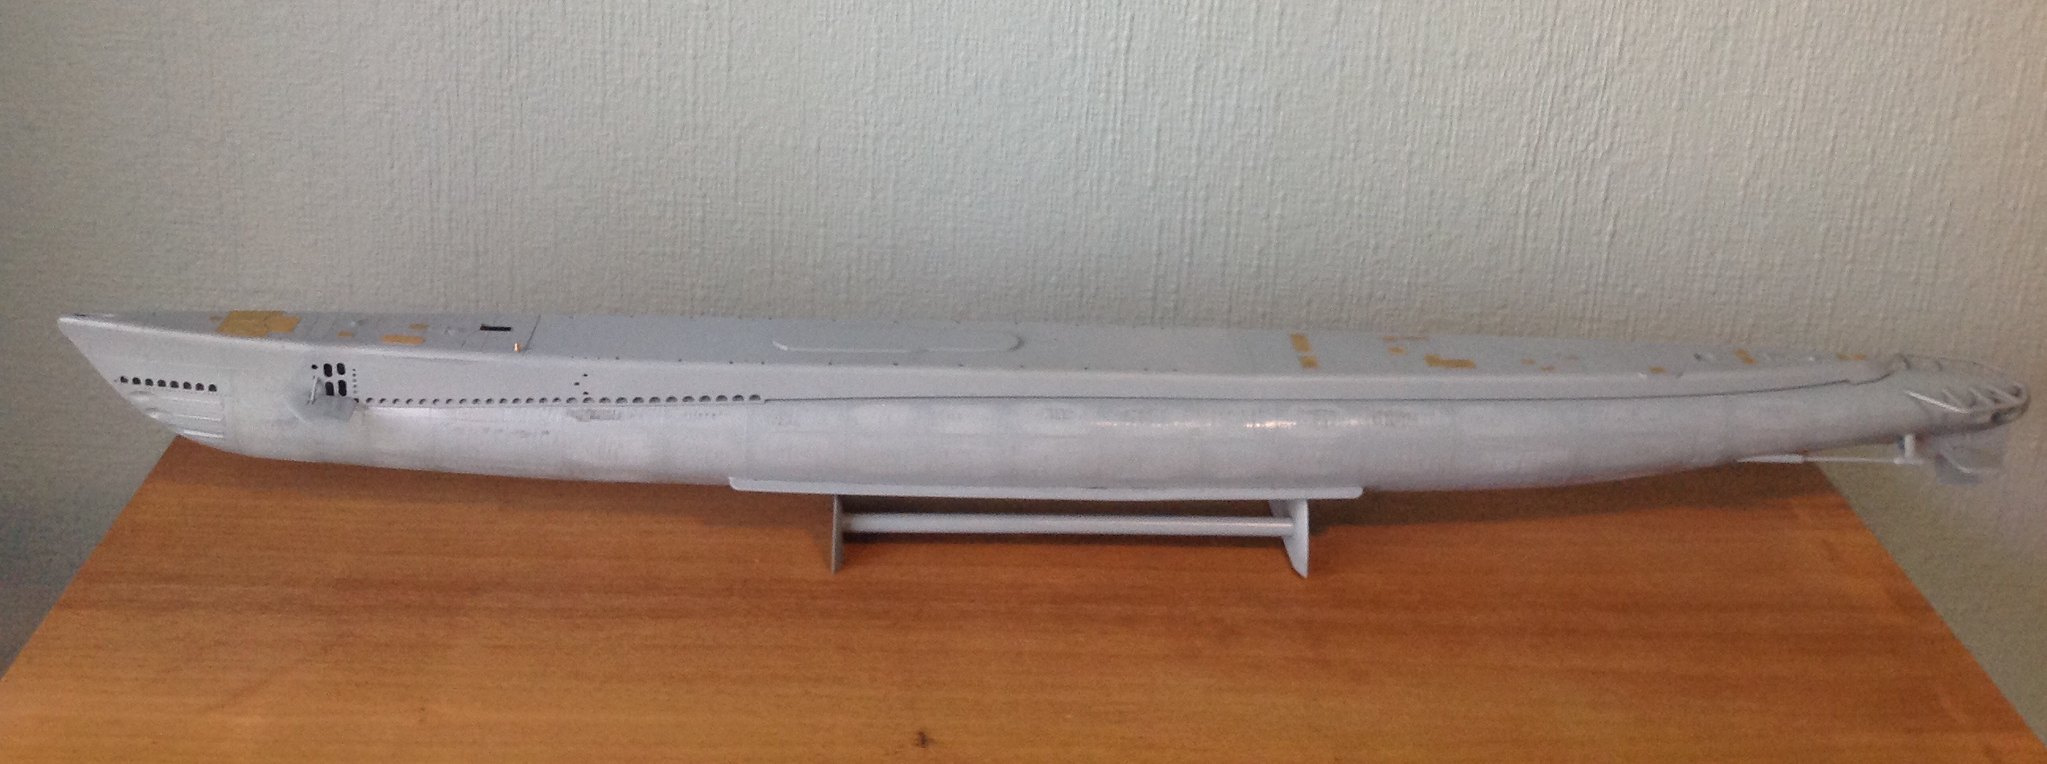
Here we go! The hull is fully built, sanded and primed! Next I will start drilling out the flood vents and applying the deck PE.
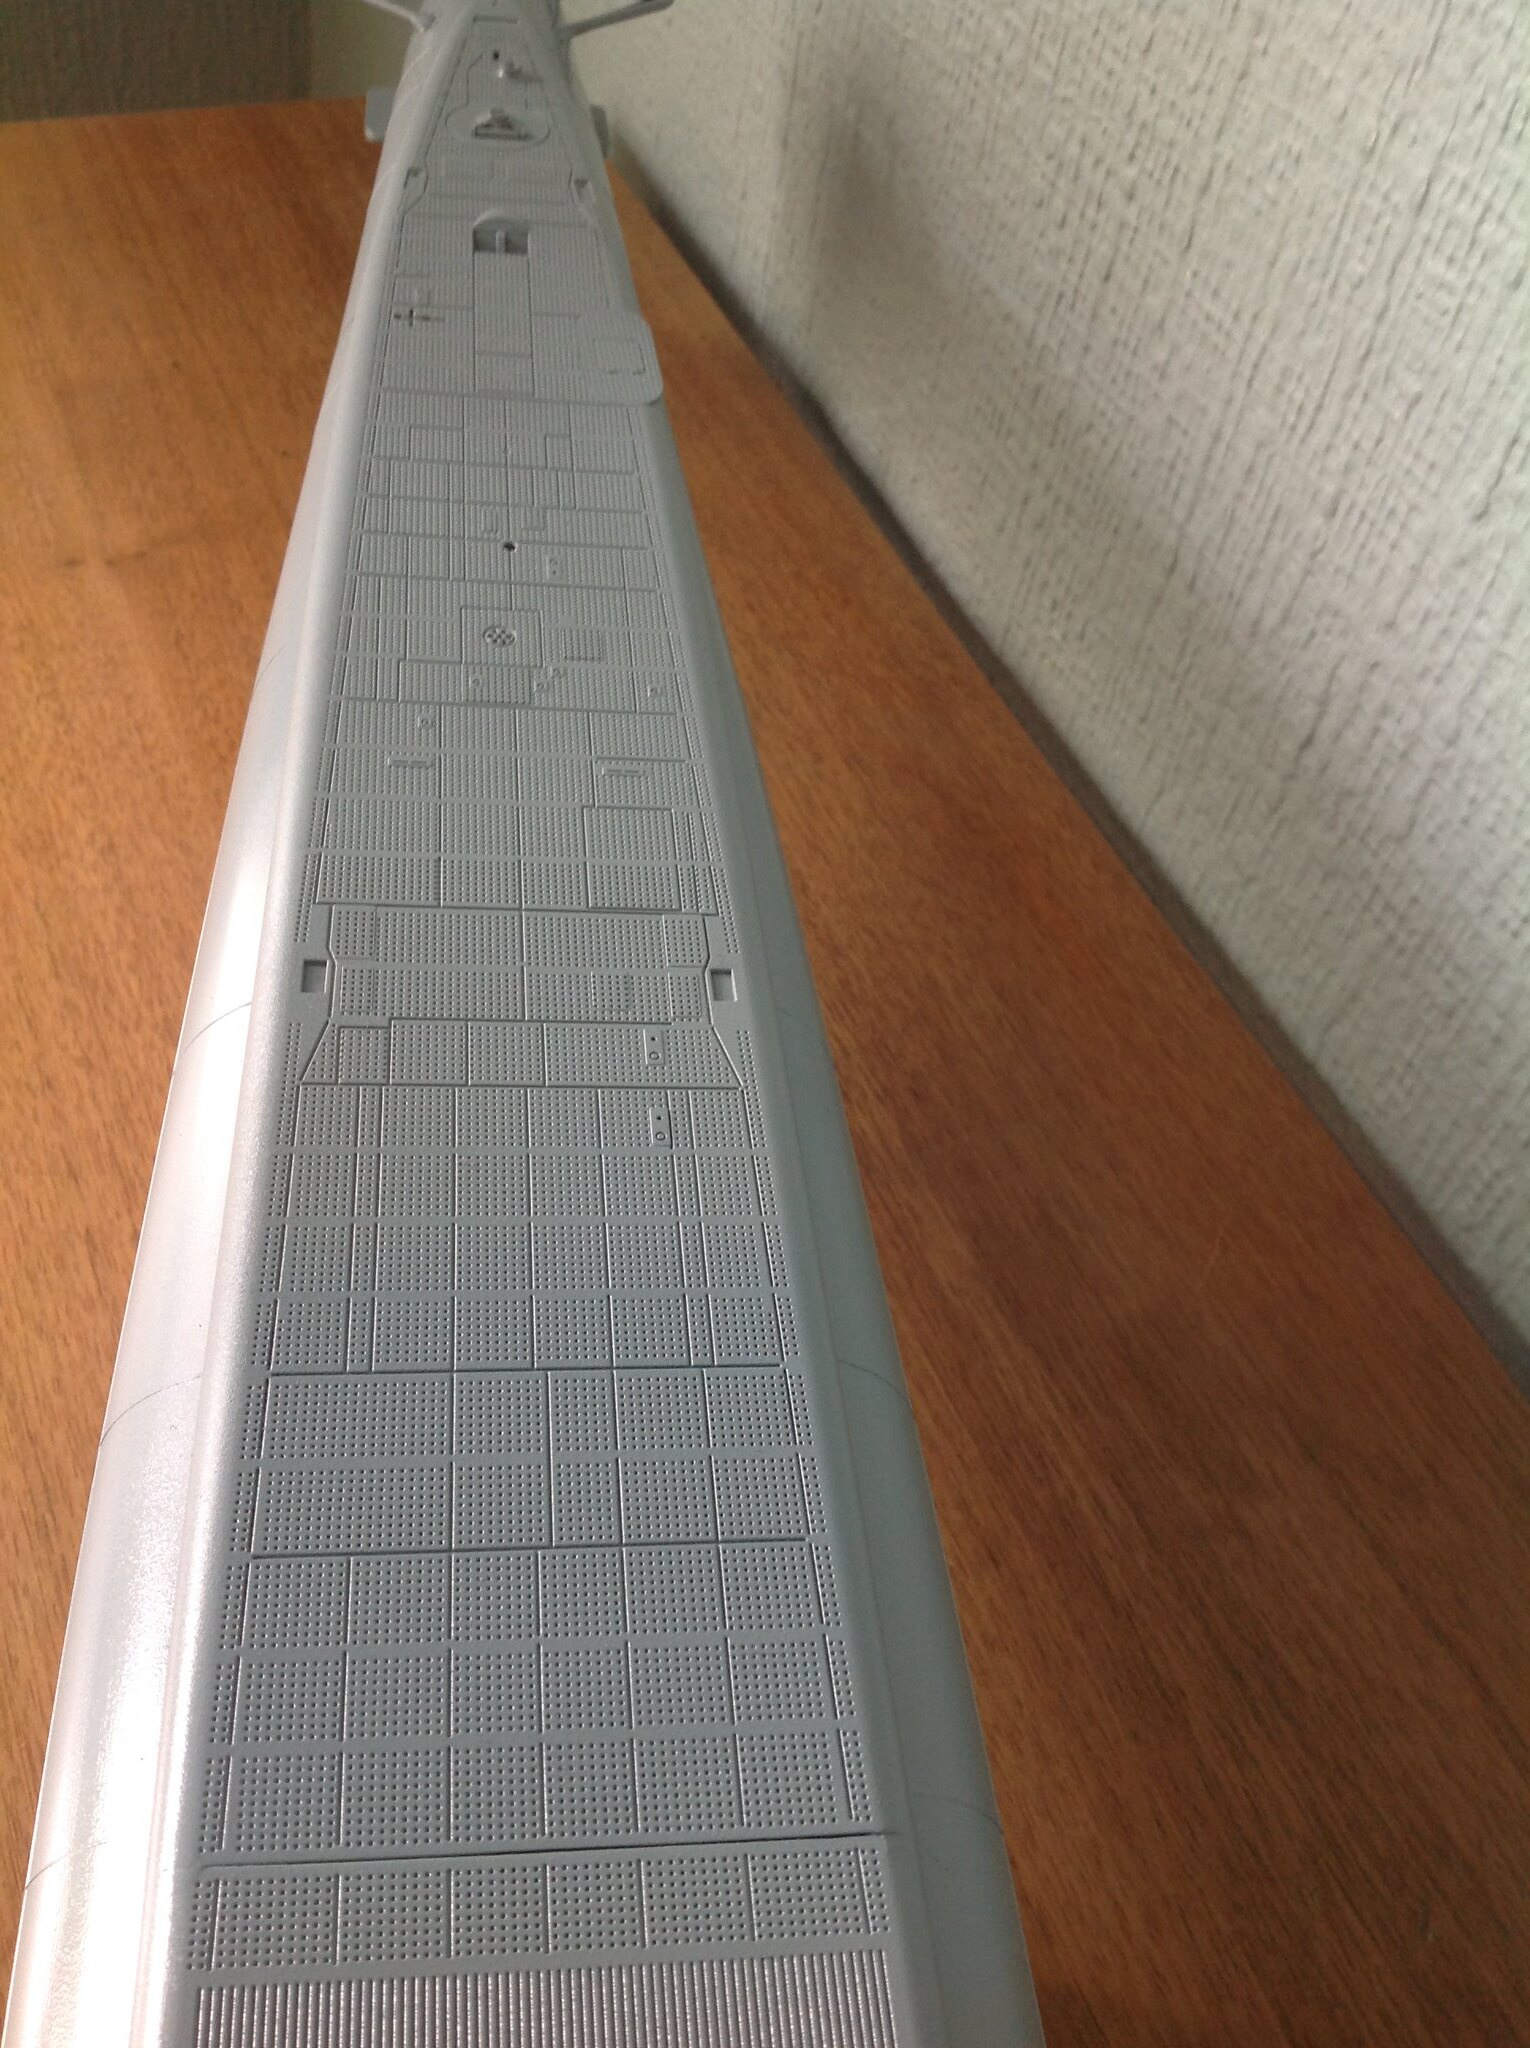
The wooden deck detail in the kit is almost good enough to not use the wood deck in the kit. ( I will still be using the wood deck.)!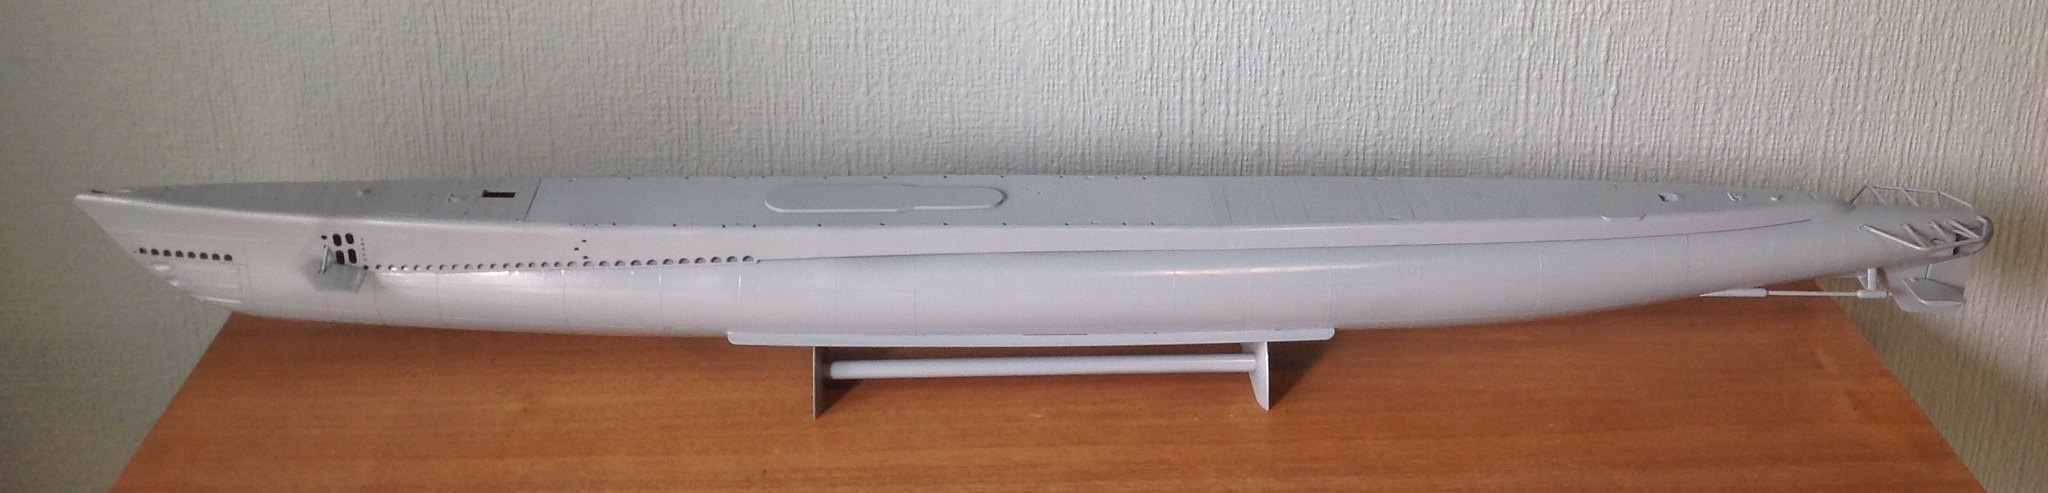

And the rest of the deck is very nice the only thing i will do is deepen the holes a little more.
5 Likes
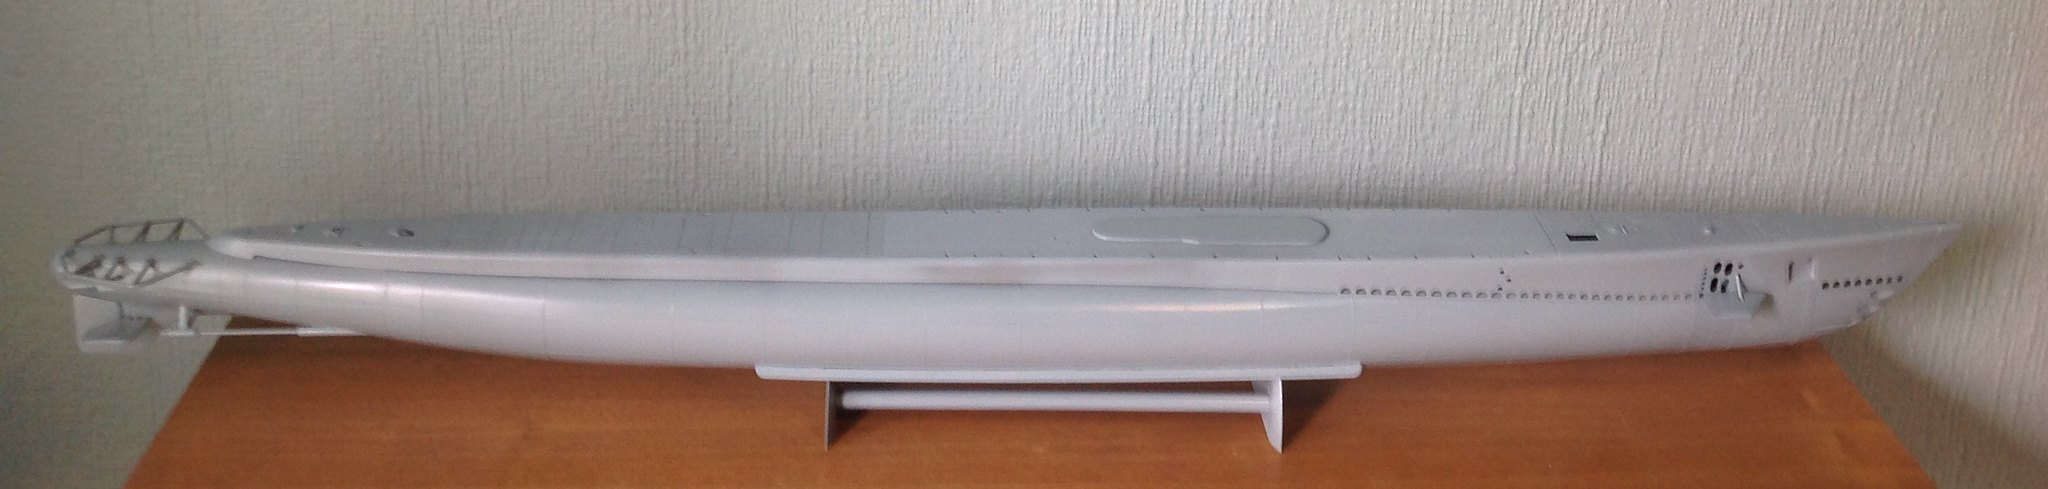
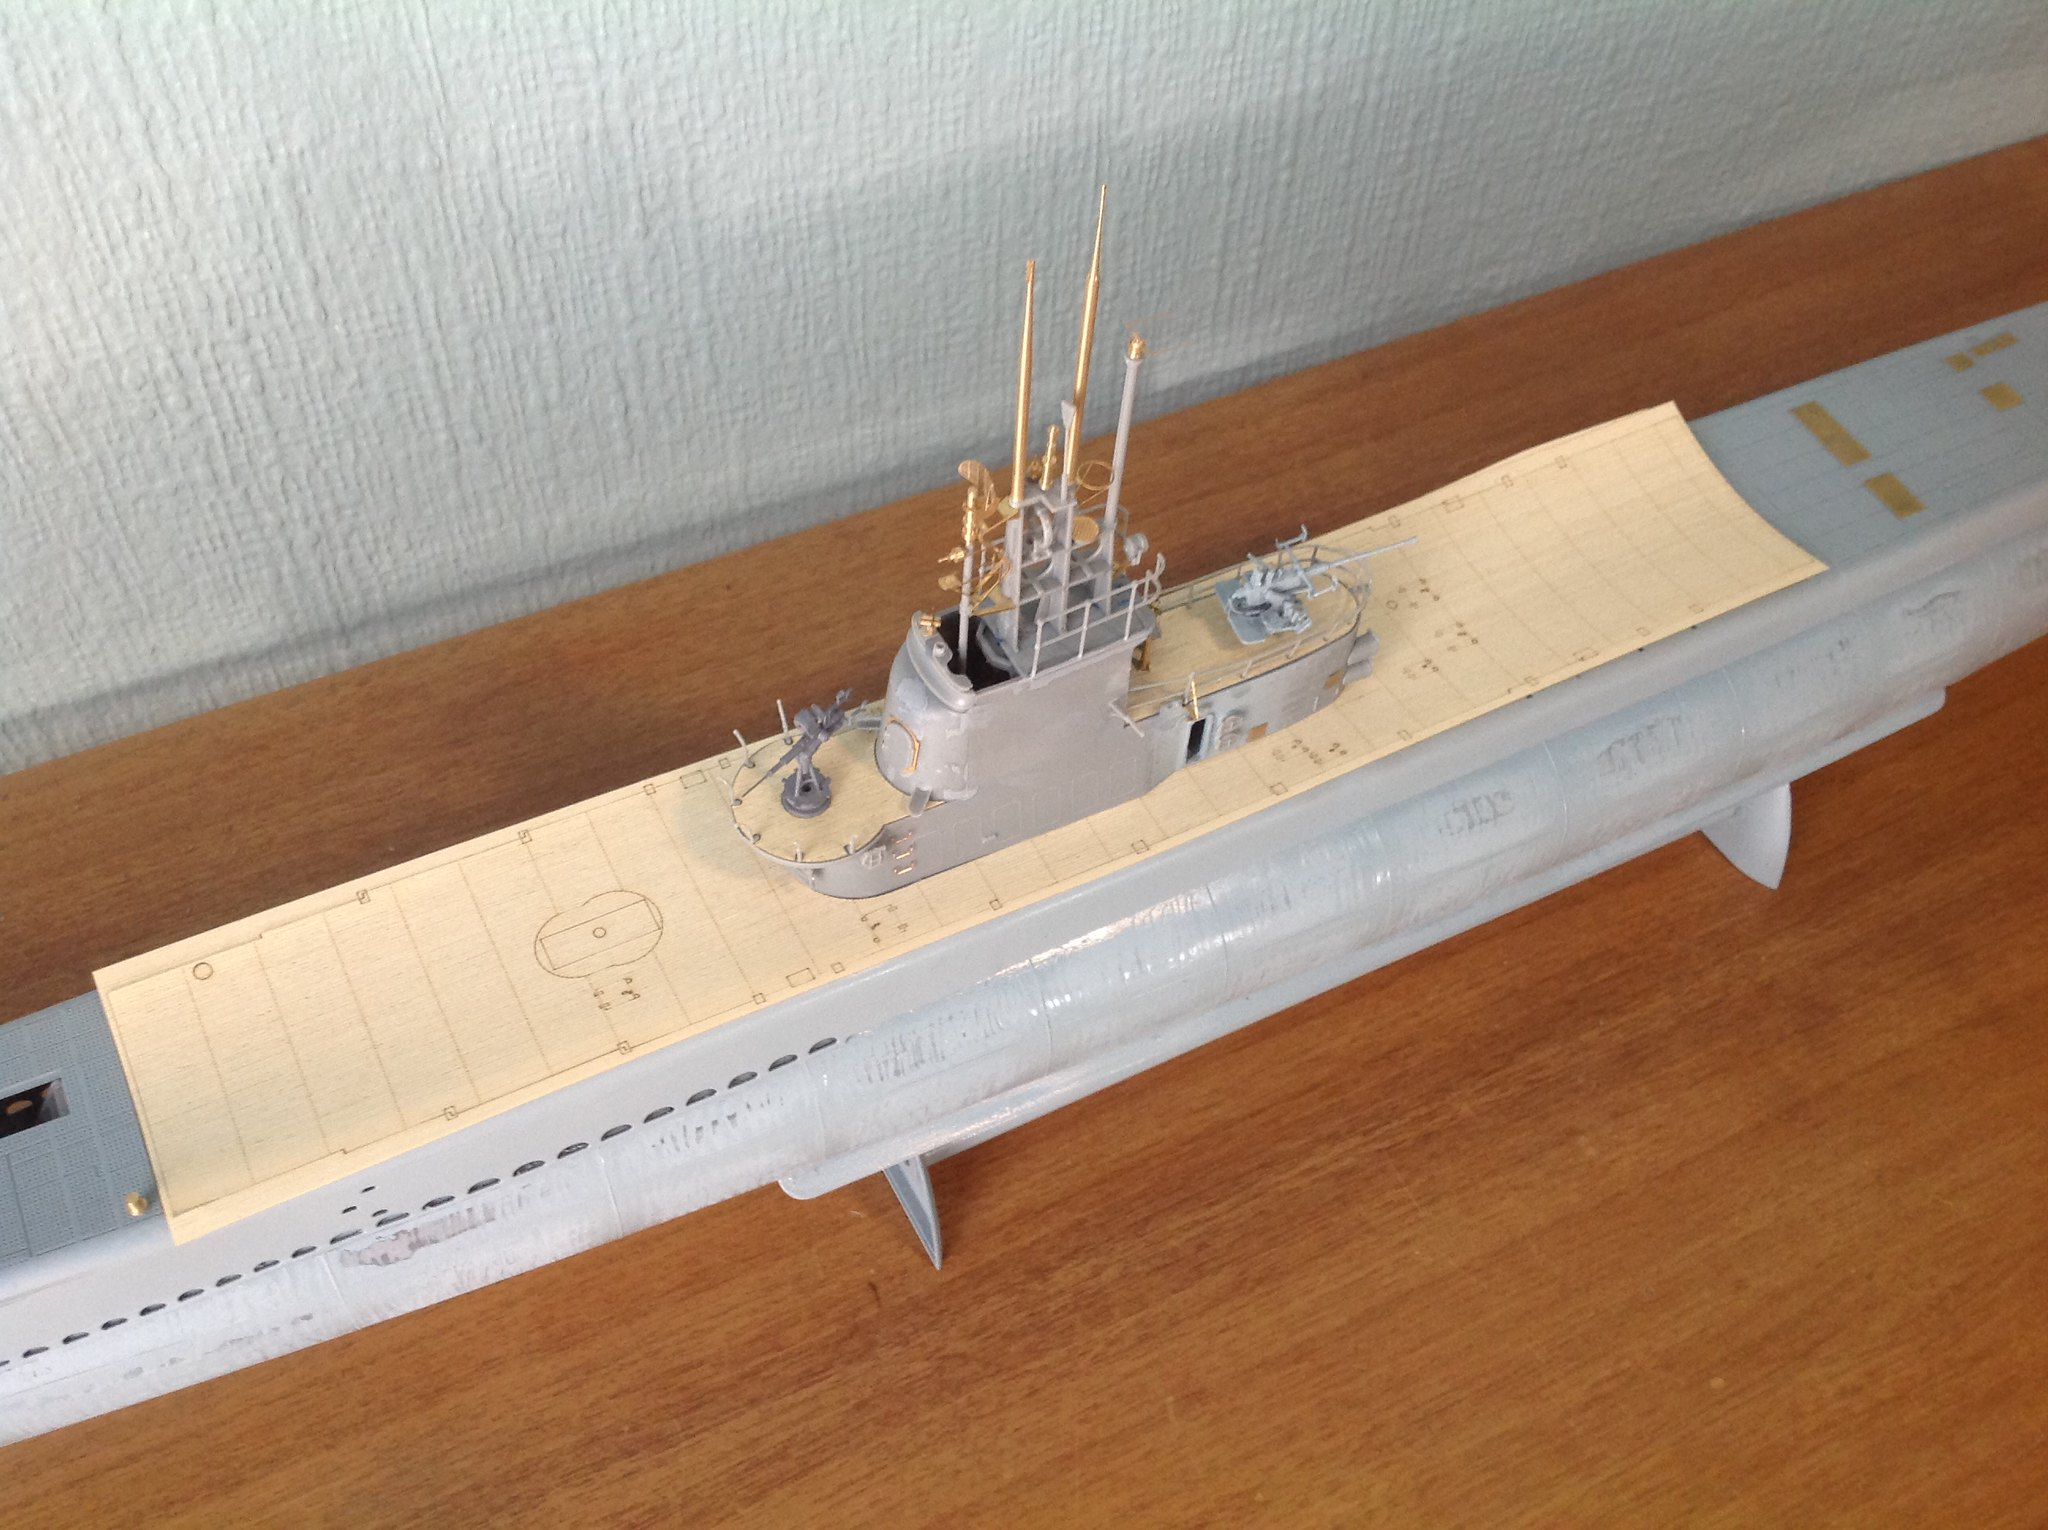
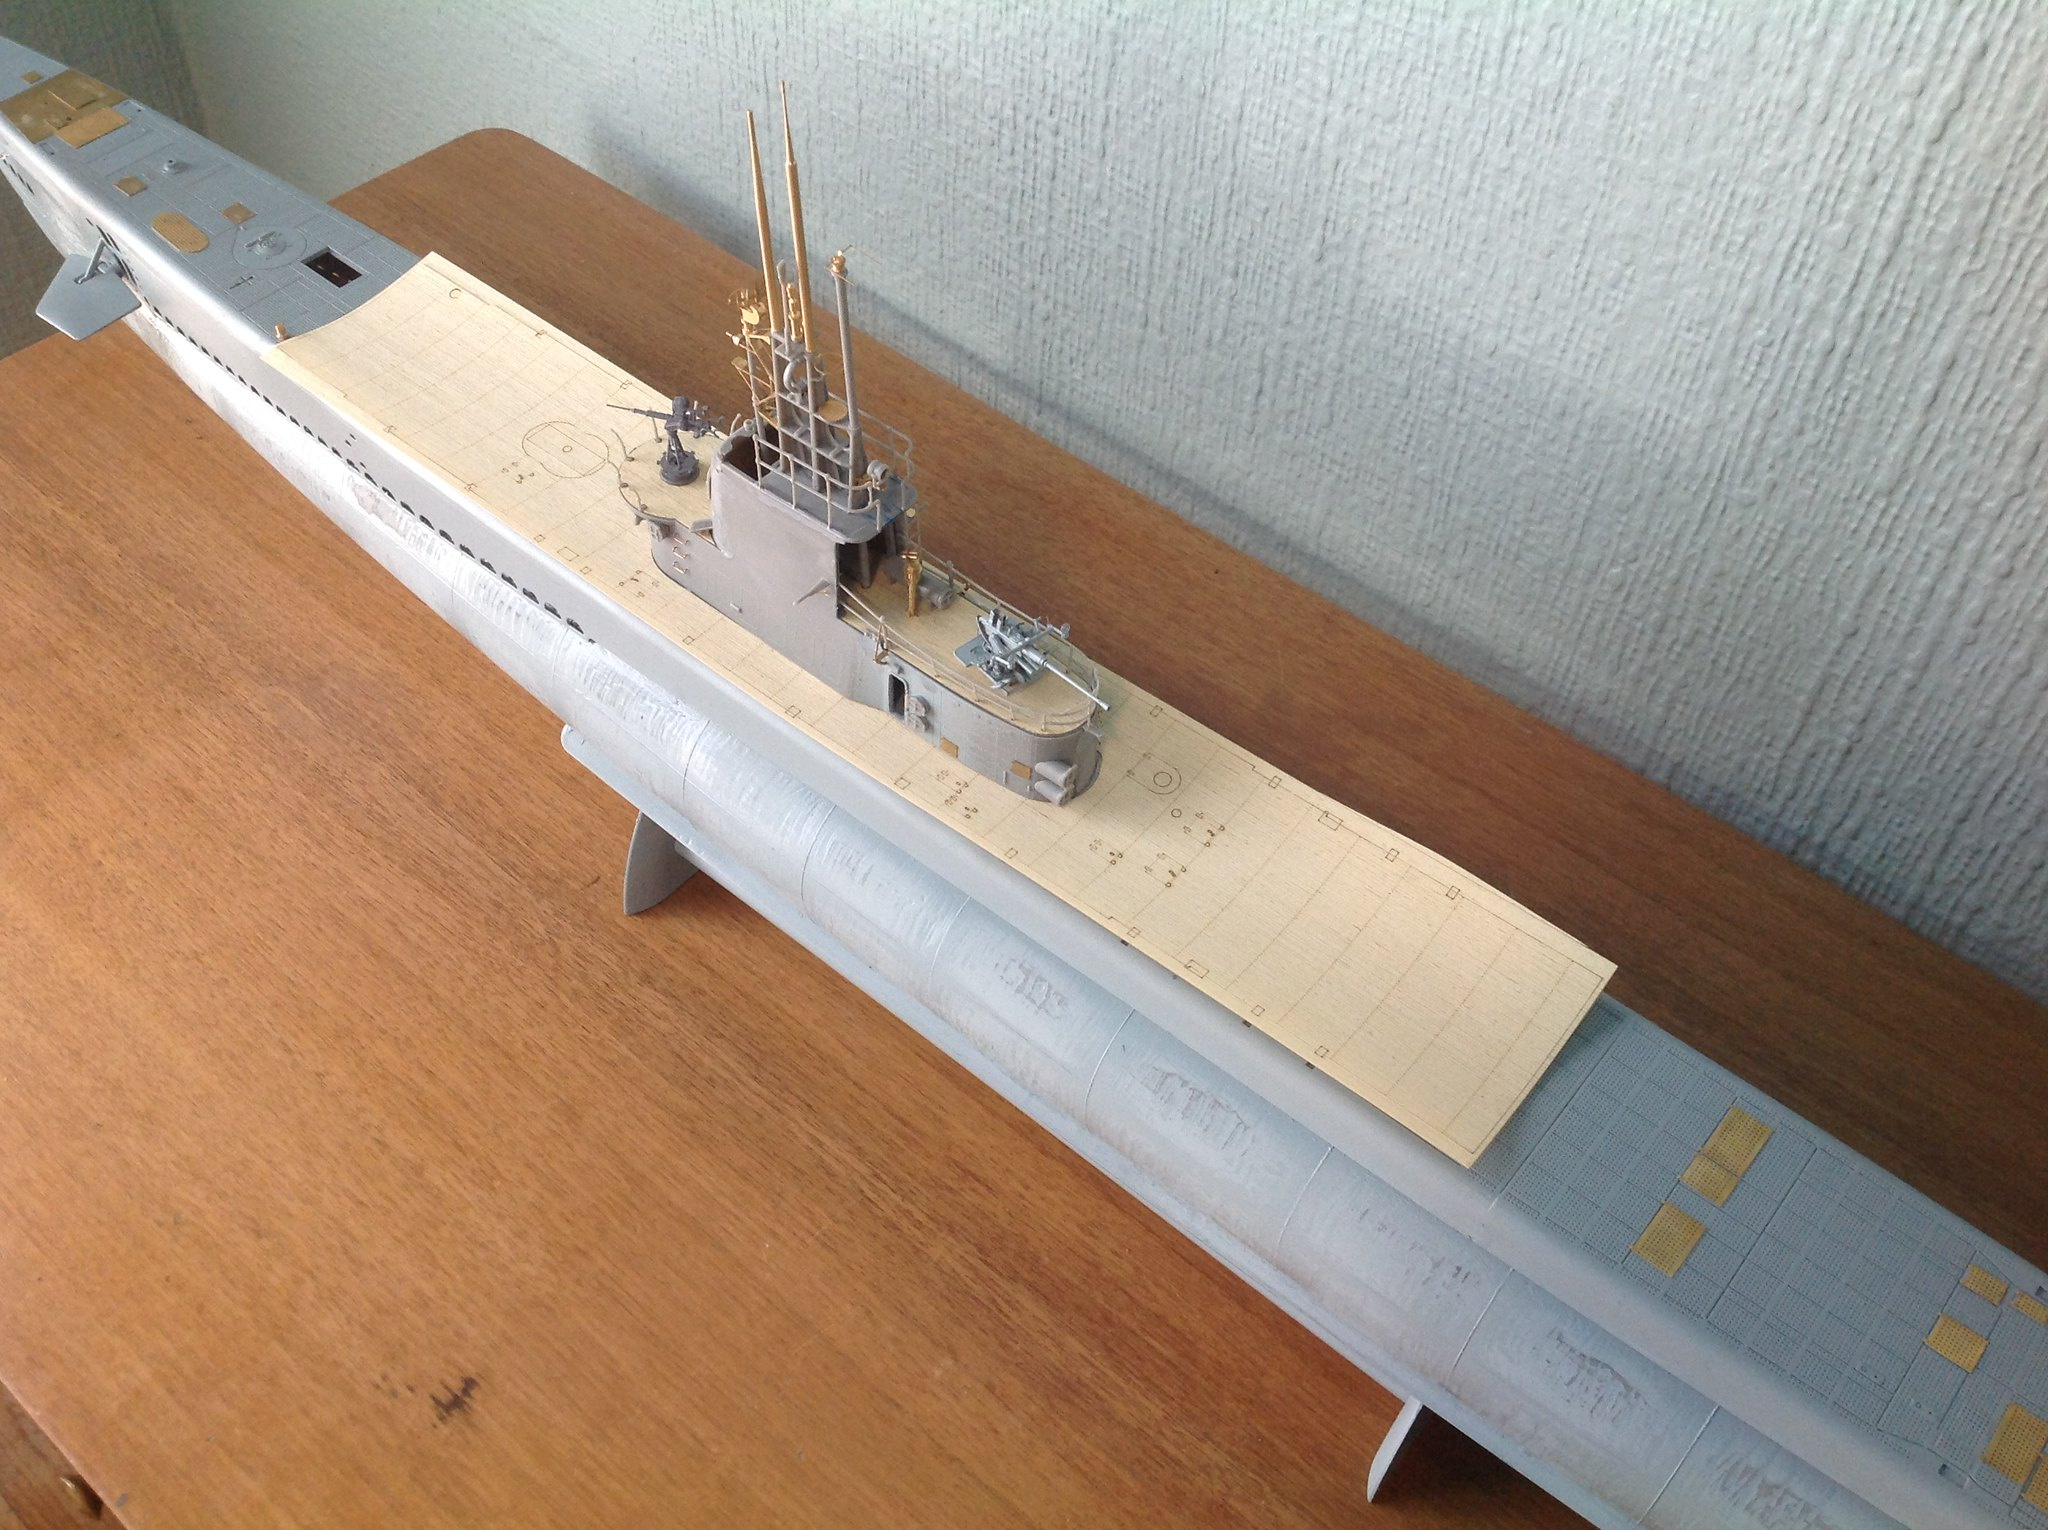
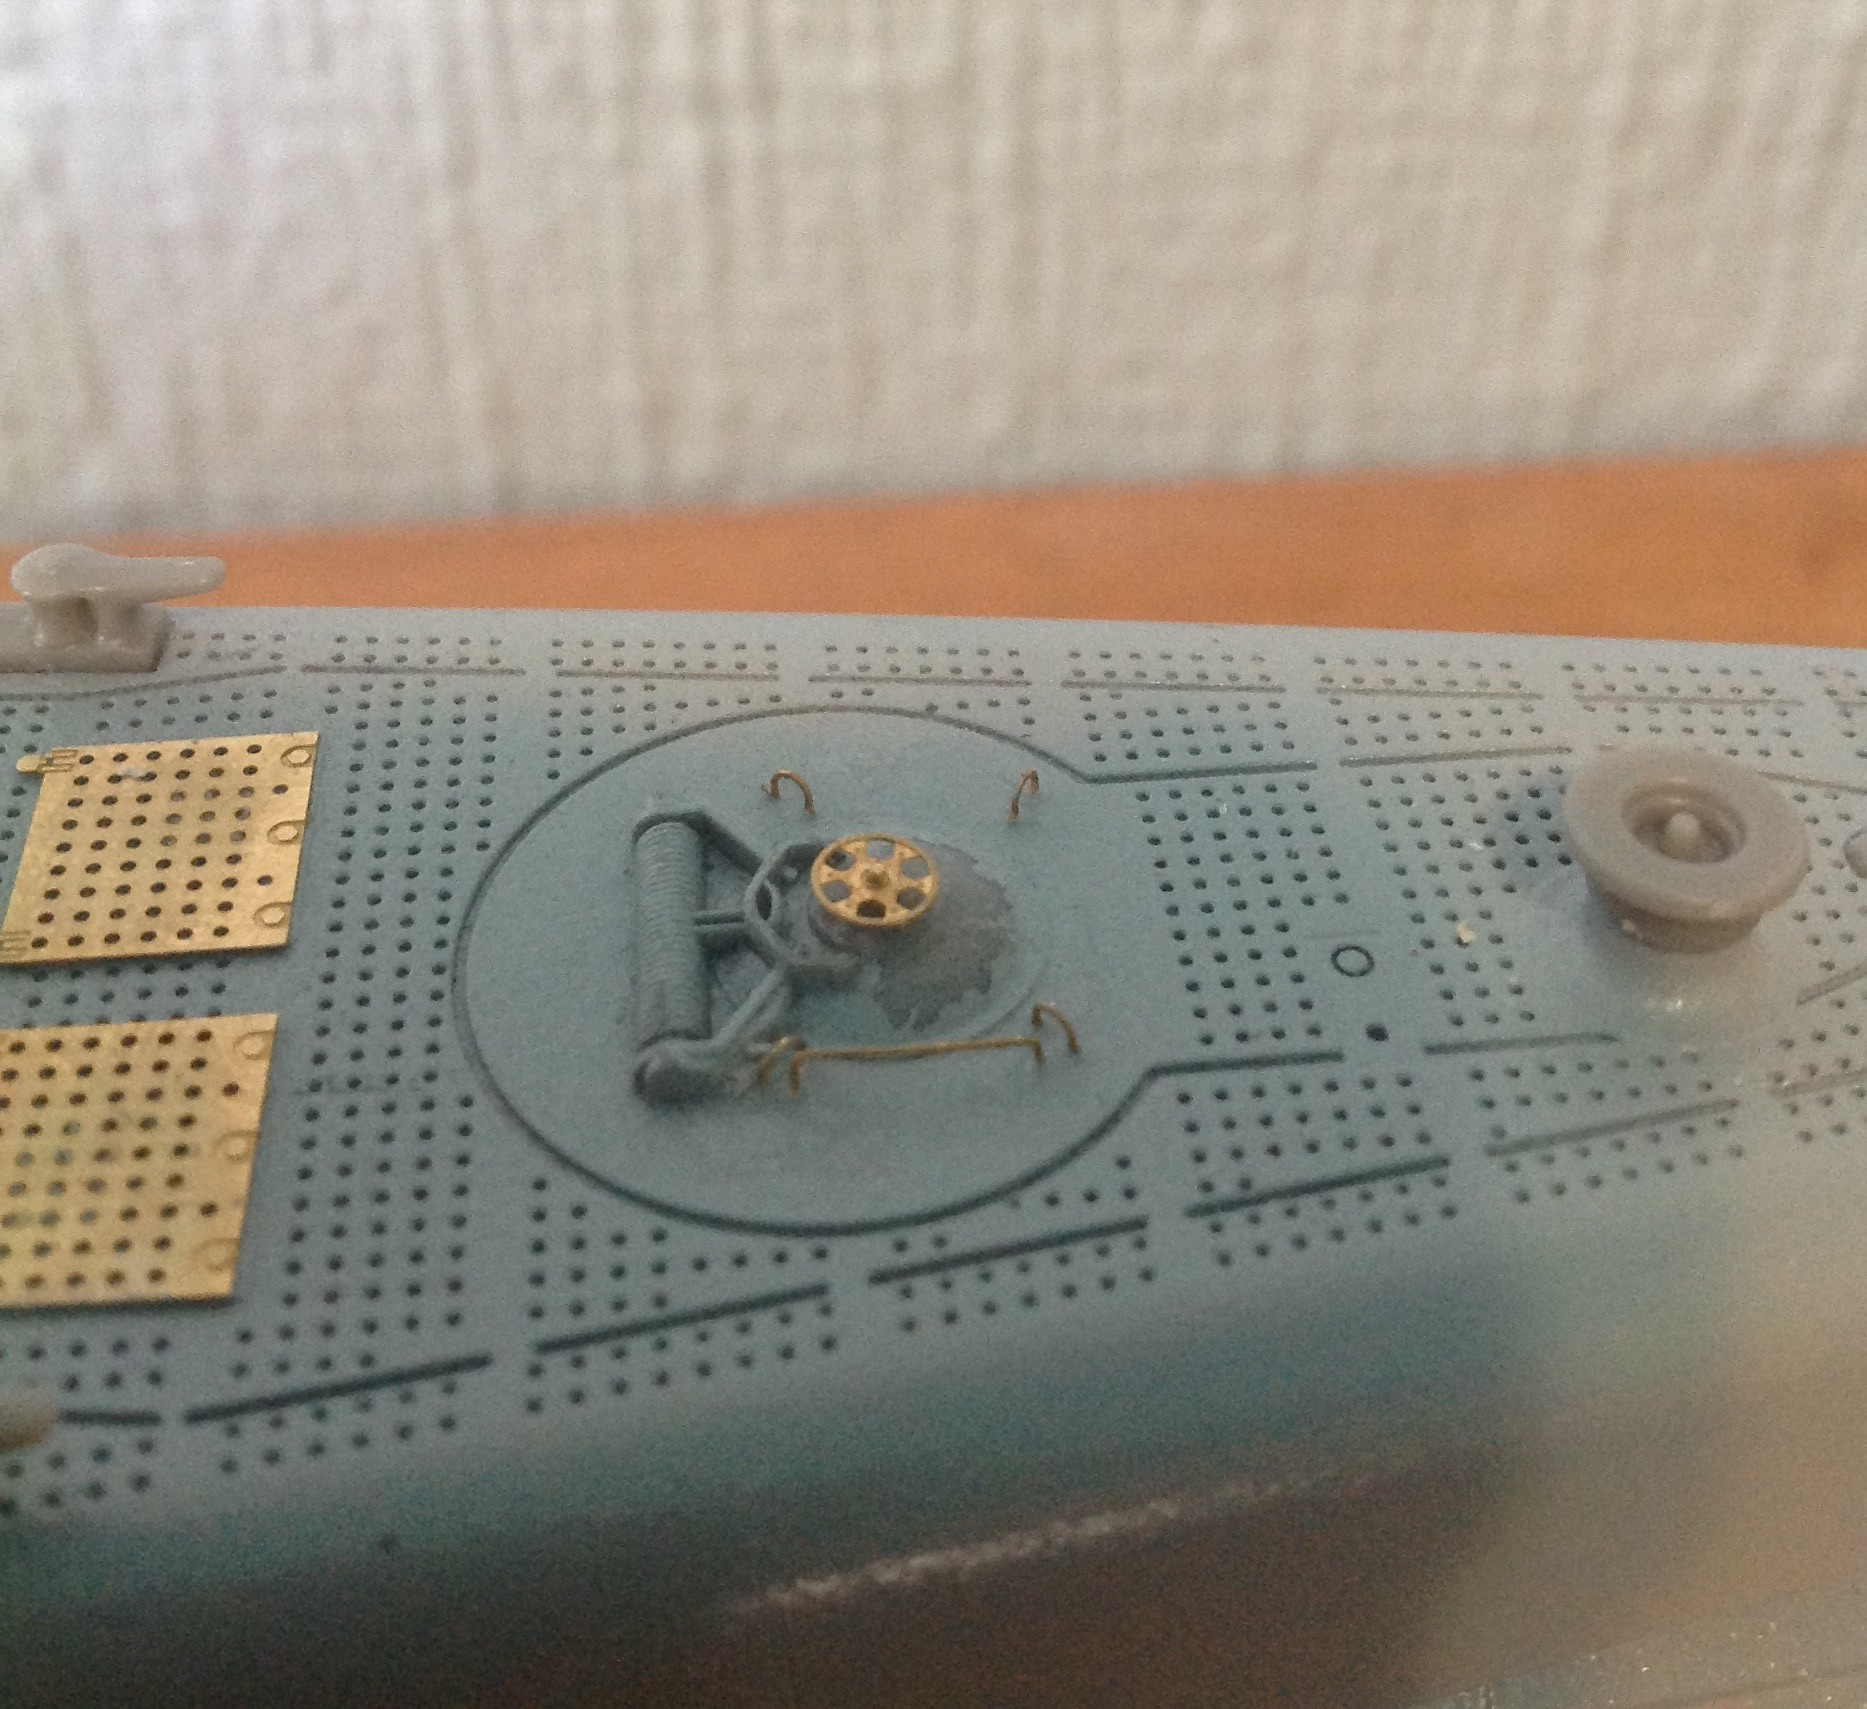
Here we go, the fairwater is fully built and some minor filling and sanding done. It still needs a little more sanding but its almost there. The PE in the kit was a little thick but useable, and the wood deck i think looks very nice.

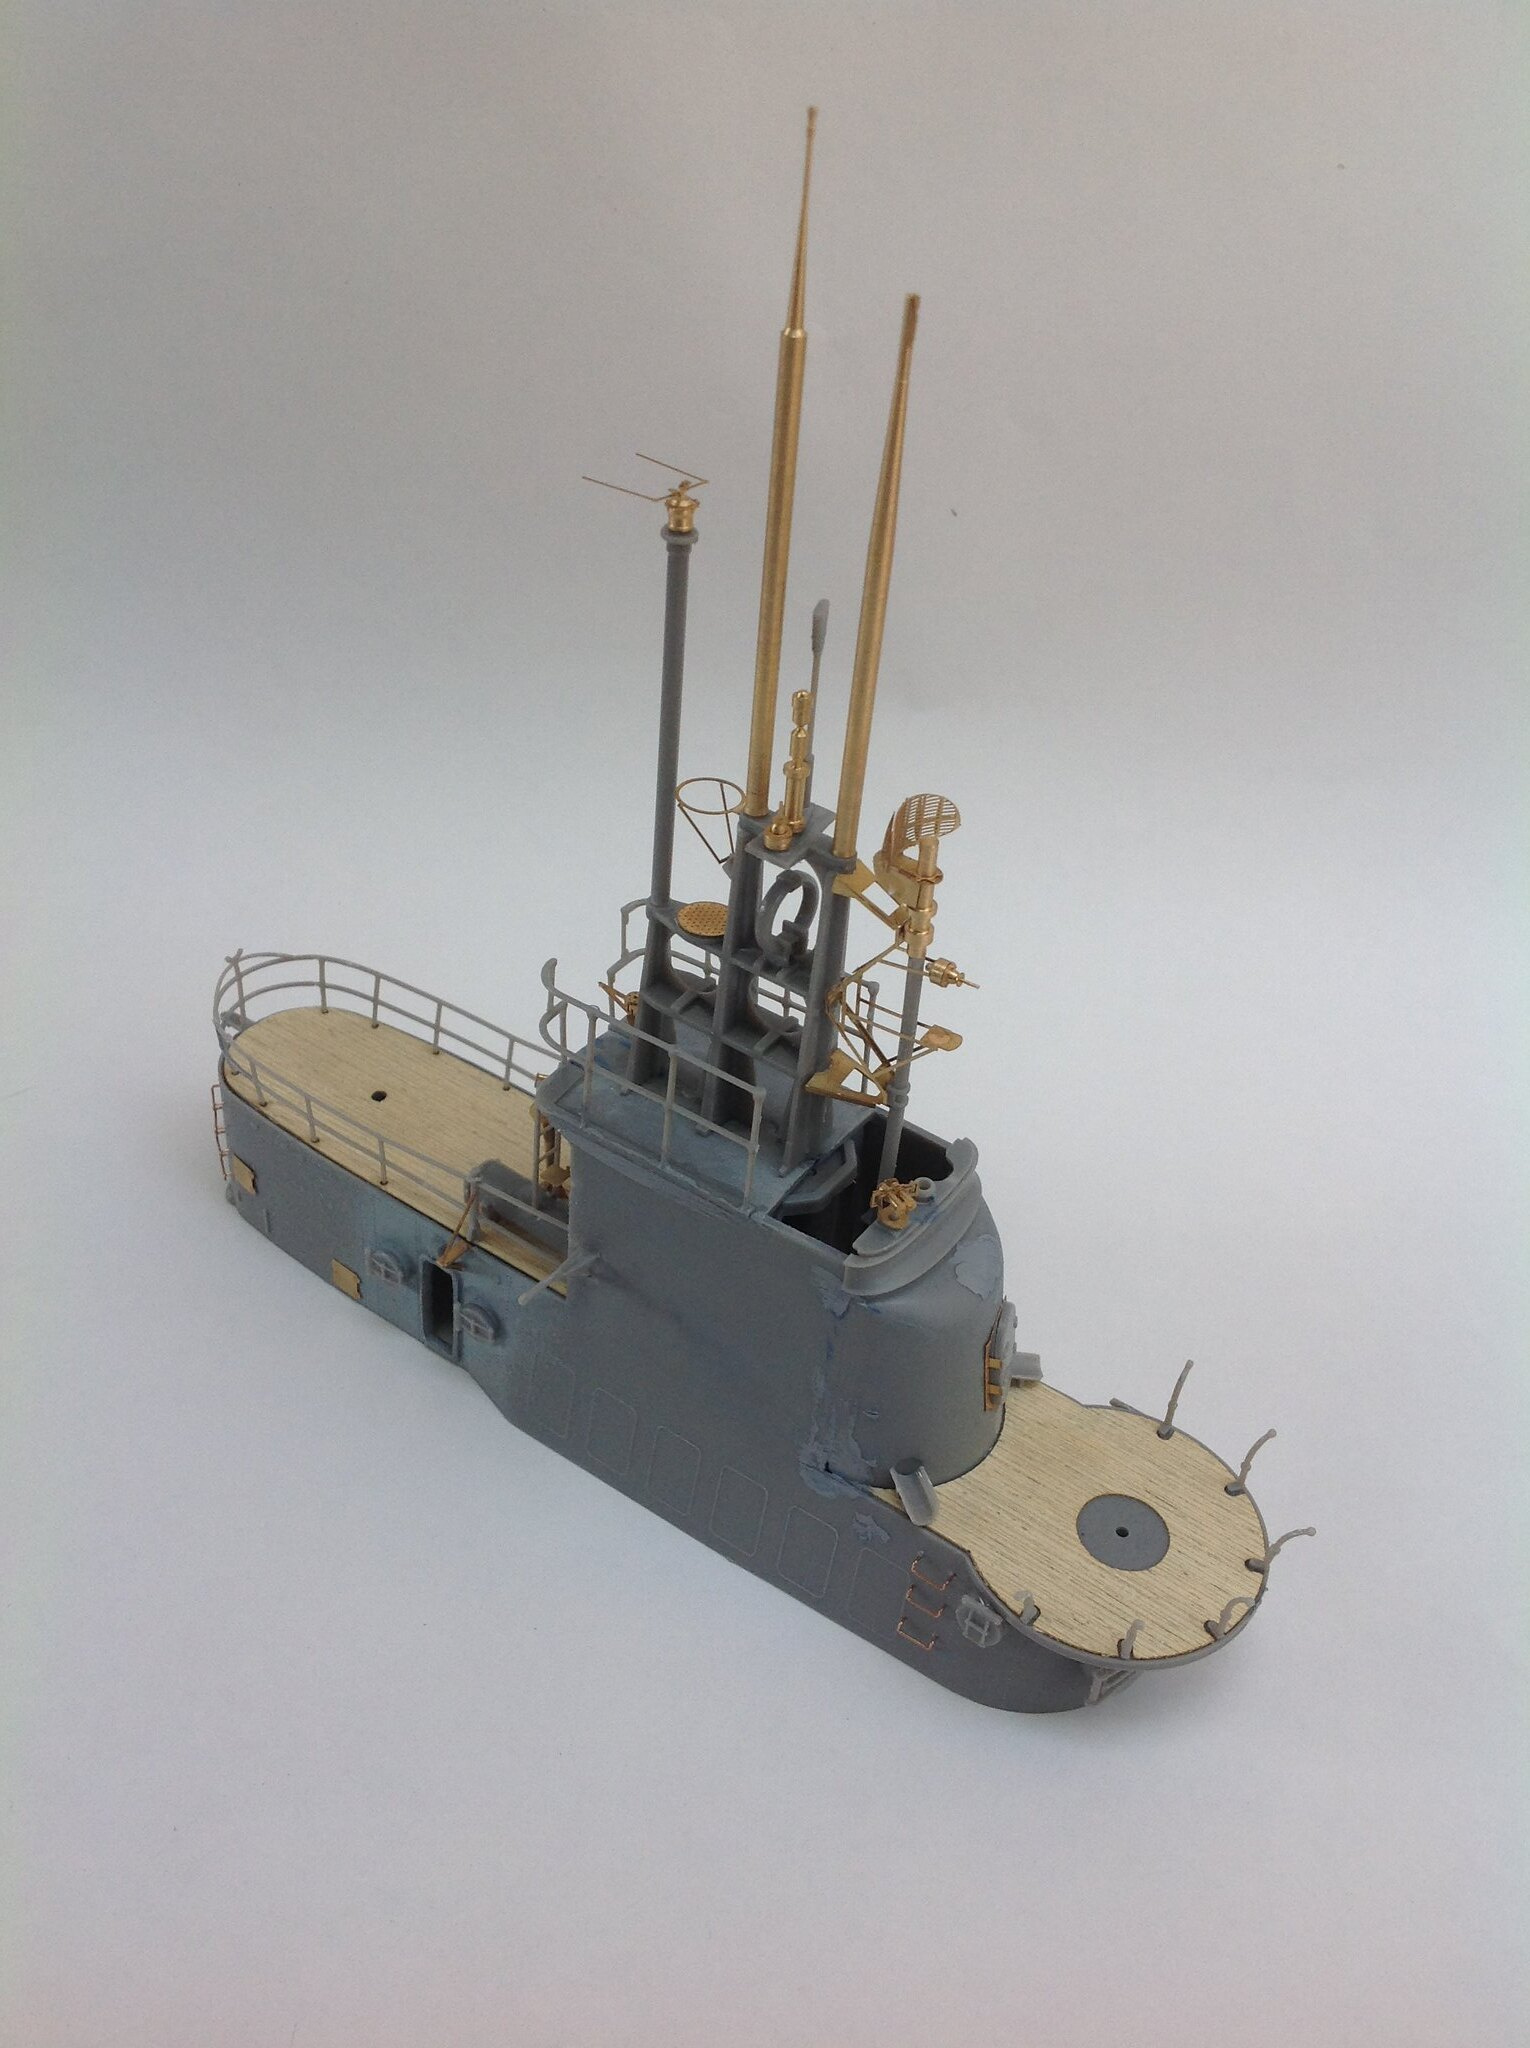
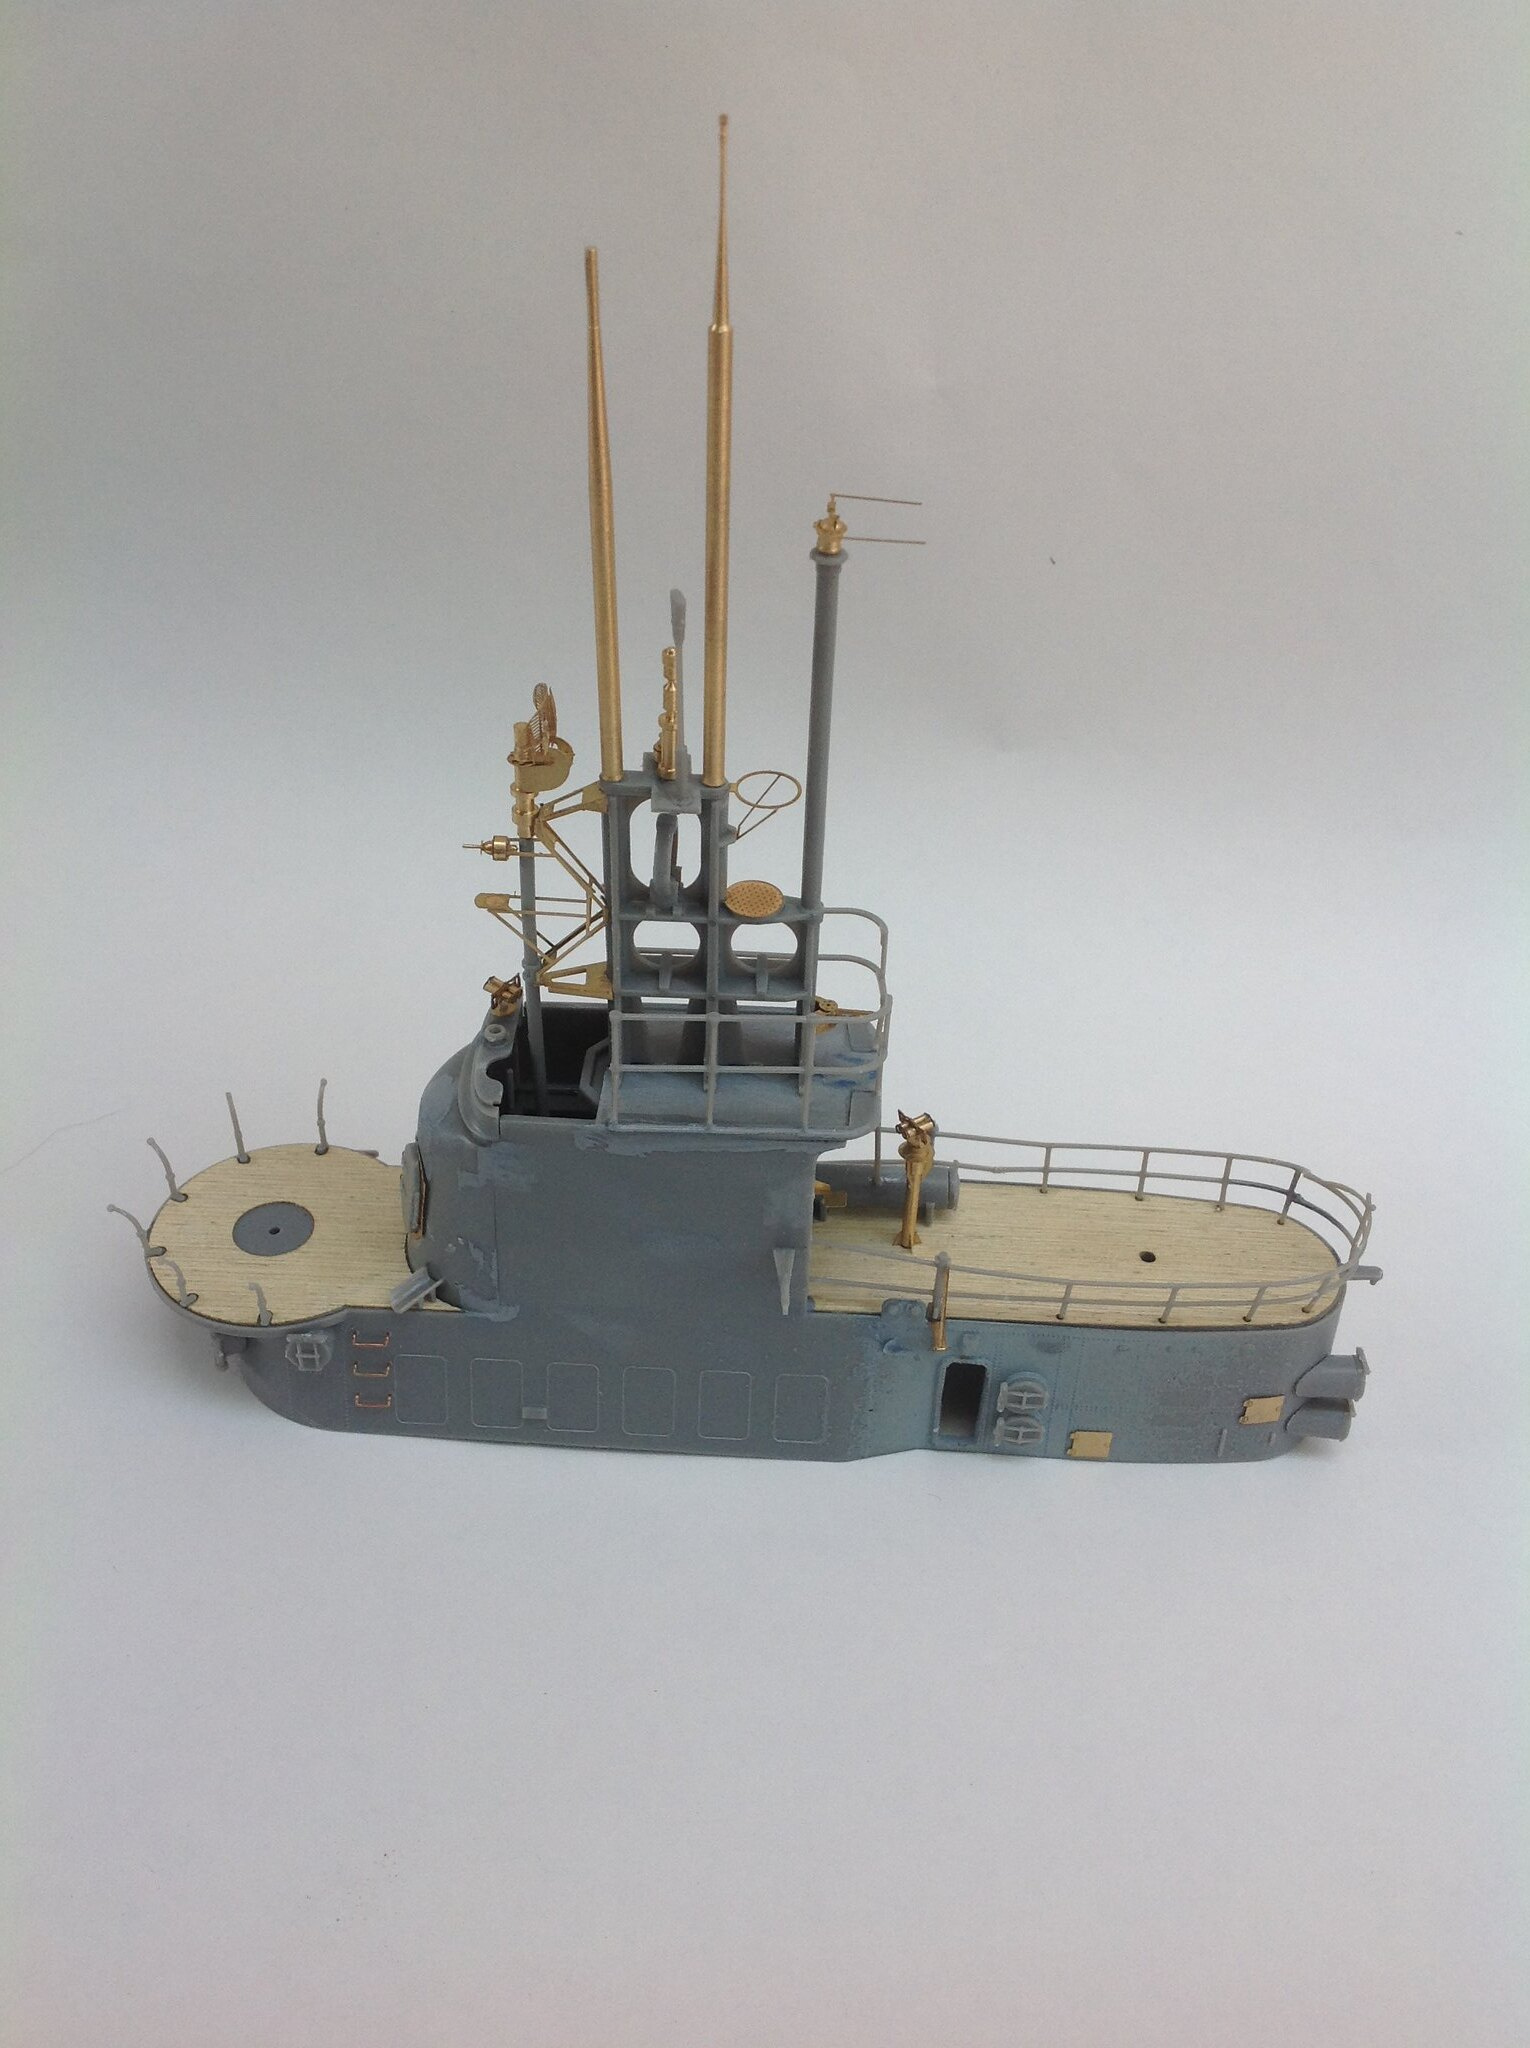
I also removed the fictional doors from the fairwater sides. They still need a little cleanup.
6 Likes
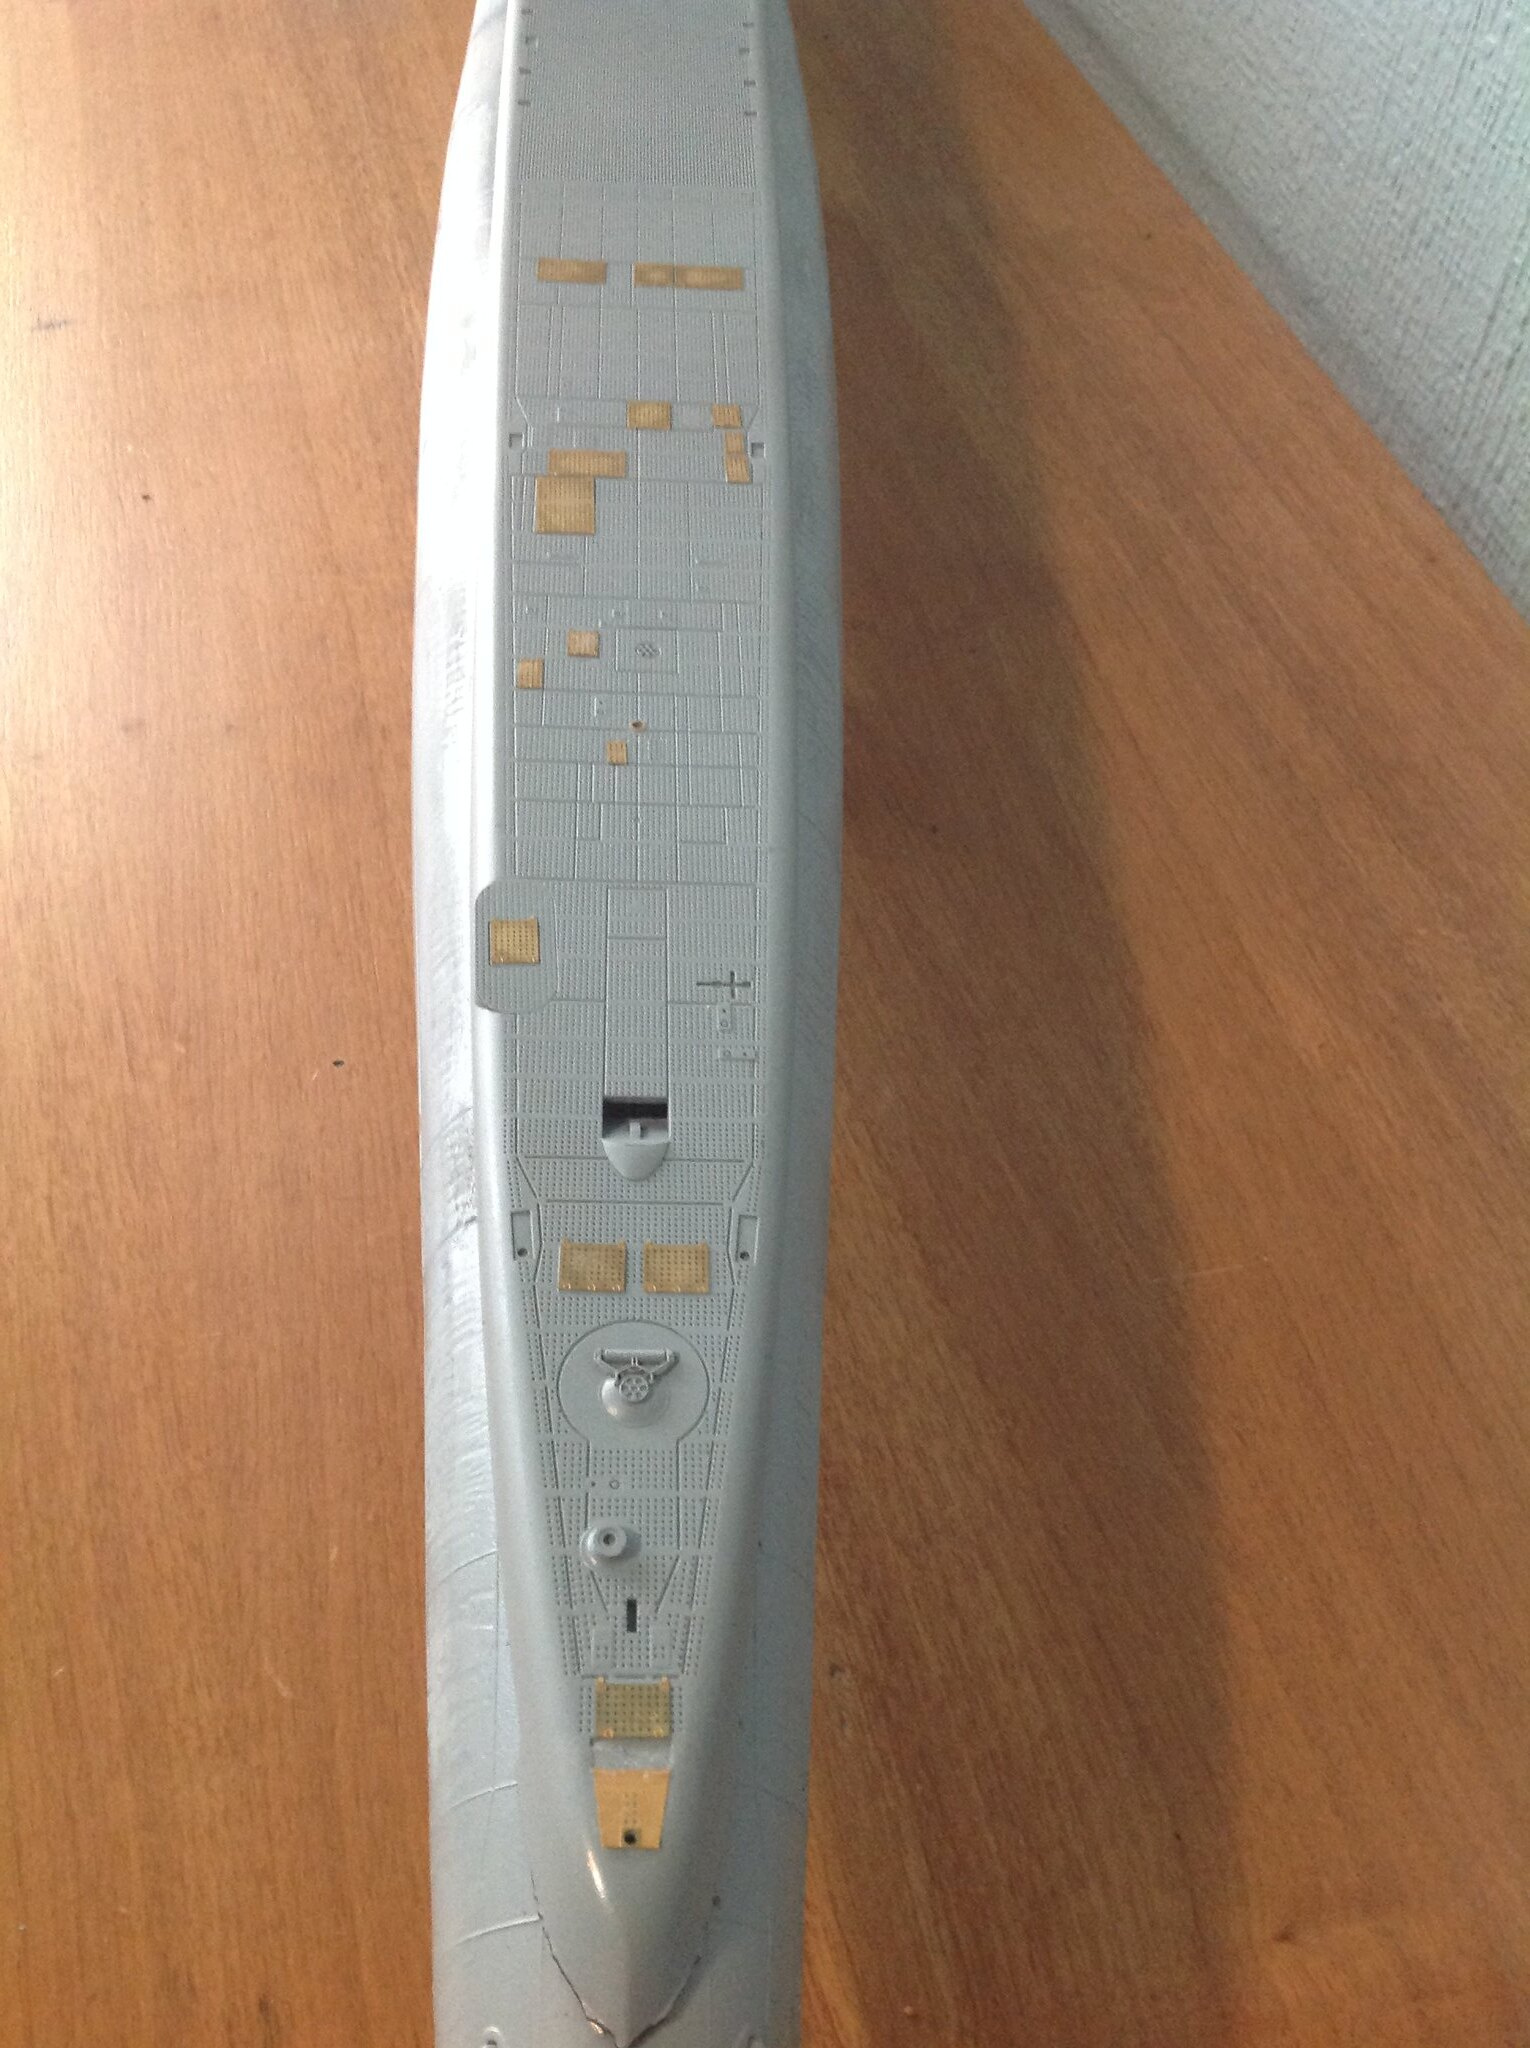
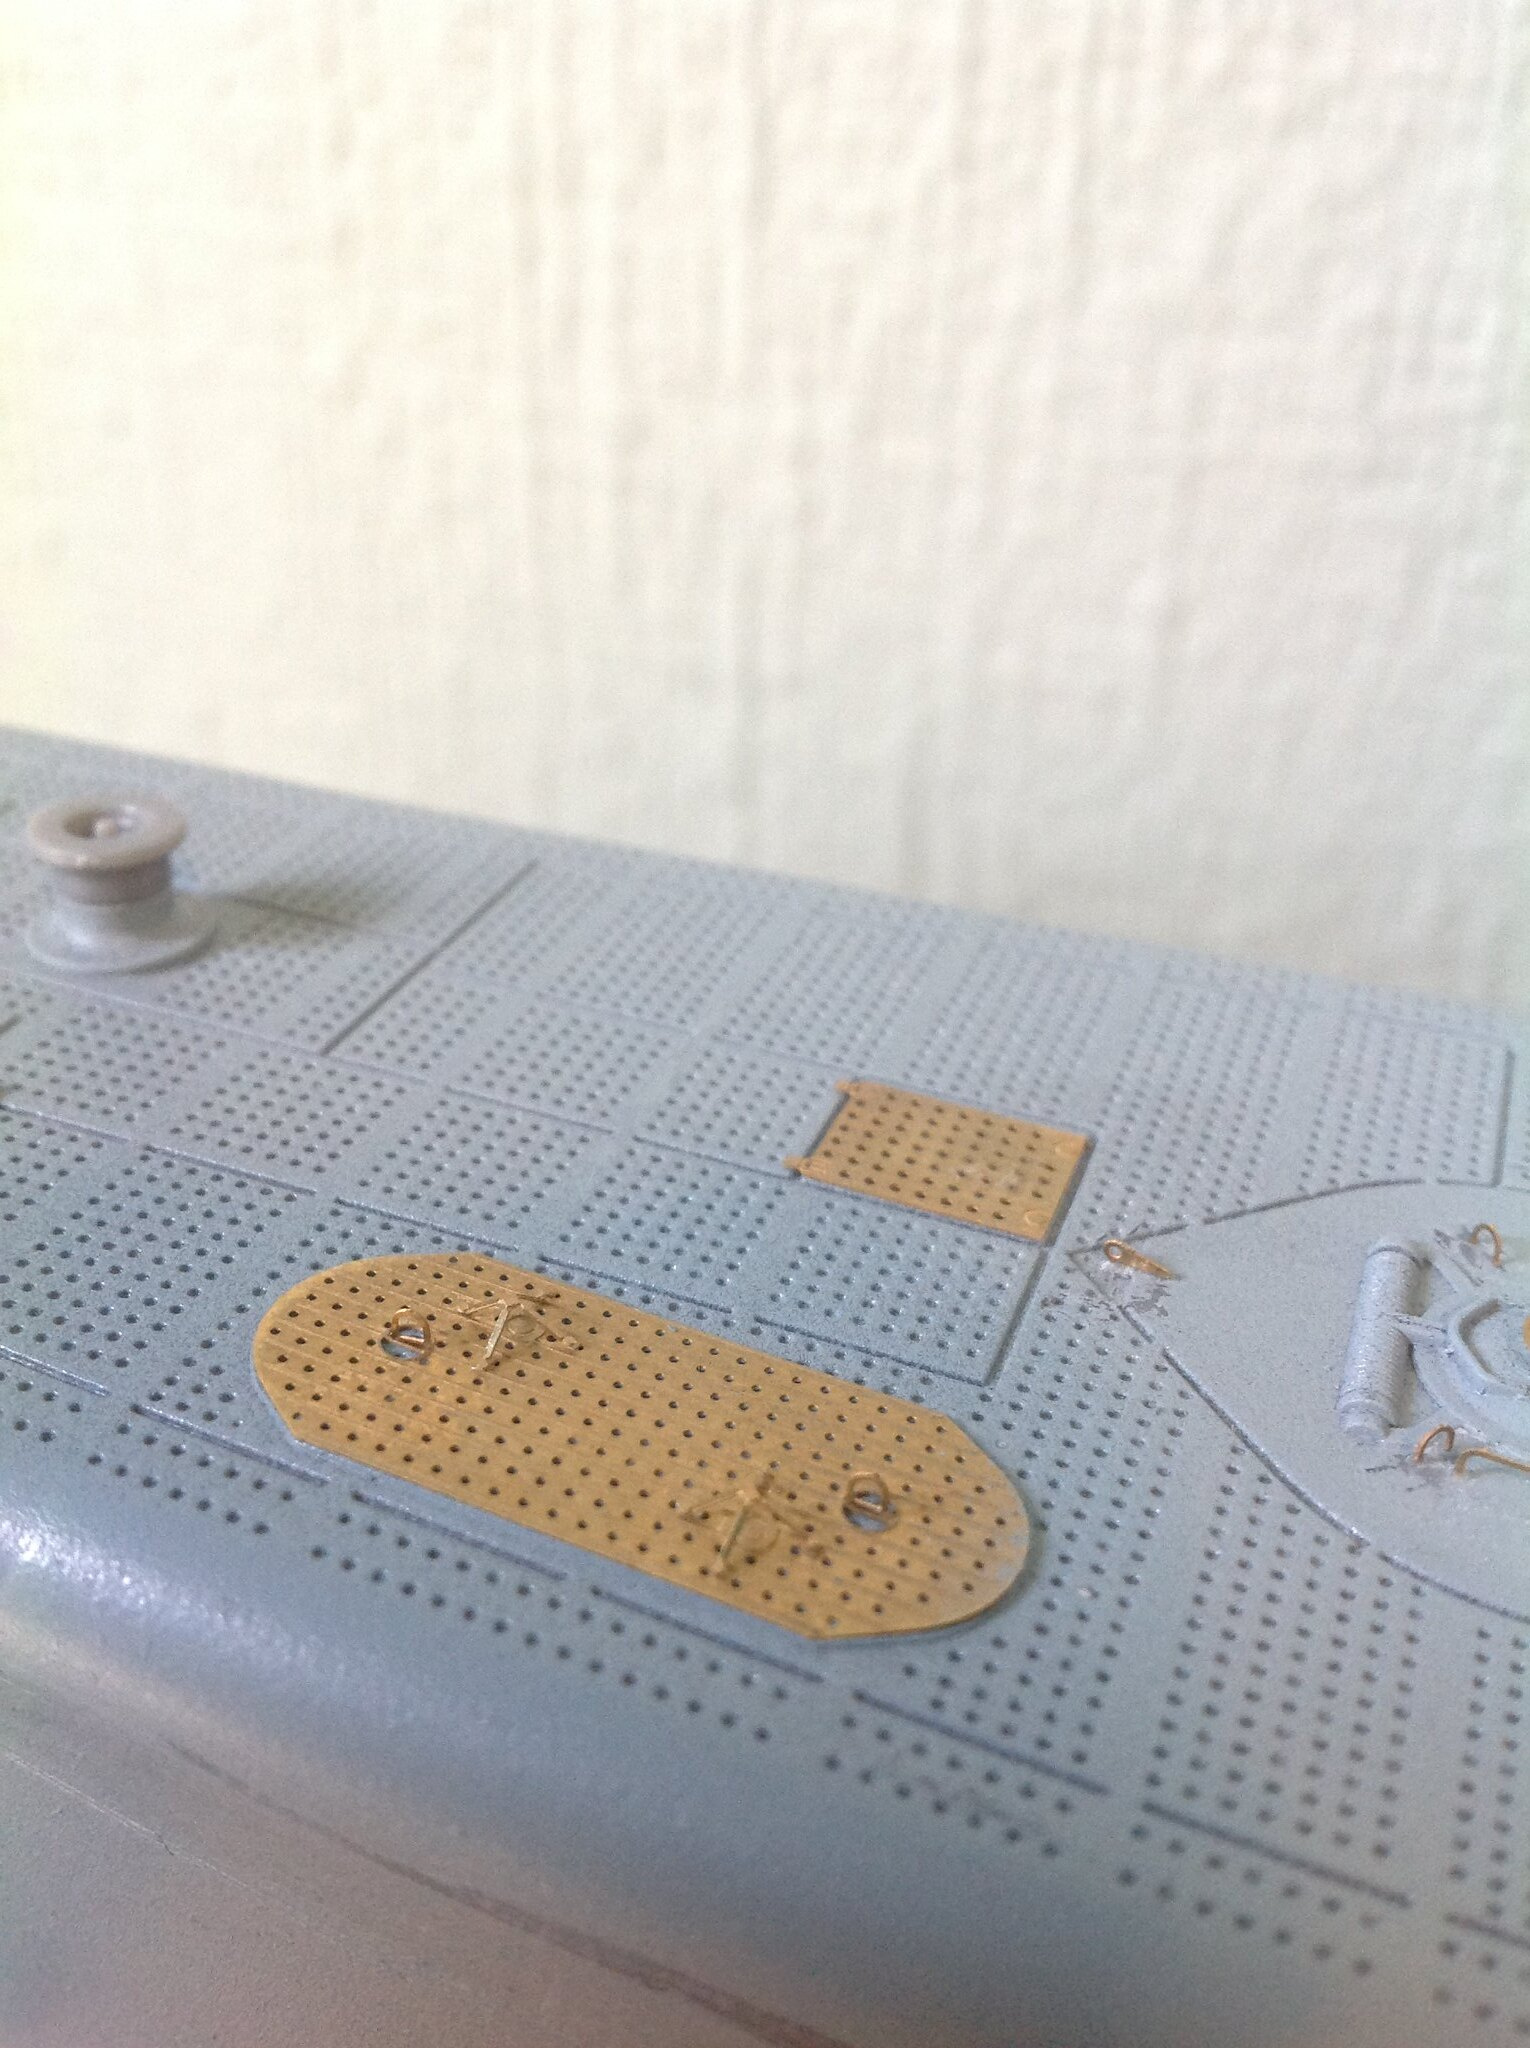
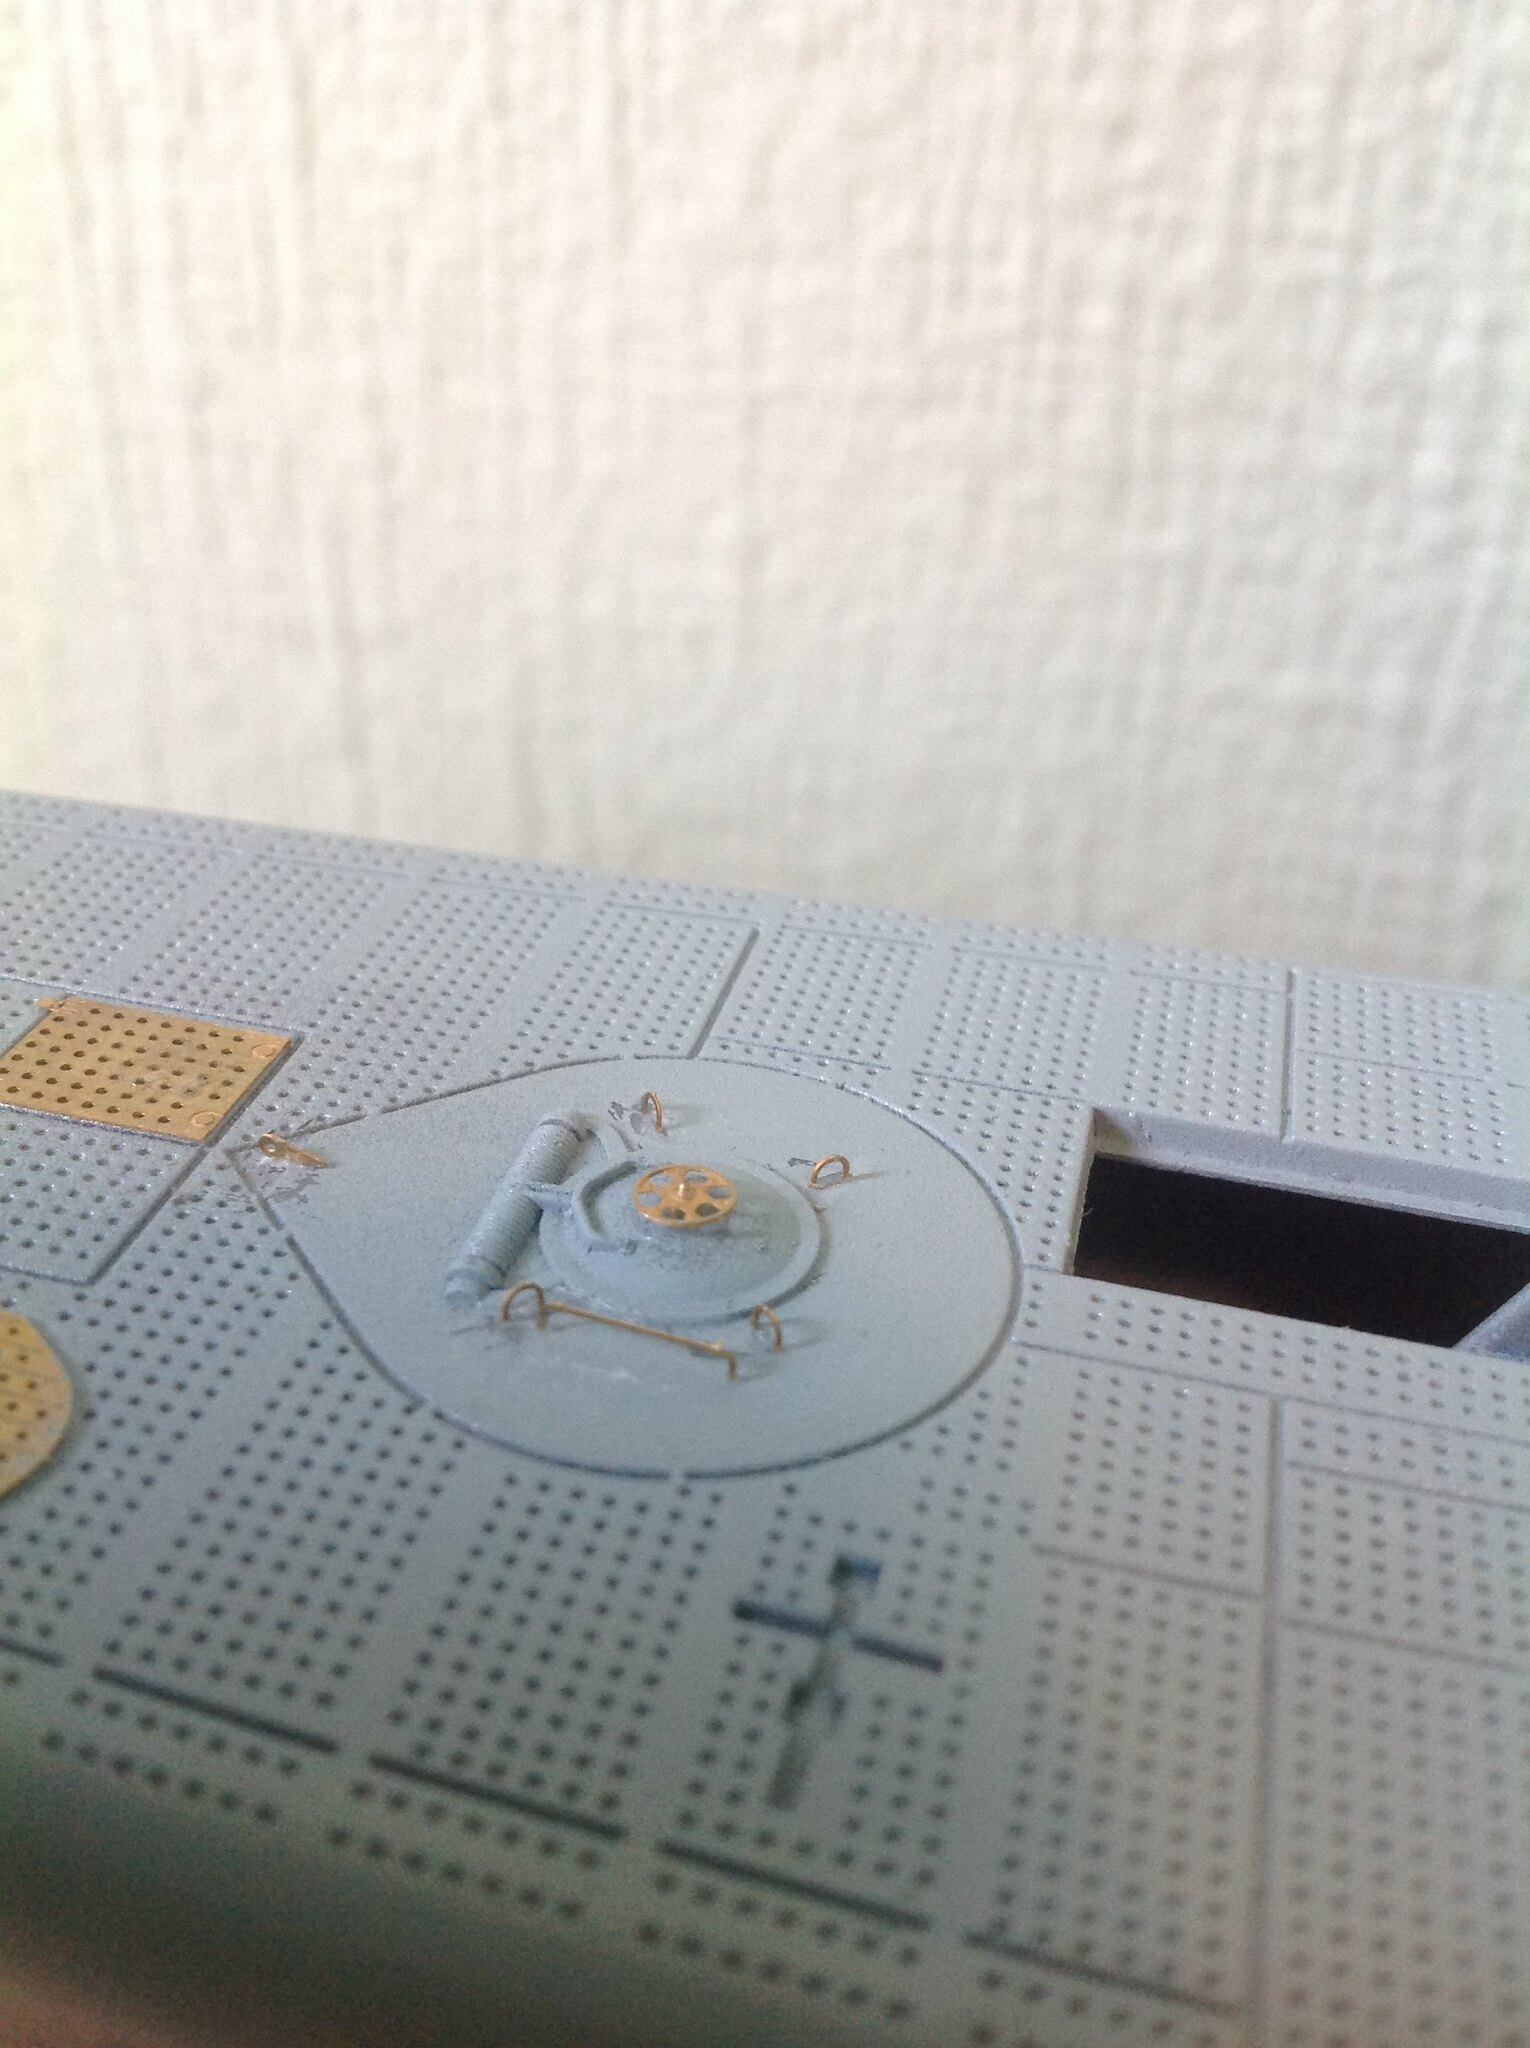
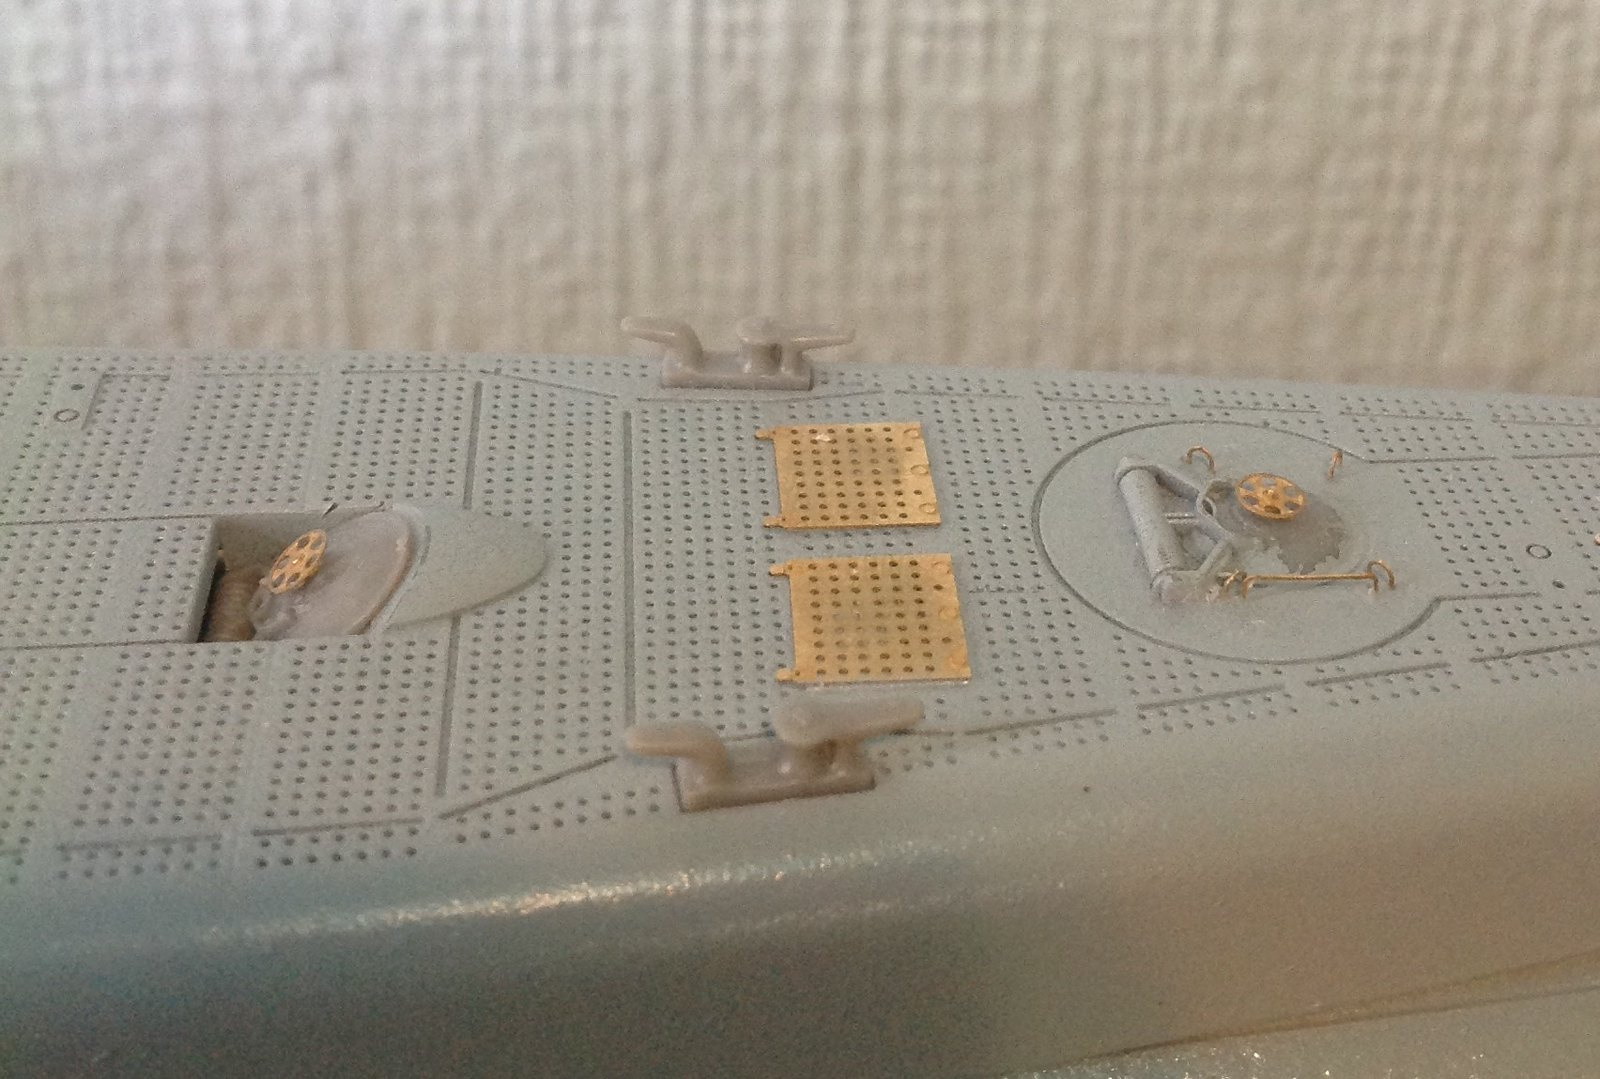
Ok here we go the main oil canning of the hull is done.(It was done with a curved Nm.11 X-acto blade and sandpaper.) All I have left is the fuselage hinge plates need to get riveted and the oil canned. I also attached most of the PE that goes on the deck. I just have a bit more sanding to clean up the oil canning.
5 Likes
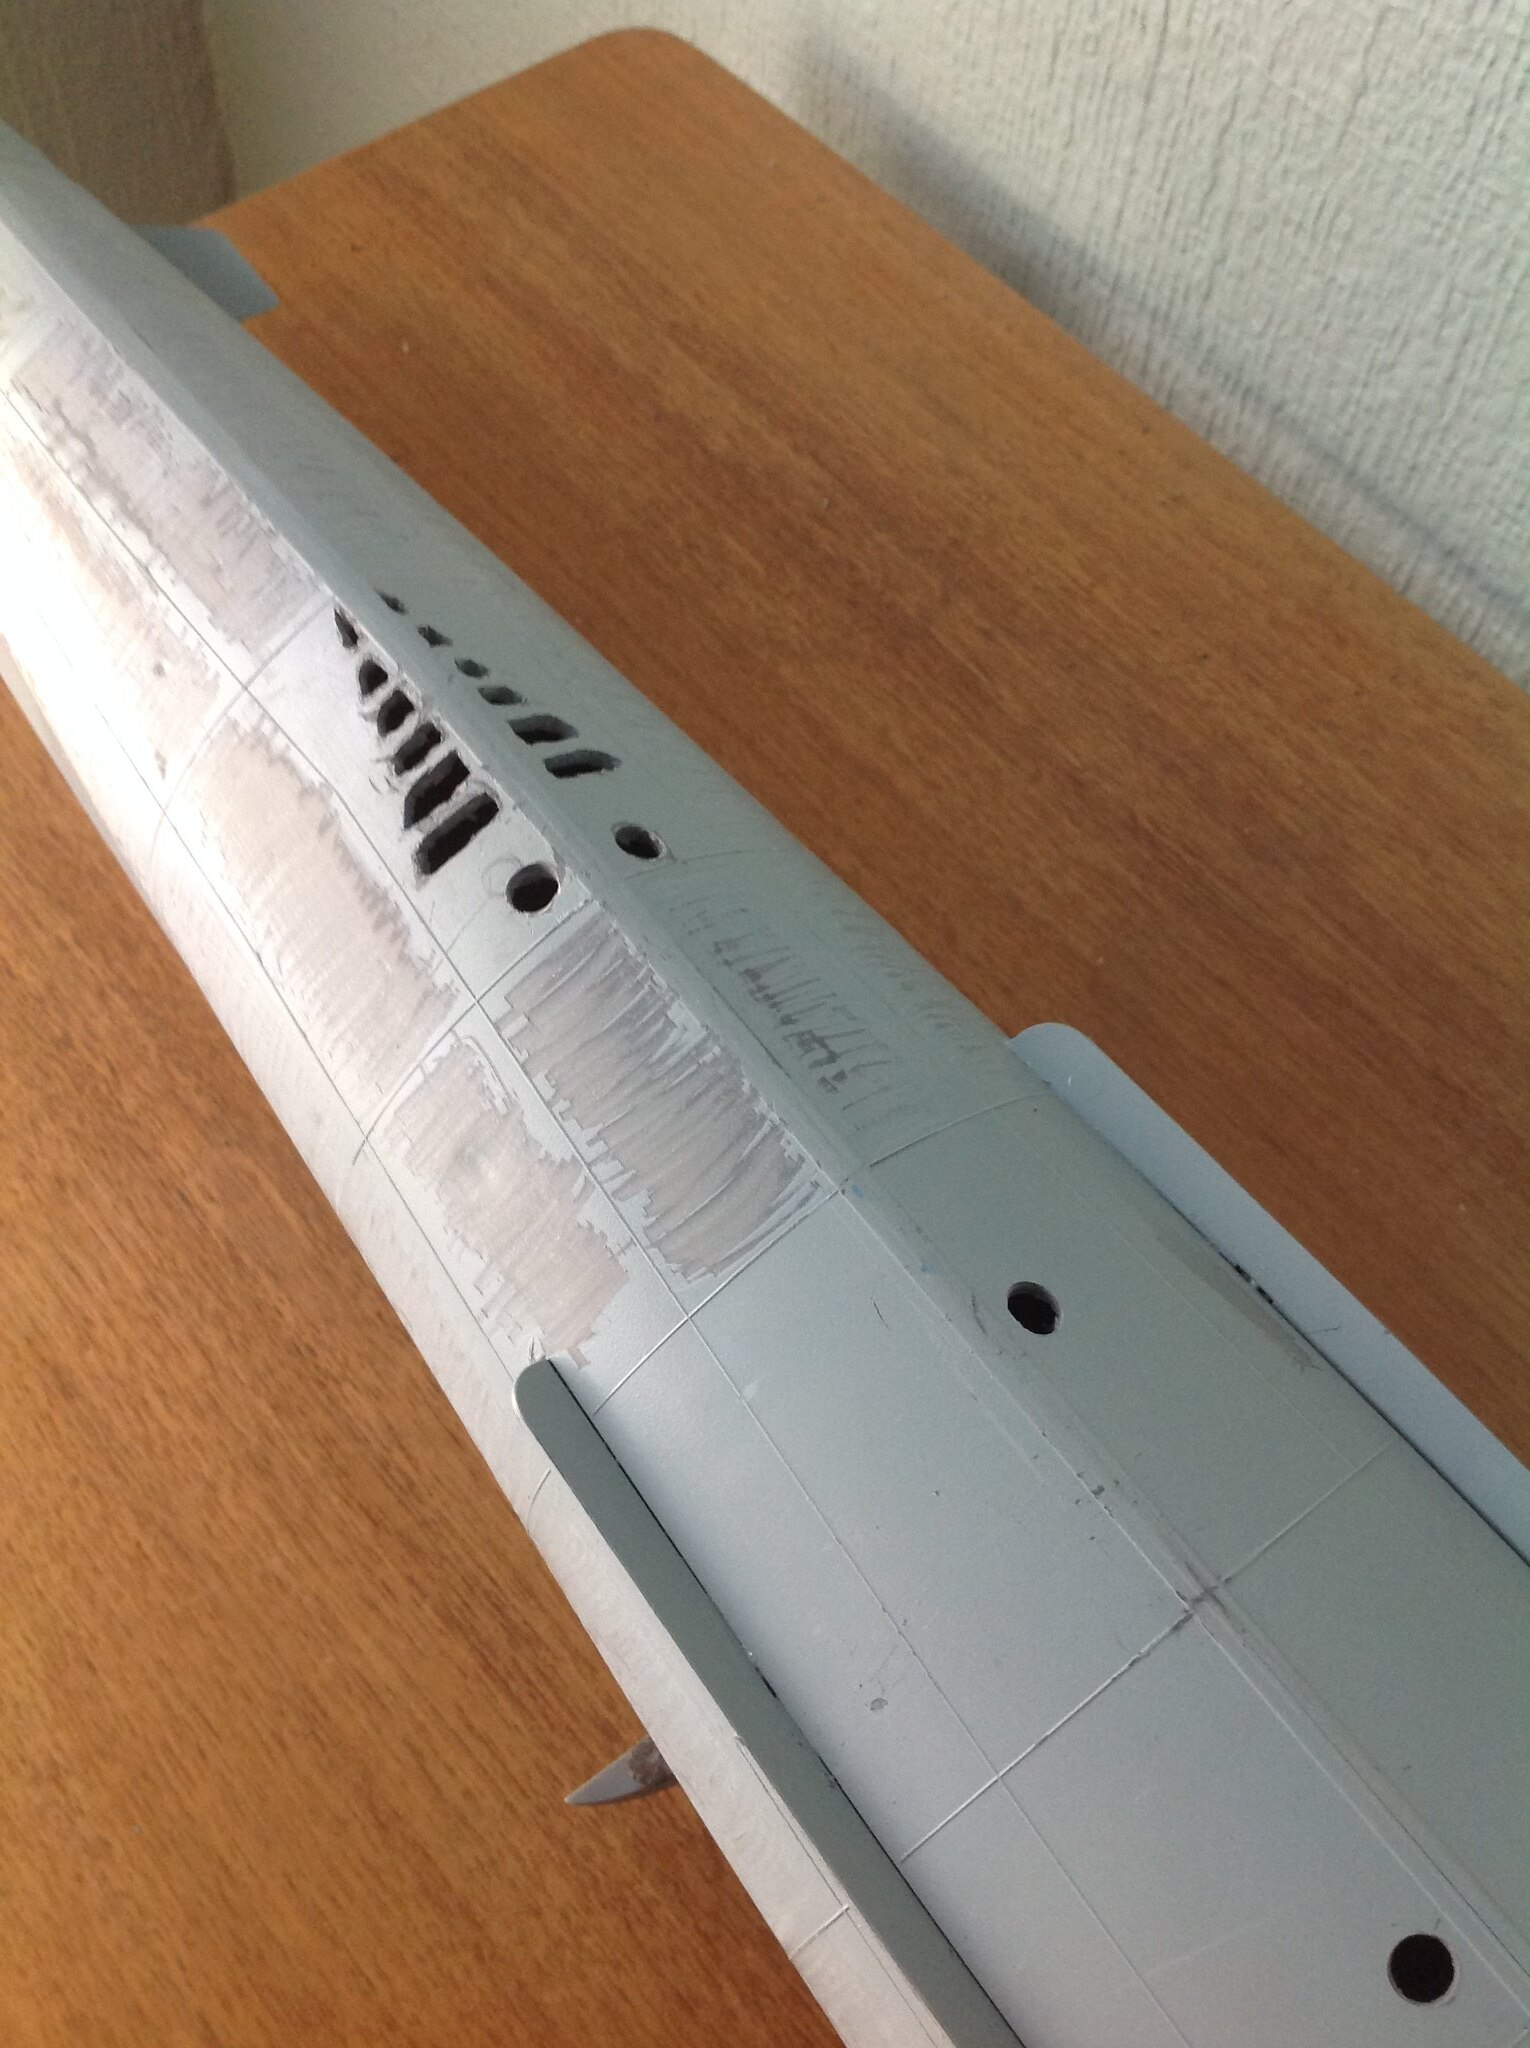
Ok here we go. I still need to rivet it and clean up the flood vents, but its nearly ready for paint!
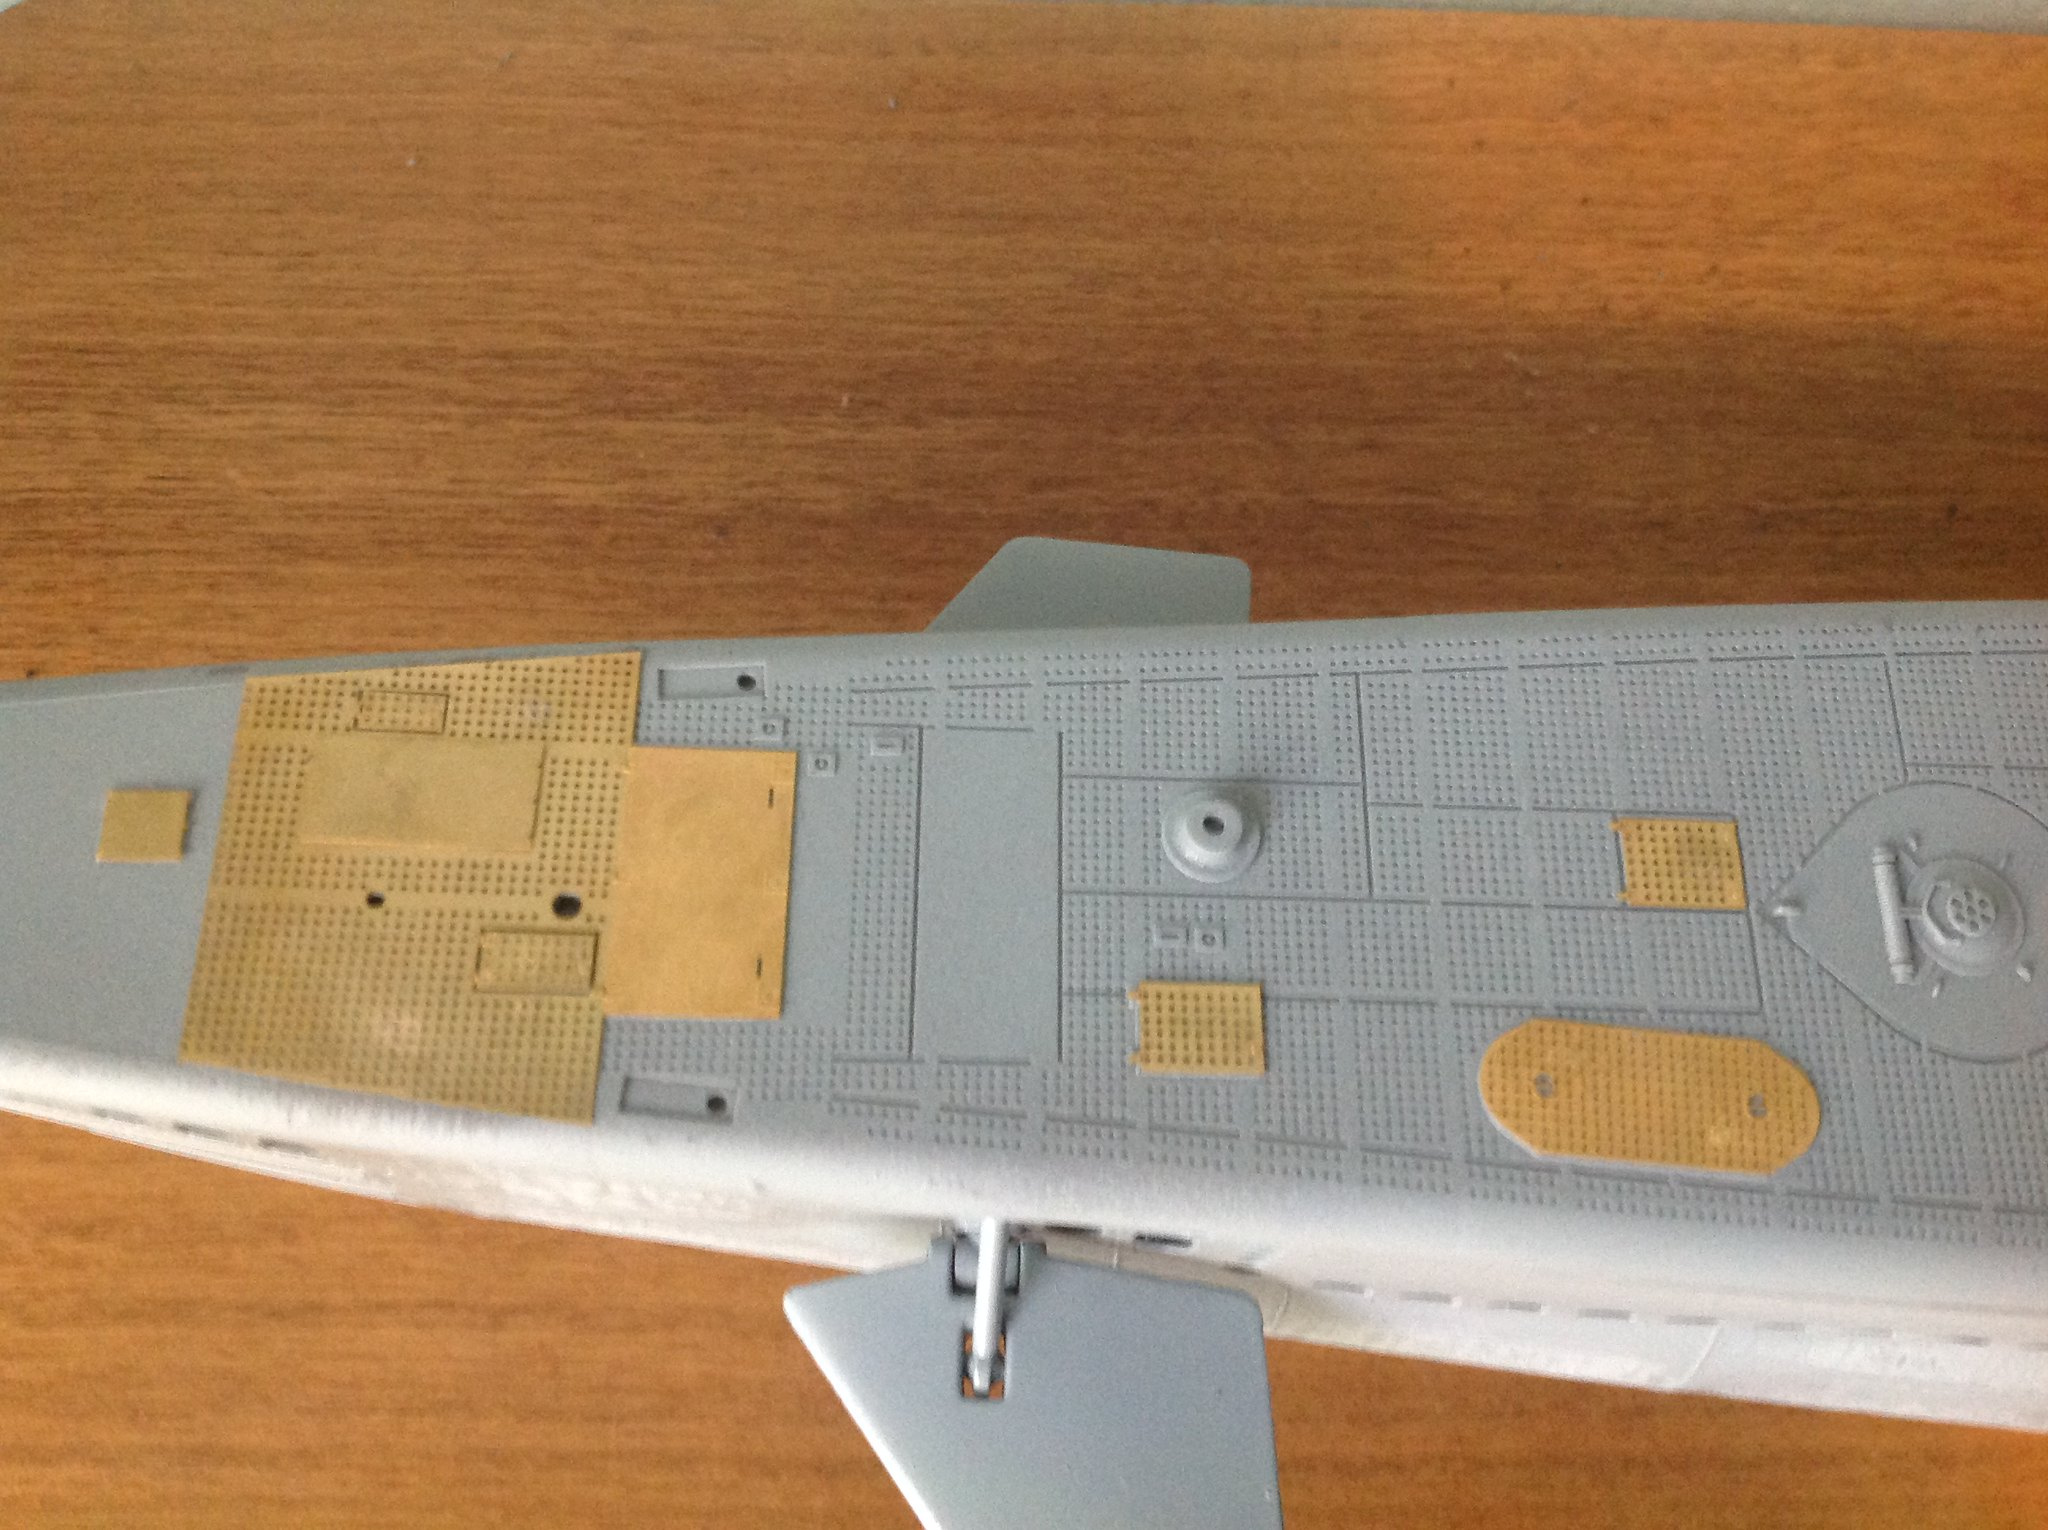
looking at the wood deck.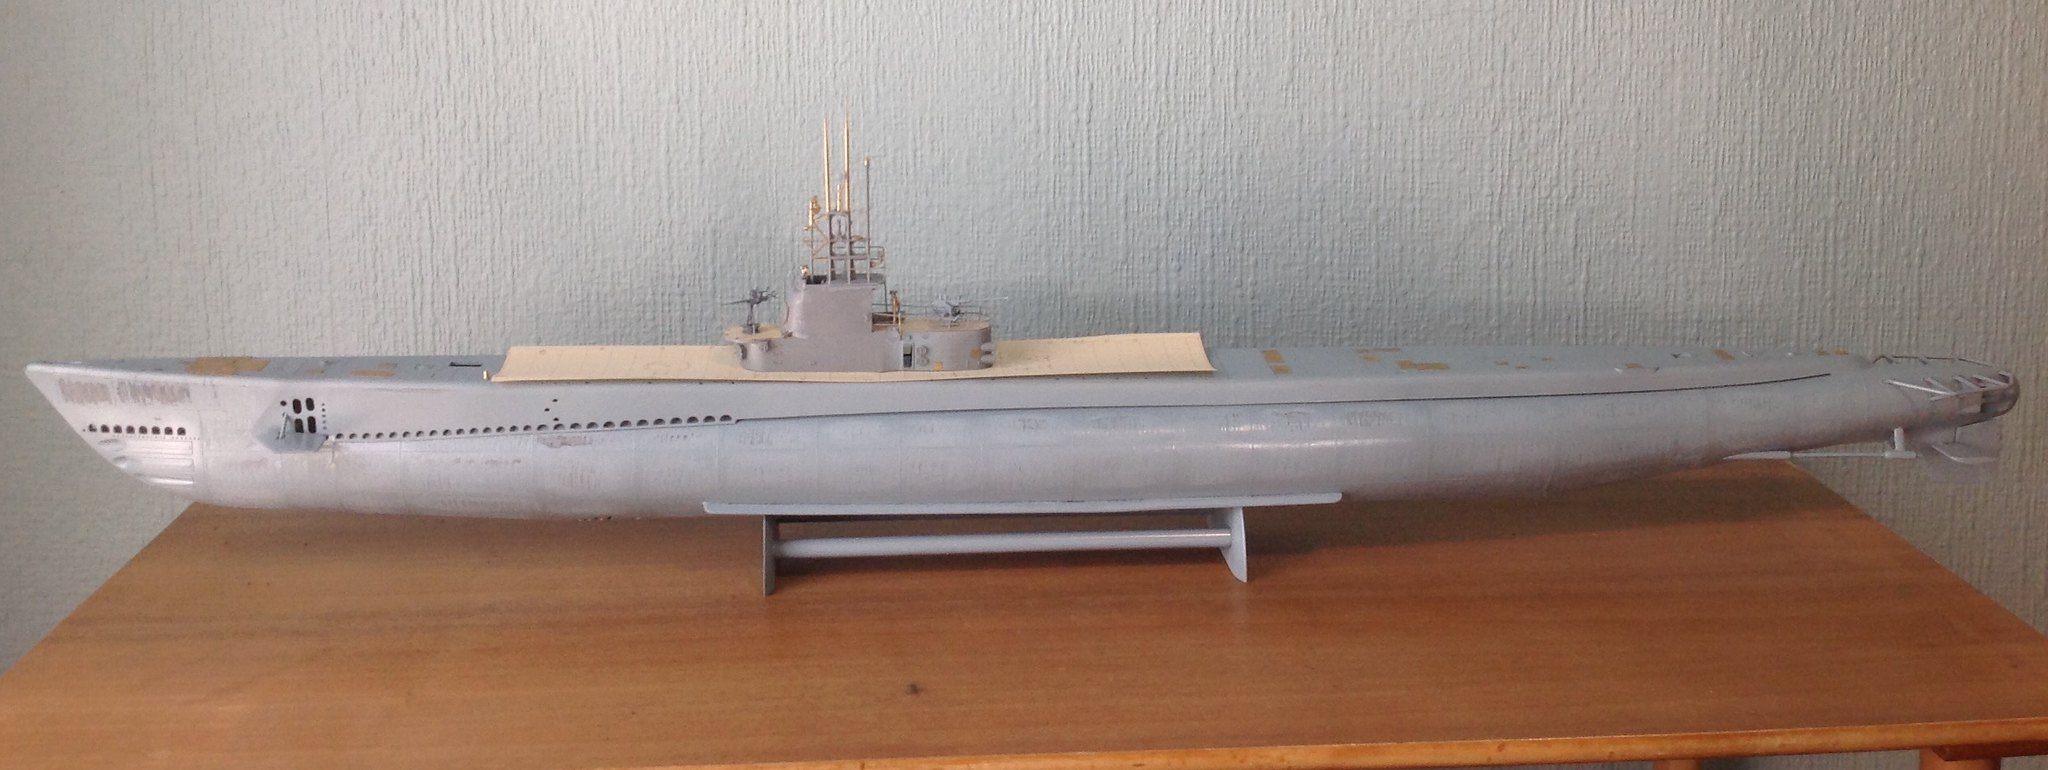
Flood holes.
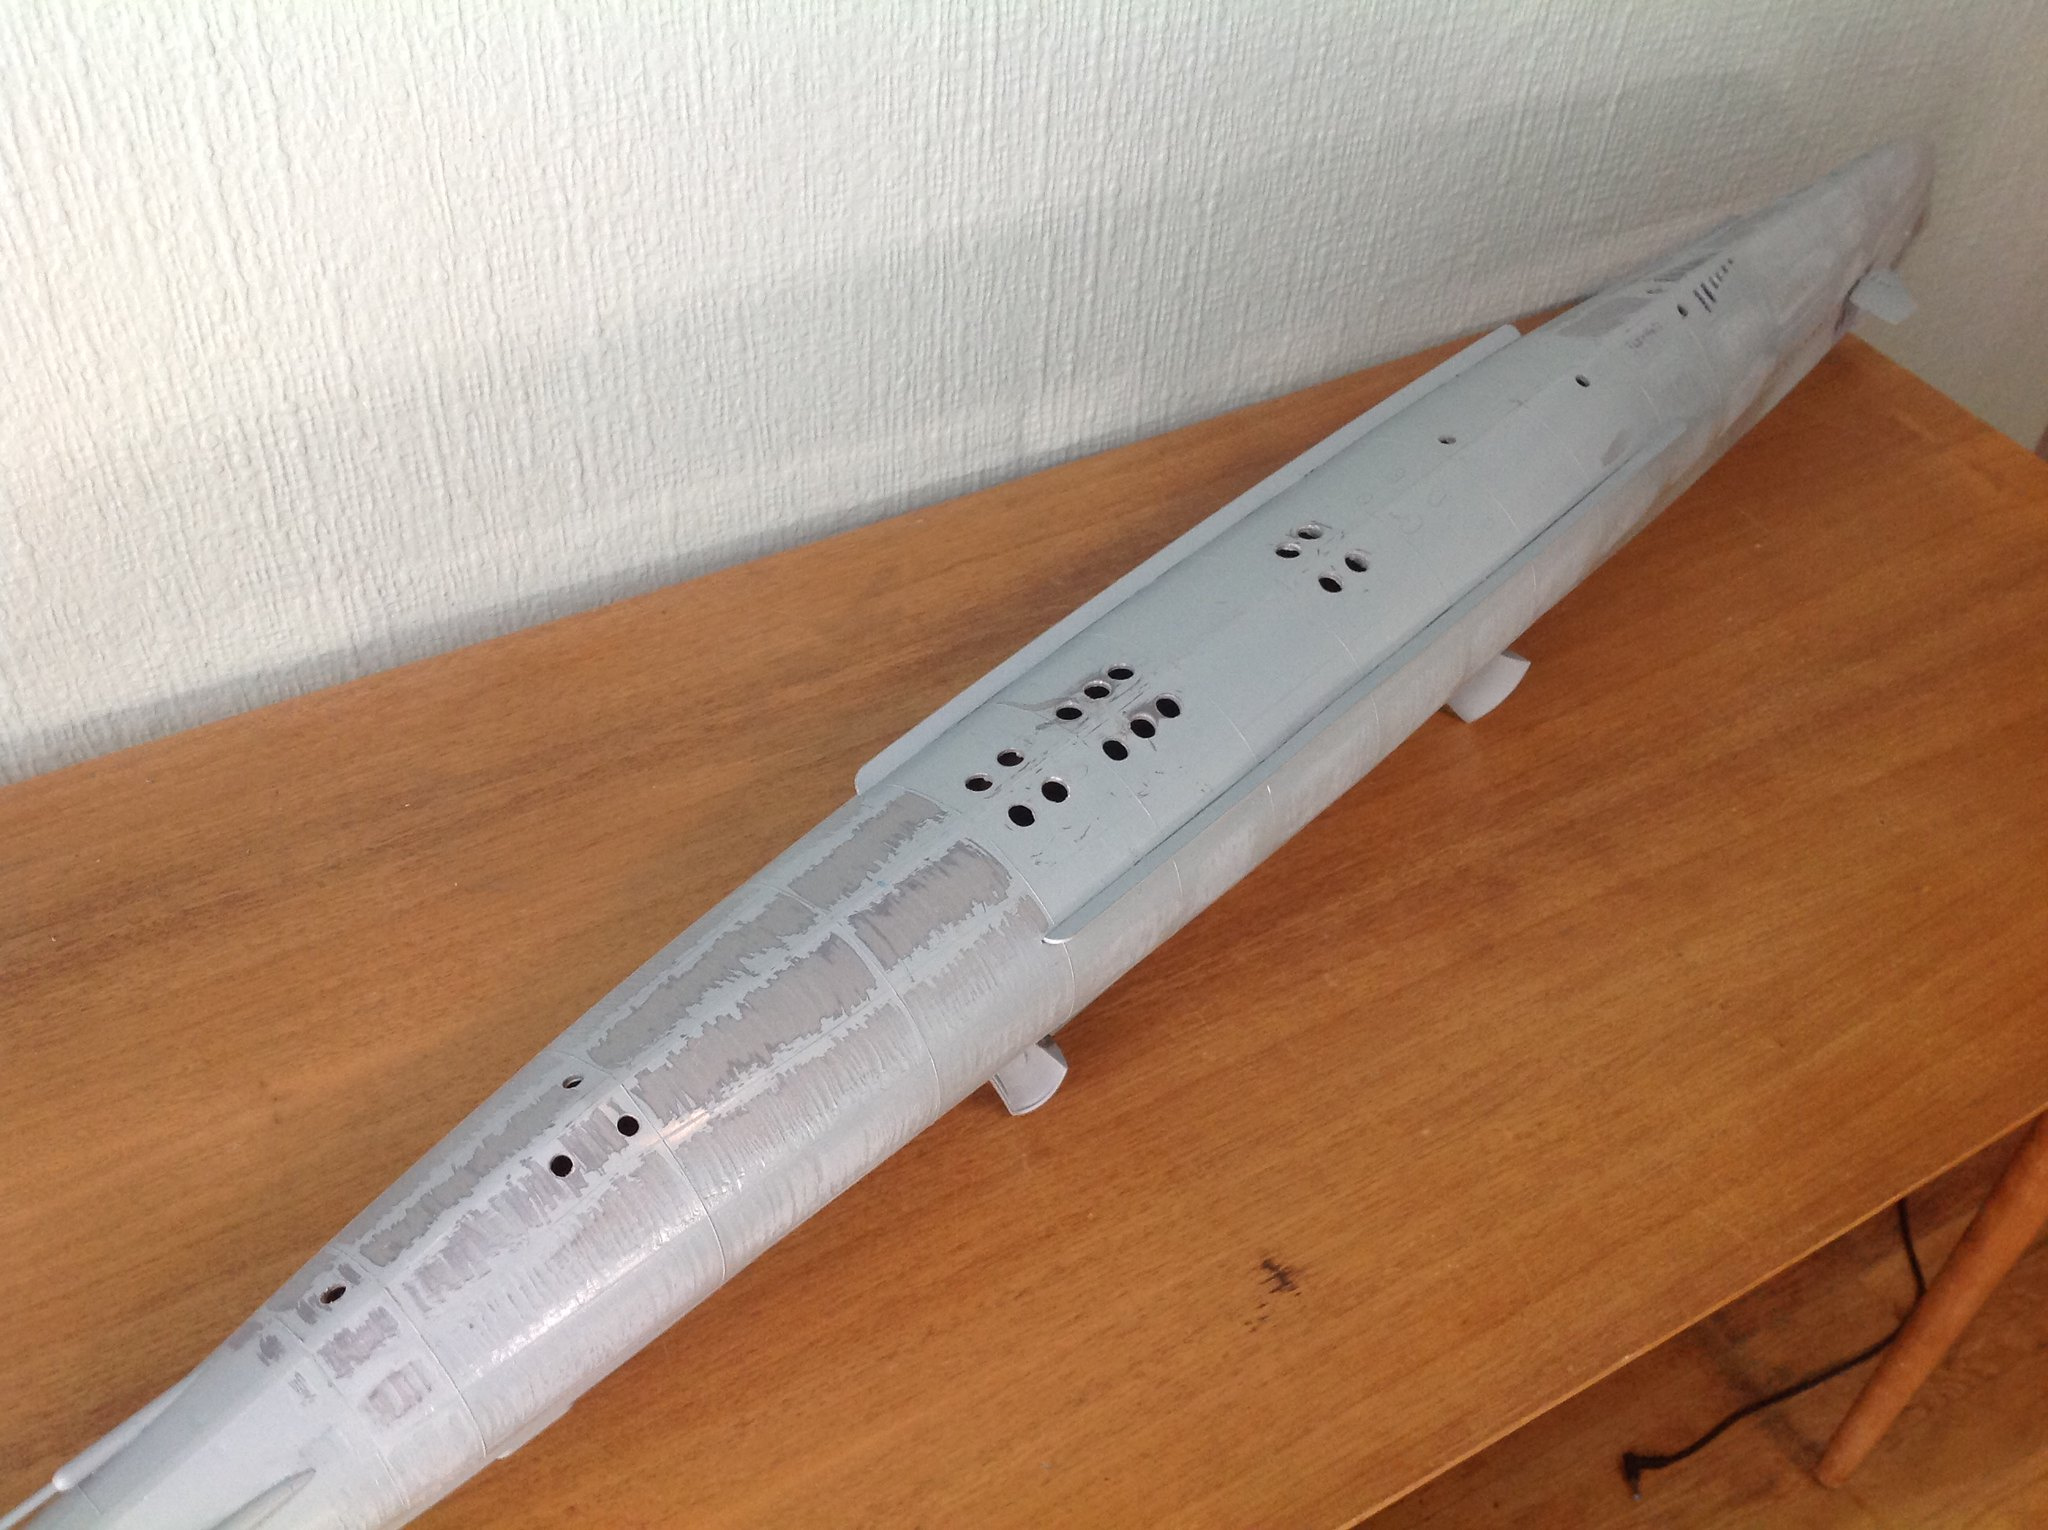
These still need some cleanup.
5 Likes
Disaster! last night I applied the wood deck to the sub, and left it on my bench overnight ( I work in a separate room) and i left the window open and over night (I think) the temperature change warped the deck! It might have been my fault applying it, but i dont think so. Im still debating on what to do because as nice as the wood deck is its a little inaccurate in the fact of there is a noticeable gap between each plank on the real sub, but that is not shown on the wood deck but it IS shown (partly) on the kits molded deck. What do yall think on how i can fix the WD or remove it and use the kit one, or whatever?
In this kindly donated photo you can clearly see the gaps between each plank.

As you can see in these next photos the damage to the deck.
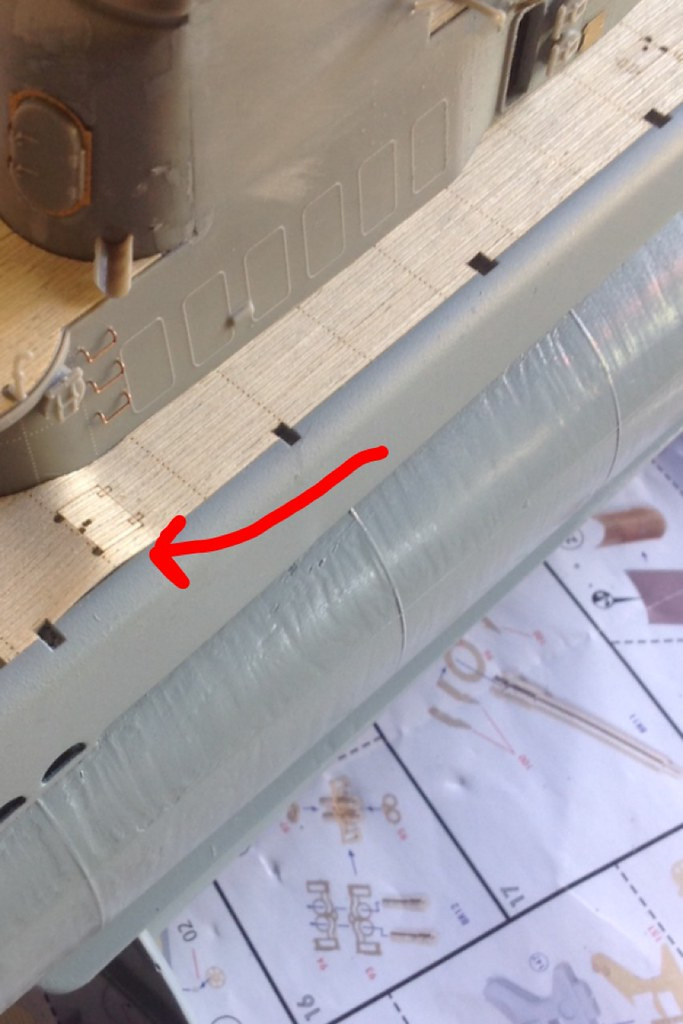
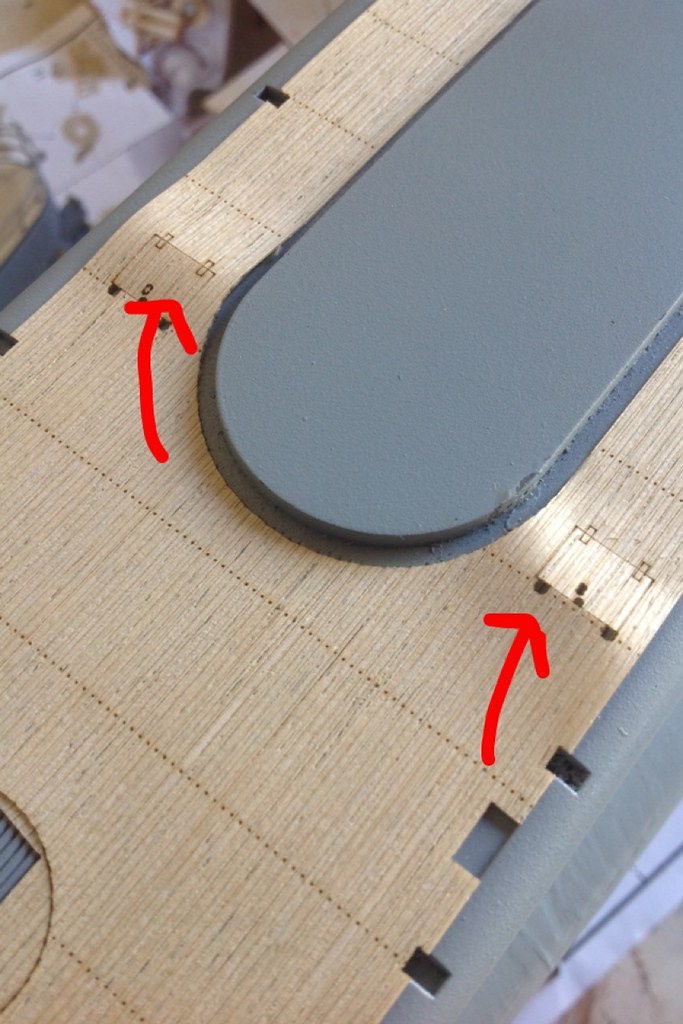
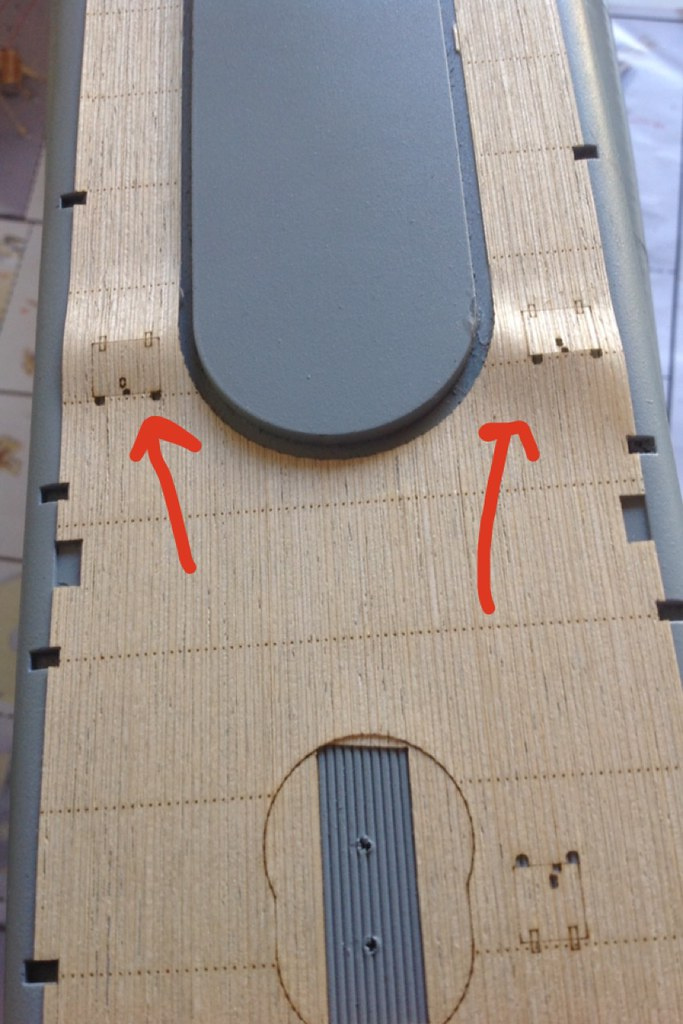
Another problem is the deck is about 1mm short so even after being placed as evenly as possible some details dont match up with there respective holes and details.

4 Likes
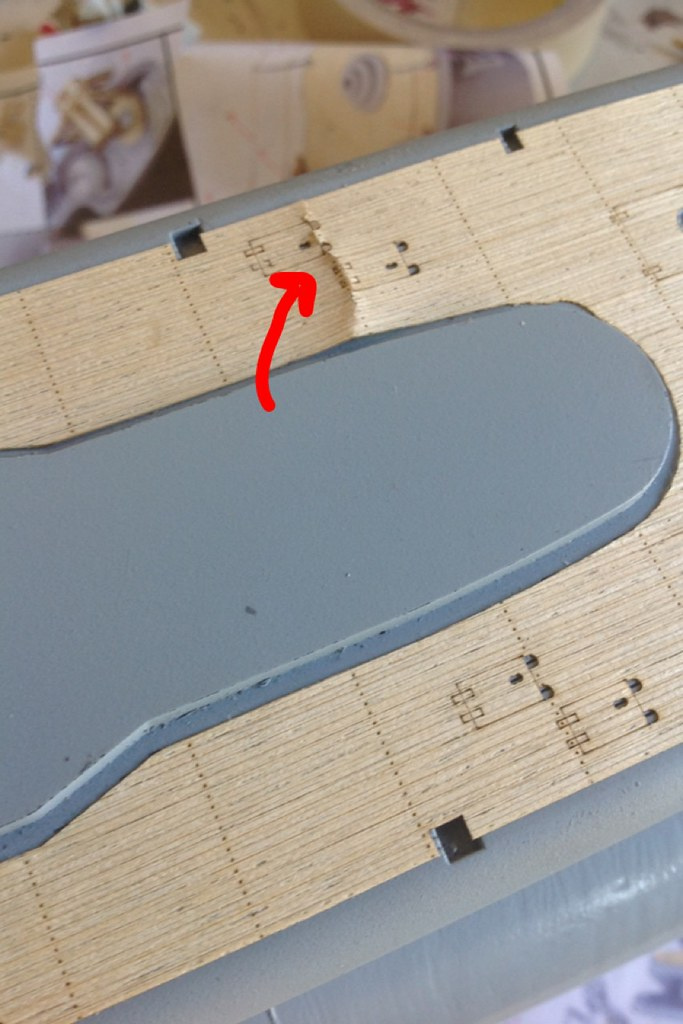
Alright, now that what to do about the wood deck has been sorted out, I carefully pried it up off the kit deck then I scribed the kit lines deeper so they will look more accurate. Next I started applying some PE to the deck. Im still undecided if i should drill out all the holes on the plated deck or leave it.

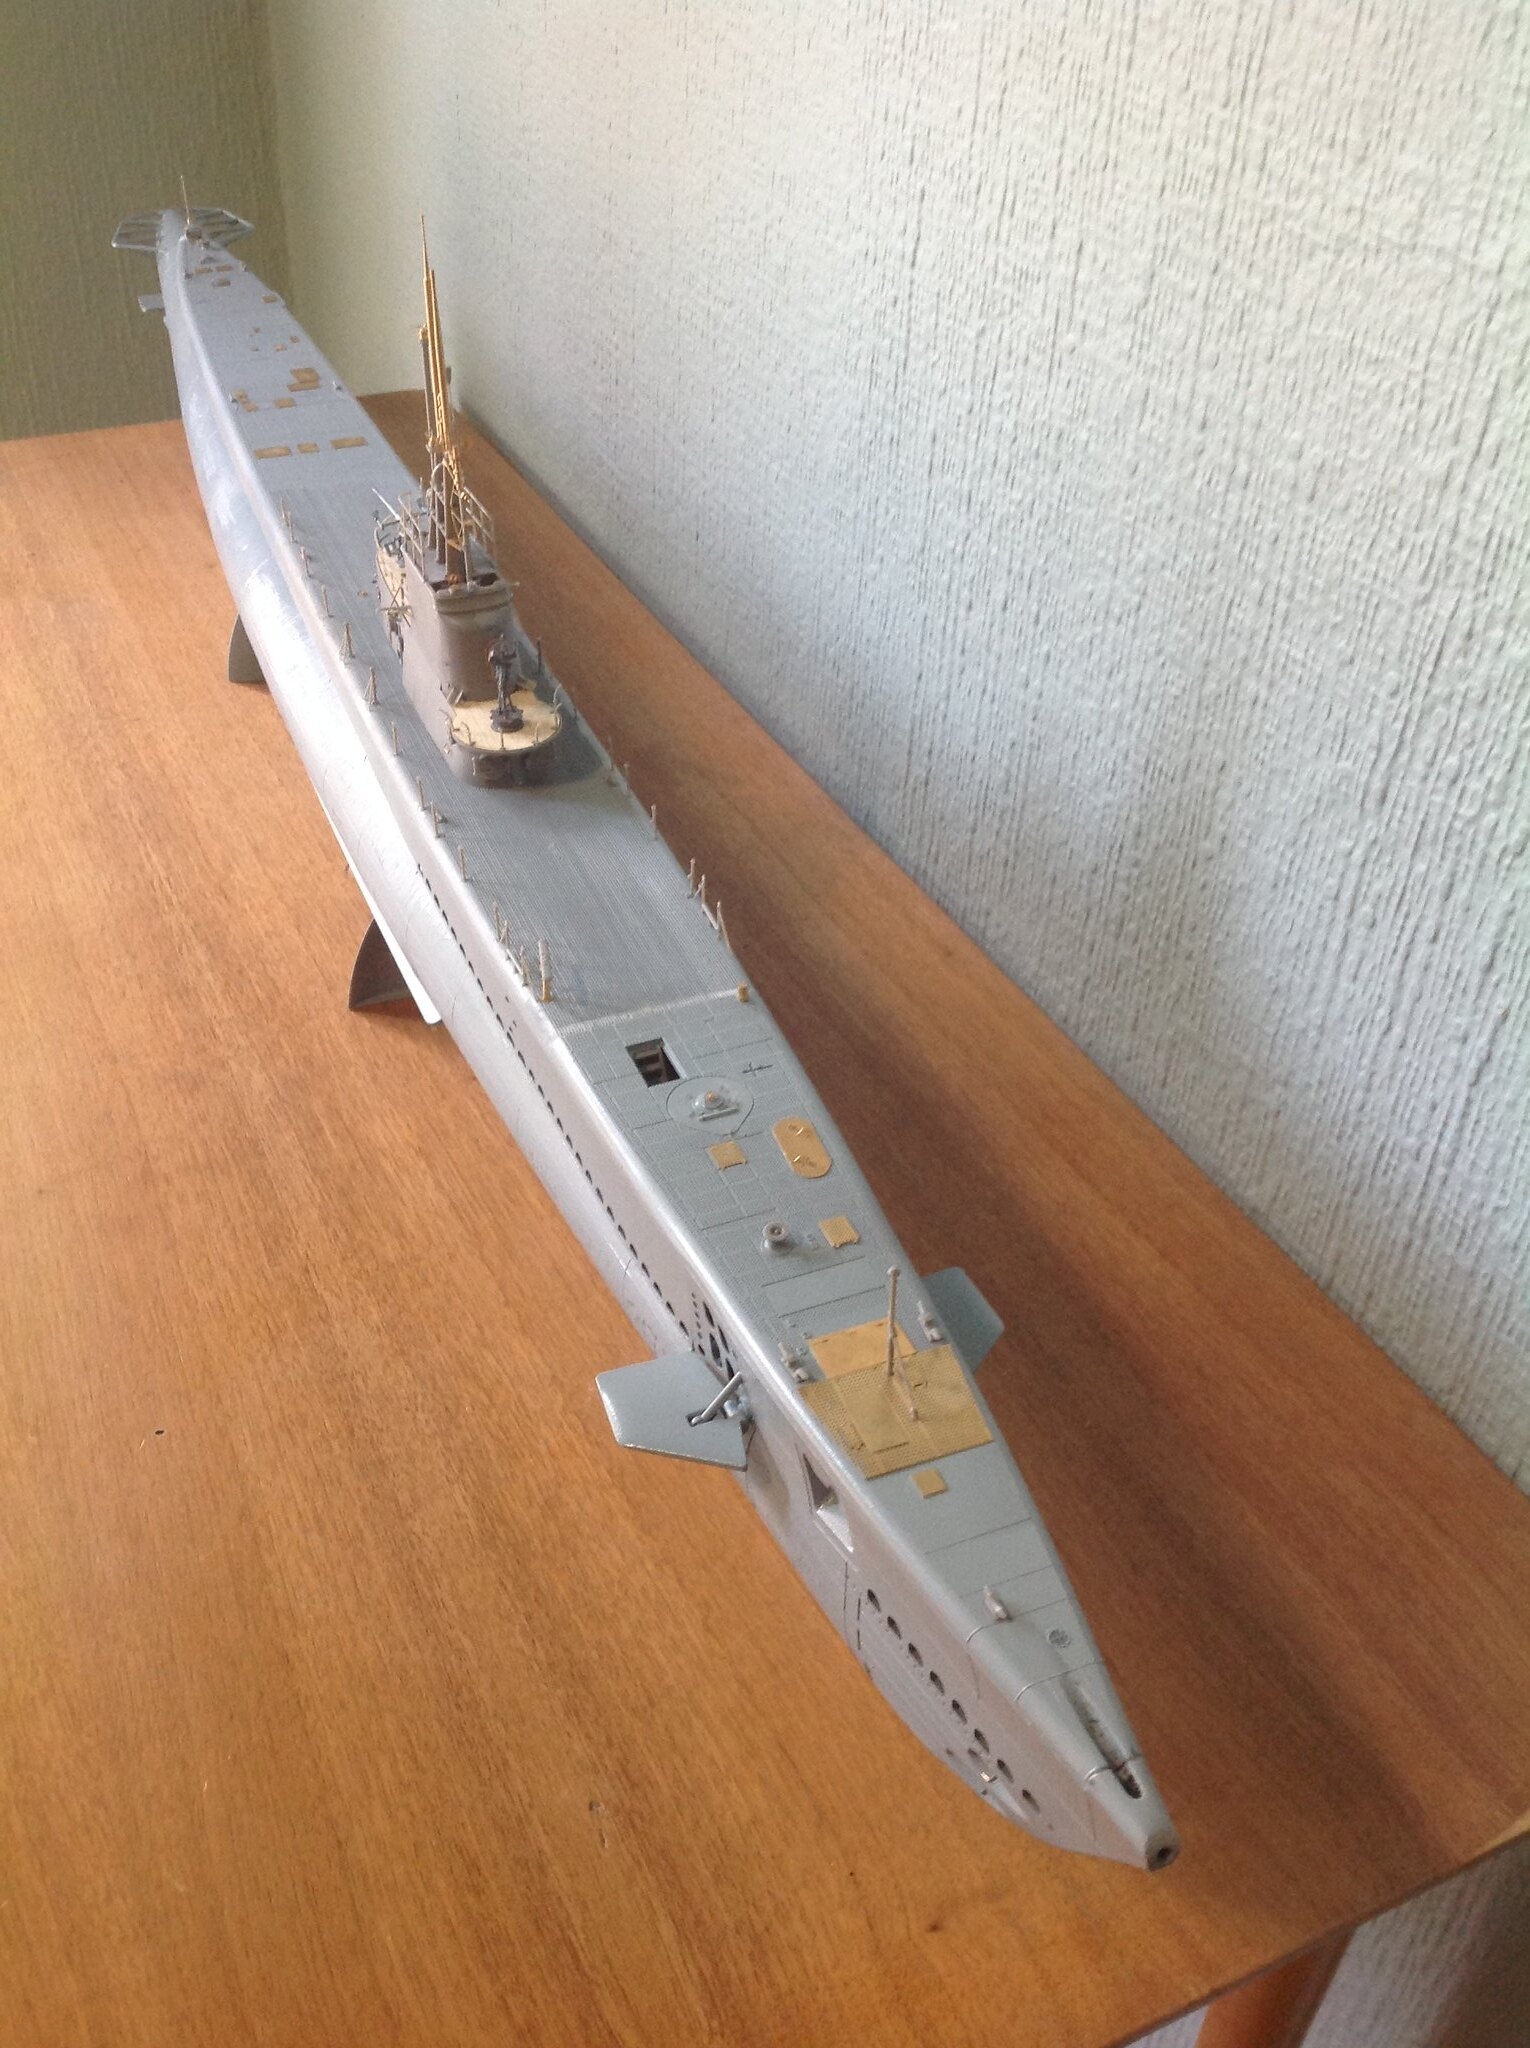
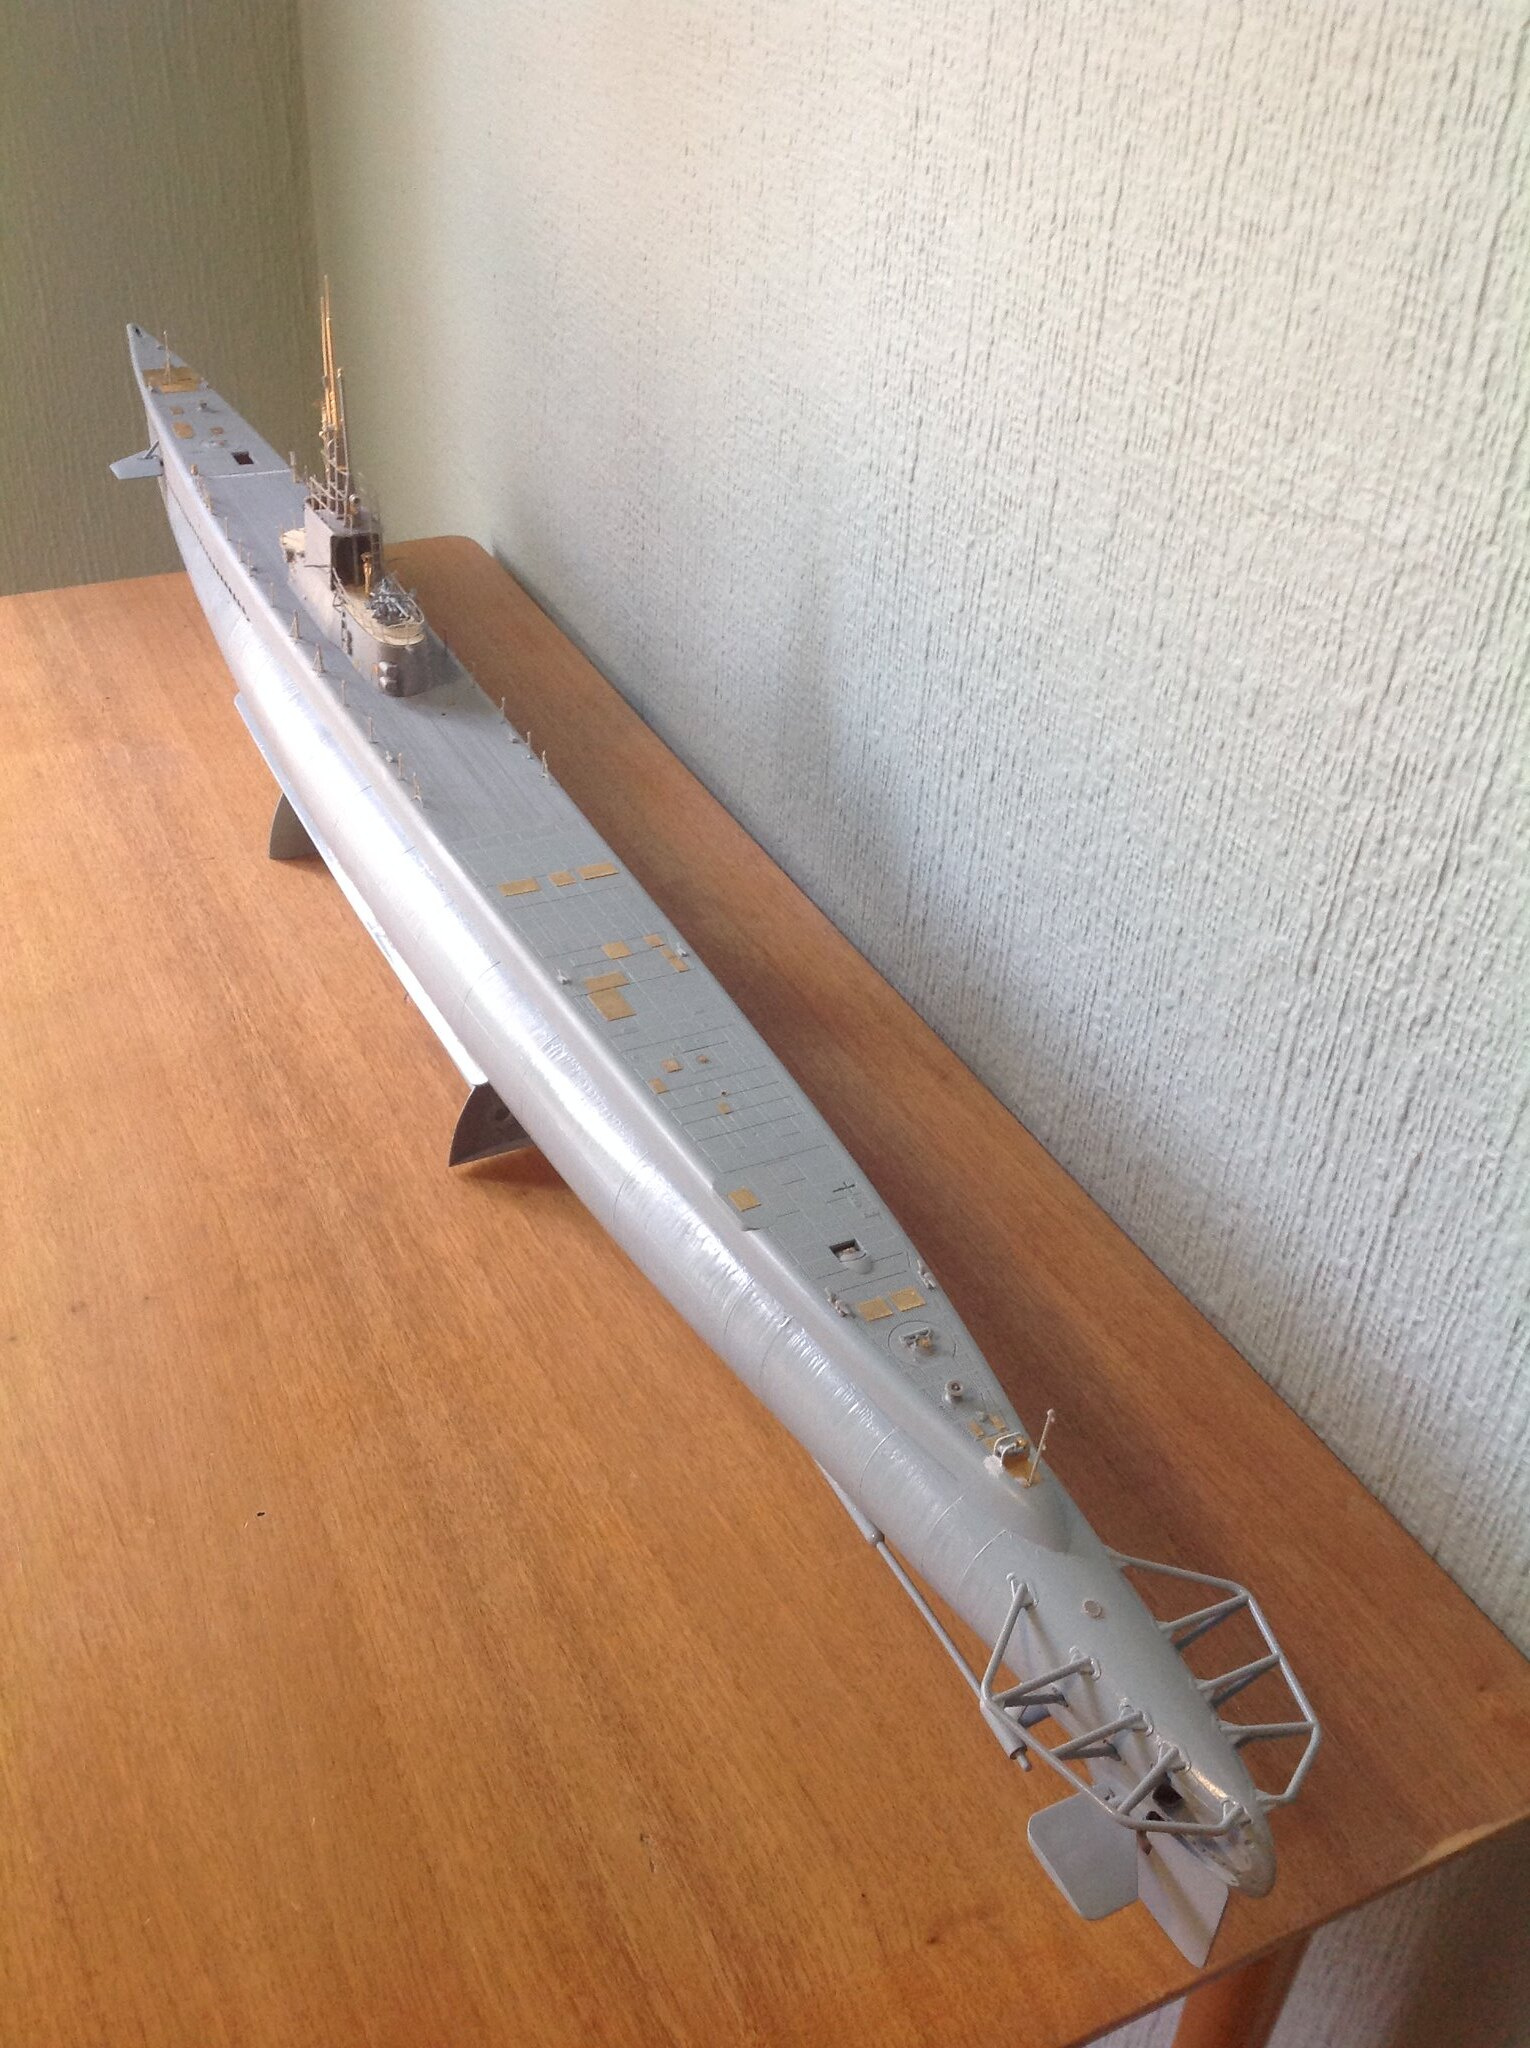
And this is where she sits on my workbench! (the move from the old forums was very easy so if anyone needs any help feel free to DM me!
 )
)
8 Likes
Ezra, I know it is a pain to redo things, but thanks for reposting this from the old MSW site! Now we can have the complete picture of the build right here as you progress. 
1 Like
Hey Ezra! Good to see this build over here too 
Thank you! I cant wait to continue it!
Wood is a “live” material so it will respond to changes in moisture. having it sealed completely with paint/oil/lacquer helps a little by preventing moisture from getting in.
Scribe those joints deeper and mark them with washes. Same for the holes. I would drill them out


1 Like
Wow Ezra this is certainly an impressive model and you are doing an incredible job on it! The PE is amazing! Sorry to see the wood deck gaffe. Like Robin said, if you had sealed the wood on all sides with a clear varnish first, it wouldn’t have warped like that. It did that from getting wet (glue) on one side and not the other. I learned that the hard way with wood trim pieces. You have to varnish all sides or it twists and turns! Still, you are producing a masterpiece. Thanks for sharing such a beautiful project.
1 Like
When I glued thin mahogany trim pieces on a wooden boat model (Billing Boats, bleach)
I wetted the visible side with water to counteract the warping caused by the glue.
1 Like
Thank you everyone for the tips! Im 98% sure i will drill all the holes out, and ive scored the wood planks a little deeper already. I will hopefully get to drilling in a couple days as my drill bits ive ordered will take bout a week to arrive. 

I’m sure looking forward to seeing more progress. I was unaware of the wood planking option. I have the Revell kit with the Big Ed PE set. The PE accurately depicts individual planking, but it’s no drop in set for sure. While not real wood I’m satisfied with the set. Once painted you’ll never know it’s brass.
Which boat are you building? I’m doing the Flasher. All of the fairwaters were different for each boat, but I was lucky enough to discover the sail on the original Flasher is on display in Groton, CT. (Where I briefly lived as a kid) Also a walkaround of the Drum, which was a Gato class as well,
The deck guns and several other details were different on the Flasher as with the other boats in the class. The thing that sort of stalled the project was the torpedo doors, there were I think three different styles of doors.
If I ever finish it I’ll mount it on an actual plank from the WWII Flasher. I have a bronze model of the nuclear Flasher, SSN 613 mounted on it now, but that just doesn’t seem quite right to me.
If you need any photos let me know.
Ezra, a couple of things I do with wood decks that may help:
- always apply to a primed surface as it will grip better than raw plastic
- always seal the timber with a clear gloss coat. This can be painted over with either satin or mat clear coat towards the end of the build when you want to clear coat the whole build. The gloss coat will also allow you to apply decals as well.
- for any bubbles or areas that lift up, you can run a little thin super glue in and press the deck down-this will help you to avoid having to rip the deck up and reapply…
Hope some of this can be helpful
Thanks for all the tips guys! Right now i’m doing some wires on the sail so expect a update in a day or two!! Here are some pics of the wires im doing:


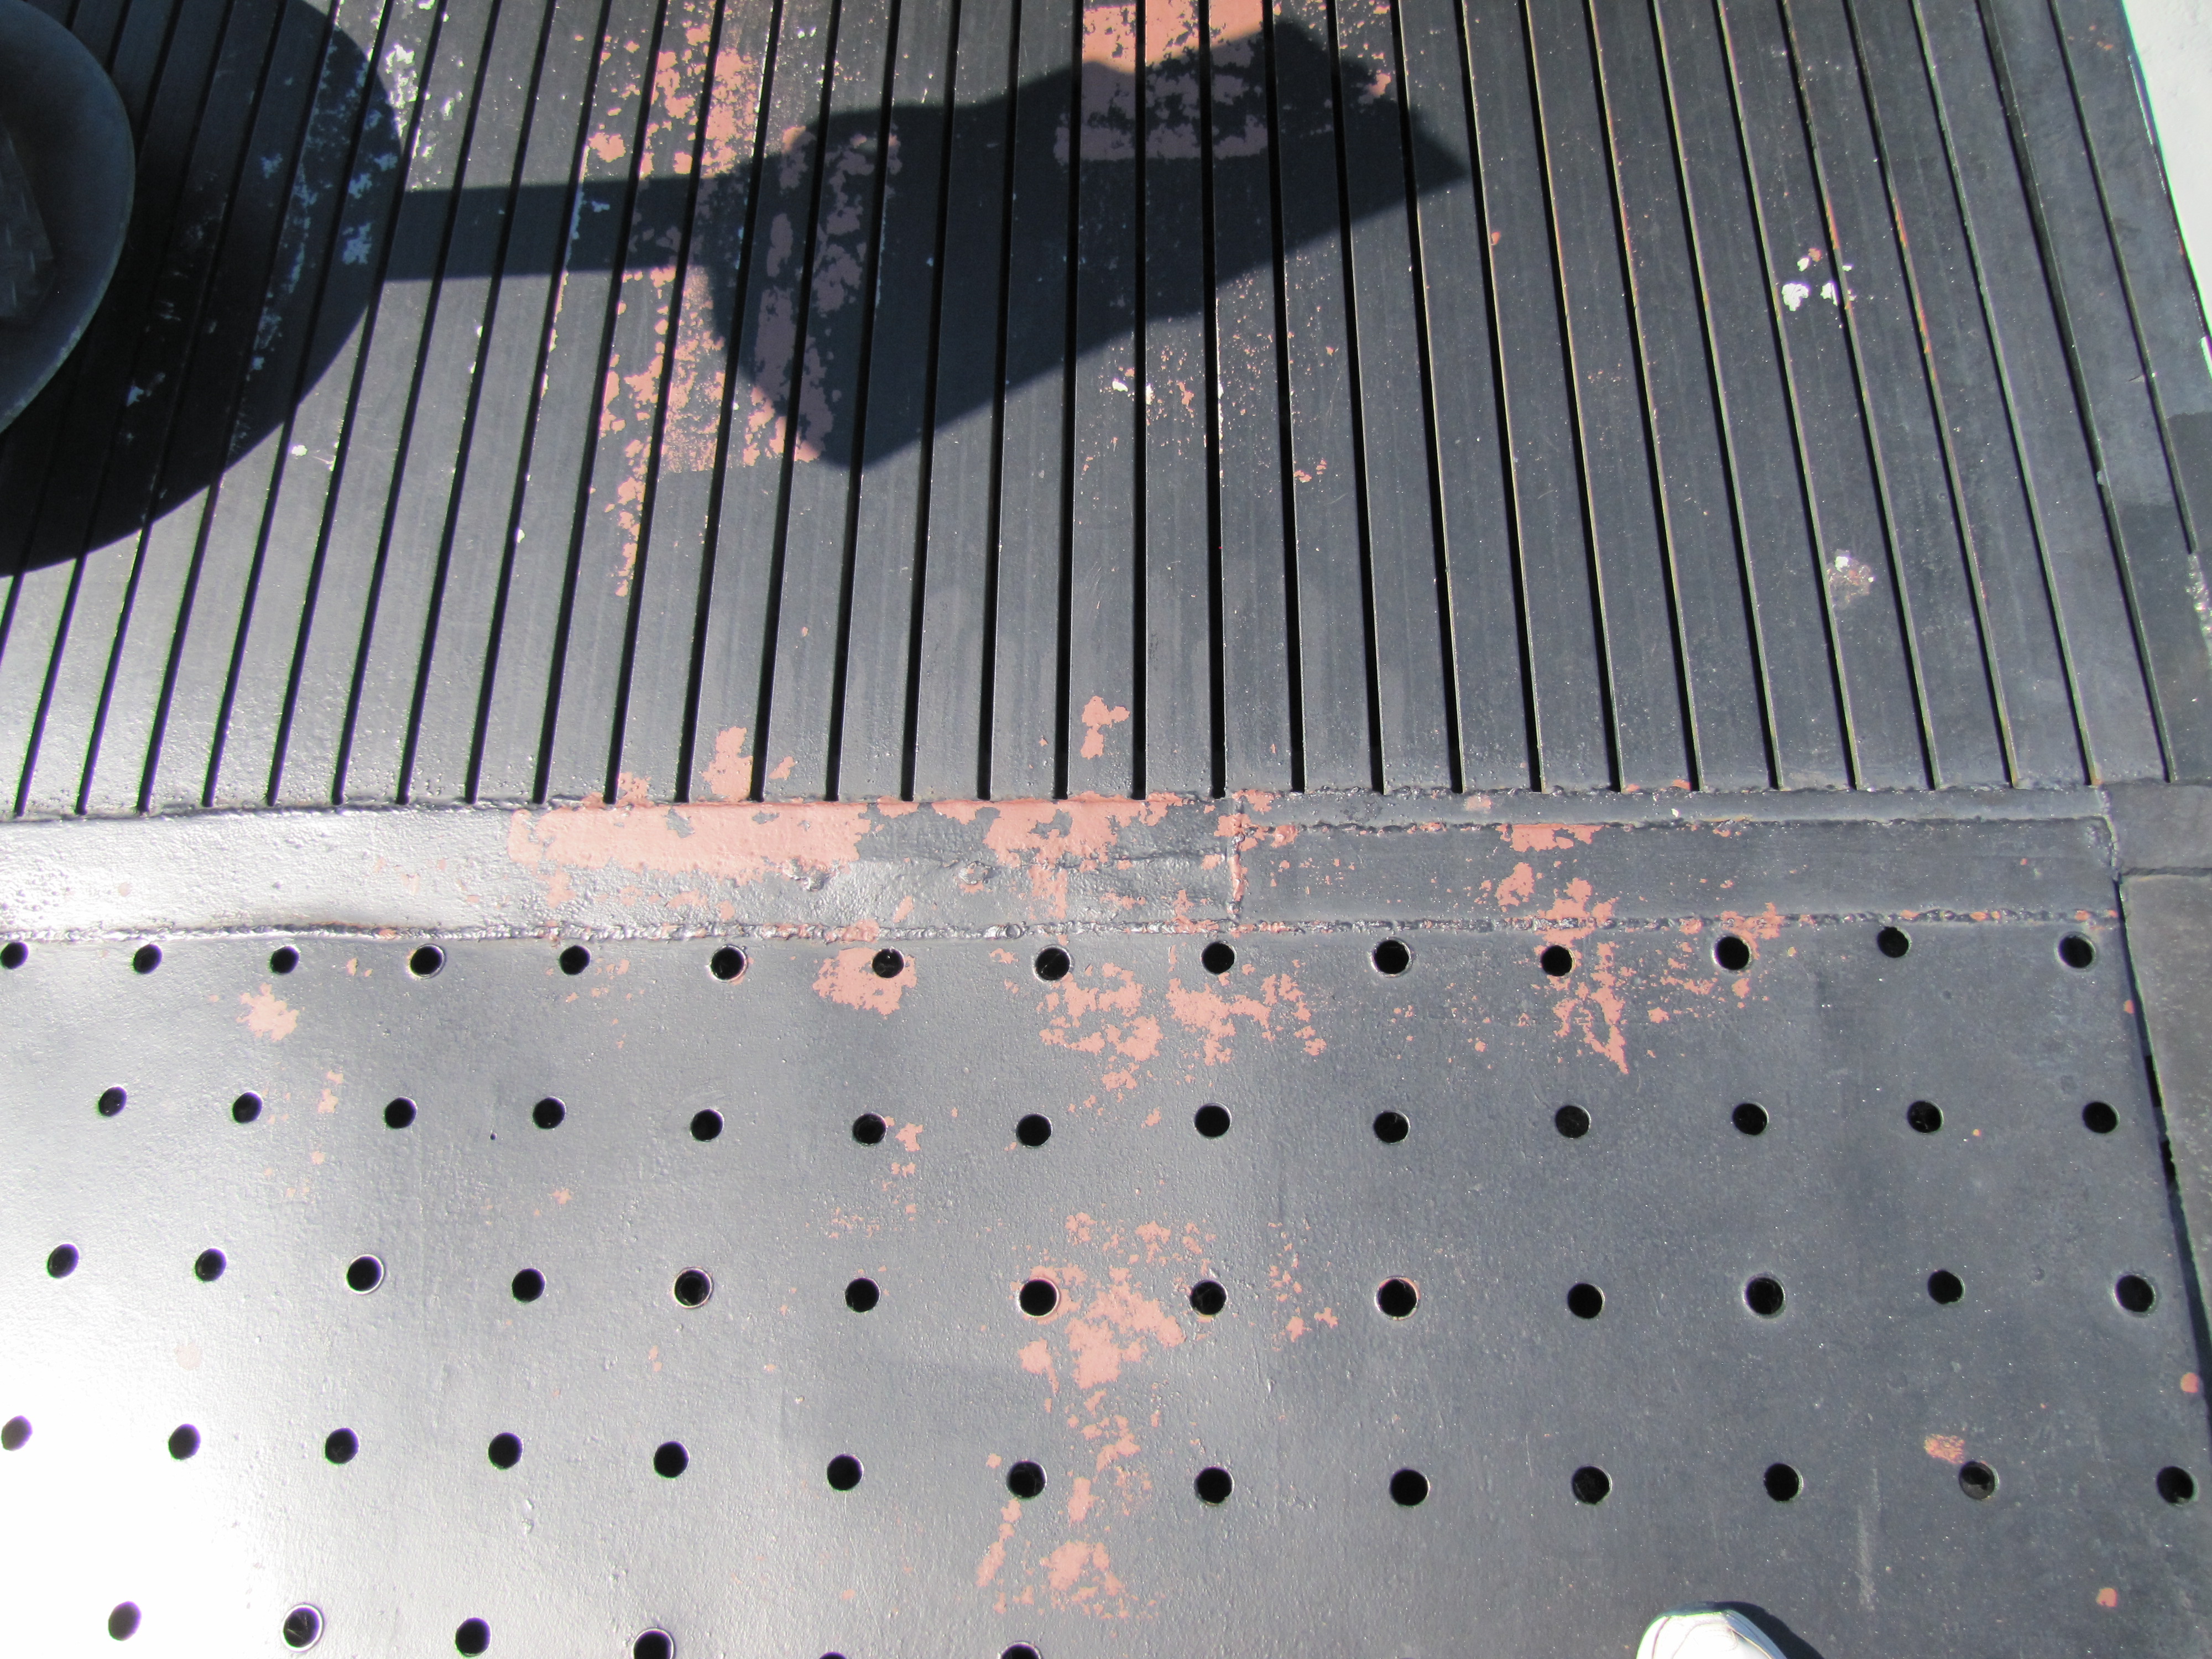
By the way does anyone know what color the chips on the plated deck would be? This pic of the Drum I have below shows it chipped to a reddish color. Does anyone know if this is accurate?
Like I said look for a update tomorrow or thursday!
1 Like
Ezra,
that somehow slipped me so far… Great work, thanks for re-posting in the new forum. Tough with your wooden deck, but as was said great recovery. 
I’m certainly in and following and looking forward to your next updates!
Cheers
Jan
Ezra,
Watching your work thus far I’m confident that you will find a way to whip those wood decks into shape!
As for your question about the reddish color of the metal areas below chipped paint, I think the unweathered color would be red lead, which was commonly used as a primer on U.S. Navy ships in the World War Two era. This would of course apply to new chips; any steel left unprotected for long would soon be subject to rust…
