Revell's USCGC Eagle

I built this kit longer ago than I’d like to admit, and for years it was hanging from the ceiling at the house my family had in Virginia Beach. Recently we sold the house and while the model was carefully packed up for moving it to it’s new location, it was significantly damaged in transit.

I can repair the damage to the masts, yards, sails and rigging, but I was wondering whether anyone on the forum has this kit somewhere and can send me a copy of the rigging instructions. I can probably figure it out from pictures available on line but I think it would be a whole lot faster and easier with the instructions.

Thanks!!

Does this work?

2 Likes

Dang! You beat me to it by a few seconds

2 Likes

What can I say??

This site and its members are terrific! That is EXACTLY what I need and will be a great help.

FULL DISCLOSURE:

The kit was originally built (and painted) when I was very young, and the kit was no doubt newly released!

It shows!

And there are a number of yards that have gone missing and well need to be scratch/replaced along with a few other parts.

I will reassemble this to the point at which it may resume its place of honor as a ceiling decoration at our lake house,

But there will PROBABLY be no photographs!!! :laughing:

Thanks again, this group is the best!

2 Likes

You could also buy the Eagle Sailing Manual:

It has a complete explanation of the rigging and a pin rail diagram showing where every running rigging line is secured. (I had to memorize them when sailing on her about 10 yrs ago)

1 Like

Looking at a lot of photographs, it appears that the kit is rigged slightly differently than most of the photos. One explanation of course is that like many kits of that era, it may not have been as deeply and accurately researched before being issued and thus may not be accurate.

Another possible explanation may be that there may have been some slight changes over time, and in particular the mizzen mast arrangement seems to be slightly different. And the biggest difference is at the time the kit was issued, the ship did NOT carry the distinctive broad Coast Guard flash on her hull.

The overall quality of the build relegates this to a hanging ceiling ornament rather than a display and accurate or not, since the instructions are specifically for this kit, I think the easiest thing to do is simply use them.

I also had a chance to tour the Eagle while she was tied up in New London. At the time my dad was an ROTC instructor at U. Mass (that alone will give you an idea of how long ago it was!), and was the coach of the pistol team. He allowed me to go to the match with the Coast Guard Academy. Some poor mid-shipman was delegated to show me around and of course one of the places we went was aboard the Eagle.

I can’t remember for certain which came first, my tour or the purchase of the kit, but I’m pretty sure like most of my model choices over my life time, the visit inspired me to buy the kit.

1 Like

The Eagle started life as the German Horst Wessel,
the Horst Wessel belonged to the Gorch Fock class but was slightly different.
Revell has packaged the same plastic in boxes labeled Gorch Fock and Eagle
so I wonder if the plastic parts are a “true” representation of the Gorch Fock or the ex-Horst Wessel …

The original Gorch Fock was probably unavailable when this kit was designed so maybe Revell used the Eagle as prototype.

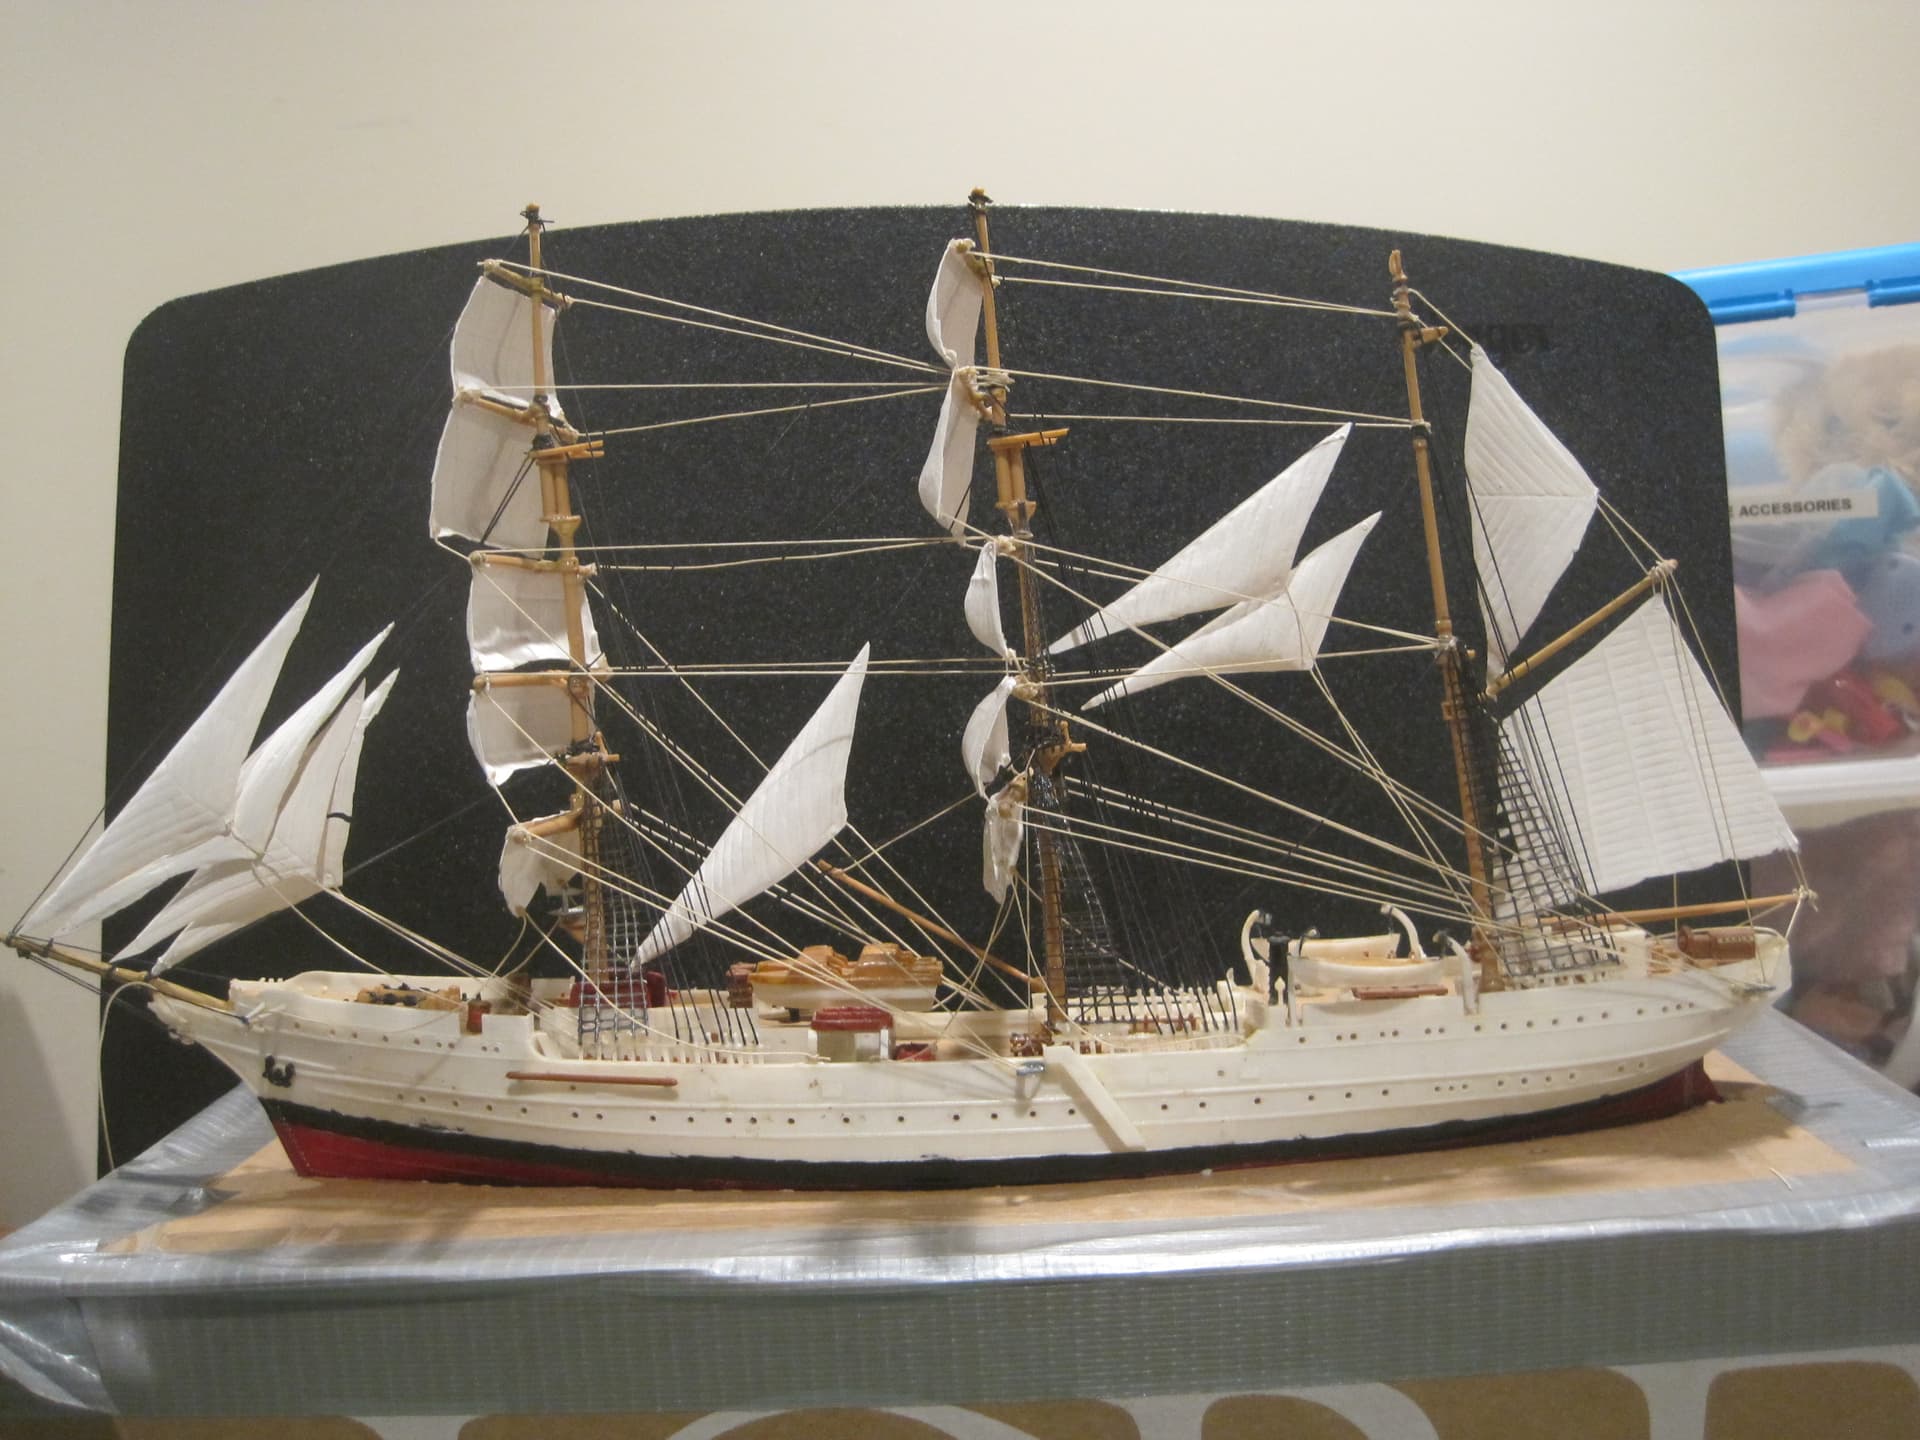
Good questions. While the canvass which is hoisted can clearly vary due to any number of conditions, two things I have noticed that are different between the rig of the kit and almost every photo I can find of the Eagle. Like the photos, the kit has a foremast staysail and jibs, a flying jib, an outer jib and an inner jib. Between the foremast and mainmast the kit has only the Main Royal staysail, while almost all photos show two additional staysails between the fore and main mast.

Like most photos the kit has two staysails between the main and mizzen mast, a mizzen topgallant staysail, and a mizzen topmast stay sail.

That’s just a simple sail choice difference.

The biggest difference between the kit and almost every photo is the fact that on the kit there is only a mizzen boom and one gaff, with a spanker sail between them and a gaff topsail above.

Every photograph that I have found shows TWO gaffs, with a second spanker between them and THEN the gaff topsail above that.

Whether that second gaff was added later (I’m guessing doubtful!) OR was an omission is hard to say at this point.

What is interesting is that photos of the US Revenue Cutter Salmon P. Chase (1878-1907) shows the single gaff rig.

Regardless of why the kit only has one, (and BTW, for some reason in the transit that gaff has disappeared), even though it is just as easy to scratch TWO gaffs as it is to scratch one, I only have the sails to fit the single gaff rig, so that’s how I’ll repair the kit.

As I said, it is now intended to be a decoration, and NOT an accurate and detailed representation of the actual ship. (And as most of you will know, that is NOT how I usually roll. Or in this case sail, :rofl:)

Sometimes owners, or new owners, change the rigging to suit the current needs.
Getting a ship “correct” for a specific date can be difficult since information about the
changes may never have existed. Depends a LOT on what type of owner it is,
small owner/operator/captain, large shipping company, non-profit organisation or in
this case a government agency.
Nailing down the details of the rear end of the USS Constitution is difficult since plans and drawings for the rebuilds do not exist anymore …

Make the rigging “correct” but with furled or not fitted sails?

Well I finally got around to re-rigging this ship. The combination of the fact that the model was built SO long ago, had hung as a ceiling decoration for about 40 years, and then got transported half way across the country, had taken a toll on it. I had to scratch a couple of the yards, which had somehow disappeared, as well as one boat davit, and several of the hard points used to tie off the rigging. I wound up cutting off all the rigging, leaving only the hull and spars and started from scratch. Also a number of the sails, which are quite thin and brittle.had to be “repaired” by taking some very thin styrene sheets and rebuilding the corner using a considerable amount of glue. And in order to ensure the rigging isn’t going to come loose, in addition to waxing the thread, I also glued all the knots. It’s not something I’d normally do since it’s pretty evident when you look closely. And the ratlines were REALLY a “disaster”, but given how this model is going to be used, I just wasn’t in the mood to scratch build all of those.

Which is why I will AGAIN hang this from the ceiling as more of an ornament than a display model.

But because Tank_1812 was such a life saver by supplying the original plans which even allowed me to do this rebuild in the first place, I thought I let him know that I actually USED them!!


BTW, I am using a cardboard box with a hole cut into it for the hull only as a jig to hold the model in place while I work on it. I lost the stand a LONG time ago and needed something to support it while I used both hands to do the rigging. Actually worked out great!

5 Likes

If you are ever curious how the rig works:

I’m glad that the Coast Guard still teaches how to sail a square rigged ship. Being able to move an object that large and heavy with just canvass and ropes is pretty special!! Not to mention how to maneuver the ship to go on the course you want when the wind and tides aren’t cooperating.

I got a chance to go for a spin on her. In March. It took a team of about sixty to set the upper topsails, hauling the fore halyard aft, crossing to the other side and the main halyard forward going in a big loop until both yards are fully raised.

A lot of work and labor intensive!!!