The Roman times spanned quite a period.
This stone grave statue of a wine ship is found in Neumagen, Germany, and is supposed to be from 220 AD. It is still considered Roman
Thanks all, I stand corrected and had I done a search before displaying my ignorance I would’ve learned the Romans supposedly first encountered barrels made by the Gauls (for beer) during their initial conquest in the 1st century BC. The Roman army adopted them for obvious logistical advantages over breakable amphorae & they gradually took over from the latter commercially as others have described. Thus rejoicing in my new-found knowledge I’ll paddle back into the shallows again.
Well, you did include some reserve in your statement, so I don’t think anyone will hold some grudge against you. IMHO you may paddle around freely ![]()
Tim, Tom, and Erwin, I do appreciate your thoughtful input! I now feel better about including those little barrels on board my corbita.
These model projects are always a lot of fun, and one of my favorite parts is the historical tidbits I pick up along the way. Thanks again!

Although I built the model waterline, the kit came with a nice lower hull part as well. It seemed a shame not to use it!

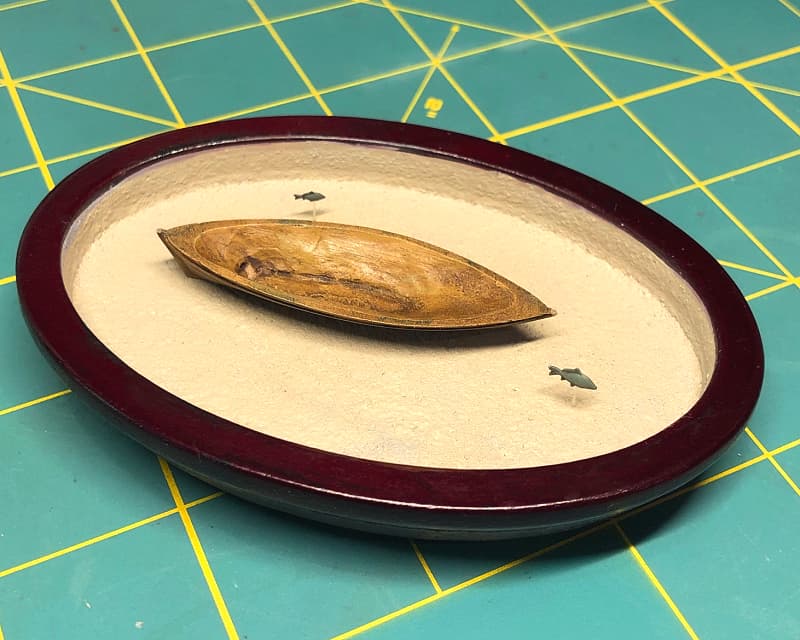
Years ago my daughter gave me a miniature Zen sand garden complete with pebbles, sand, and a tiny wooden rake. It was really cool and I have enjoyed it… but my family has learned that I’m liable to repurpose all manner of things to serve my model building compulsion – it is now to be a display base for the corbita!

I started by painting the interior of the former garden base with Mr. Surfacer 1200 and sprinkling some of the fine sand over it to create a sandy seabed. The top of the underwater hull happened to align pretty closely with the top of the base, and shaving a couple of millimeters off the keel made the fit almost perfect.
The seabed next received a coat of the same lightened Tamiya Buff (XF-57) acrylic used for the ship’s deck. I also added a couple of fish from a Busch HO-scale animals set. They are perched on tiny stalks of clear acetate which, with luck, should be invisible under the water surface to come.
Your “cargo” looks great Tim! This whole project, challenging as it was, is going to make a fine display piece on your shelf. Tom S.

Good morning Tim. What a challenging, unusual project. You have conjured up a piece of jewelry out of the little chubby ship. Bravo.
Nice job, now it just needs to be sitting next to a trireme to show how tiny they really were. HA HA Wayne

Excellent job Tim, the neatly coiled down ropes, very seaman like. The deck cargo, with the tarp very effective. Cheers, Si
Tom, Jörg, Wayne, and Si, thank you for your comments!
Now that the ship and seabed are pretty much done I’m playing with how to best represent the water… ![]()
Perched? I saw what you did there. Great pun even if it was unintended. Perch the perch! They probably could use some like a little bit of
“Perched? I saw what you did there. Great pun even if it was unintended. Perch the perch! They probably could use some like a little bit of” …
Lost your train of thought? Or are you still fishing around for it? Must be the one that “got away”. ![]()
![]()
![]()
I’ve used clear pouring acrylic in a few dio’s. Less iffy than using pouring epoxy, but you have to pour levels of only a few mm’s at a time otherwise it will never harden.
![]()
![]()
Never ask “How could this get any better?” Every time Tim does a build he answers the question!
![]()
Tim,
joining in late, but I was watching your build log. Another little gem, and you did it agin - or are doing it - in your very special style. Just great!
Looking forward to see her ‘swim’, I hope the fishes will be visible, that’s just a great idea and adds much to it!
Cheers
Jan
Never ask “How could this get any better?” Every time Tim does a build he answers the question!

Tim,
joining in late, but I was watching your build log. Another little gem, and you did it agin - or are doing it - in your very special style. Just great!
Looking forward to see her ‘swim’, I hope the fishes will be visible, that’s just a great idea and adds much to it!
Cheers
Jan
Mark and Jan, thanks. I begin too many projects and am a slow builder, so I’ve been rushing this build trying to get one completed for a change. The numerous mistakes so far have shown this to be a silly approach, so I especially appreciate your supportive comments!
Hi Tim,
I like the plan for the sea base, the tiny fish look good too.
Cheers, Si
I’ve used clear pouring acrylic in a few dio’s. Less iffy than using pouring epoxy, but you have to pour levels of only a few mm’s at a time otherwise it will never harden.

Hi Leo, a resin pour for the water was my first plan, but I thought I’d try something a little different this time…

For the water surface I used clear acetate film scavenged from an old overhead projector. Over this was applied a thin wavy coating of Golden soft gel gloss medium, a thickening agent for artist acrylics that goes on white but dries clear.

I made several of these “oceans” to test different types of wave effects; this version with the smallest ripples seemed to look the best.

Test fitted over the base, the sandy seafloor and fish are still discernable from above but distorted, just like looking through clear water.

Hi Tim,
I like the plan for the sea base, the tiny fish look good too.
Cheers, Si
Thanks Si!

This is a great technique Tim! I’m eager to see how it turns out once it’s painted. Good Luck with it.
Tom S.
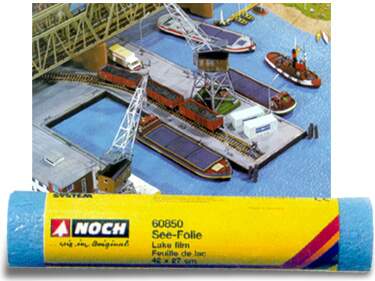
Thanks Leo, I like the Noch water product too, but I went with the much thinner acetate partly because it integrated better into the small size of the scene, and partly because the scavenged acetate film was CHEAP! ![]()
After attaching and blending the “sea” to the base, I secured the ship to the surface with a few dabs of the gel medium around the waterline. It is hard to see in this picture, but the lower hull is just visible under the calm water.
In the home stretch now…

The kit provided resin steerboards were credible enough but just a bit chunky, so I made quick replacements from styrene sheet and rod.

Common before the invention of the centerline rudder, steerboards were the main method used to control the headings of ancient ships. Mounted on each side of the sterns of corbitas, they weren’t all that efficient; in heavy weather it could take three or four men pulling on each of these just to maintain a ship’s course.

I imagine these relatively delicate fittings would have been hauled up and stowed when the ship was not underway, but I couldn’t resist showing the steerboards dipped in the water. It was simple to cut small slots in the thin acetate/gel sea to allow them to penetrate the surface.

Once the steerboards were attached to their little platforms on the ship’s sides, the gaps where they met the water were filled with gel medium.


This is looking so COOL Tim! Wow, for being a “small, simple project” when you started, this kit has turned into a challenging, though sometimes rewarding,build that is going to look awesome on your display shelf. Well done Tim!


