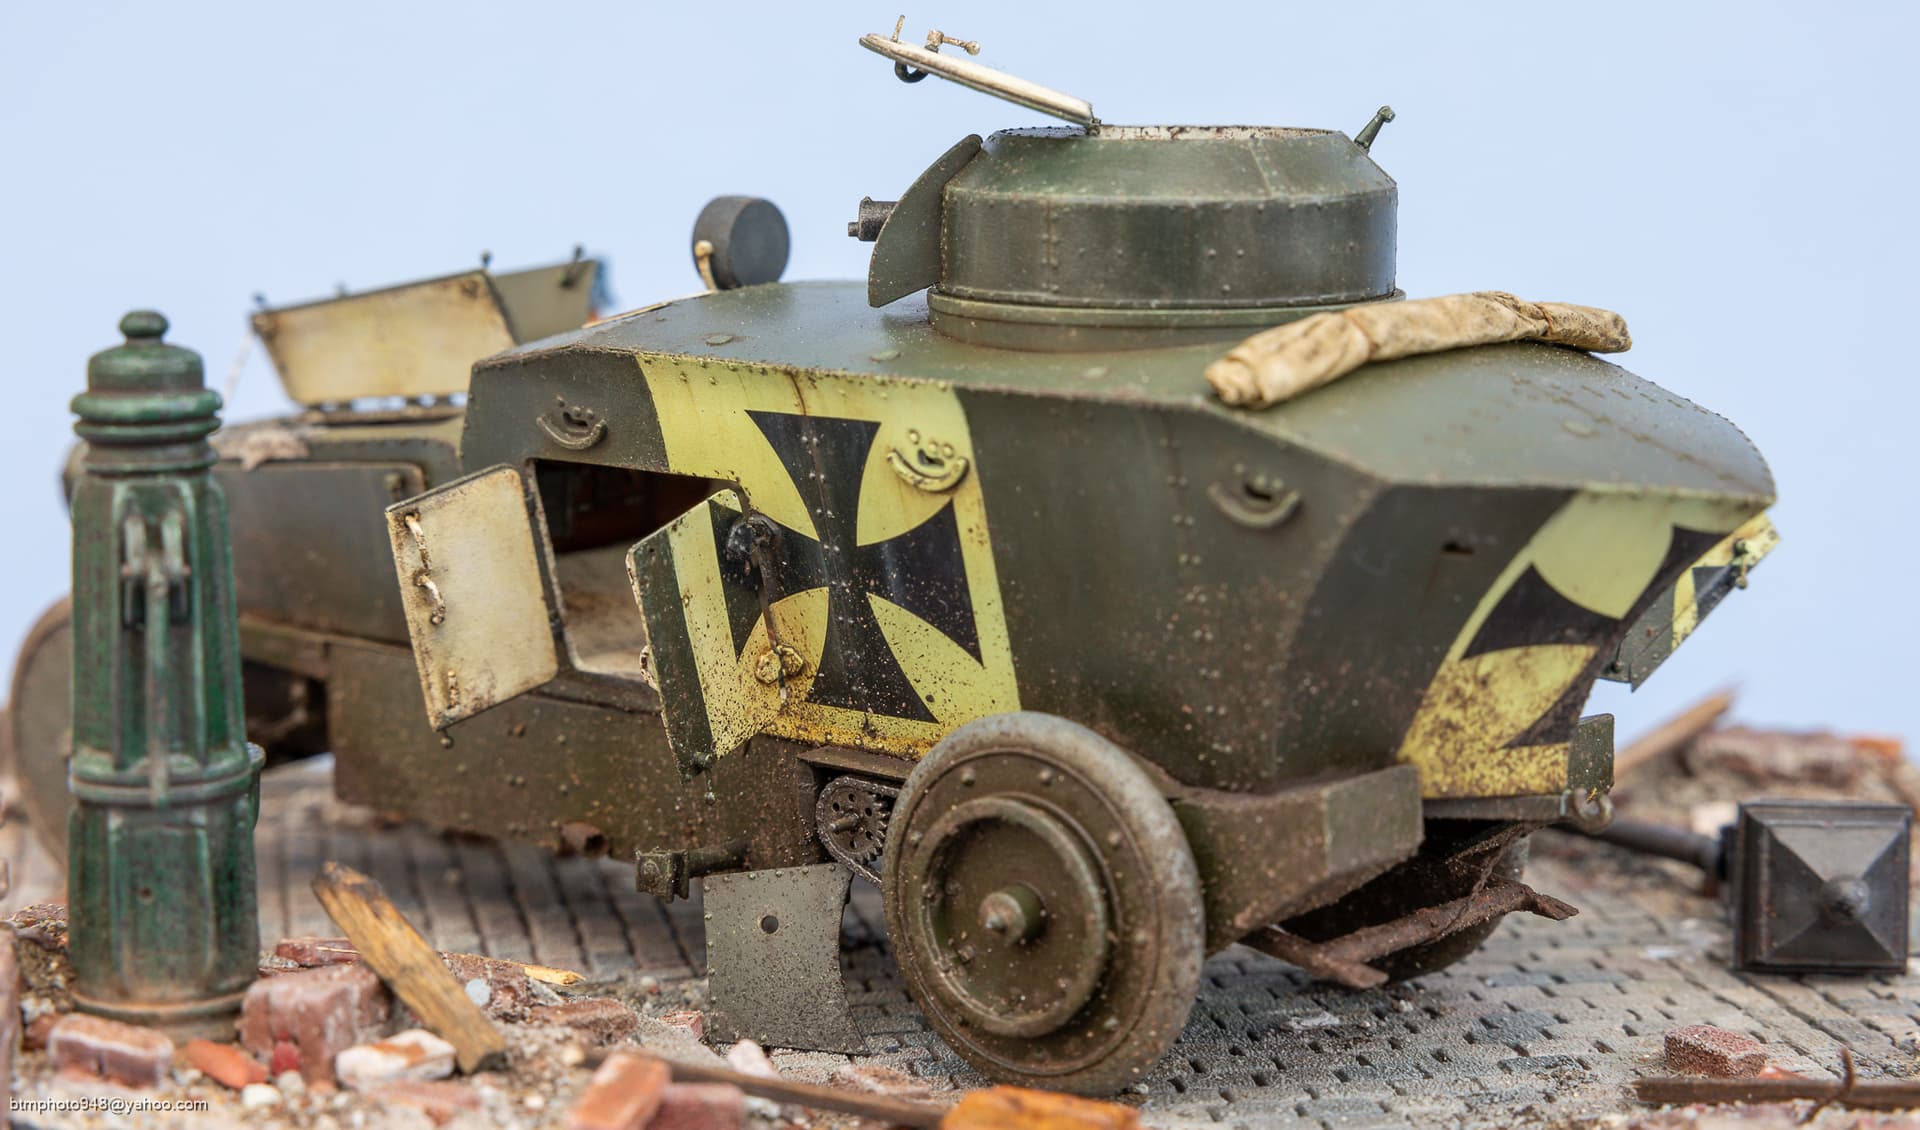
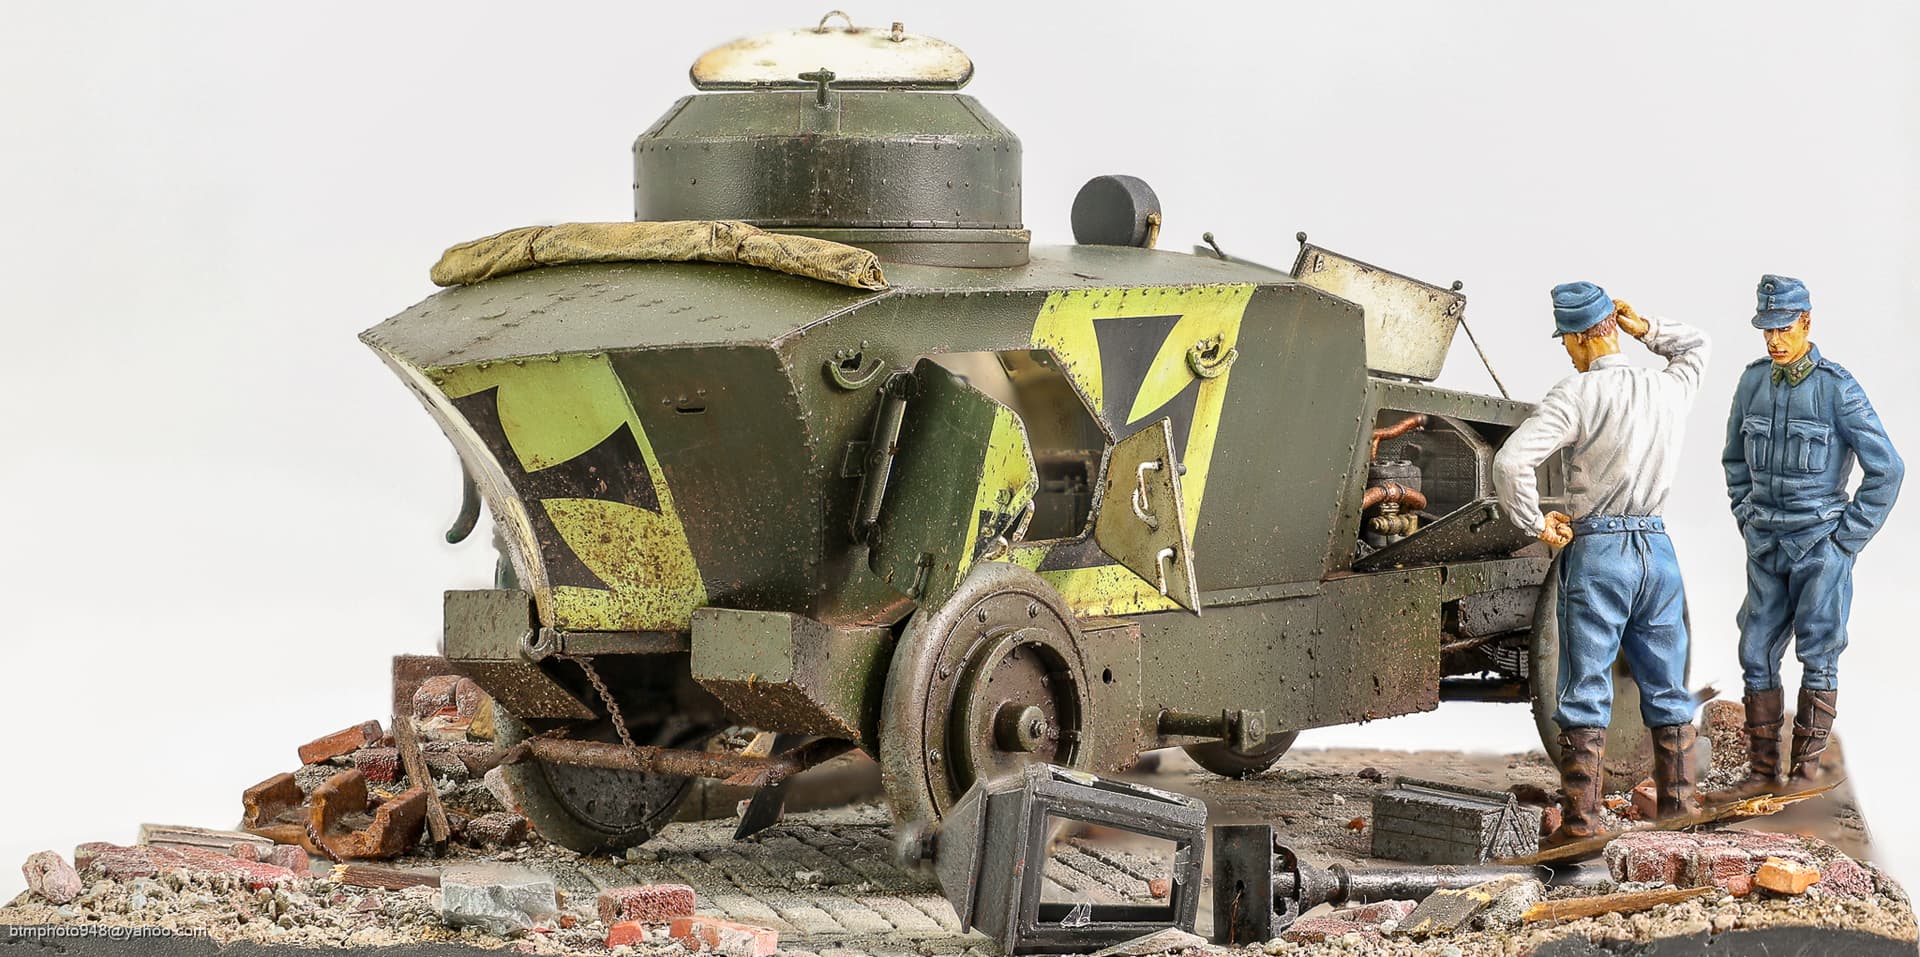
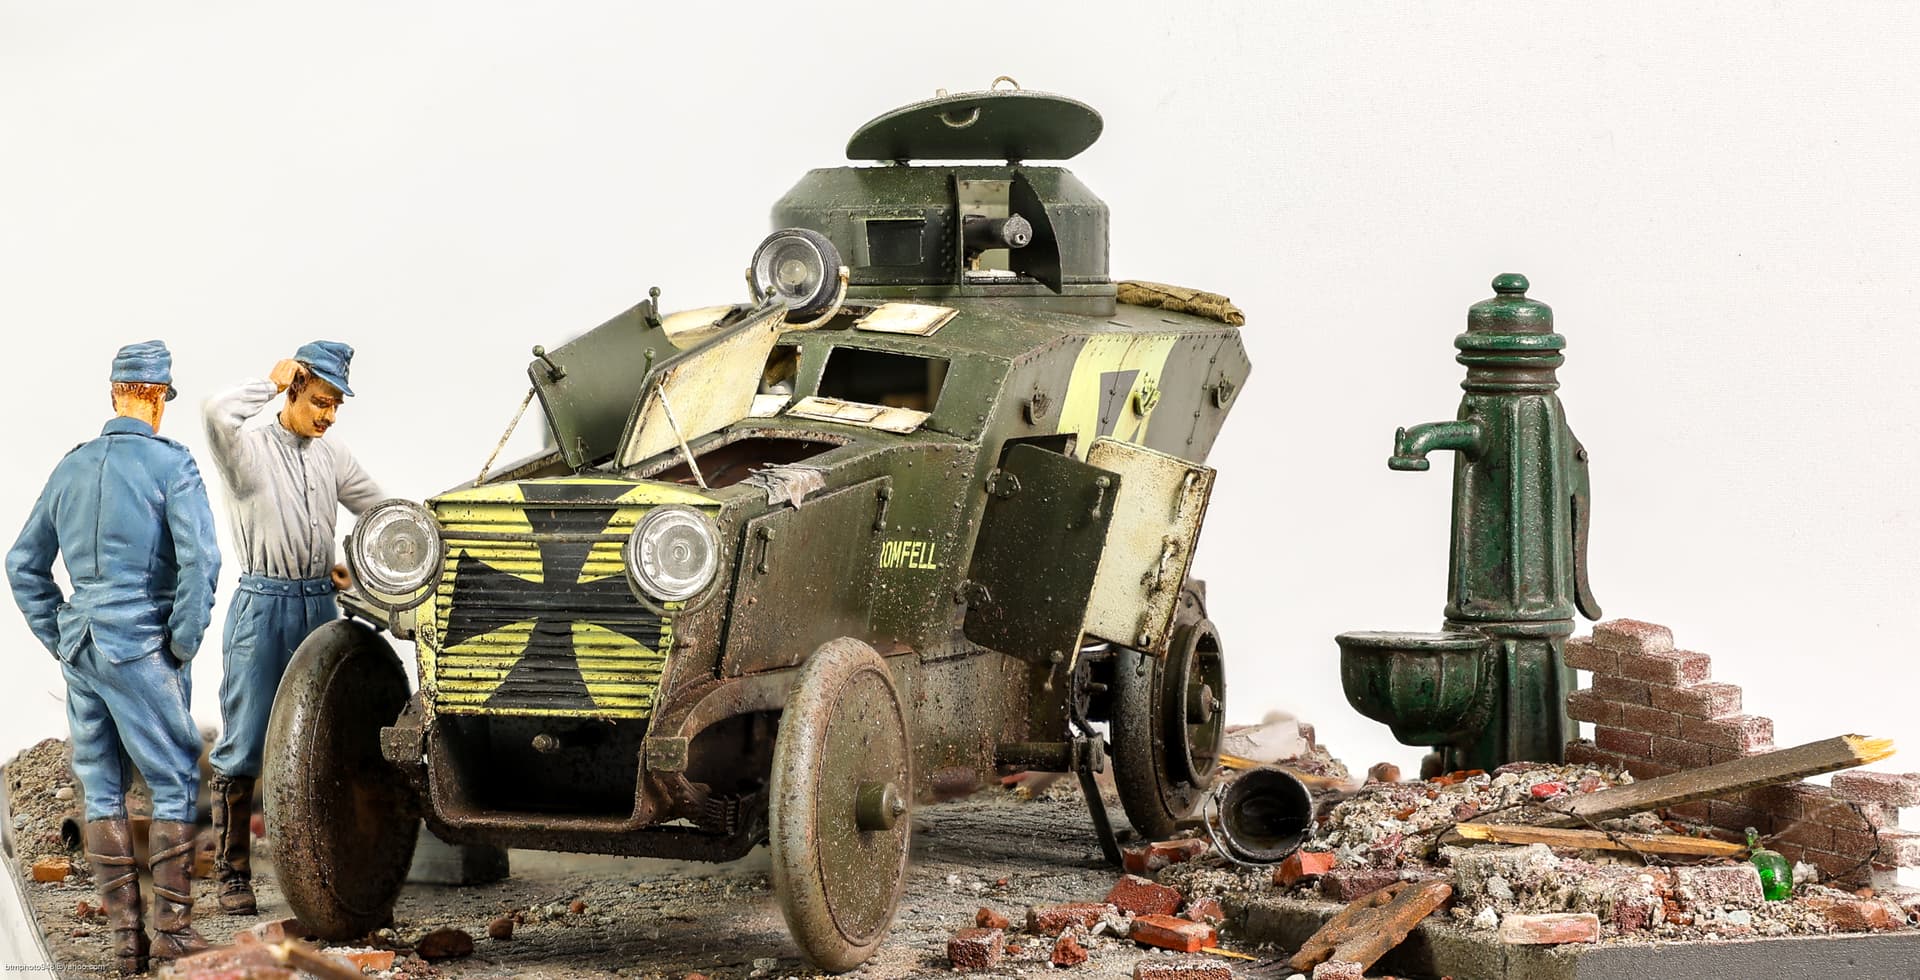
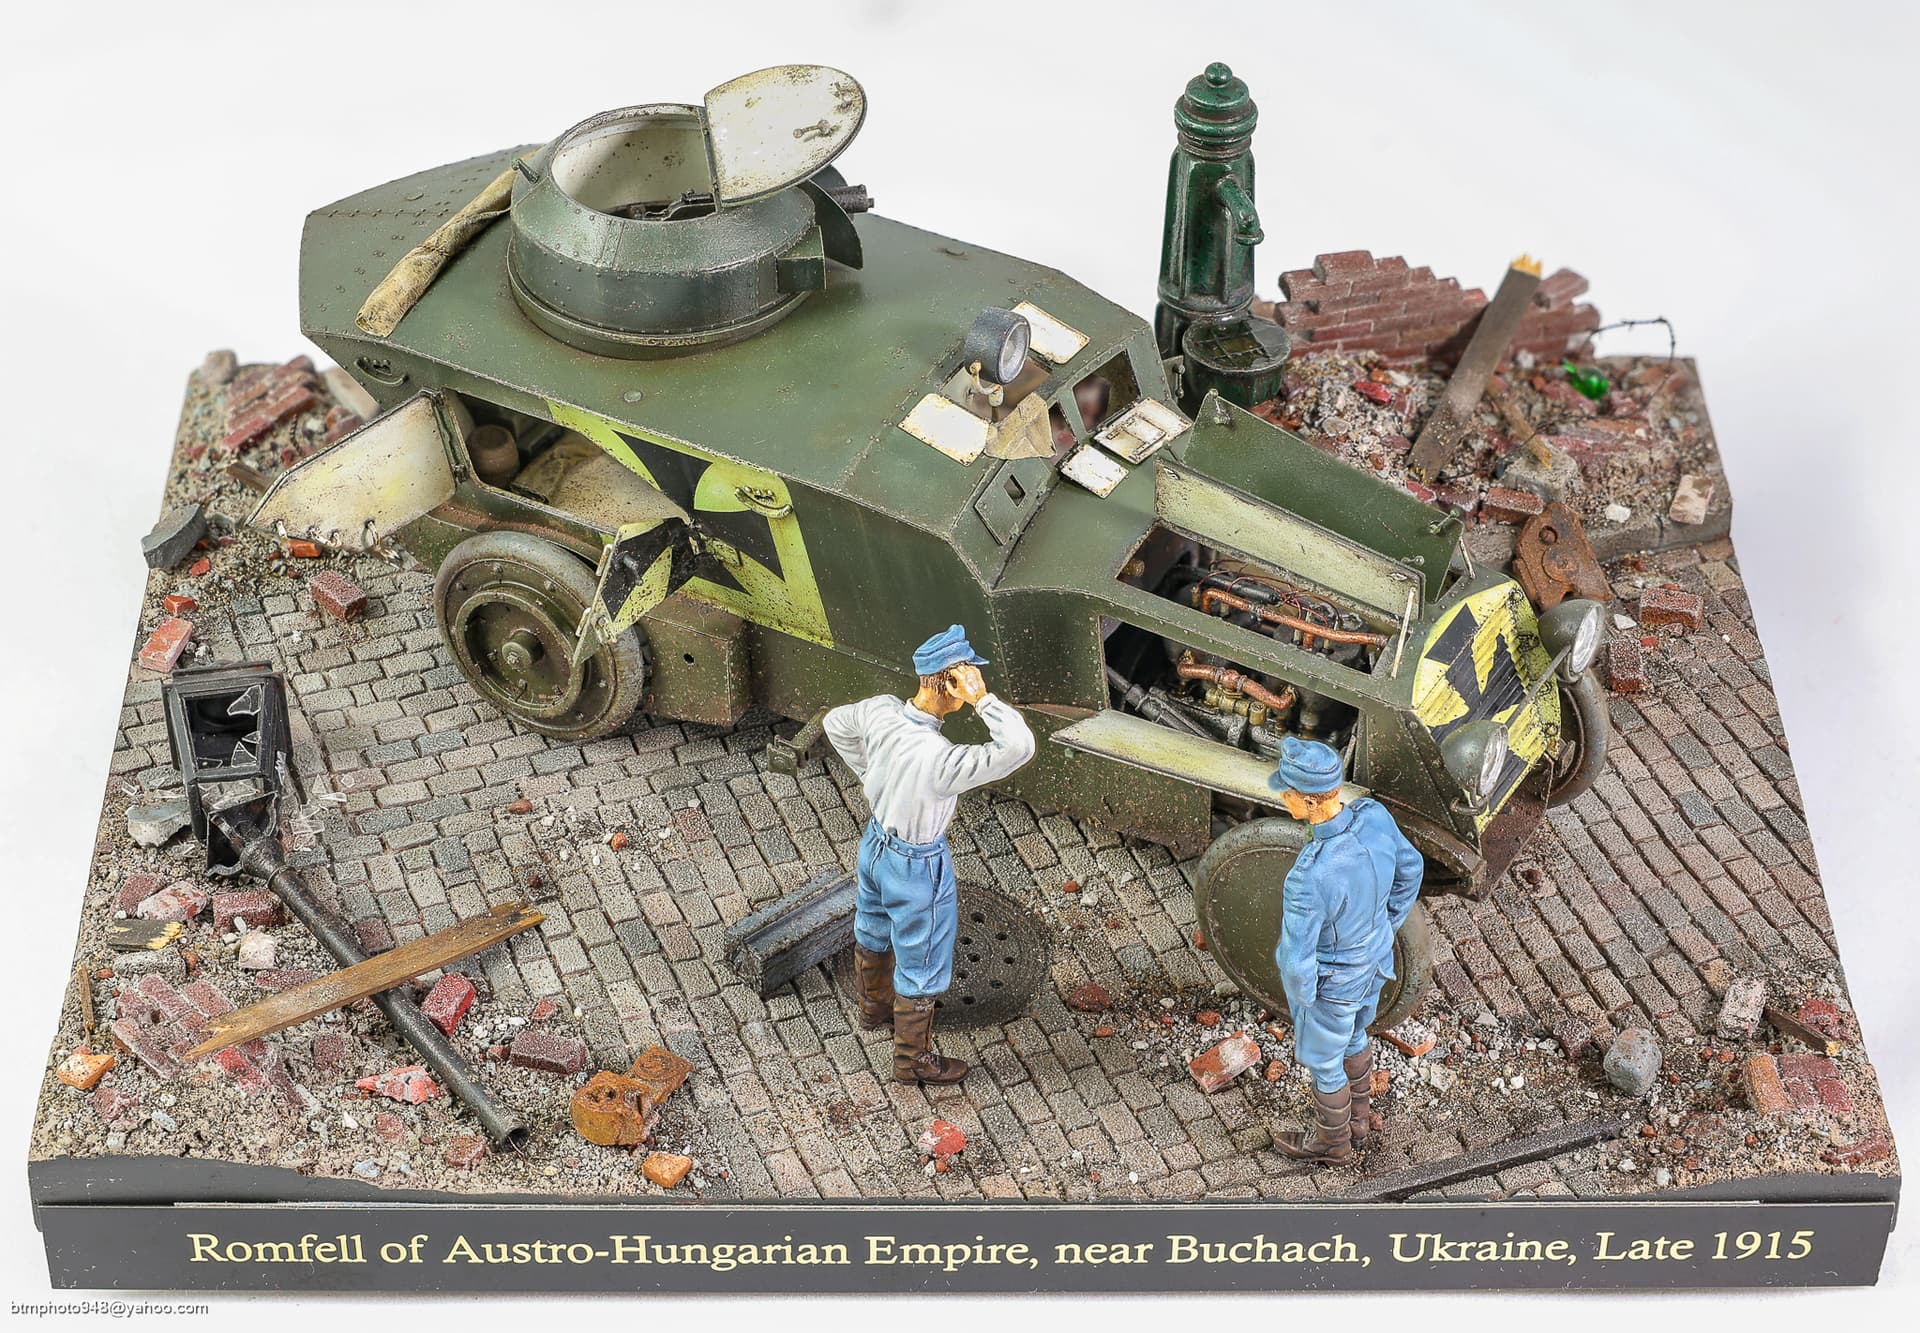
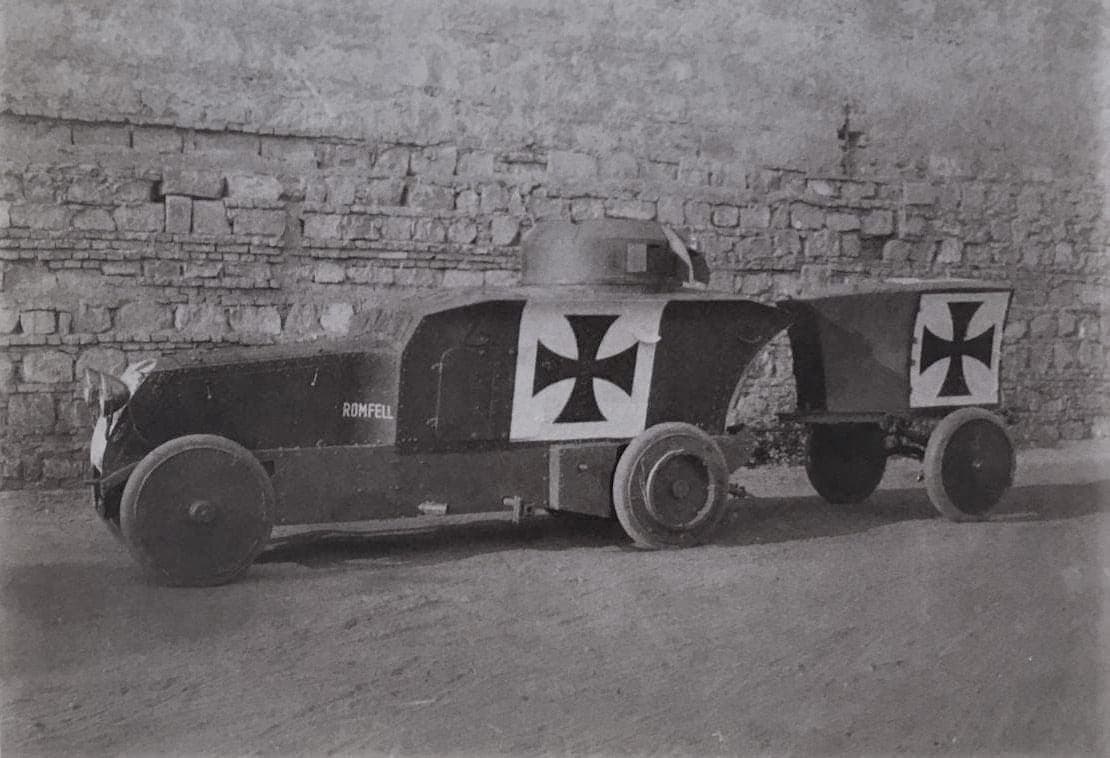
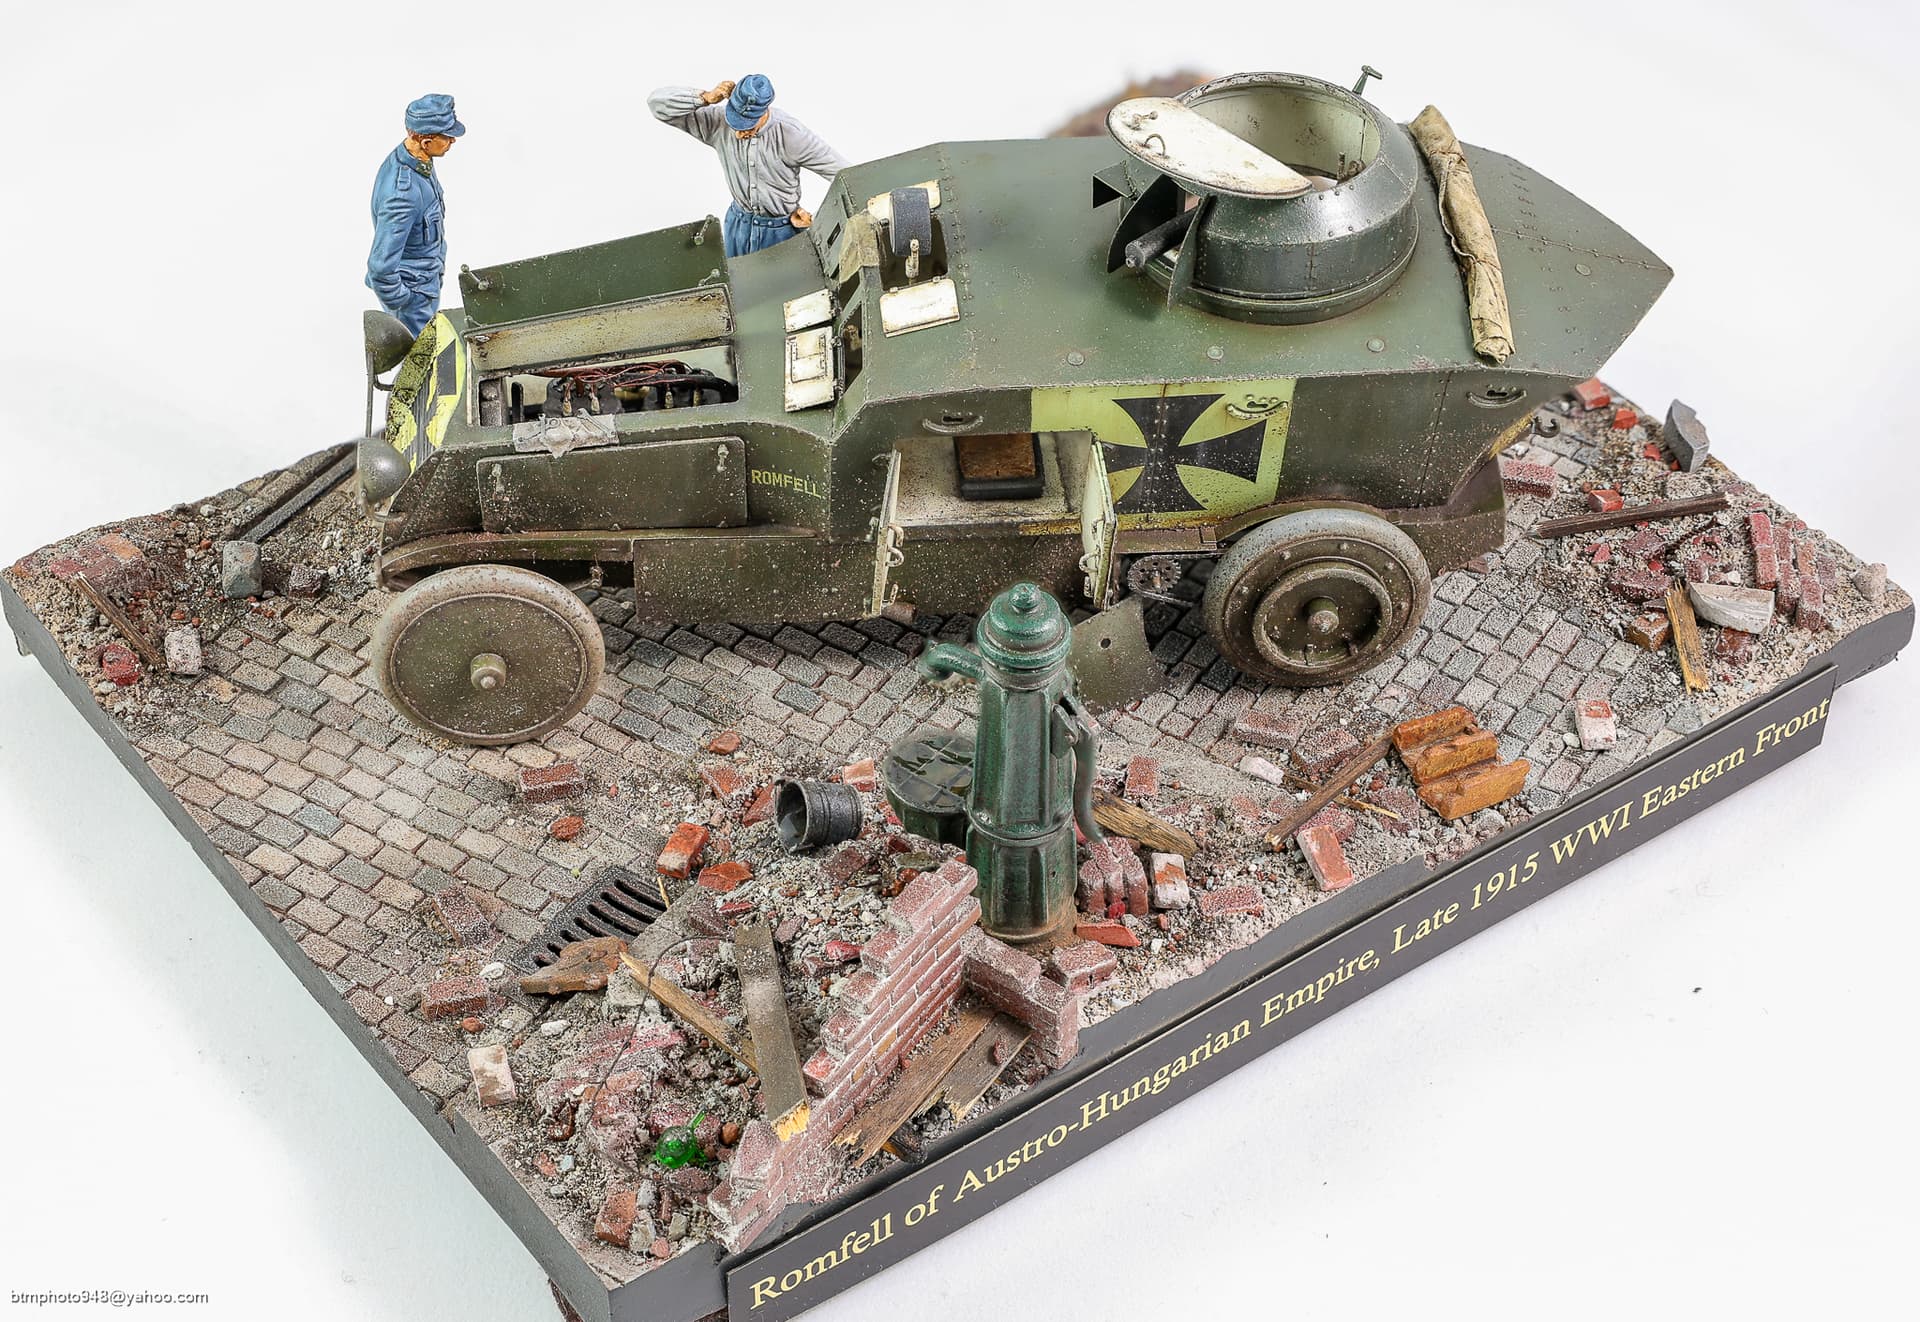
Wrapping up a small diorama (really vignette) of the Romfell Panzerwagen, a Austro-Hungarian WWI Armored car, around Buchach Ukraine in late 1915.
I have a few WIP photos I will share in this top post and will add finished pics in a later post.
The kit is by Copper State Models and was supplemented with the following accessories:
• Romfell Photoetch Set by CopperState Models
• Interior Set for Romfell Panzerwagen (CSM) by Visi Models
• Romfell Trailer by Vargas Scale Models (never used due to bolt scaling issues)
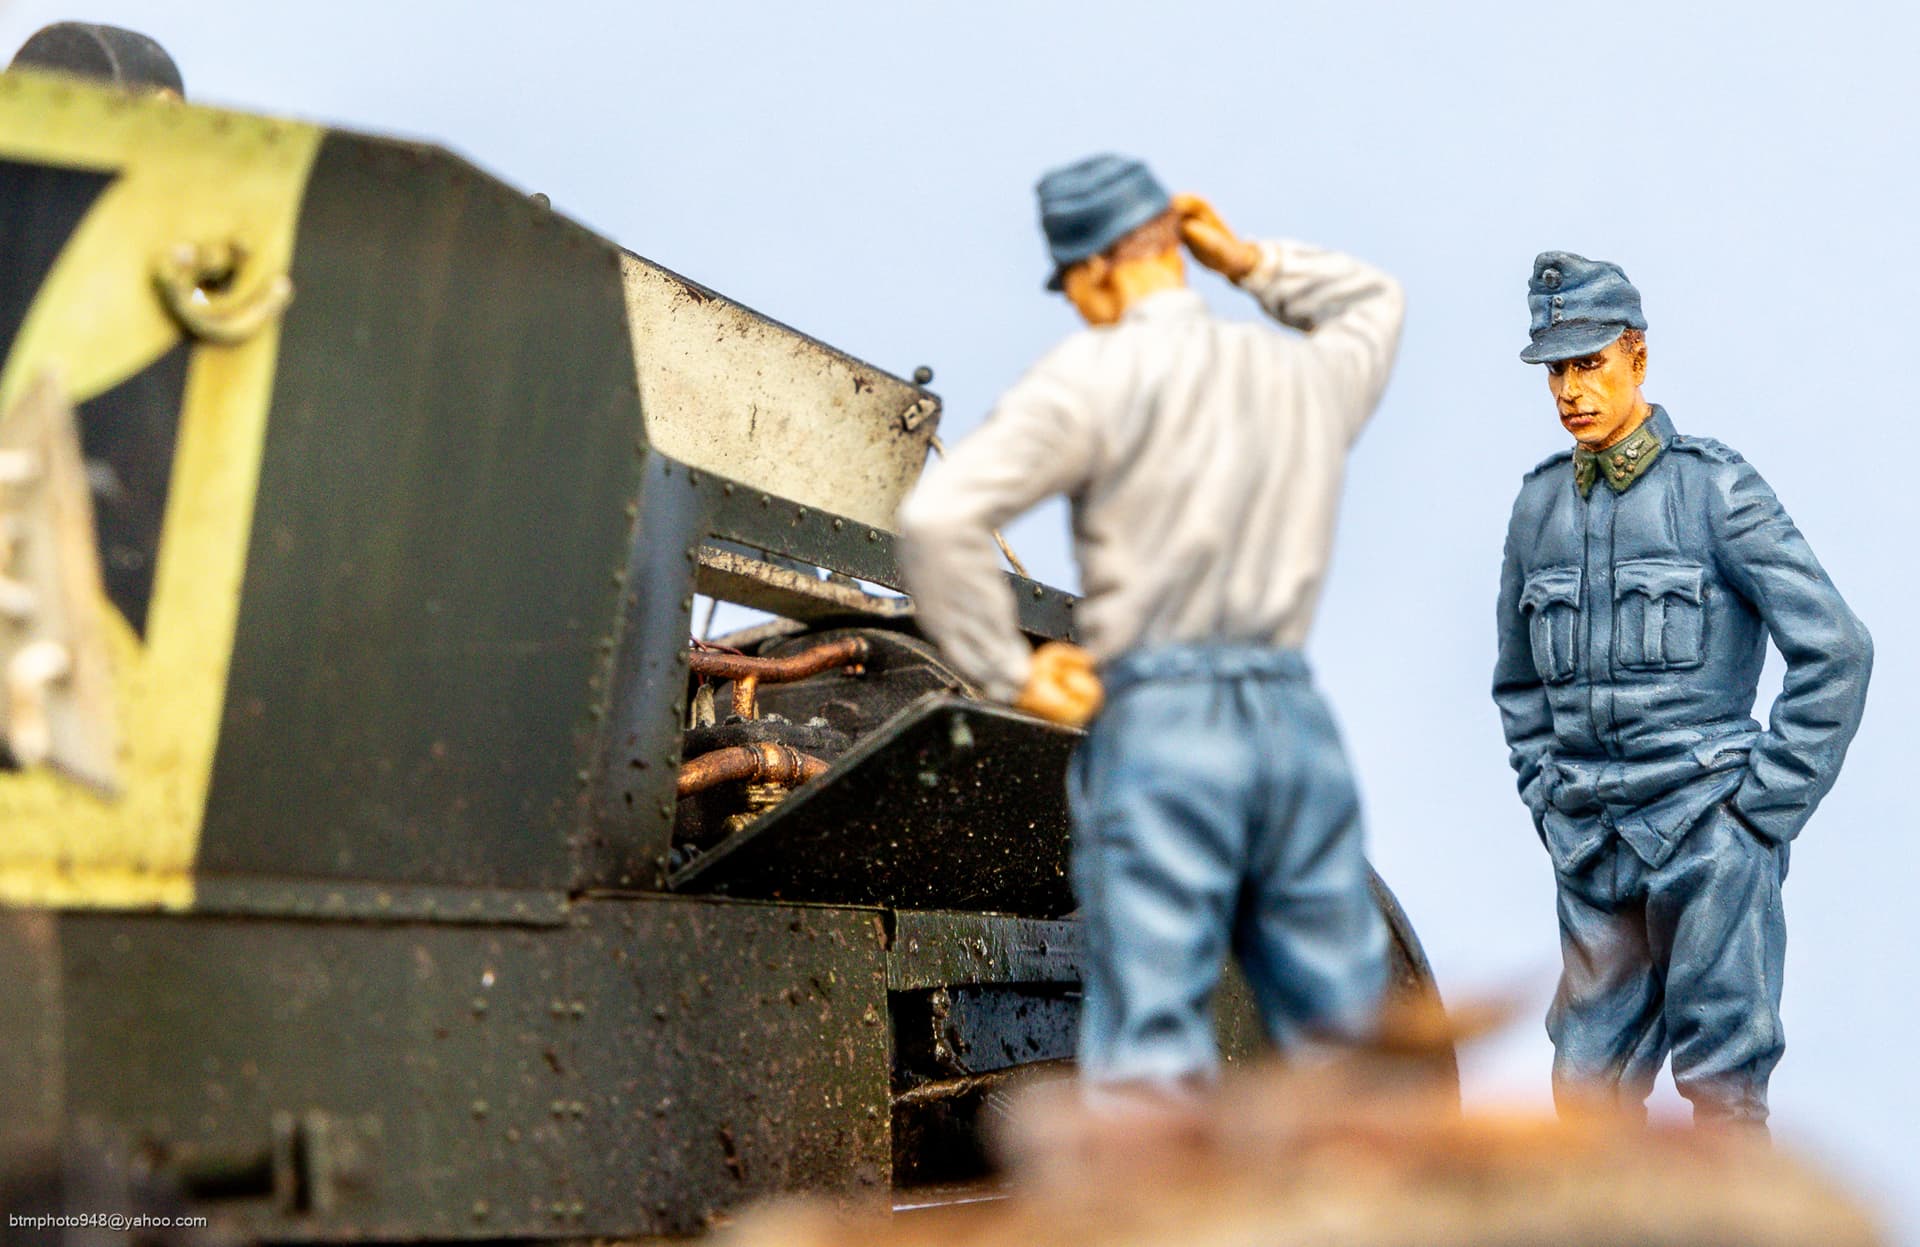
• Austro-Hungarian Armored Car Mechanic by Copper State Models
• Austro-Hungarian Armored Car Officer by Copper State Models
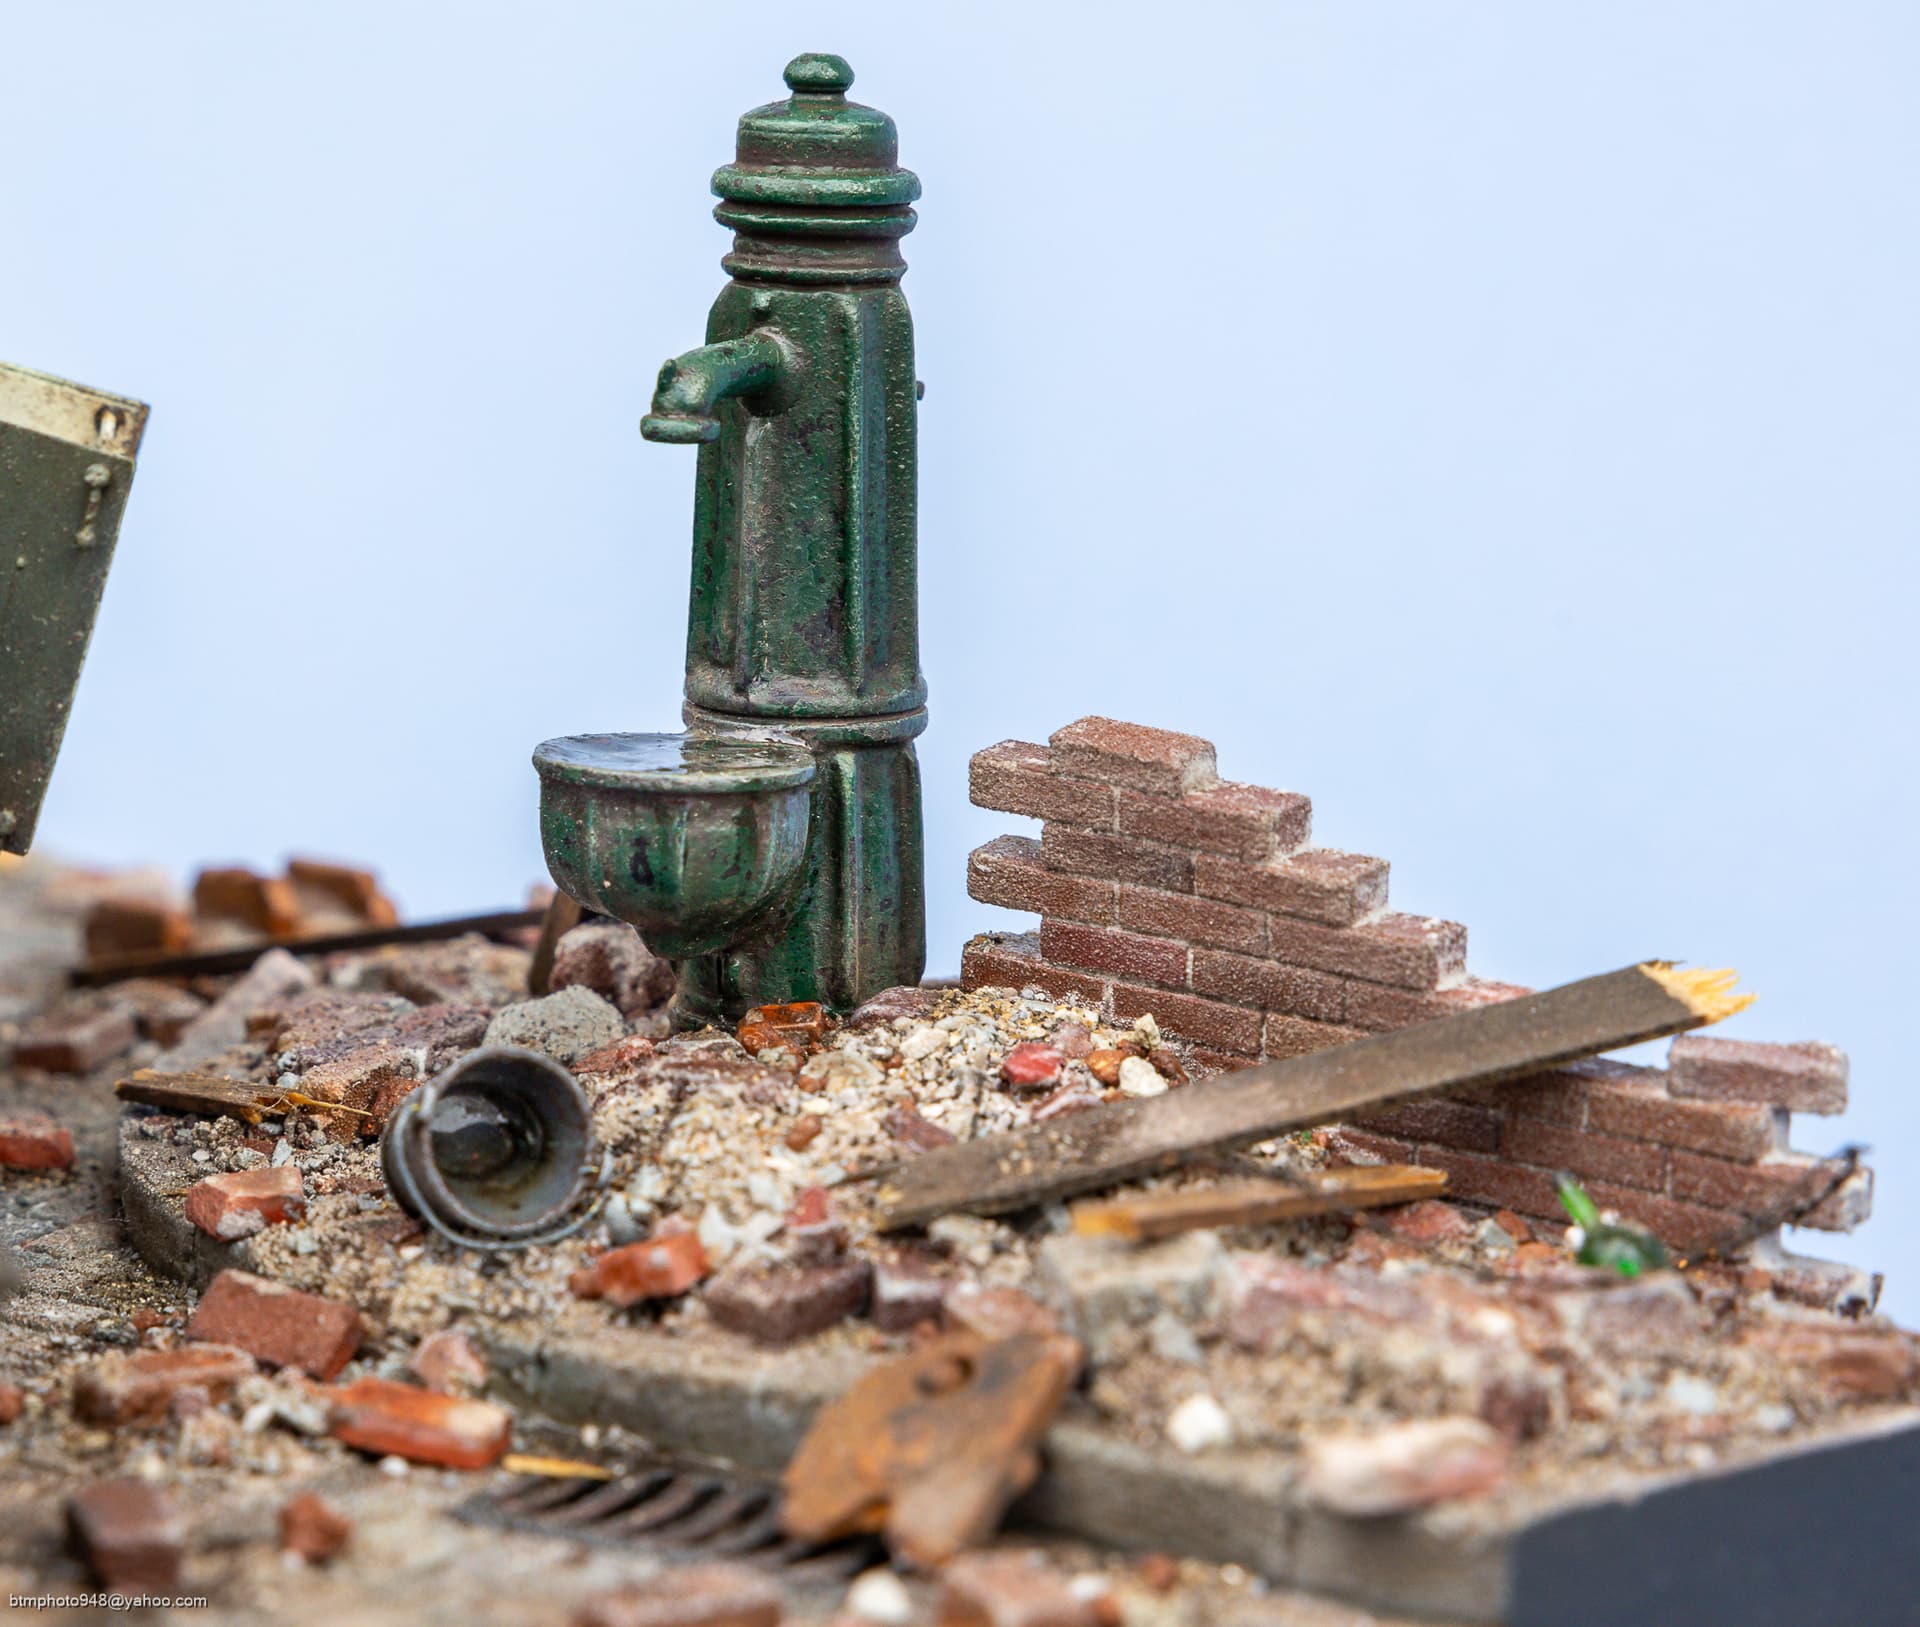
• Base: Heavily modified resin street section, manufacture unknown
• Base accessories: Misc. items by Mini-Art, Plus Model, and Juweela
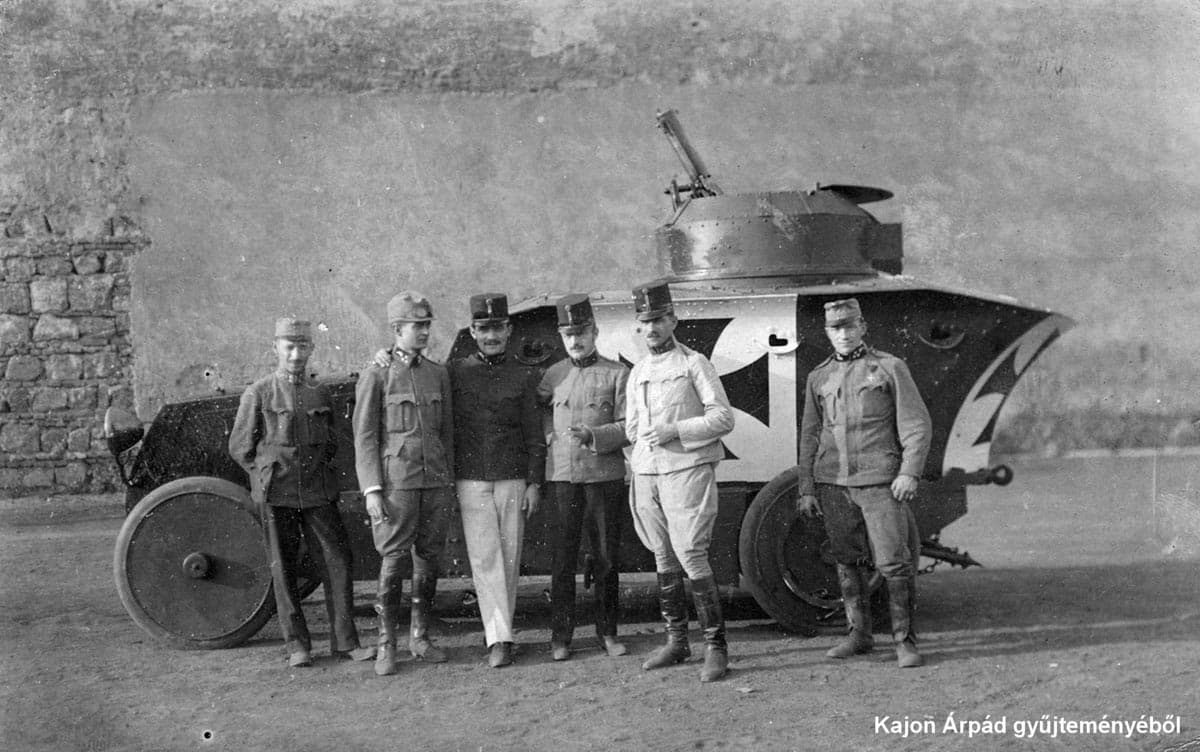
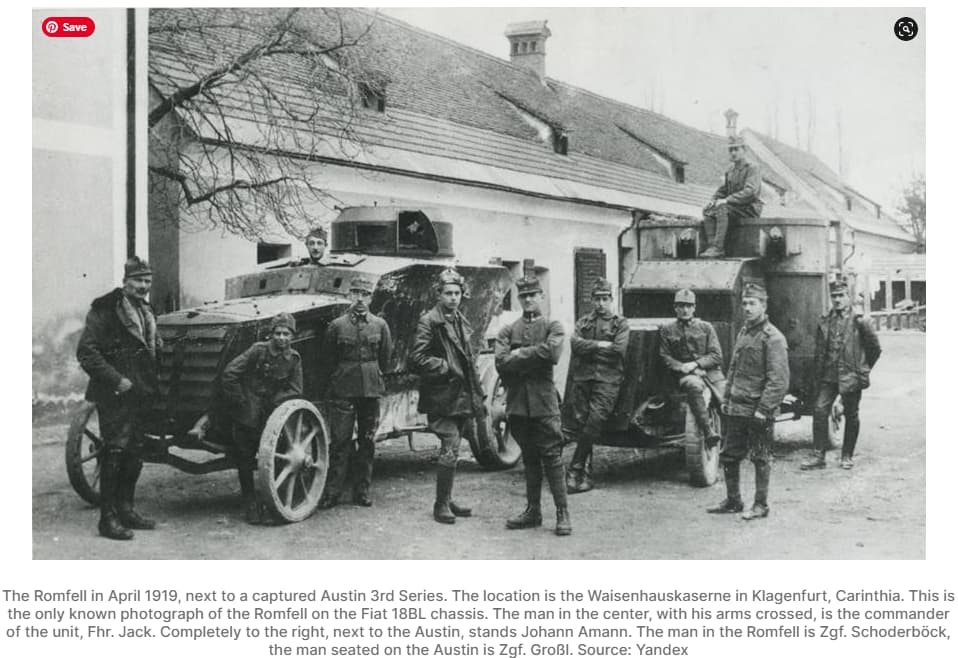
In order to depict a realistic scenario, I did a deep dive on the excellent manual’s history section, but supplemented that with the tanks encyclopedia website (https: https://tanks-encyclopedia.com/ww1/austria-hungary/romfell). These were both a great source for how I detailed the interior, as well as the paint scheme. I wanted to depict the vehicle while it still had the large black crosses, which by all accounts were removed sometime around the period it is depicted. Later in its operational history the Romfell changed even more, down to having a different set of wheels.
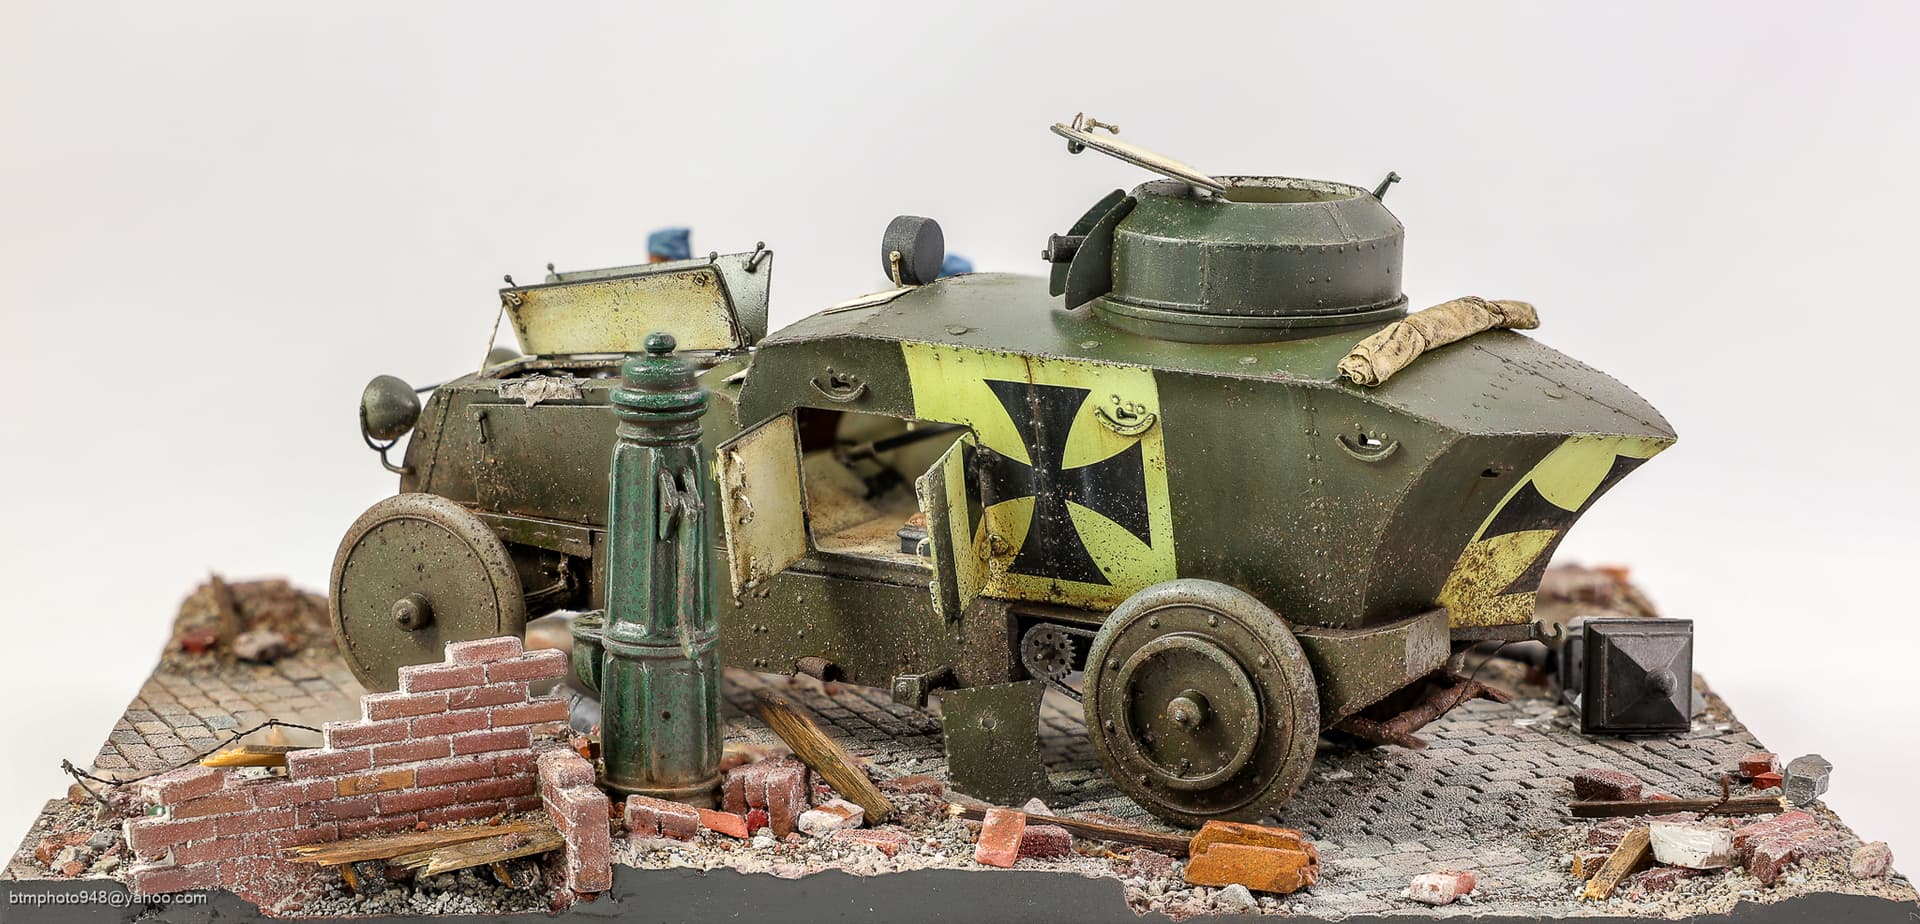
Another item that I originally wanted to use was its matching trailer, which now has a 1/35th scale kit from Vargas. However, I opted to not use it for several reasons. One is historically they only used the trailer at the very beginning of the vehicle’s operational life due to its limited storage space and reduction in mobility while towing. In addition, the kit itself has a few issues that would take some time to overcome. I found the print lines to be very excessive in my copy, which are very difficult to sand down in between all the bolts (and there are a lot of bolts). That brings up the biggest issue I had with it in that the trailer bolts are not in the same scale as the Romfell car. They look fine as standalone kits, but if you put them side by side, the different size of the bolts really jumps out. One way to rectify that is to sand them all off the trailer, which would also solve all those print lines, and then add new ones using aftermarket resin bolts (e.g., Archer). Either way, I ended up not going with it but wanted others to be aware in case they tackle these kits on their own.
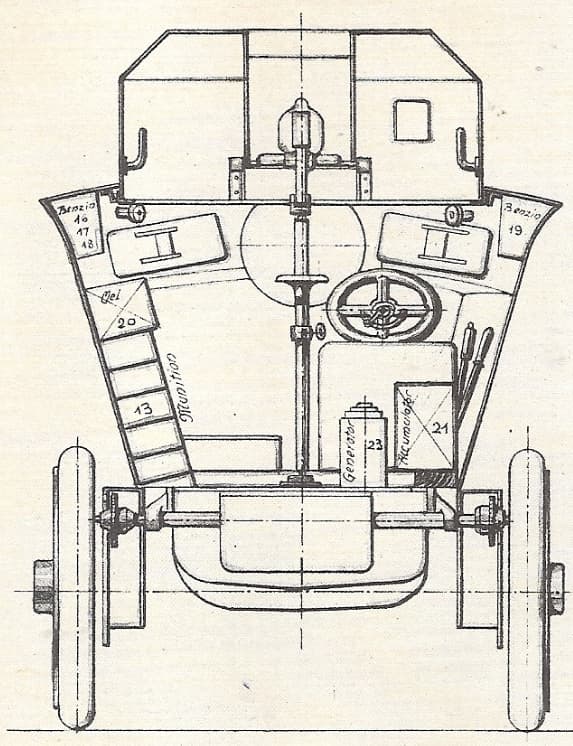
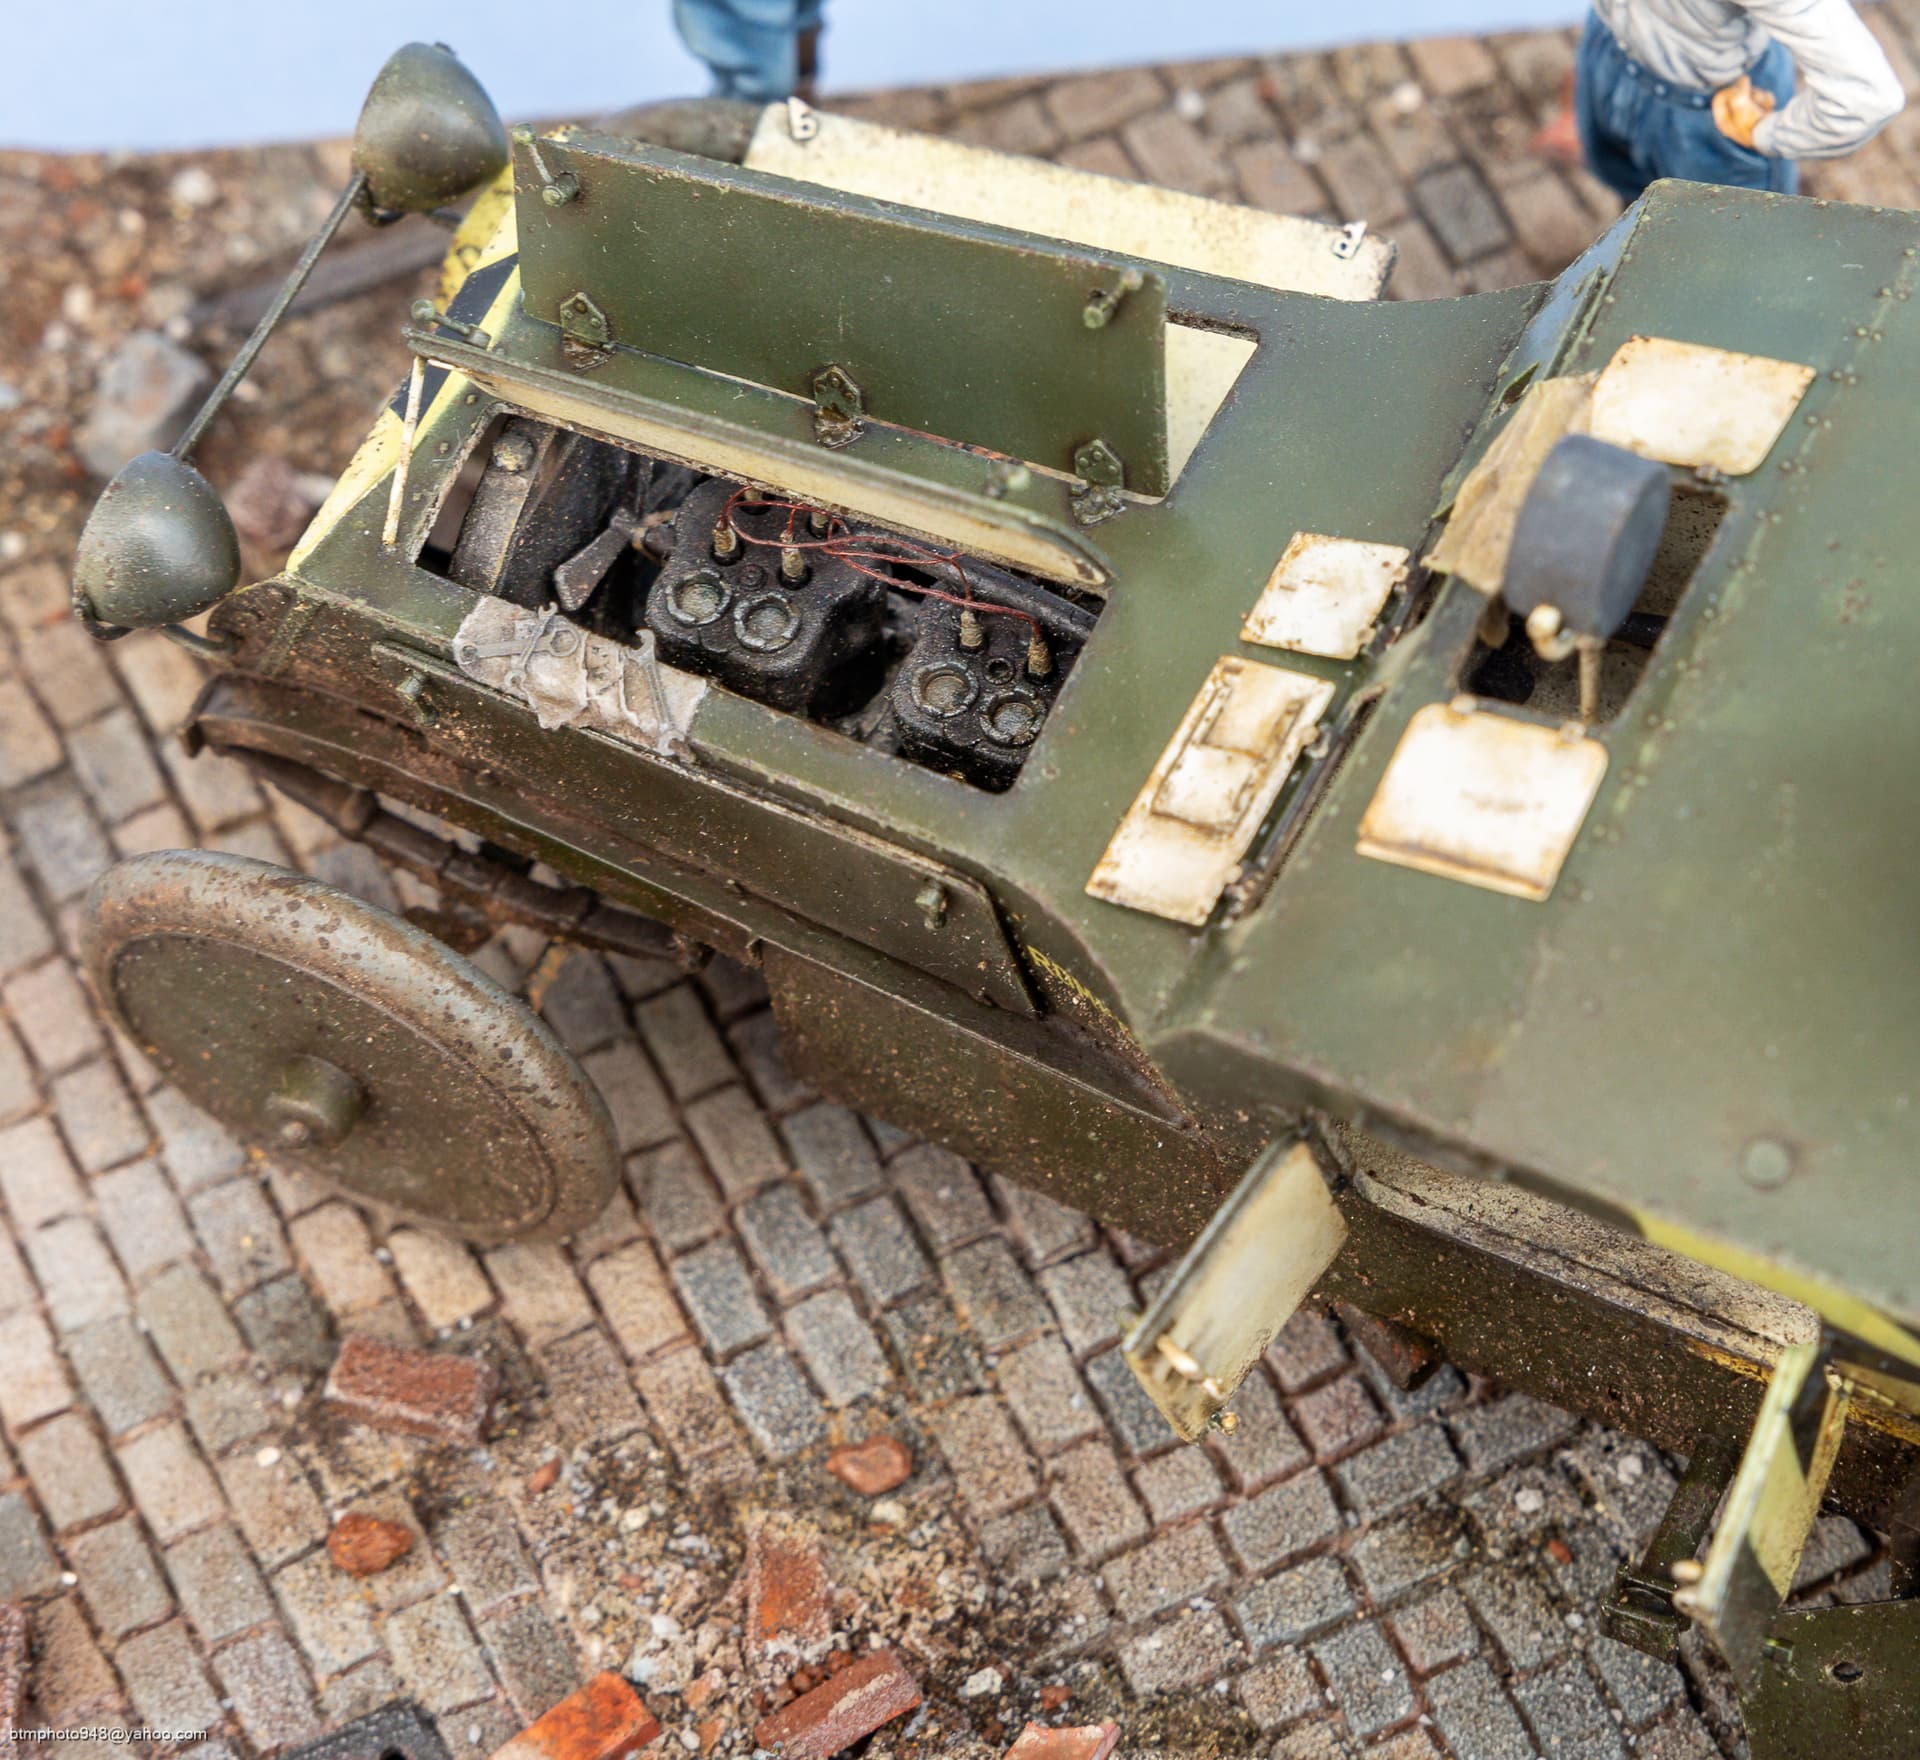
The interior was first primed with a rust color from a rattle can, then practiced the good old hairspray method by applying AK’s heavy chipping fluid using an airbrush. Soon after drying I applied a basecoat of white, tinted with a touch of tan, to represent a light cream interior color. Worn areas were then created by rubbing this with a brush or toothpick. Interior details were expanded by adding a resin detail set by Visi Models. This included most of the fuel, oil, ammo and storage boxes, which are referenced in design drawings in the excellent kit manual. I used milliput to create the seat cushions. These details were hand painted mostly with Vallejo acrylics. All of this was sealed with a clear coat before applying various washes, followed up with oil paint rendering (described later for the exterior).

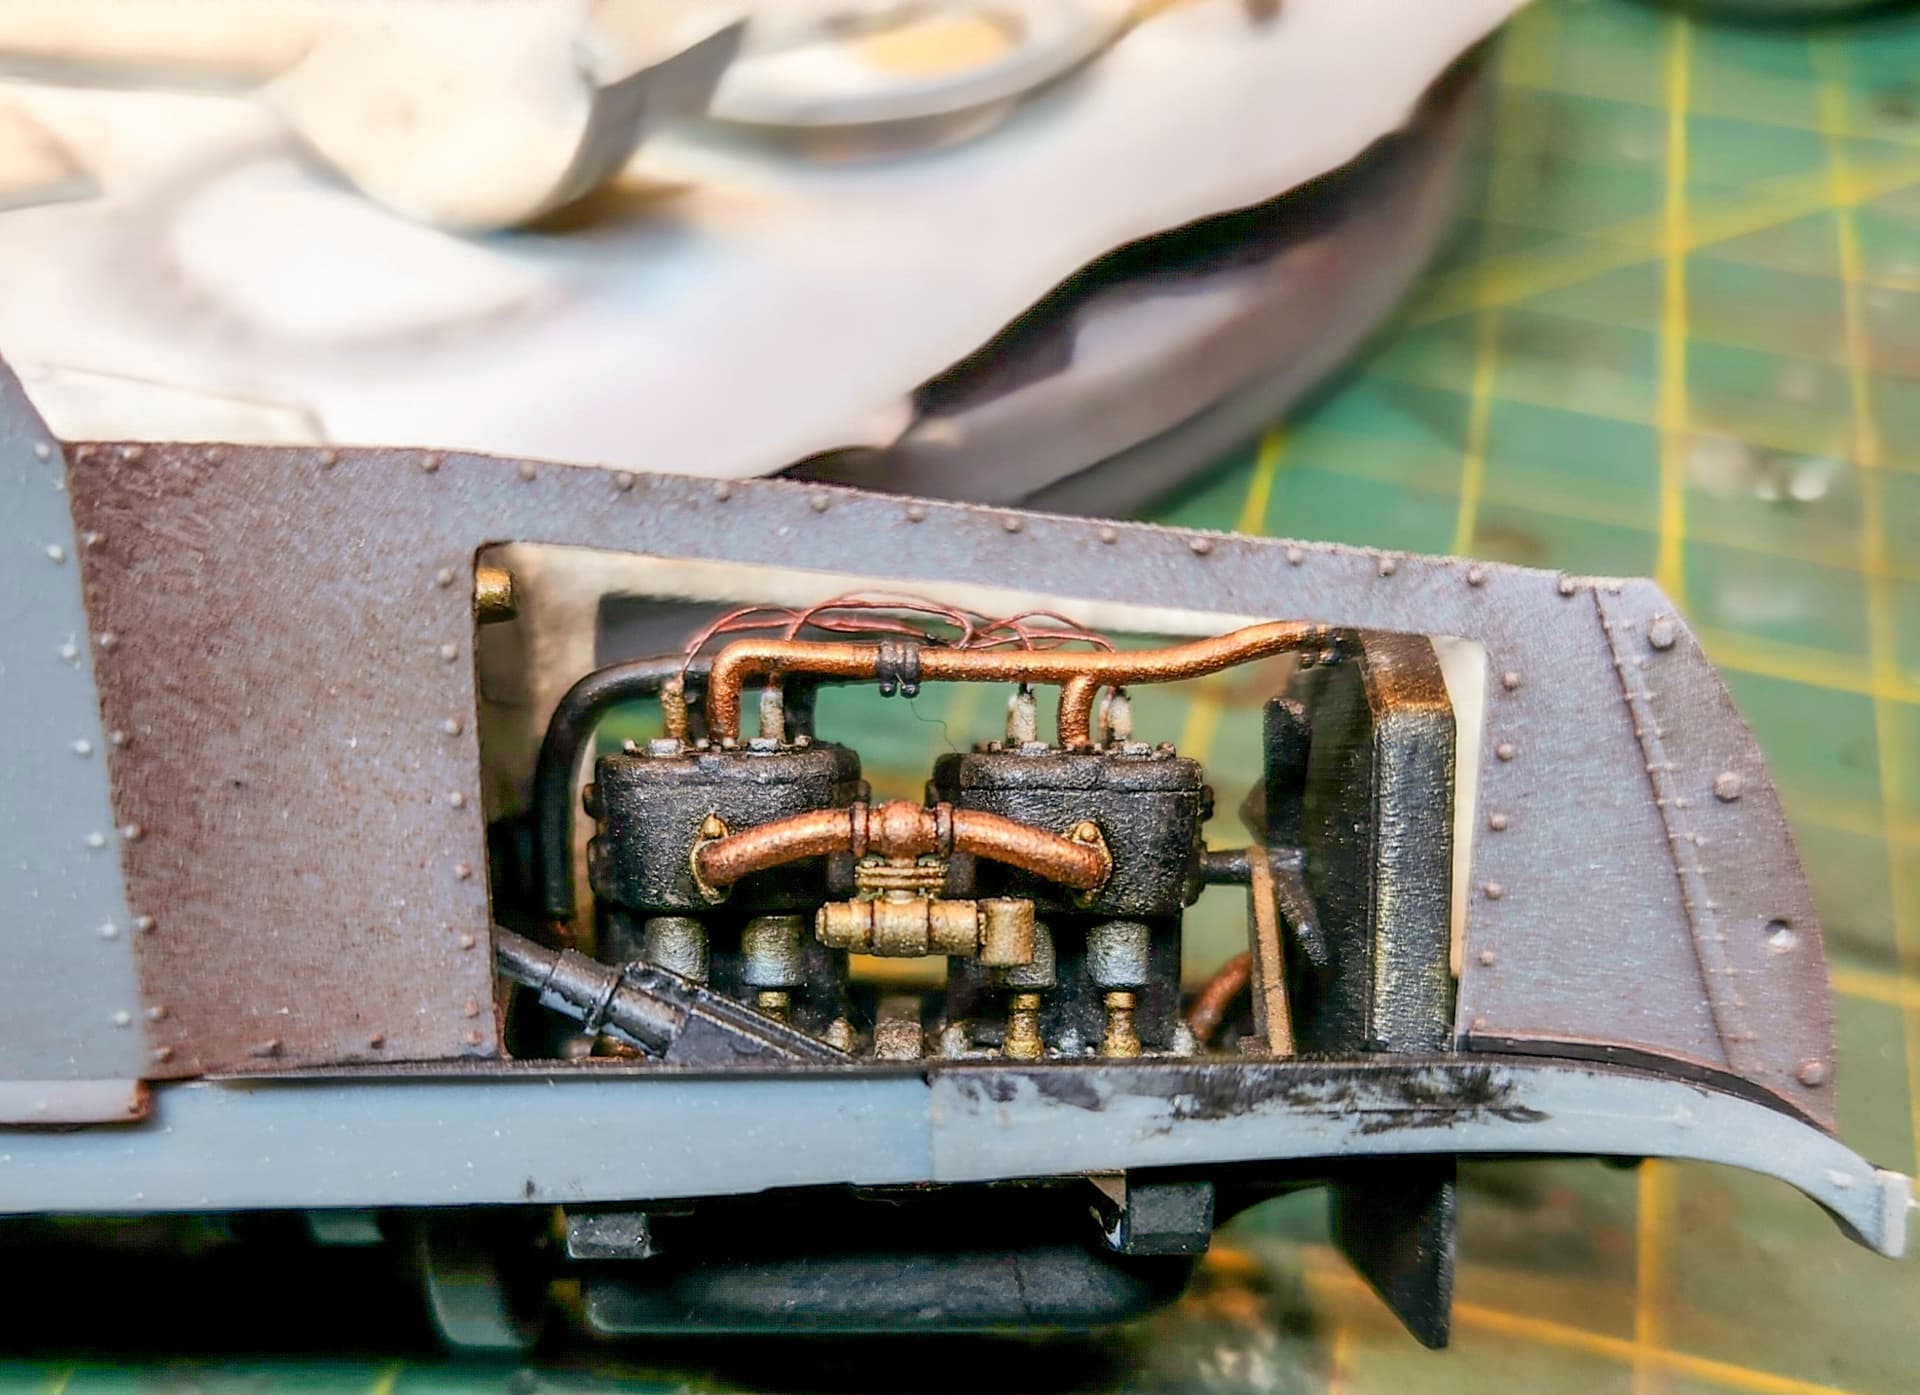
Right out of the box, the engine has a ton of good detail. The only thing I found it needed was sparkplug wires, which were represented using small diameter metal wire. I would glue one side using either super glue or JB weld epoxy, wait for it to set before pulling it to the other side to be glued. This was an aggravating process as I knocked them lose from time to time while weathering the surrounding area. For painting, I did try my hand at using some of the Mr. Metal Color products using a brush (even though label says airbrush only). I then added a bunch of grease and grime using pigments mixed with 502 ABT160 Engine Grease, which is tube based oil paint. Unlike most of my other oil paints, this actually has a gloss sheen to it and represents petroleum very well.
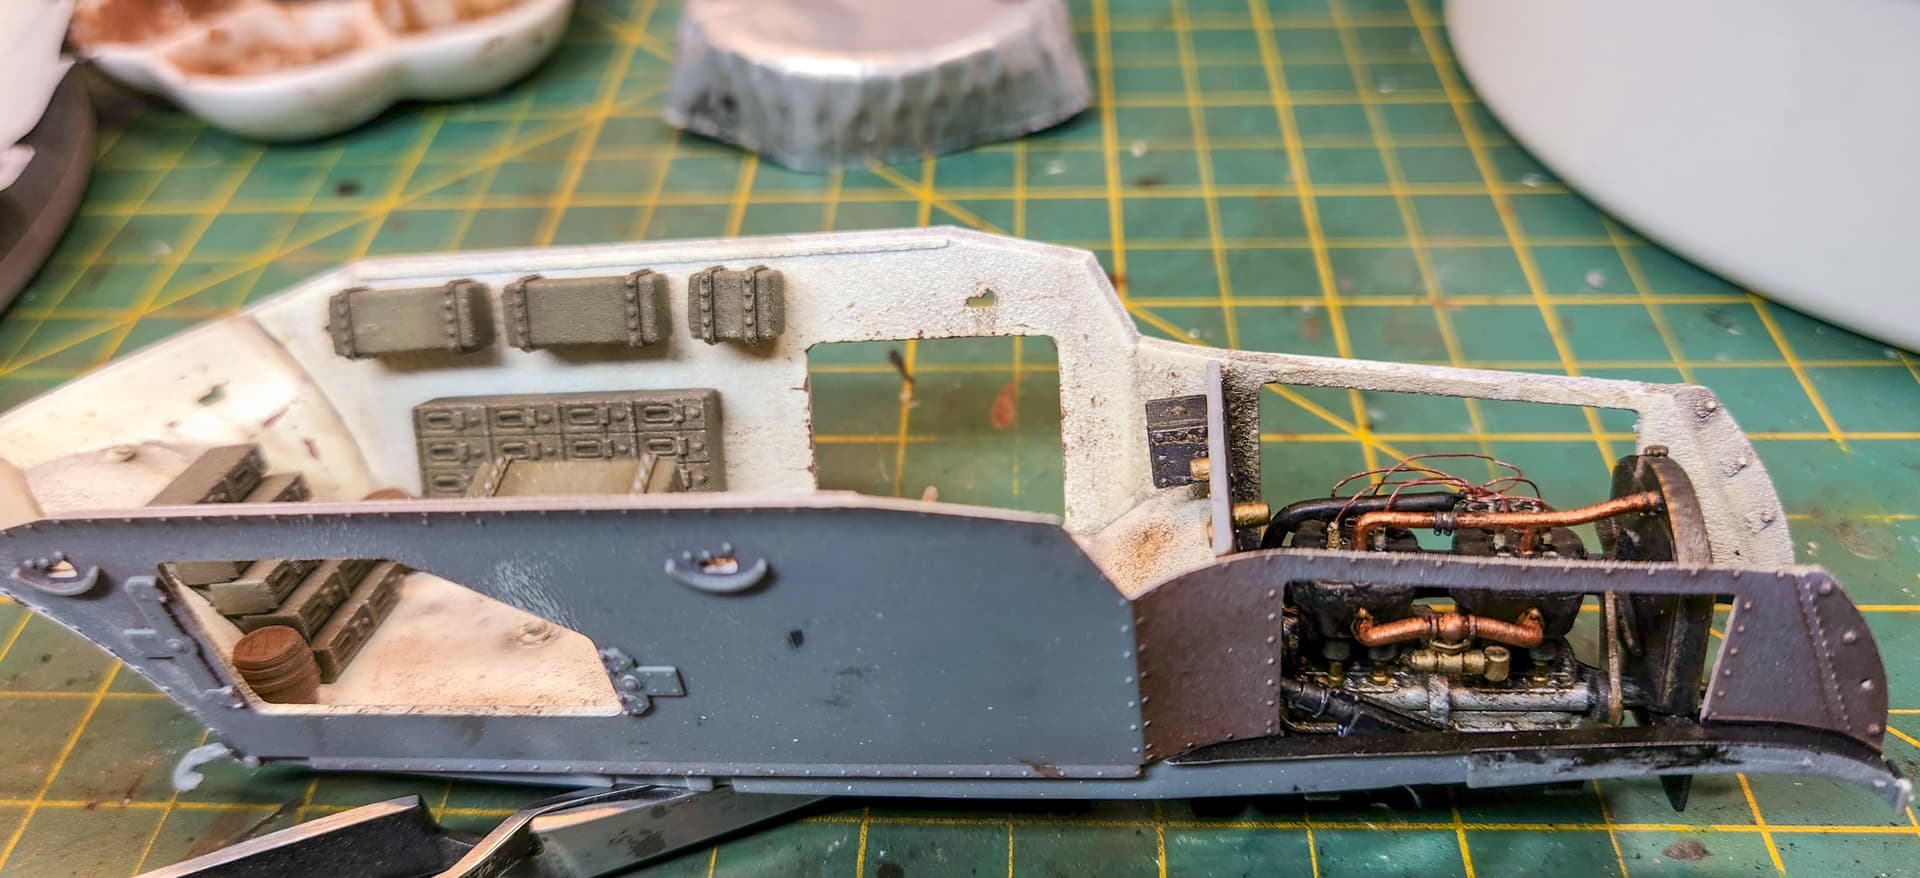
The exterior went together well but did require some filler along the top rear deck area. I wanted to depict a fully opened vehicle in need of some mechanical service so added some scratch built interior door handles (metal wire) based on photos, while also using most of the PE that came with the Cooper State Model detail set. Once the exterior was done, I temporarily attached the hatches and doors in a closed position to protect the now painted interior, as well as to get a consistent paint job for their exterior sides. I wanted to paint the vehicle to closely match examples historically shown, which appears to be a dark gray along the sides and top of the hull and a more grayish green for the bottom half of the sides (area below the doors) and wheels. To come up with these colors, some liberties must be taken but I think I got it close to what I was after using the following:
• Upper Hull and Top: Tamiya German Grey mixed with Tamiya Dark Green (~50%)
• Lower Hull and Wheels: Tamiya Dark Green
While airbrushing these colors, I did add some lighter shades to represent fading along the center of panels, especially on upper surfaces. Thus, no one color mixture was consistent. Once dry, I sealed these base coats using Tamiya Clear (about 50% Gloss to Flat to make a semigloss). Recently I started to seal base coats with semigloss instead of gloss as I think that still works well for washes, while also better for oil paint rendering techniques as described by Wilder and Rinaldi. I used oil techniques to not only darken areas that may not have been darkened enough through the wash, but to also add more weathering effects from both fading and staining. Chipping and small scratches were also added, first using lighter shade of the base coat and then followed up by a darker rust tone in “some” of the centers. Finally, mud and dirt effects were added to the lower hull using pigments mixed with some real soil debris. Large dirt sections were also washed with diluted darker earthtone enamels and then dry brushed with lighter shades.
Will make a new post for base details.