I’m now knee deep in this kit. I have had it in the stash for some time and have been psyching myself up for it for a while too, especially having built Takom’s Tiger II and RFM’s Pz IV, both with interior. Opening the box revealed a well packed kit with a heck of a lot of parts, lots of which seemed to supernumerary. In fact, at first glance it looks as though there’s most of an extra Panzer III there as well! As might be expected, this means the parts are spread over all the many sprues, which is frustrating to me - I don’t like having to source parts from several sprues for a single stage of the build. The other problem was that the instructions were deficient in explaining installation of the torsion bars, only showing one side of the vehicle. Since you have to install the torsion bars from the outside after assembling the tub and fitting the torsion bar caps in a previous stage, it turned out that 1) I couldn’t fit a couple of the bars as I had been a bit careless with gluing the caps, so I had to shorten them to fit and 2) the instructions didn’t explain the the rods had to be fitted in a different orientation on the other (un-shown) side (the rods are all the same part, irrespective of which side they fit). This meant that when I tried to fit the suspension arms, they wouldn’t fit the end of the torsion bars on one side, necessitating removing the locating pips from the end of the bar, making it impossible to have the suspension working on that side as the kit offered. Fortunately, I wasn’t too bothered about having working suspension, but if I’d had in mind fitting it into a diorama with an uneven surface, this would have been a major b**l-ache. As it was, they just got glued up solid. Those with good eyesight may also notice one of the suspension arms has a thicker axle on it - this is due to having to replace a snapped off one with a metal pin. This arose because access to some of the parts on the sprue is very awkward with my sprue cutters.
Anyway, enough complaining, this is the stage I was at after a couple of days work. I have now progressed somewhat, more pictures to follow.


Looks like you worked through it.
Phase II of the build. Actually, this all went together much better and I finally reached a point where I had no choice but to paint stuff. RFM thought it was a good idea to assemble the engine, fuel tanks, cooling fans and exhausts and the firewall all into one assembly then try to get it all into position in one go… I wasn’t falling for that so I positioned the fuel tanks and ammo storage first, then sprung the engine and fans into position. It worked OK. They also wanted the brake drums with their cooling pipes and the mounting brackets for the gearbox in first; then the gearbox. No, that doesn’t work, the front brackets and cooling pipe from the right hand steering brake had to come off again, then the gearbox just drops into position. All paints are Humbrol, the gearbox colour was mixed; there used to be a Humbrol 115 that was a perfect match for German interior grey/green, so of course they deleted it (much like Matt 74, Linen, which mixed 4/1 with Gloss Ivory is a perfect match for Elfenbein. You can still get it in the Acrylic though. Helpful).

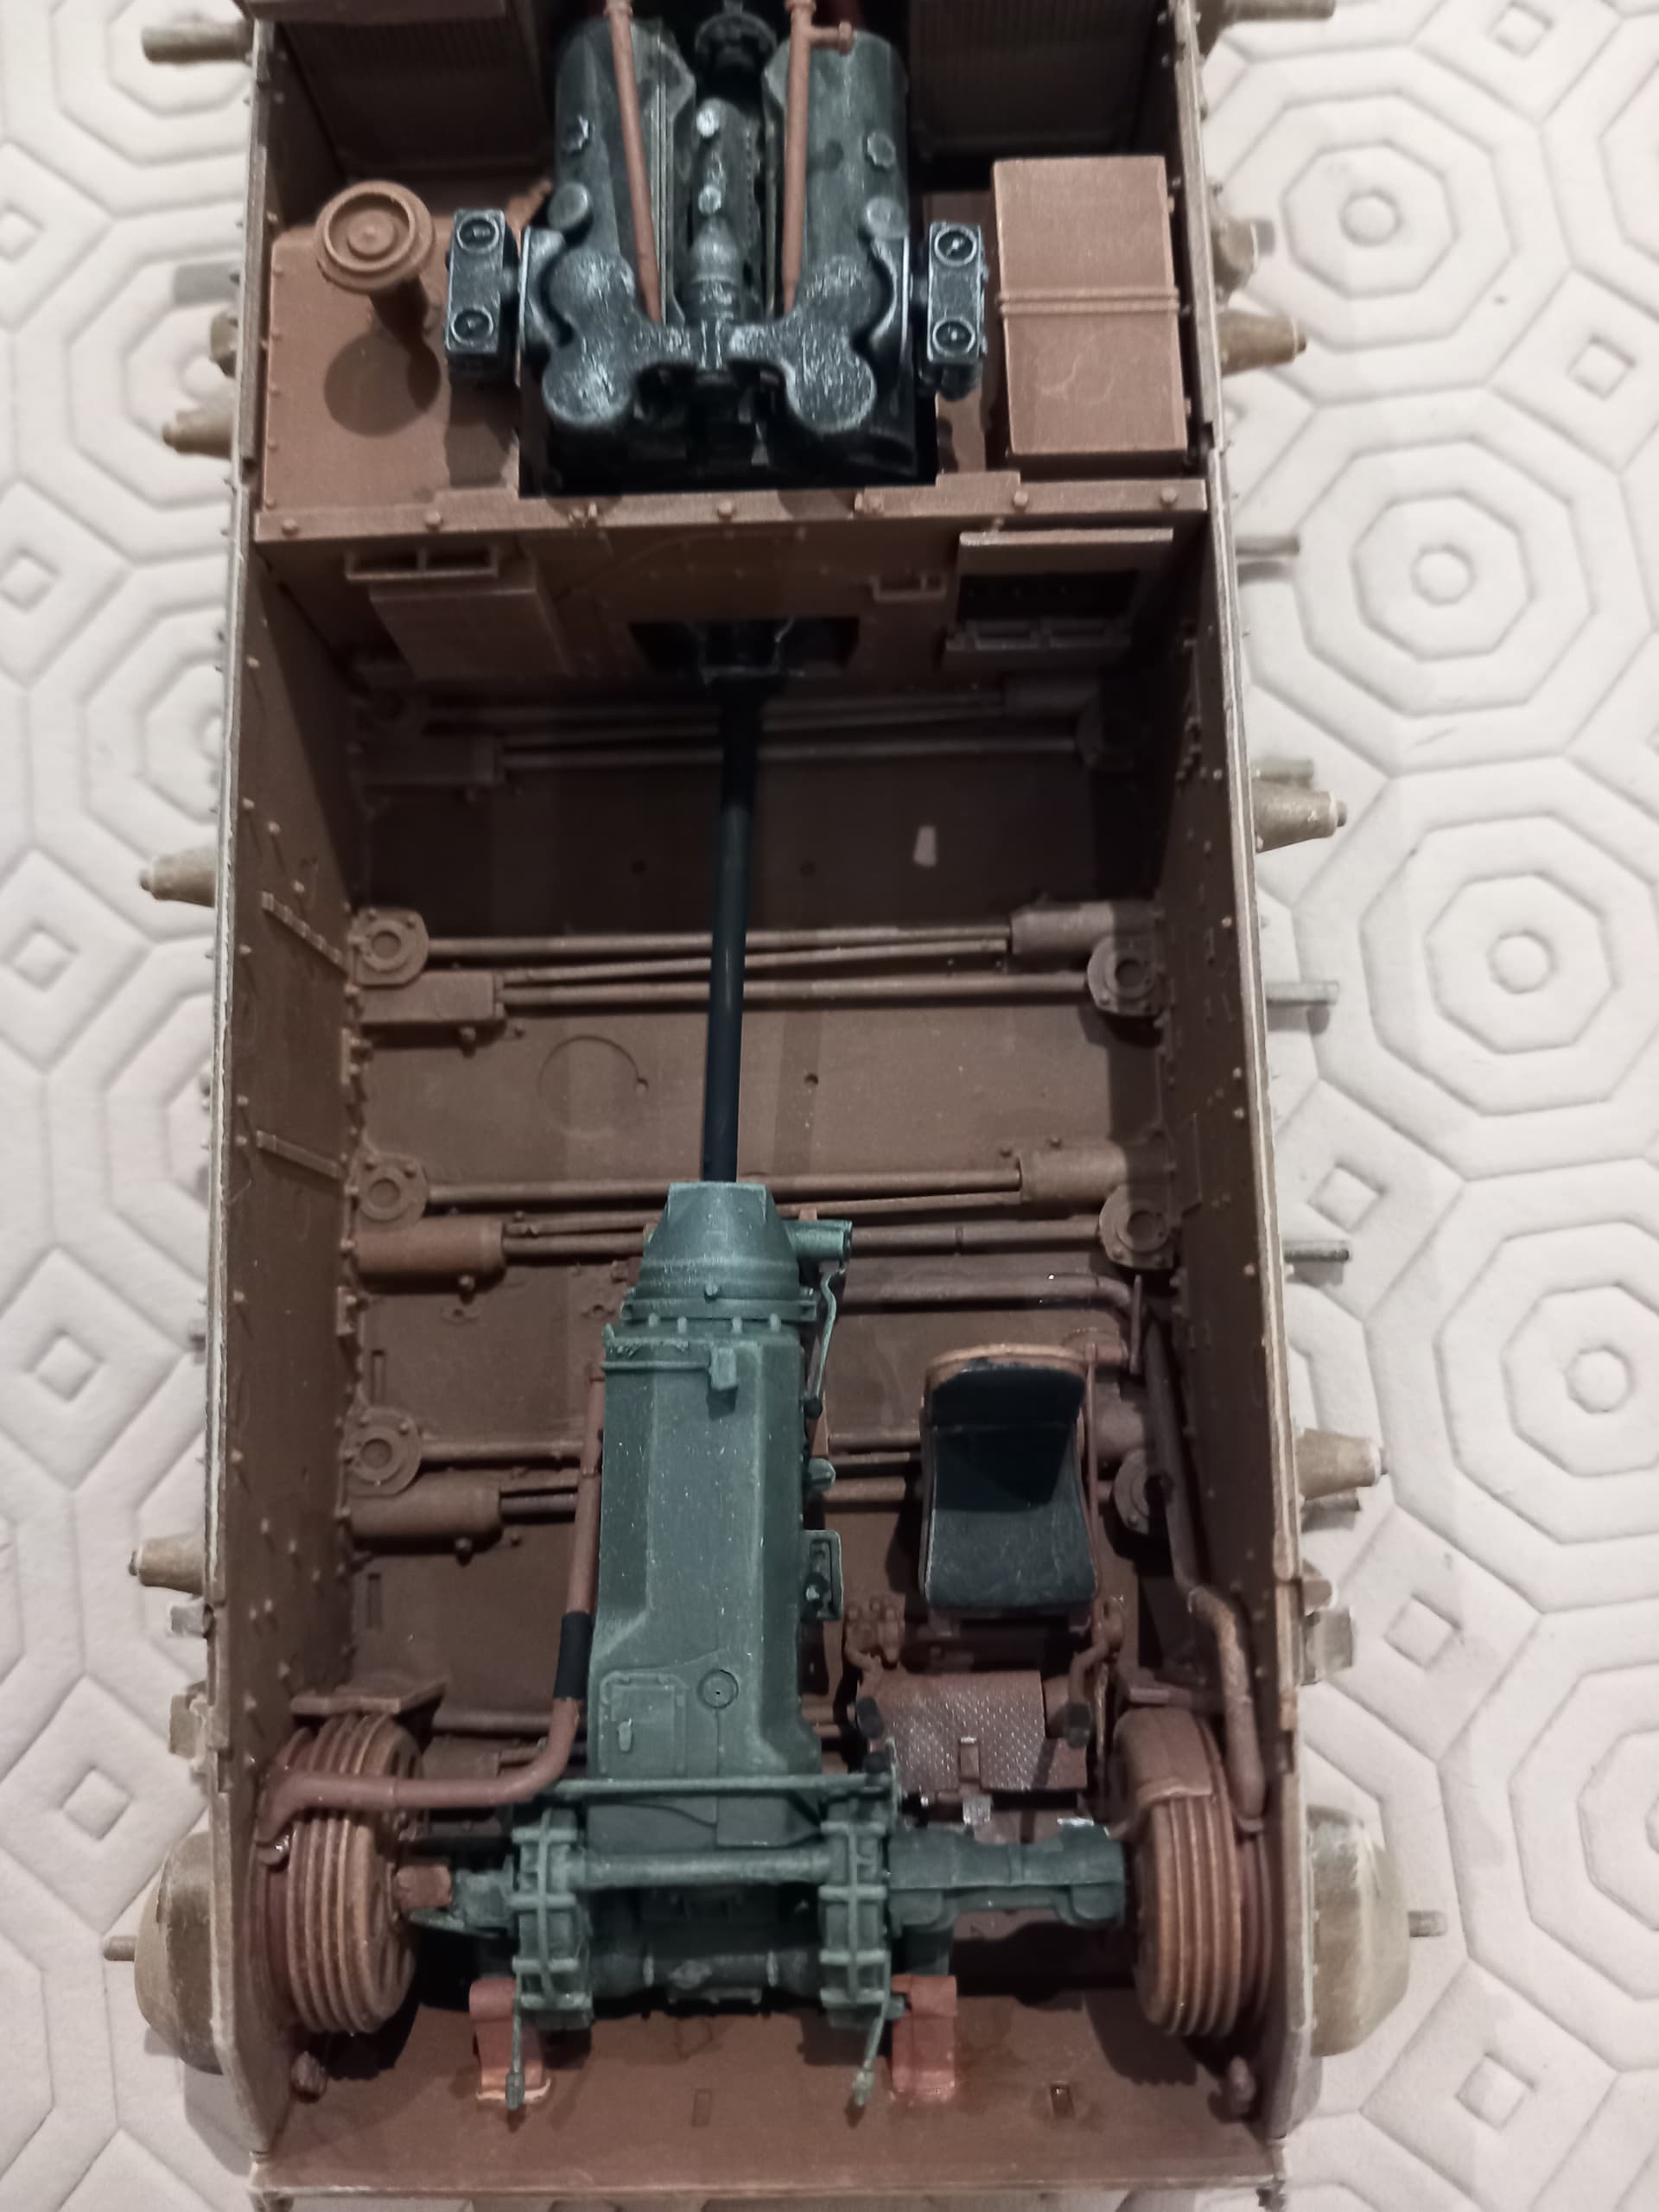
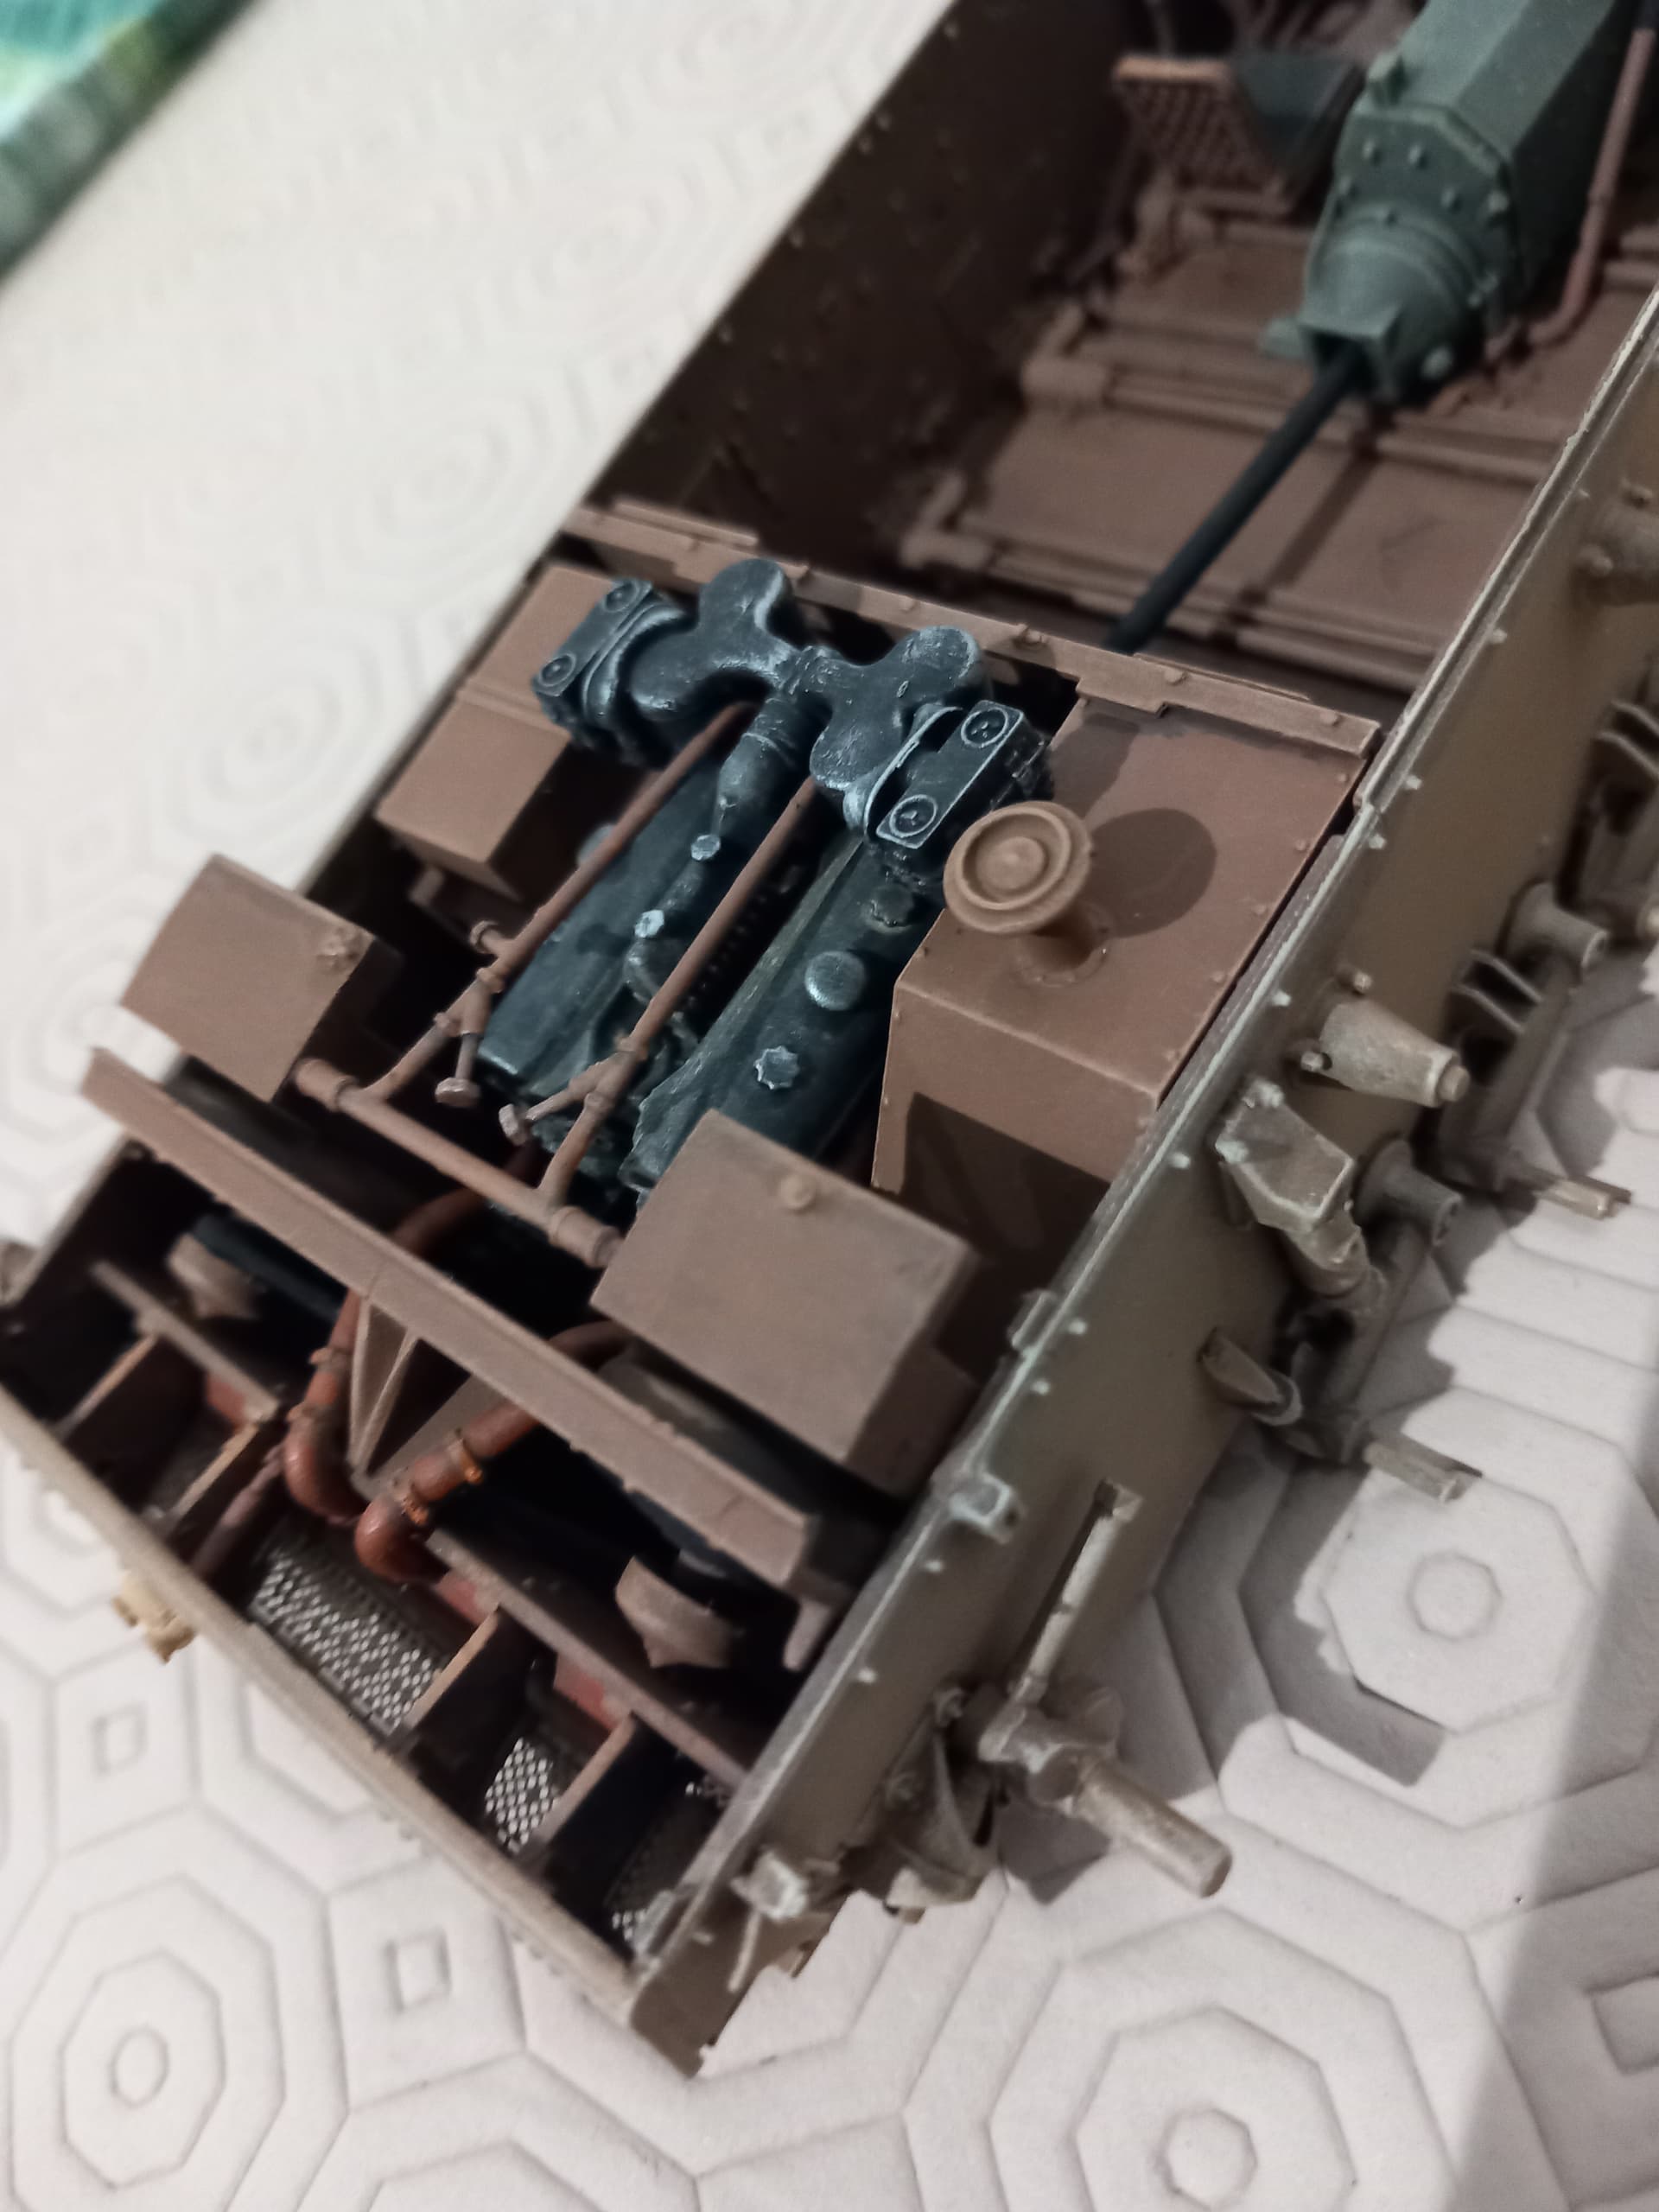


Oh yes, the German Red Primer is Humbrol 113 Rust, which is a pretty close match. Don’t be fooled by its very brown appearance here; a) it’s already been shaded and dirtied up; b) in decent light it appears much redder than it does here. For colour guides I’m using the Tank Museum/Haynes manual and a Squadron/Signal Walkaround from Tom Cockle.
That’s a nice build so far.
That’s a great start.
A few years ago I built a Dragon Stug with a partial interior added from some aftermarket sets and a fair bit of scratchbuilding. Of course it was fun, but also a shame to see so much work disappear into the gloom once the top was on!
At least it looks as if you have everything you need in one kit. Too bad about the poor instructions though…
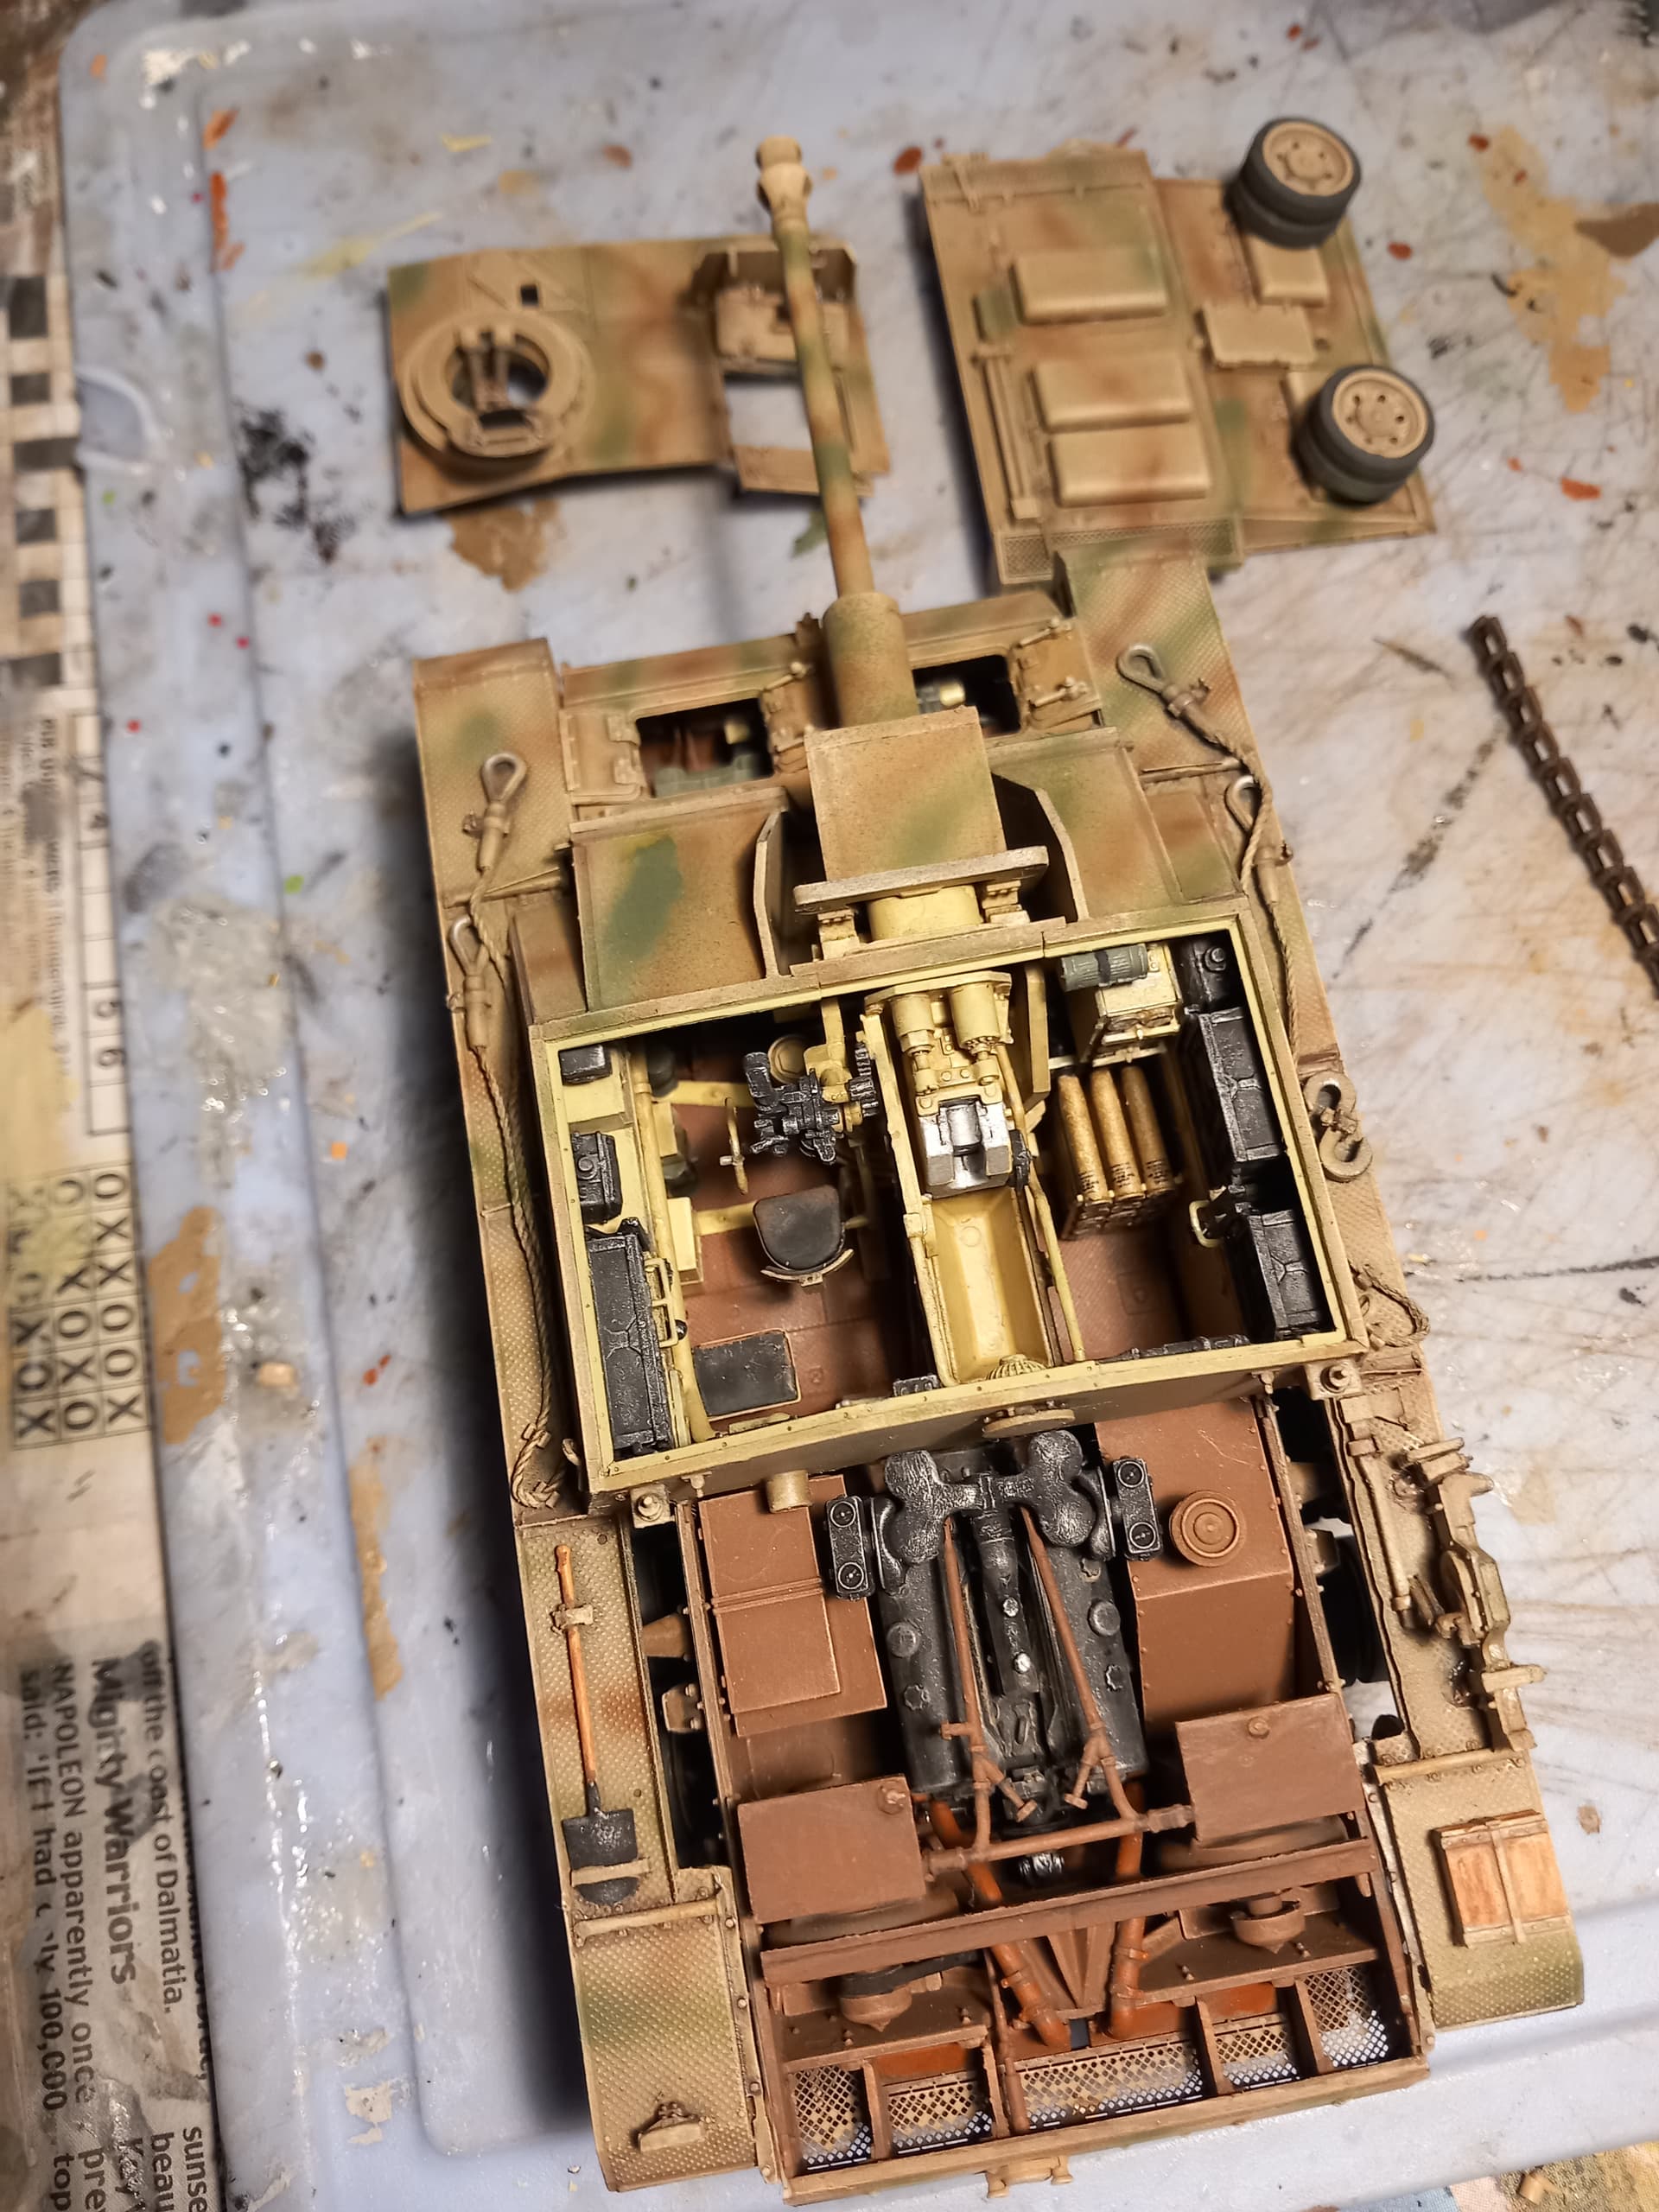
It’s been a while since the last update, apologies for that. In the meantime I have pushed on with the build and have ended up with several assemblies that can’t really go together until painted. The wheels didn’t provide any problems, having poly caps which go inside (like Tamiya) so they just push on and are free to rotate which helps with painting. The ammunition was fun, with three tiny transfers for each round, then the front rack you can’t see any of it when it’s in! Also attached are the gun base mounting and the front glacis plate. I’ve left the steering brake access hatches open so that these parts will be visible with the casemate on. Note the front Notek light base, not called out in the kit, but present on the subject being modelled (and fortunately in the kit box!).


Next assembly is the casemate. This includes the radios, drivers vision devices, more ammunition (this is the H.E.) and sundry other bits. Attaching this is going to be fun, as I will need to line up the gun mounting, casemate and gun mantlet all at once. For this reason I decided to keep it separate and paint it separately, so that any overspray can be cleaned up or touched up before it goes together. Also shown is the rear deck, the assembly of which was straightforward. These assemblies have been a case of one step forward, two steps back, as I have dry fitted them and found they don’t fit! So there has been a lot of juggling and filing to try and get them something like. In the case of the rear deck, it was nothing like, so I had to get the Dremel out and grind away part of the locations for the hatches, leaving enough to hold them in place. Fit still isn’t perfect, but it’s being left loose anyway so that I can still look at the engine if I want to.


Excellent work so far. I have this kit in the stash and will be following. Great paint job on the interior!
Here is the gun mounting assembly, a kit in itself. It’s all very tight inside when it’s in and four men had to fit inside in the real vehicle as well! I’m still not completely sure how I’m going to glue the gun to its base on final assembly.


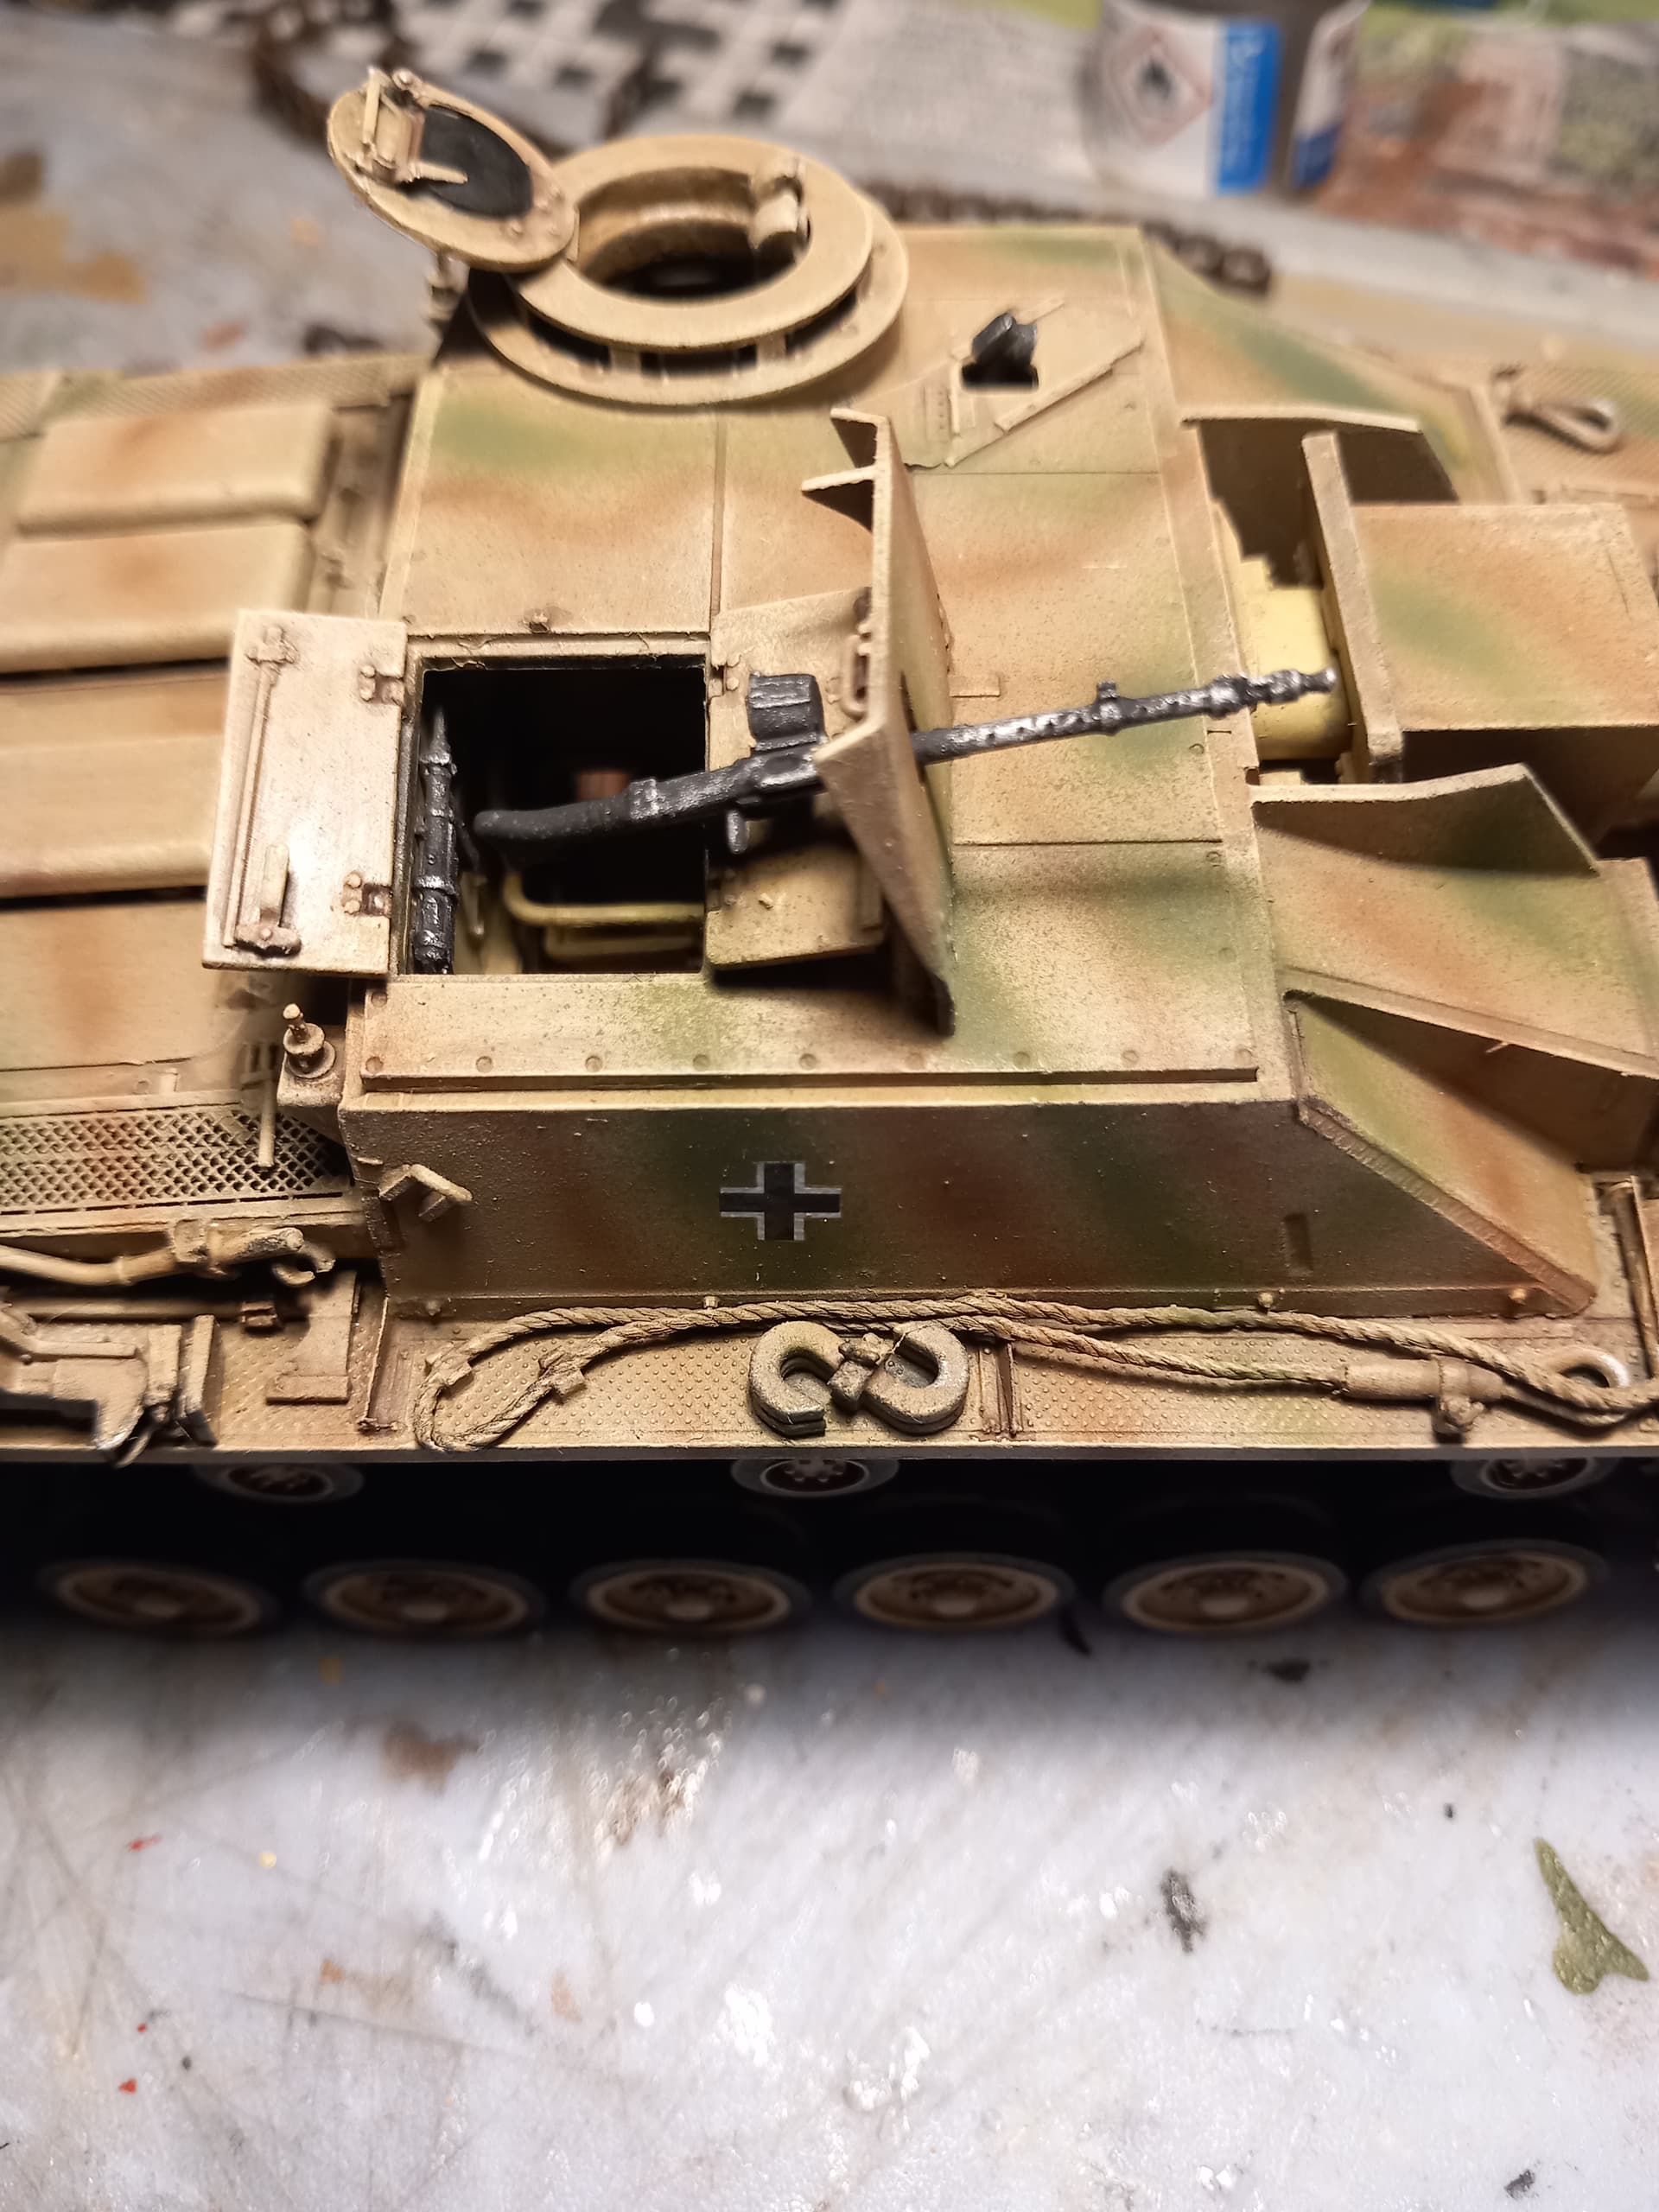
Finally here’s the inside and outside of the casemate roof and an overview of the hull parts together. The roof is a nice snug fit in the casemate, so it will be left loose to allow access to the interior (see below). I have departed from the instructions to some extent with this build, as I am modelling a specific vehicle, not the ones the kit gives you the profiles for which are three vehicles from Stug Abt 202 in the Ukraine in 1944. Mine is based on photos taken during an exercise on the Somme in autumn 1943, laid on by 9SS to a delegation of Rumanian officers. The Stugs involved (six in number) have a very specific fit-out; only one has the bolted on front plate, only one carries any spare tracks and in this case they are piled on the rear deck. One of the six (the vehicle I’m modelling) has had the casemate roof removed so that the Rumanians can see the inside. None of the Stugs have the additional armour around the cupola and none have extra brackets welded on at the factory for stowage. The spare road wheels are mounted on the rear fan inspection hatches, not on the mudguards as per the kit.


To anyone considering this kit, I would say it is not an easy build, but the final result will be worth the effort (I hope!). Apropos of nothing, there is still a box full of bits left after reaching this stage! There is a full Panzer III hull and numerous other bits which don’t get used, including the additional armour around the cupola, the casemate mounted smoke candles and the “Saukopf” mantlet, the so it is possible to make an earlier and later version from this kit (however it doesn’t contain any of the later cast, rubber-free return rollers).
The other thing is the subject Stug doesn’t have Zimmerit (hooray!) and 9SS at the time was still a Panzergrenadierdivision, not a full fledged Panzerdivision so the crew are in the Field Grey version of the Panzer uniform.
It should also be said that Rye Field have never understood or correctly implemented the radio configuration of a Stug.
David
Yes, I did think that there was rather a lot of gear for a standard fitment. But it’s in now and does clutter up the sponsons nicely, if nothing else!
The interior looks great.
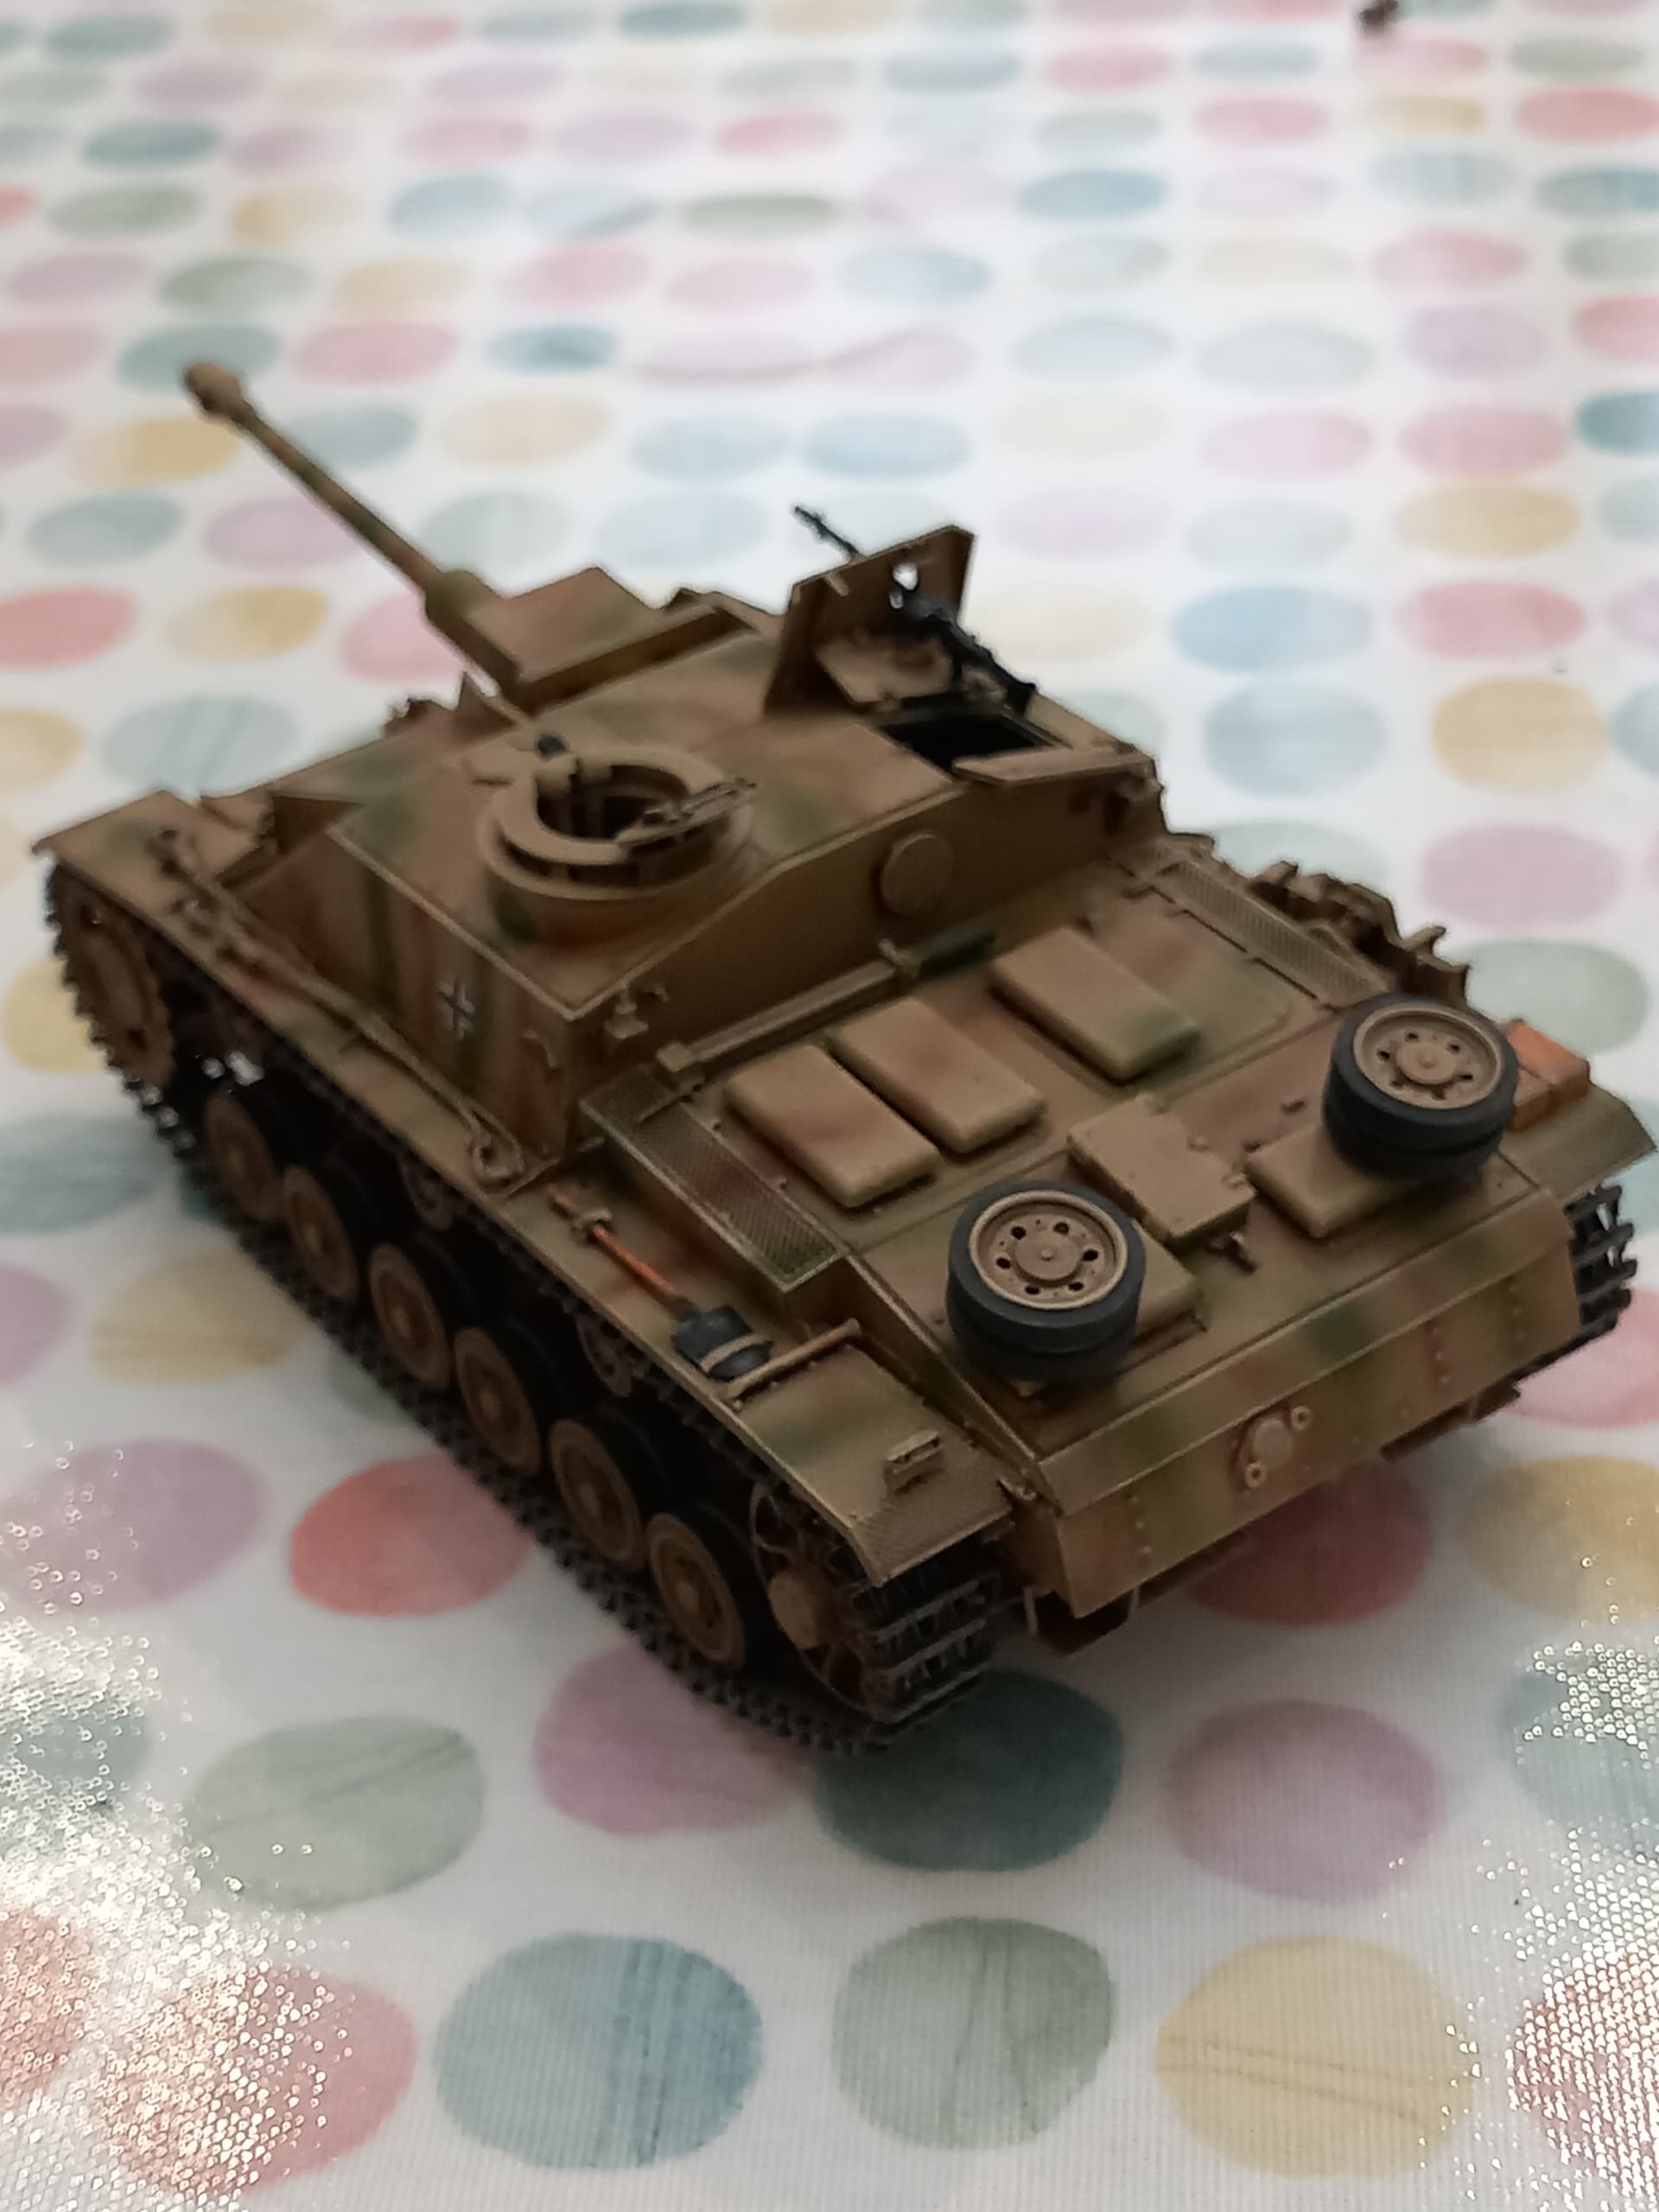
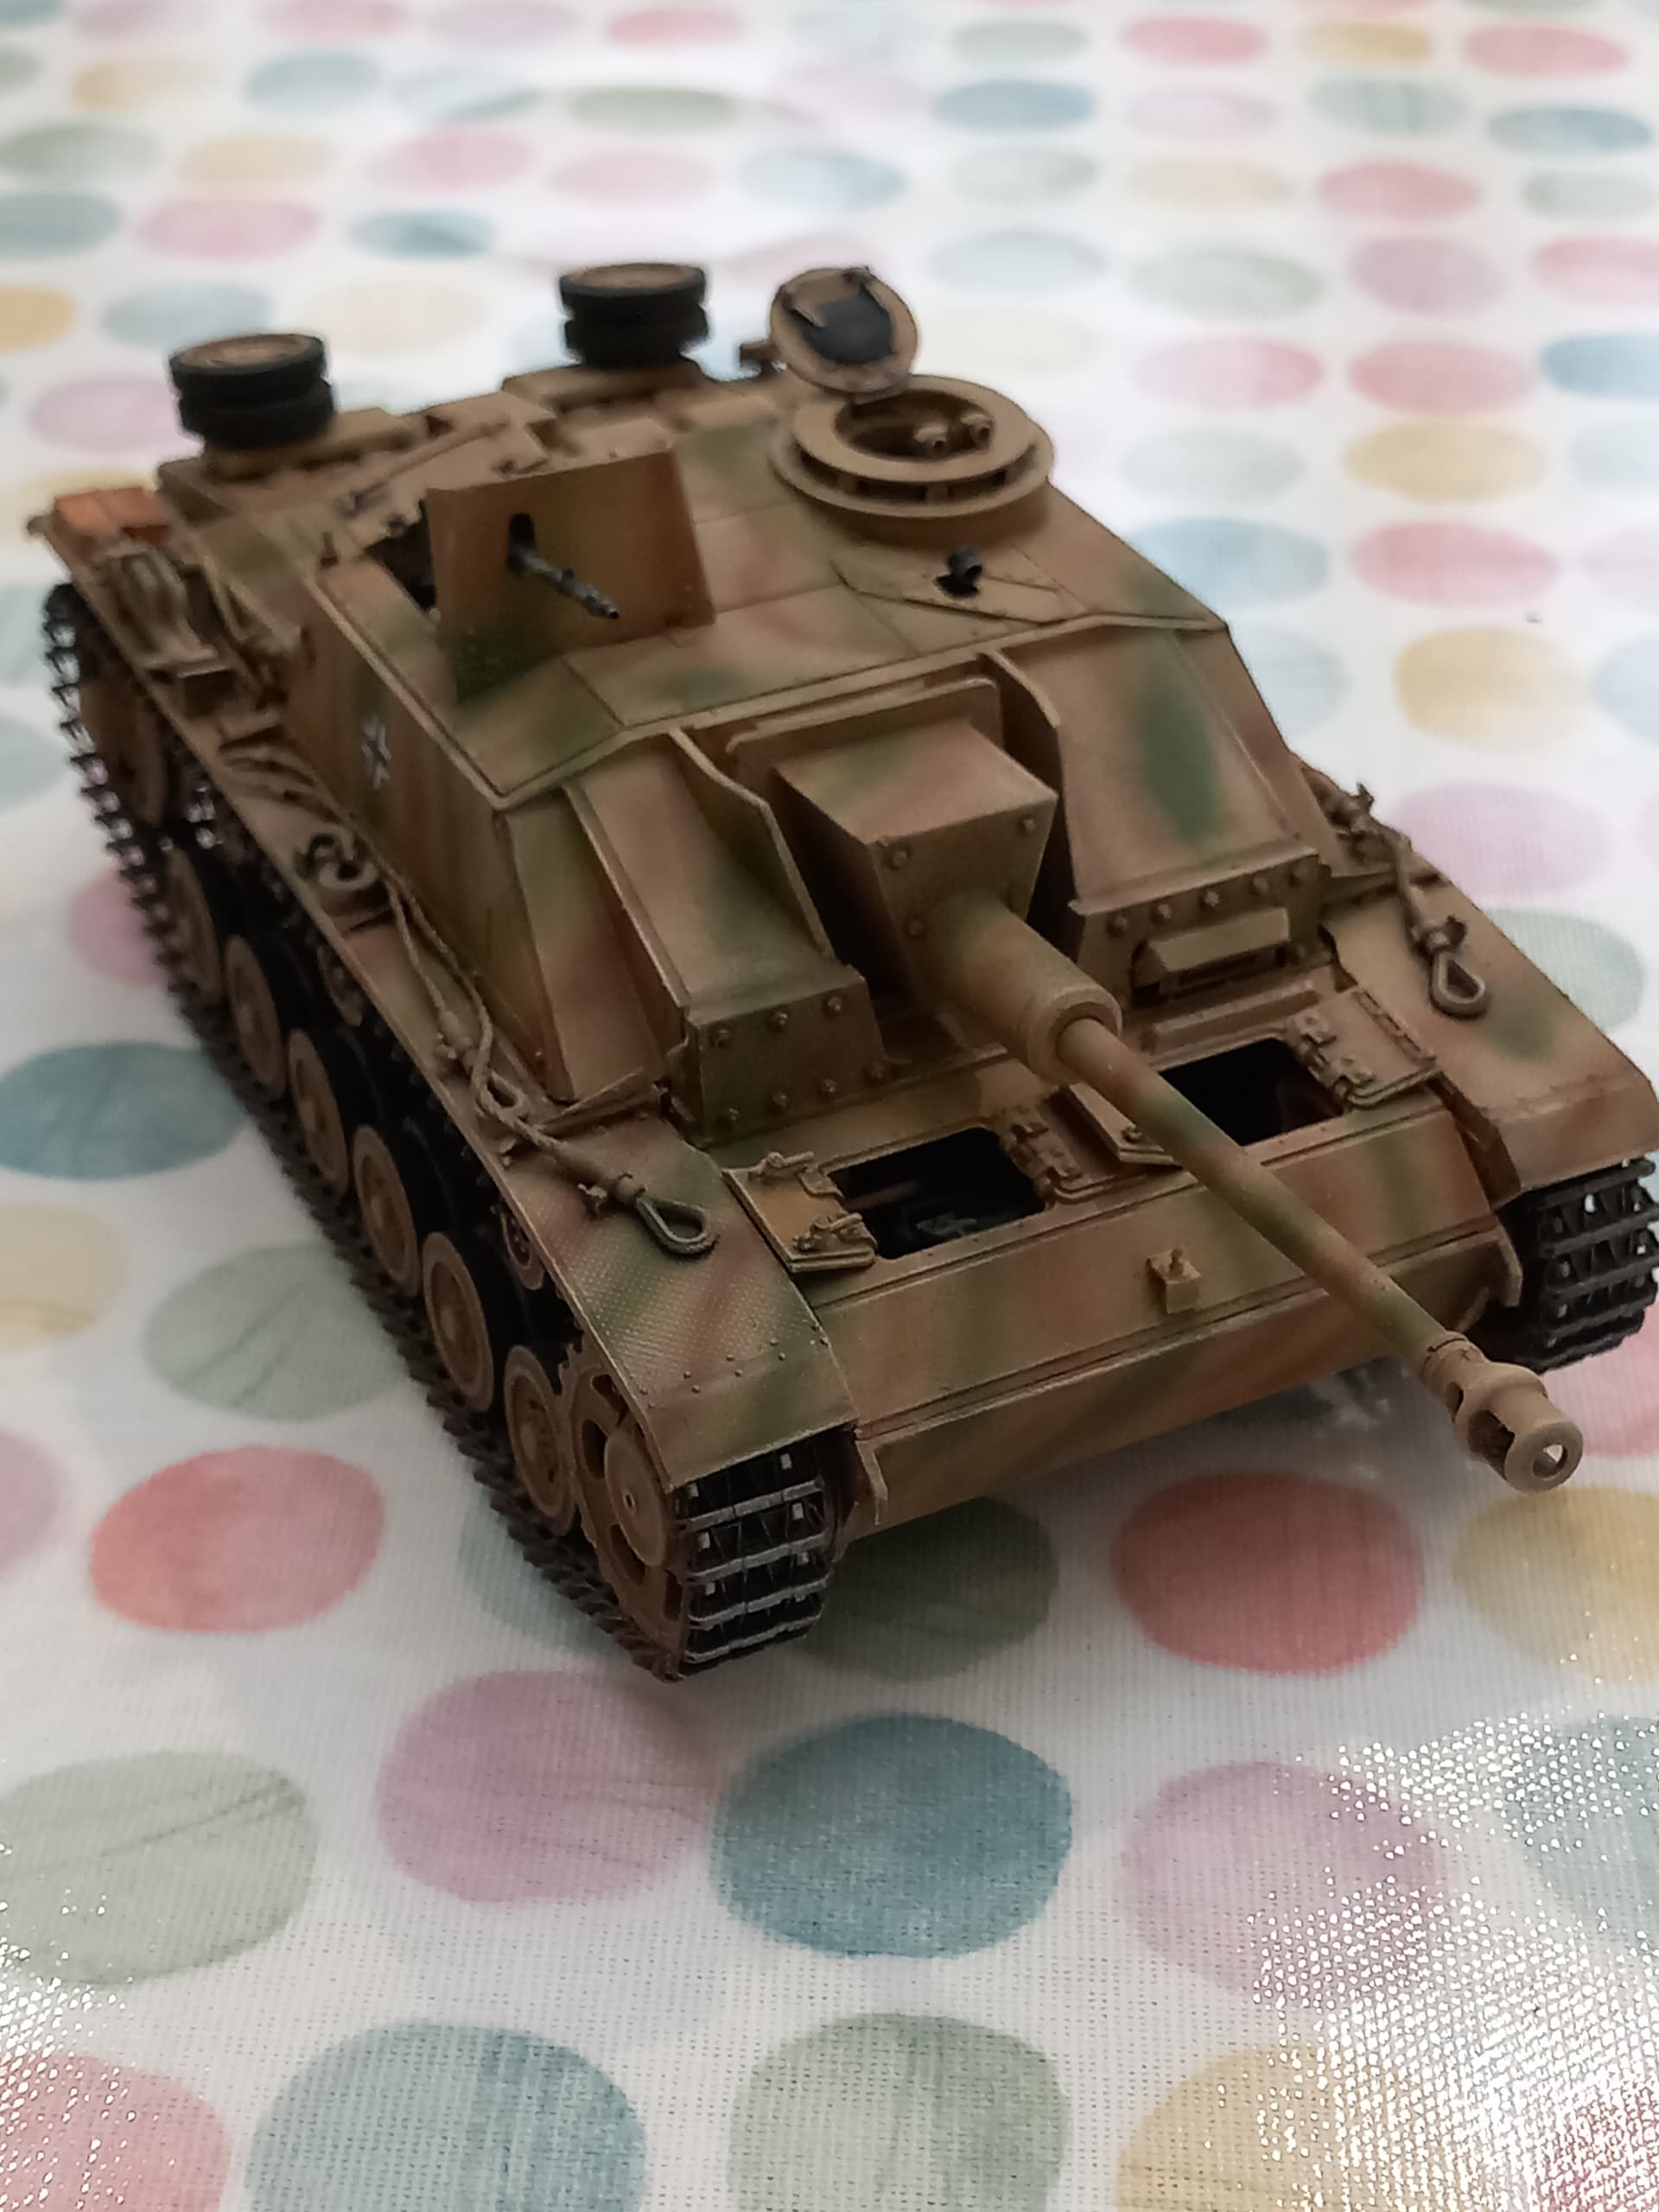
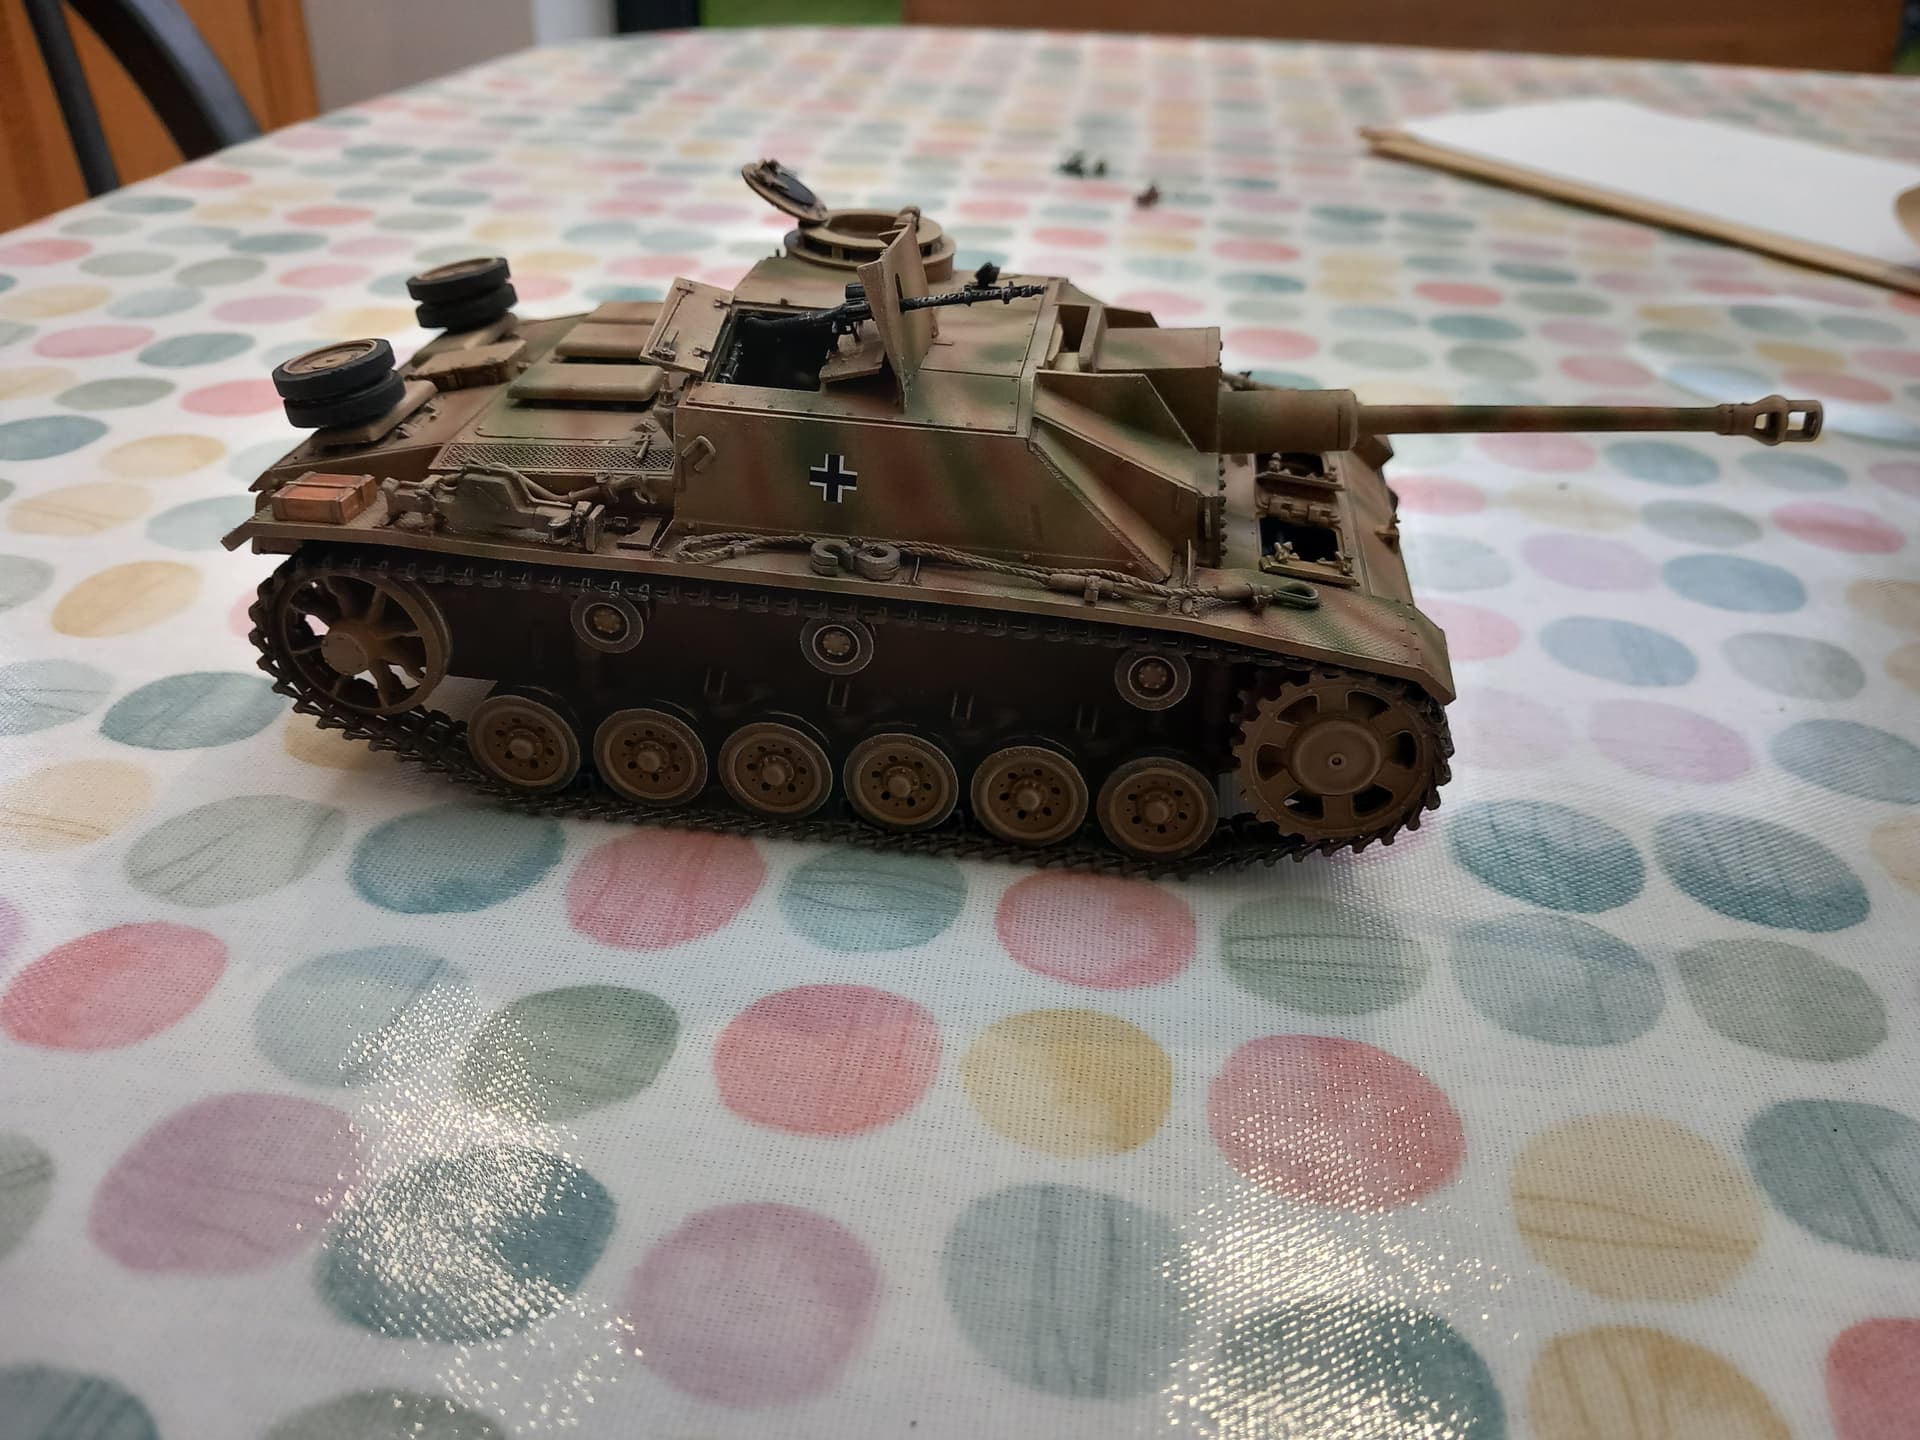
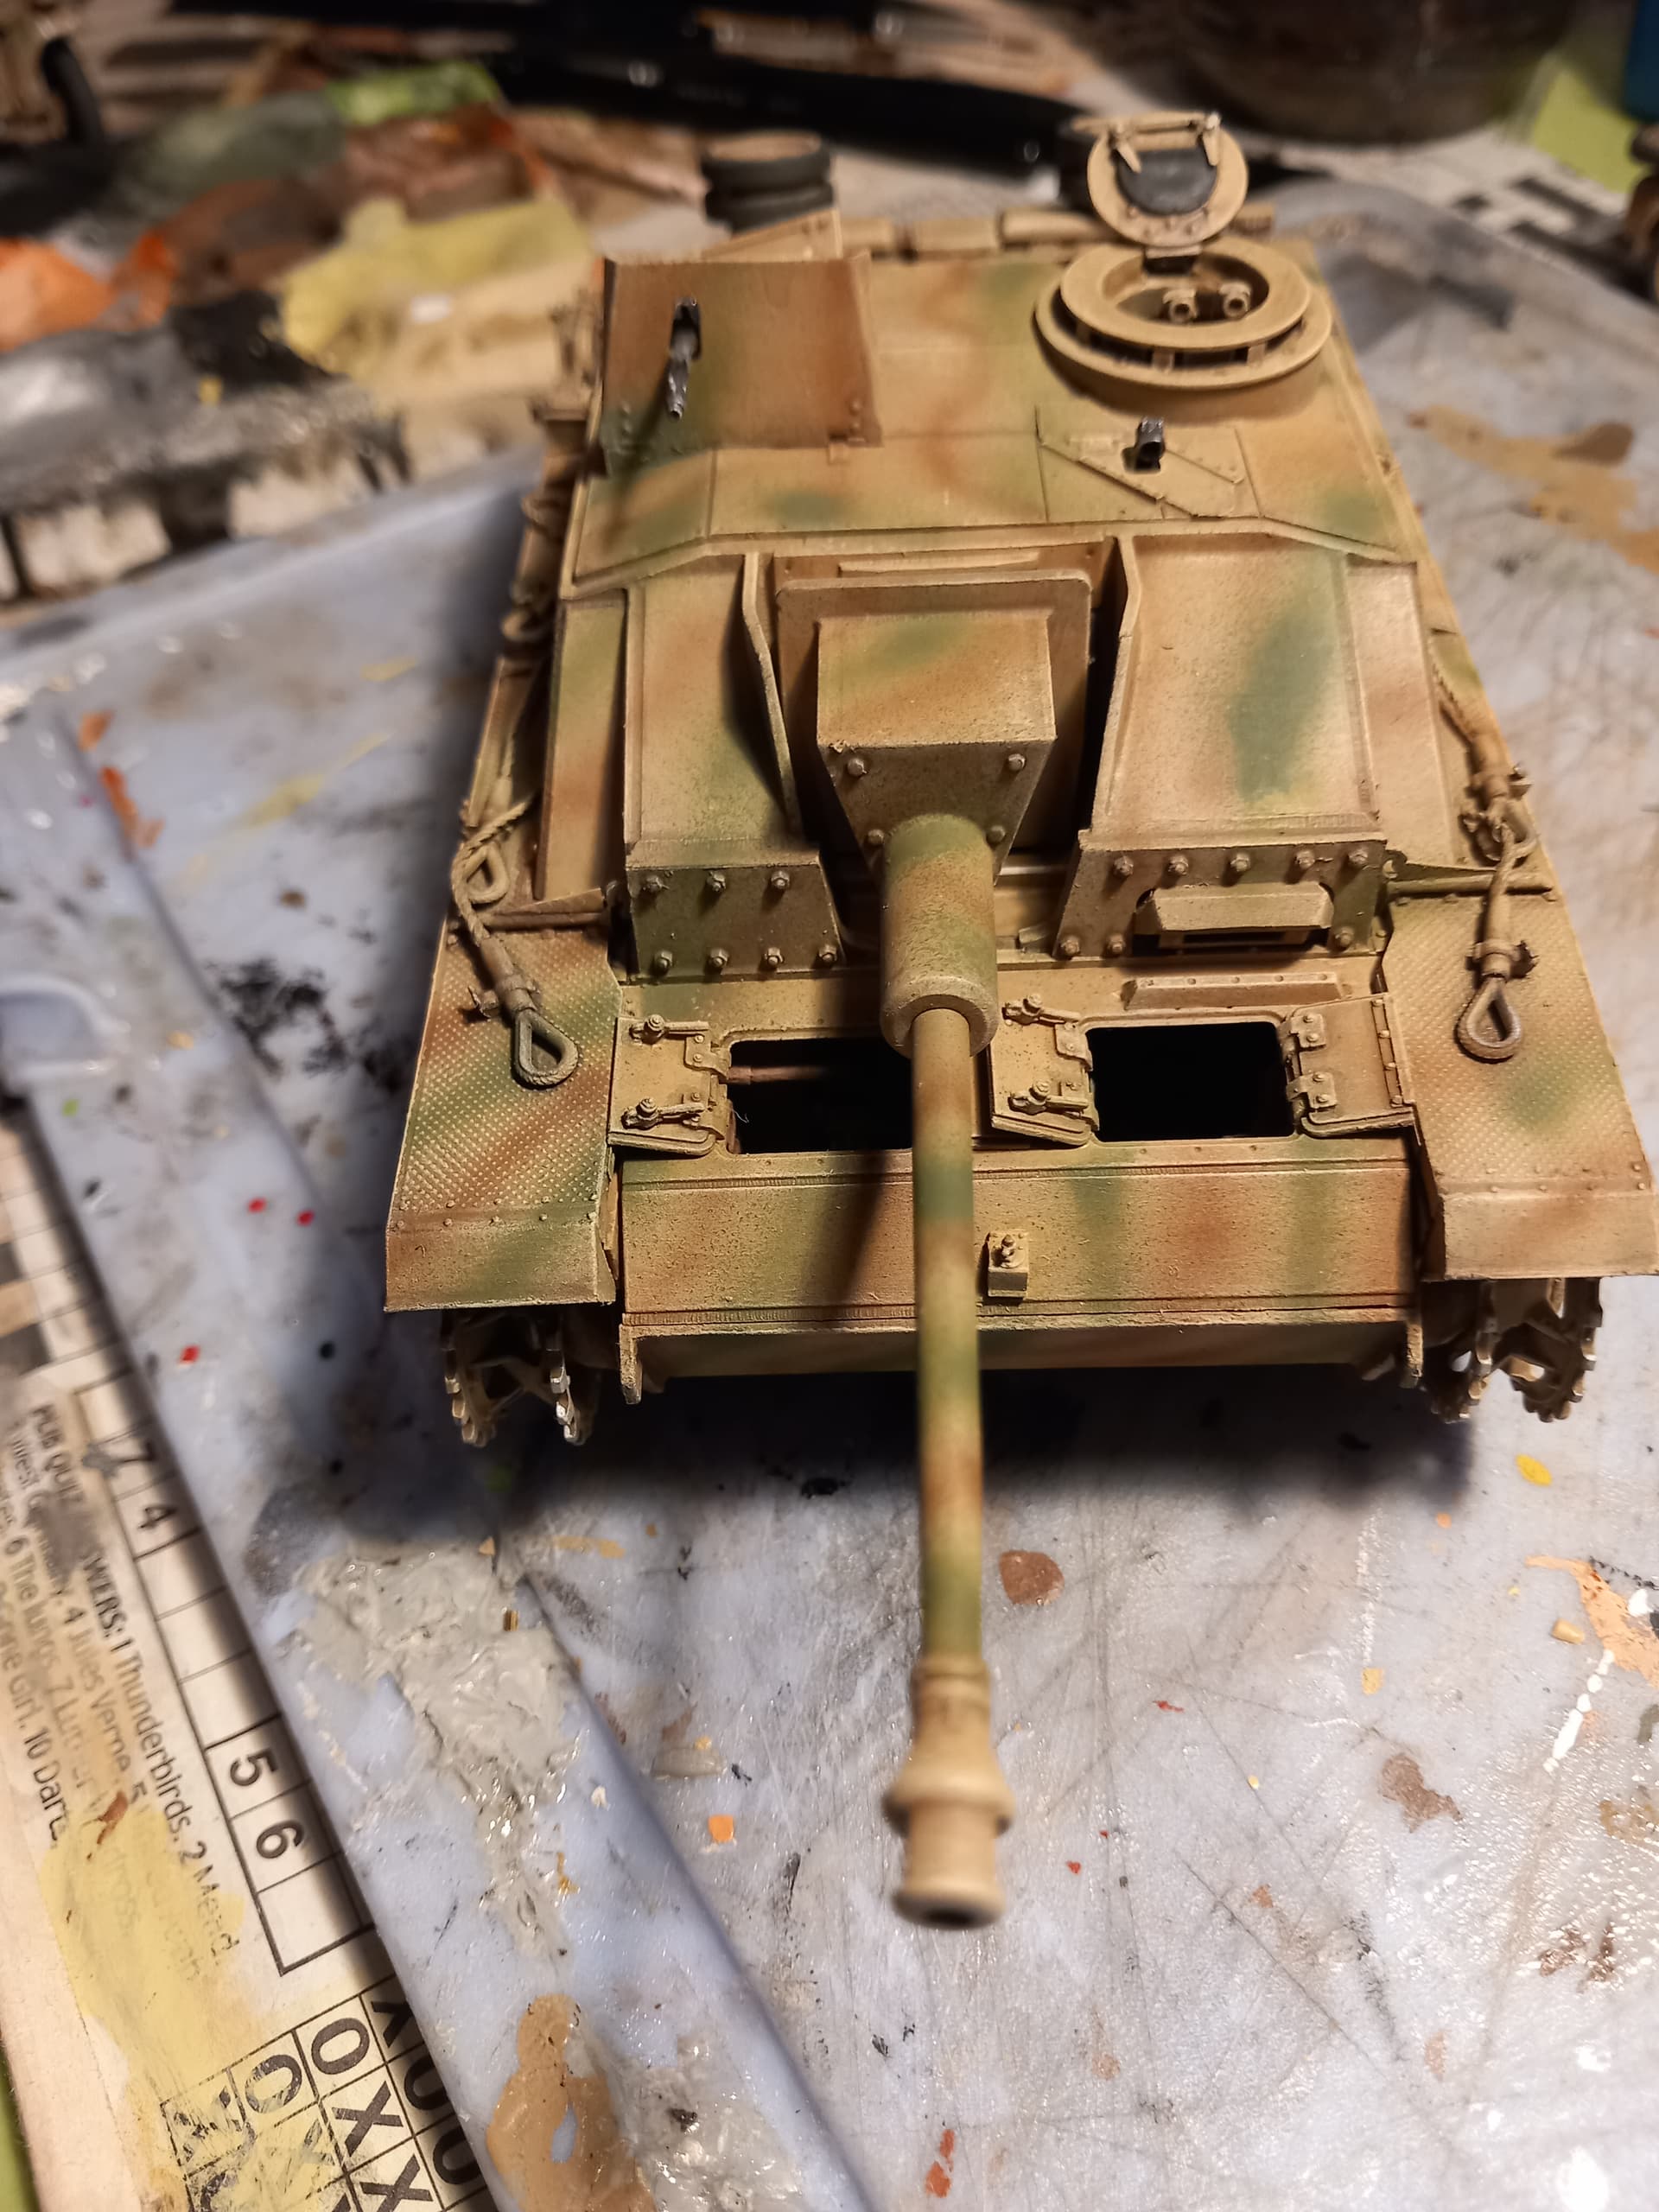
This is the stage I’m at now. Paint applied and ready for the “dust coat”. I’m not going for extreme weathering, a) because I don’t like it anyway, b) because the subject vehicle just has a light coat of dust and is virtually brand new. Fitting the casemate wasn’t quite the bear I was anticipating; I put the gun mount in position in the casemate hole and attached the mantlet first, let them dry, then attached the casemate to the hull. It worked surprisingly well. The photos show the basically completed model, with and without top plate and engine covers which will both be left removable. With the top off and the open hatches, you can still see 90% of the interior. The tracks are complete, just need “dusting”, running on and joining. They are workable if assembled carefully, which makes life easier.

That is lovely! Really worth the effort to do the interior! Nicely done.
Doing a fantastic job on this one.
Here are the final pictures with tracks on, dust coat etc. Sorry about the table covering! All paints used were Humbrol. The camouflage pattern was random, as was that on the original photo. It looks as though whoever painted it had just sprayed the lower hull in ellipses with colour. The pattern is quite faint and hard to distinguish on the photos. The tracks were a bit fiddly to join, getting the last pin in once they were on the kit because they are quite tight. I used the recommended number from the instructions, with hindsight an extra link each side would have a) made fitting easier, b) given a bit of sag. However having the wheels and sprockets turning made it bearable, I just ran the track on in prototypical manner. Thanks for all the previous nice comments guys, on to the next project (although I may do some dusting with MIG powders)!