Jack, thanks.
Will get my senior researcher & technical assistant to do a de-fuzz.
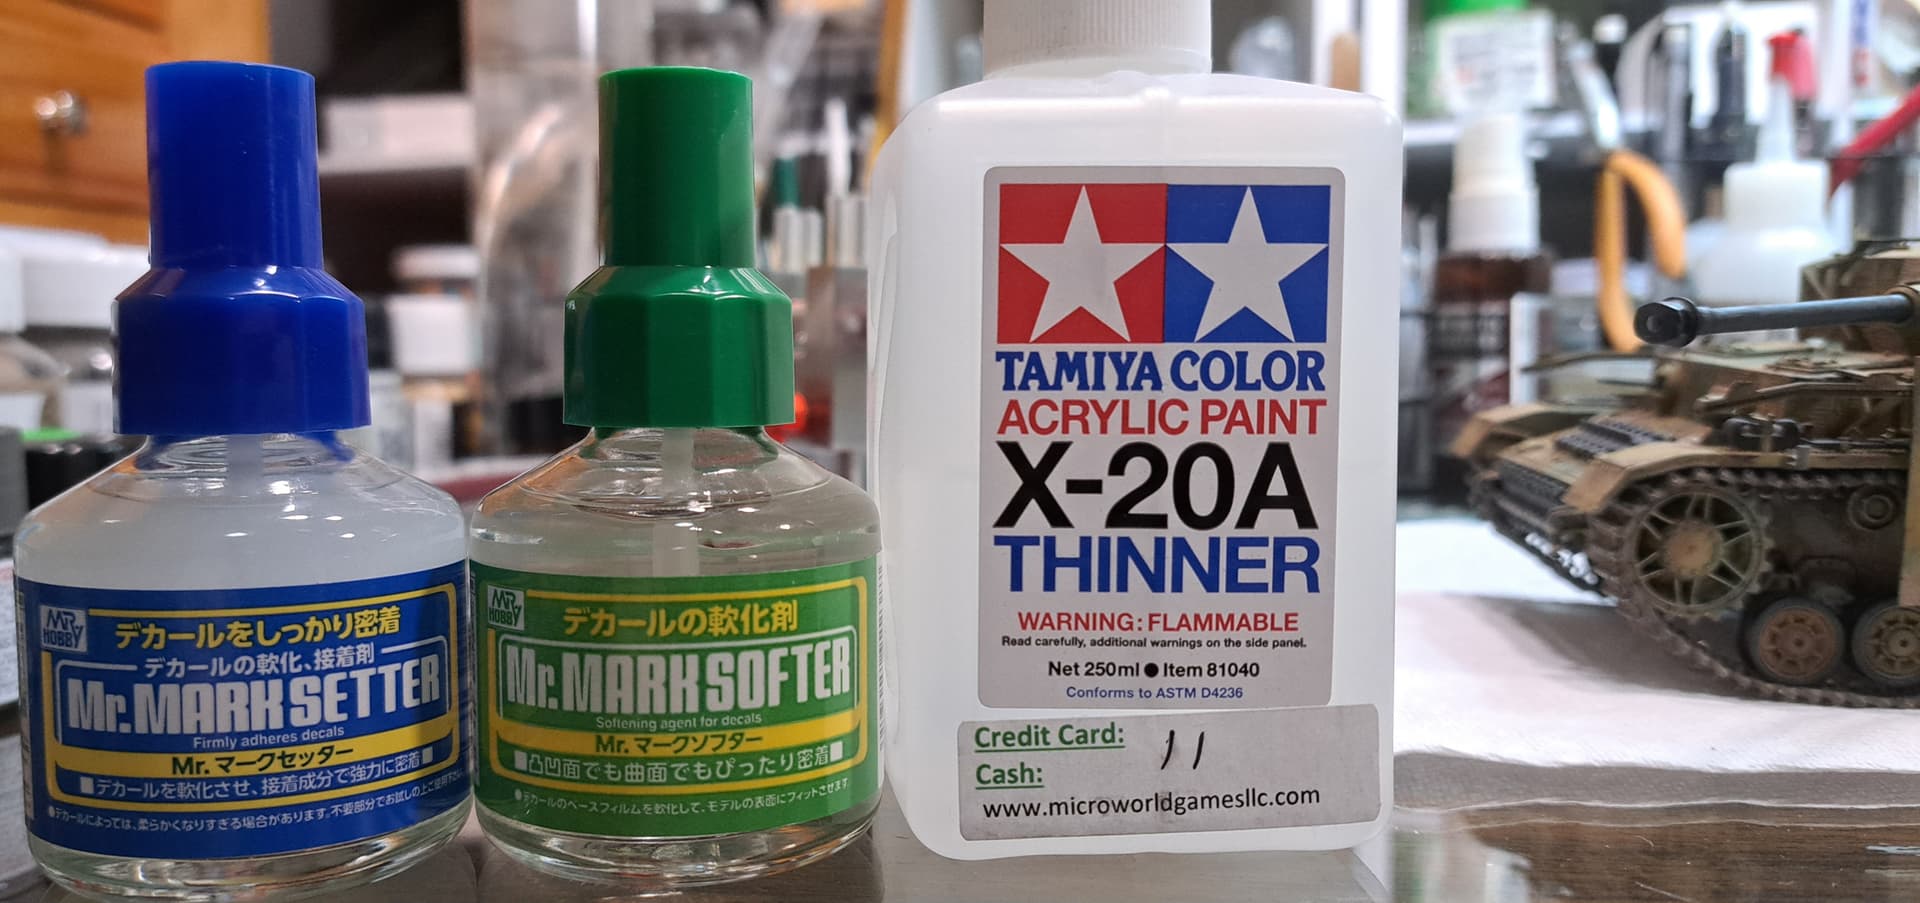
Ended up with some sort of reaction with the setting/soften solutions and everything else. Ended up with a nasty white stain appearing.
This morning a treatment of X20A appeared to remove the stain. If the stain stays gone today, hopefully filters and flat coat soon.
Had used all of the products before together with no issues. I wonder if the Star decals had something to do with it? Only time Ive used Mr Mark w/Star.
Glad it worked out for you. Did you do a gloss coat before applying decals?
Yes, there’s a gloss coat but it is only in the approximate area the decals are applied.
Some folks use acrylics and apply decals directly to paint and don’t seem to have issue etc. I’d rather use enamels and lacquers and use clear.
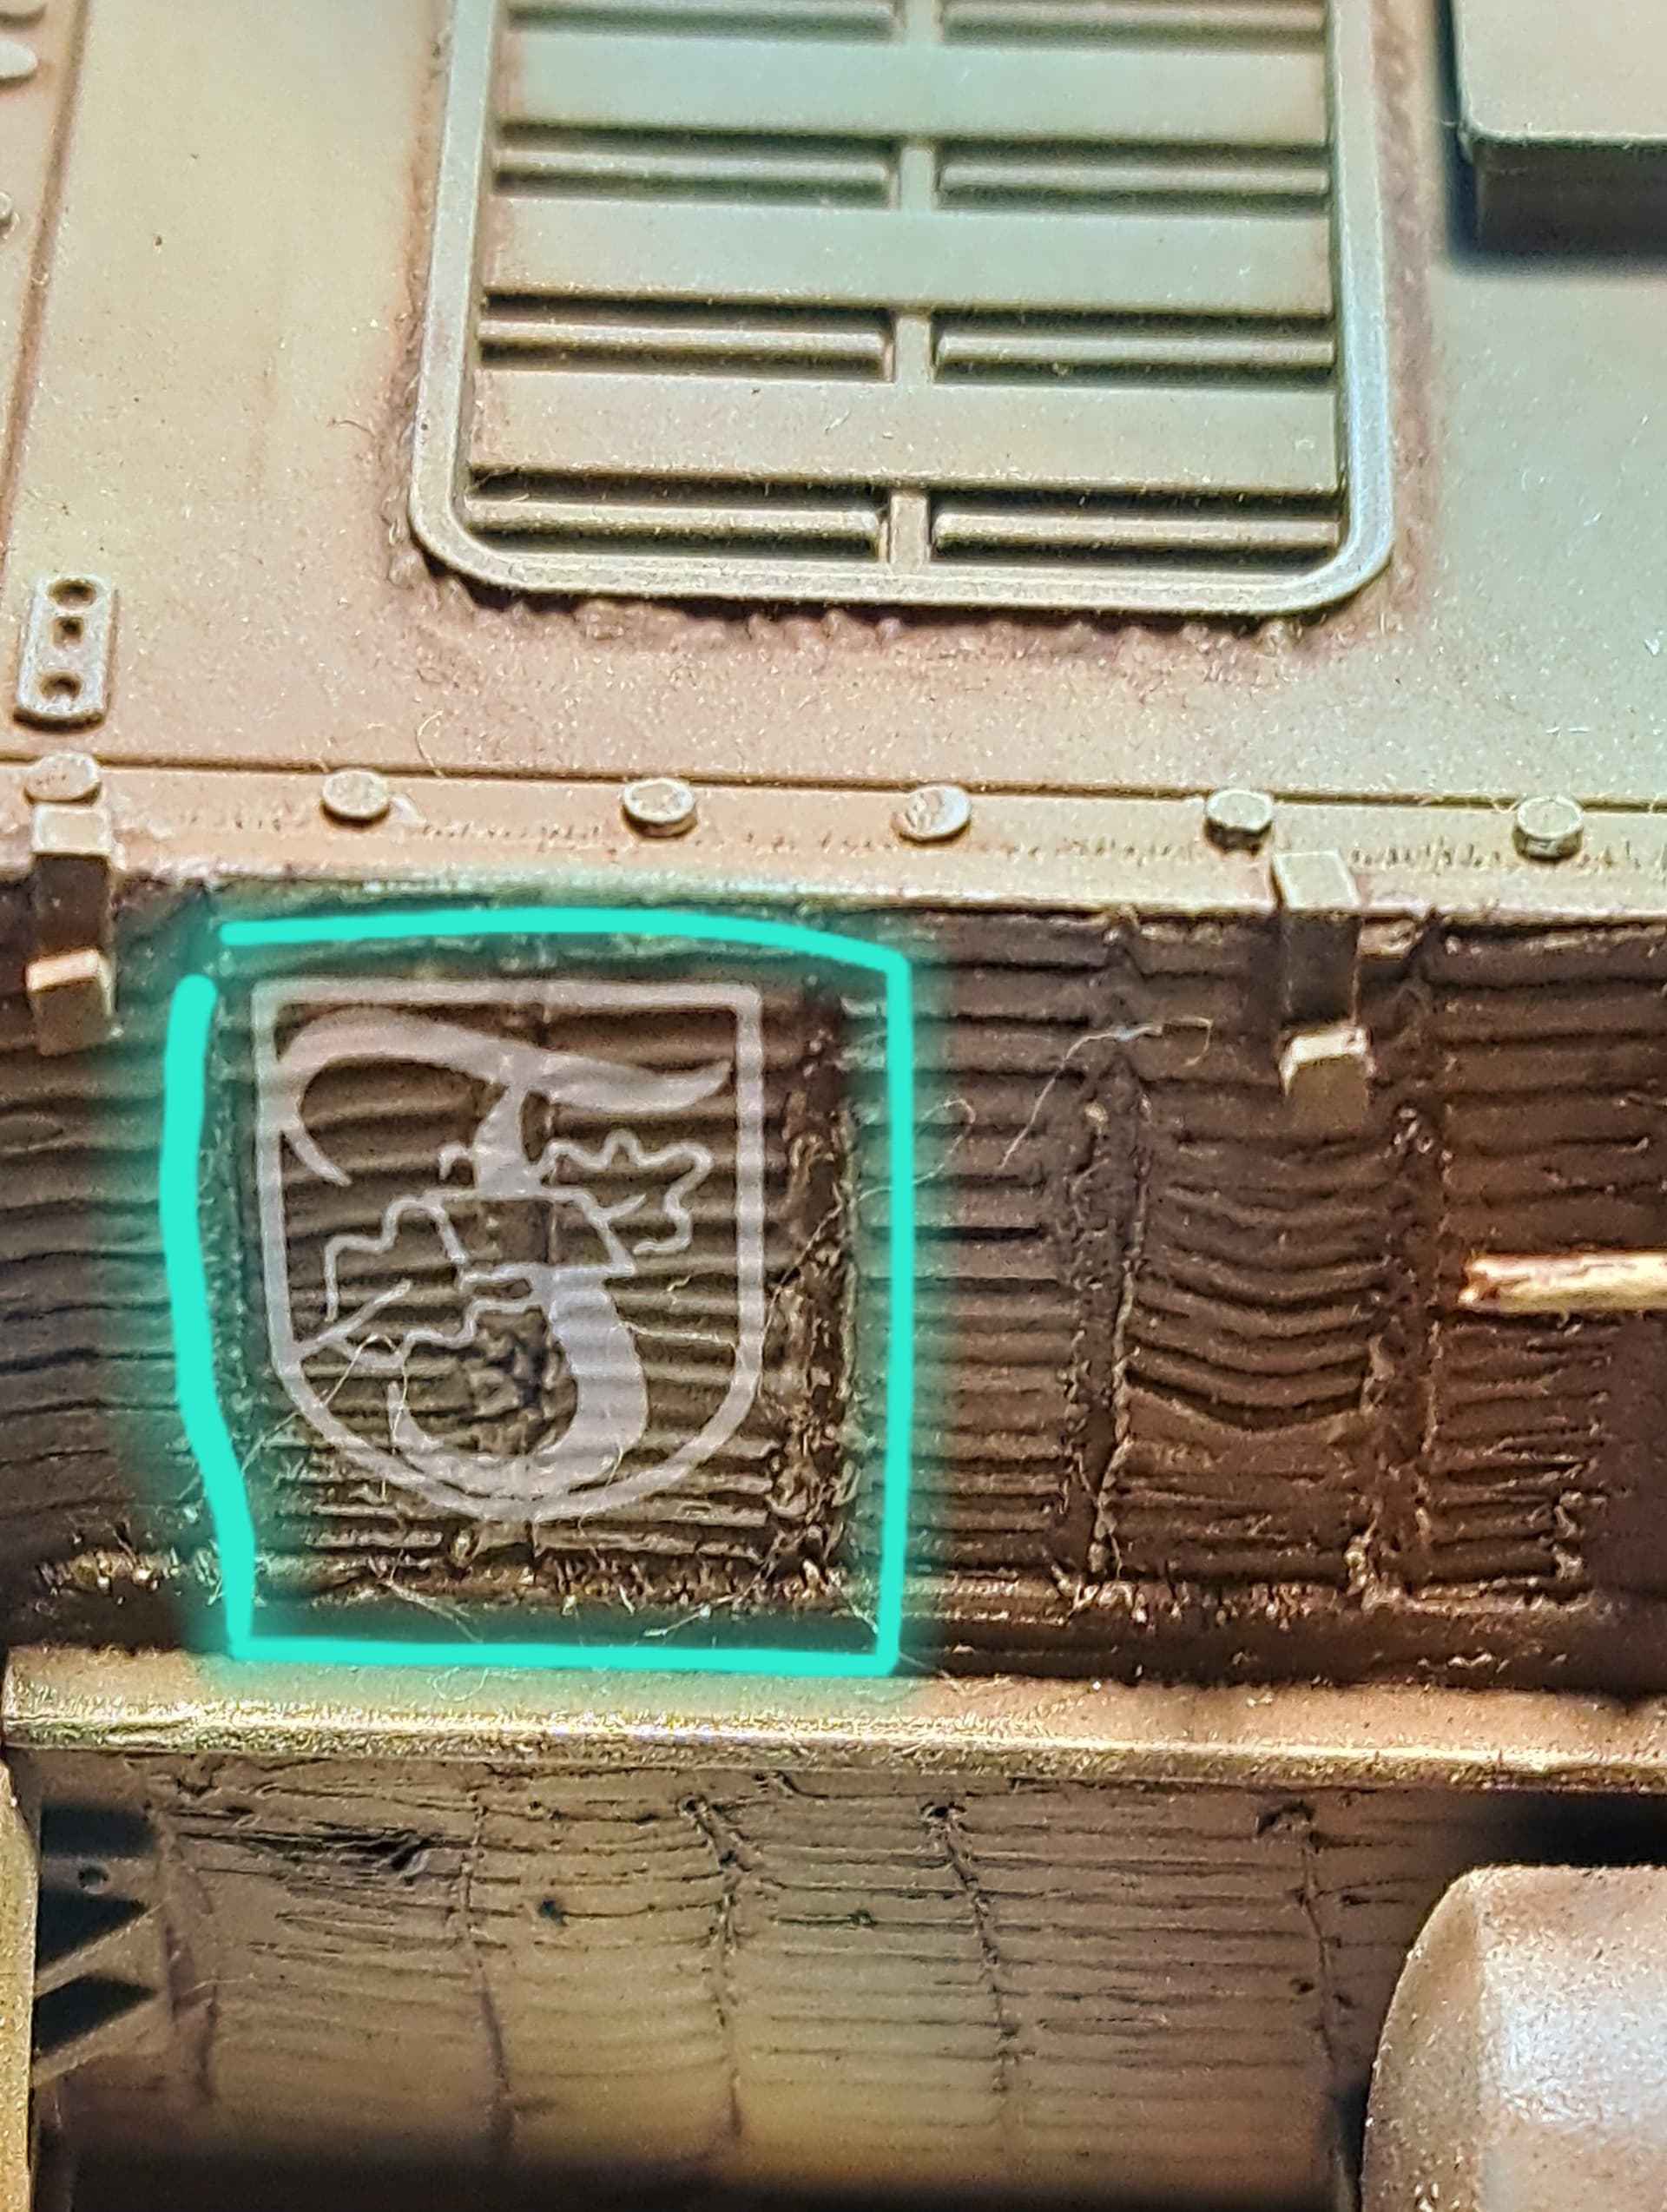
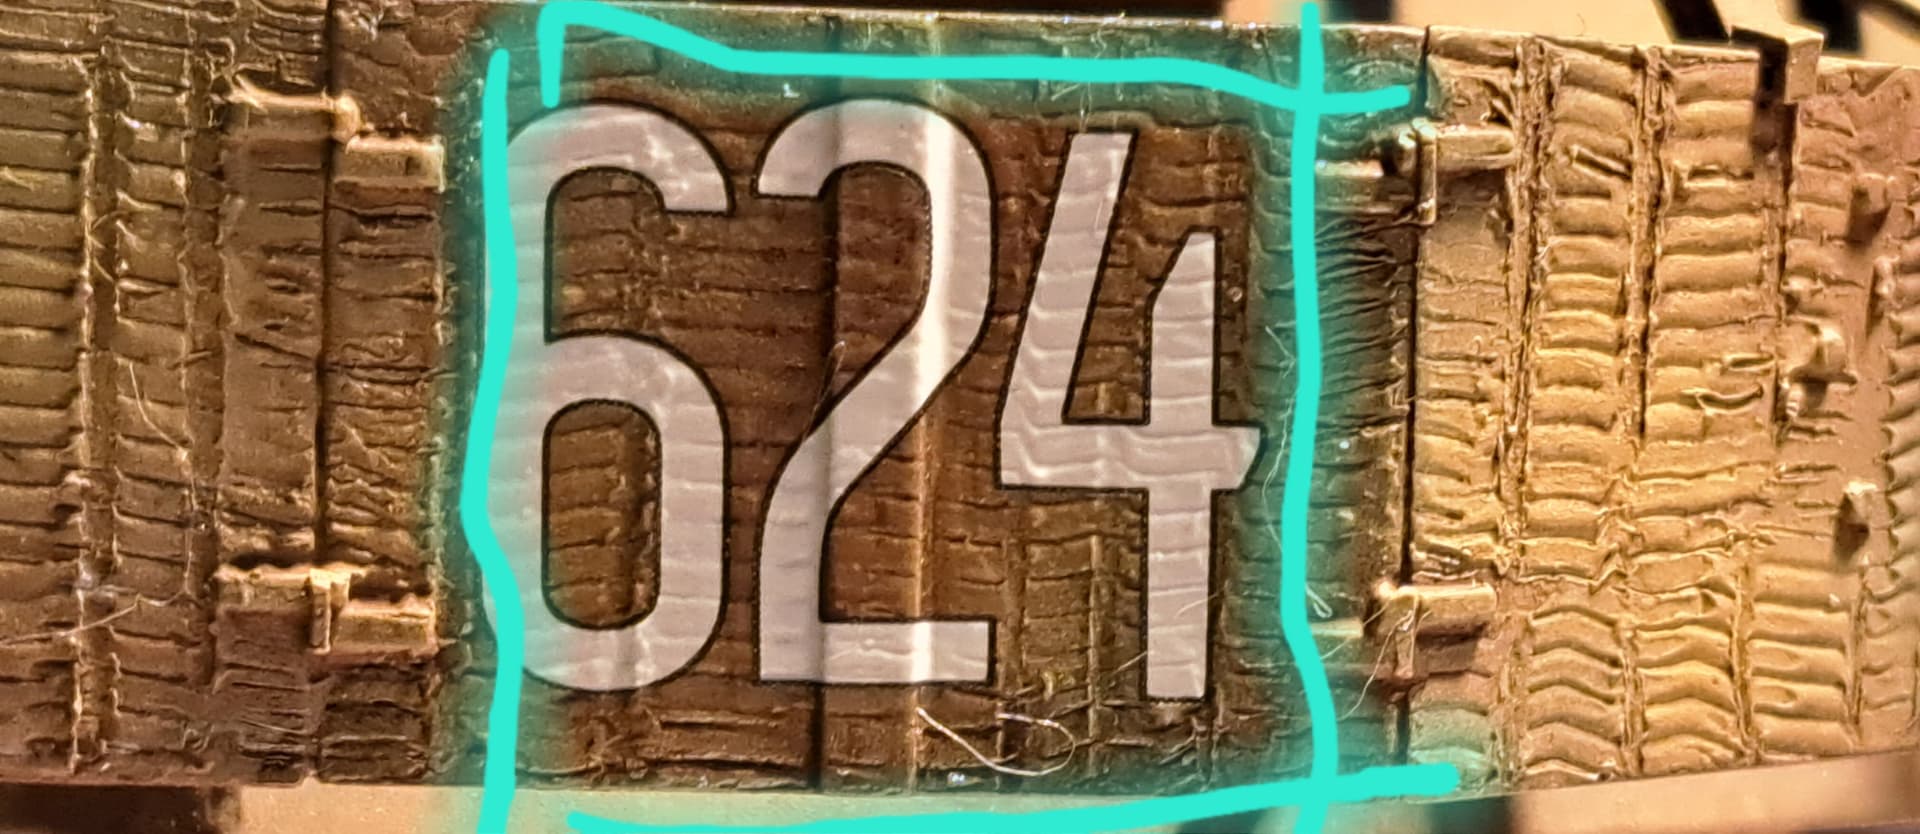
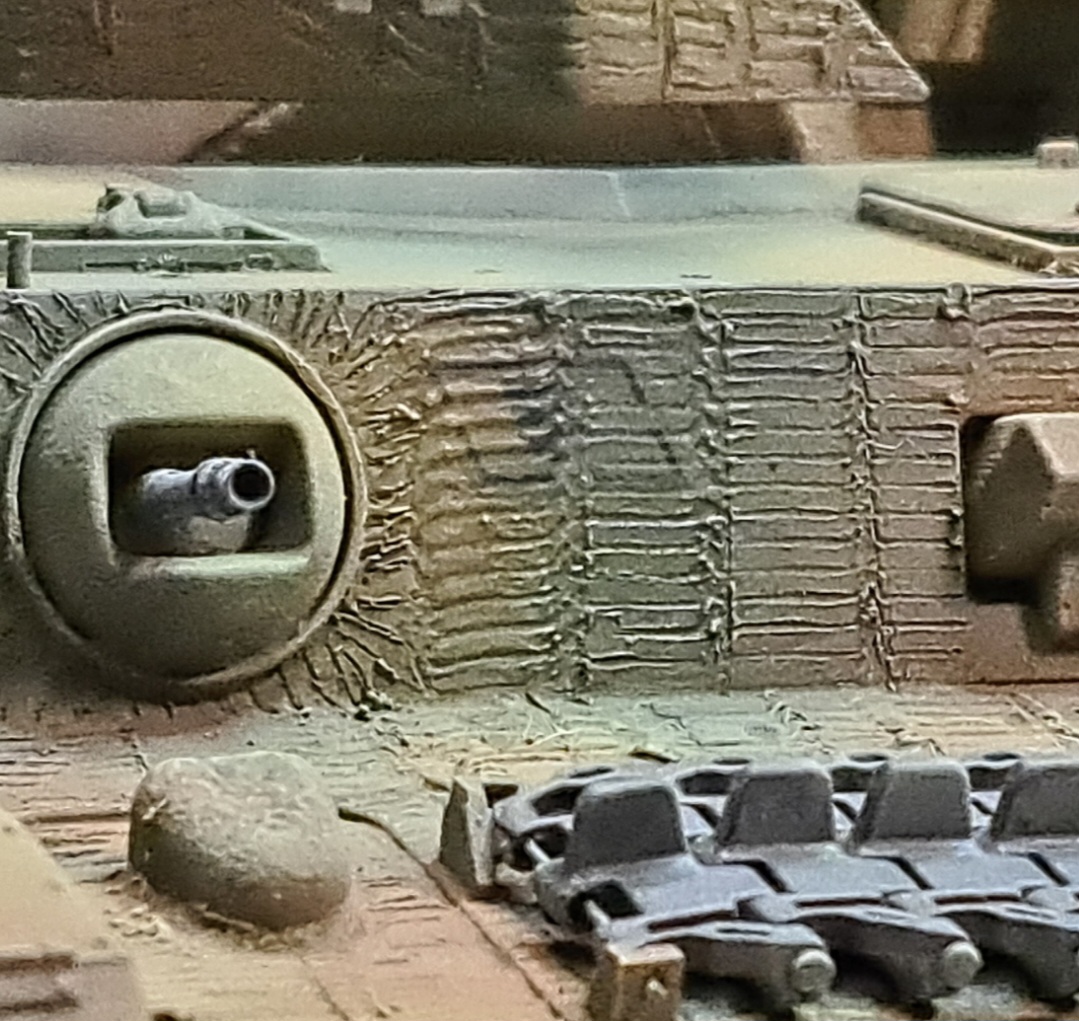
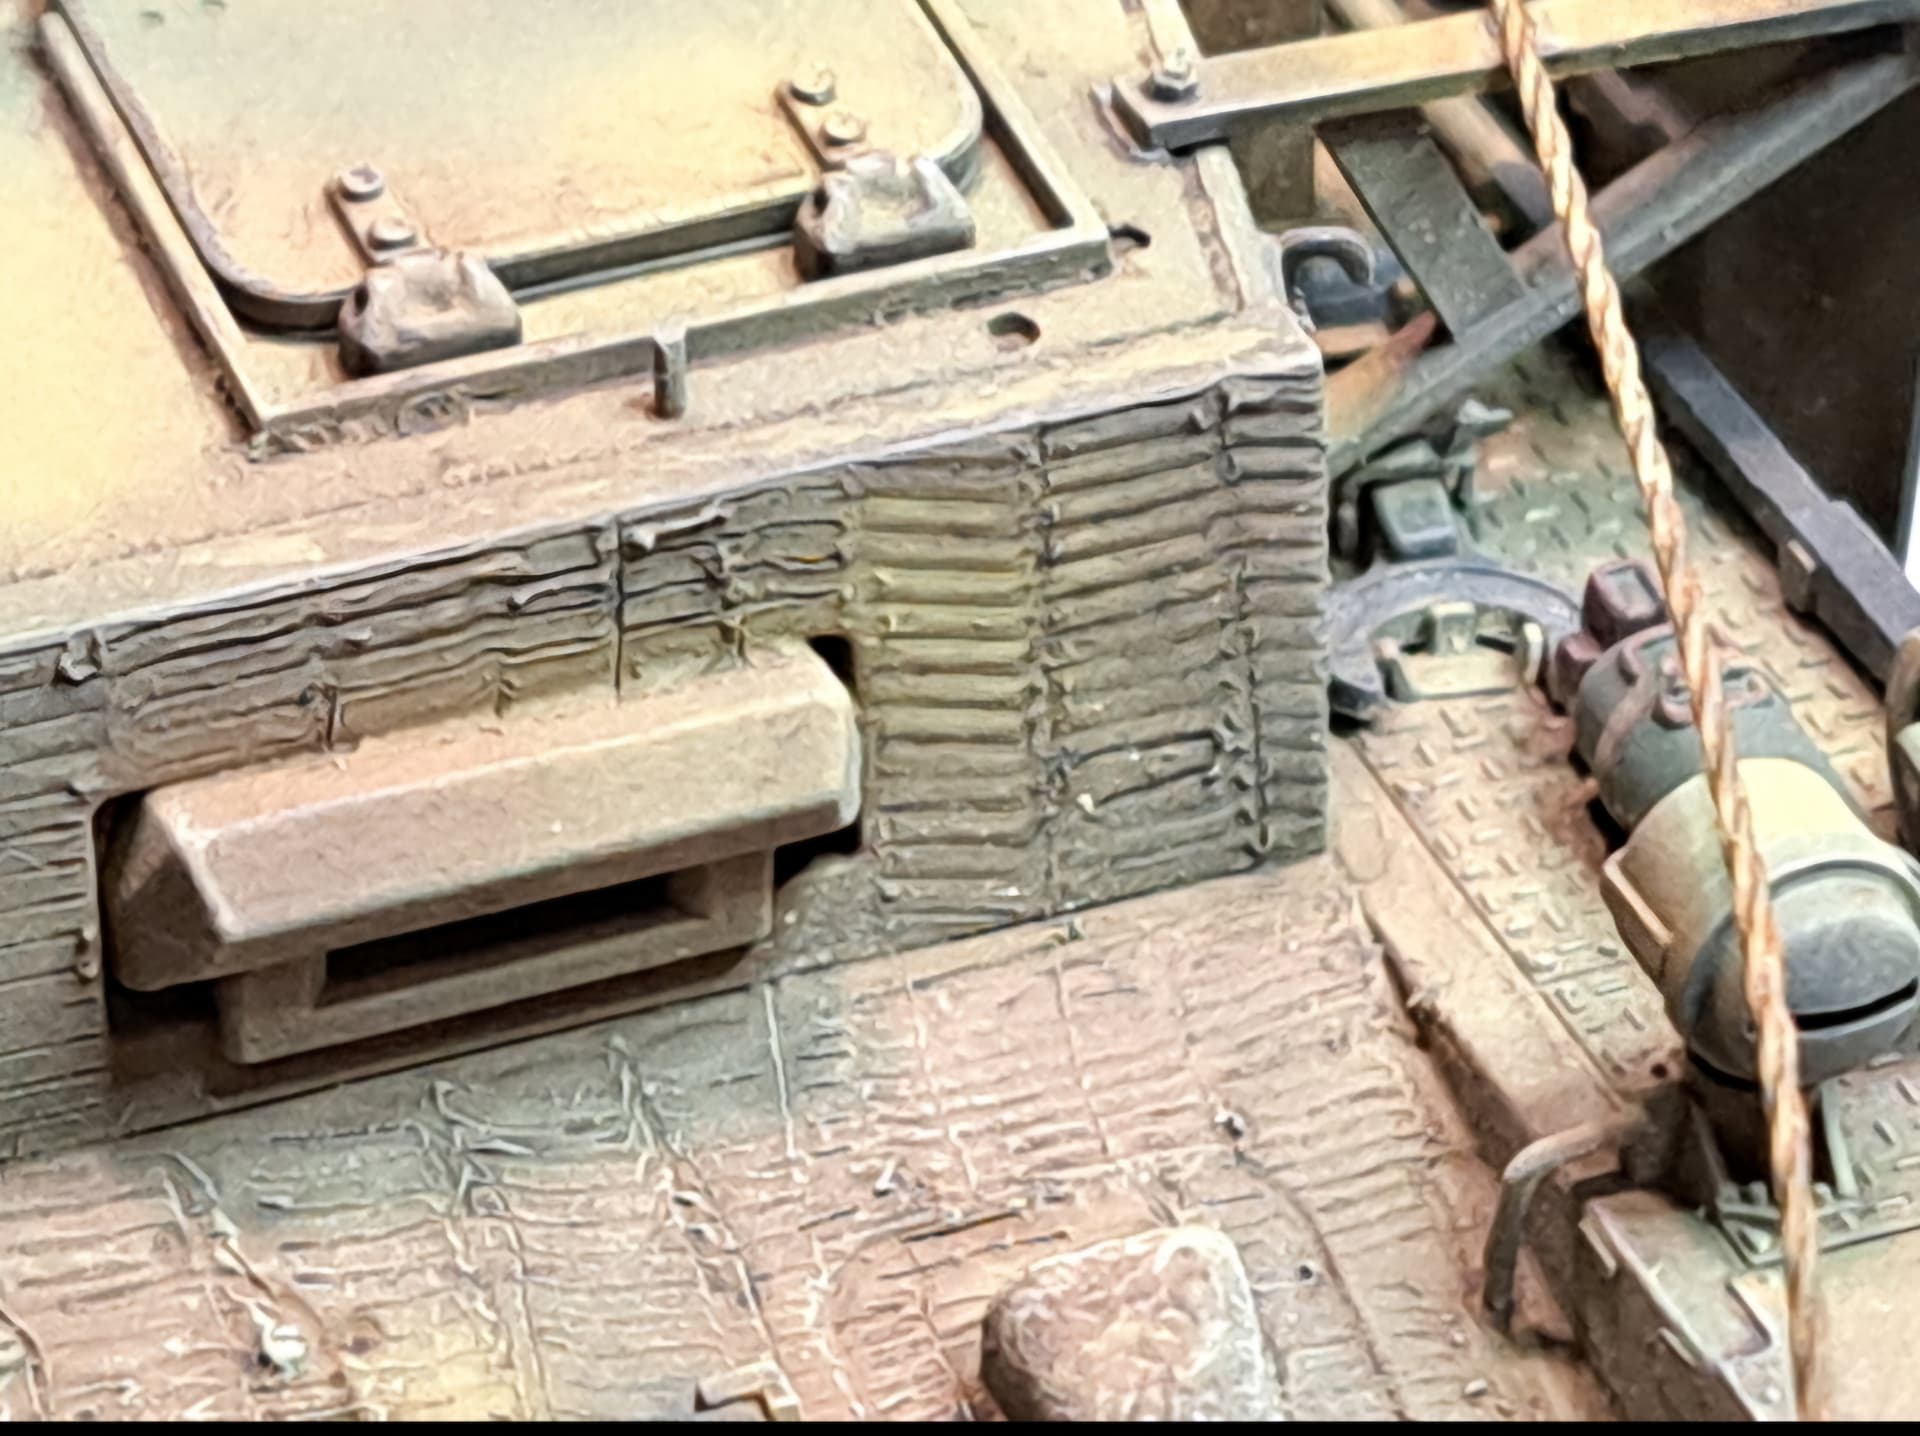
The zimmerit makes a nice grid so it’s easy to figure out exactly what needed gloss coat.
Applied to the hatch excluding the hinges etc.
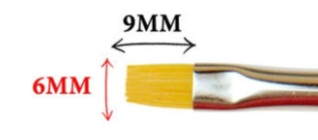
Tamiya Gloss was applied with a fresh 6mm shader brush similar to this one.
Cleaned the brush for good measure in X20A before applying the gloss. The damp bristles seem to help the clear level better.
Many folks have done similar.
My first tests for this technique was on a Tamiya Sherman M4 using Tamiya decals and Dragon 234/2 Puma w/Dragon’s decals last month.
Previously, I always glossed everything via airbrush, decaled then gloss coated again. Decided to trust the airbrushed Pactra Acrylic Flat A48 coat to tie it all back together so skipped 95% of 1st gloss coat & all of 2nd gloss coat.
I rank Pactra Acrylic Flat A48 as a Magic Elixir. It’s incrediblely good like Mr.Color Leveling Thinner.
I’d used Floquil Military Color Crystal Cote for ~30 years as my clear but I don’t have much left so had to test new (to me) products & techniques.
So far…
I like…
Mr Hobby/Gunzy Clear
Tamiya Clear
Thanks for the details. I would think the brush method would be more economical by reducing waste and save time setting up an airbrush?
Steve, yes that could be an additional benefit.
FWIW - (and many won’t agree)
My general view it’s best practice to gloss the whole model via airbrush. This ensures consistency in the finish. Glossing flat paint changes it’s reflectivity. It can also shift the colors making them darker.
Otherwise, your at the mercy of your flat coat to “level” the reflectivity of the paint between glossed areas and flat areas.
Sometimes that’s asking a lot.
Flattening shift’s it back but sometimes areas that are glossed and not glossed won’t look exactly the same after flat coat is applied.
Back in the 1990’s several modelers in my old club had issues with that. In my opinion, they used 2nd rate flat coats (Testor’s, Model Master or similar junk clears & flats) and had issues.
If they shot dusty and dry from further away, the finish looked like 1500 grit sand paper. If they shot close and wet, it had a nasty sheen. They’d get white streaks from too much etc. Some of the problems were operator issues for sure but part of it was planning and not using idiot proof products.
ITwo thin coats of Pactra Acrylic Flat A48 (a near idiot proof product) cross-hatched shot thin at high pressure would fix that sort of mix matched reflectivity mess, however it couldn’t fix the 1500 grit sand paper finish.
FWIW - in Wade’s World. Pactra Acrylic Flat A48 is about as valuable as Tritium.
For the record, I do this as well. Reflectivity & texture are issues, & if you spot-gloss, the chances of a texture change screams “there is a decal here!” increases.
The only time I spot-gloss is AFTER applying the decals, to seal them in.
Damon.
@Garrand , Damon very well said!
Agreed ![]() percent!
percent!
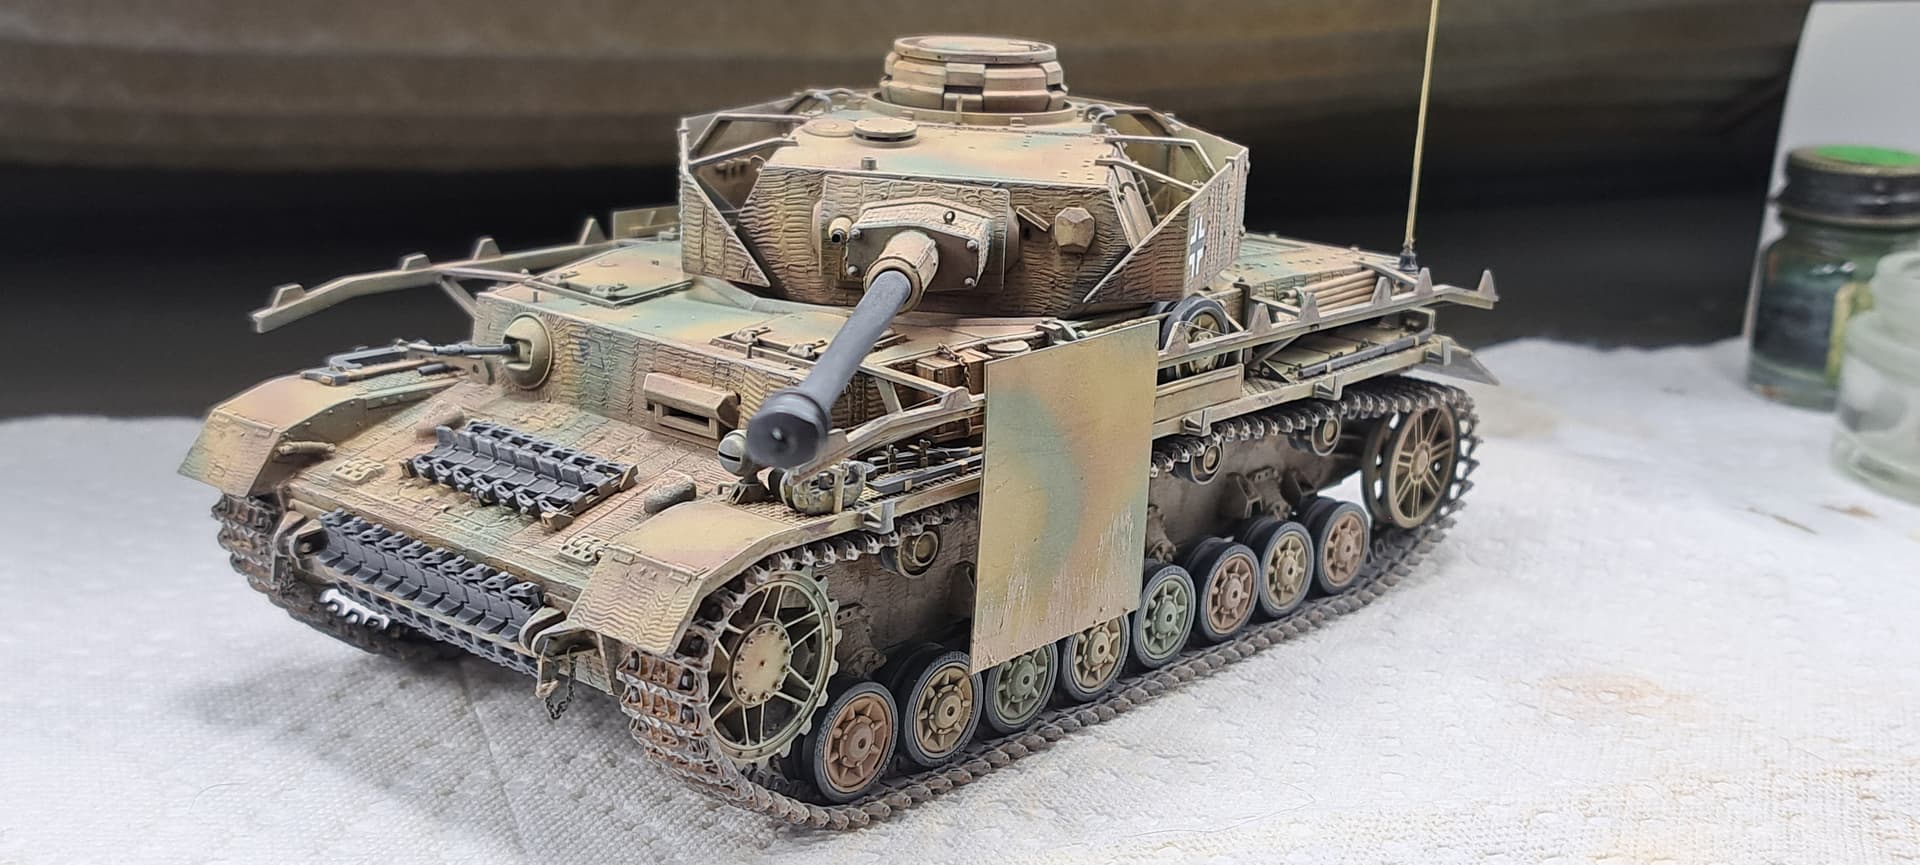
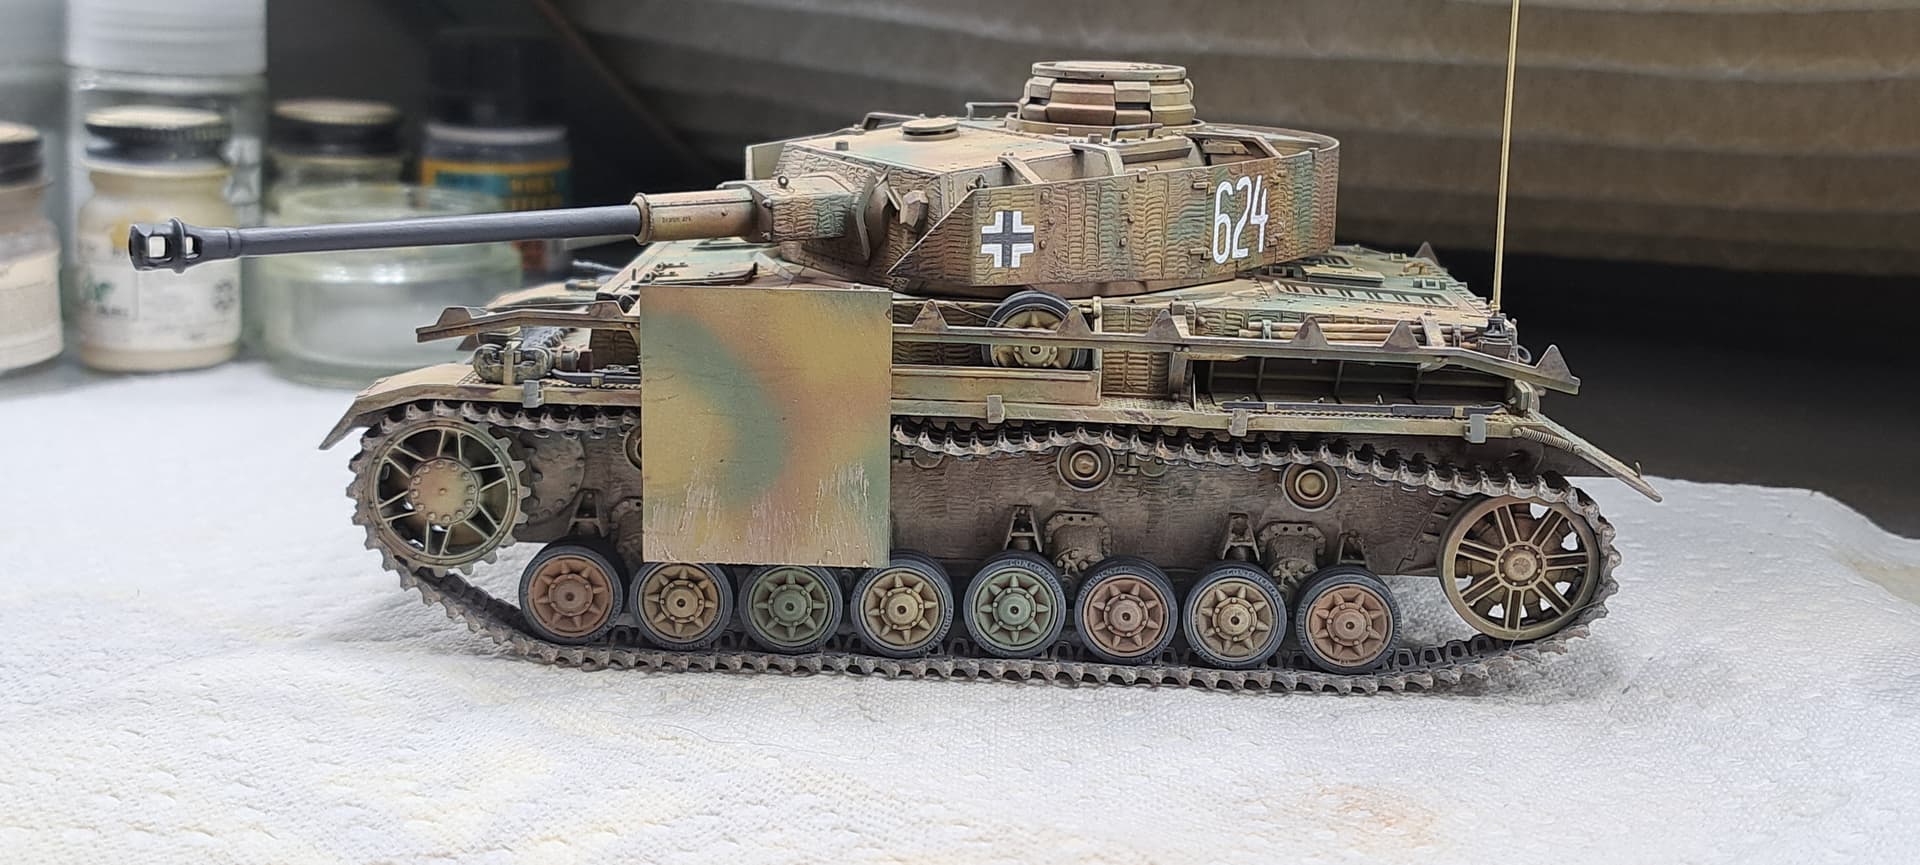
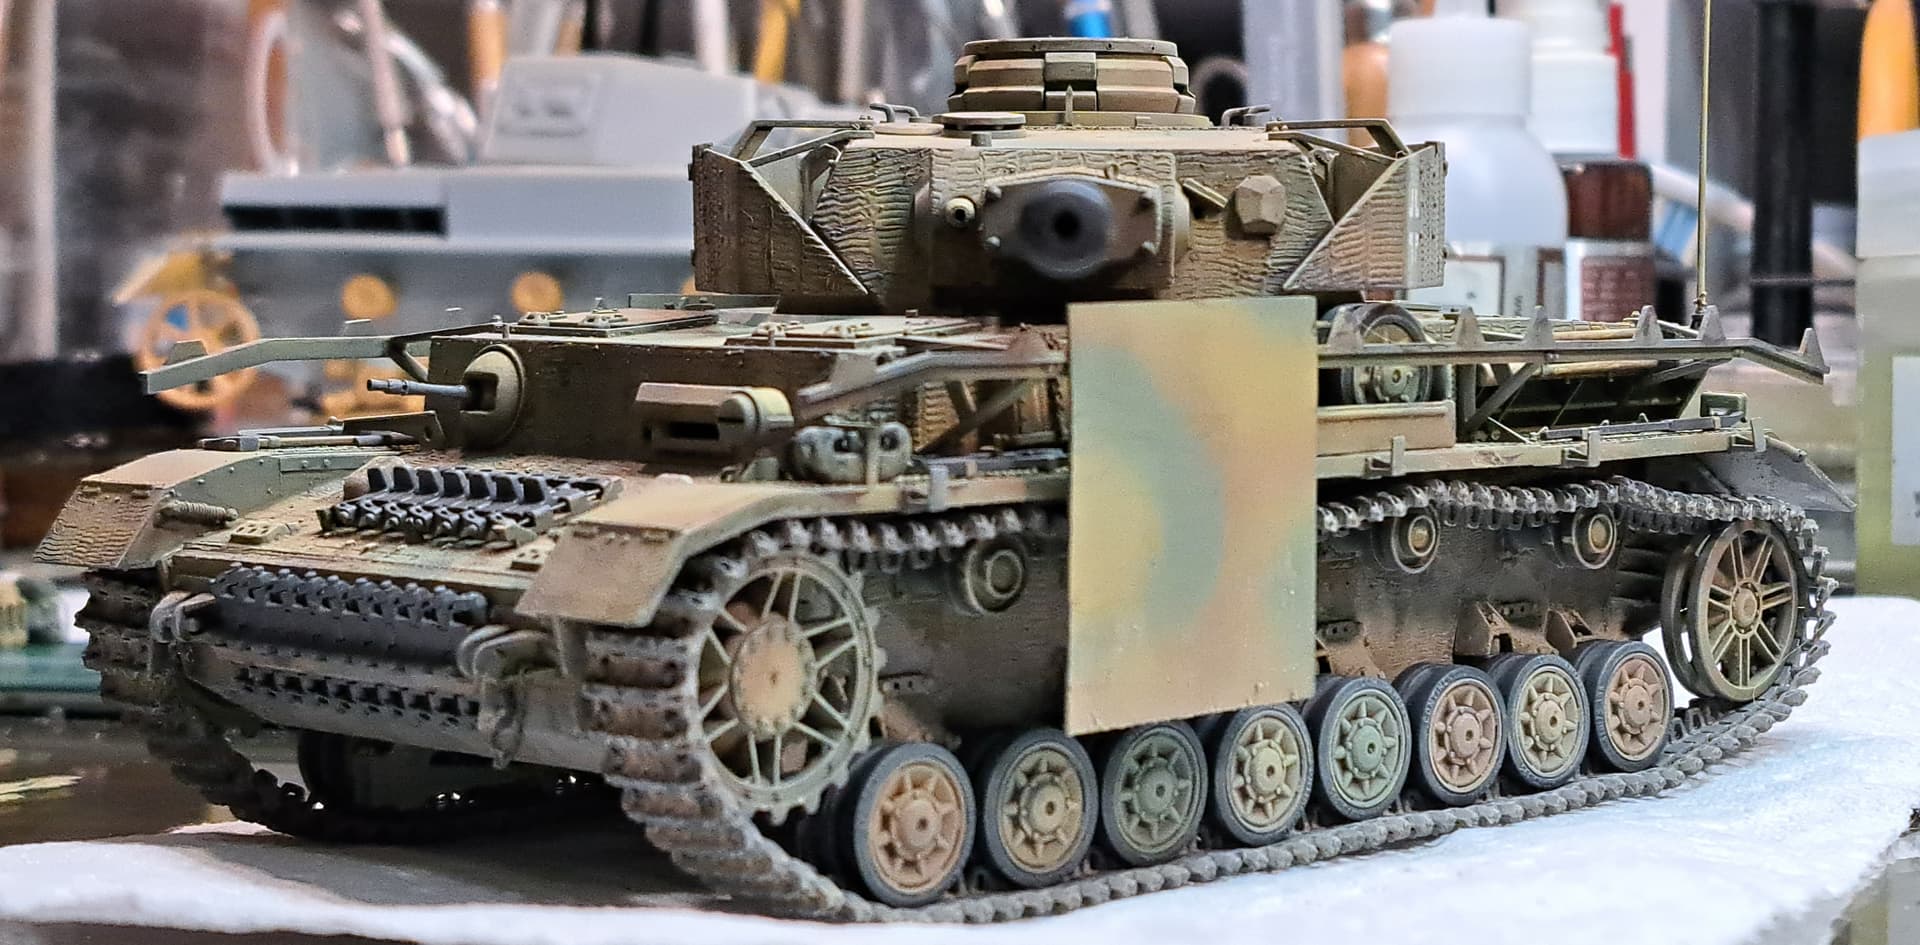
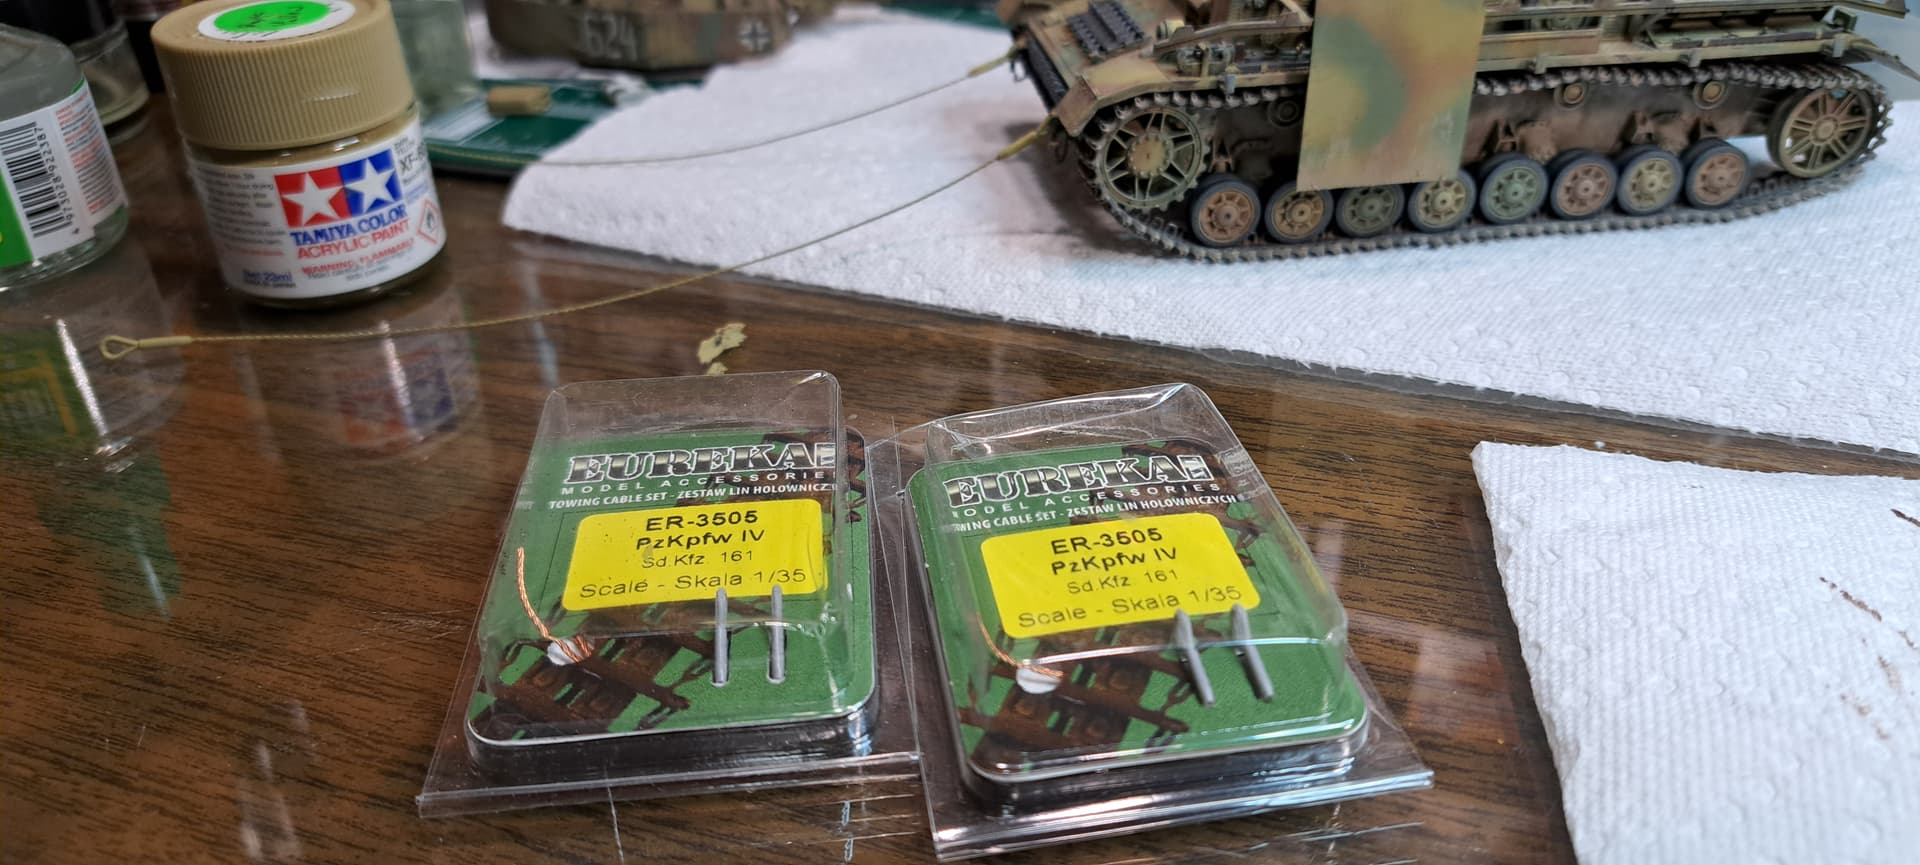
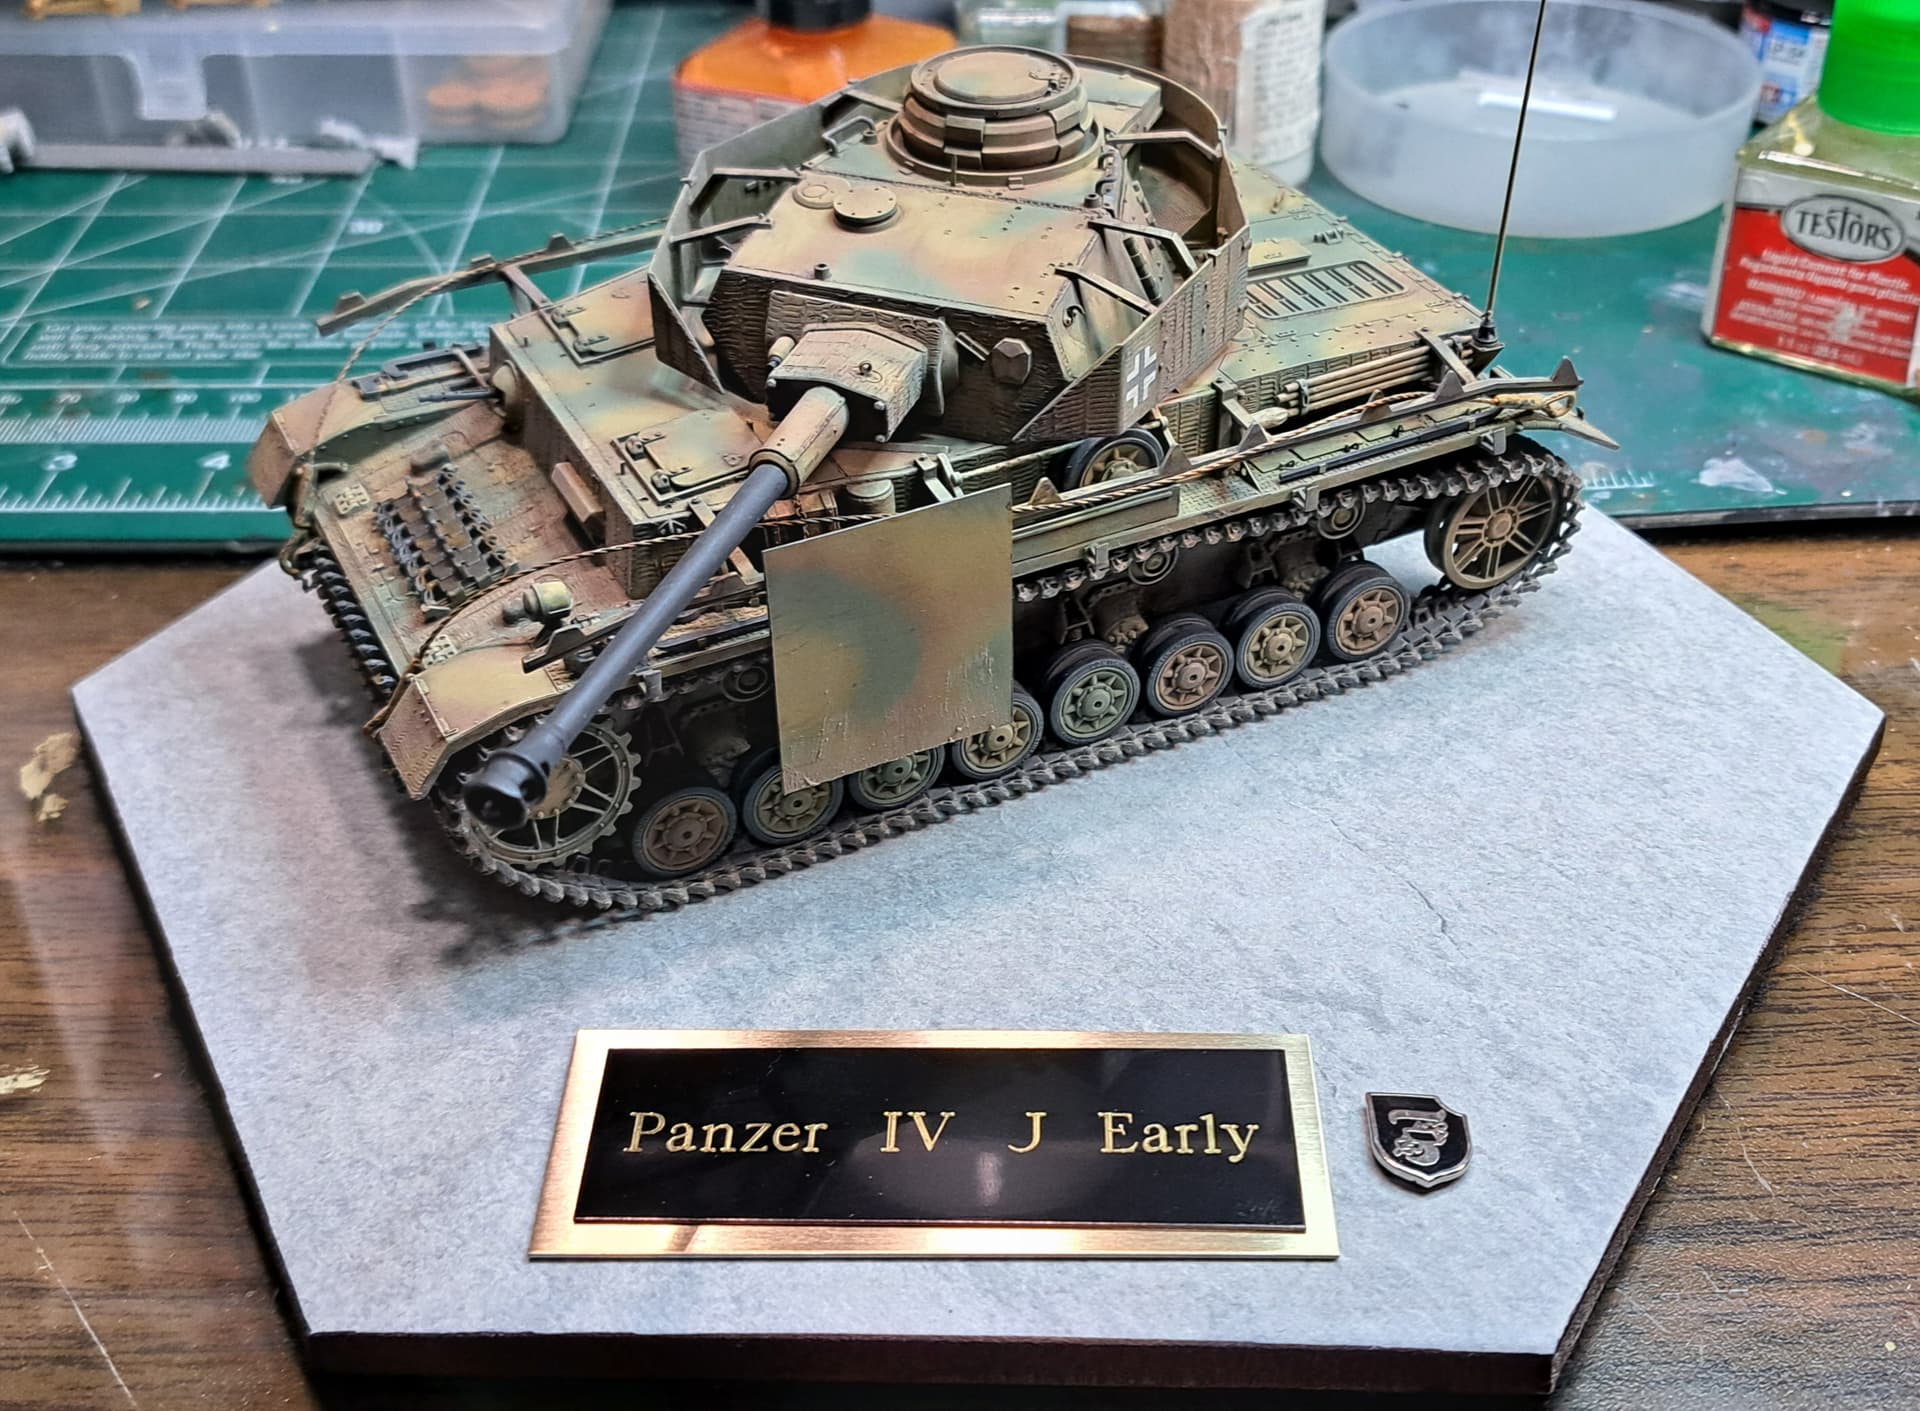
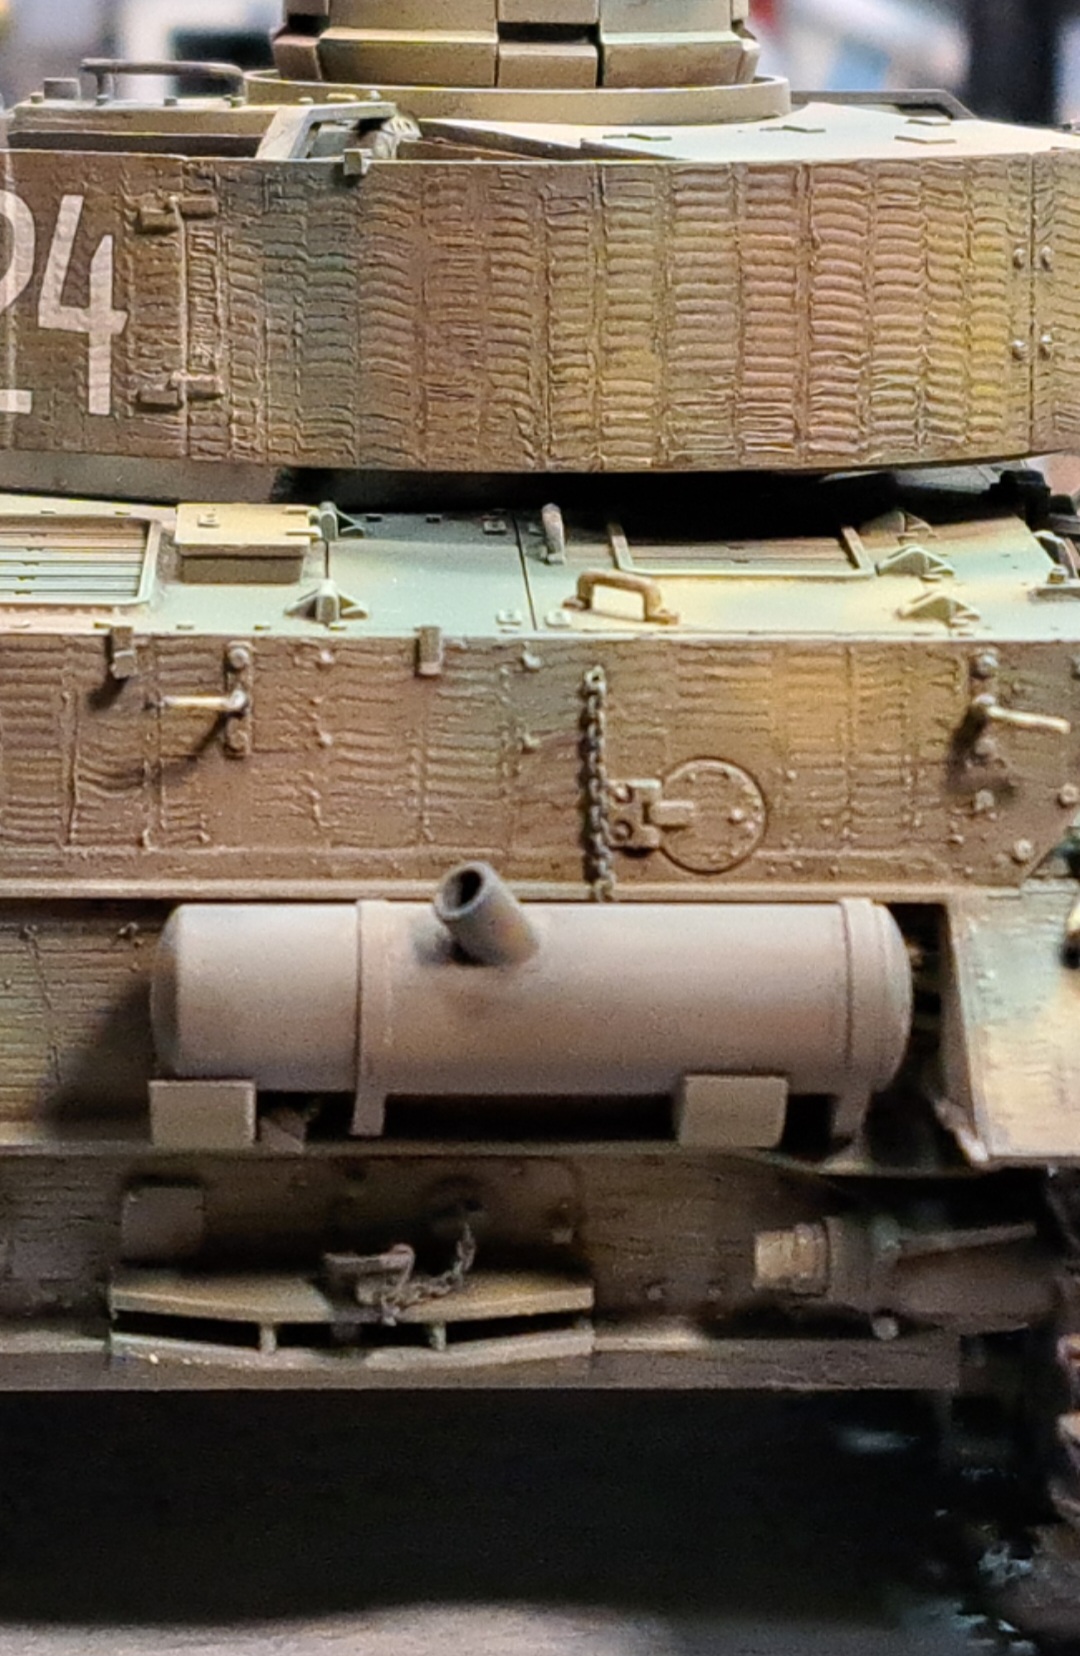
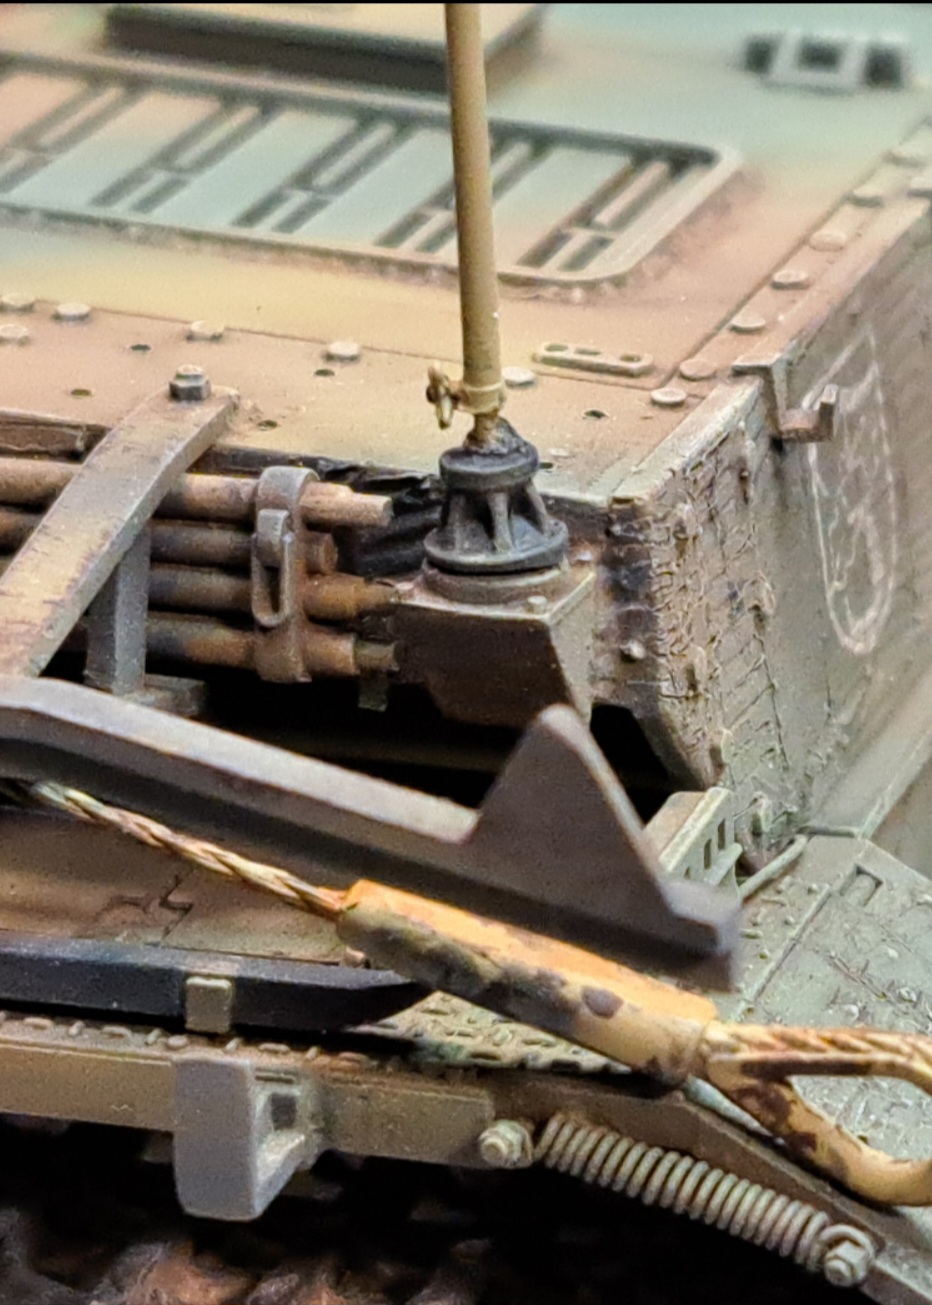
Minor repairs, antenna installed, filter applied & Pactra Acrylic Flat A48 applied.
Still needs tow cables, they were ordered last week, pastels, final touch ups and display base.
And harder to get!
Ken
So true!
Wrapped most of the touch ups, still waiting on tow cables to arrive. Tried to rework the ones I jacked up and the 3D printed parts shattered ![]() . Kicked around adding gear but really don’t feel it with this particular model. Tested some bases etc.
. Kicked around adding gear but really don’t feel it with this particular model. Tested some bases etc.
Status…
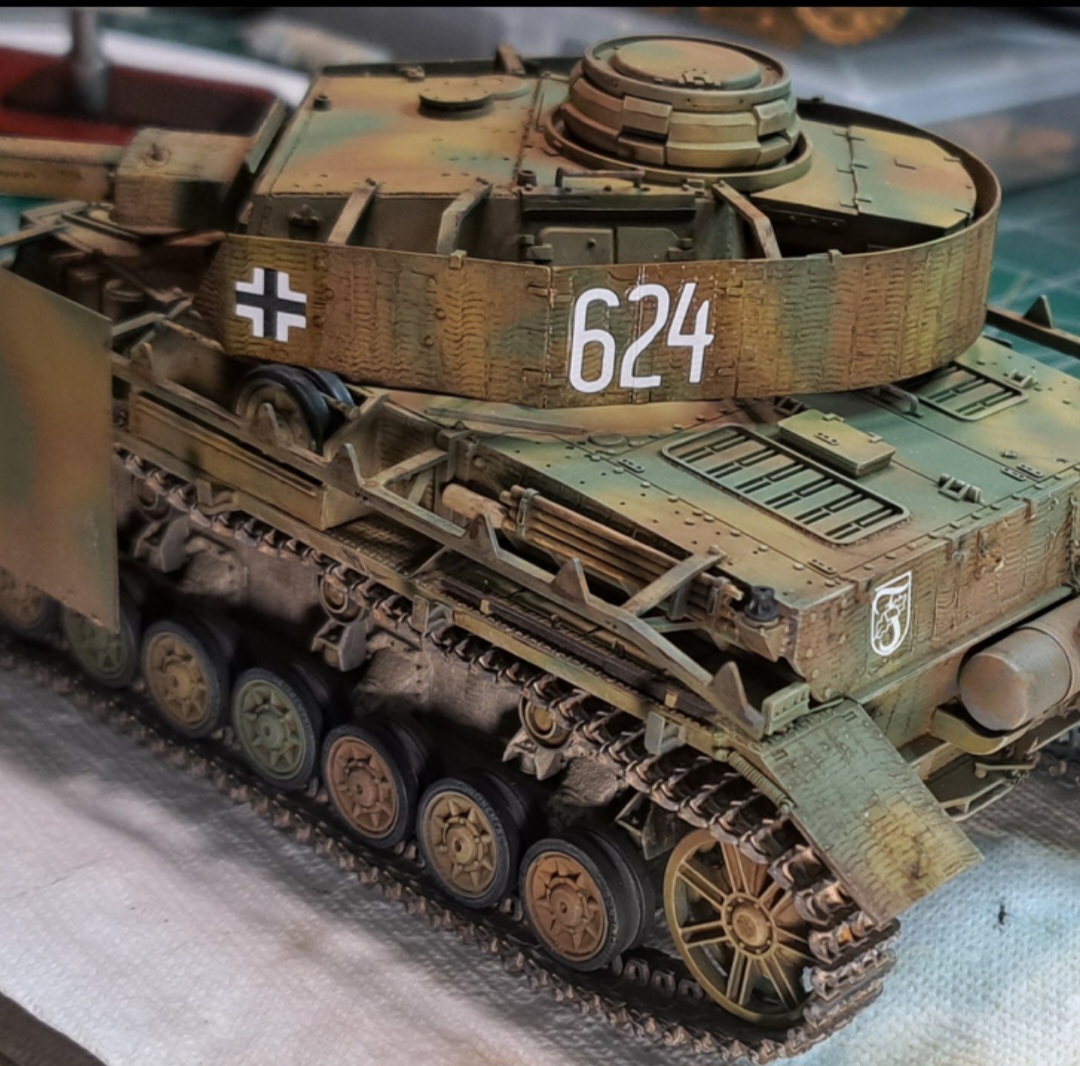
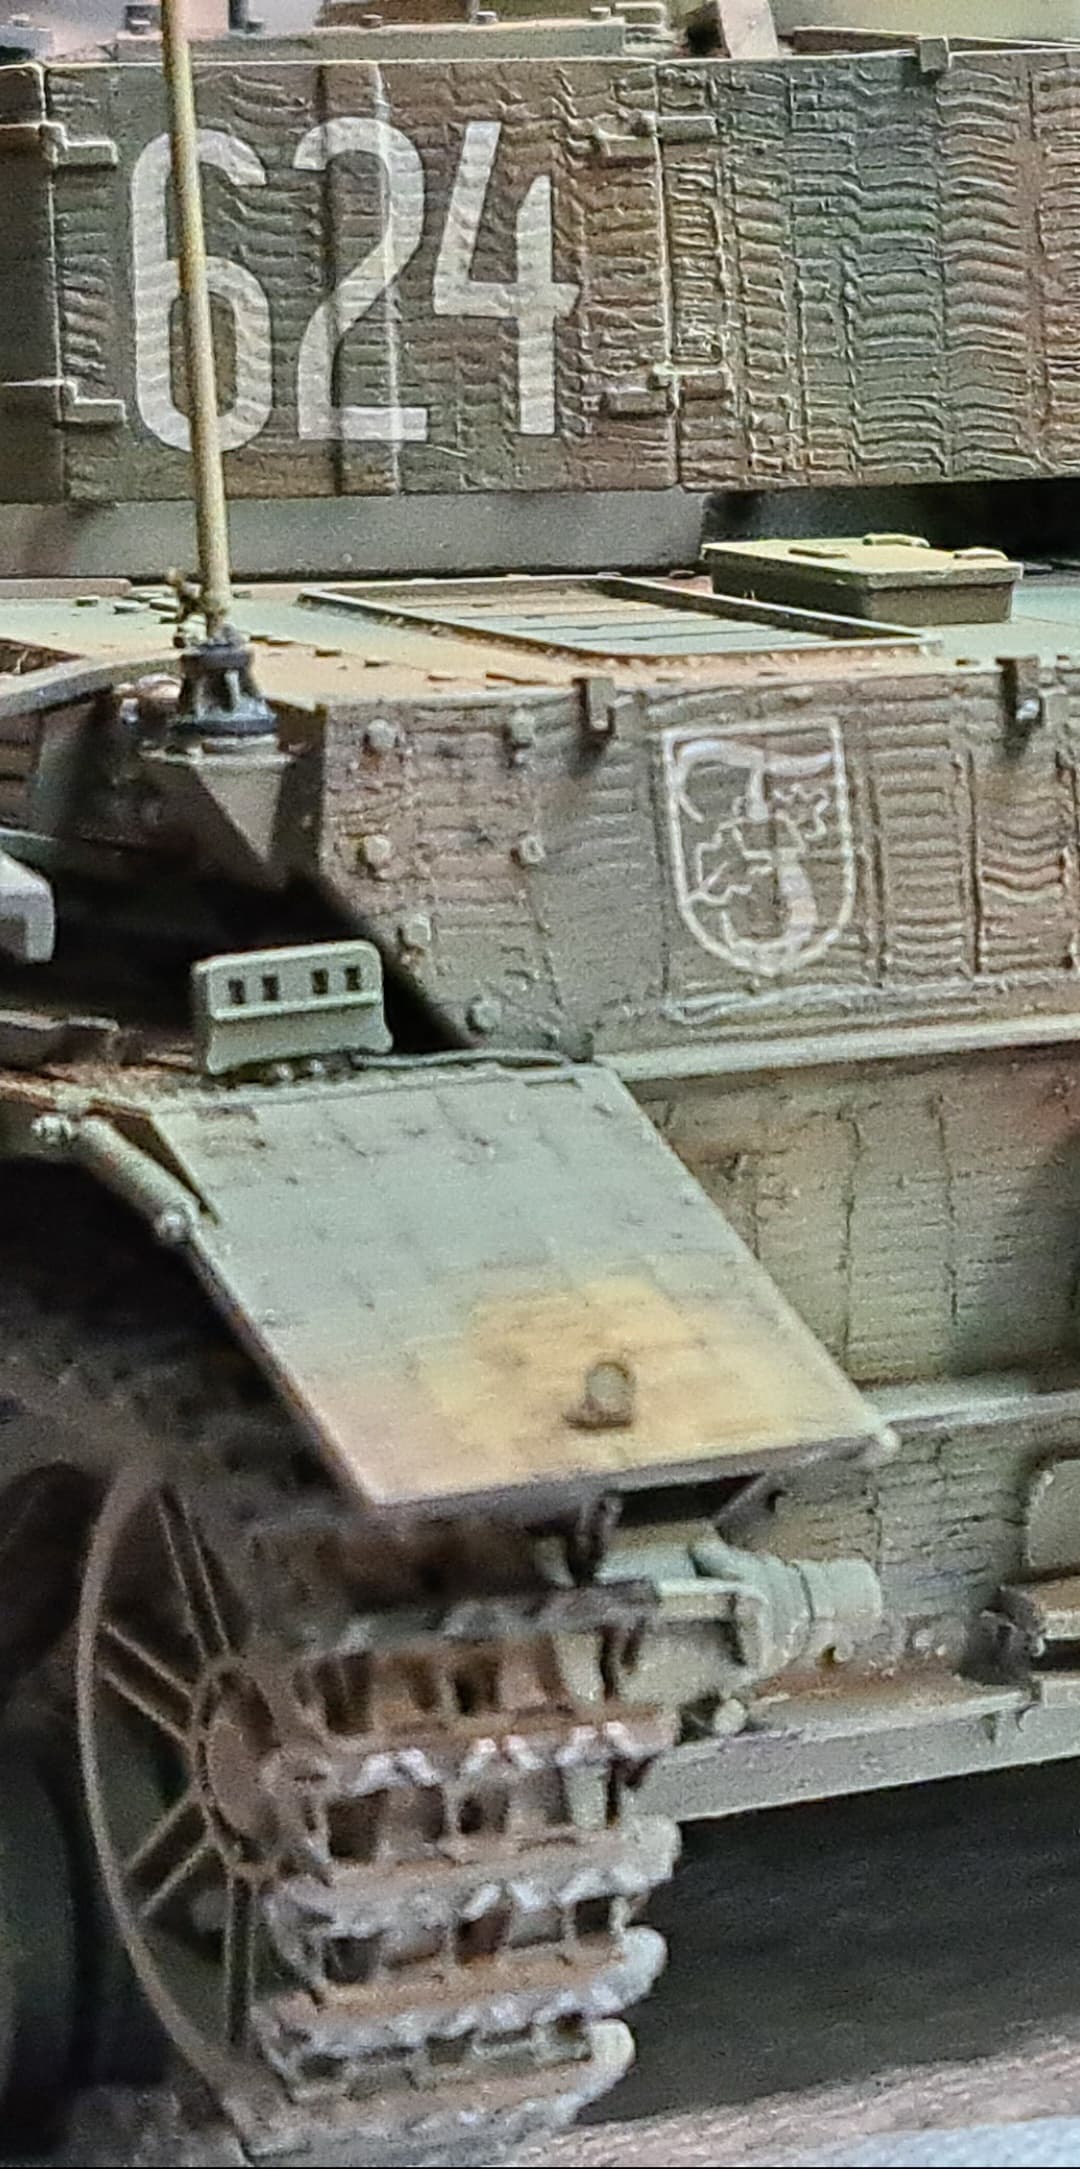
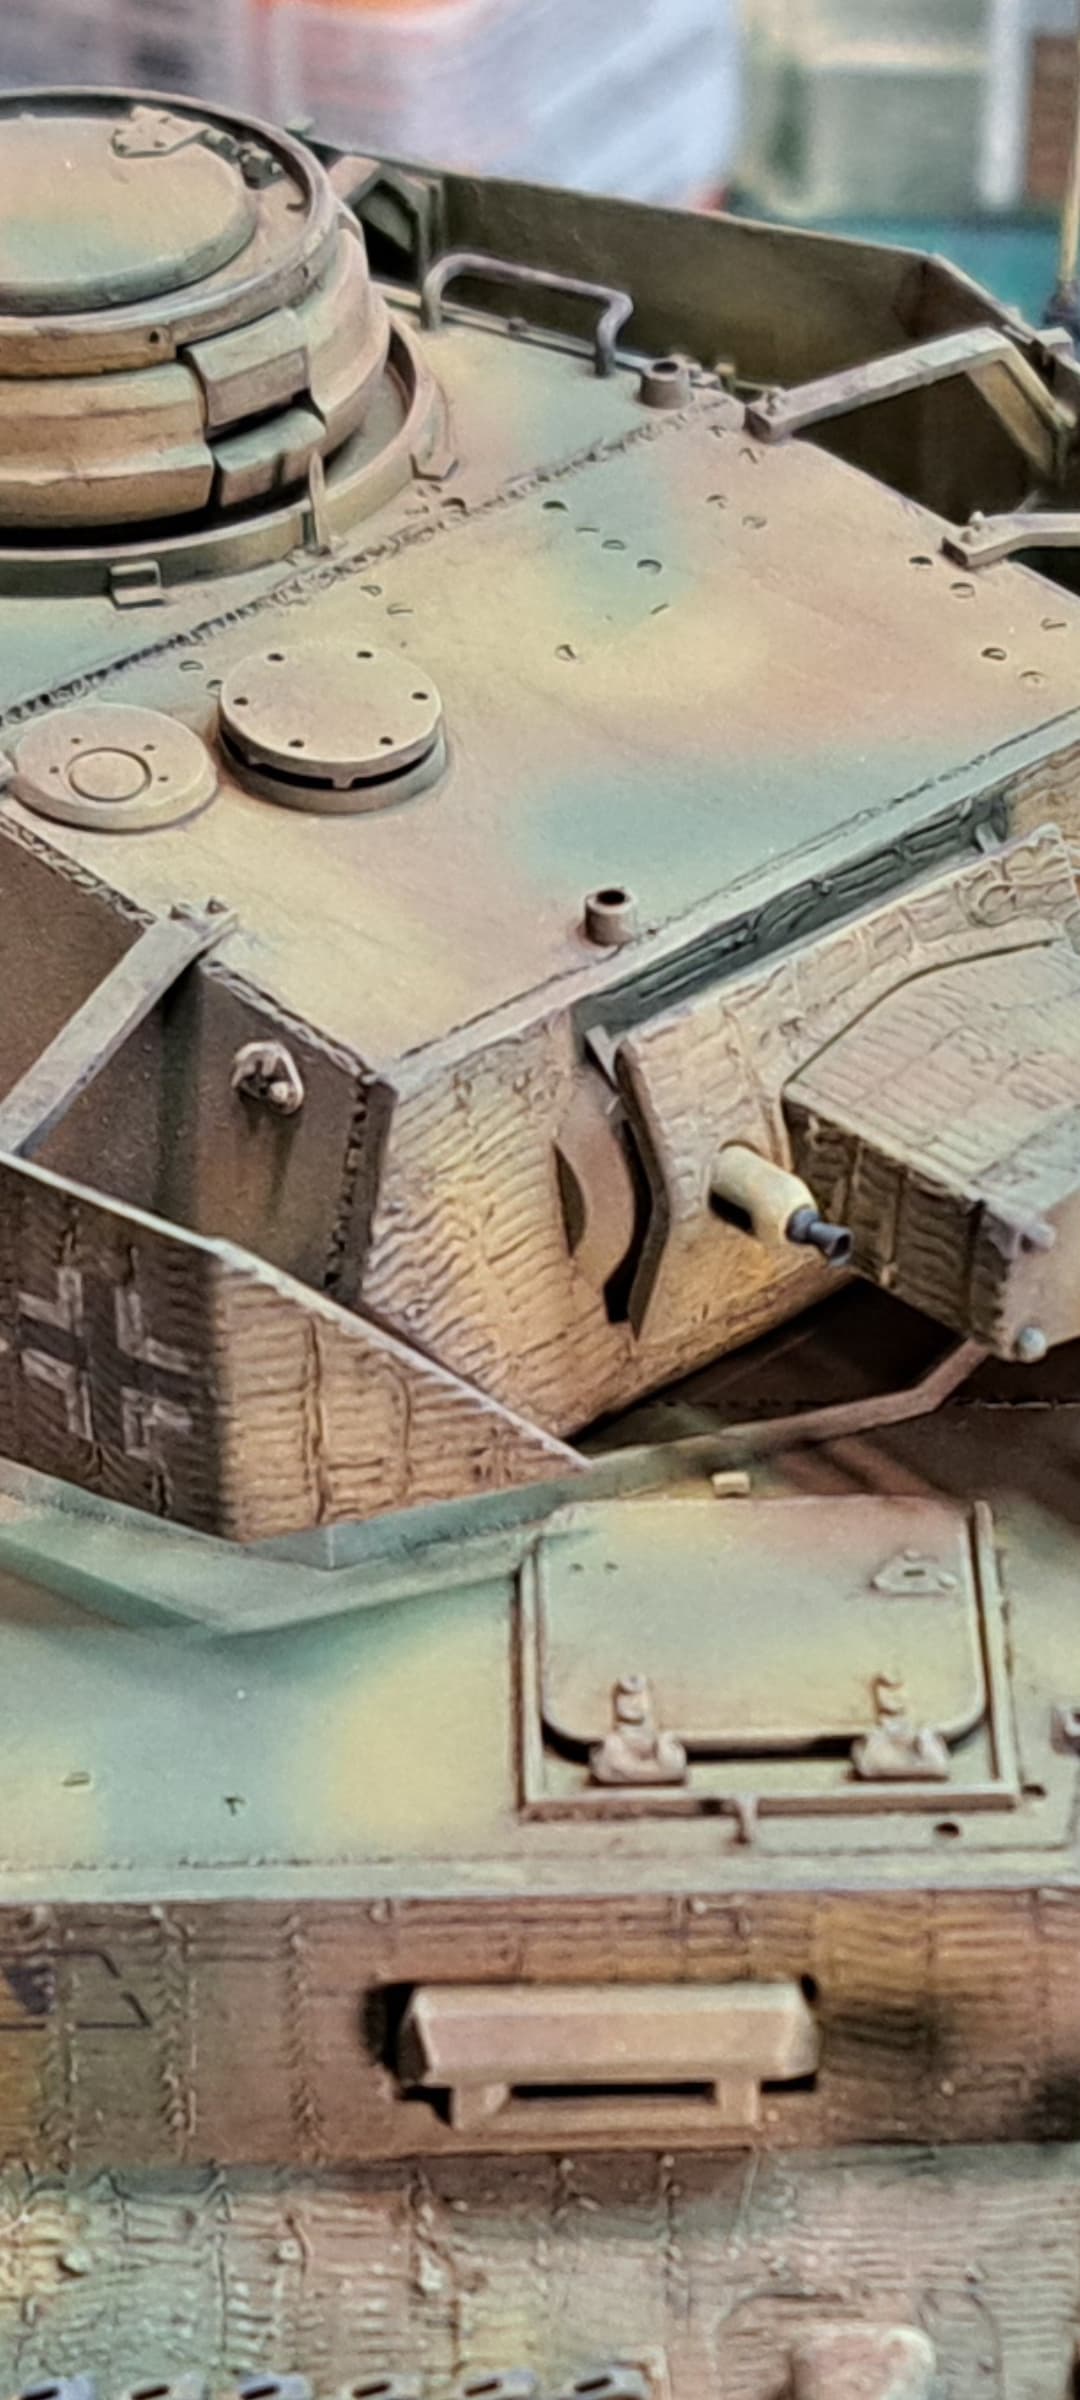
Happy with the markings after flat coat & dust.
Murphy’s Law had been surprisingly absent the last two weeks as there’s always curve balls with this build…
Naturally, they arrived an hour after the Dragon tow cables were installed.
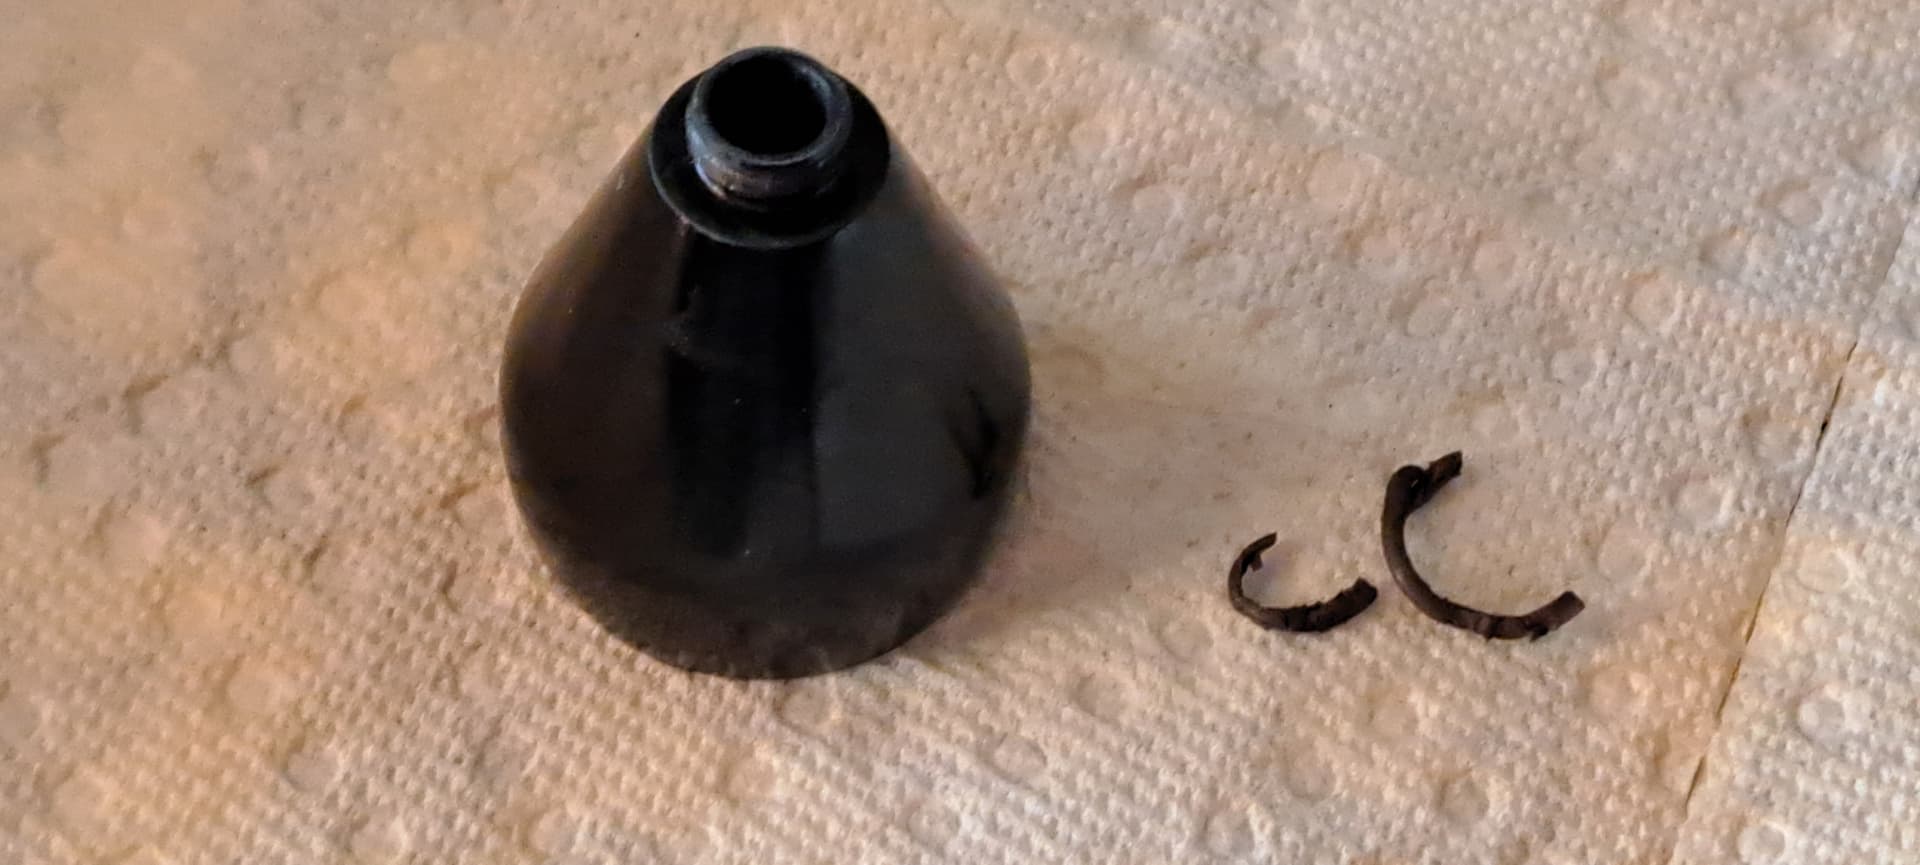
…went to remove the color cup and it wouldn’t unscrew then…
Apparently my high ![]()
![]()
![]() horse power airbrush cleaner(s) are just too hot for the o-rings. Another One Bites the Dust and joins the Harder-Steenbeck in the stack of disappointments. Probably nothing a visit to Harbor Freight for some Chinese spec o-rings won’t band-aid.
horse power airbrush cleaner(s) are just too hot for the o-rings. Another One Bites the Dust and joins the Harder-Steenbeck in the stack of disappointments. Probably nothing a visit to Harbor Freight for some Chinese spec o-rings won’t band-aid.
Again that ~100+ year old design Paasche VL, I’ve used for ~30 years saves the day.
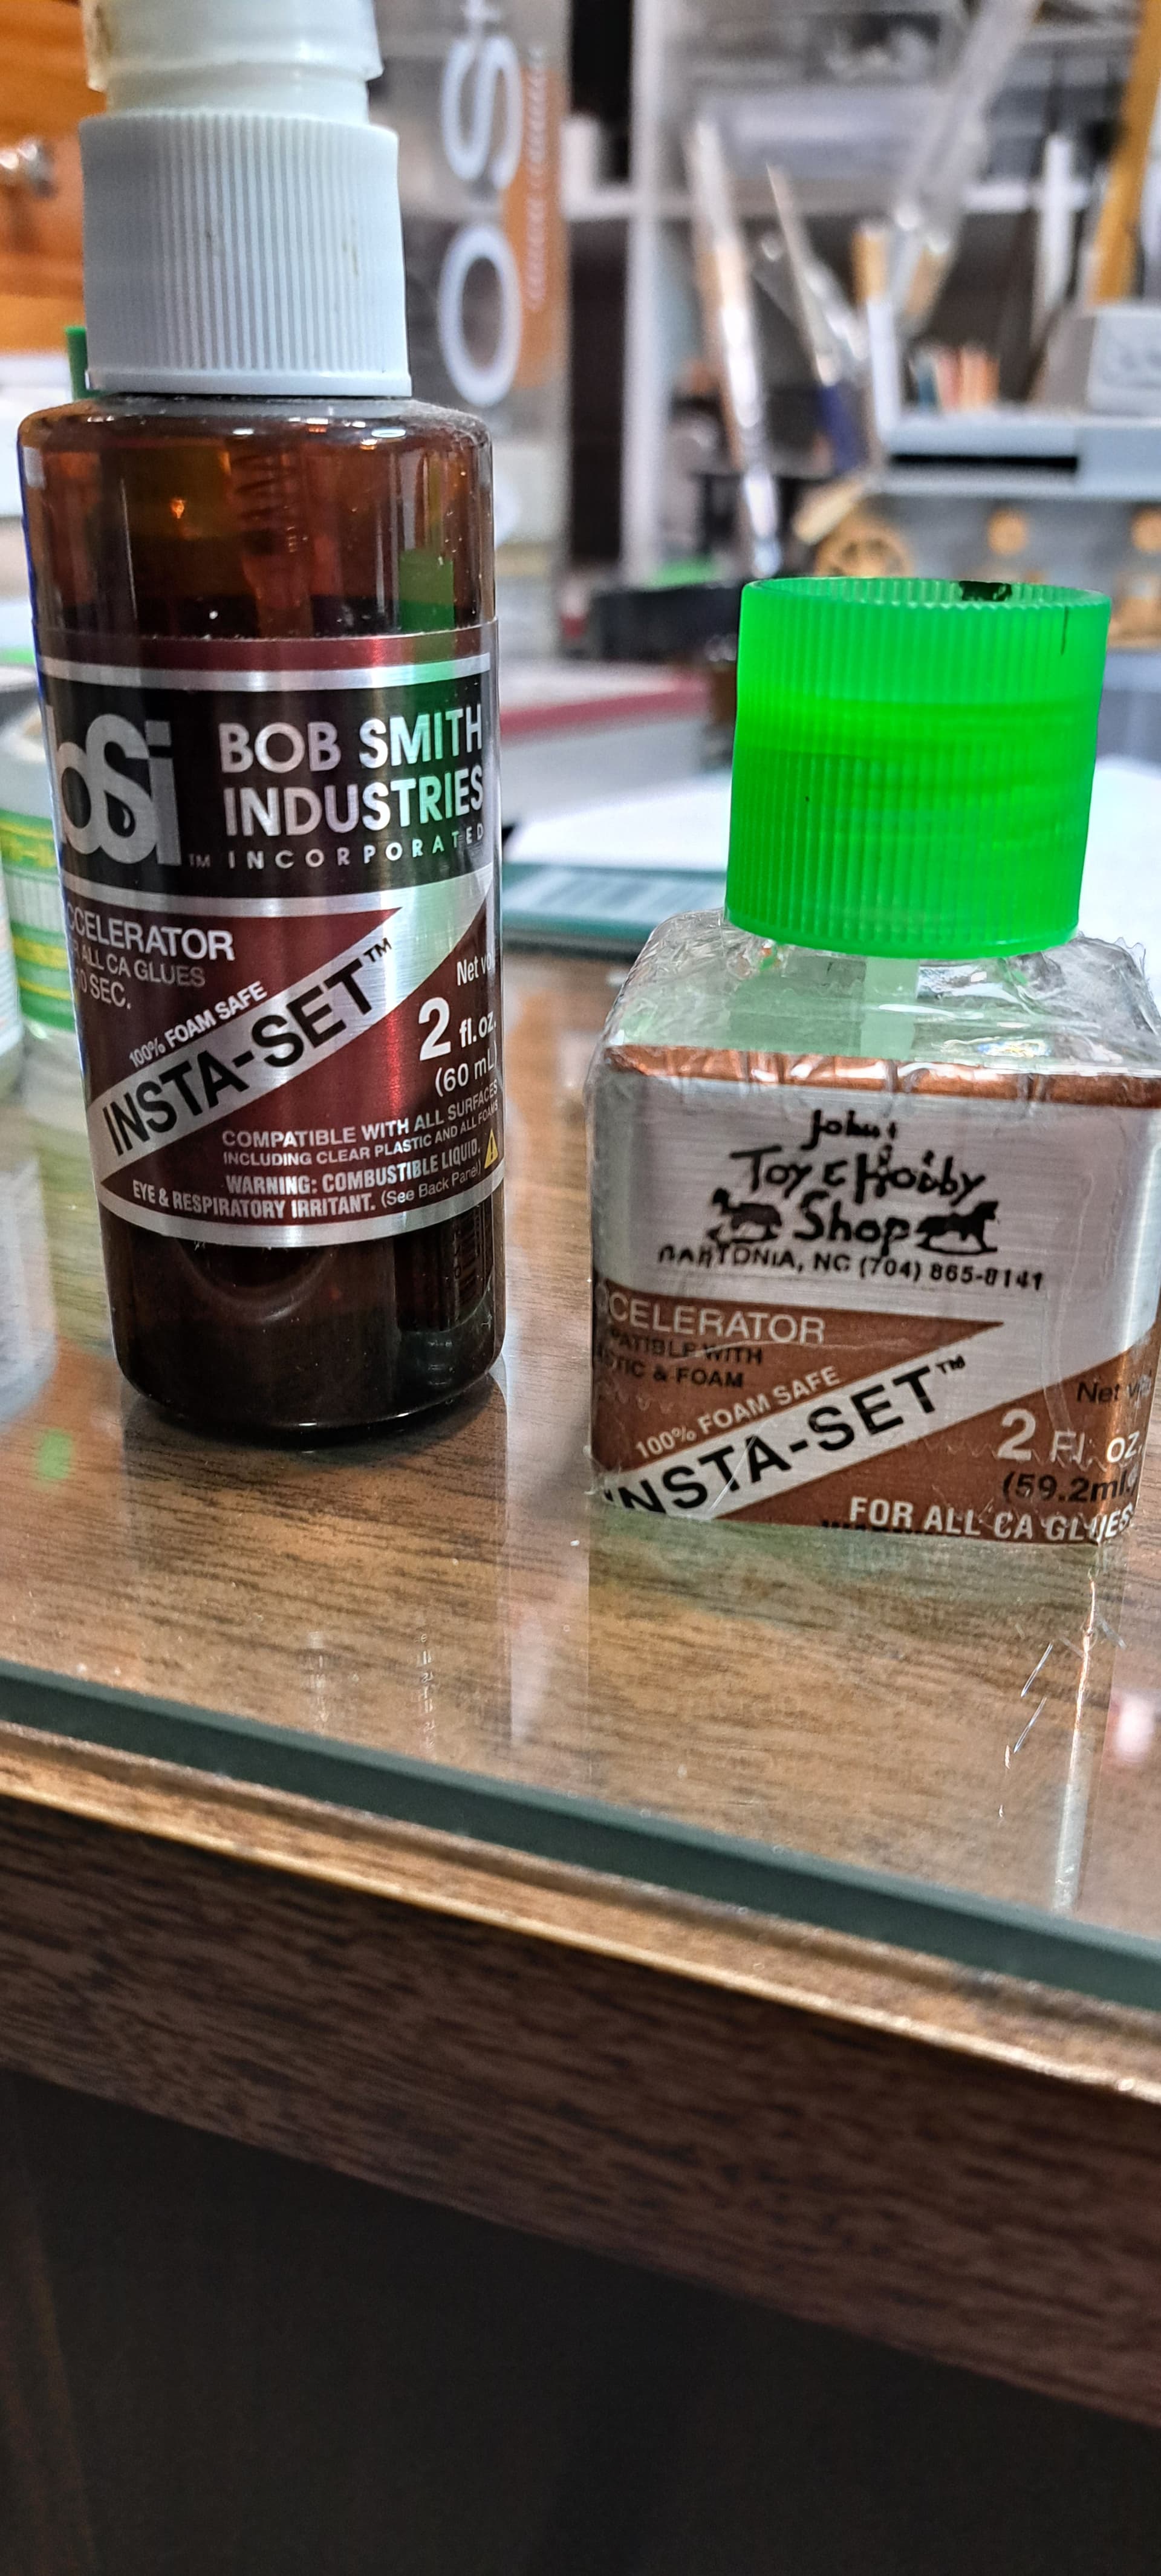
On a positive note, had an idea to use a spare empty Tamiya Extra Thin bottle & brush to apply Accelerator. Added an old label so I’ll know it isn’t glue.
Should come in handy and work well with the Glue Looper too.
Friend of mine uses a .5mm mechanical pencil to apply CA. I tried it and it works very well. Great control, inexpensive(multi pack is a couple of bucks). Just break off the tip after each use.
DV, thank you for sharing that idea! I have couple of mechanical pencils on the desk that have an additional use now.
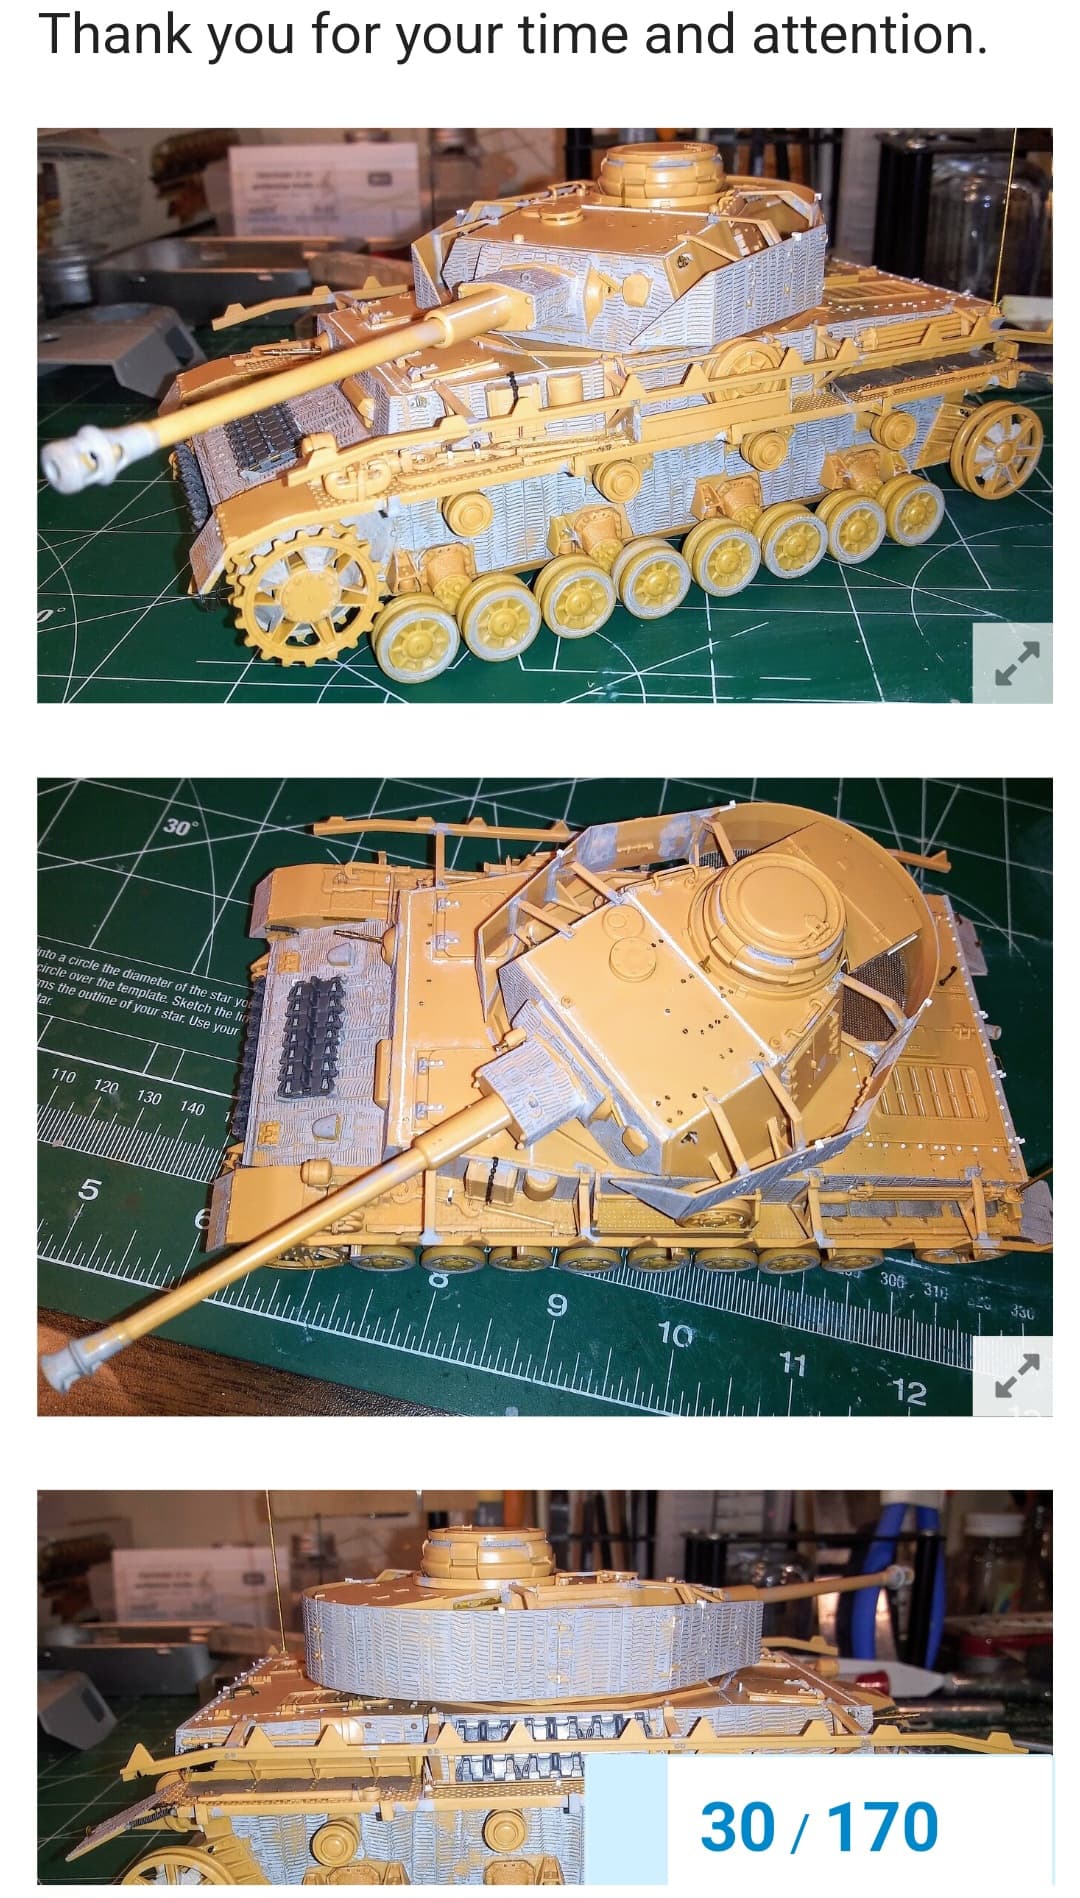
Calling this 30 year old Shelf Queen wrapped! Mounting to base will be done later when a more appropriate base is finished for the model.
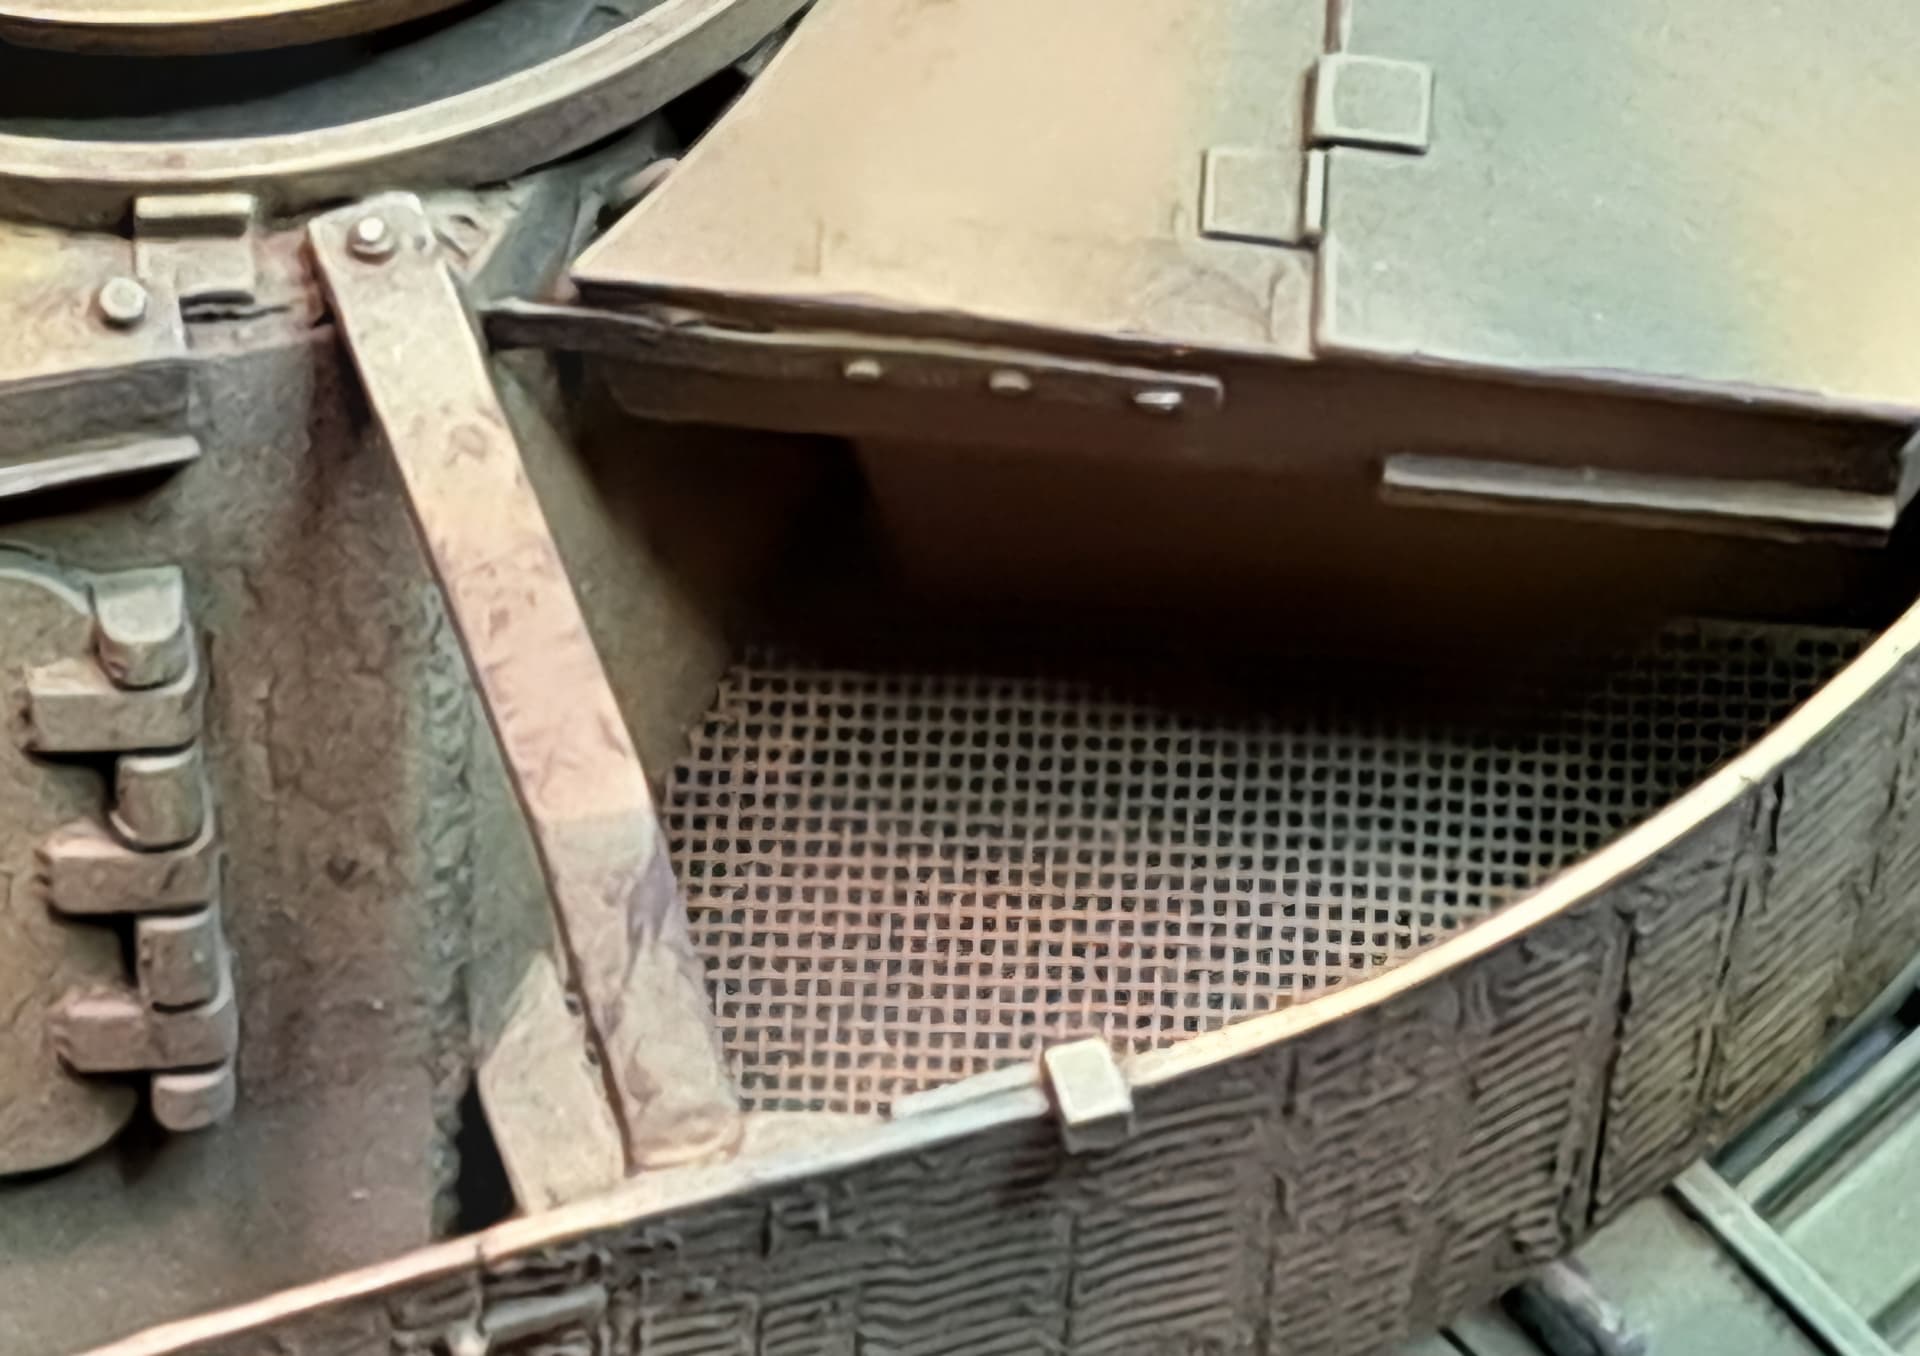
Probably should add a jerry can or two to the turret basket.
Feels like a long time ago…
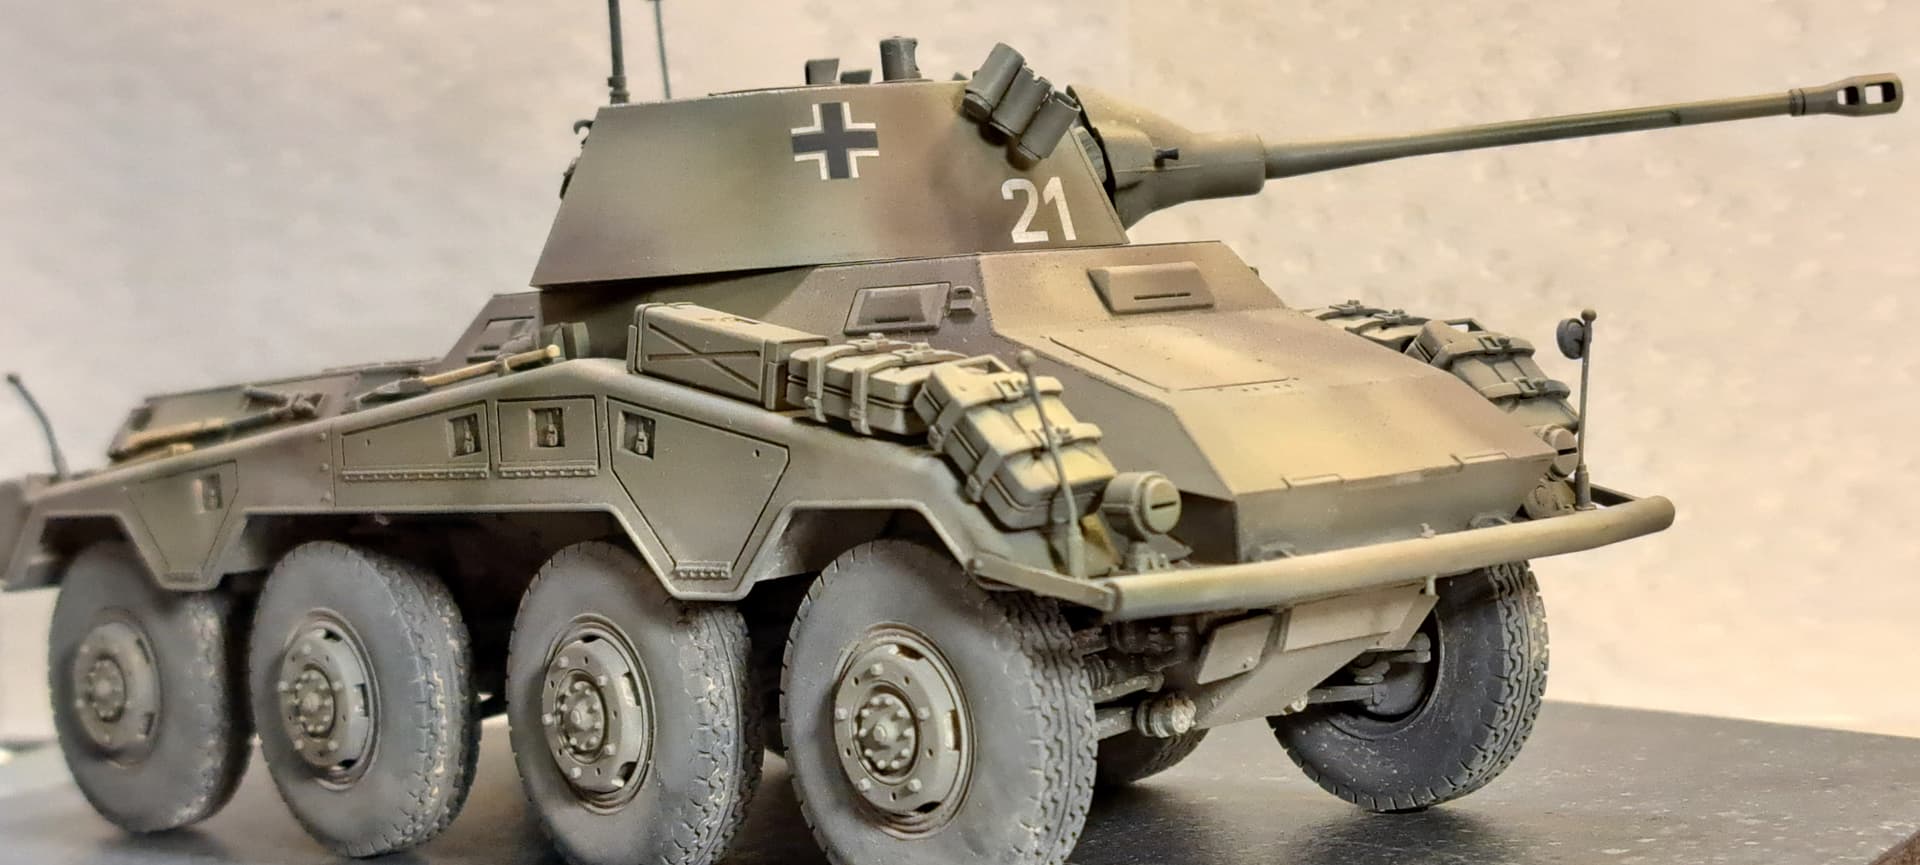
Wade that is a ripper! Really nicely salvaged! I particularly like the work on the tracks that just looks so real, as well as the overall weathering which is spot on!
Only just got fully caught up with this. Beautiful work as ever!
A superb reno/resto job Wade, even the close-detail shots could easily pass for the real thing. Ossum! ![]()
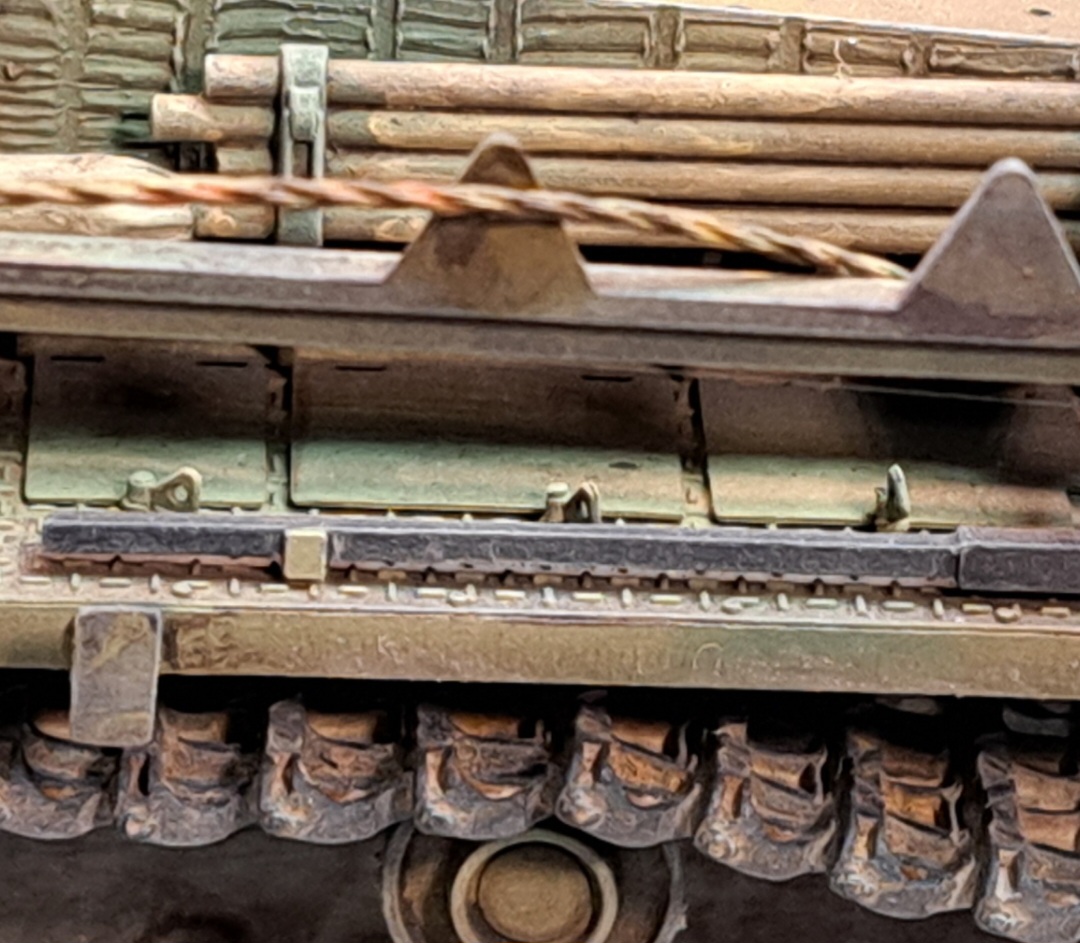
@SamS Sam, thank you! I appreciate you taking time to look and comment! The white metal tracks like Fruilmodel are fun to work with!
@Chepster , thank you for checking in and for the kind words! I’m enjoying following your Academy Pz III build!
@Dioramartin Tim, very much appreciate you talking a look and commenting! Given how many times this model proved flustrating, that means a great deal to me.

Excellent walk around video of Saumur Tank Museum’s Pz IV J that’s been restored.
While the Pz IV J is restored, this video is Ca$h Money ![]()
![]()
![]() of Excellent quality pictures of small bolt details etc well worth viewing.
of Excellent quality pictures of small bolt details etc well worth viewing.
Every happy I didn’t find this video before Dumb (J) & Dumber (H) were finished. Finally quality pictures of the casting numbers on the bogies! I made some for parts thst weren’t ultimately used but had part of the sequence wrong etc.
Really lights the fire to get a Thoma screen Pz IV J (Dumbest?) on the work bench soon.
Posted in wrong topic, moved.
Outstanding job Wade! Fantastic build and beautiful finish- attention to detail is amazing on an old kit.