Hi guys,
A recent adventure with after-market parts made me wonder how far it’s possible to add detail using just some patience and plastic. At this point, I have to confess that I’m slowly falling out of love with resin, photo etch and other aftermarket. There’s no doubting the detail they offer, but the need to use primers, different glues and sometimes work hard to get a good fit is increasingly irksome to me. 3D printing offers a whole new route, but that’s a hobby in itself, I think. I’m not saying these products are bad or criticising anyone who likes them. I just wanted to try something else, something I personally might find more satisfying.
My test bed is a Hobby Boss, SU-17 UM3. The seats are basic and crying out for some extra detail. I gave myself just one rule; whatever I do, it has to be done in plastic. After some researc, I had a plan to improve the the headrest and add all the missing harness detail. Here are the results so far. Anything white has been scratch built.
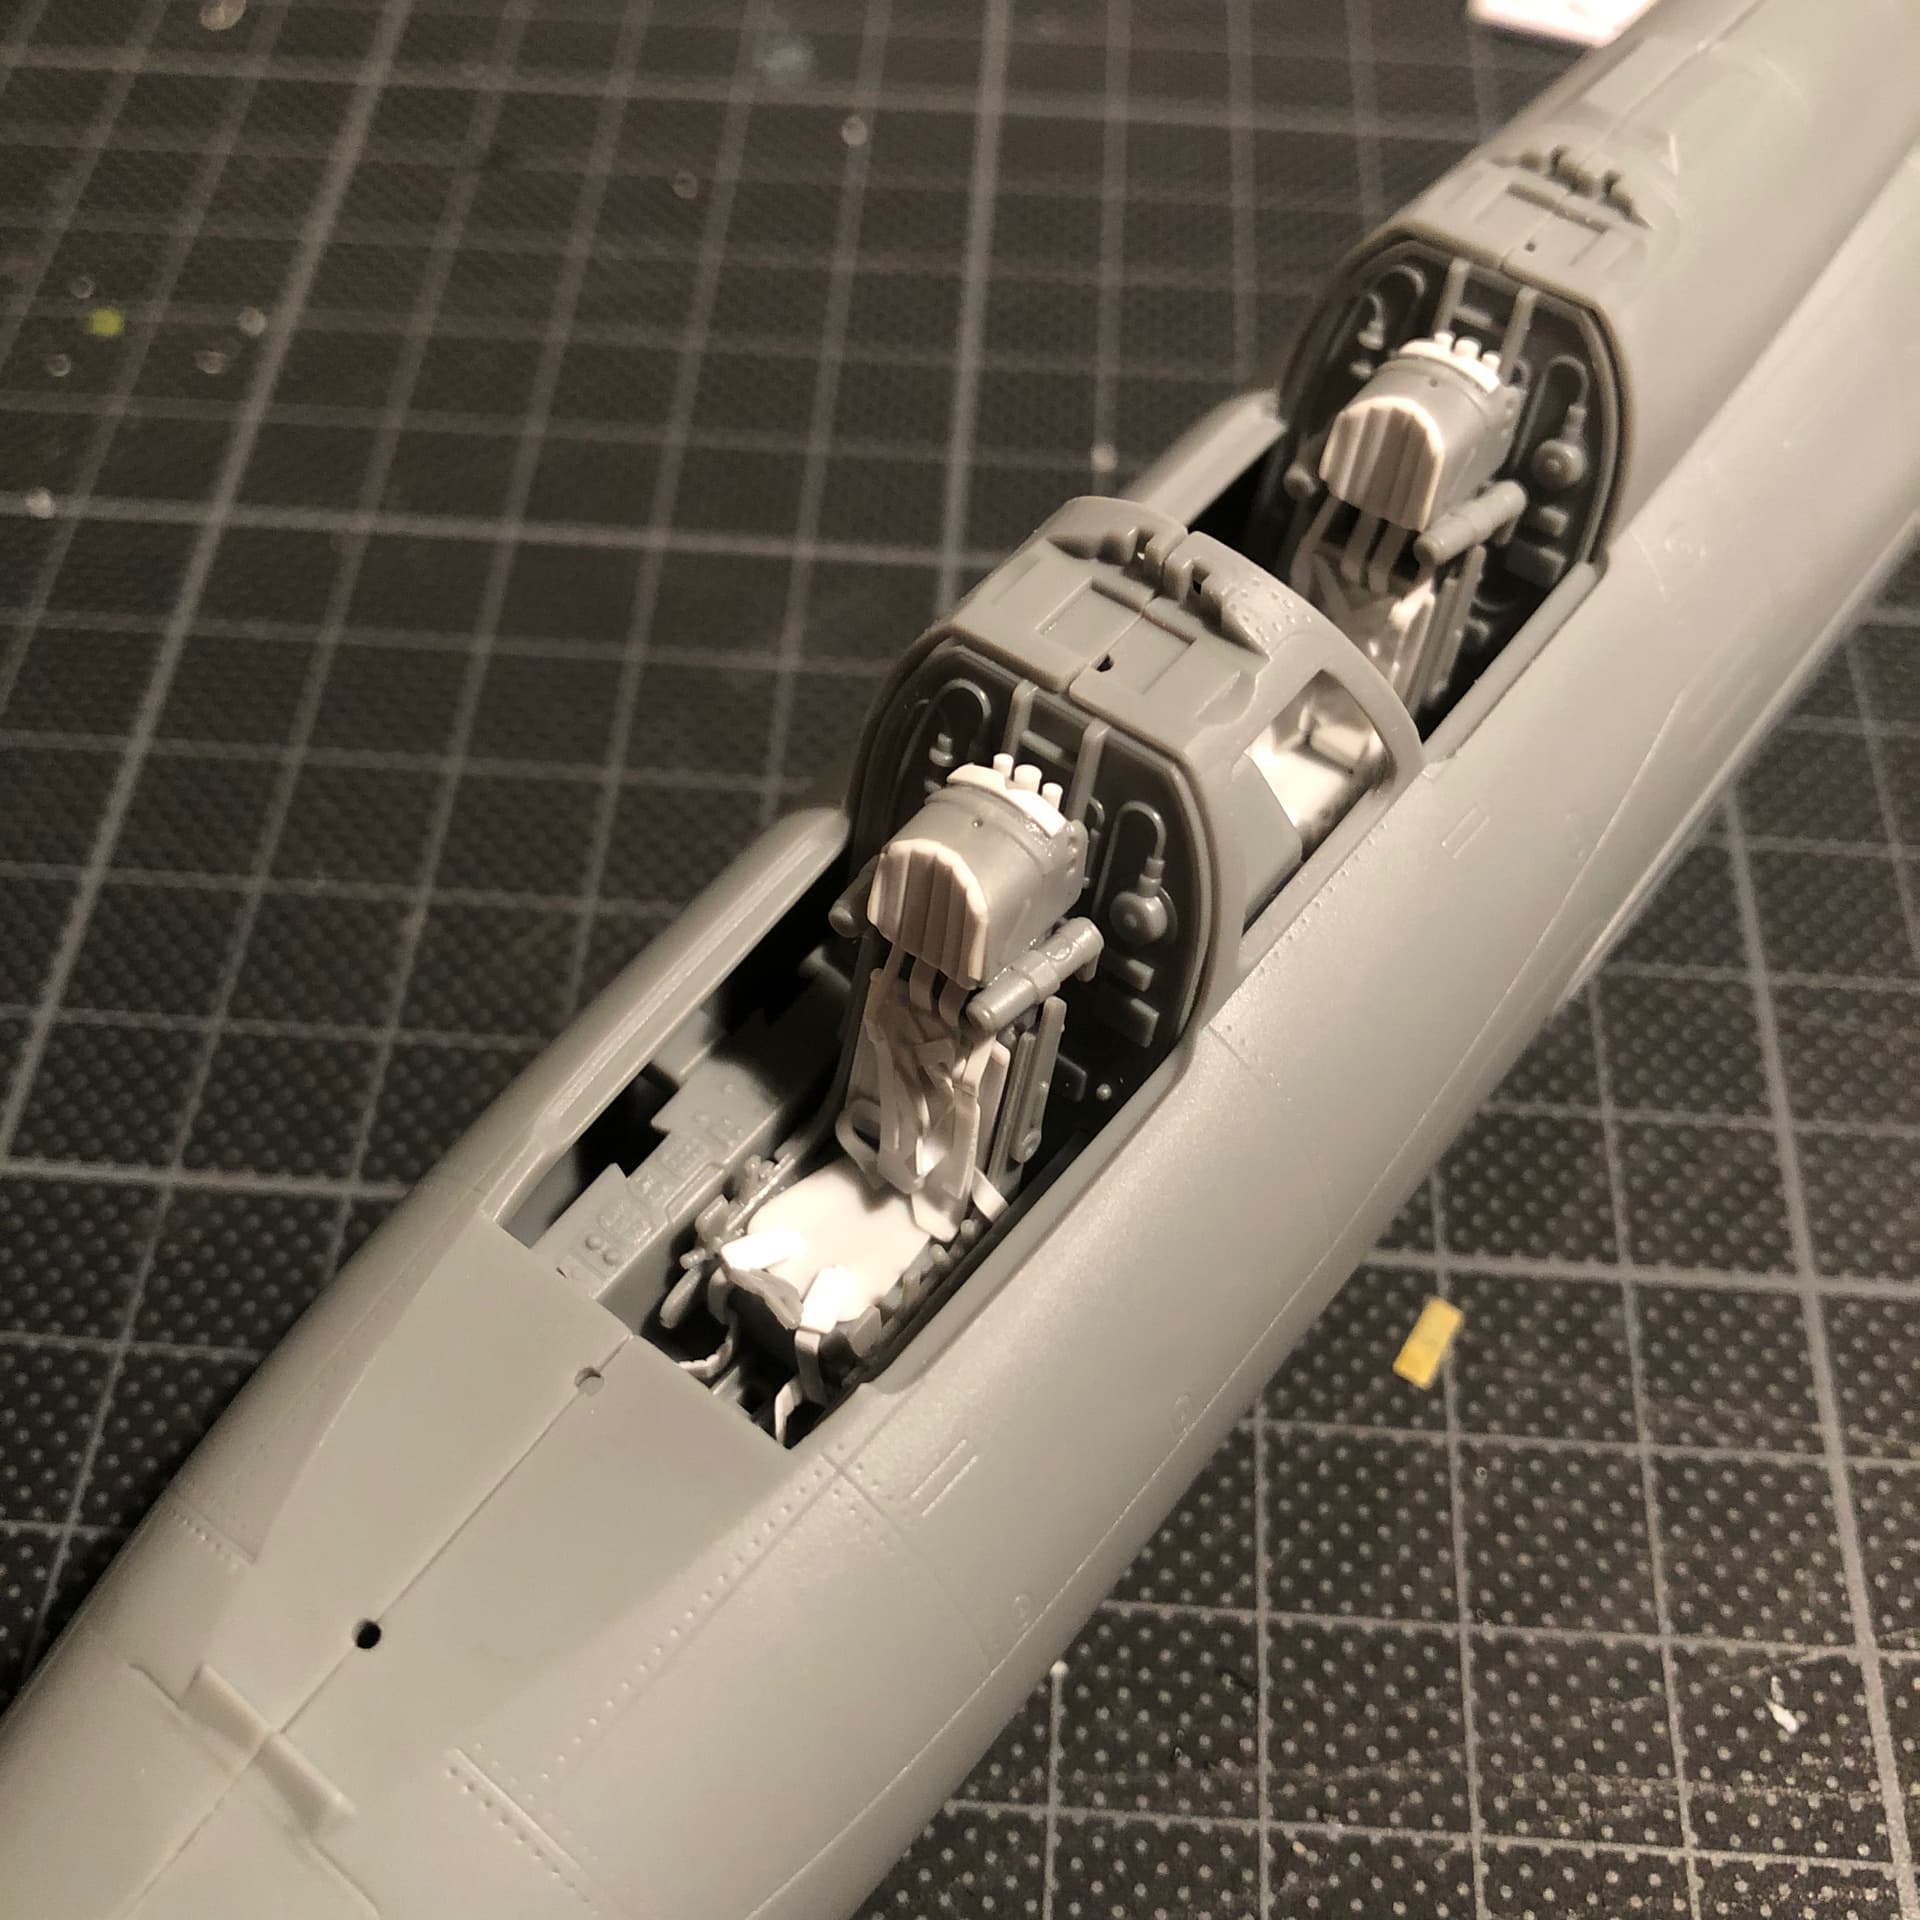
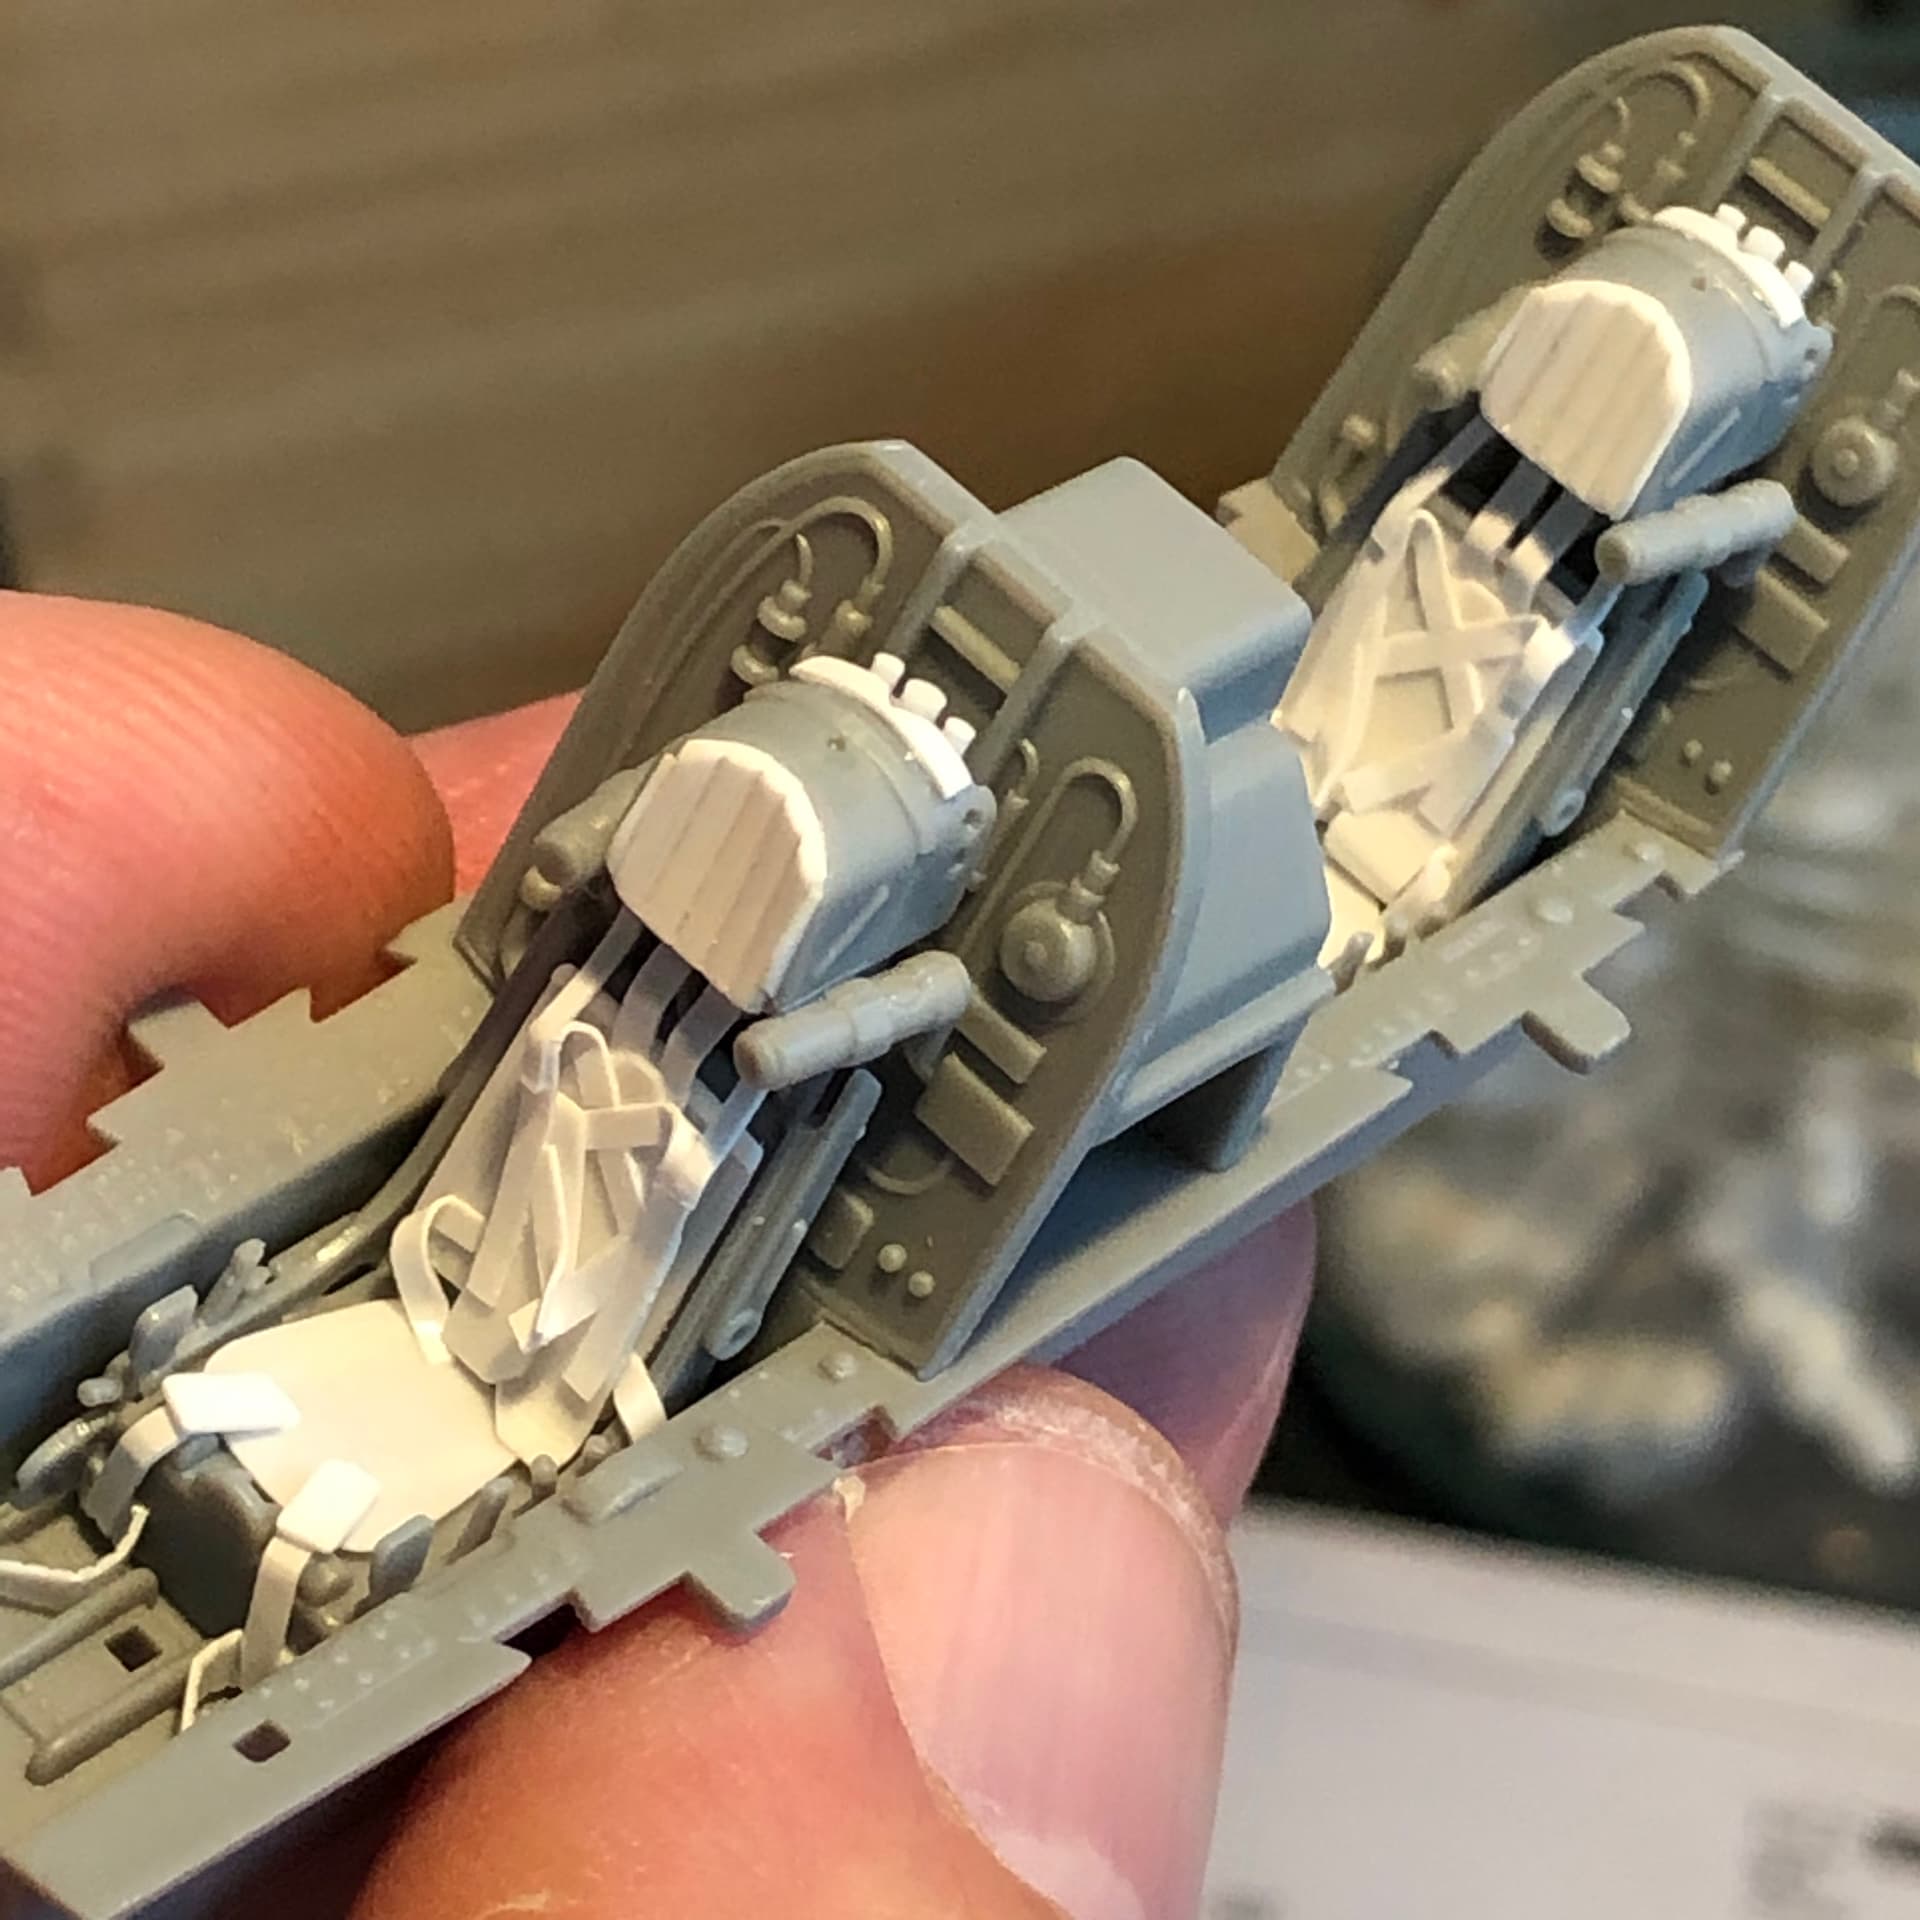
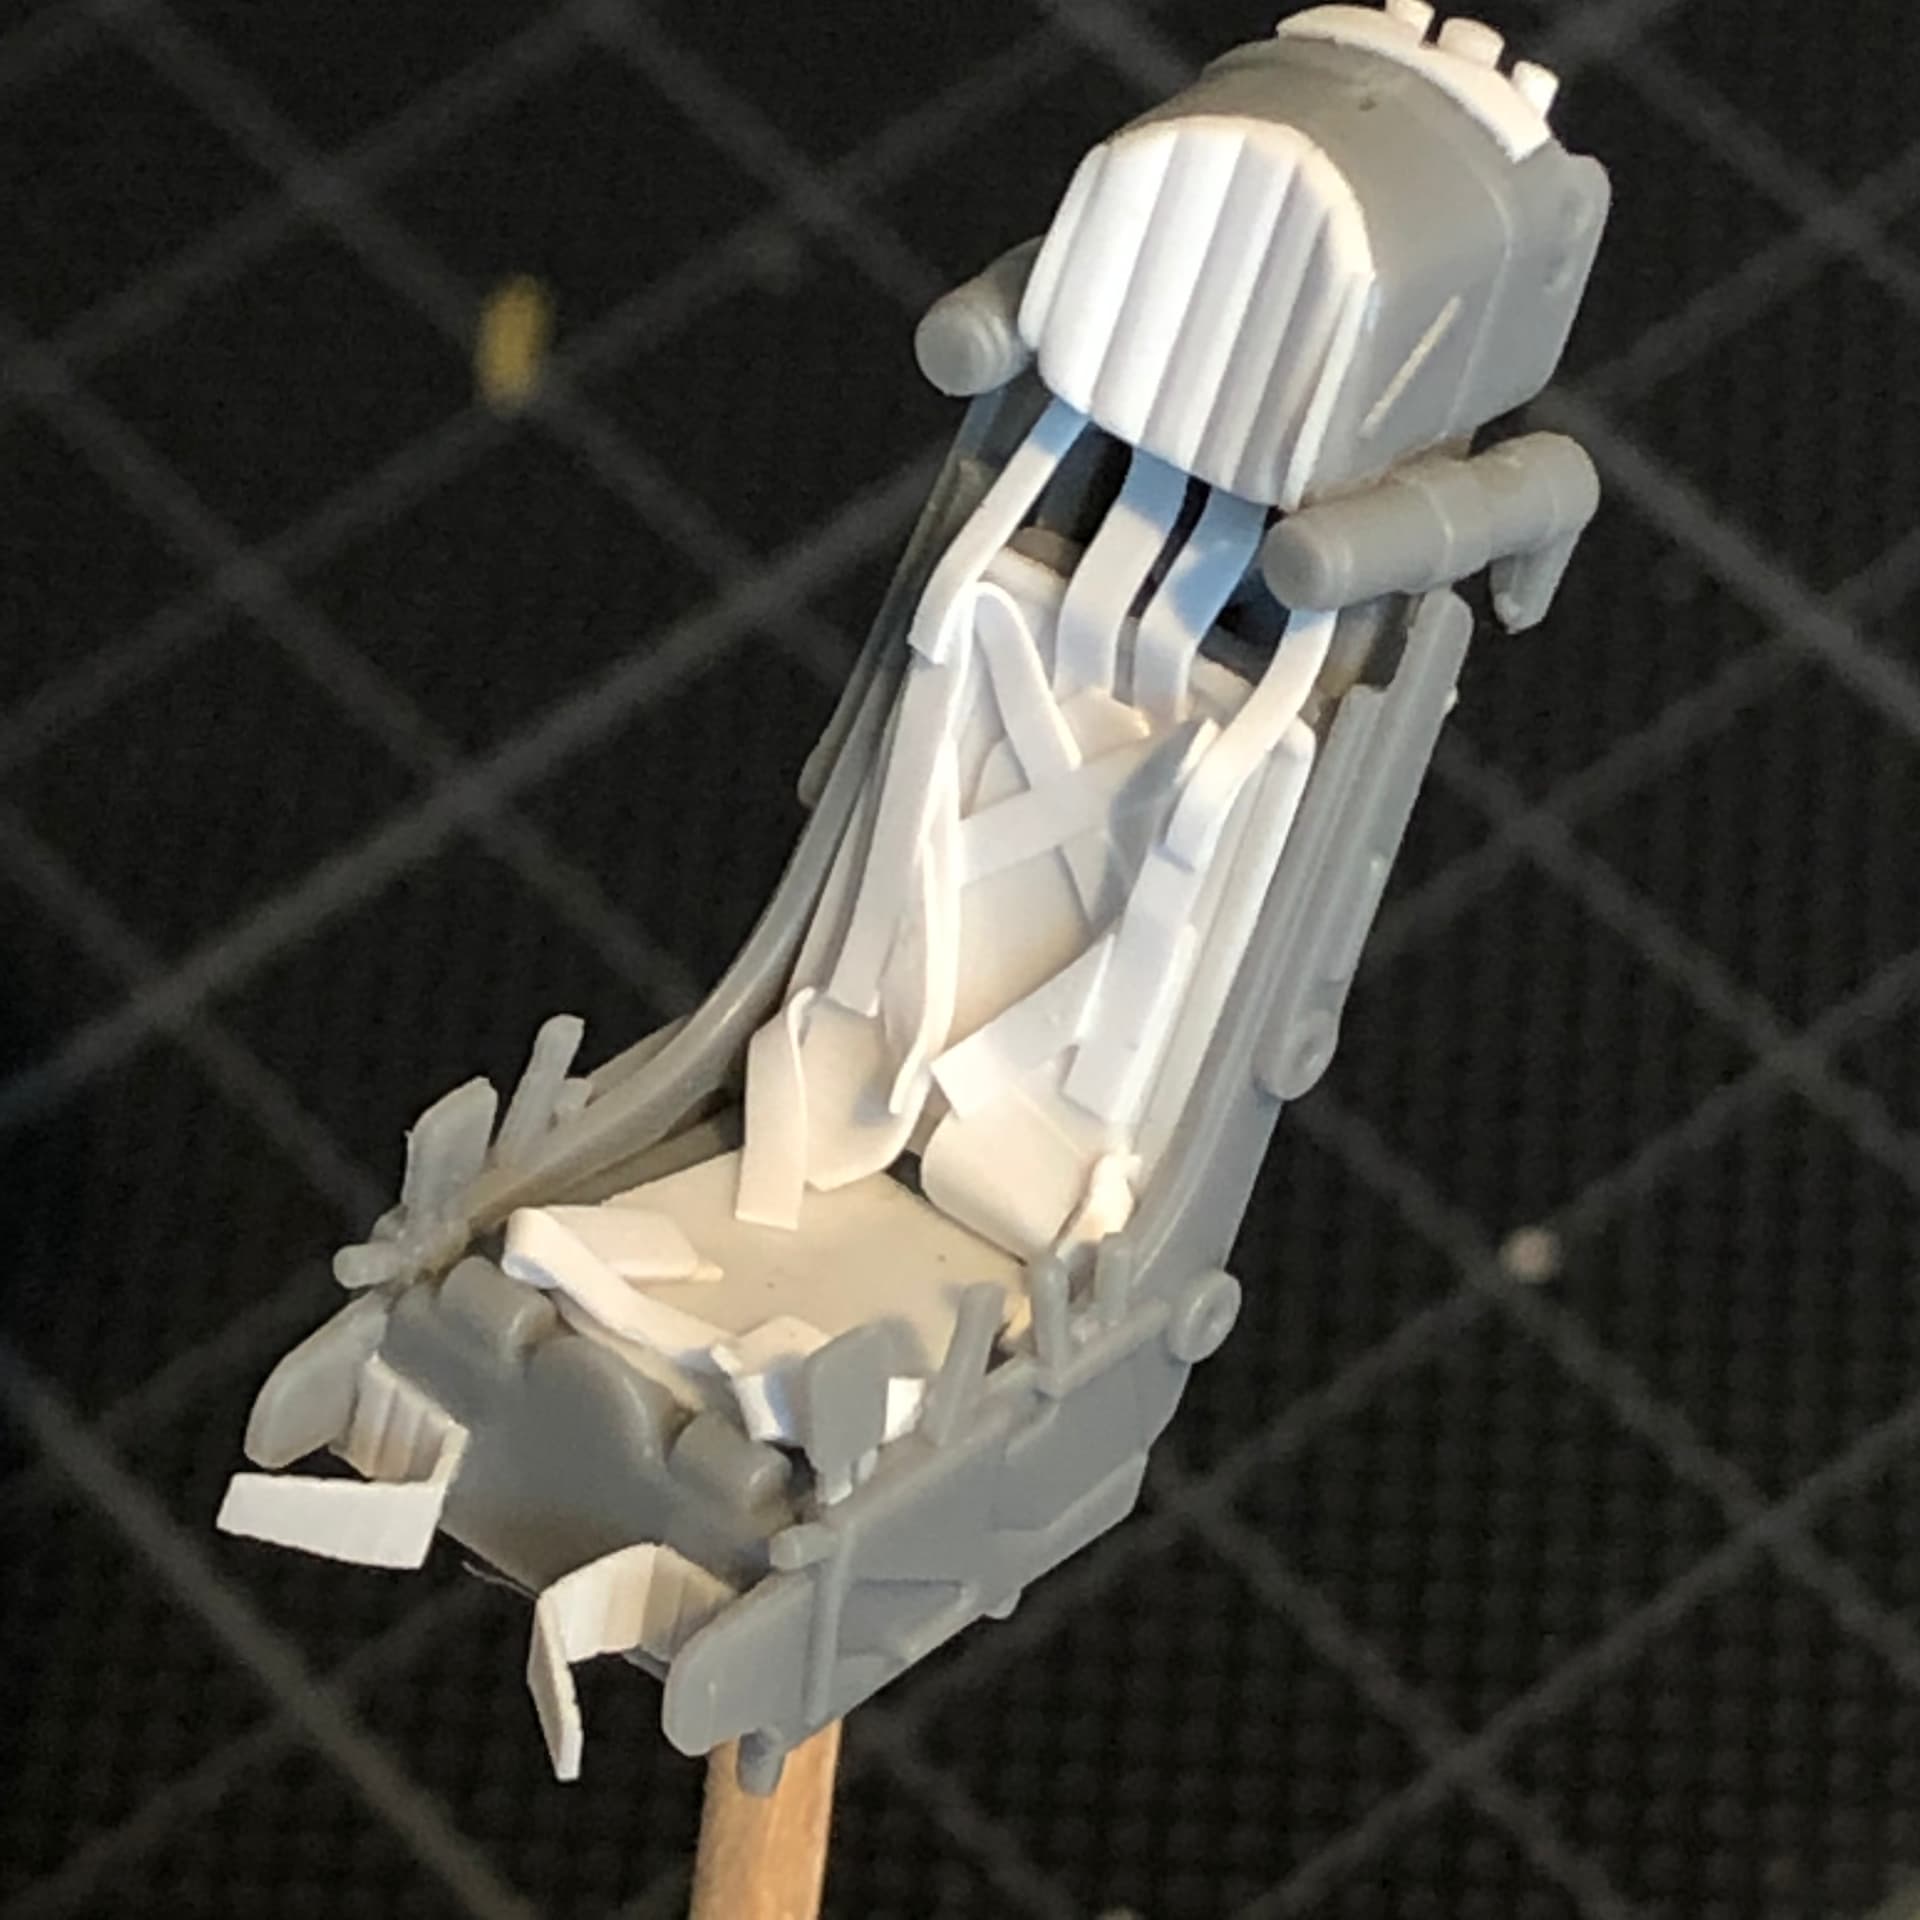
The harnesses are as close to replicas of the originals as I could make. I used thin plastic strip, thinned even further by scraping with a knife. There’s plastic rod behind the headrest. A scriber made lines where needed. Generally I worked in sections - doing a bit then letting the glue set before moving on. The thin plastic meant using glue sparingly was essential. I probably made each piece at least twice as the casualty rate was high! Things pinged out of tweezers, got lost, got melted or I didn’t make them the right shape. Hmmm, wasn’t this supposed to be more satisfying than the alternatives?
Despite the frustrations, I really enjoyed getting to this point. I like the three dimensional look, and I surprised myself with how much could be done with basic tools. Avoiding superglue was a bonus, and when it comes to paint I’ll go straight to lacquers with no need for primer. I can’t fashion as much detail as a good after market set - buckles and clips are problem I’m still working on - but, the organic feel and individual character in each seat are gratifyingly my own Oh, and it cost me virtually nothing. I just dipped into my existing stocks of plastic card and rod.
So, there we have it - a diversion into scratch-building. I thought I’d share this in case you feel the same way and want to give it try. Maybe you’re getting great results already and want to share something? Please feel free to add anything to this thread.
Happy modeling.


