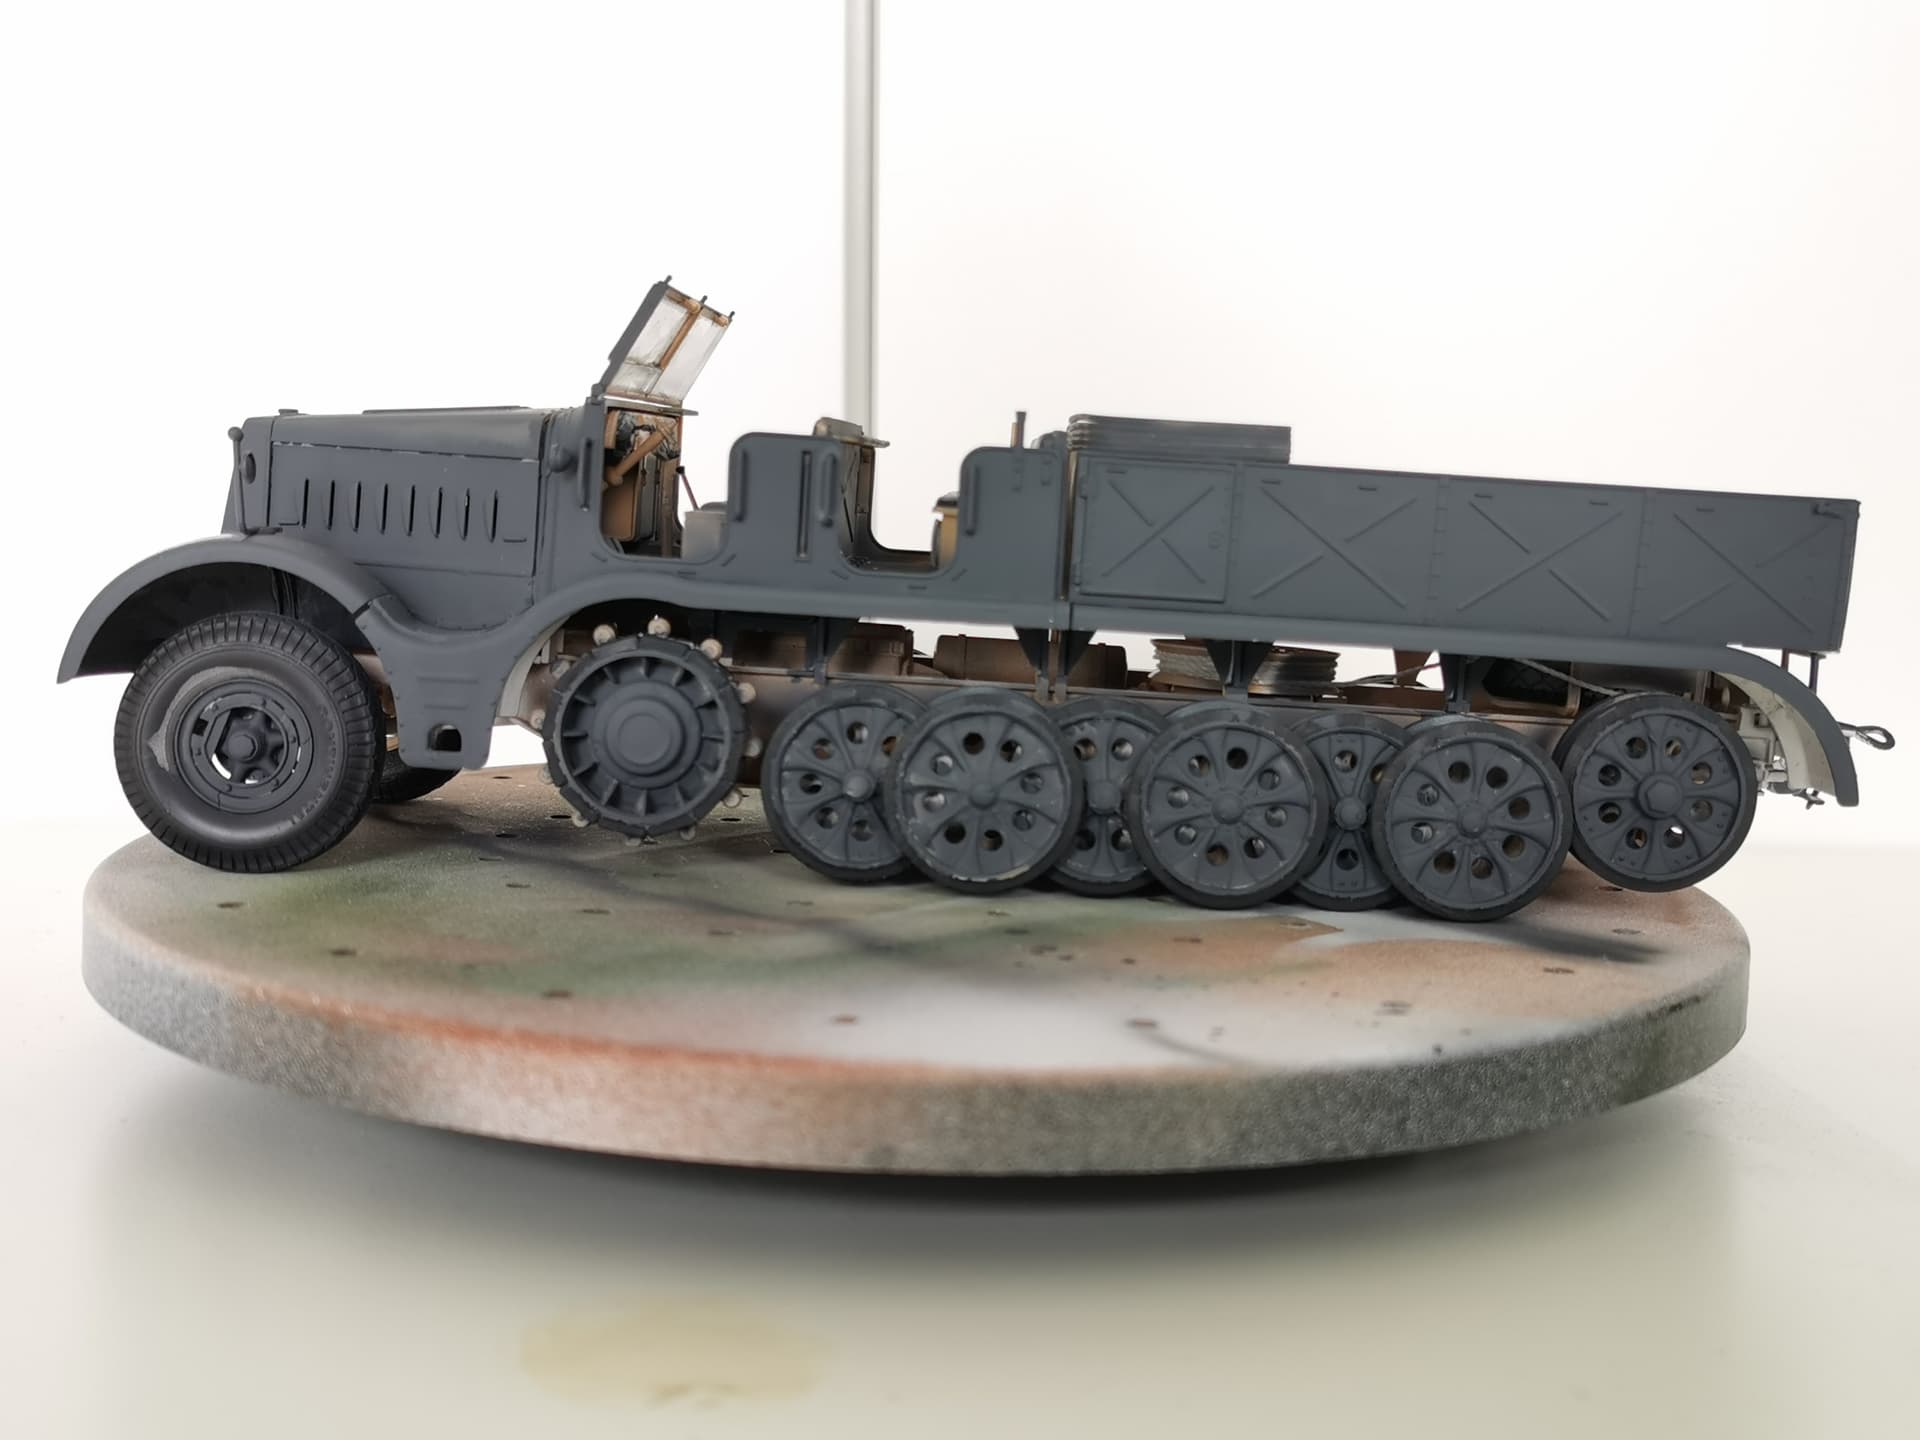
Since a few days I have started work again on finishing the Sd. Kfz. 9 Famo project on which I have worked for the last since months. Since the temperatures are still not allowing me to airbrush, I decided to take on the job with paint brushes only, no airbrush. So far I have ben working for hours at least today and before this day. And I’m happy with how the result turned out to be. Sure, it may not be perfect. And it could still be there are some more rough edges on the project. But I’m doing my best to make it as best as I can. It’s time to get the job done and move on to the next project. With a clean slate. Still much work needs to be done and I estimate it will take me at least a couple of days or more to get everything cleaned up. And even more days for working on the tracks and the figures I’m going to include onto my vehicle. And I’m going to try for the first time in my entire life to do some weathering on my very first project I’m planning on to do this. This one. I’m planning on doing some drybrushing on handle bars and things like where the soldiers stepped on to get into the vehicle. And maybe do some light weathering on the tracks and wheels with some weathering projects I have to purchase.
A+++ because this ^^^^^ is the very most important part of modeling. When one feels happy with the model it’s a success!!! That’s an outstanding feeling!
Congratulations ![]()
![]()
![]() !!!
!!!
Looks much better than your previous effort ![]()
Thank you, this means a lot to me. I have done everything exclusively with brushes only. Today I was working on the other side. But got bored heavily, so I decided to only work on the project on Saturdays. I’ve also learned now why I’m using an airbrush in the first place. And how to use it. So that is an + as well. Hope next Saturday I will be working again on the project and get just as satisfied as I was with this side. Or even more satisfied then I was first.
Super job, well done! I’ve always liked this vehicle.
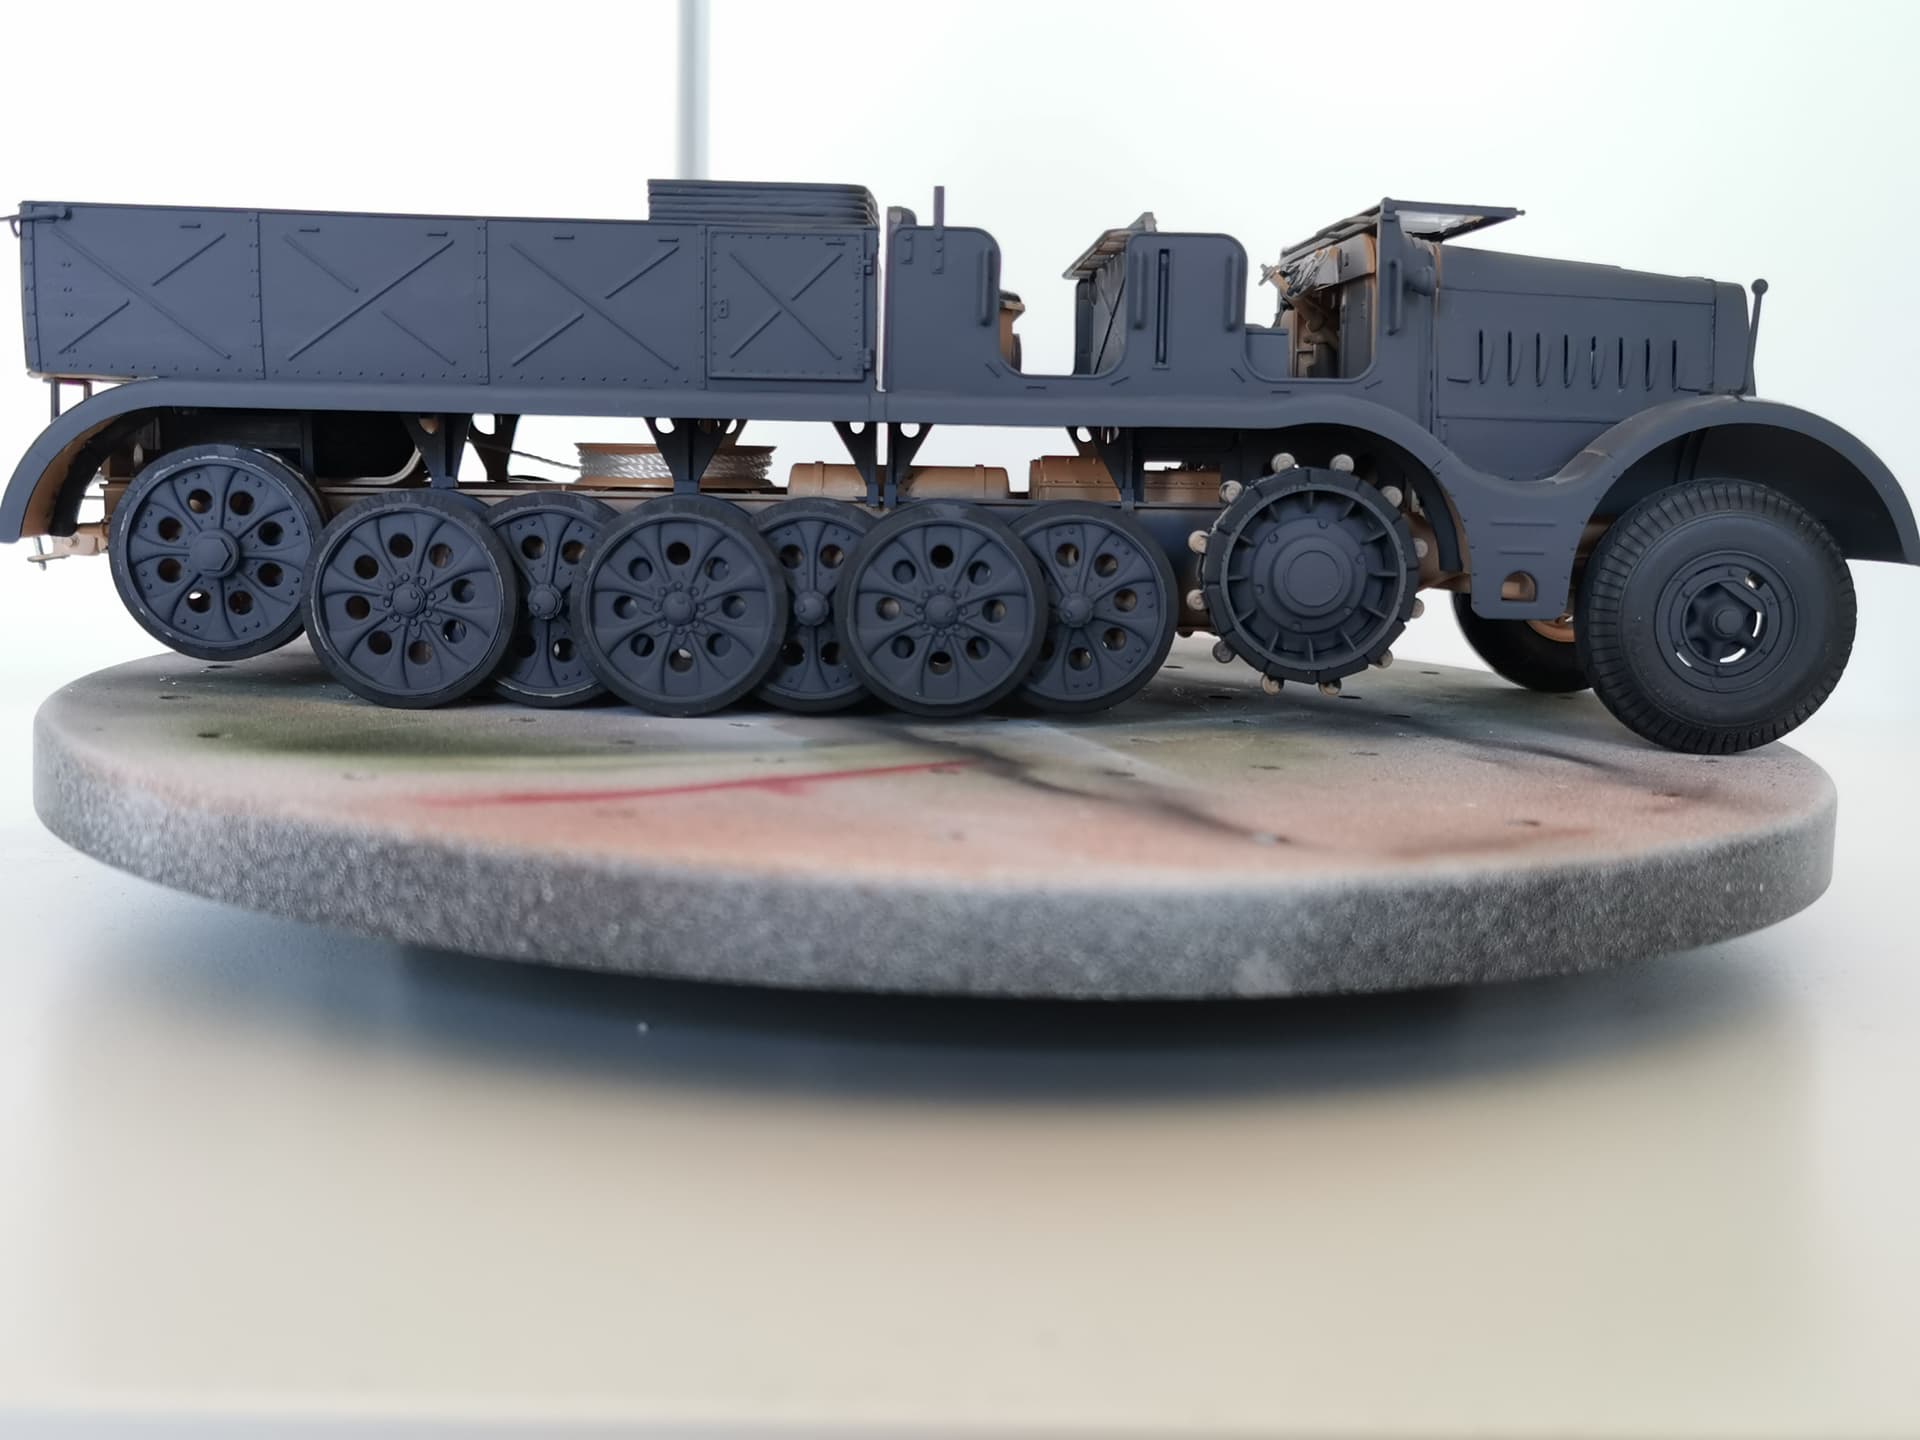
Front done of the project. However, I’m not entirely satisfied of the paint job now. Because the lighting conditions were poor. A problem I’m longer struggling with. Because I’m now relying on natural lighting. And when the shutter is down so much that natural light doesn’t get in anymore enough. Because I want my room to be cool. And the sun is directly shining into my room at some point. That it get’s hot very quickly. I just can’t anymore rely on natural lighting. But, because I’m not having good lighting equipment for the job currently. I was forced to improvise. And I’m already sick of it. Probably spend a lot of time on research for improving lighting conditions of the space I’m working.
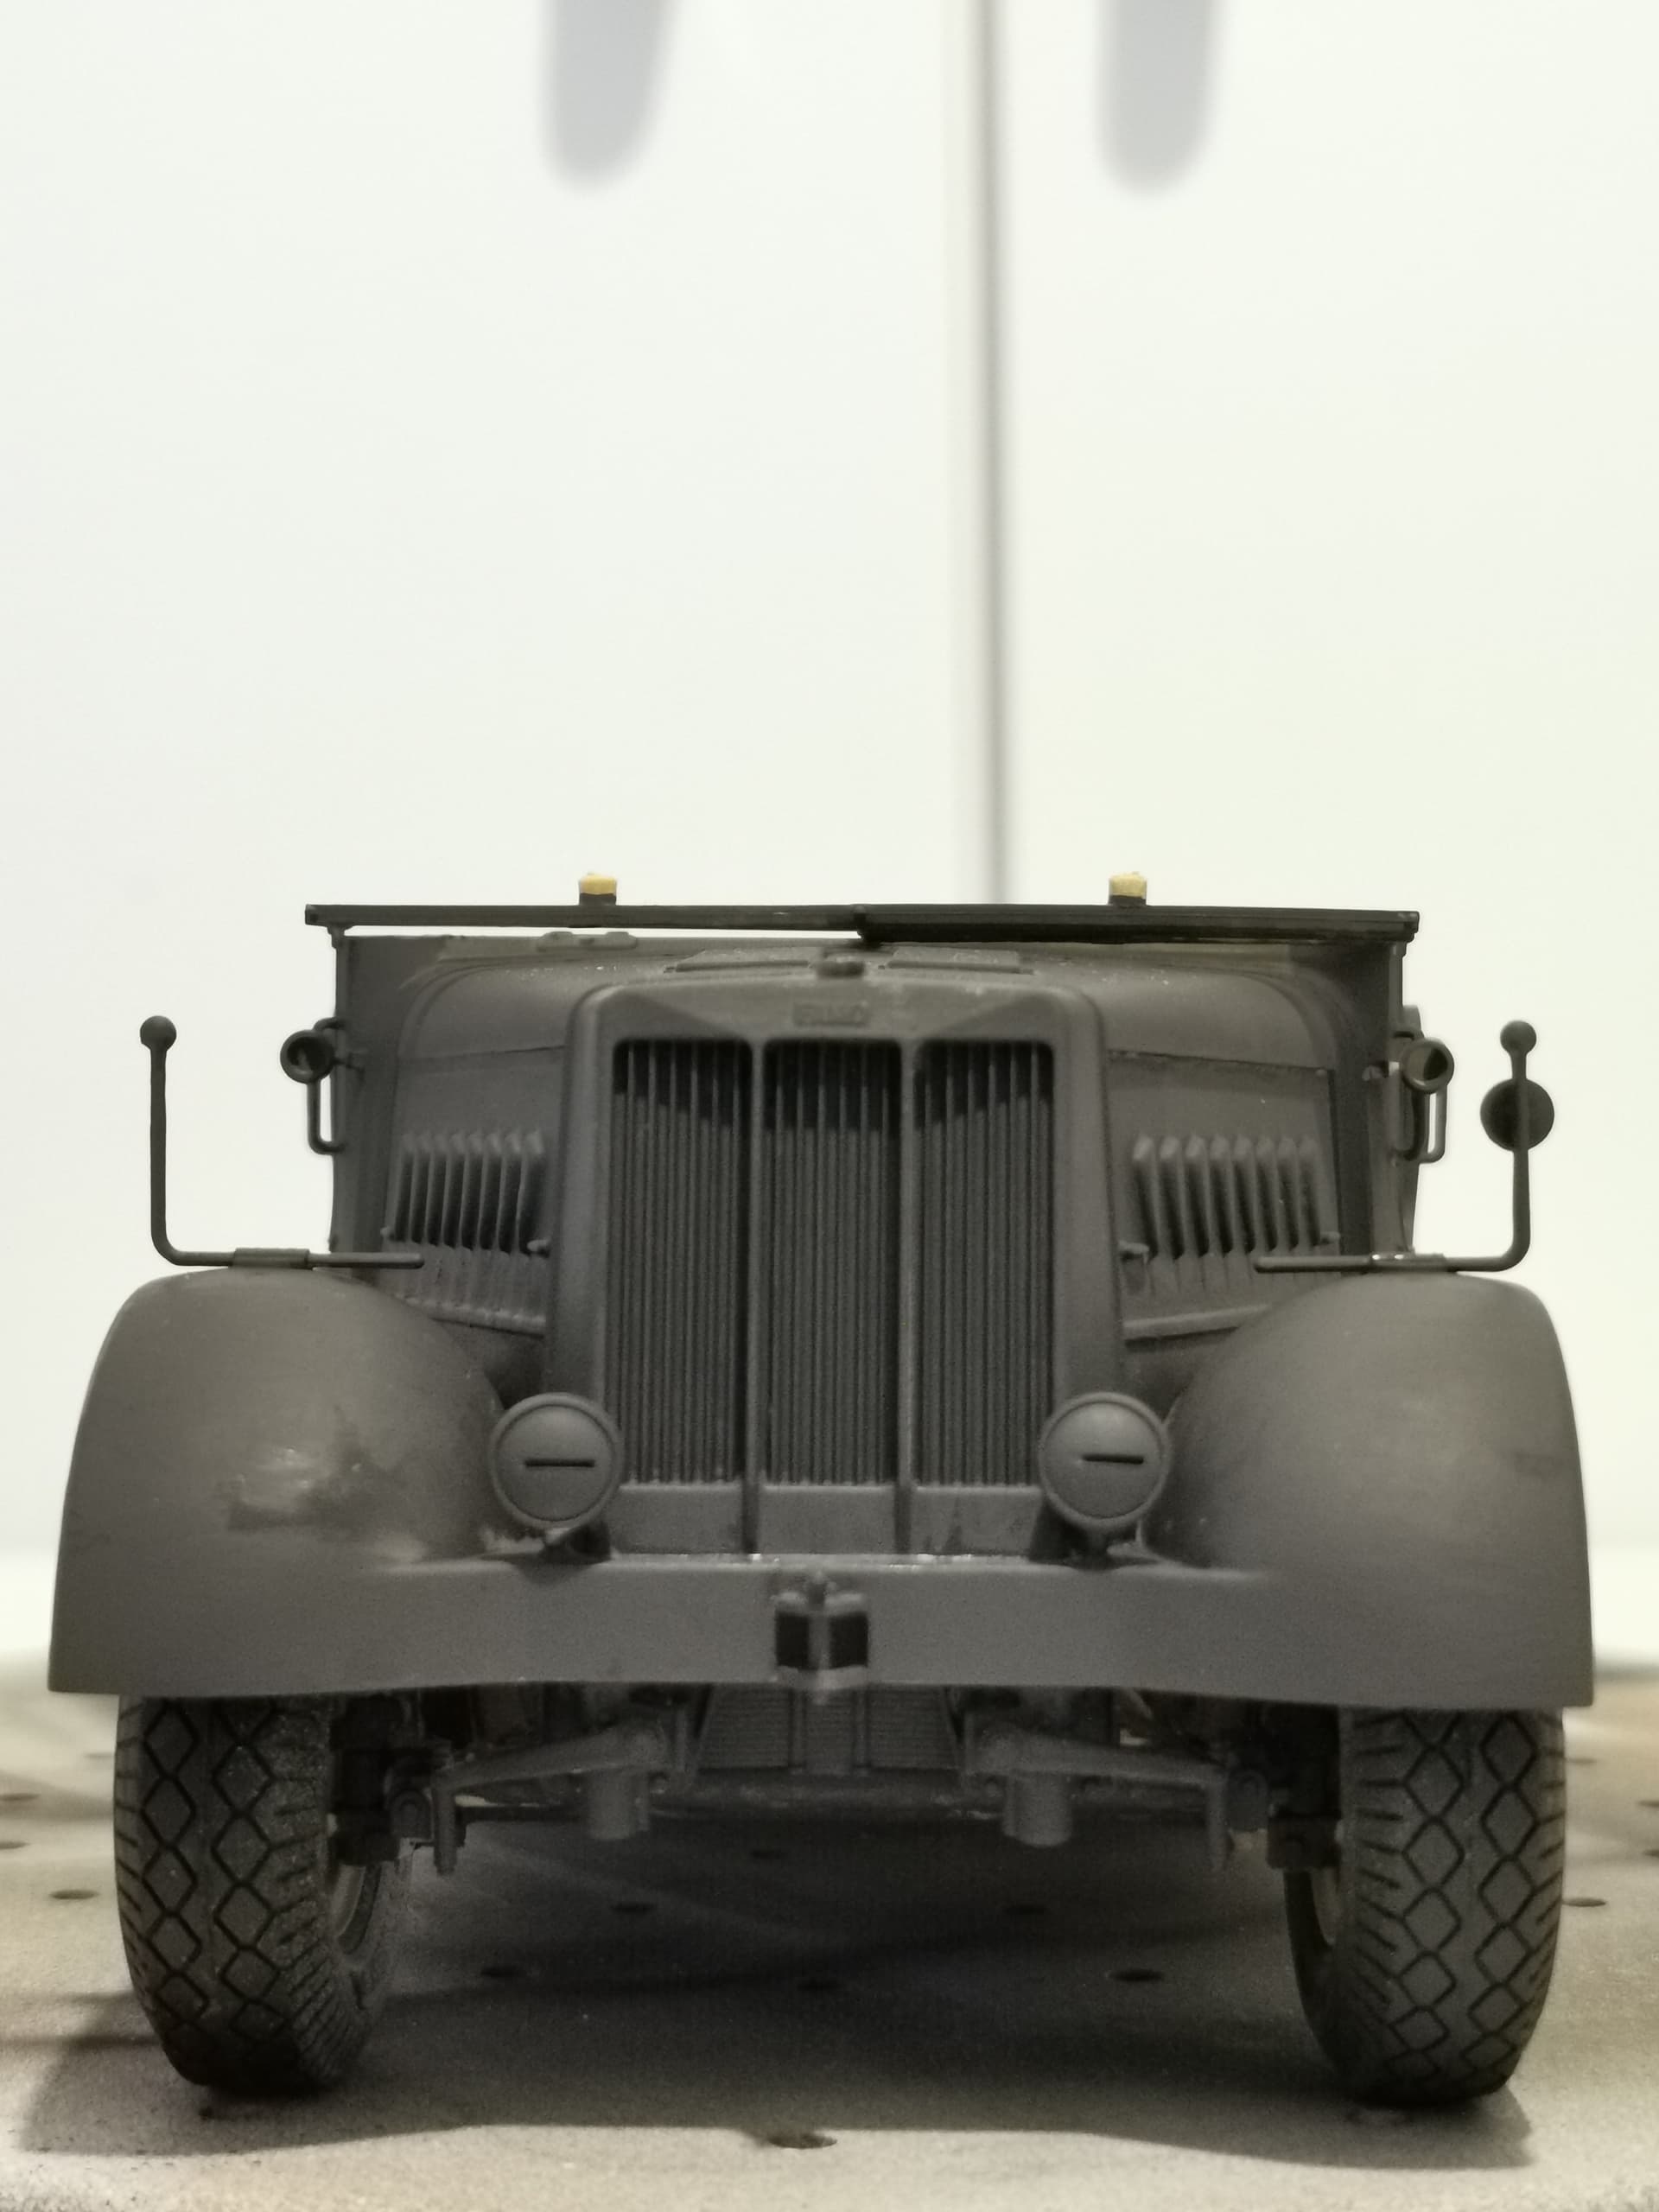
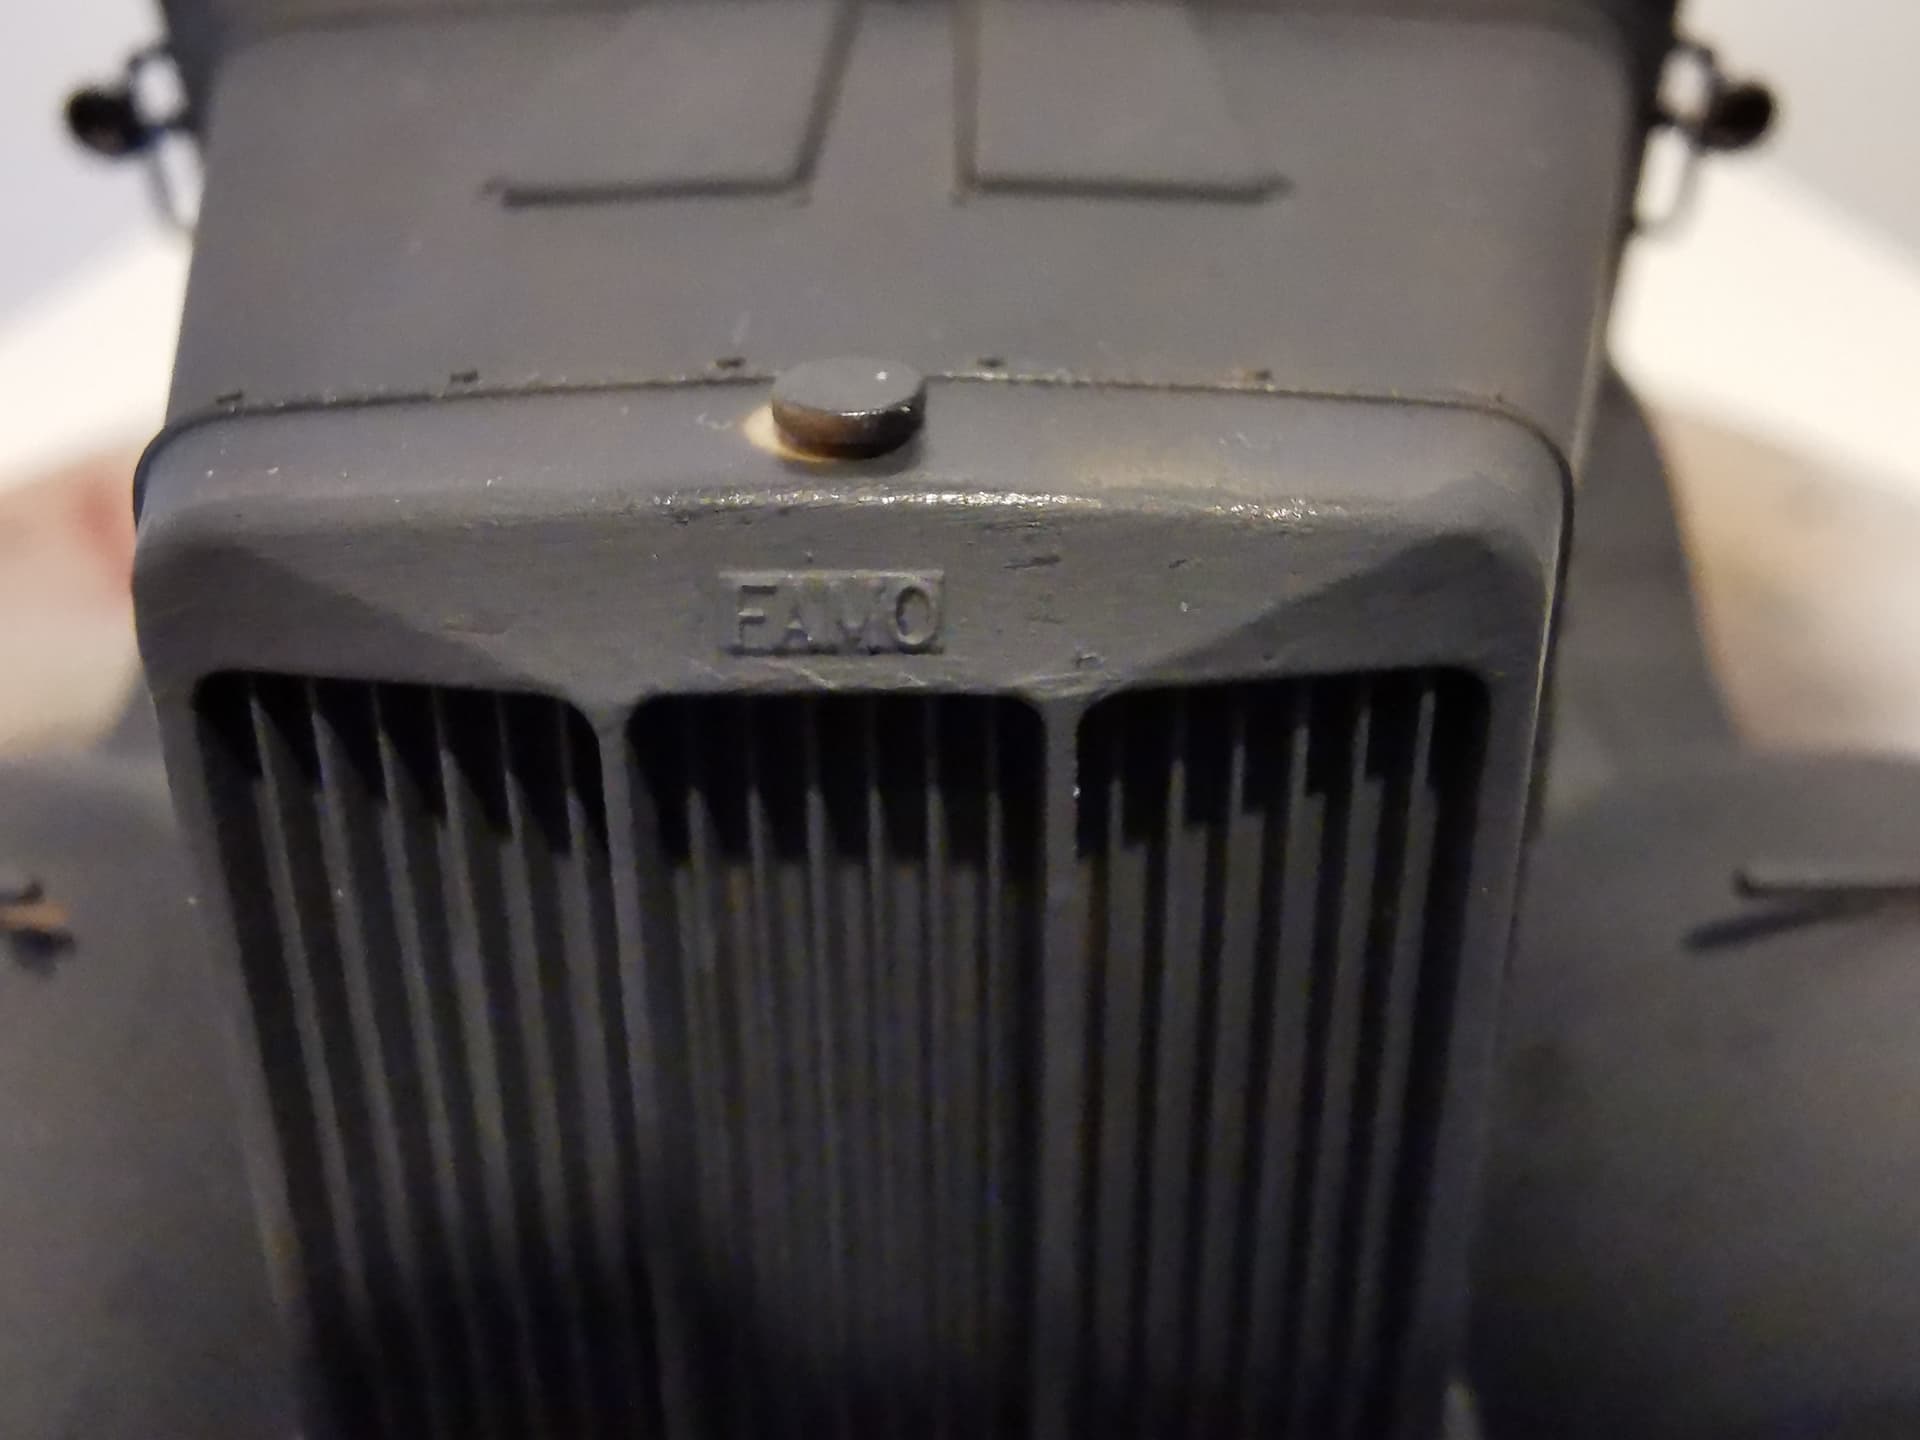
Bottom picture is a supermacro shot taken with my P30 Pro smartphone. To show the Famo badge clearly.
Nice save on this one! What paints did you use for brushing? Brush painting can be a bear on a whole vehicle and your effort looks great
Thanks a lot, this means a lot to me. I have used Revell Enamel number 78 paint. Last time brush painting I discovered most of my brushes are trash. And I’ve already labeled two of them for drybrush and weathering usage. Luckily, now I’m writing this. I’m remembering I have a new budget to spend this month. So I might invest in new brushes. Luckily, I got some good help and advice from here to help me with this all important purchase. And I got some books now of Osprey modelling bought last month to help me improve my skills and bring projects to the next level. So improvements and progress being made. Studying began shortly for the next project of the Italeri Jagdpanther kit to build. So lot’s of stuff to plan and execute. And you will probably see soon enough of it on the forums. Thanks for replying.
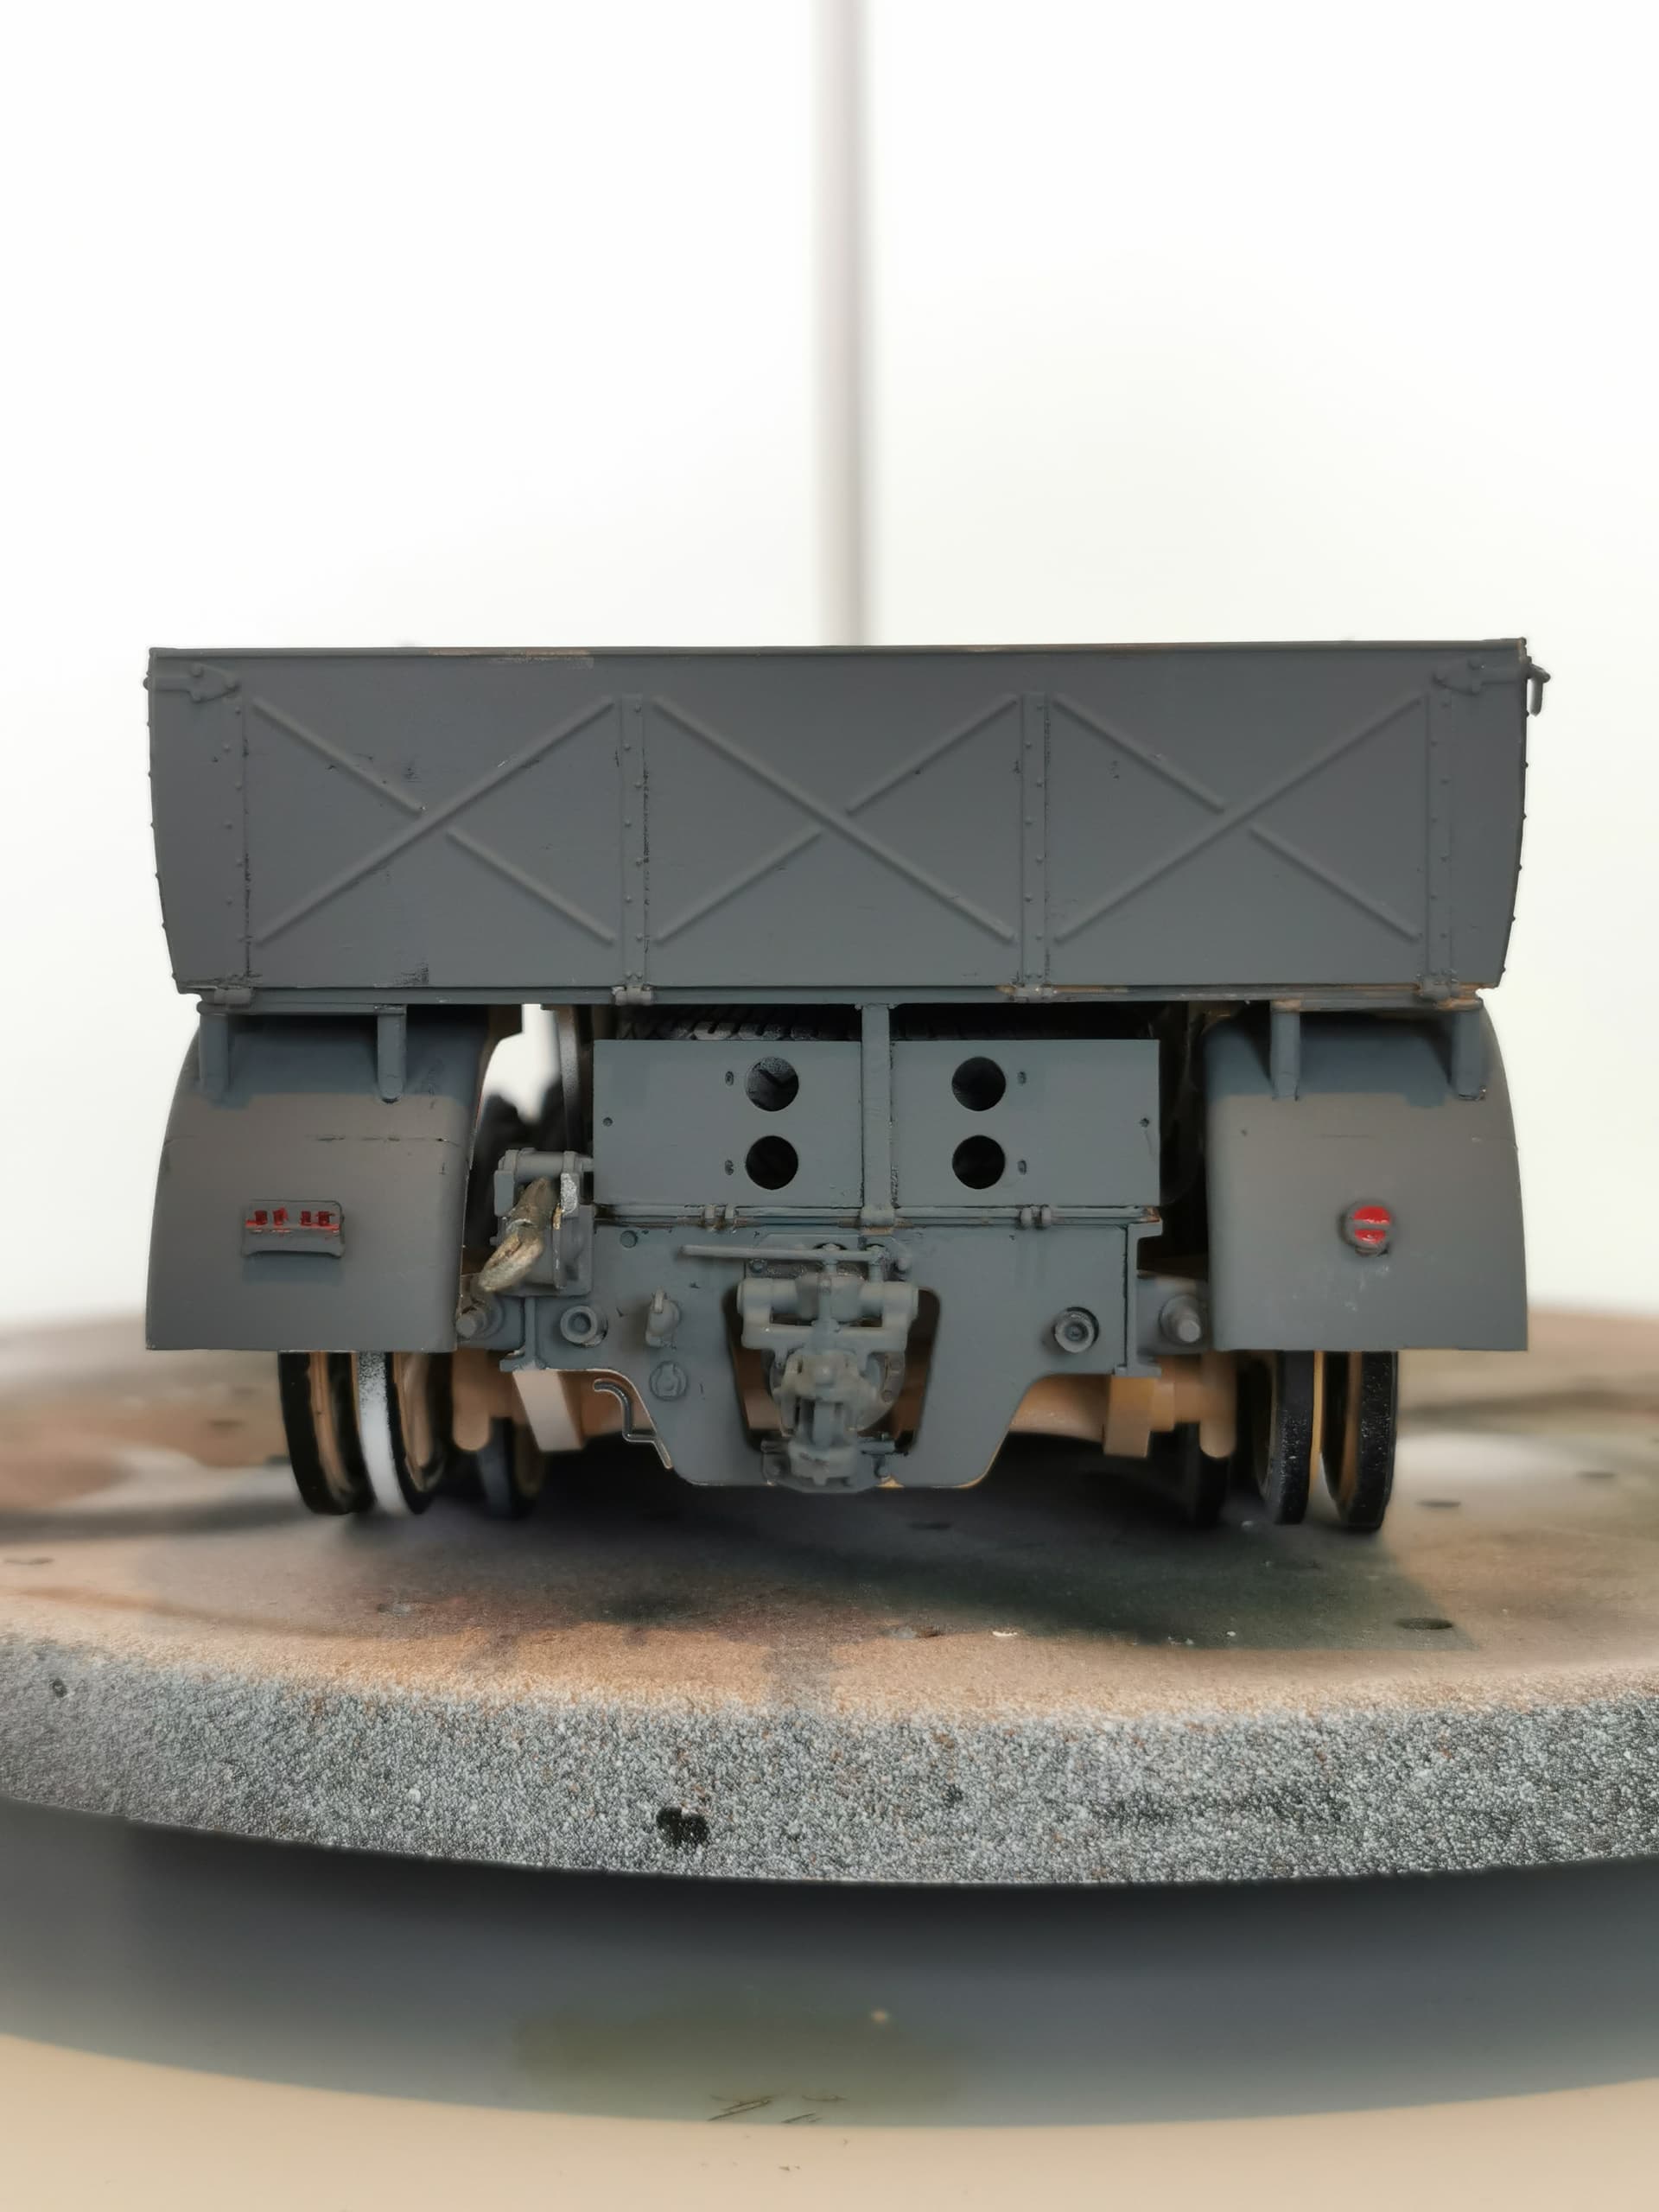
I have worked yesterday on the back of the Famo. I did use Revell enamel color number 77 instead of 78. Because the paint has gone wrong. It was like some sort of syrup or so. Not very liquid anymore. Didn’t have another paint brand with the same color or something that looked enough like it. So decided to use that color instead. I’m not going to repaint the whole model, because then I never get finished with the project. And I really want to move on to the next project. Start fresh. It will be the Jagdpanther kit I got from Italeri. And studies on the subject have already started. But it takes a very long time, lot’s of stuff to read about it. First book I’m reading now is the trackstory book downloaded on PDF Drive.
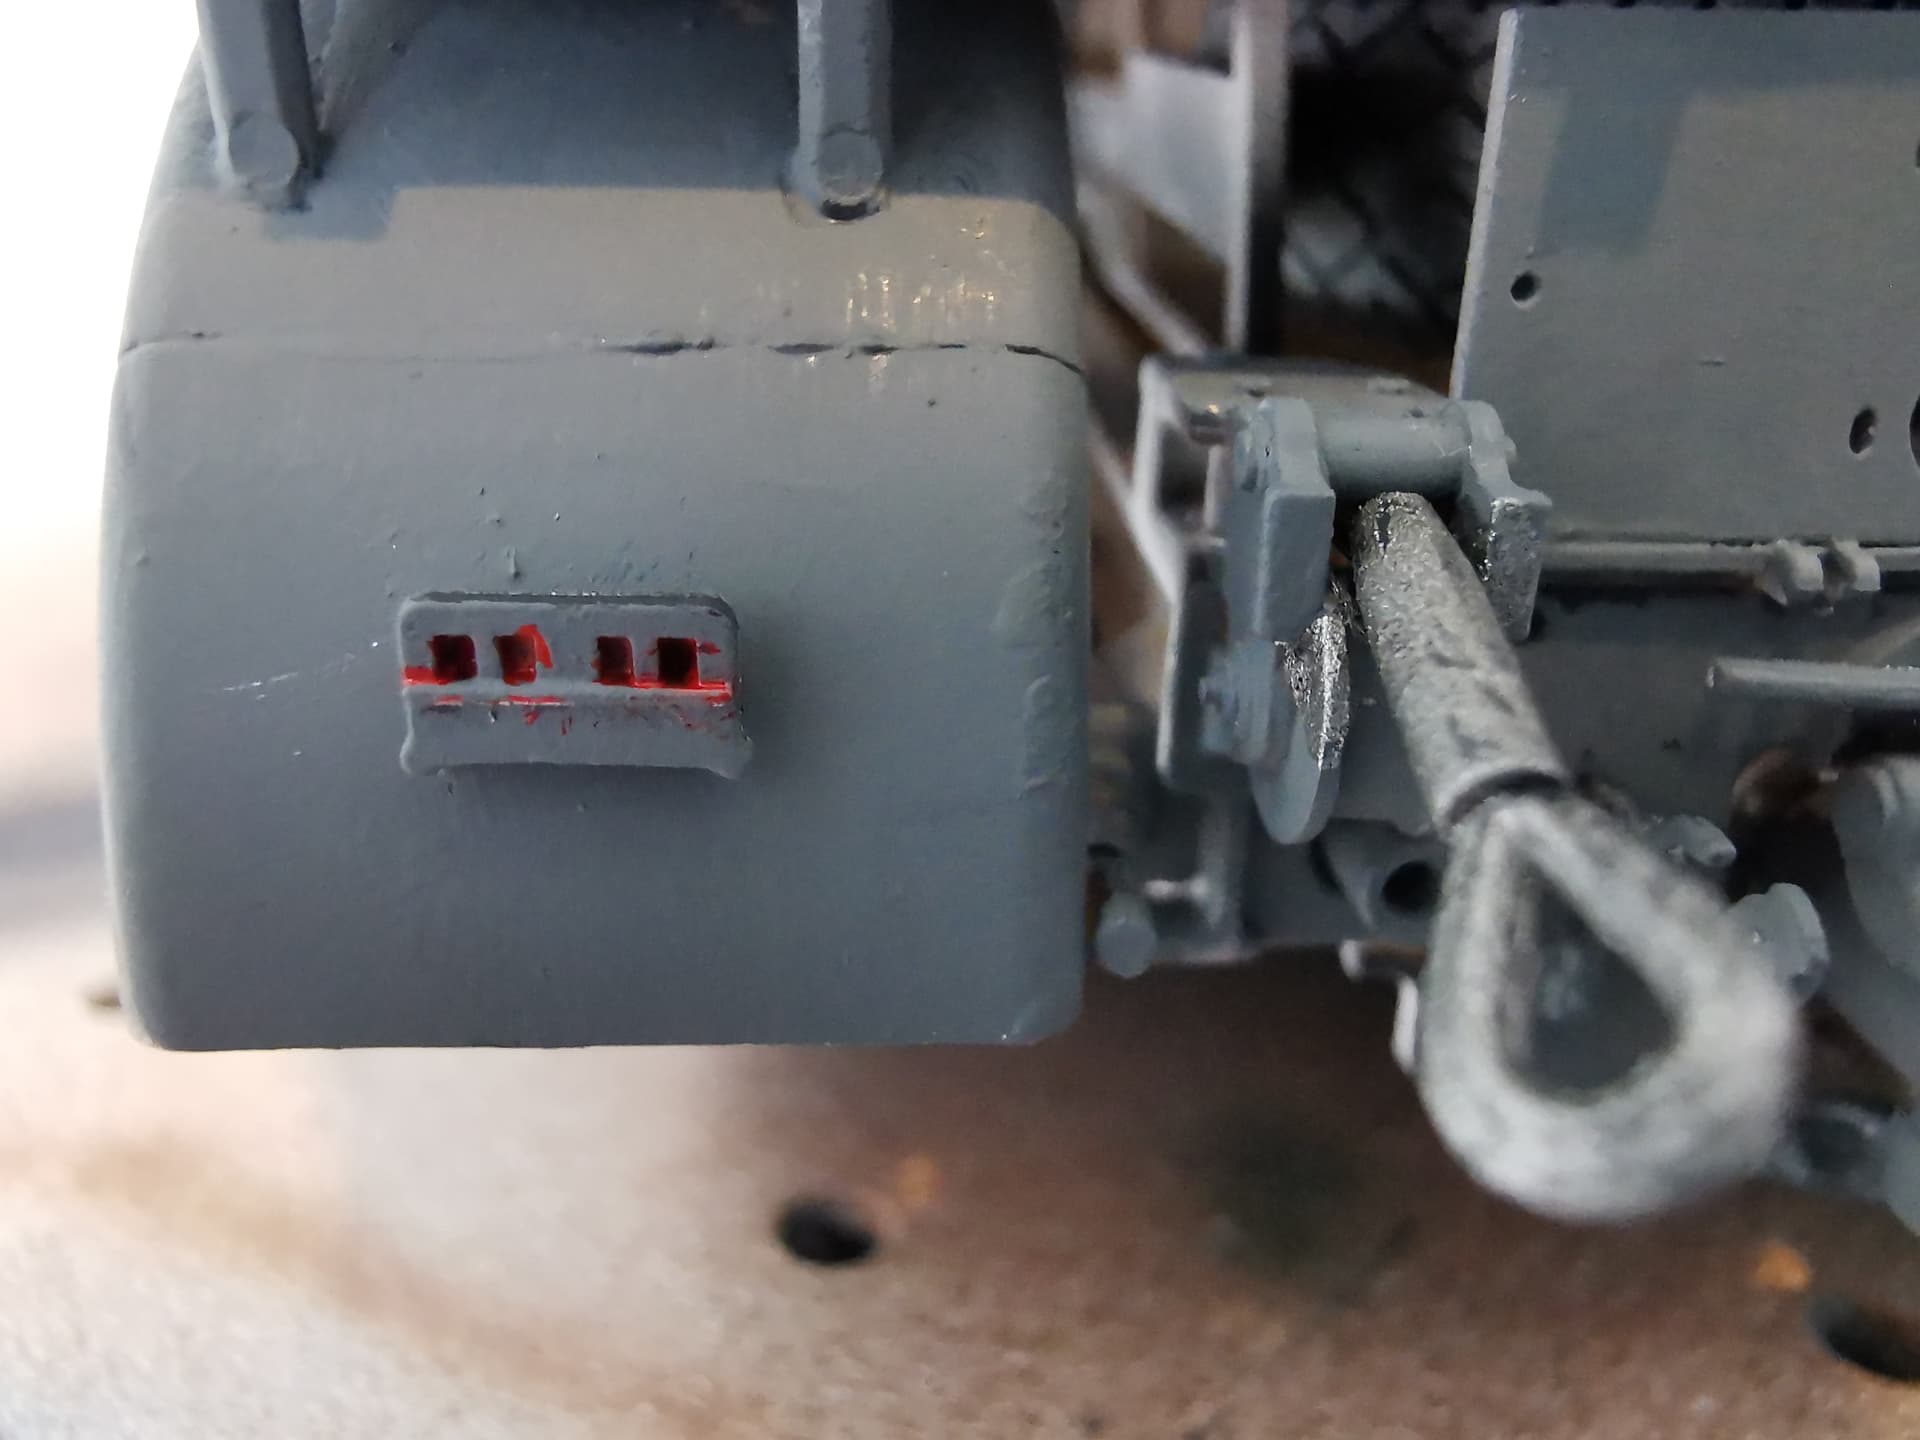
A close up shot with the Super Macro function on my Huawei P30 Pro smartphone of the convoy light at the back of the vehicle. On the left mudguard. First painted with the tiniest figure painting brush I had availlable the red in the holes which represents the lights and then with a slightly bigger brushes painted the number 77 on the spots where needed. It was very time consuming to paint the back like this, because there were hard to reach places with my brushes. And most brushes got beaten up. So, needing to buy new brushes. On which I will start research today as well.
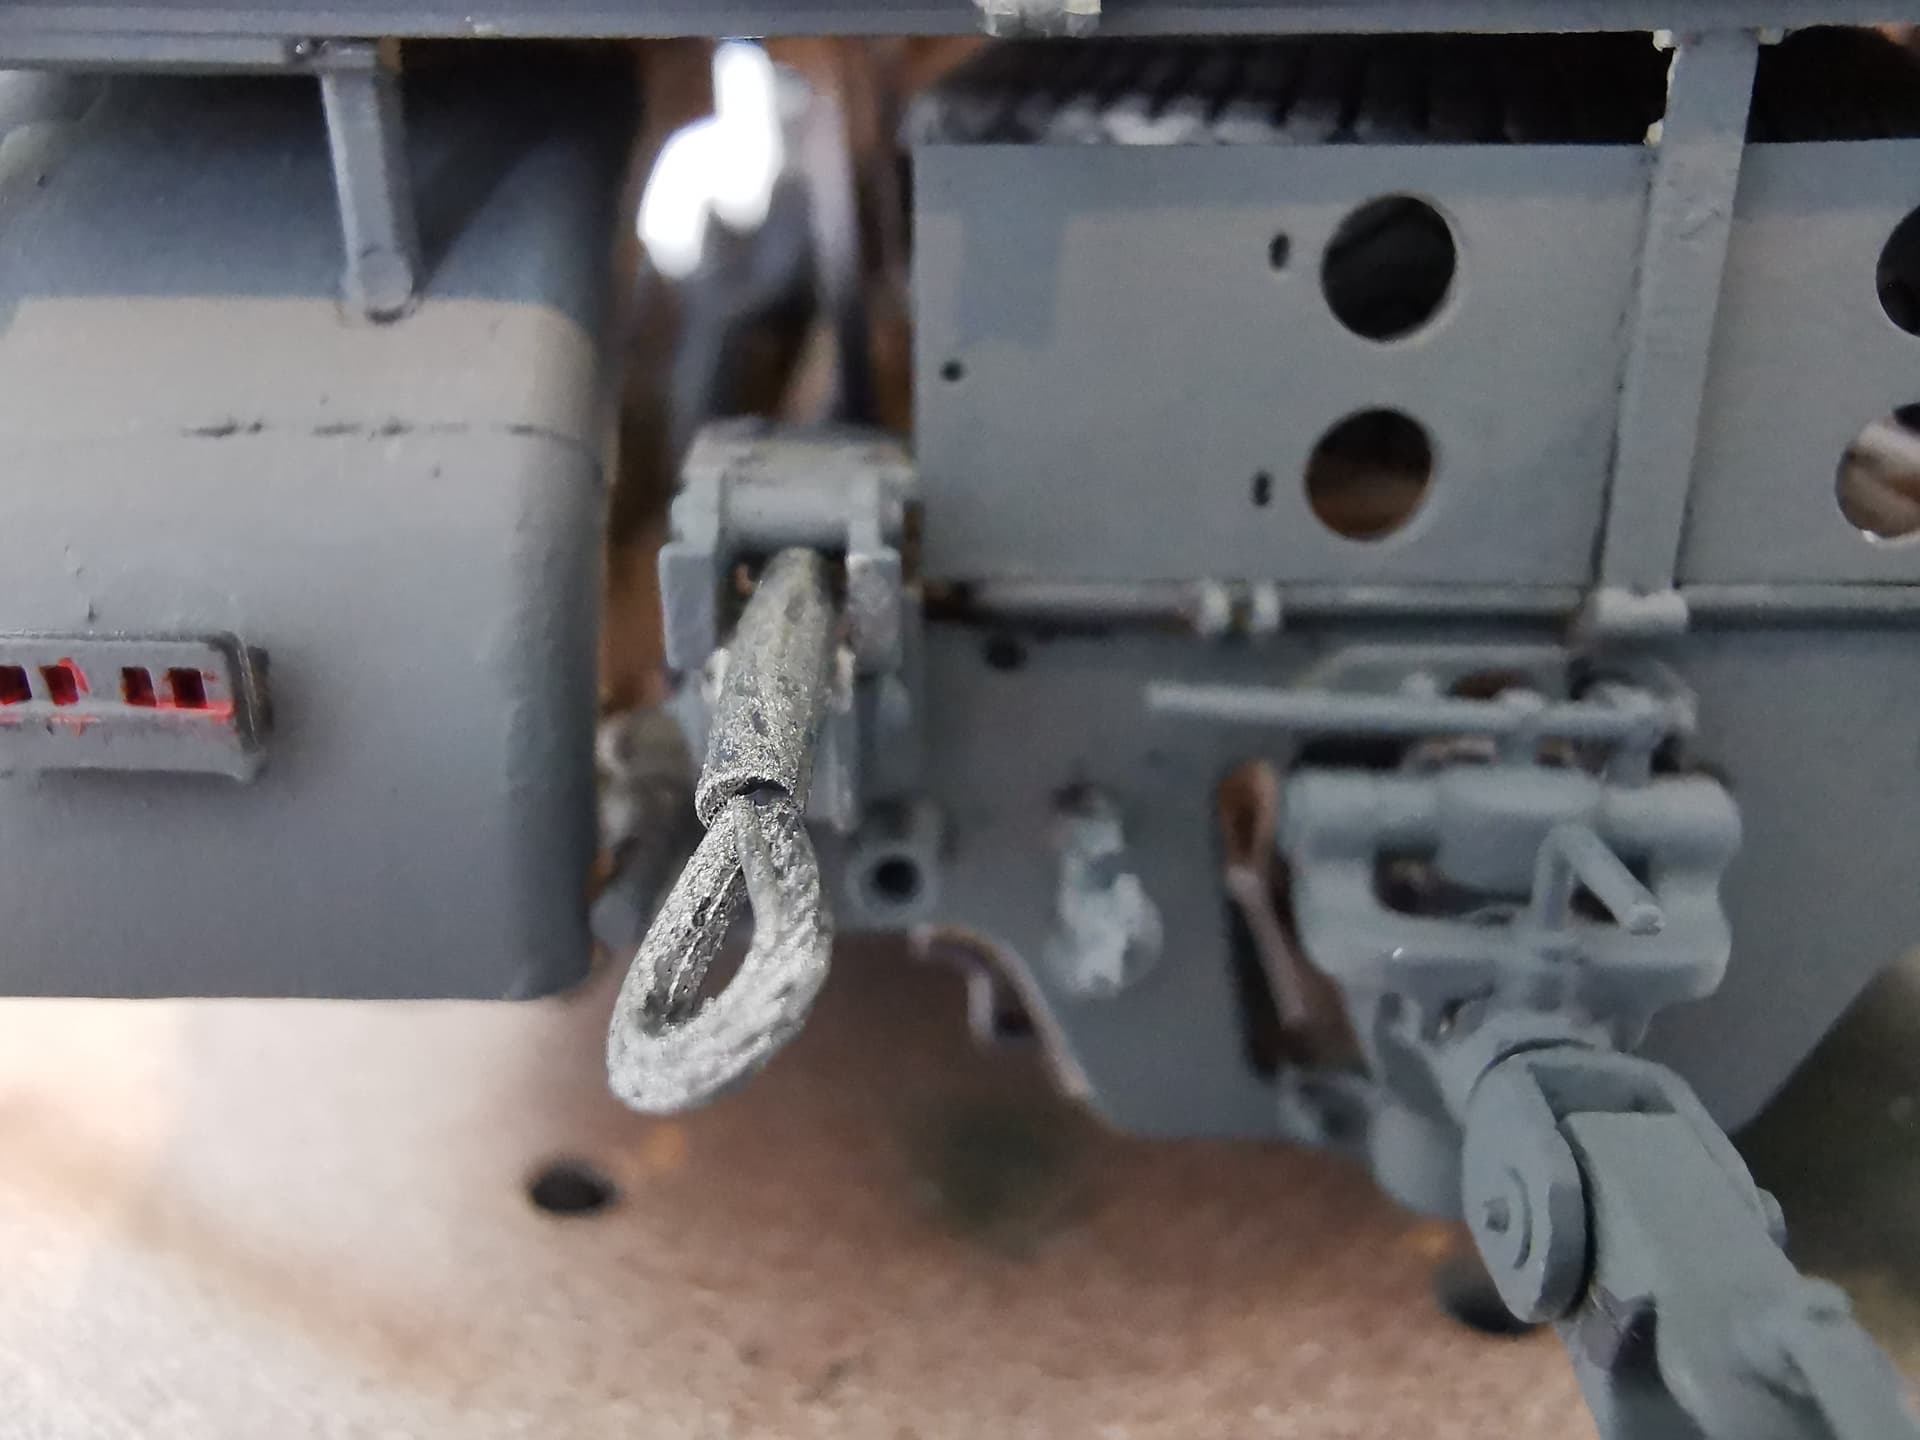
A close up view of the eye of the cable of the electric winch at the back. Wasn’t easy painting this detail. But I’m finding it good enough. Want to move on slowly but steadily. Before paitning it this color according to instructions provided with the kit, it was number 78 from Revell enamel paint.
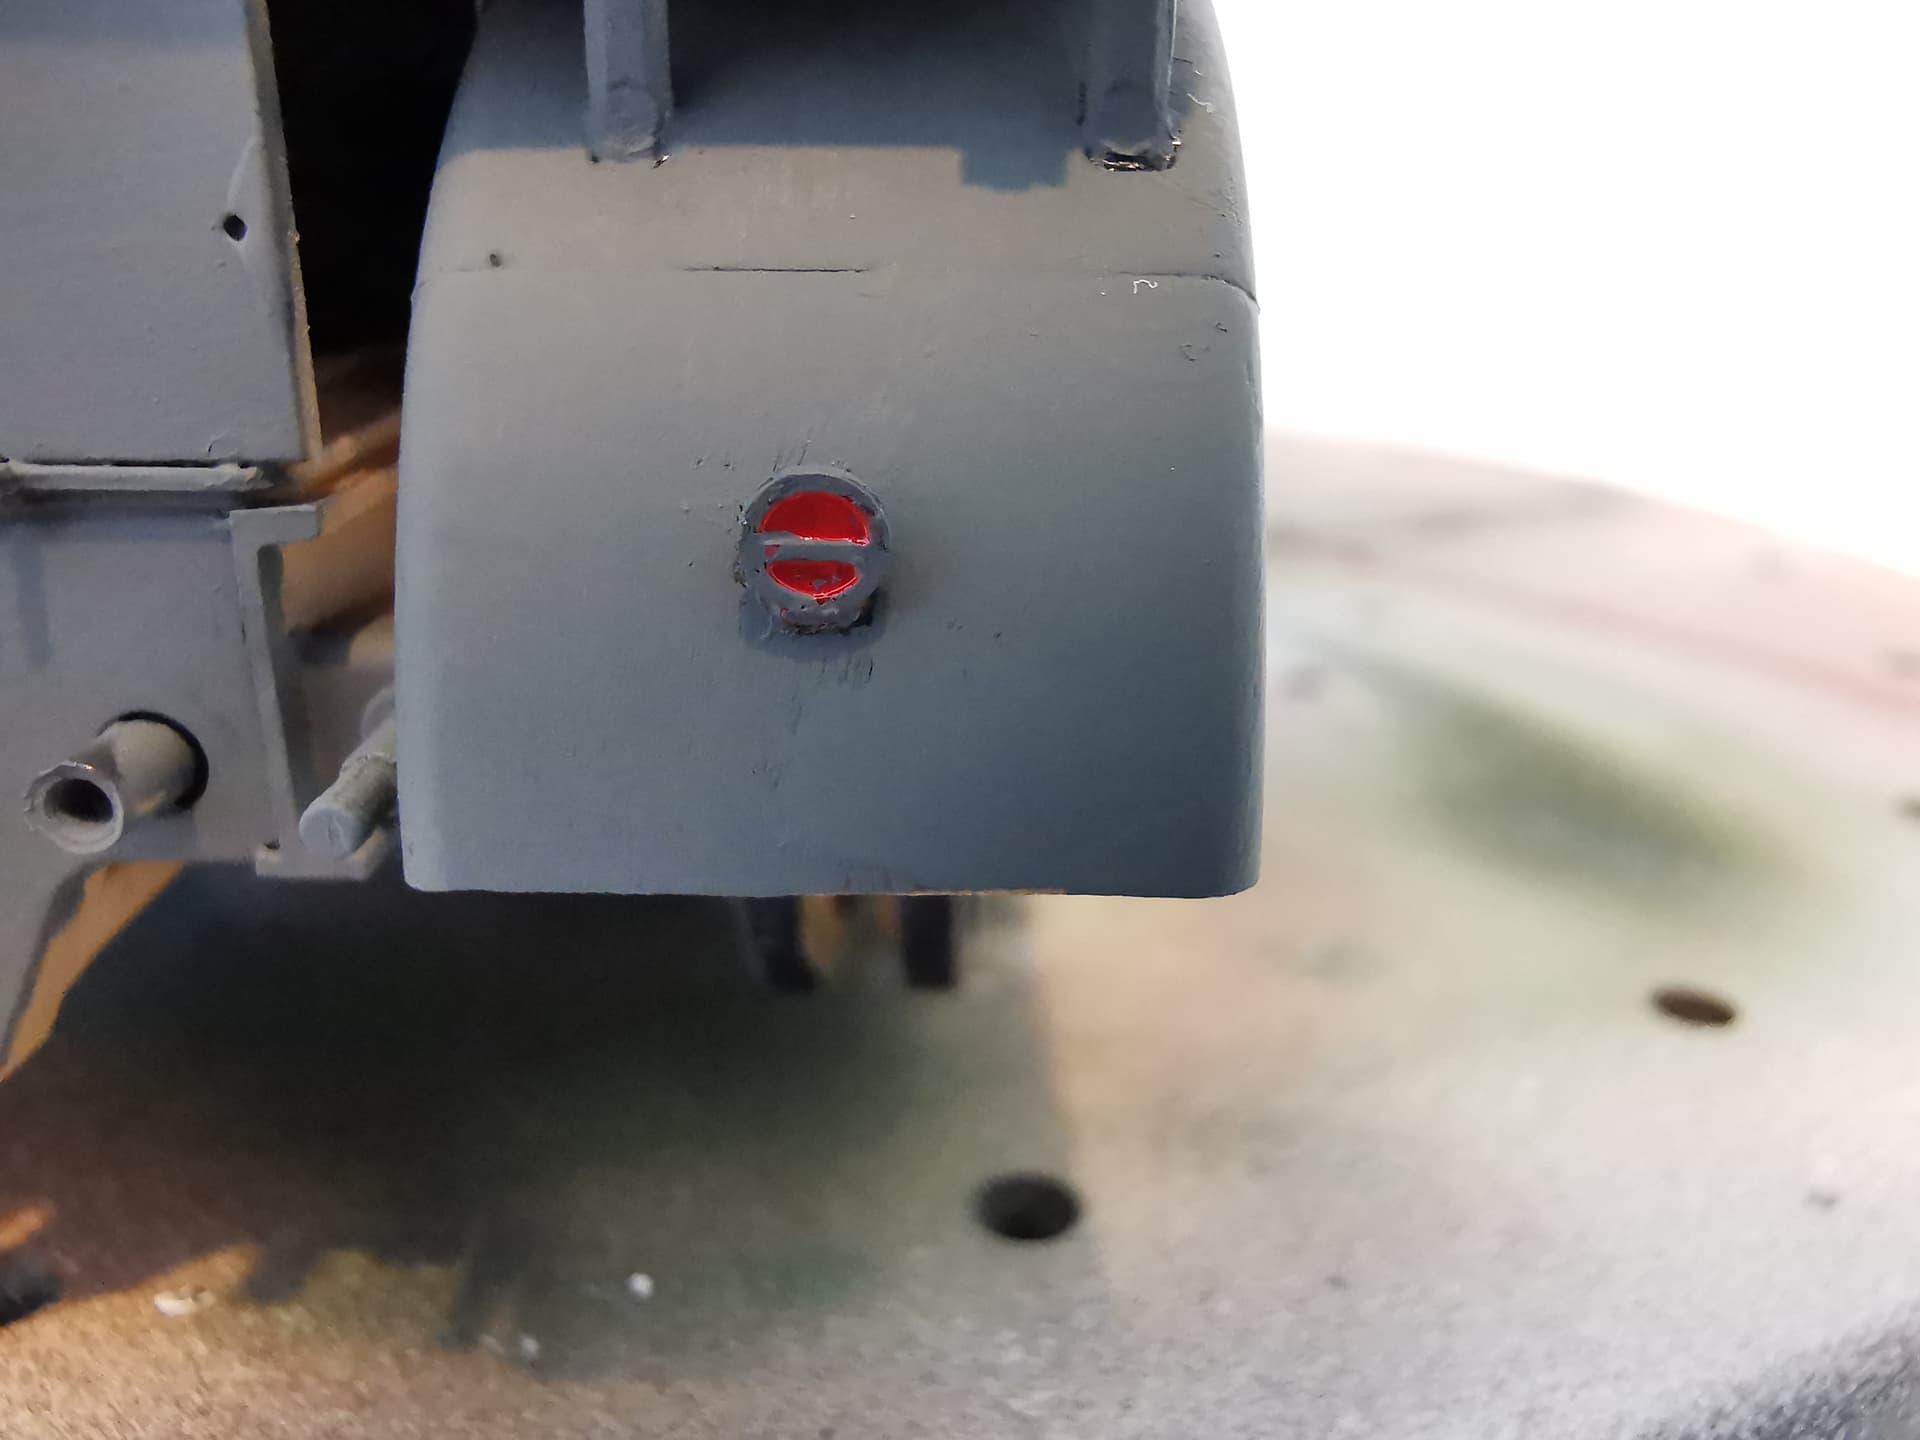
I’m not sure what this is exactly. I suspect it is a rear headlight of some kind. But also painted the red on first. And then the 77 color.
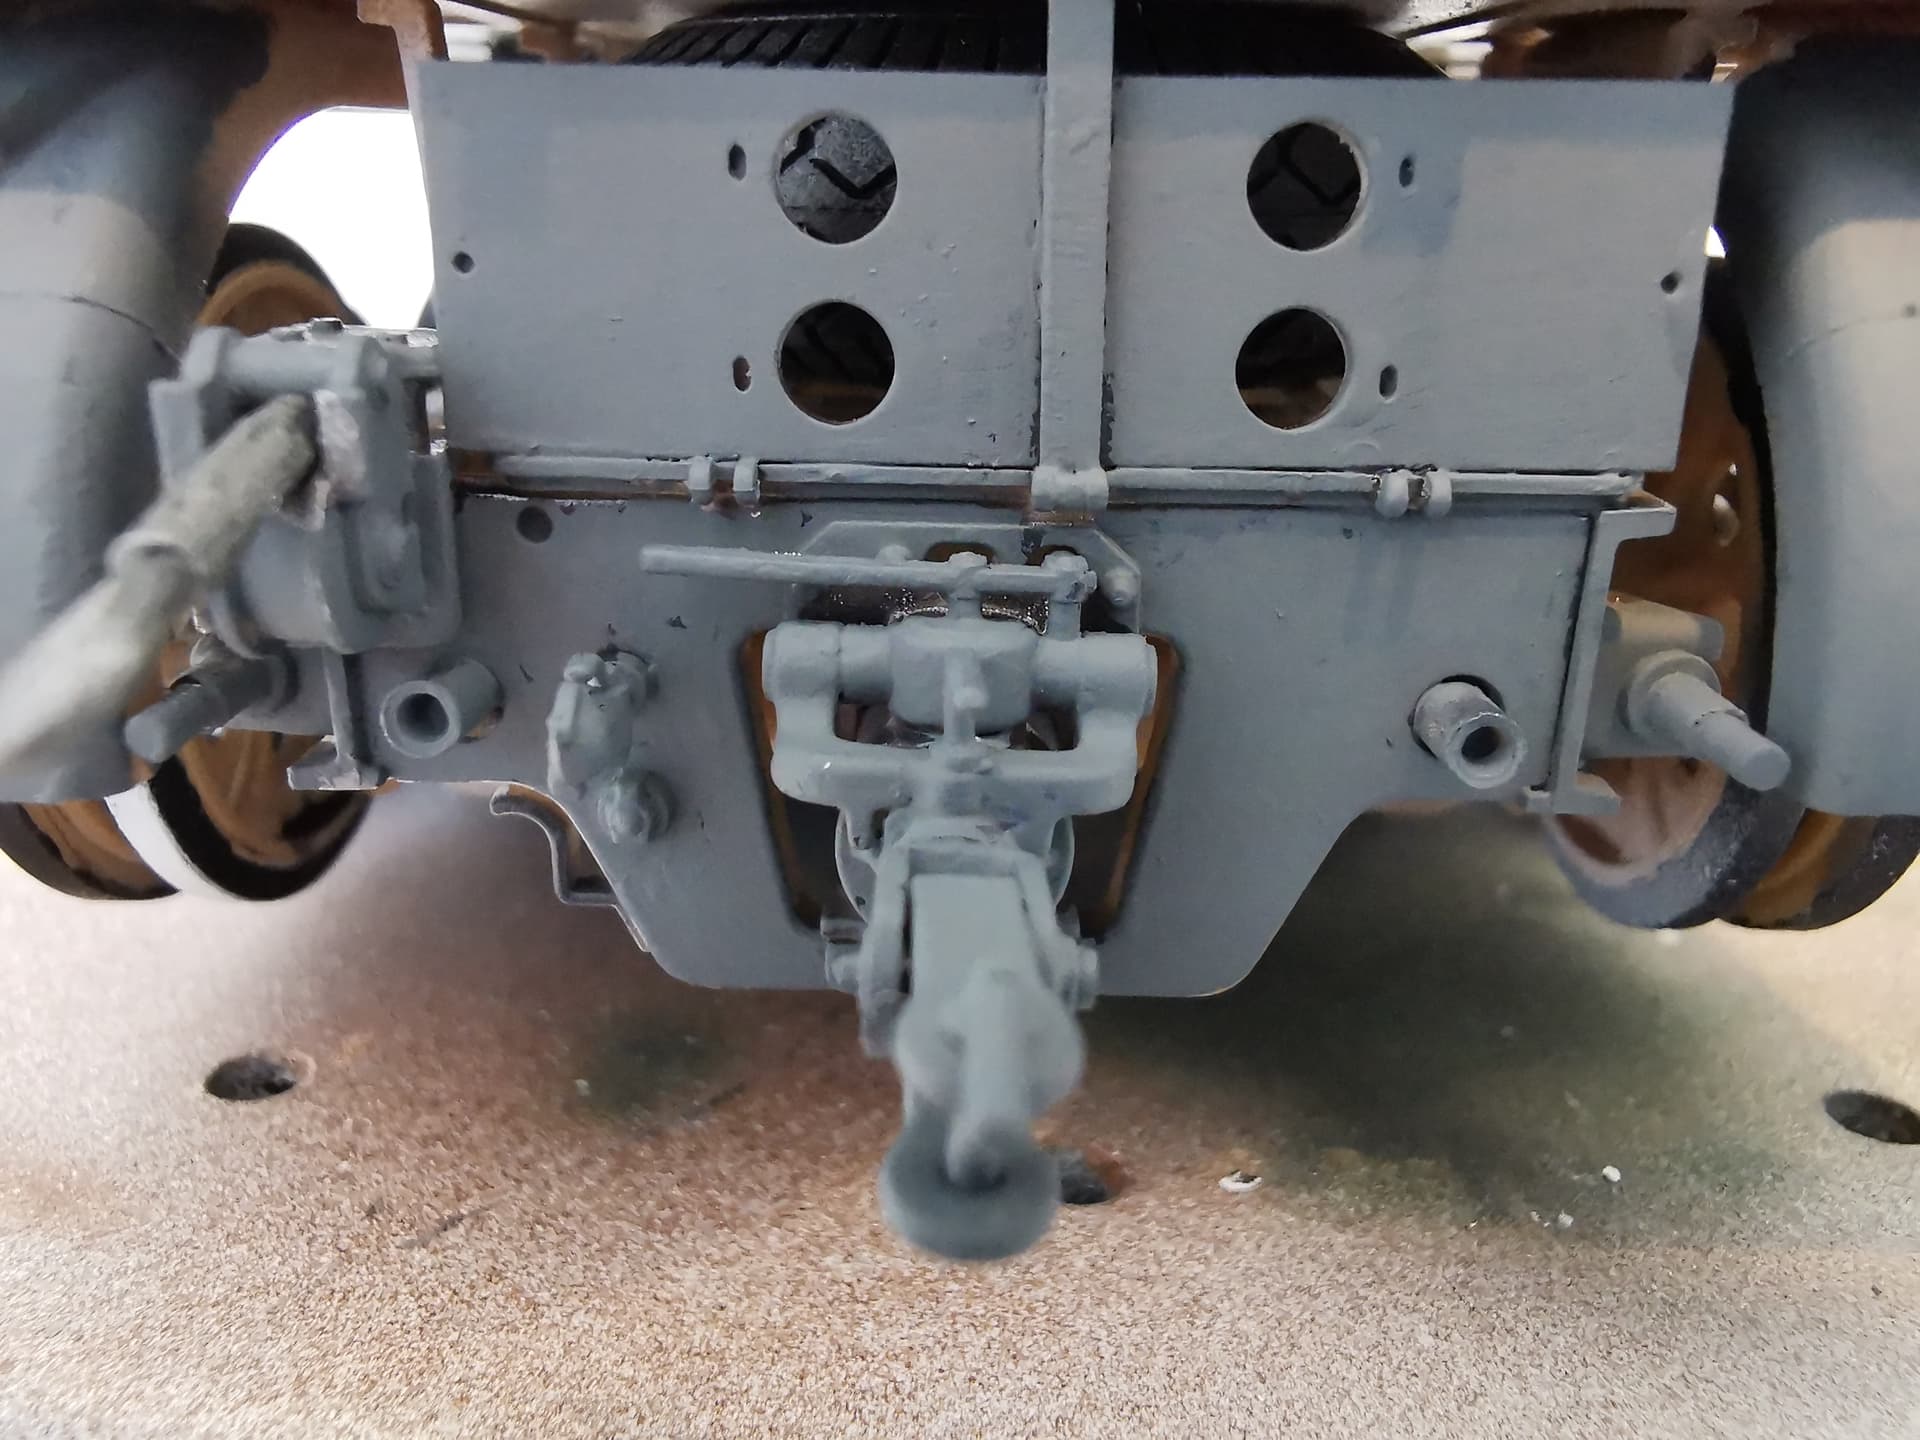
And last but not least a close up of the coupling. Fully painted. I didn’t glue the pin in place, because if I want to let the Famo tow something. I’m still able to do that later on.
And these are the photo’s of the progress made yesterday on the project. Next Saturday will probably the top view of the Famo be improved. Tracks are next and to finish the project the figures. And that would be the end of the longest lasting model making project in my entire model making life. The decals will also be put on last with the varnishes to prepare for it and finish it.