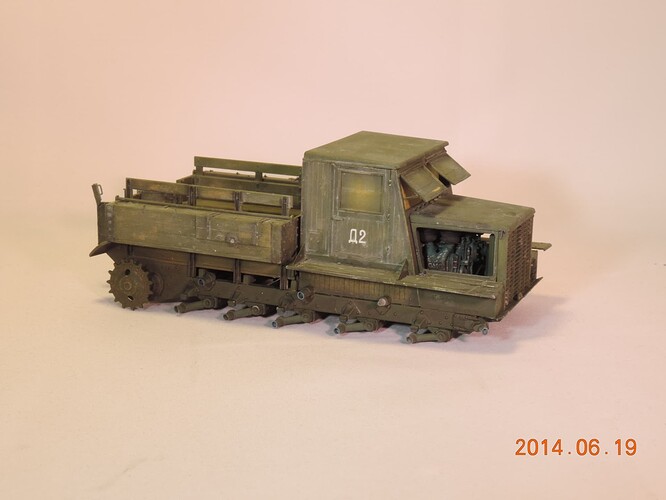
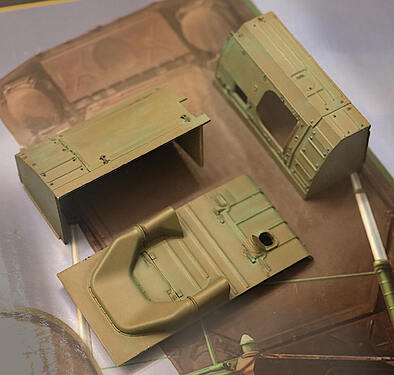
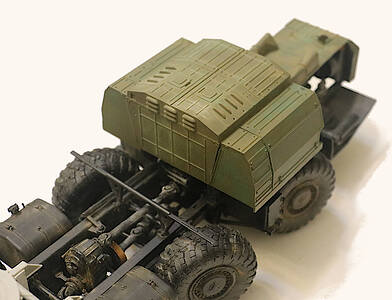
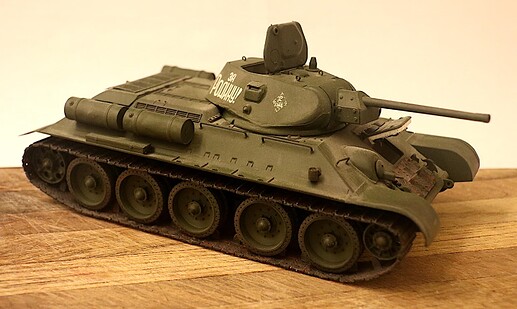
I have an early version, but it differs only in rollers (sort of).
It’s been a long time since I did it, I don’t really remember. But there were no problems and doubts with the color scheme. The only thing is, I made the engine more to the correct American color scheme. Well, I attached the letters (not quite technically correct, but historically correct).
From personal feelings: at the very beginning of the assembly, it is possible (provided by the instructions) to make the torsion bars work. Nothing complicated, but requires increased accuracy. Later it turns out that they do not withstand the entire model in the assembly and completely sag. Then I had to glue everything motionless. I have read that others are having this problem as well.
I remember tormented with the headlight. She is behind bars. You can’t cover it with a mask. And there is a risk to paint over when painting the cab. That’s what happened to me.
I made the rear door of the body in the open position and at the slightest touch it fell off from me.
“Functional” torsion bar suspension in a plastic kit is a gimmick.
I glue them fixed from the beginning, I don’t waste time on making it work and then
have to glue it solid when the build is almost finished.
People swear a little at the tracks: “The “body” of the tracks is not fragile, either the connecting “pins” break off, or the wall of the reciprocal hole breaks. It happened to me with about every 10th track.
I put them aside, and then glued them into the lower straight section of the caterpillar."
The non-scale thickness of the rollers is noted. But don’t fix it.
And I give a link to the finished project, there in the middle (between the pictures) there is a specific recipe for 4BO paint. Everything, incl. I find the set enjoyable to build, but not for beginners.
Can be made workable if there is an intention to make a diorama with an uneven surface.
Workable or made fixed in a flexed position 
Thank you for all the additional information, Salekhard. It helps a lot.
I will build mine parked in a field on level ground to avoid dealing with conforming road wheels, torsion bars, and tracks to uneven terrain. My hope is to model a decent engine compartment and interior, good enough to leave the bonnet and a door open. Since I lack the material for a cargo load, I intend to put the cover over the bed. Crazy stuff can wait until I get more experience. 
Good luck with the build!
If it does not work out with an awning, then you can always leave the body open. What can be in the back of an artillery tractor? Of course the shells in the boxes. And you have them in your package.
Below are some materials on the engine and cabin interior. Maybe someone will come in handy.
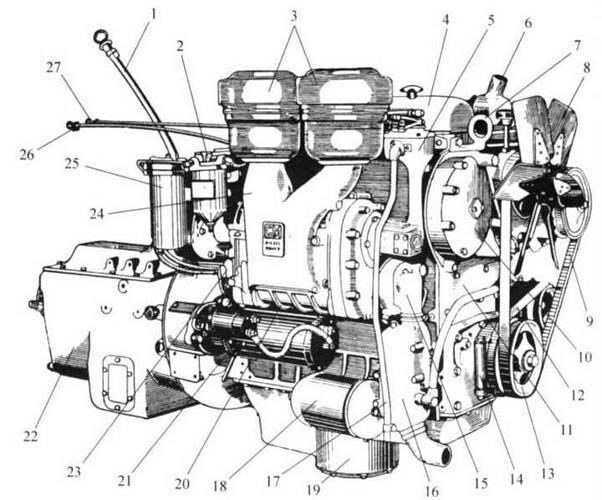
Engine GMC-4-71 (right side view):
1 - gearshift lever; 2 - secondary fuel filter; 3 - air cleaners; 4 - block head cover; 5 - speed controller; 6 - thermostat housing; 7 - front eye; c - fan; 9 - fan drive belt; 10 - counterweight cover; 11 — block crankcase end plate; 12 - generator drive belt; 13 - fan pulley; 14 - trunnion; 15 - water pump; 16 - oil-water radiator; 17—breather tube; 18 - primary oil filter; 19 - lower half of the crankcase; 20 - pressure pump; 21 - starter; 22 - gearbox; 23 — fuel priming pump; 24 - air supply manifold; 25 - primary fuel filter; 26 — thrust “Stop” for an urgent stop of the engine; 27 — thrust “Stop” to turn off the fuel supply
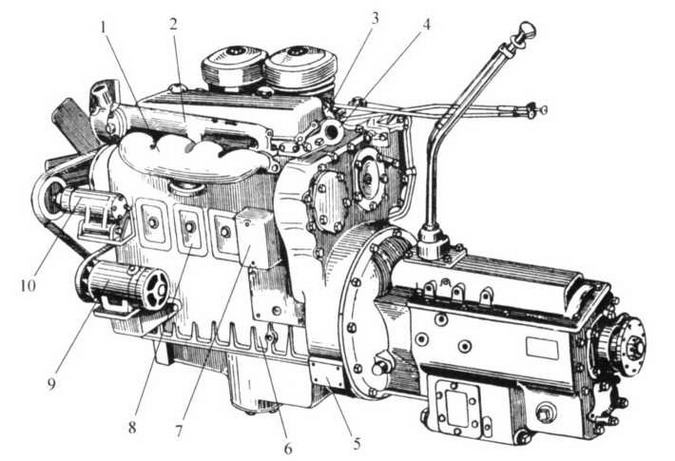
Engine GMC-4-71 (view from the left side):
1 - exhaust manifold; 2 - water collector; 3 — the lever of draft to the air damper; 4 - rear eye; 5 - flywheel housing; 6 - crankcase; 7 - starting heater cover; 8 — hatch cover; 9 - generator; 10 - tensioner
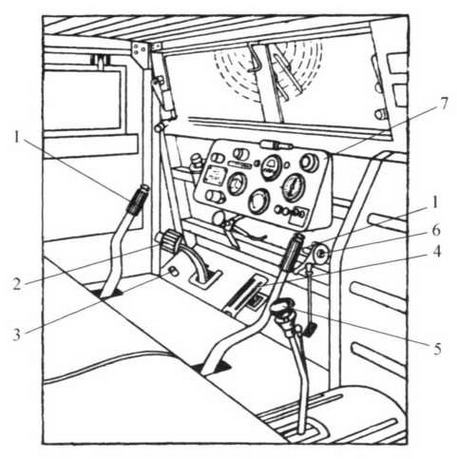
Cabin interior:
1 - steering clutch control levers:
2 - main clutch pedal:
3 - starter button:
4 - fuel pedal:
5 - gear lever:
6 - lever for manual control of fuel supply:
7 - instrument panel
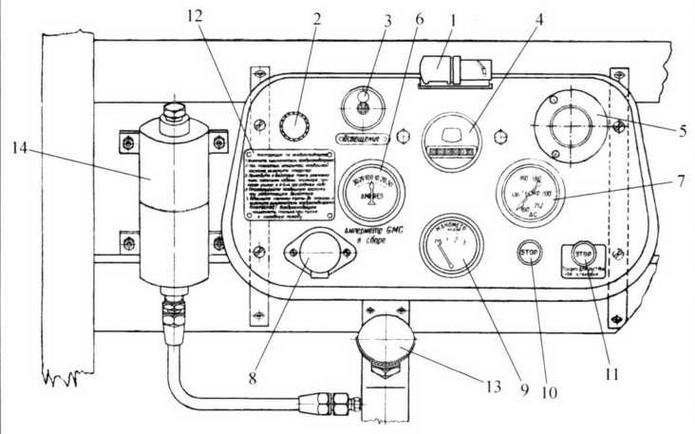
Dashboard:
1 - light bulb for lighting the shield: 2 - air heating switch; 3 - light switch: 4 - speedometer: 5 - signal button: 6 - ammeter: 7 - aerothermometer: 8 - socket: 9 - pressure gauge: 10 - “Stop” button for turning off the fuel supply: 11 - “Stop” button for emergency stop: 12 - instructions for air heating: 13 - manual pump for supplying fuel to the heater: 14 - tank
Whoa! Thank you very much for those super useful diagrams, Salekhard!
Since I cannot really paint in the evenings (or in the middle of the night), I started work on the Ya-12 two days ago. As I built the engine, I conjectured as to the function of all the various parts. To my credit, based on those diagrams, I was about 70% correct. 
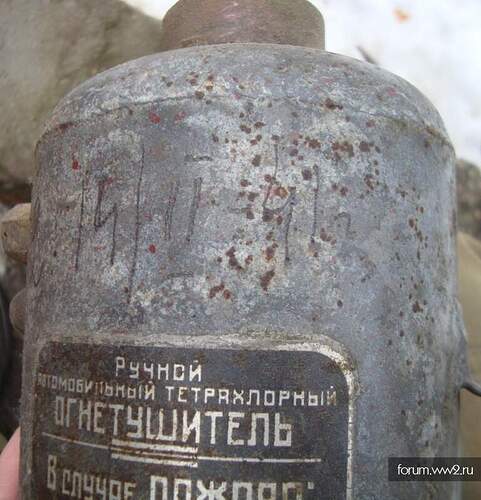
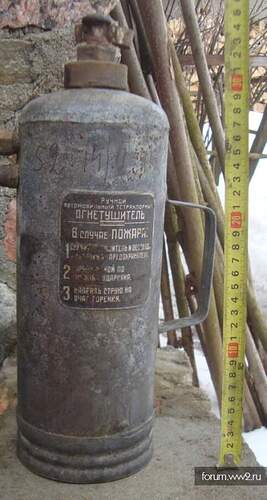
Sadly, the model does not include a decal for the instrument panel. The fire extinguisher probably needs a label as well. If I can get the printer working (it clogs, sort of like my airbrush), I will need to make custom decals for those things in Inkscape.
I was interested in your desire to make a fire extinguisher marking. I dug a little on the Russian Internet. Plus, it so happened, I went to the fire museum in a neighboring city (almost 500 km one way).
Soviet tradition dictates that fire equipment should be painted red.
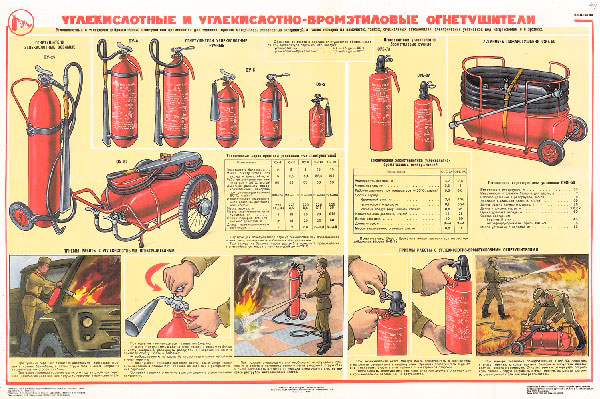
I always thought that this tradition is the same age as the Soviet regime. It turned out that no. Before the war, fire extinguishers could be unpainted or painted black. One of our marketplaces is currently selling a fire extinguisher dated 1941 and it is black.
It seems to me that this color is more appropriate for military equipment than red. At the same time, I have no doubt that during the repair or field painting of equipment, the fire extinguisher could also be painted green. Then the plate would have been painted over.
Salekhard, that was above and beyond and I am truly grateful for your help.
Over the next few days, I will undertake to draw that placard in Inkscape and turn it into a decal.
Yuri, what paint/color did you use to paint your tractor 4B0 green? I really like the color.
It was a very long time ago, I don’t remember. And I’m even afraid to guess, so as not to deceive you. In any case, this is not a pure color, but the result of a consistent application of filters and washes. And at least two coats of paint with separation hairspray.
Sorry.
I talk a lot around this site about using pigments to “color shift” as well as to weather.
I know this is a Cold War/Modern Russian reference shown here but still I wanted a somewhat aged, starting to fade look.
Tamiya has A LOT of green shades & choices in their Military Spray Can line. I can’t really remember just what green I used here but after that I over sprayed everything with a very dry coat of Tamiya Matte Clear. (TS-80 rattle can)
This rough, dry matte spray gives the pigments something to hunker down into. I actually burnish the pigments into this rough “toothed” surface with a stiff, short bristled brush. No additional setting spray is necessary after that. It would take considerable touching and rubbing to greatly disturb these pigments.*
I think you can see the brown tones as well as the light green “faded” areas created in the base coat of green, all accomplished using “color shifting” pigments.
*This technique, I admit, is not for use on children’s toys or models that will be handled frequently but I think it is safe to say that our models are more likely to end up in display cases rather than on the floor being played with. Besides if they do end up on the floor they won’t last long anyway.
This one below is just one of the many Tamiya military dark greens with just a little bit of pigment “dust” added for an almost “brand new” look.
