Short, Squat and Deadly - 38cm Sehr Schwere Minenwerfer

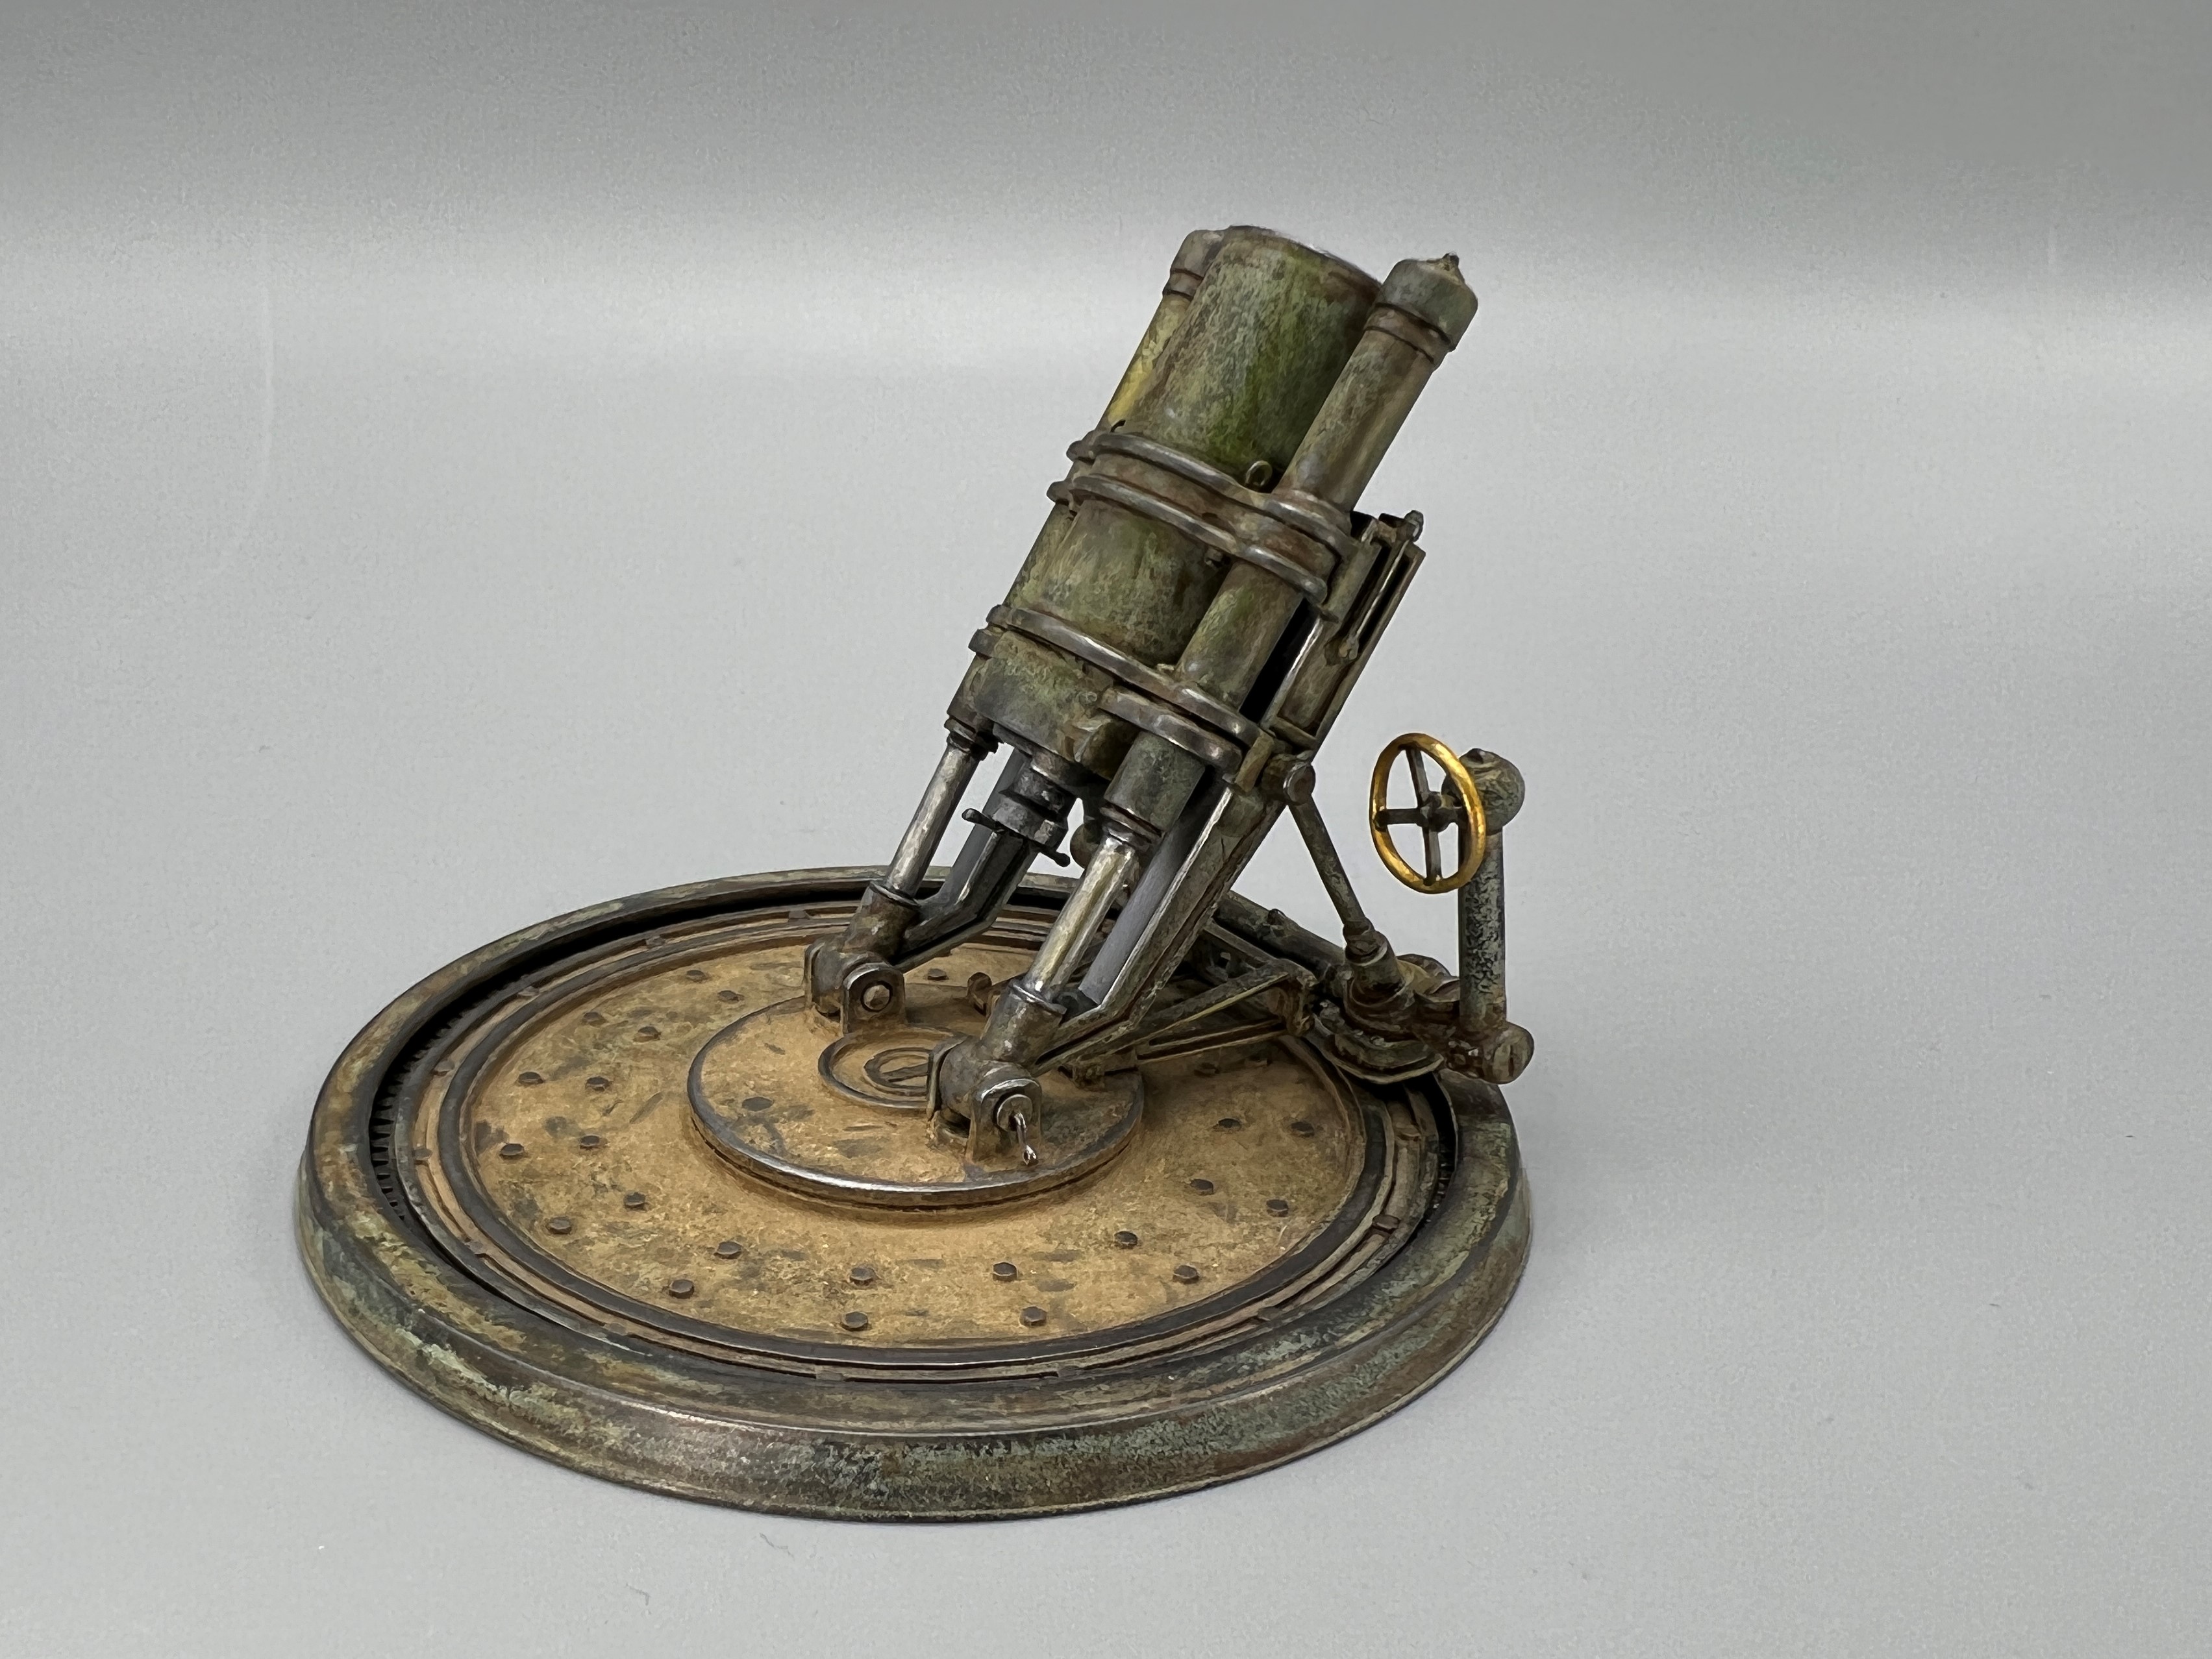
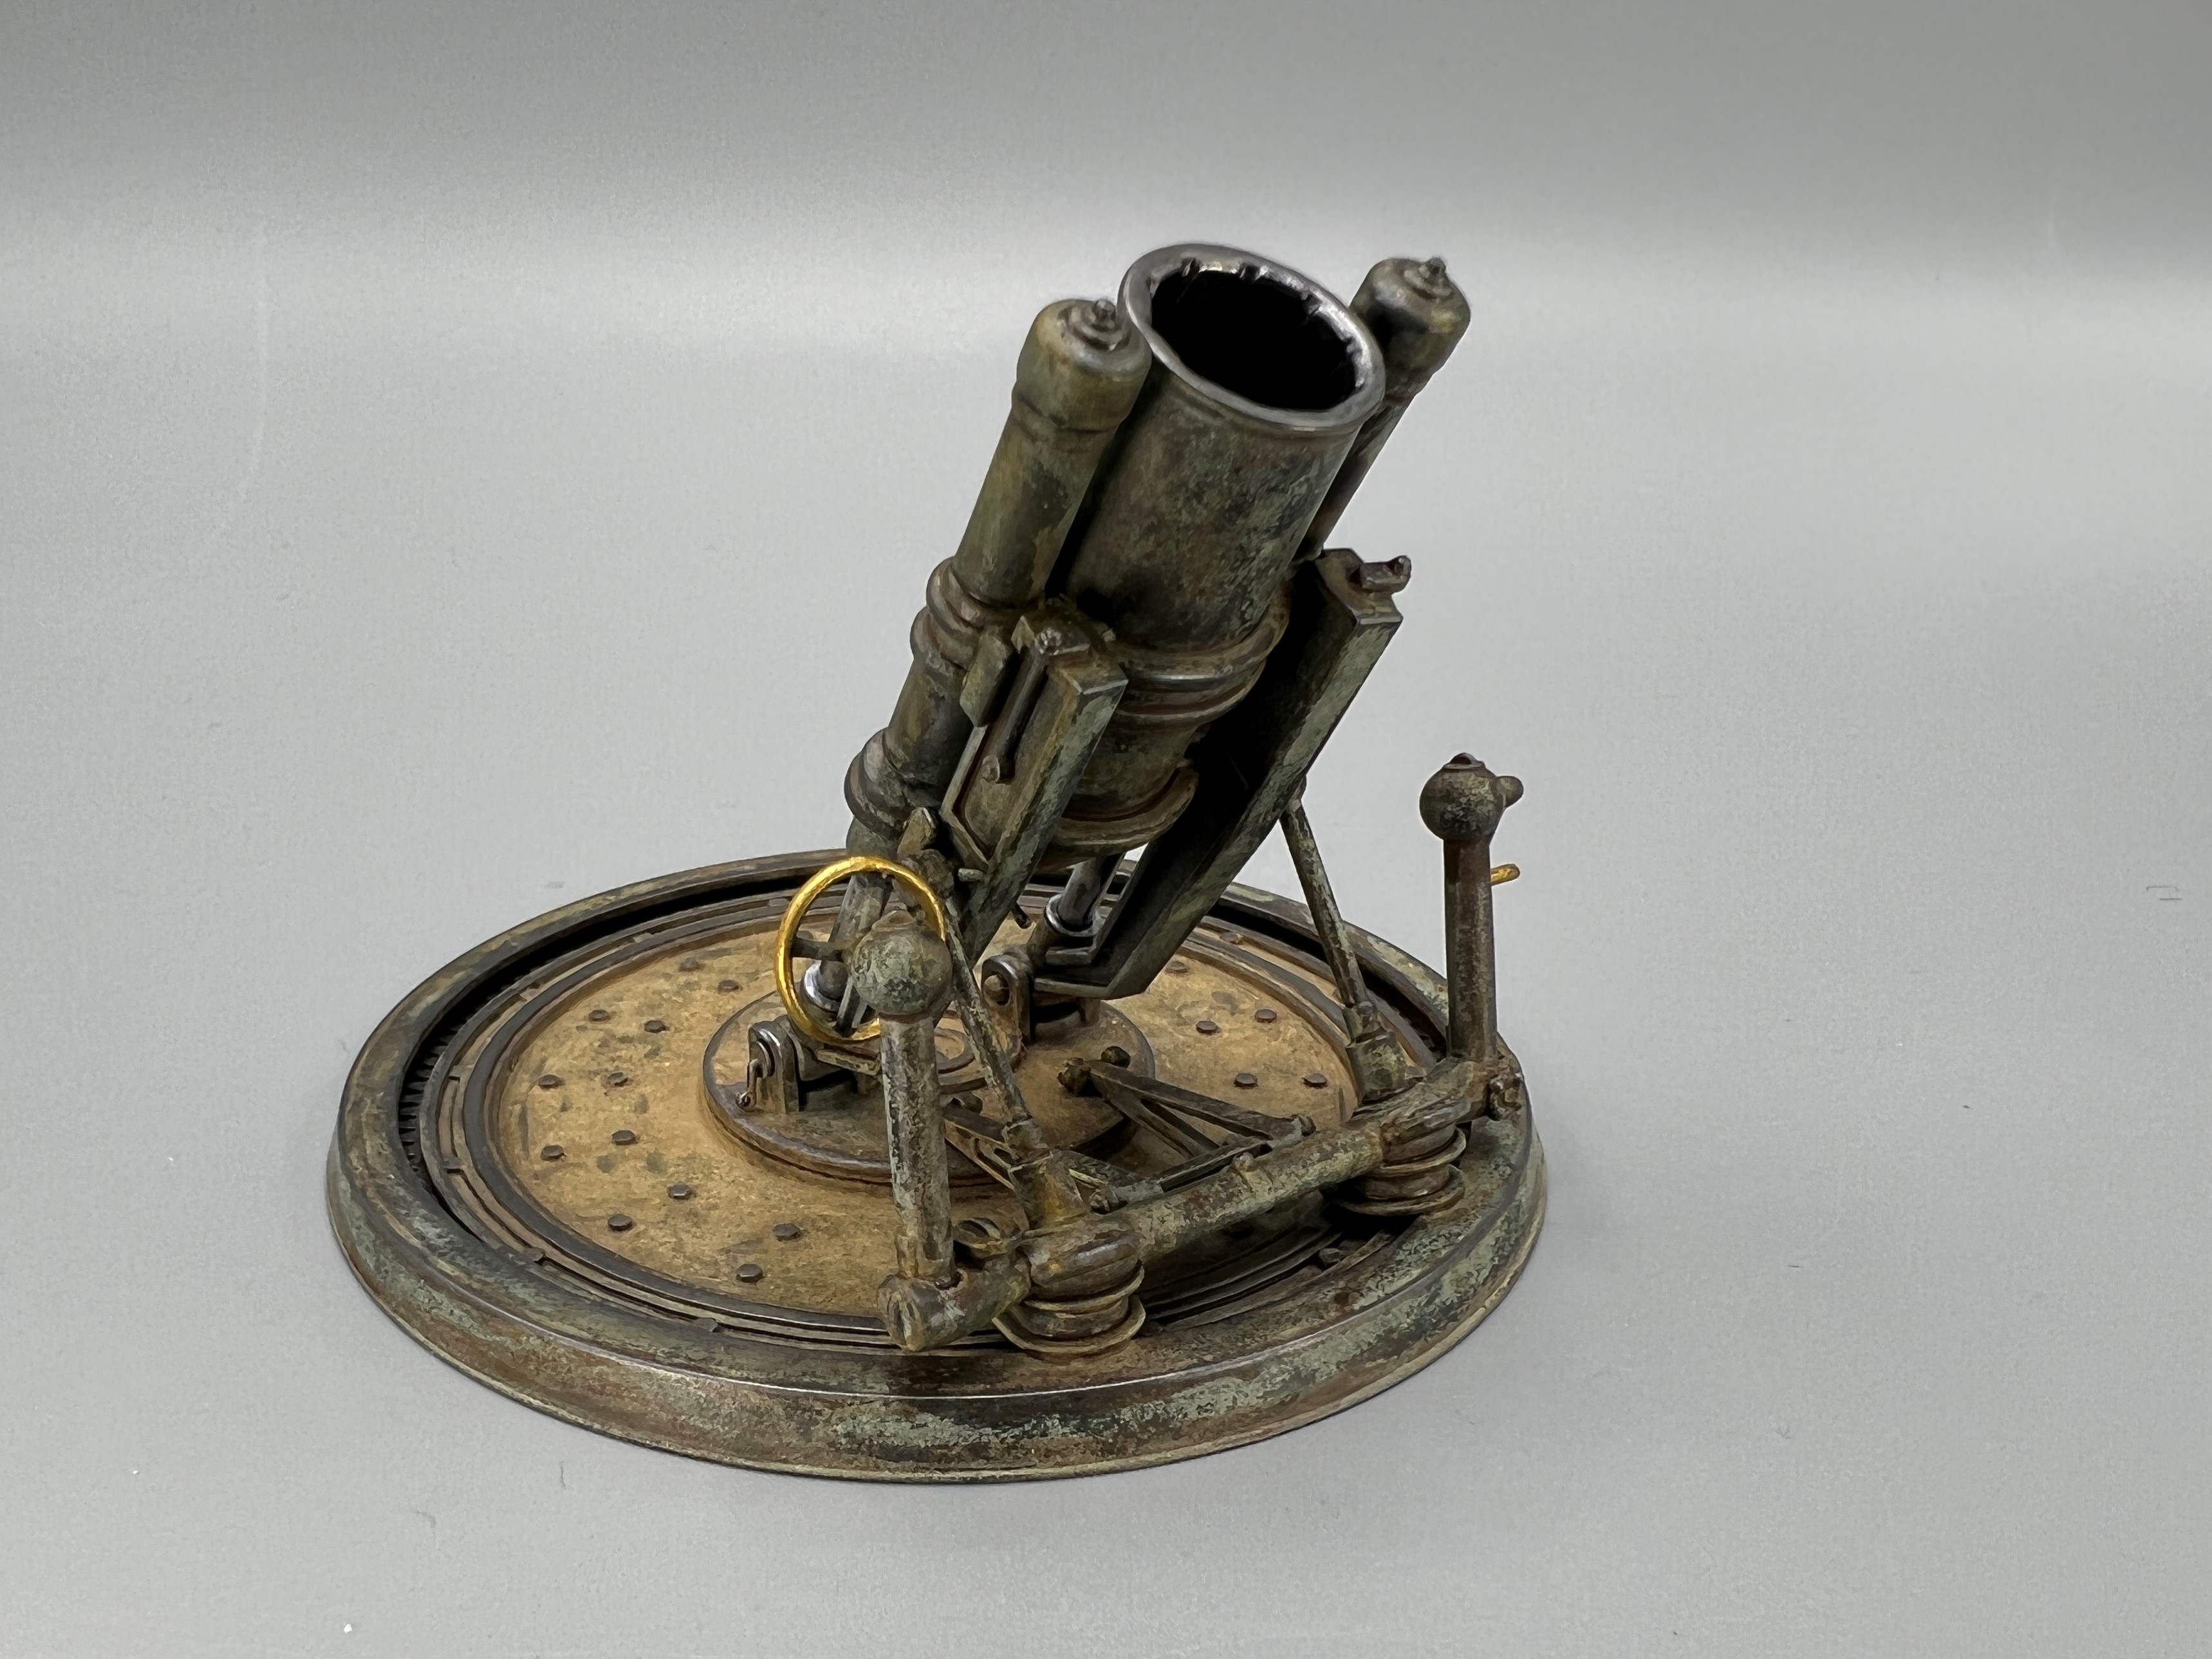
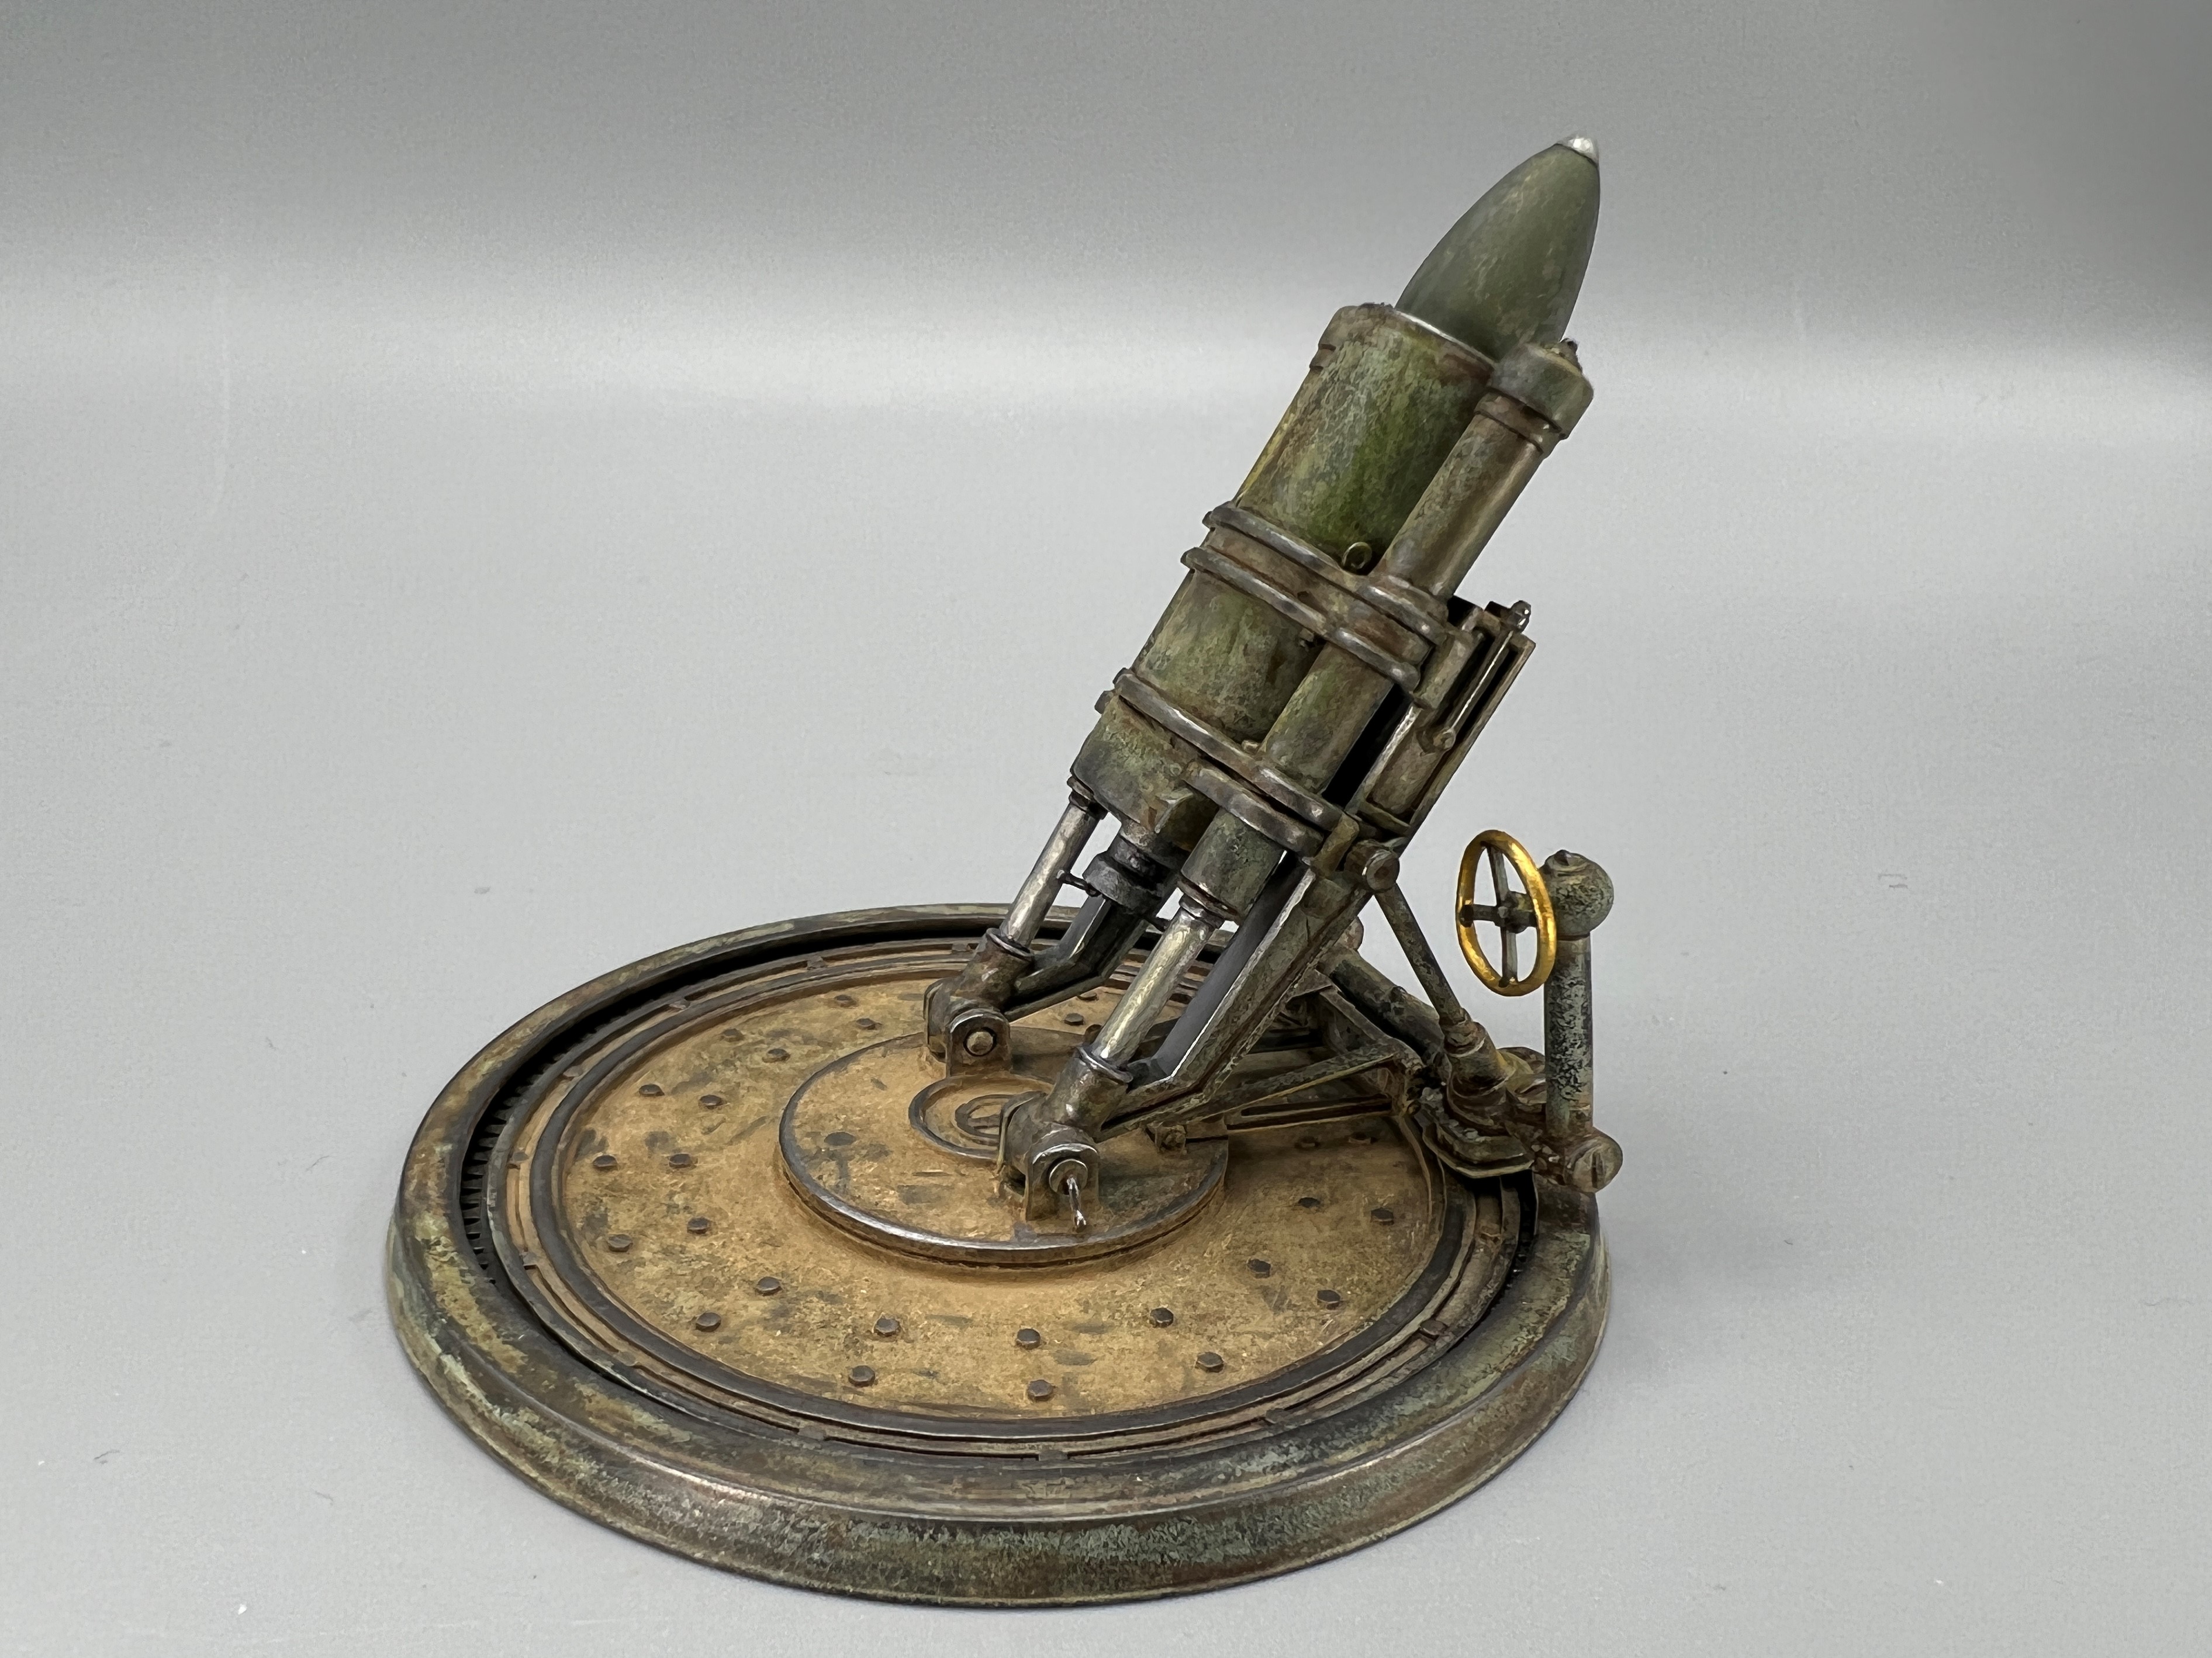
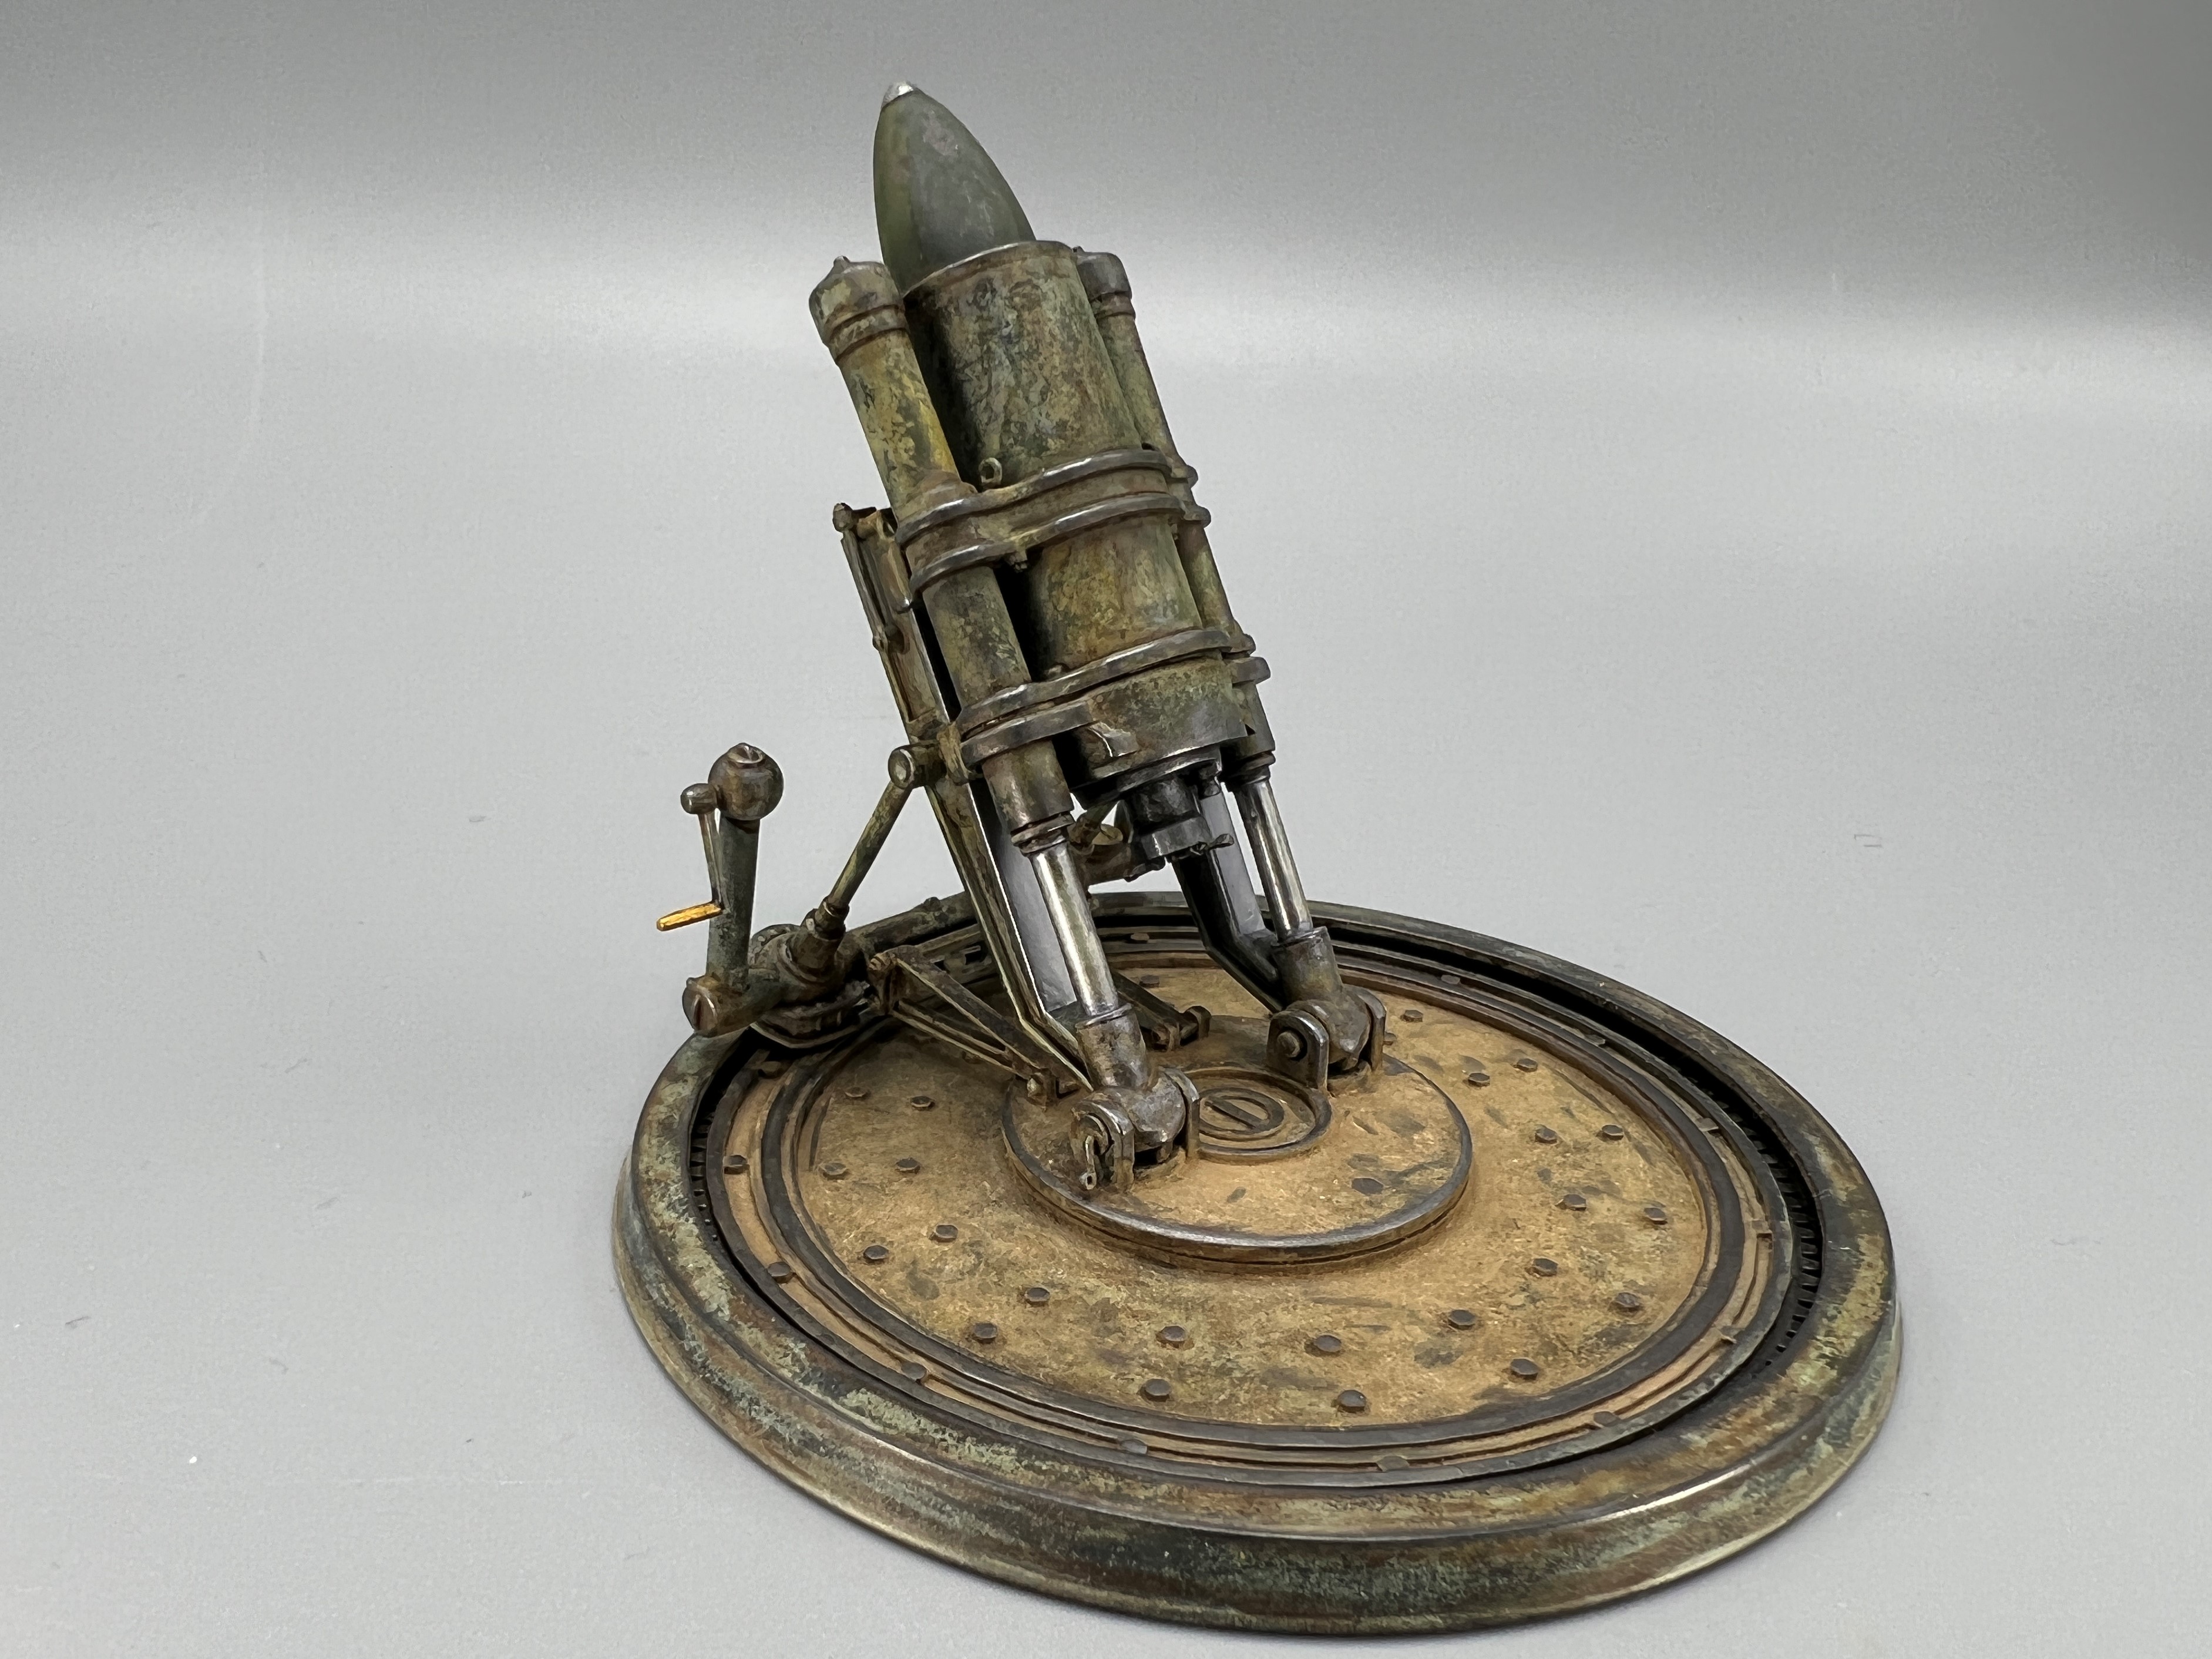
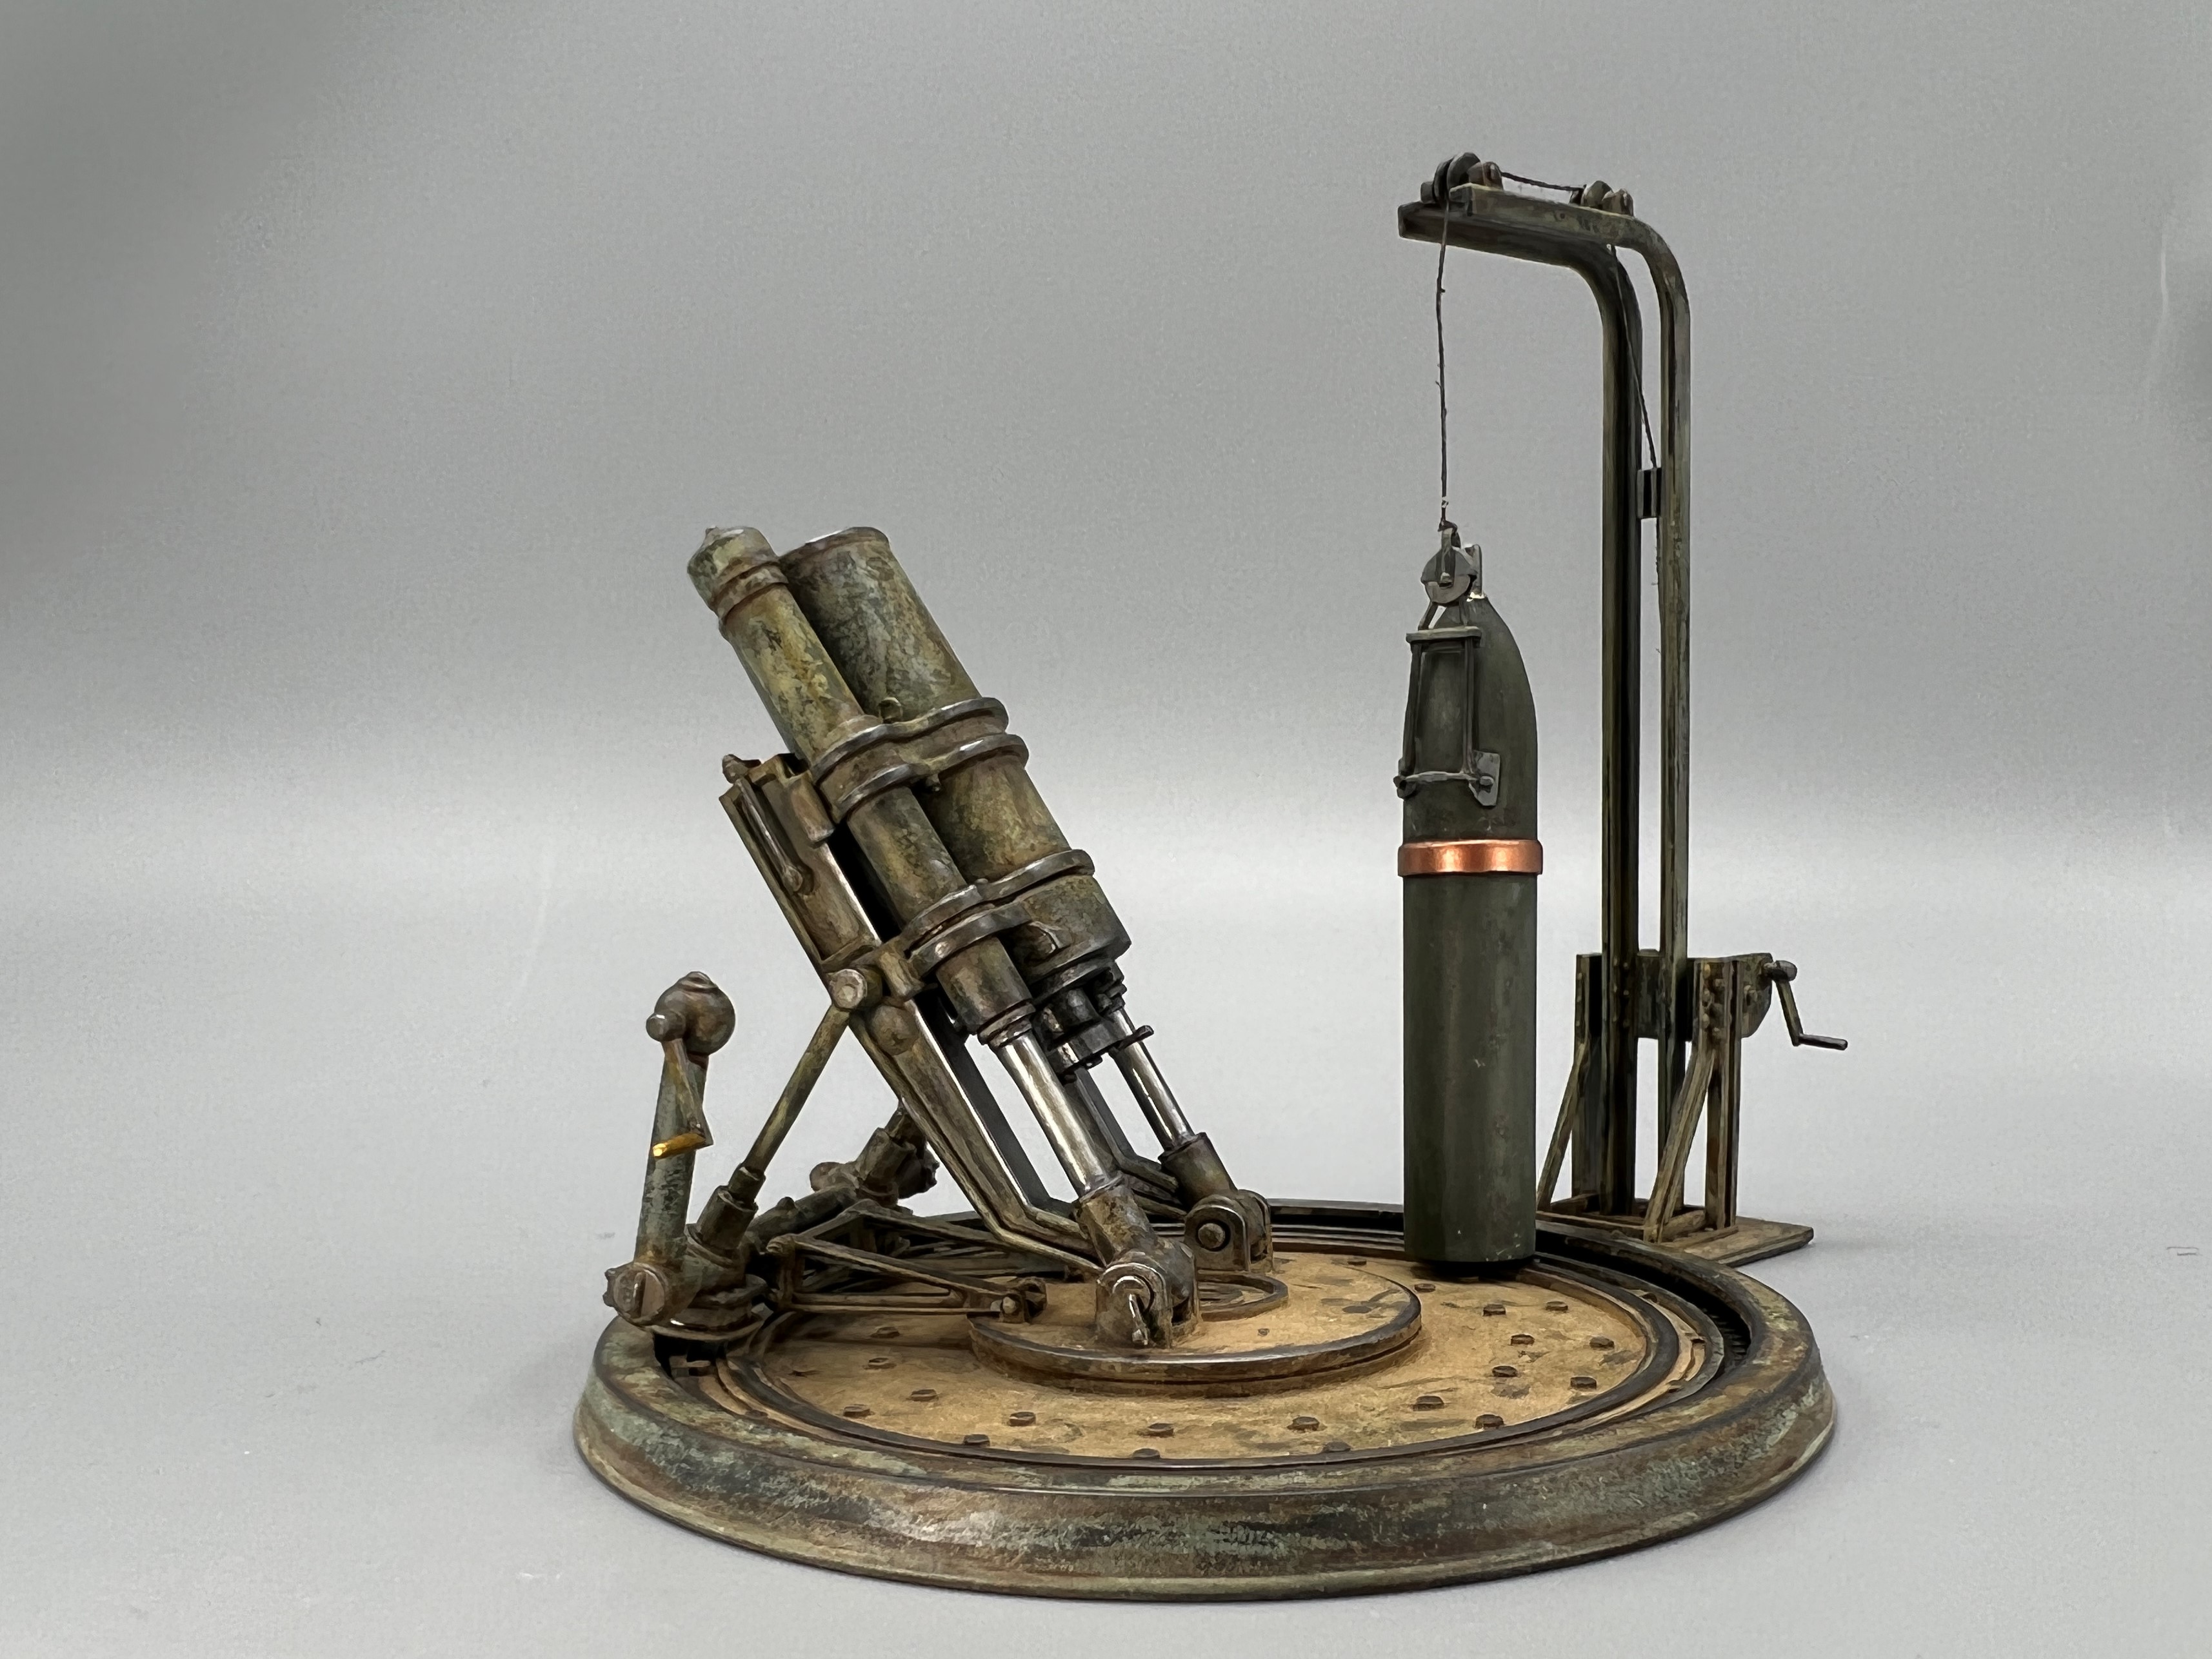
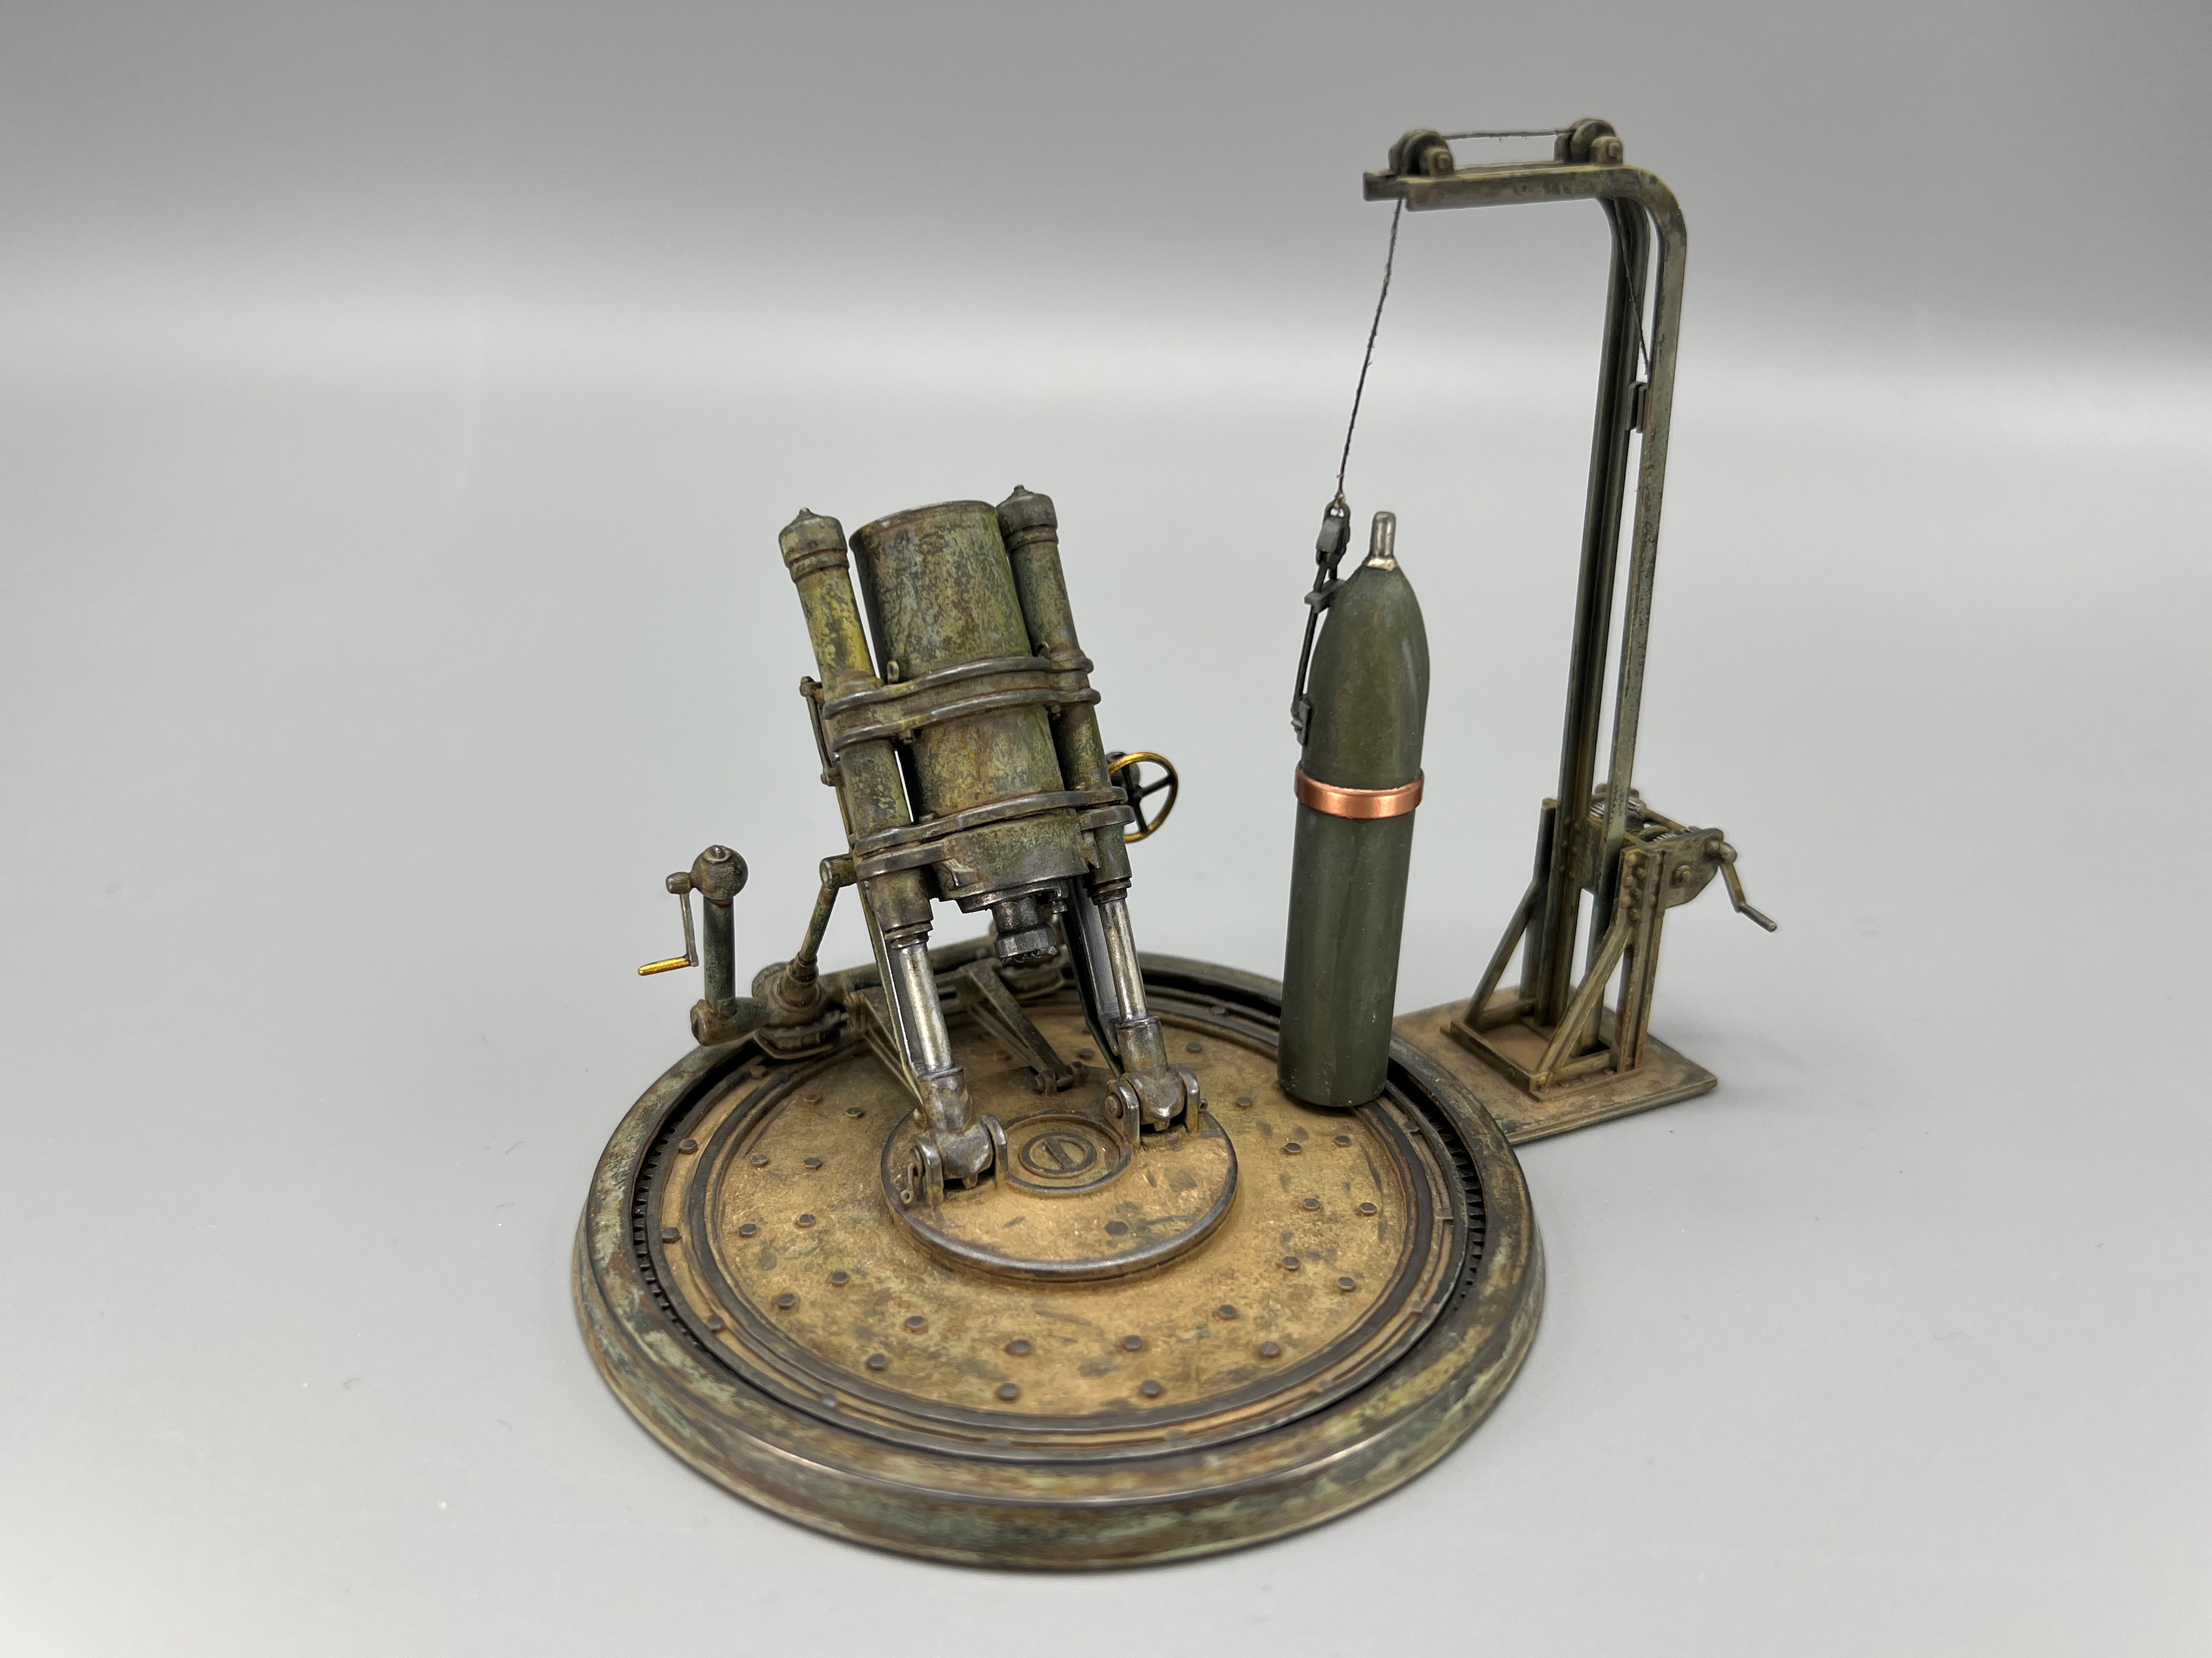
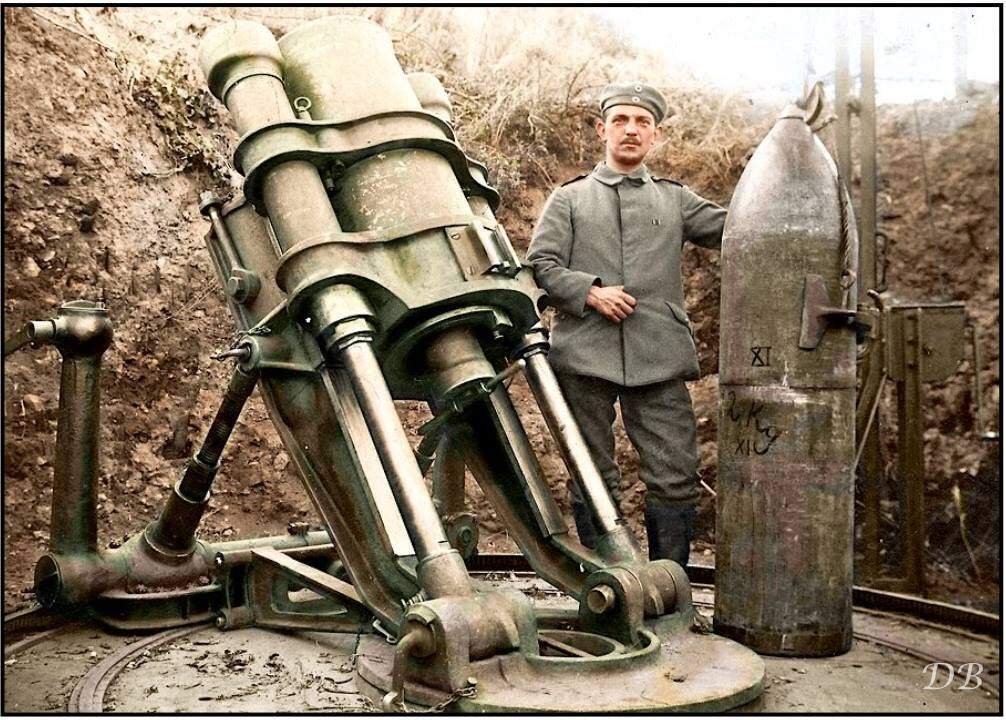
Prior to the start of WW1, Germany correctly assessed the need for heavy artillery to reduce enemy fixed fortifications and entrenchments. They developed a decent variety of heavy howitzers and mortars for this task. One of the simplest was the 38cm Heavy Trench Mortar. It lobbed a massive shell that came down nearly vertically to punch through roofs of fortifications and demolish sections of trenches or wire. Unusually, the shell was longer than the barrel.

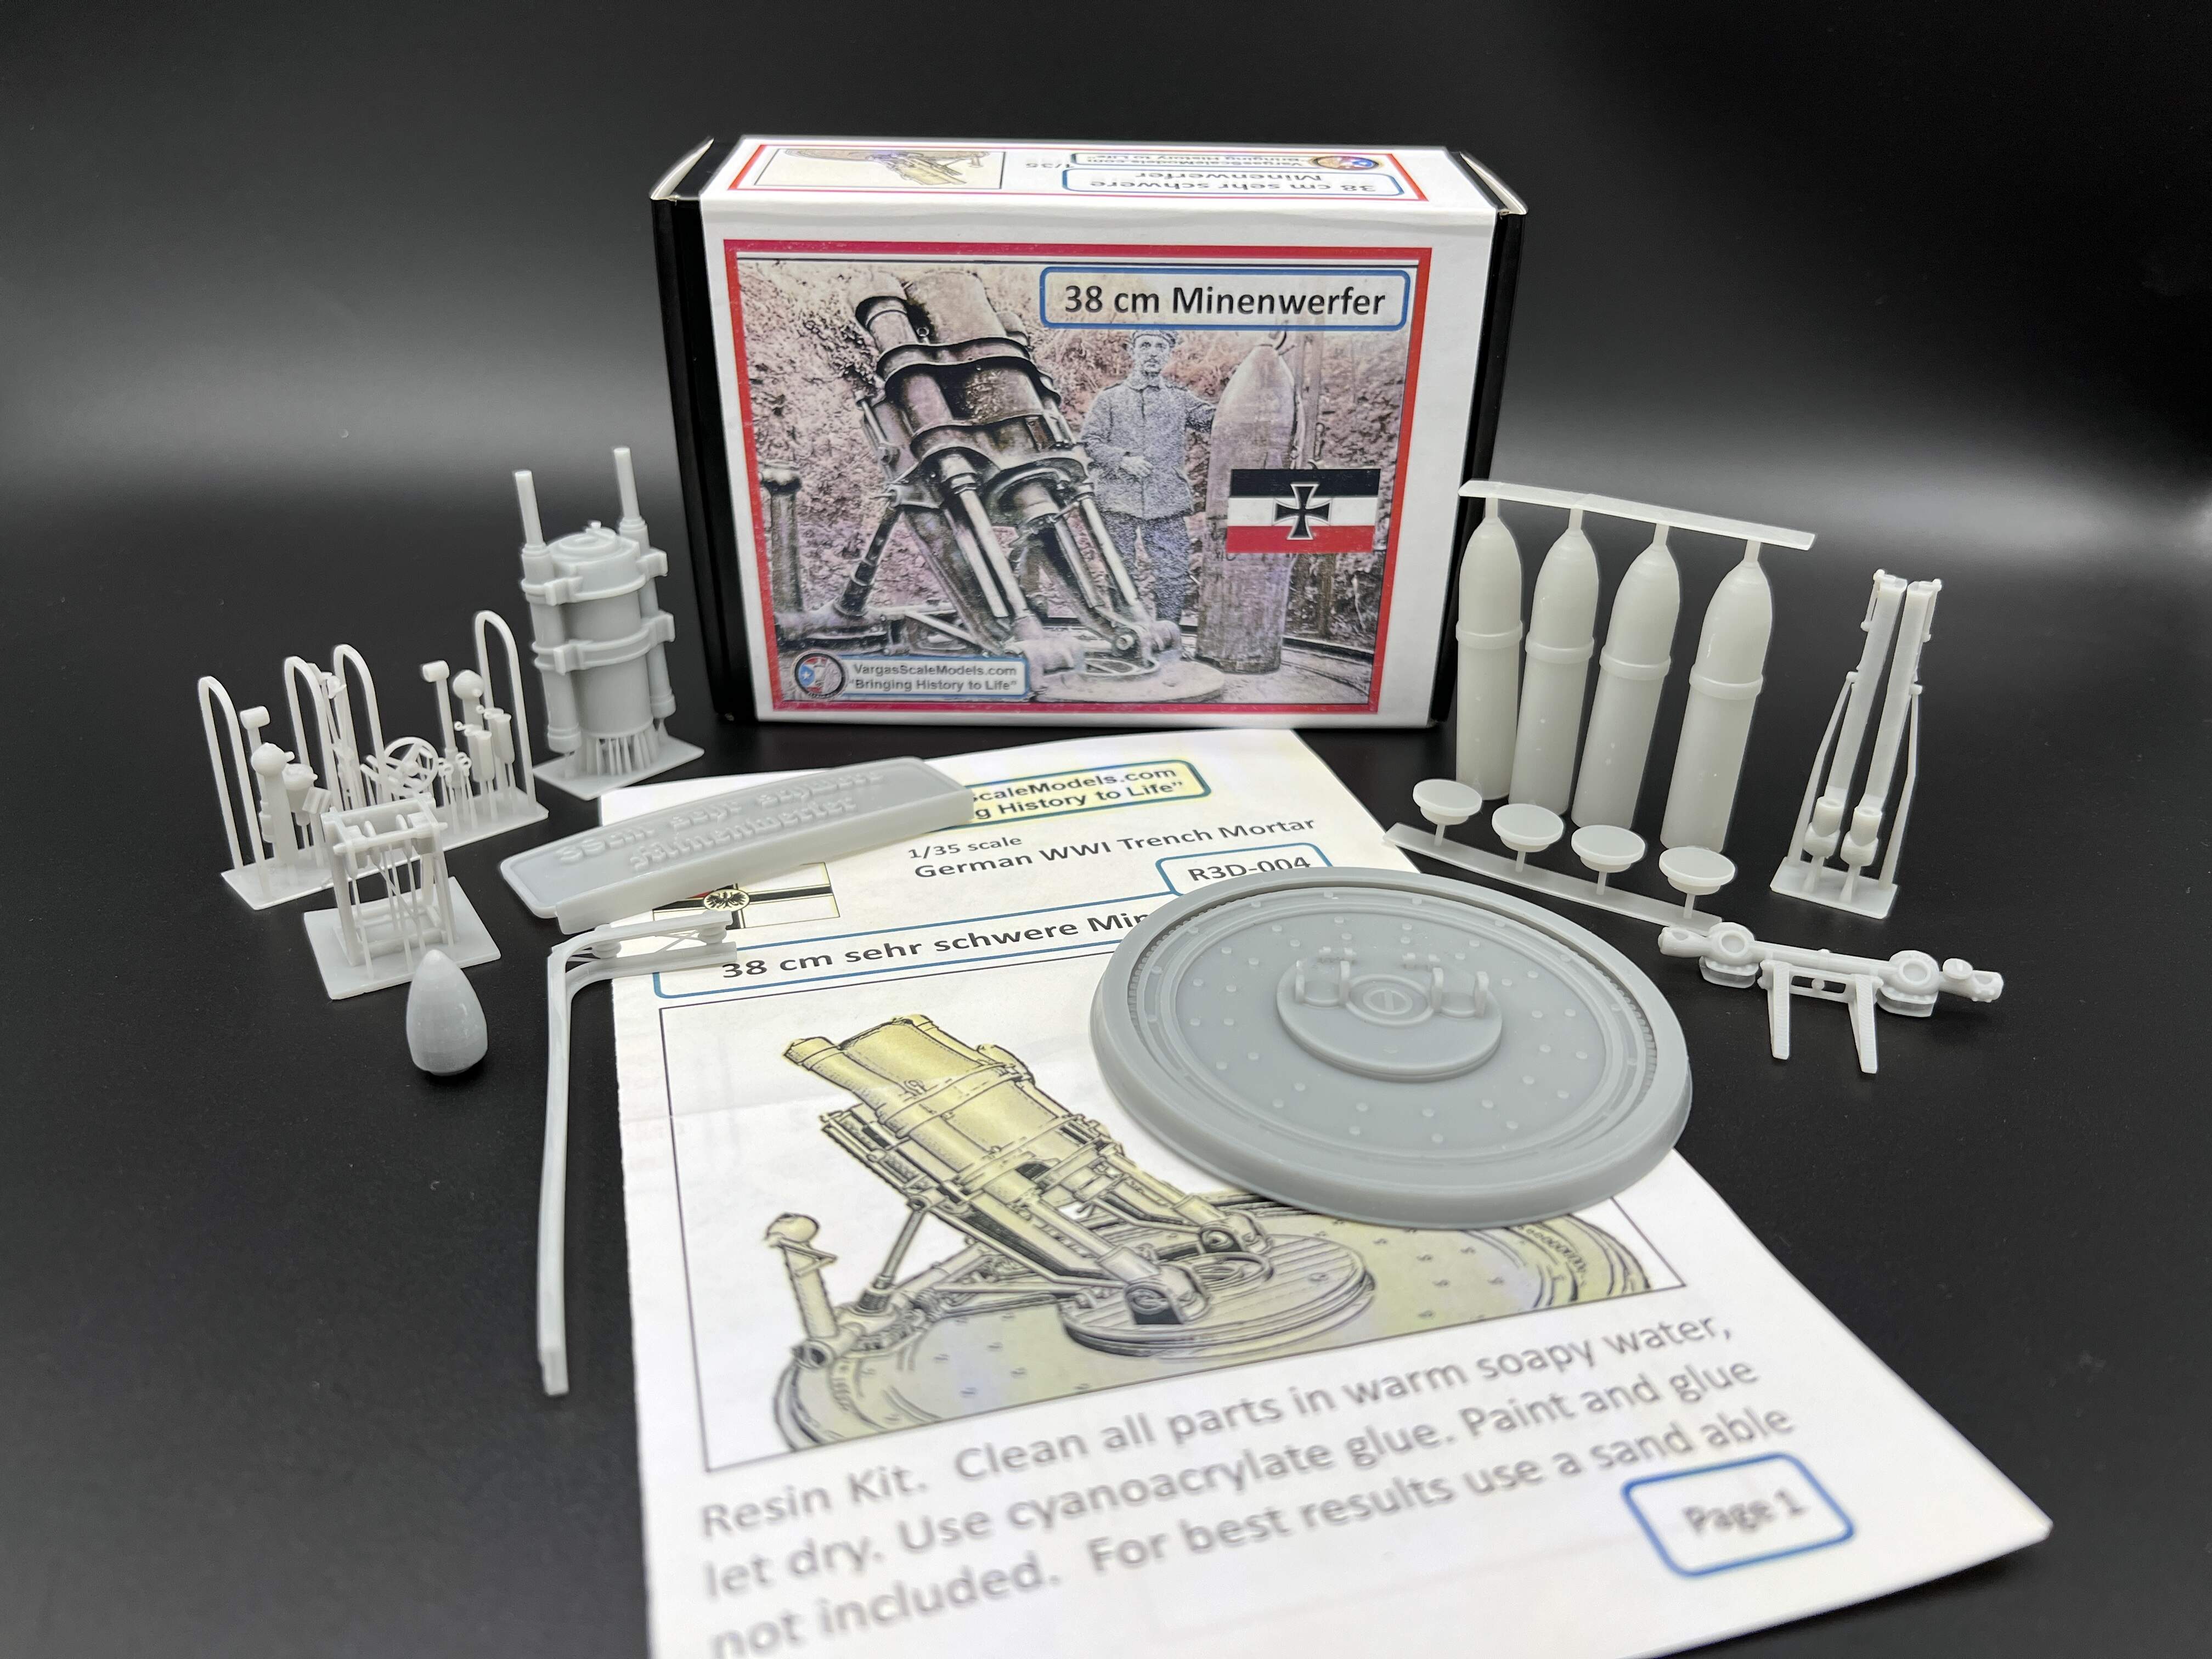
Vargas Scale Models has the only model of this interesting mortar. It is in 1:35 scale and consists of about 25 3D printed resin parts. Vargas also offers additional mortar shells to go with the kit. The kit is well detailed and goes together well. I had to drill out all of the mating holes and did some minor sanding on the cylindrical parts. The fit was decent - no putty was required. The instructions are a color printed 8.5x11 two-sided page with color coded 3D renders with arrows and part numbers. The instructions include a parts list. No painting guide or decals are included.

Vargas Scale Models sells directly to the modeler at:
Products – vargas_lg (vargas-lg.myshopify.com)

I left the shell hoist unattached to allow choices in display and modified one shell to allow it to be optionally displayed in the barrel.

I washed the kit in warm soapy water to remove any uncured resin. After assembly, I primed it with Mr Surfacer 1500 black rattle can. This sandable, self-leveling primer is the secret to building 3D printed kits. It makes the fine print striations disappear. I painted the model with Tamiya paints and used the hairspray technique to give it that aged patina. Weathering was accomplished with AK enamel weathering products and AK pigments. The shiny cylinders and slides were done with Alcad Aluminum and then polished with Uschi Chrome pigment for a nice metal finish.

All in all, I’m pleased with the results and it makes nice addition to my collect of Great War artillery.


24 Likes

Oh wow Rick- you have really done a world class job on that beast! It looks so very close to the photograph in terms of the color and the beautiful, worn patina on both the launcher and the baseplate. The metal tones are extremely realistic. What did you use for them?

1 Like

Looks very Steampunk but I love it. And I don’t usually do WWI. Well done

1 Like

That looks excellent!

1 Like

Excellent build and finish on an unusual subject. How do you get the brass handles to look like polished brass? I always get kind of a glittery/grainy finish that although it’s brass colored, it isn’t very realistic. You’ve nailed the colors all around, kudos.

Cheers,
C.

1 Like

Artillery is not my thing but this is an unusual subject and very interesting indeed. First class job on the finish. :+1: :+1:

1 Like

Karl,

The recoil cylinders and slides are Alclad Aluminum and then polished with Uschi Chrome pigment.

To give that well-worn but maintained look to the mortar and baseplate, leave a bit of black primer showing through on the edges when I base coat it. After all of the paint layers are down, I use a reddish-brown enamel wash (AK Streaking Grime) on all of the edges. This is blended with mineral spirits on an almost dry brush. The edges are then rubbed with AK Dark Steel pigment on a rubber blending “brush”. If I want a bit more wear and shine to the edge, I rub an HB pencil on the edge and use the rubber blender brush to blend it with the pigment.

1 Like

Thank you for explaining that Rick.

Very nice job!!!

1 Like

Charles, Doing lots of WW1 artillery I have to deal with a lot of brass. I think that I’ve tried just about every brass product out there. For bright handles I’ve settled on Vallejo Model Color Brass 70.801. I then put a tiny bit of AK True Metal Brass wax AK460 on a cotton bud and gently rub that on the high surfaces. This provides a bit more shine and gives the handles/wheels some depth.

1 Like