Chinchilla kinda sounds like “six seven”….
6 Likes
I get enough of that at my job as a high school teacher, thanks.
7 Likes
You did NOT slip in six seven on the forums…..
7 Likes
Oh yes he did!
3 Likes
Slay, Queen.
2 Likes
Your cooked brah!
2 Likes
Totally logged in with W drip! ![]()
2 Likes
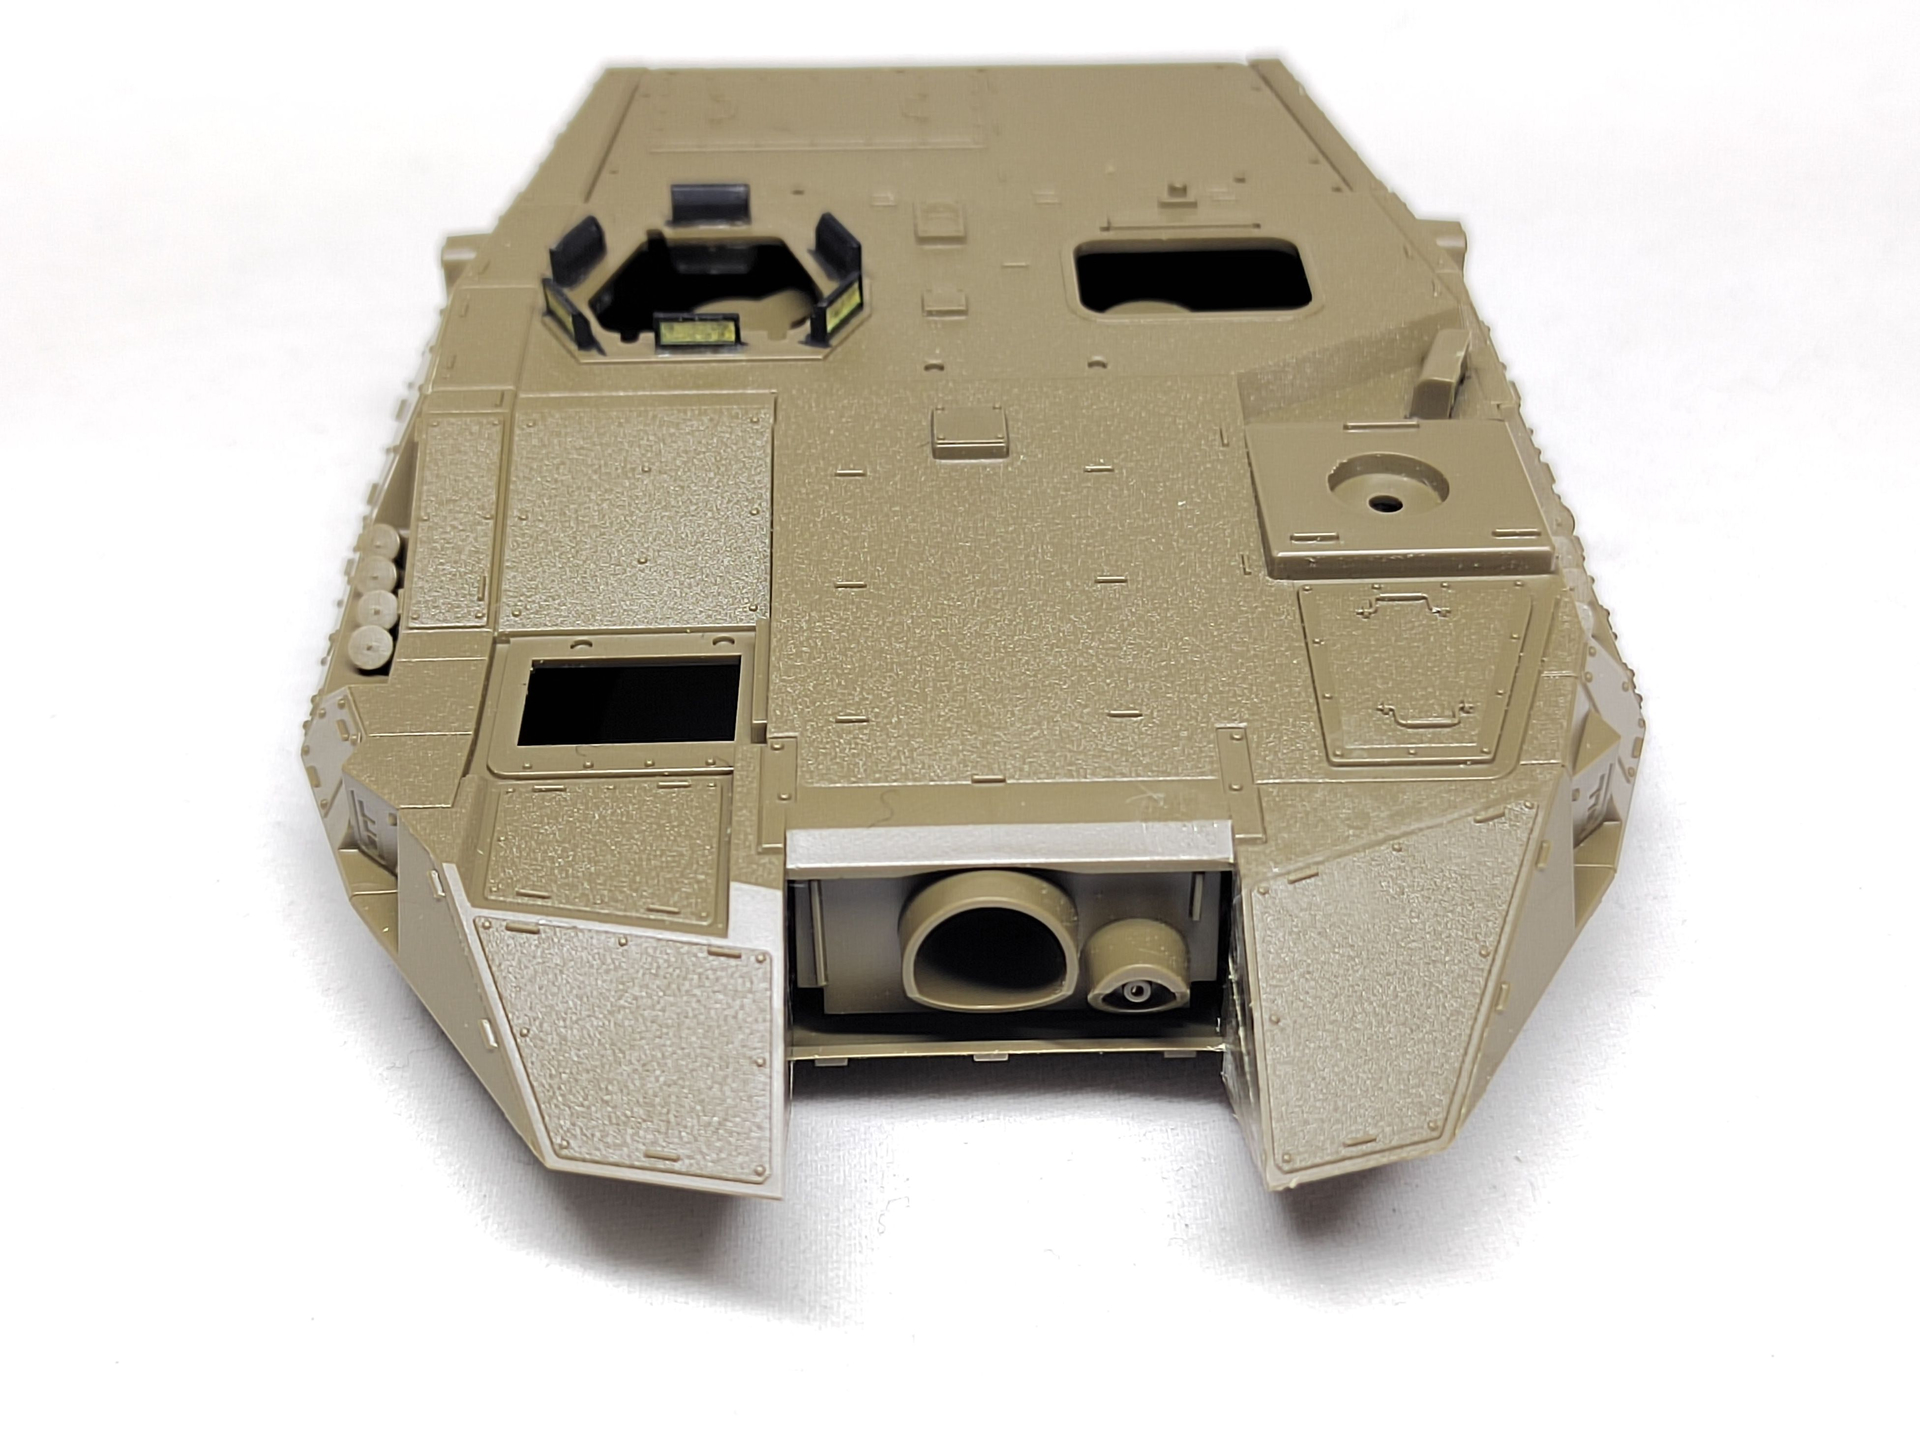
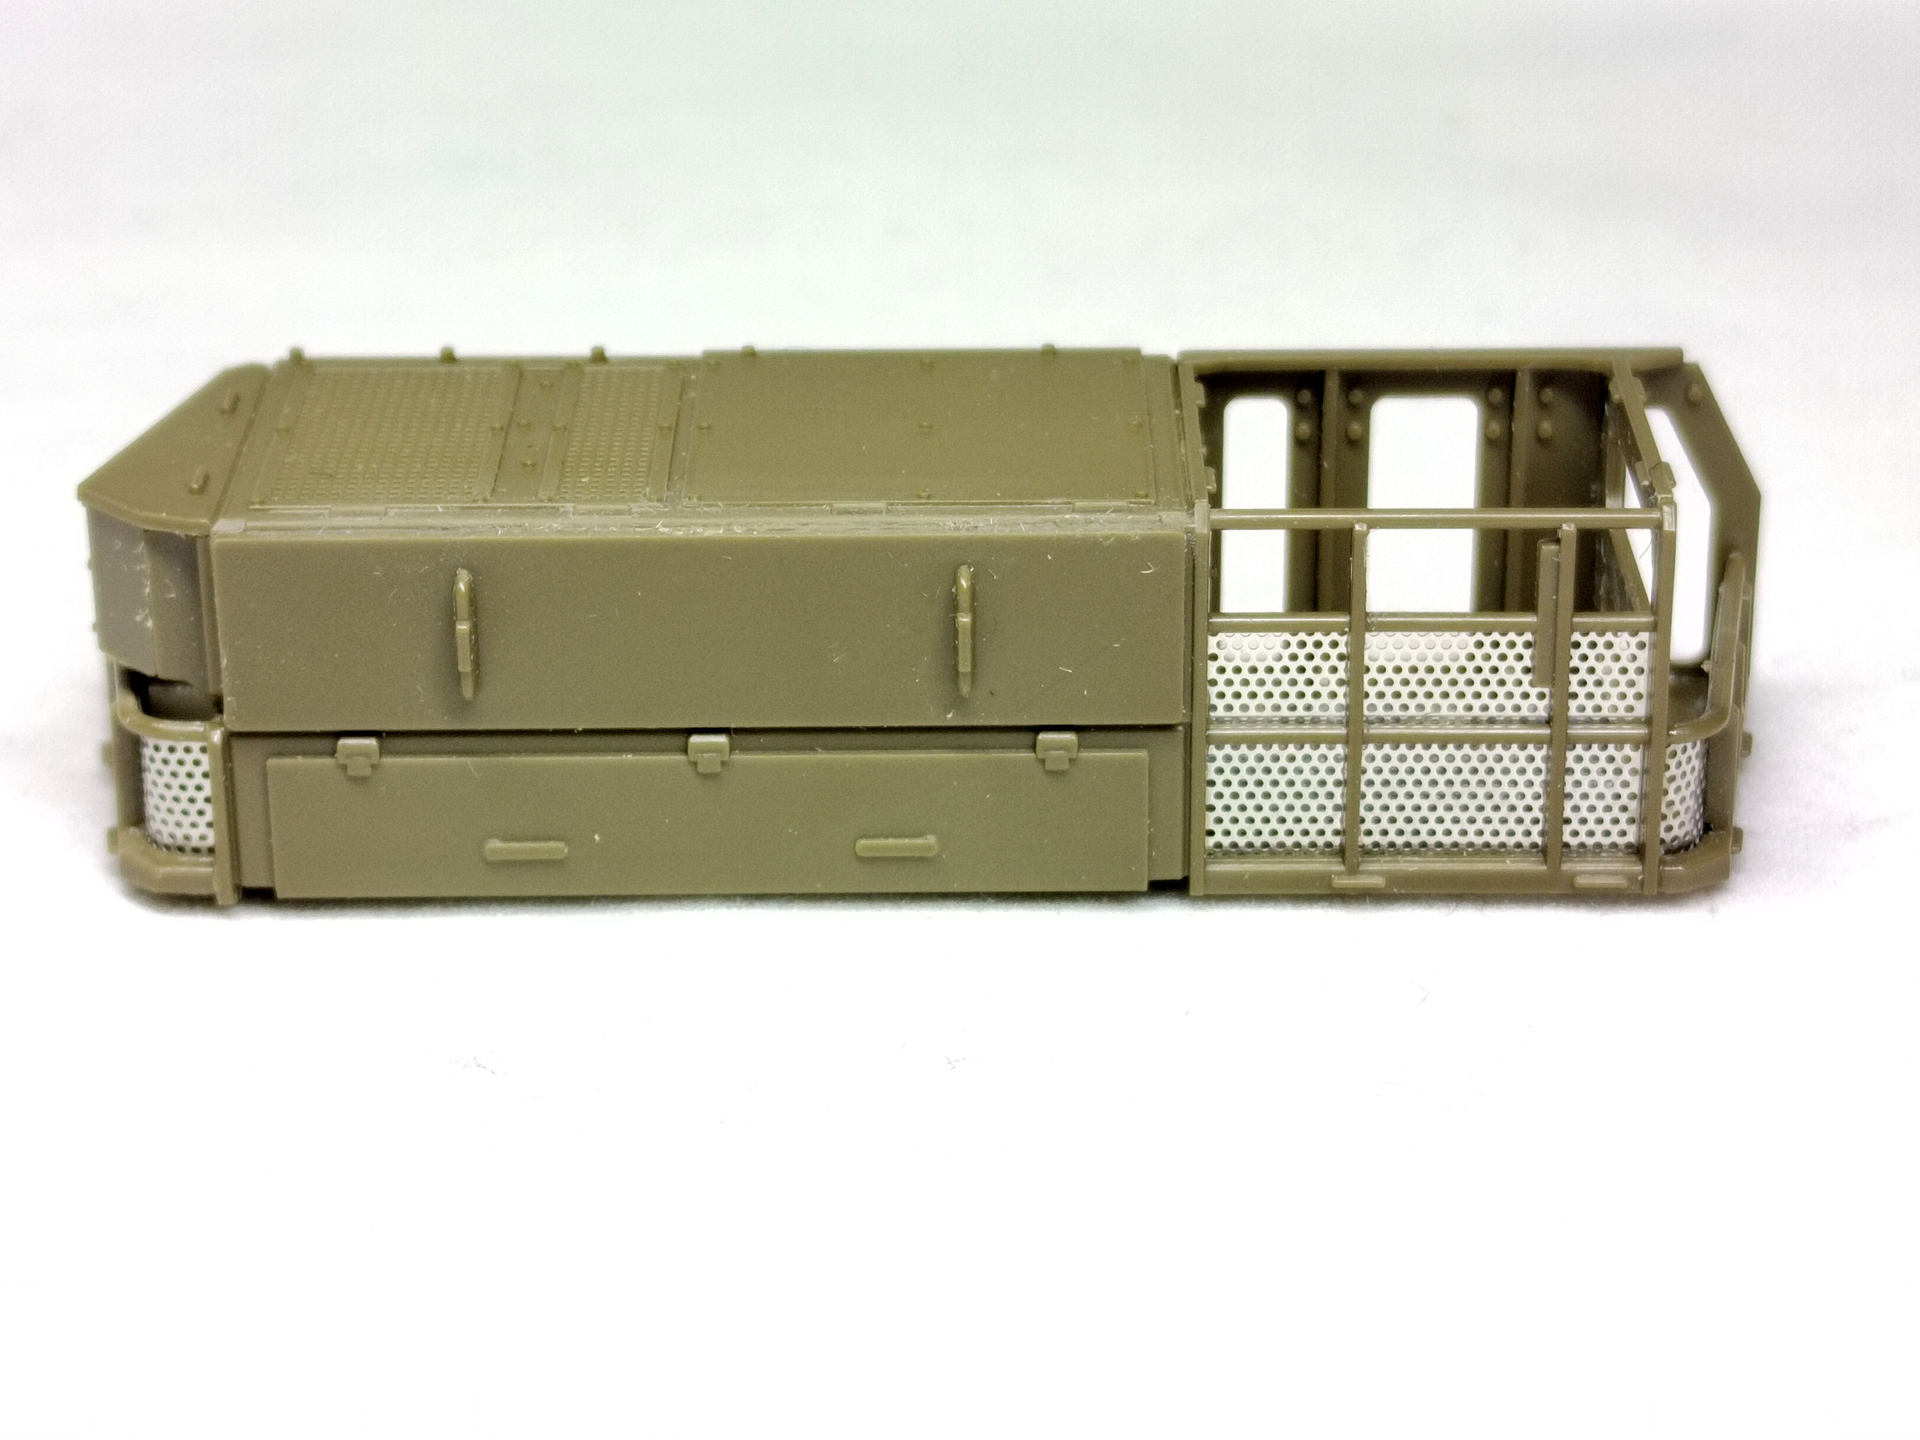
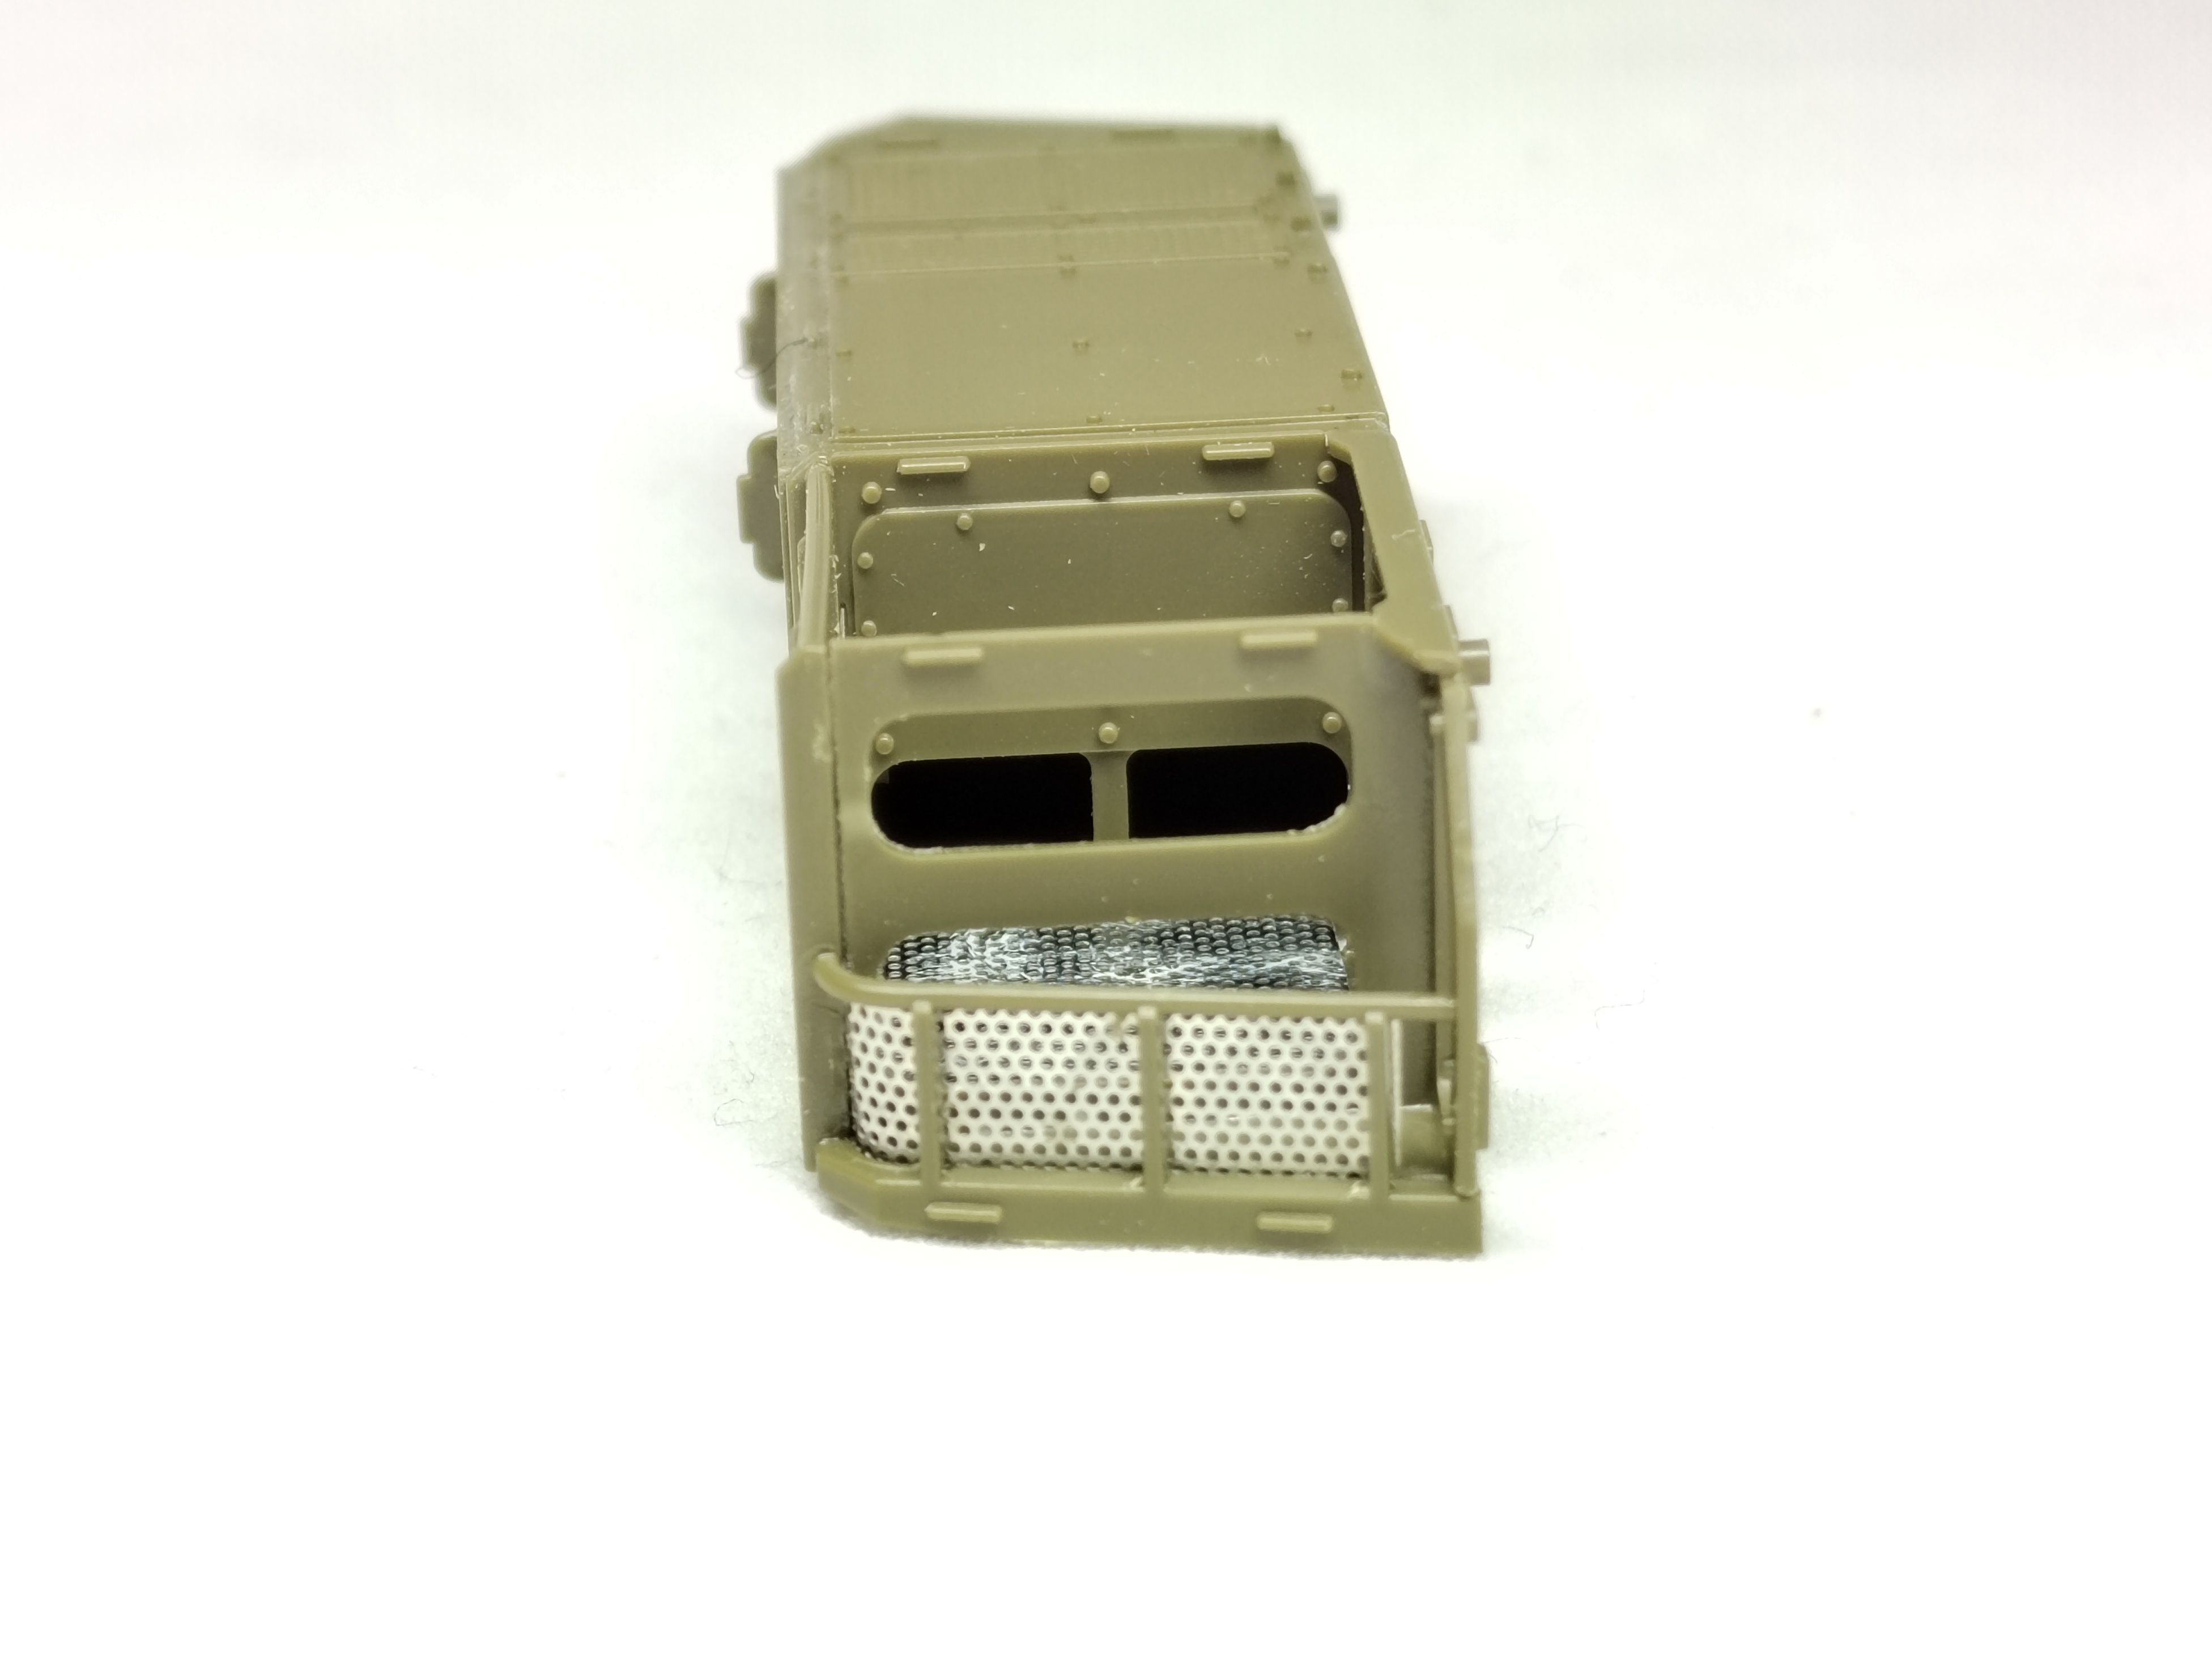
I have started to assemble the turret. Although it comes in 5 main parts it is pretty easy to build.
You’d better start the smoke-grenade dischargers assembly from the front.
Olivier
11 Likes


Beautiful work there- such clean and precise lines!
4 Likes
Sharp paint work, Raj!
2 Likes
Yes indeed! Beautiful work! ![]()
![]()
![]()
2 Likes
Sensational paint work Raj. Very impressive.
2 Likes
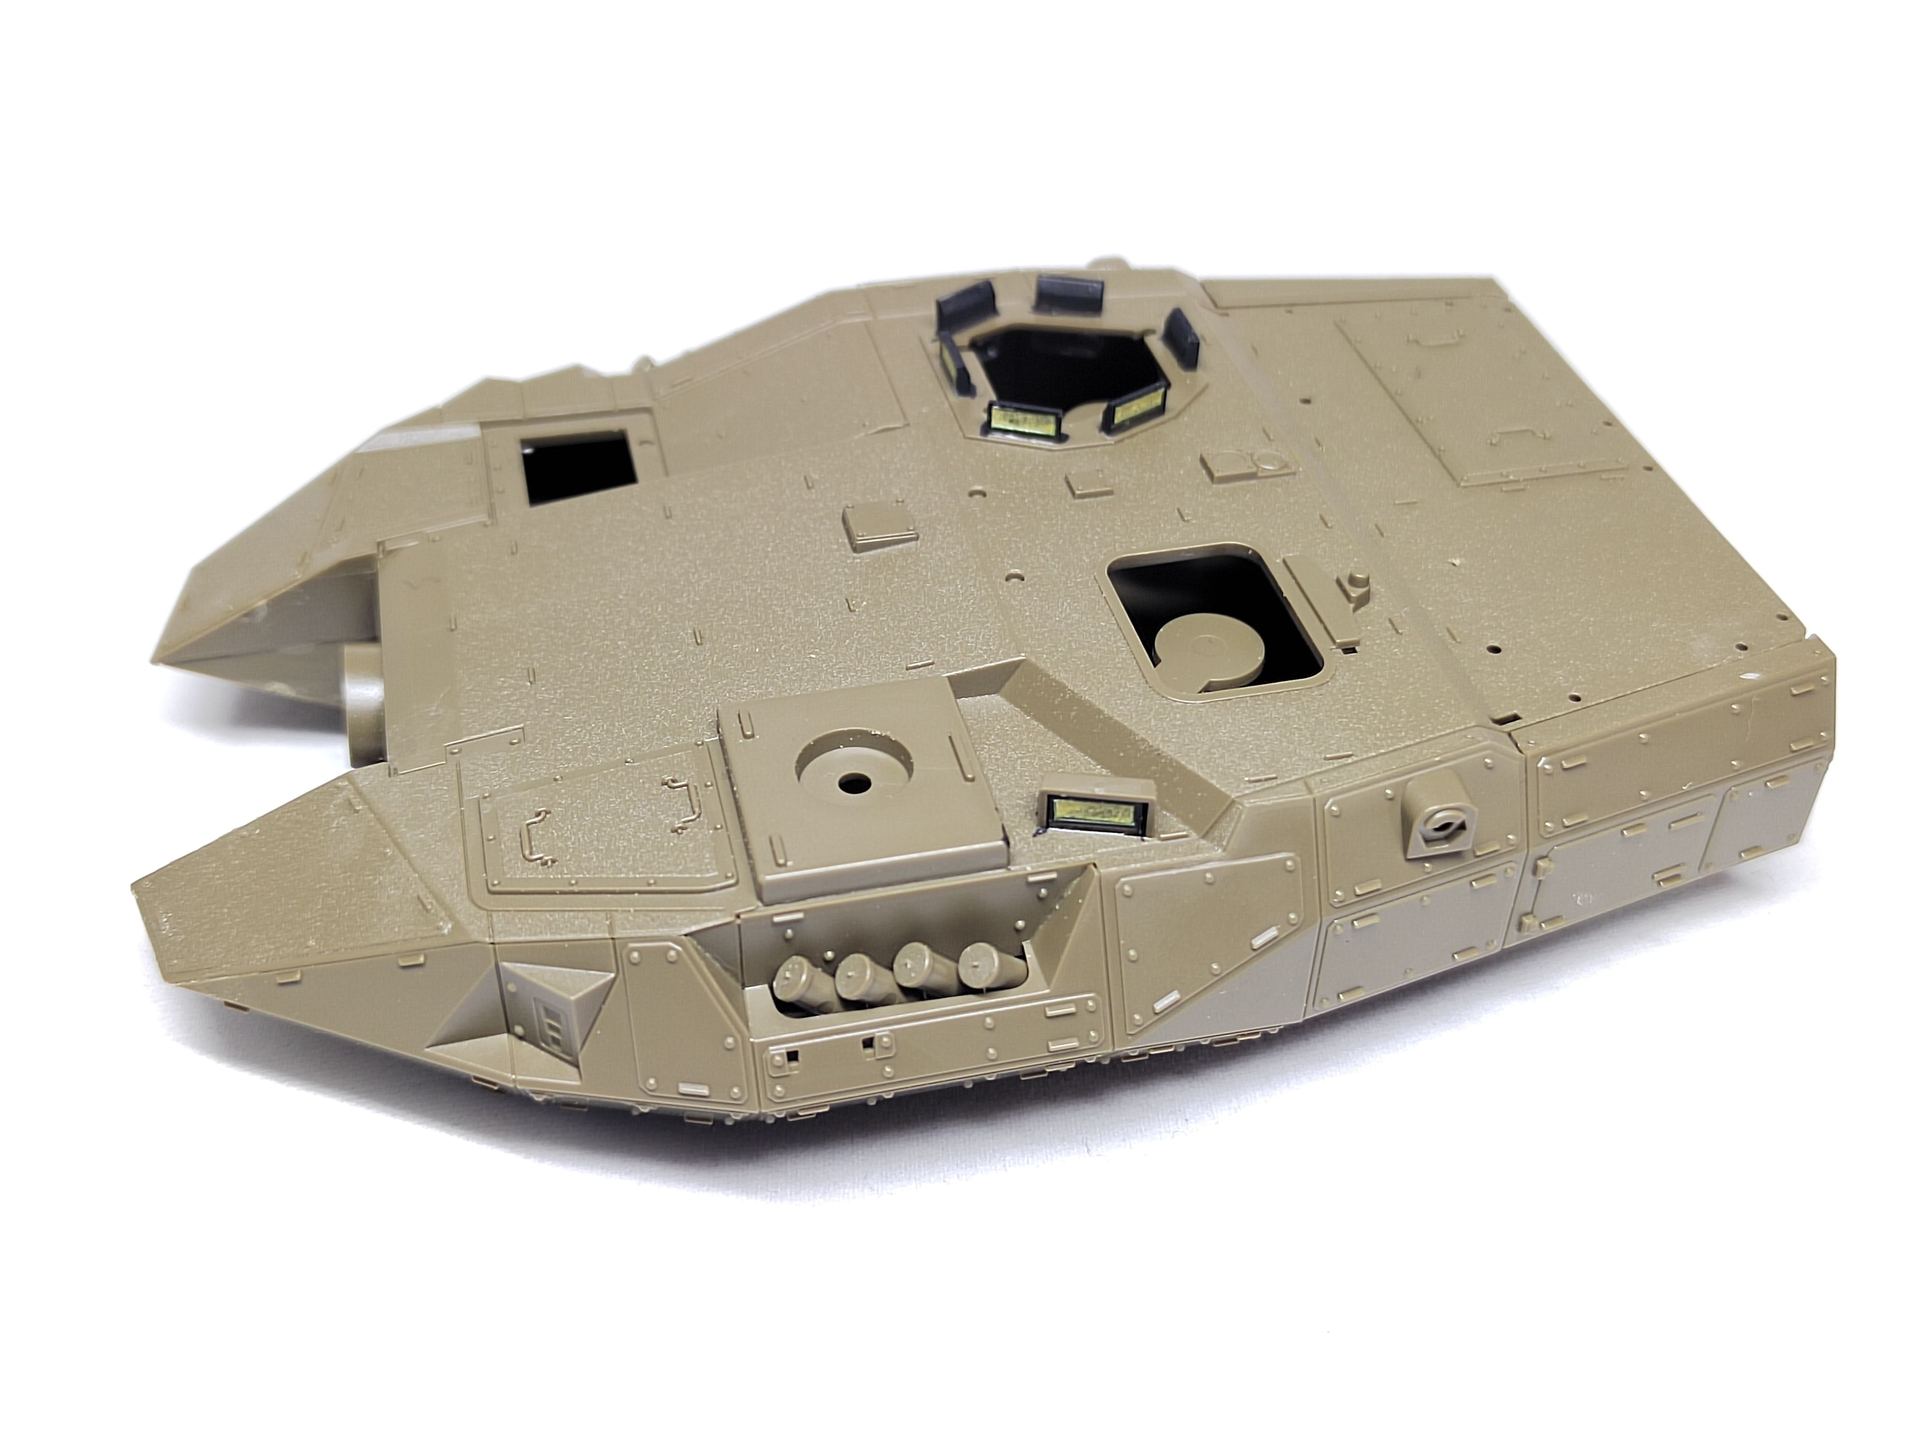
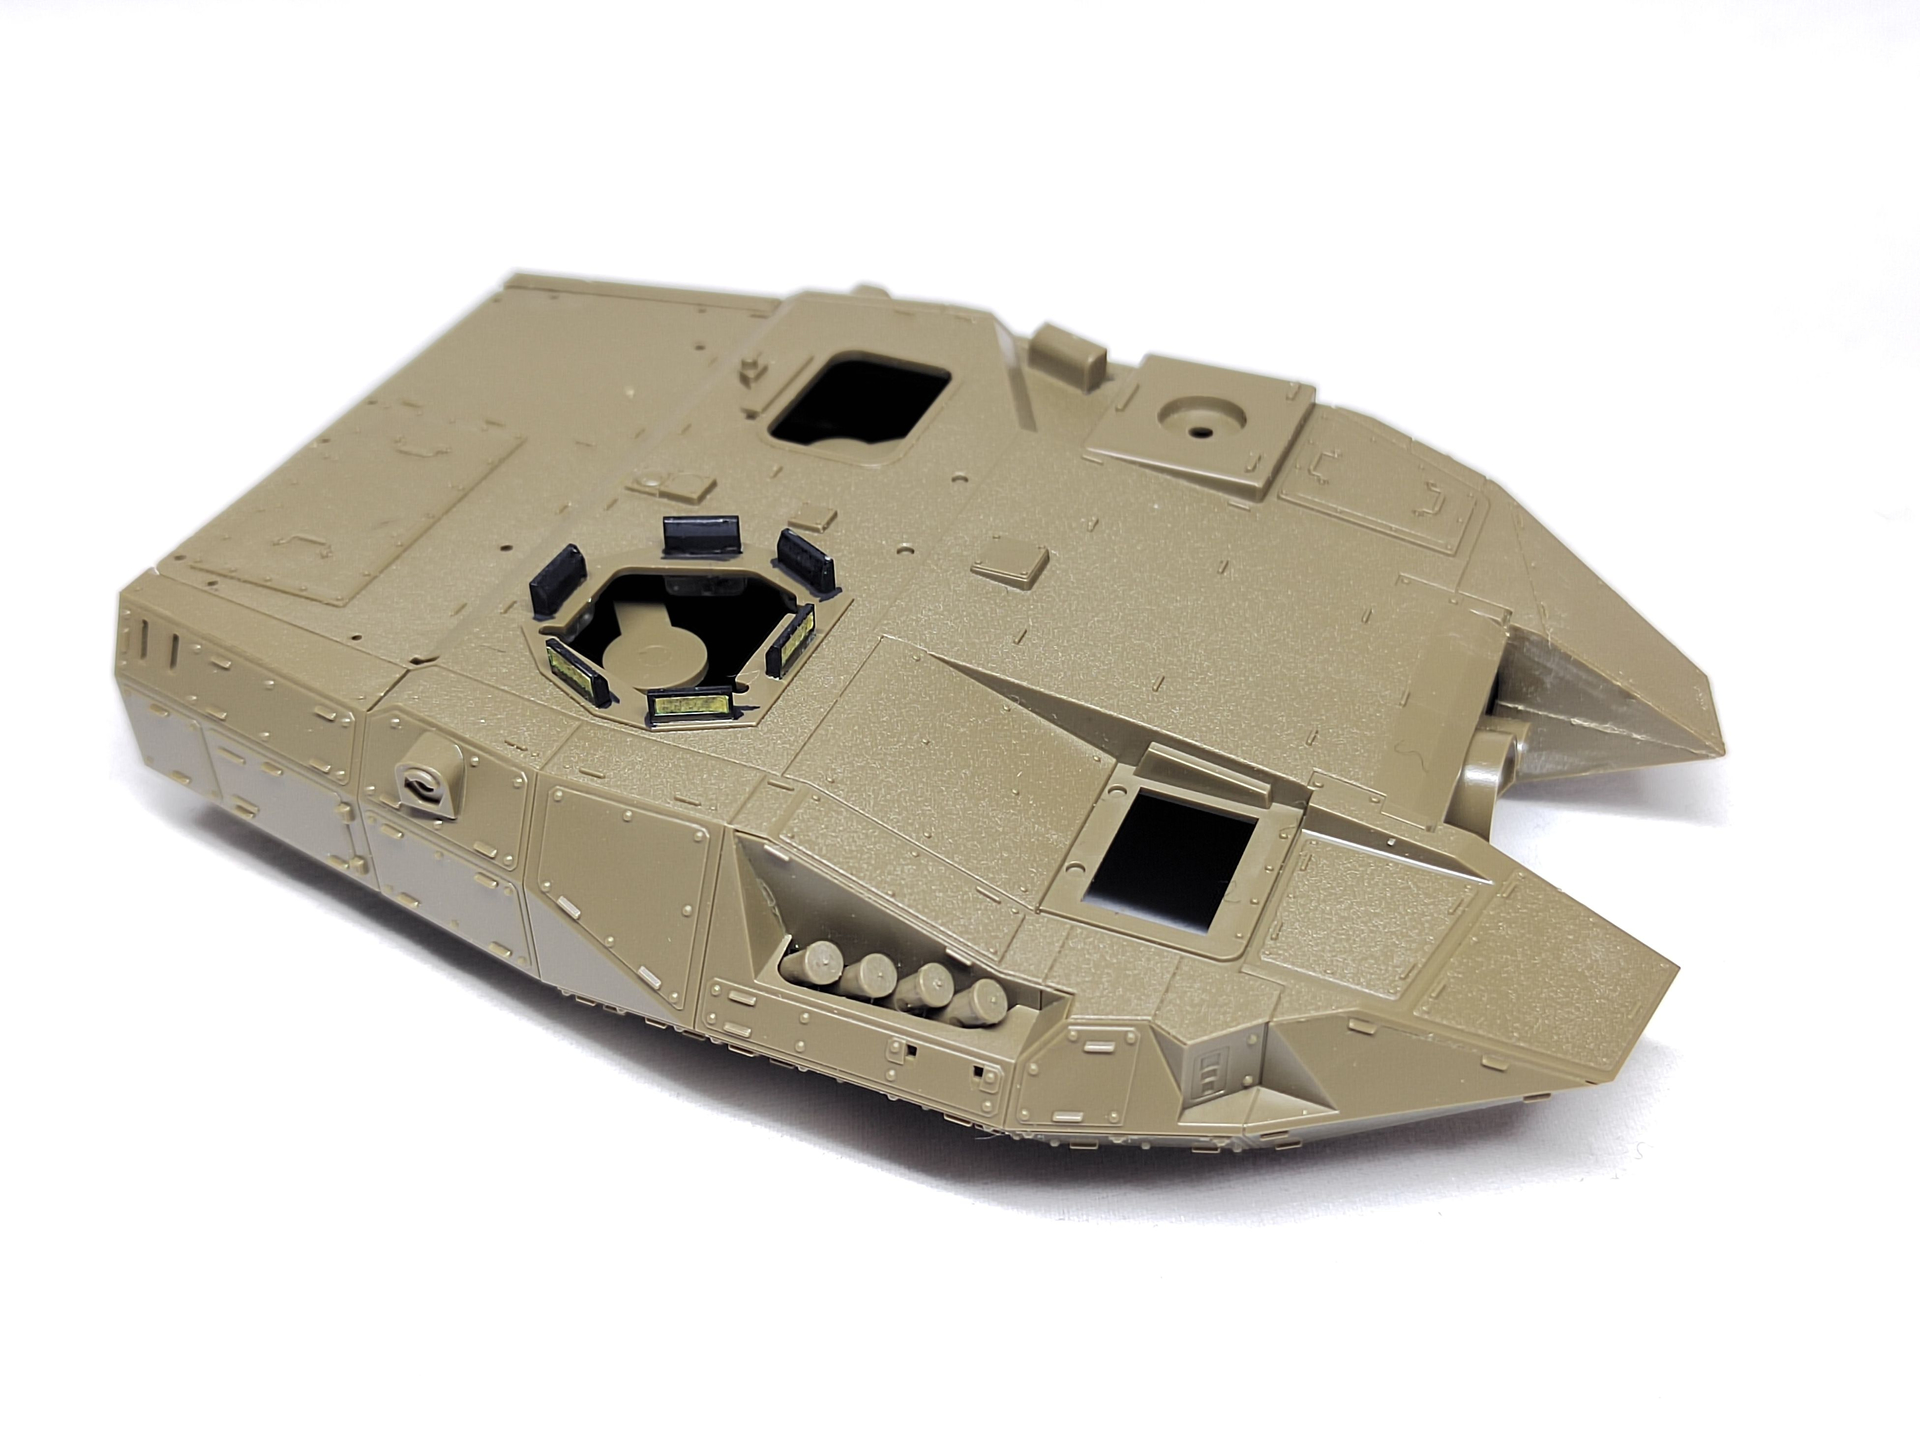
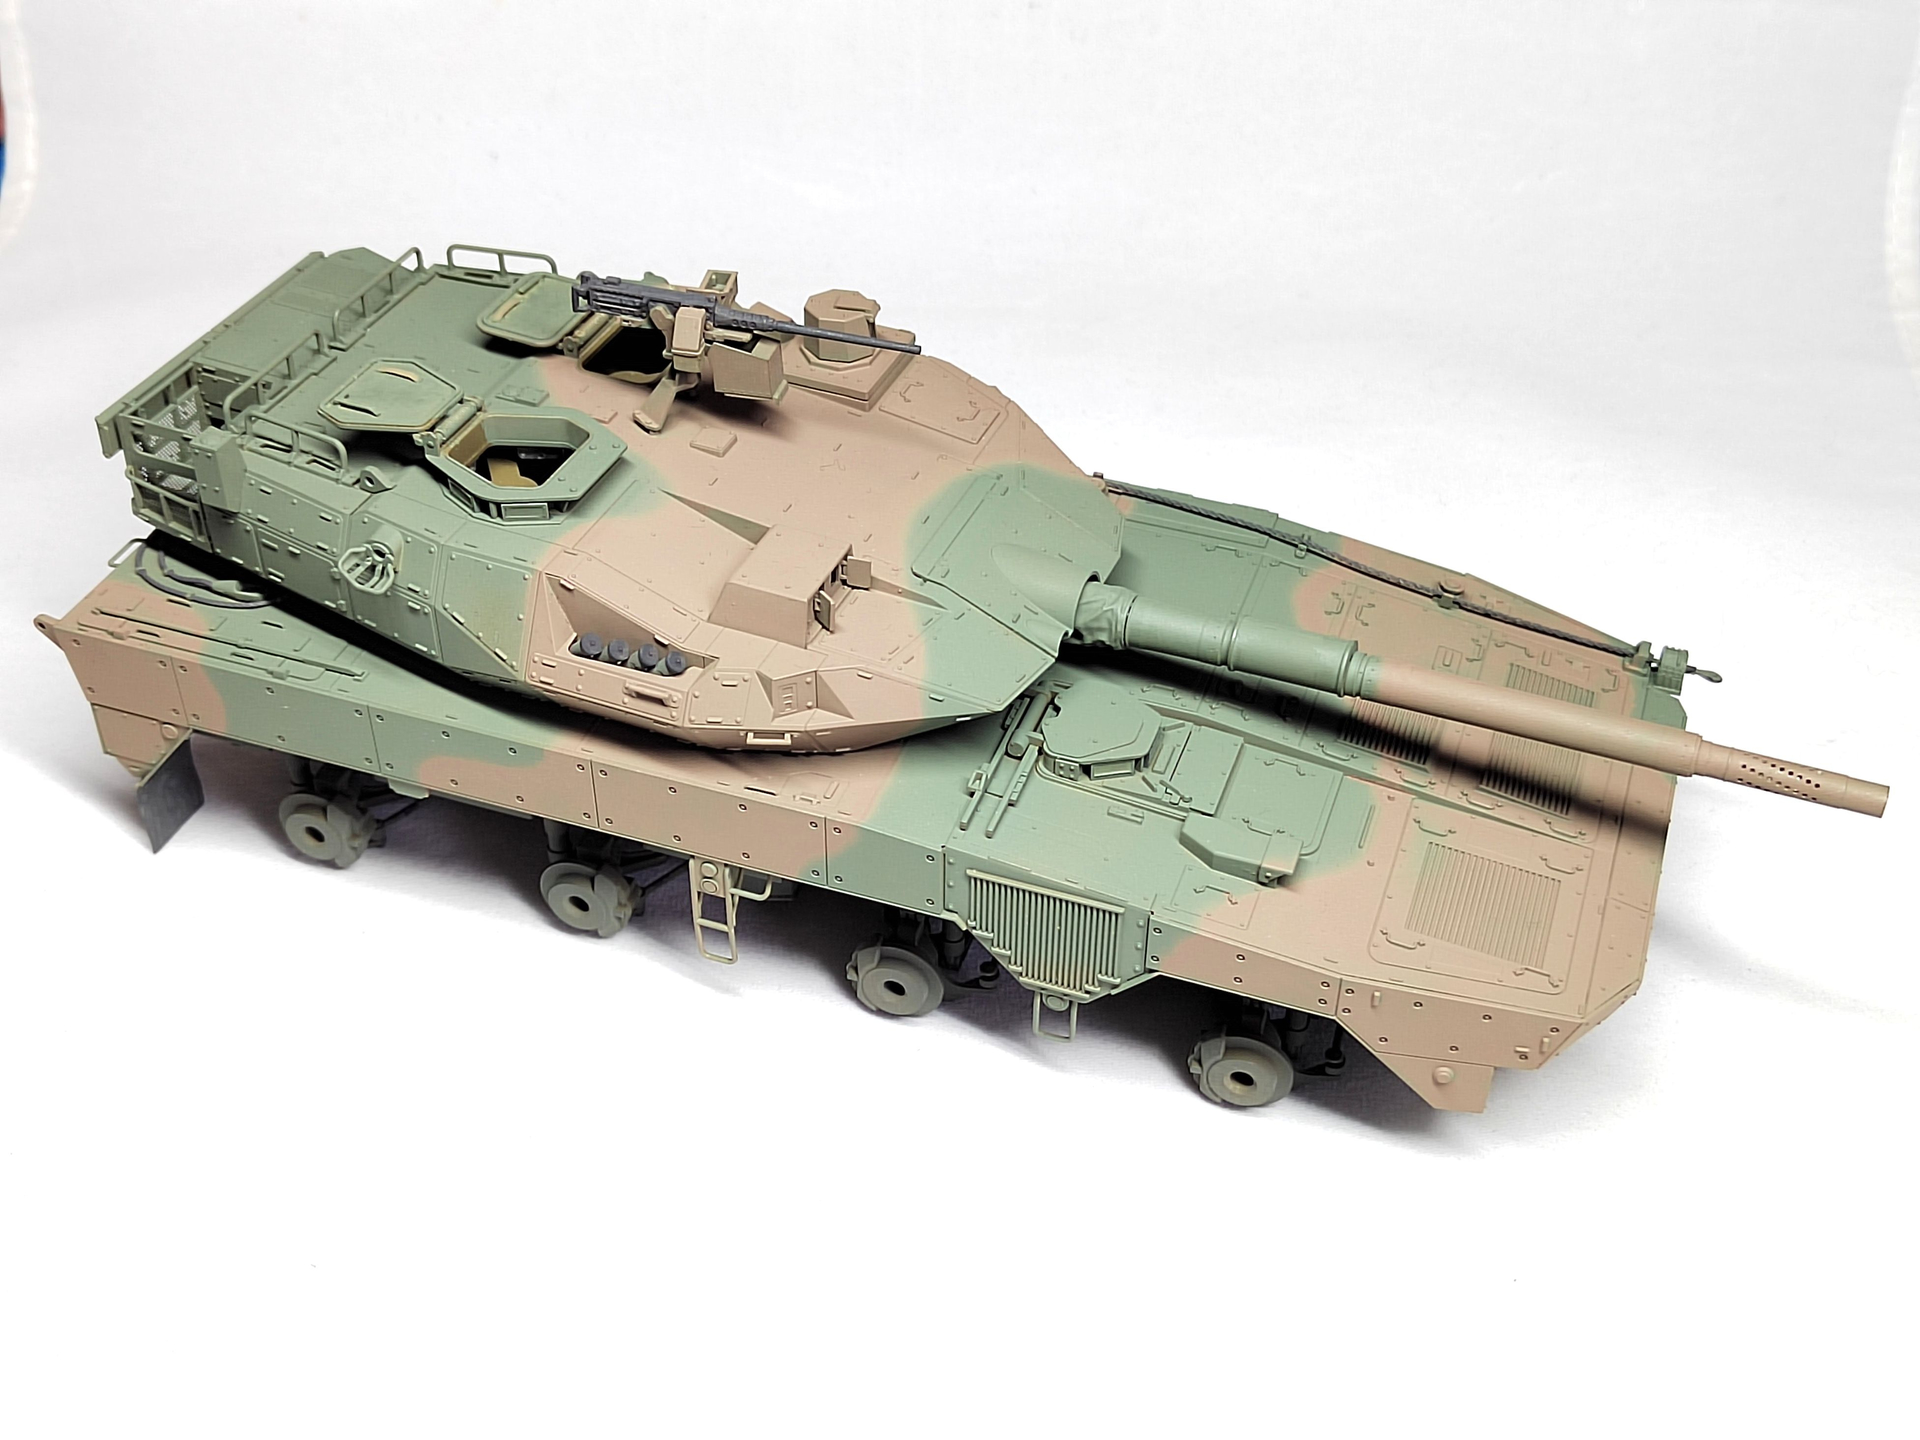
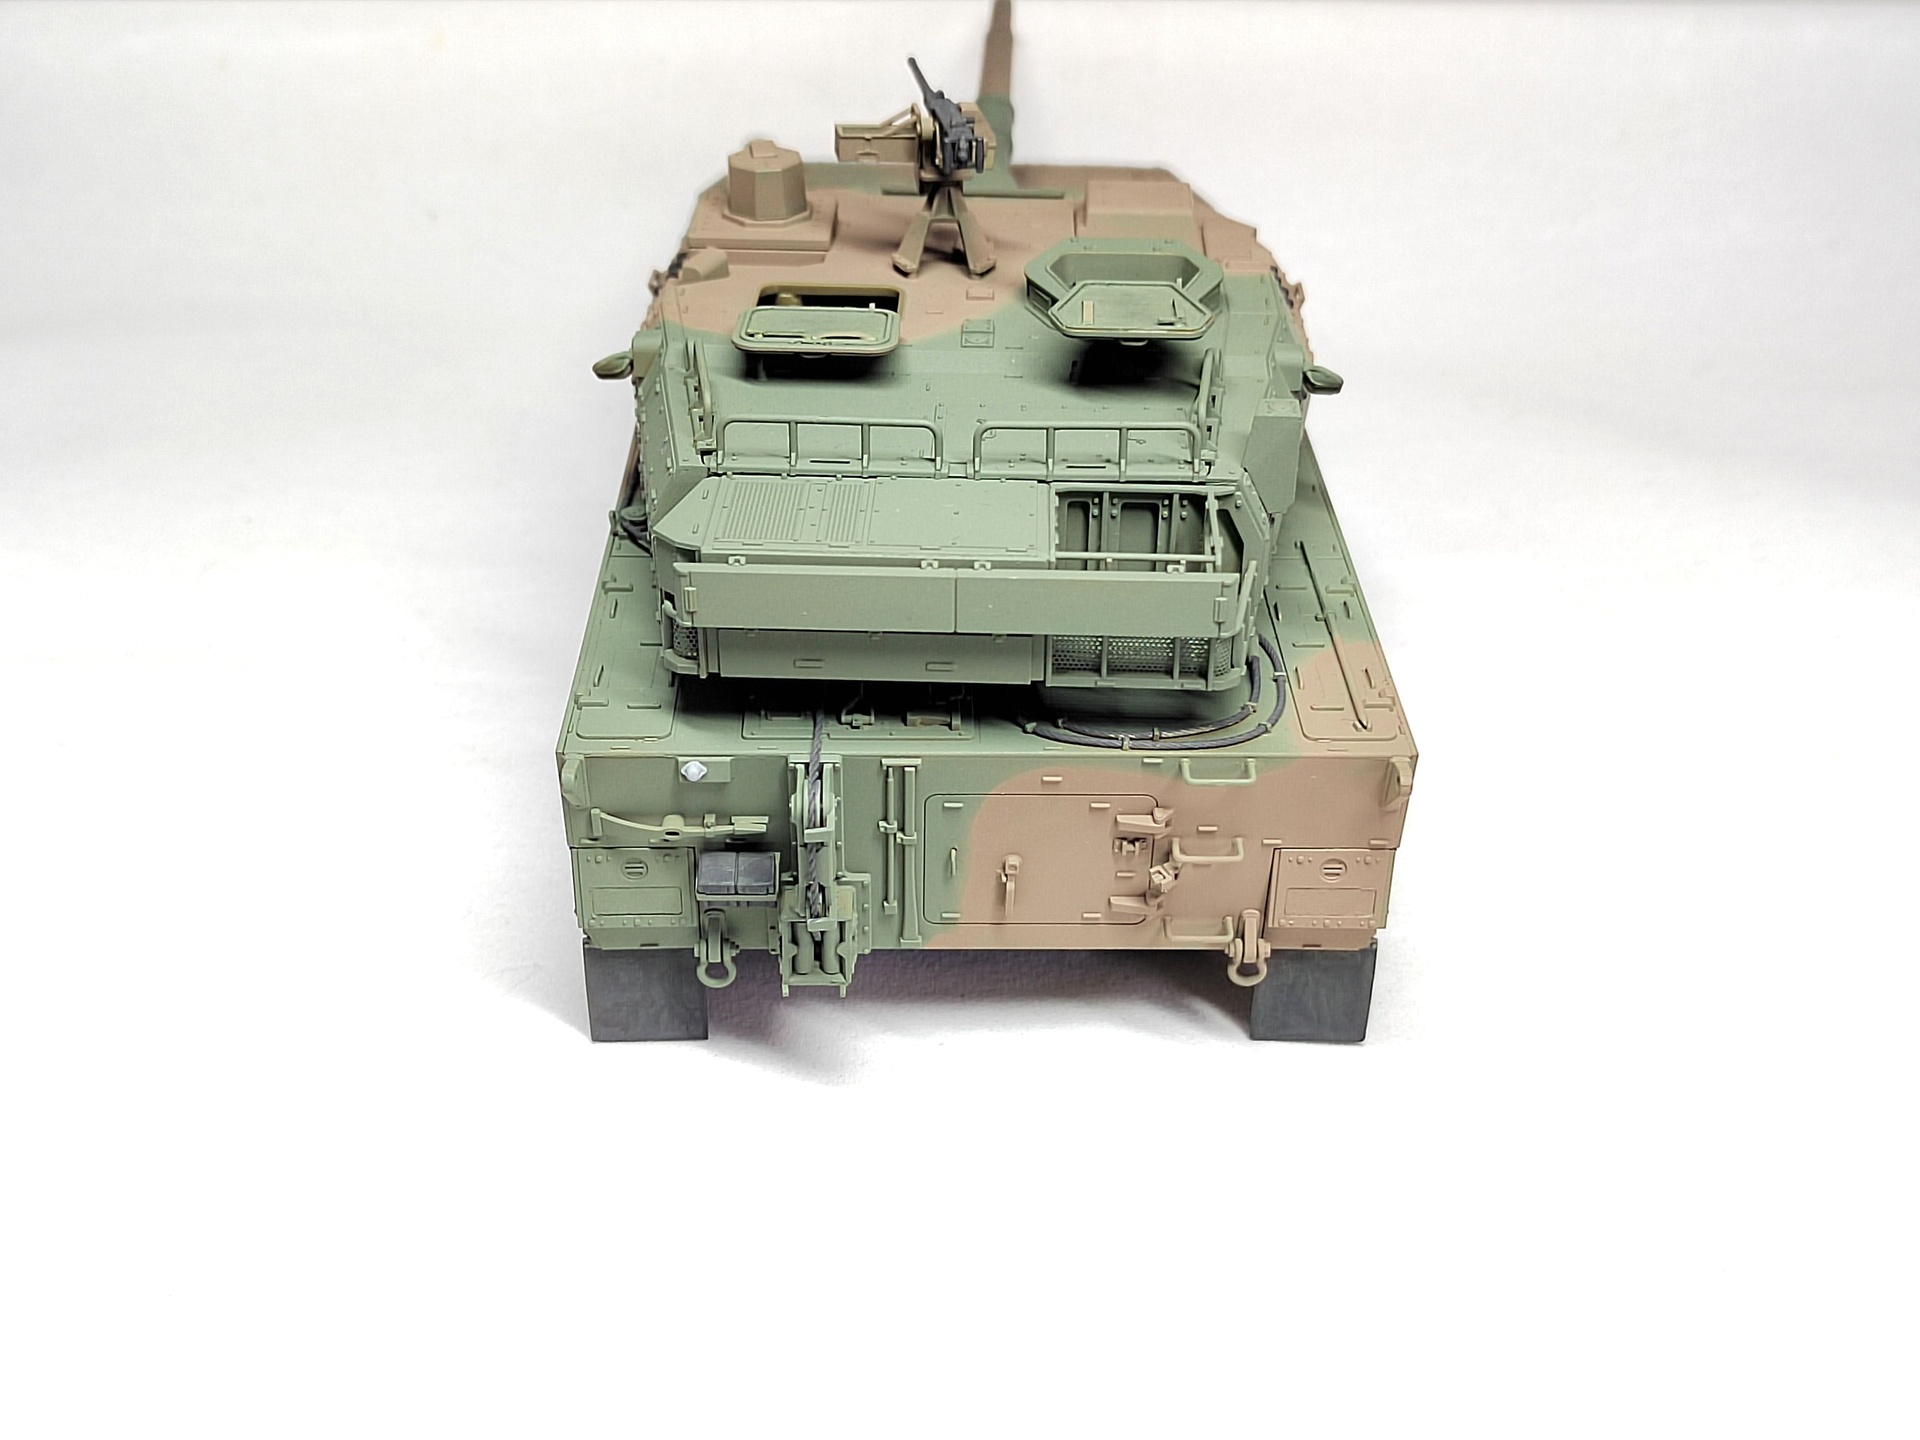
I finally completed the turret.
First I added the C5 version details on the rear of the turret roof.
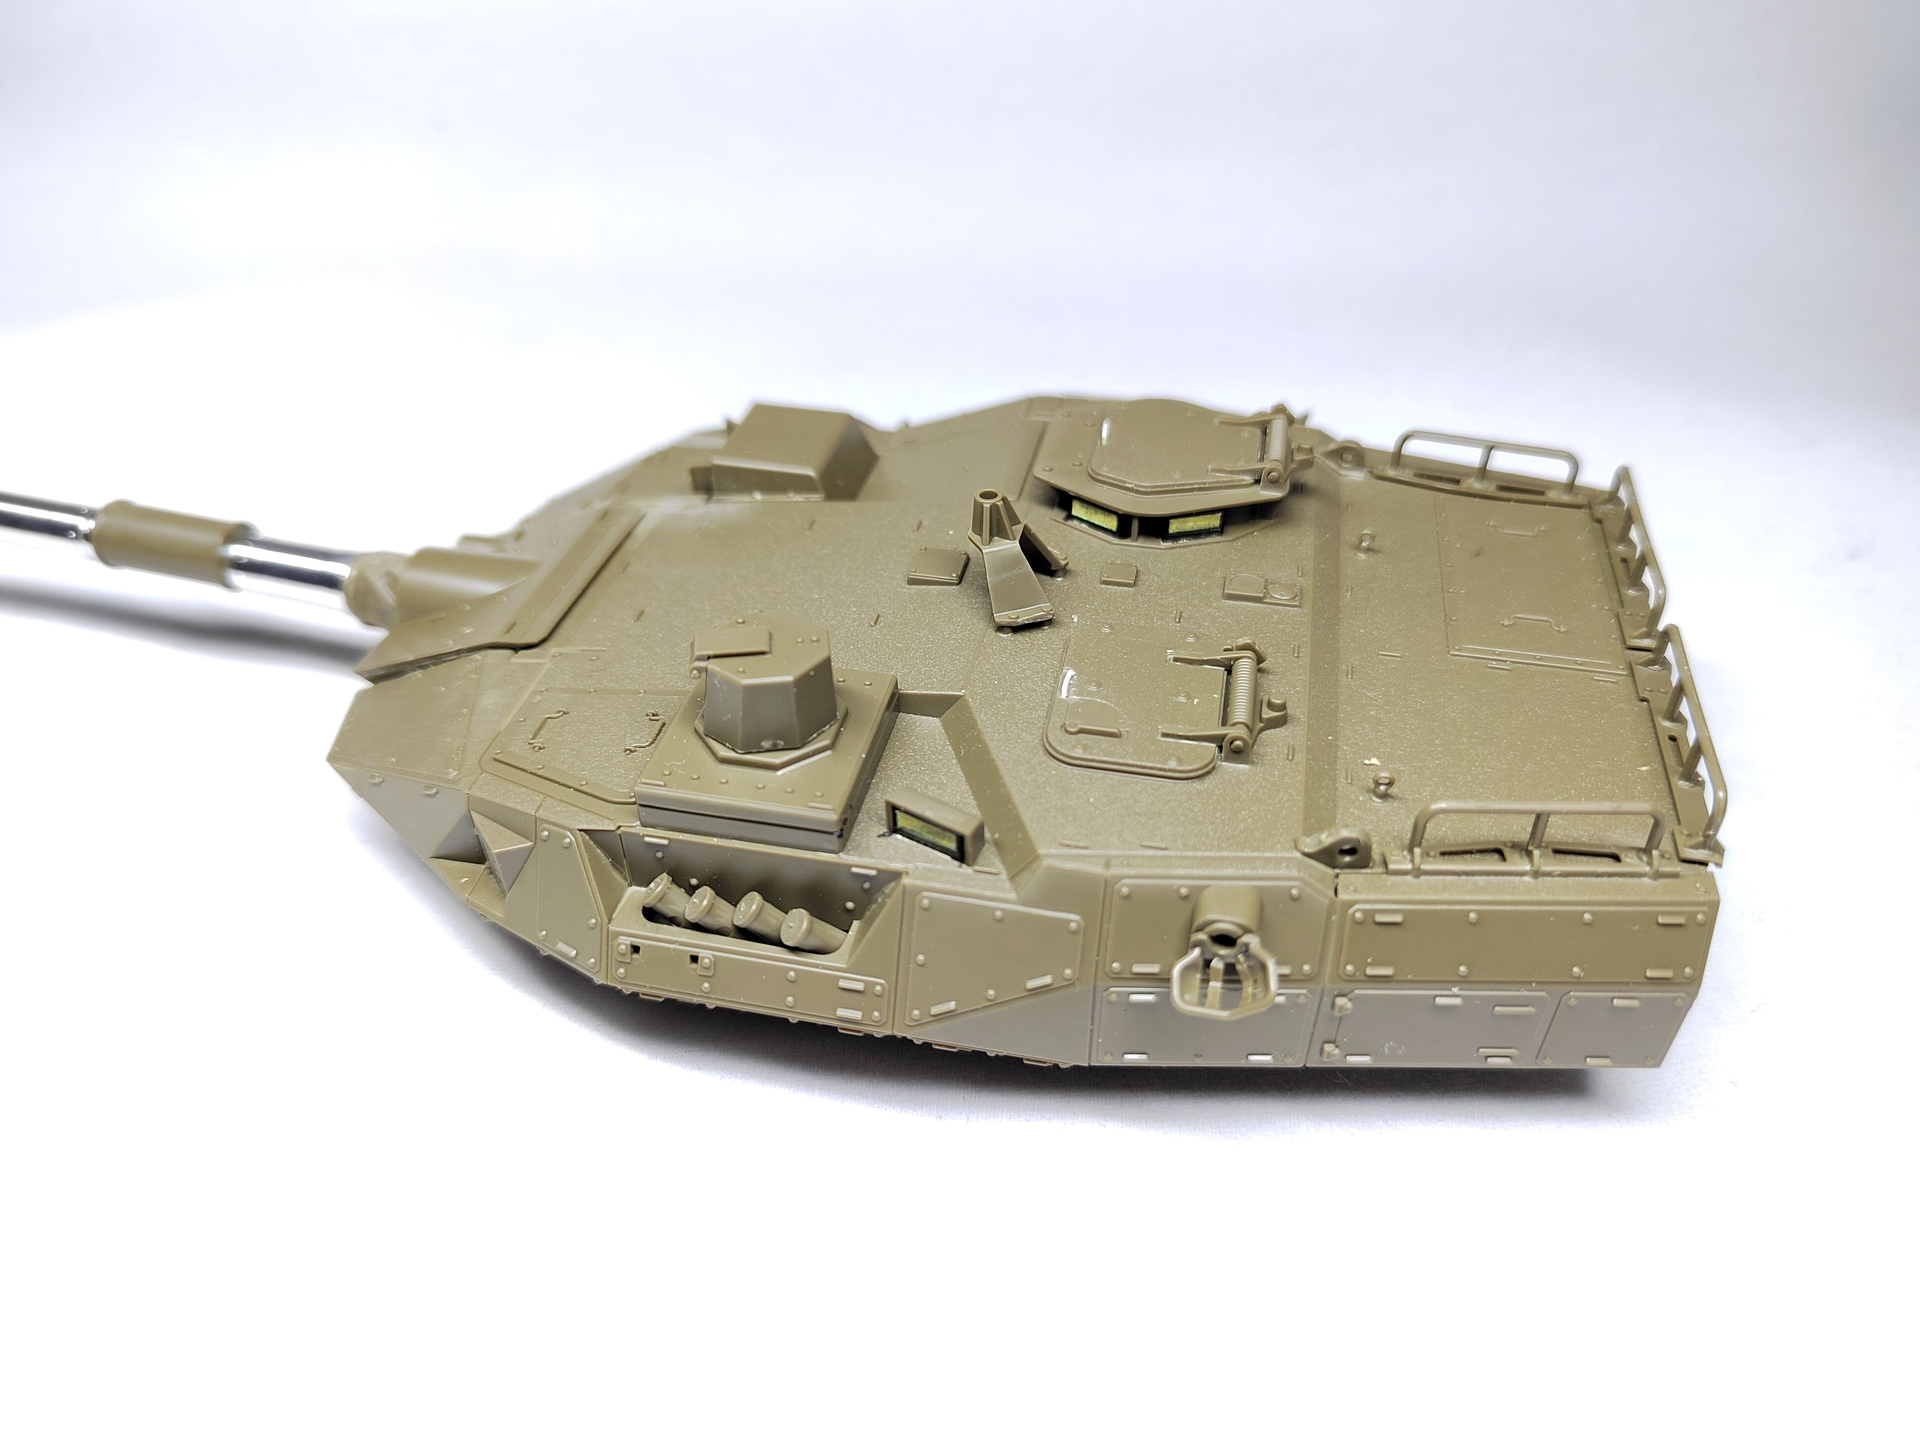
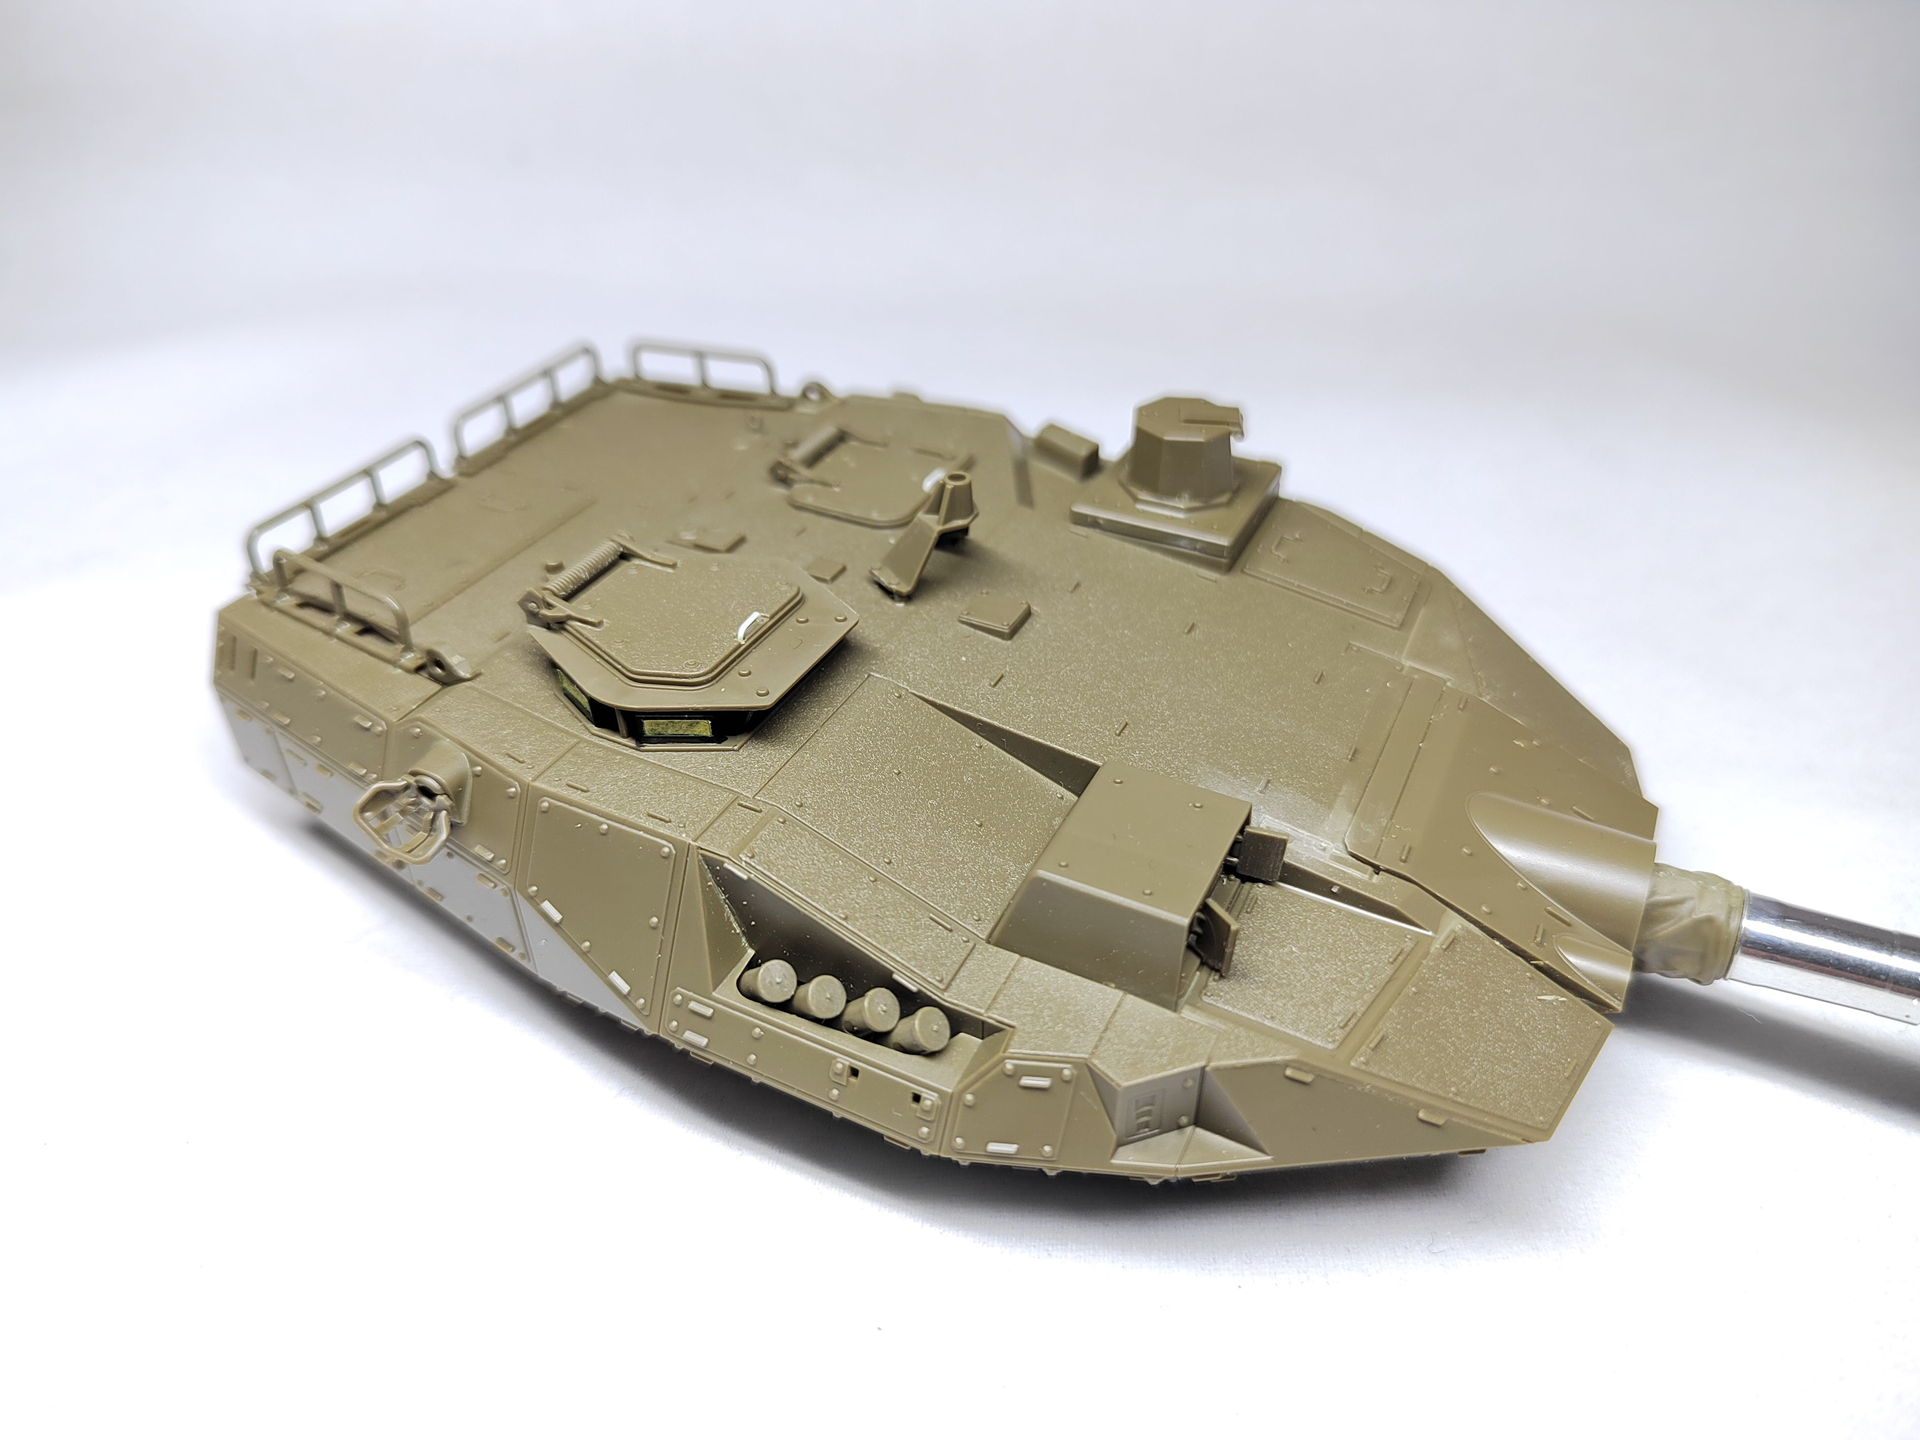
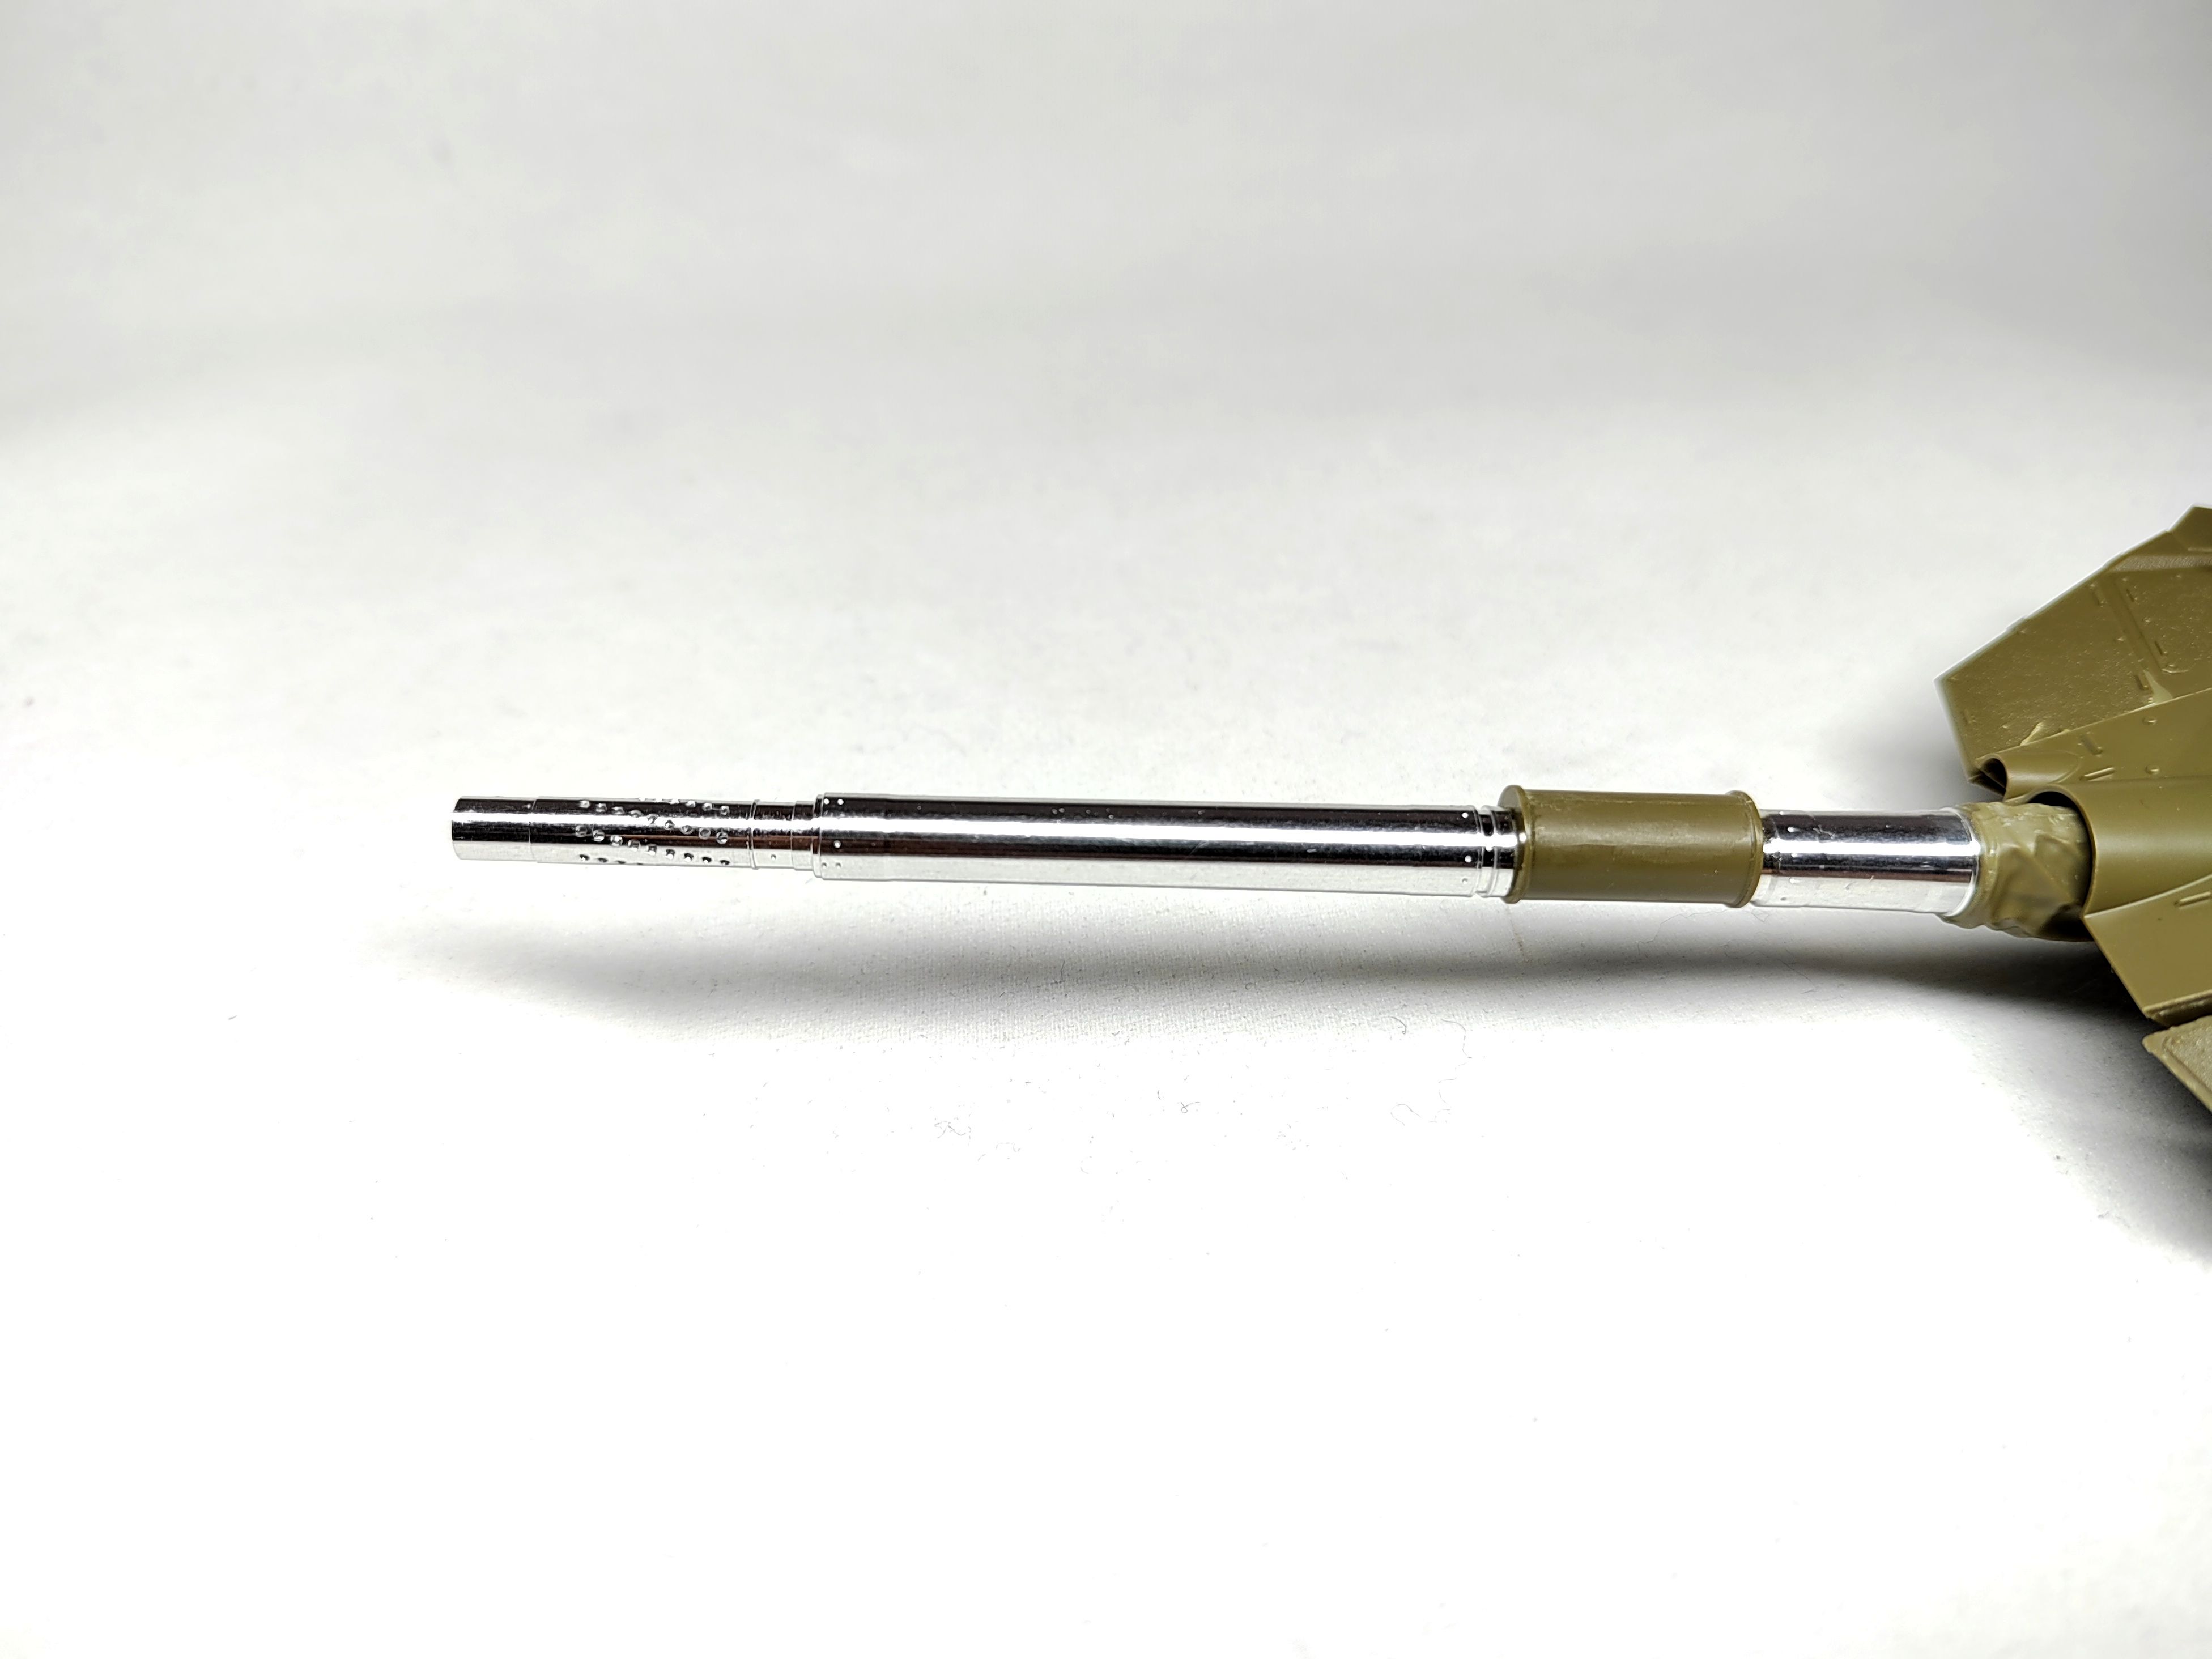
Then I glued the aluminum gun to which you have to glue the bore evacuator and the dust cover. The turned barrel is a great replacement with the drilled out holes of the muzzle brake. If you use the plastic one-piece barrel you can depict the holes either with a decal or by drilling them using a mask as a template which can prove quite boring (no pun intended).

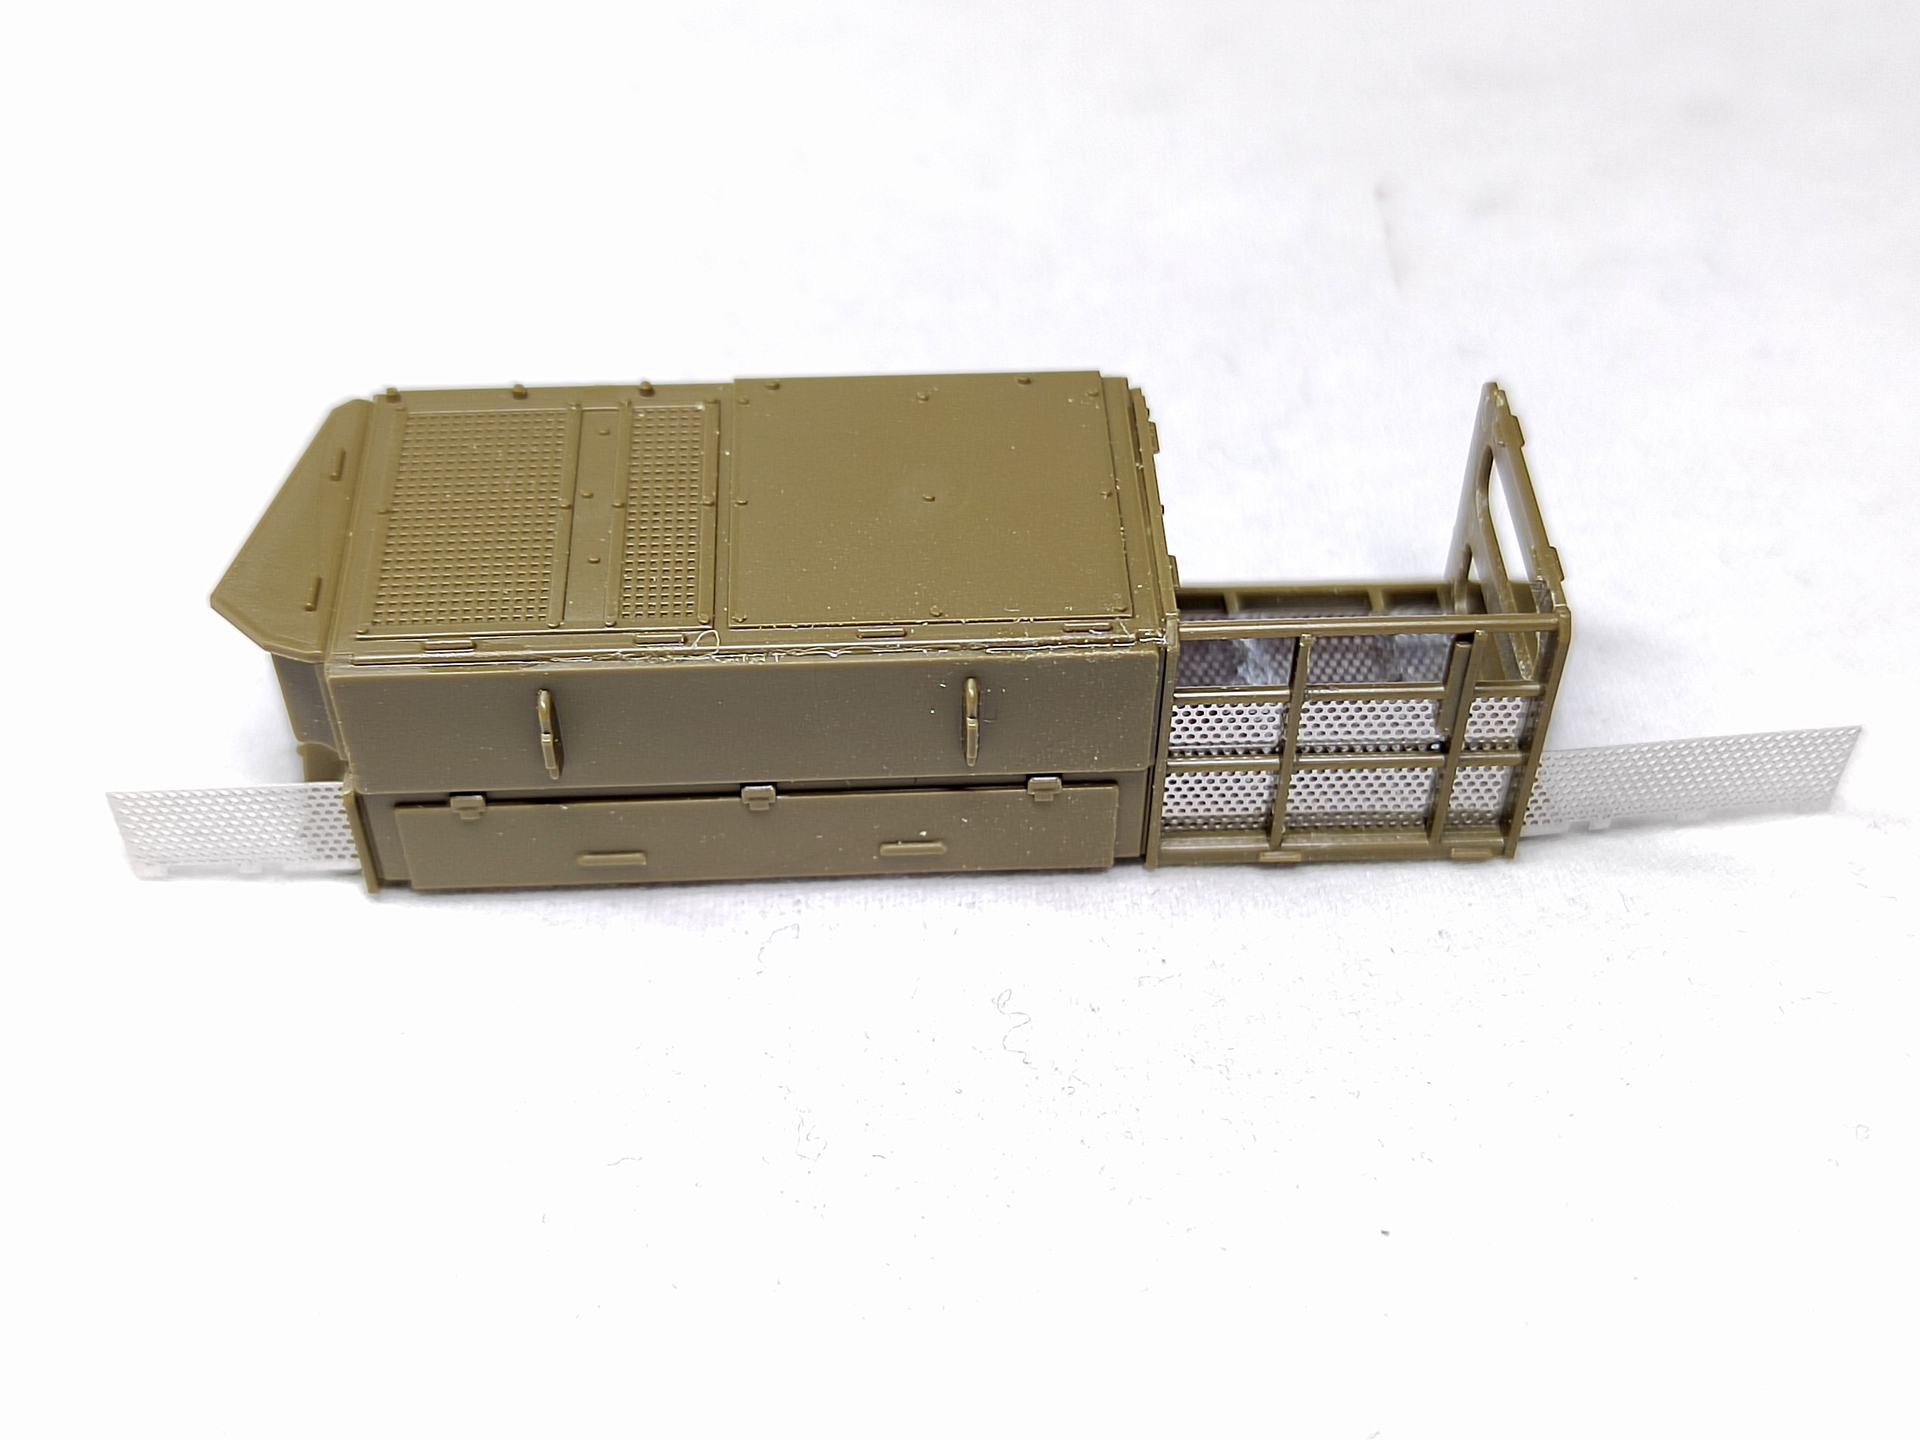
The air conditioning unit and the bustle basket are well engineered. The PE parts are a bit stiff as they are not brass.


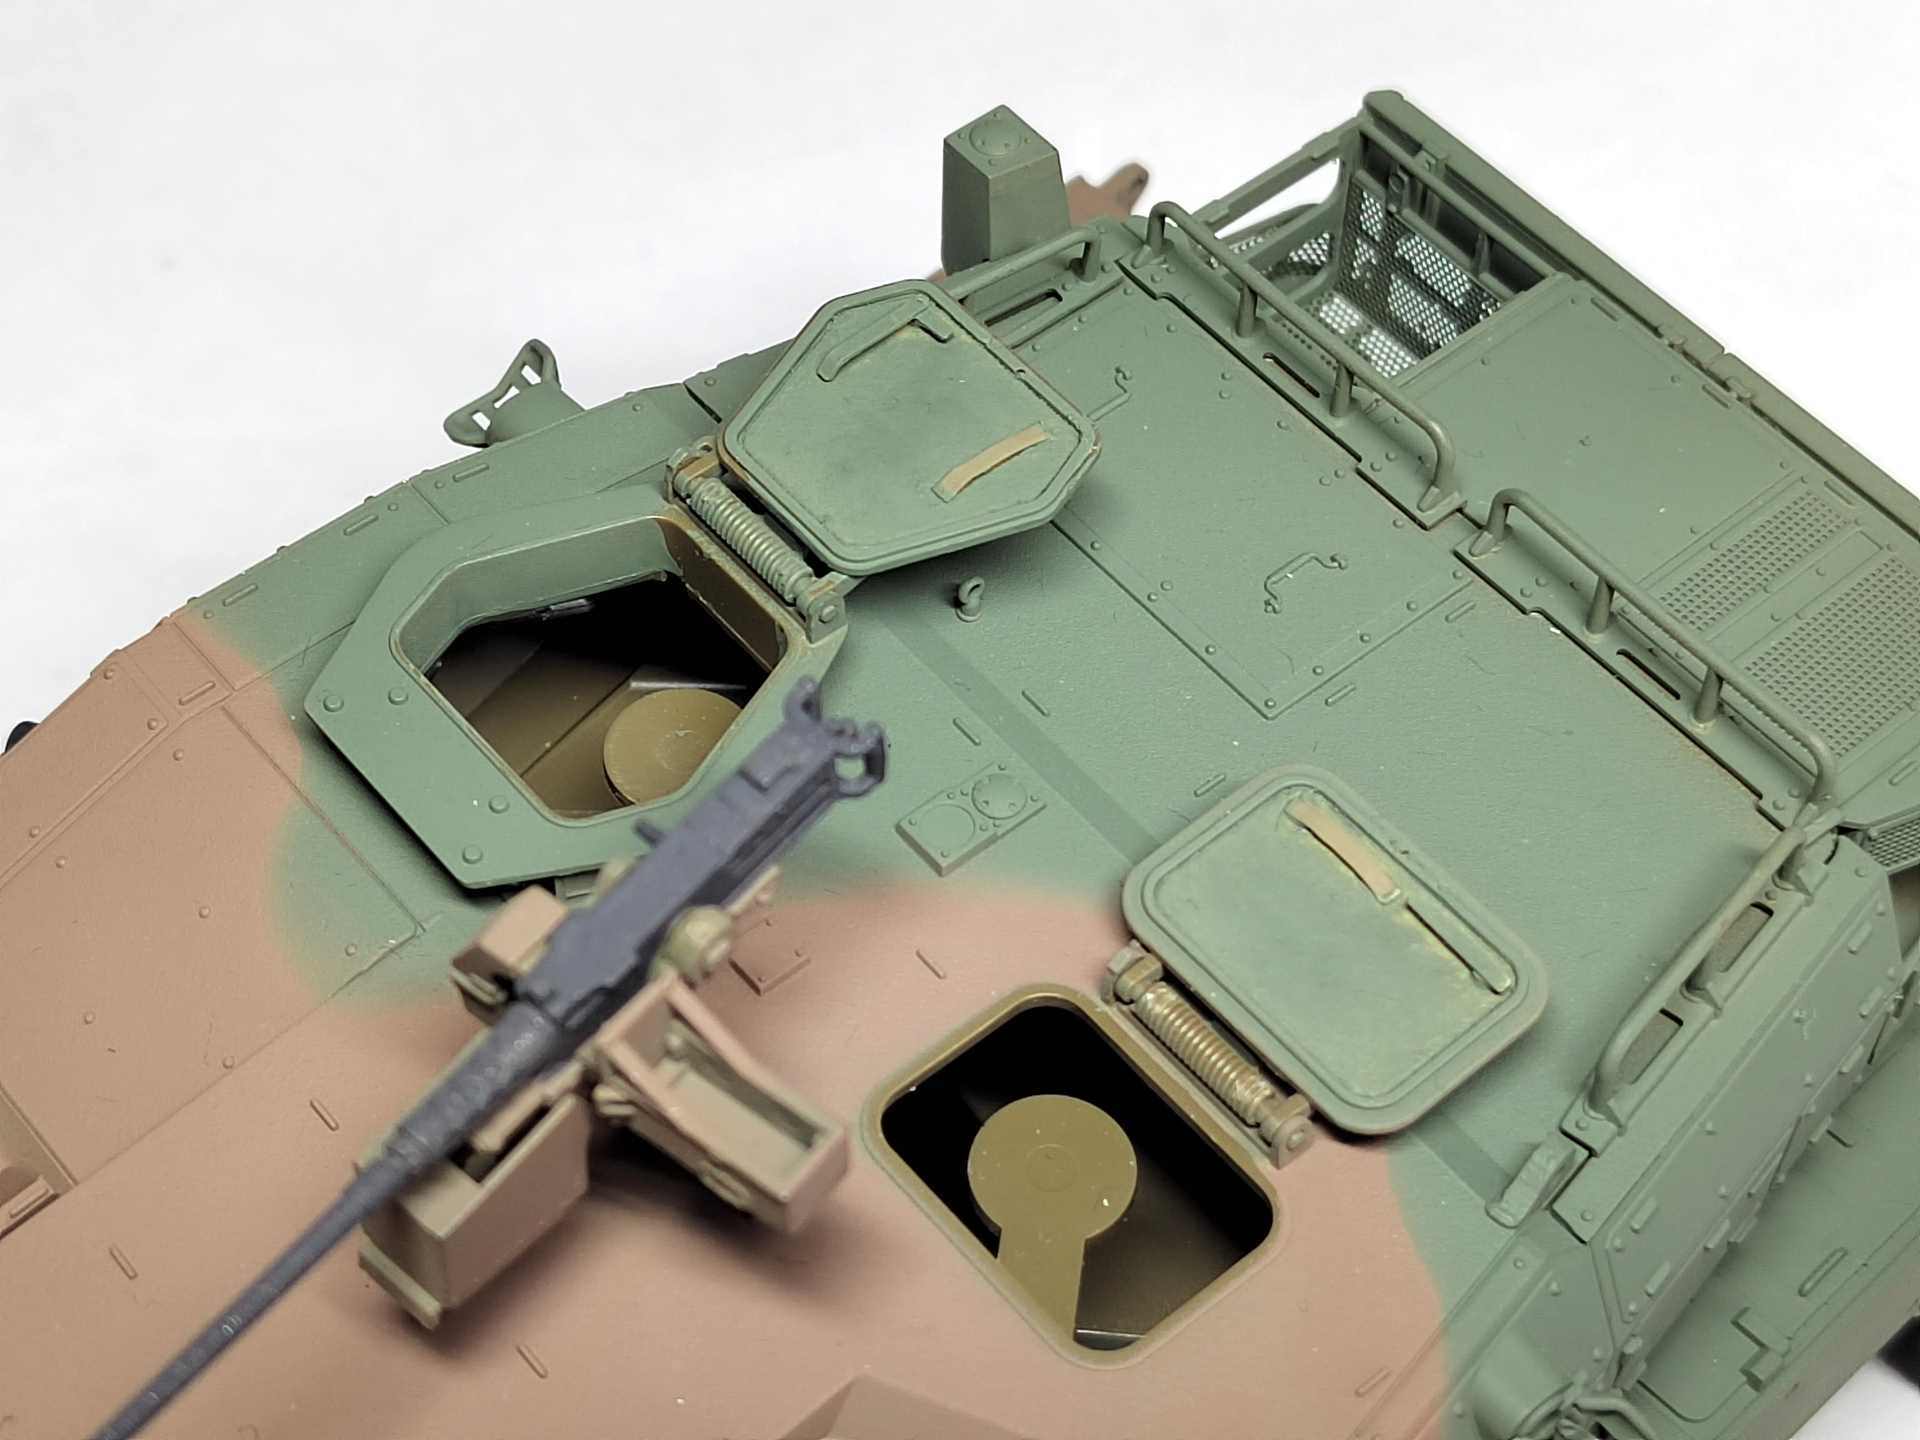
The turret is complete. The .50 cal MG is in place just for the pictures. The antennas bases are not glued yet. They have been drilled out so I can insert a length of styrene rod after the painting stage.

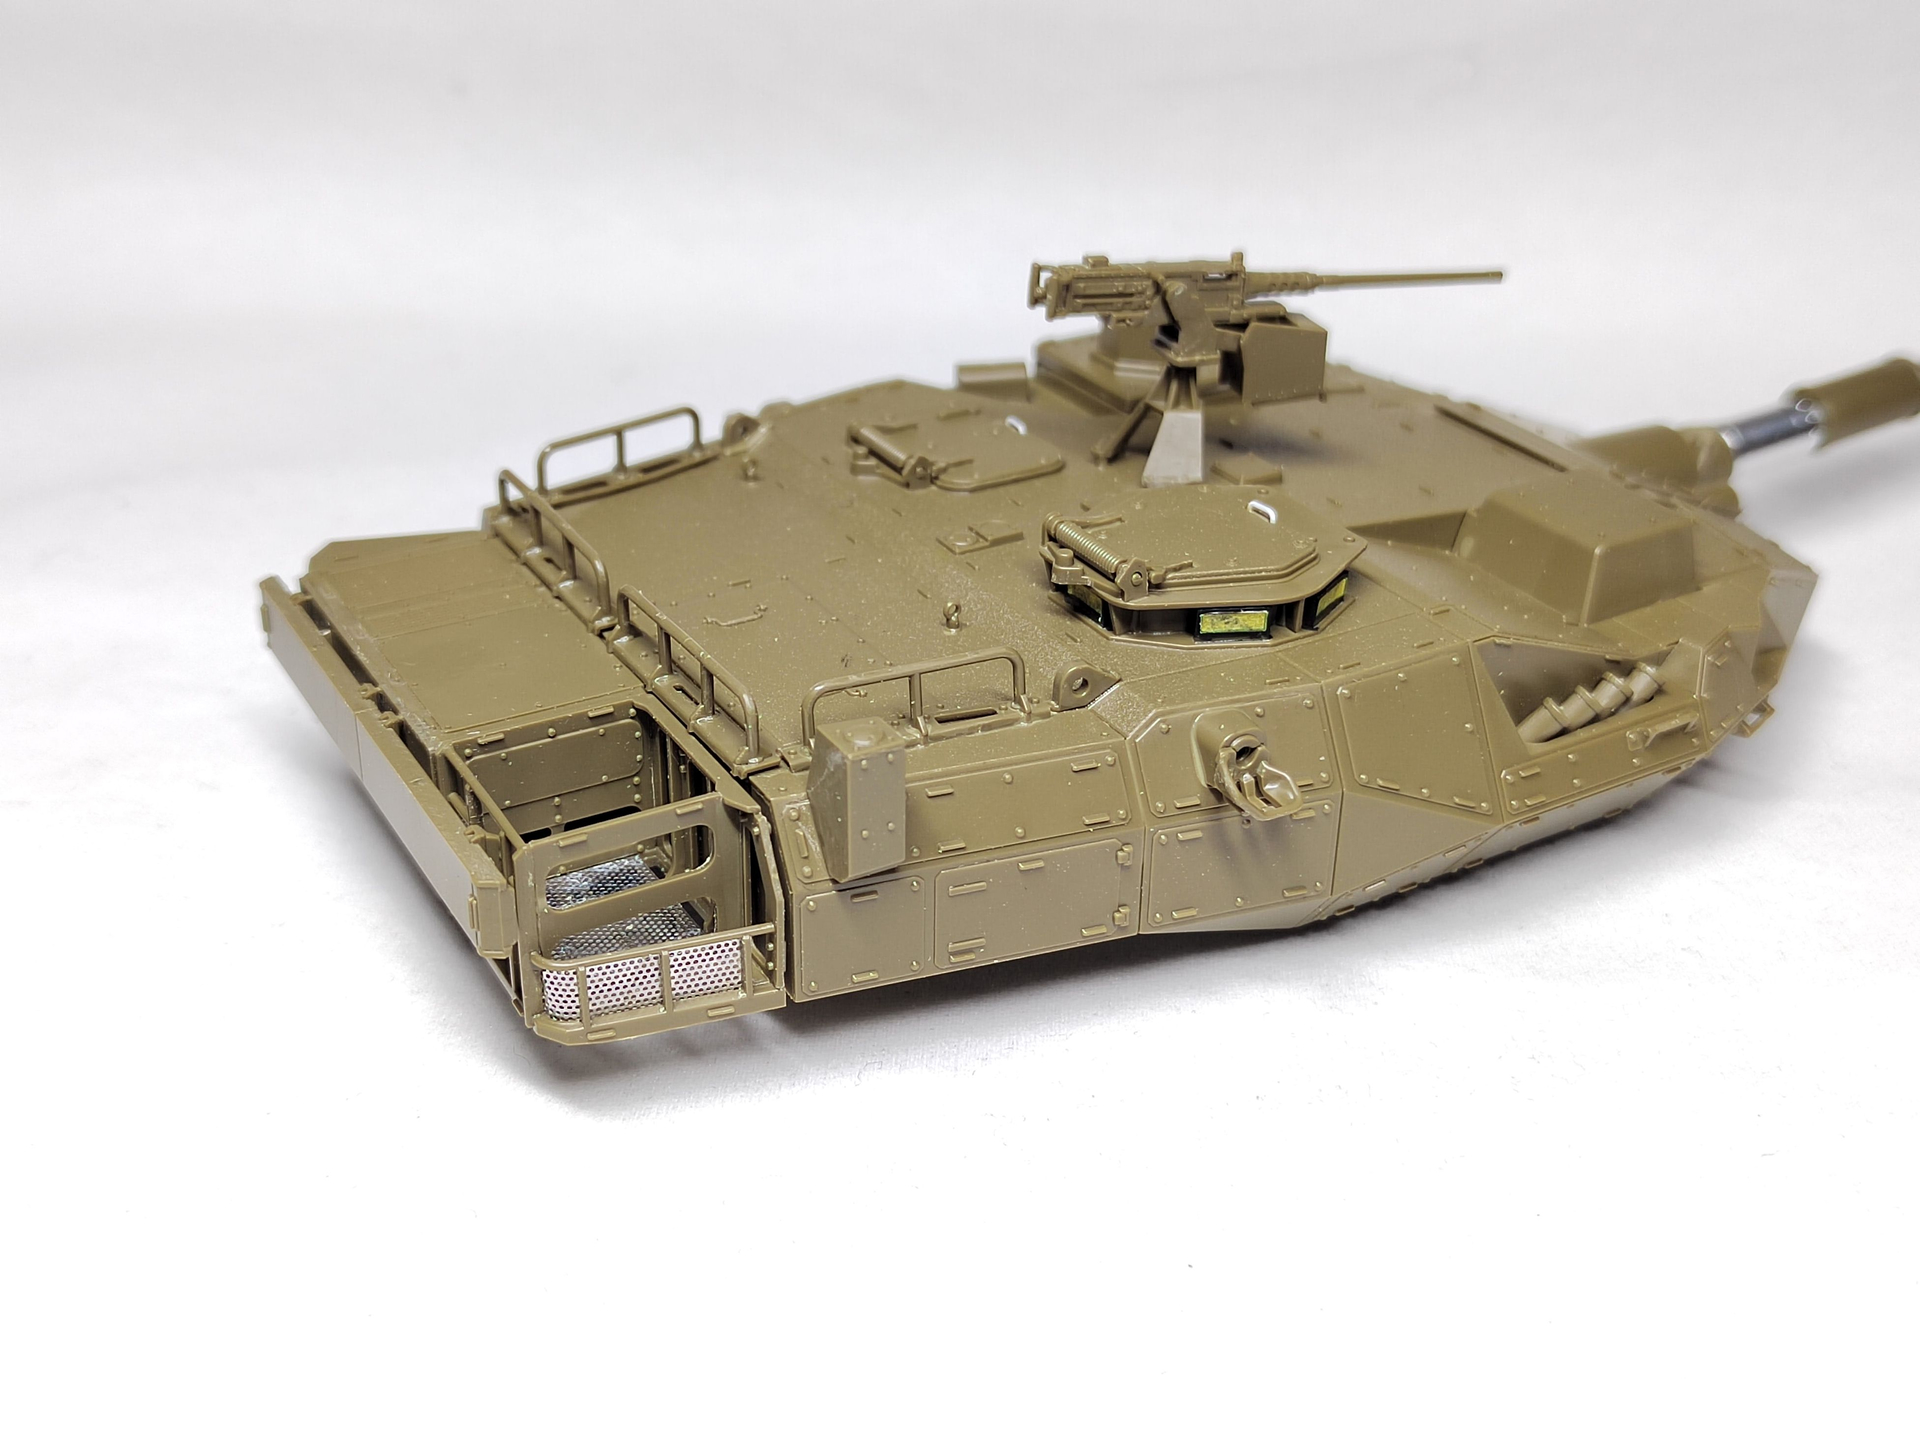
The turret and the hull are mated to have an idea of the final result.
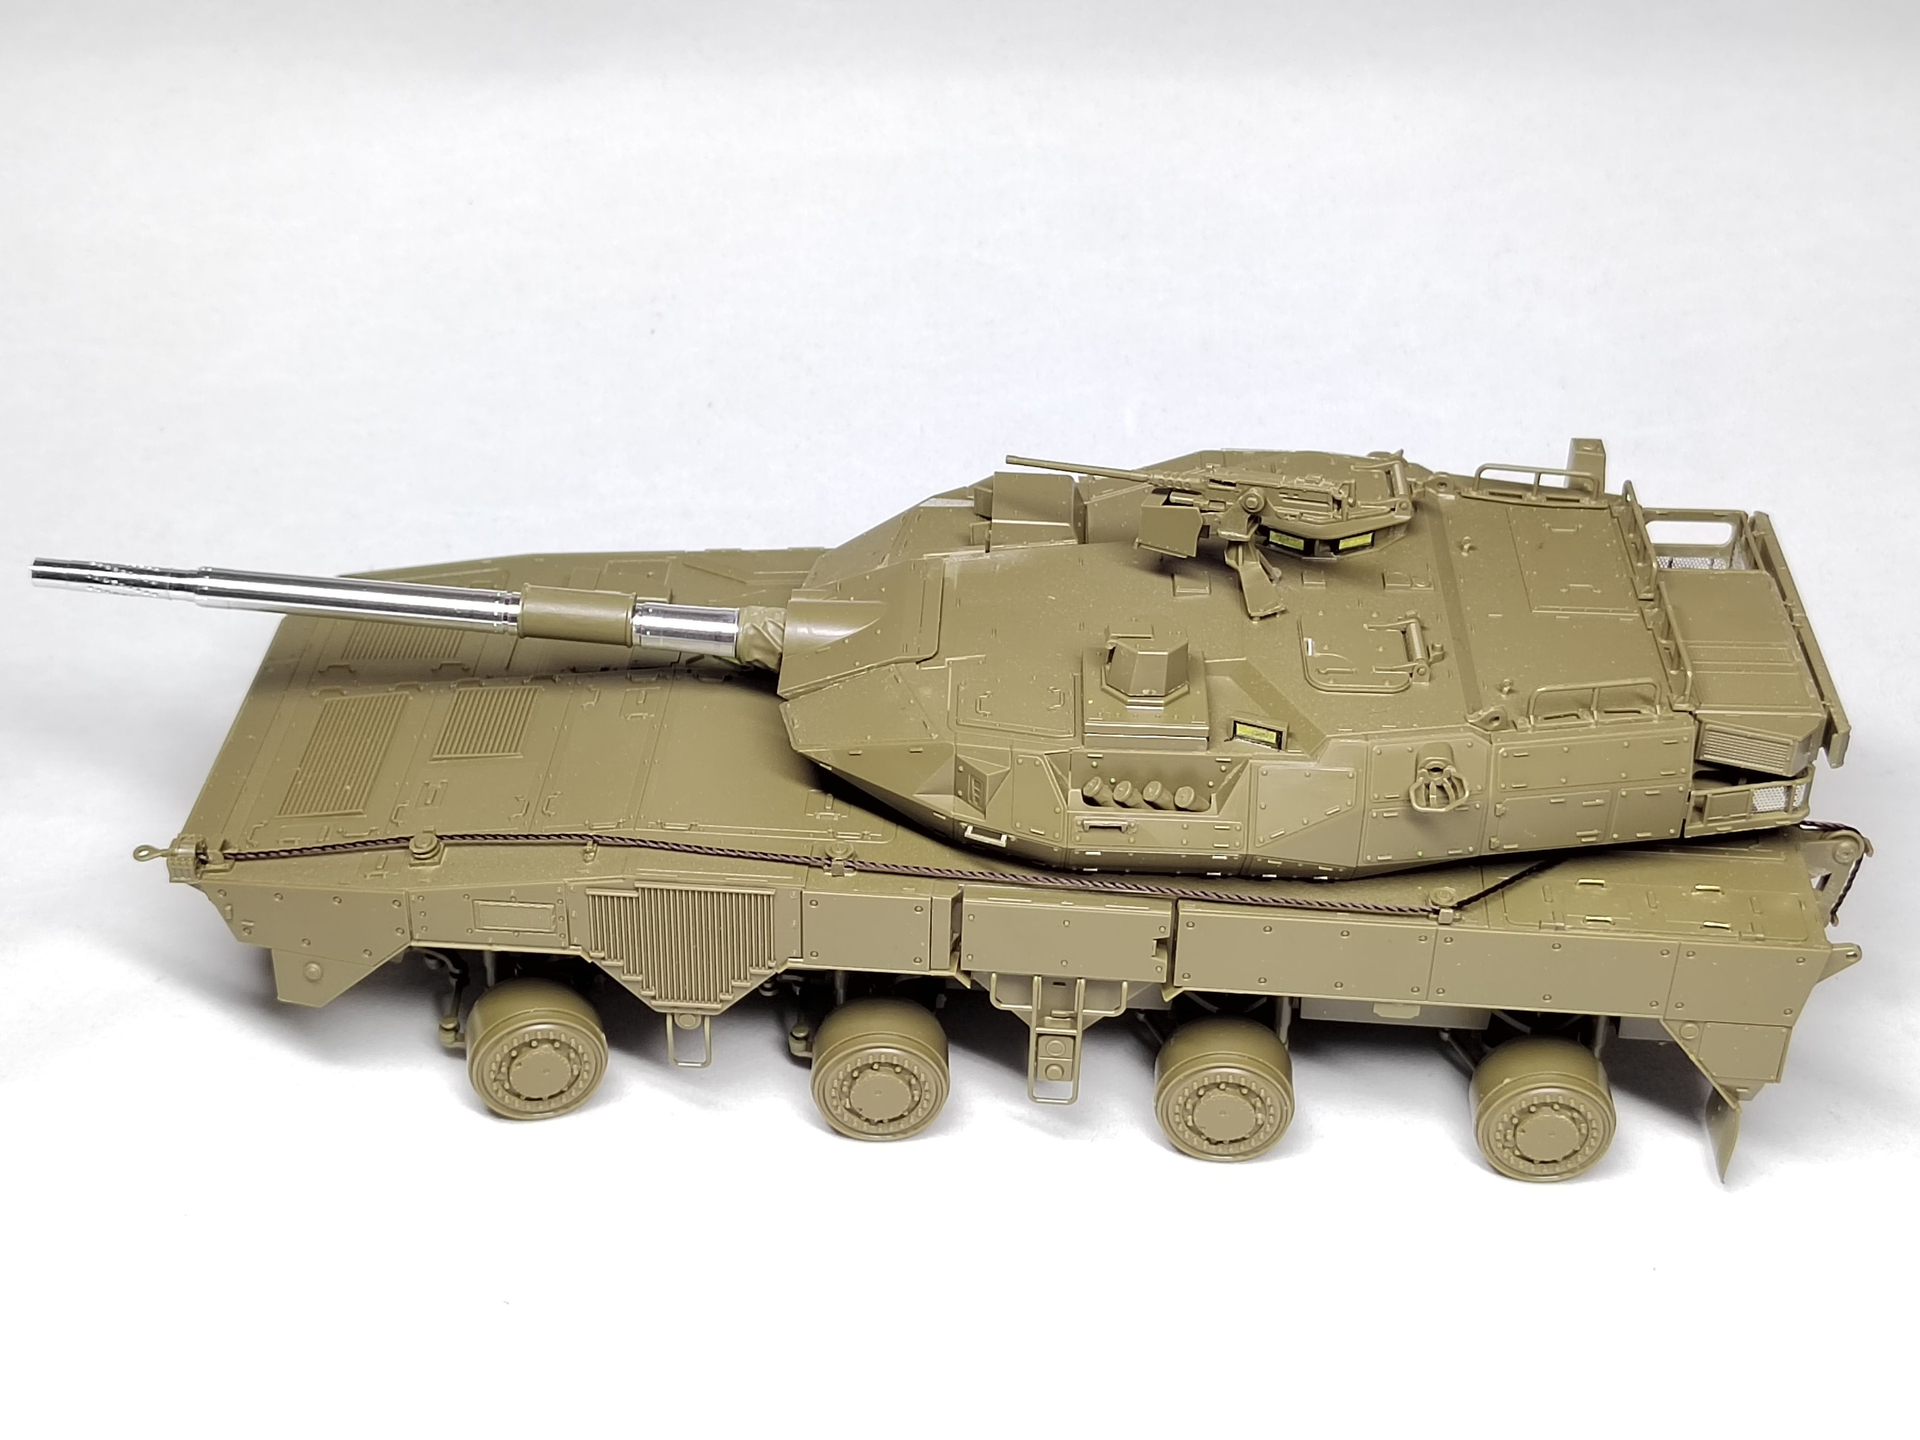
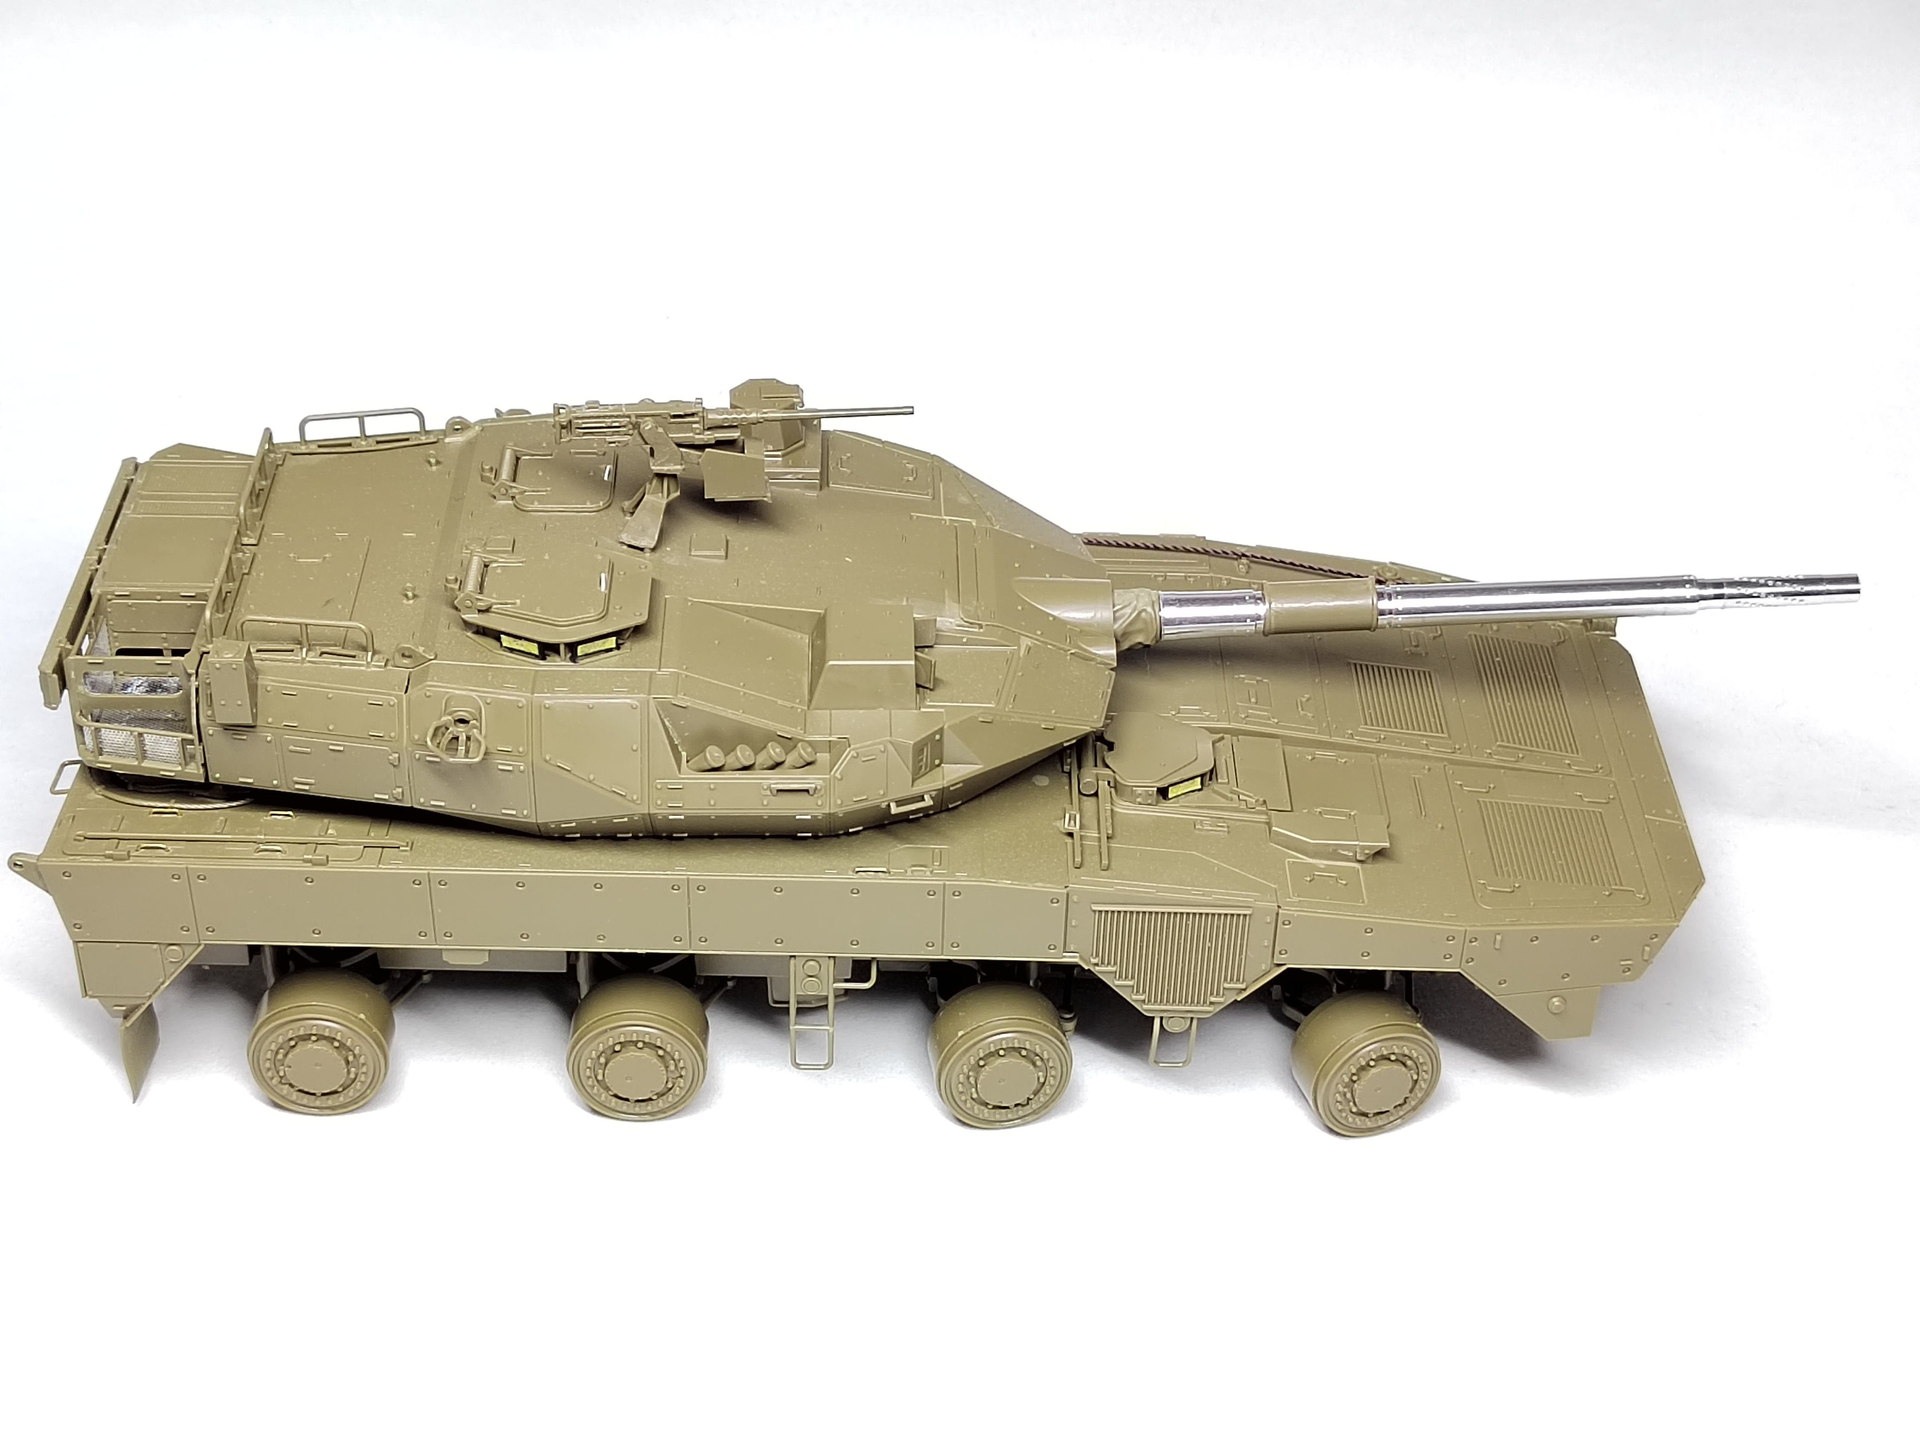
Now it’s time to spray some paint on it.
Olivier
14 Likes
That’s a huge turret for a wheeled vehicle!
1 Like
Very interesting muzzle brake on that beast.
1 Like
Well I guess accidentally im building 5 tamiya kits right now and in the next few months
3 Likes
Making progress on the Wolf. This is probably the most fun I have had modelling for some time - it must be the Tamiya effect of straightforward building ![]()
The chassis is pretty much complete, just a couple of more pieces and some wiring and plumbing.
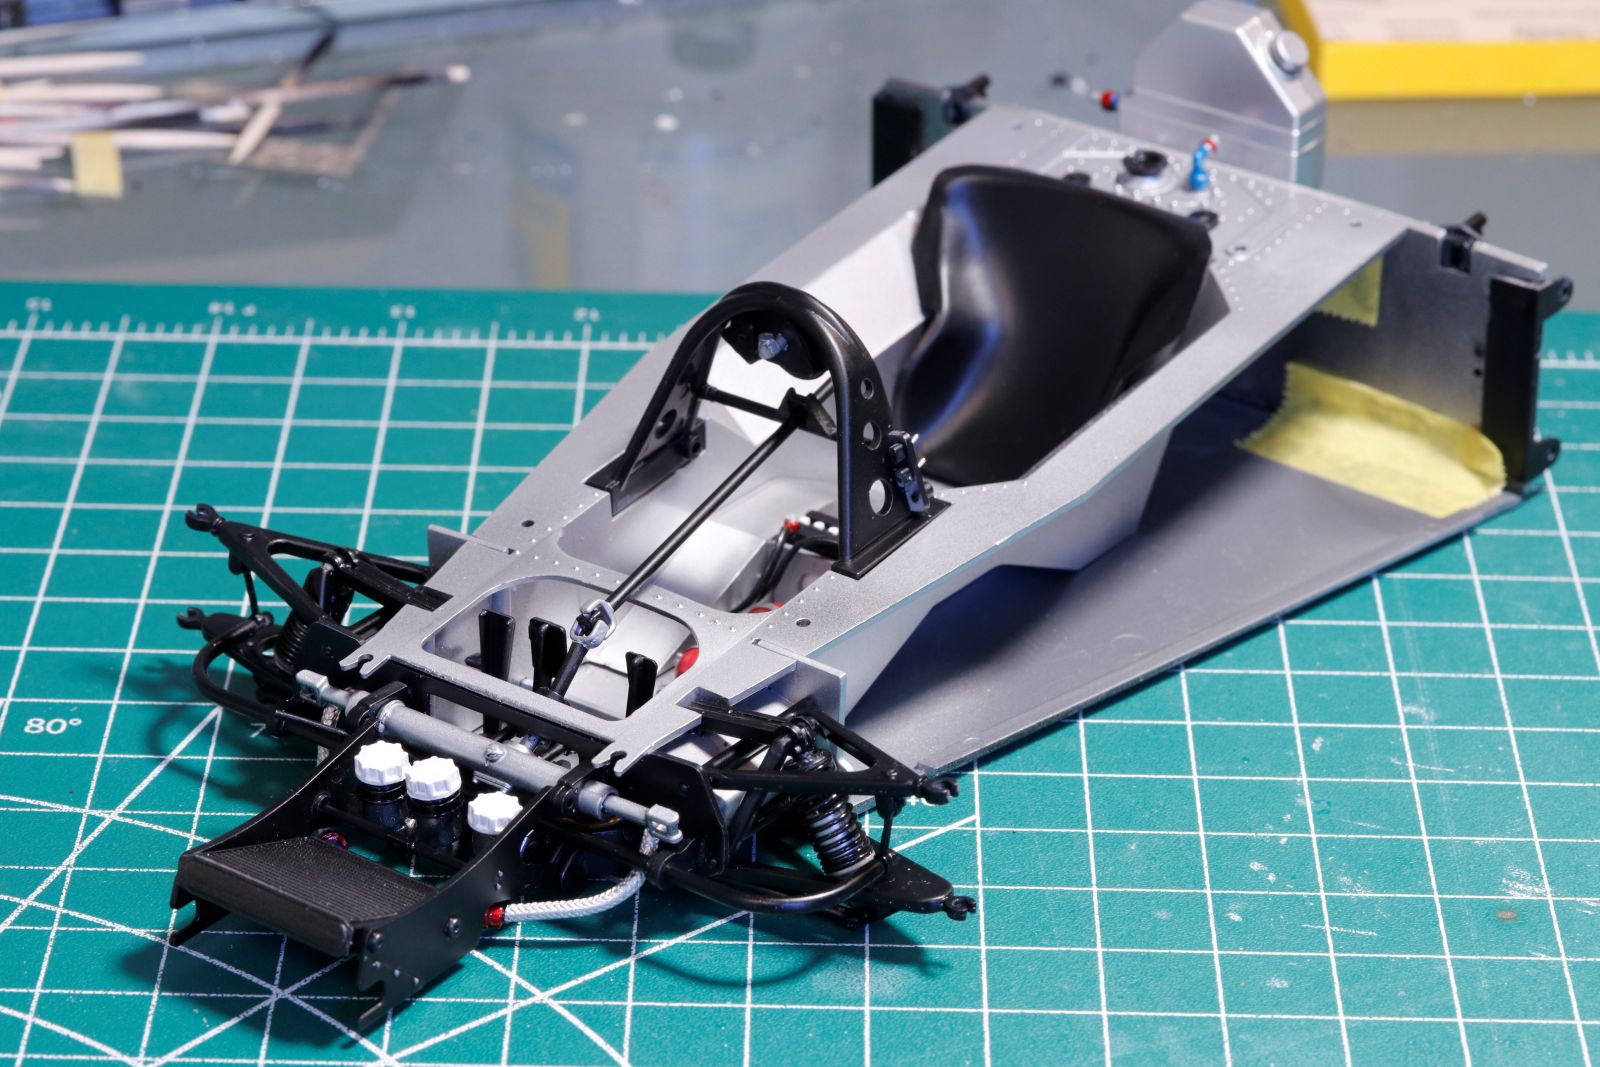
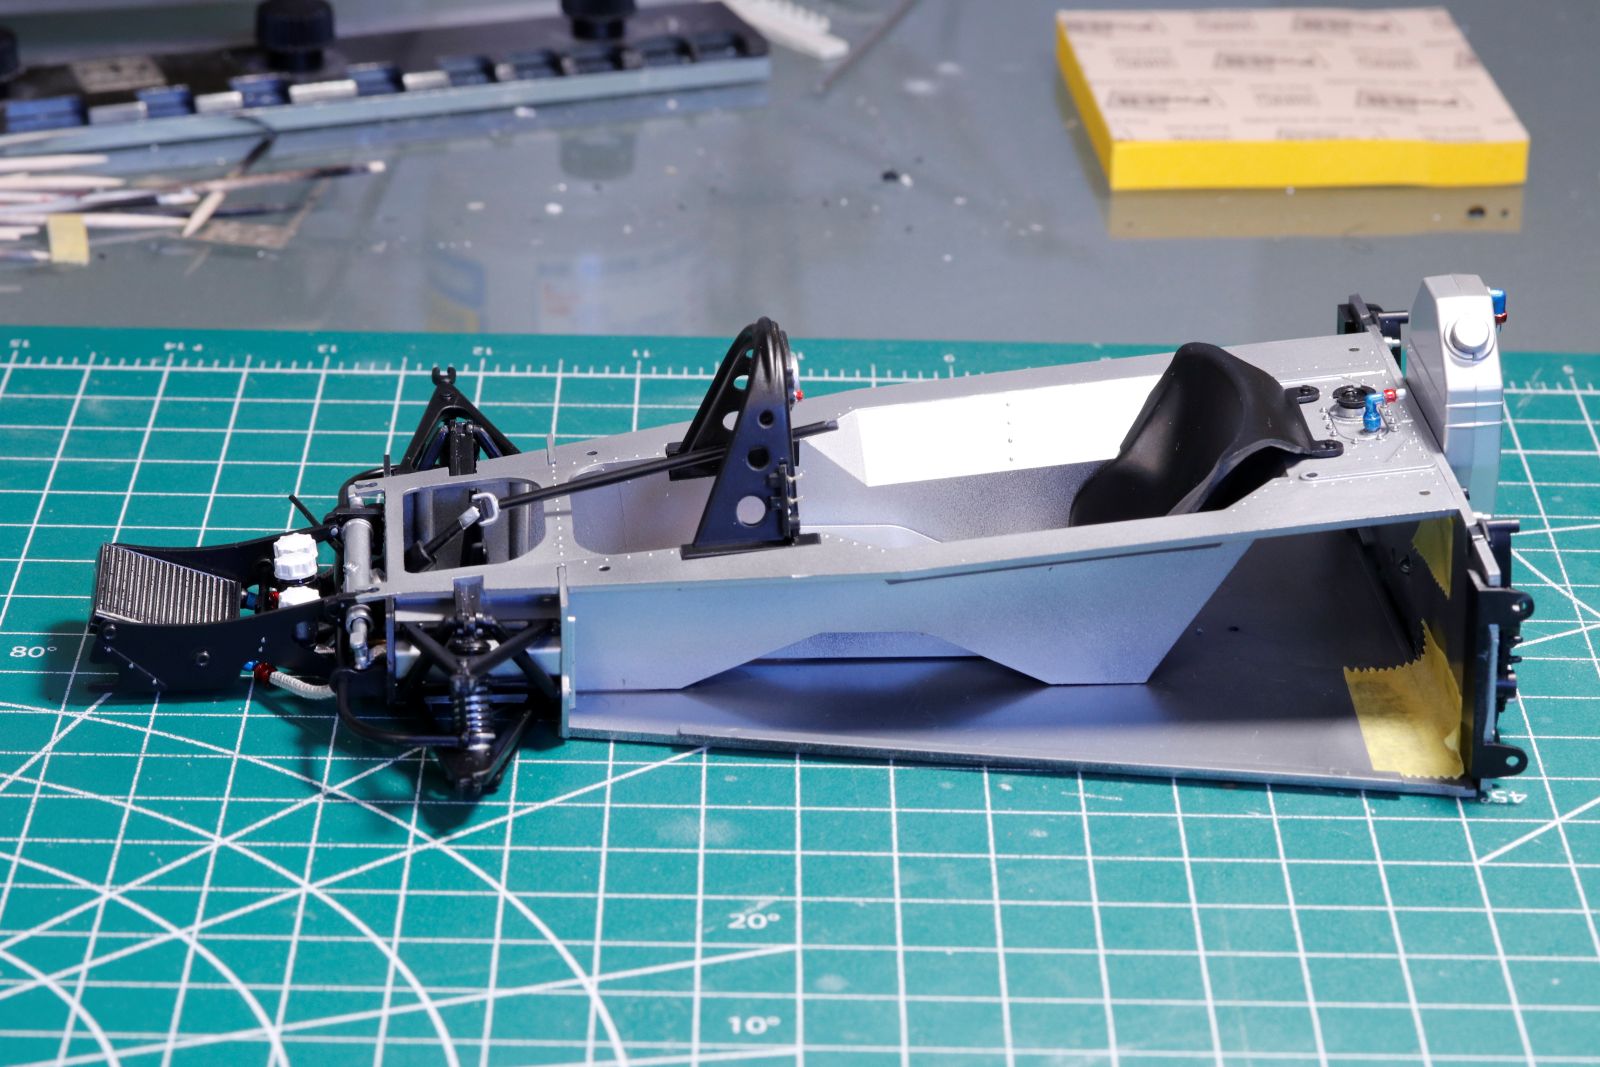
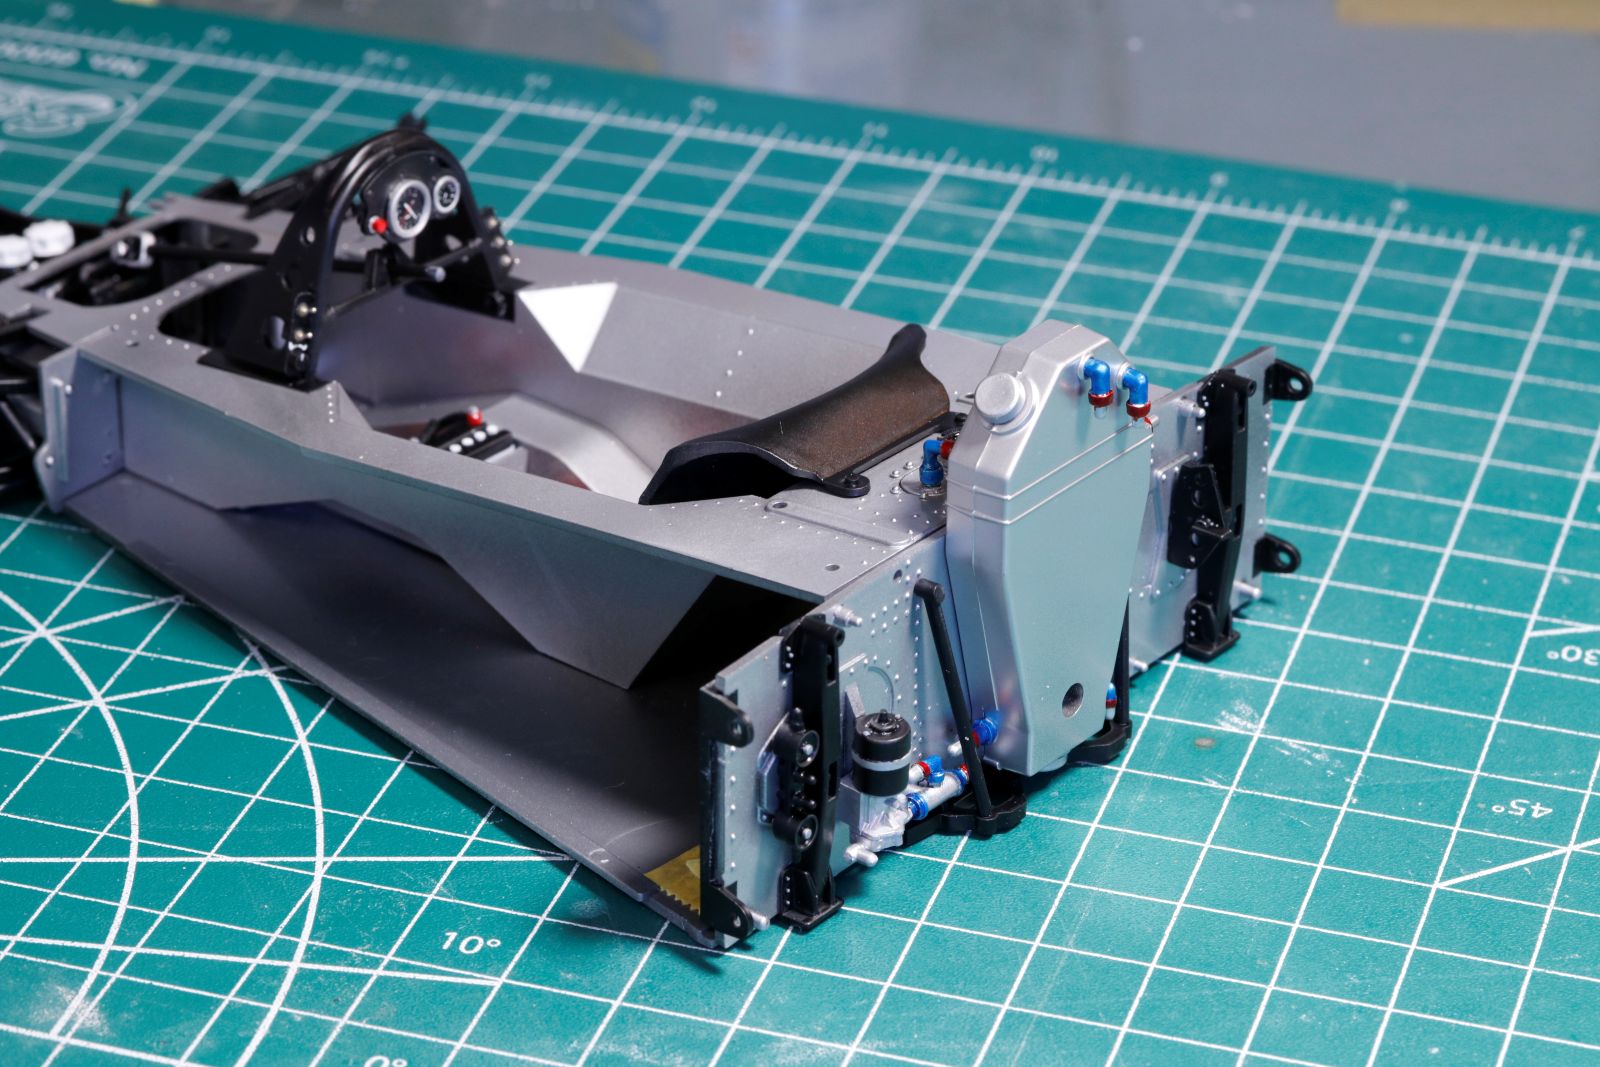
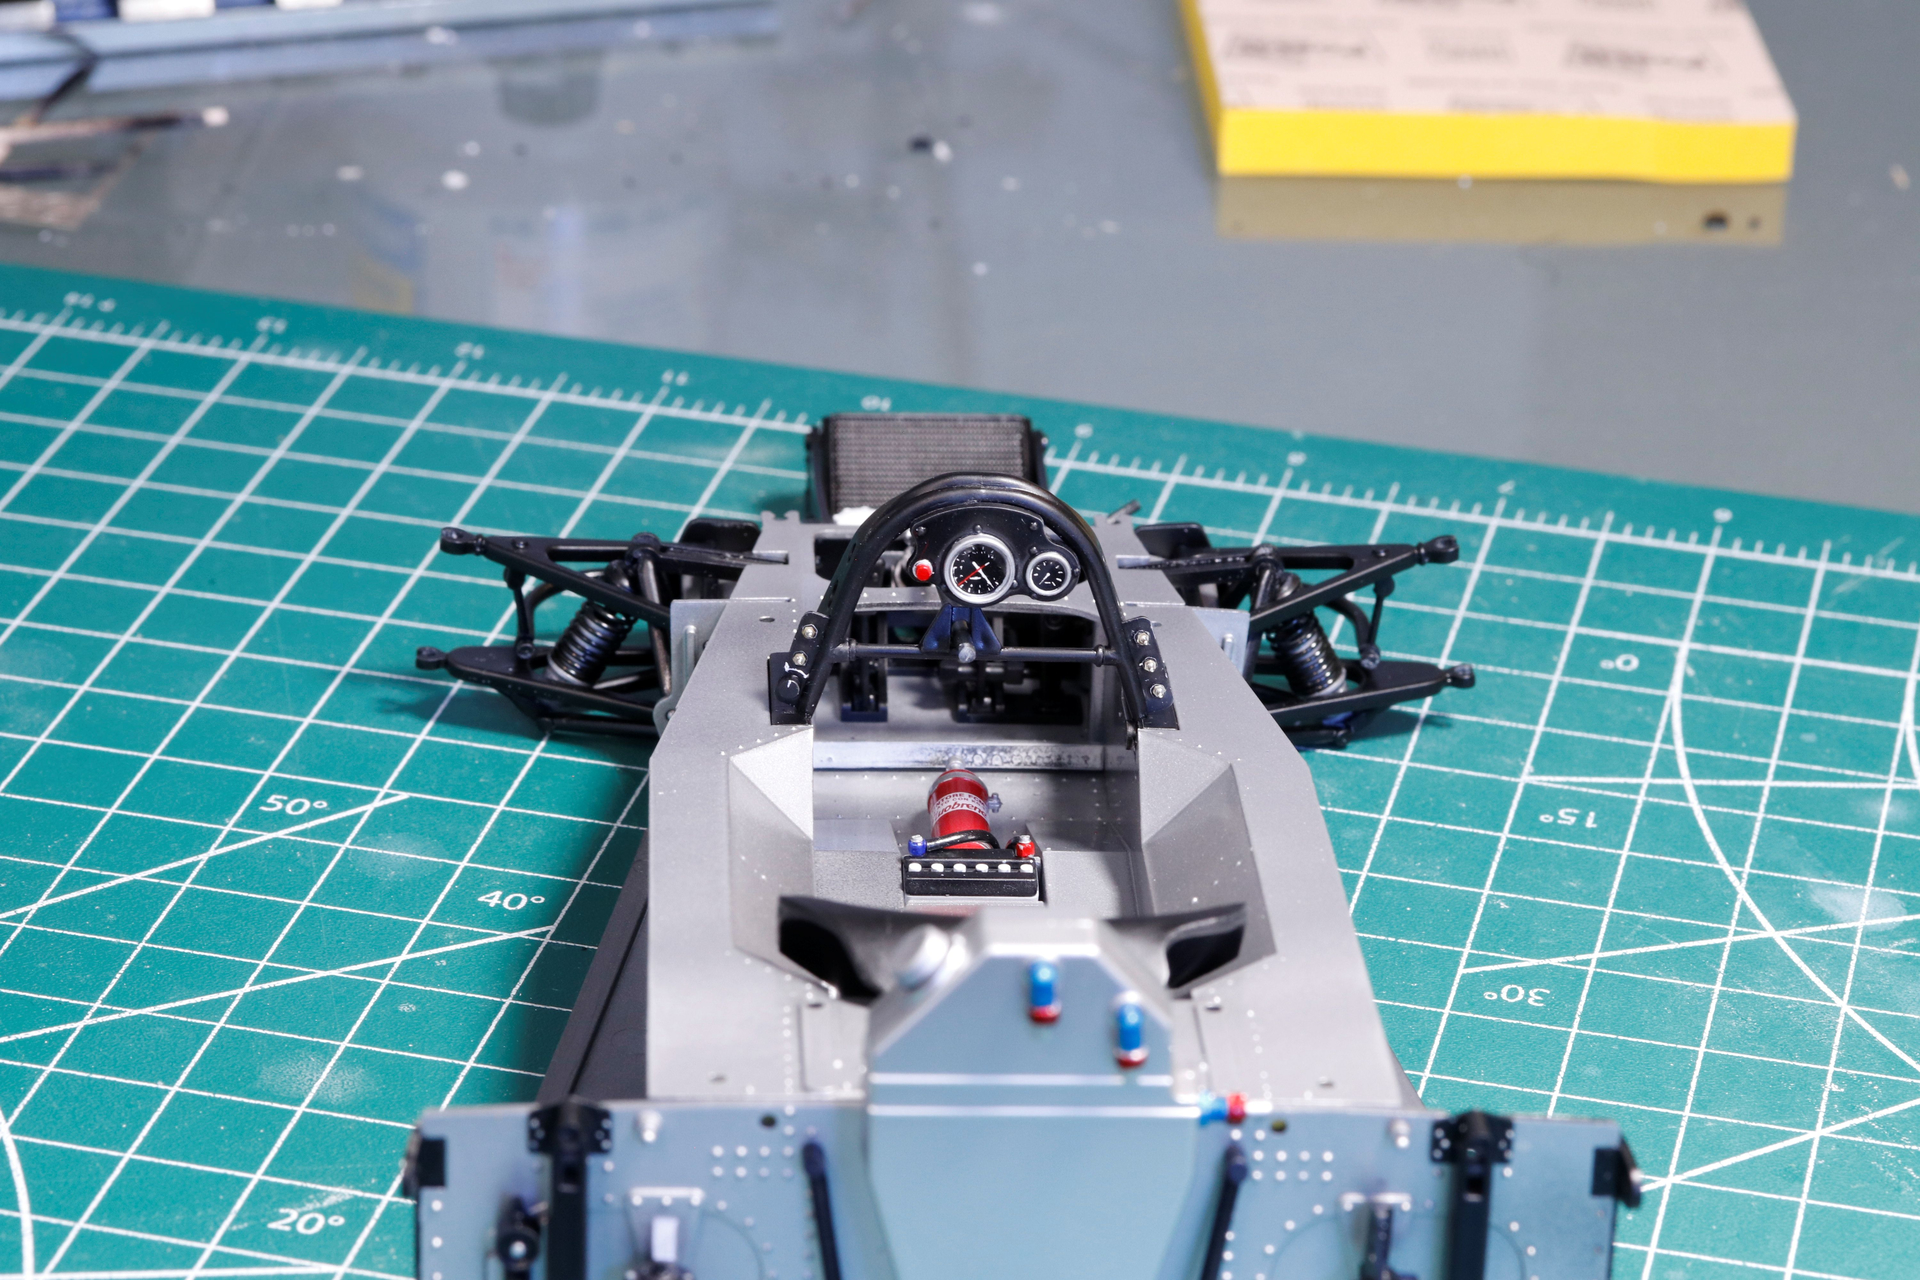
This is not entirely out of the box. I have some detail from the spares box adding toggle switches and battery terminals and cables plus some radiator cables. There is more to go on the bulkhead.
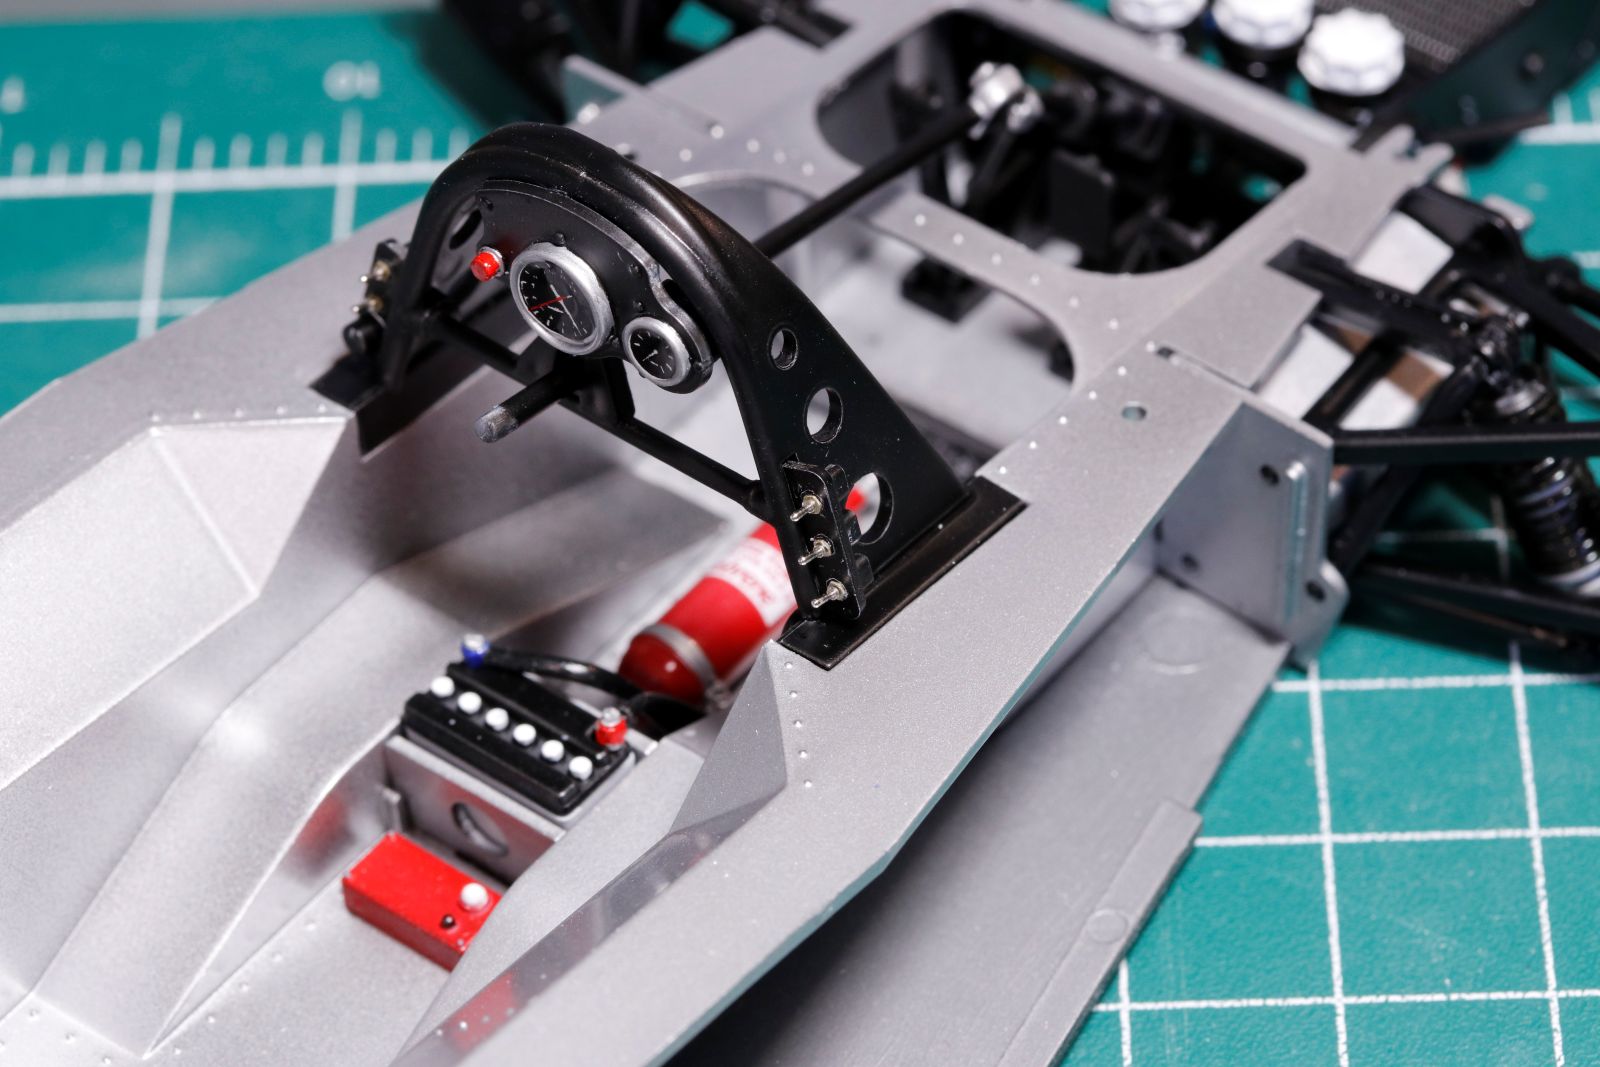
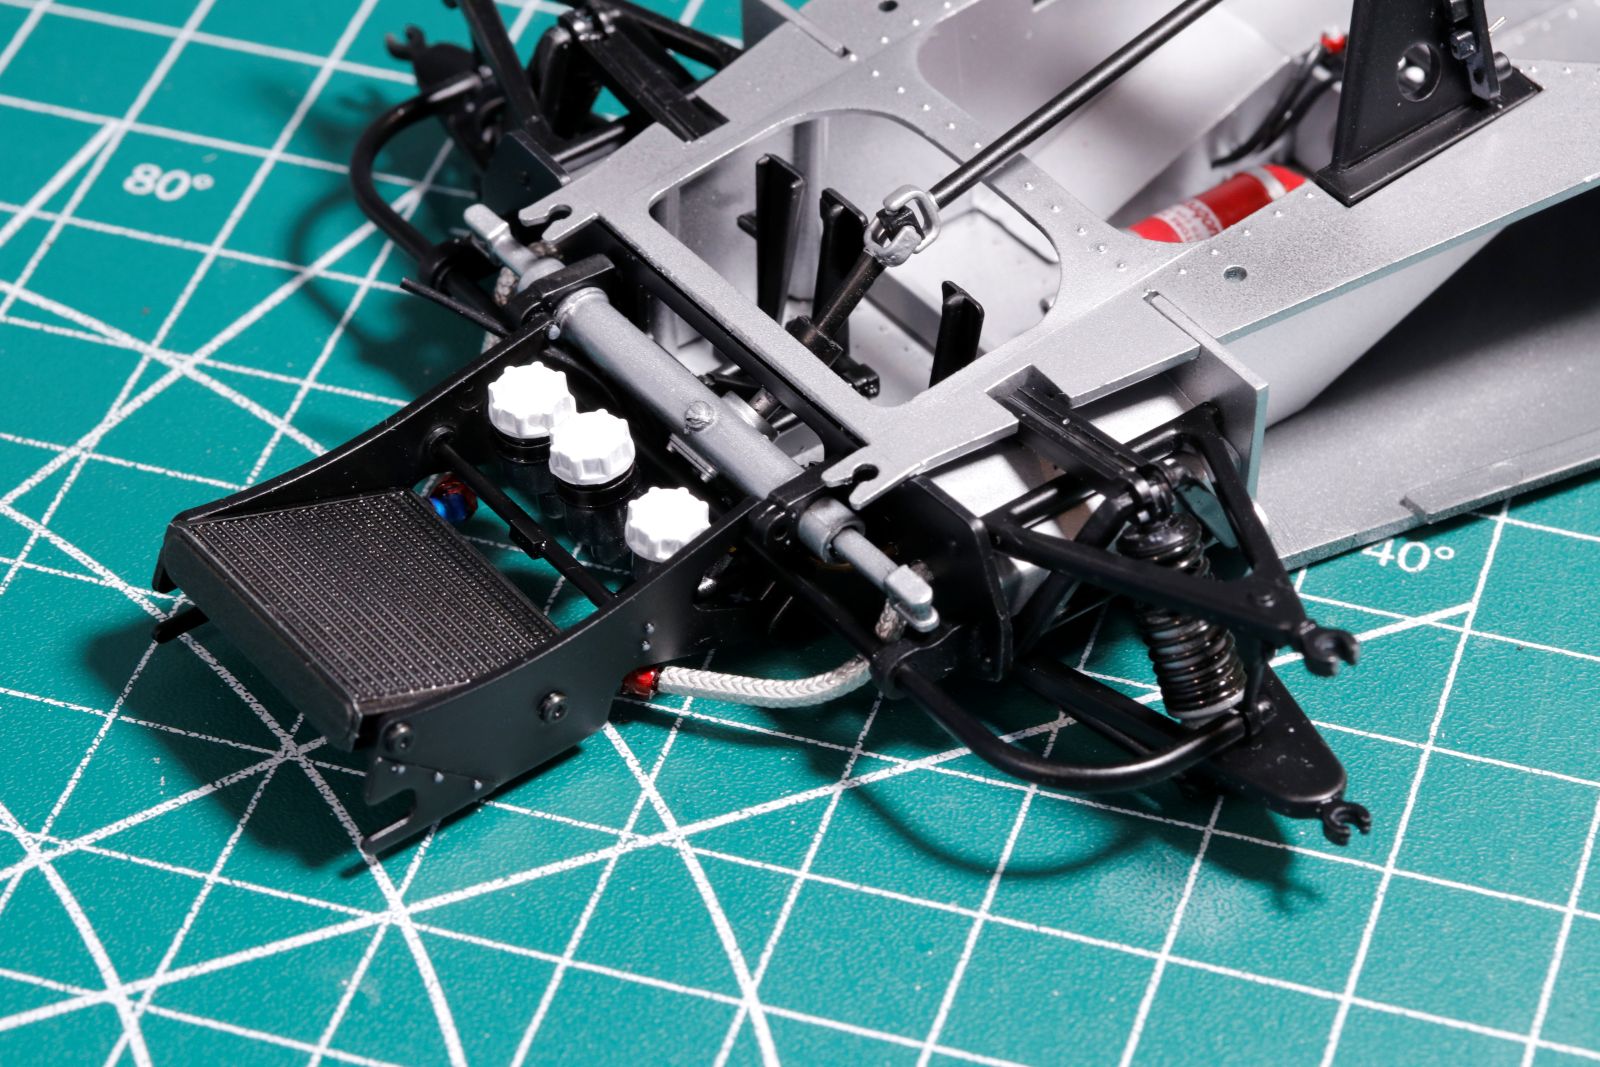
The Ford Cosworth is up next.
cheers Michael
14 Likes
The base paint has been applied to the Type 16. I used the Tamiya JGSDF refs. I first painted the dark green then I hand brushed the outlines for the brown areas before spraying the brown inside. I also sprayed some brown along the outlines so they do not look too sharp.
I also detailed the inner faces of the hatches so I can use the figures in the model. I first glue some masking tape pieces to get rid of the 4 ejection pin marks on each hatch. Then I made handles from styrene strips.
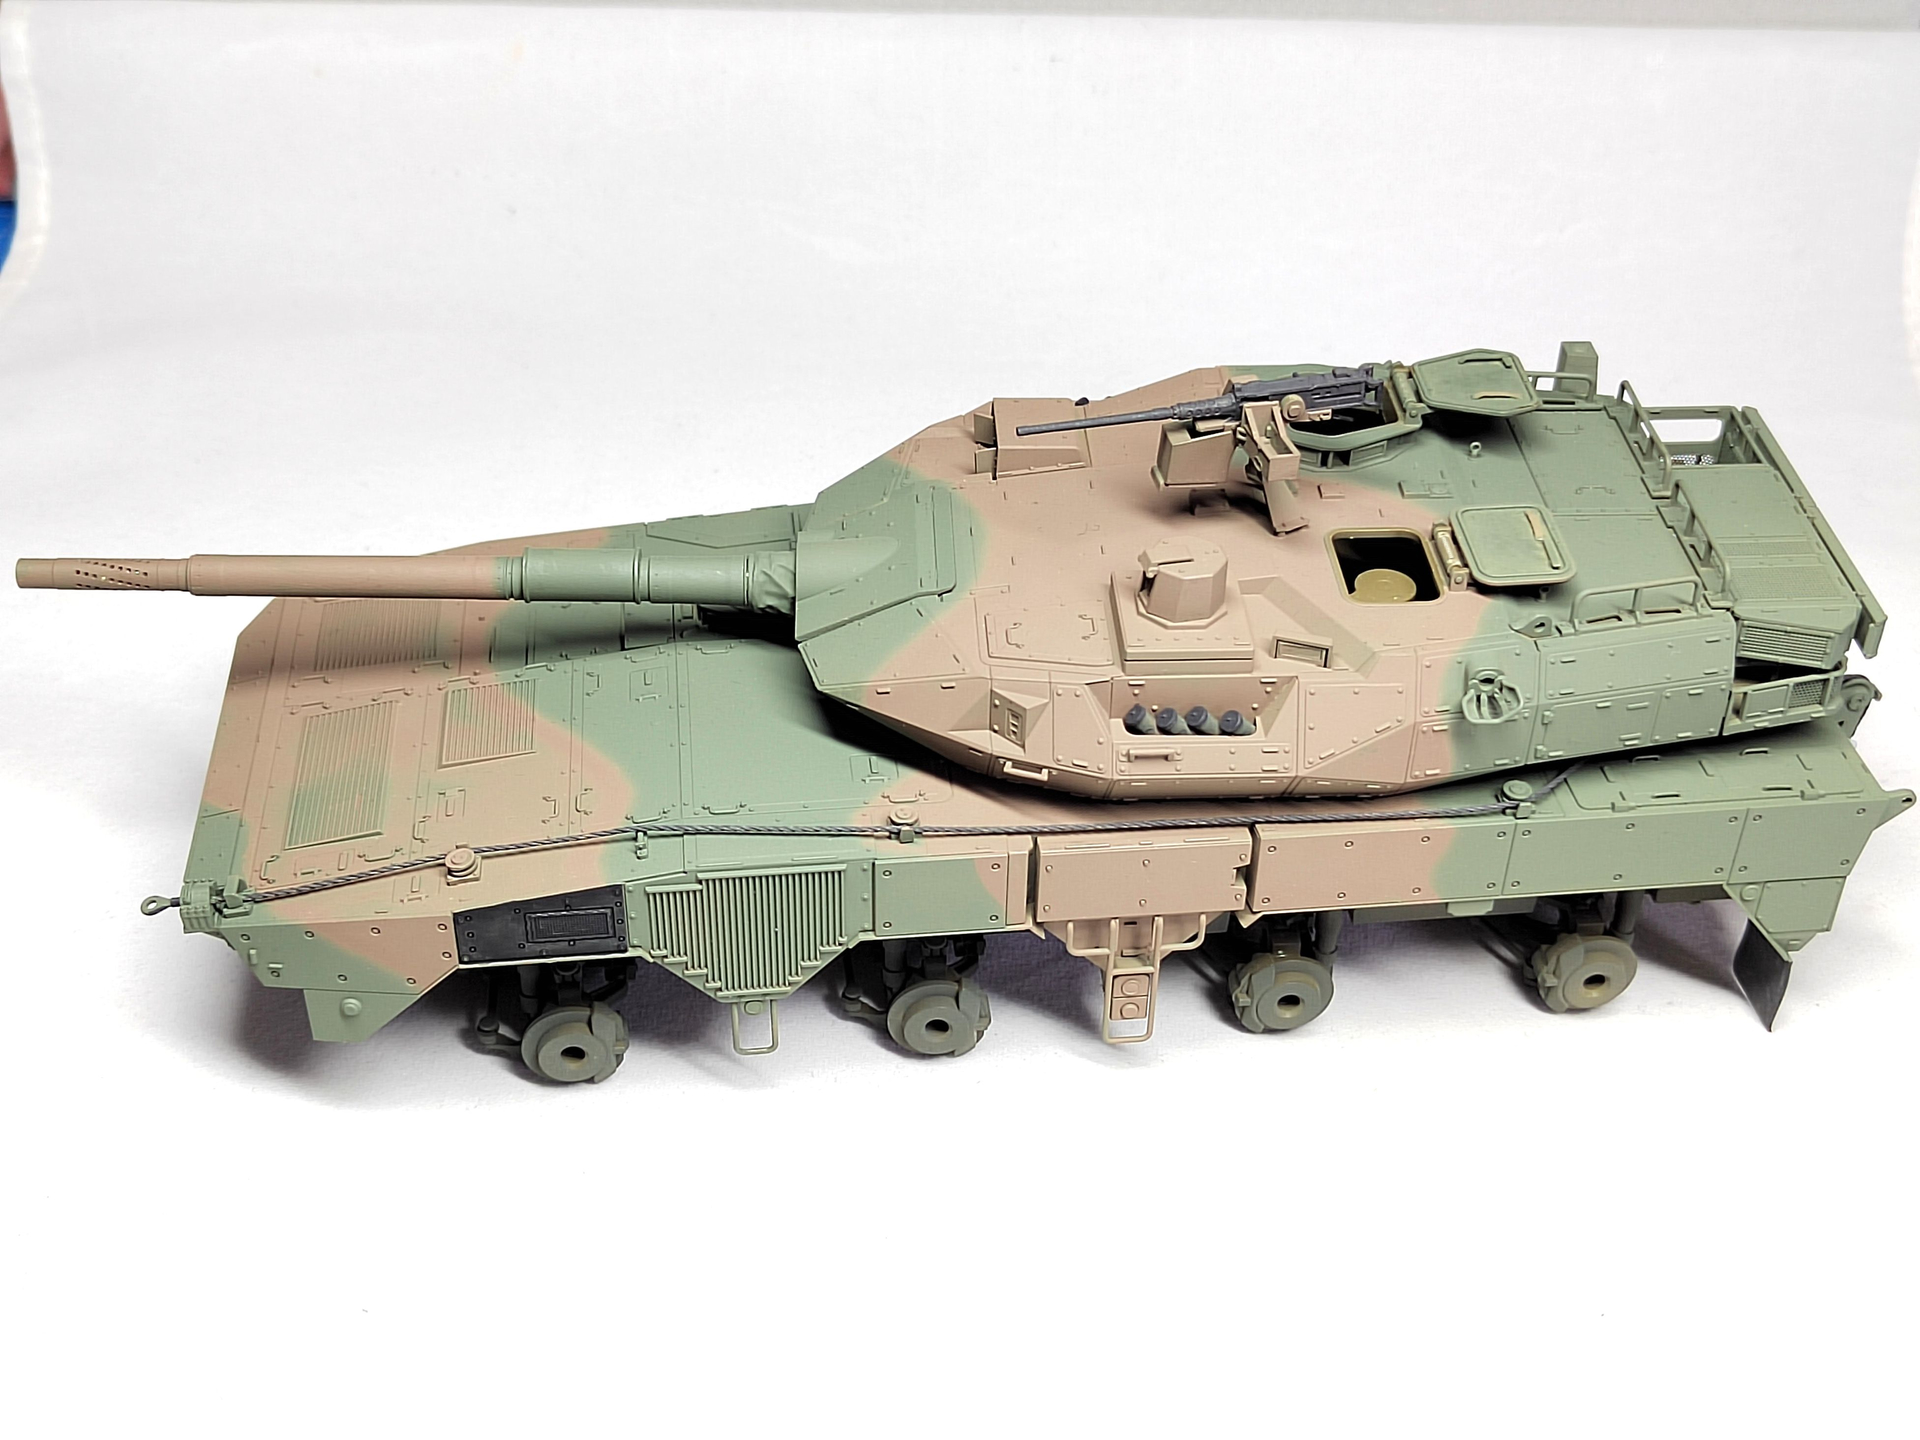

Olivier
11 Likes
Nice progresses on the Type 16.
It looks similar to the italian Centauro.
2 Likes