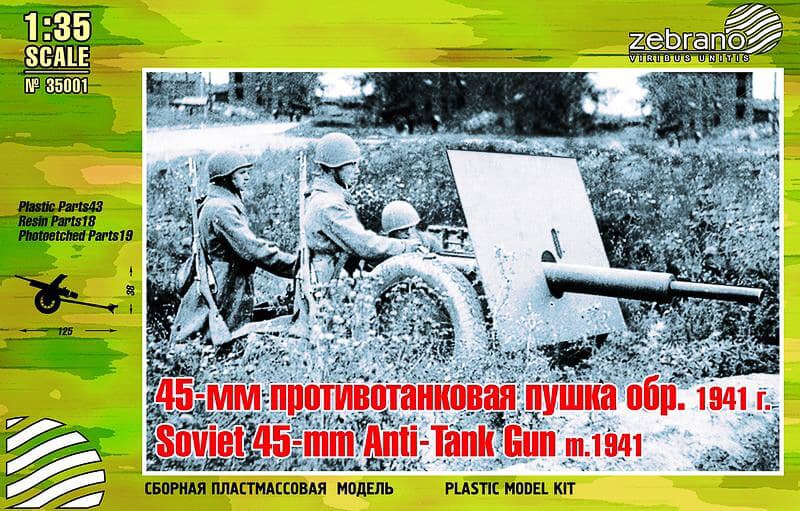


After more than two years of absence, I’m back with the Zebrano “Soviet 45mm AT gun mod 41.”
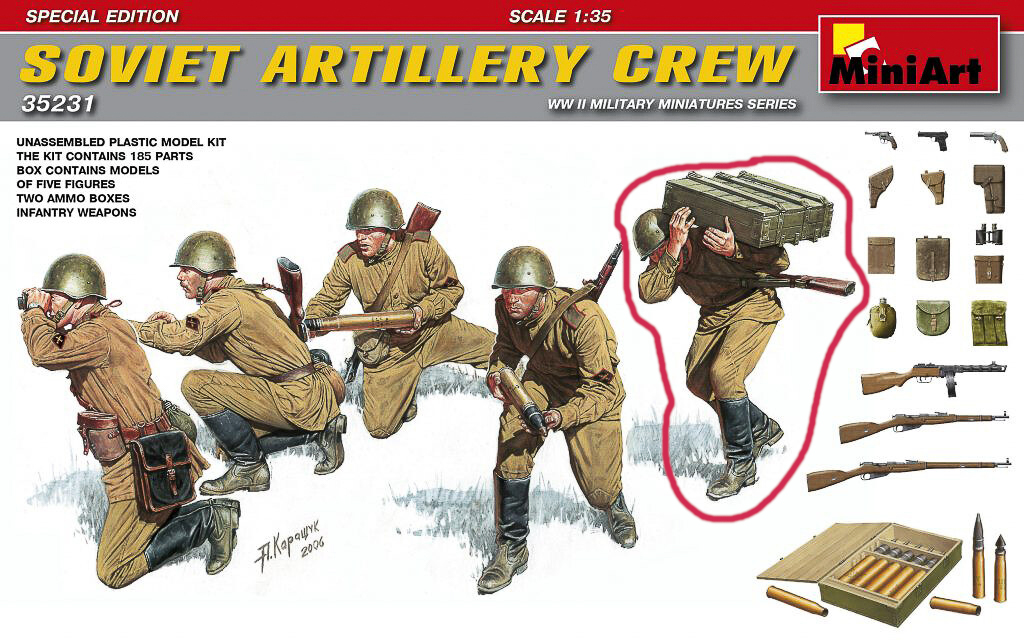
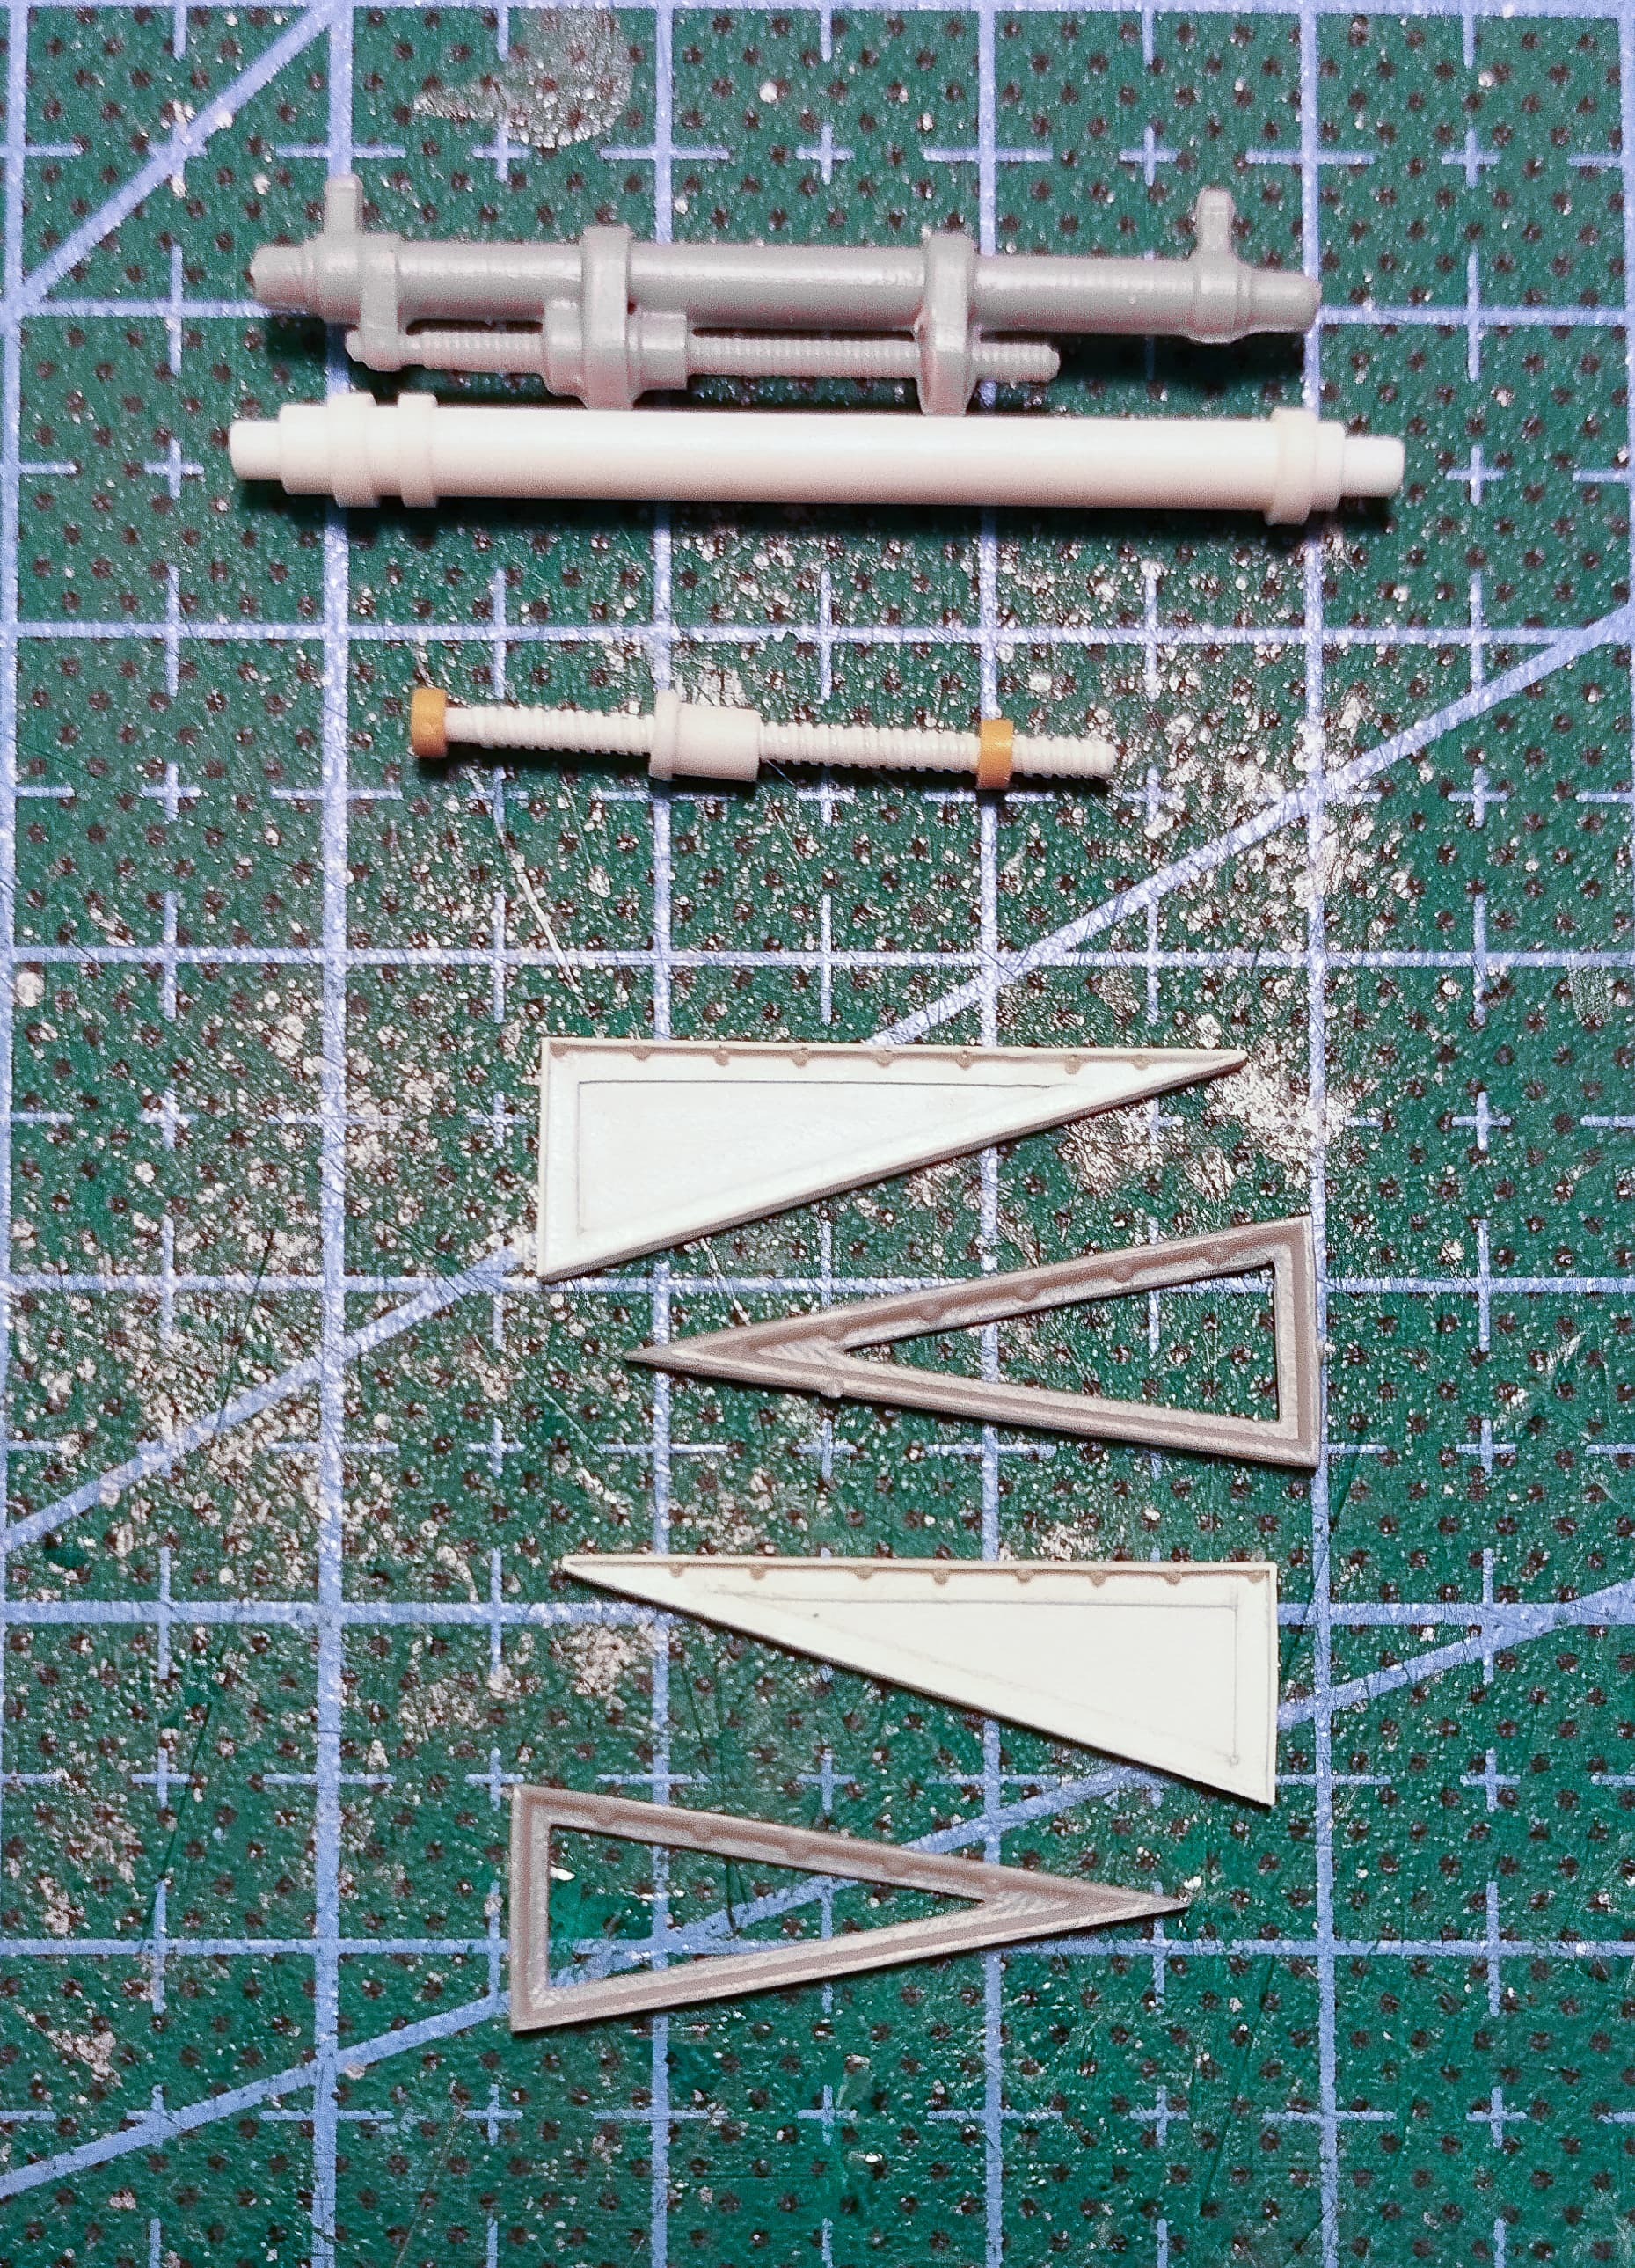
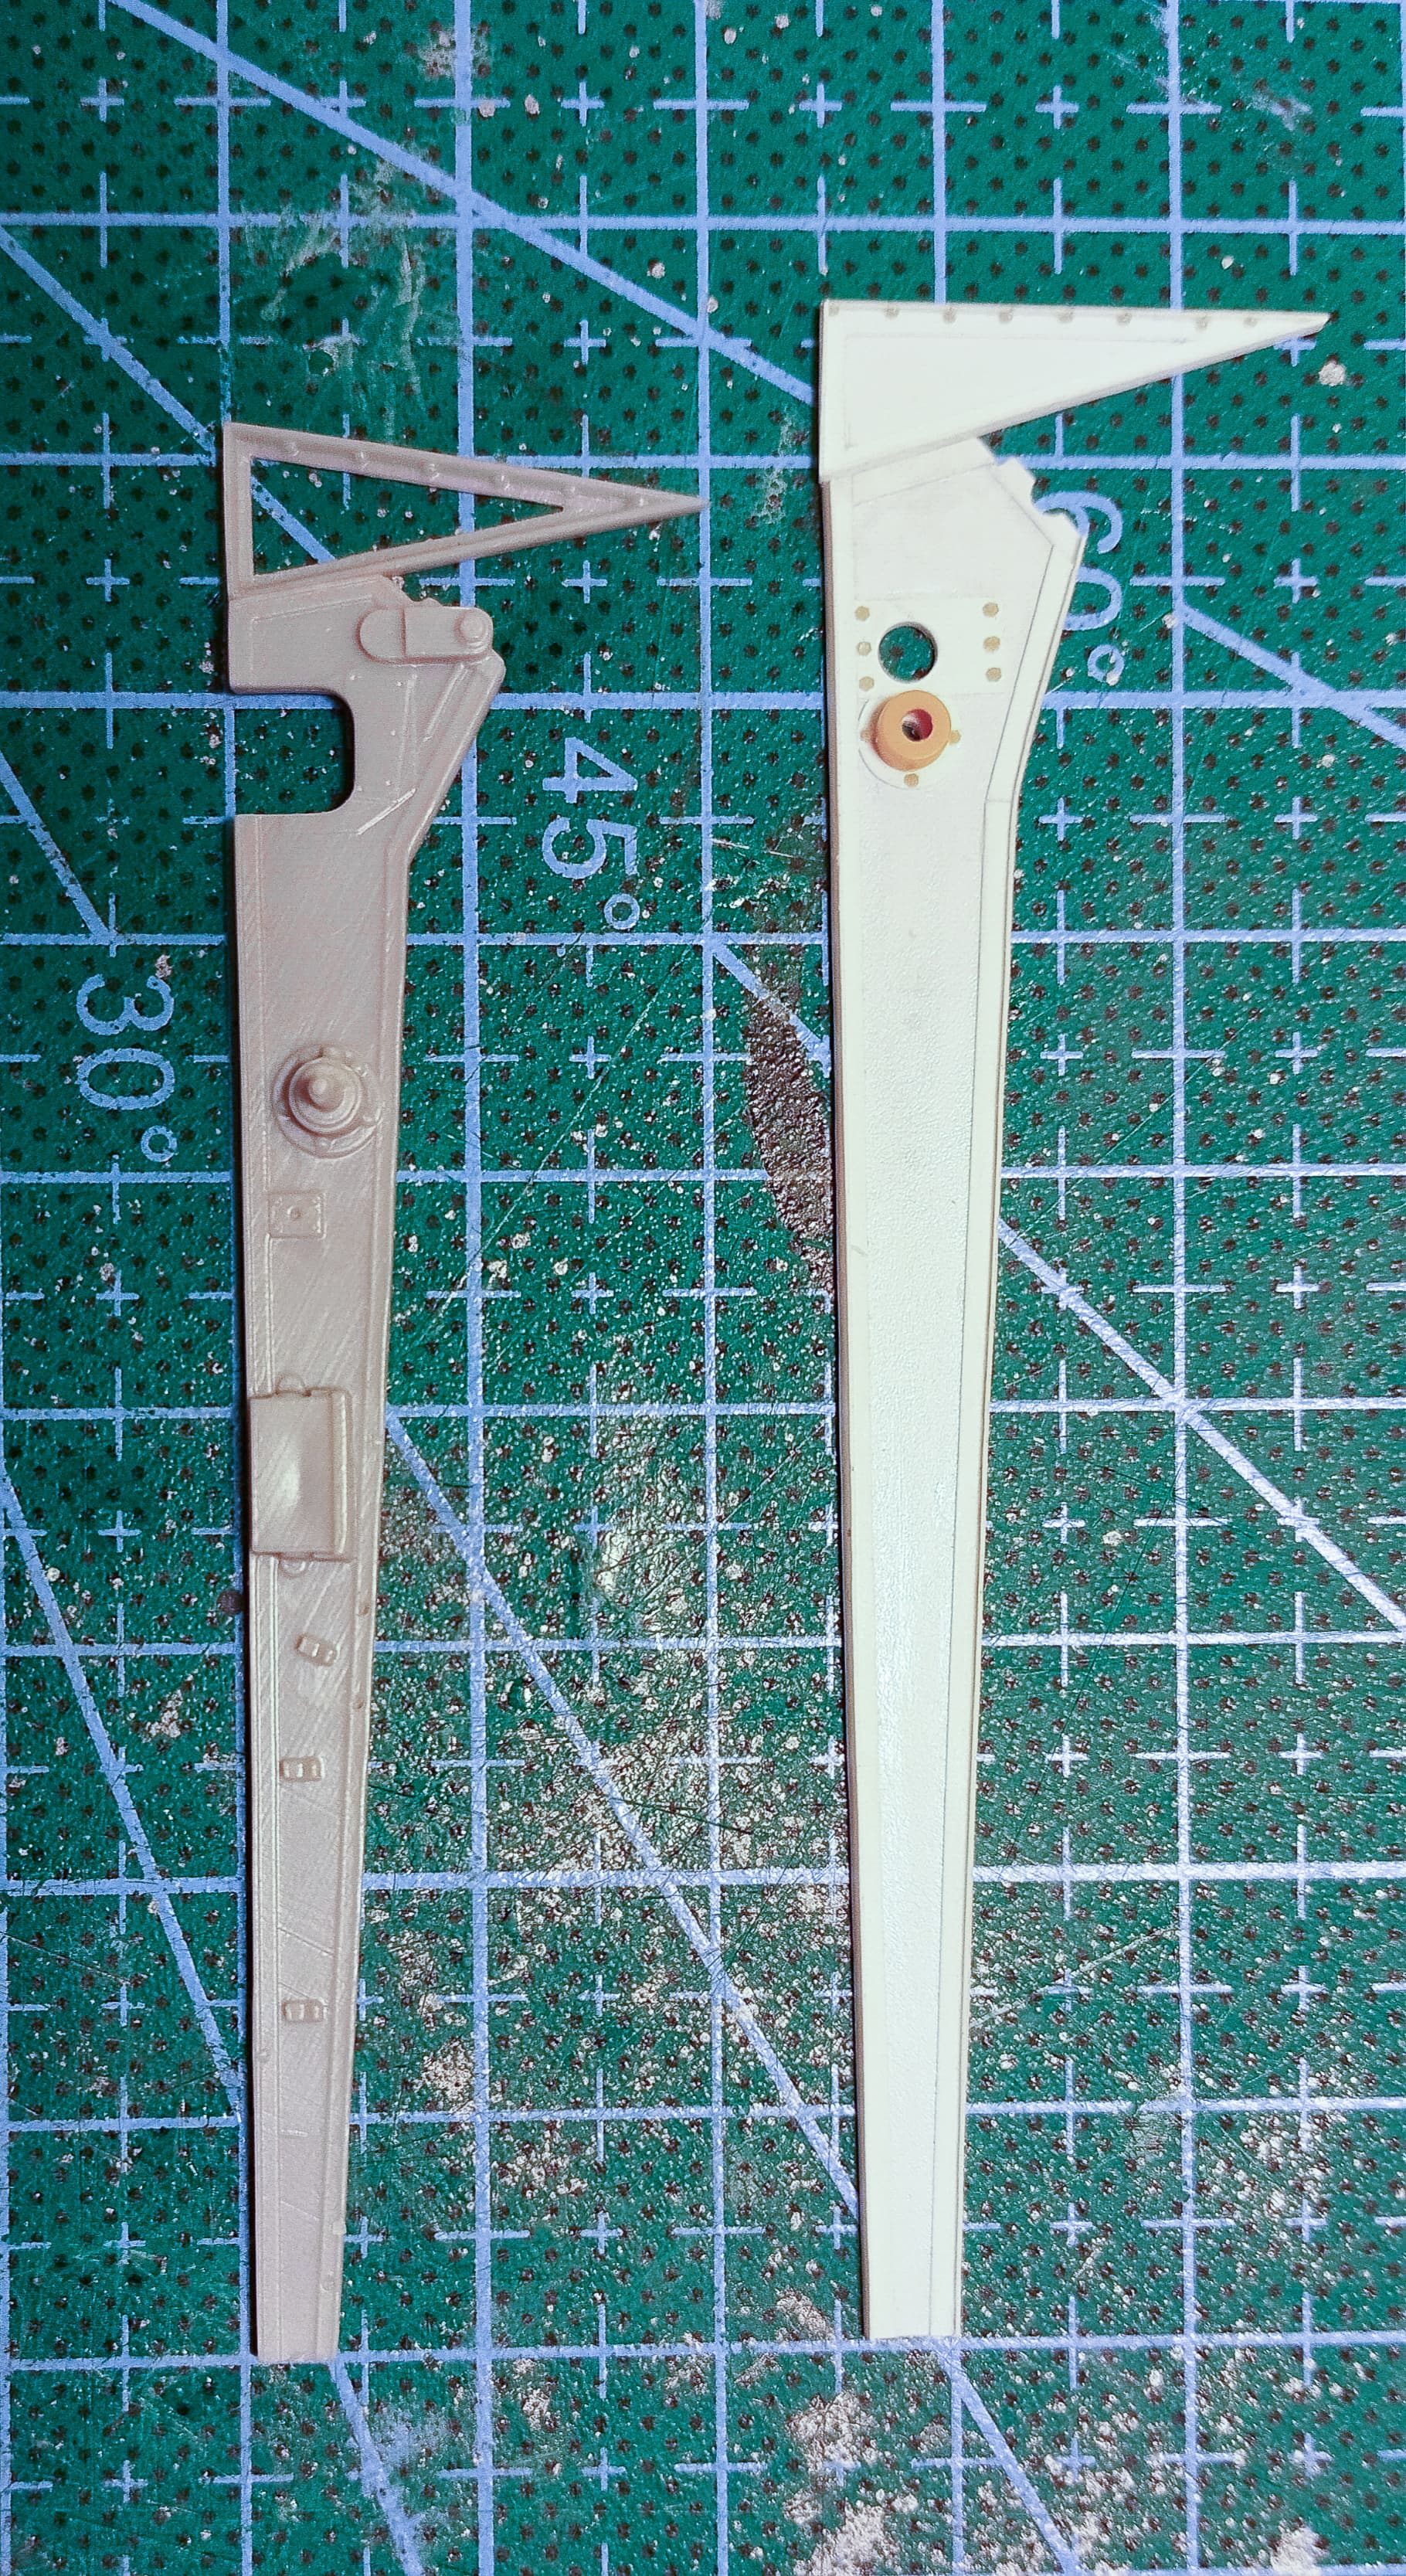
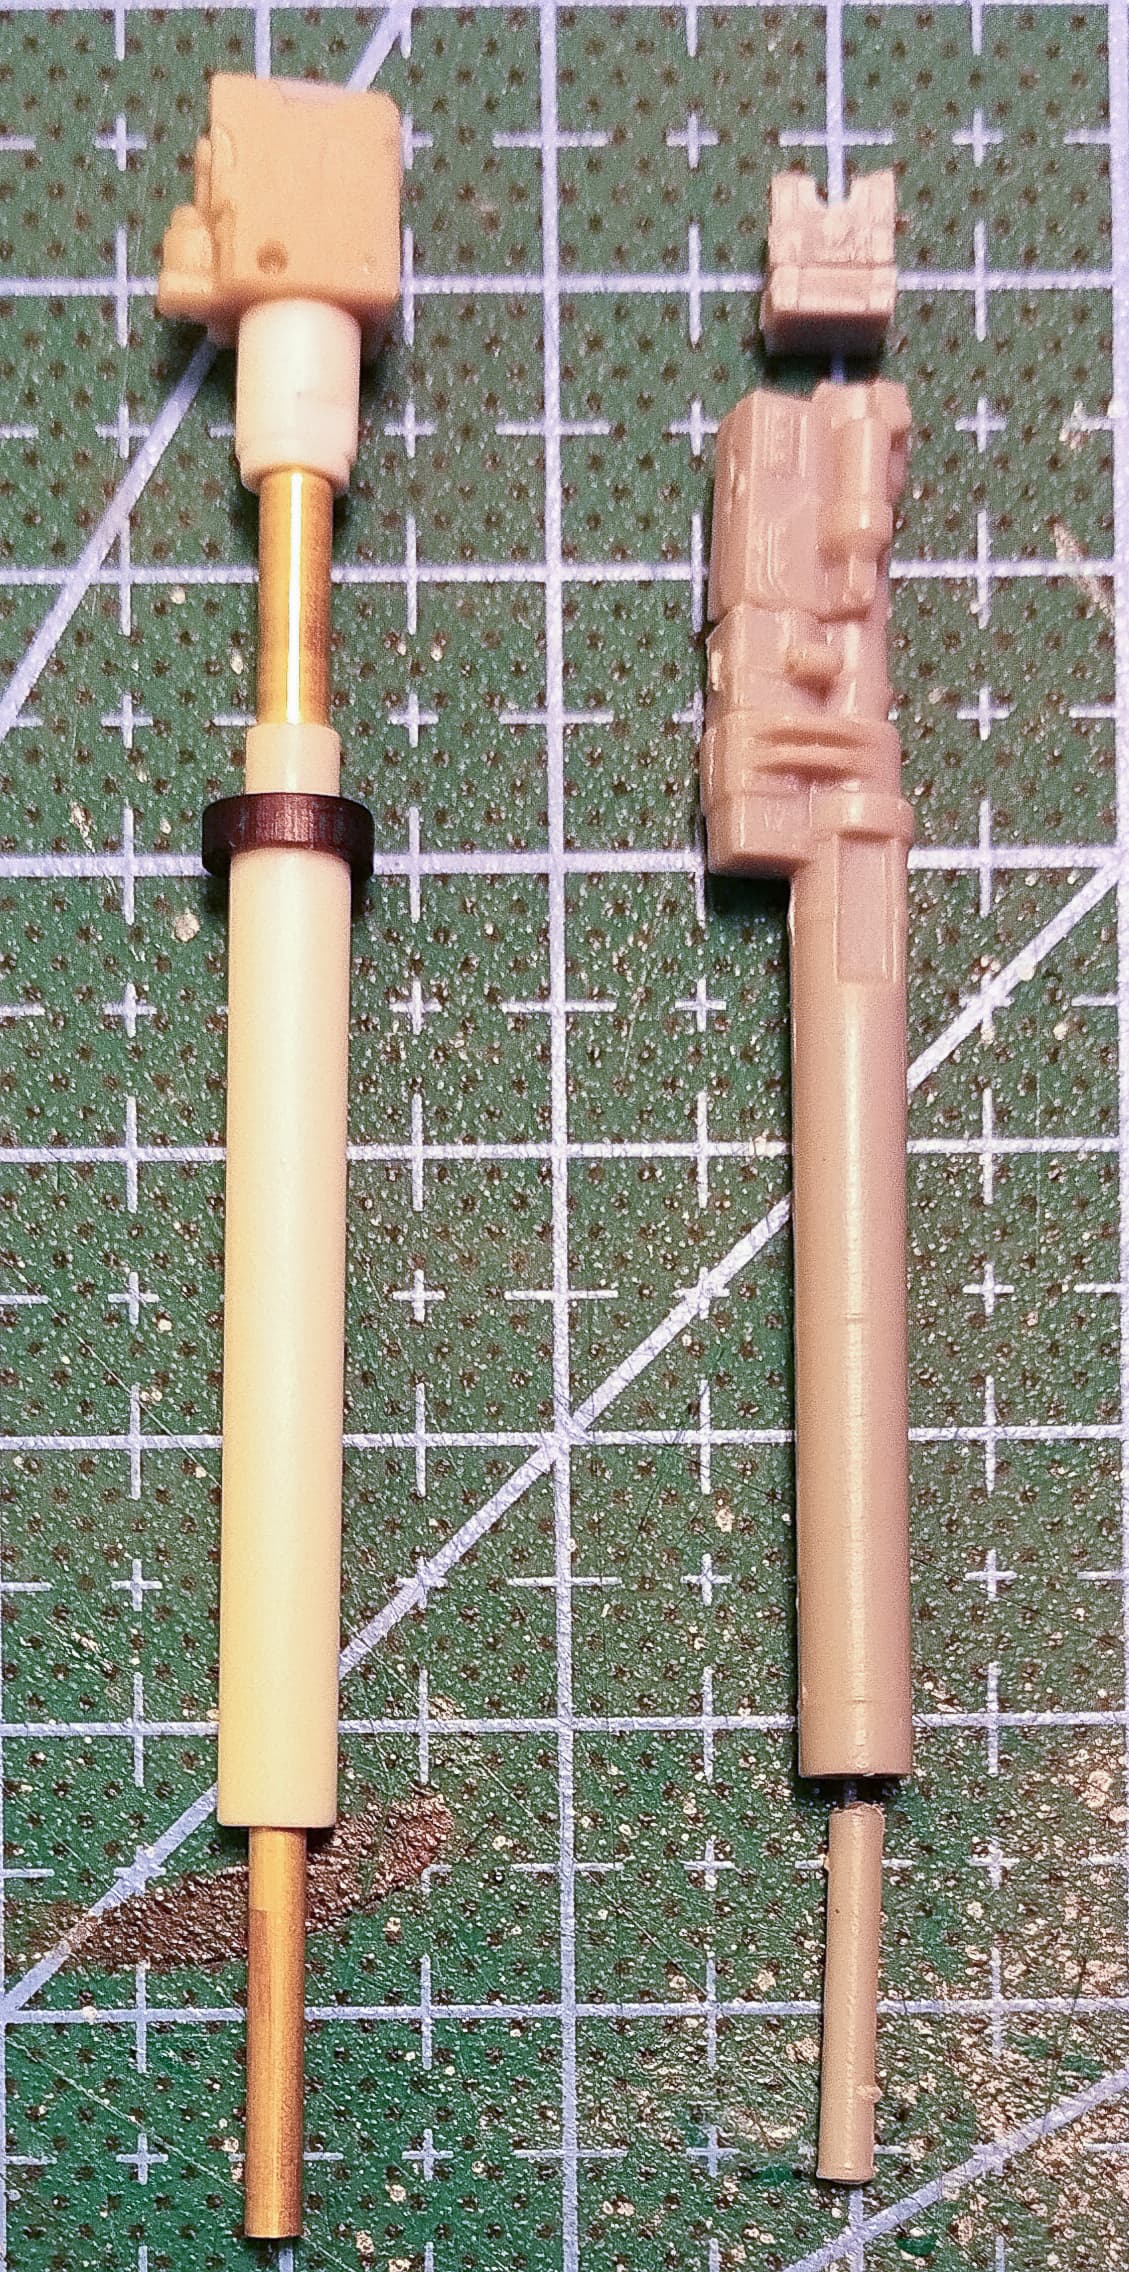
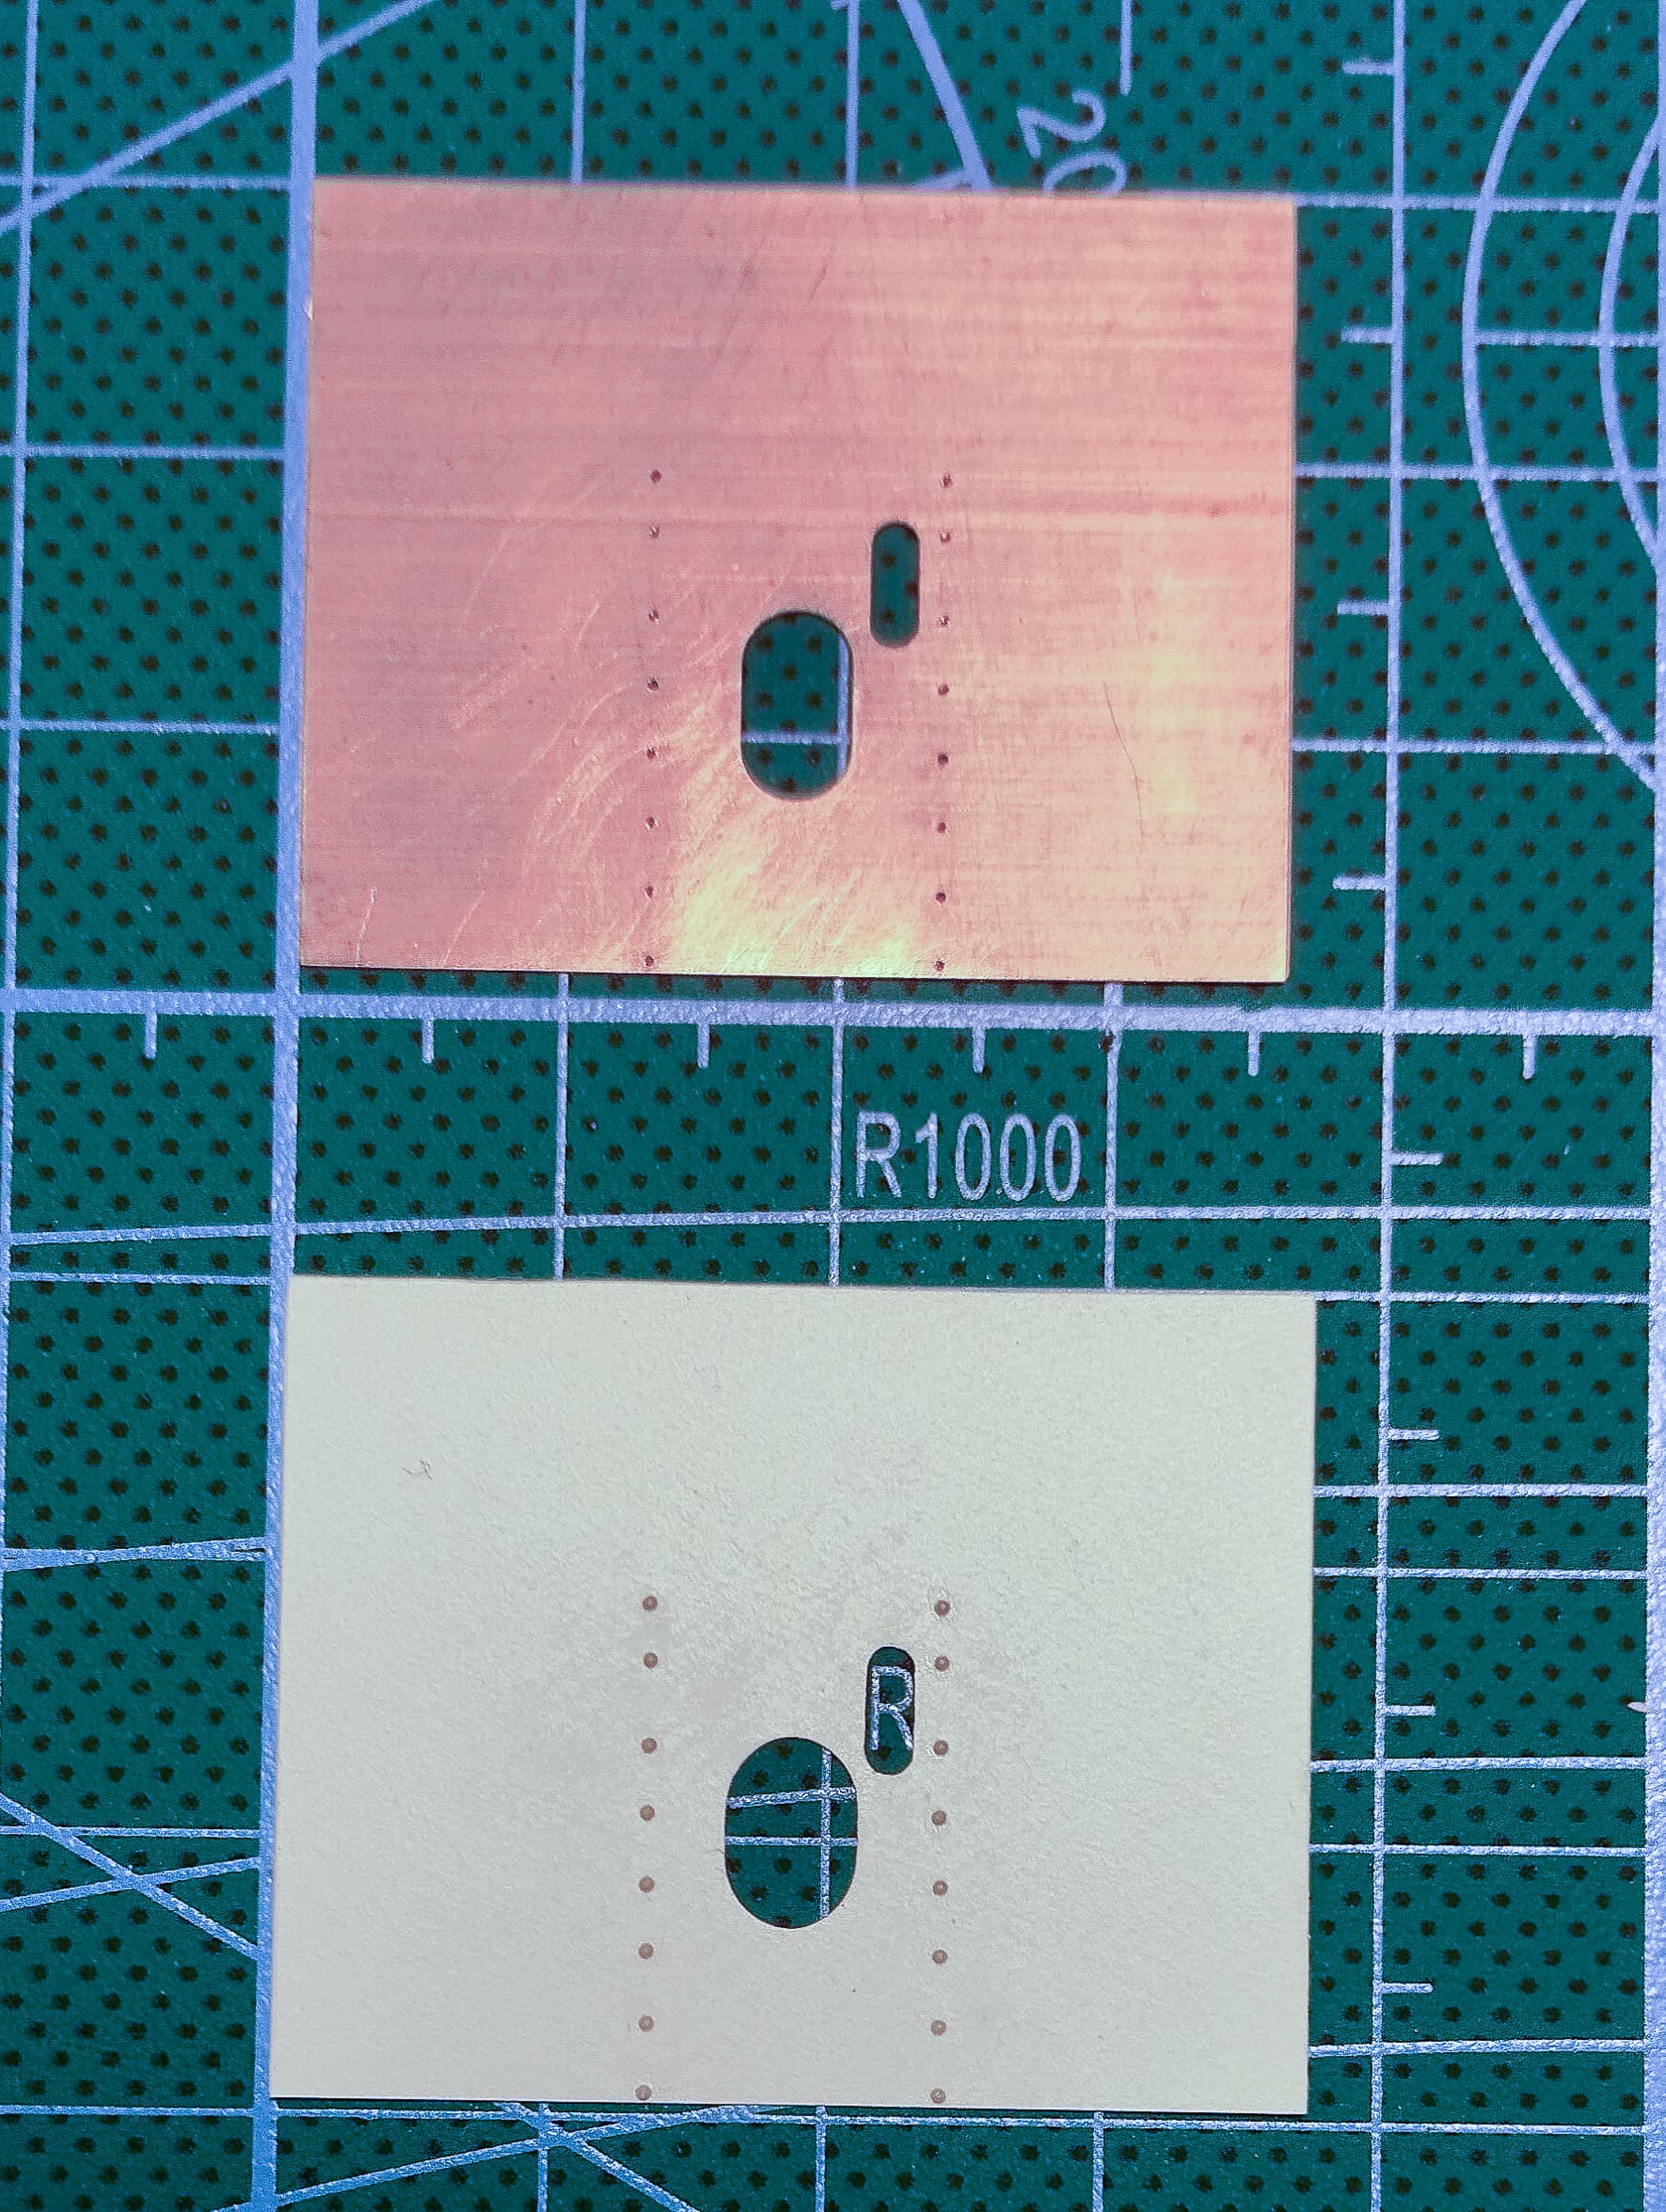
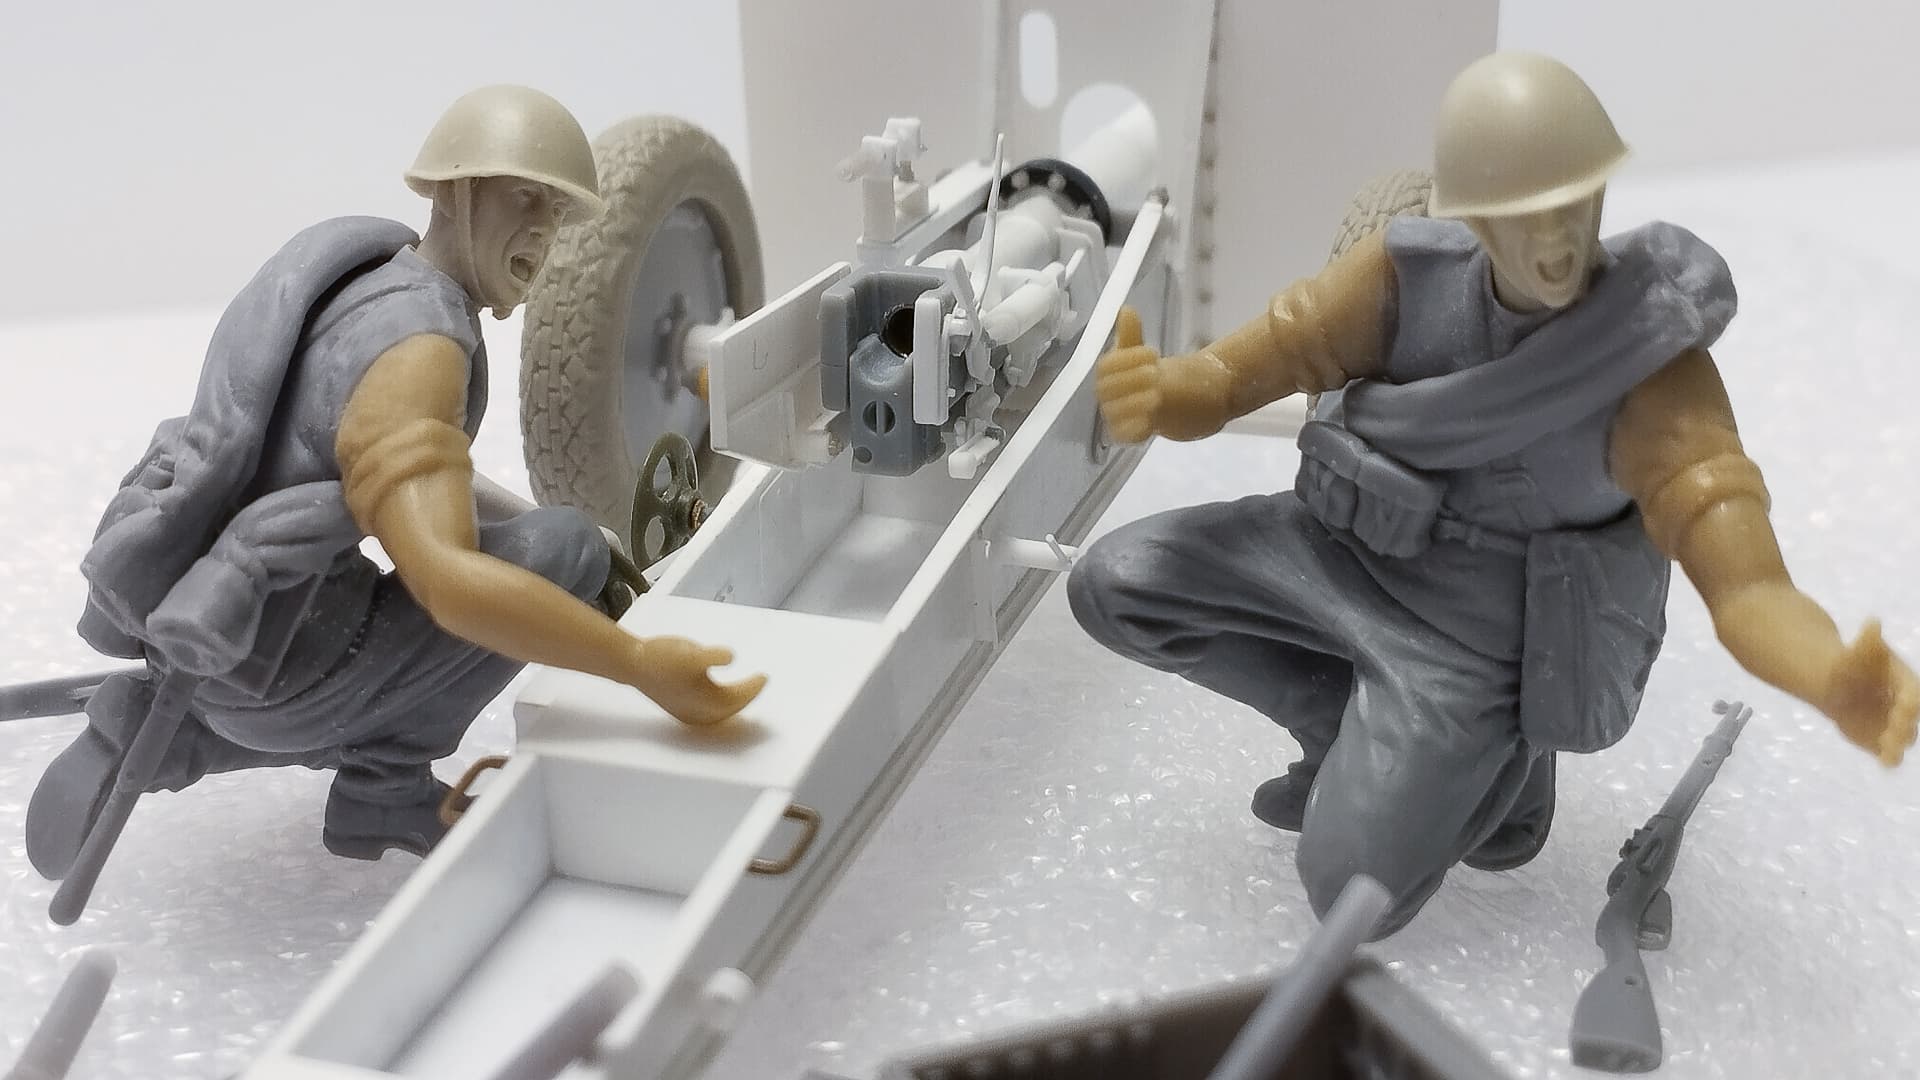
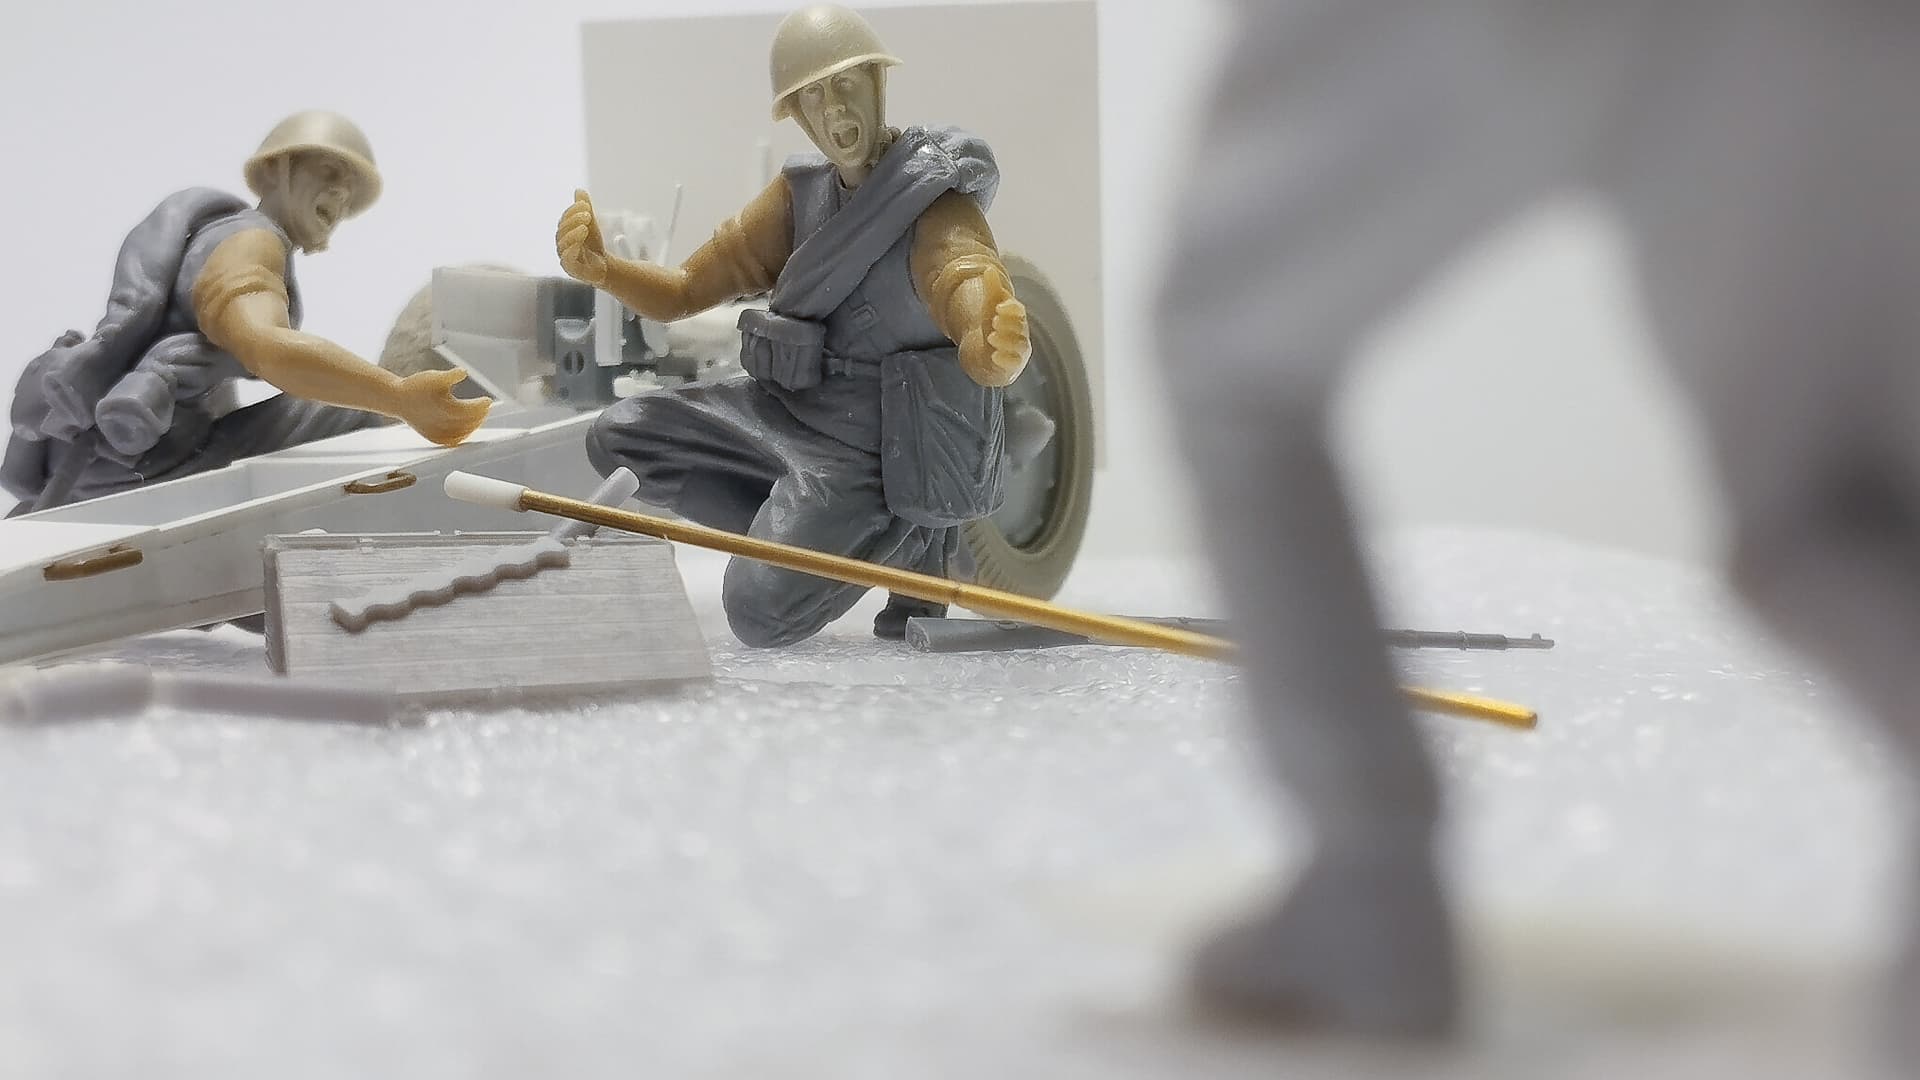
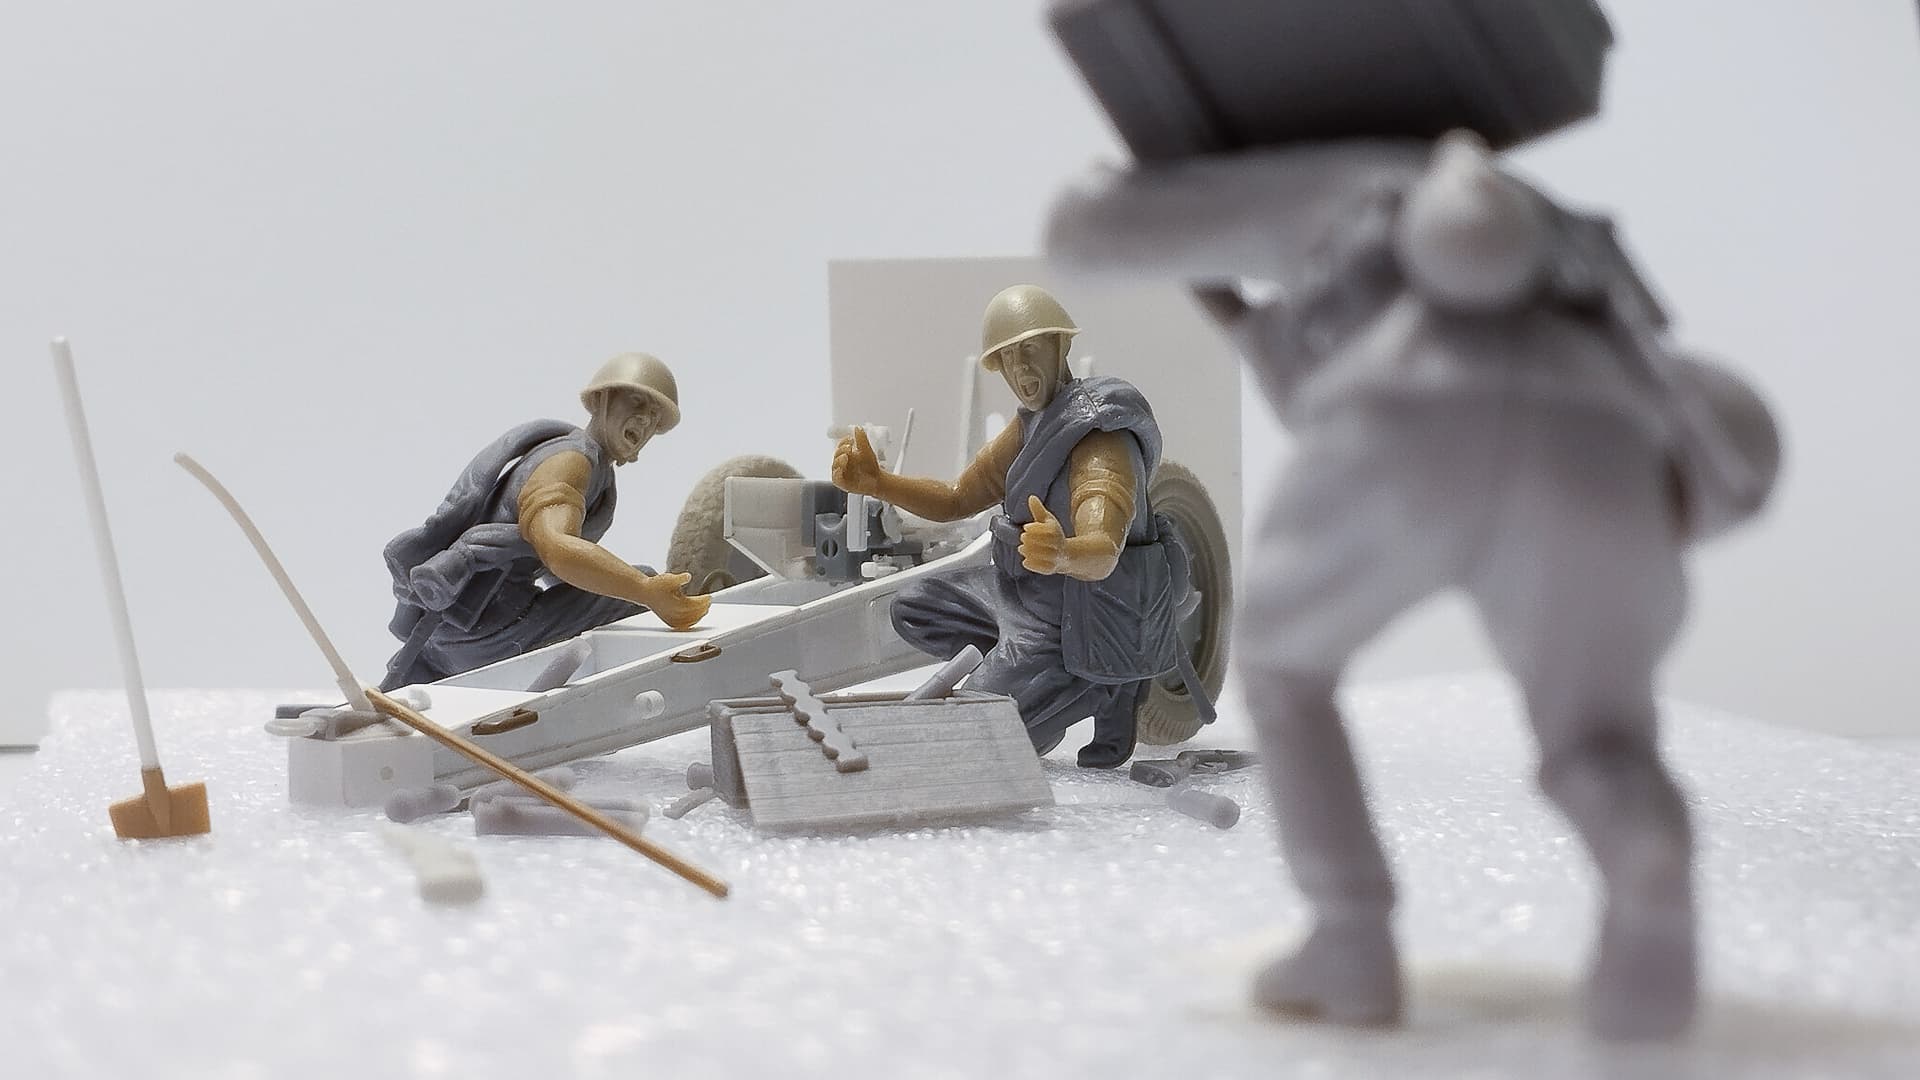
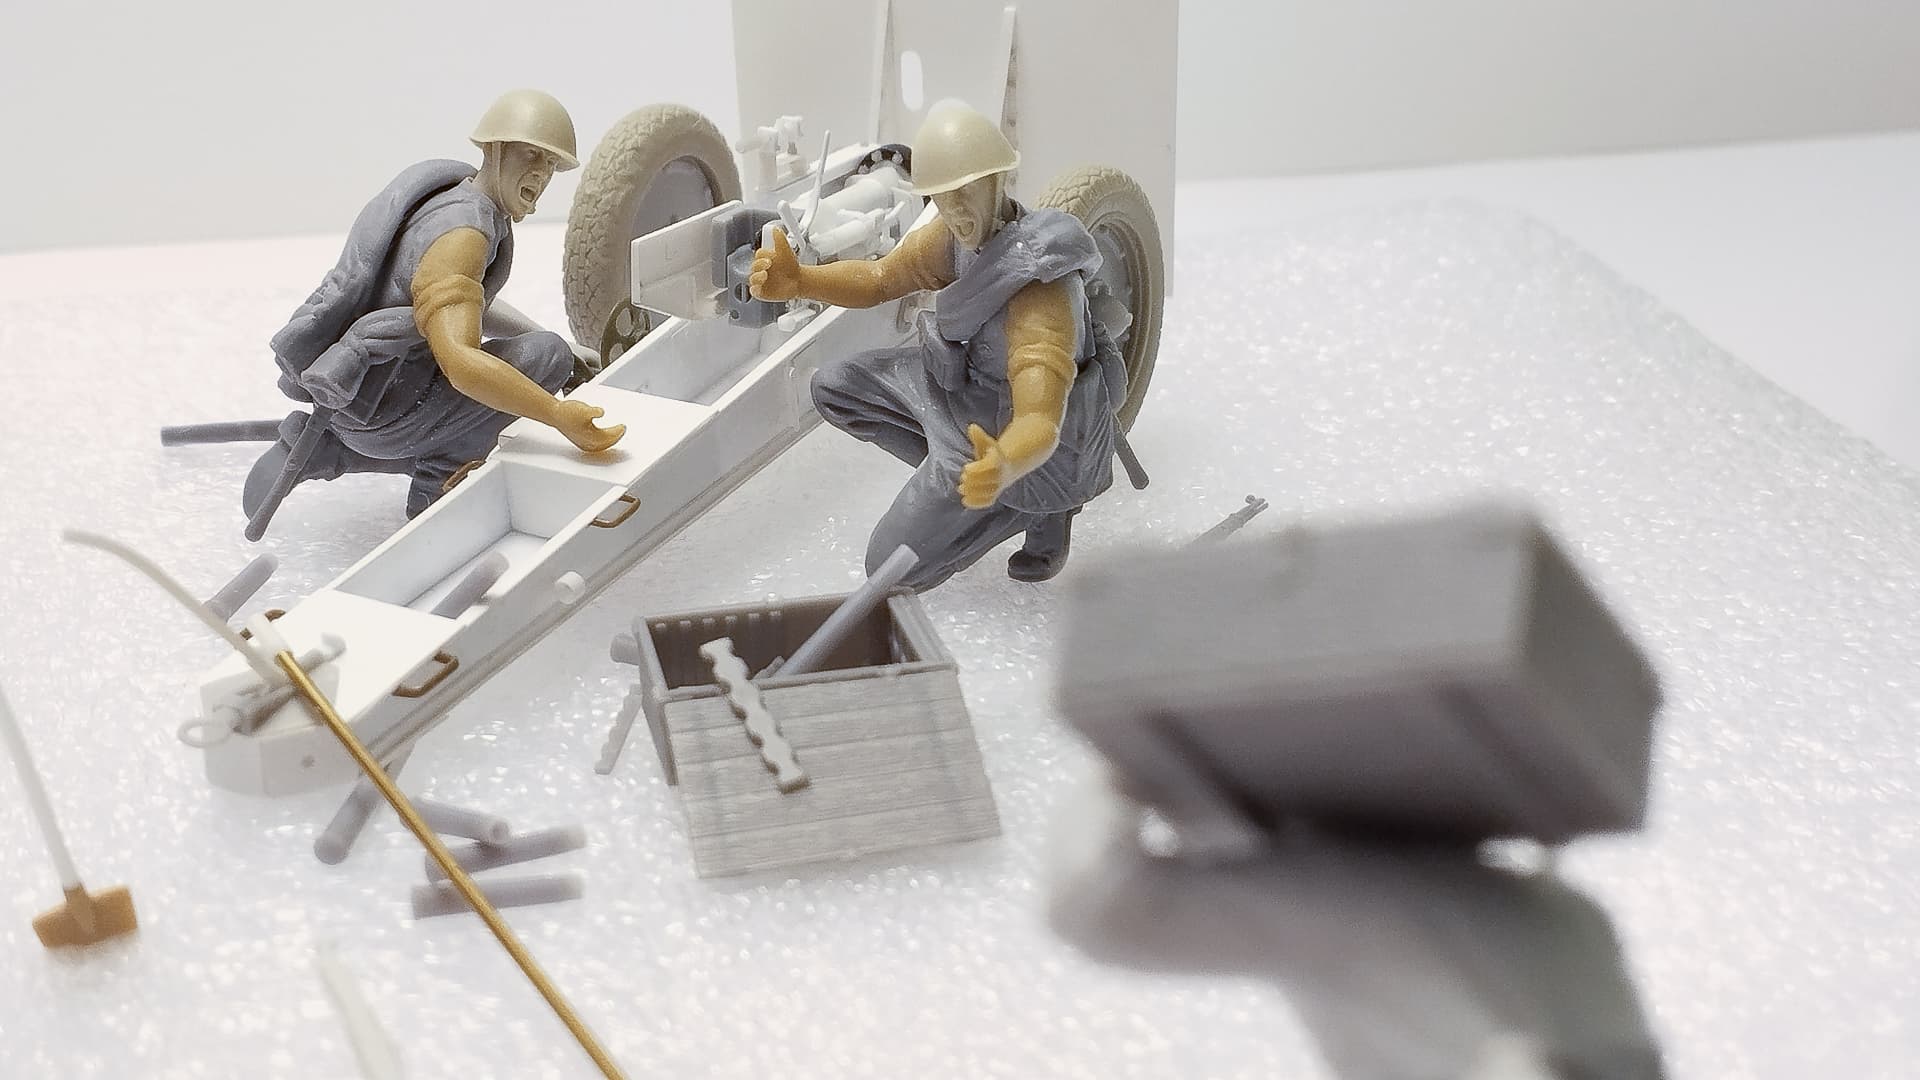
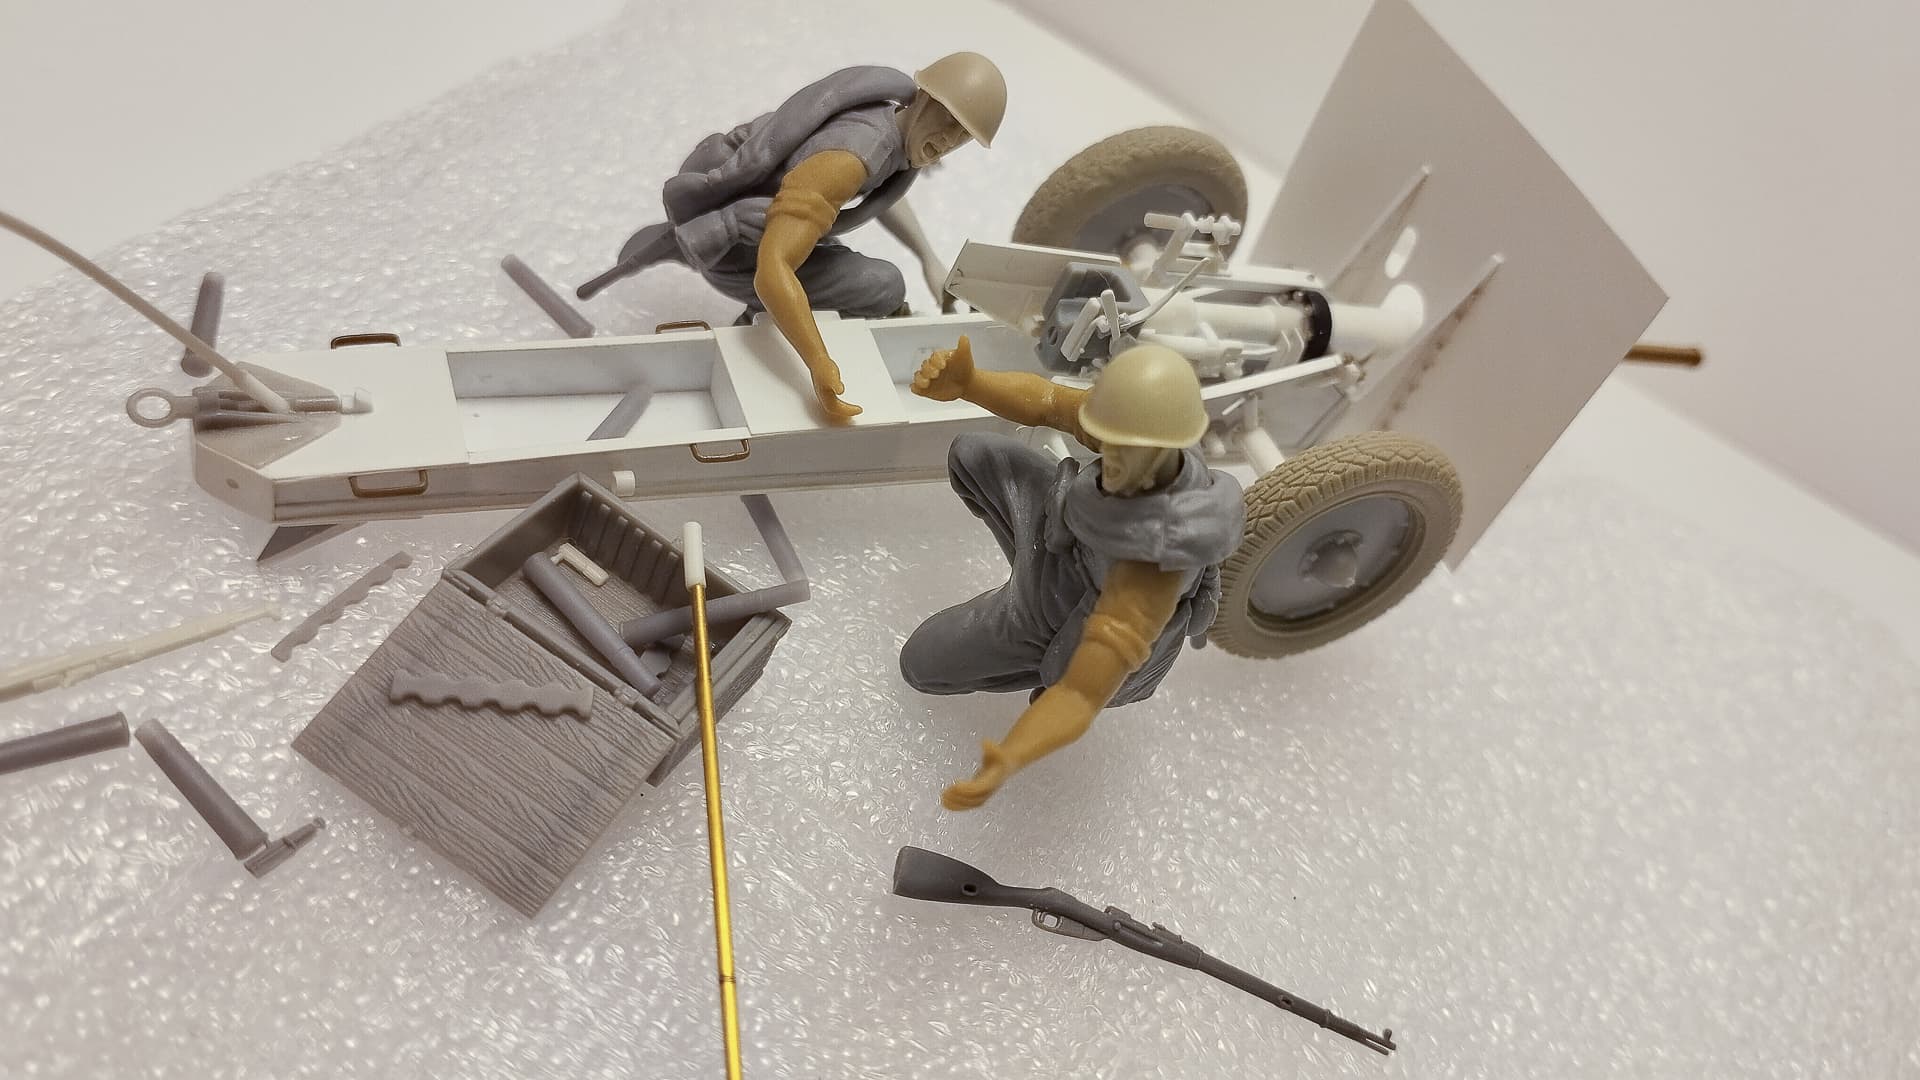
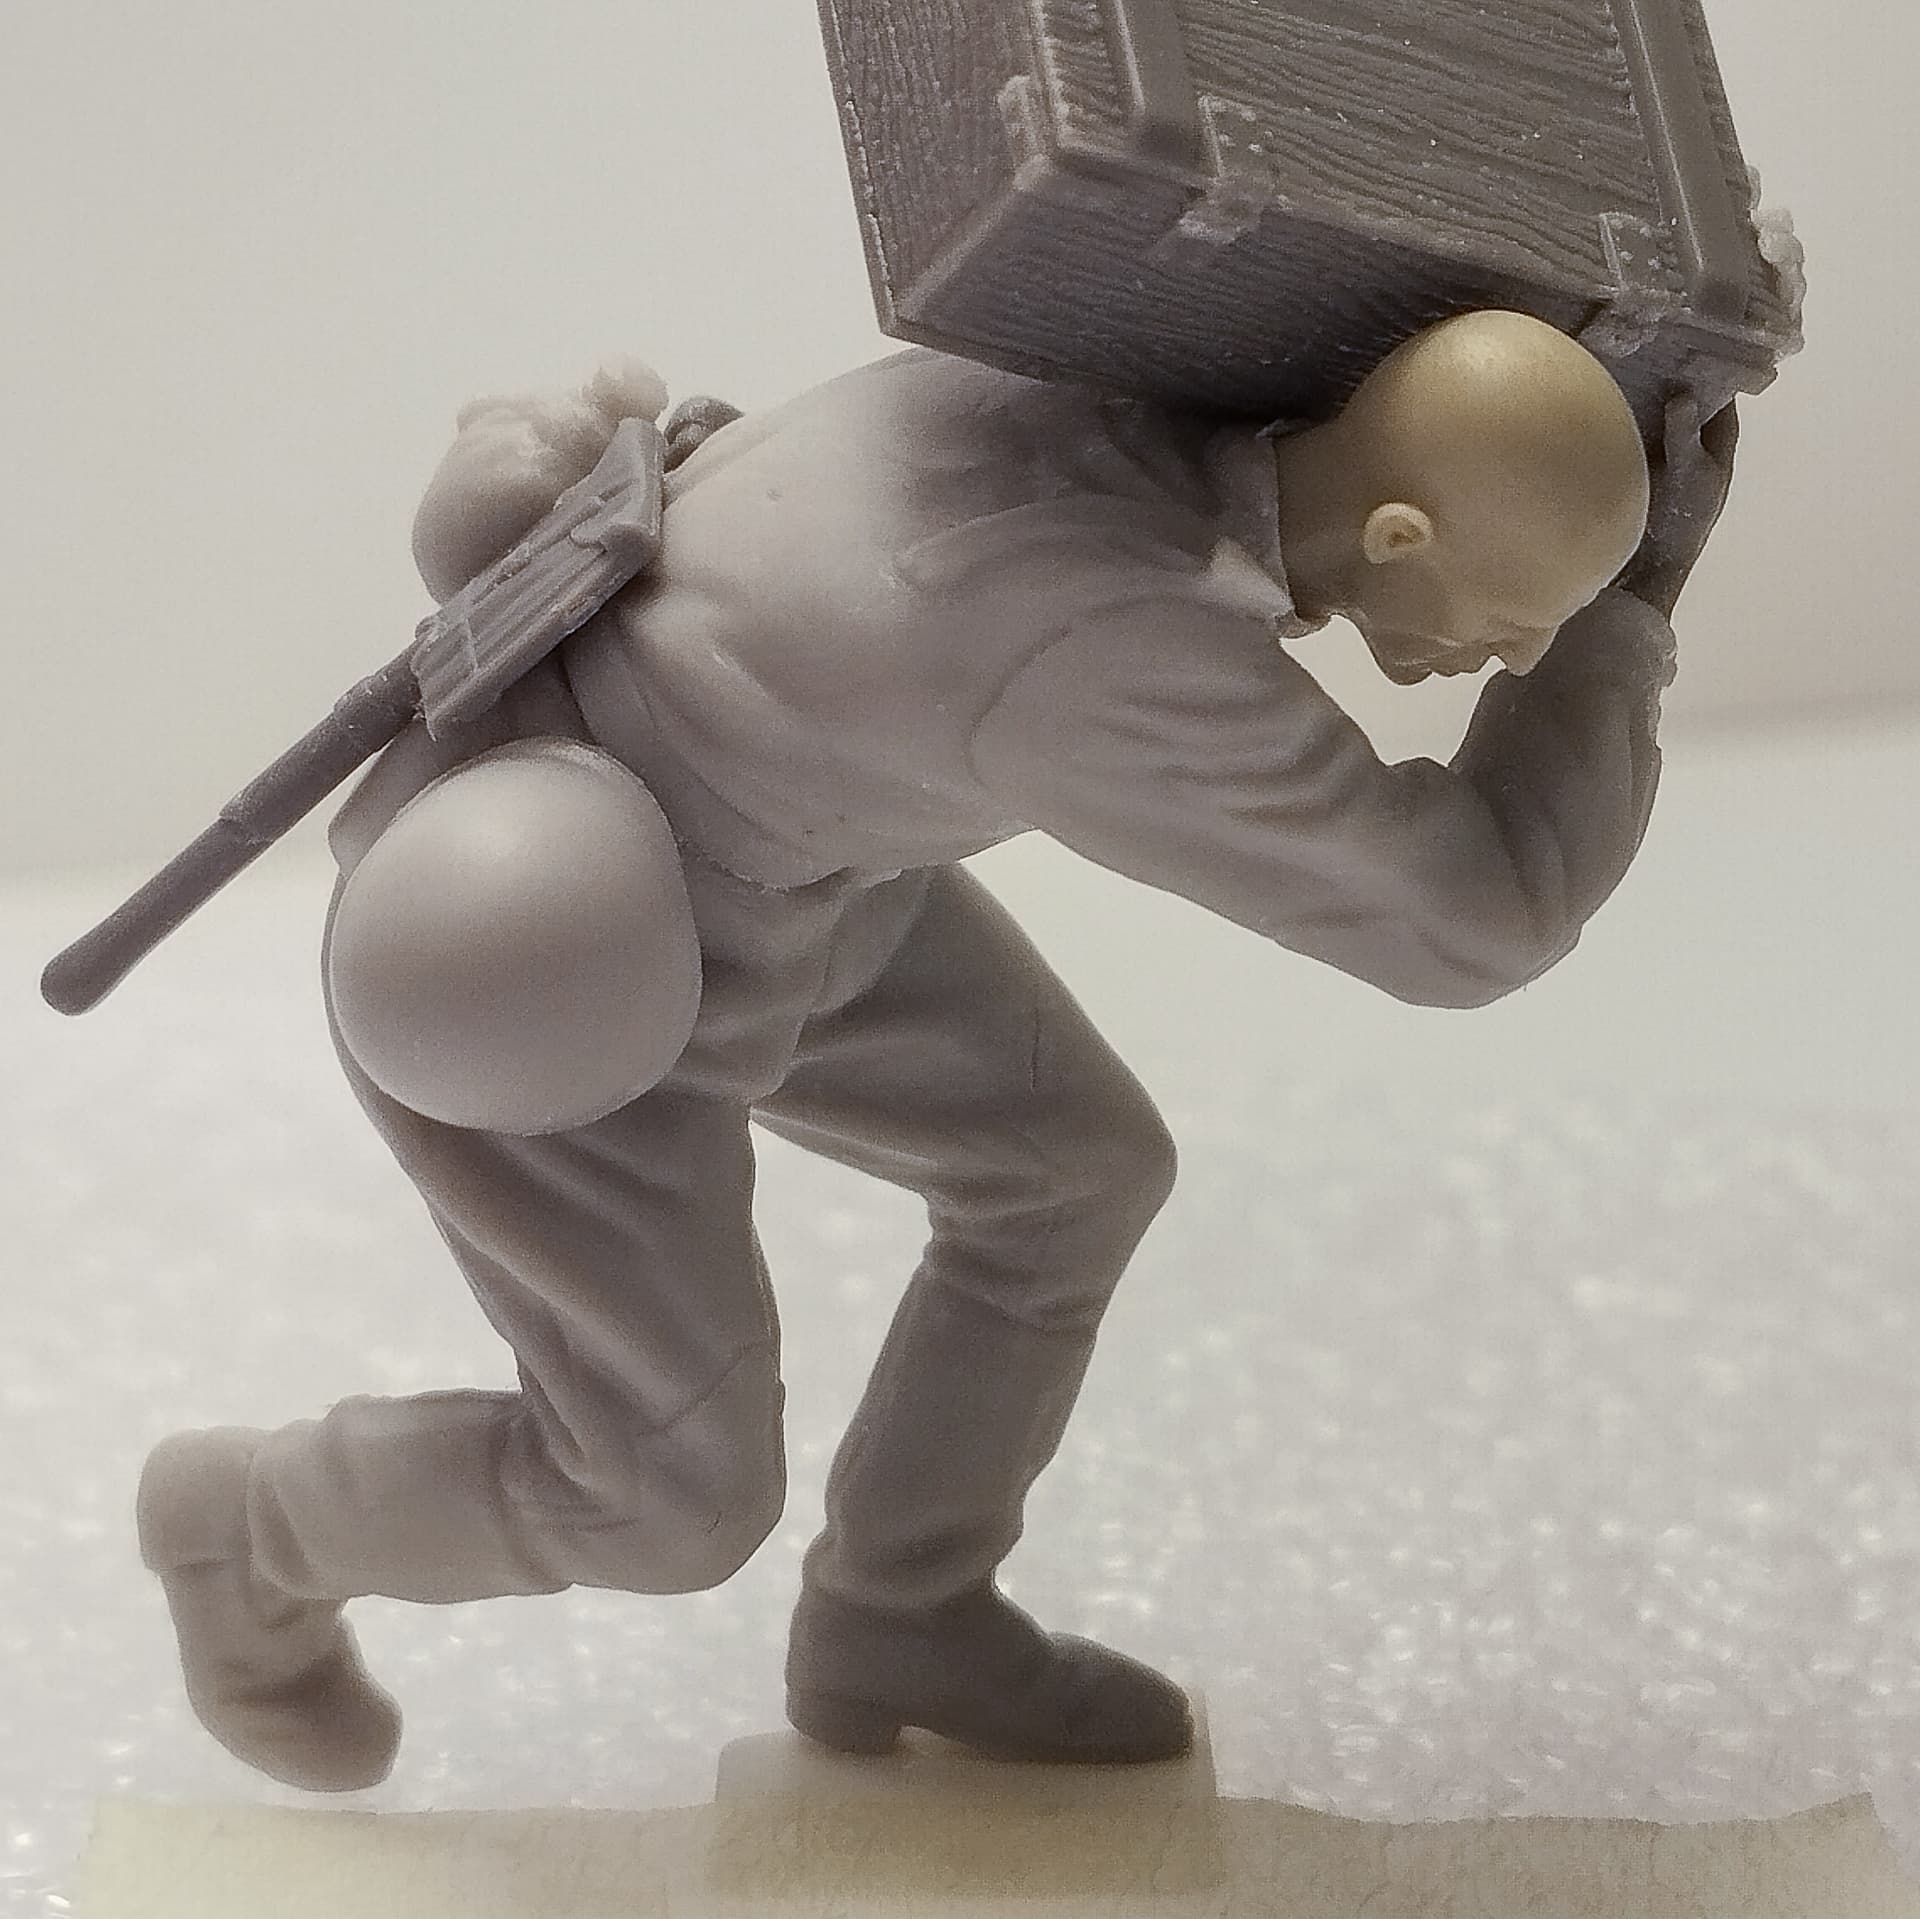
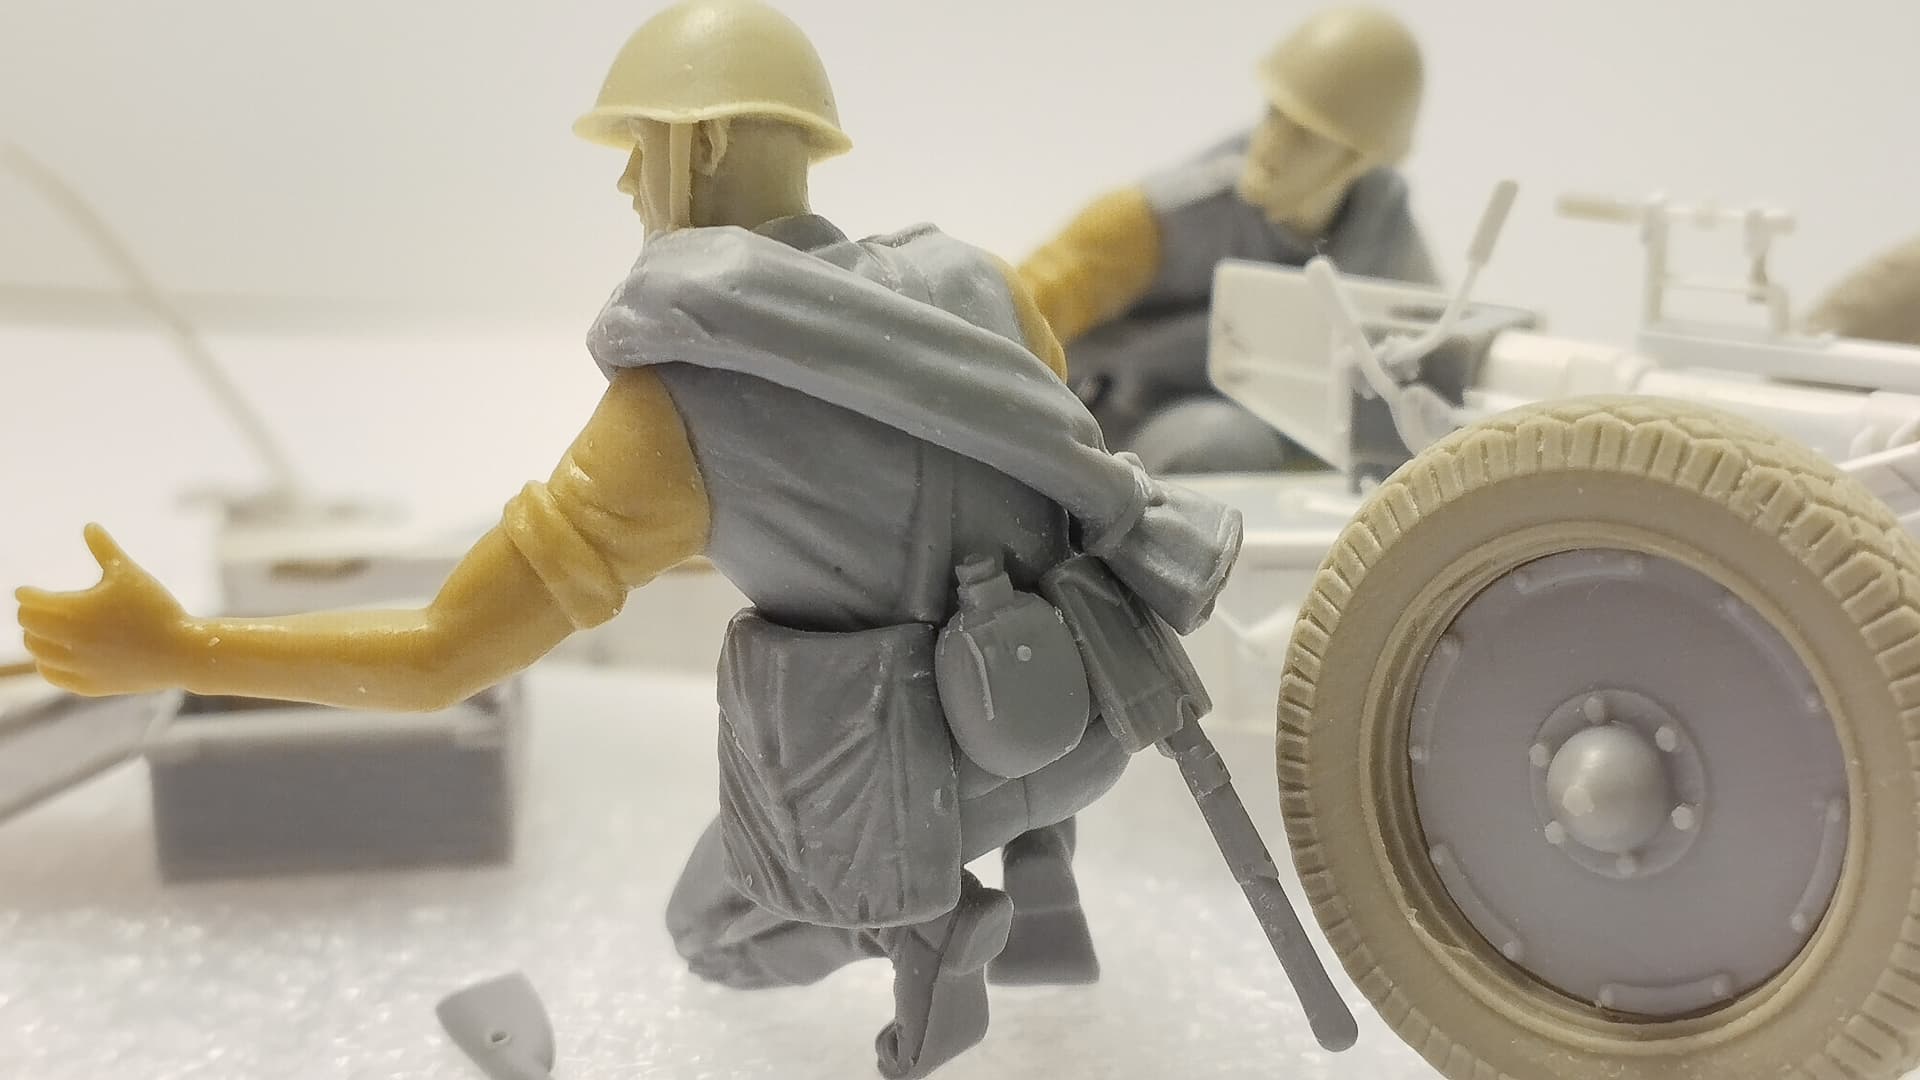
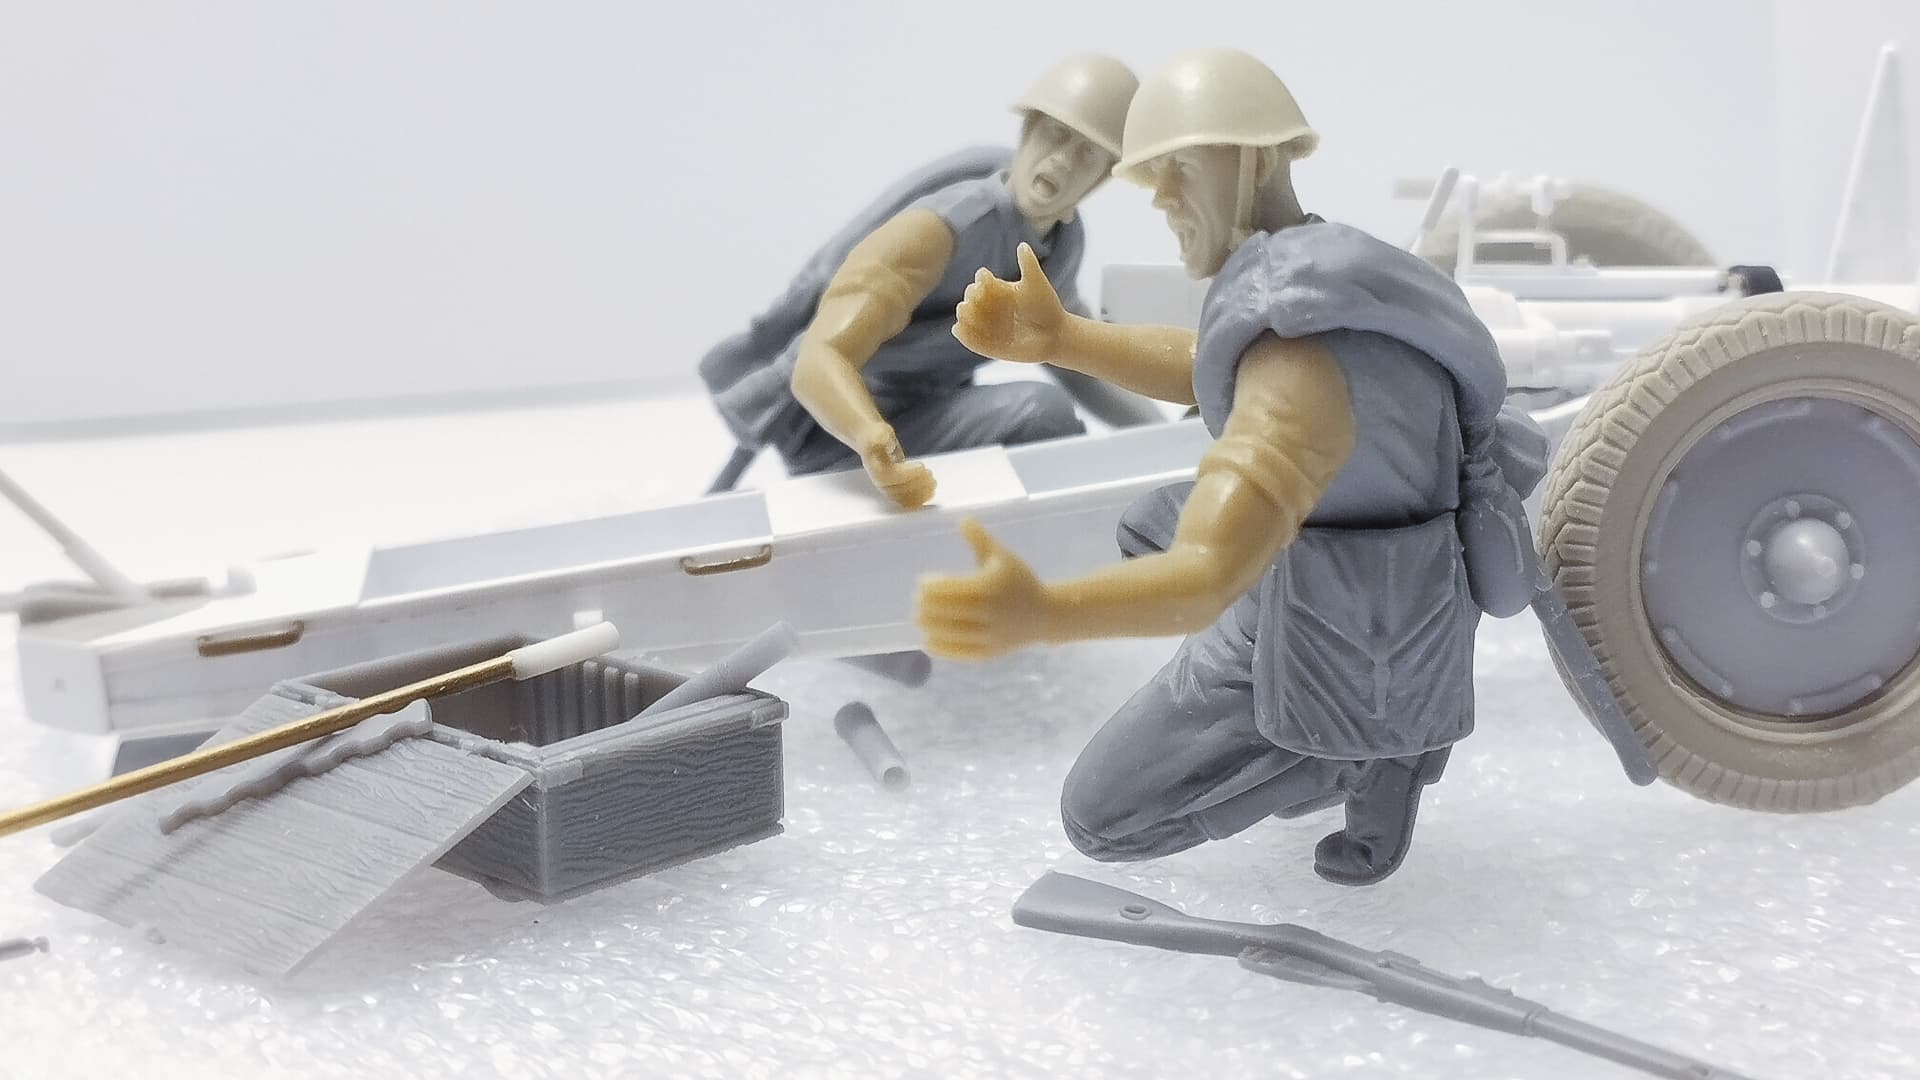
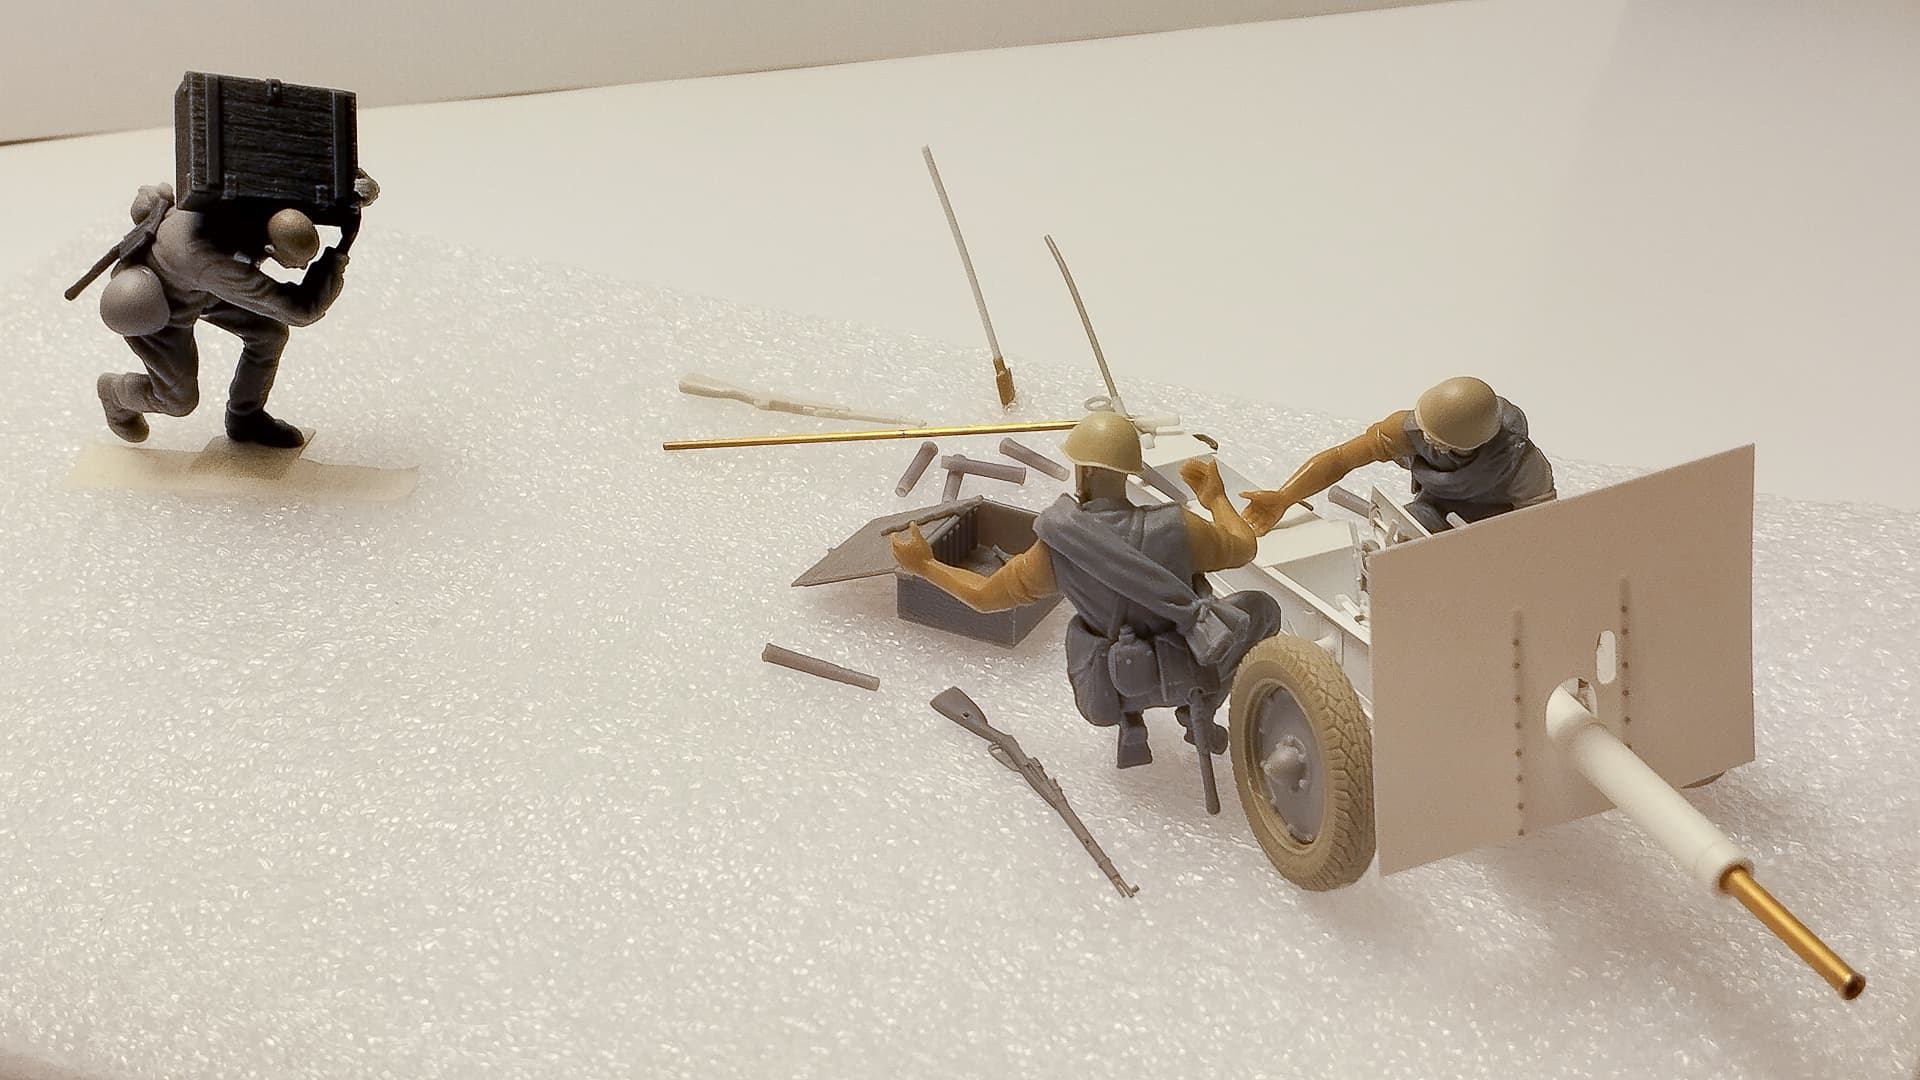
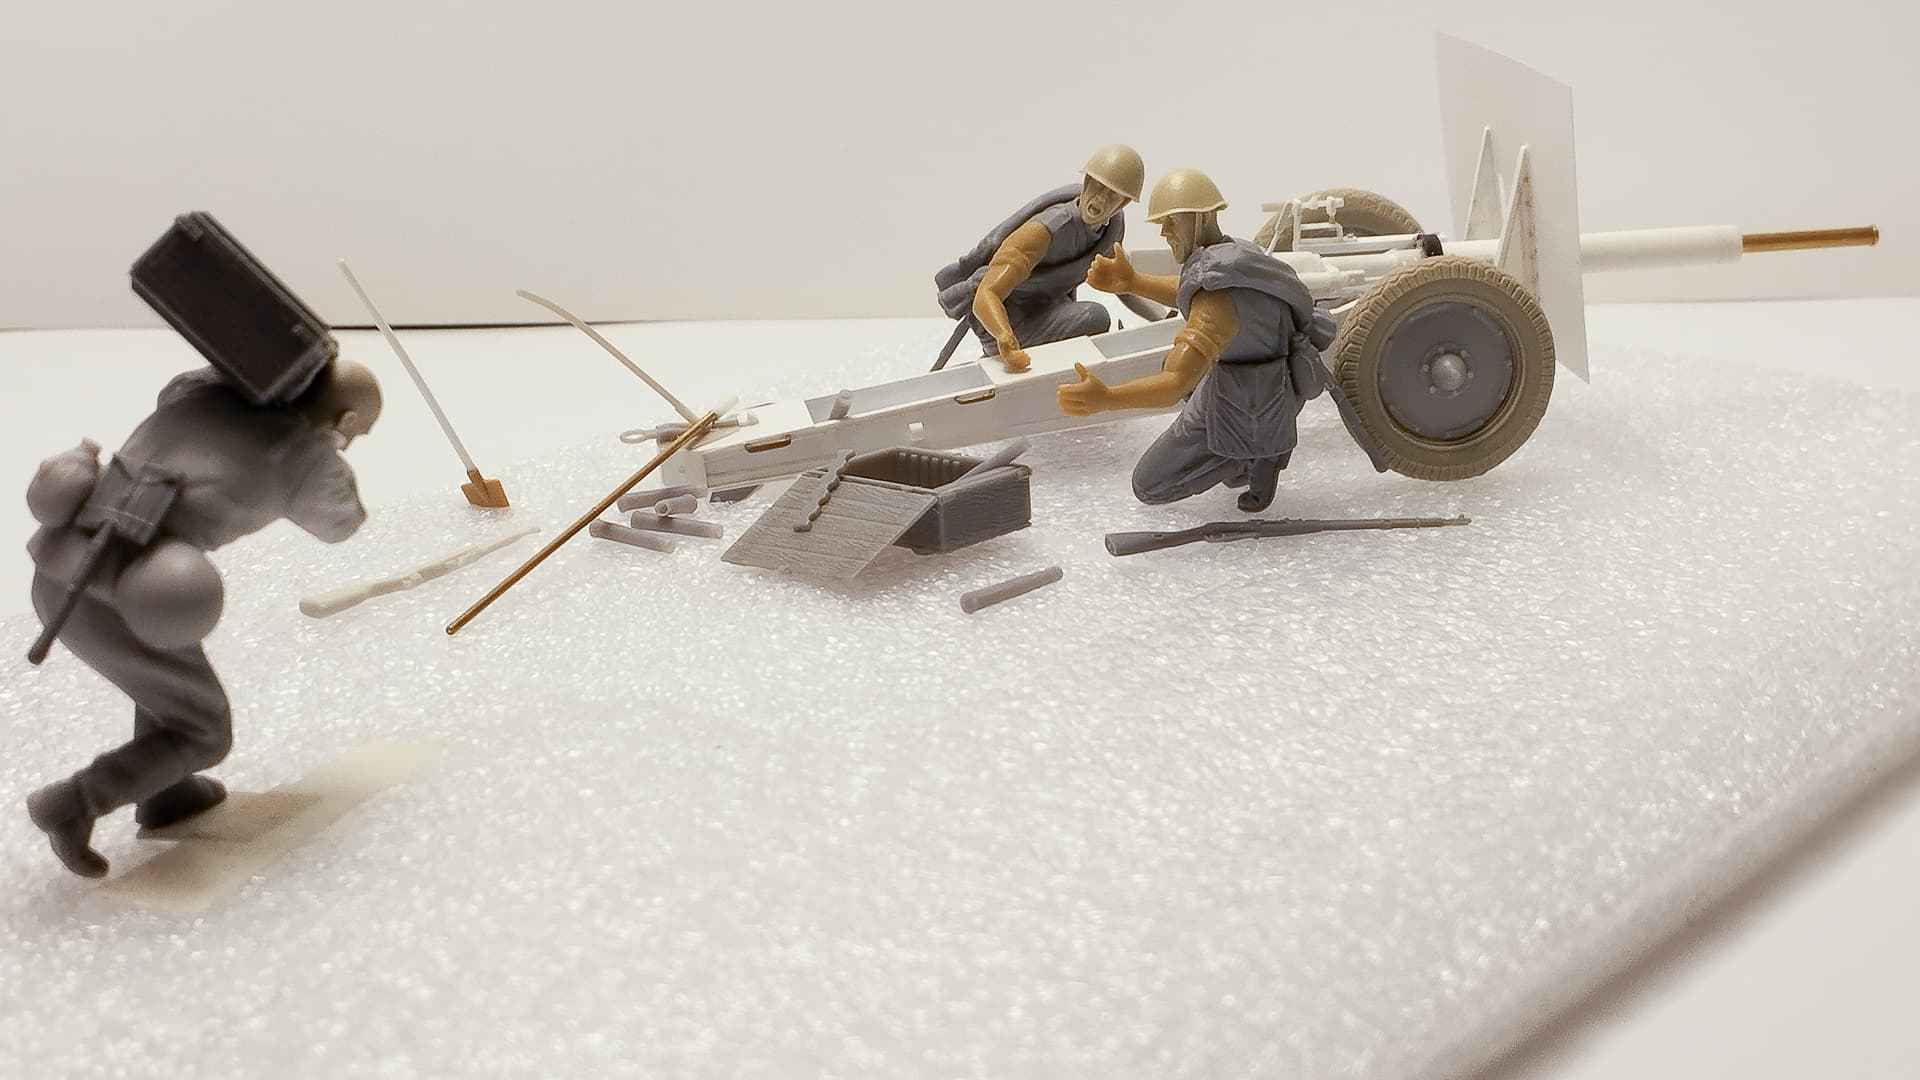
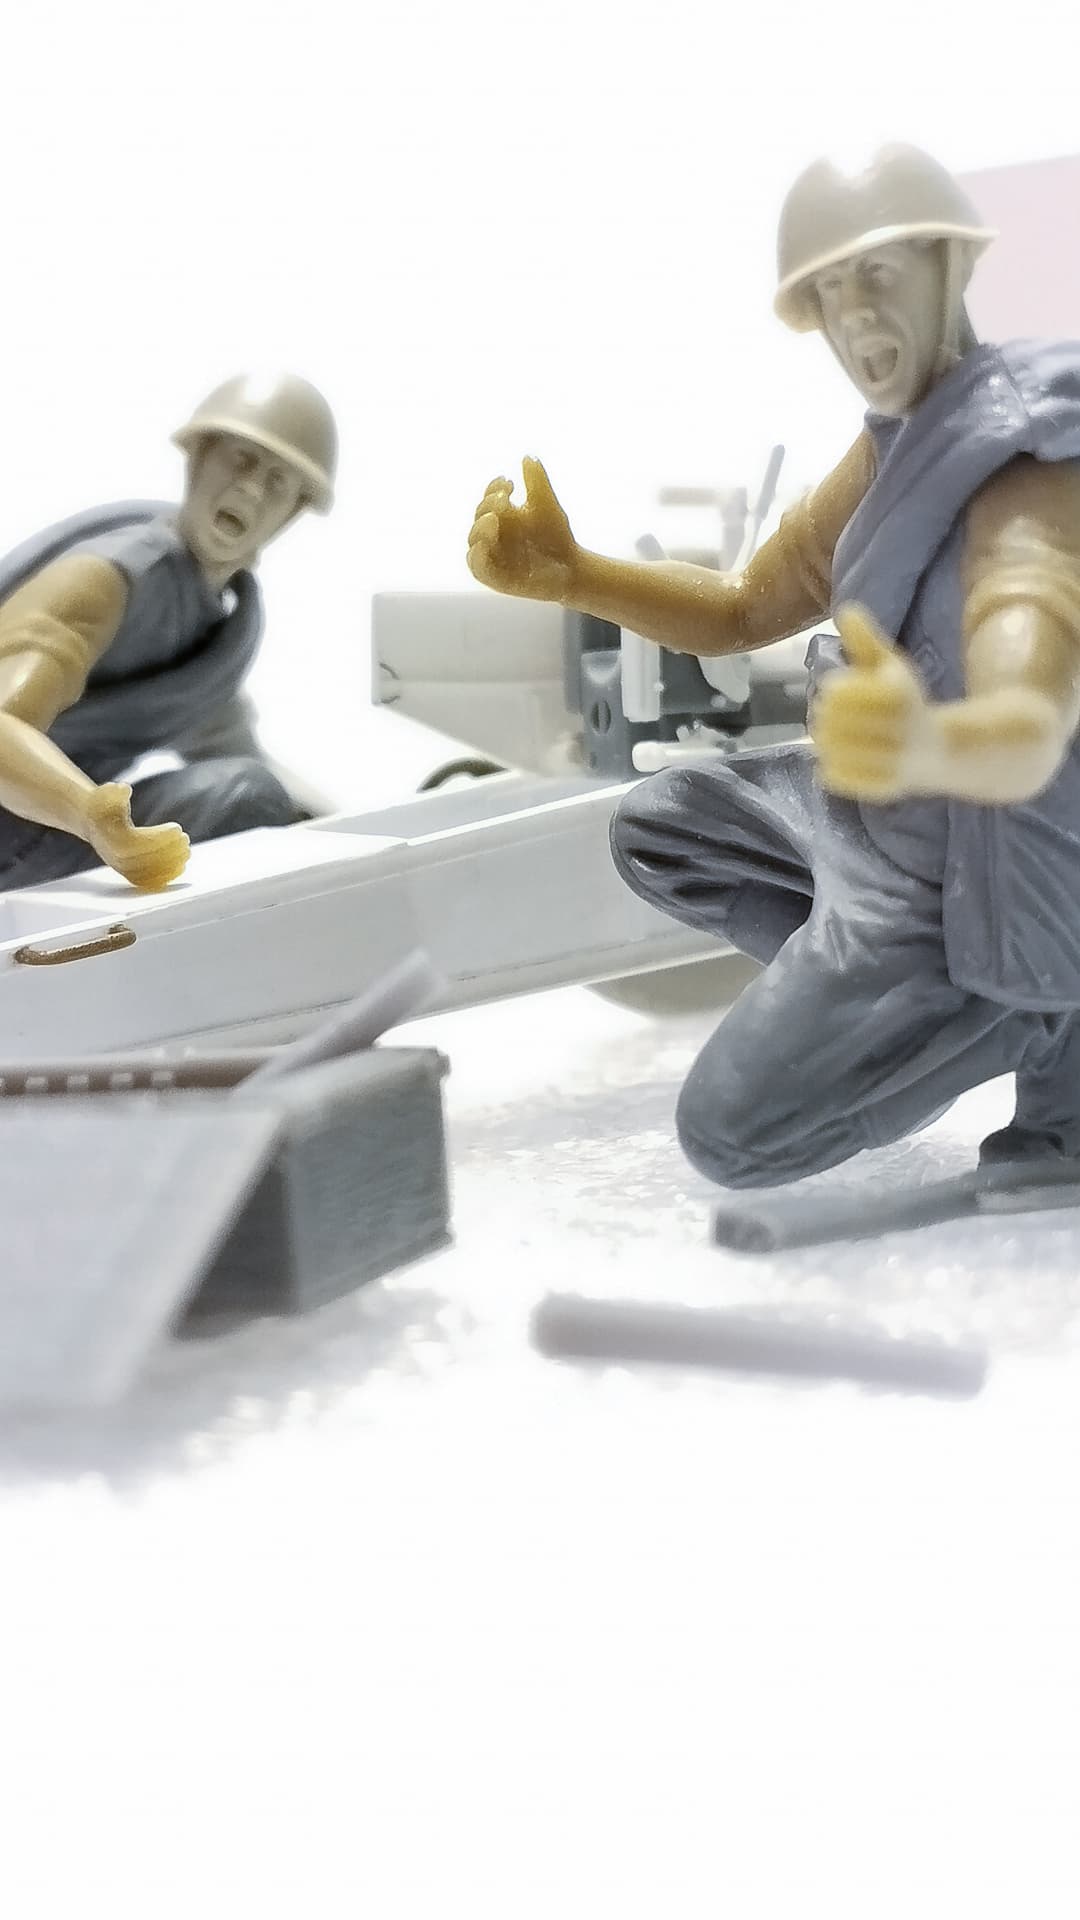
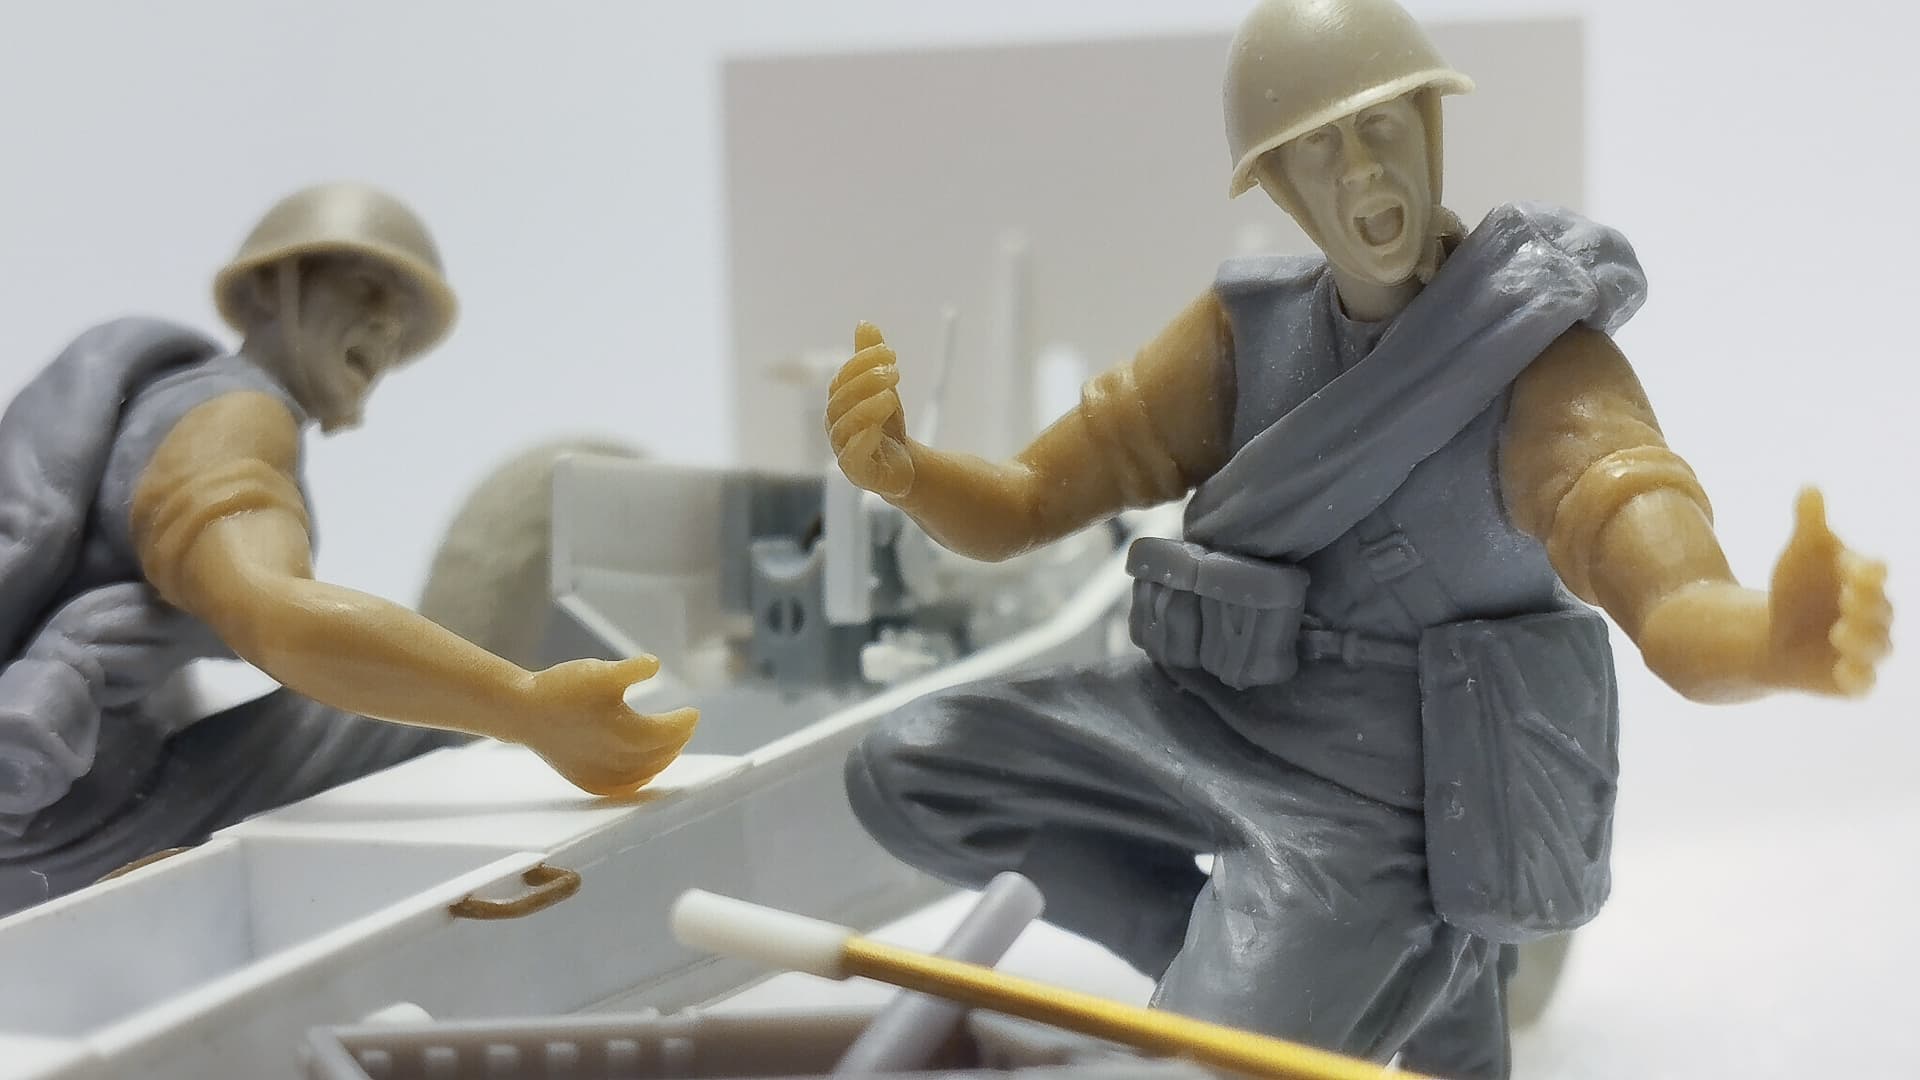
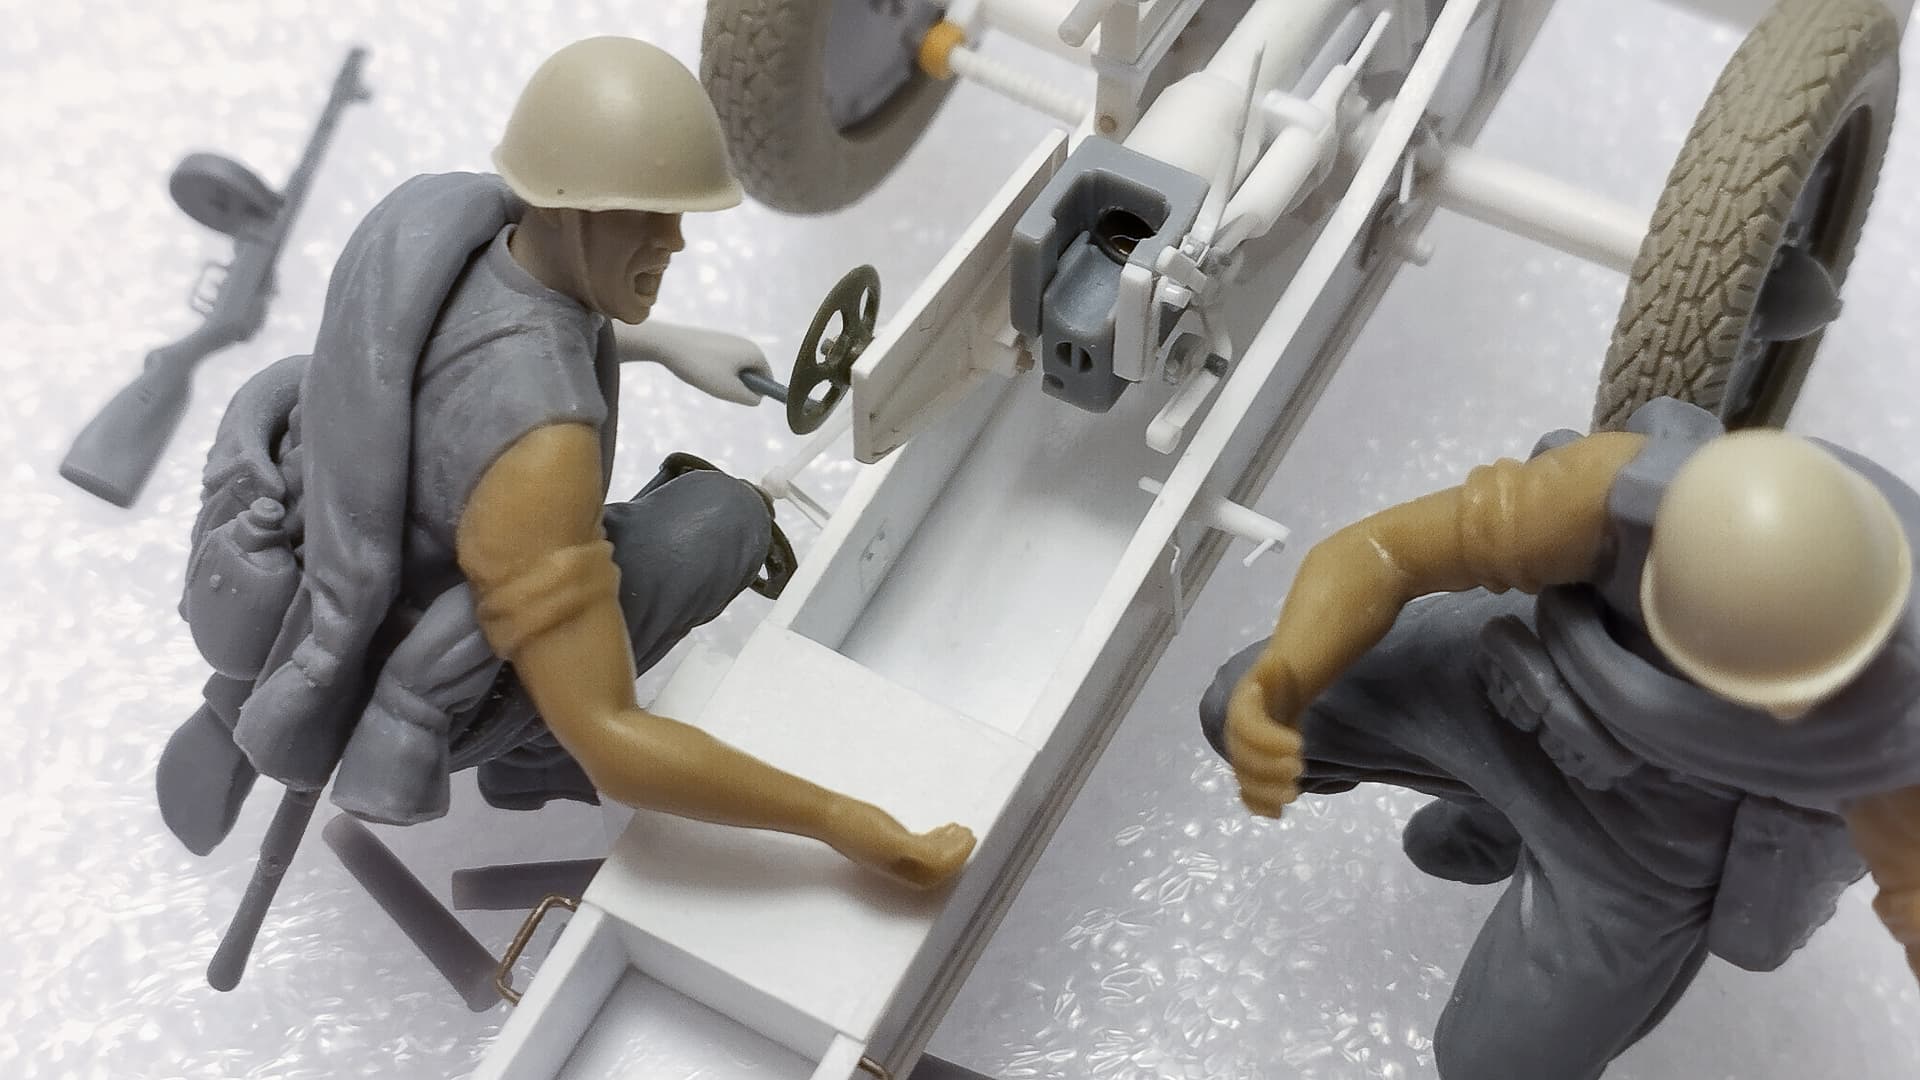
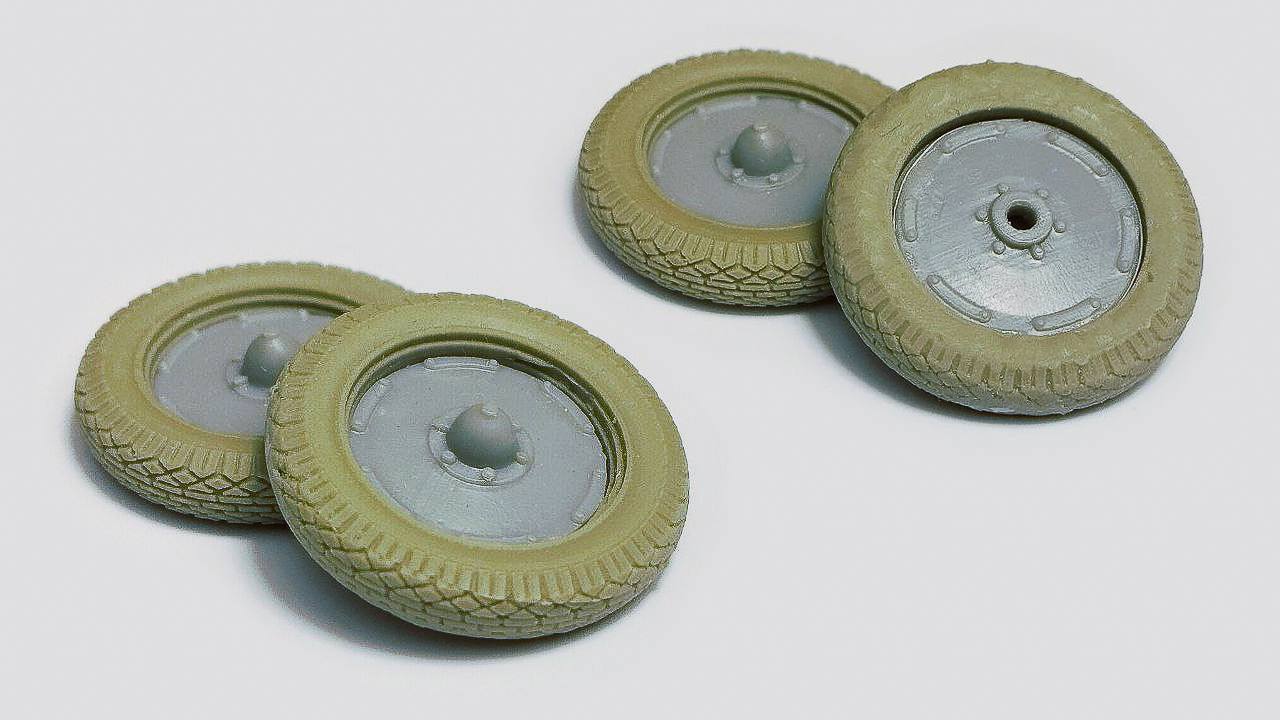
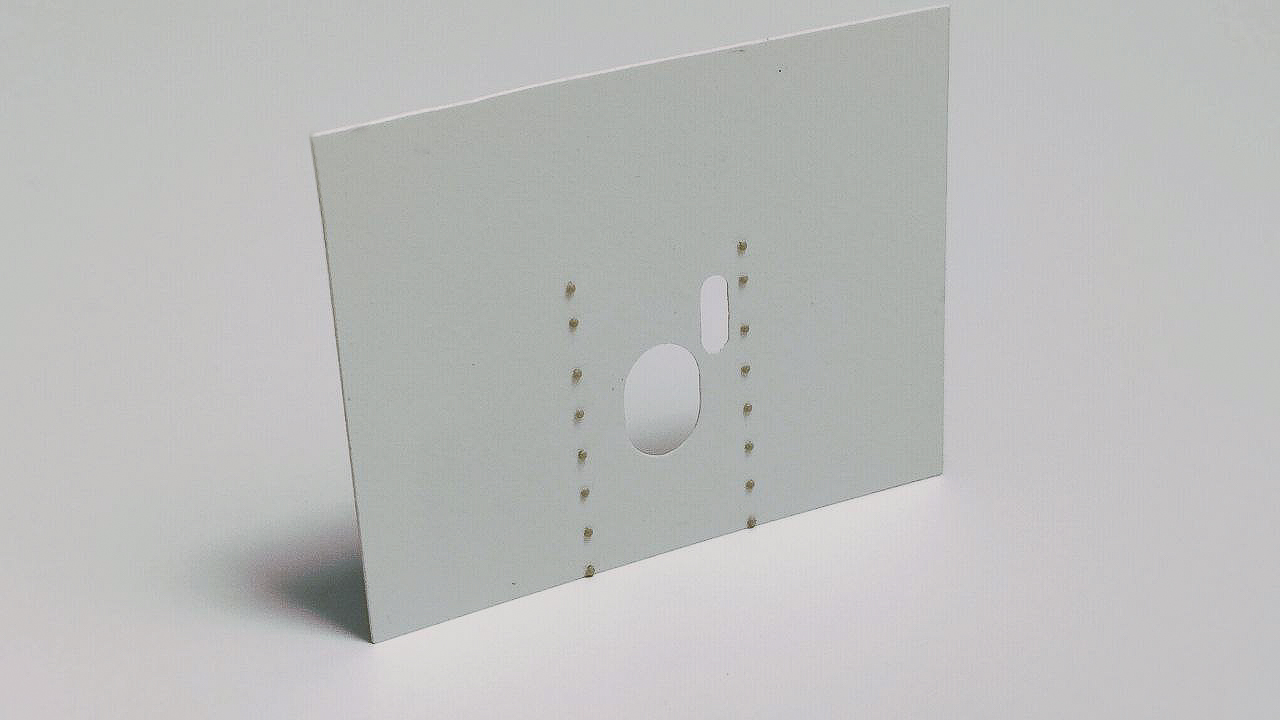
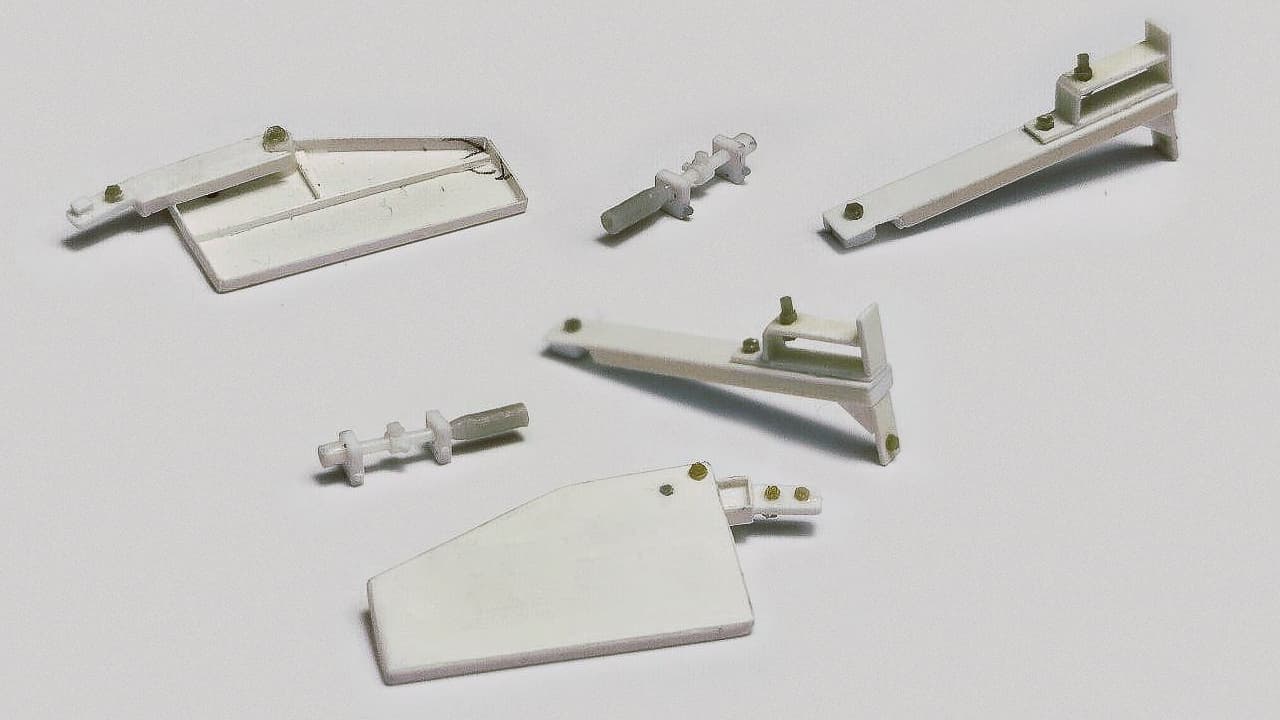
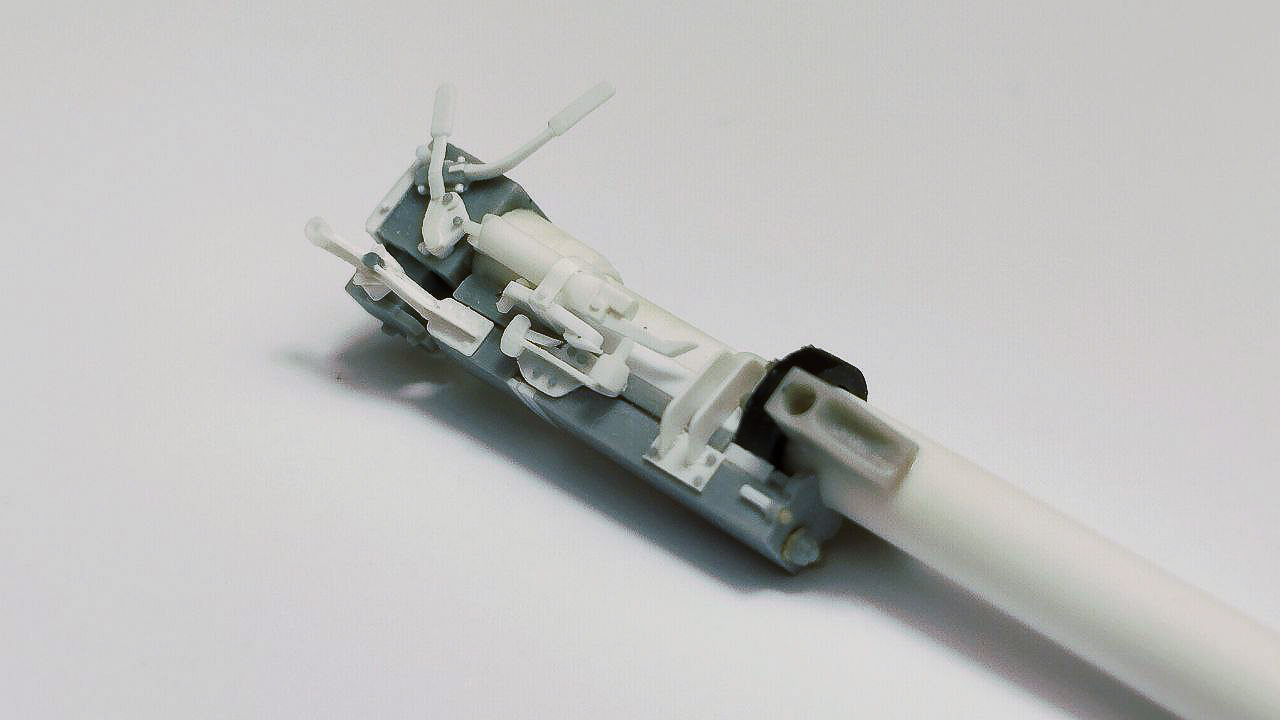
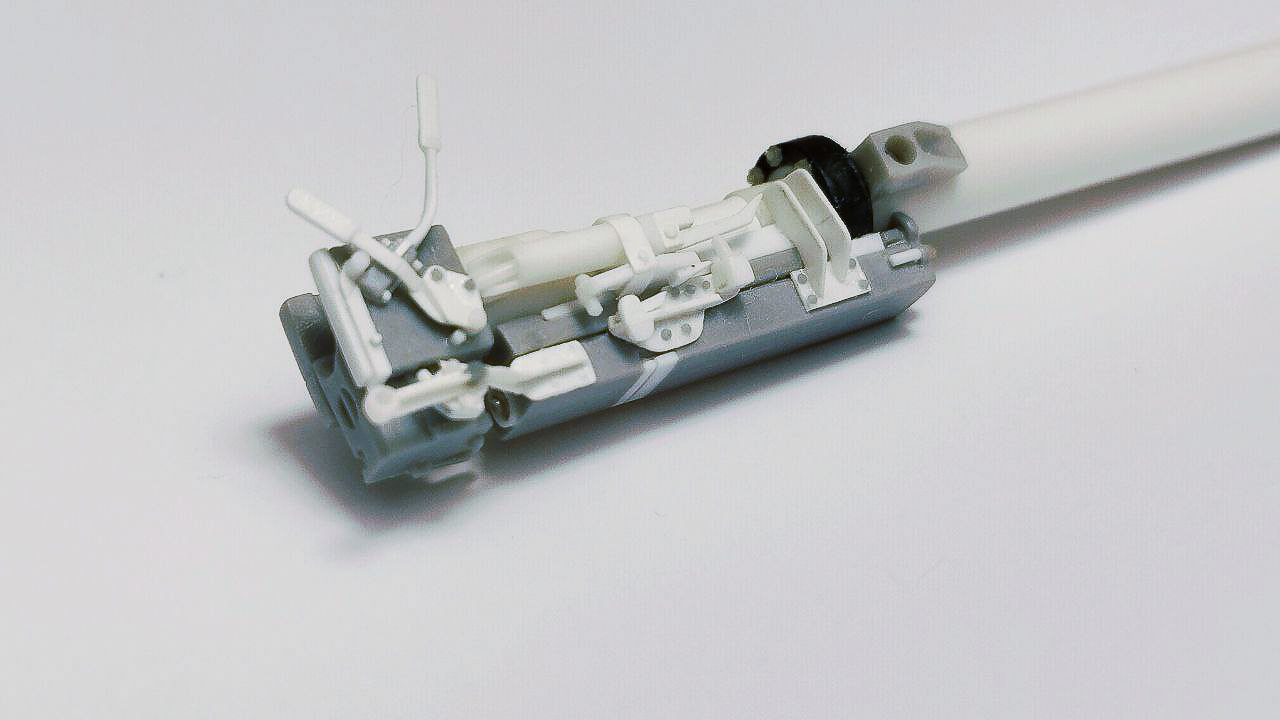
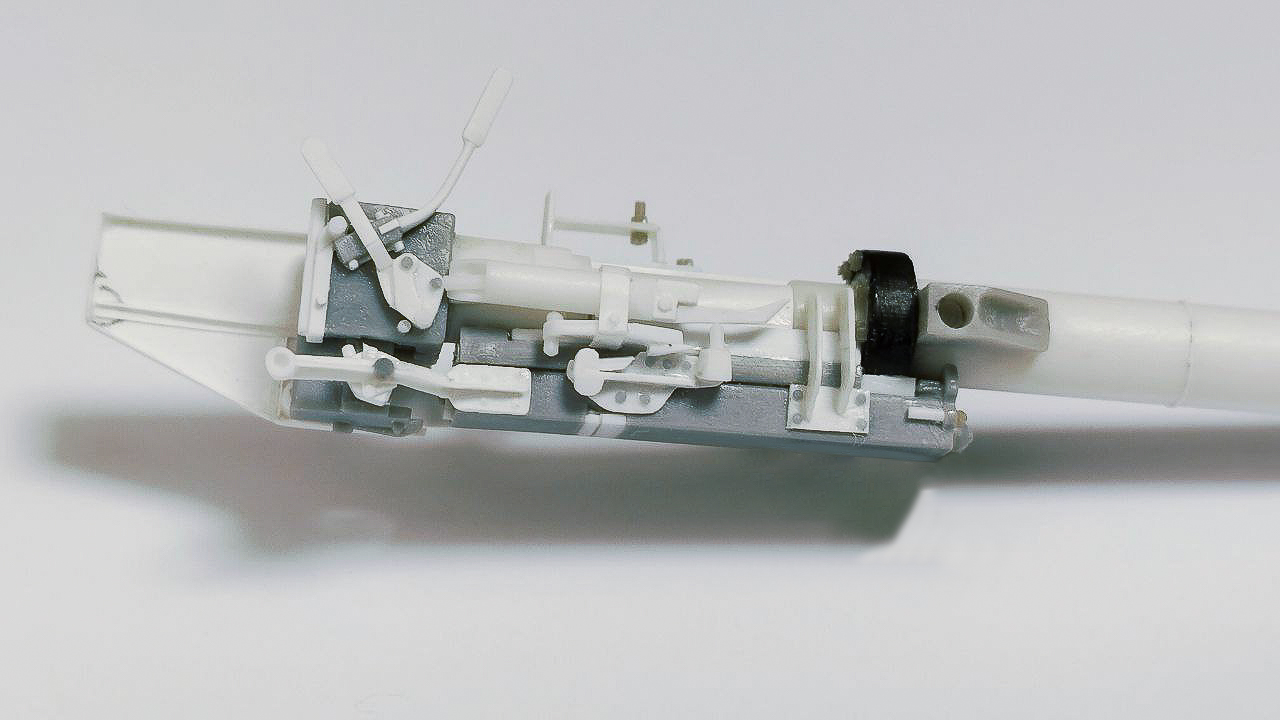
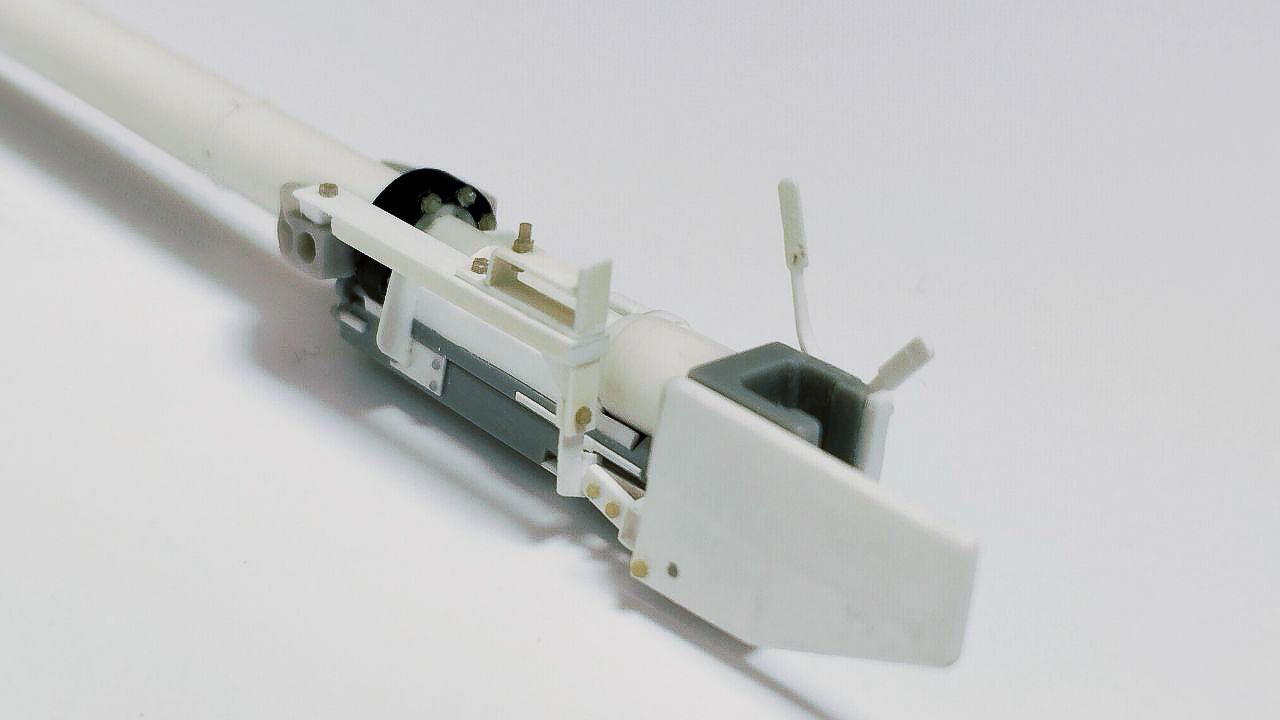
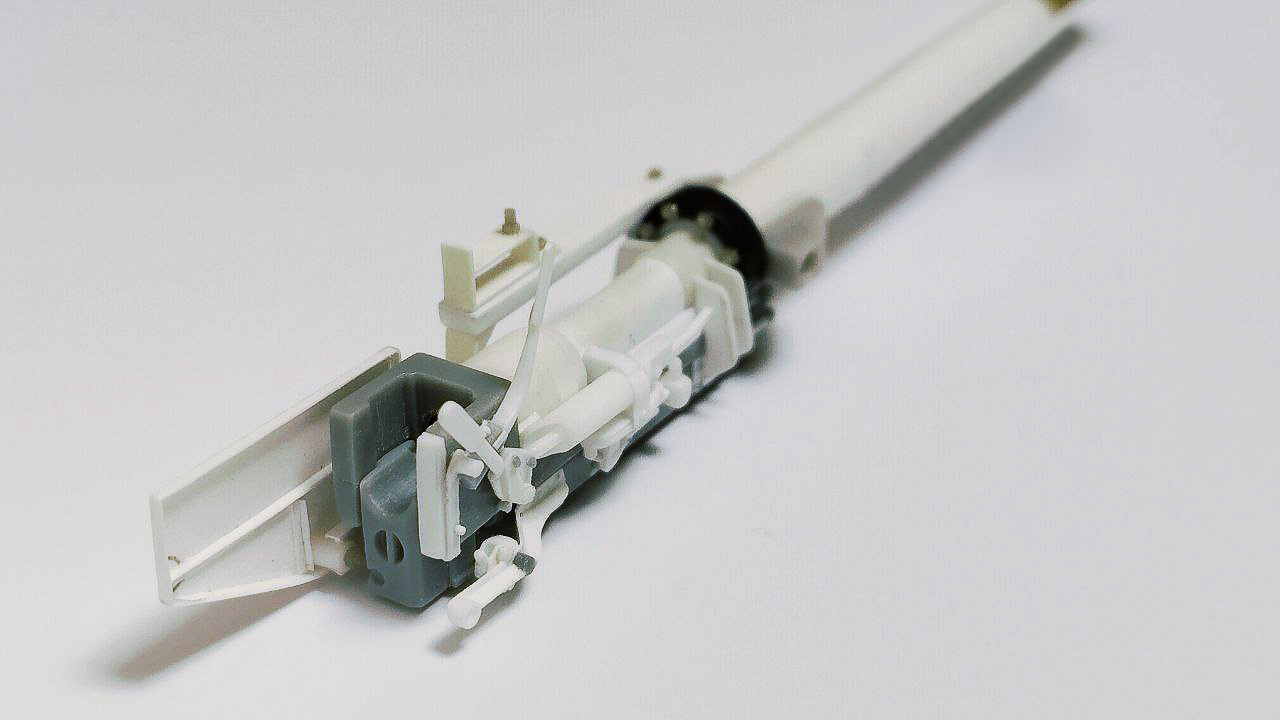
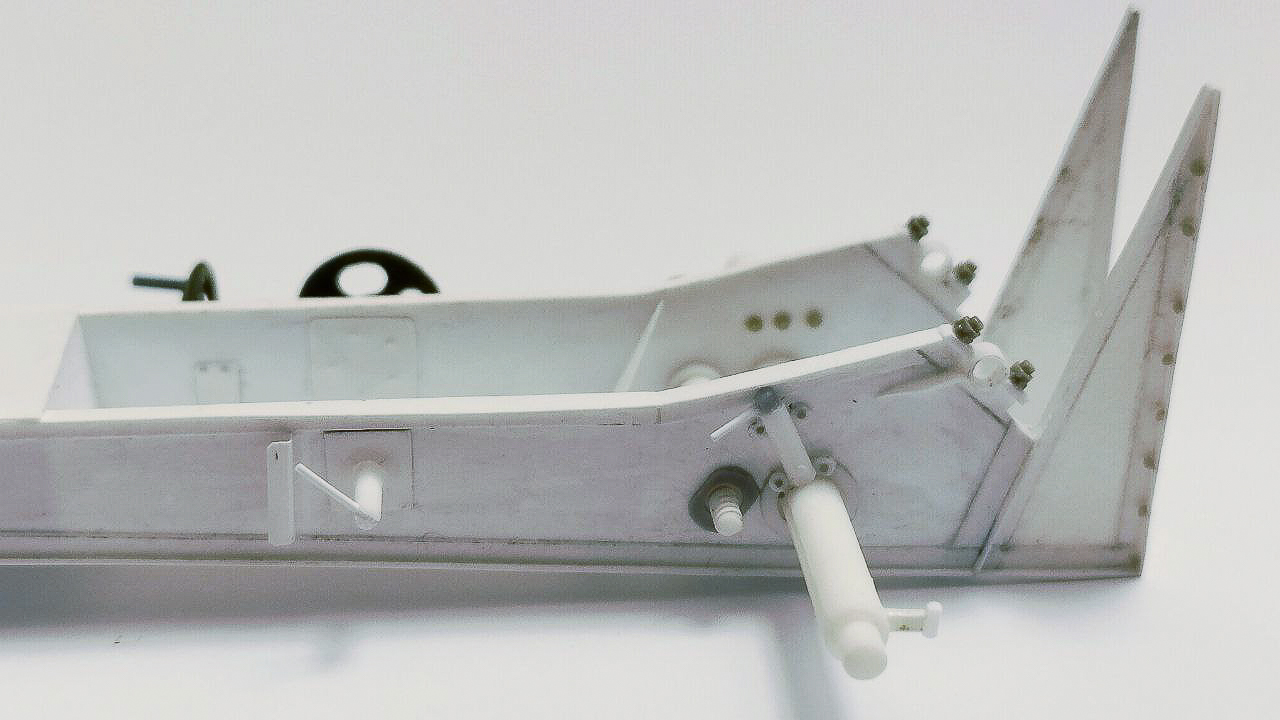
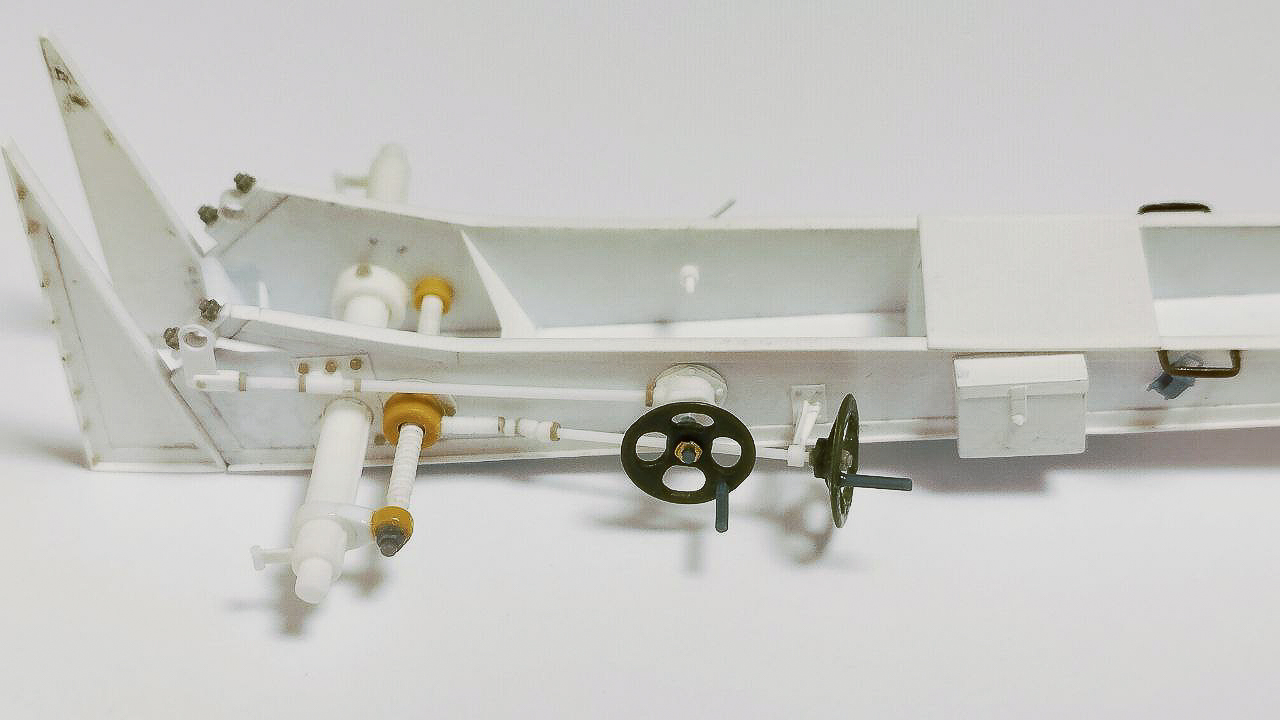
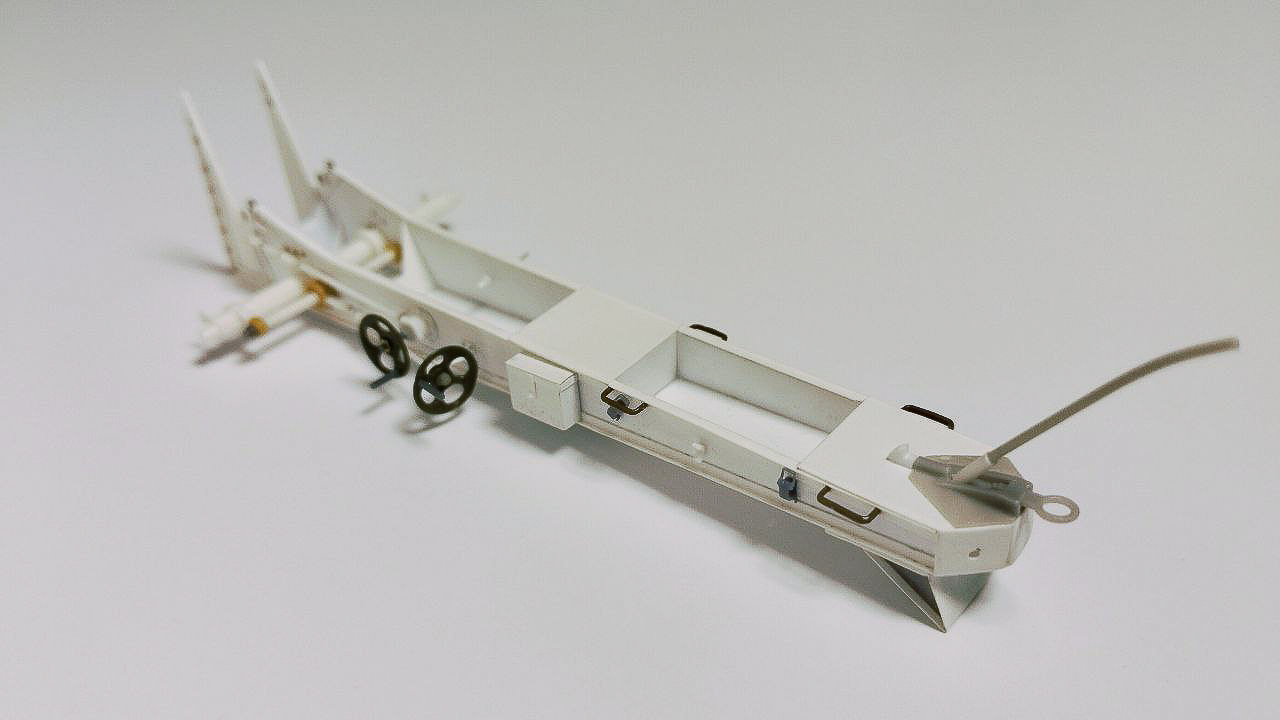
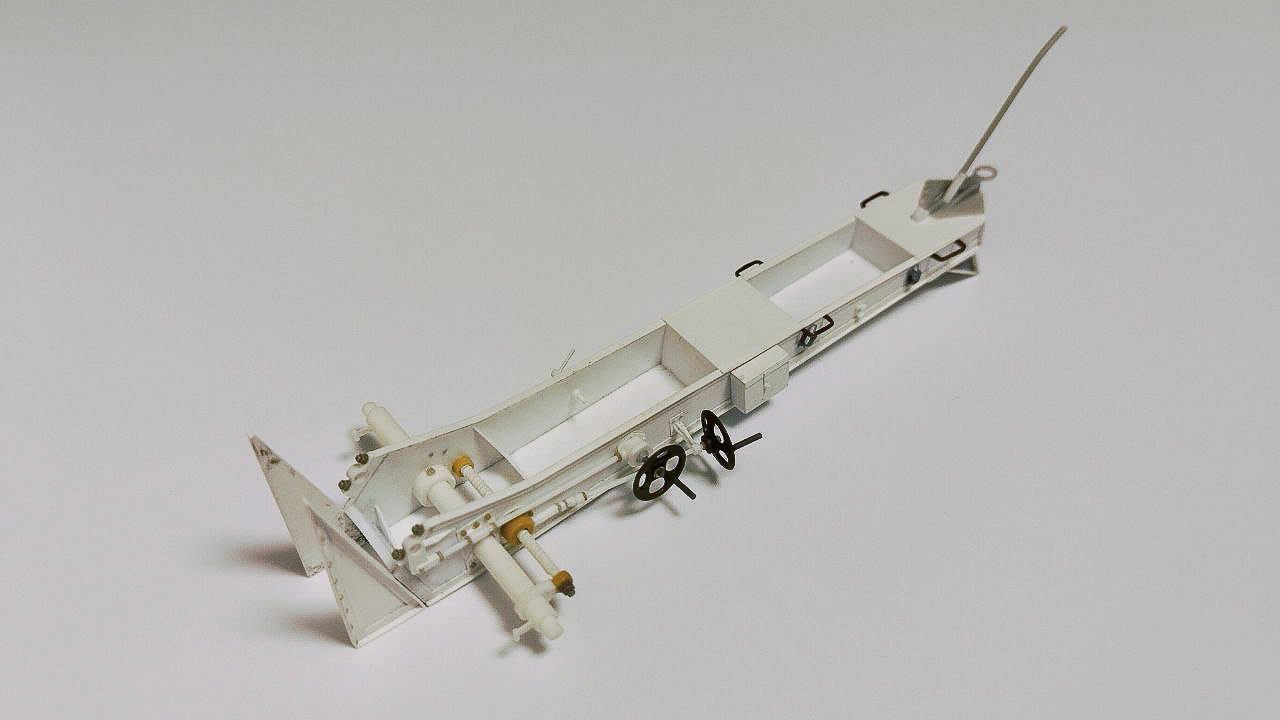
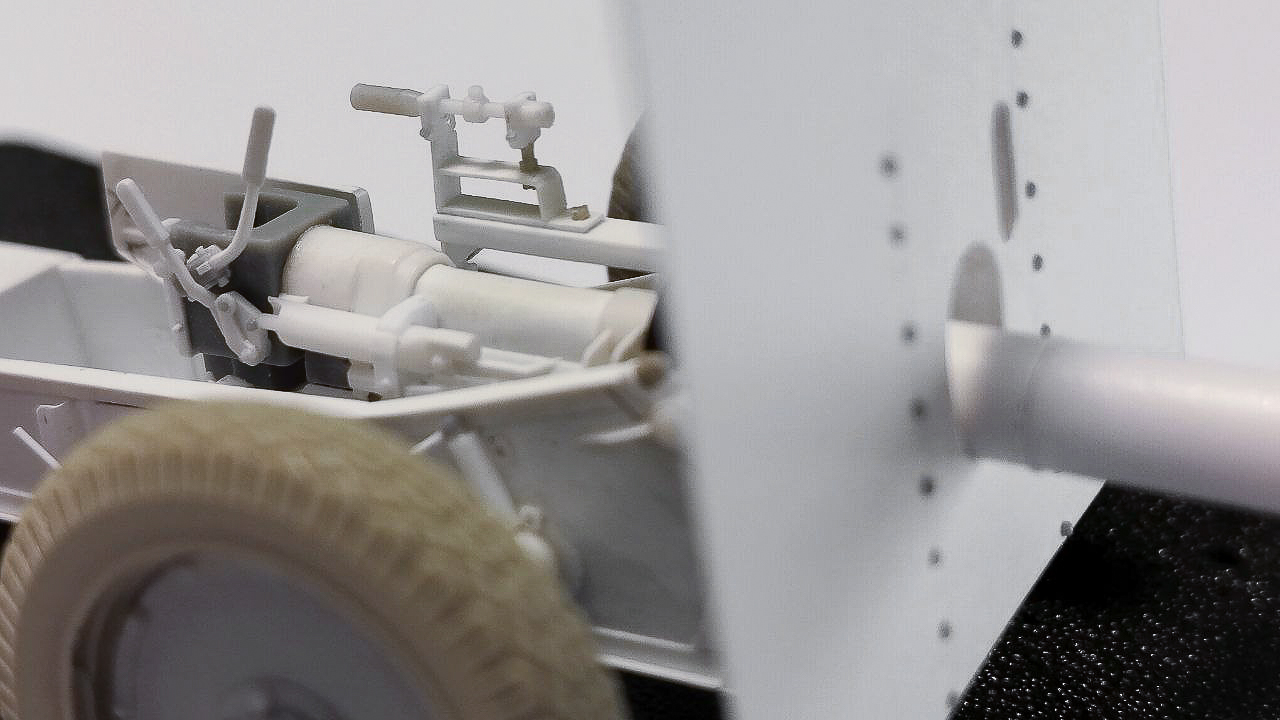
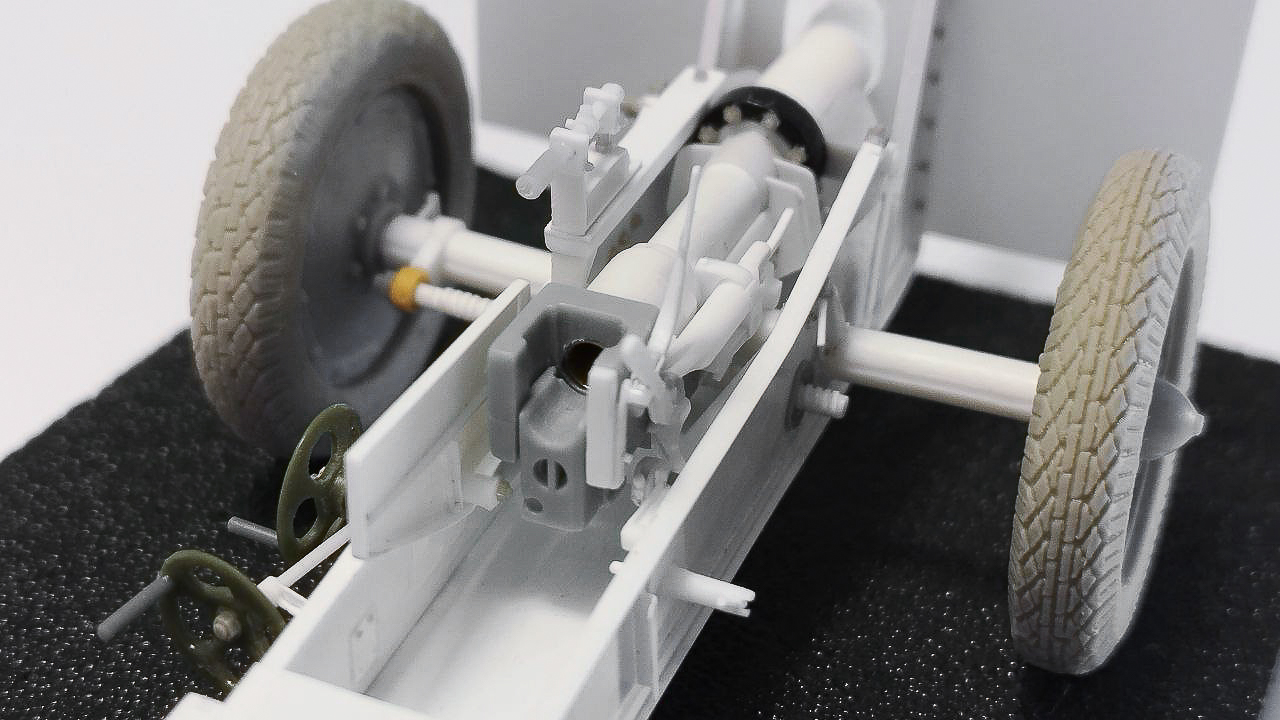
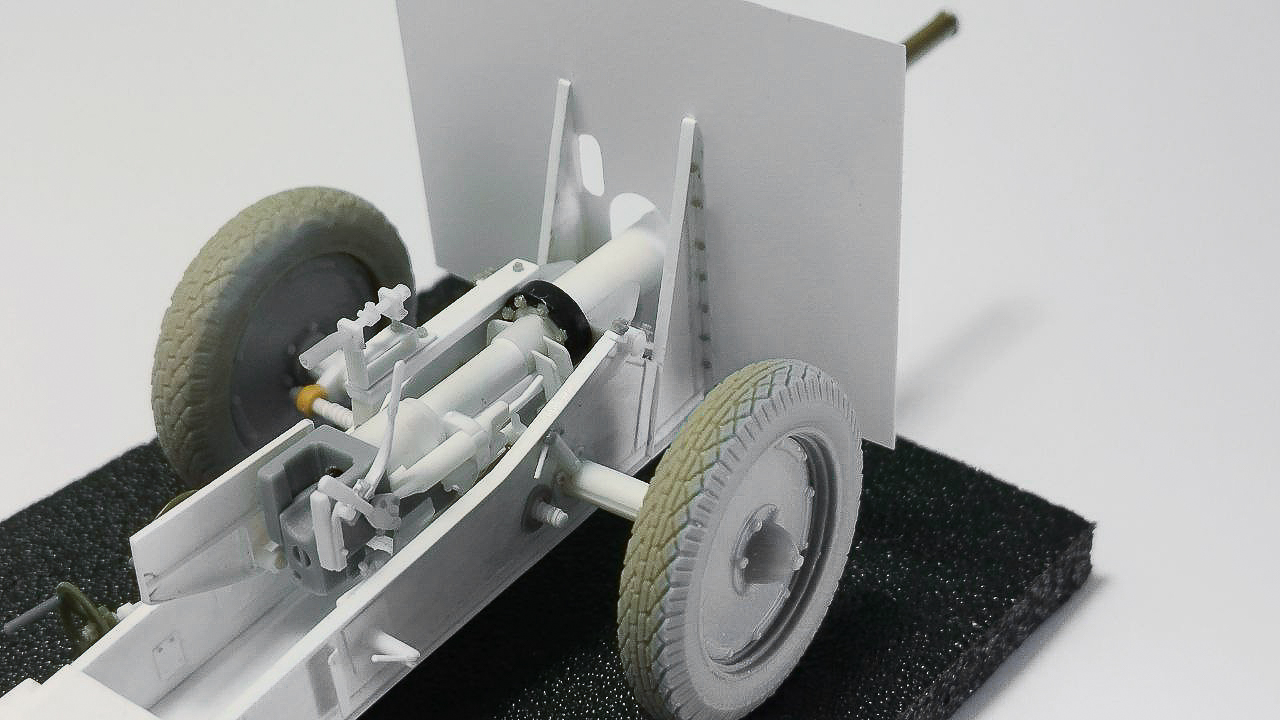
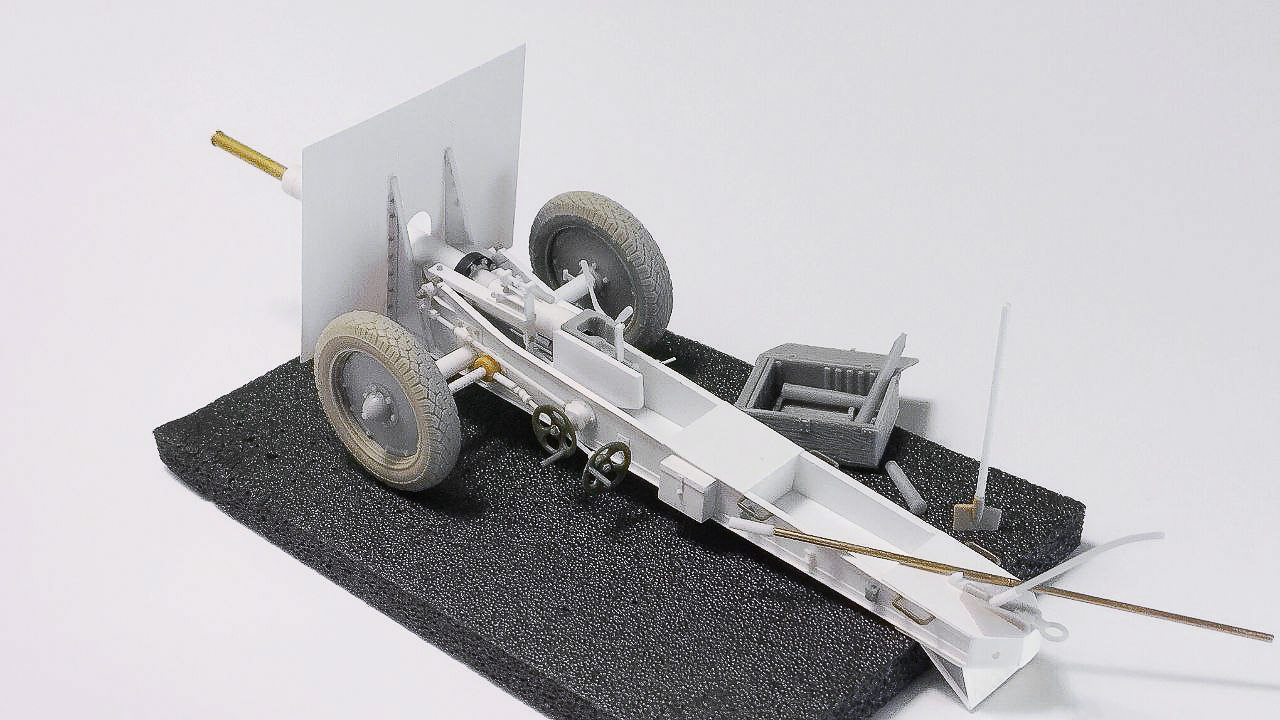
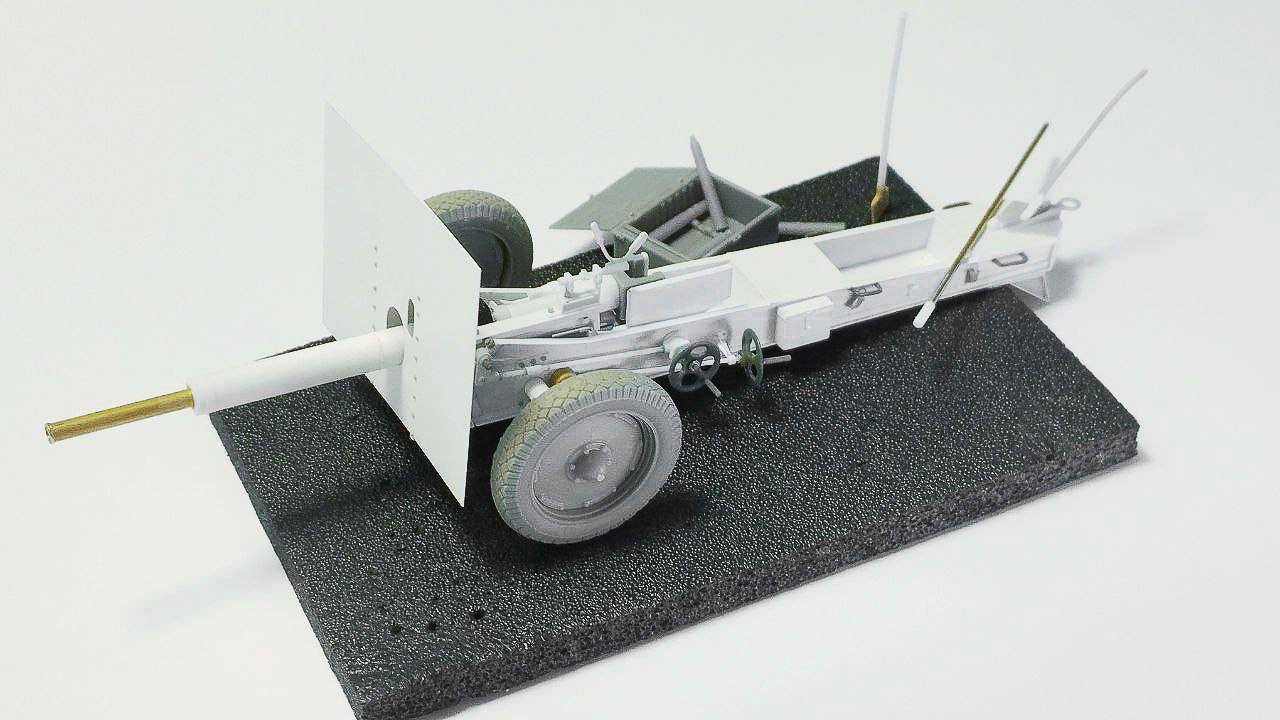
I purchased this kit a couple of years ago and had high hopes for it, as it came with several photo-etched parts with resin wheels and rivets. So I was looking forward to getting my hands on it, thinking that, for once, I’d finally be faced with a super-detailed job of a small scale. Nope! I practically had to rebuild it from scratch! And yes, because as soon as you examine the kit more closely, thanks to all the photographic documentation in my possession, you realize that the kit is undersized in every part and the detail is practically lacking. In short, this kit needs to be rebuilt from scratch! The only original parts in the kit are the wheels (1mm undersized, never mind. They’ll be promptly replaced as soon as I find them on the market!) and the rivets on the shield, the original photo-etched piece of which is undersized to the point that the hole through which the barrel protrudes is so narrow that even the original barrel, which was already undersized, wouldn’t fit through! For the rest, it was a great reconstruction job using plastic sheets of different thicknesses for the shield and the carriage. The model is then super detailed by adding 3D ammunition from FC ModelTrend, although the quality isn’t the best because unfortunately they are still “wet” and have grooves along the entire length of the cases (I will replace these as well as the ones I find on the market made of brass), while the breech is taken from the beautiful “German Pak 36/37” kit by RIICH MODELS, practically identical to that of the German 45 mm PAK (sooner or later I’ll write an article with all the models of the German PAK 36/37 variants). The two tool holders on the left side are 3D printed by EMP3D. The smaller details, the rivets and bolts up to a diameter of 0.3 mm, are from Plusmodel and Gas Hans. The brass barrel is homemade, but it was perhaps the easiest thing to make, while the most challenging part was threading the large screw for the gun’s horizontal aiming mechanism. I also sent a complaint email to Zebrano to point out the kit’s flaws, but never received a response. The kit is completed by the crew, derived from two Miniart kits, enhanced with heads and a hand from the Hornet and two pairs of arms from the TAMIYA “Shweres Wurfgerat 41 Heulende kuh” kit. As usual, I don’t like coloring my creations because I like to show off all the work I’ve done, so you won’t see a final image of a completed diorama. My pleasure is precisely that: to detail the pieces and show off even the smallest details!
I hope you like it.


Excellent scratchbuild of an unusual subject.
Thanks for your appreciation. Yes, indeed, they always make the same subjects, forgetting that the cannons used in WWII were truly numerous and varied.![]()
I really like and appreciate the scratch building skills. The devil is in the details and it looks like you NAILED IT. Great work
Not only WWII guns, a lot of artillery of Cold War is also needed.
![]() Nice quote! Thanks!
Nice quote! Thanks!![]()
Yes, definitely, there’s already so much WWII material that dedicating even more attention to Cold War artillery would have been too much! I still have so many pieces to build…![]()
There are only a few parts left from the original model! Very impressive work. Good luck!
Yes, I think only 2
Wow that is an excellent job of scratch building there! The details are outstanding as well as the figures . Really great job!
Thank you! Yes, with the figures, rather than carrying them in the usual configuration, I always try to tell a little story: here the tension created by a critical moment.
Incredible scratch building details. Have you ever thought of painting just half a model?
It’s quite evident that the figures tell a story with their poses, obviously they need ammo fast!
Again excellent job !
No, but I’m tempted to paint it (and the others I made with it) a metal/steel color…
Very impressive! Not too common a subject matter and yet
you’ve really brought this to a high level of completion. Bravo!![]()
Cheers
Dave ![]()
You voiced a very interesting thing that began to intuitively form in my head several months ago. Do you have any visual examples of this type of paint job? It’s clear when the model is fully painted, and it’s clear when it’s not painted at all. But partially painted—that’s not clear!
Not really. Not a cannon, though; I painted a rocket launcher. One of the next articles will be about that.