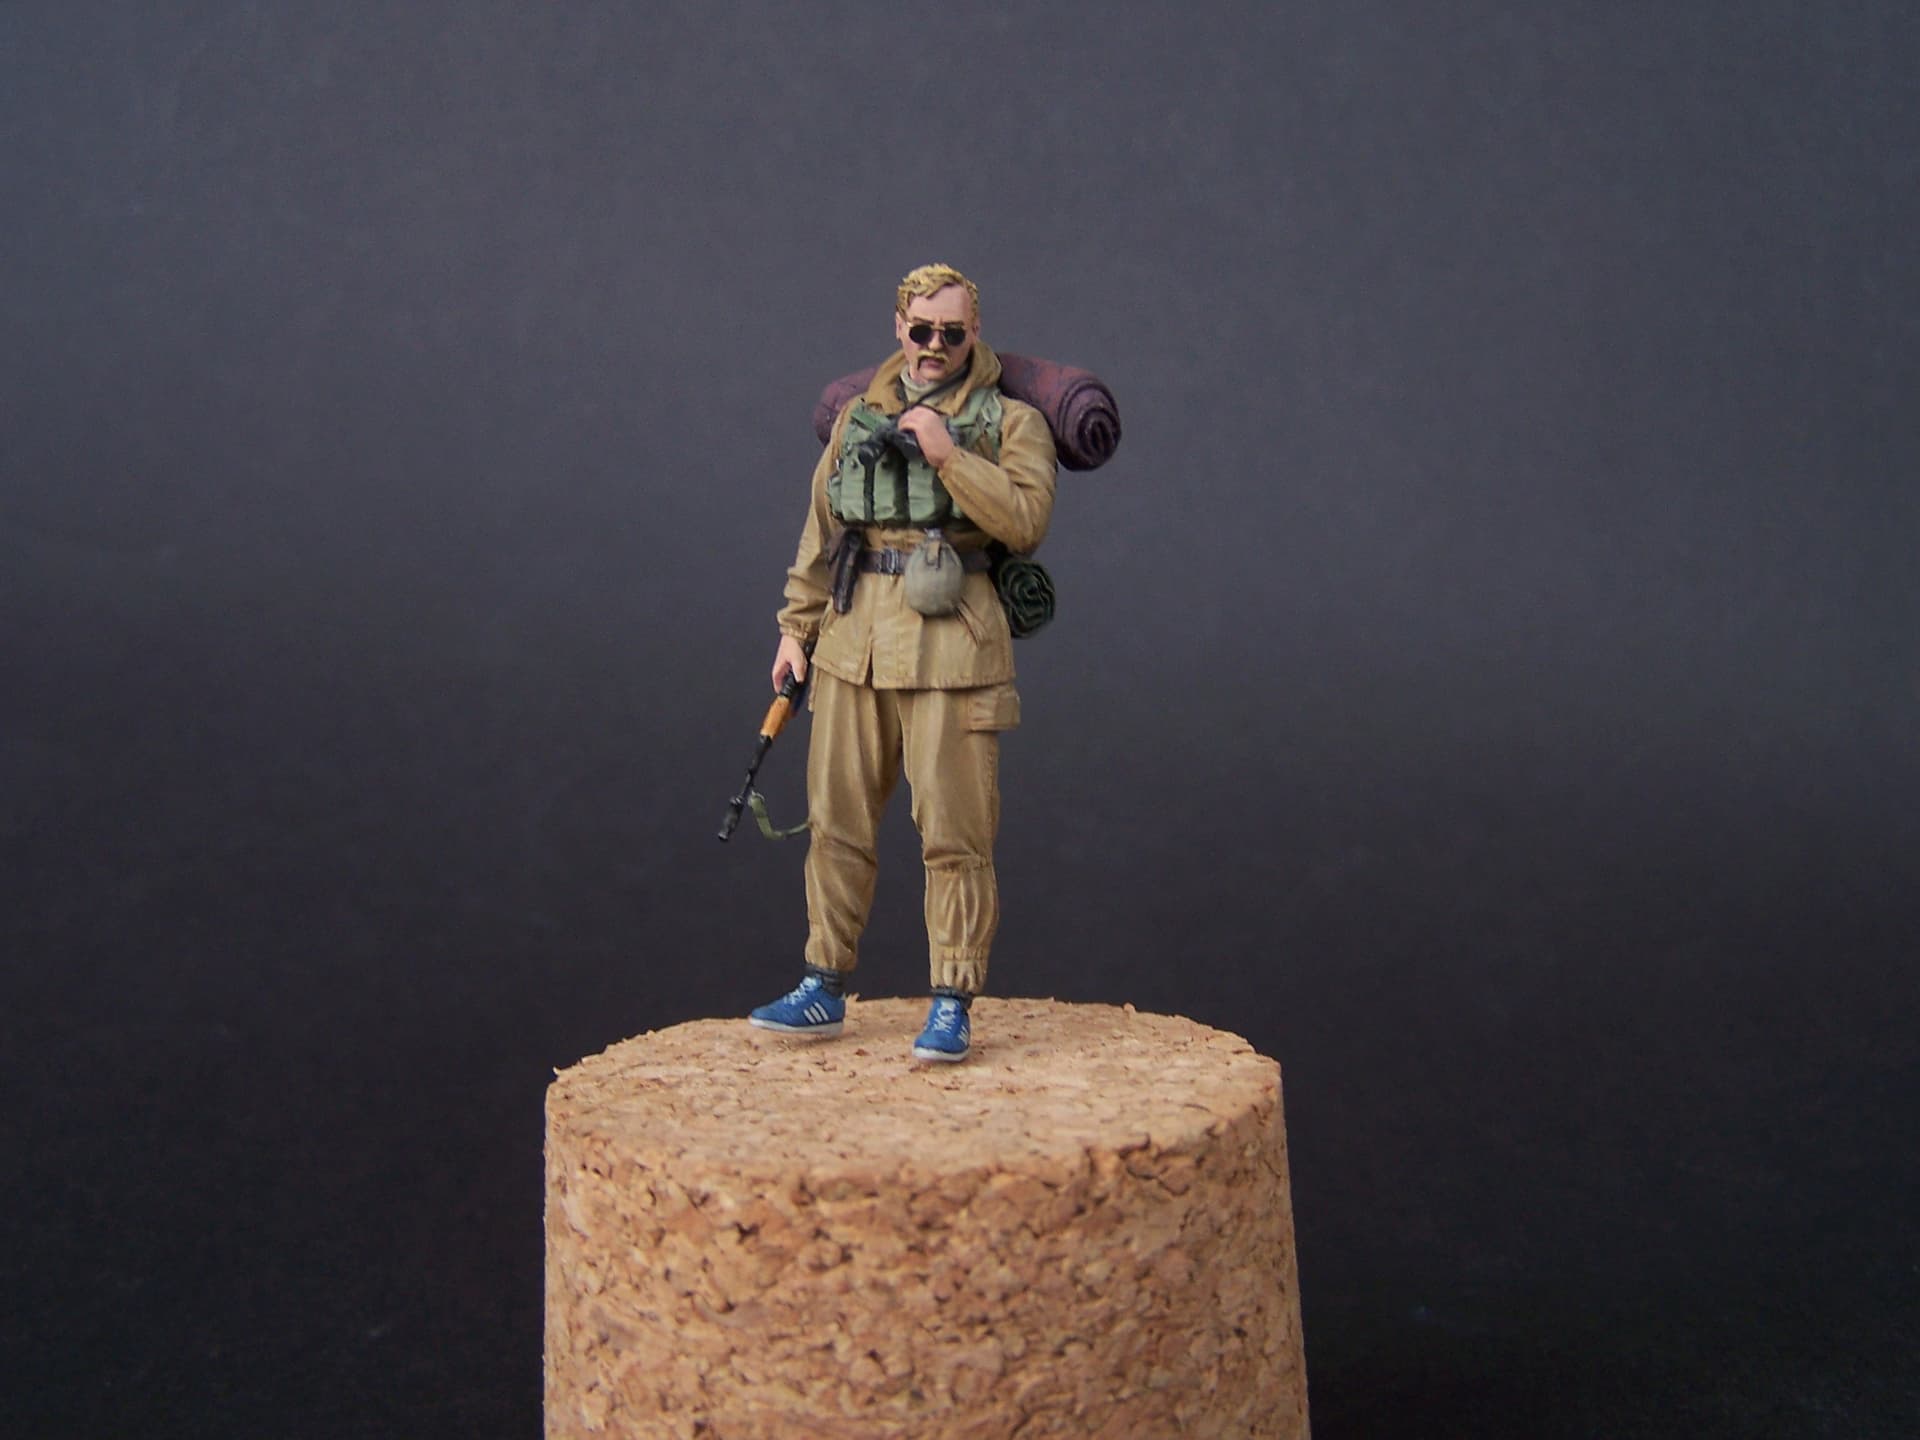
I had an idea for a small diorama with this GRU officer from Evolution miniatures, which I painted a time ago in the old forum, and when the Zvezda UAZ was announced, I decided to combine it with the figure. Maybe I will add one or two other figures if I find suitable ones.
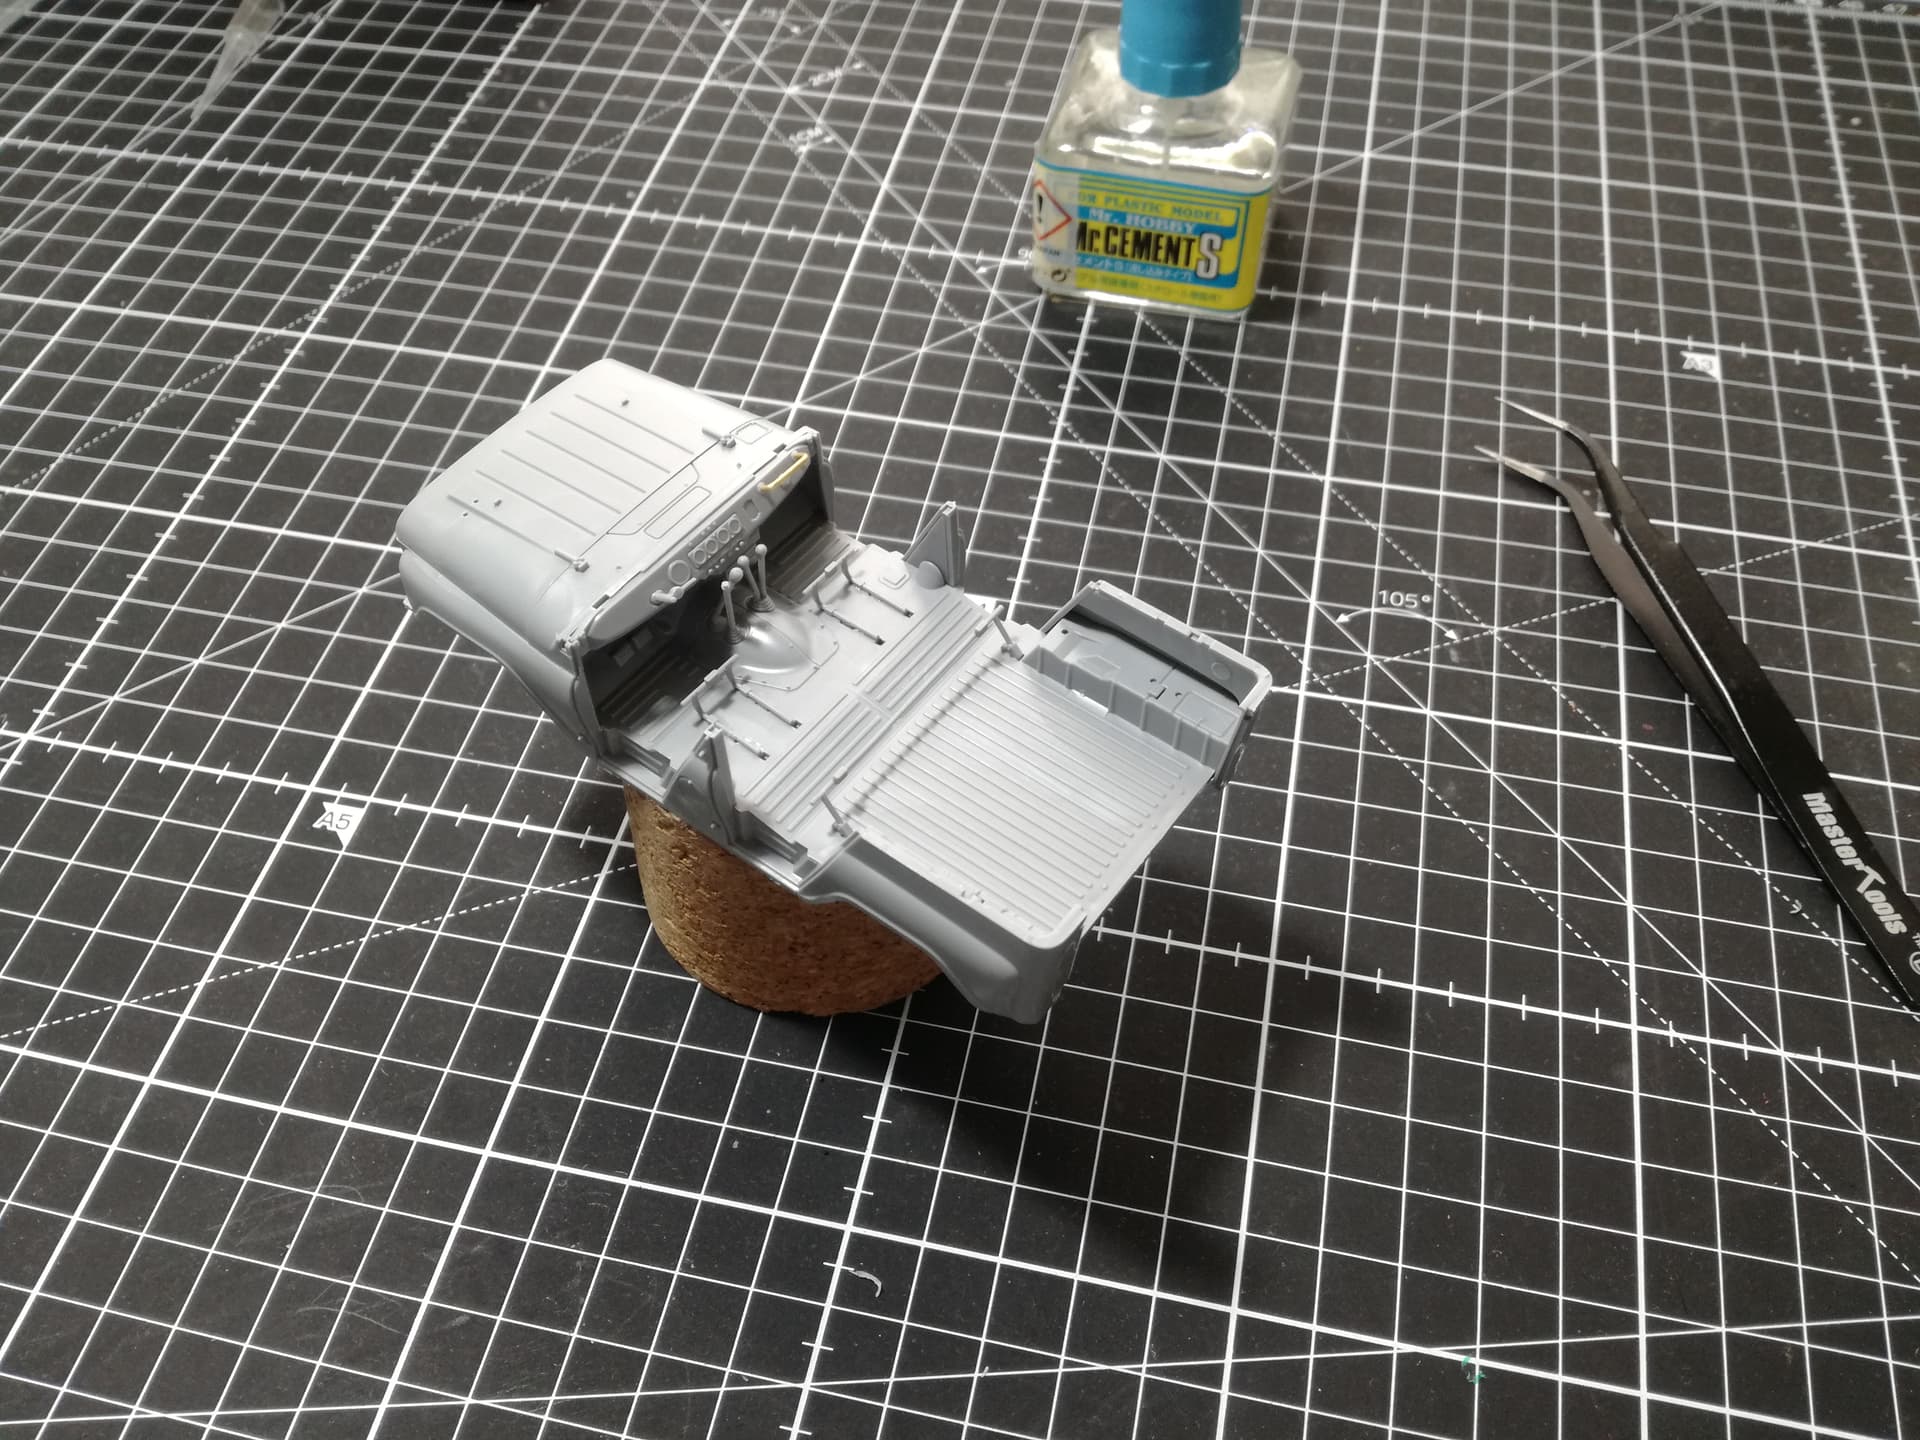
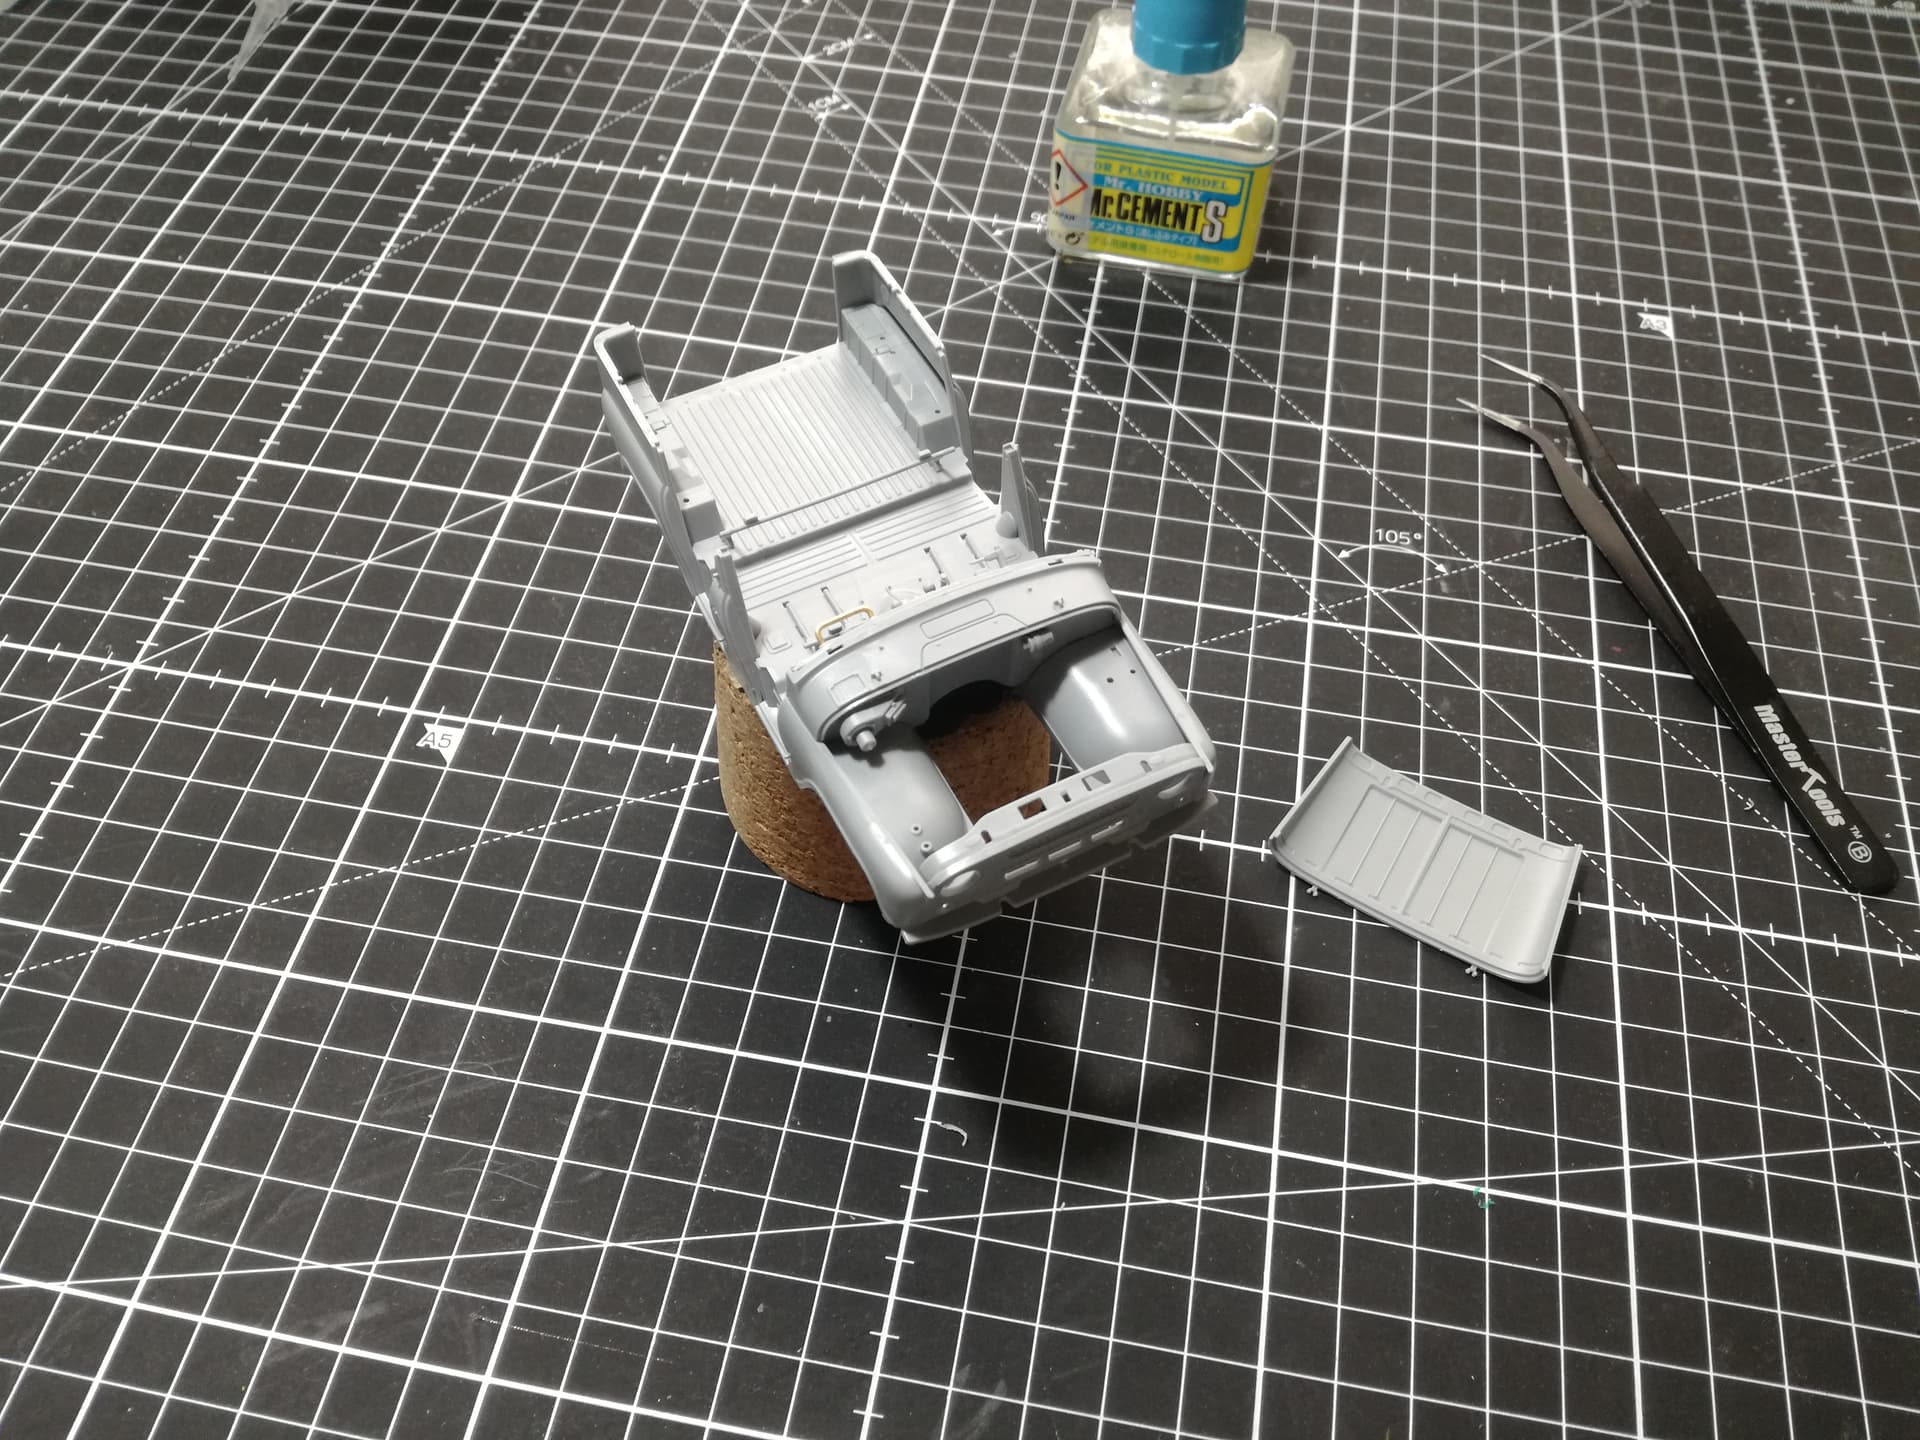
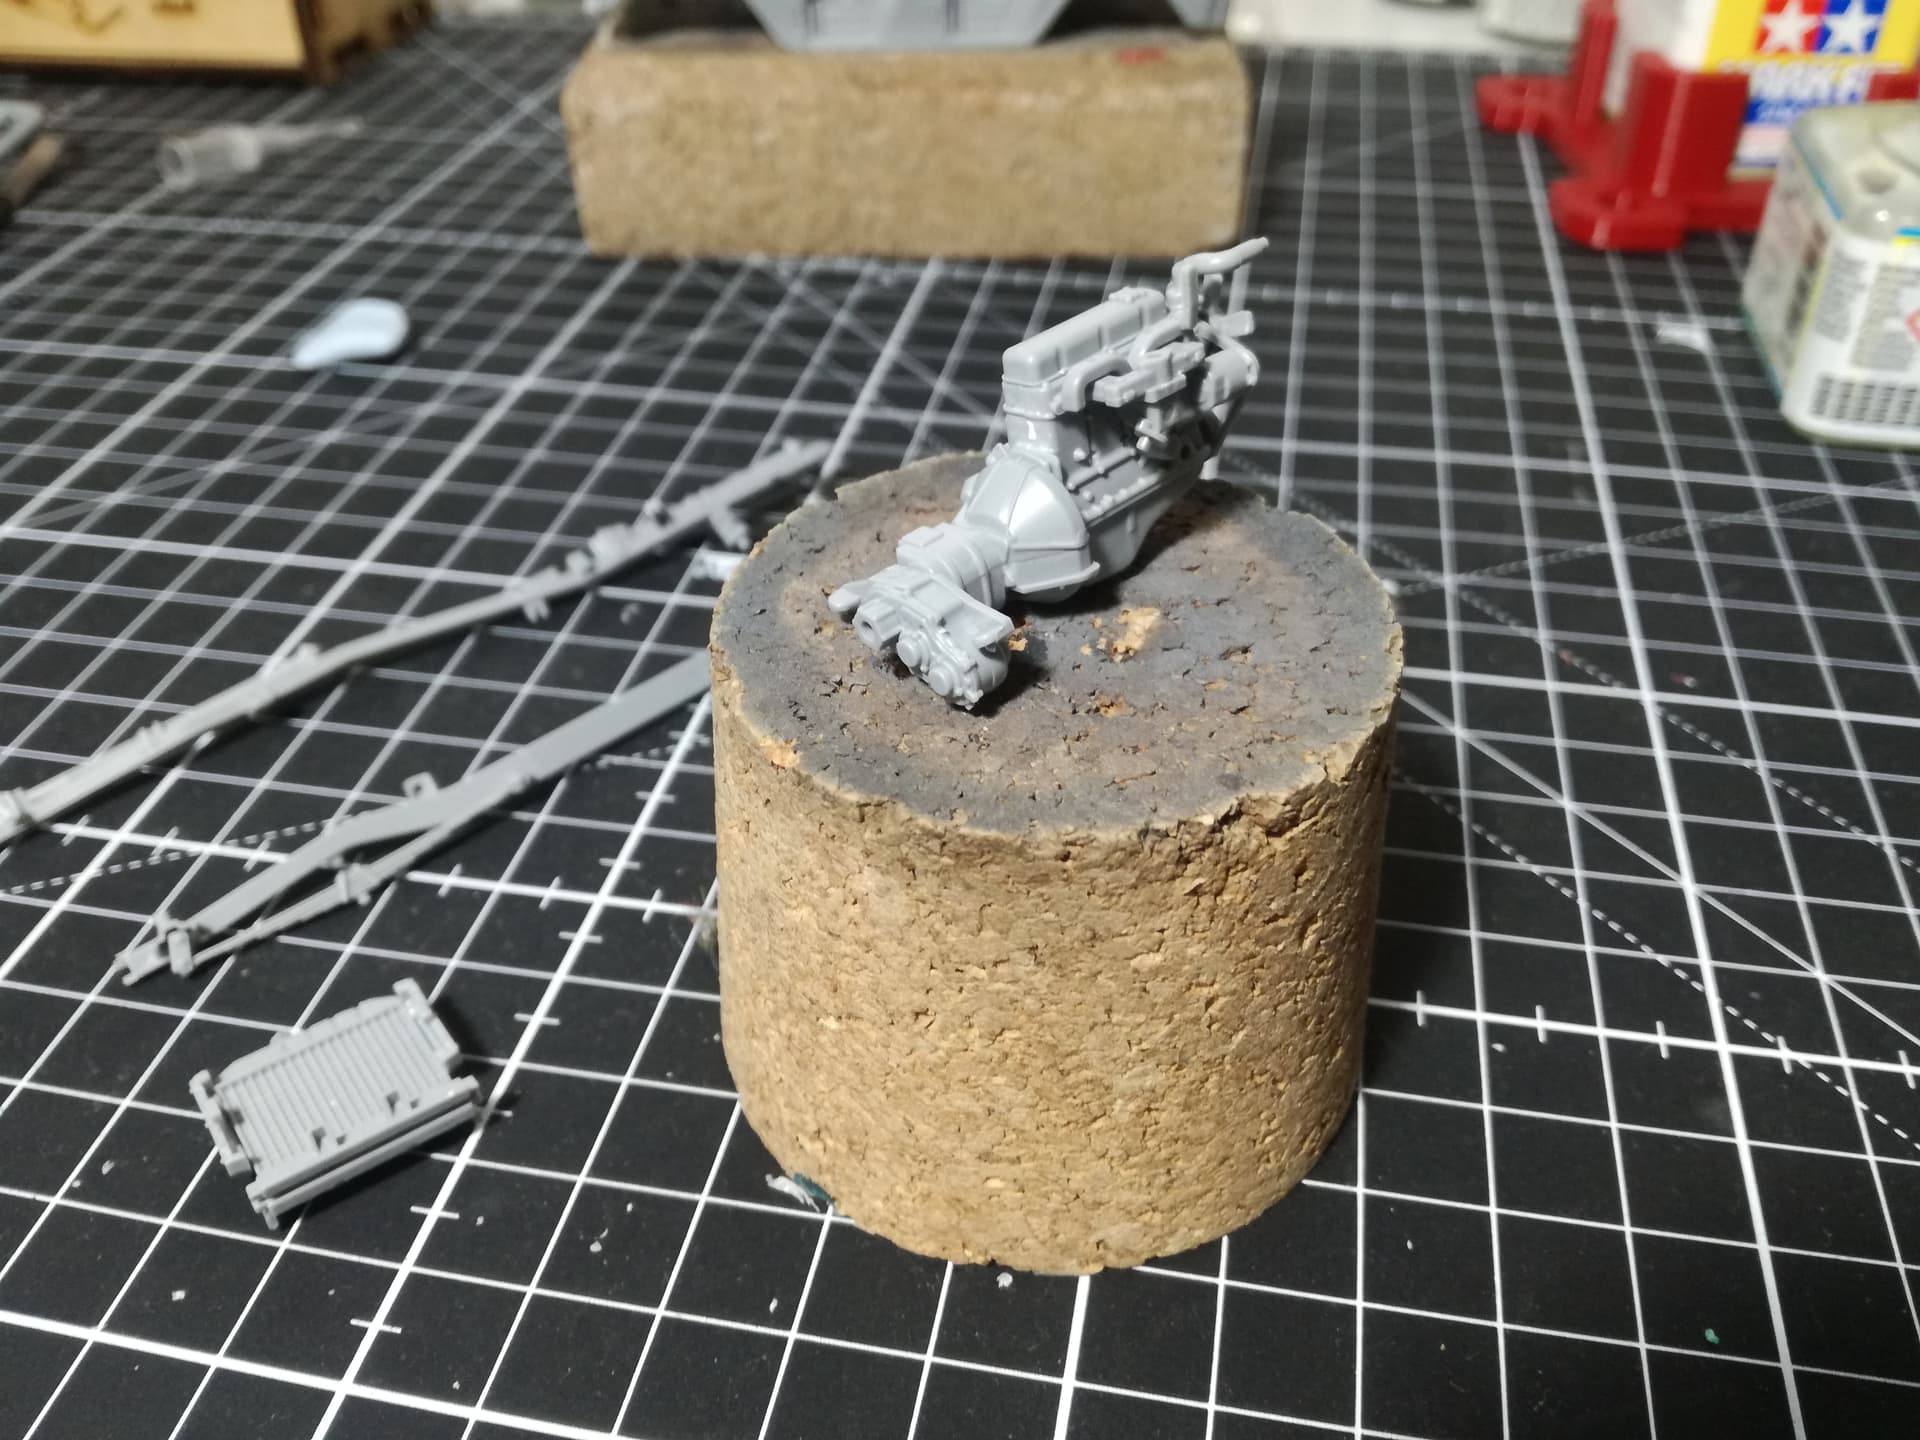
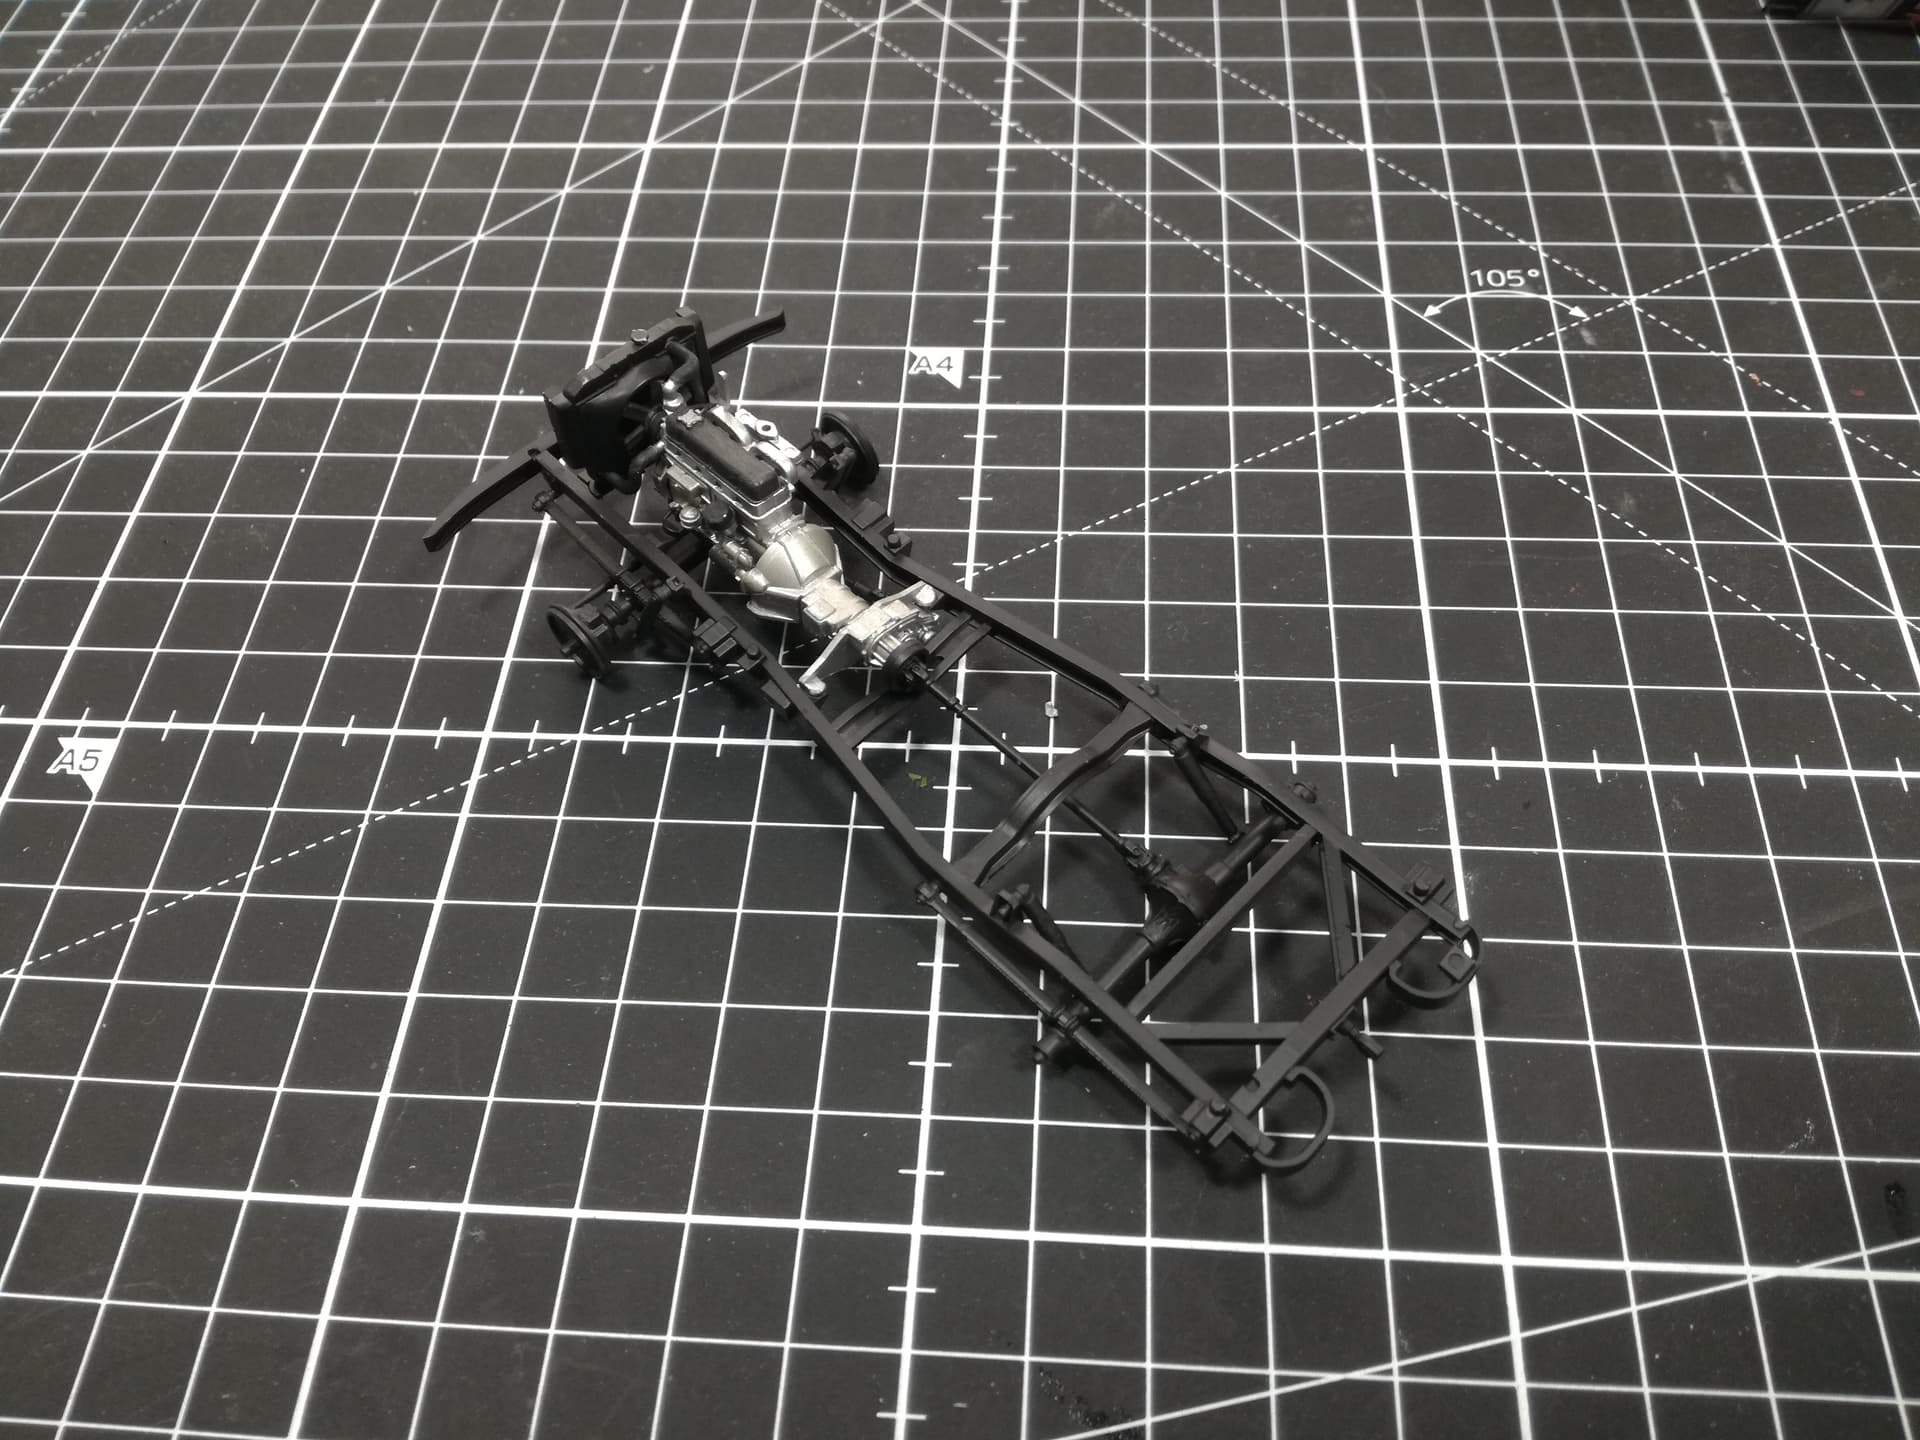
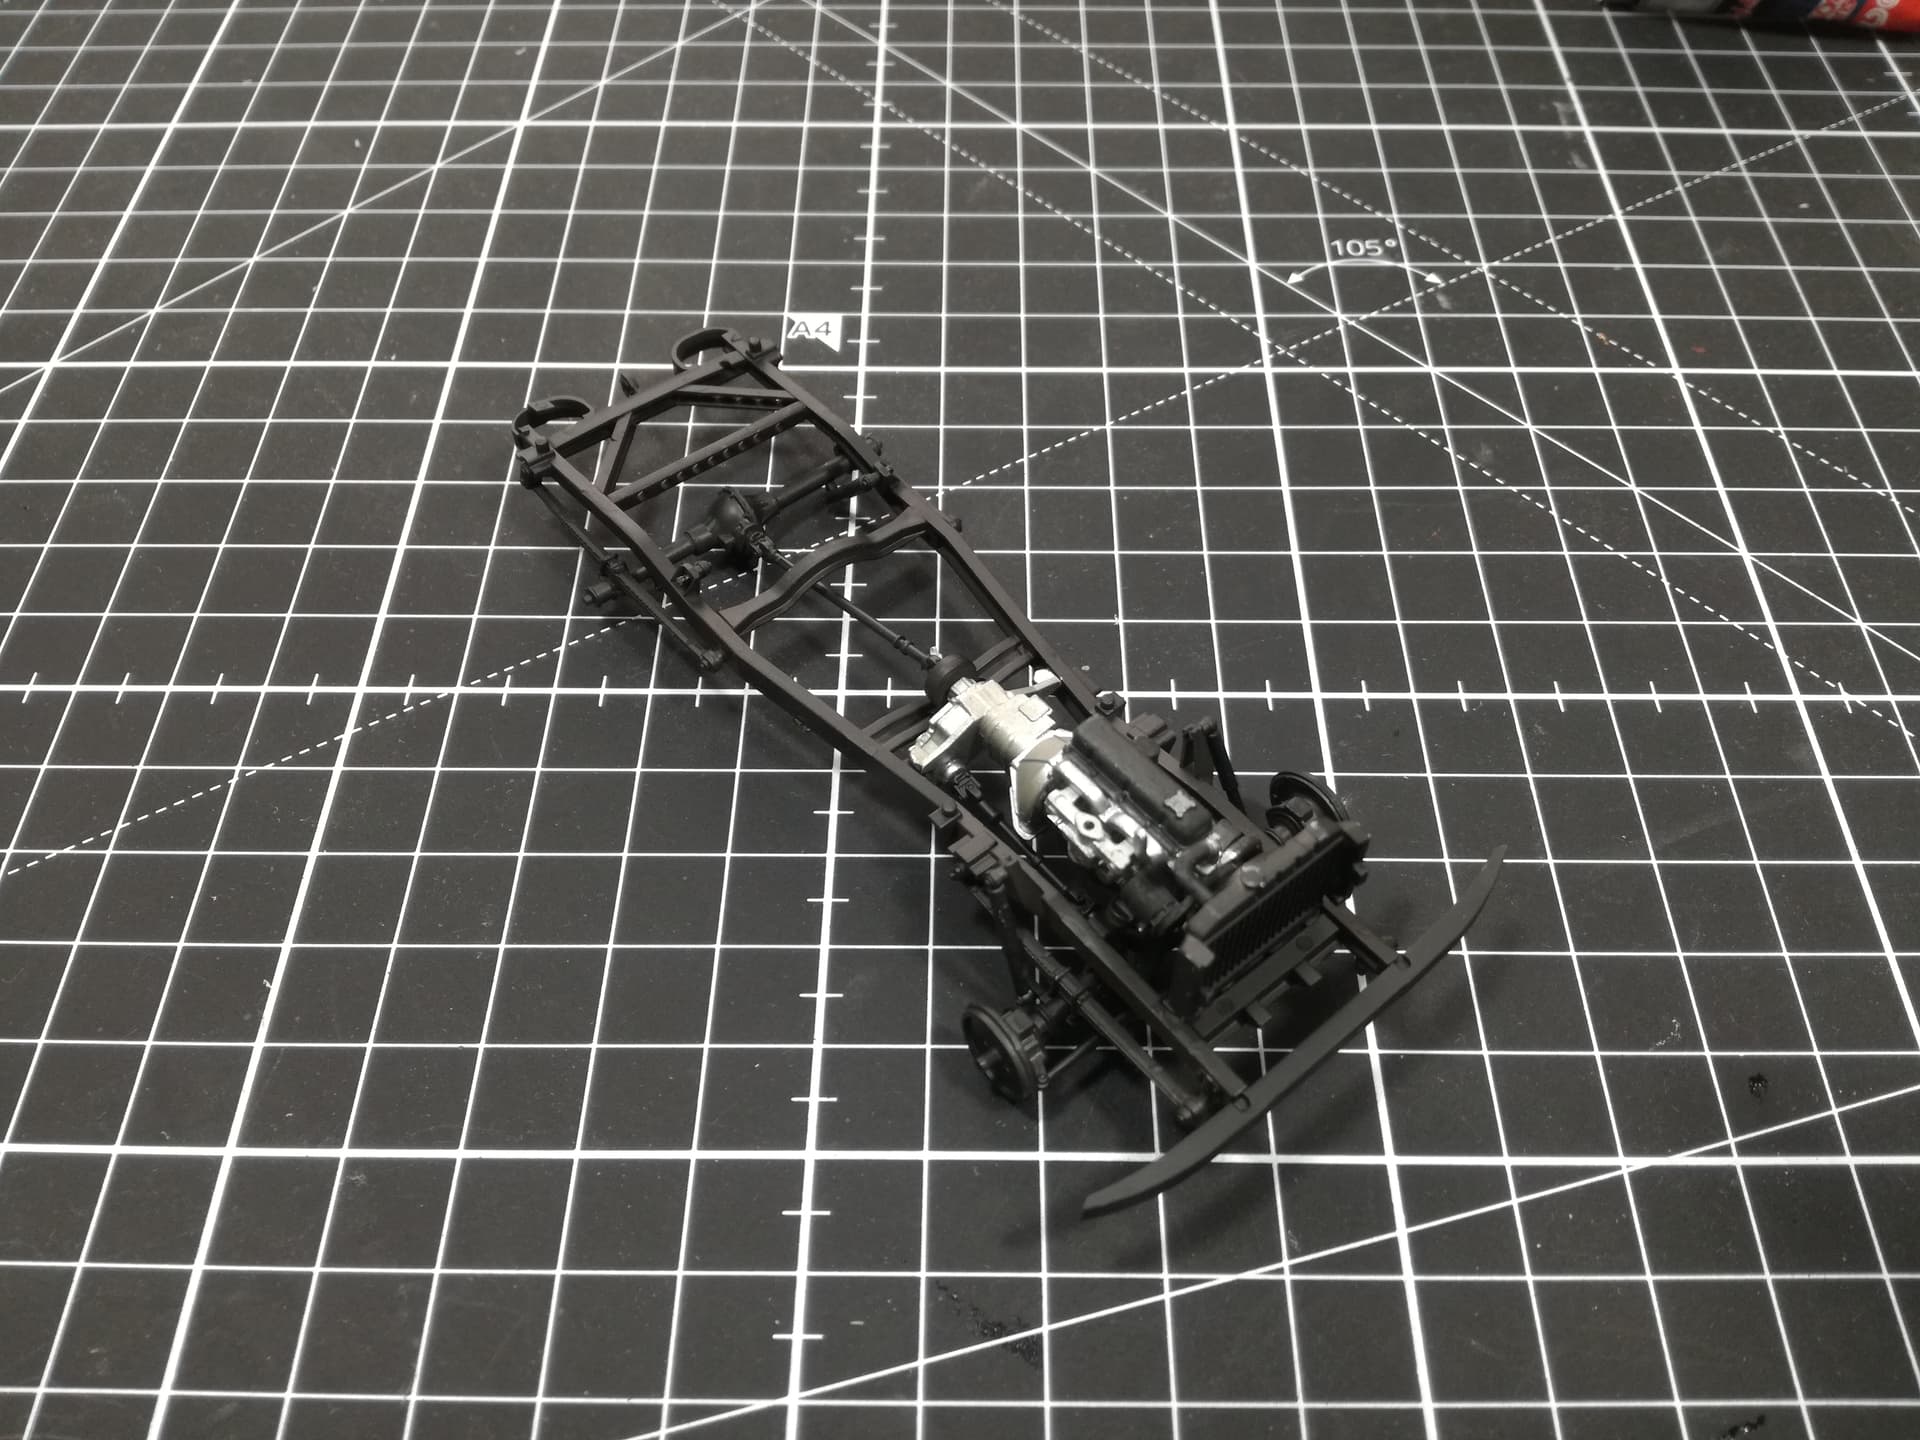
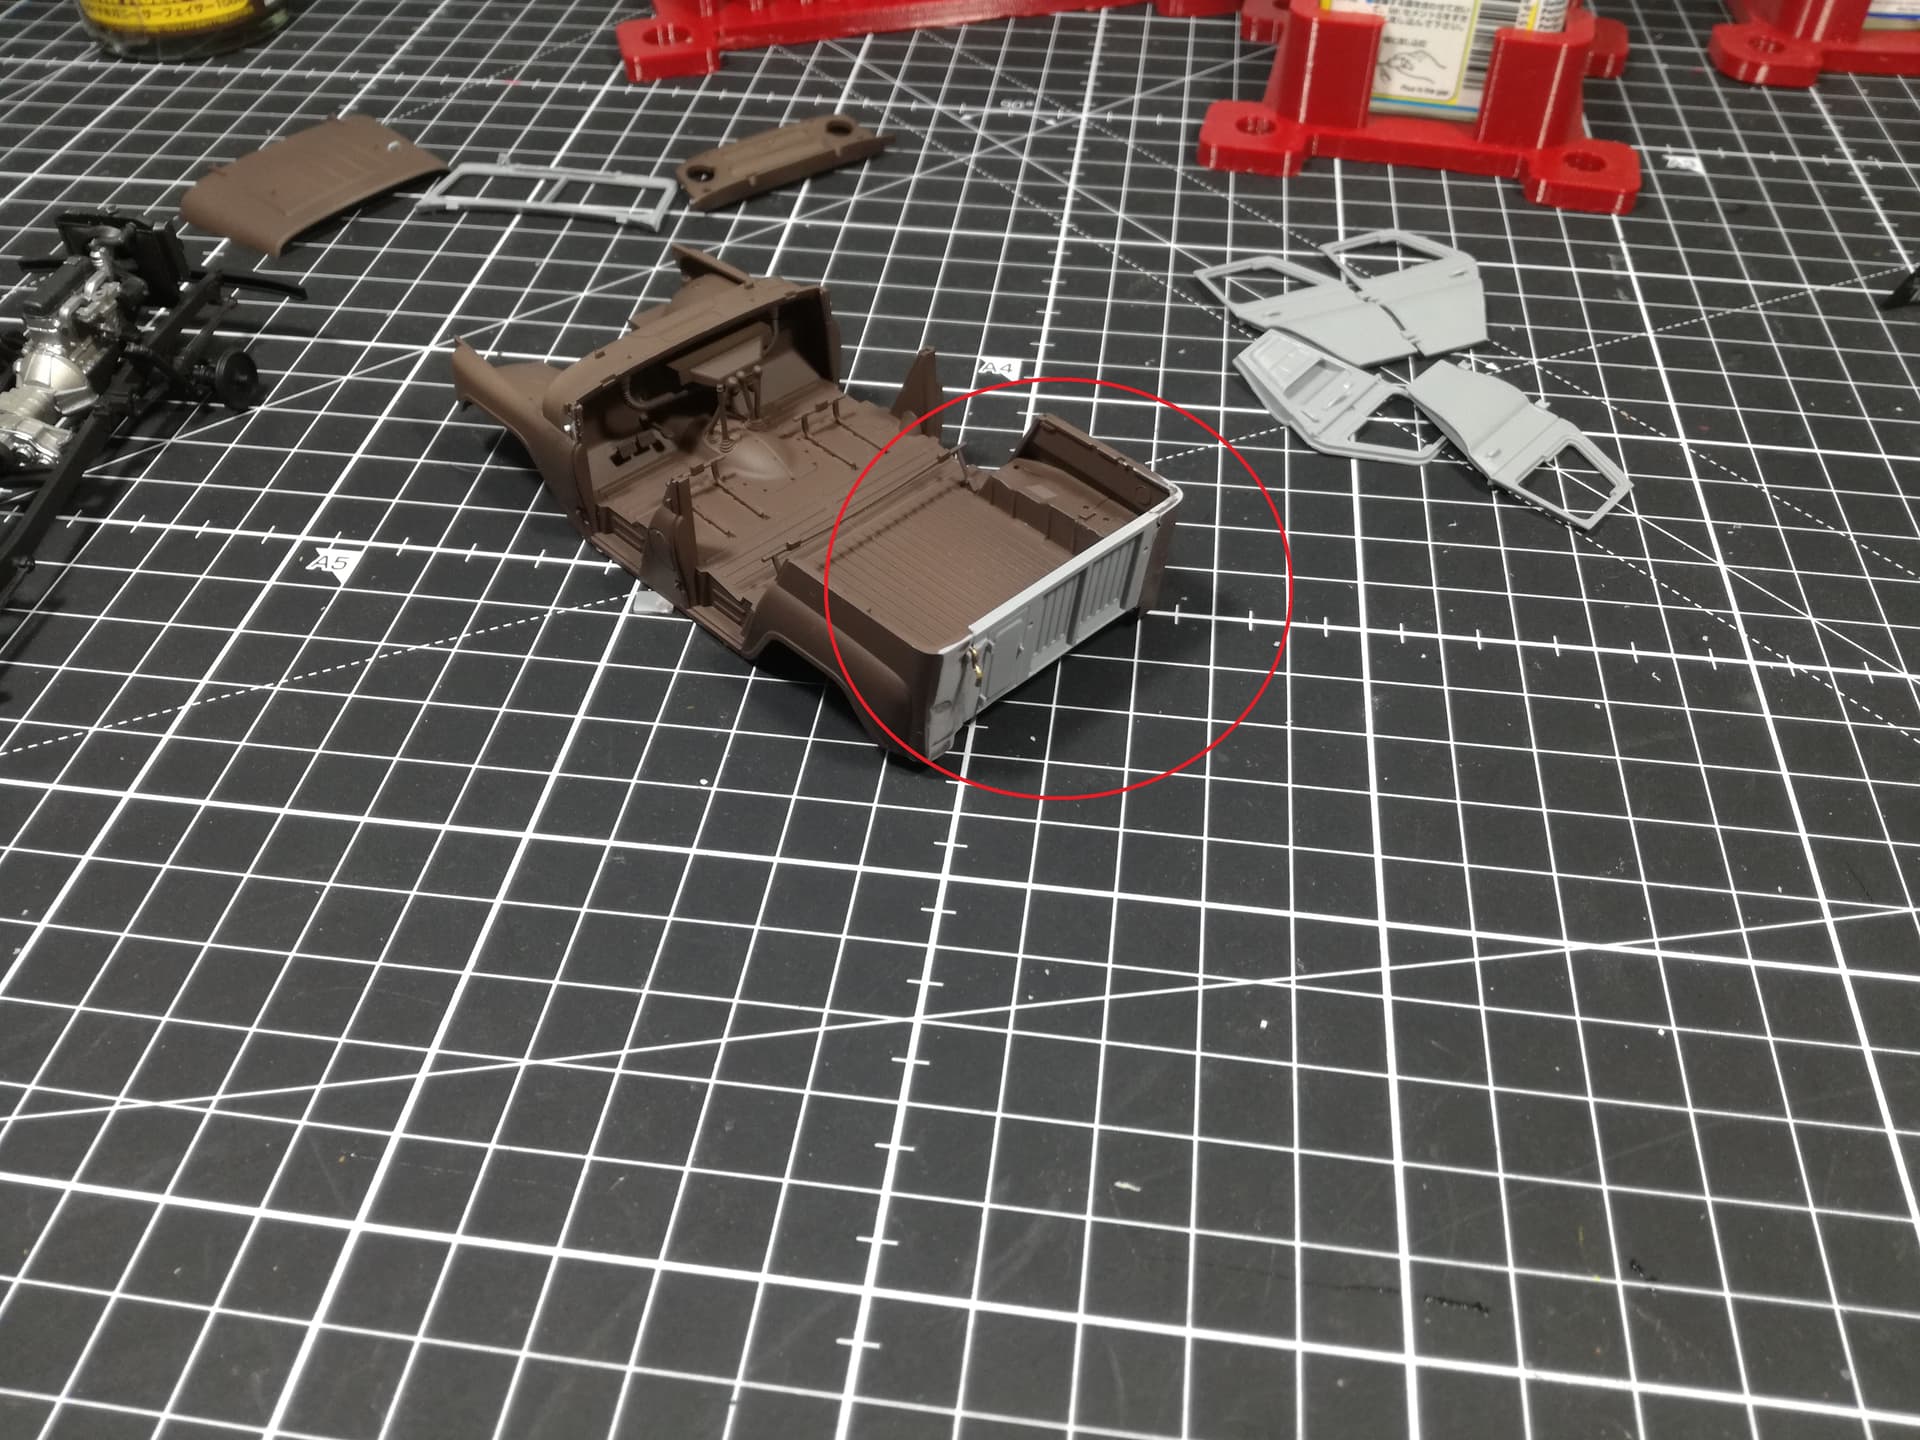
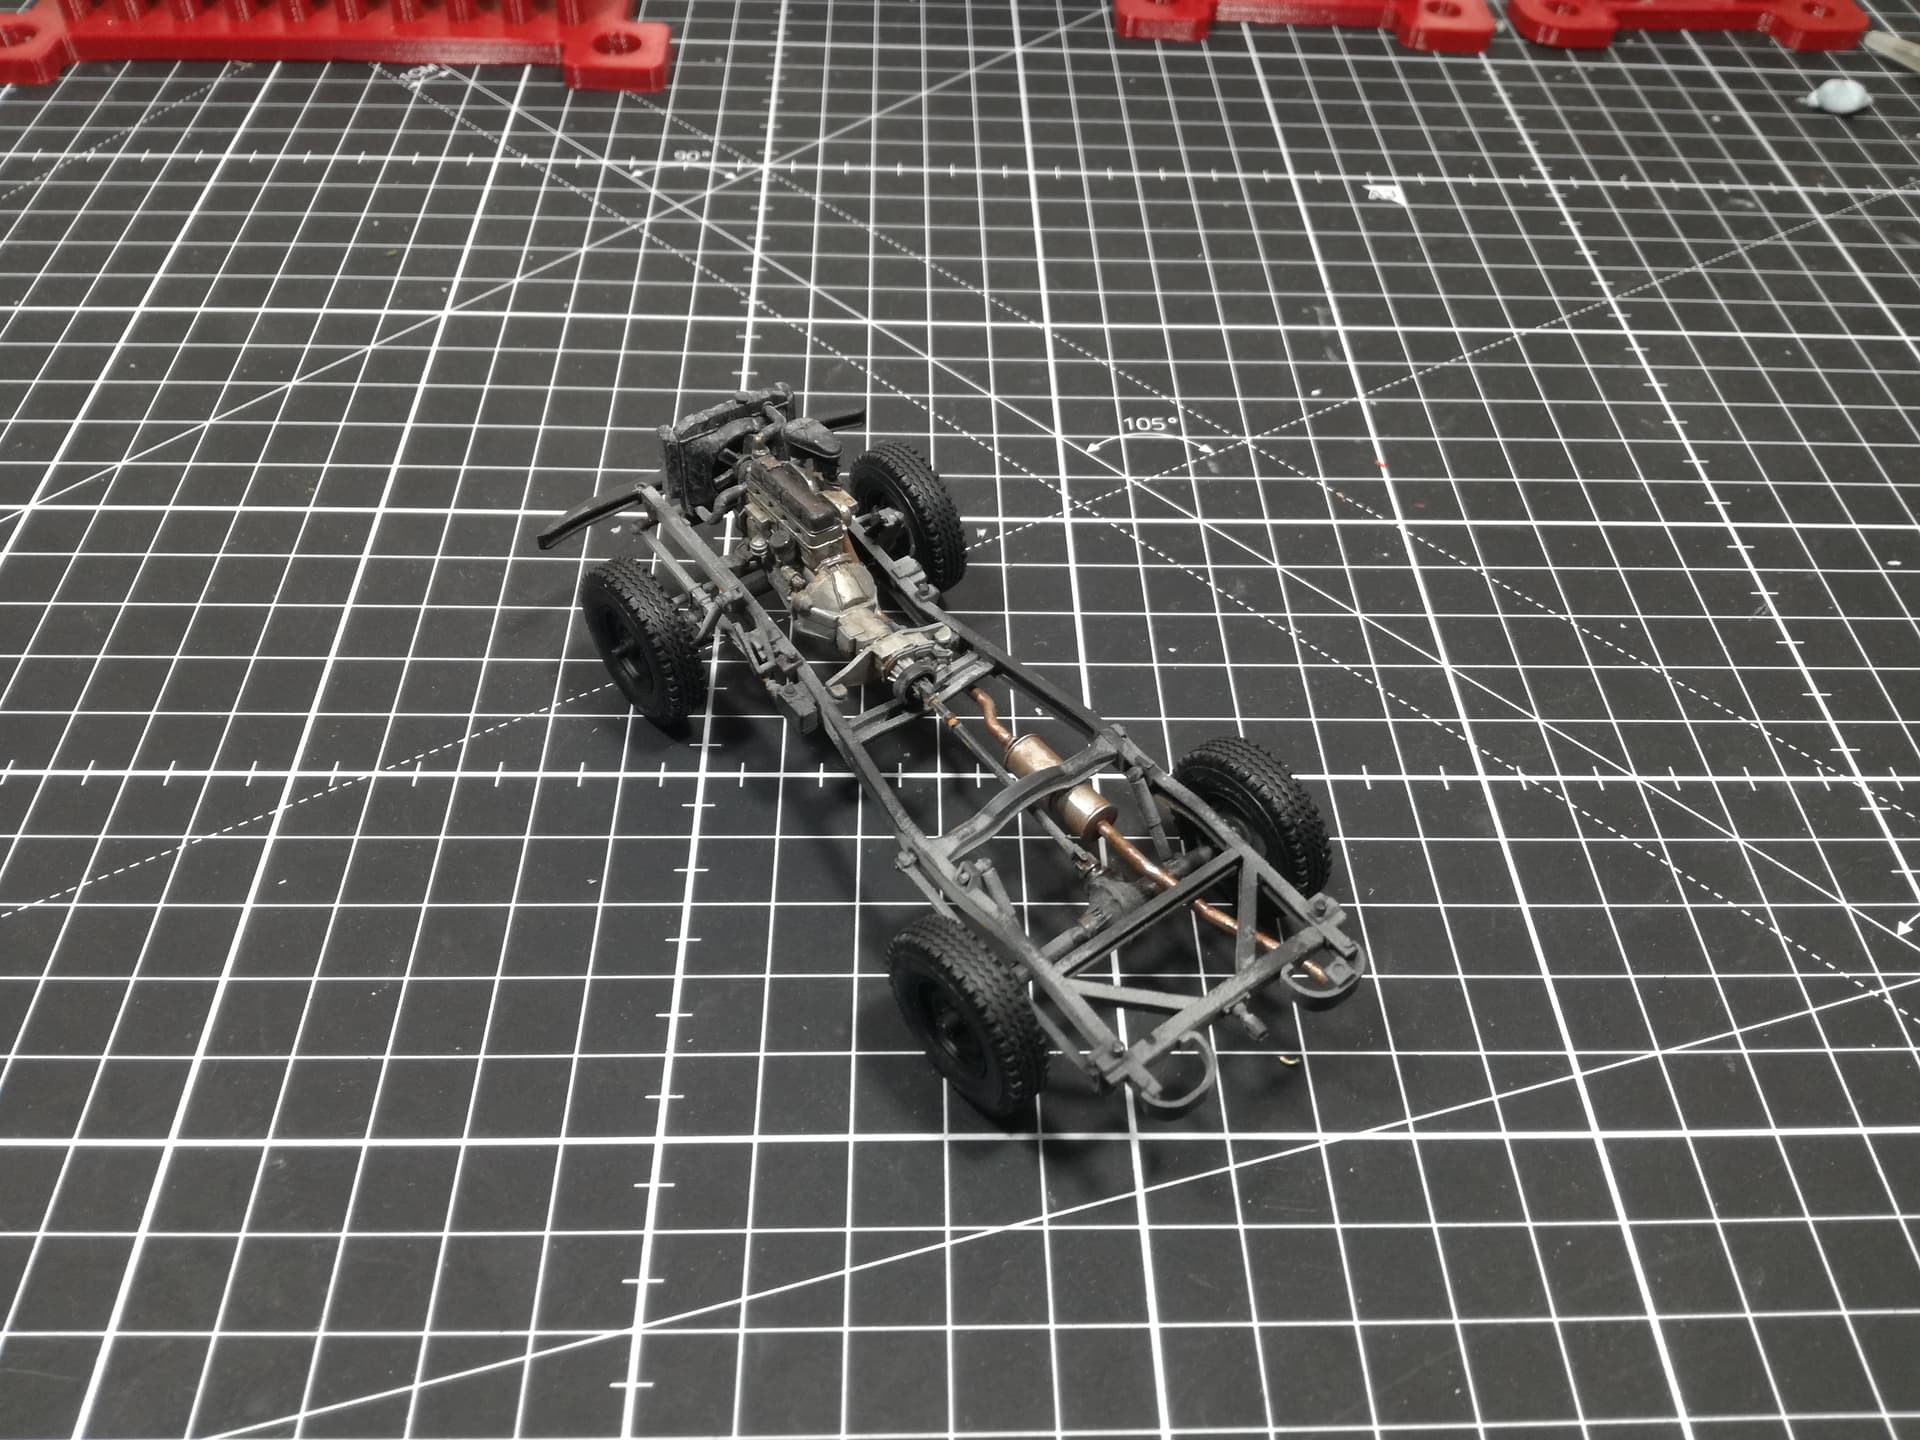
The UAZ itself has many small parts, some are very fragile, so attention is needed. Cleanup is minimal, fit is good for now, detailed engine and chassis is included. I didn’t glue everything, just to show the fit.
First time I’ve seen the new Zvezda kit in plastic. Looks great from what you’ve shown so far. Really like your painted figure- plenty of character in it and your painting skills are fantastic- the colors and tones are rendered beautifully.
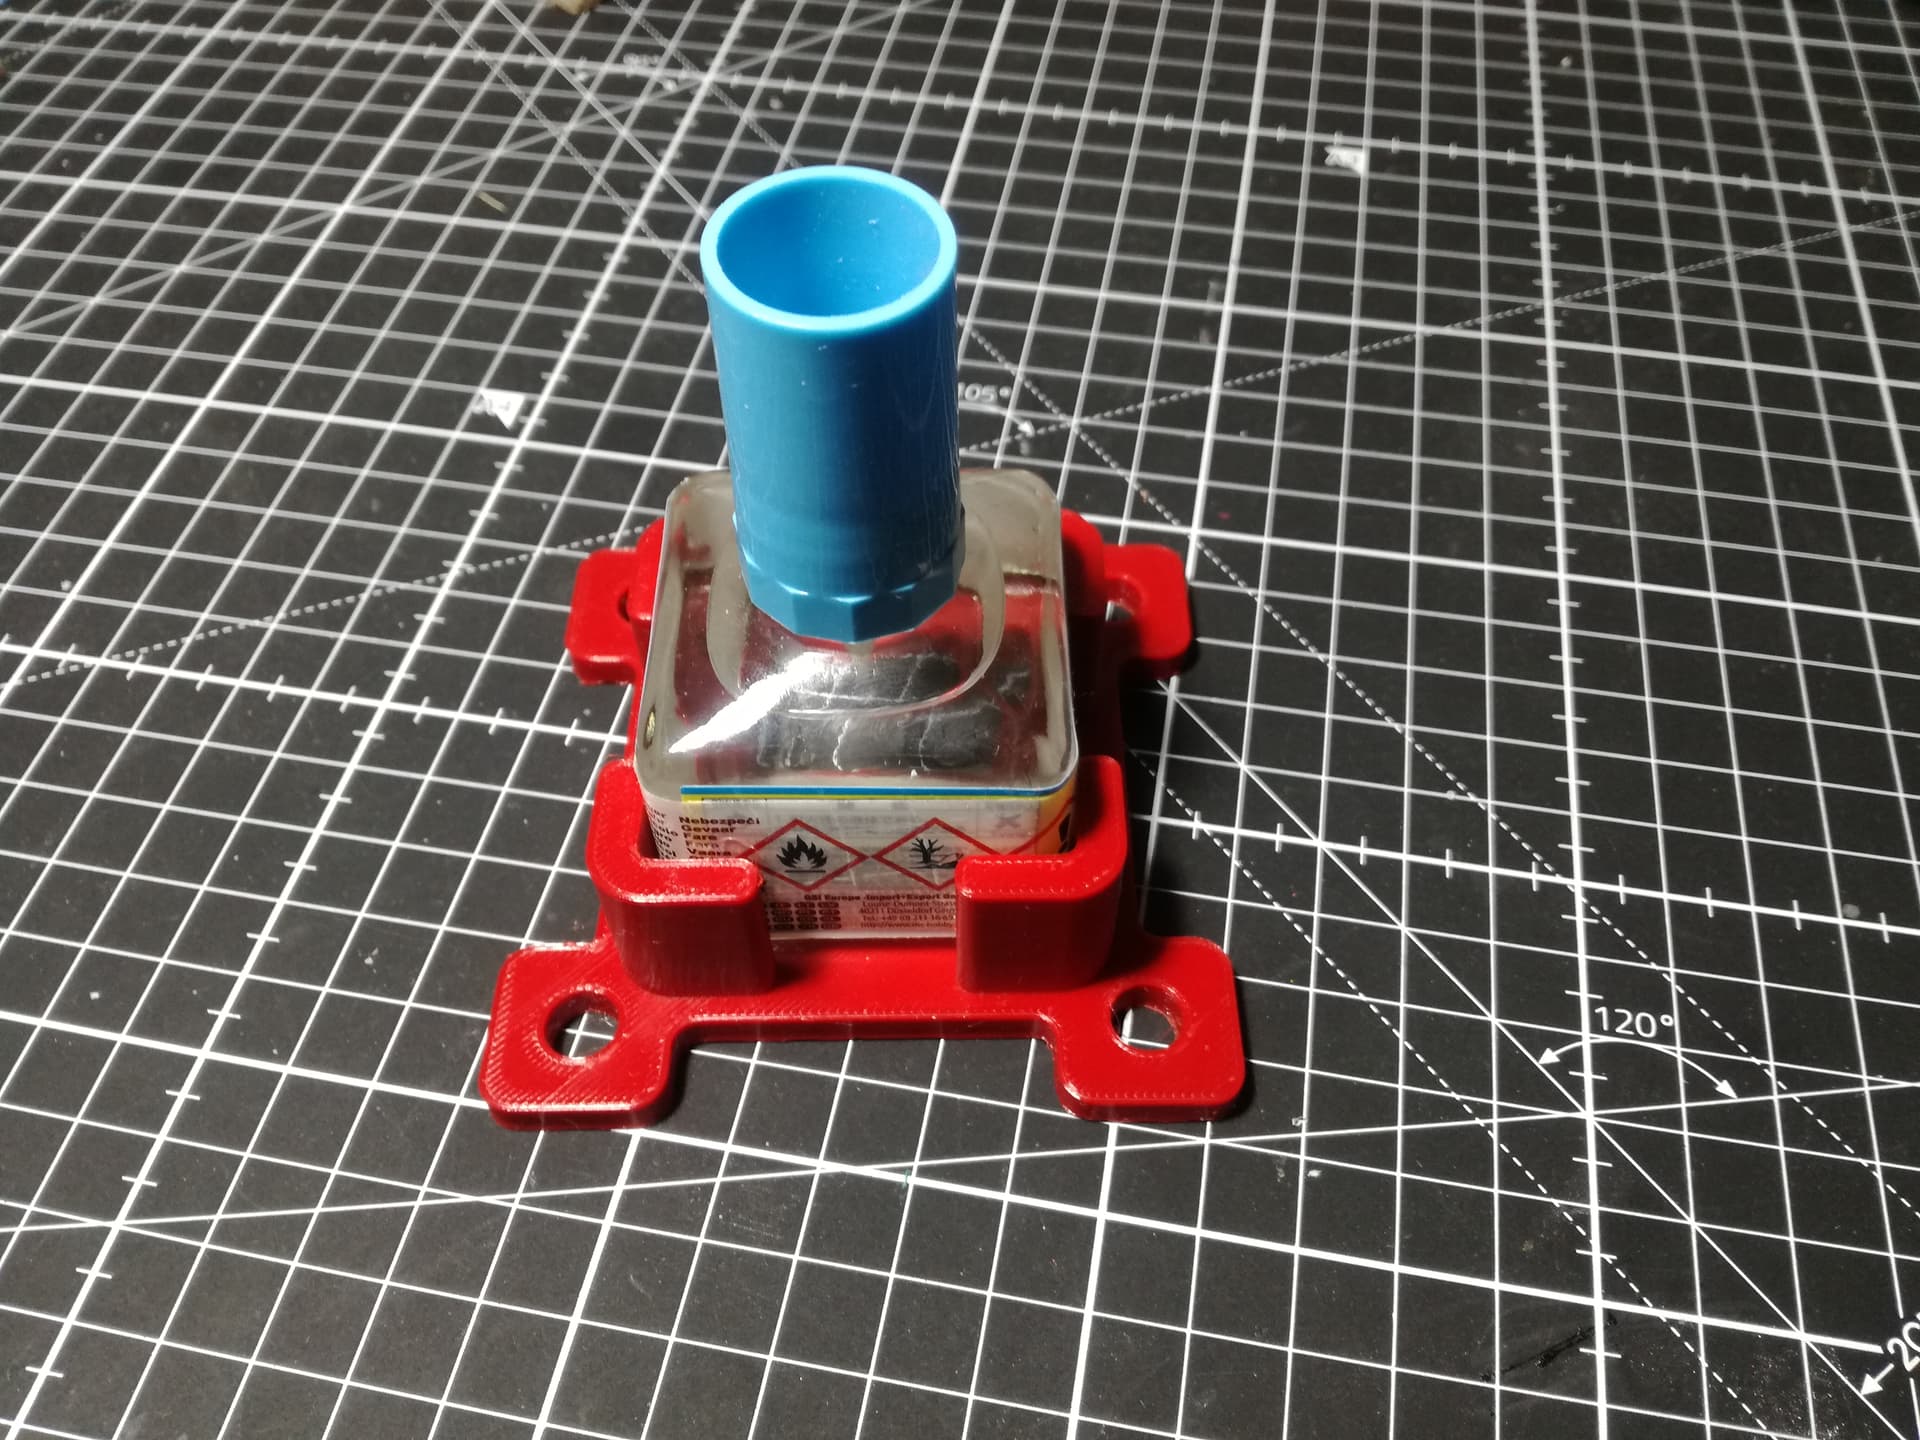
By the way I designed a bottle holder (anti-spill) for Gunze/Mr.Hobby glue bottles (original design is for Tamiya), which you can download for free and print. Those are very handy
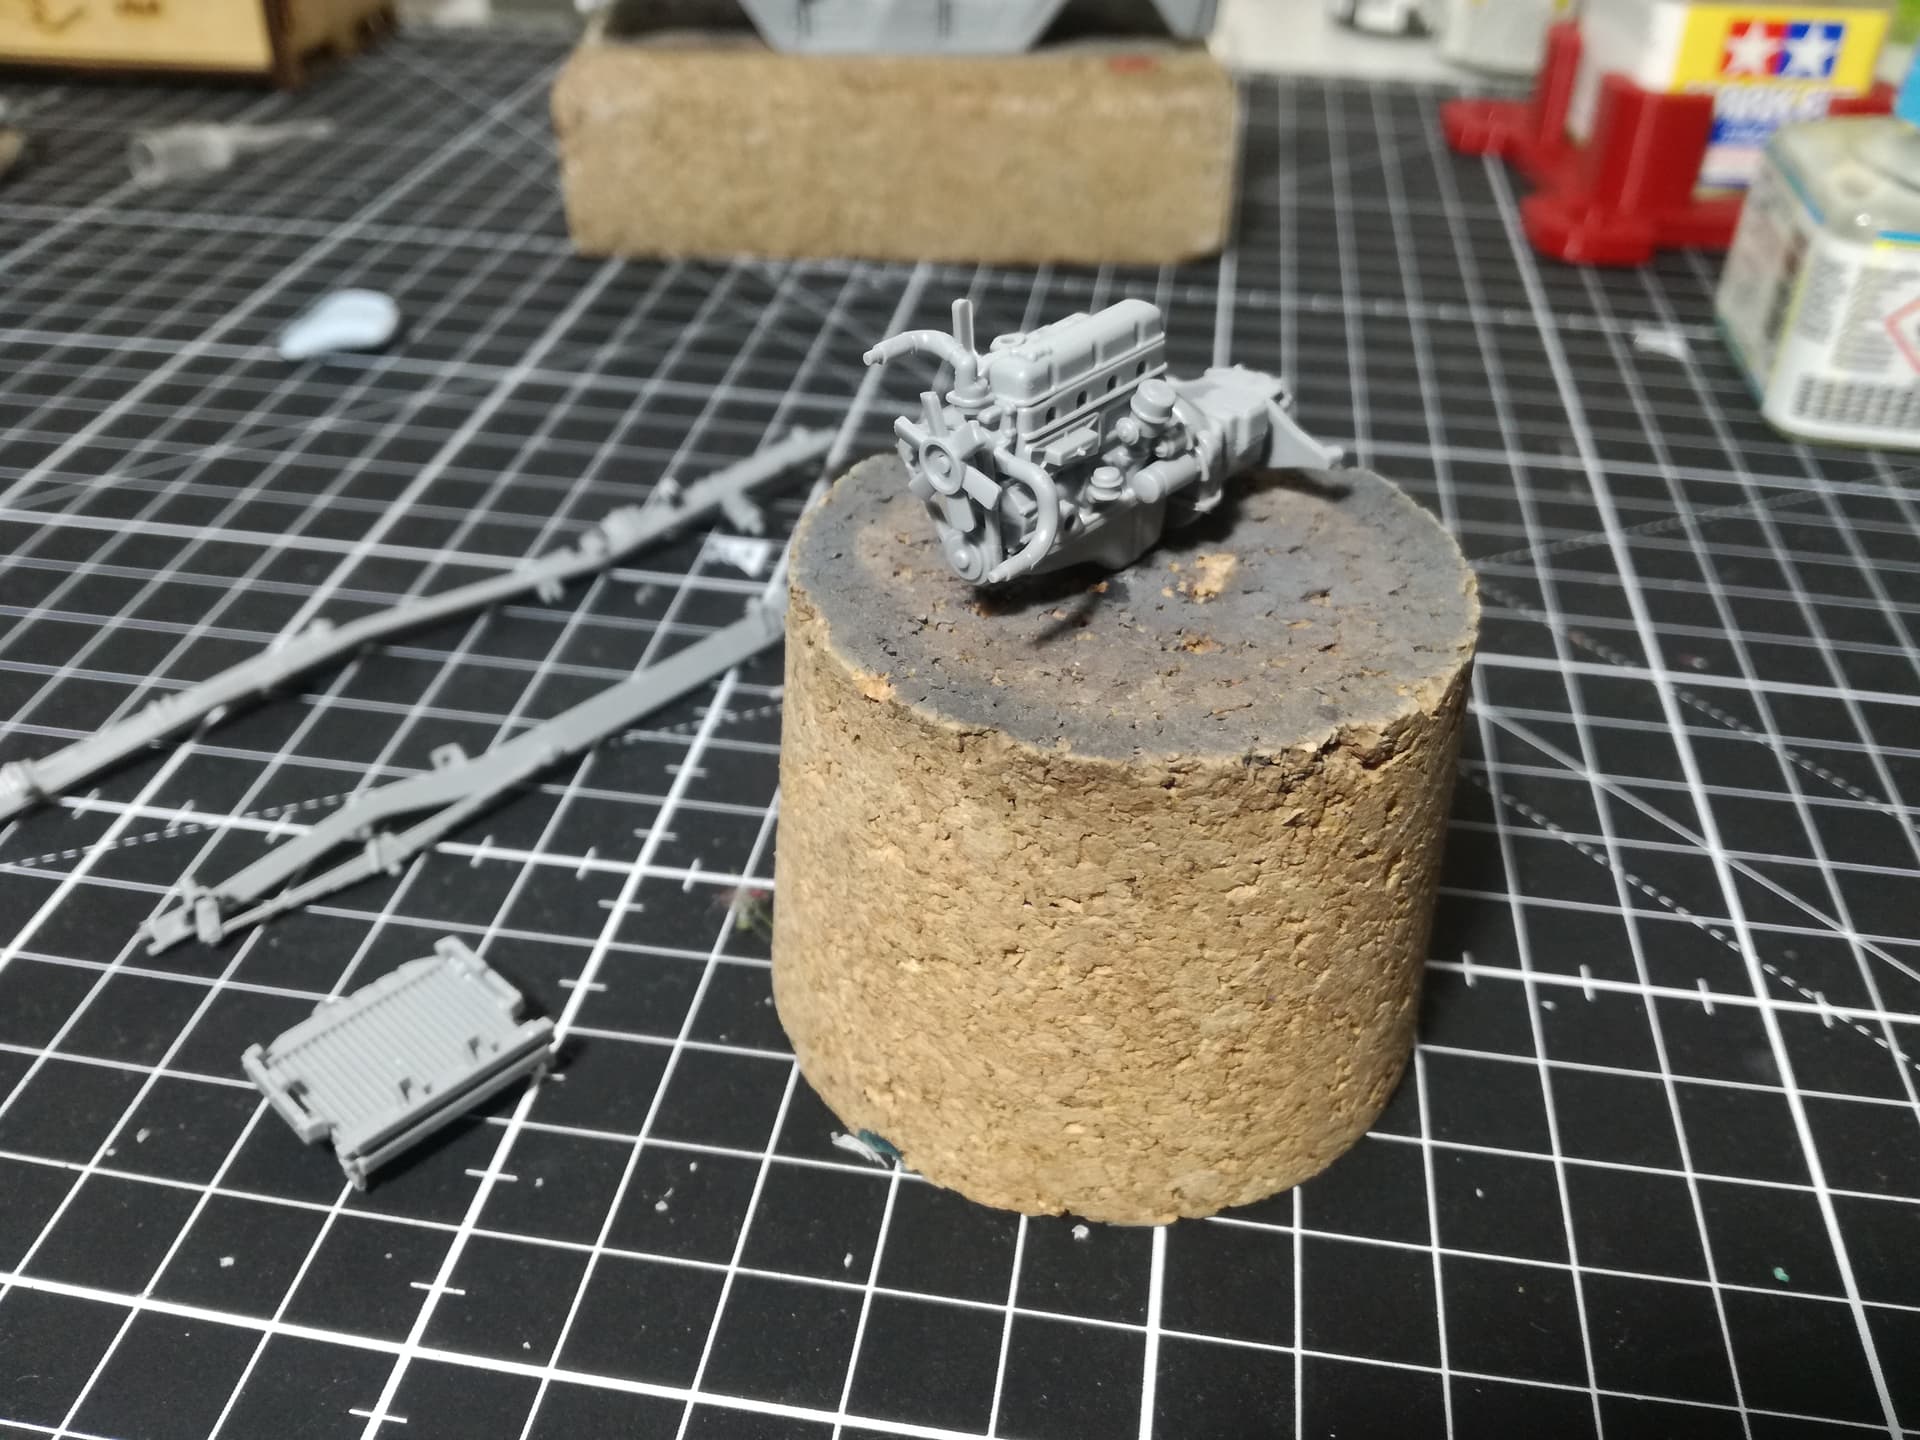
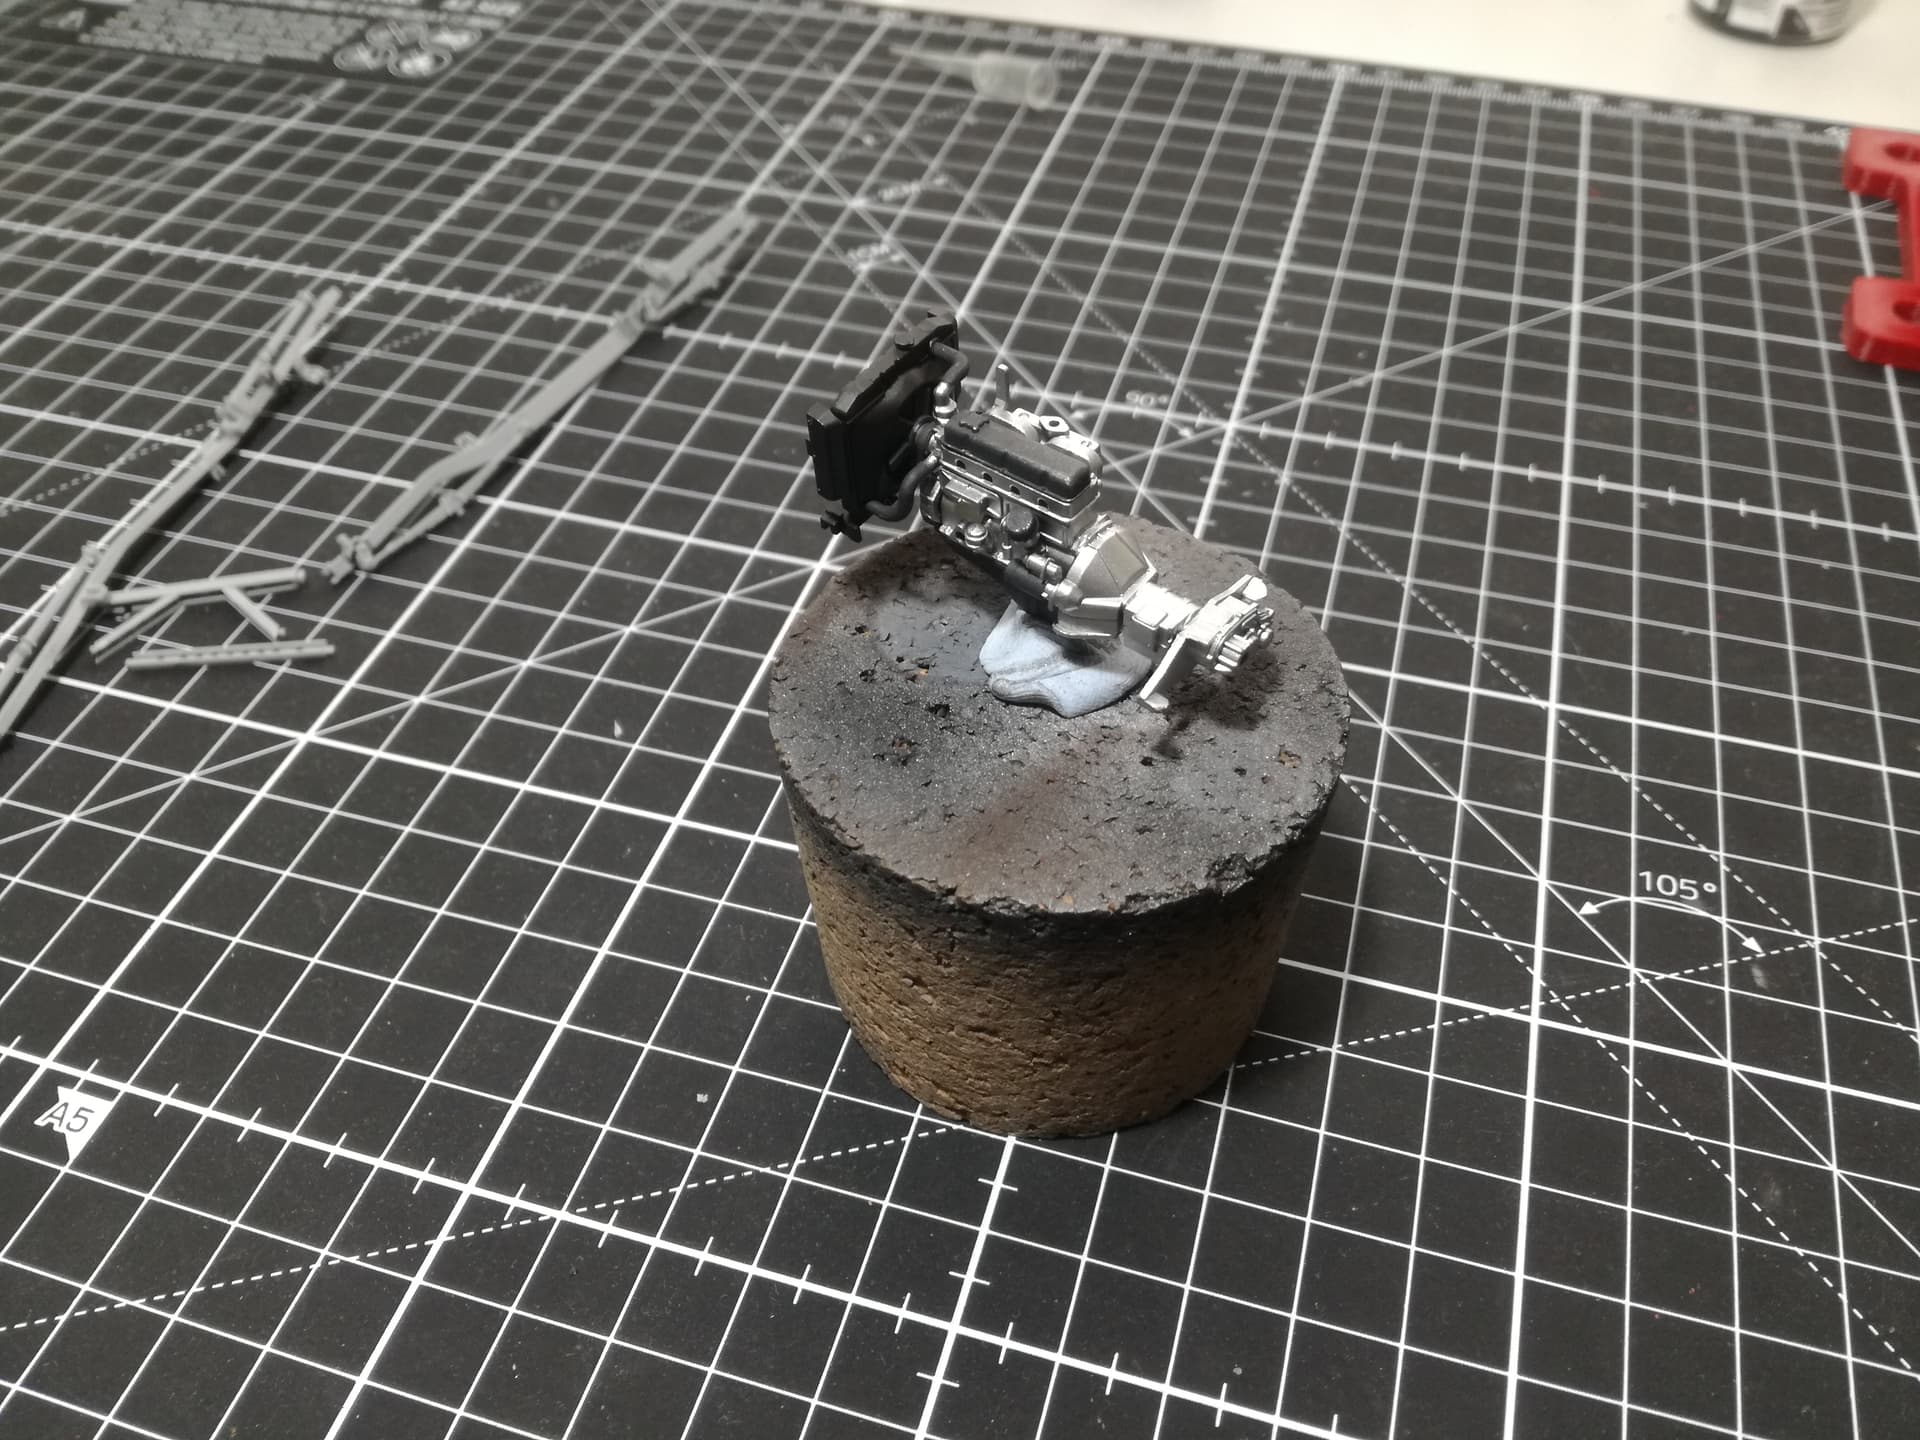
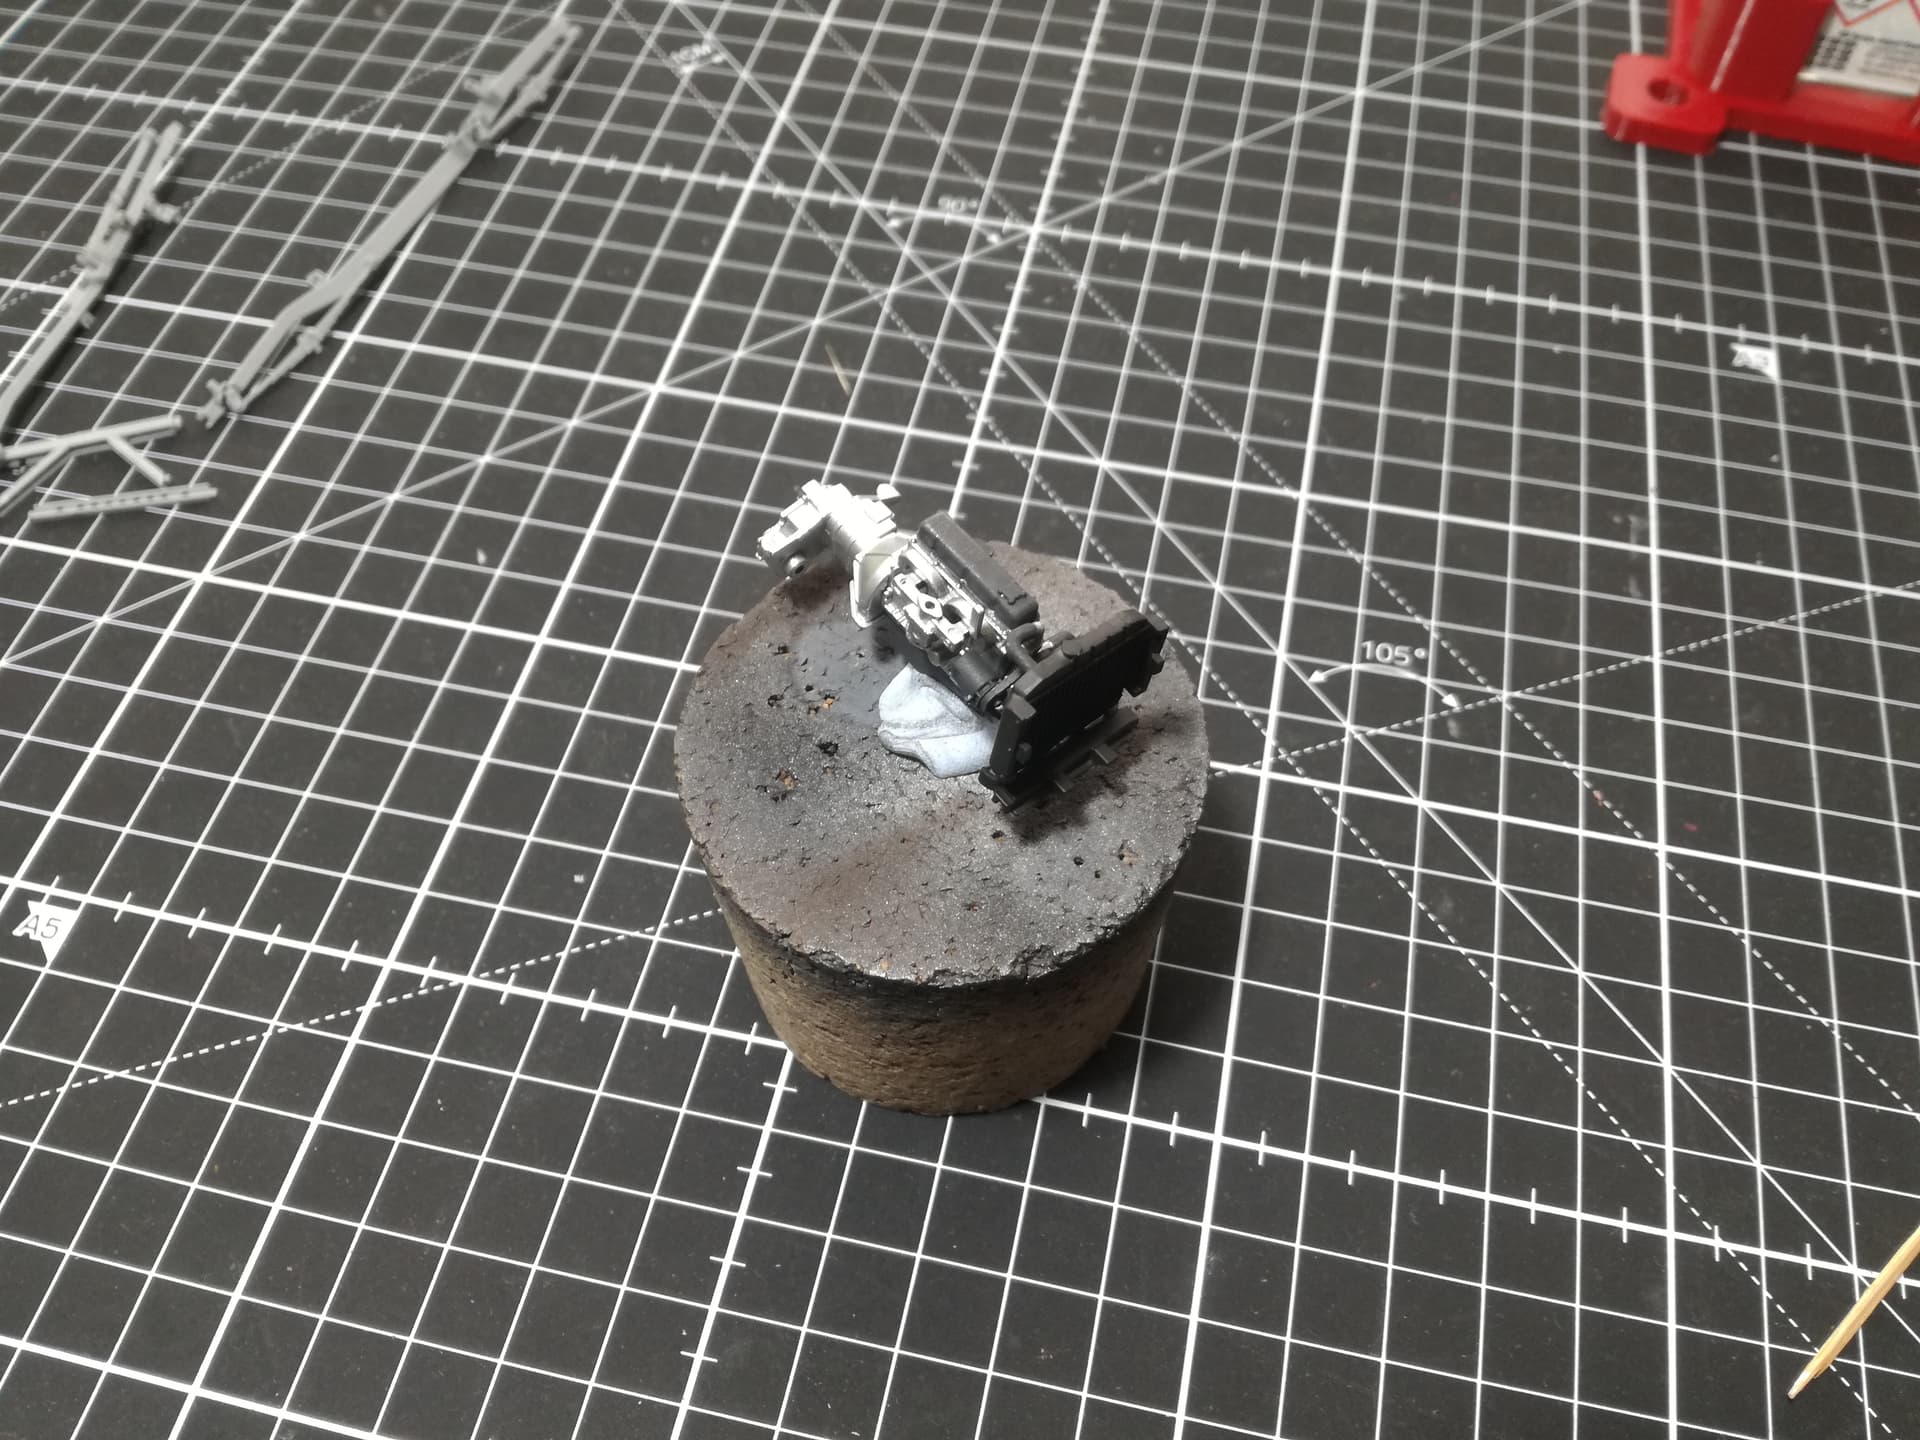
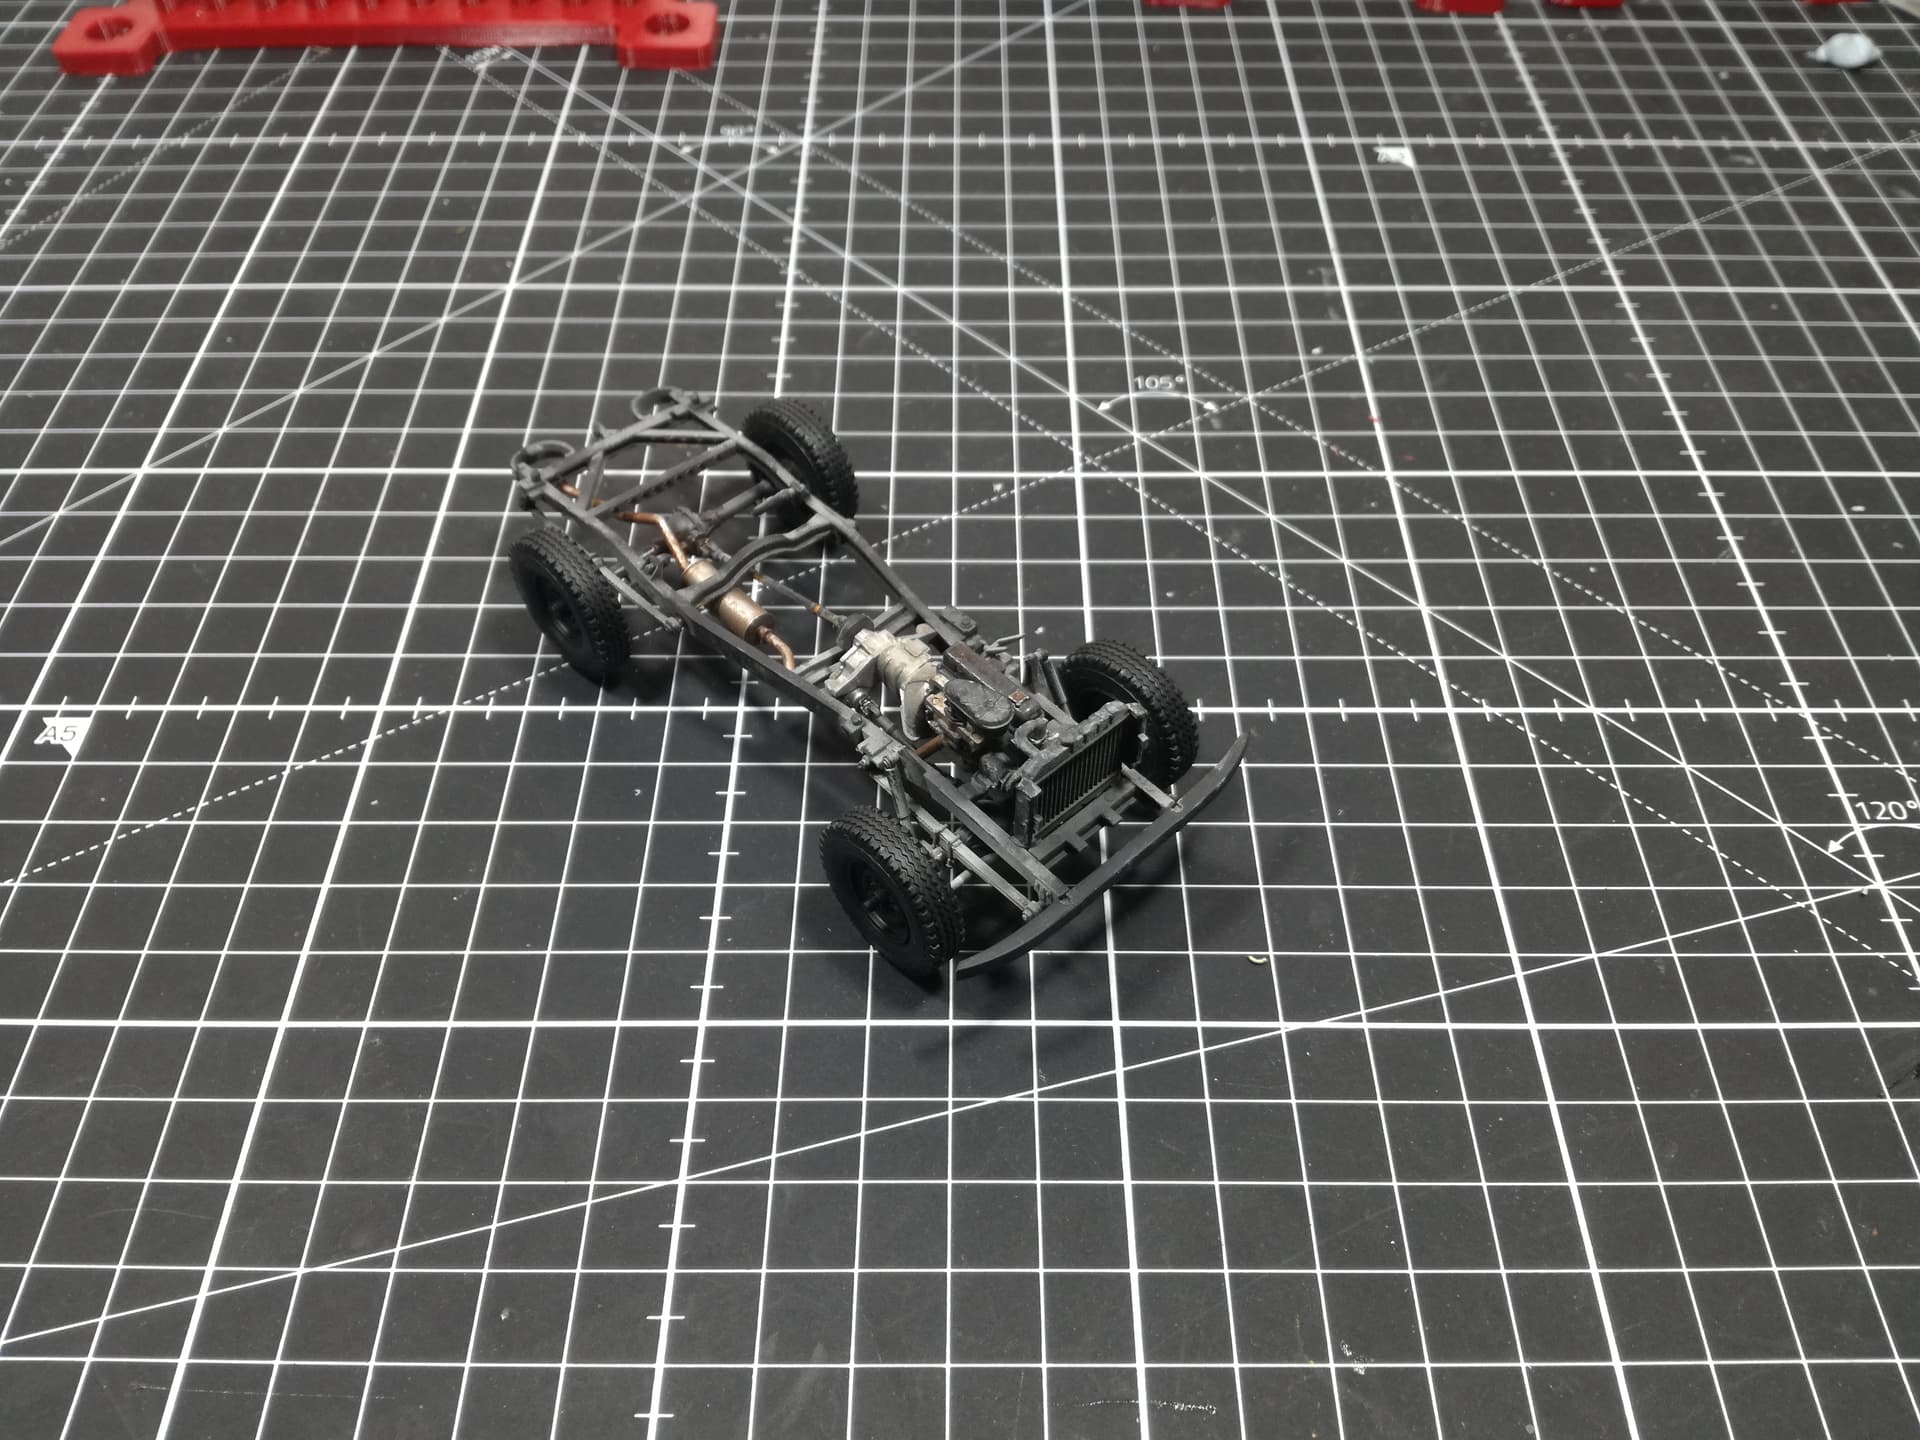
Basic paint on the engine. I realized that I don’t have aluminium paint in the stash, so I used Vallejo Metal color silver-maybe slightly bright, but heavy weathering will be applied next.
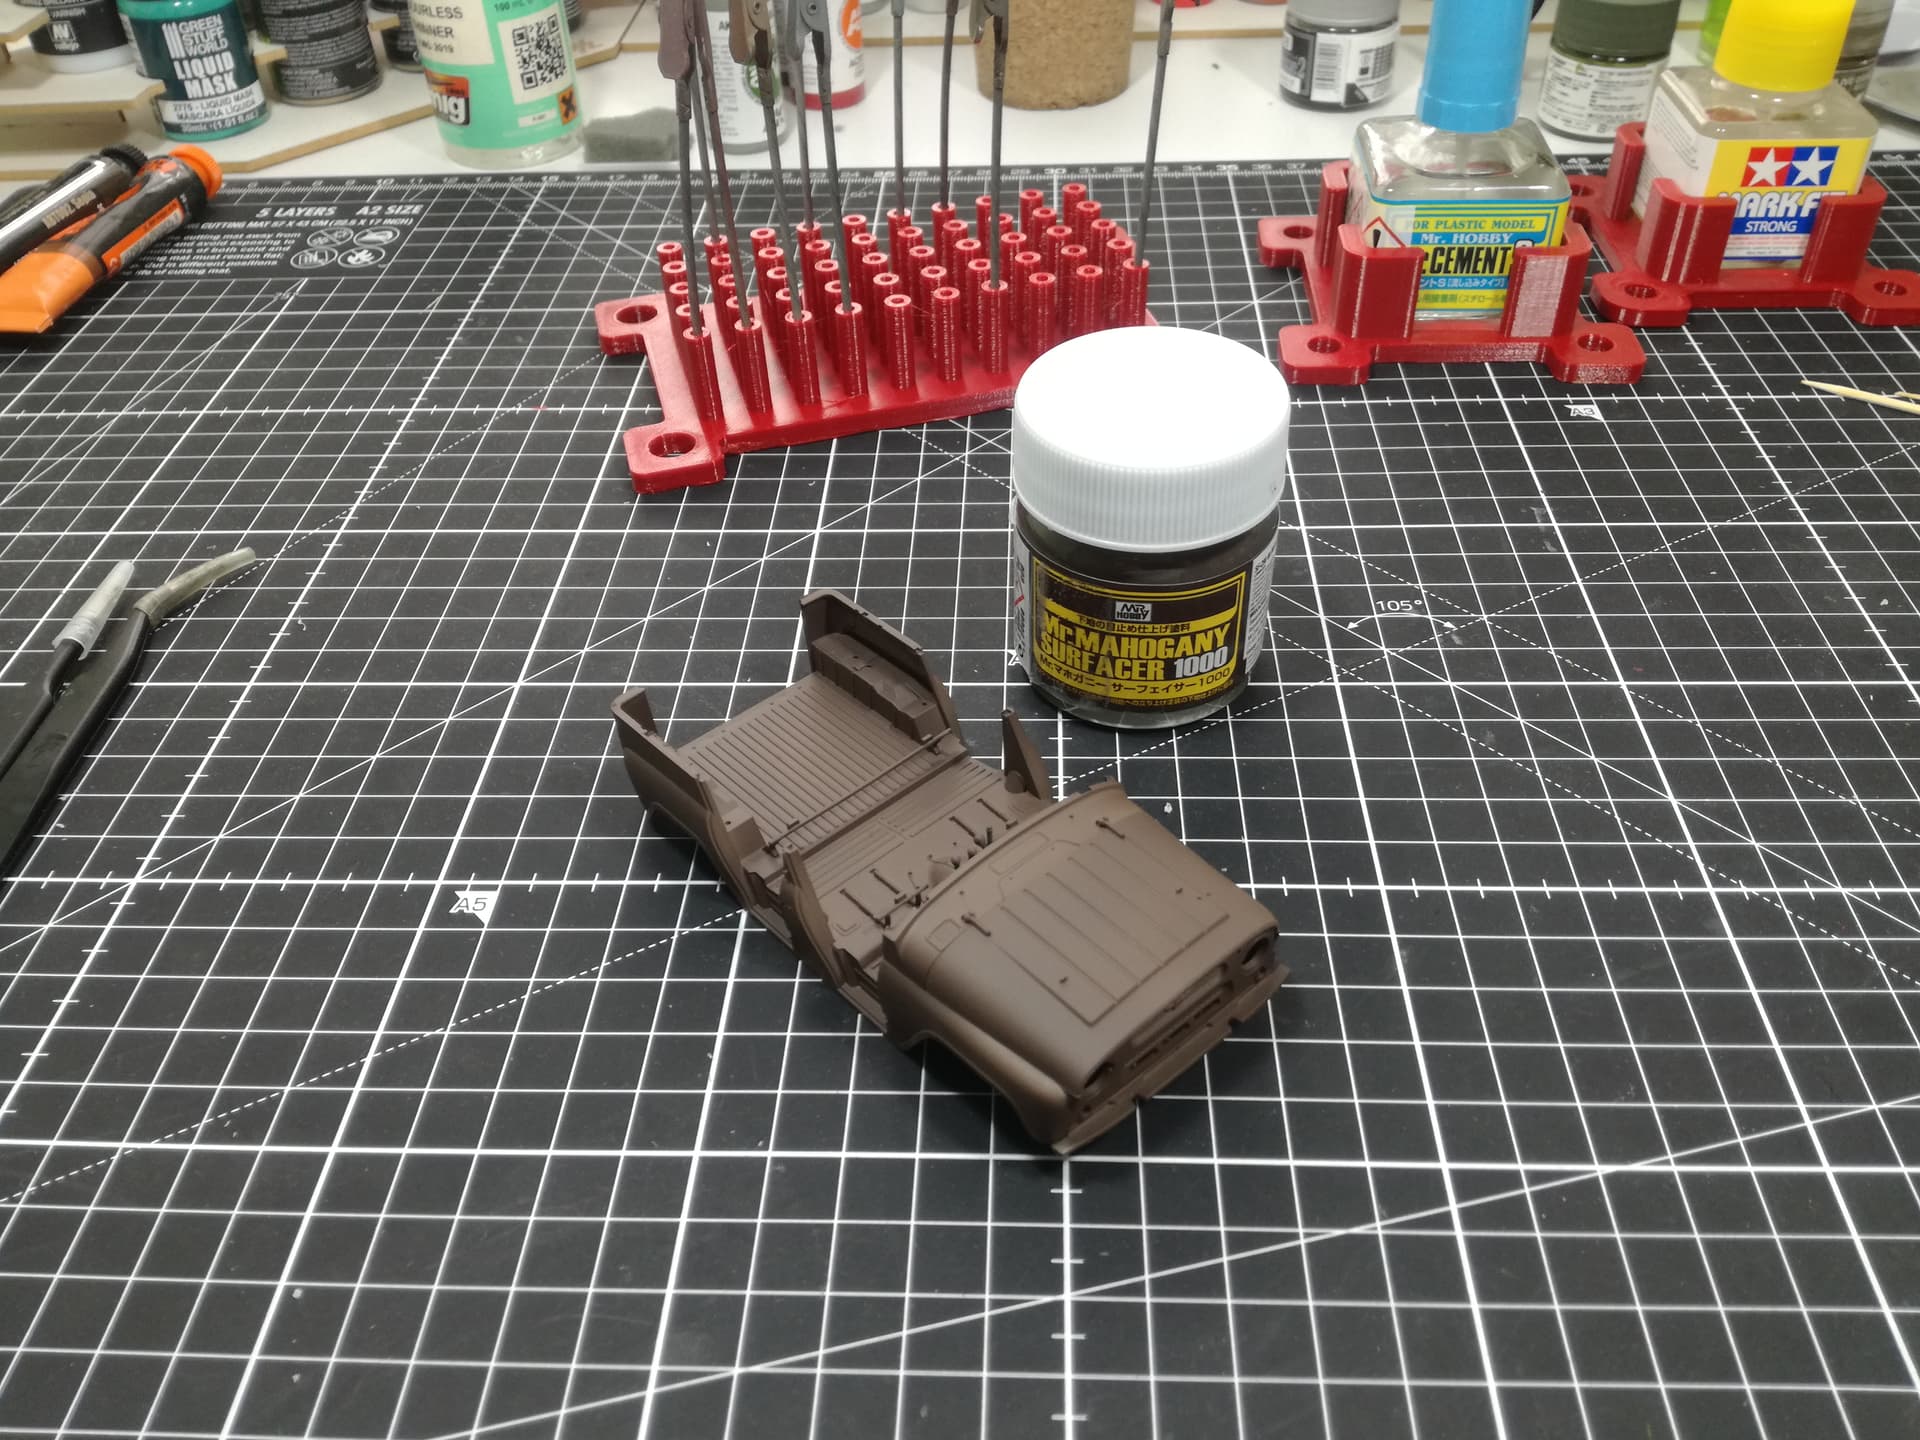
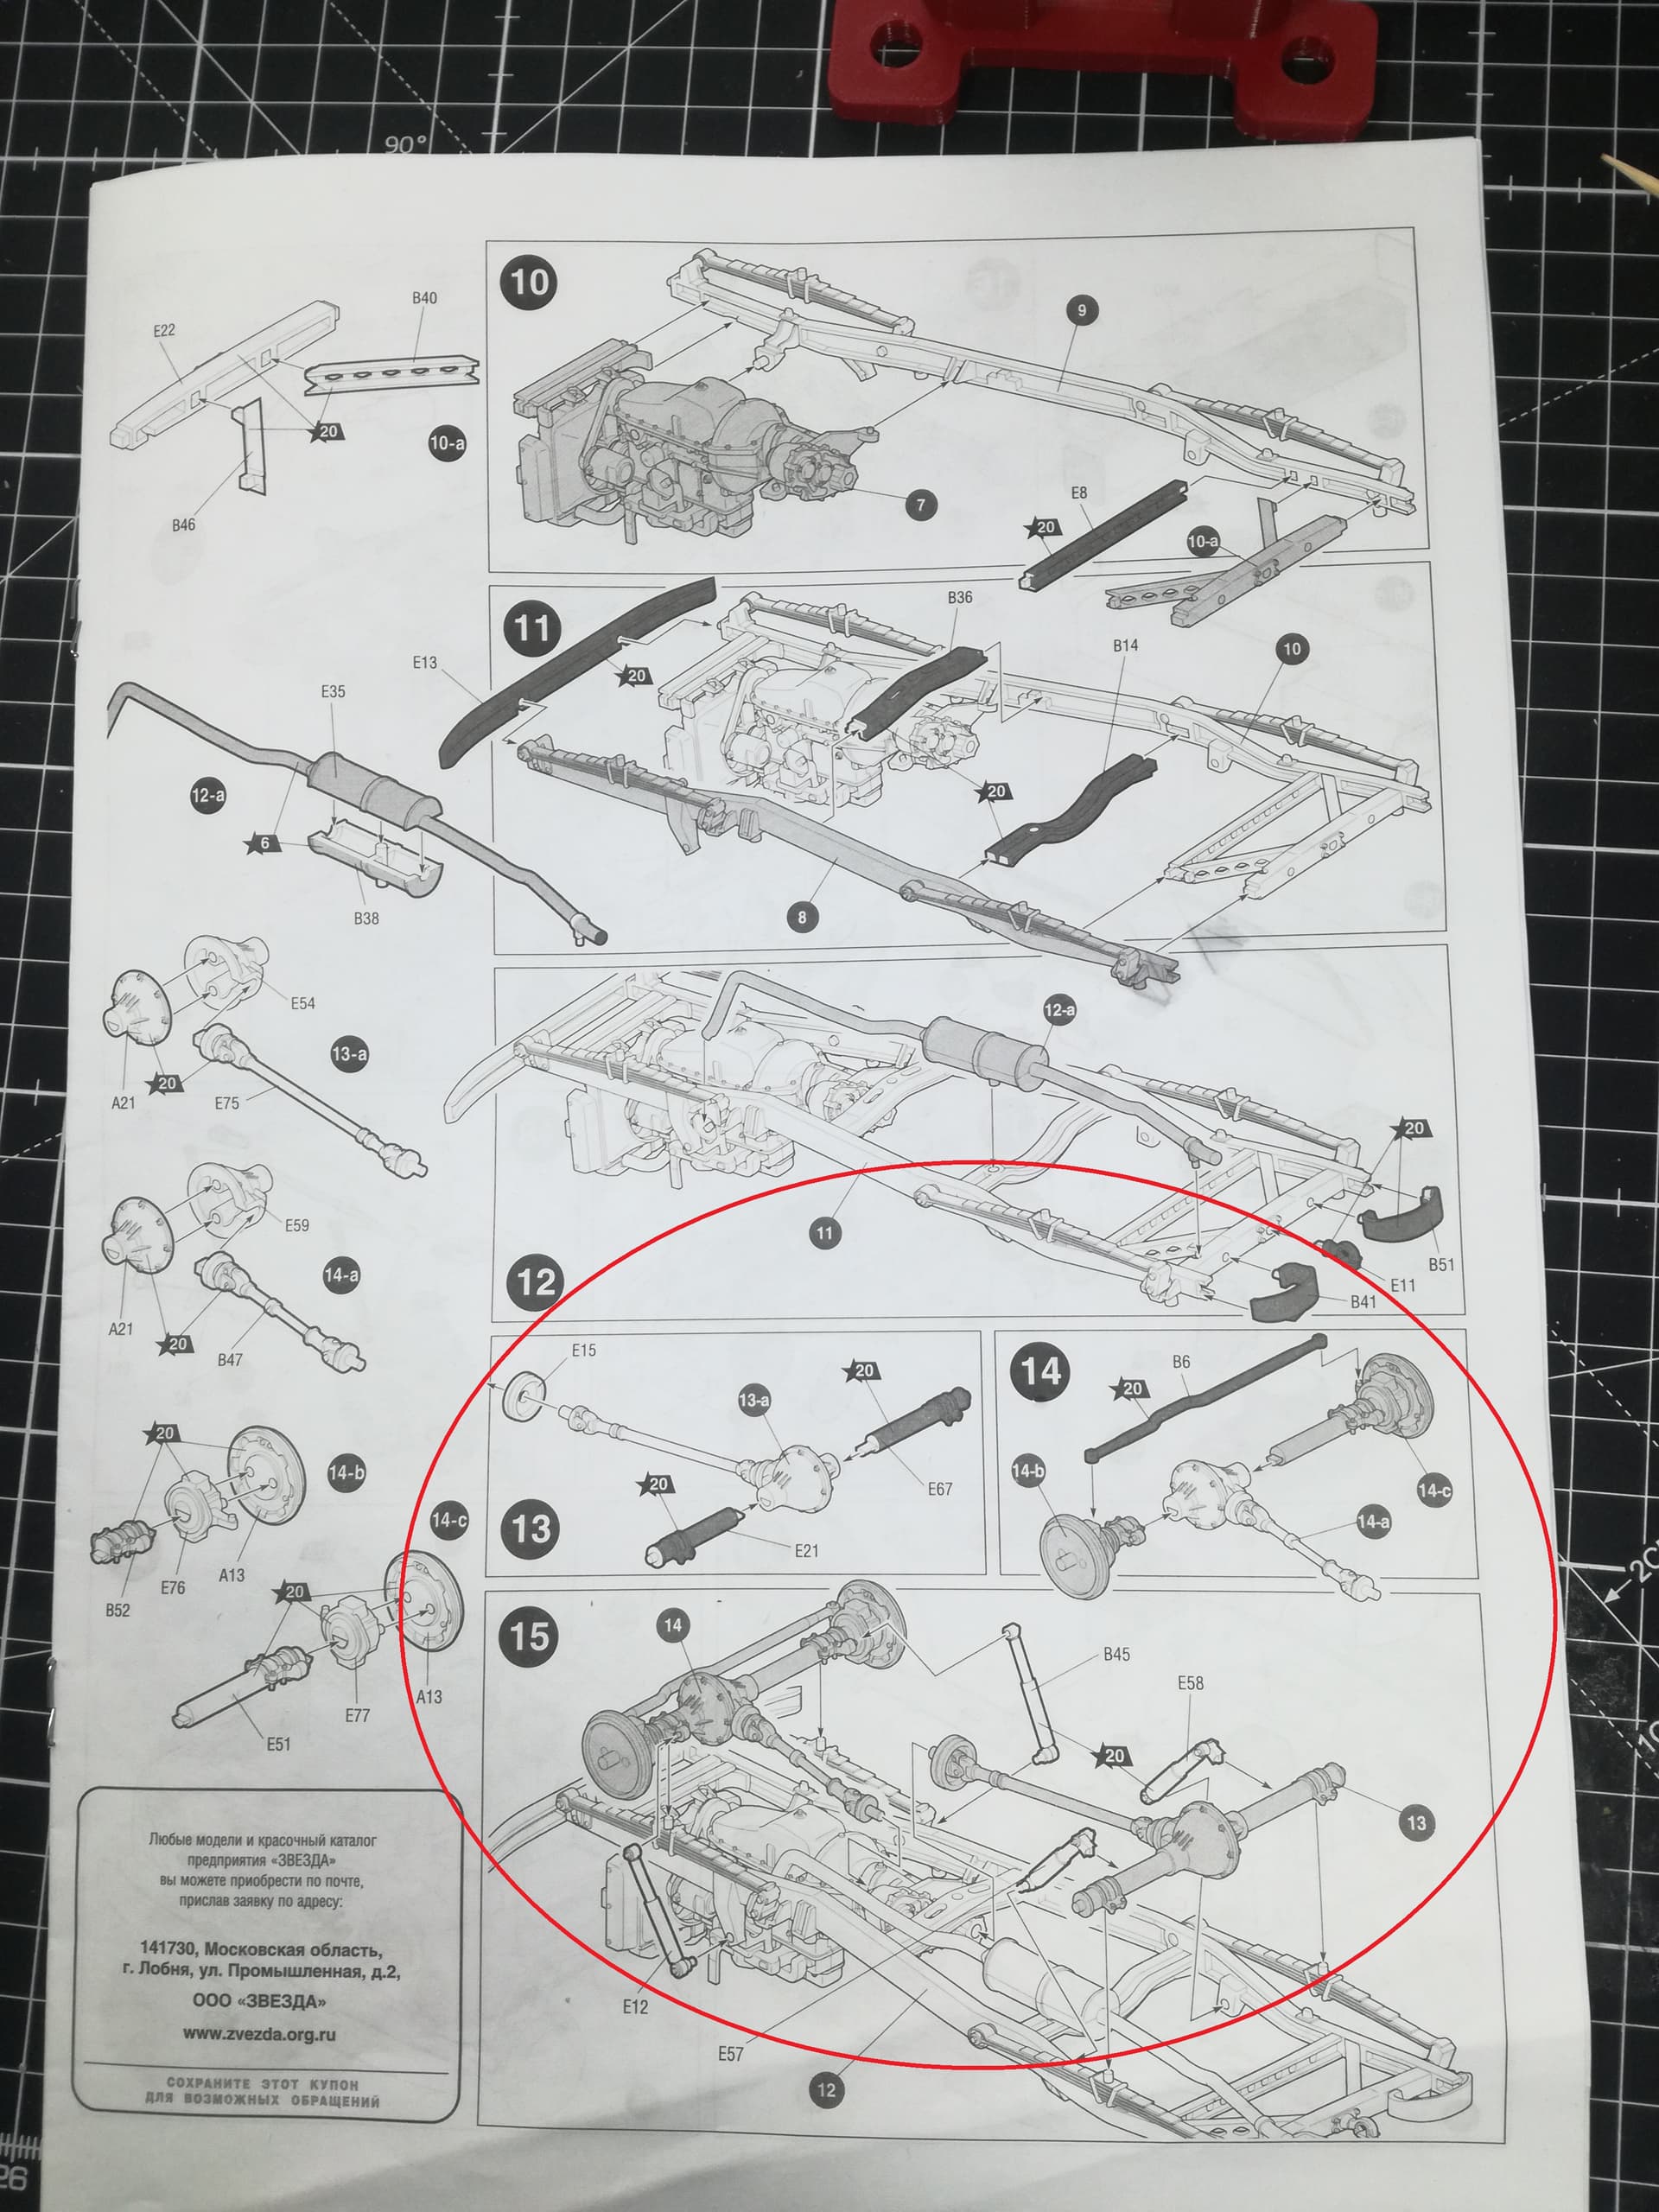
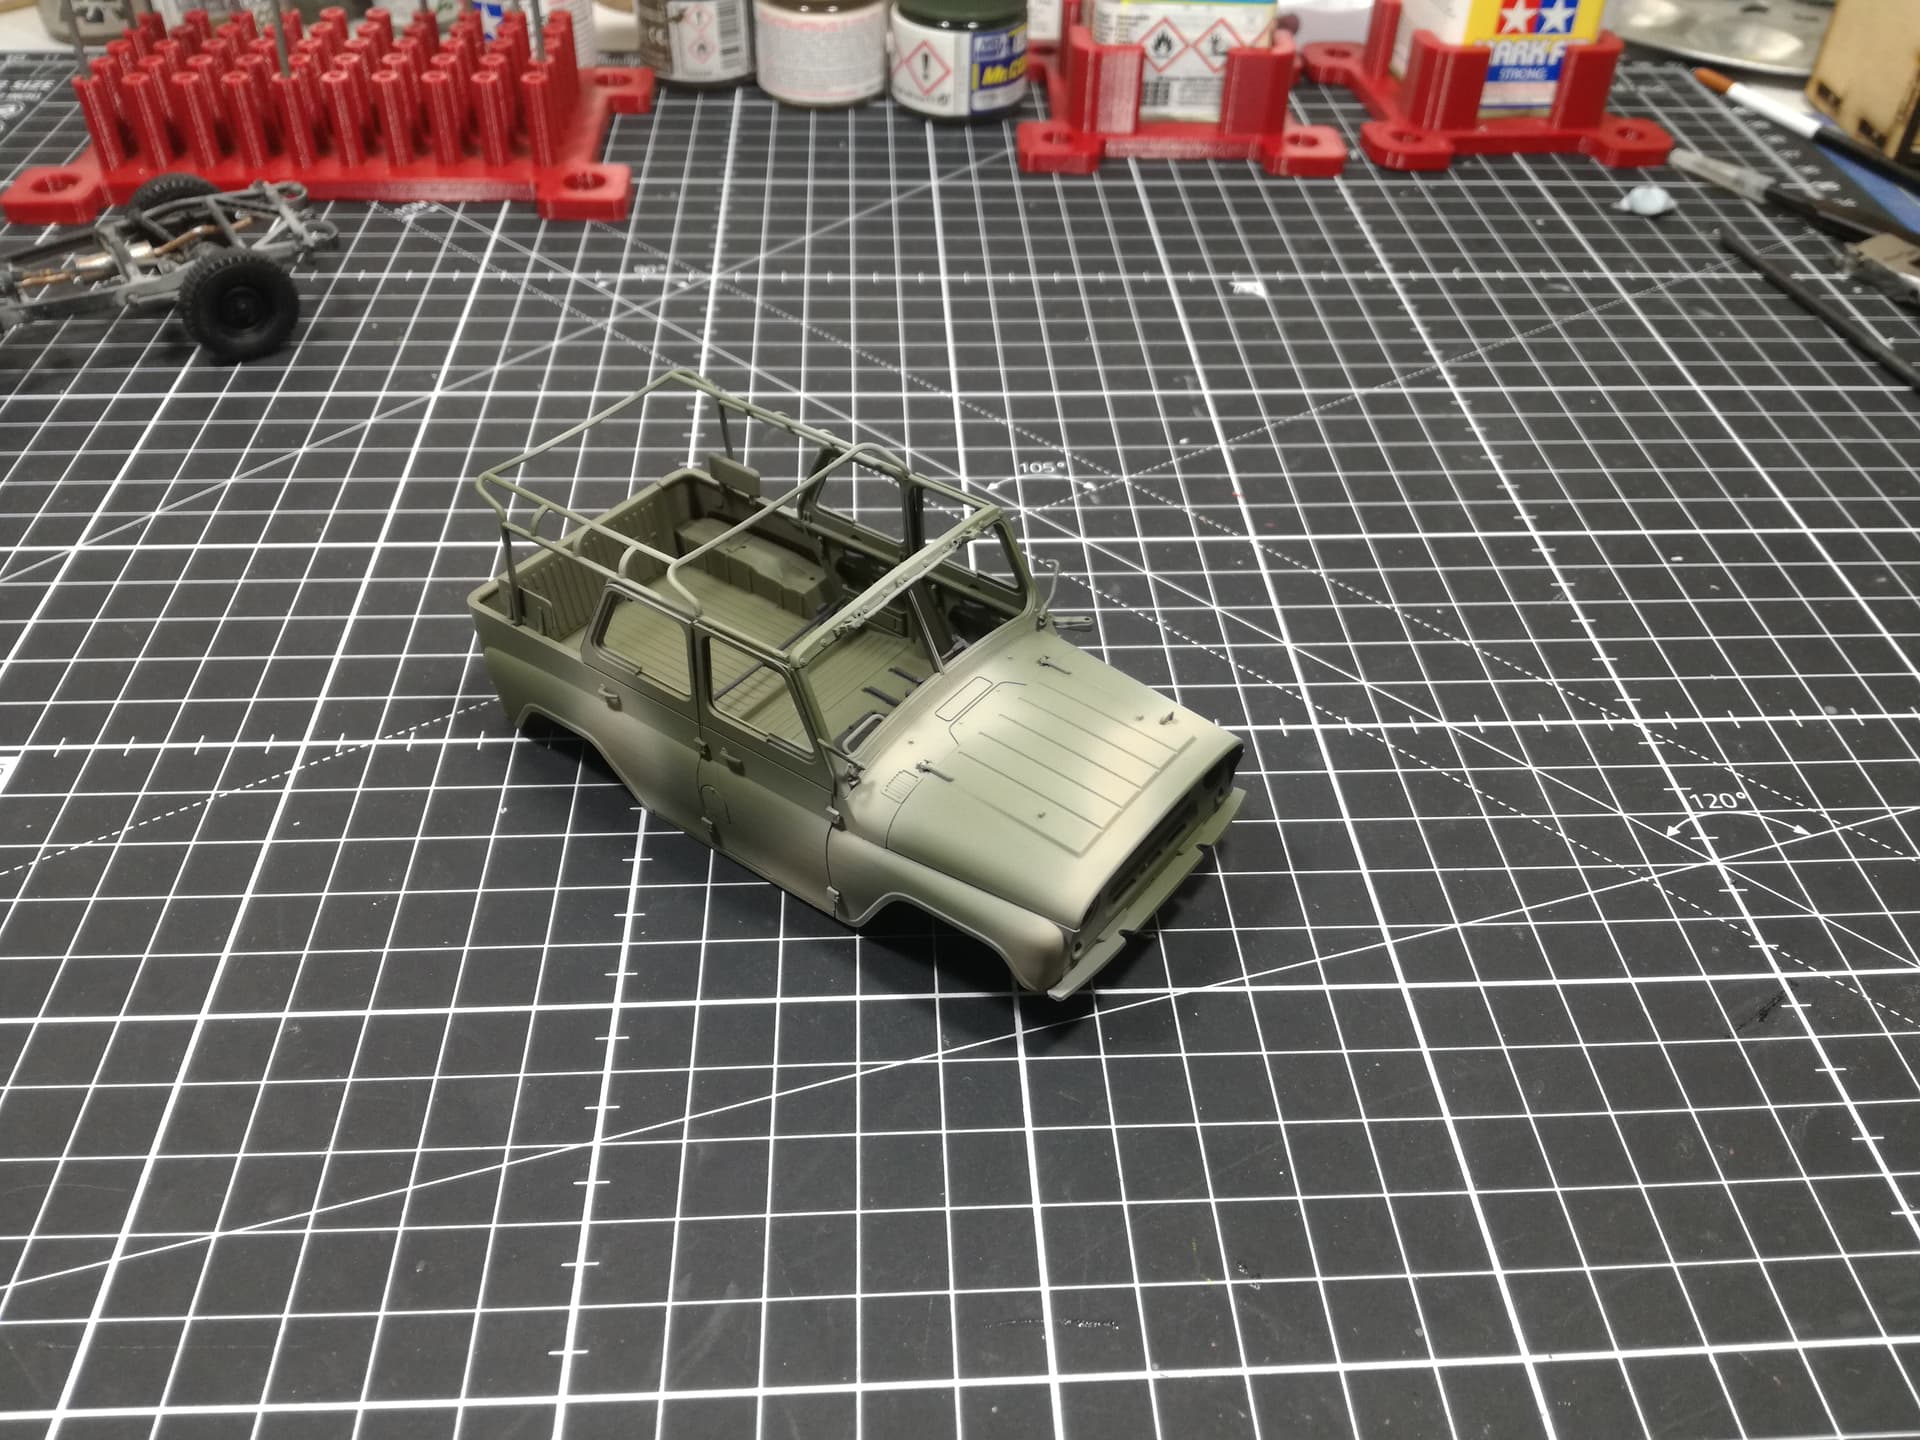
Preparing the chassis and engine for weathering, pay attention to those steps in the instruction-to not flip the transmission. Also base primer of Mr. Surfacer 1500 mahogany on the body:
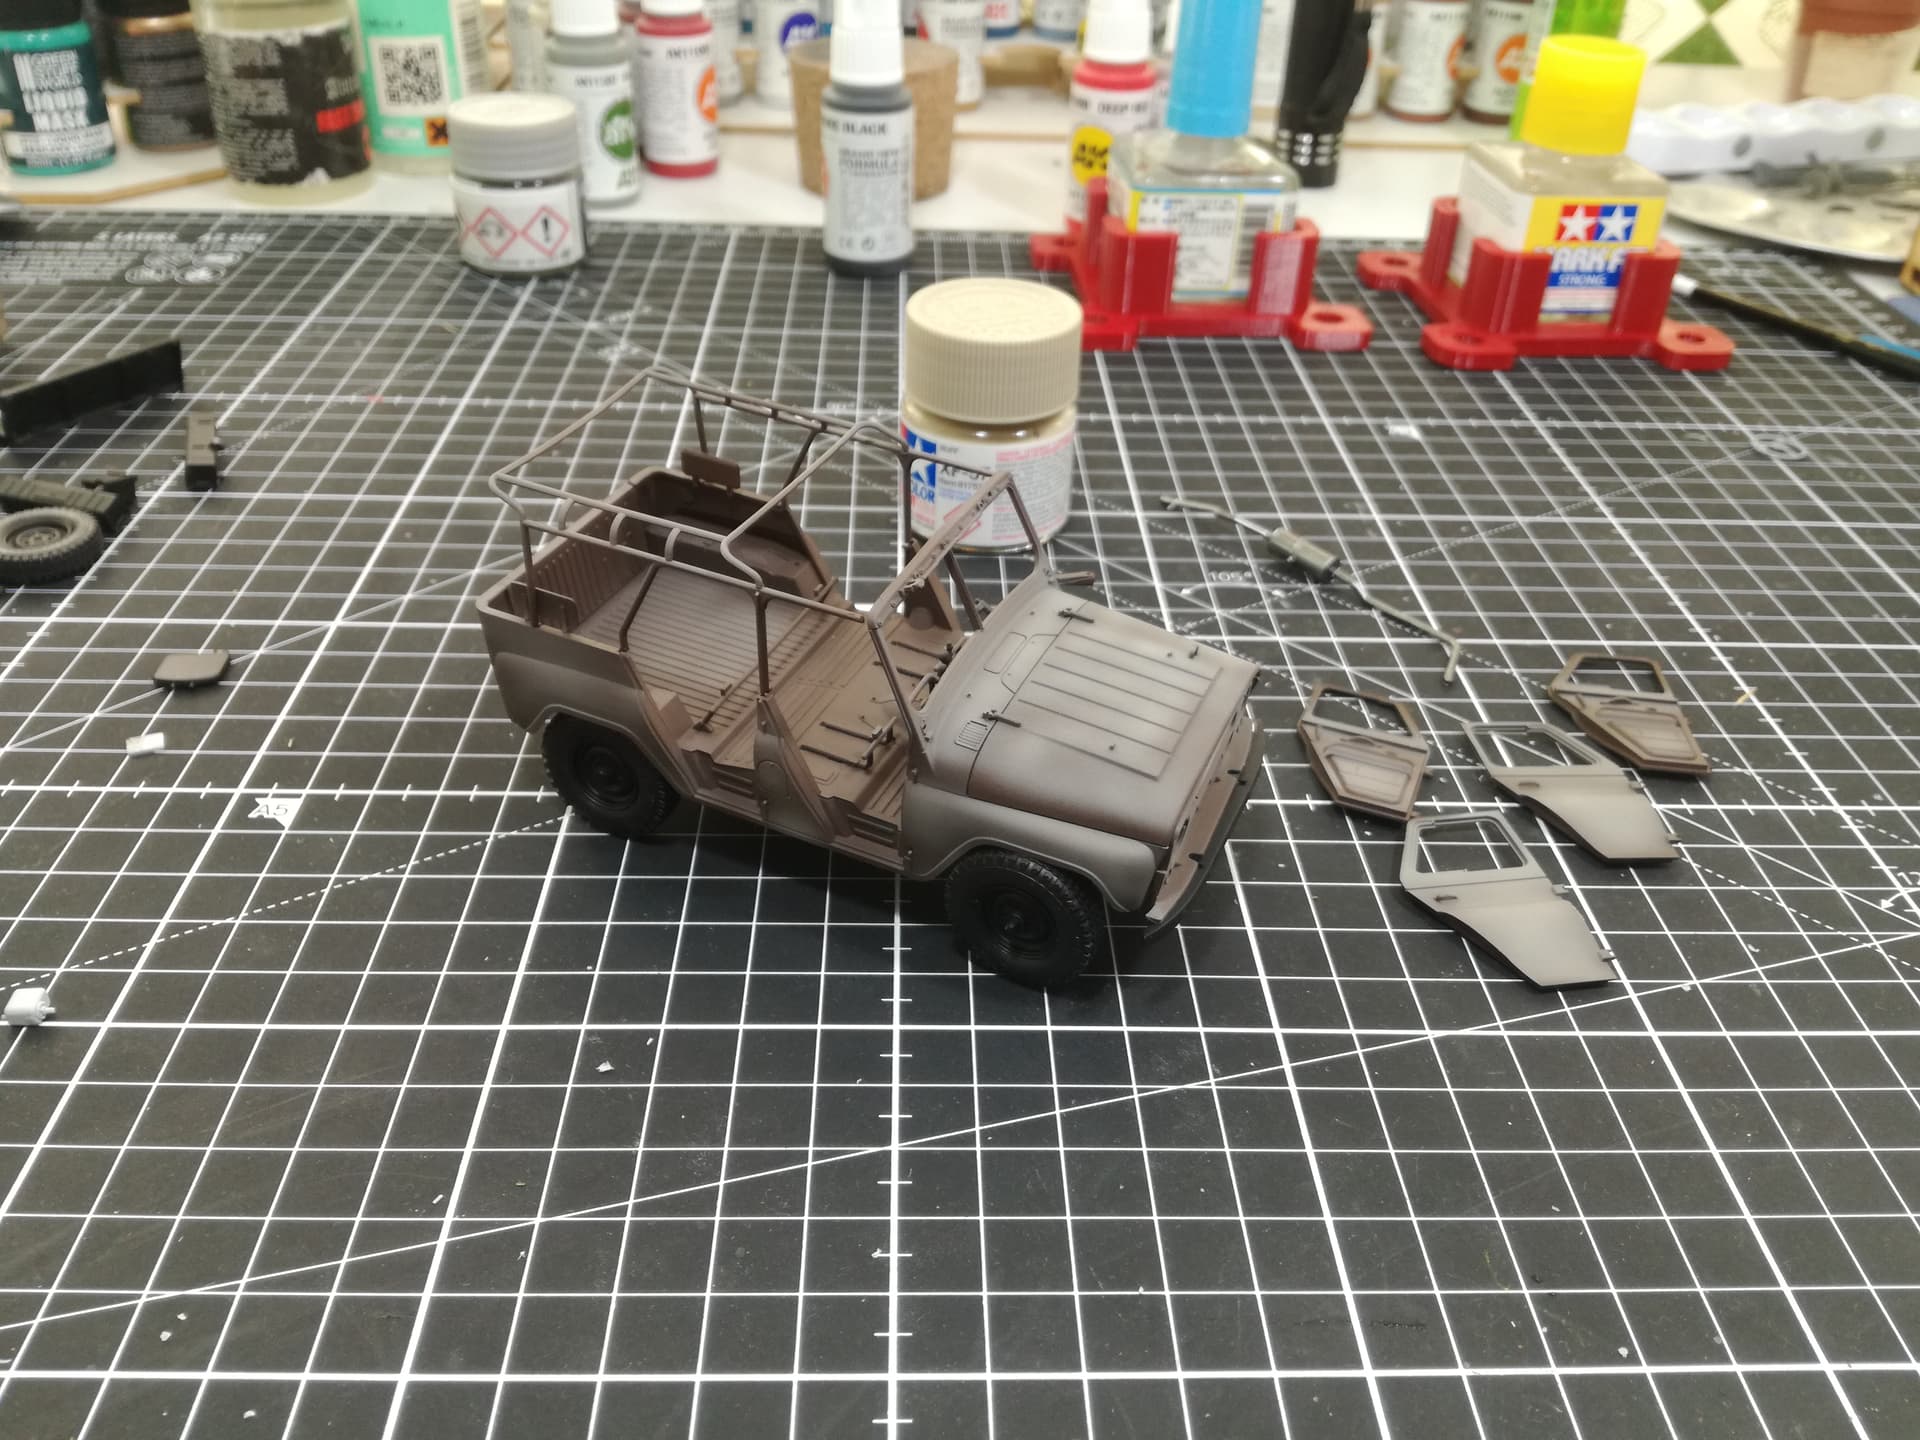
Applying some Tamiya XF-57 Buff before the green color. I decided for open top body, becuase the back will be filled with accessories like weapons (I made AK’s, RPD, RPG-7, munitions and more ), nothing is completely glued yet:
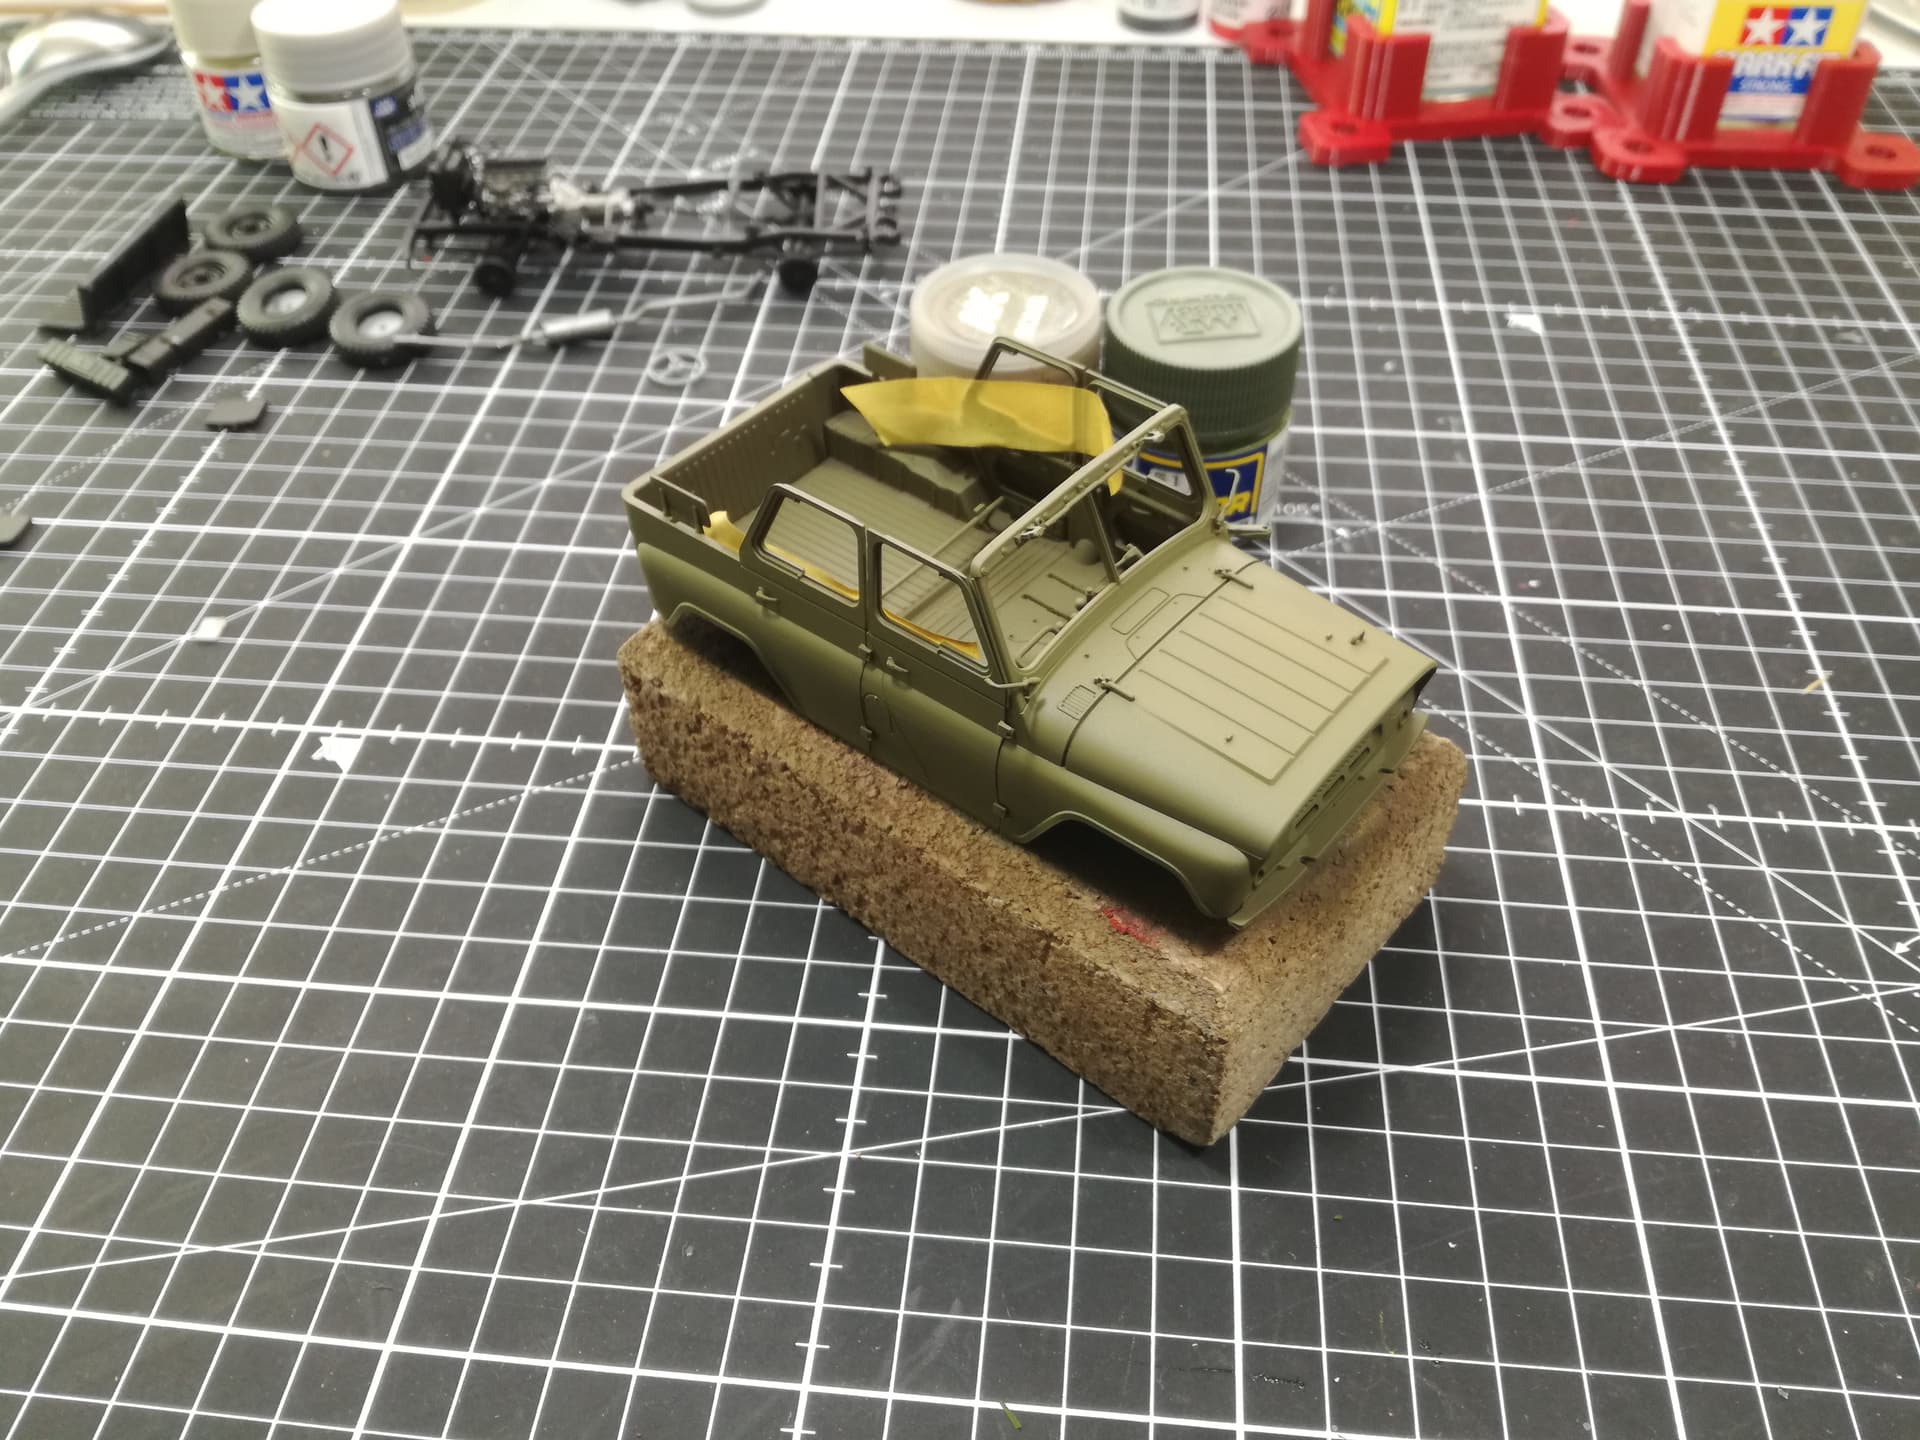
Base color of green, I mixed Mr.Color 4BO with AK RC Olive drab, maybe 2:1, to give some mustard hue to the green (something like khaki green). I don’t have the “correct” green, but I think is looking good.
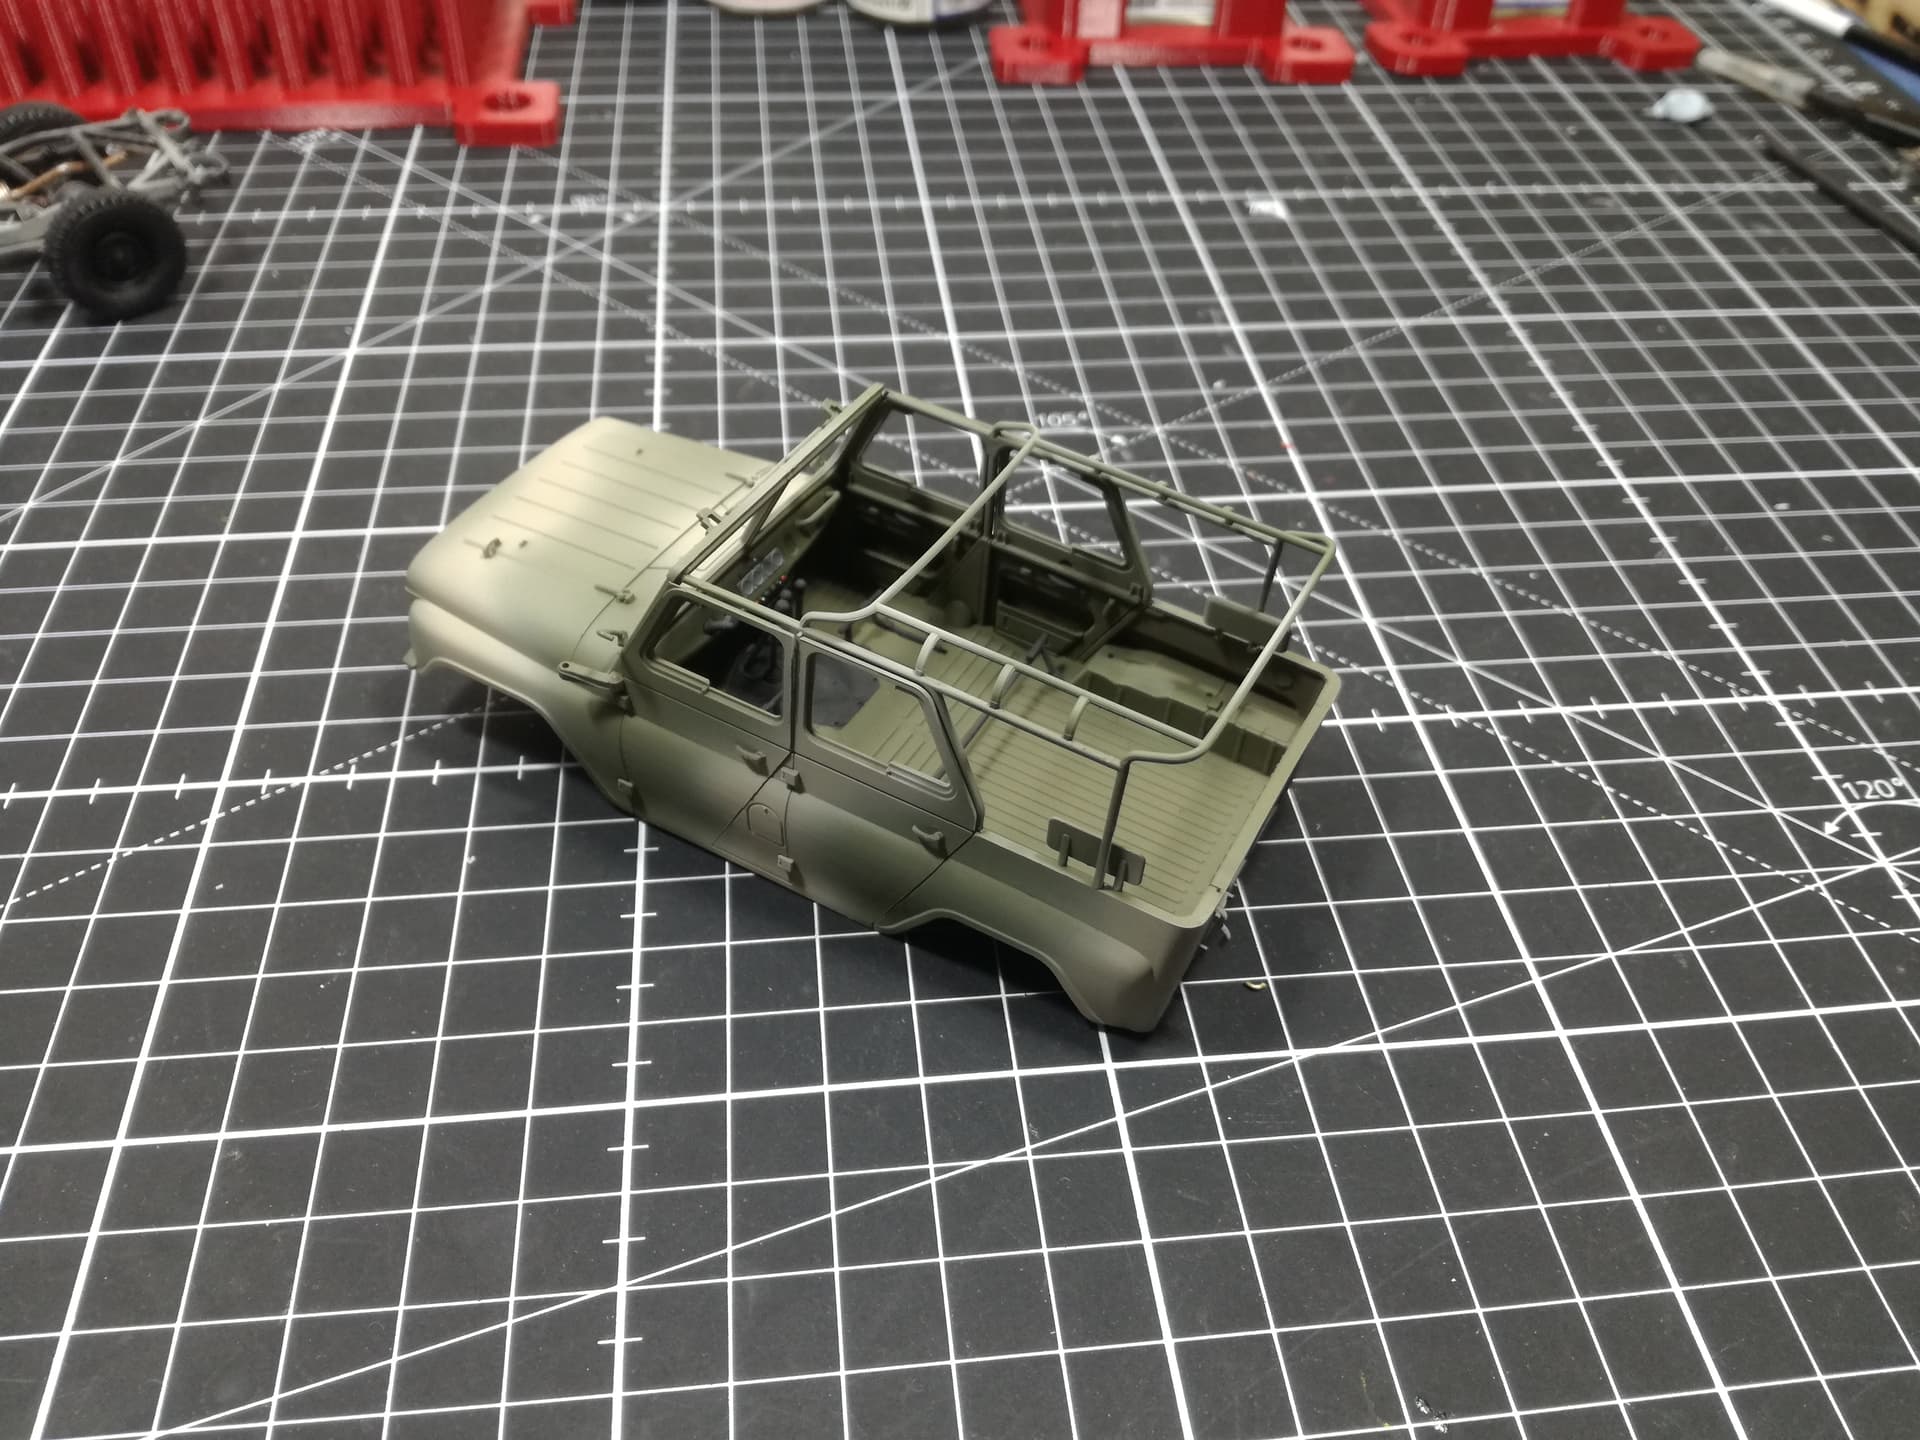
I will add patches of sand color for two tone camo