My friend’s daughter (on the right) got her welding certification earlier this year. She’s 19 or 20, and looks about 12 herself.
It was a nation wide effort back then. Short of being attacked by Martians I doubt we’ll ever see anything like it again.
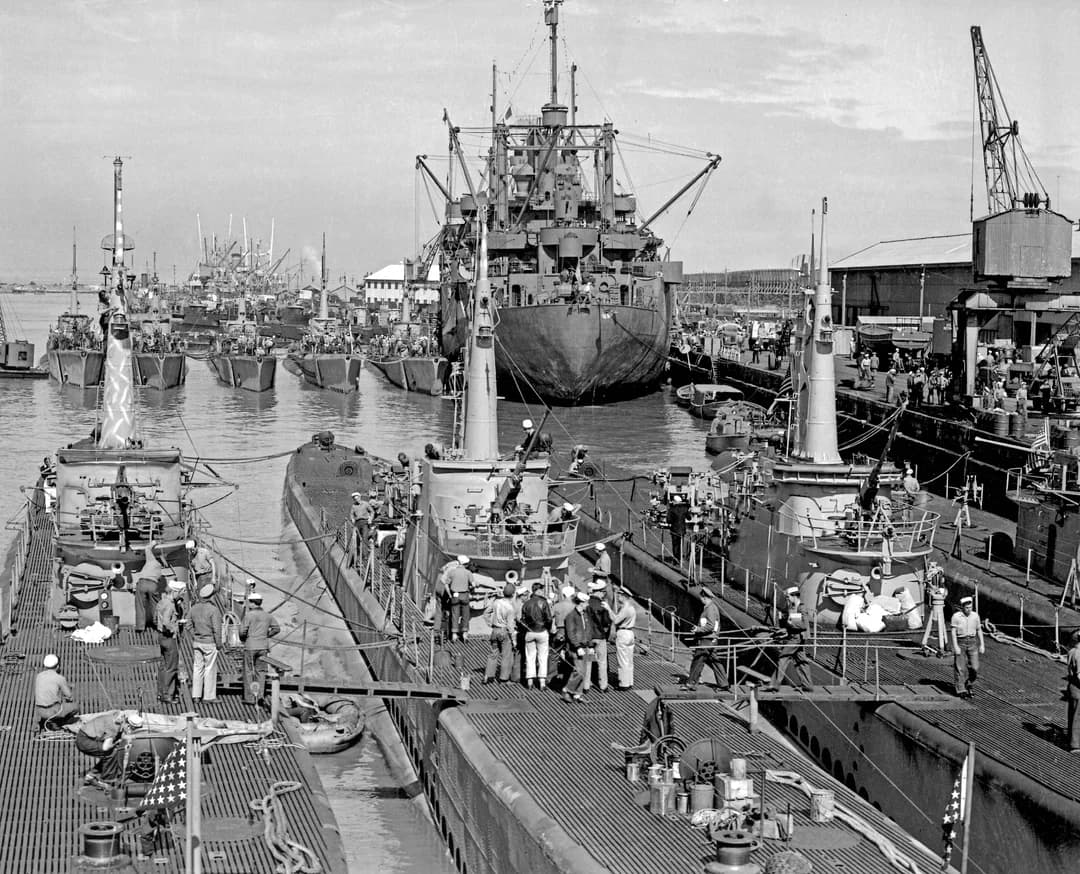
In other news - after rereading Flasher’s war record, it makes little sense for me to show her in dry dock in Pearl Harbor. Not in the configuration I’m building her in. However, she did put in to Fremantle from 2 to 29 January, 1945. That was plenty of time for dry dock repairs, and according to my plan, is when she lost her forward deck gun but gained the 40mm Bofors in the front portion of the sail.
Fremantle figured hugely in the US’s submarine warfare in the Pacific, and did indeed have dry docks. This is a cool photo - they’re not in dry dock obviously, but I like it nonethelss:
8 Likes
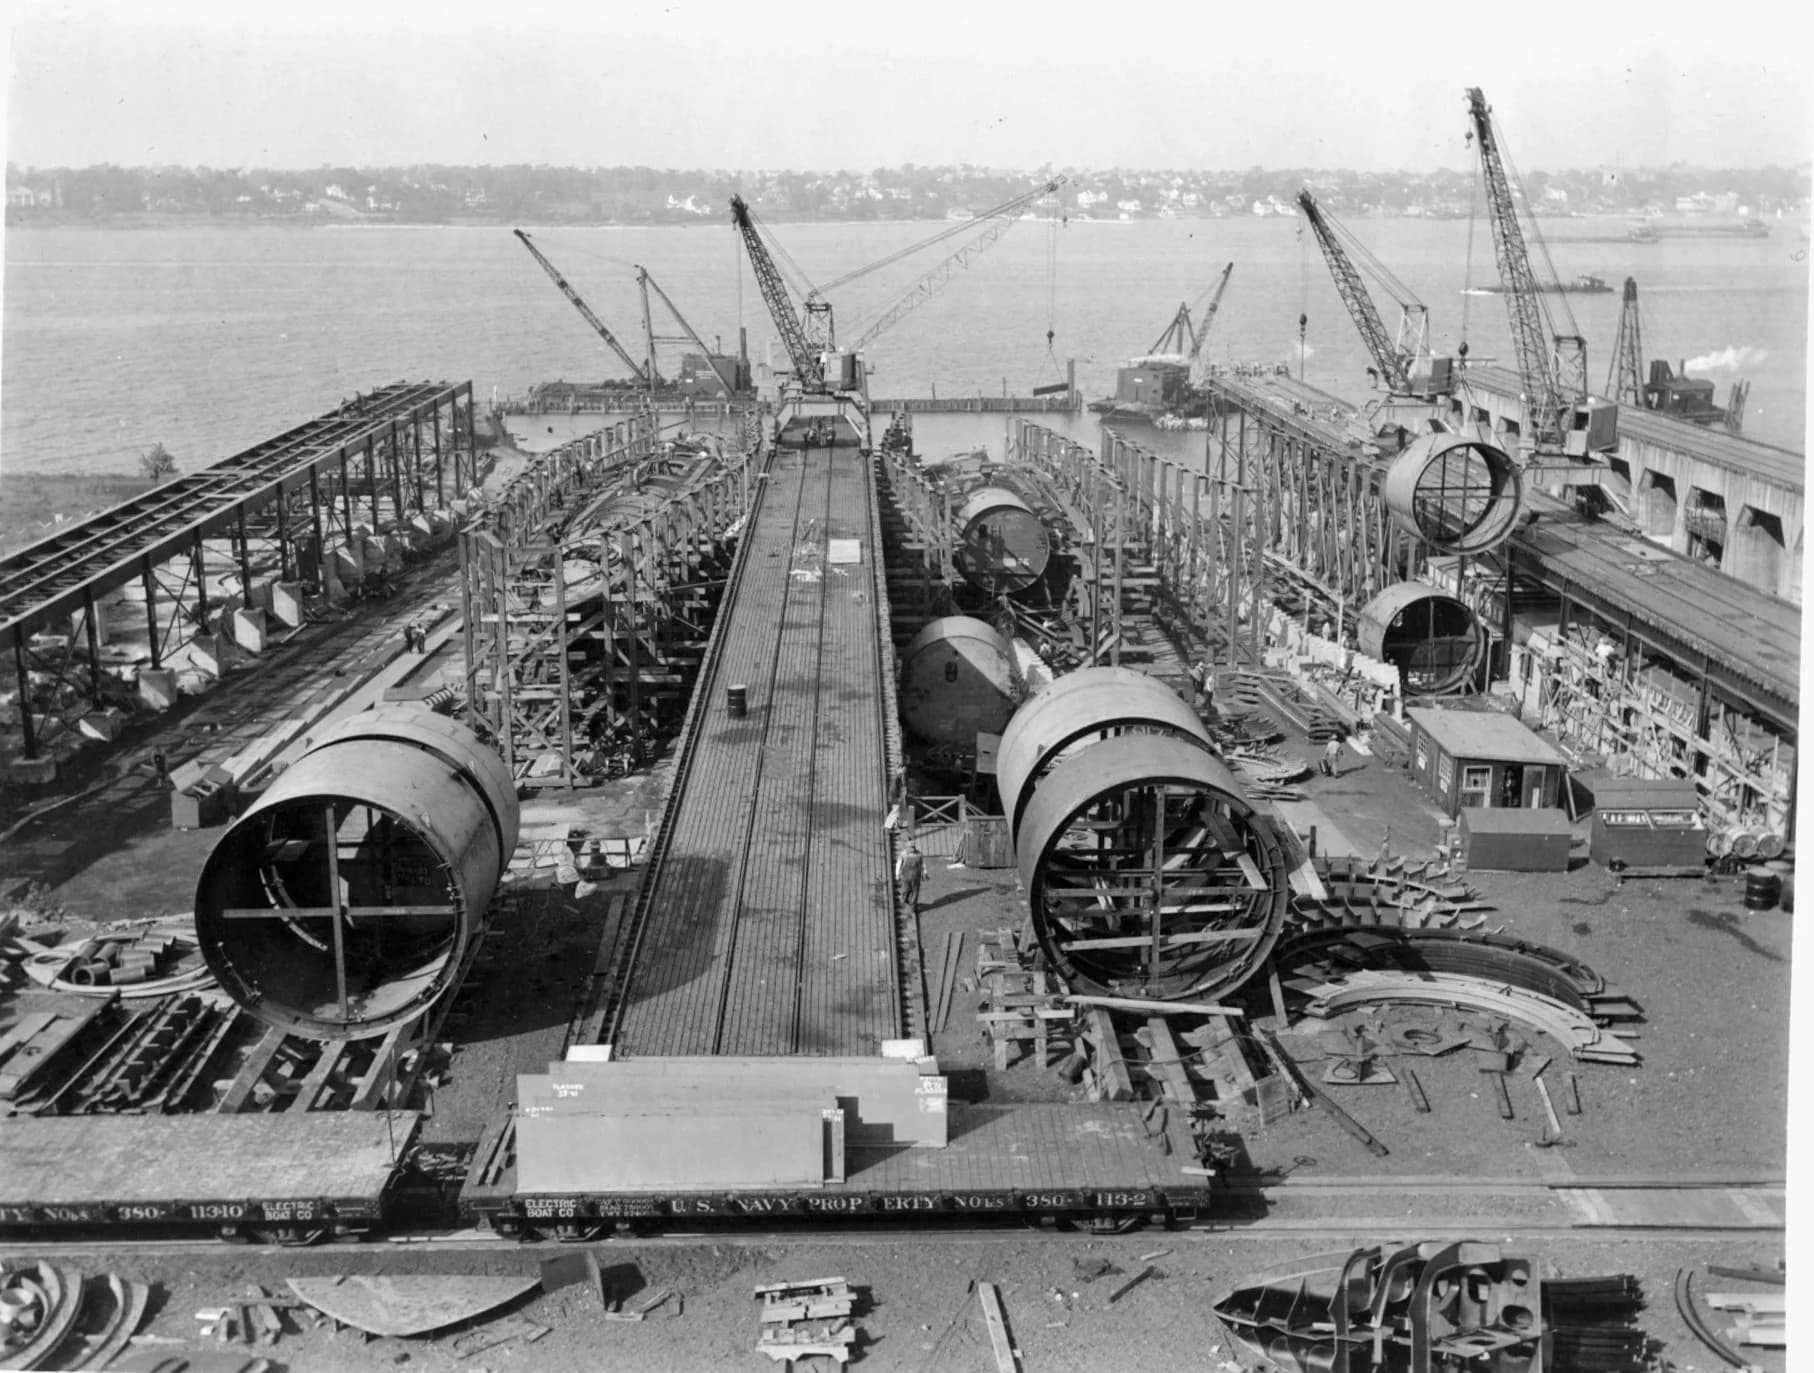
More cool photos keep emerging.
5 Likes
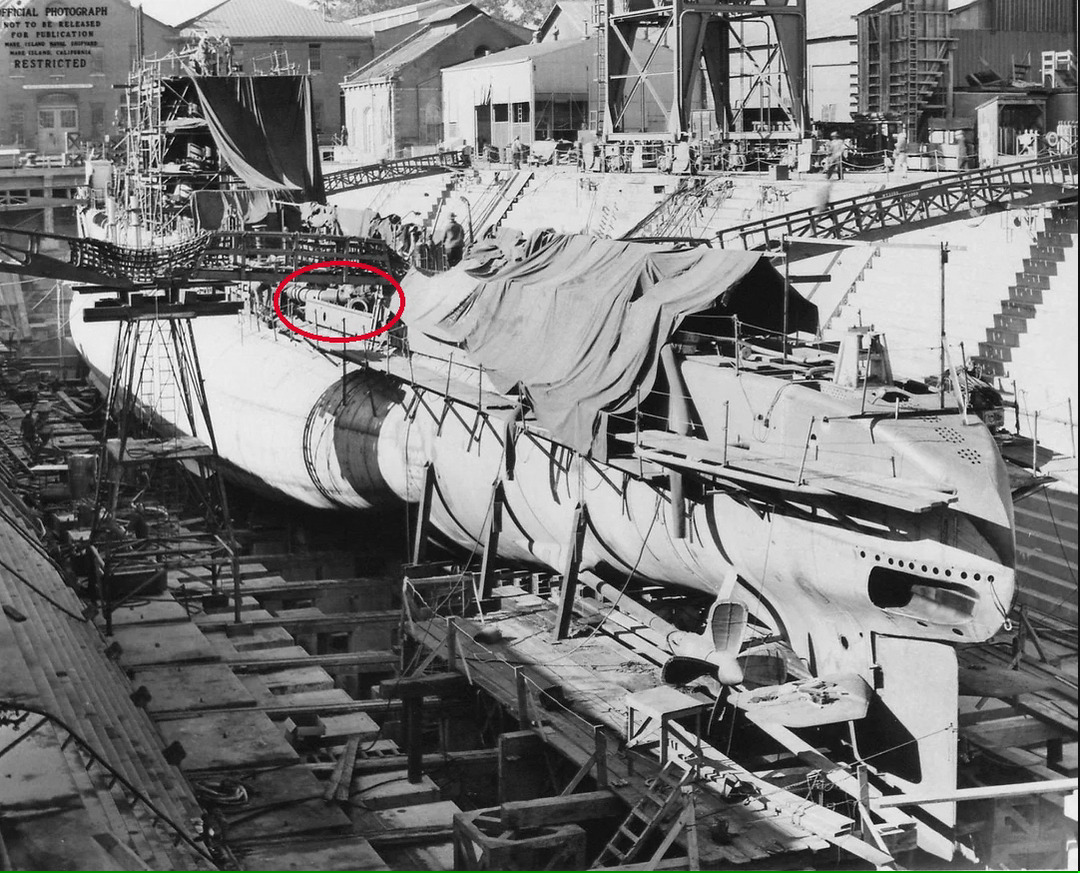
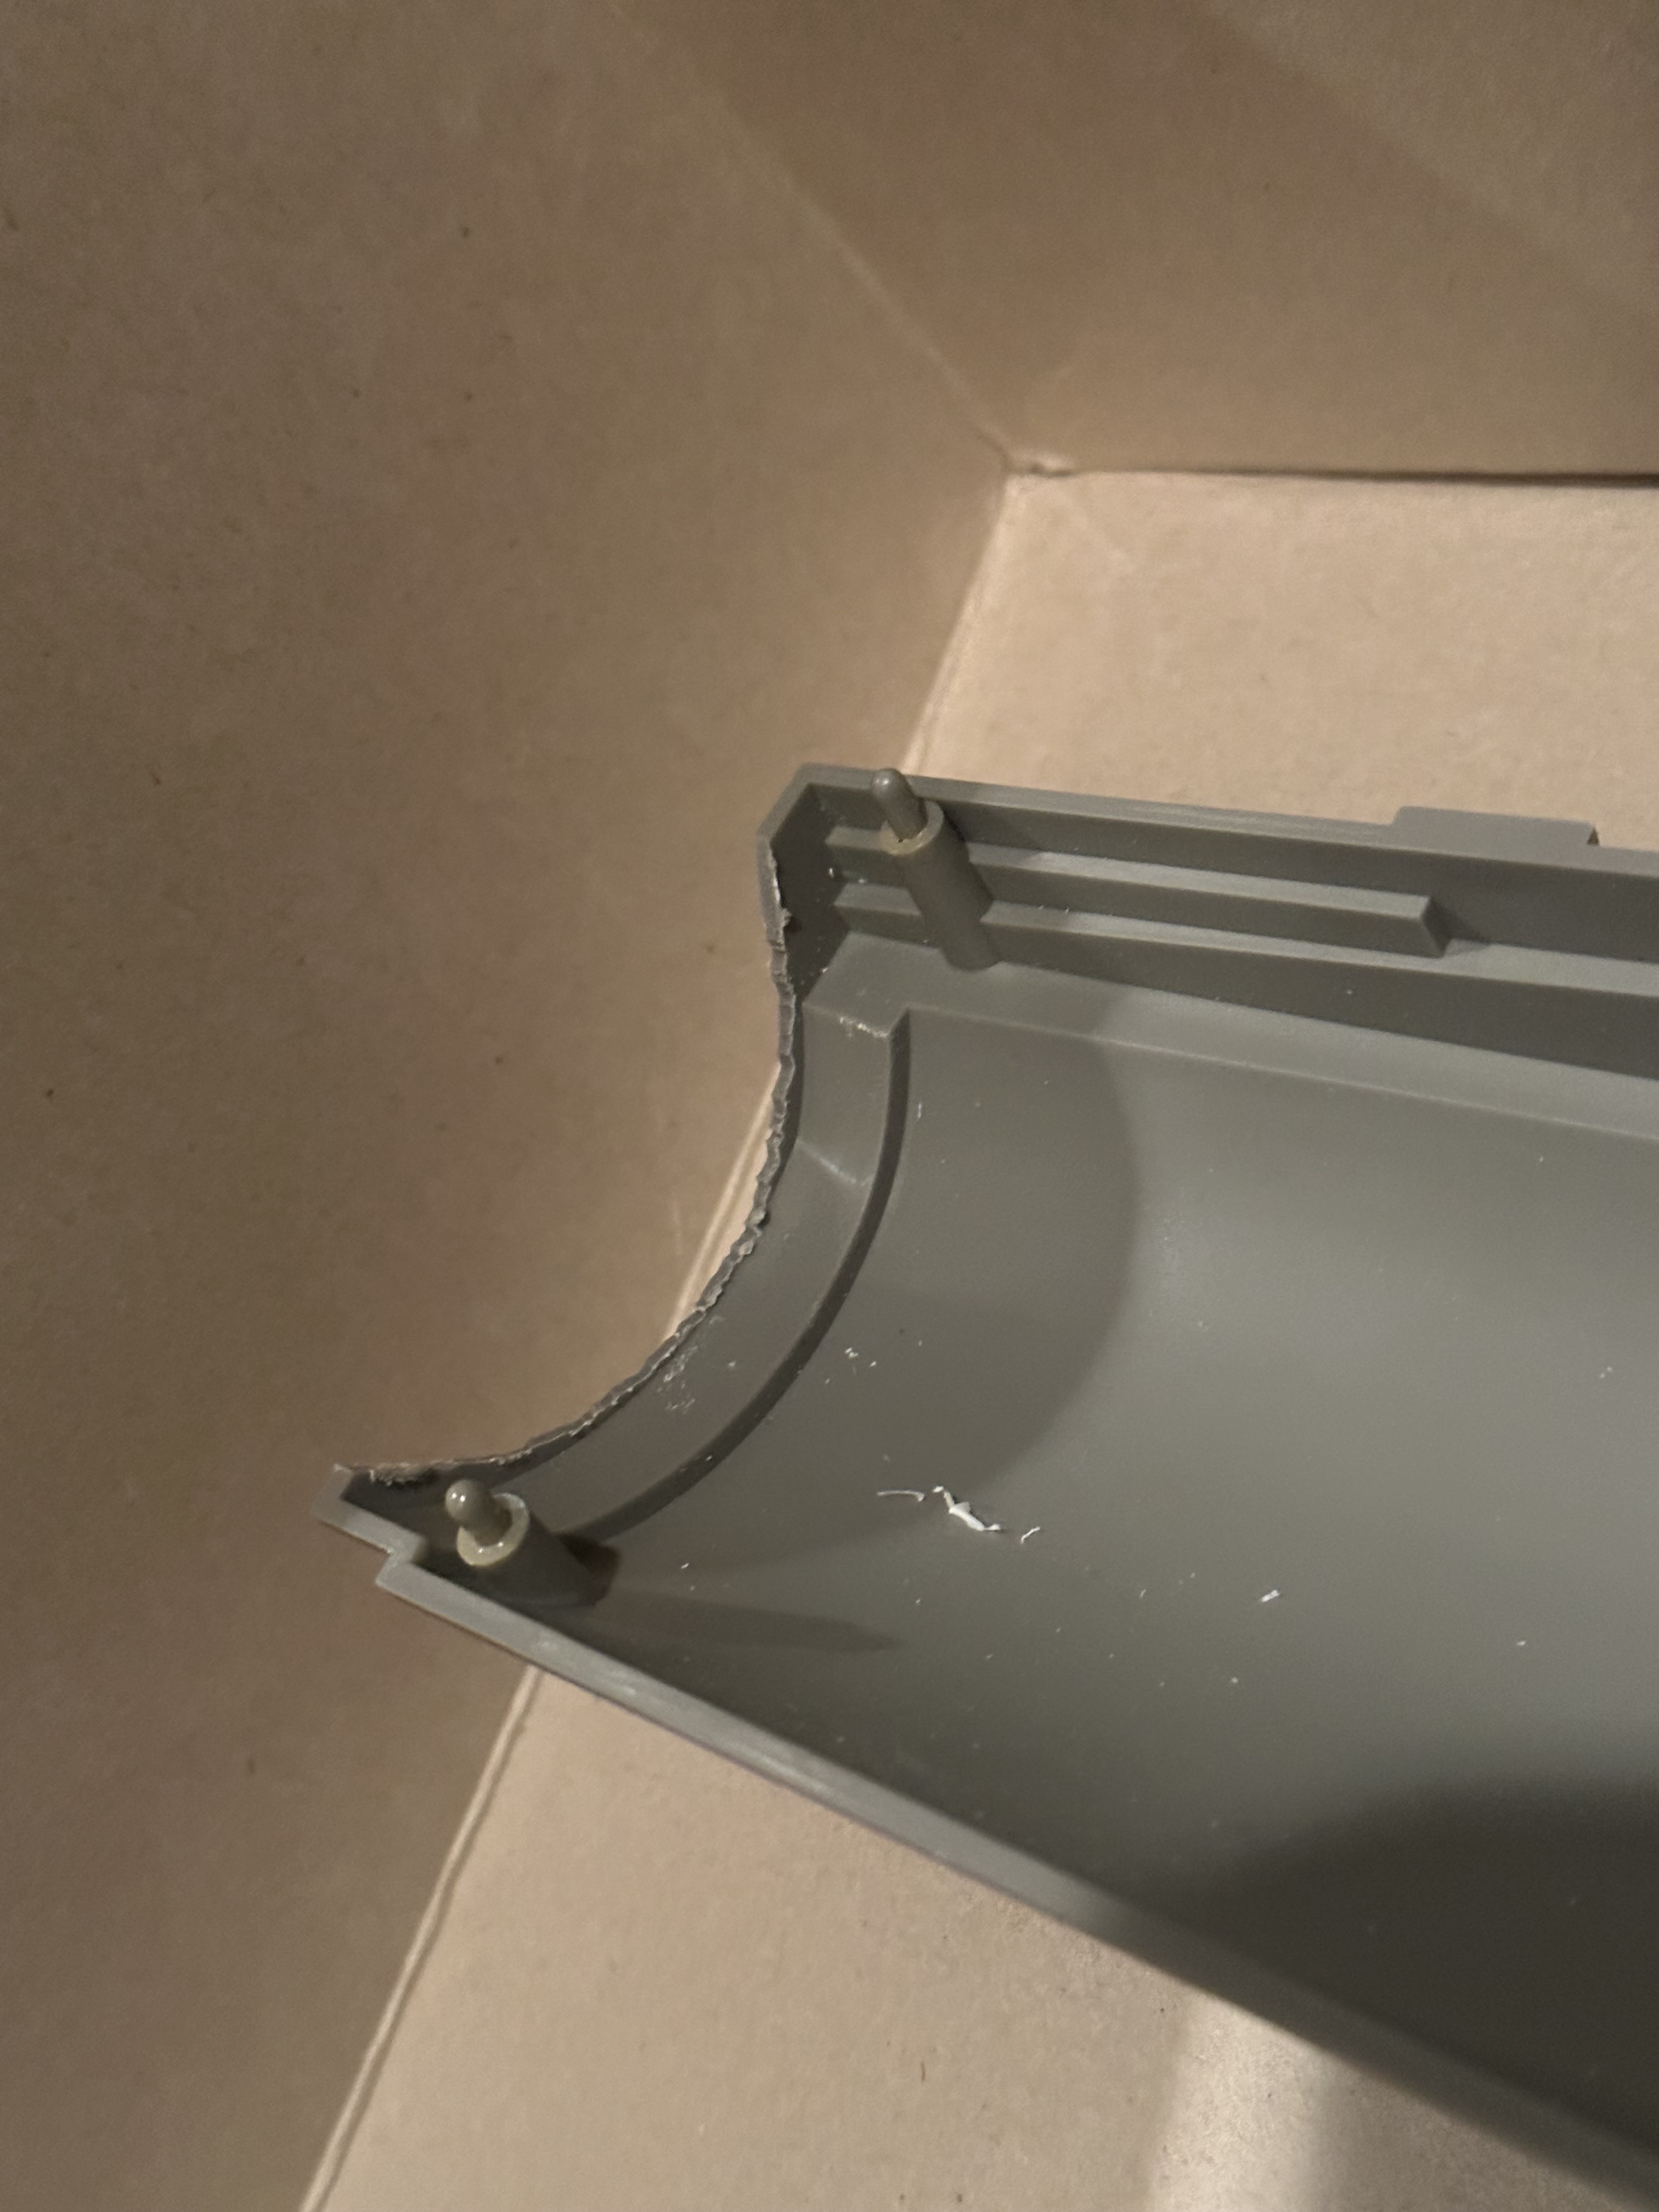
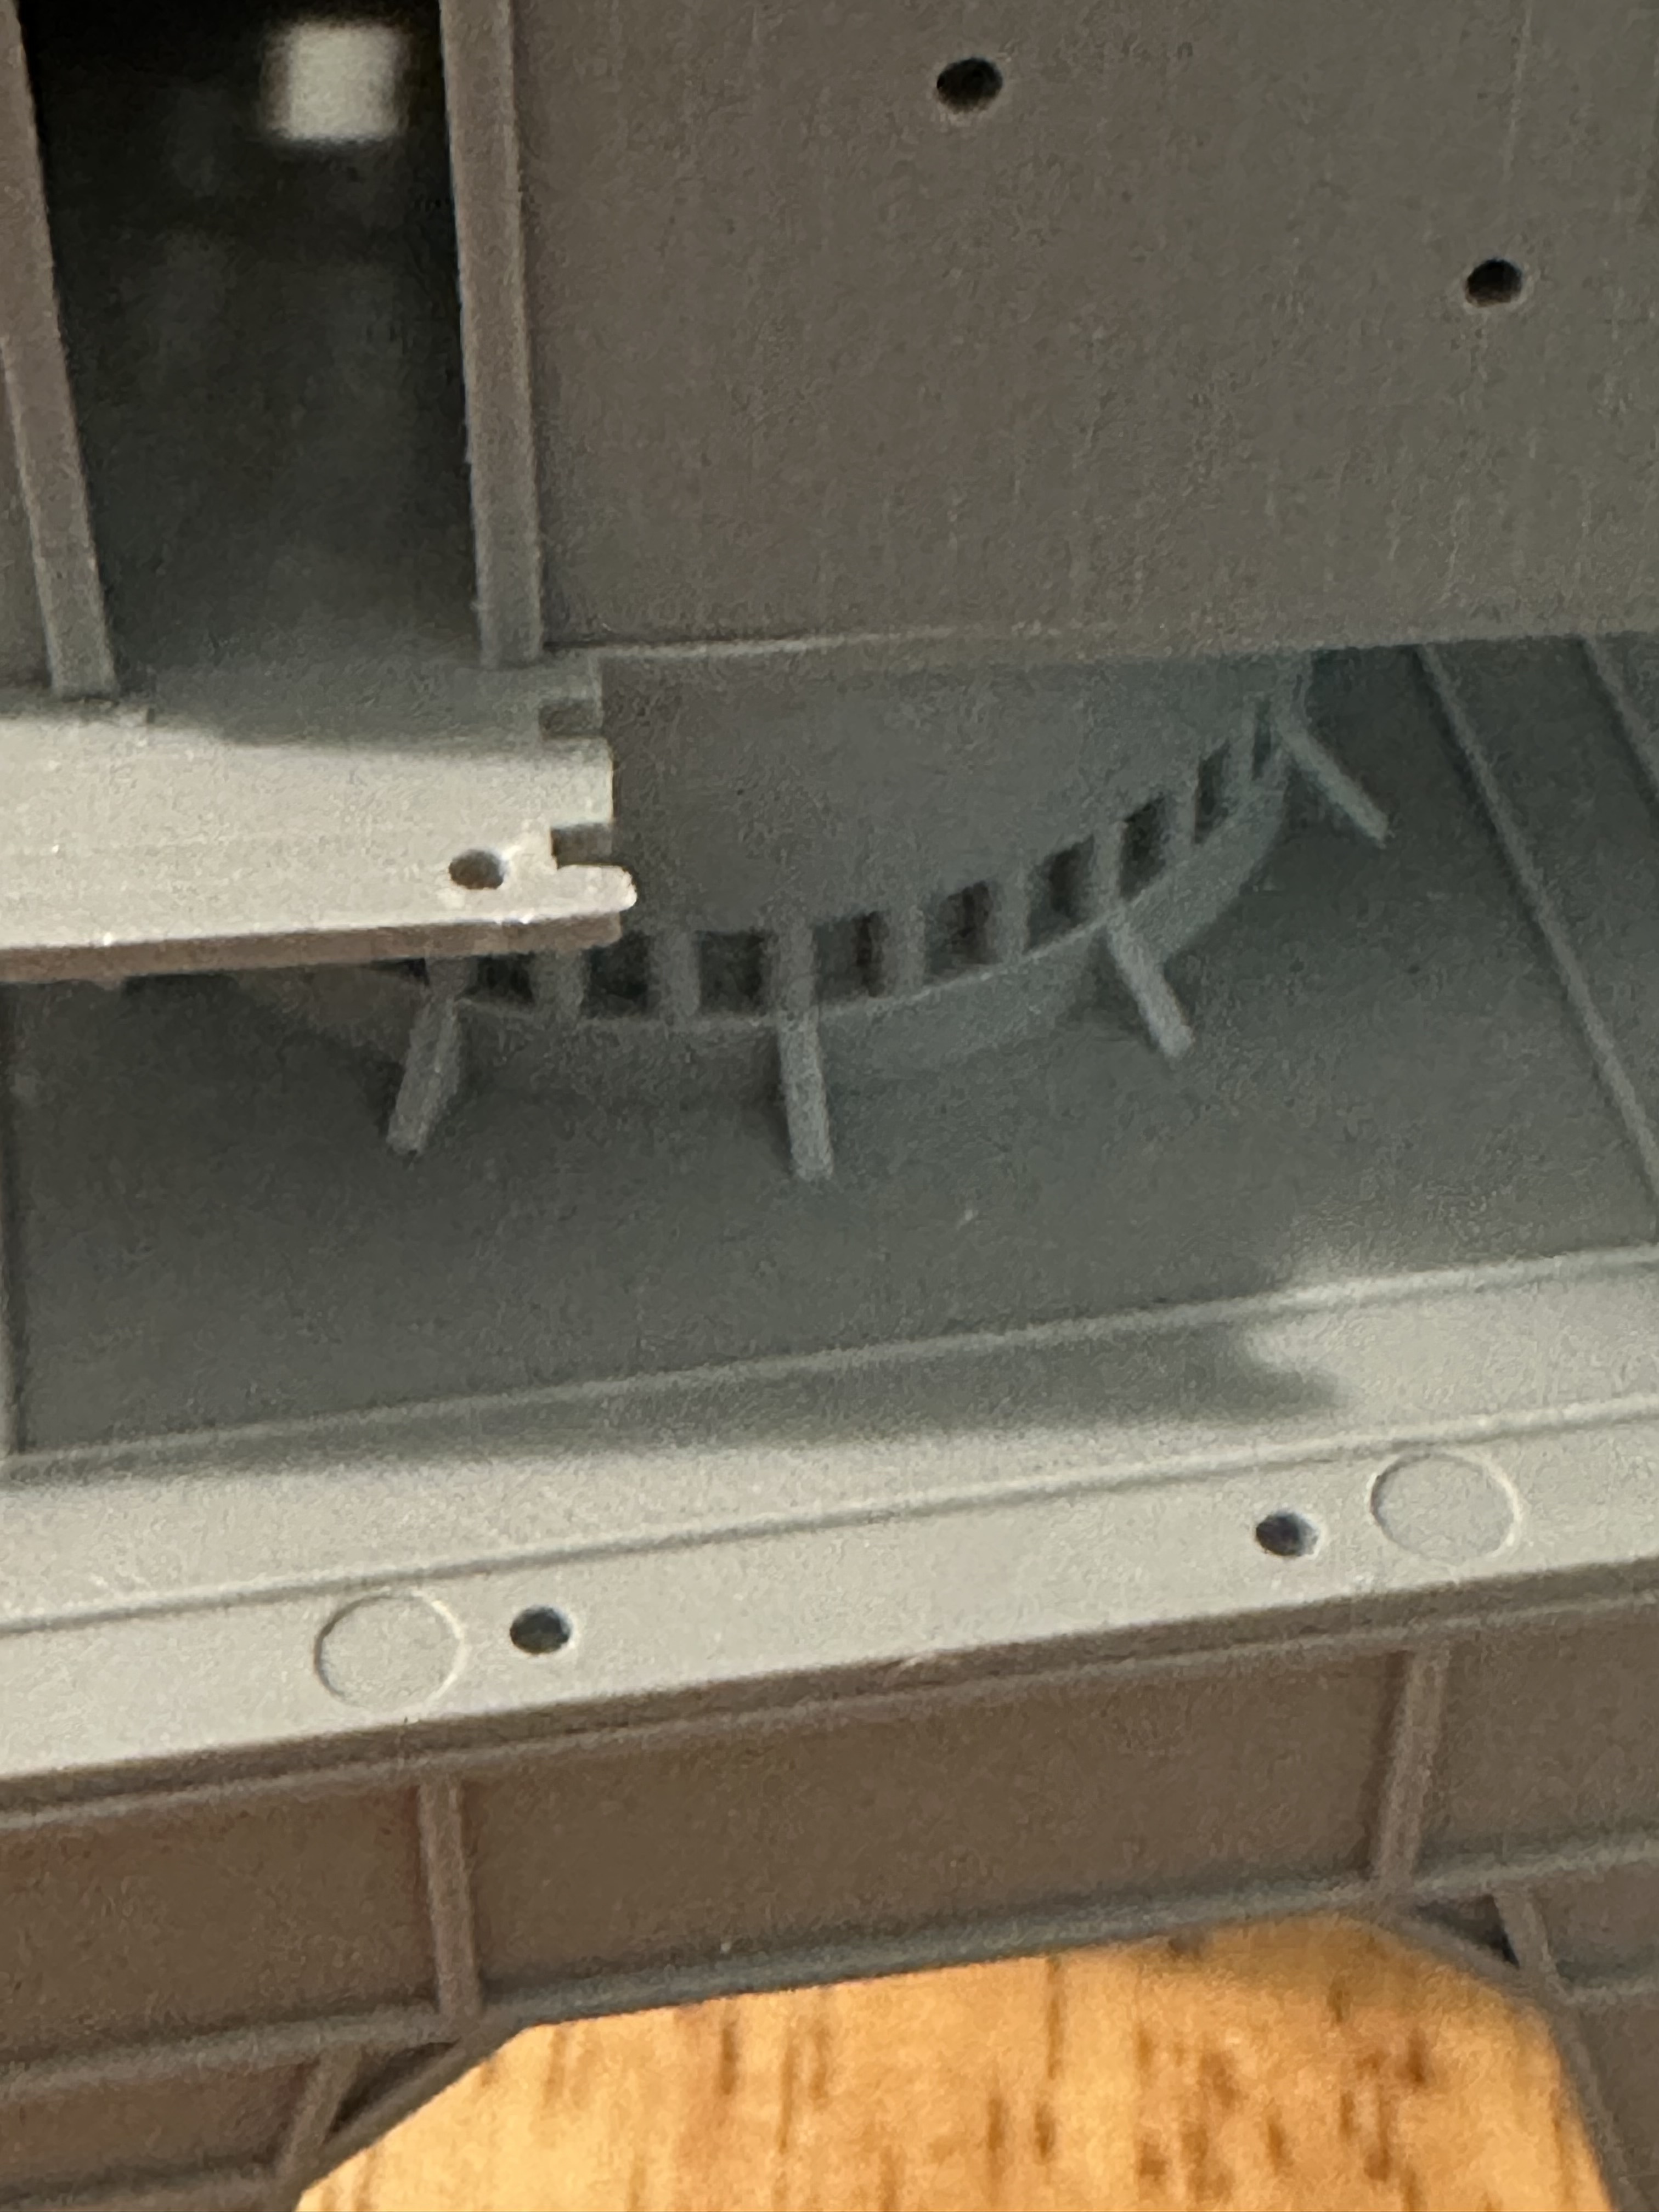
This photo shows the large pipes comint off of the main induction valve that I want to portray underneath the wooden deck - by making individual planks that can be seen through but also by removing a few sections of it.
5 Likes
In my best Jim Gaffigan voice:
When is this guy going to stop posting photos from the interweb and get on with it?
I get it. I’ve spent the last week collecting photos. If you enter submarine dry dock or Gato dry dock, or any similar combination of words into a search, the results are not very useful.
But if you look up images for every one of the seventy-seven Gatos built, and one hundred-twenty Balao class boats, suddenly the results are almost overwhelming. I think I may have enough now.
So time to get back to it. I’ve installed my inner pressure hull. It will be visible in several locations-more on that later. It would have been ridiculously easy to get to this point had I not installed the bulkheads into the outer hull years ago,
I had to remove the end of the outer hull to slide the PVC in, and even then it was tight. All the better - it’s very secure. Now for reinforcement ribs around the pressure hull and inside the outer hull.
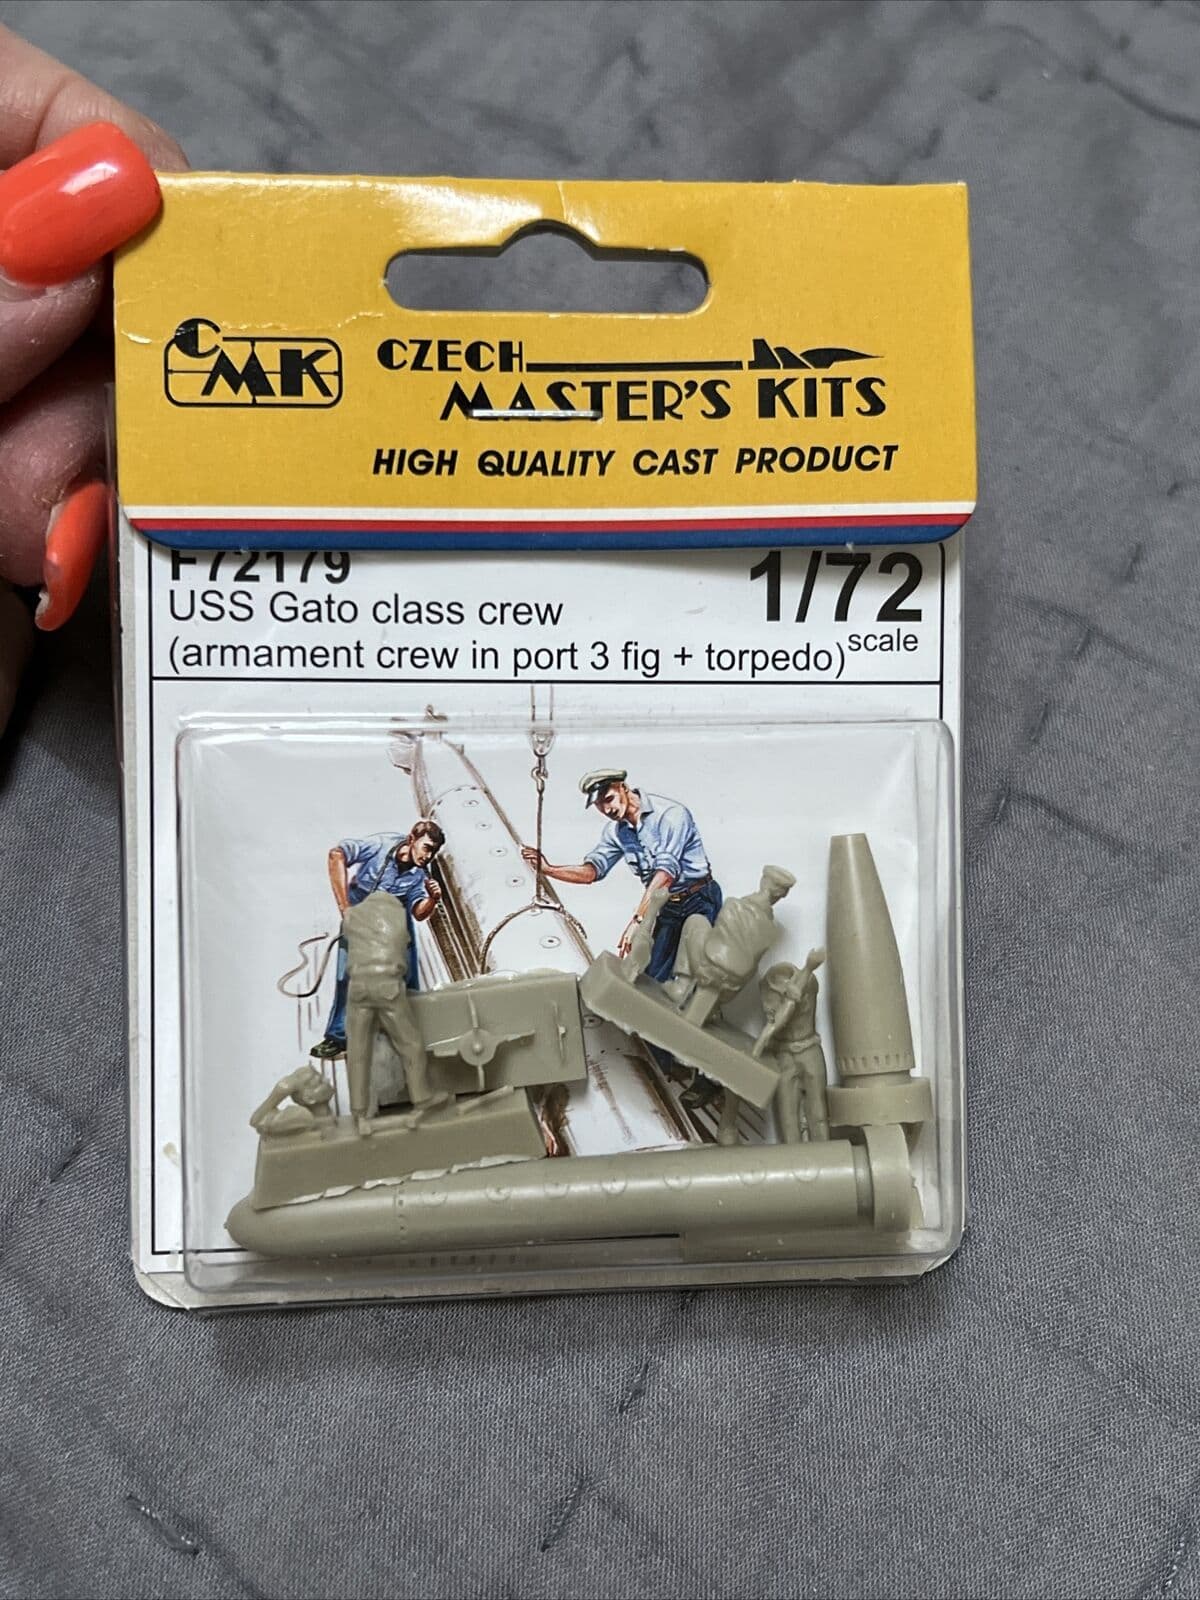
I’m also excited to have found a torpedo. It comes with the CMK Gato armament crew, And by the looks of it it’s the Mk 18, which is good for the late war period. They were slower, but were more reliable and didn’t leave a huge bubble trail like the Mk 14.
7 Likes
And your nails are looking good Rob ! 
5 Likes
That’s the eBay seller. Everyone knows I do mine in black.
7 Likes
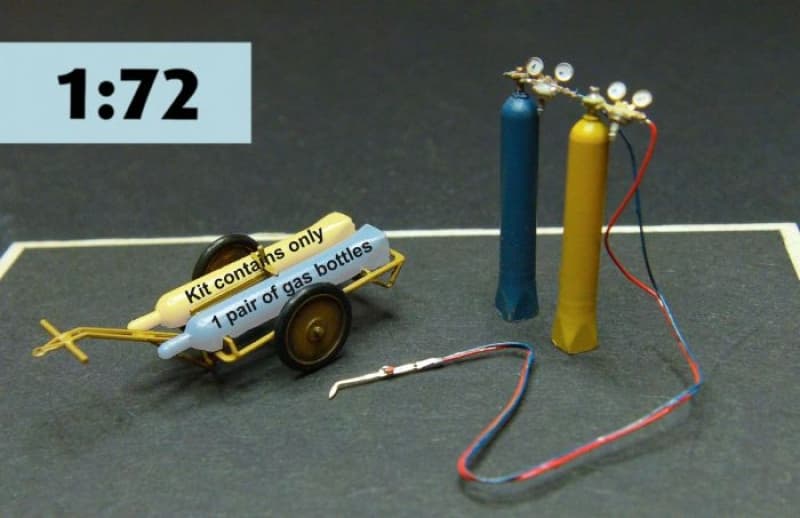
Thank God I found this:
It’s light years ahead of the only other option I could find. Sometimes 3D printing just won’t cut it
5 Likes
Still gathering up the courage to hack into the deck of the kit. There are three sections - two are covered with steel plating and one is covered with teakwood planking. It all has to go if I’m to show any of the work between the deck and the pressure hull.
In the meantime I’m still working on other project within a project. I’ve always been of the belief that a large diorama should be more than a collection of German tanks clustered way to closely together in a French village while their officers play chess and drink wine.
The theme of mine is simple - a Gato comes in from a war patrol with obvious depth charge damage, which the Flasher endured more than once, and needs to be repaired, along with being refitted with new SV radar and weaponry. So there will be small vignettes within the larger diorama as a whole, and that’s where I’m devoting my energies of late.
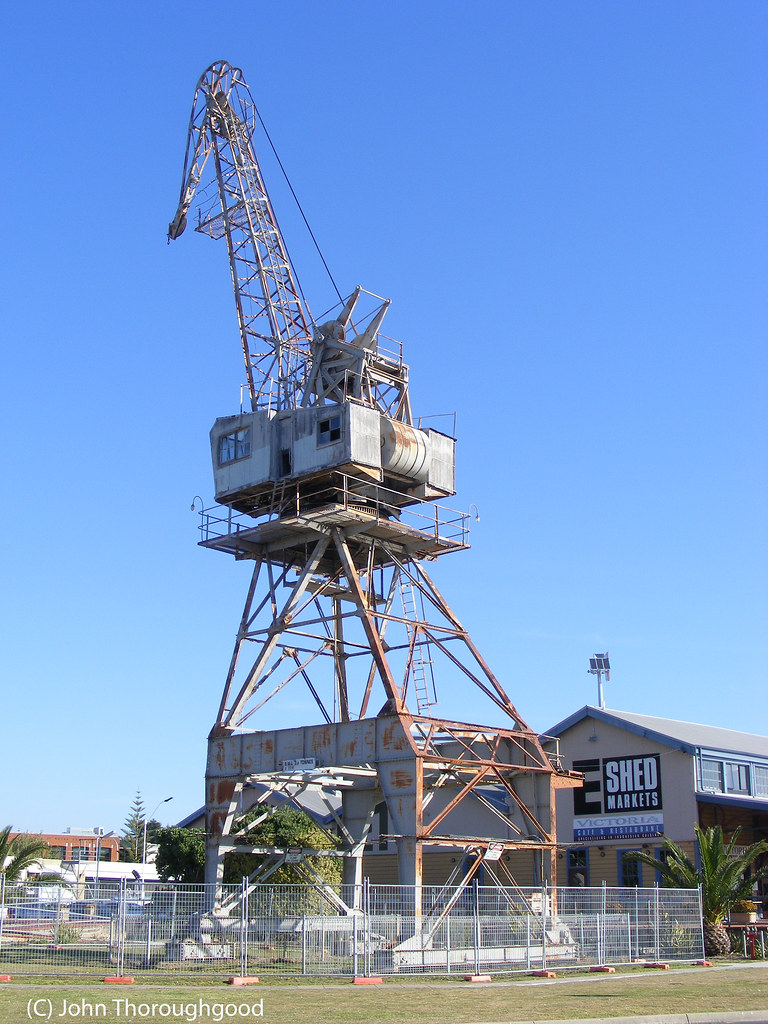
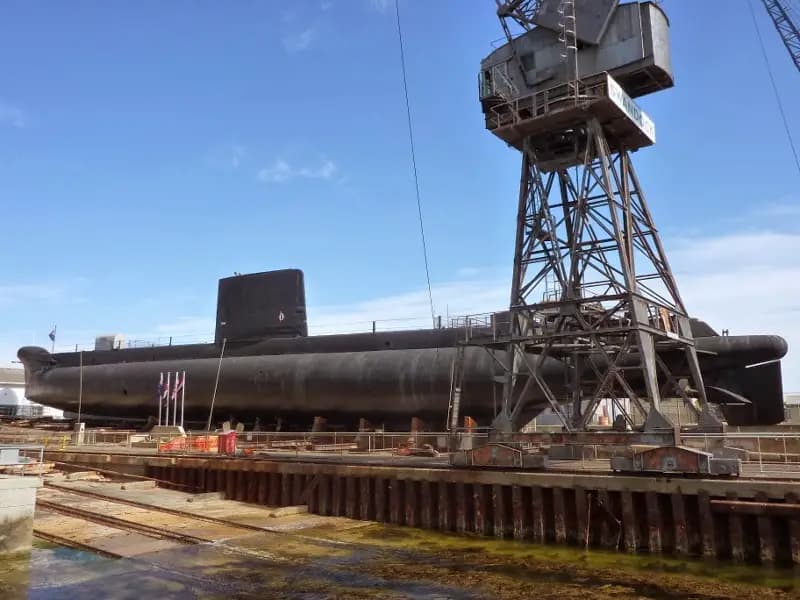
My Mk 18 torpedos have not yet arrived, nor my wheeled vehicles, so I’ve decided to work on the dockside crane. I found a very nice photo of one actually used at Fremantle. I surmised that a UK dockside crane would be similar in design to one in WA. Here’s the real thing:
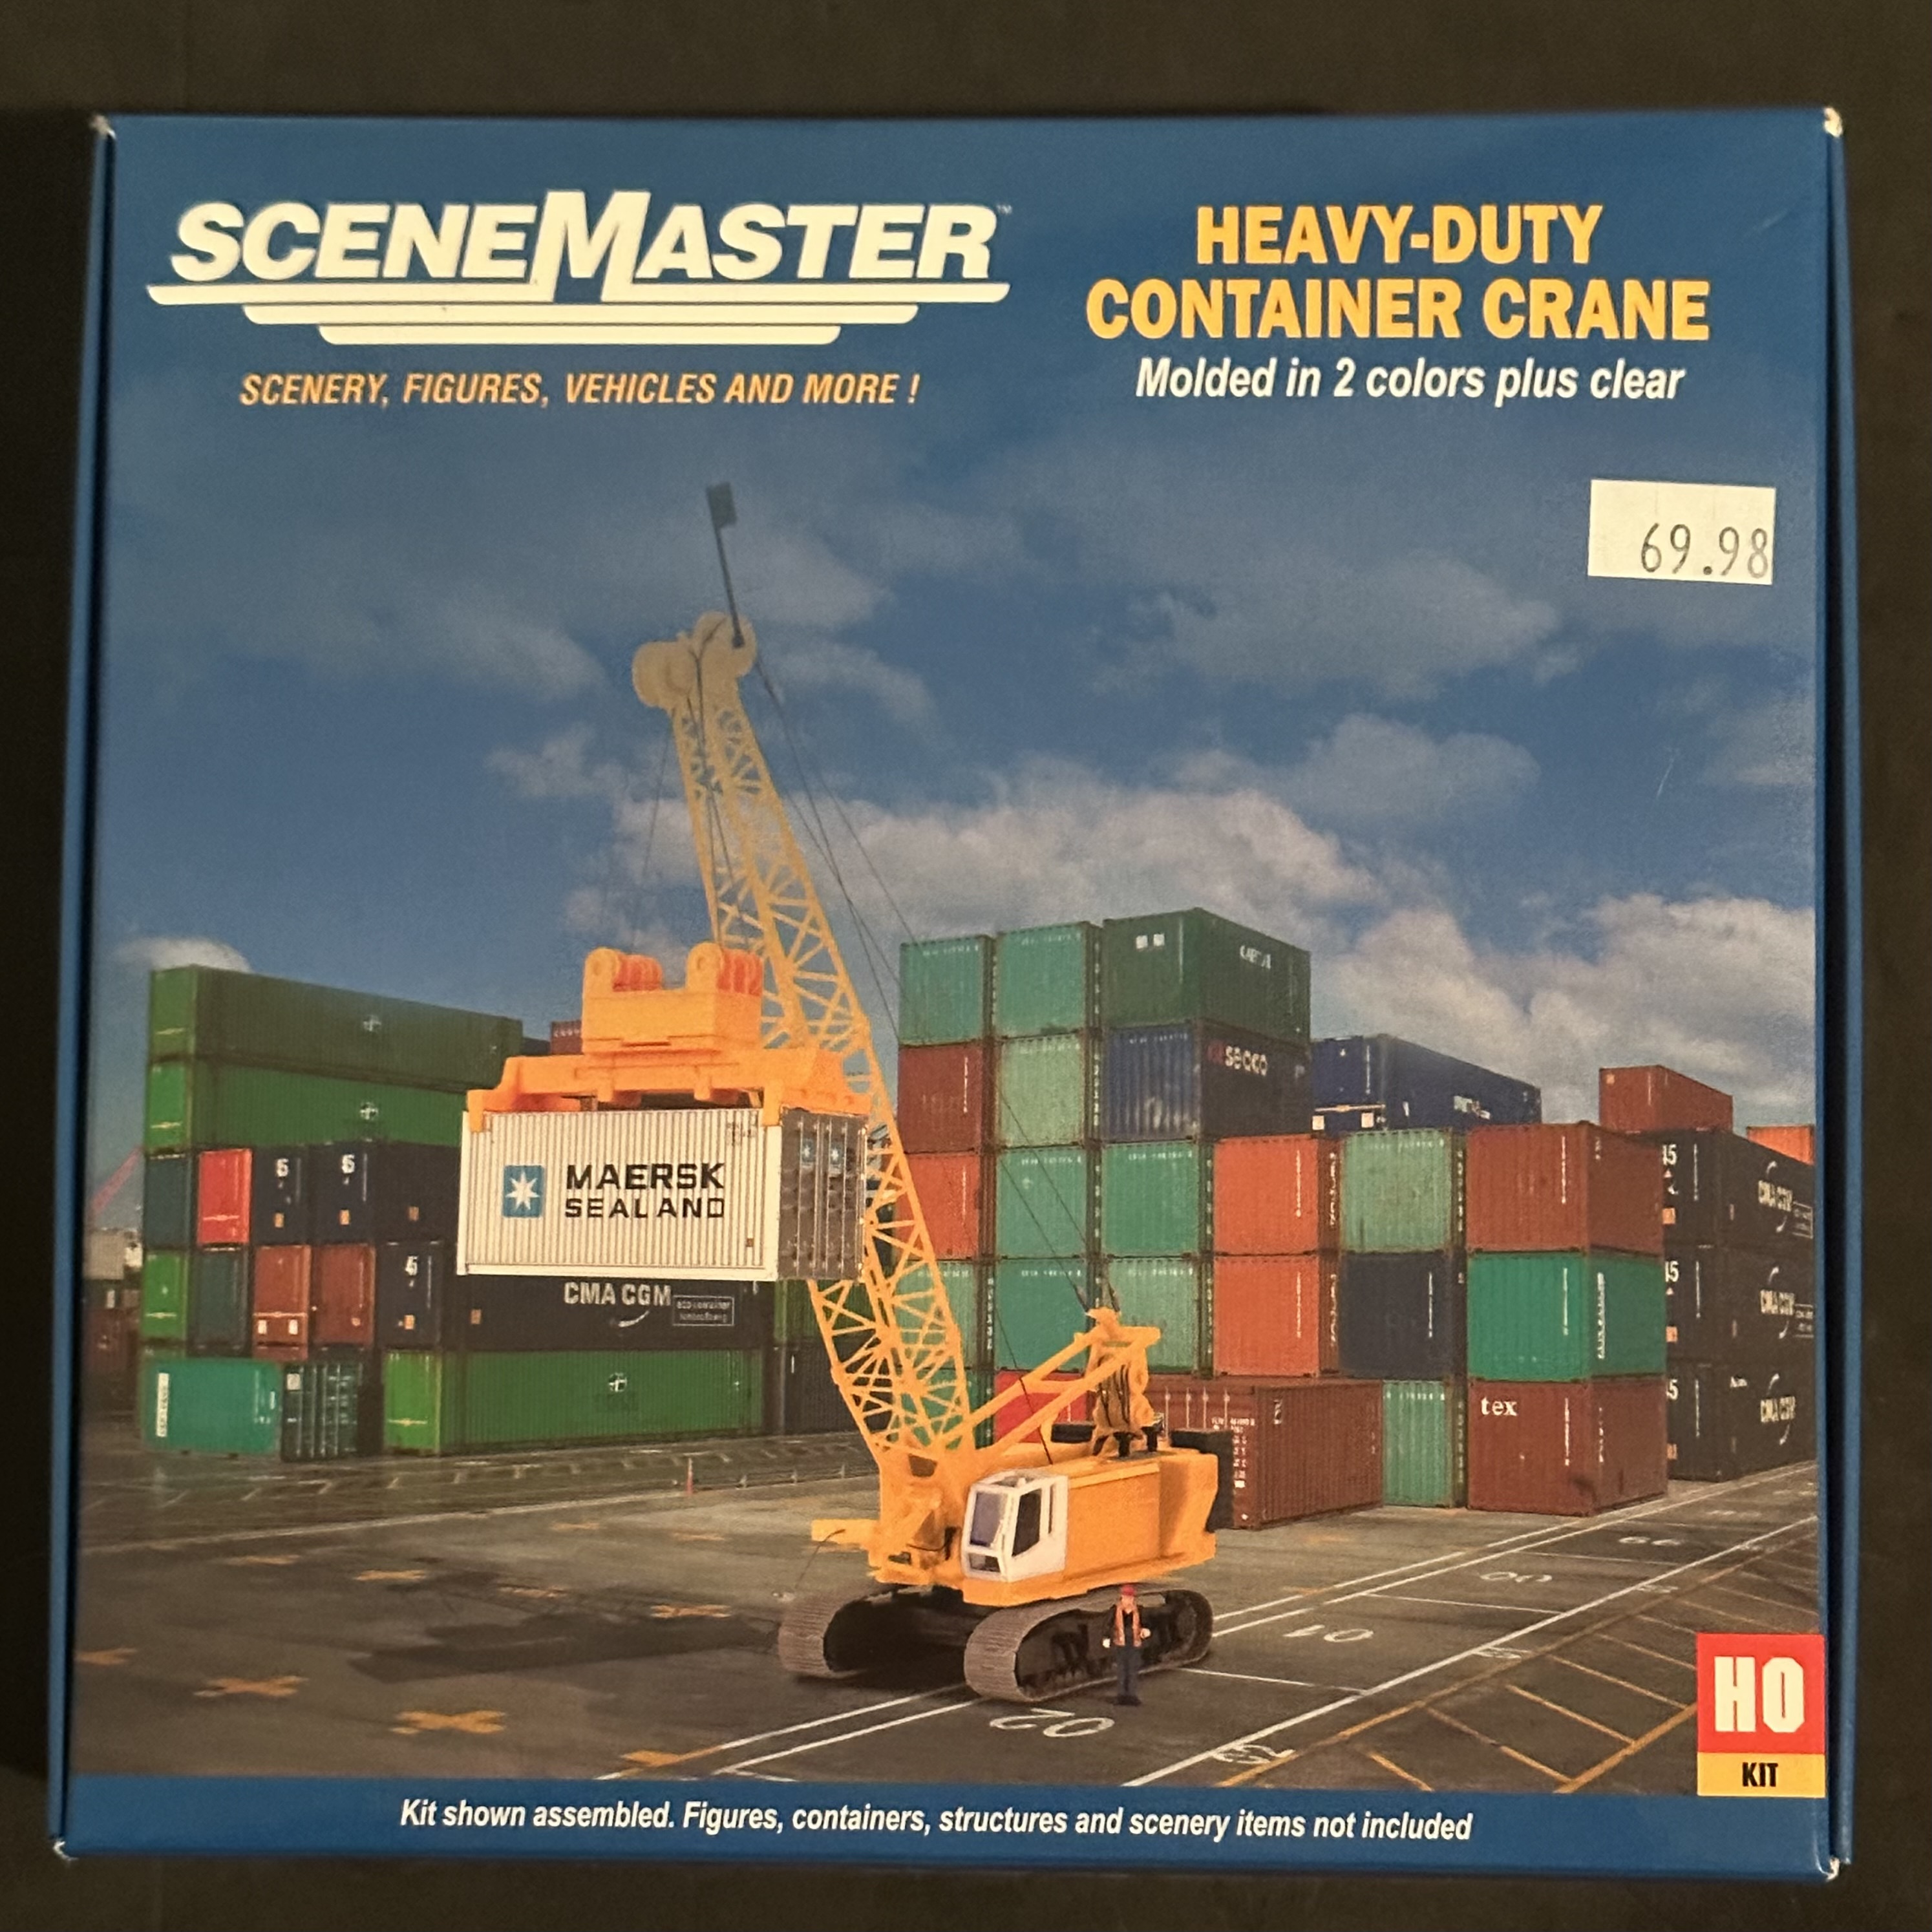
Here’s the kit I found:
The scale is listed as HO/OO. Since OO is 1/76 scale I figure it’ll work for 1/72, especially if I use a little forced perspective. You can see that the lower portion is strikingly similar to the one at Fremantle.
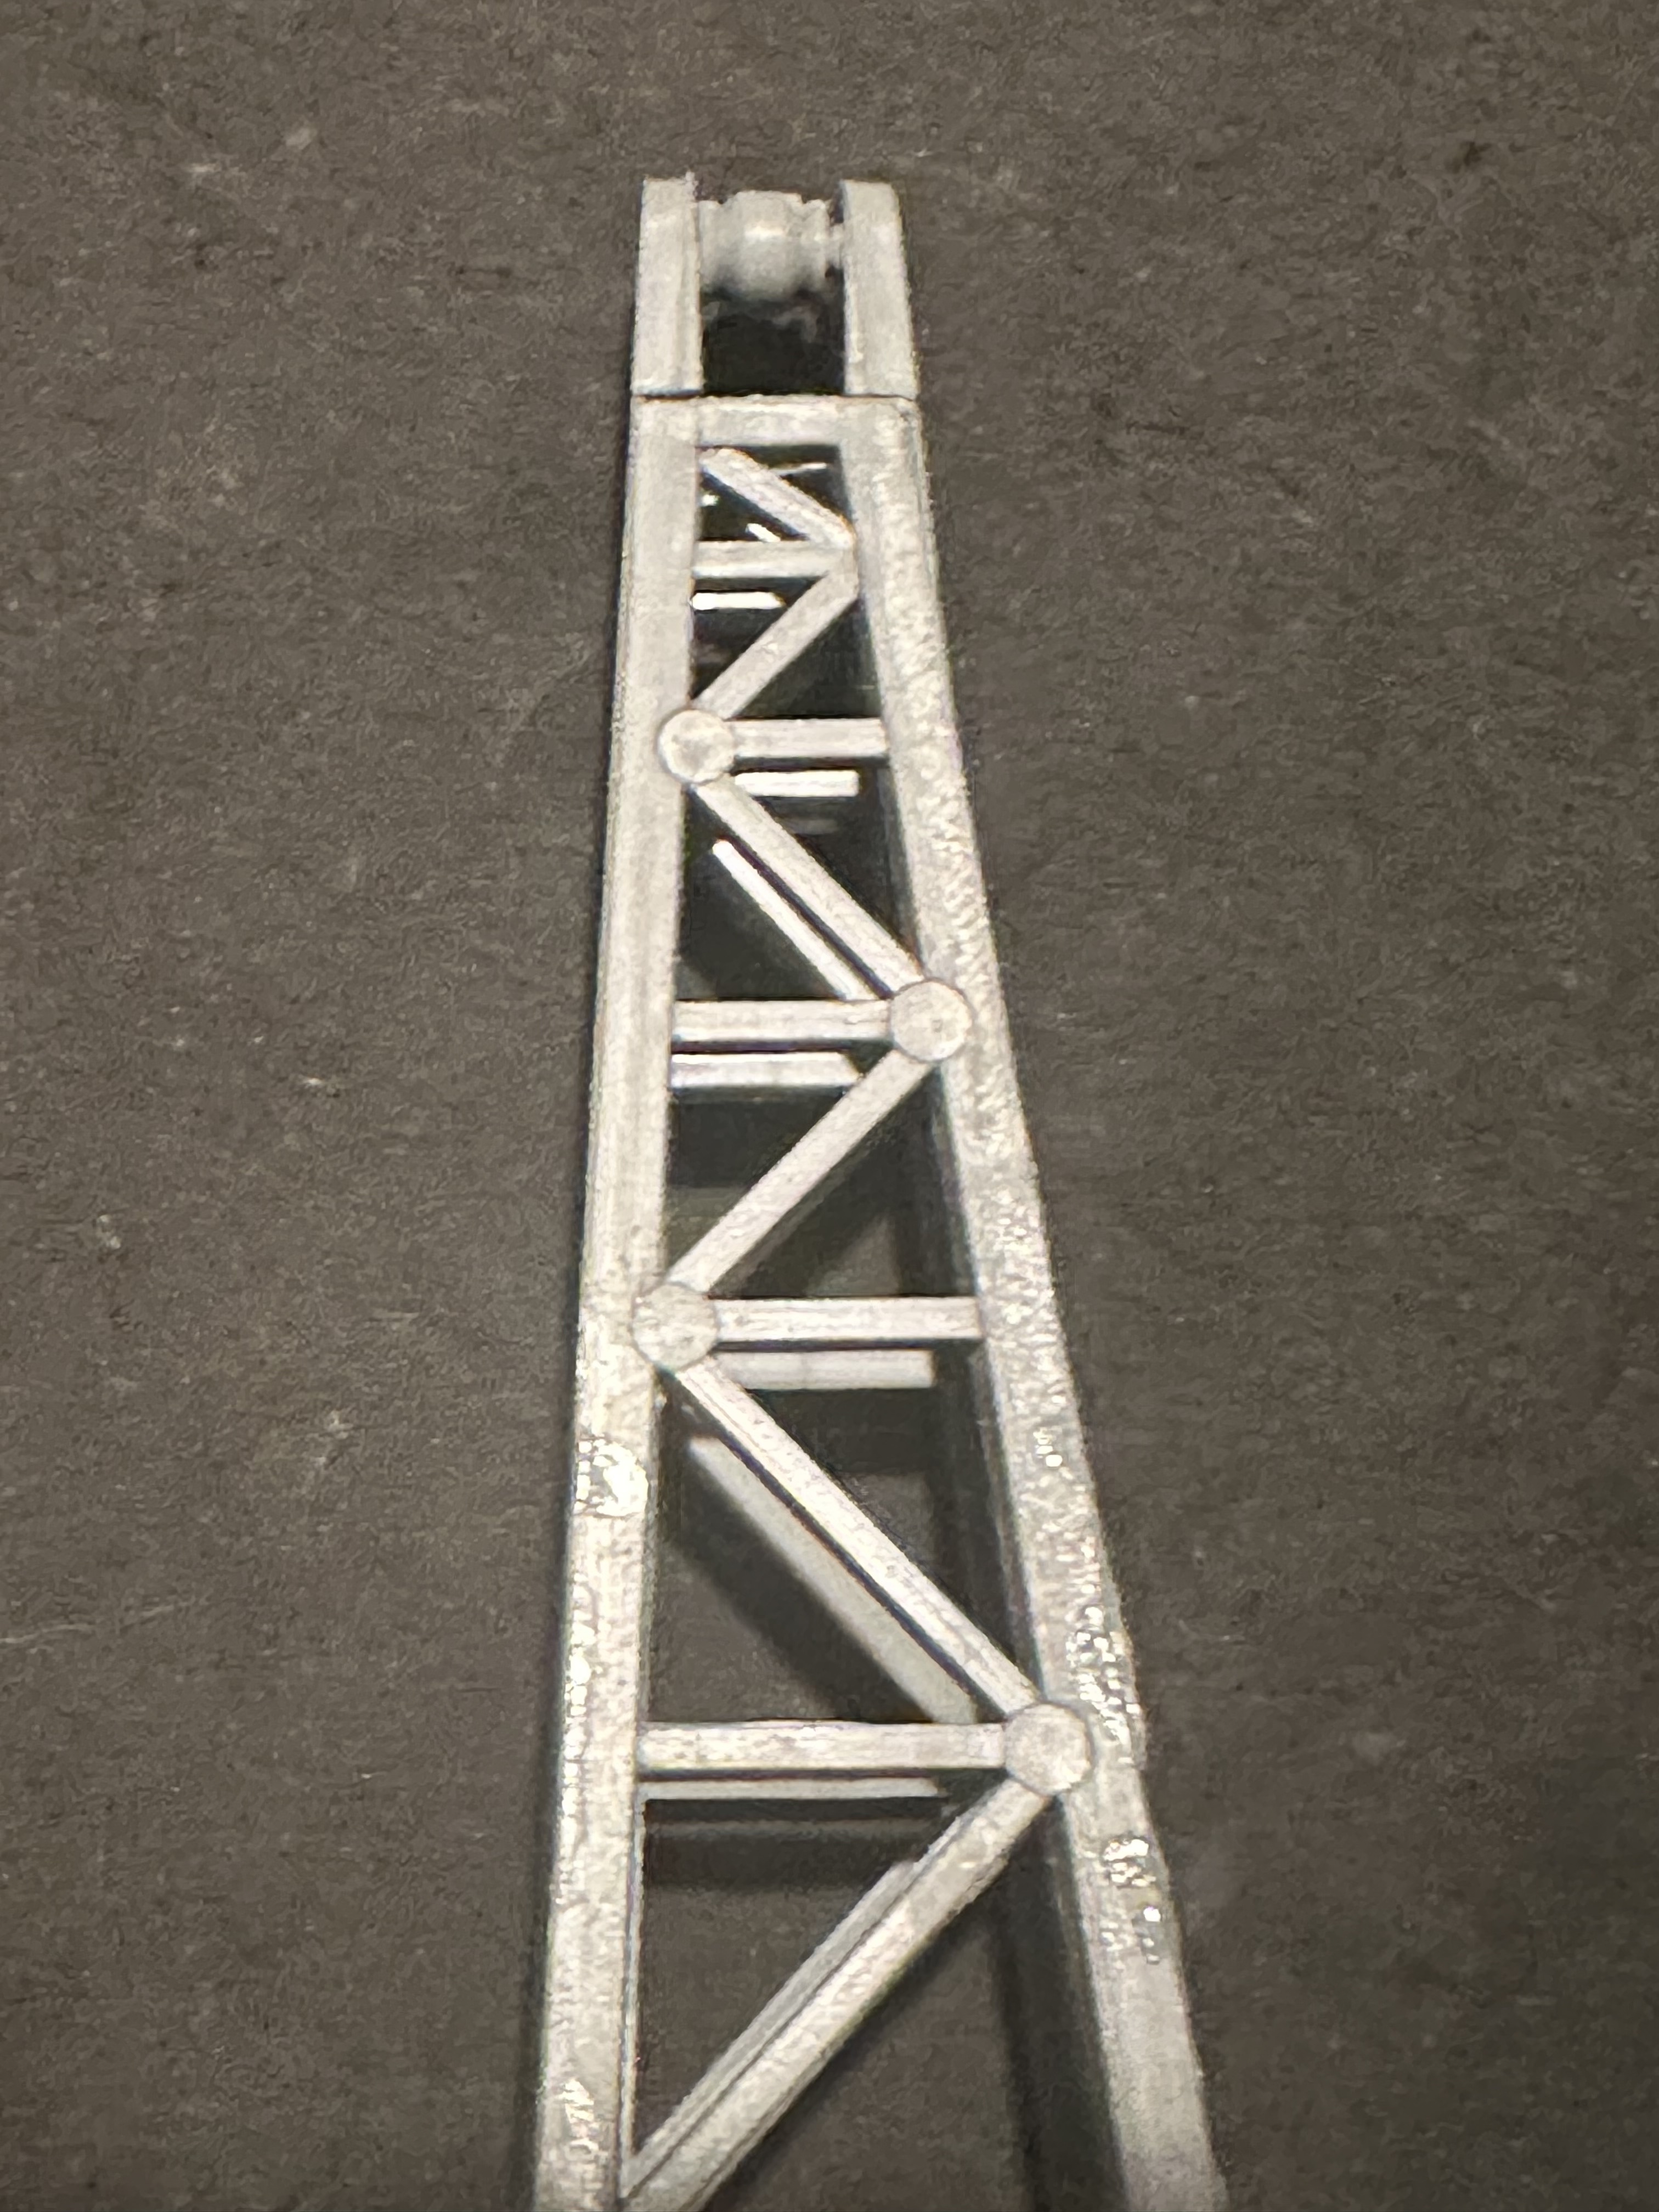
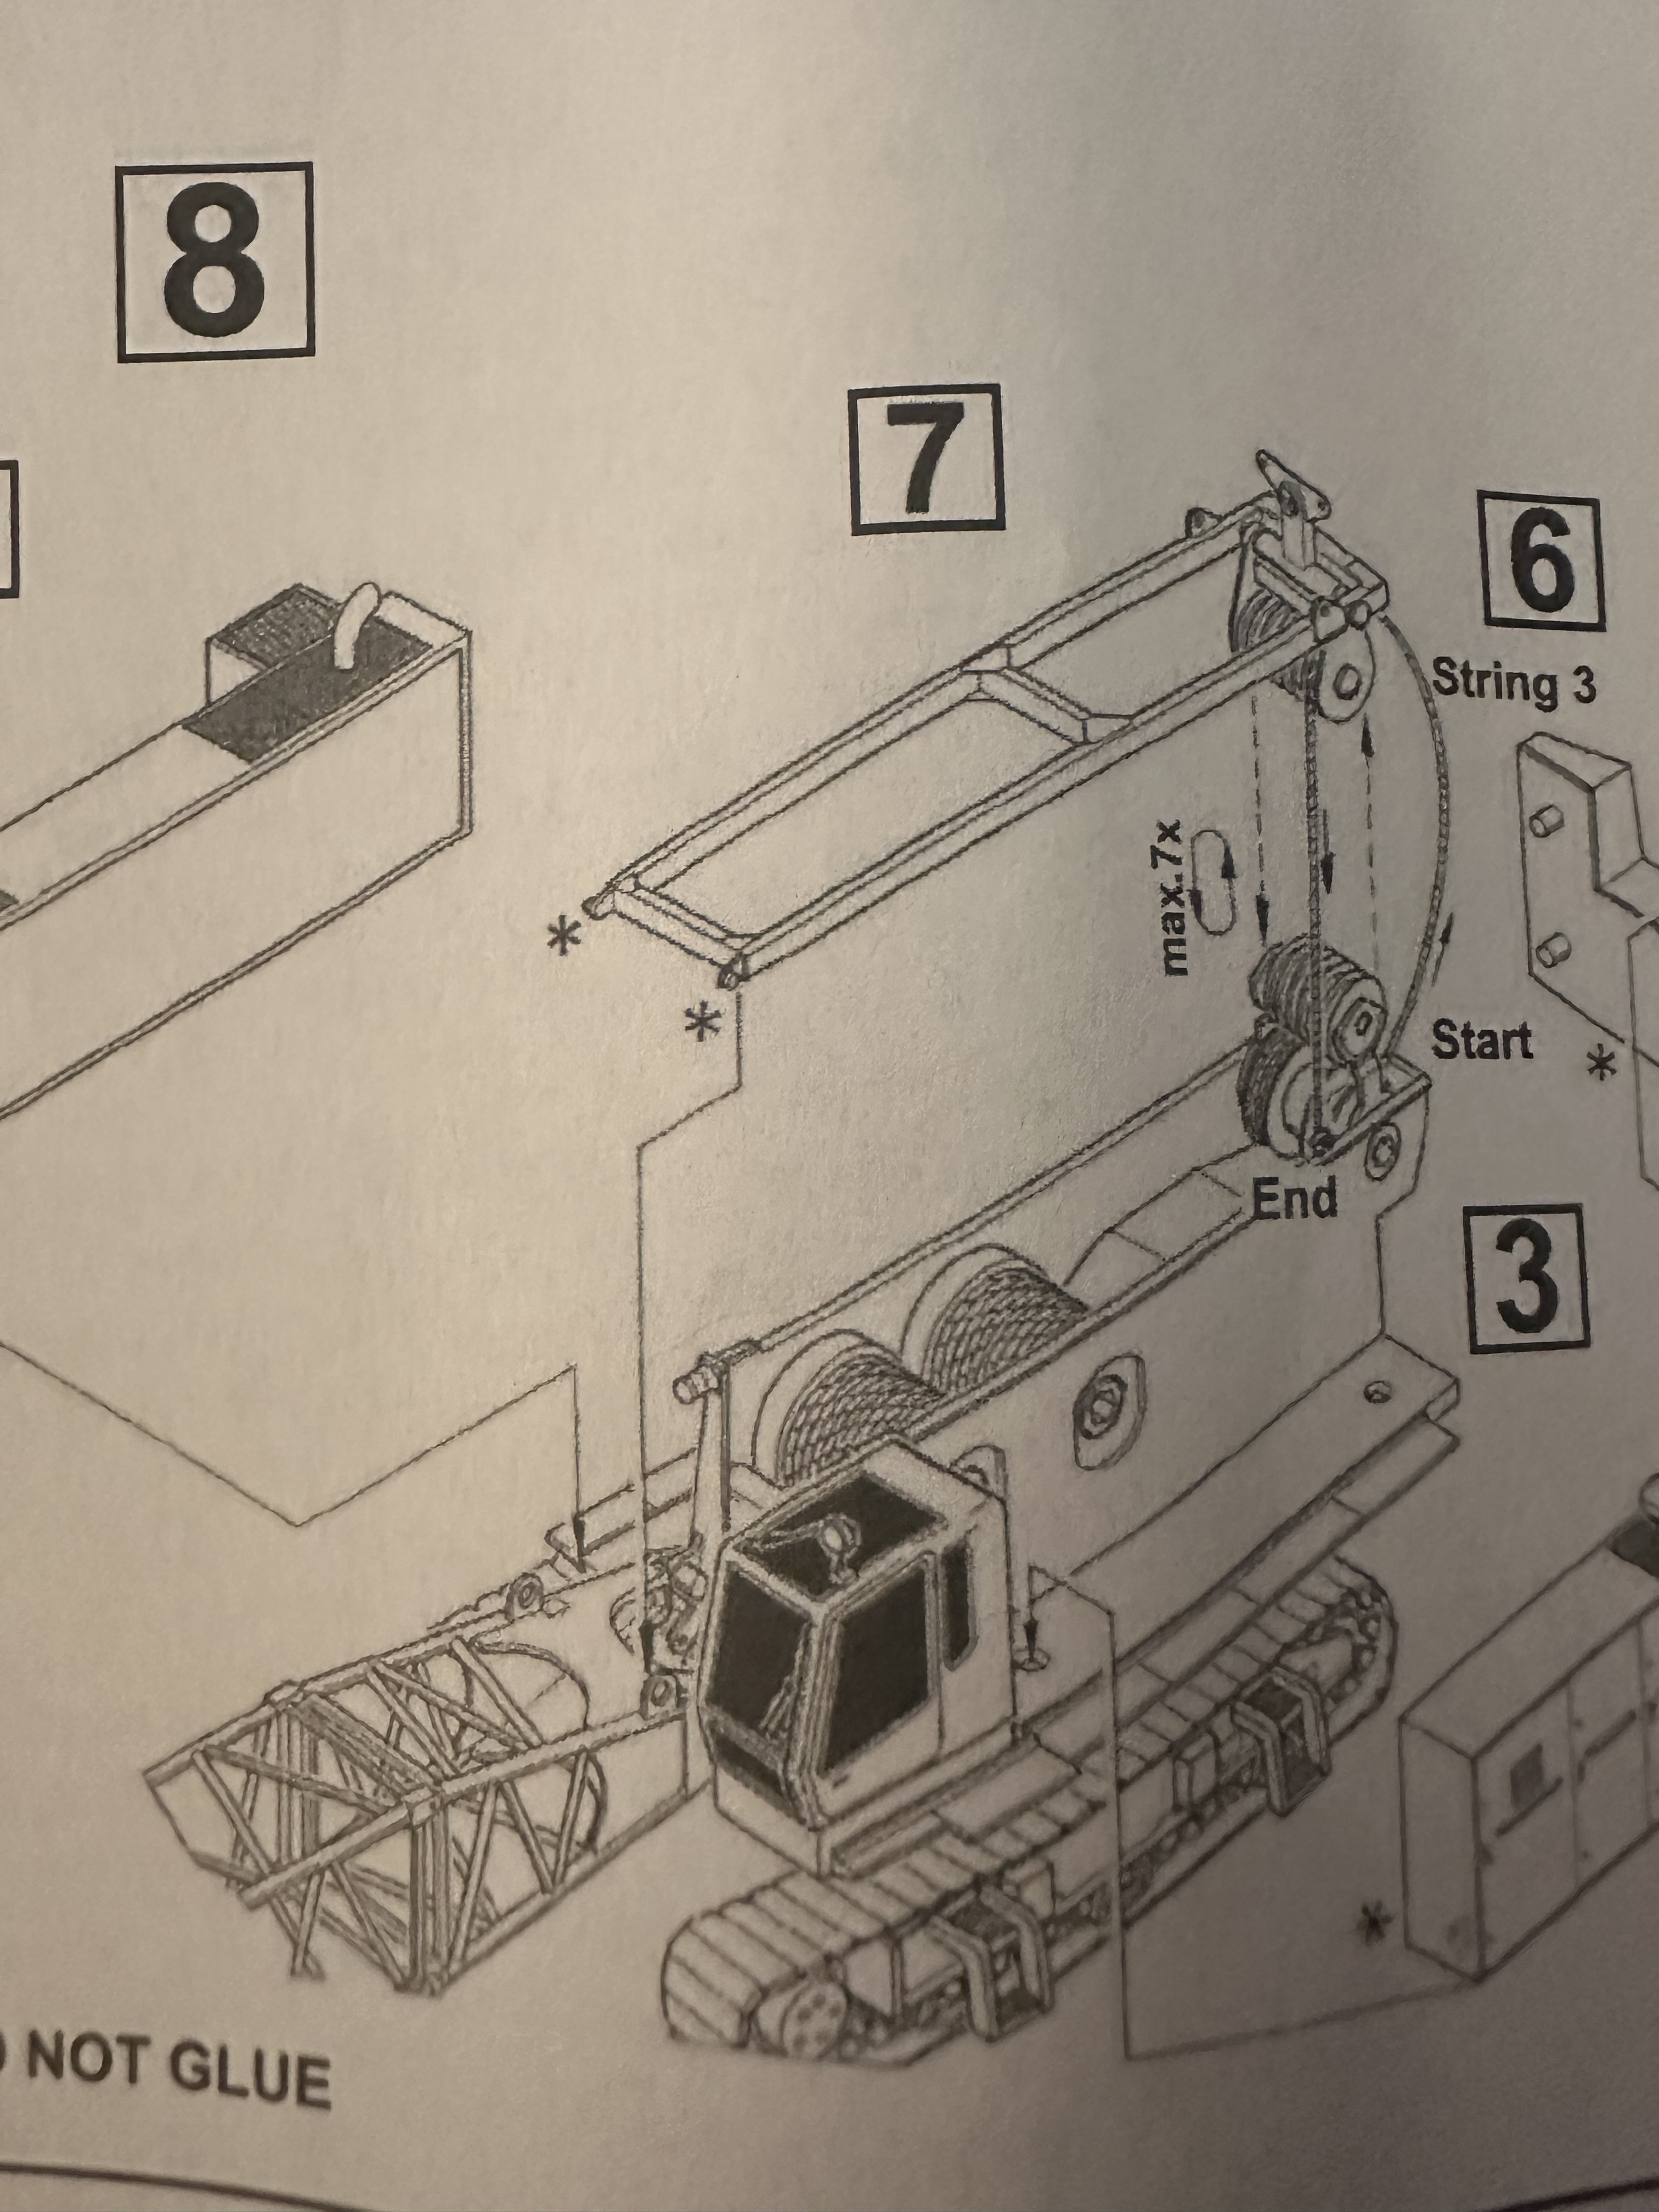
The kit arrived around noon. They tell you in the instructions that the tooling is over fifty years old. I believe it may have been an old Airfix kit. It’s quite basic, meaning it takes quite basic modeling skills to build it. That was certainly the case. With all of he mitered joints, removing the sprue gates completely was paramount. Even with the care I took, there were problems with the boom as all four parts were severely warped, They even warned about it the in the instructions and advised to use warm water, which I knew from experience does not work. Just a lot of patience and holding parts together while I watch Chinese dramas on Netflix.
By three I’m at this point. The kit suffers from knock out pin marks in the most unfortunate locations, and it seems they could have been avoided, I can fix most them. The ones on the top of the rectangular base I’ll just hide with strips of Evergreen to simulate wooden planking.
All in all I’m pretty pleased with the kit. I’m certain it’s going to undergo some radical changes, but for now it gives me something to do. It’s all done save for the stanchions and the steps to the cab. I may add some interior detail and possibly a peaked roof. Maybe even a working exterior light to replace the one in the kit. (As seen in the stock photo in front of the cab)
6 Likes
This photo from Fremantle encourages me. I think I’m on the right path, even if the HMAS Ovens is a museum piece.
My enthusiasm from yesterday has dissipated somewhat after taking a better look at the boom. The knock out pin marks, and those windows -oof!
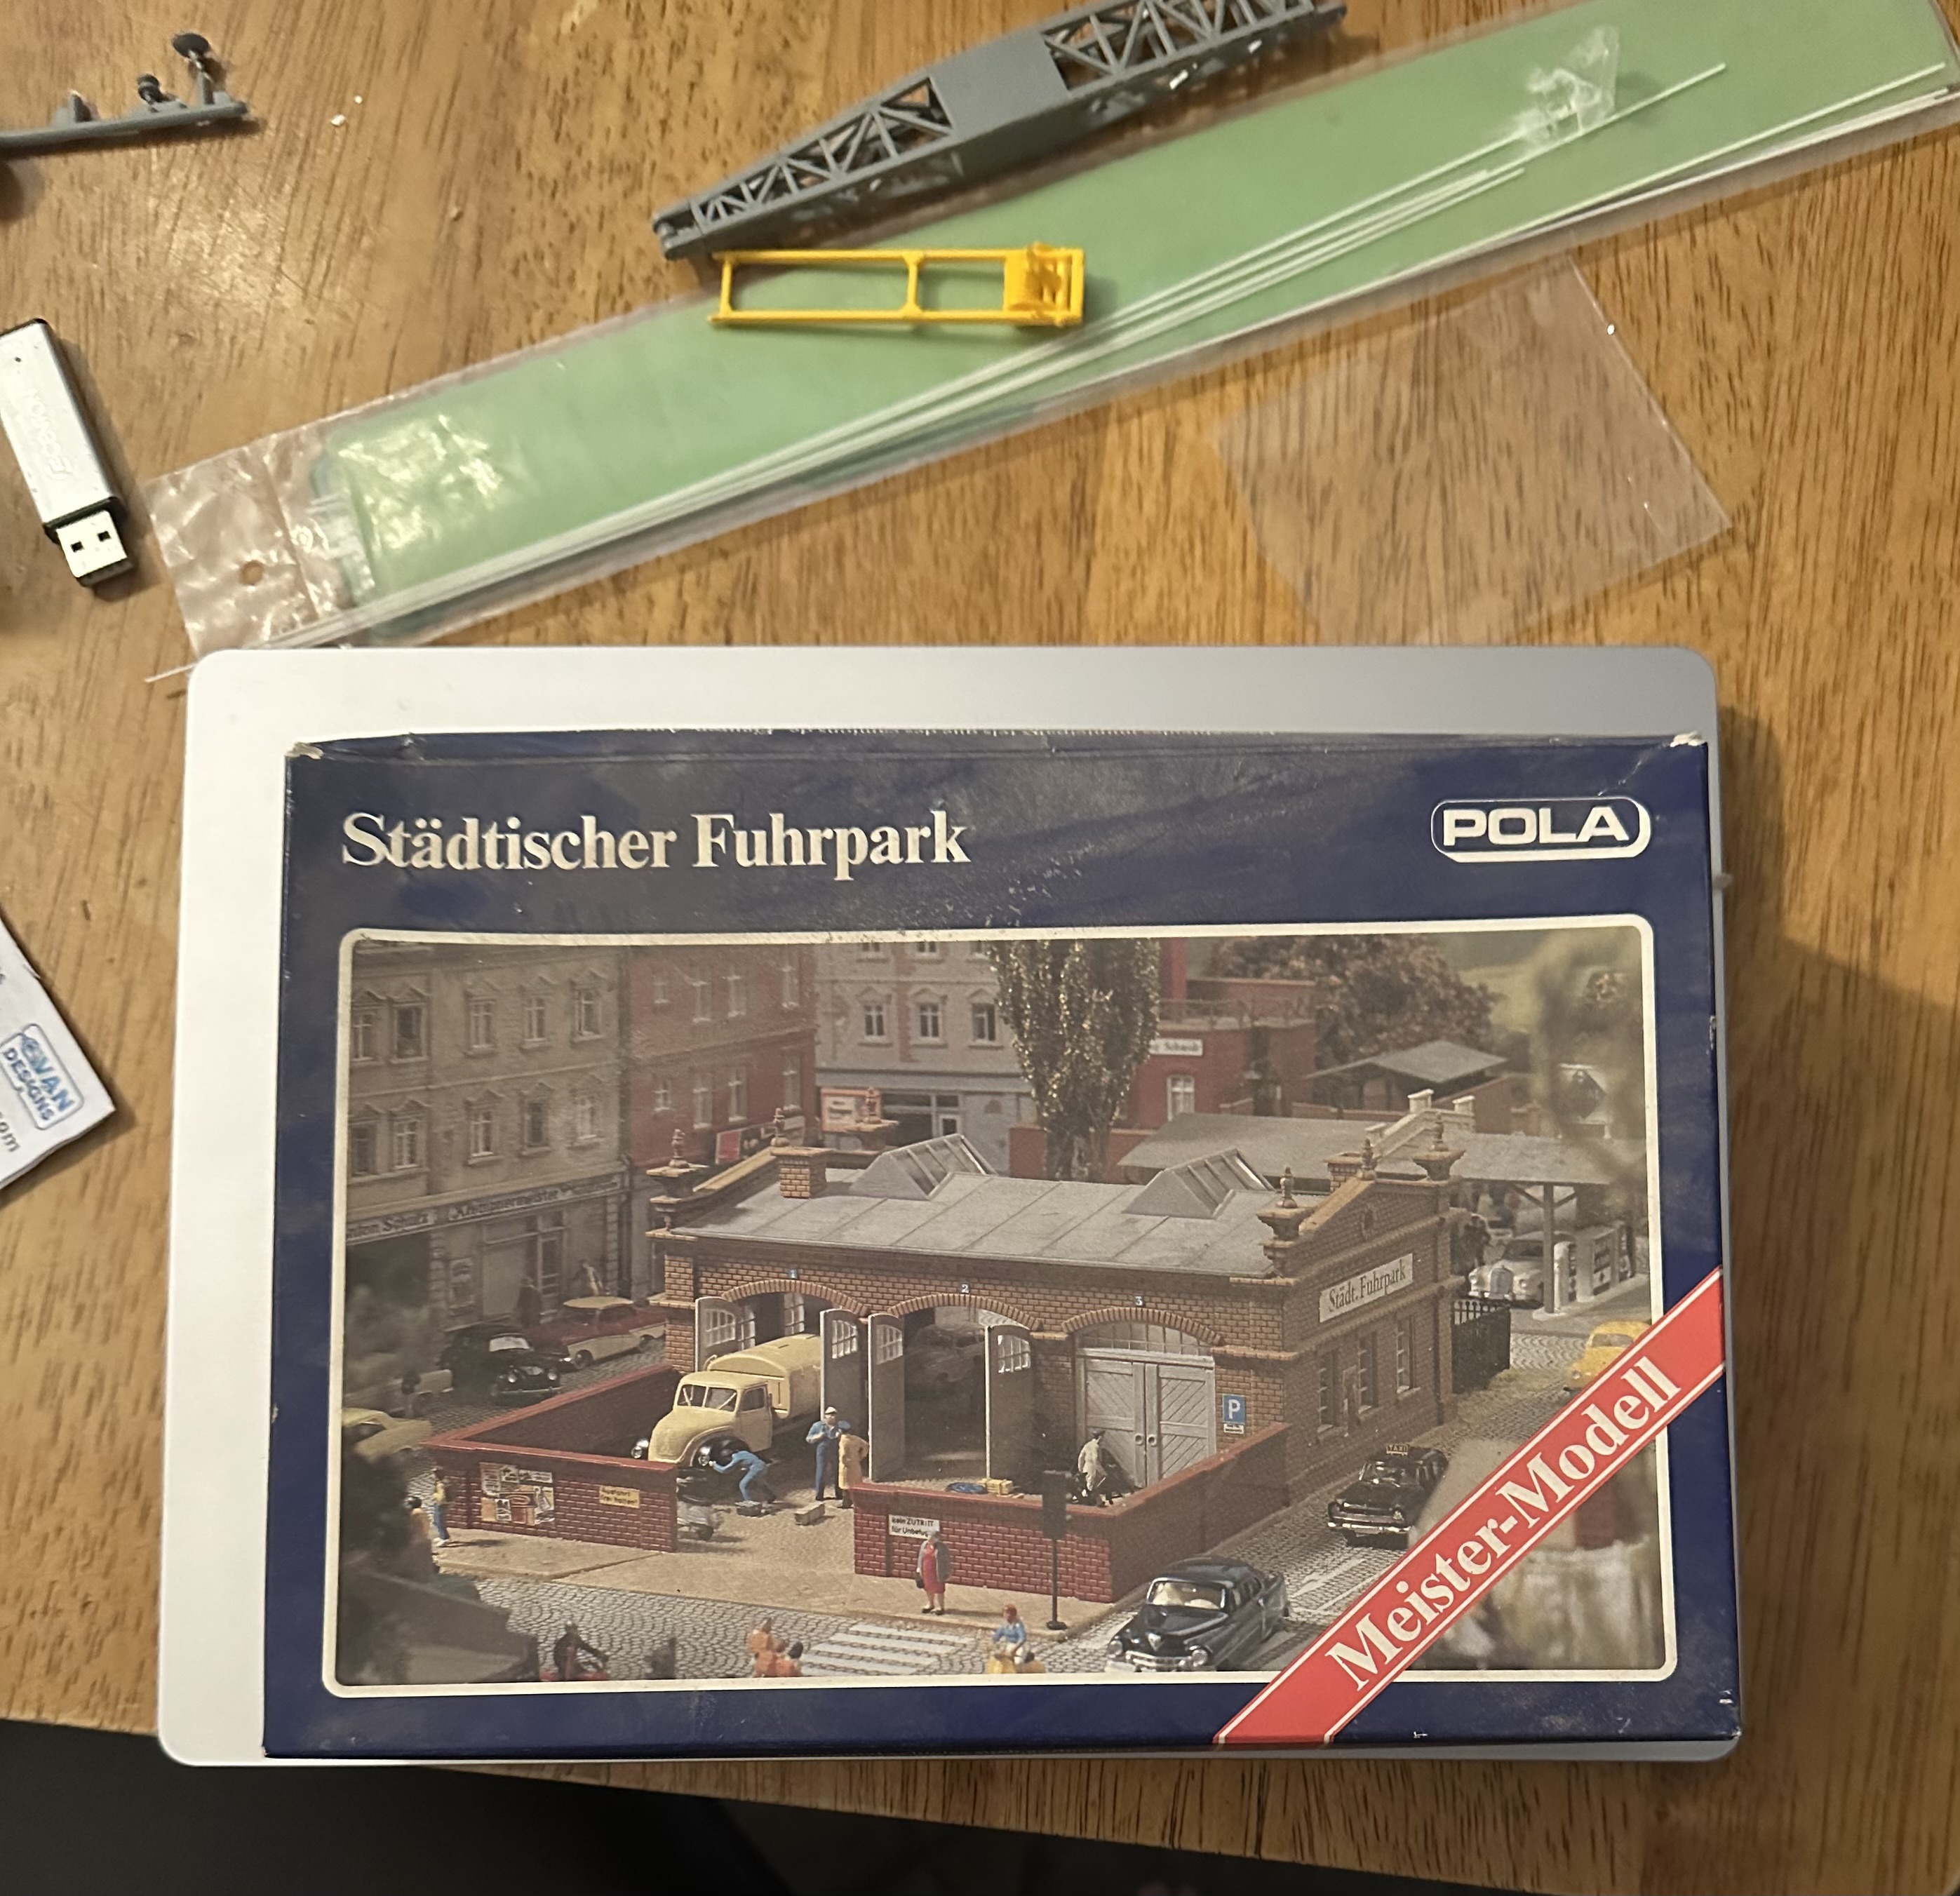
So…off to the local train shop get supplies, I figure I need six packages of .020x.030 Evergreen strips to replace the deck planking on the Gato. I bought his remaining five.
And then somewhere I heard Beethoven’s Ode an die Freude, and spotted this:
I’m determined to make it work.
My wallet is lighter by $75 and some change after taxes, but my happiness will last longer than a couple of lap dances would have.
5 Likes
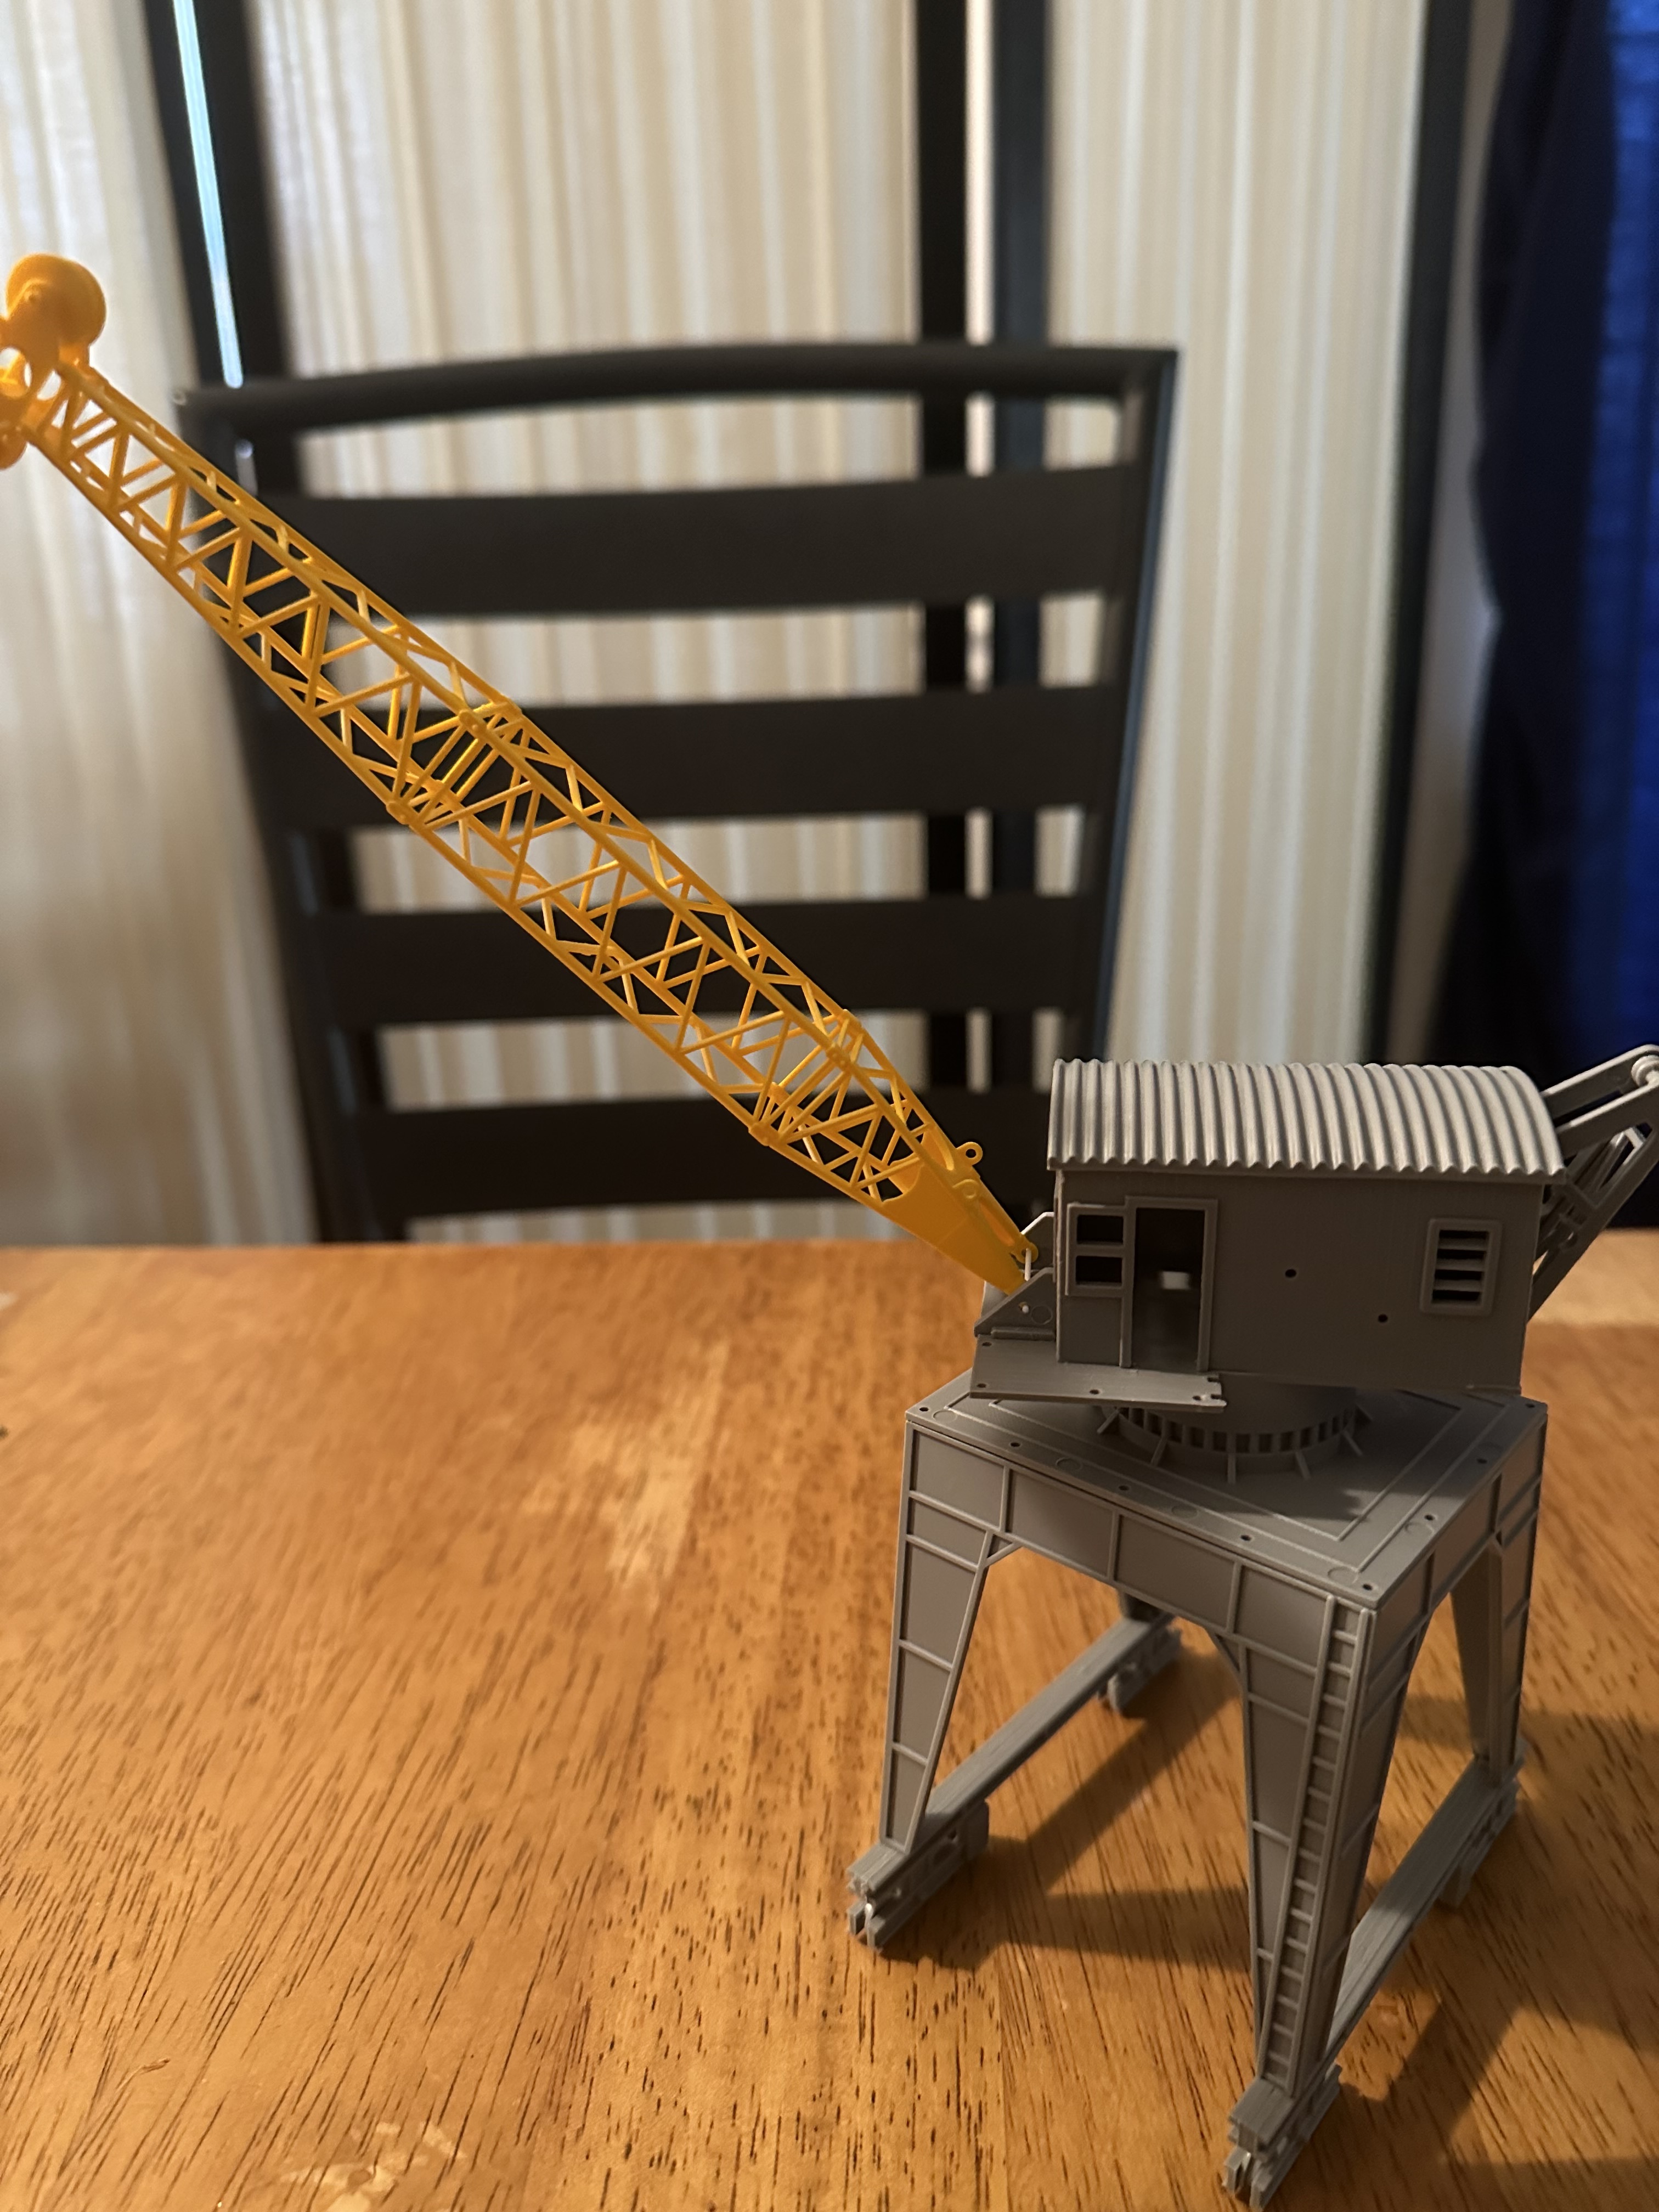
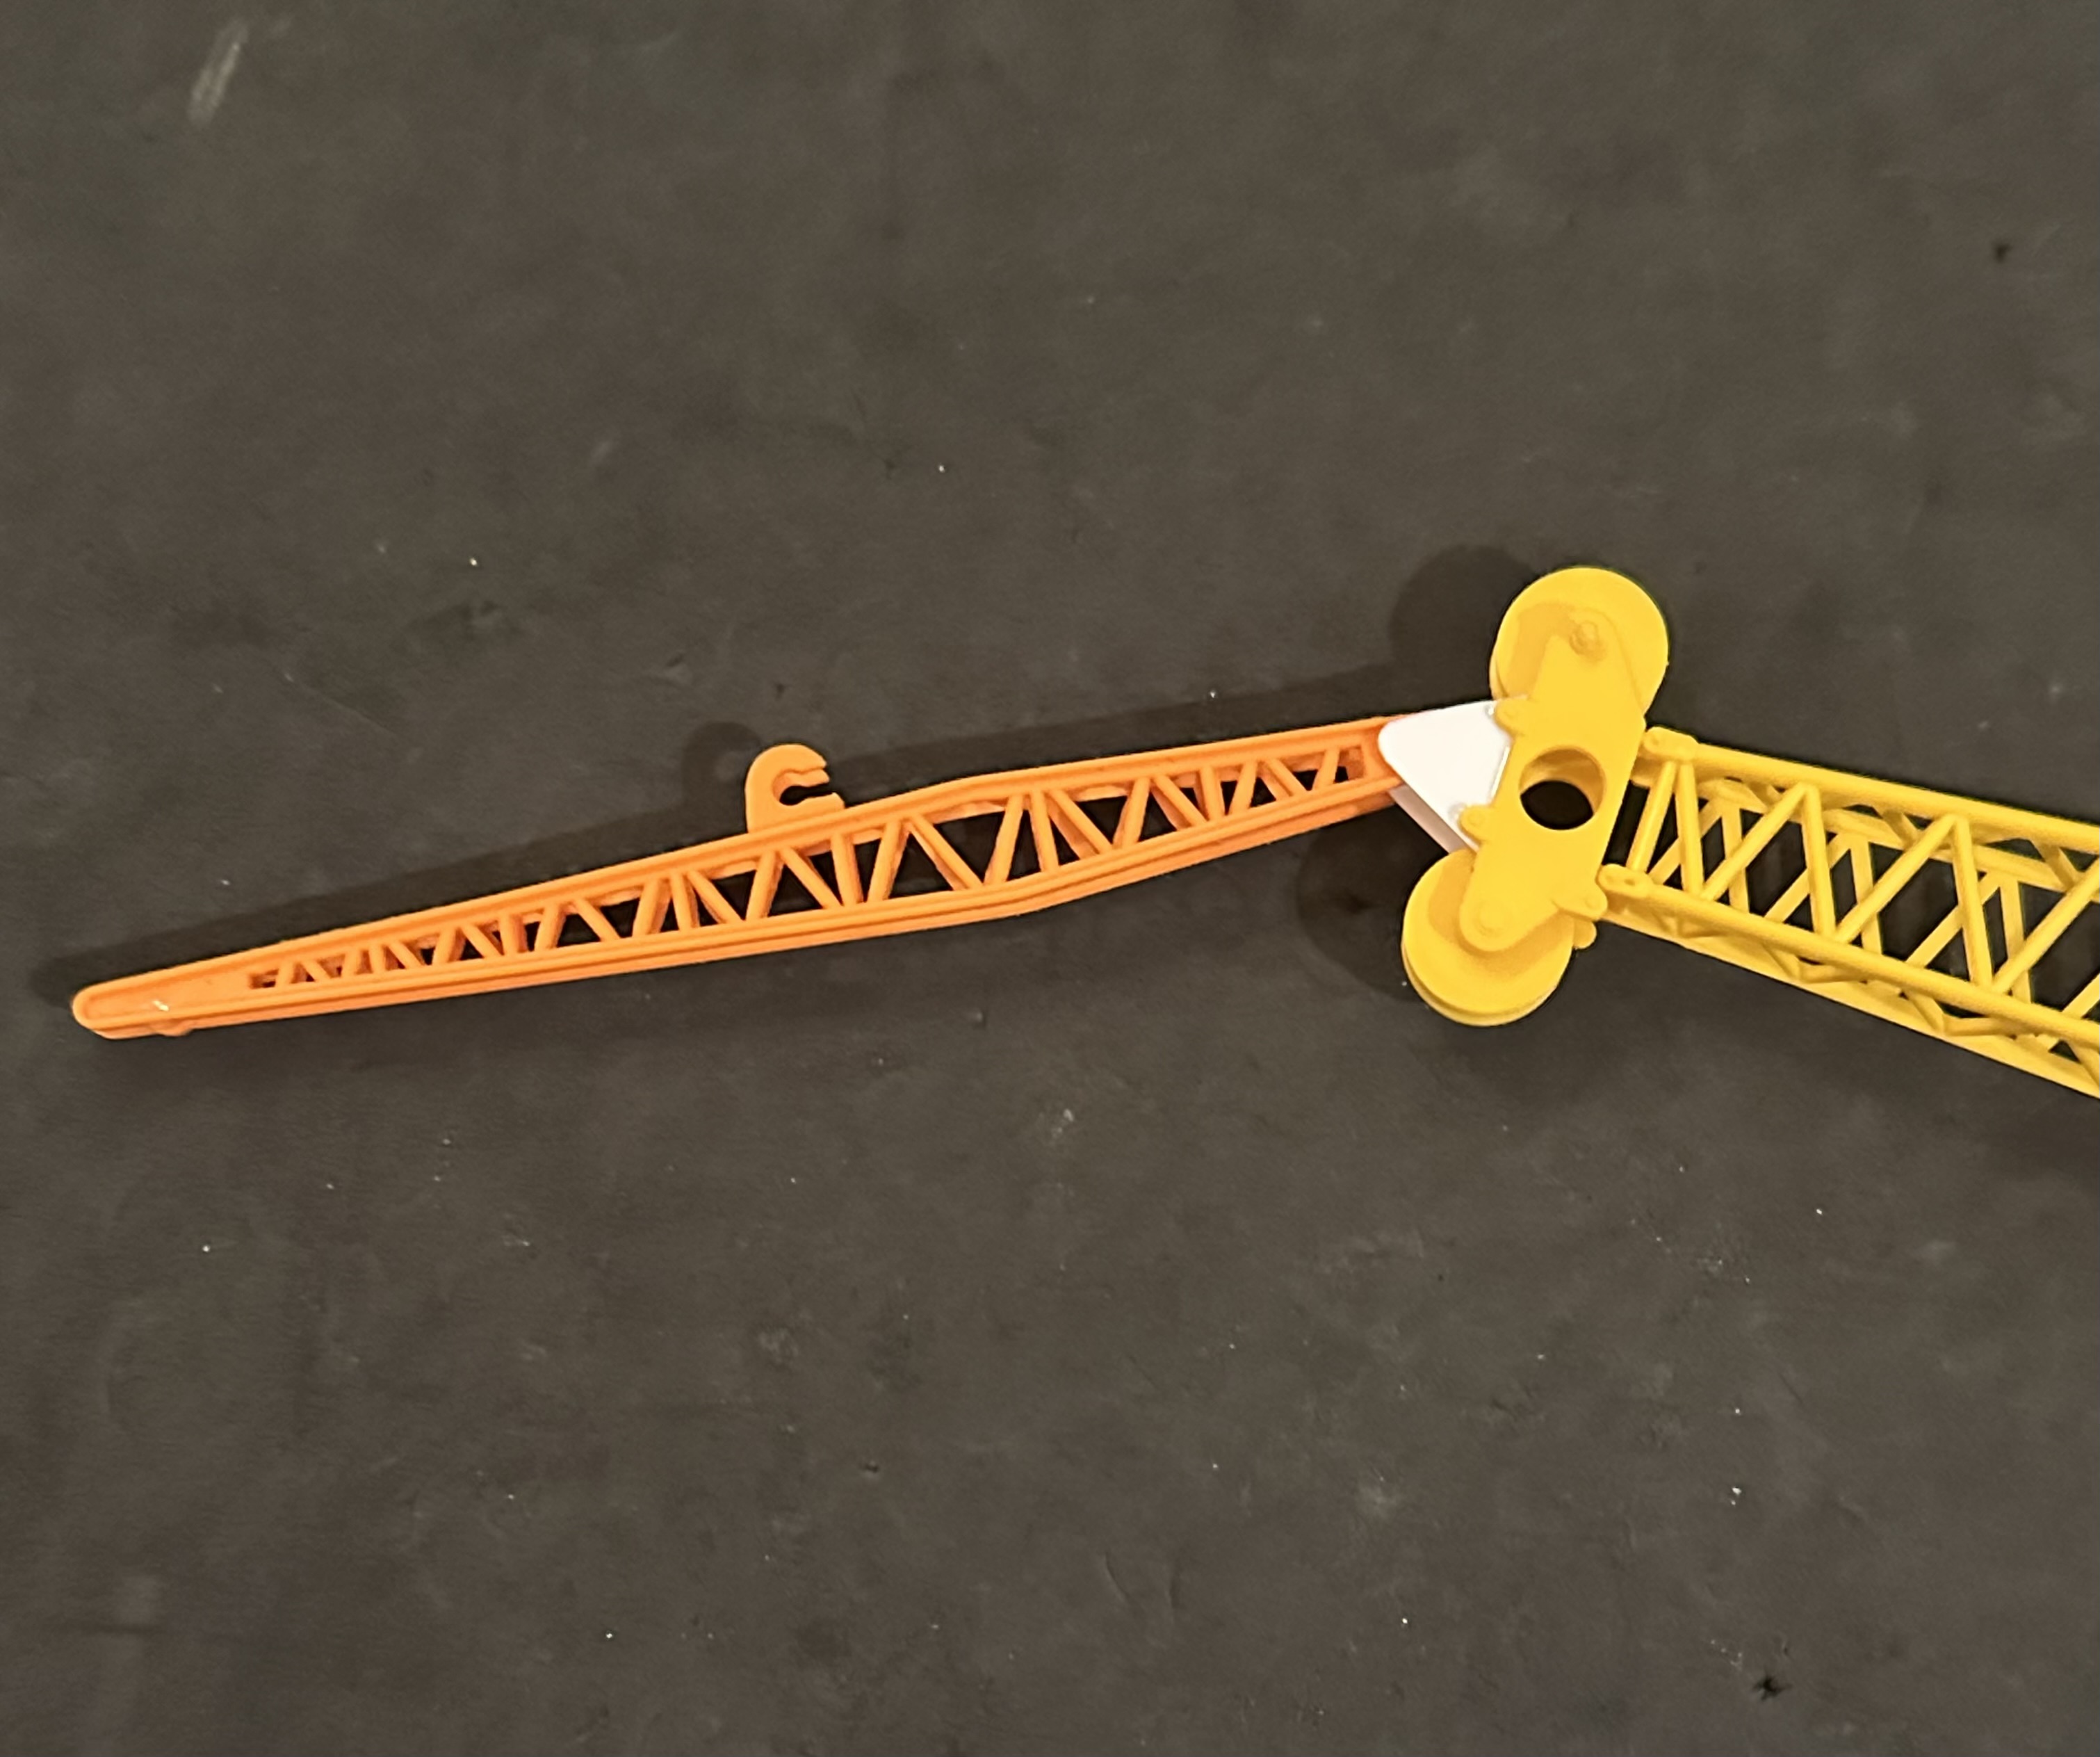
After positioning everything in the diorama where I want it, I discovered the old boom was barely long enough. With a larger ship it would be useless. This one has the additional length, but I’m still not satisfied, although I’m much happier with this boom.
4 Likes
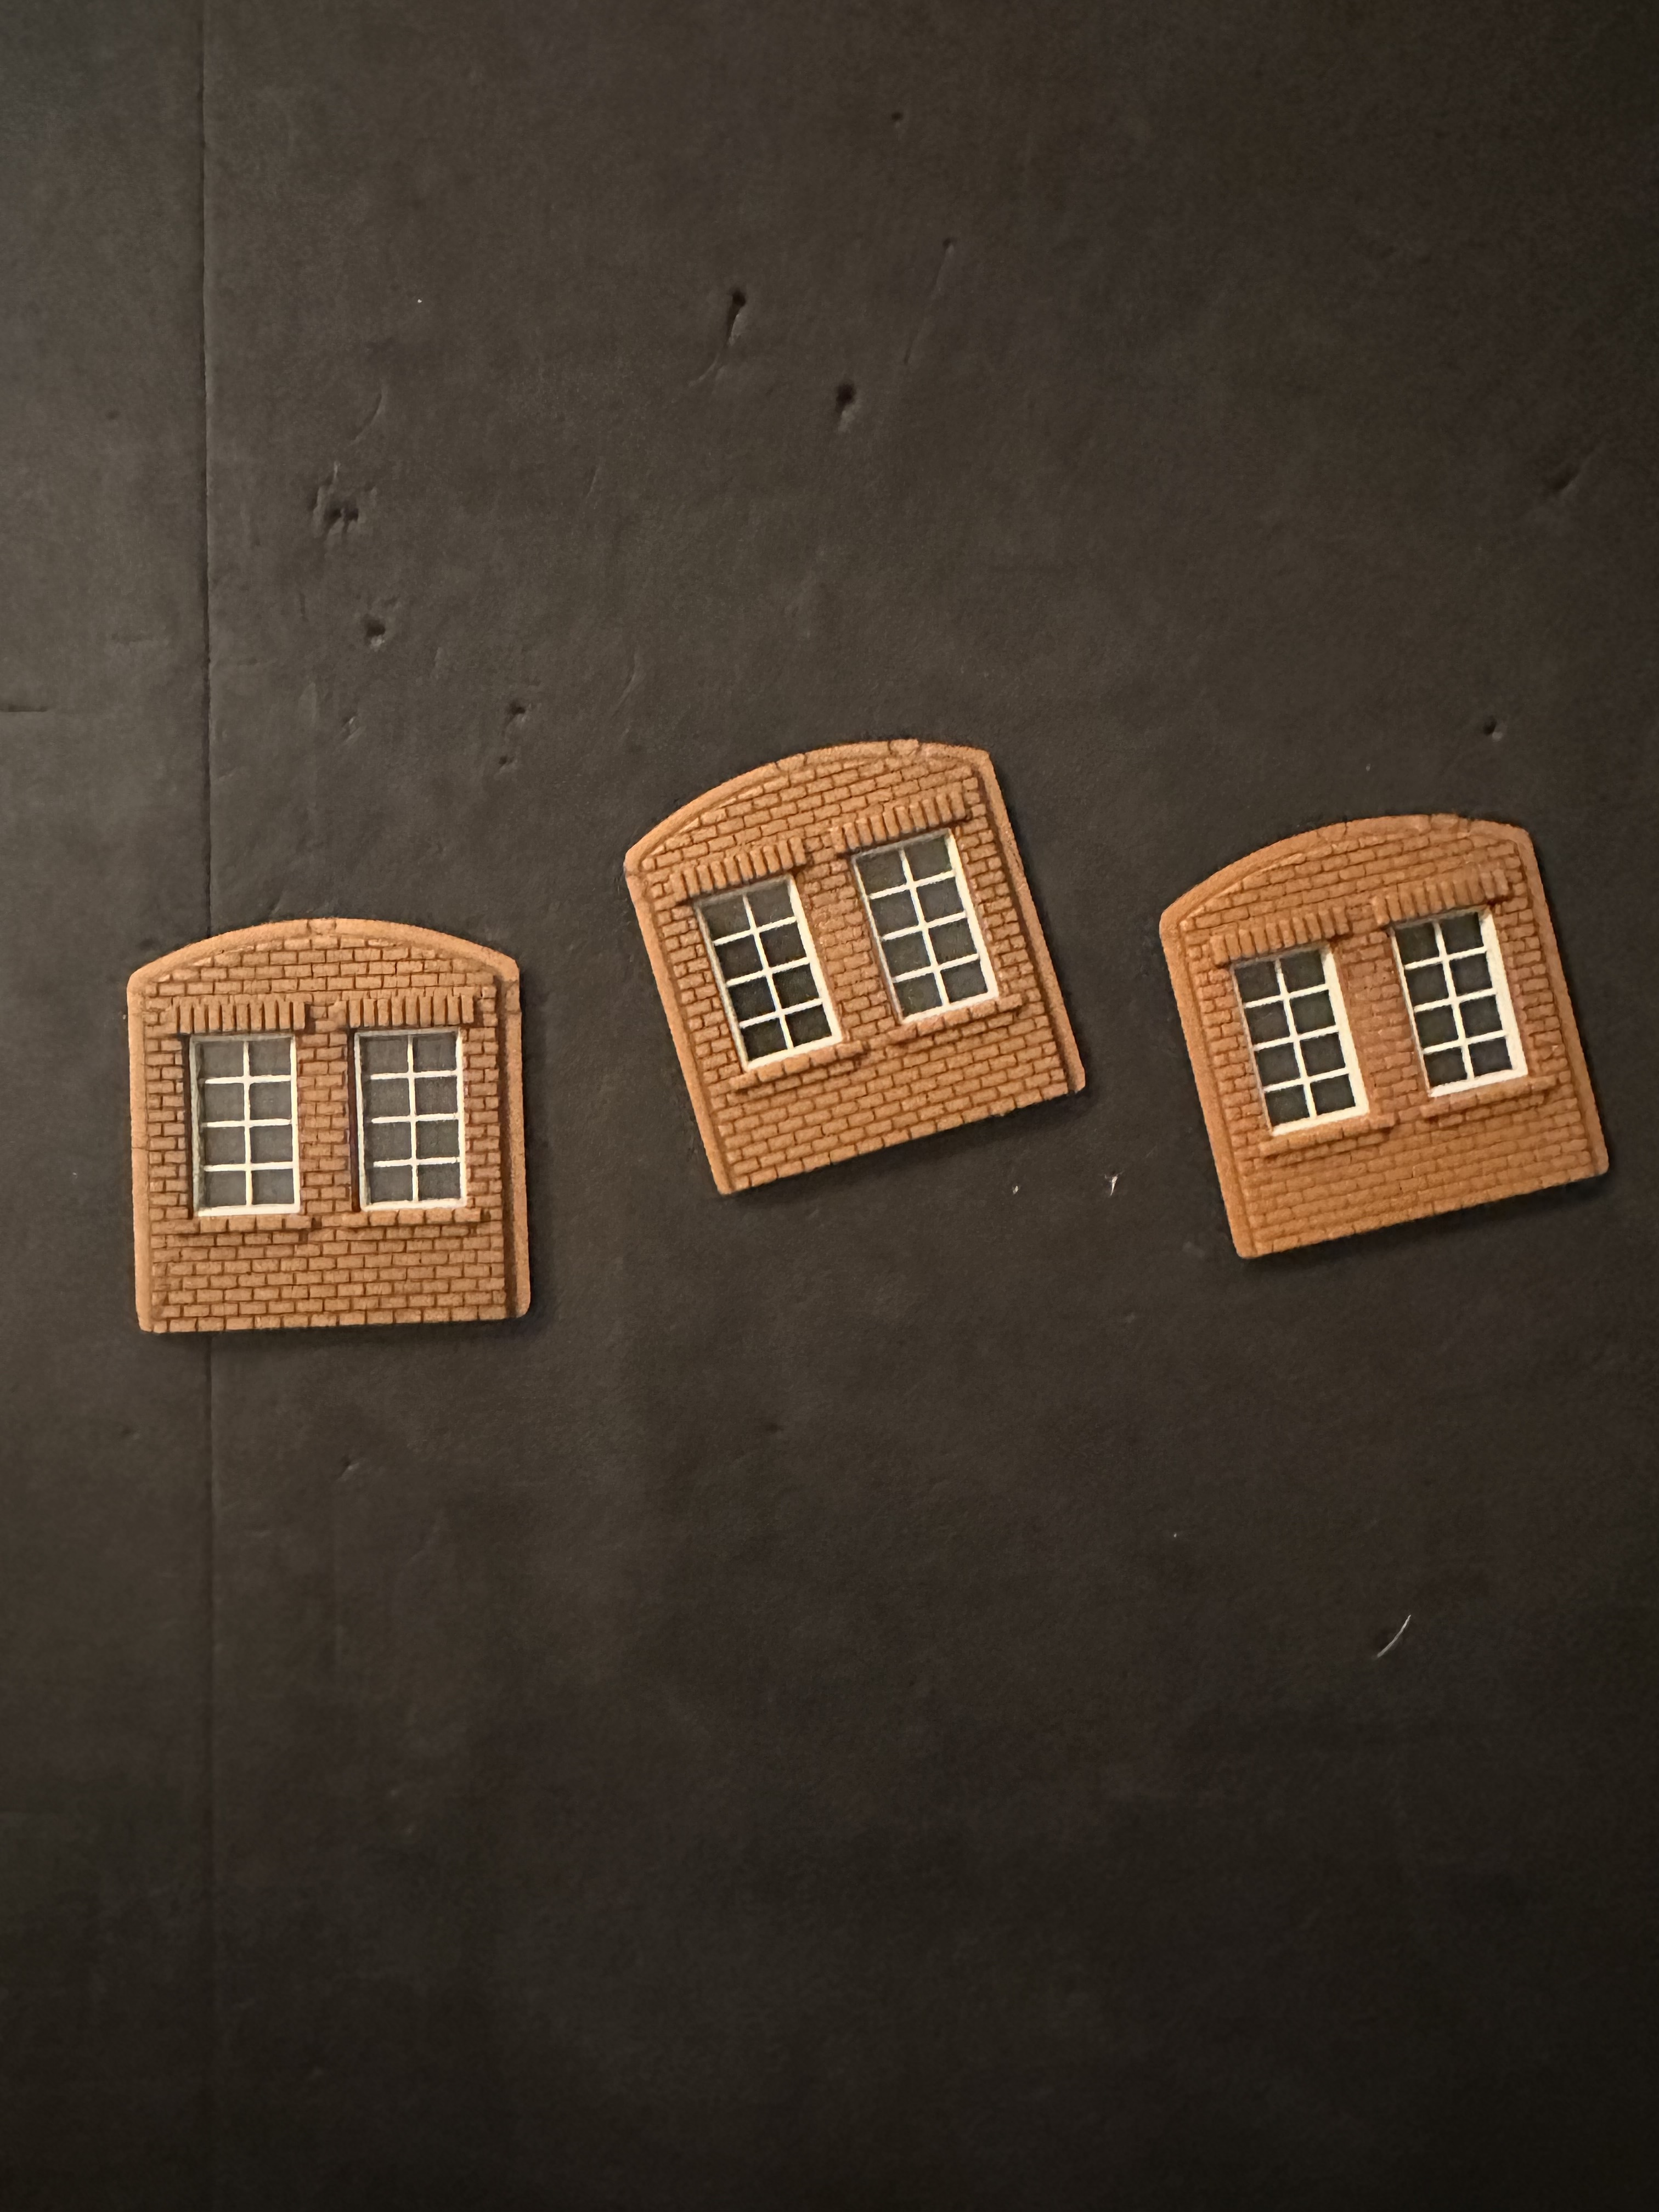
I decided to raid my collection of German building kits for my future DDR layout. These windows will be perfect:
I can always buy replacements later. Hopefully I can get them out.
4 Likes
Put a jib on it Rob - or make up and add another section from another kit .
2 Likes
I have thought of it - perhaps using the end of the old boom, I have no idea how they rigged these things but it is something I’m looking at.
The one I’m using for inspiration has one.
I’m going to try it. The kit has two main cable drums and one isn’t even rigged up. One can be for heavy lift and one for lighter loads on the boom extension, And there are certainly enough extra pulleys that aren’t being used…
I’m putting the guts of this new kit into an older wooden cab with a corrugated metal roof, hence the need for those windows.
4 Likes
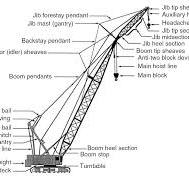
You obviously have a high degree of mechanical aptitude. Just remember that the jib needs some triangulation for stability. Sometimes it is achieved with a strut and guy stay as in the illustration in my post - some times with a radius type as seen in your photo . The cable itself that does the lifting can be the main one that originally led to the sheave at the end of the main boom and re led to the jib or if the crane is so equipped it can be a secondary one with it’s own drum .
1 Like
Hi Rob,
I’m glad I stumbled across your project. I know nothing about submarines or drydocks, so this is perfect to see.
Are you planning to add the mid section to the crane? The trussed area between the base and the cabin? I’ll bet you could also match the cabin of the crane you are showing above too. You probably know my vote on those decisions.
Looking forward to the next update.
Cheers
Nick
2 Likes
It’s a blessing and a curse.
Way back when we had carpet in the house, I used to try the old excuse, “I don’t know how to run the steam cleaner.” Whenever I’d try excuse an like that my wife would always, hell, still does say, “You built your own chopper from scratch. I think you’ll figure it out.”
Indeed I am. In for a penny, in for a pound, I say.
I’m not using the original base either - it’s not wide enough. So I’m redoing the whole thing. I may use the lower wheeled frames though - we’ll see.
And I’m going to make it asymmetrical, like the ones at Fremantle.
With luck I can get a lot done without visiting the hobby shop again any time soon.
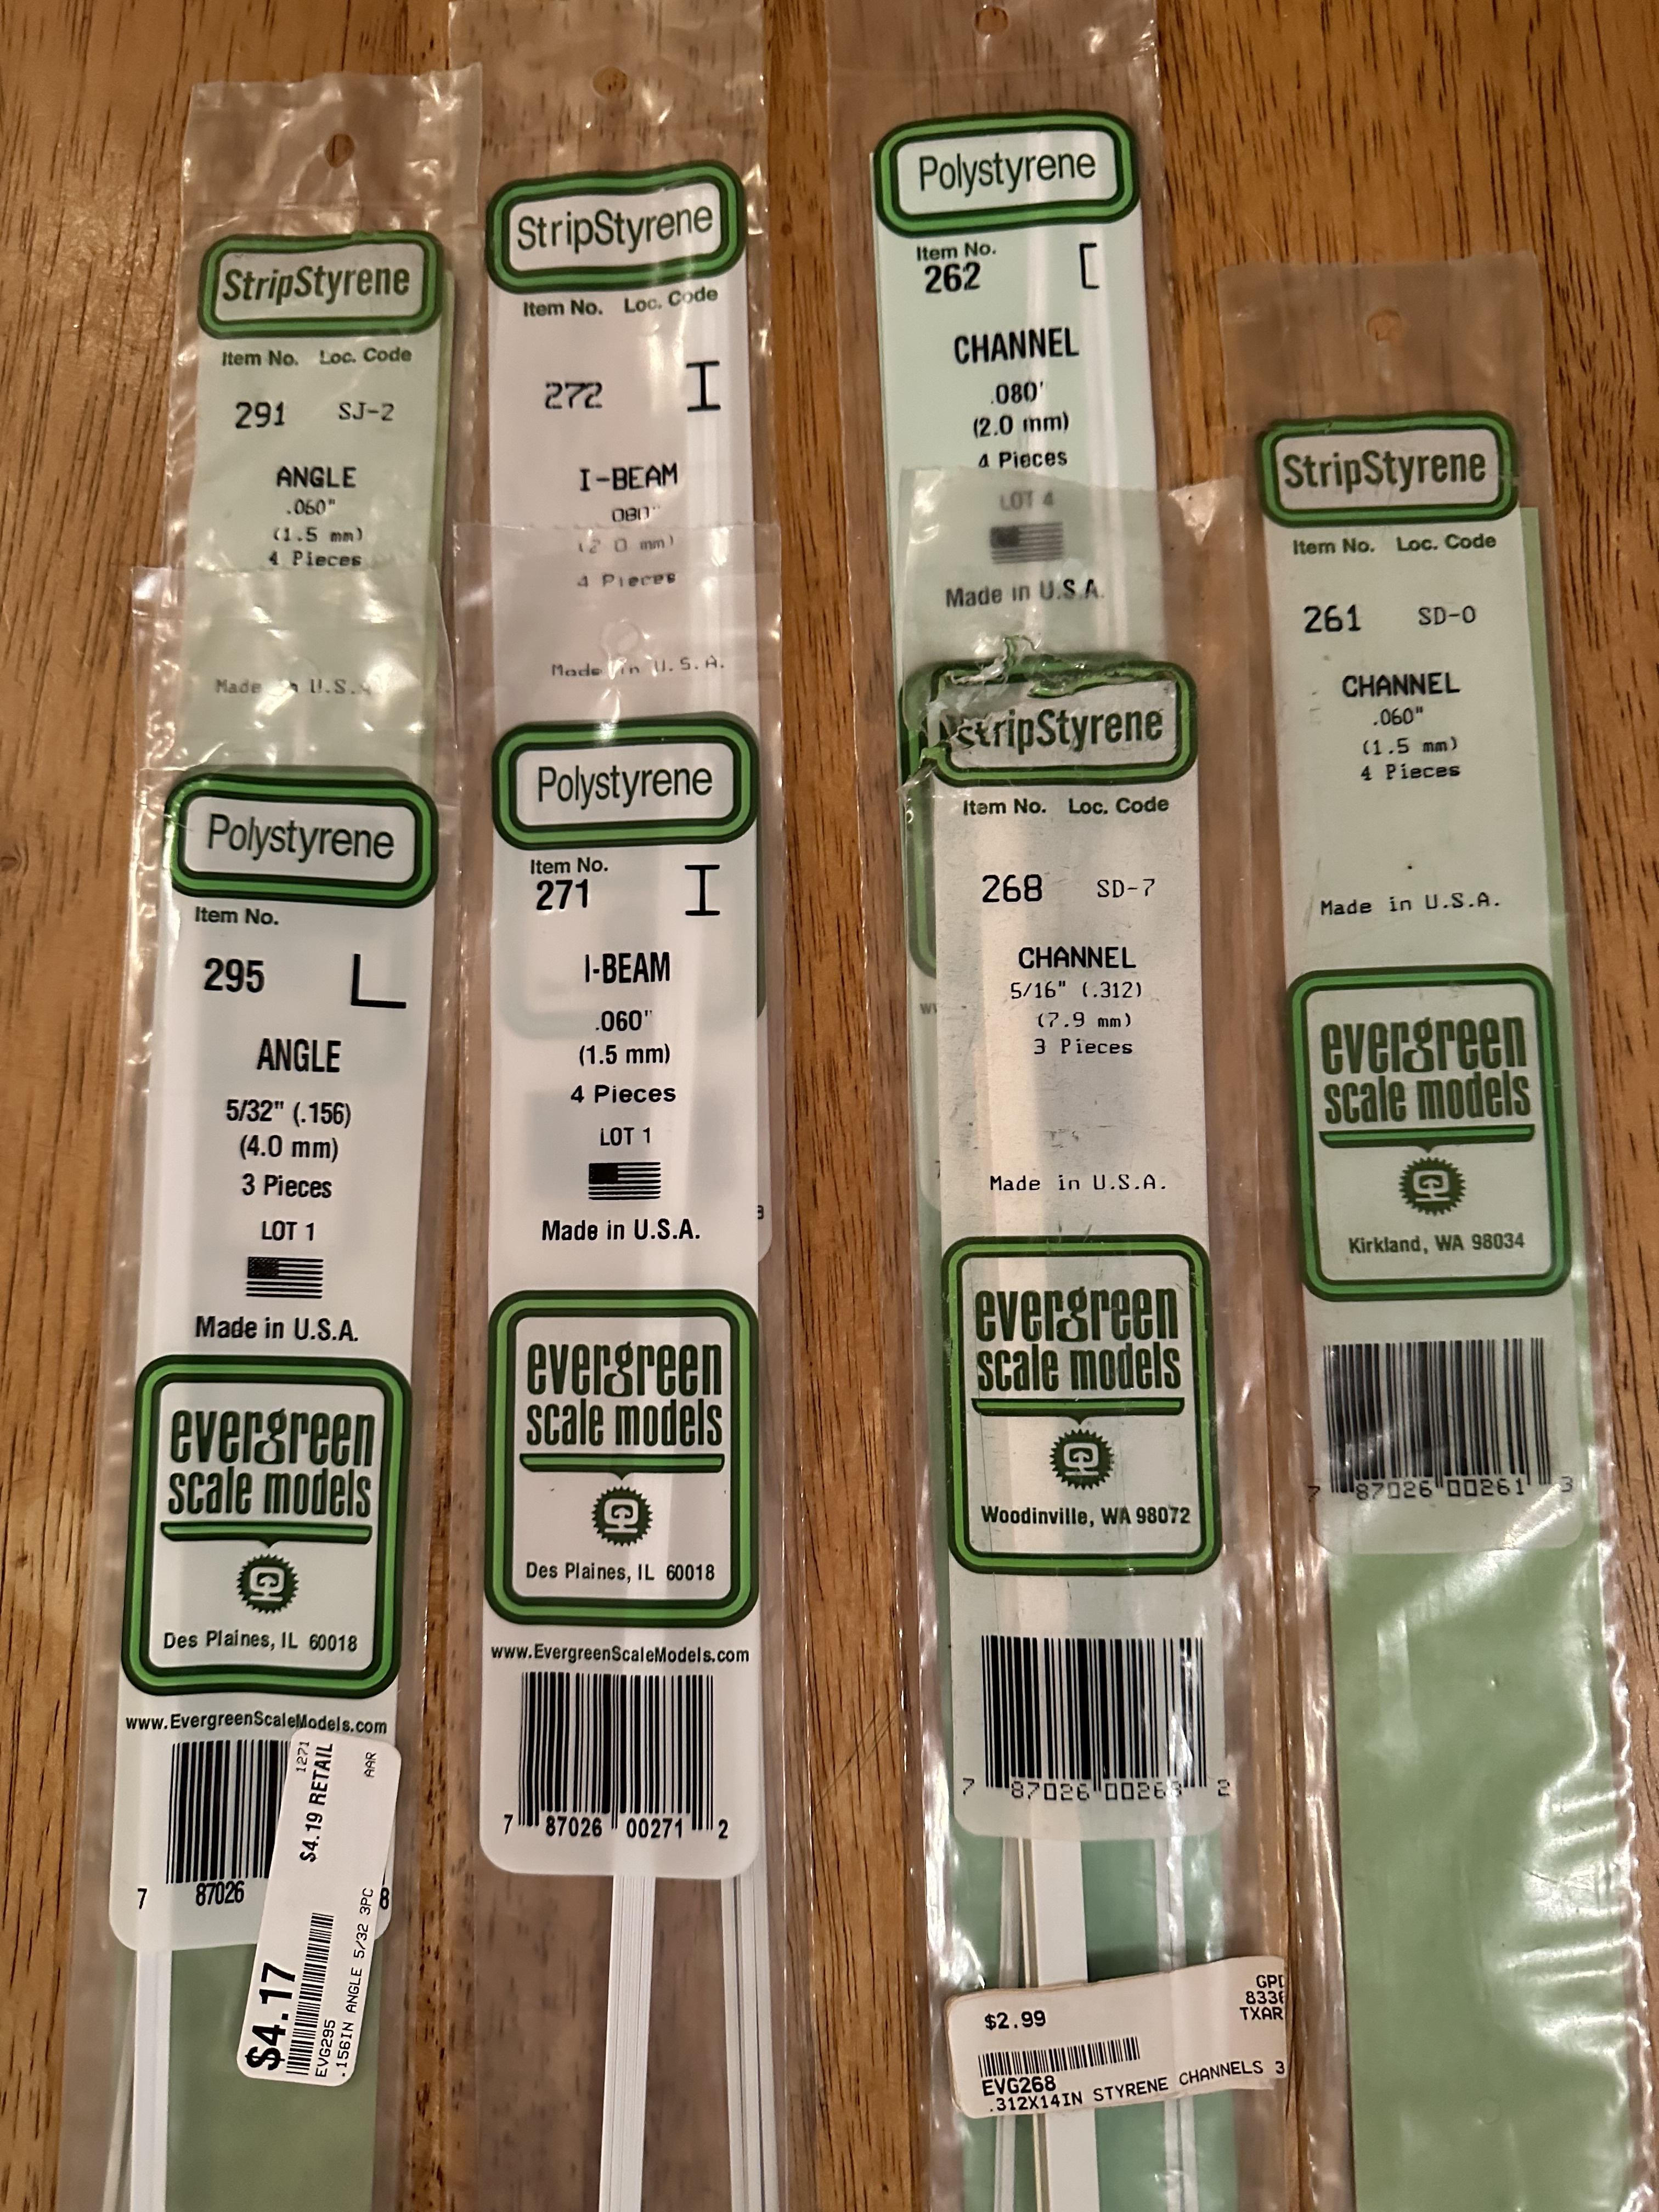
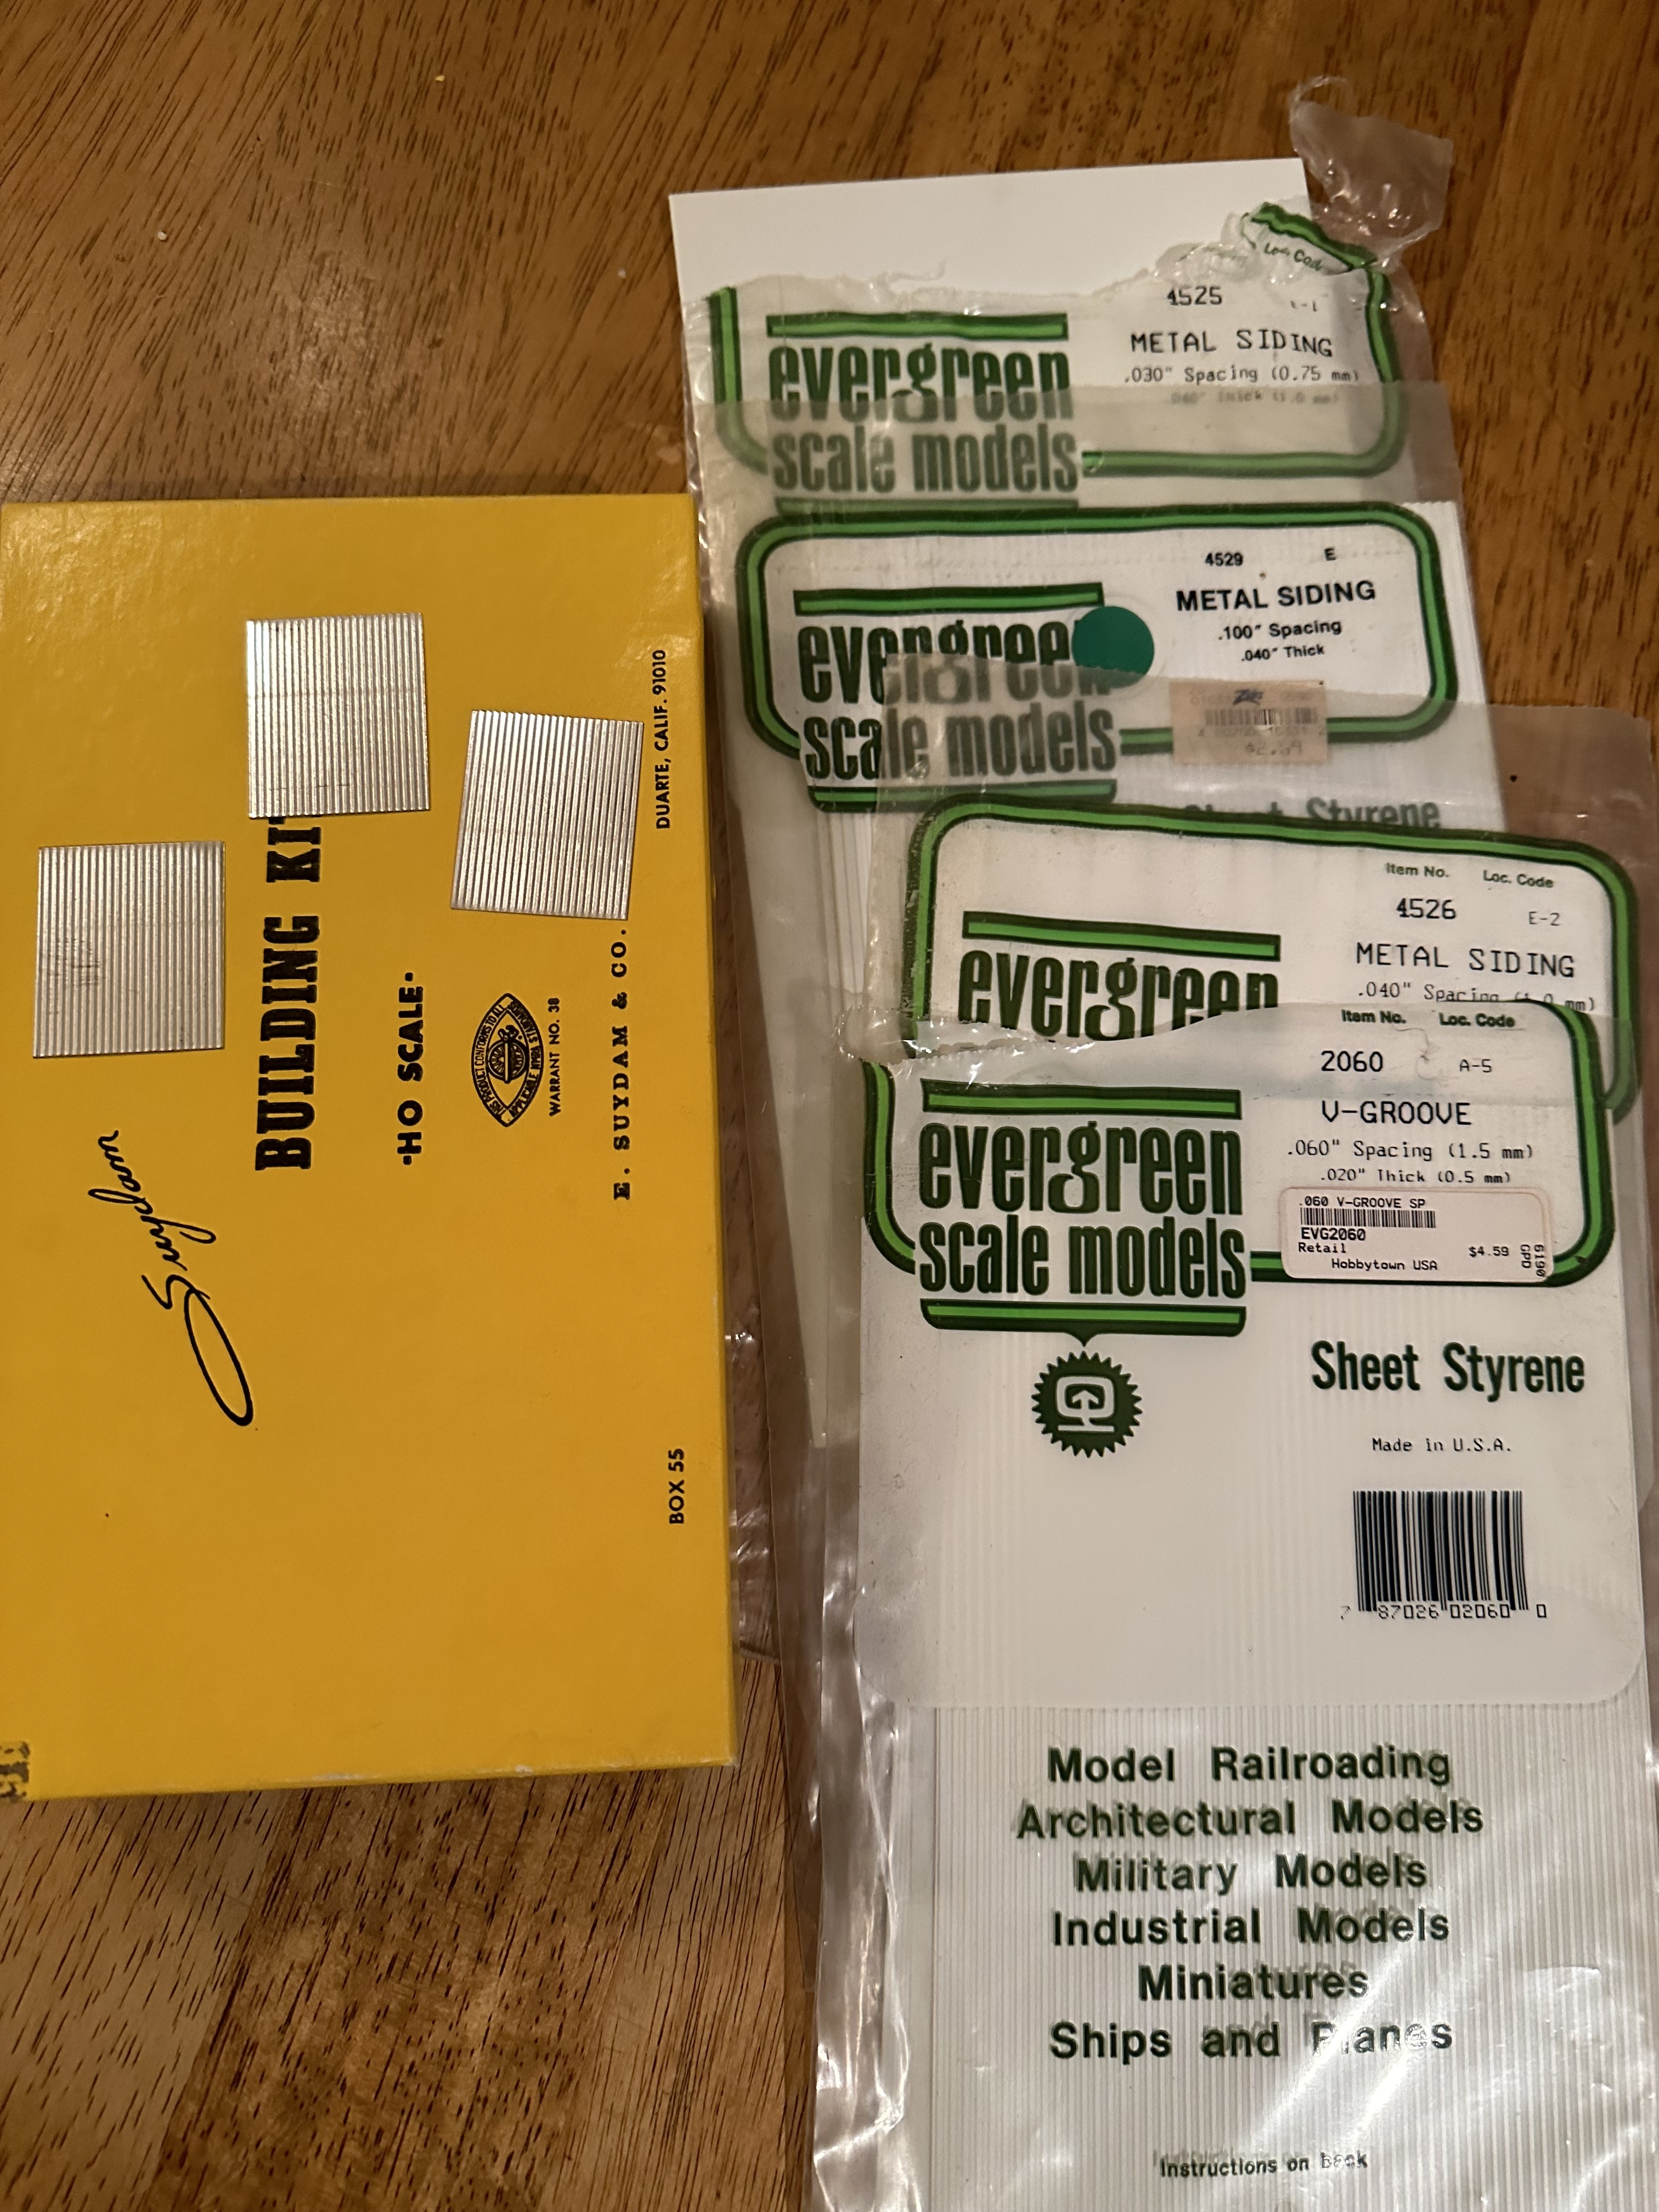
I’ve got tons of structural shapes. This doesn’t even include all of the various sizes of strips that I have:
Plenty of different siding too. And I bogarted some corrugated metal for the roof from a Suydam kit. I didn’t need the pieces as sliding doors as I’m using wood for them. I wasn’t willing to bogart longer pieces from other Suydam kits, which turns out to be a good thing. Shorter pieces will force me to overlap them in a prototypical style which will add more interest anyway.
7 Likes
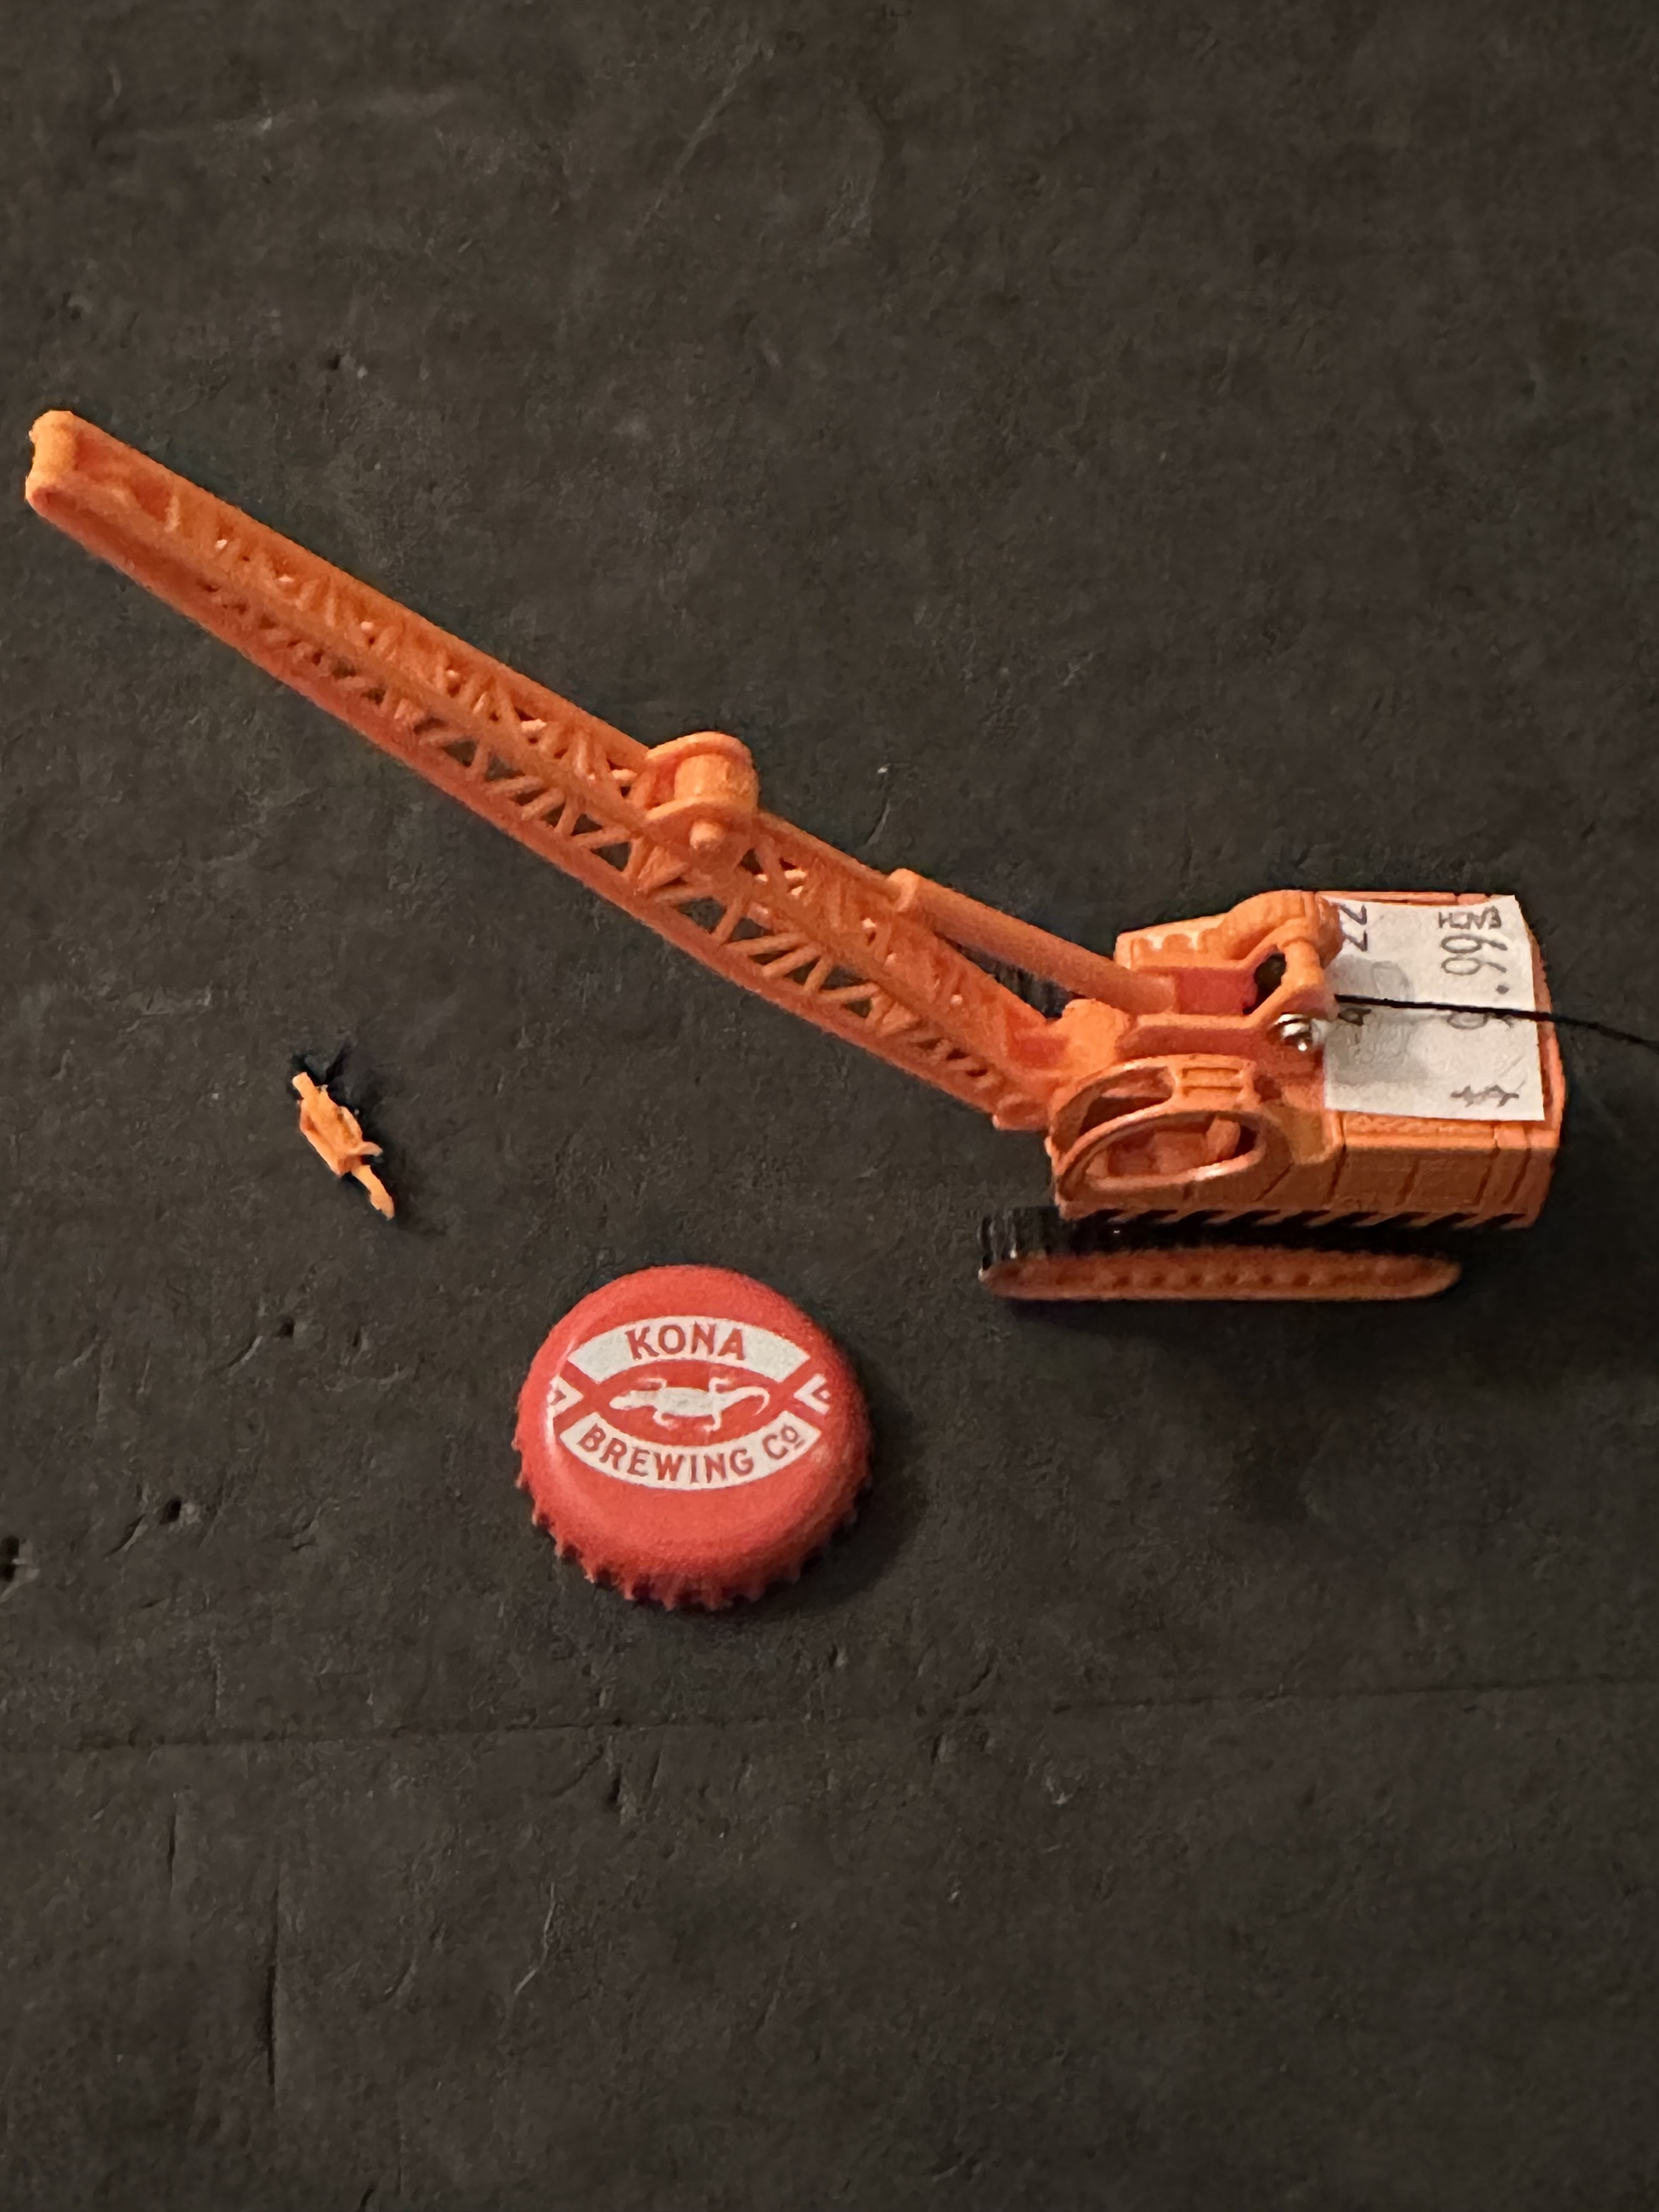
Found languishing on the “used” shelf of a train shop. N gauge? Z? 
Bottle top because not every on Armorama knows how big a quarter is.
4 Likes
Those Suydam kits were a bit hit and miss, but, I know the siding you’re talking about. As I recall, it’s a bit thicker than the Campbell material, which I’ve used a lot of - I like the thicker material - you can still easily punch nail heads or rivets into it, but it’s a lot less like tin foil, looking a bit more realistic when you paint and weather it. As for the tiny crane, can you adapt it for use as the jib boom?
Cheers
Nick
2 Likes
This was excellent news for me this morning.
38086 REFUGEES TEACHERS FAMILY | Armorama™.
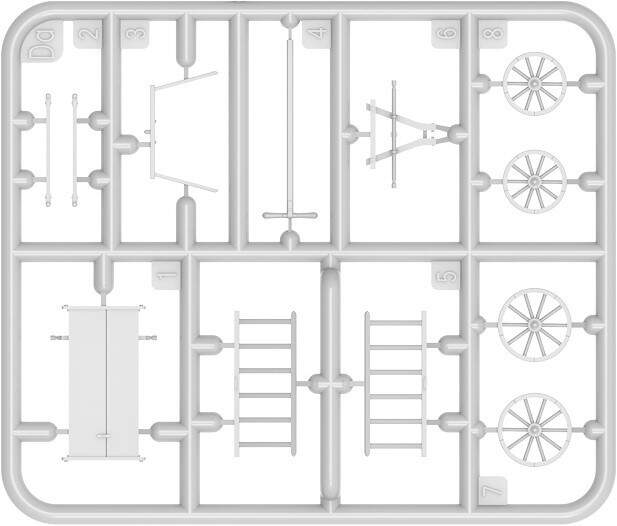
After counting the spokes in the box art I was a tad disappointed, but then I looked at the sprue shots. They are not the same, The actual kit wheels have ten spokes.
Okay dude. Your point being?
Because I have three CMK torpedoes that need carts.
The sun can even shine on a dog’s ass when it’s 10 degrees outside.
5 Likes
In my best Karl Childers (Sling Blade) voice:
I reckon it’ll work all right. Mm Hmm.
4 Likes