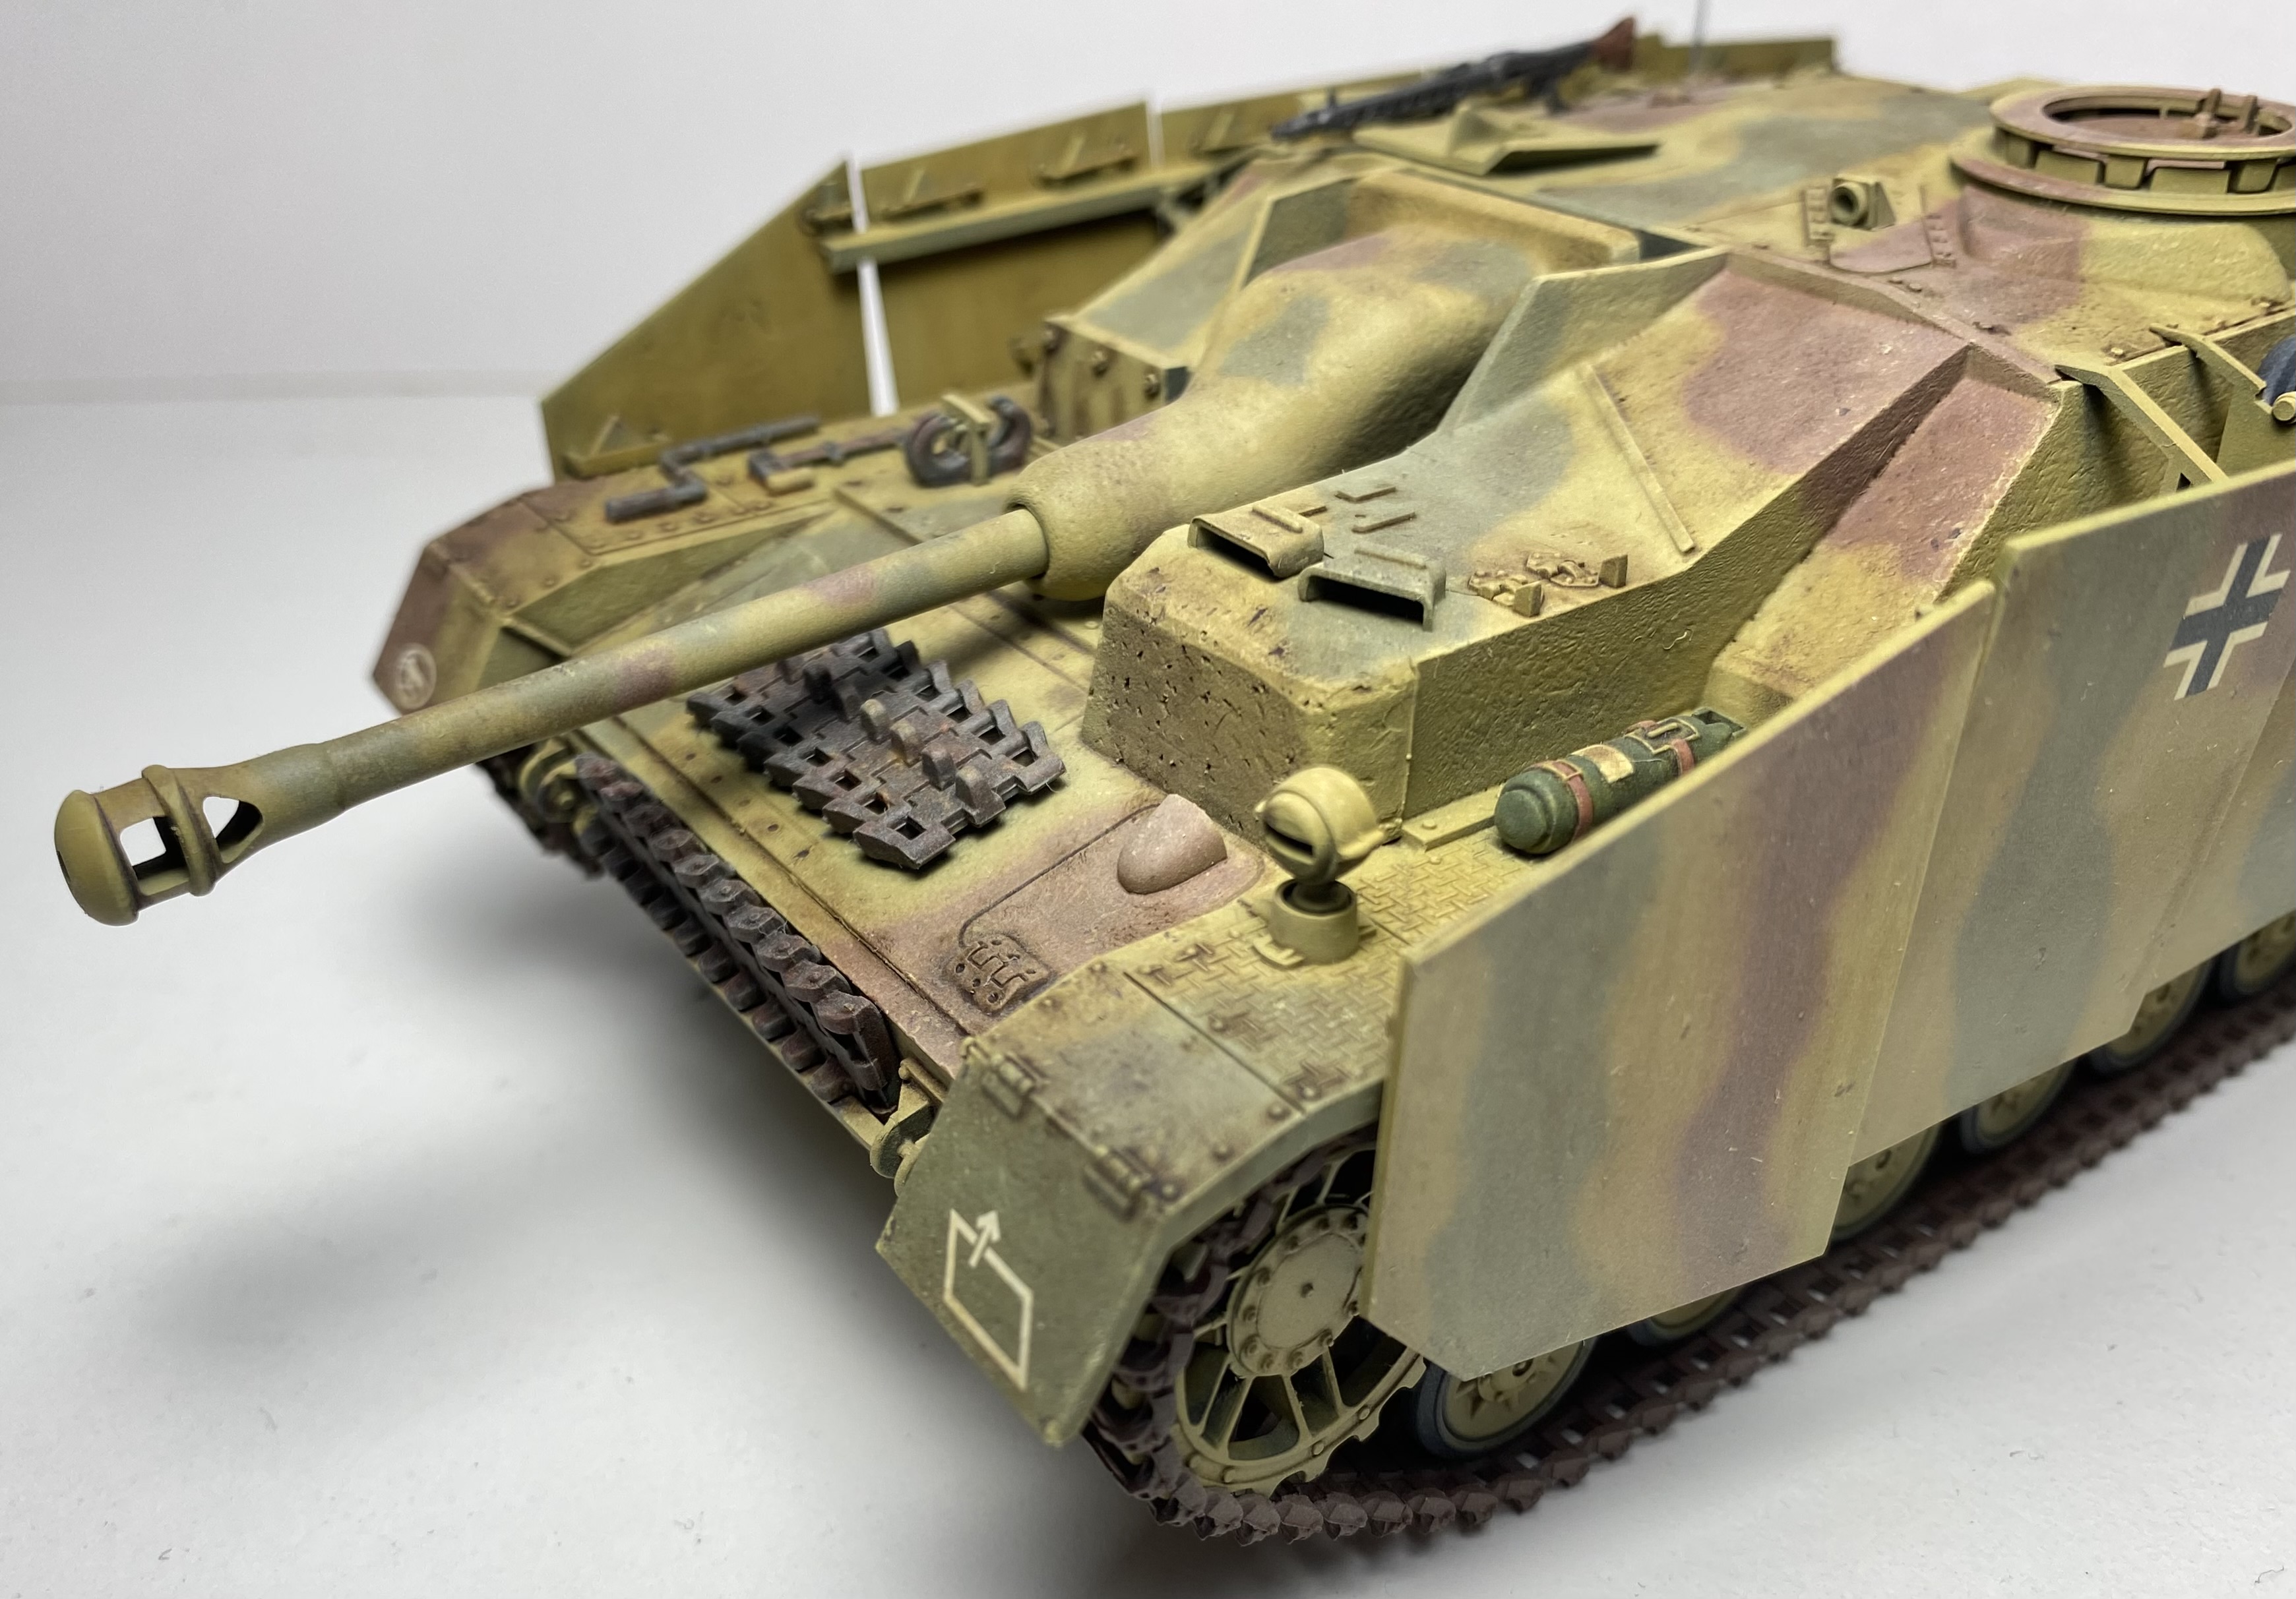
Hey y’all! Finished up my first Stug, love the pig head mantlet! I tried a few new techniques for this guy and really tried to tone down my weathering compared to what I usually do.
This is the first time I have tried texturing the armor with Tamiya Extra Thin. I think it came out well,but could be better. How do y’all texture armor?
First time free handing camo with my airbrush also. It took a lot of concentration and was tedious, but I like how the camo came out!
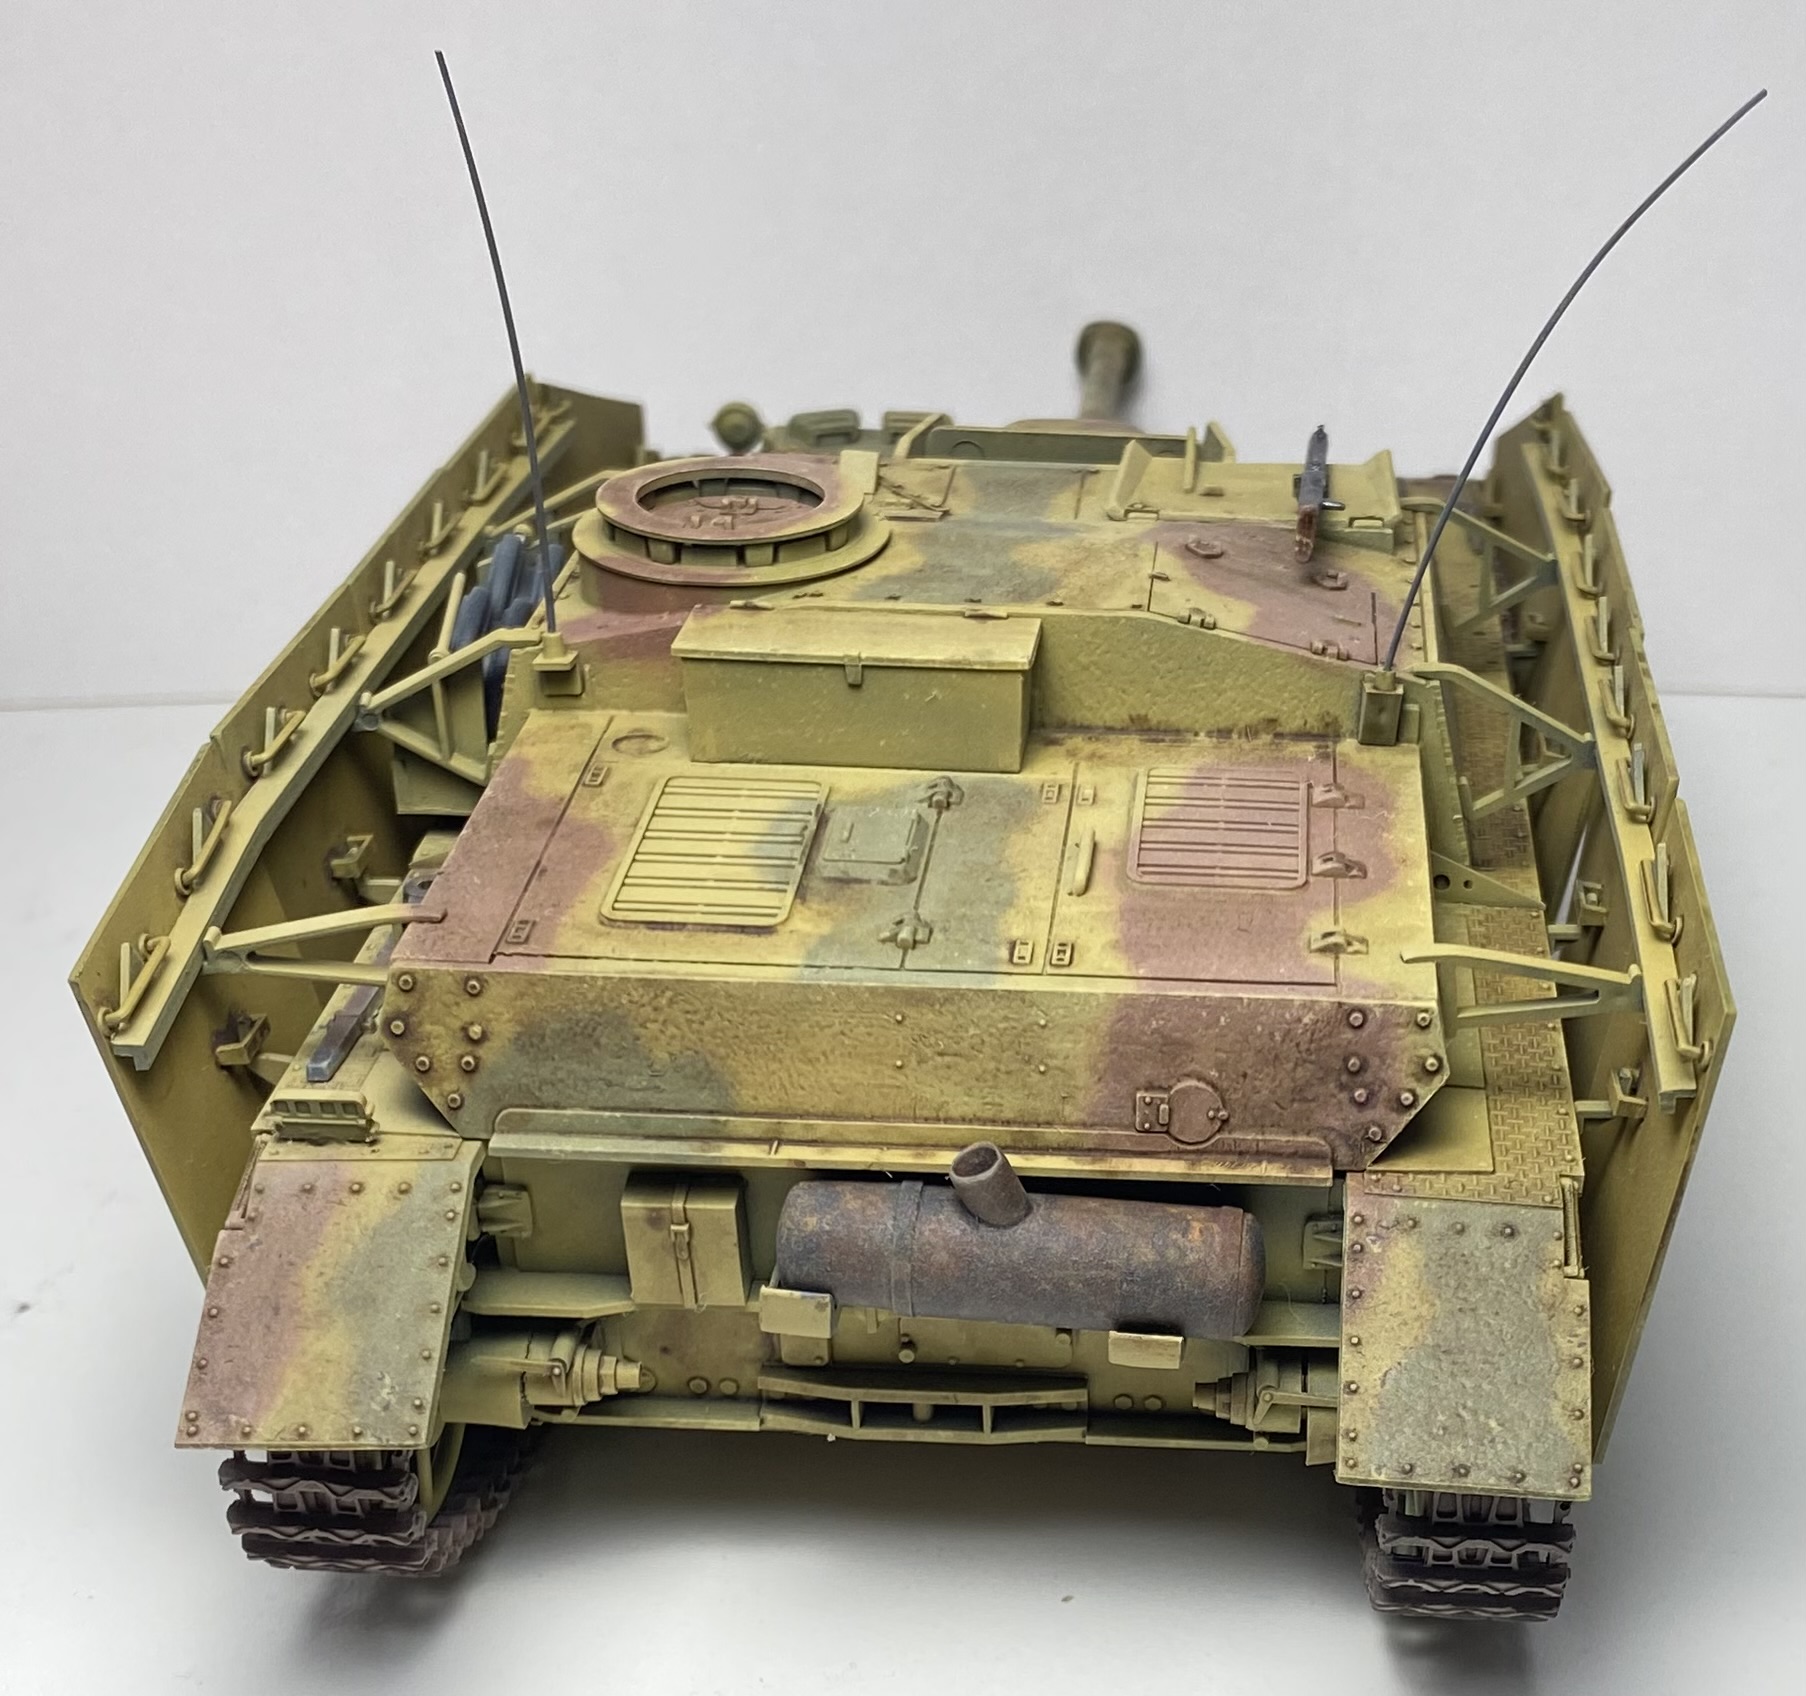
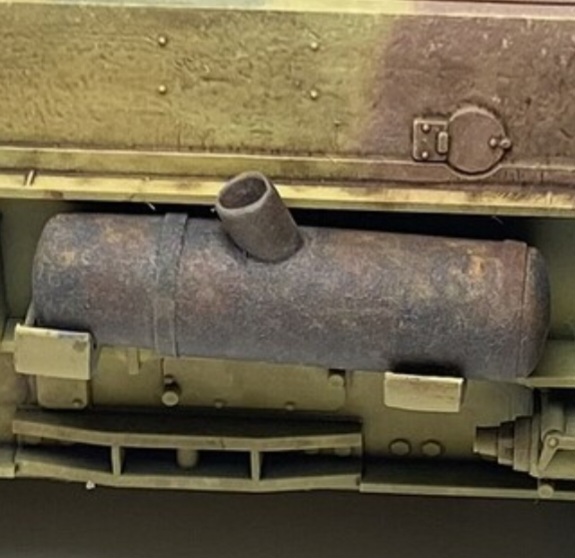
For the exhaust and extra track, I used 3 different oils paints and wet blended them until I liked the look of it. The thing I didn’t expect was when I dusted the vehicle with Vallejo Buff, it brought out some grey on the exhaust and track and made it look so much better!
I was impatient and hurrying when cleaning up some wash and forgot to remove excess on some areas. I was upset when I first noticed it, but now I consider it a lesson learned!
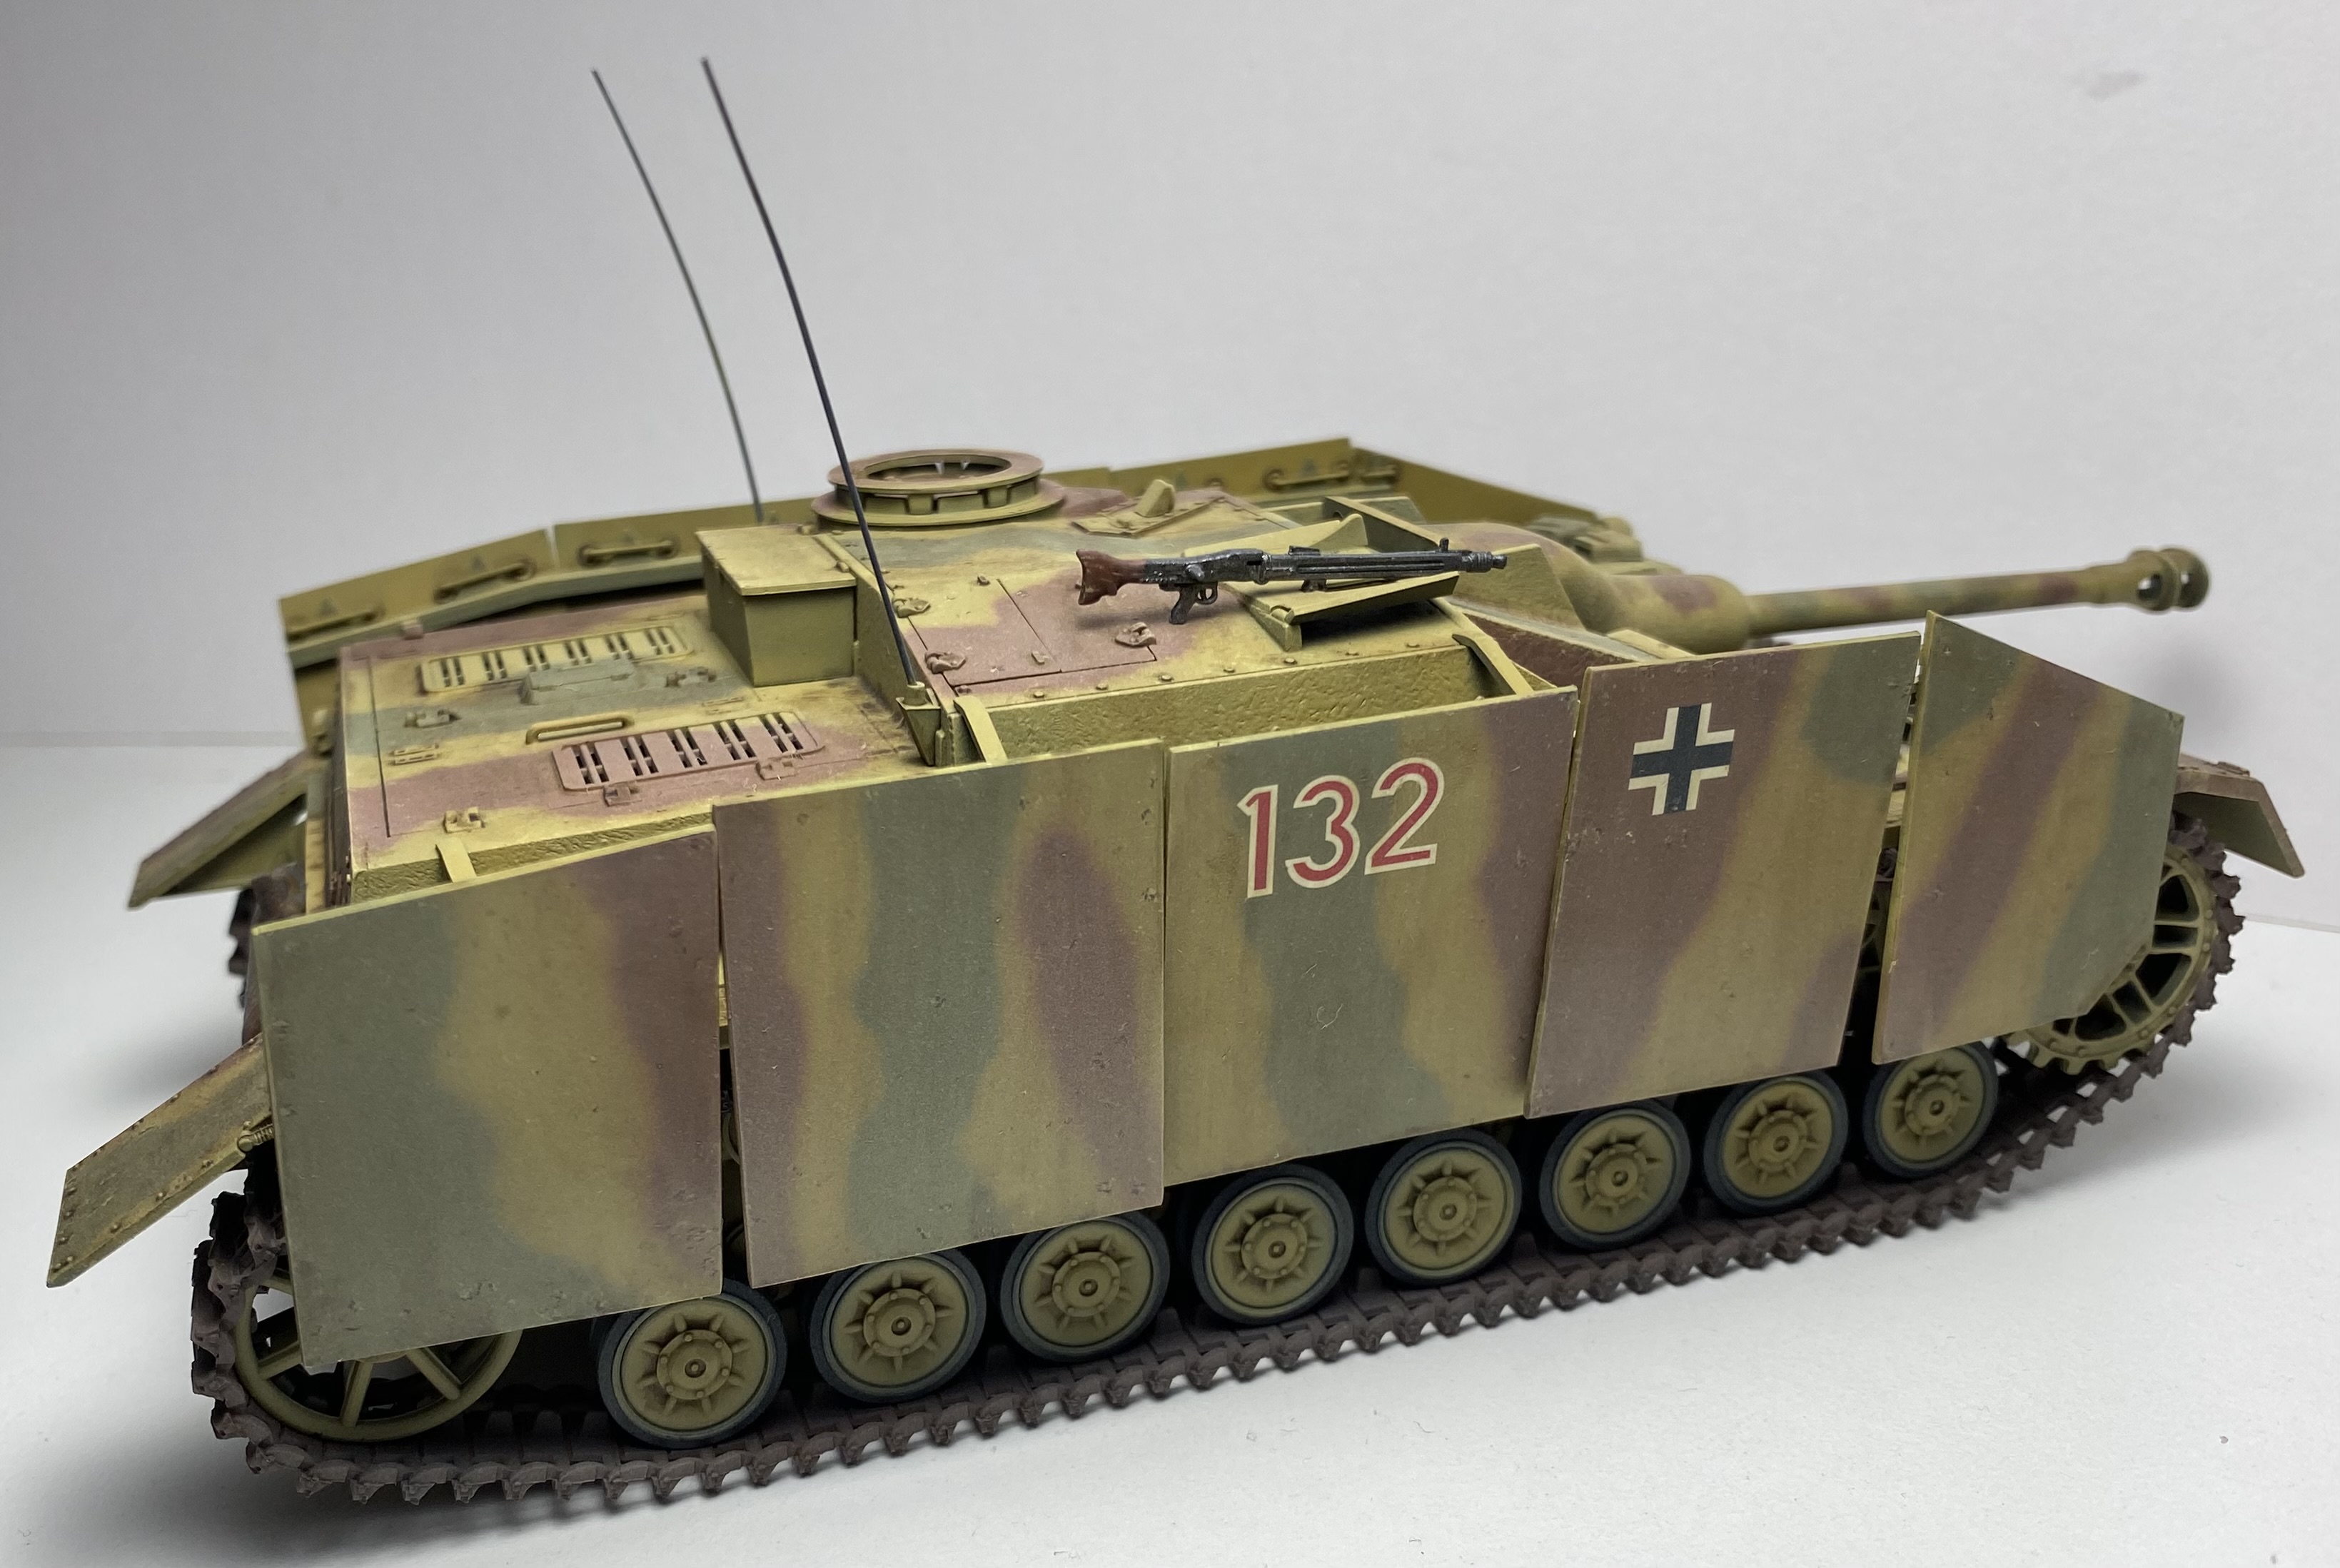
116th Panzer Division “Windhund”(Greyhound) Division is a cooling looking insignia to have on the fender. A+++
Regarding armor texture, German armor plate of that era is fairly smooth so it’s usually good to be fairly restrainted. There’s many approaches suggest experimenting until finding one you like best.
I like to use Testor’s Liquid Cement and Tamiya Basic Gray Putty thinned like paint, applied with an old brush. After wiping excess on paper towel, lightly drybrush the open areas of armor plate. Testing on the underside of the model first to make sure the brush is dialed in.
Oh wow! You did a great job with that! I have Mr.Hobby white putty and mixed it with Tamiya Extra Thin, but I didn’t like how it looked. Is the white putty different than the gray?
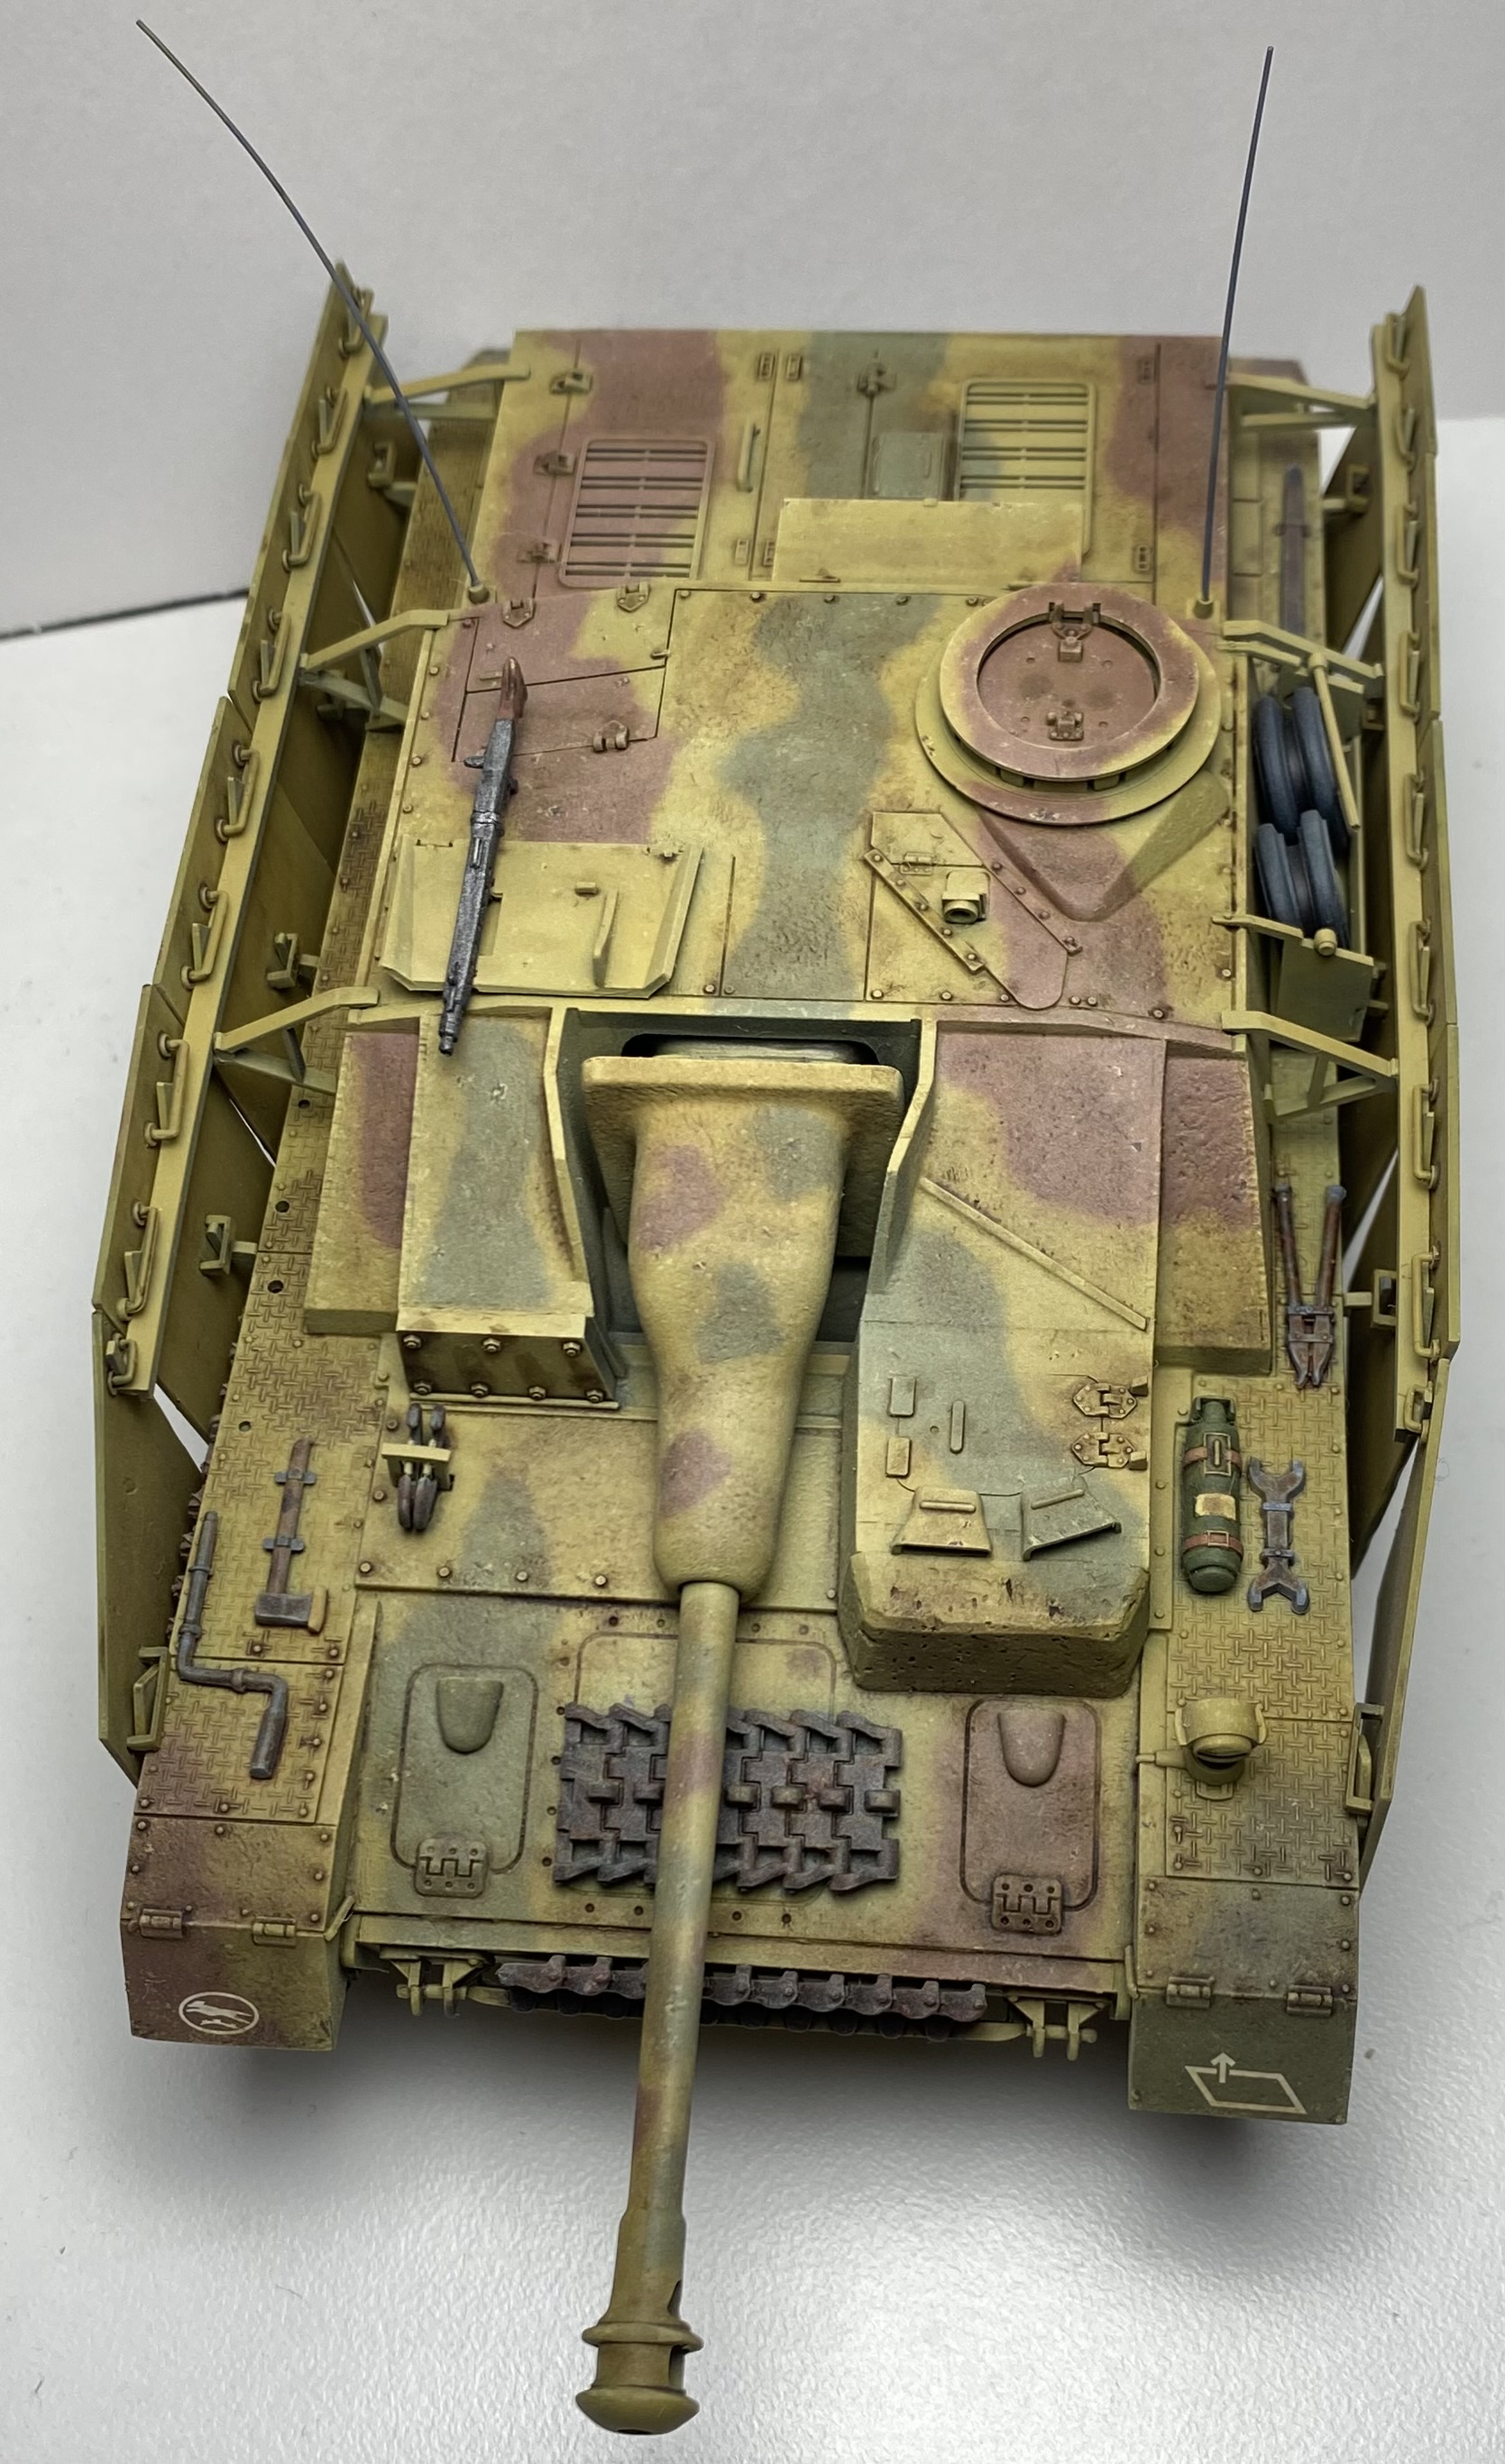
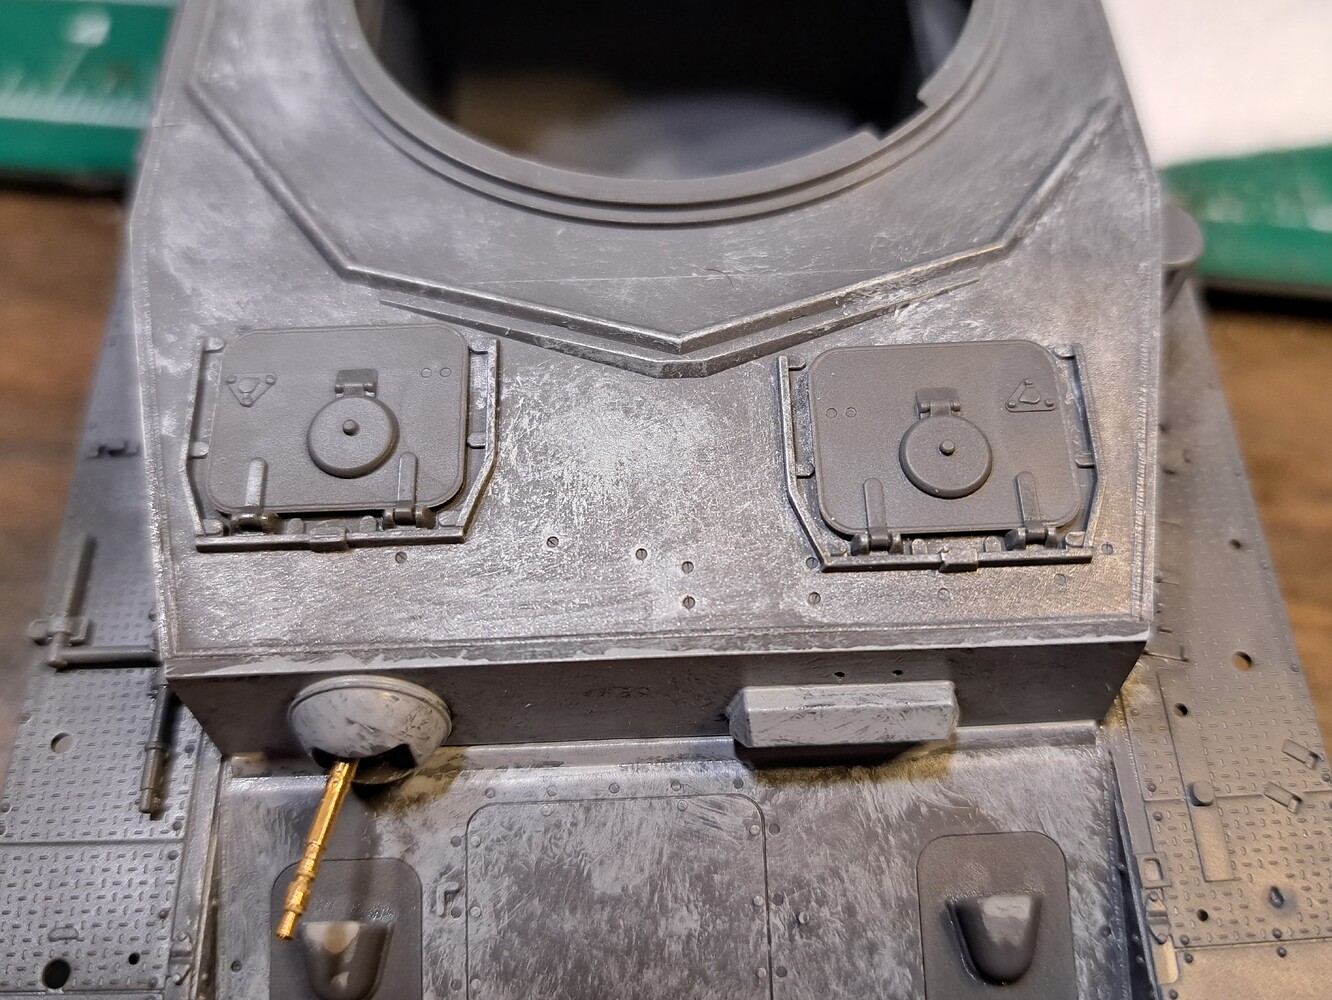
Very nicely done! my only critique would be to paint the lenses of the periscopes around the commander’s hatch. A dark clear color such as blue, green, or smoke would work perfectly.
Thank you, Derek. Yes, the Mr Hobby white is a good putty but it has a different formulation than the Tamiya Basic Gray.
The Tamiya Basic Grey, Molak Stucco & Fine Glaze Bondo and many others are nitrocellulose based putty. This type of putty thins well with Tamiya Extra Thin or Testor’s Liquid Cement etc.
Not sure what the white Mr Hobby putty is but it reminds me of Tamiya’s white polyester putty.
It all depends on how the green is done. I always thought the periscopes and vision blocks had a blue green tint, like the bottom of a glass coke bottle. At least in the days before the anti laser coating.
I didn’t use any detail set, just what came in the box. There were quite a few mold lines to remove. The barrel came in two pieces, so had to fill and sand it. Used some stretched sprue to make the antennas. The track is vinyl, but the side armor helps hide where I stapled it. And surprisingly the fit is not the best considering it’s from Tamiya.
Ya, the belly and the rear plate don’t fit too well together, or at least mine did not align.
As for fatigue, I think that was an issue. After an hour or so of washing, especially if I have to put another layer of wash, I start to hurry for some reason lol.
One piece lower hulls have a tendency to pinch, having the proper width on the bottom, which is solid, but pinching in at the top, which is open space. This happens with lower hulls from many manufacturers and often causes alignment problems with major parts. I usually push upper side walls apart using sprue cross beams. I have not built a Tamiya Sturmgeschutz IV in a very long time but suspect the rear plate was very tight at the top because of such pinching.
The belly of the model does not include any detail–the rails running down the left and right sides, the escape hatch, armor reinforcement plates, drain plugs, and bolt detail. No one can see those things on the finished model but more modern offerings include those details.
Anyway, your project turned out quite well! The camouflage is also very good.
Now that you mention it, the bottom hull was slightly pinched! Had to finagle the lower hull sides to match the top. Using sprues as a cross beam is an excellent idea, and totally gonna do that next time!
And thank you for checking it out! After free handing the camo on this guy, I can’t wait to try it on some other models!