T-55s and GMV dio - Part Two, now it's done

Hello builders,

Back in 2017 I built this diorama and called it done, but was not at all satisfied with the final pictures. The build was posted on the old site.

The problem I had was that because of the nature of the layout, it was very difficult to get any decent overall images. I like to take outdoor photos - the colors and textures (and errors!) really stand out.

What I don’t like is having unwanted objects in the background - drives me crazy. So, for another project I began experimenting with graphically “cutting out” unwanted objects in the background and then “dropping” the image over a backdrop of my choice. Along the way, I thought about this project.

Unhappily, I’m not a graphics or computer expert, so this has been quite an adventure. OK, enough rambling, how about some pictures?

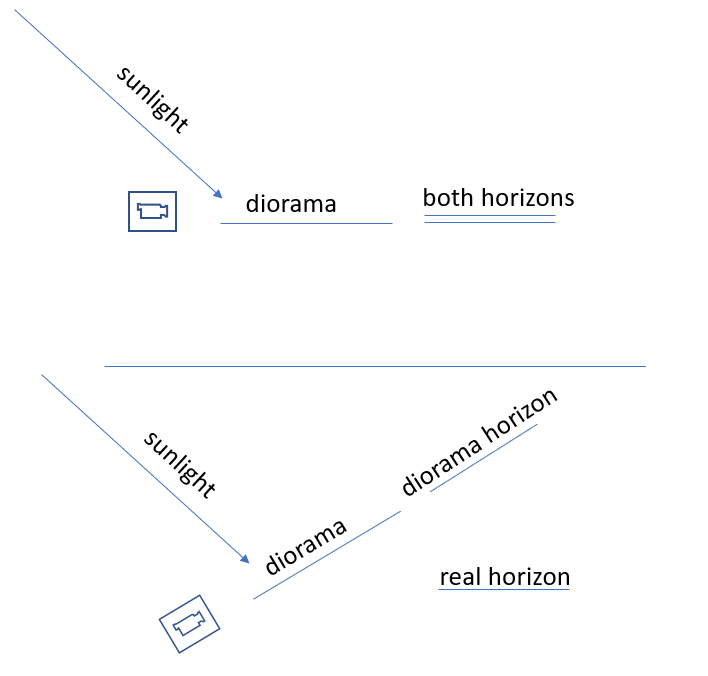
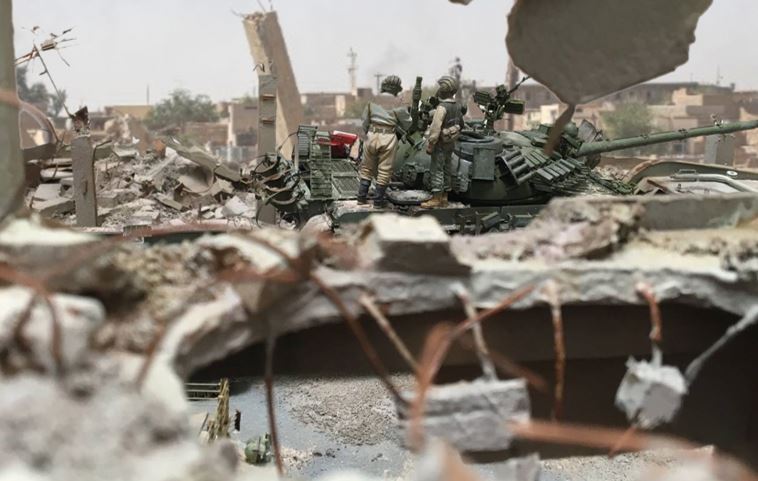
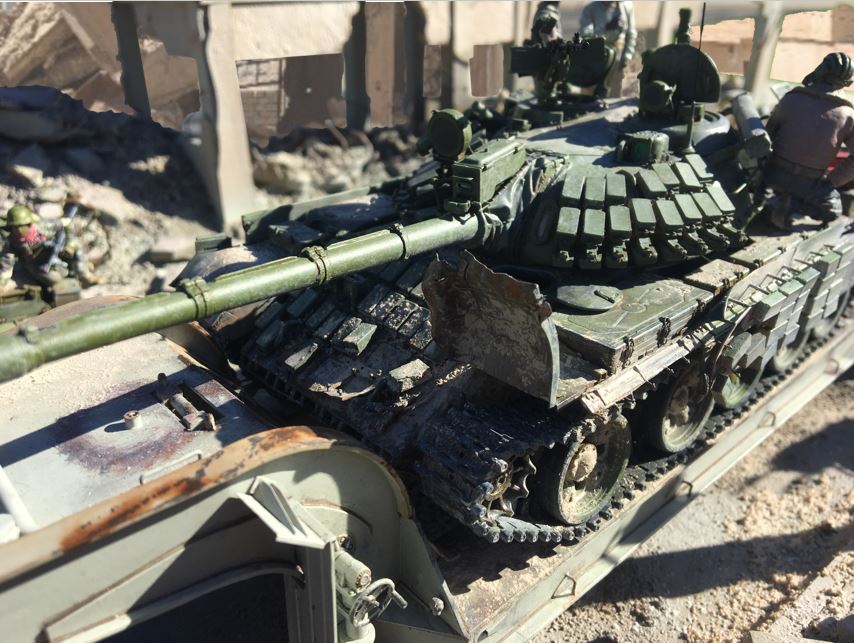
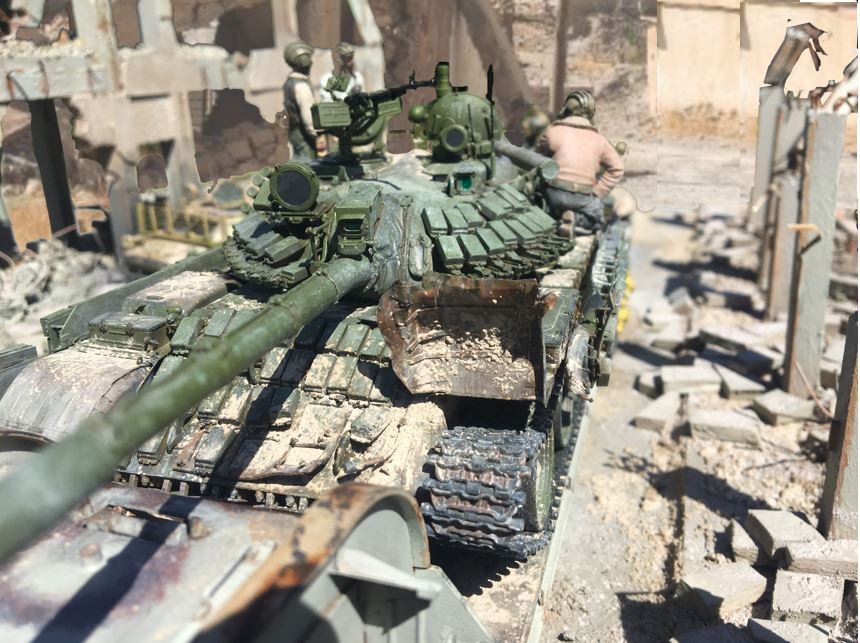
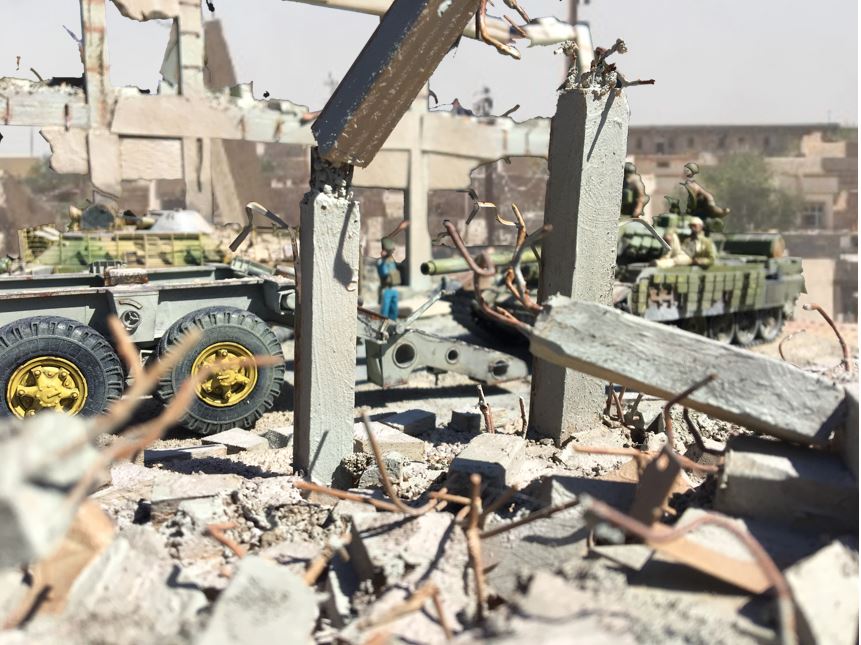
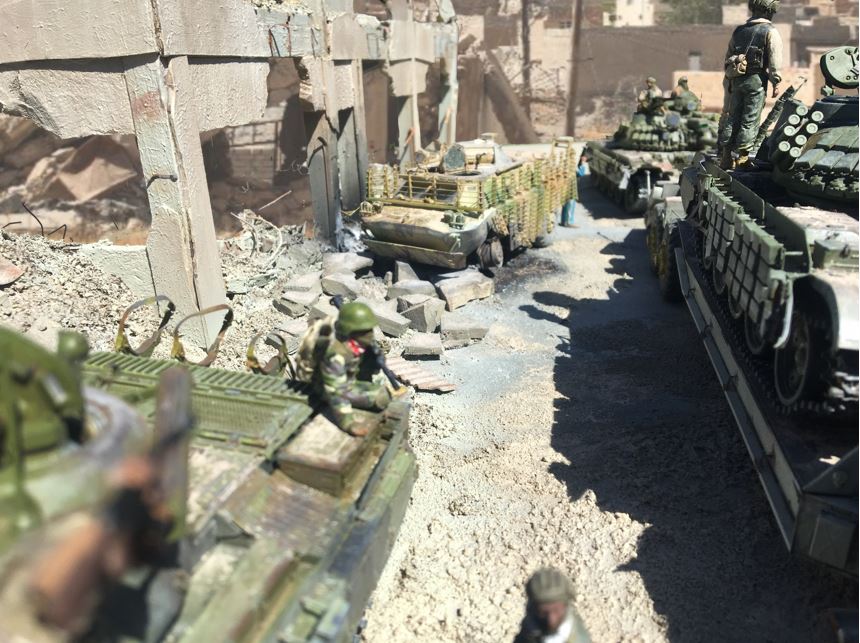
For some context, the WIP images above illustrate my challenge - the building, is really more of a ruin - which means you can see right through it.

So my final pictures all looked like closeups - not because I wanted them that close, but I didn’t want the background to get in the way:

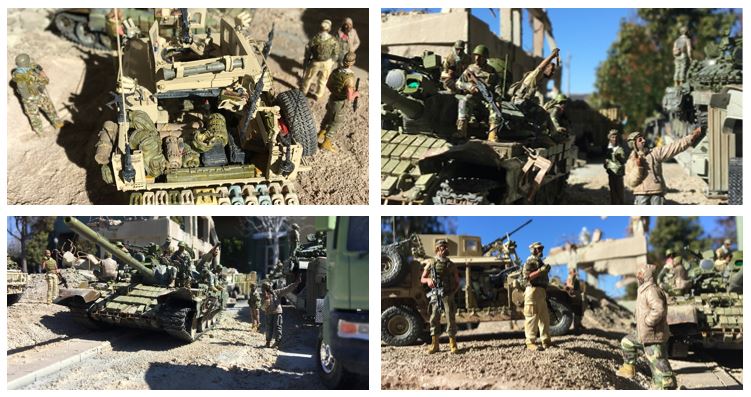
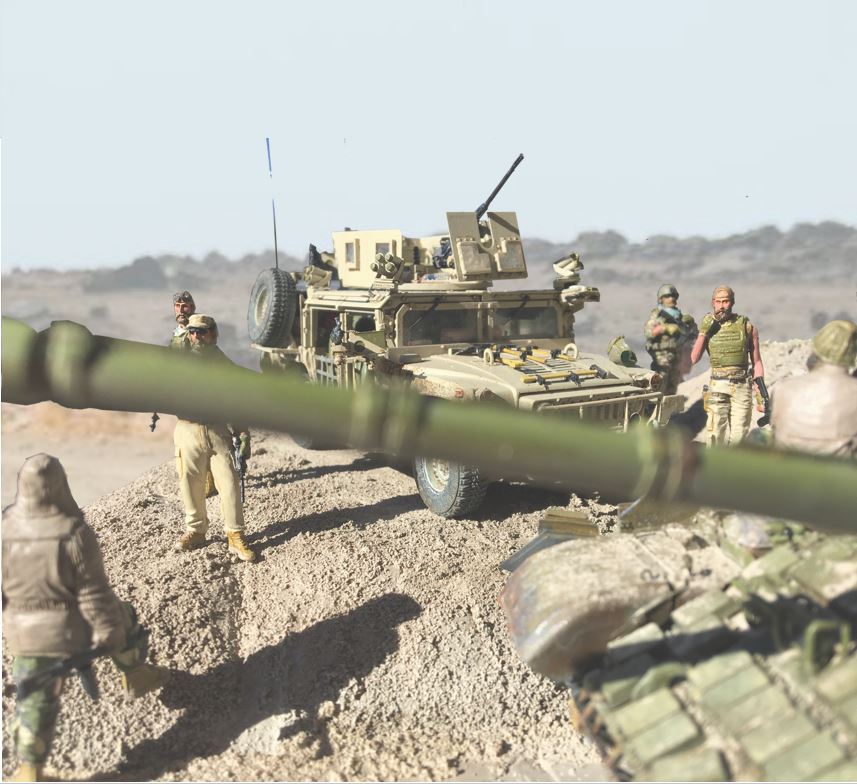
You can see the project, which is supposed to be in Northern Syria - but, there or anywhere else the background trees made it next to impossible to get any decent pictures of the overall project. As such, I never felt that good about calling it done.

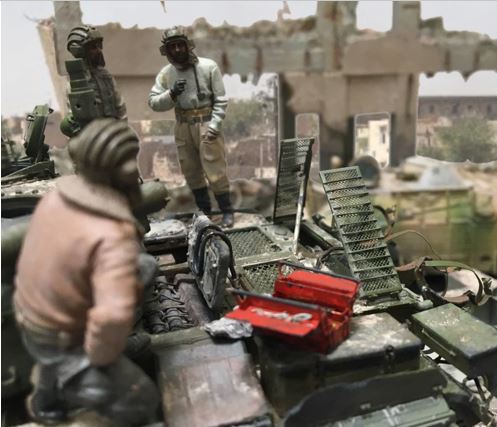
So, I found the old images and went to work. The experiment started with using some indoor images I took of the project when it was done. Because as they were taken against a white wall, they were relatively easy to “cut out”:

The pic above isn’t too elaborate or of the final project, but, I like it - others received a more complex background:

15_dio_in

18_dio_in

19_dio_in

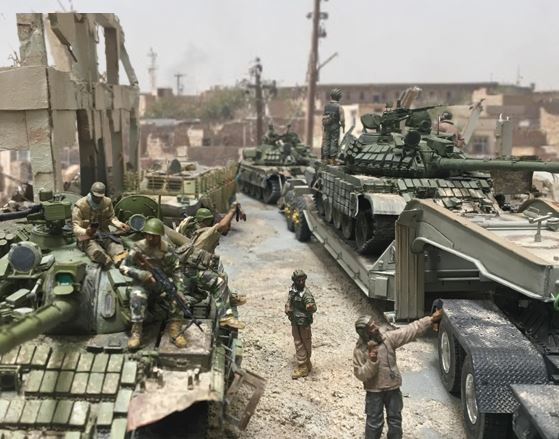
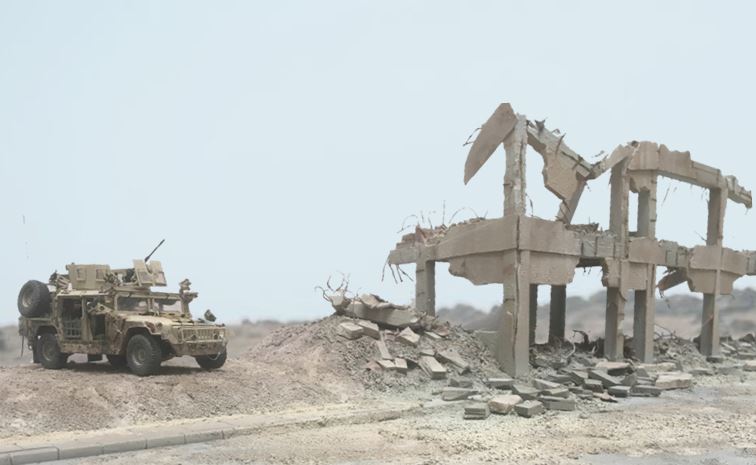
With this success, I went through the outdoor photos and picked a few to try and do the same:

I think the picture above reflects the intent of the build, and although it is a 2017 photo, it sure looks better without trees/dogs/buildings/real people in the background!

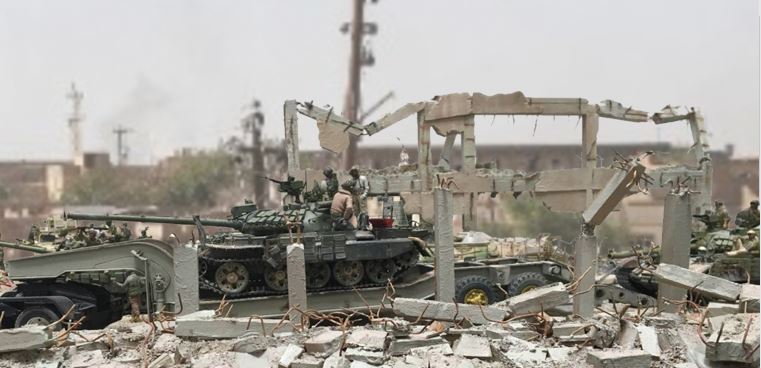
For the two above, I laid a greyscale/transparent box over the image to try and get the picture and backdrop to blend a bit better. Limited success - interesting to see tho.

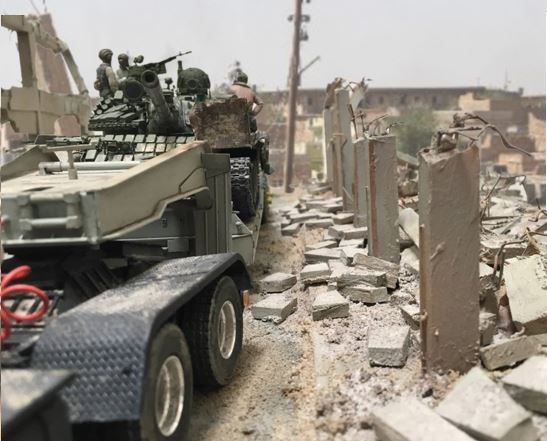
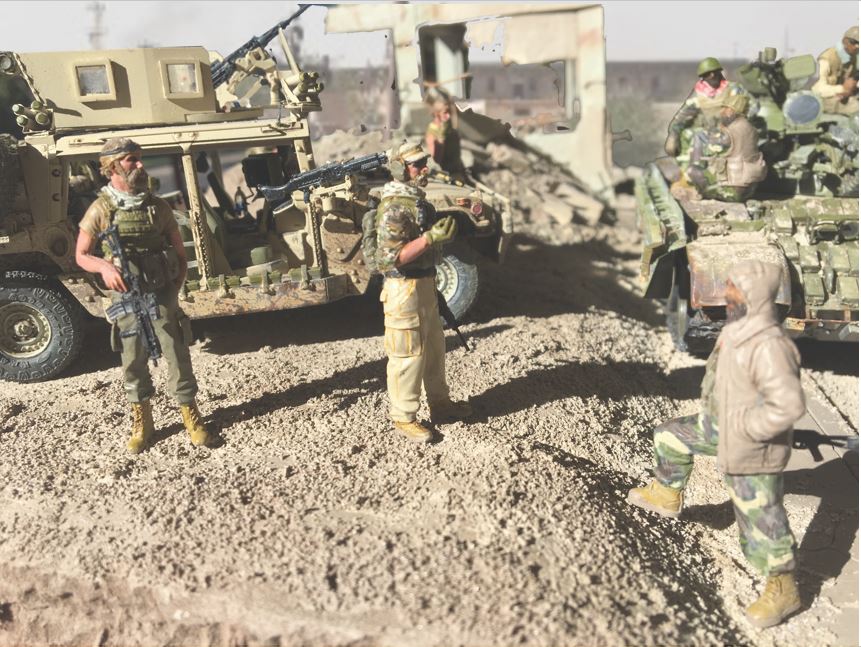
The following, like the first, are just outdoor pics - no filter:

So there you have it! This might sound ridiculous, but I feel better now calling this one done (again!)

Thanks for having a look

Cheers
Nick

10 Likes

Although you couldnt get an overall pic on the first lot you did a while ago (and I remember this from the old site as the ruins looked superb) the close up shots did and do look great as the natural shadows that are there give it a real genuine look, and they still stand the test of time.

And well done on the revamp and trying a new approach :+1:

Excellent results!
Two minor suggestions though:

  1. If you had angled the diorama when taking pictures outside so that the “horizon” of the diorama was above the real outdoors horizon you could have eliminated the unwanted real life background
  2. Angling the diorama gives you closer to 90 degrees angle between diorama “ground” and the sunlight → closer to Syrian sunlight. The angle of the diorama can be selected to generate a correct sunlight angle by comparing your locations latitude with the latitude of the place the diorama is supposed to replicate. Long shadows on a sunny day means early morning or late afternoon when you are close to the equator or noon in a very northern or southern location. Angling also allows you to lower or raise the sun so that photos taken late afternoon can look like noon in Syria.

You have done some very fine work there and I think you are certainly getting the hang of editing the background. This is such a large and complex dio, with the ruins giving you many complex shapes to deal with in terms of sorting out the background- what you have done so far is excellent, it gives the whole scene a more natural setting, like it is down a ruined street in a city. There’s certainly plenty to see in this dio too- from troops to machines to ruins. Fantastic stuff.

@Johnnych01 , yes - this is the same project as before - same pictures too, just presented in a different way, that I think better reflects the bigger picture than before. The longer I stay in the hobby, the more I find myself getting distracted by things like this, subjects for builds, presentation methods, painting techniques, materials etc! trying new things out - Thanks for your thoughts.

@Uncle-Heavy hi Robin - those are some good points - both in terms of attempting to reduce background clutter and so set geographically correct shadows - never thought of that one! I’m at latitude 38 - the project is depicting latitude 34, so with some calcs and basic assumptions (ie season and longitude), we could indeed calculate shadows and how they “should” look on the project. Not for this project tho - it’s done.

@Karl187 thanks, Karl. Editing the background is on one hand a bit tedious, but on the other, so is making a lot of rubble! So, for future builds, I will likely try this method again. To Robin’s point, I usually try shots from lots of low/eye level angles, to avoid unwanted background, but I live in an urban area with all sorts of distractions - buildings, trees, power poles, overhead power lines etc, so it’s unusual to get a picture with a “clean” backdrop.

I recently took photos of another project in a place with fewer visual distractions and it worked ok, so I’ll likely go there again. This alt location is about .75 miles from here, which I can easily walk one or two buildings/vehicles etc to - but, would need to drive a full dio there (current base is 2’ x 3’, so not carrying it that far) - which is pretty funny to me, but worth it!

Thanks for having a look - on we go

Nick

2 Likes

Missed this completely Nick, I also remember its awesomeness from the old site. Backgrounds are the bane of diorama photography as we know but I think your enhancements work really well. As Robin has suggested I used to angle all my dios to lift the horizon above unwanted 1:1 elements, which worked provided all the figures etc. are nailed down. I’m not sure how big your base is but my Anthropoid is too big (with the two halves only butted together) to do that, especially when it needs to be on a turntable outdoors so I can take photos of different viewpoints from a fixed position and spin it to keep the background clear all the time. I plan to take all shots with the sun pretty much overhead (over many days!) so the shadows shouldn’t vary enough to be noticeable.

I’ve also tried the backdrop ploy but not as successfully as Jerry Rutman in his current Epsom epic for one. Looking at yours I’d suggest it might be a viable alternative provided of course the sun’s always behind you. A lightweight backing panel around 18” high & 3ft or 4ft wide painted pale blue with maybe some airbrushed wispy clouds. With some experimentation you could print out photos of actual buildings (suitably faded using camera/phone software) and cut/glue them to the panel. Given the soft focus any joins should be invisible, especially if the panel’s fixed a short distance beyond the far edge of the base :tumbler_glass:

1 Like