I used thick CA to get in place and then used very thin CA to reinforce the join.
3 Likes
Looks good. Whose loops did you use?
2 Likes
MJ Minatures
4 Likes
Thanks. Didn’t know if was are own @JacquesD loops. 1/35 WWII US Vehicle Footmans (Tiedown) Loops (50) | eBay
I have his 1/16 M113 set. Might be an options as those MJ’s are out of stock.
2 Likes
Thanks, I just ordered a set from Jacque as the MJ are very fragile.
3 Likes
Yeah Amazon is out of stock but I defaulted to EBay and ordered a set for $17. Thanks Dan @Dan for pointing me toward these. I have PE ones that are a PITA to form and are flat profile. These should do the trick. I’ll be careful sawing them off.
2 Likes
Id recommend using snippers.
2 Likes

I can’t say “FRA-GEE-LAY” with my tongue stuck to the flagpole!
4 Likes
Don’t try it!
3 Likes
For those who want to evaluate kit and aftermarket parts or make their own locating jigs.
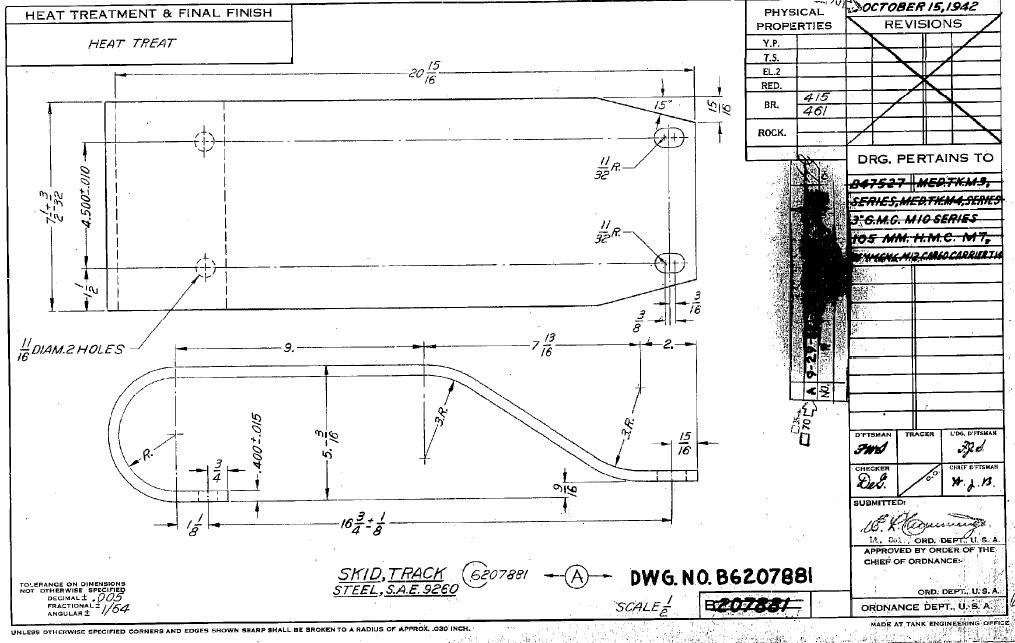
Note that the thickness is about twice what normal PE provides and about half what 3D printing can make.
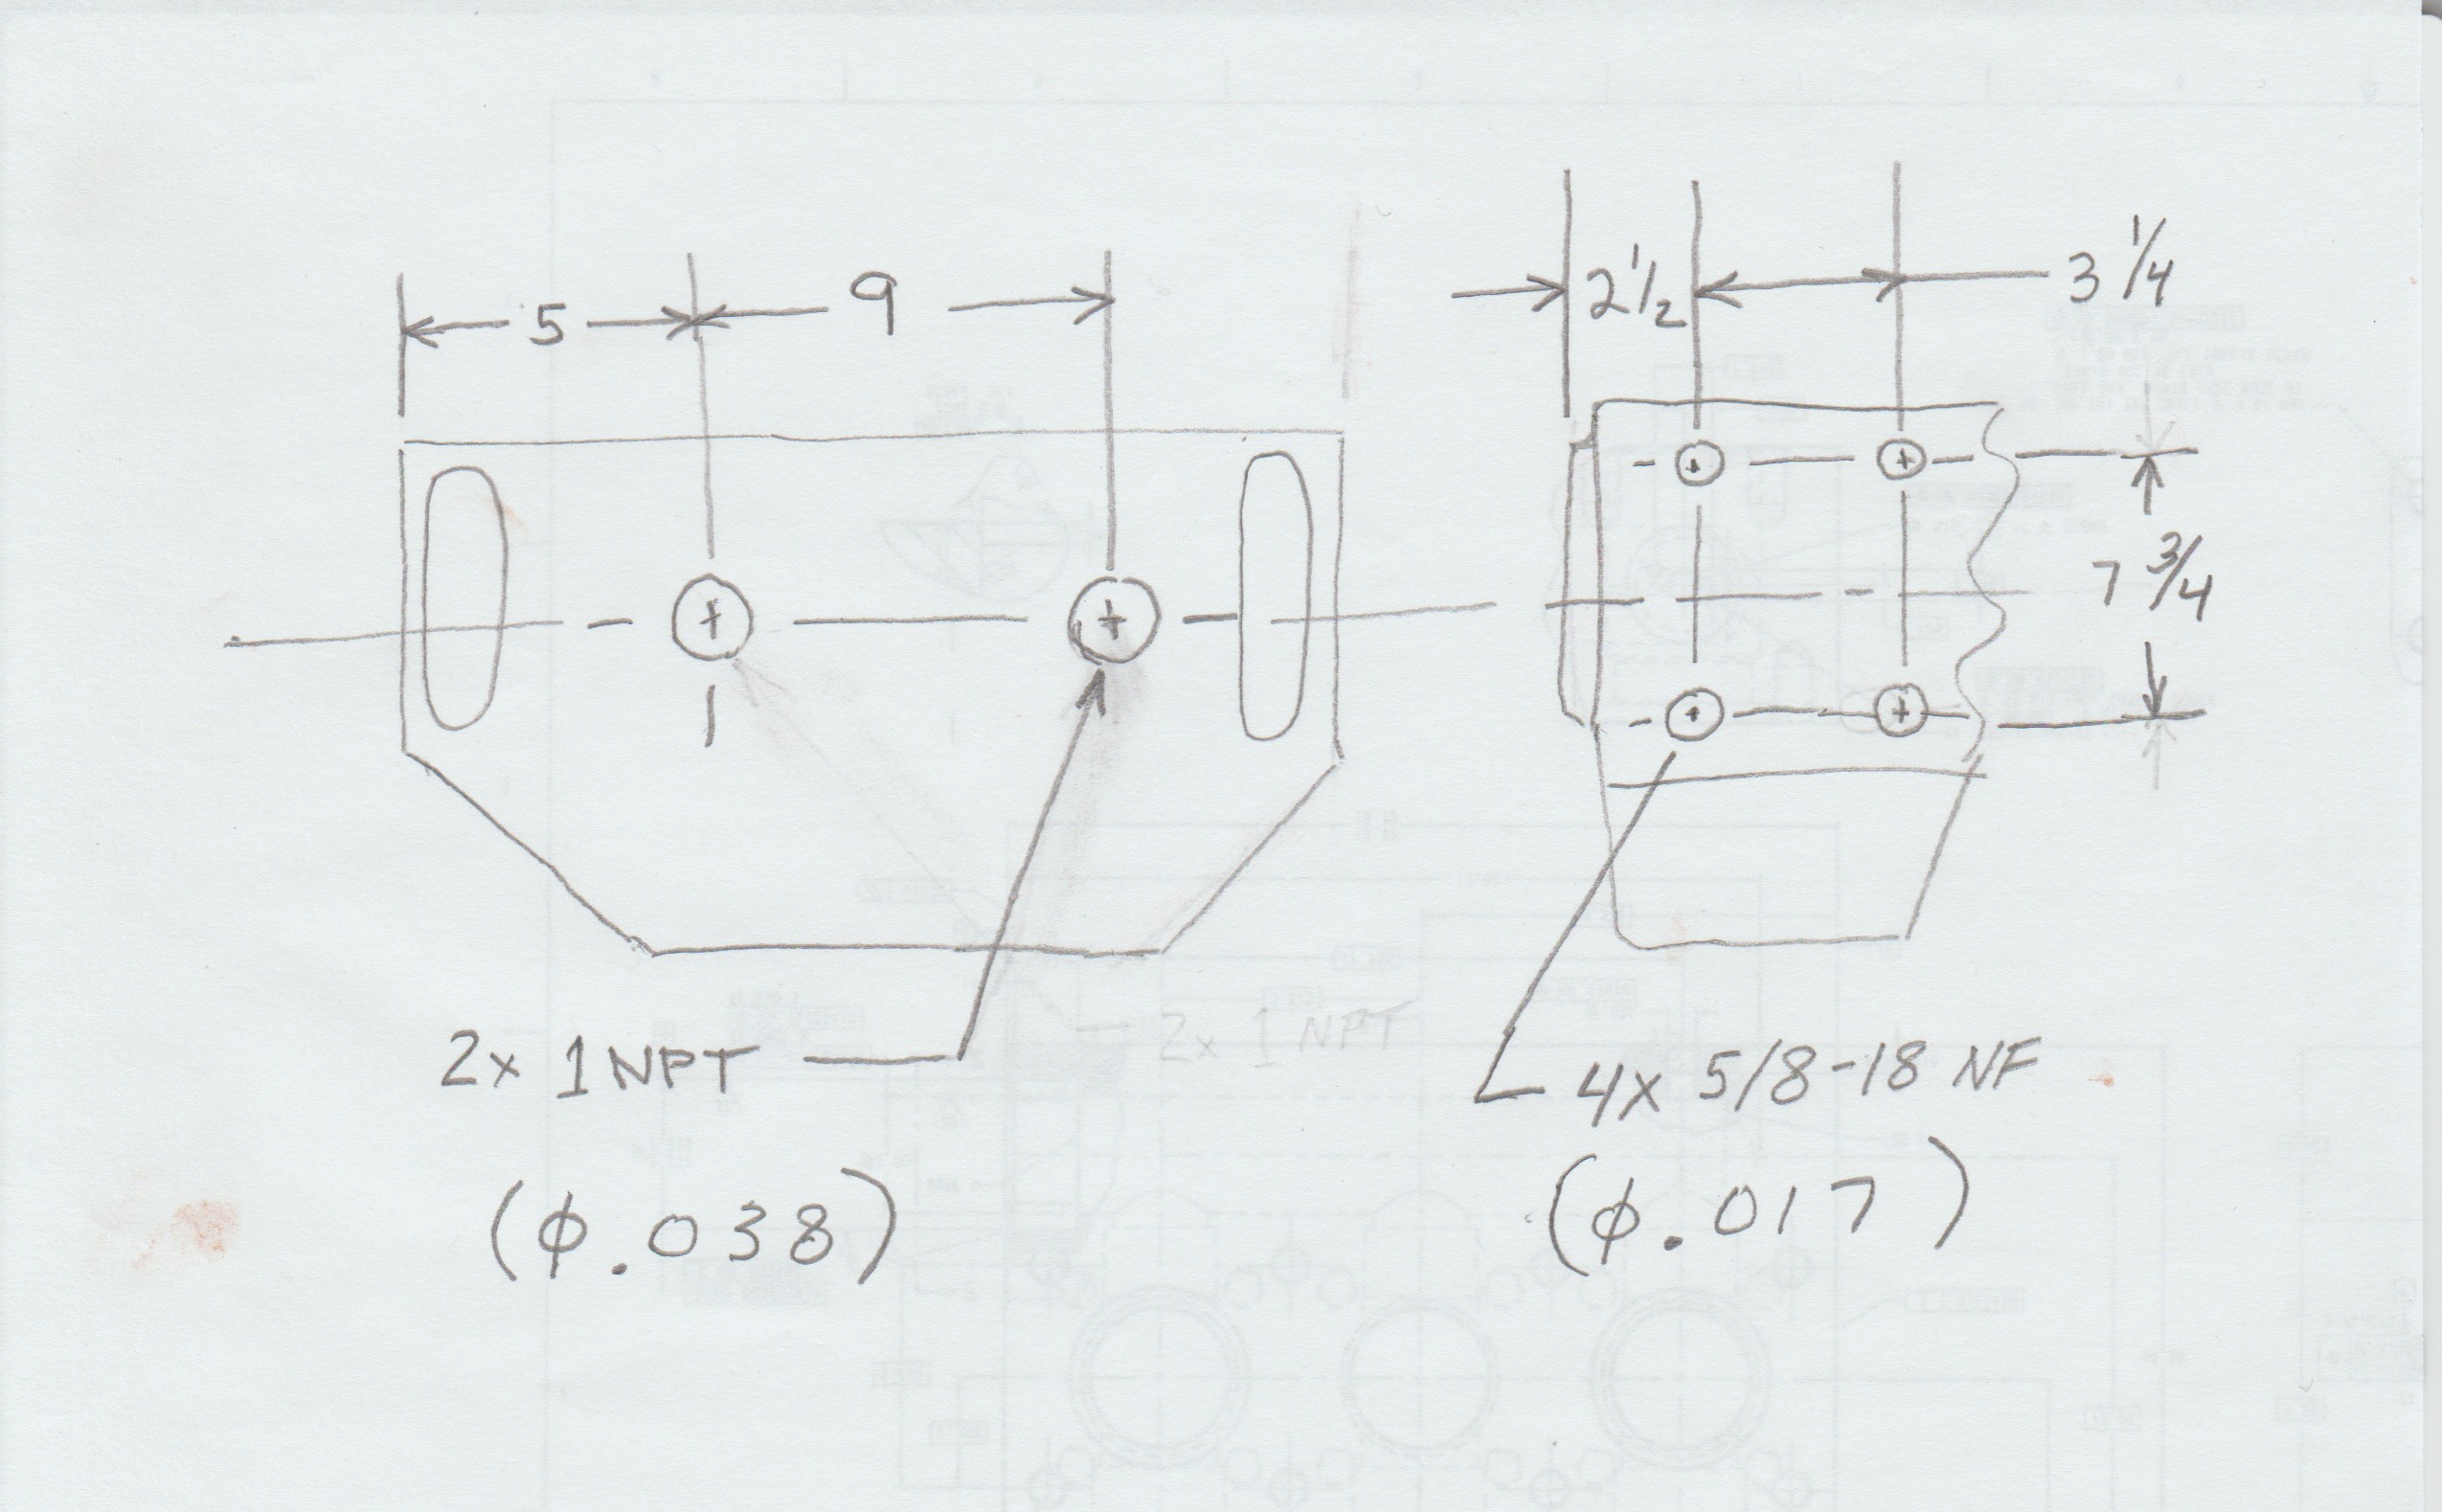
The dimensions in parentheses are 1/35 equivalents to the actual size items. For the spring compressor hole plugs use two disks .038 diameter and .005 to .010 thick. The four open bracket mounting holes should be .017 diameter; .035 deep will be plenty.
KL
5 Likes
For the truly AMS-afflicted, I believe the spring compressor holes were plugged with large grub screws that were supposed to be screwed in flush, and had a large recessed hex-hole for a giant allen key! So your thin disk needs to have a tiny hex-shaped hole cut into the middle. (And NO, I don’t bother with it myself!)
2 Likes
It was a pipe plug, not a set screw, and pipe threads are tapered so it is very difficult to make them flush. They invariably protruded to some extent.
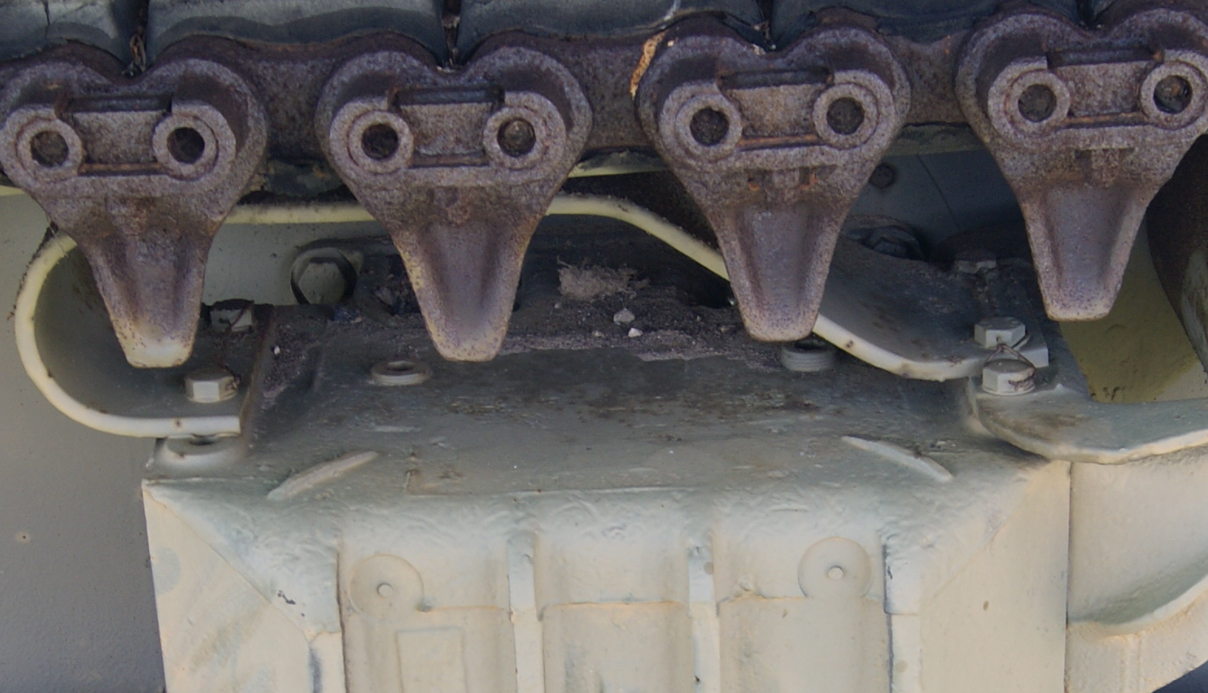
I would not bother with the hex socket either. FYI it was a 5/8 hex, .018 in 1/35. I don’t think anyone make a hex punch that small but a similarly sized circular hole would suit the illusion.
KL
3 Likes
^^^I think this is one of the reasons I became addicted to the Sherman tanks. Always learning new things about these vehicles. I had never paid attention to how the skid makes a sandwich out of the top lip of the return roller bracket arm. And underneath both there is a small raised molded in ledge where they machined the threading for the bolts. The skid must have an offset to compensate for the thickness of the return roller bracket otherwise it would sit at an angle with its front lower than the rear. I never paid attention to that or the additional bolt that sits right outside of the skid that also helps to hold the return bracket in place.
As for the tapered (conical?) threading on the spring adjustment plugs (?), I wonder if the shape protects the threads from the pressure of the springs. I’m not smart enough to figure out why that tapering would somehow disperse the energy in a way that wouldn’t damage the threads as opposed to a straight thread..
2 Likes
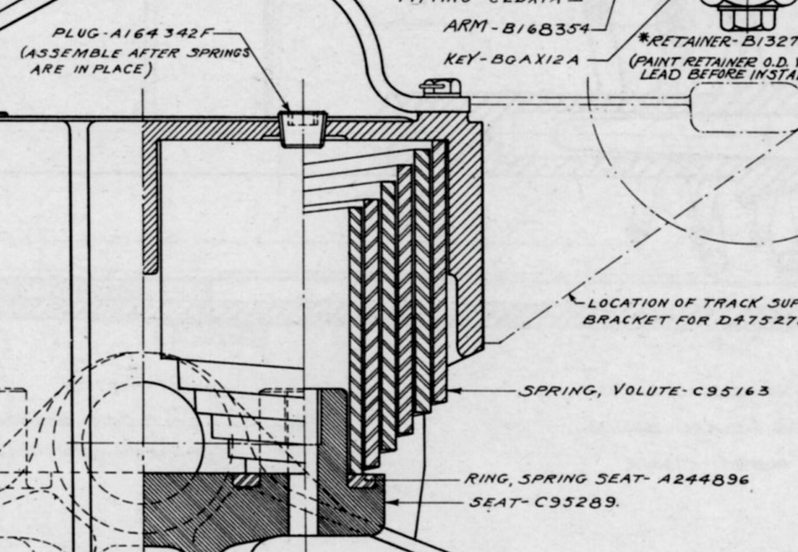
The threads are never loaded or touched by the springs. Pipe threads are tapered so that the joint closes up and seals (more or less) as the parts are tightened. They likely used a pipe plug as it is a simple, one-piece, self-locking (more or less) closure.
KL
4 Likes
So the plug is literally just a plug for the hole? As in the actual tightening device is internal? So you would remove the plug, stick something down into the hole to tension the springs as desired and then put the plug back into place?
1 Like
To paraphrase Freud, sometimes a plug is just a plug.
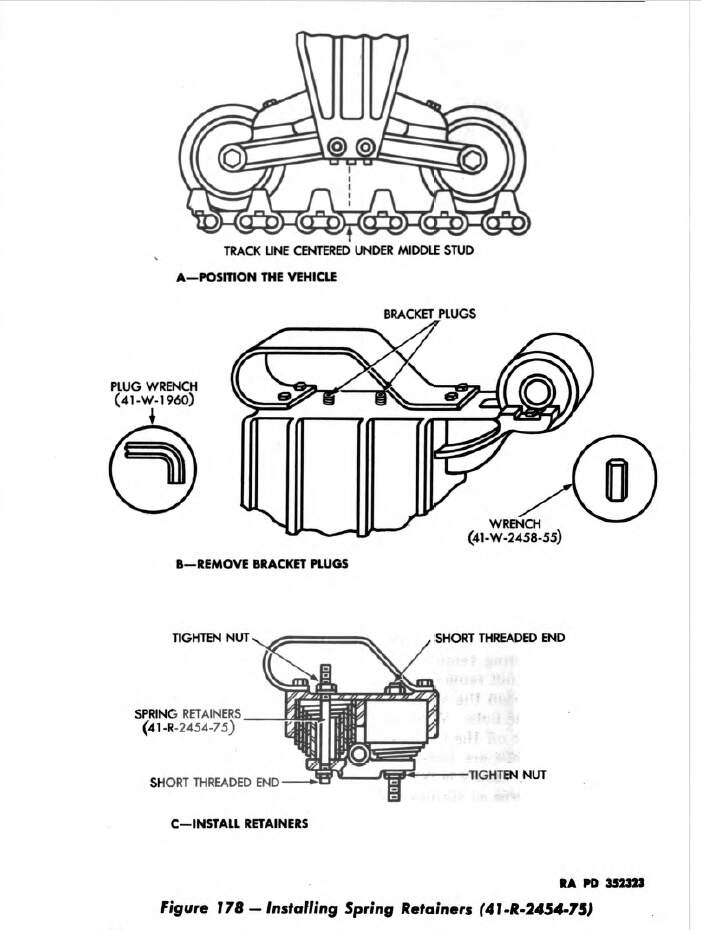
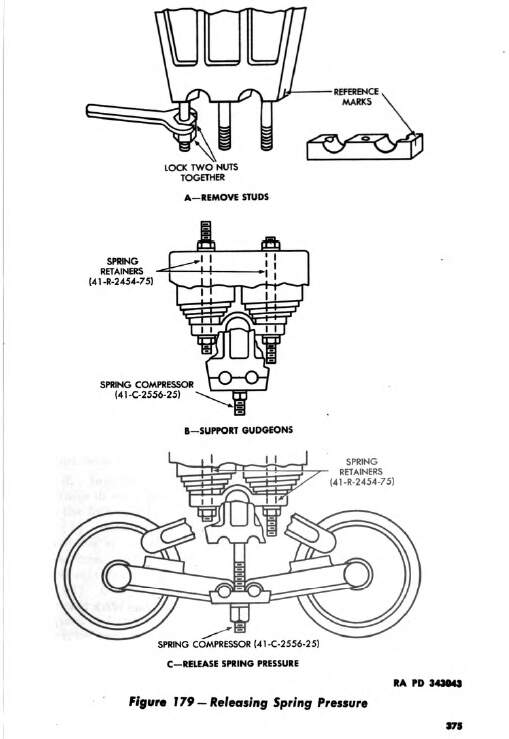
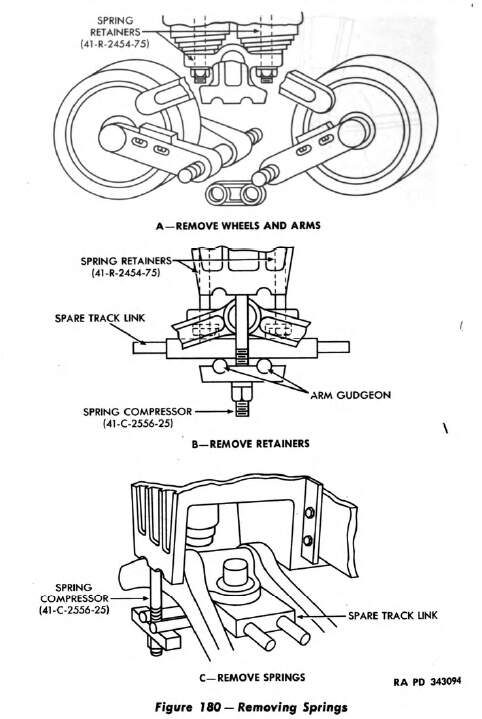
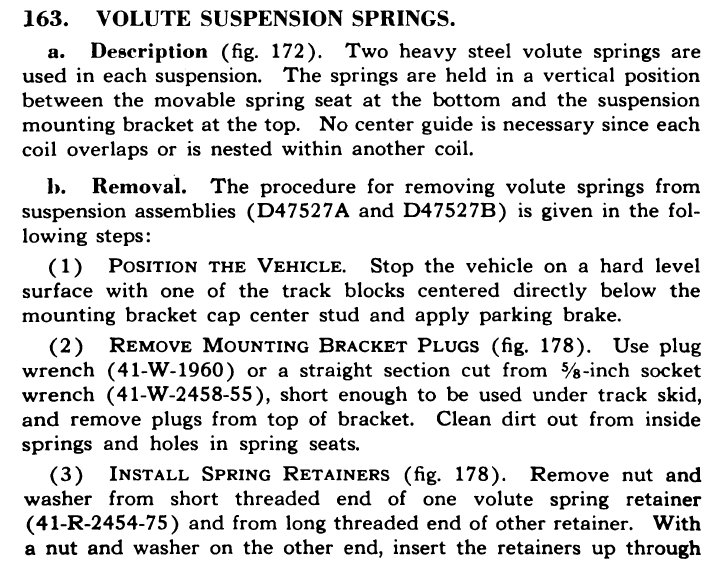
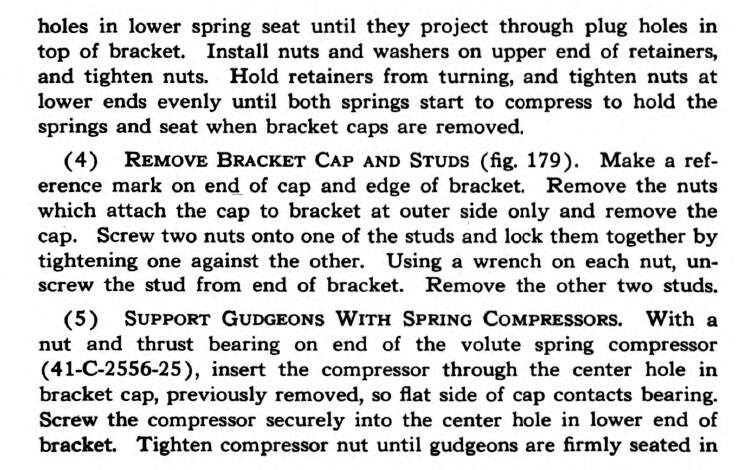
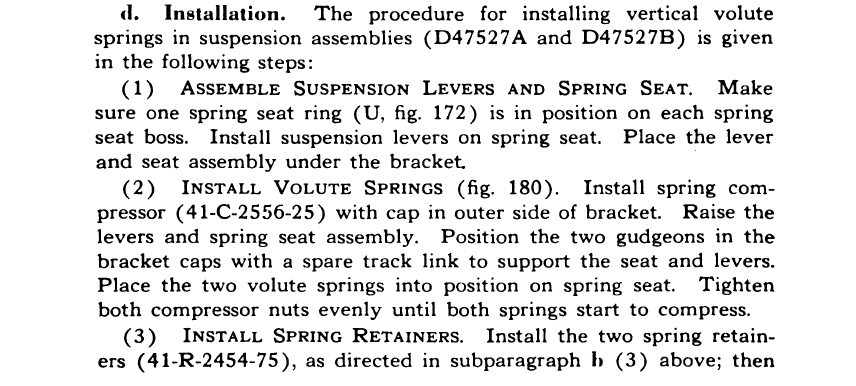
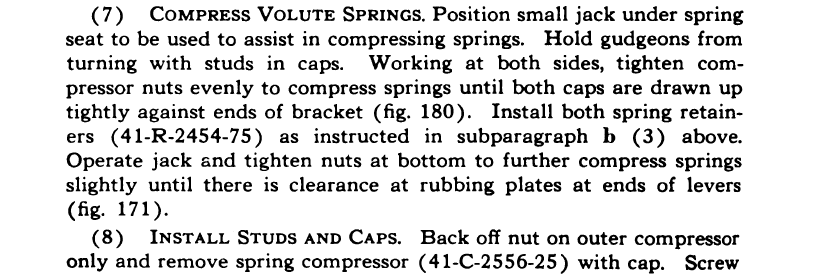
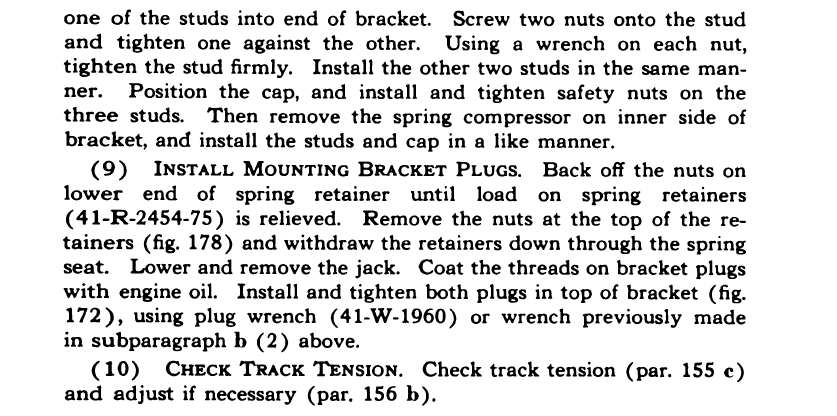
The tightening (compressing) device is a tool called the Spring Retainer, not part of the bogie. And, the the springs are compressed just so the bogie can be assembled or disassembled, not to set the springs at a desired point
.



KL
7 Likes
The point of the holes is to allow a tool to be inserted that takes the spring pressure off the suspension arms, else it would be difficult — not to mention dangerous — to remove the arms, and very difficult to put them back in.
2 Likes
Think of it as a bigger version of the spring clamp your local garage uses when changing the shocks on your car! The hole was for a tool that pulled the spring up into the housing, taking pressure off the upper rocker arms.
3 Likes
I was thinking the same thing. I did this two years ago on my Ranger, I didn’t like the rake that it had from factory so I leveled it and brought up the front a couple of inches and added a higher performance set of struts. I don’t remember now if it was Harbor Freight or my local auto parts I went and rented the tool, compressed my springs, and then put the new heavier duty adjustable strut and then released the tension once the bottom plate was re-installed.
I know different type of springs but the concept is very similar, they would remove the plugs, insert basically a big bolt in there, use nuts on top and bottom to compress the spring and take the spring tension load off the arms. Then they could service whatever needed to be serviced. I have seen vintage images of field repairs where the mechanics just used a jack to lift one arm of the bogie to replace a wheel. I wonder if that was safe or recommended or if they were just kind of winging it without having to deal with going thru the motions of tensioning on the springs to save time?
I think I’ve even seen a photo where they used something like a come along with a cable or chain to lift the arm, probably because they didn’t have a jack handy?
1 Like