My wish list keeps getting bigger. It does look great though 
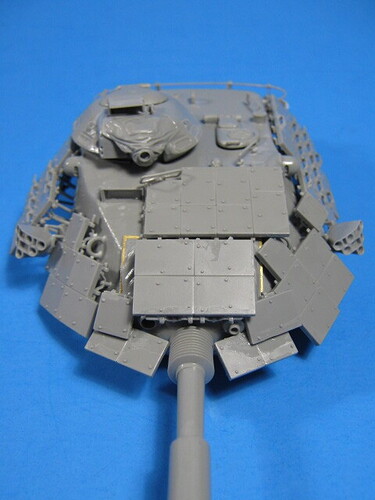
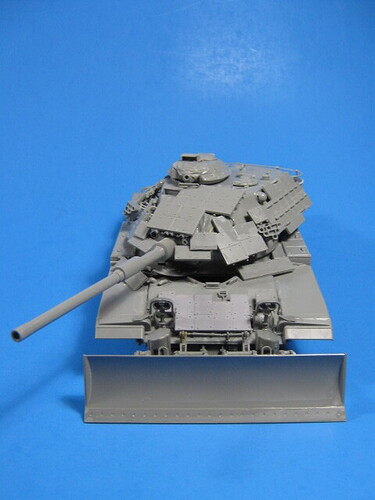
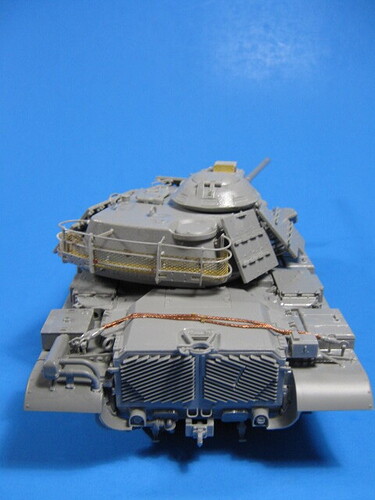
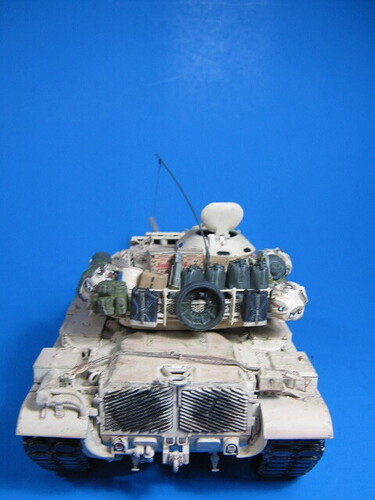
I was able to finish the basic build today. Here it is with the ERA all in place. They went together well, with no issues; just like the rest of the kit.
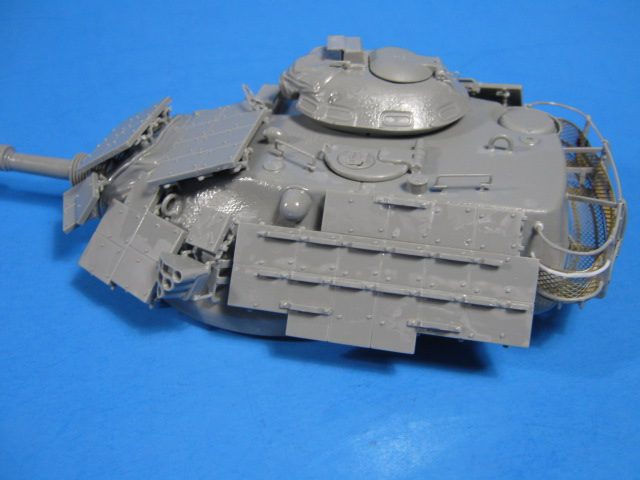
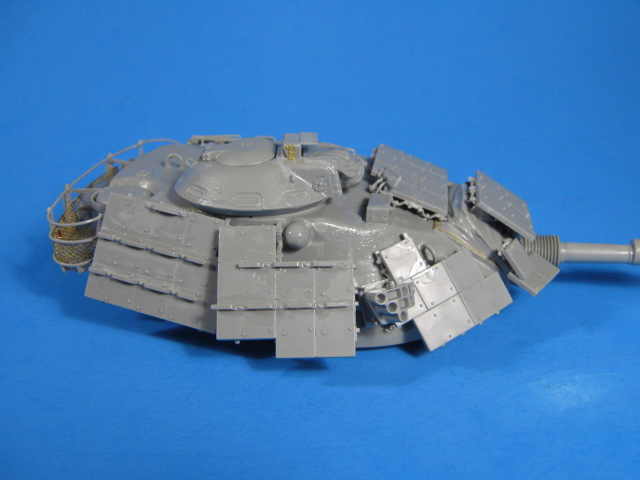
Here it is all together.
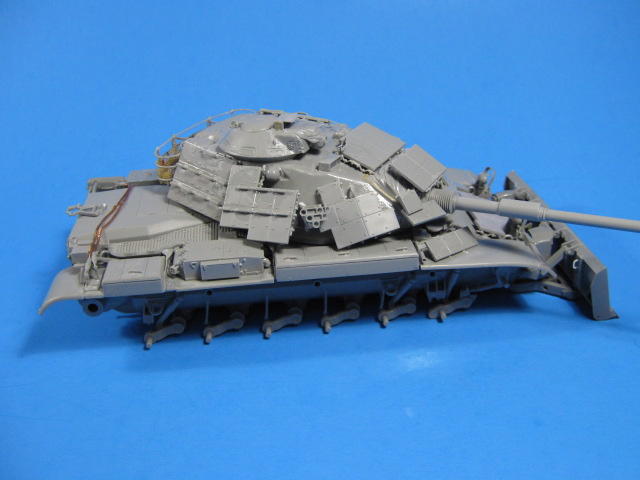
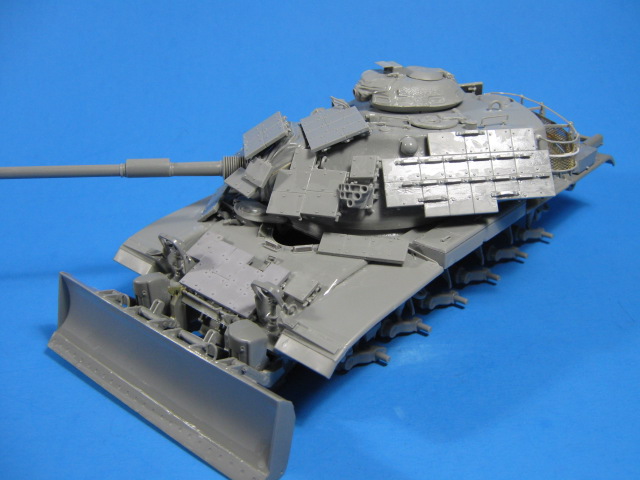
I am putting the rest of this on hold for a little while though as I just discovered I am out of sand paint. Off to order it and wait as there is no longer a hobby shop anywhere near me.
The sad truth for a lot of people these days.
Have loved the build so far Gino. Looking forward to seeing more.
Fantastic build , looks like a very good kit
Thanks gents. It is a great kit. I hope to be able to continue on it by this weekend. We shall see.
I like where they put the tow cables on this version.
Much better than the turret.
Nice job on the kit Gino.
I like them on the turret. Out of the way, yet easy to get to. With the ERA, they had to move them. Thats life!
Ken
Thanks guys. The cables on the rear deck is interesting. I could see how they would be a bit harder to remove and use though.
Looking great Gino.
Cheers,
Ralph
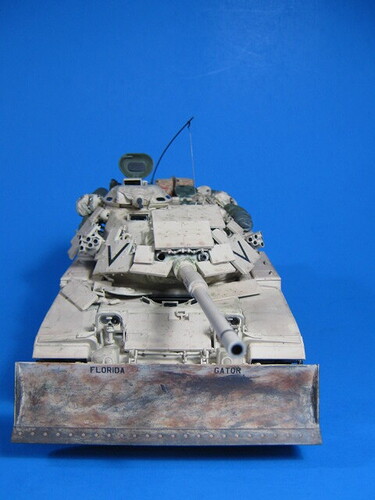
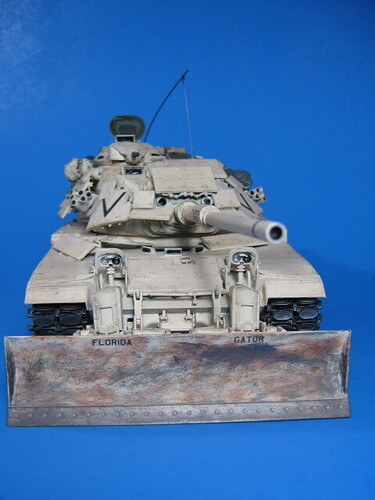
I finished up the M60A1 RISE / Passive w/ERA and M9 Dozer Blade.
I ended up paining it with a rattle can of Rustoleum satin Ivory as I couldn’t get the Testors Model Master Sand any longer; damn Rustoleum for cancelling it.
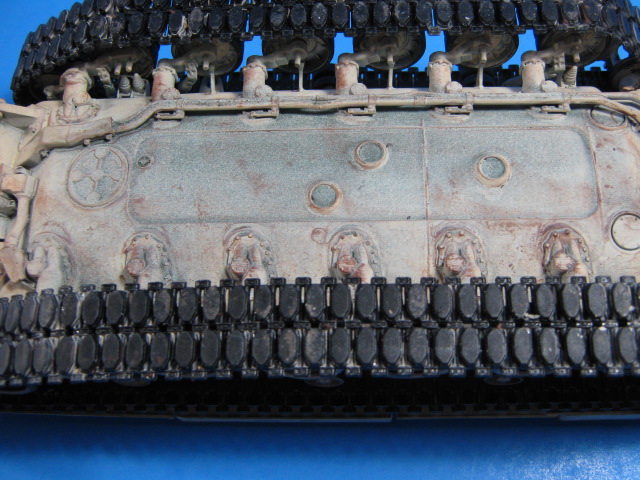
First, I painted the lower hull, behind the ERA panels and, around the hatches dark green. Then I painted the Ivory, going lightly around the green areas so it would still show in corners, behind the ERA, and on the underside. It is hard to see in the pics, but pretty convincing in person to show a tank that has been hastily over-sprayed sand.
Here is the underside to see what I mean.
Once it was sprayed, I added the decals. Since I am a graduate of the University of Florida, I had to go with the “Florida Gator” option; Go Gators!! The decals went on without any problems and snugged down nicely.
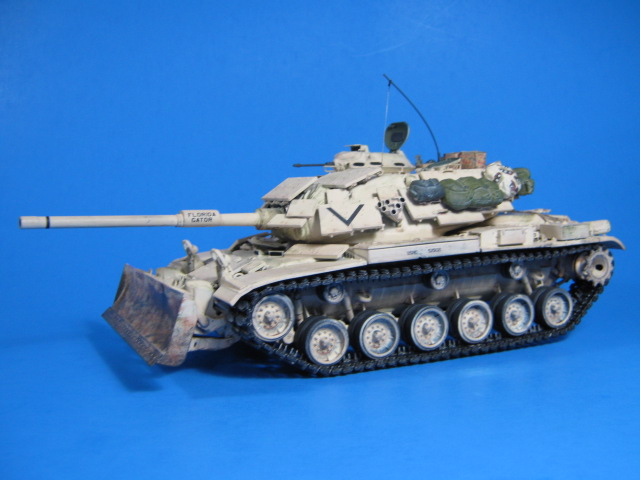
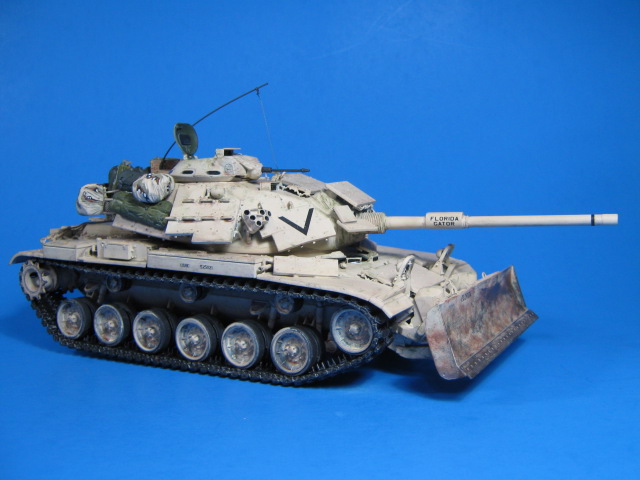
After the decals, I drybrushed some dark green on areas that would wear to show the sand being worn down to the paint below. Then I drybrushed with a bit of a rusty brown color selectively to show dirt and wear. Next I washed it with an earth brown color and then a sandy color. I drybrushed gun metal and rust onto the blade to show some bare metal on it where it has been rubbed clean by the dirt.
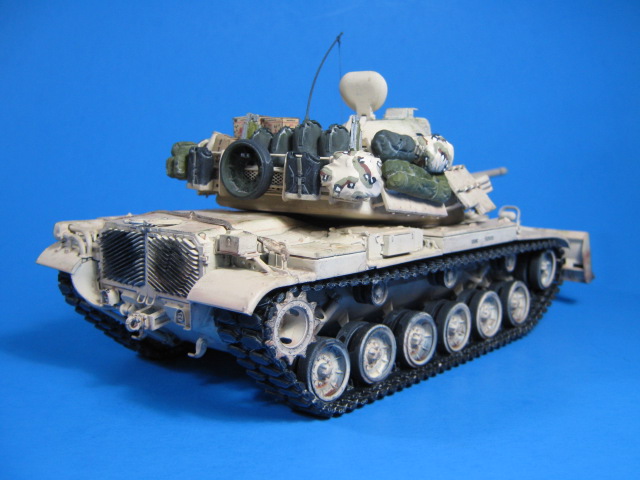
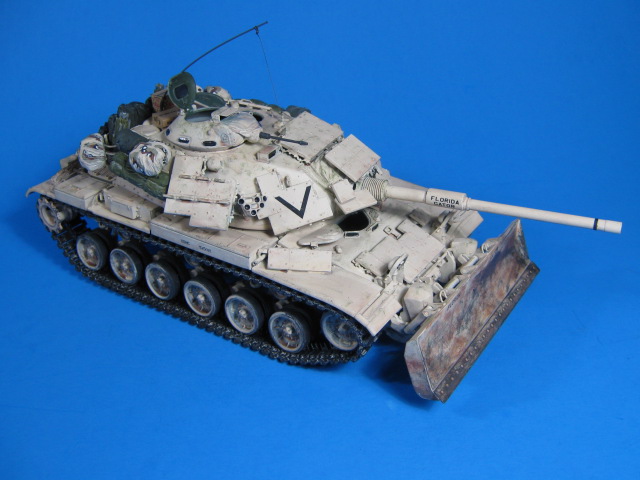
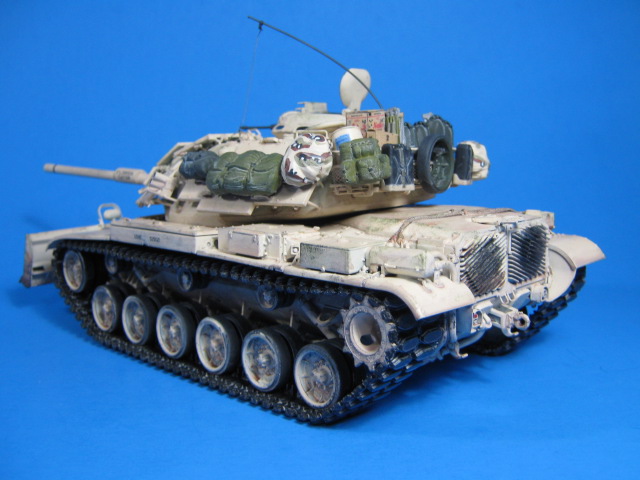
I added gear from the spares bin; MRE boxes, water boxes, a couple cots, camo net bags, etc. to represent vehicles how they looked in ODS; well laden with lots of junk.
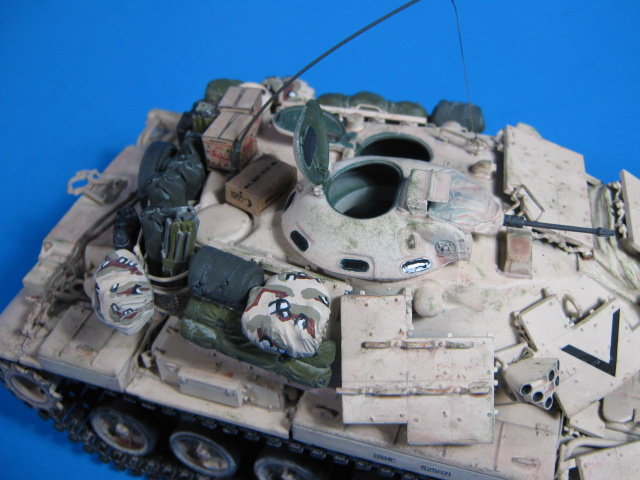
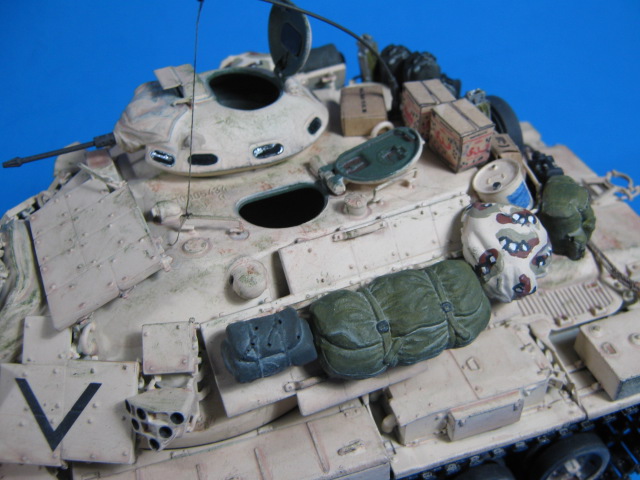
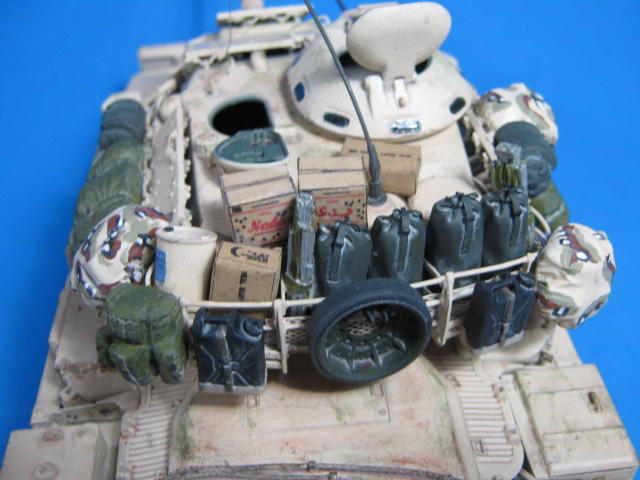
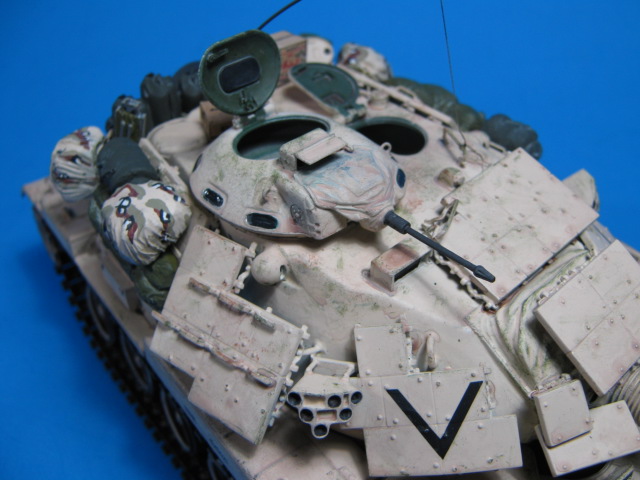
The dozer blade is still movable as well. Here it is with it down in digging position.
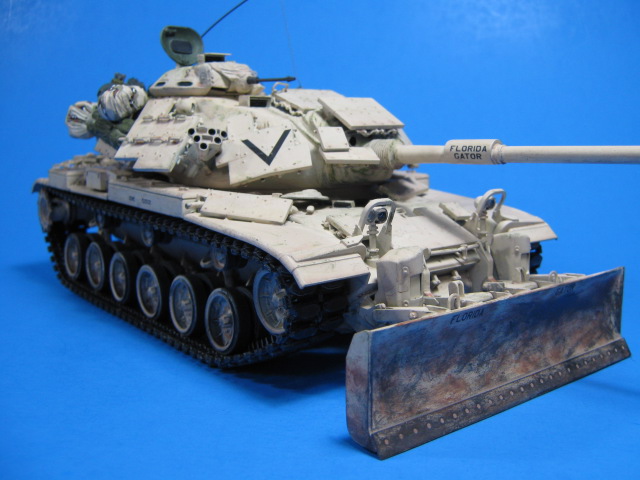
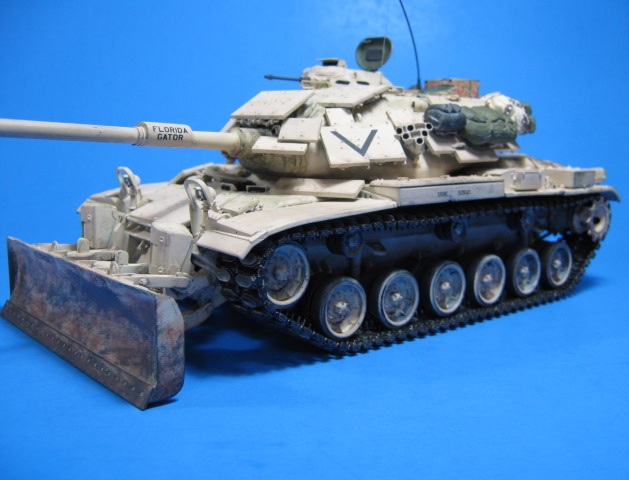
I had fun with this one. The kit overall was a great kit, no issues. I highly recommend the Takom M60s, they are awesome.
Well done Gino this one’s a winner! Good solid build and great finish! Paint job looks fantastic and weathering is superb. Stowage looks great. Outstanding model!
Great work and a really excellent finish. Definitely has the lived in and used look which is so evident in the online images you see of the 1 to 1s. Top job 
Thanks gents. I really enjoyed building it and am glad you see it like I did.
Looks great Gino! The dozer blade weathering is especially nice.
Very well done Gino. Thanks for posting the build.
Very nice Gino, and a great job on all the gear too, I take it that is aftermarket? I like the green showing through, and the blade looks great.
Thanks gents. I am very satisfied w/the build and how it came out.
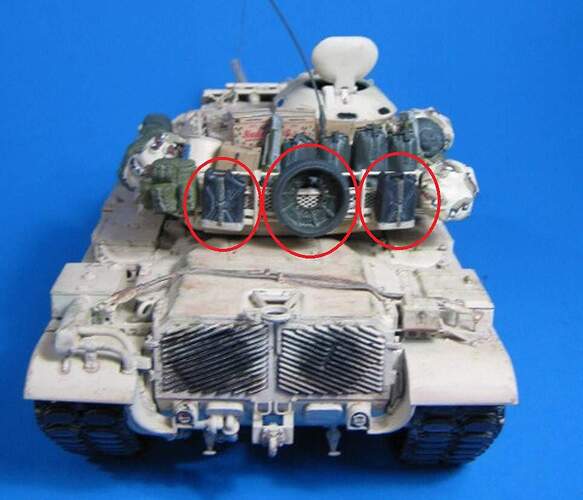
Jim, no, all the gear is not from the kit. Some is aftermarket resin, some from other kits; all from my spare TA-50 bin. The only pieces that come with the kit are the two water jugs in racks on the rear of the bustle rack and the spare road wheel (two in the kit), it even comes with the two-part center guide tooth to mount the spares with (two of each in the kit as well).
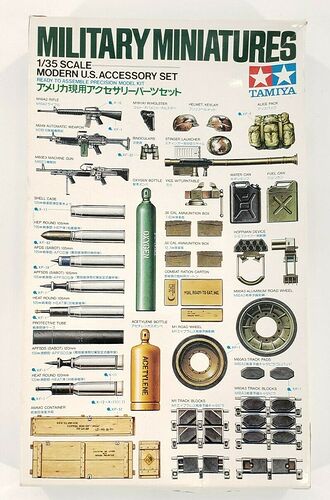
However, the spare road wheels in the kit are the smooth, steel ones. I opted for the aluminum road wheels with fins, so I swapped it out for a spare aluminum road wheel from the old Tamiya Modern U.S. Accessory Set (35141).
Excellent job Gino!
Thanks Taylor. I enjoyed it.
Thanks Gino, that will really help with my eventual build too. I think the only way they could top this kit is with a mine plough version.
Thanks again. J.
