Started building this kit over Christmas break, was visiting some family and decided to bring a small kit along to keep me busy. It’s a pretty simple kit, which made for quick building, but I was not all that impressed with the fit. The putty had to come out a few times, and some parts like the grousers were a loose fit. Would make for a nice beginner’s kit if not for the PE, which puts it at a more intermediate level.
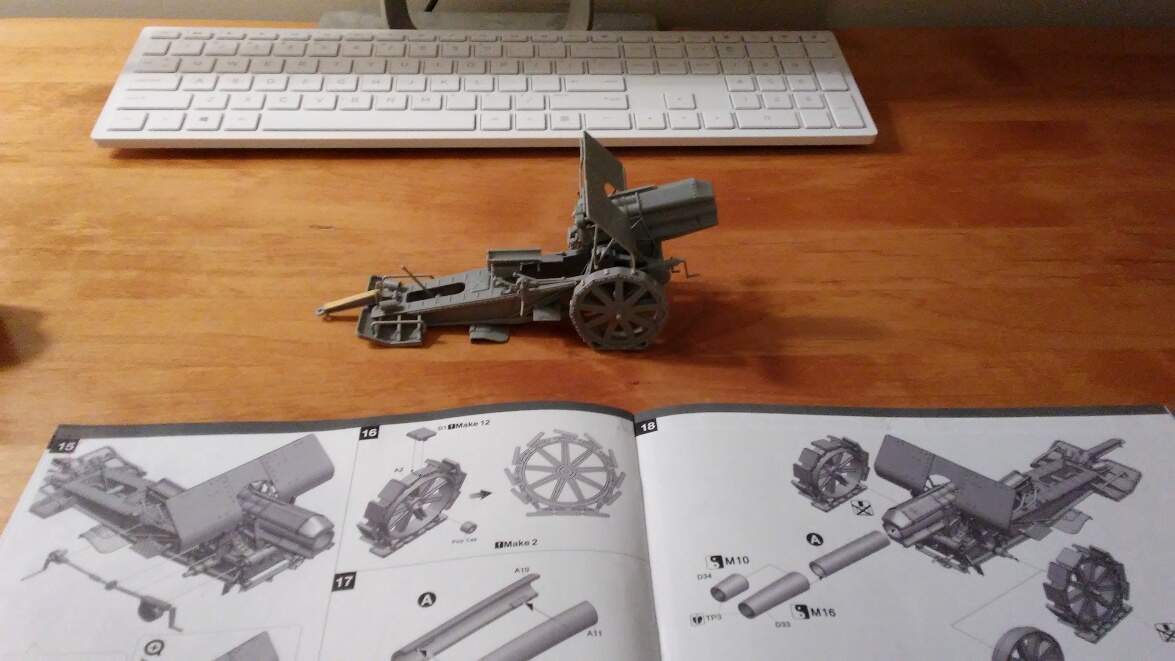
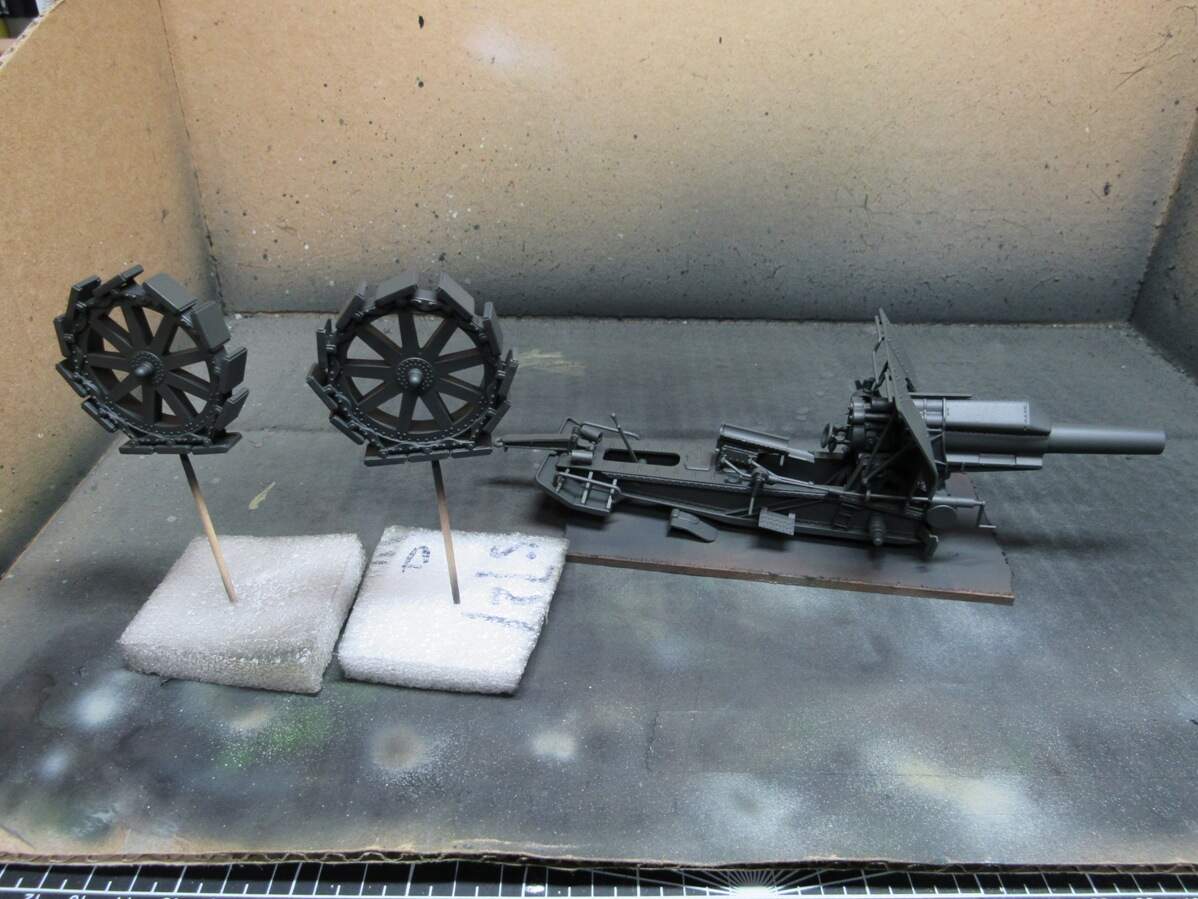
The only WIP picture of the build I have,
Built on the same desk that I built my first kit on 7 years ago. Came full circle.
Once back home, I shelved the kit and got a little distracted expanding my workbench, but with that done it was straight back to modeling.
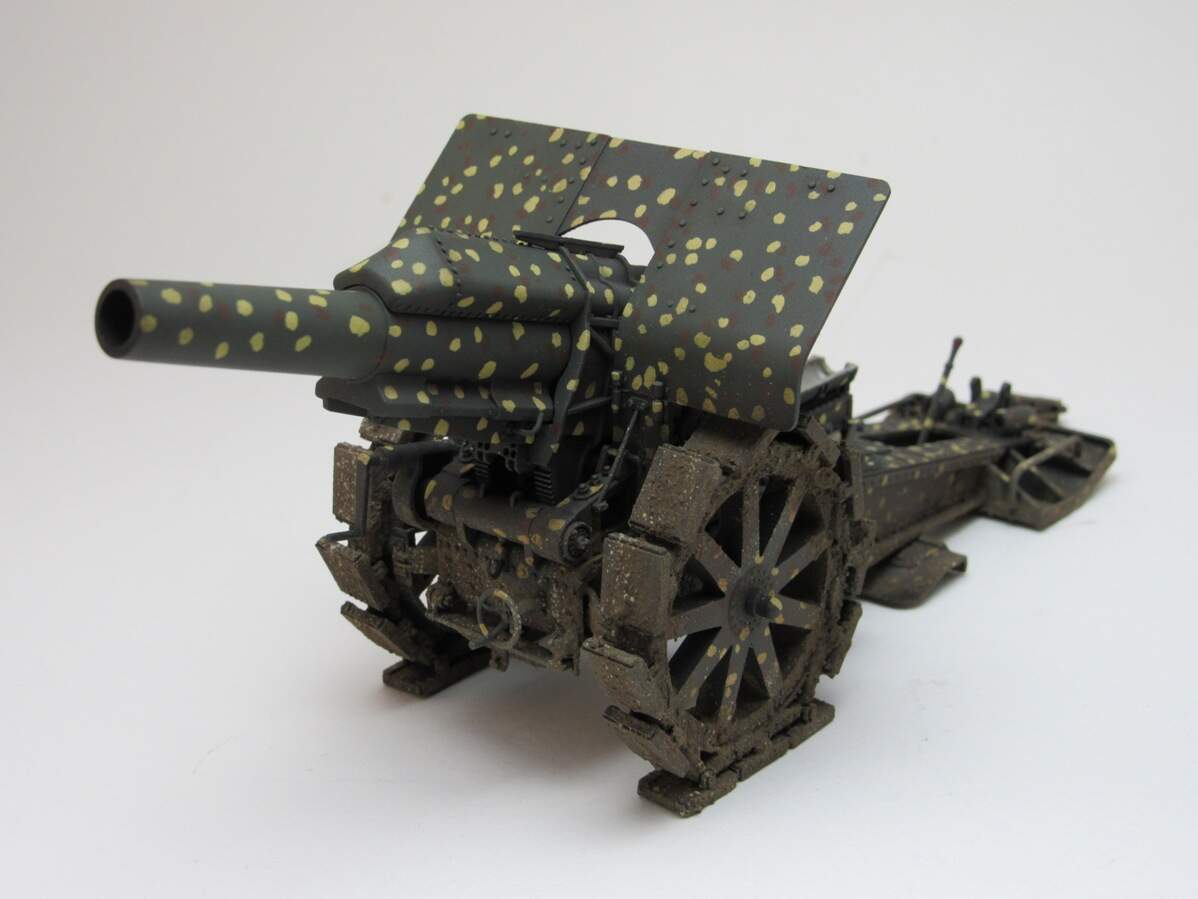
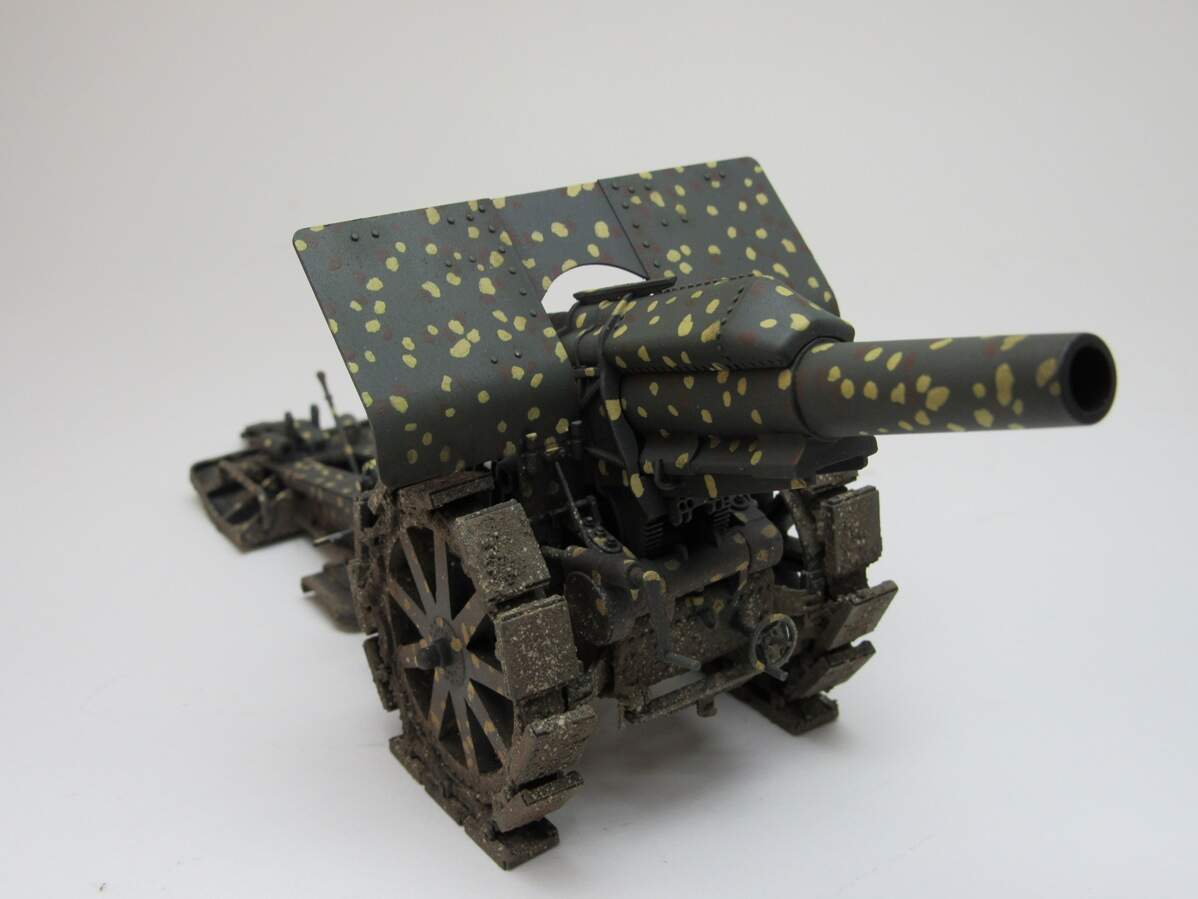
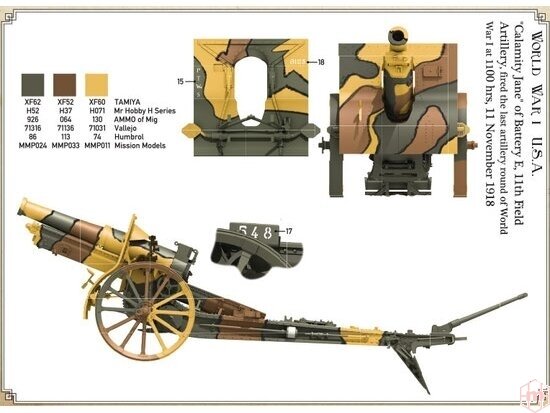
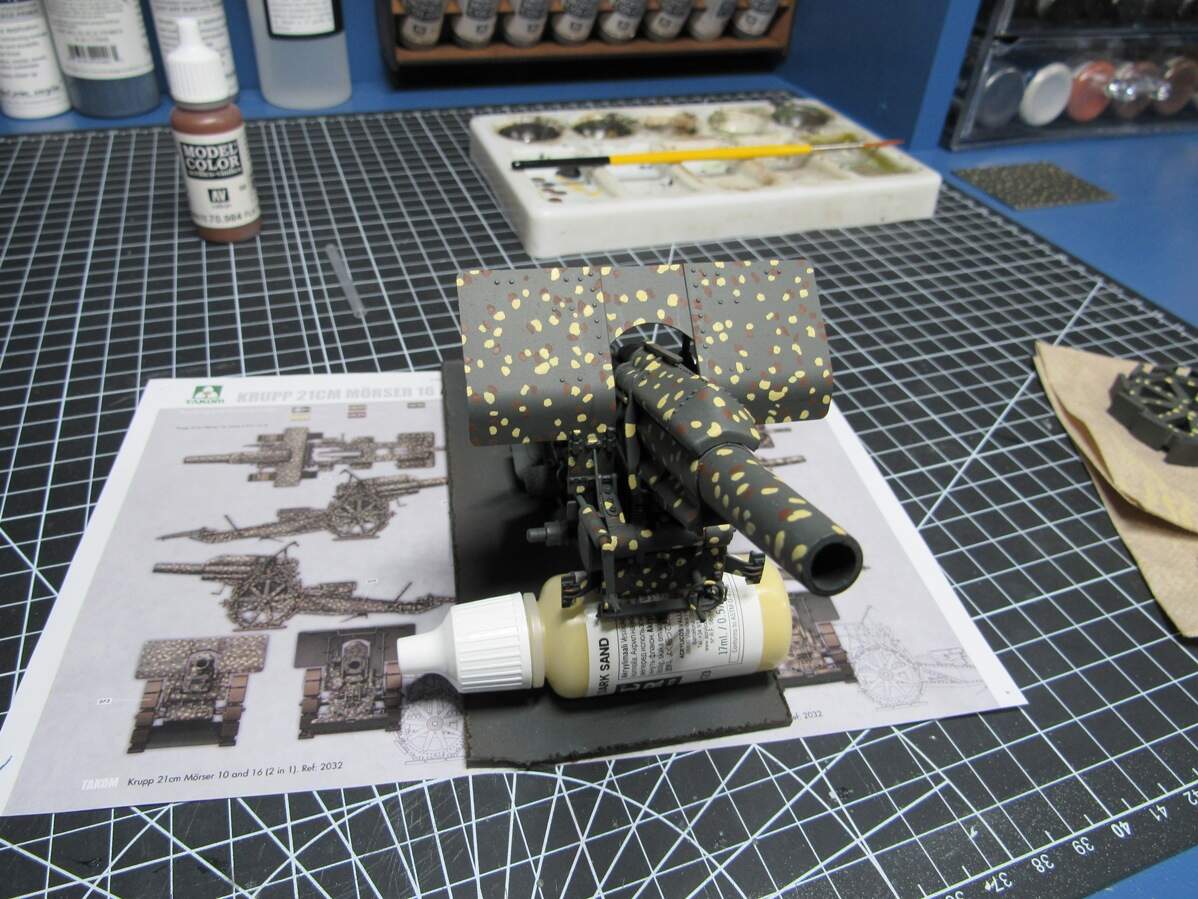
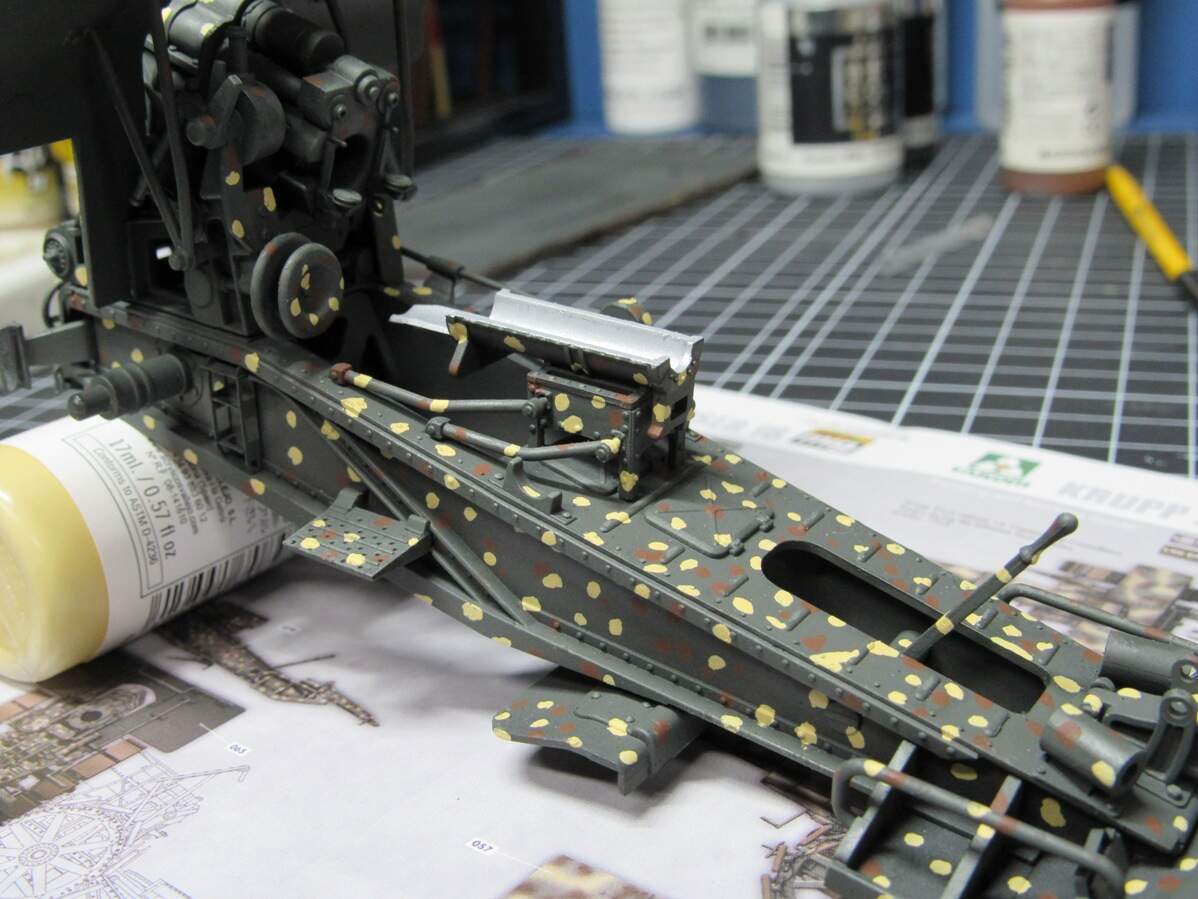
The kit comes with a number of panting options. I wanted to avoid masking or fine airbrushing work, but didn’t want a plain Jane single color piece. That left me with one option, dapple camo! It also has the bonus of looking a little odd, and I haven’t seen many people try it before, so why not.
Primed and painted it’s base color. I used Vallejo 3B Russian Green as it looks fairly close to the forest green color from the painting guide.
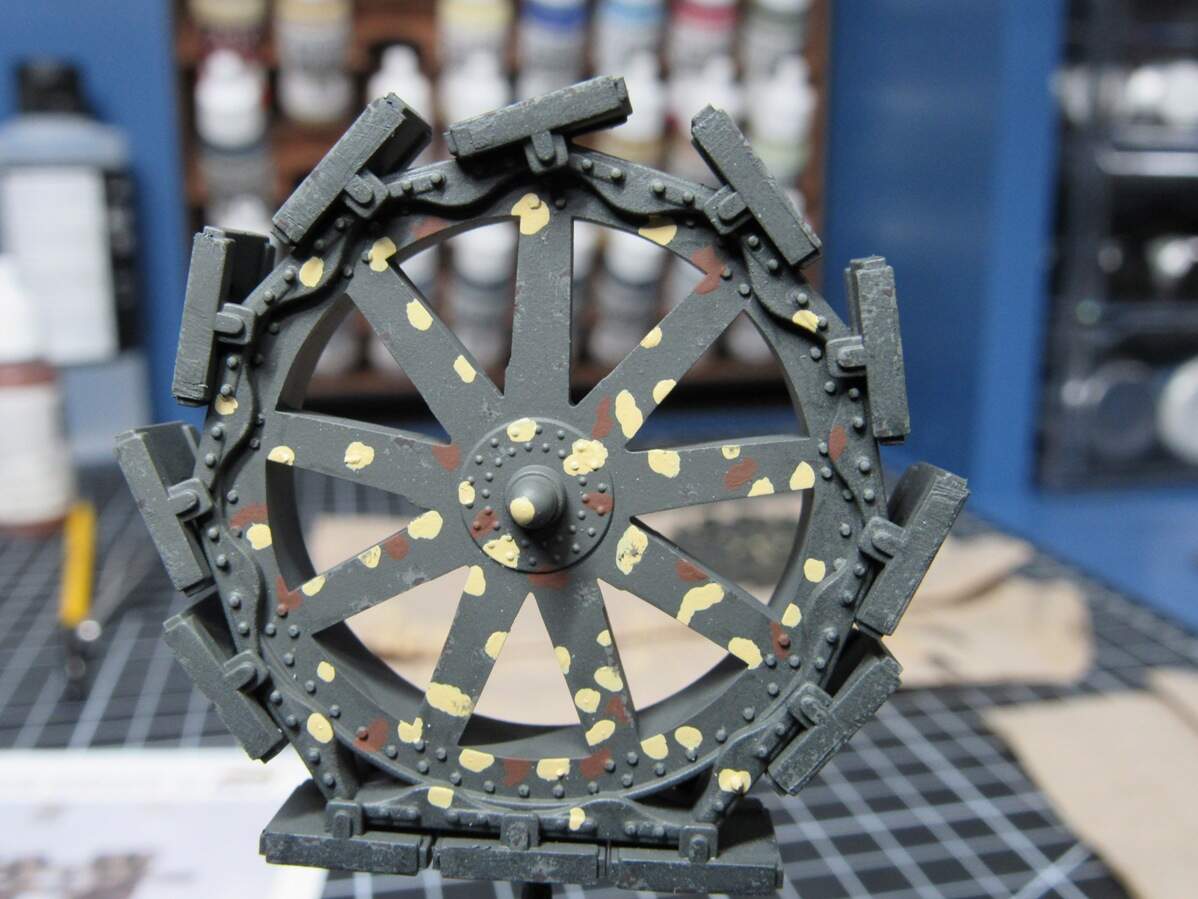
Now it was time to start dappling. I settled on Vallejo’s dark sand & flat brown for my dapple colors and had at it.

… and it doesn’t look right. I had been following the guide loosely, so that most dots were accounted for and in roughly the right spot. Turns out I had to be a little more ham-fisted. During the first try I defaulted into detail painting mode, making small, controlled dots, when in reality they should have been much larger. Easy enough to fix, they needed a second coat anyway. I found that a number 1 brush dabbing straight into the surface worked best, leaving the least amount of brush marks.
One small nitpick is that I wish the instruction sheet was larger. Working off that small guide made things a little more time consuming.
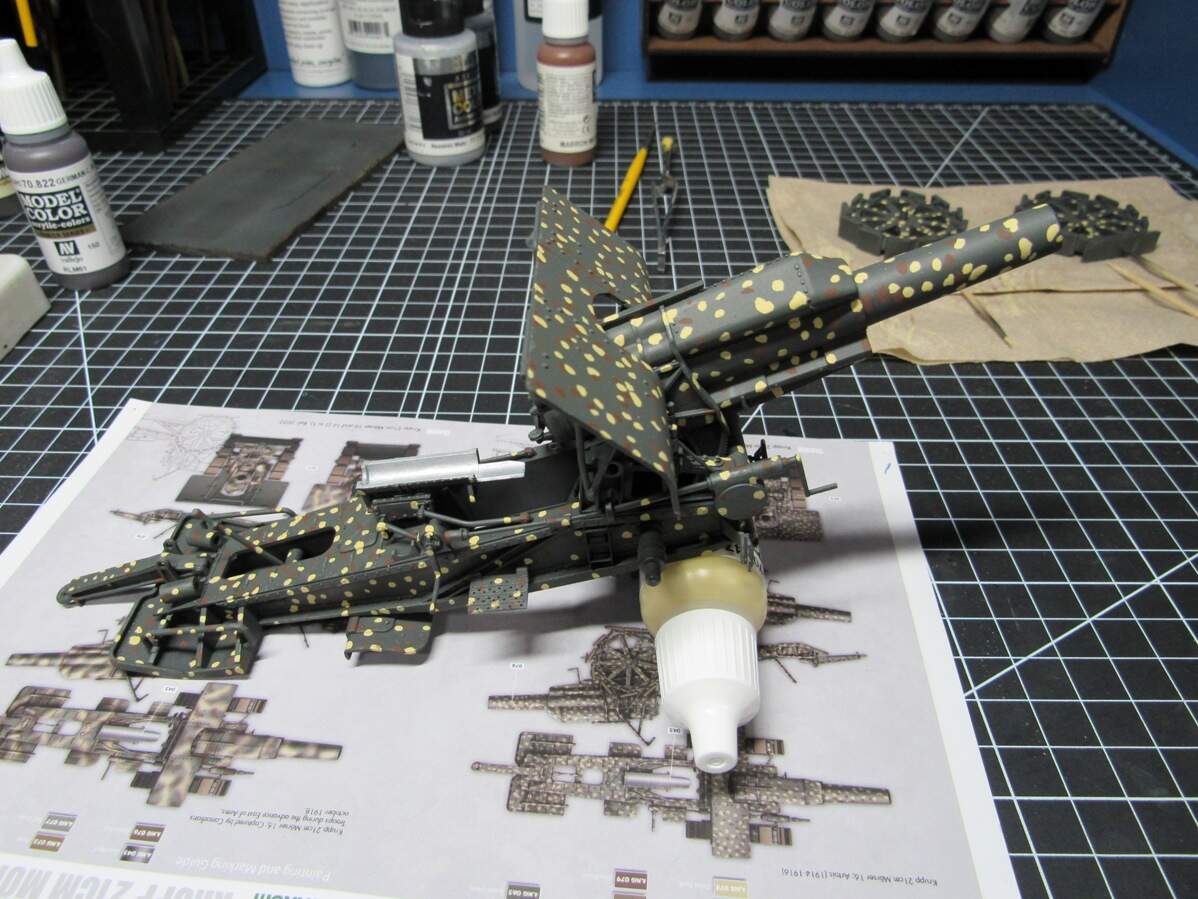
Alright, so the 2nd try,
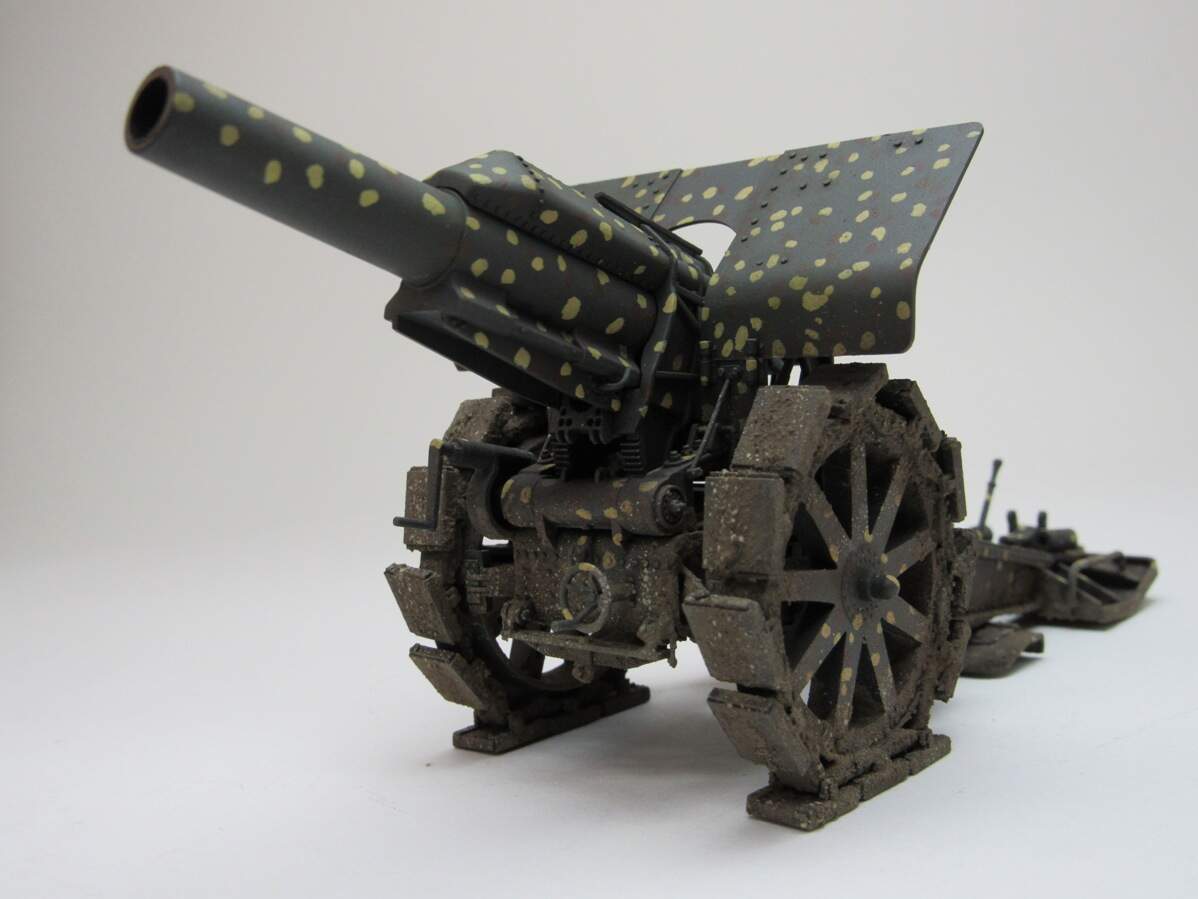
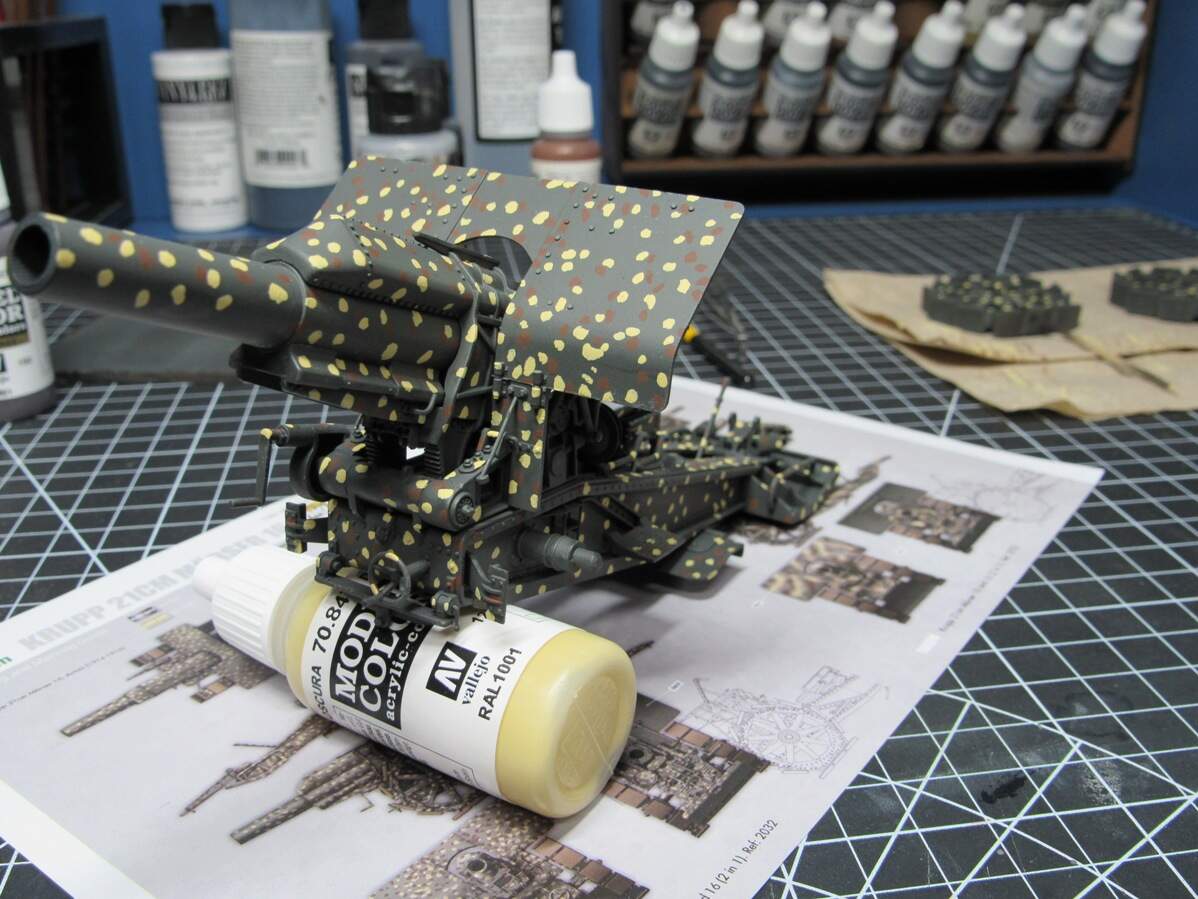
I think that looks better. Time to dapple the rest of it up. Getting the gun and shield done gave me a good feel for the process which made finishing up on the carriage easy.
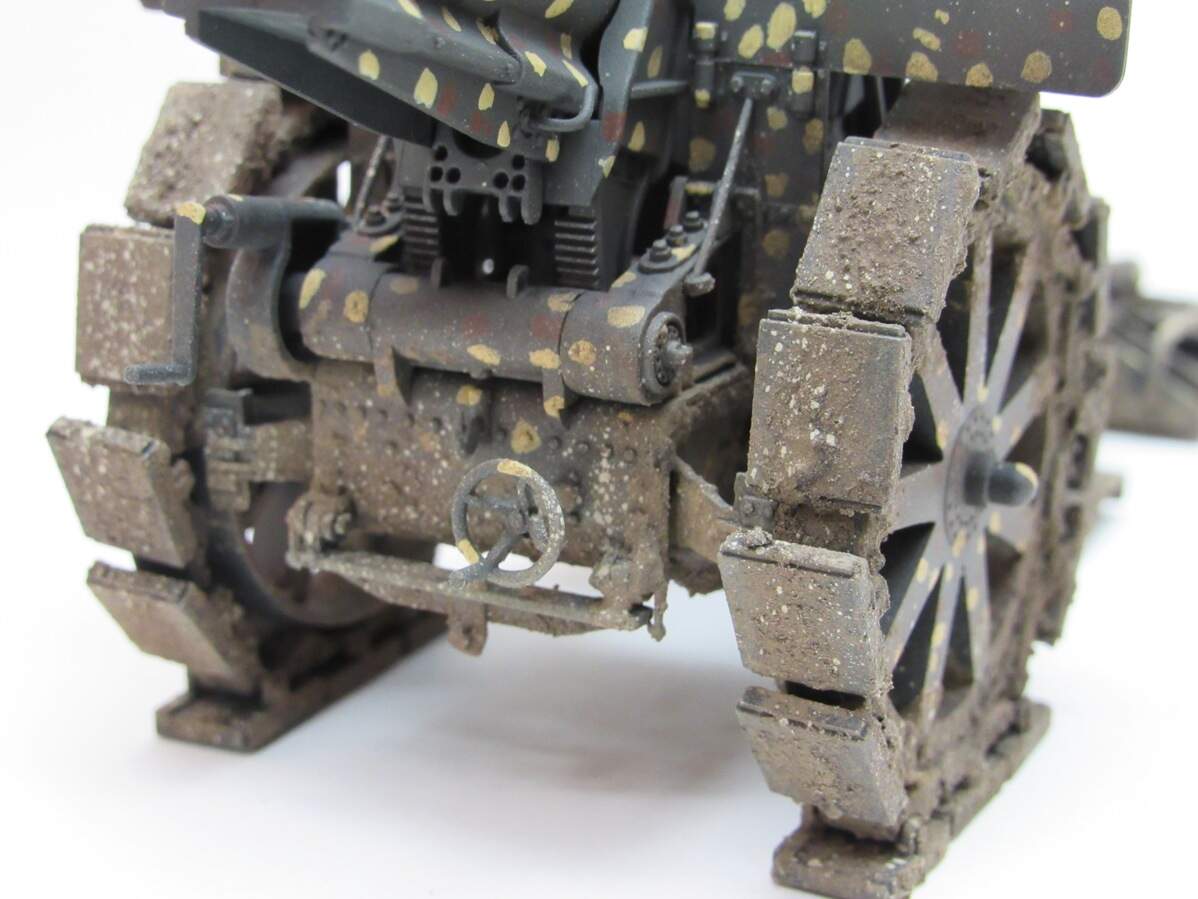
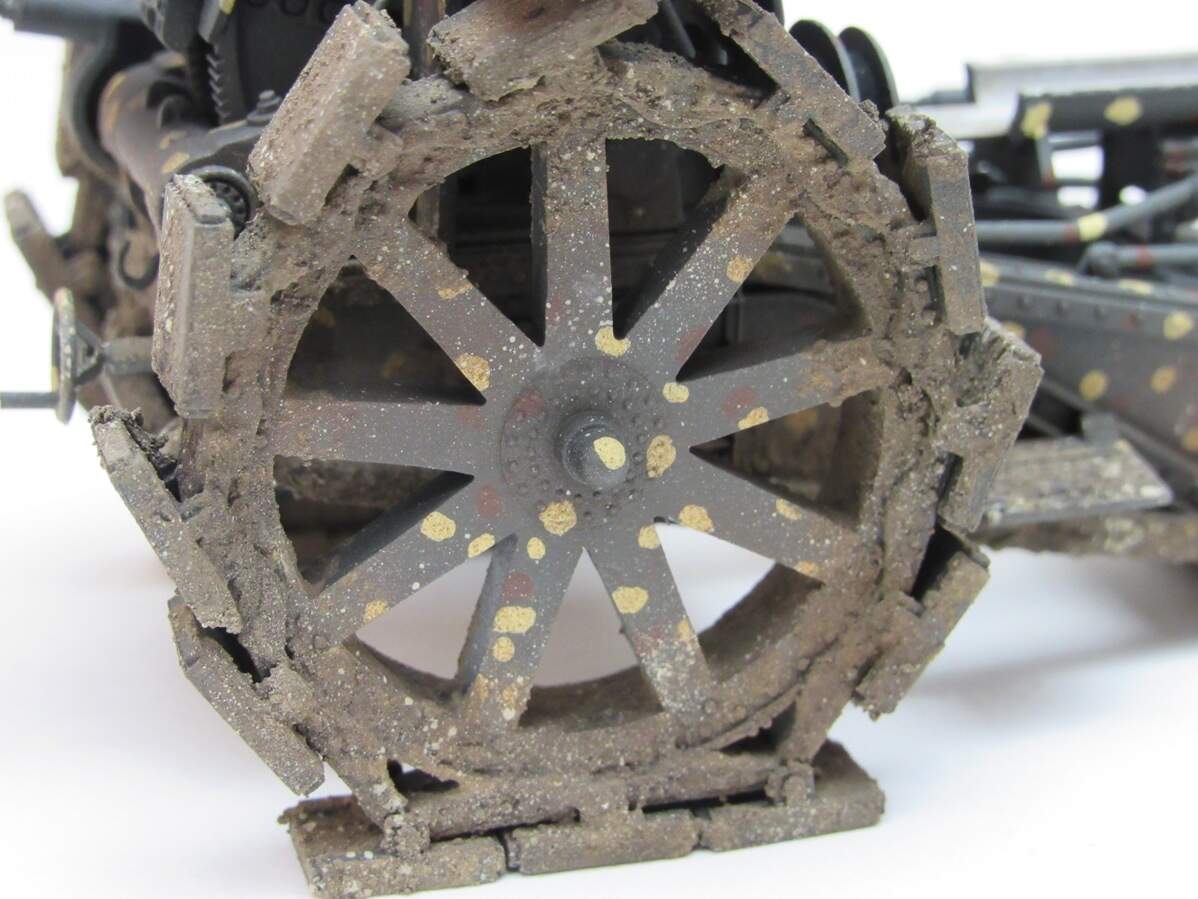
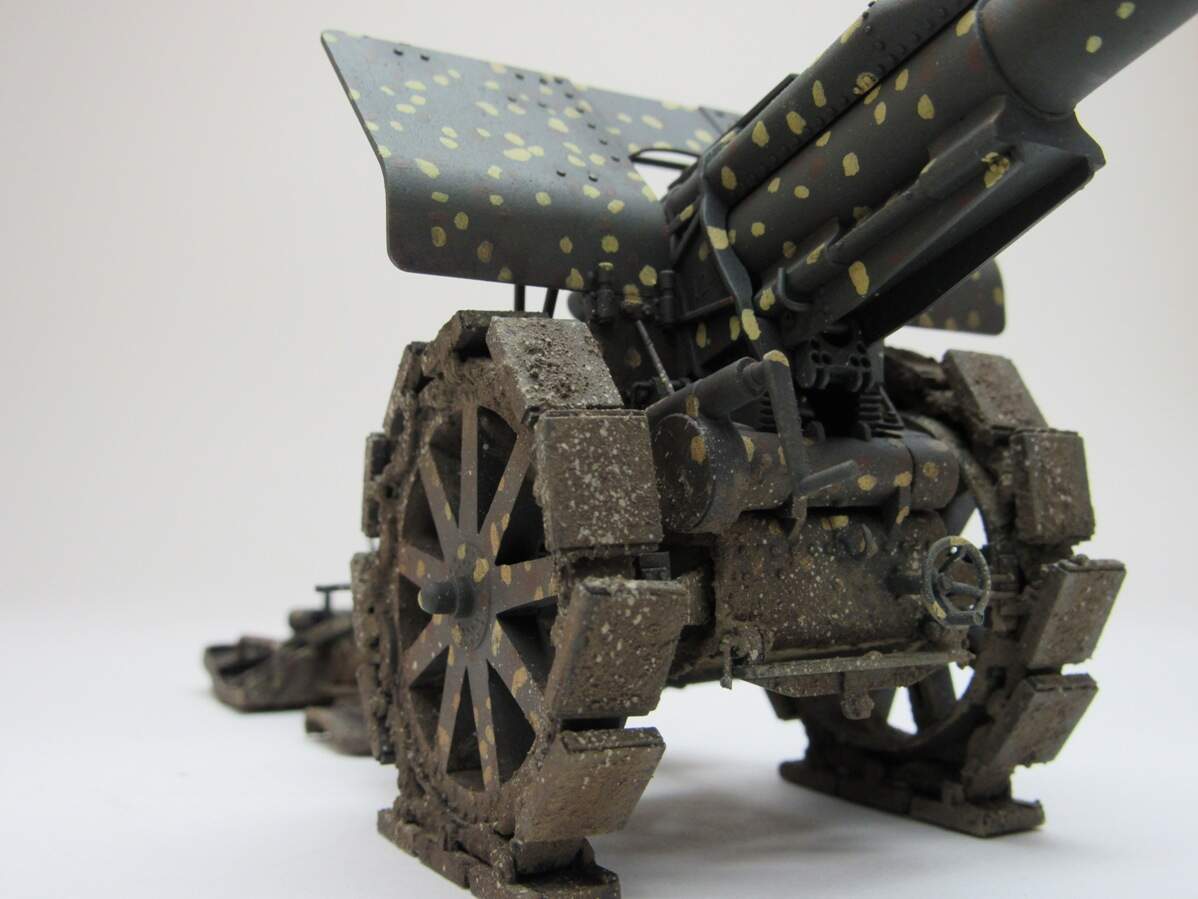
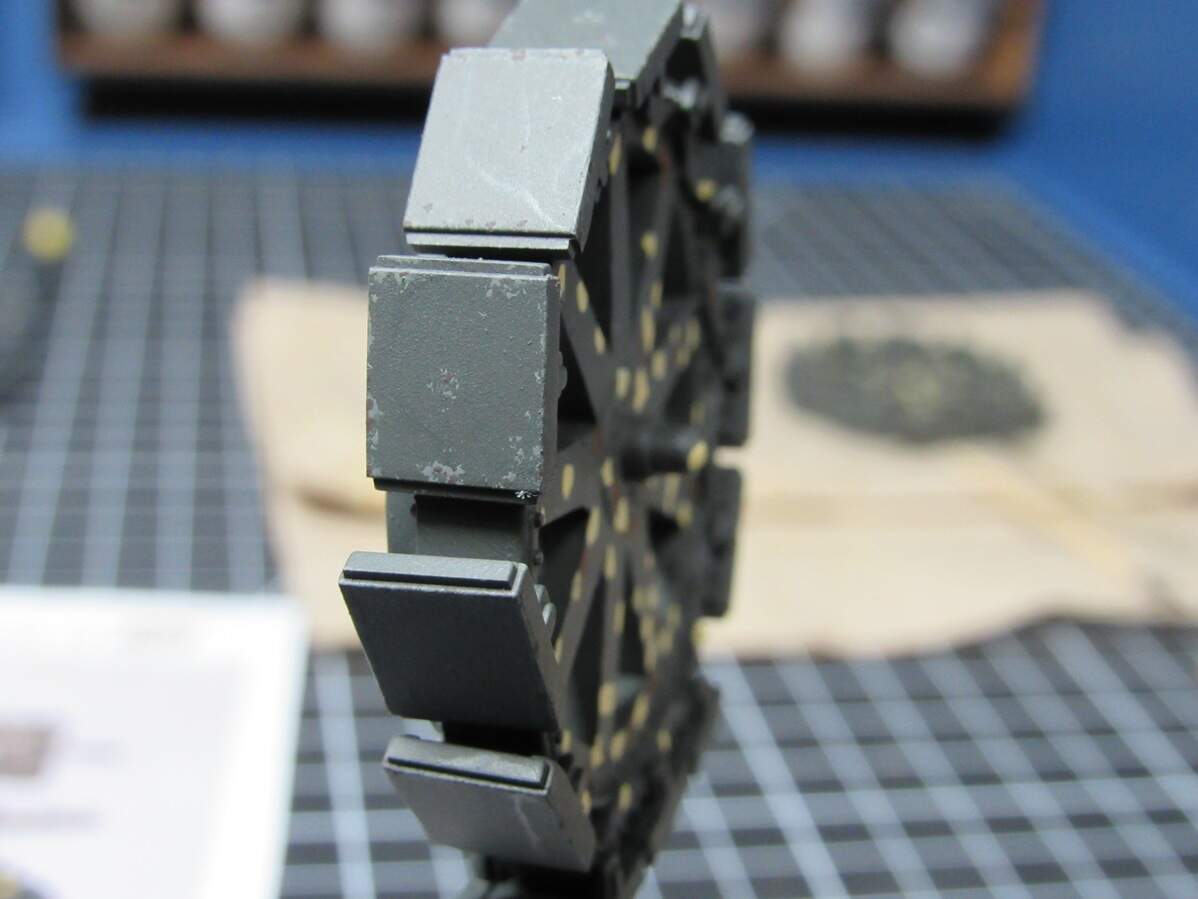
With the painting done I went on to chipping. I had some fun doing this on the grousers(?). The instructions would have you paint them a wood color, but the reference pics I saw all showed them as sheet metal wrapped around what I assume was a wood insert, so I painted them as if they were metal and chipped accordingly.
That’s all the pictures I’ve got for now. But since the chipping I’ve gotten two filters over the model, a dust spray, and a pin wash. So more updates soon.