Hi all - Trying this again . I started this blog on the old site but for various reasons the build never got underway.
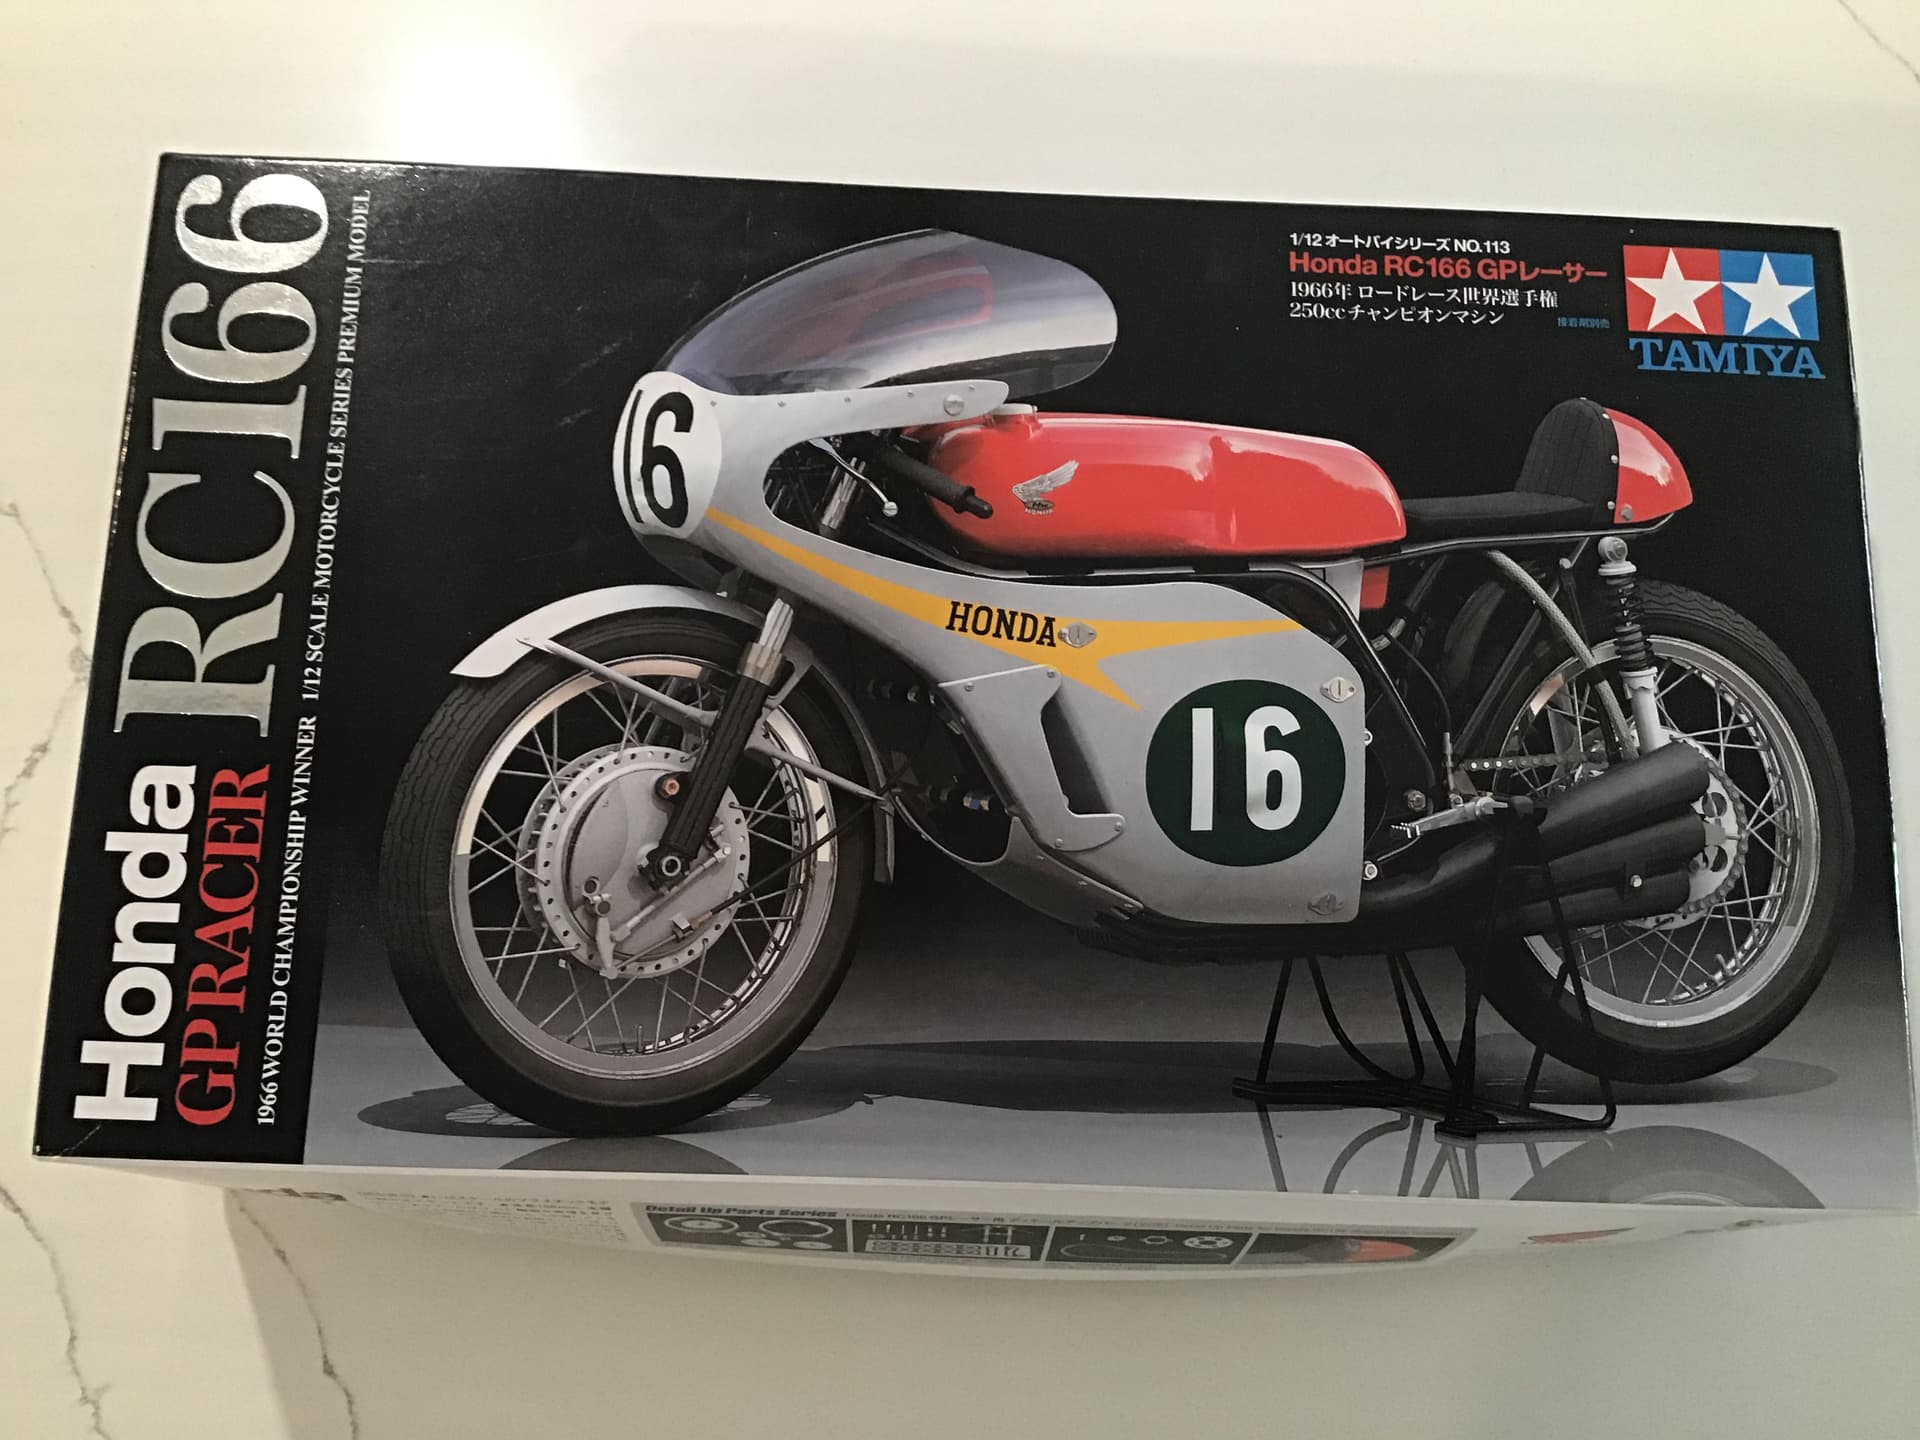
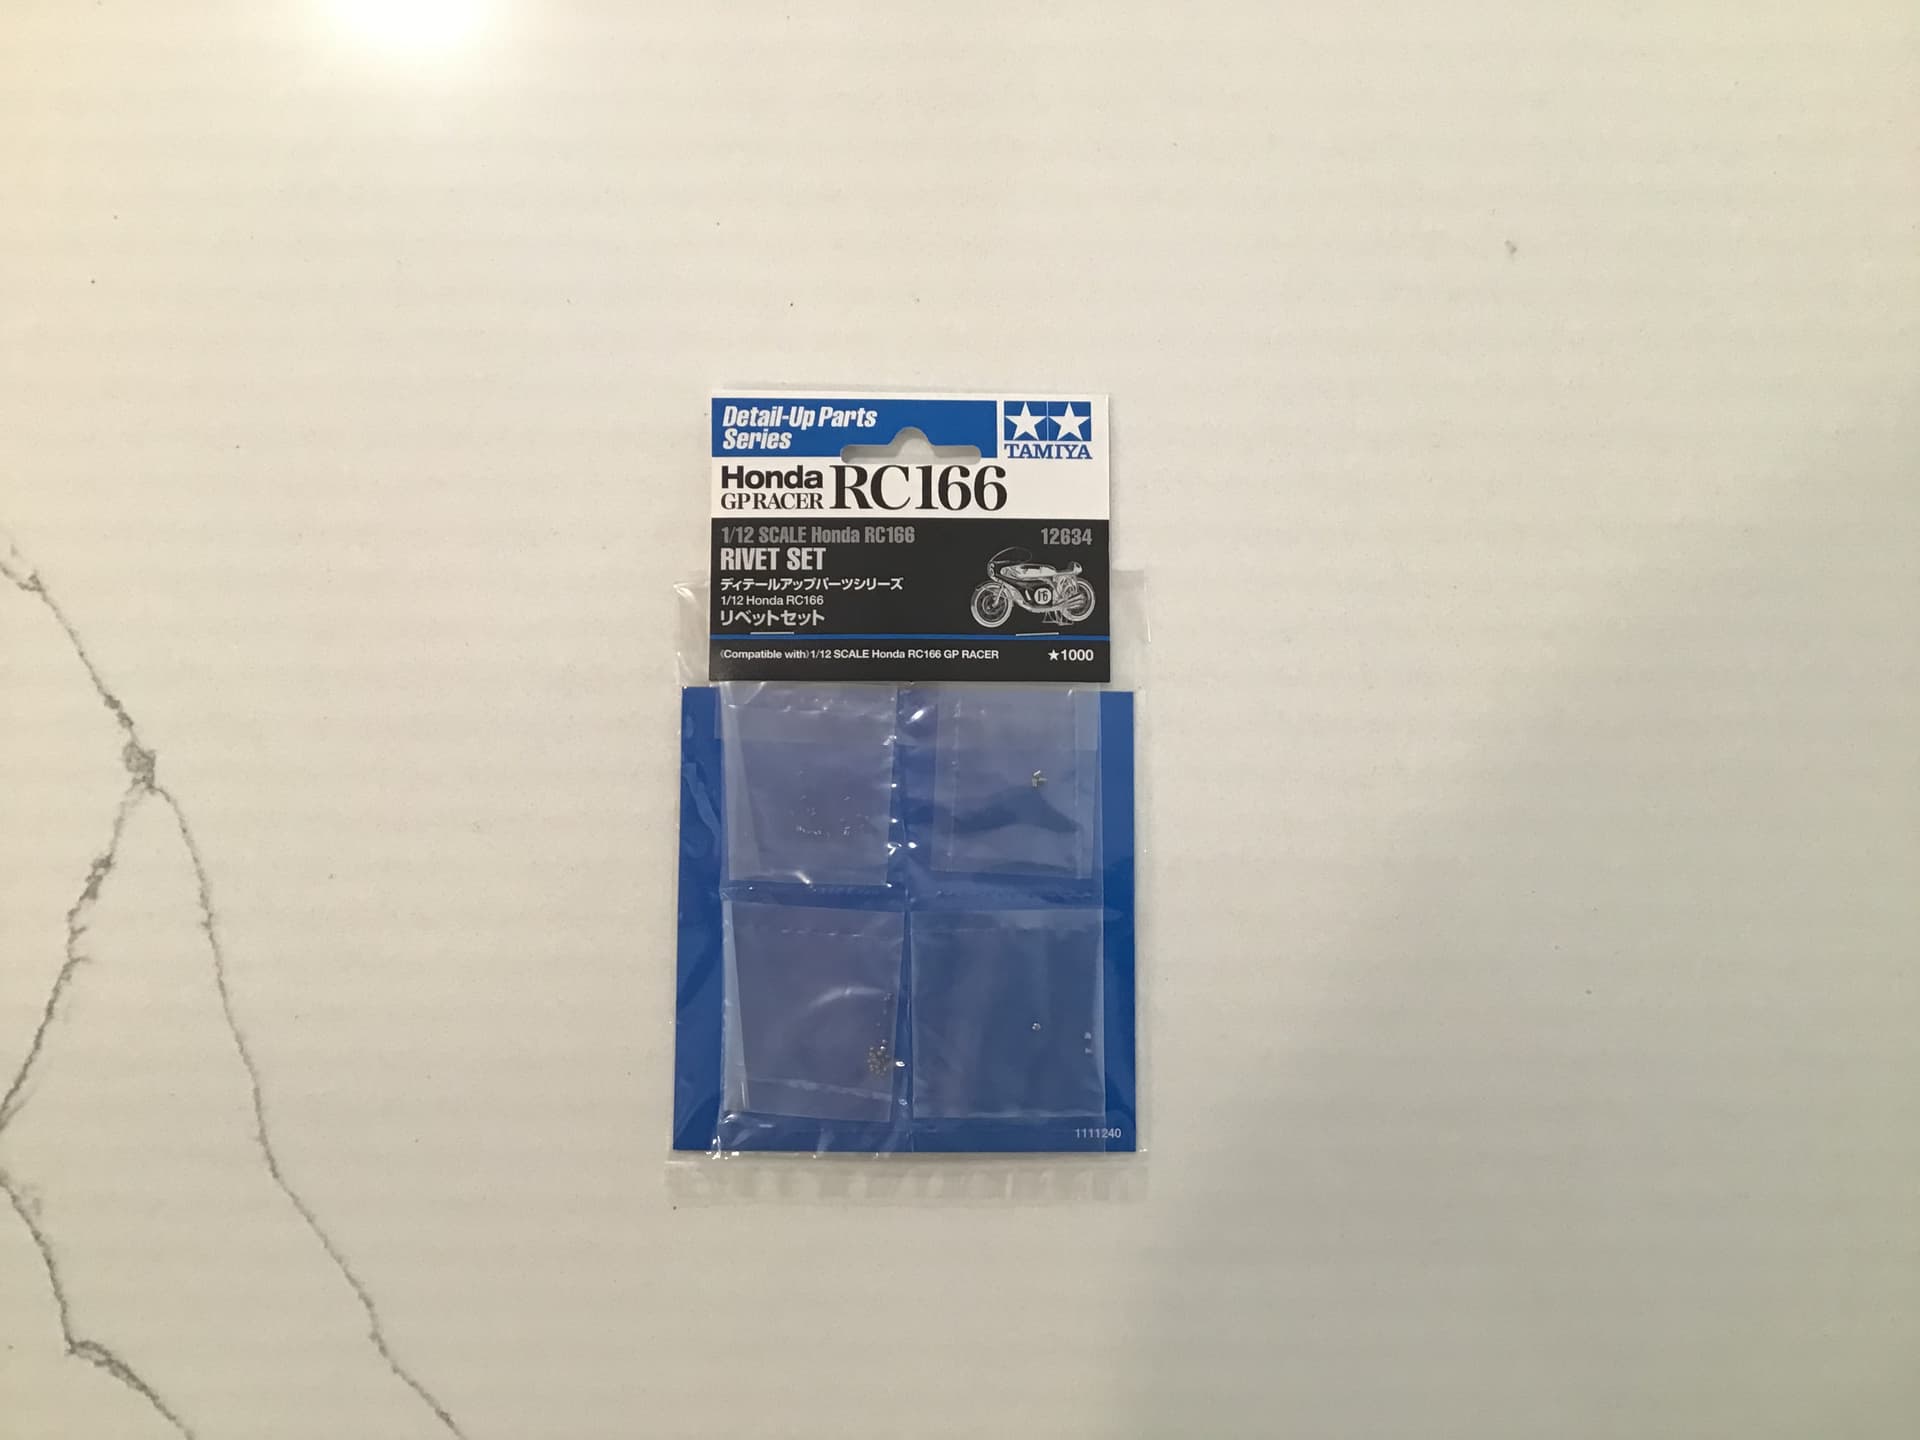
I will be building Tamiya’s 1/12 Honda RC 166 including all of Tamiya’s aftermarket accessories.
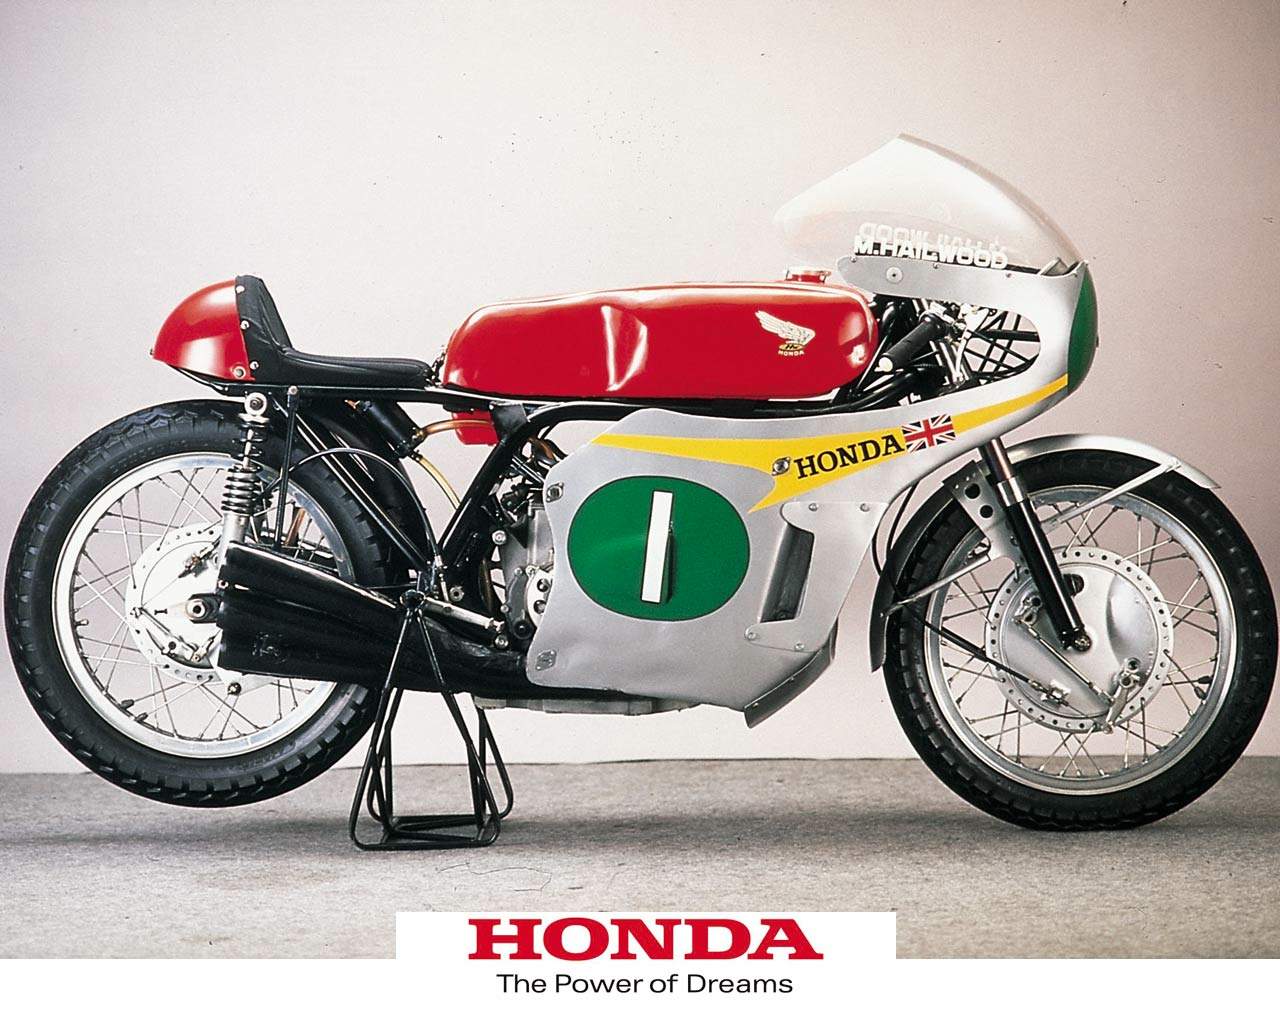
A little background on what I consider to be the most amazing motorcycle ever built.
Soichiro Honda was committed to 4 strokes because of their cleaner running and lower fuel consumption. ( He did cave in a bit and developed some 2 strokes for off road bikes ).
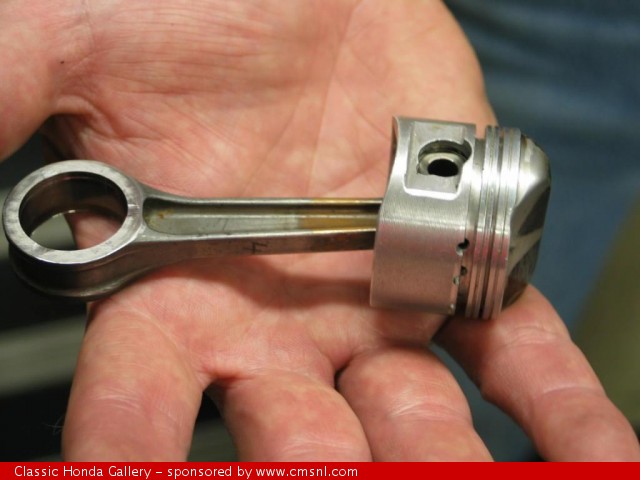
2 strokes were beginning to dominate road racing at the time . As a 2 stroke produces power with every revolution and a 4 stroke every other , to make 4strokes competitive the basic idea was to double the rpm . More easily said than done but the answer was and still is reducing reciprocating mass.
This means tiny components and in order to meet displacement requirements, many of them.
Enter the RC 166 . A 250 cc DOHC in line six -
four valves per cylinder producing some 60 horsepower @ 18,000 rpm . ( no typo here- that’s 18 k rpm ) That’s 300 revolutions per second.
There are several videos posted on YouTube demonstrating it running - if you watch be careful with the volume- it will make your ears bleed.
There is even a video from a Japanese TV program showing a complete engine tear down.
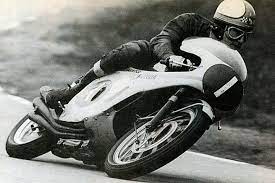
In it’s second season in the VERY capable hands of a certain Mr. Hailwood it won ten out of ten GP races and gave Mike one of his 14 IOM titles.
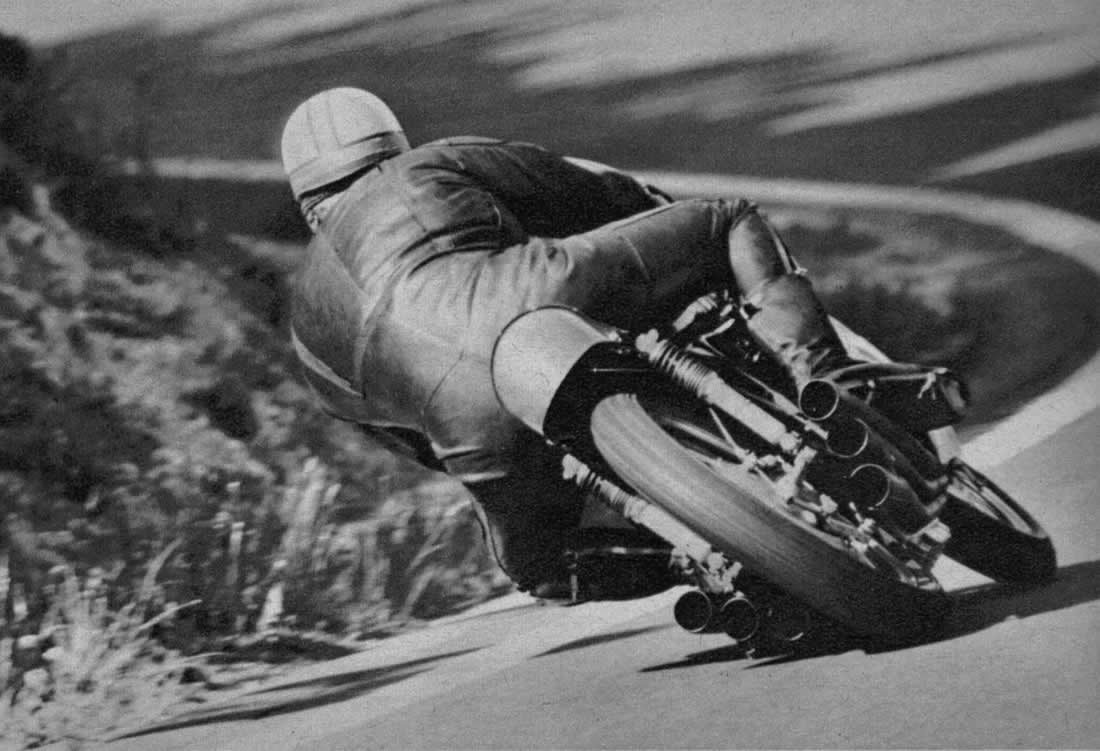
I never tire of preaching about this bike and one aspect of it that continues to amaze is the fact that it was designed, built and raced unbeaten in an era that predates computer assisted design and manufacturing. Yep - that’s slide rules , drafting tables and hand wheels on the lathe and mill .
It is also VERY easy on the eyes - as they say ,
“ If it looks right it is right “ .
If lusty images offend you then look away because this is motorcycle porn .
Wonderful start to what promises to be a really engaging build log Richard!
Personally, I’ve never been into bikes, but I’m always really interested in watching such detailed projects and the skills and materials required on display.
Richard,
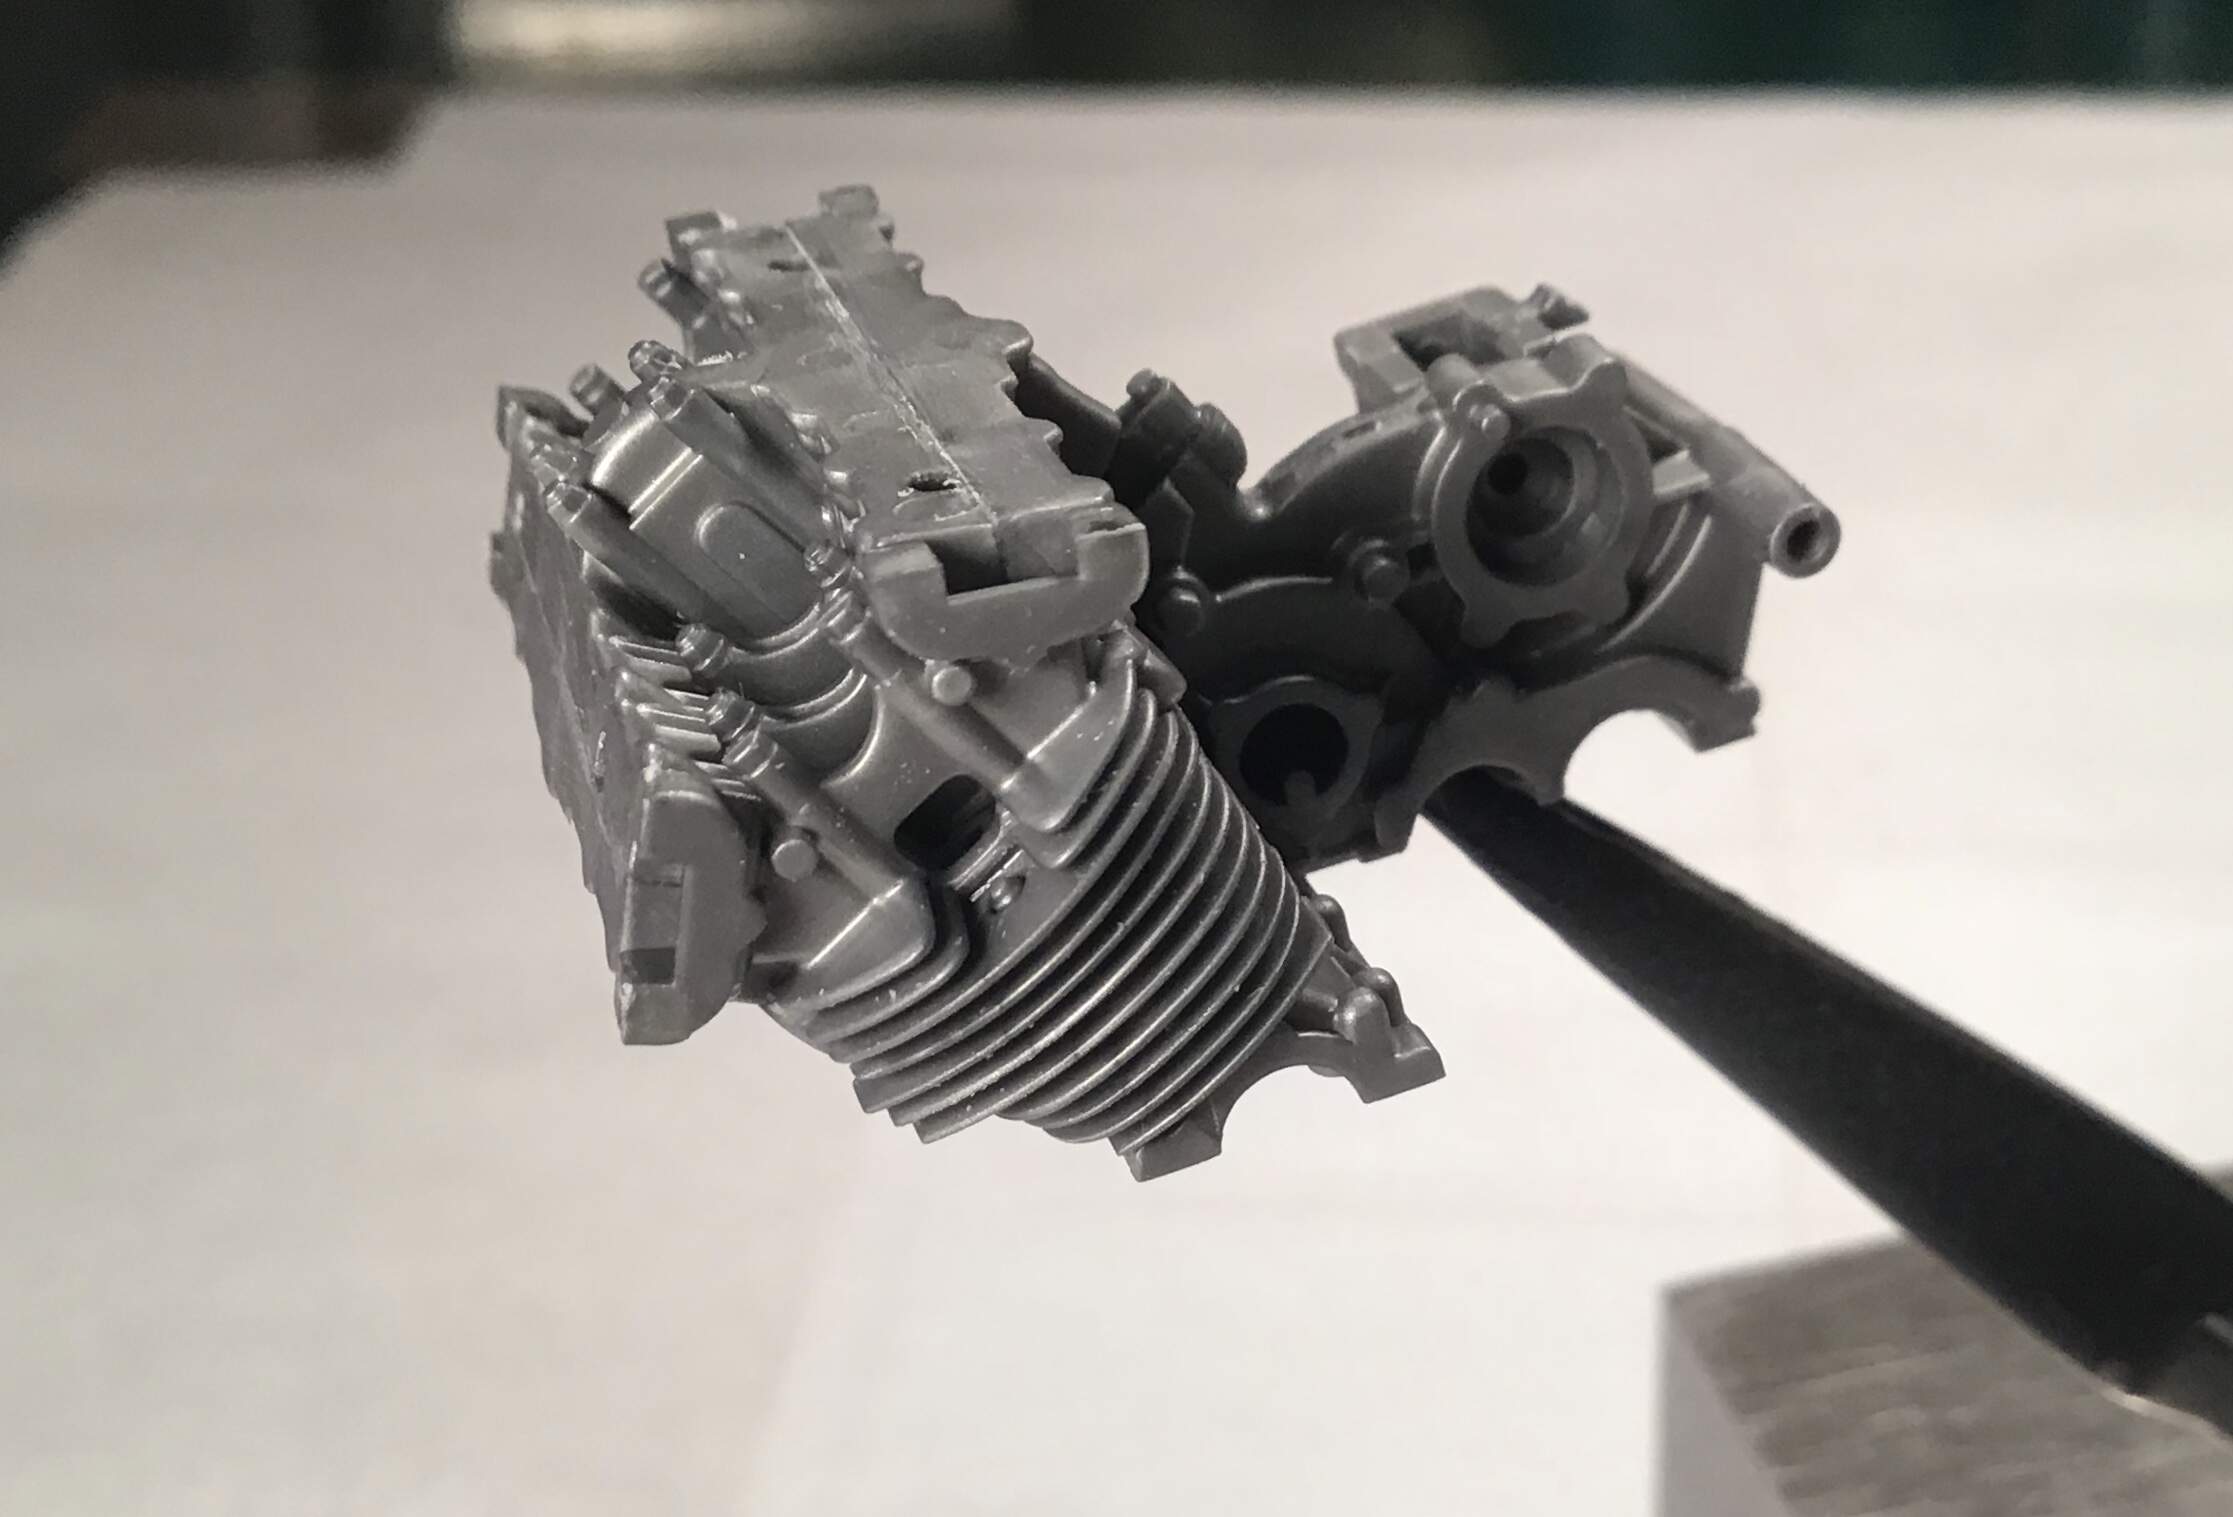
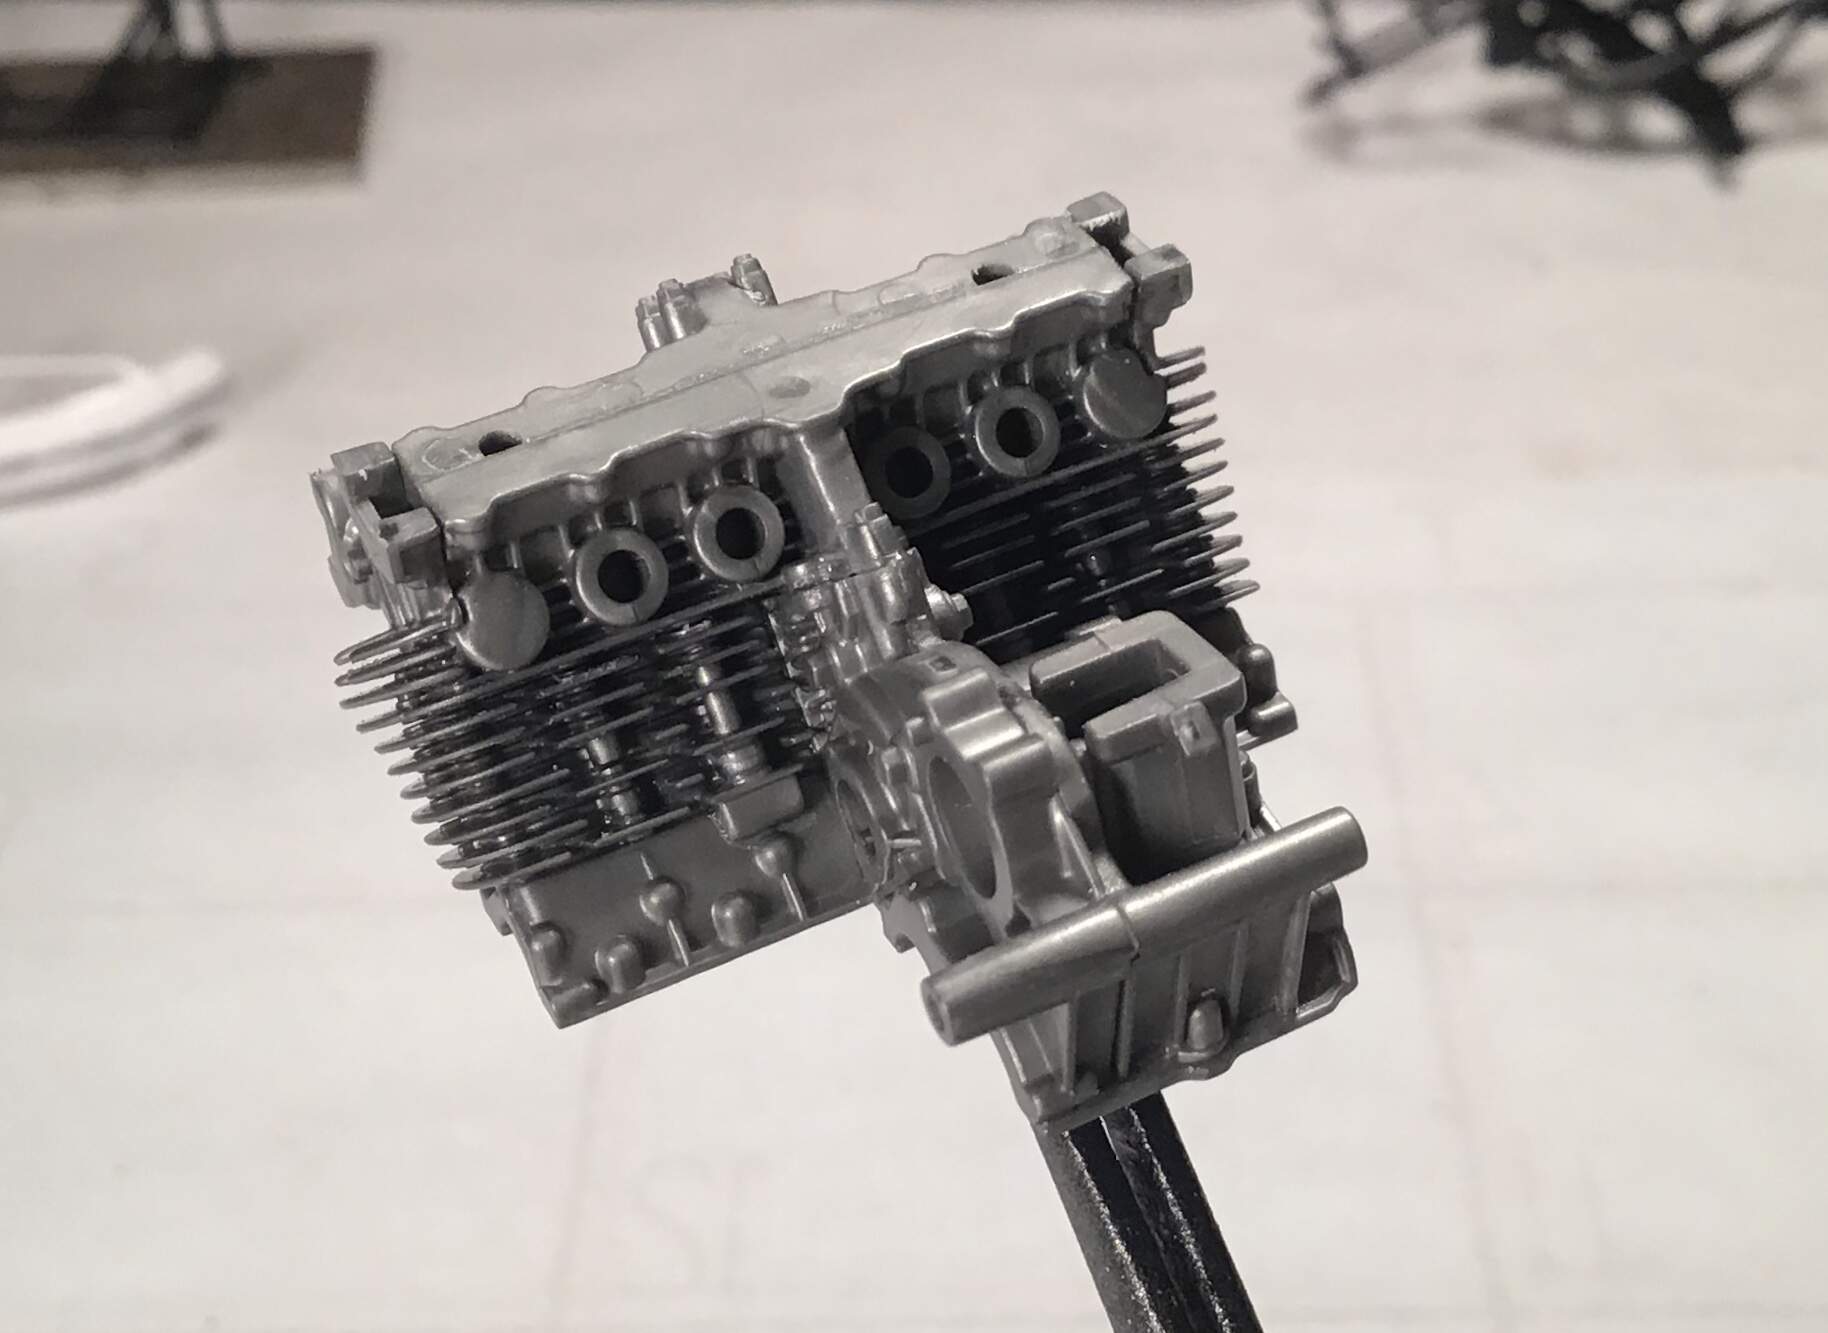
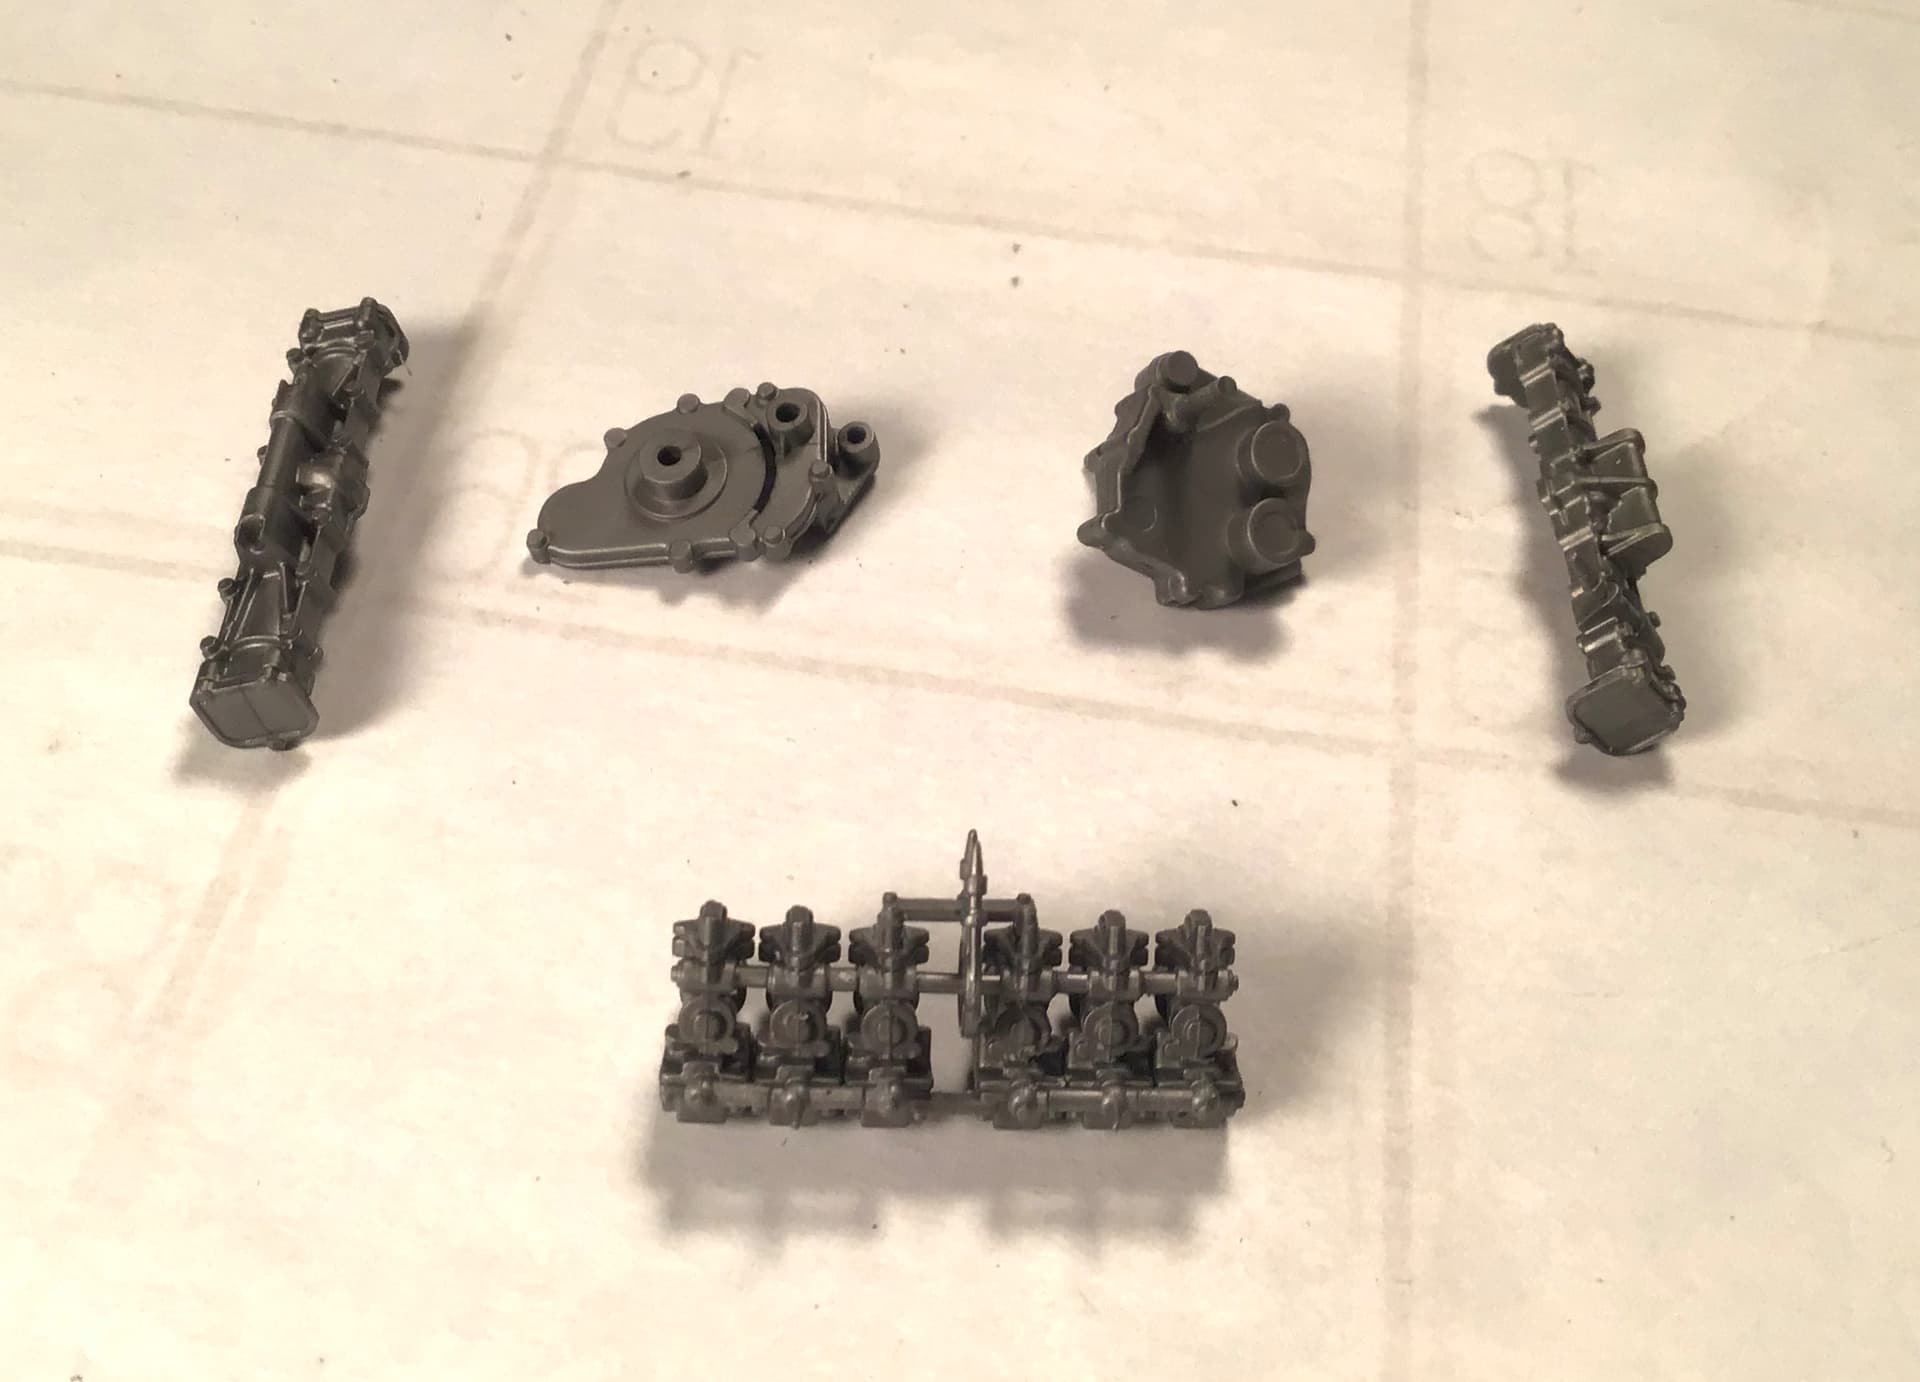
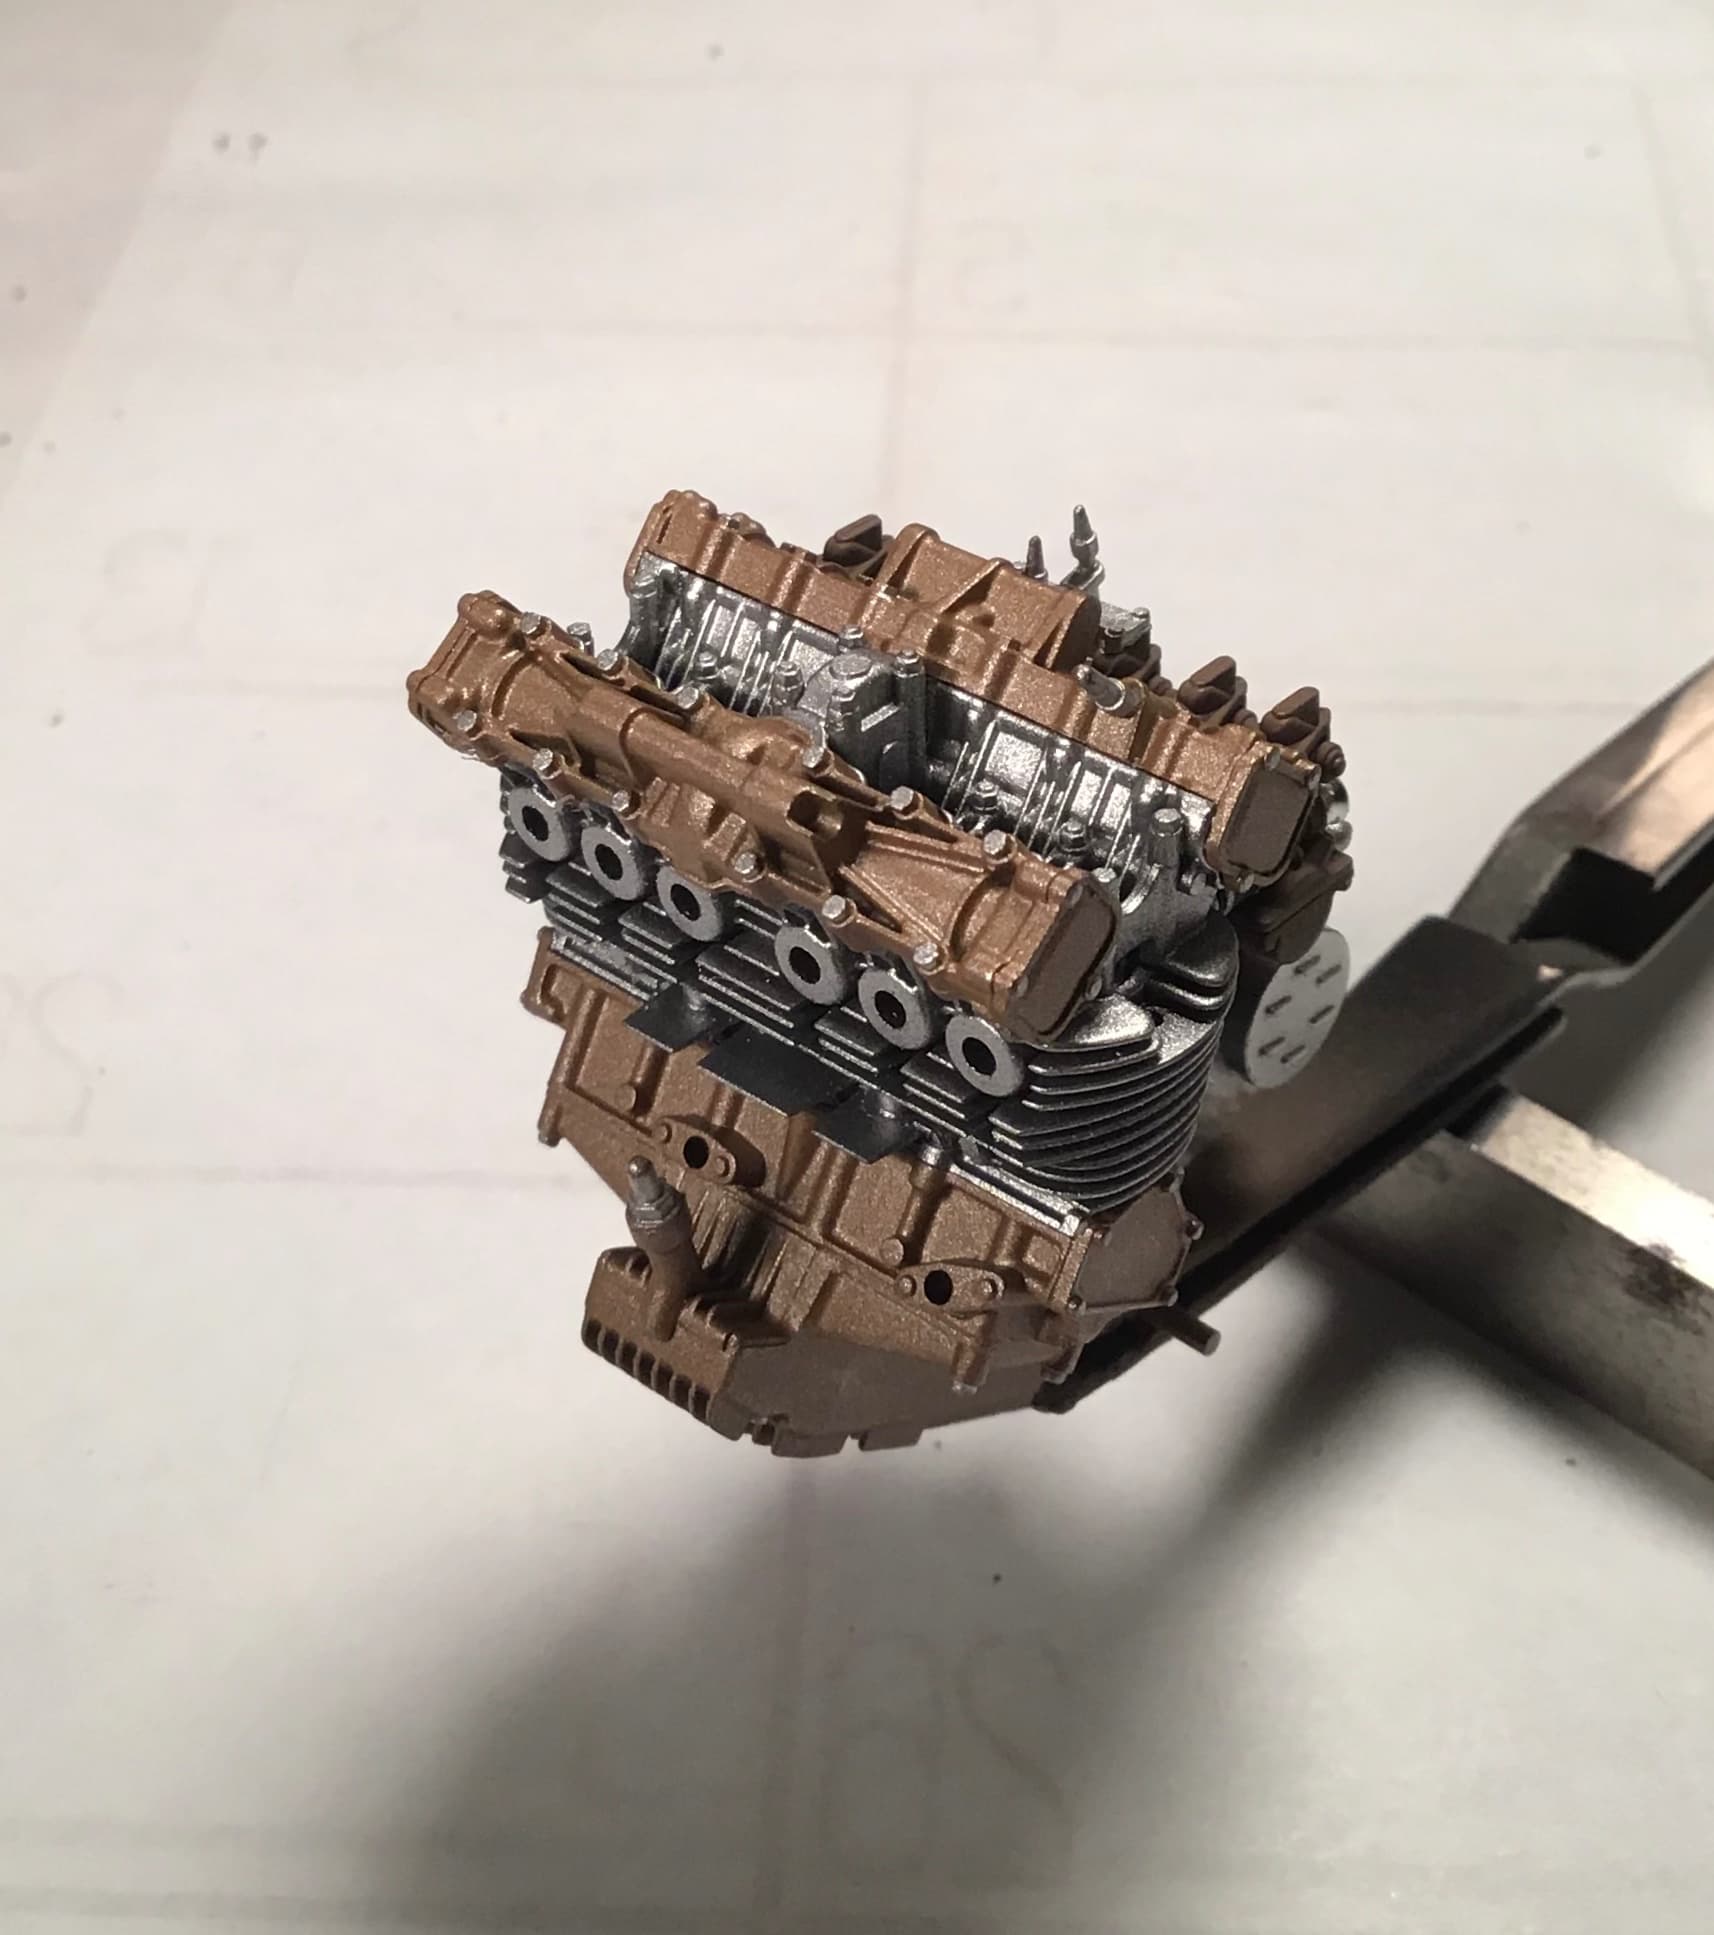
Just a tremendous start. Your attention to details is already showing with the sub assemblies, especially the cylinder heads and cylinders. I had no idea that they were individual sleeves built up one at a time. I’m betting that that valve assembly didn’t come as just a few pieces either, but rather every rocker arm and spring assembly needed to be assembled.
@AussieReg @Joel_W
Thanks gents for the interest and kind words.
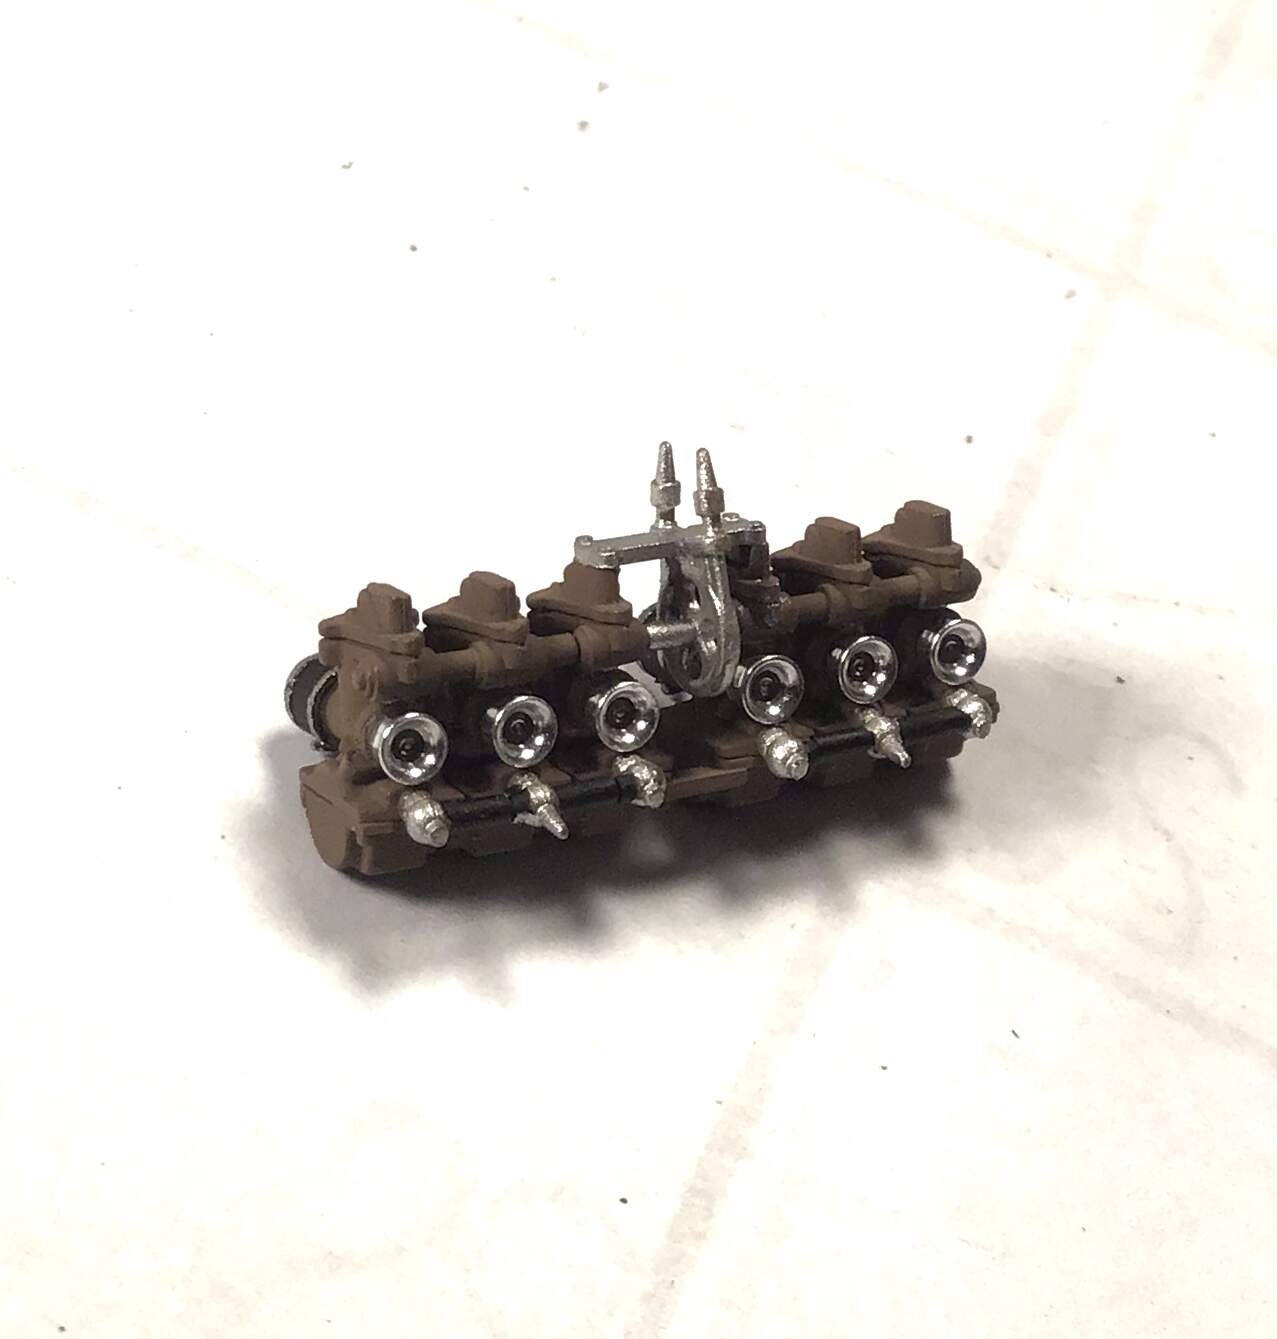
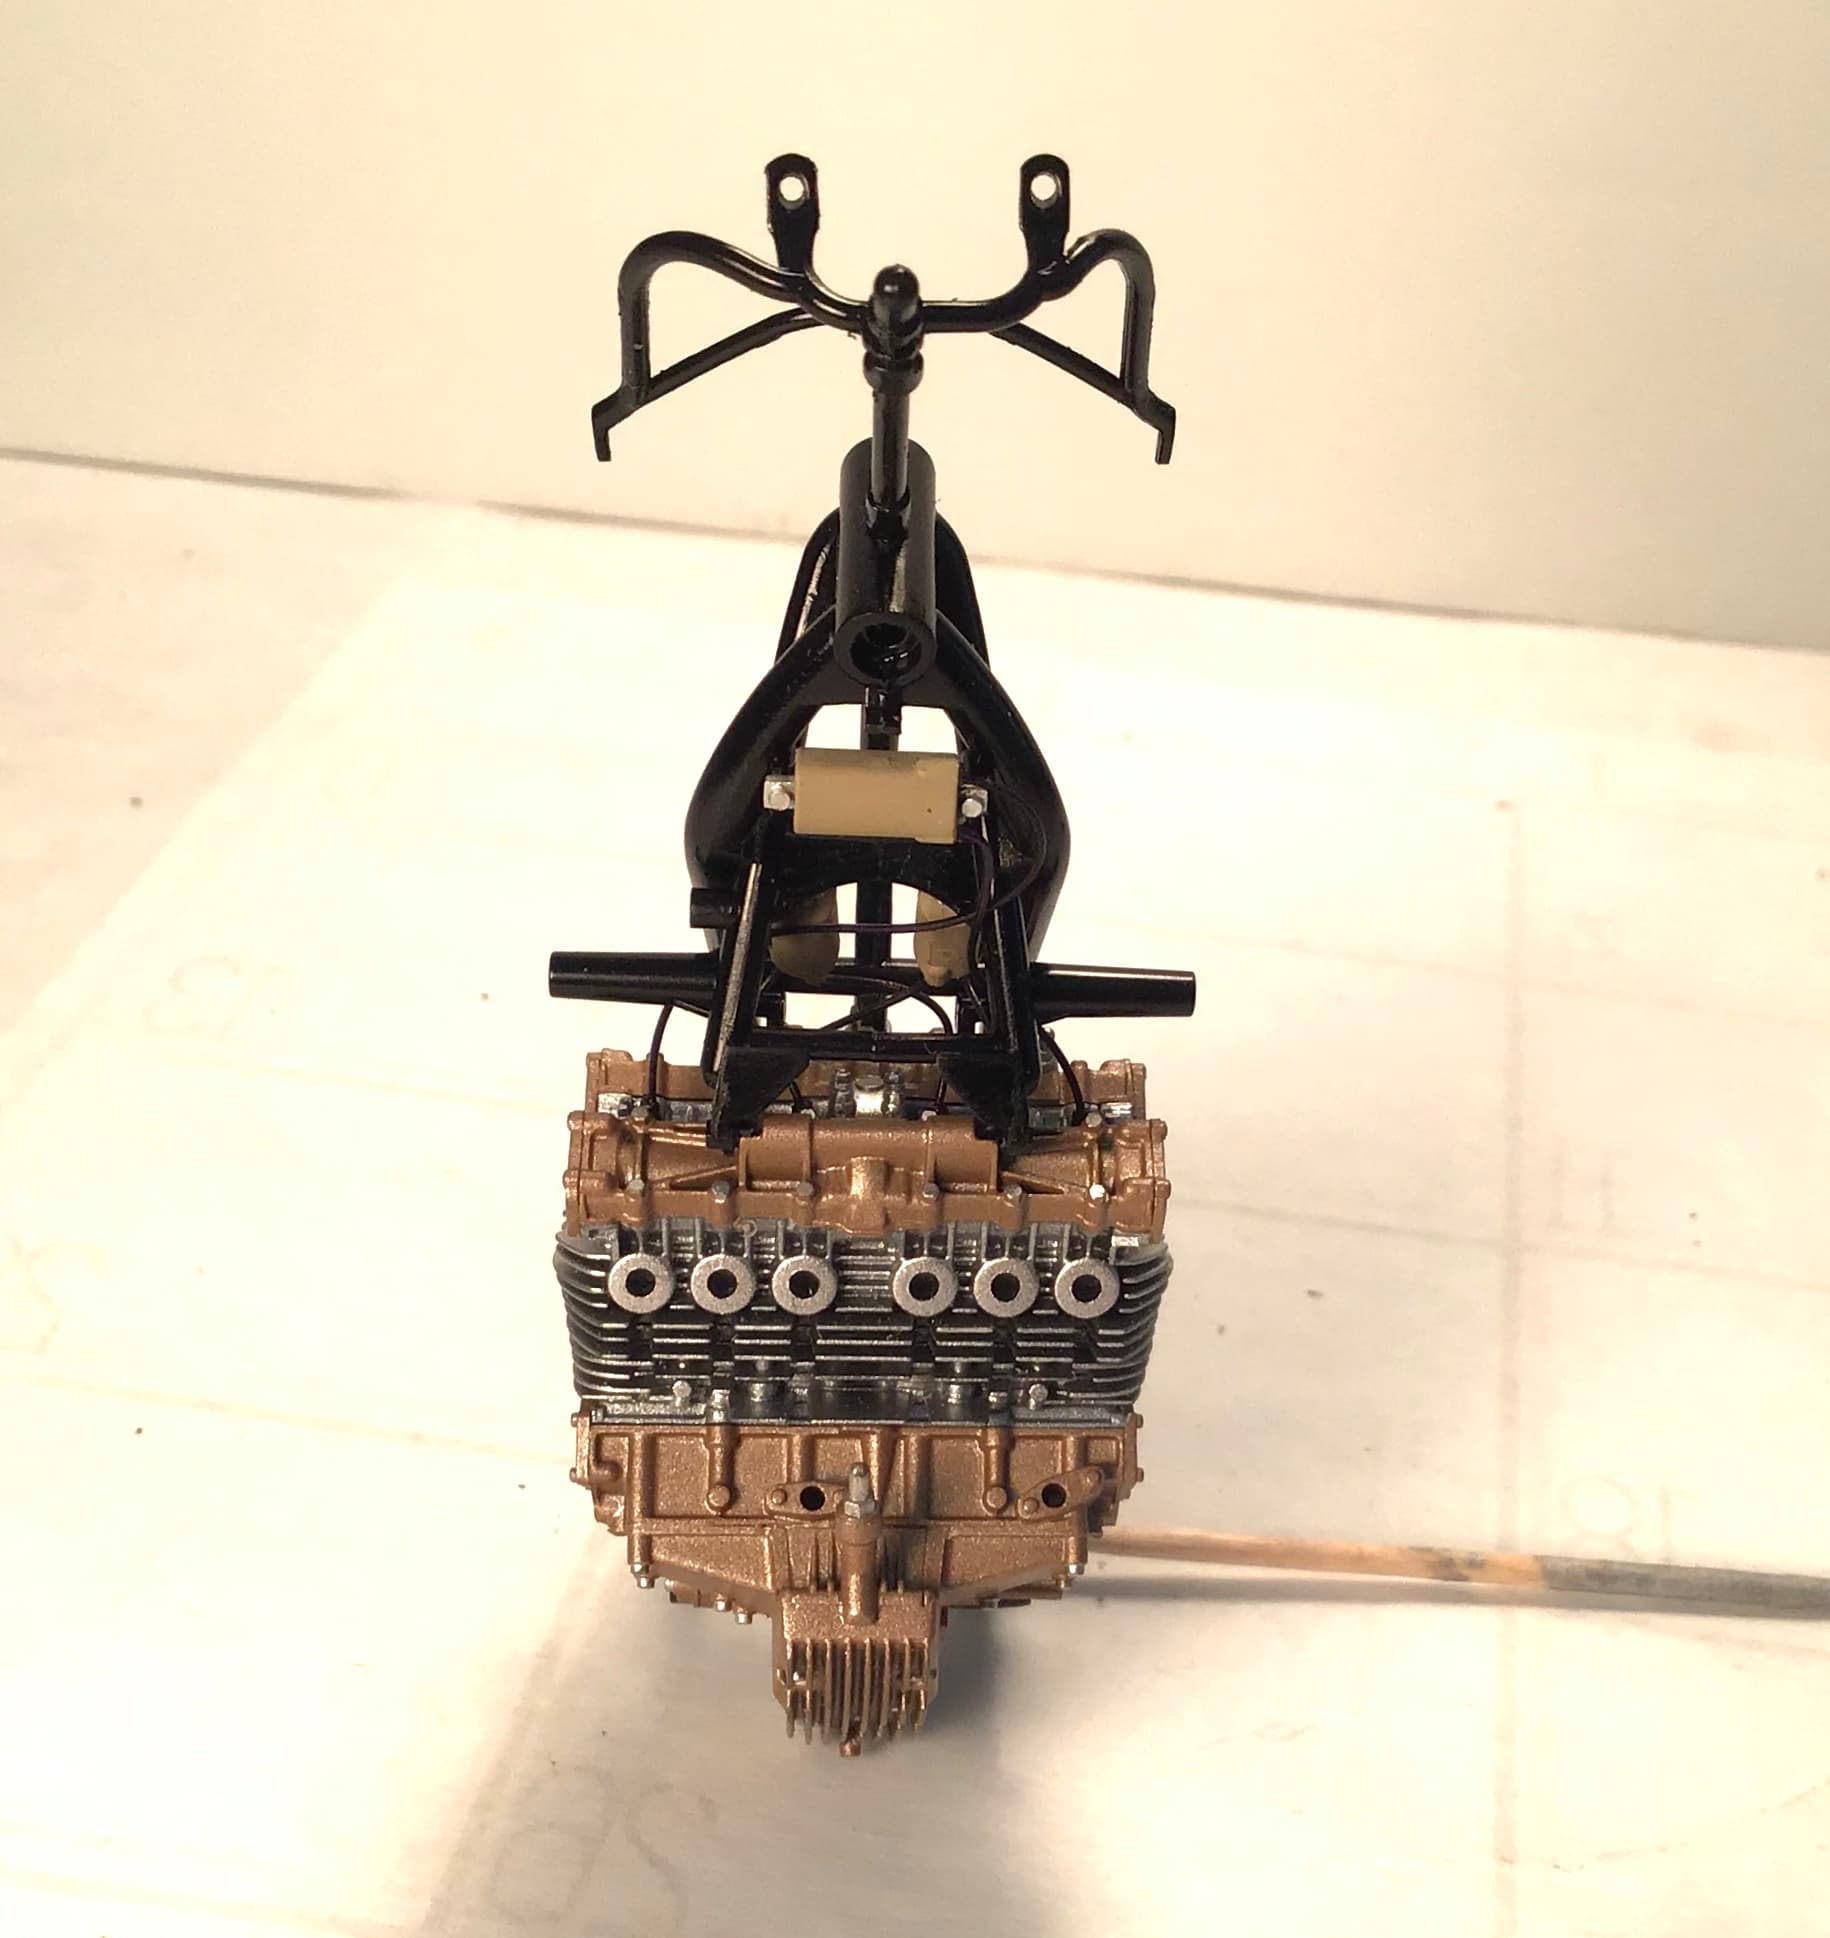
A little progress on the heart of the beast-
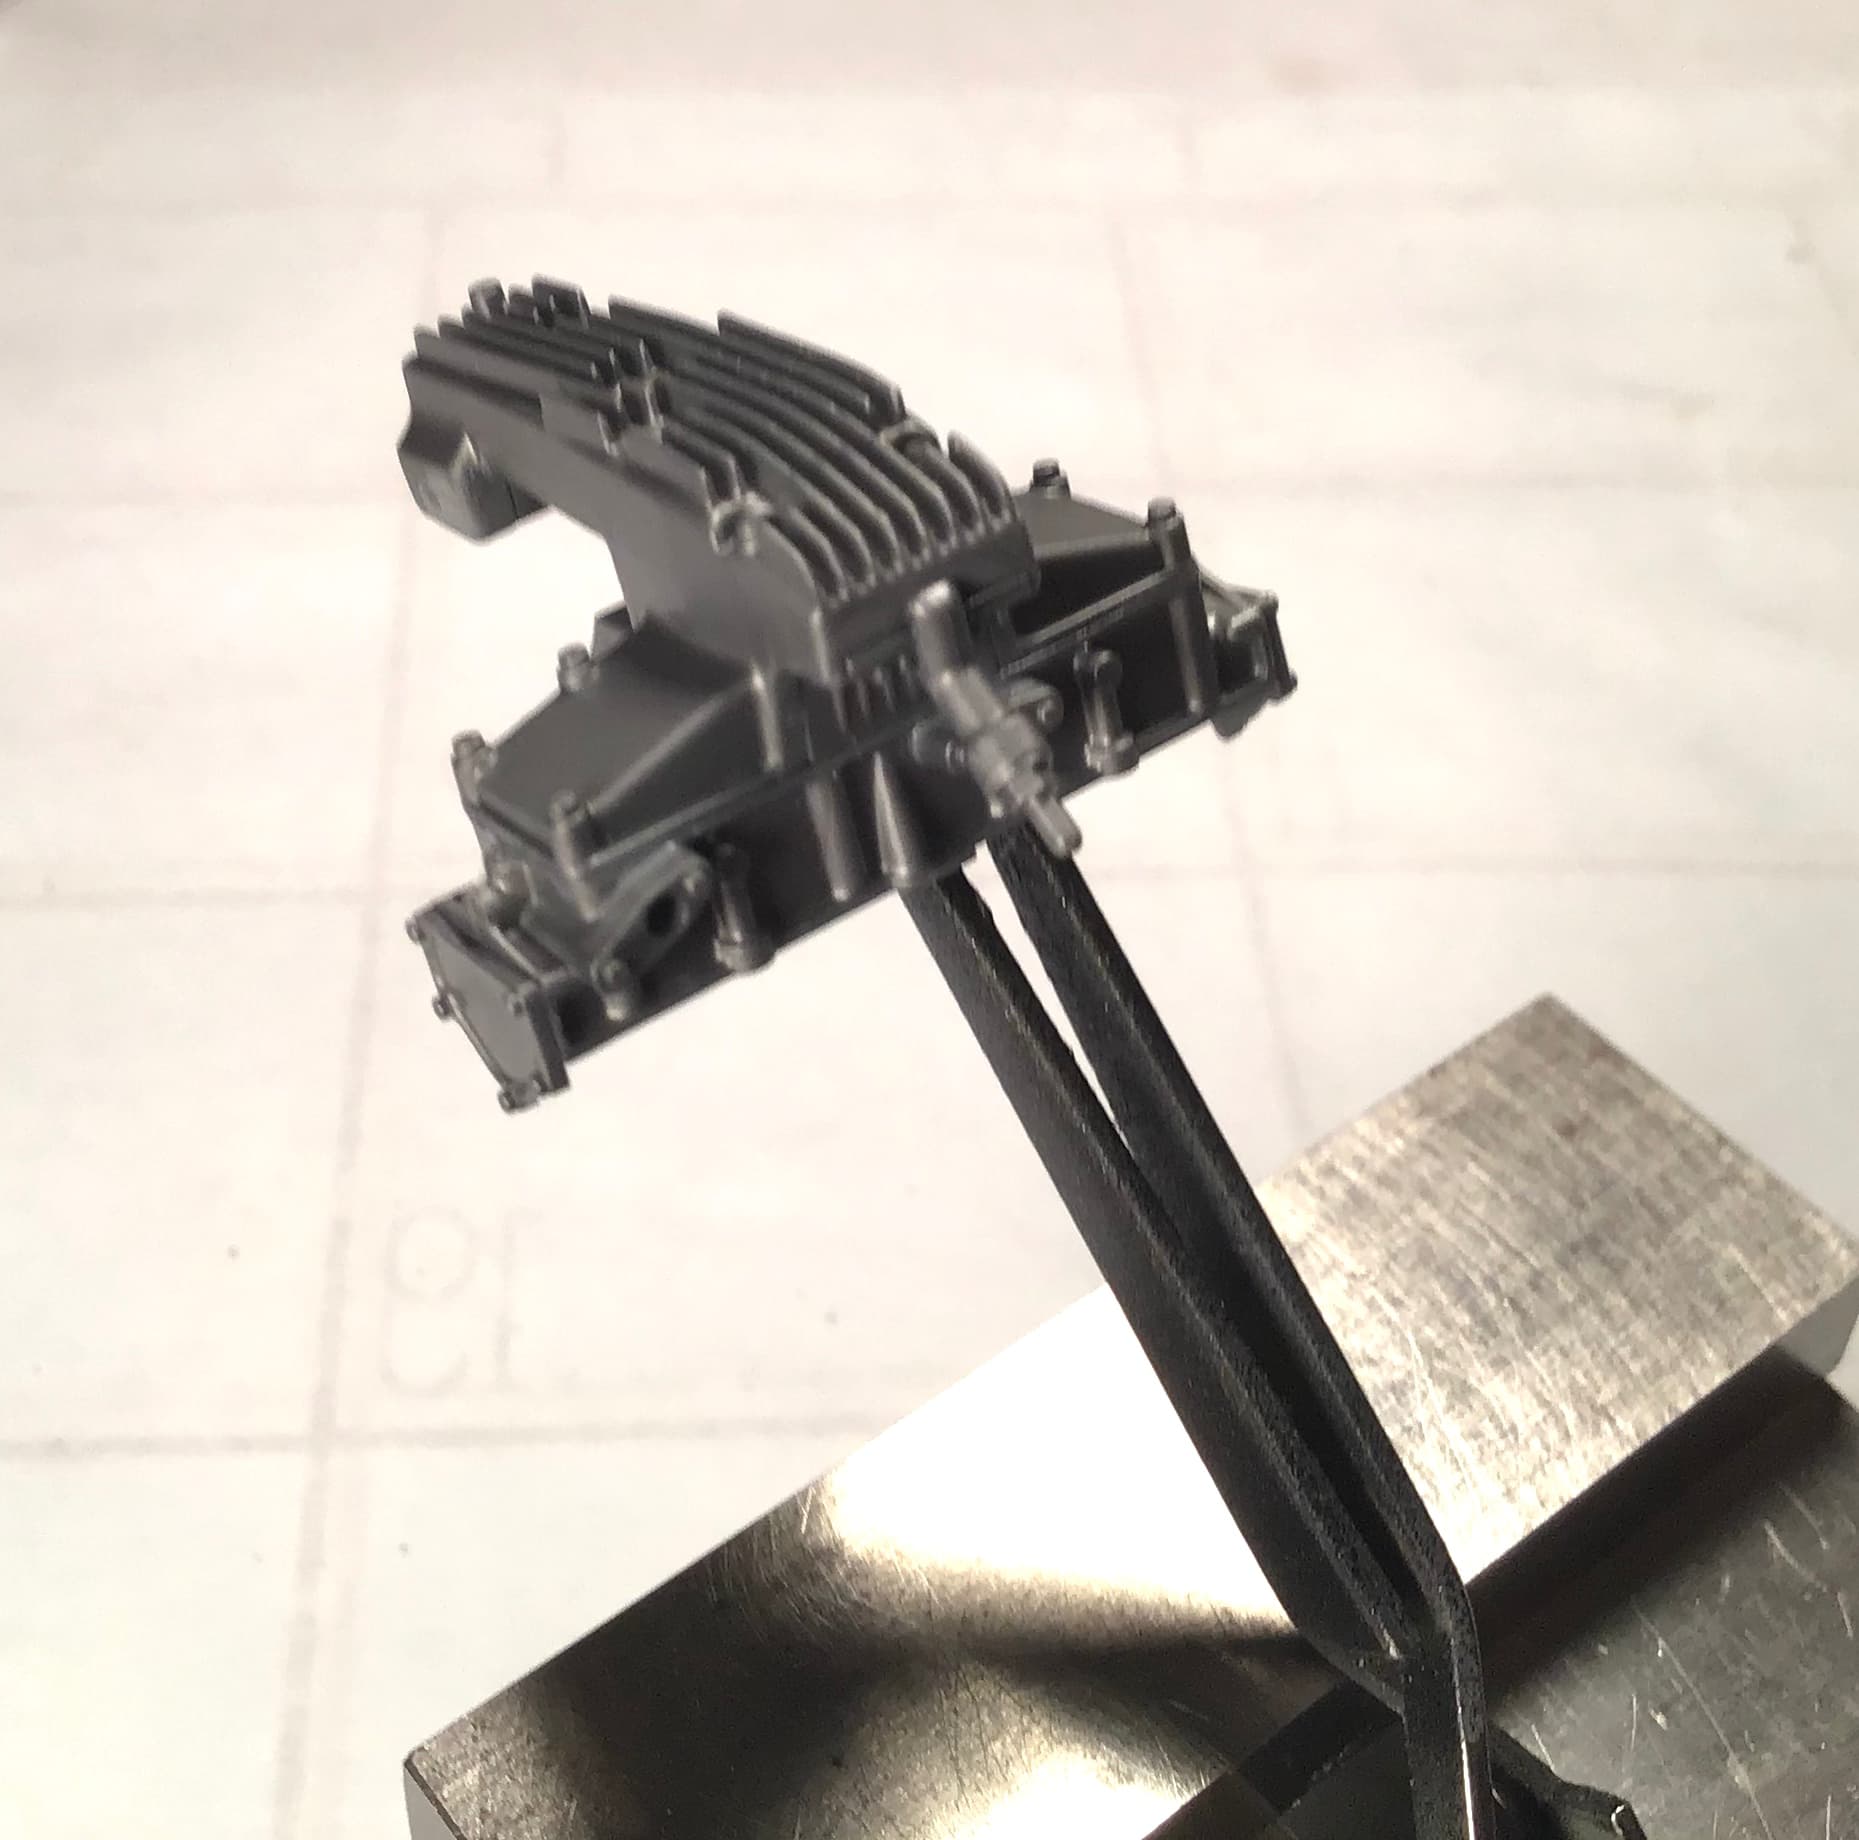
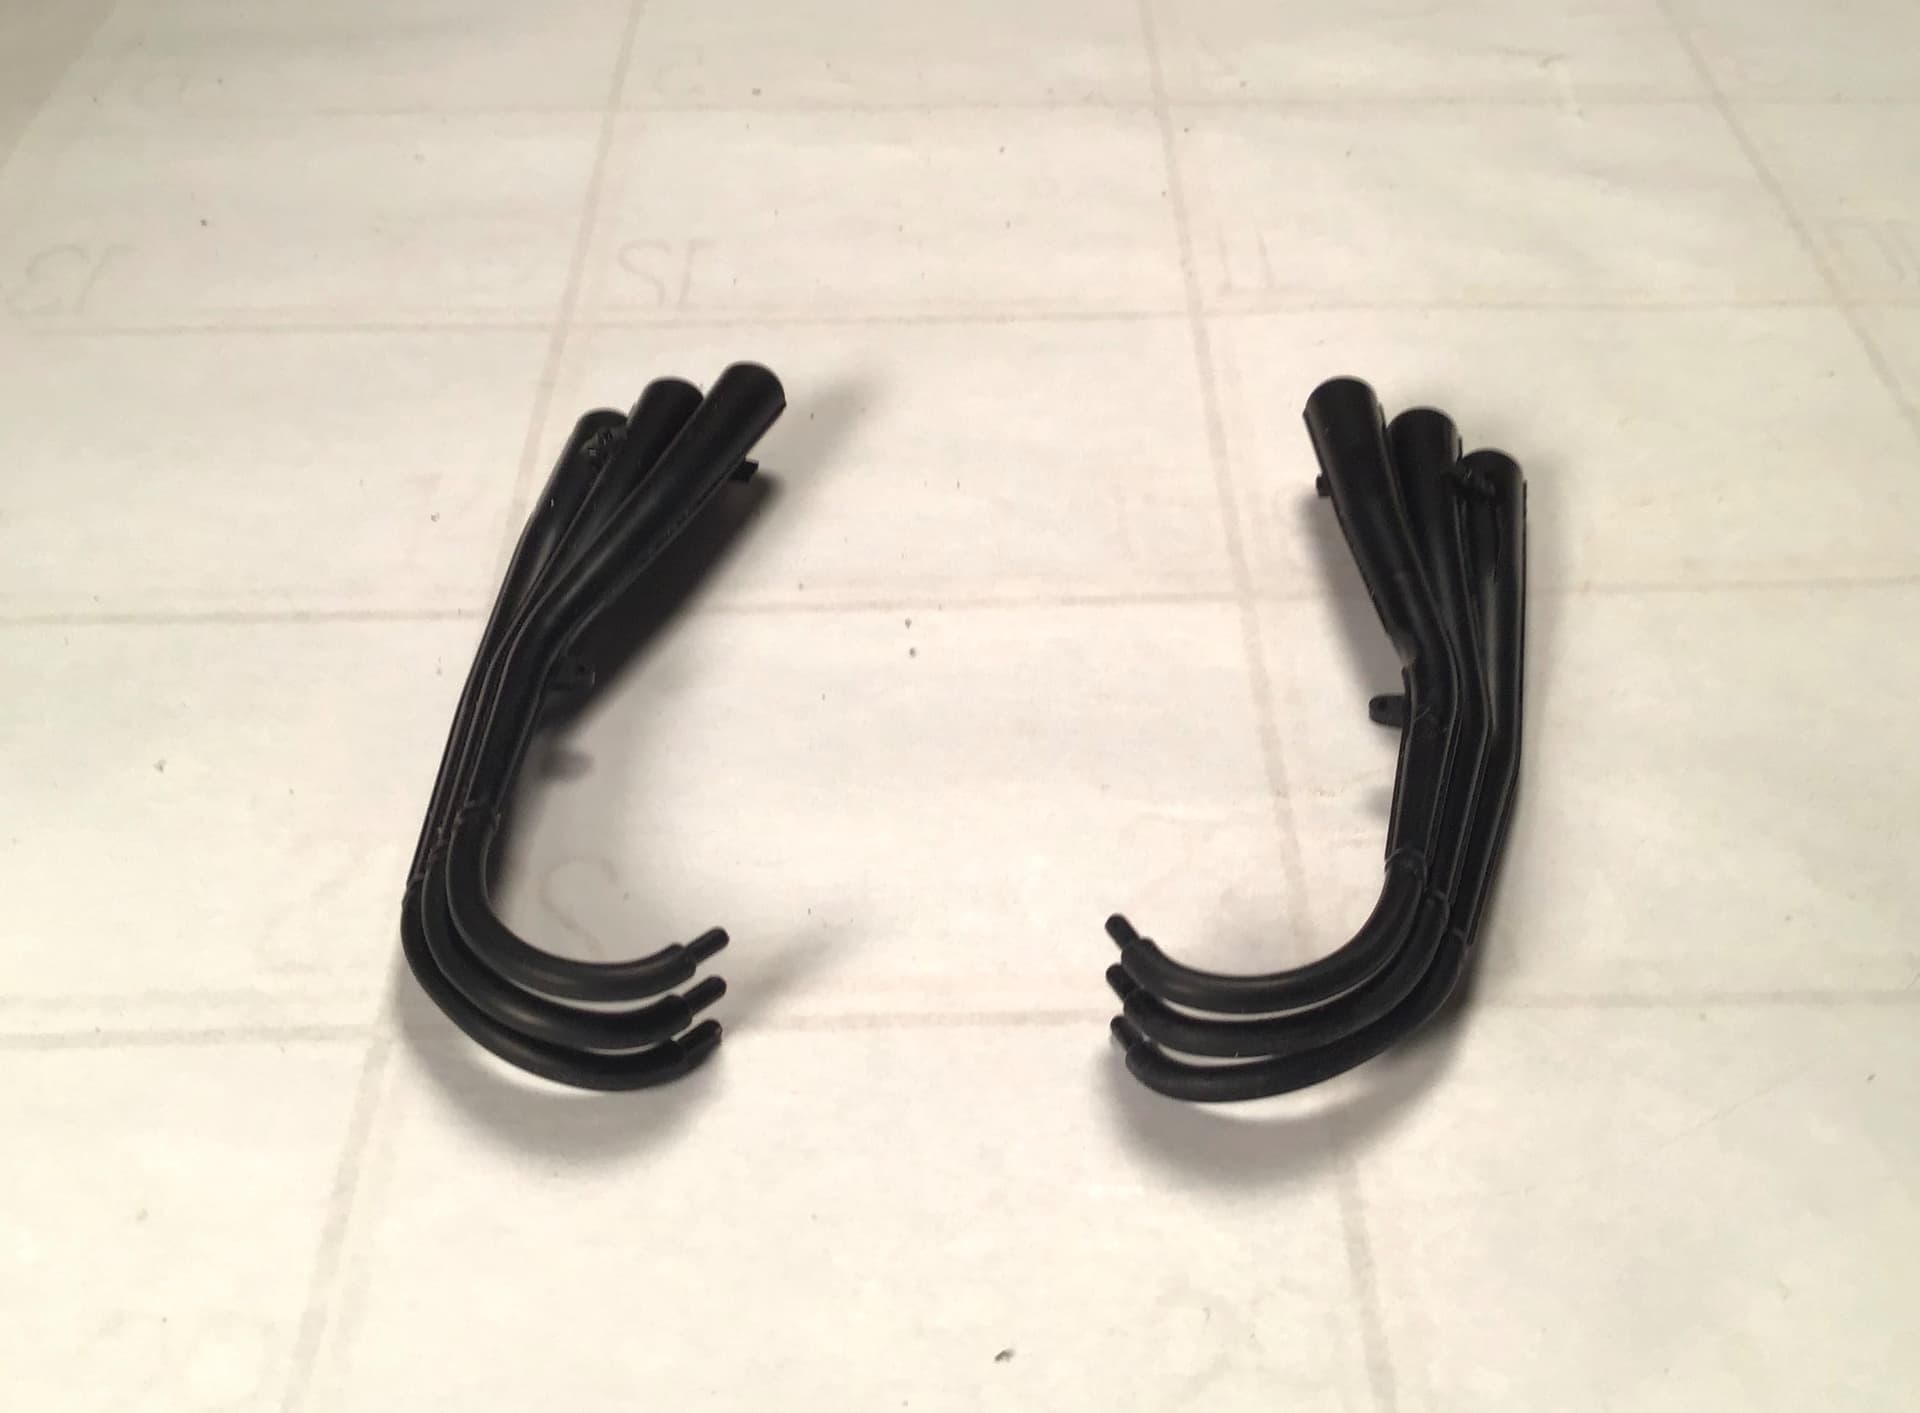
The first of the aftermarket stuff - 6 tiny turned aluminum velocity stacks that are included in the forks/clutch set .
Richard,
Thanks for the history lesson. I love the old photos. Riding styles were certainly different from today’s modern MotoGP.
You are indeed off to a rapid start and those aluminium stacks make all the difference to an amazing engine…
Richard,
Those intake stacks really look good. Nothing like turned Aluminum to look like turned Aluminum, and no priming/painting required. I’m thinking that you turned them yourself.
The engine/trans assembly finished in various shades of metal alloy really looks quite impressive. Between you and Michael, I just might take another look at modeling bikes sooner then later, as I do watch Moto GP bike racing. BTW, those guys are just plain FEARLESS.
@cosimodo - thanks Michael- looks like you and I are bearing the motorcycle torch here but sounds like it wouldn’t take much of a shove to get Joel to give it a try ! @Joel_W - thanks yet again . If you want to try a bike kit you can’t go wrong with any of Tamiya’s 1/12 offerings - even the 35 year old Yamaha I just completed was a joy to build . My heart is in the earlier machines . I would love to see a Yamaha TD 250 . In the asking for the moon department , how about any Gilera or MV GP bike or the Guzzi V8 with a dustbin fairing … sigh .
Richard,
Just to give you an idea of what class of Bike newbie I am, I have zero clue on any of those bikes. Actually, the only bikes I can even recognize are the road racing bikes I see when watching racing.
My overall building plan moving forward is 1 1/12 scale F1 buddy build with my brother, then a bike build, which should have taken me a good 6+ months, then just two 1/24-1/20 builds.
I saw some where quite recently a note that Italeri have Barry Sheene’s Suzuki. I don’t know if that is new or just a re-release but it would go well with your Yamaha, different scale though, with the Suzuki being 1/9 like most of Italeri’s bikes.
Thanks Michael - I will stick with 1/12 for the time being. I have a few Minichamps Classics and one of my unfinished builds is the Italeri (ex Esci ?) Triumph 3HW. I could be tempted by the Italeri/ Revell / Protar 1/9 Manx Norton though.
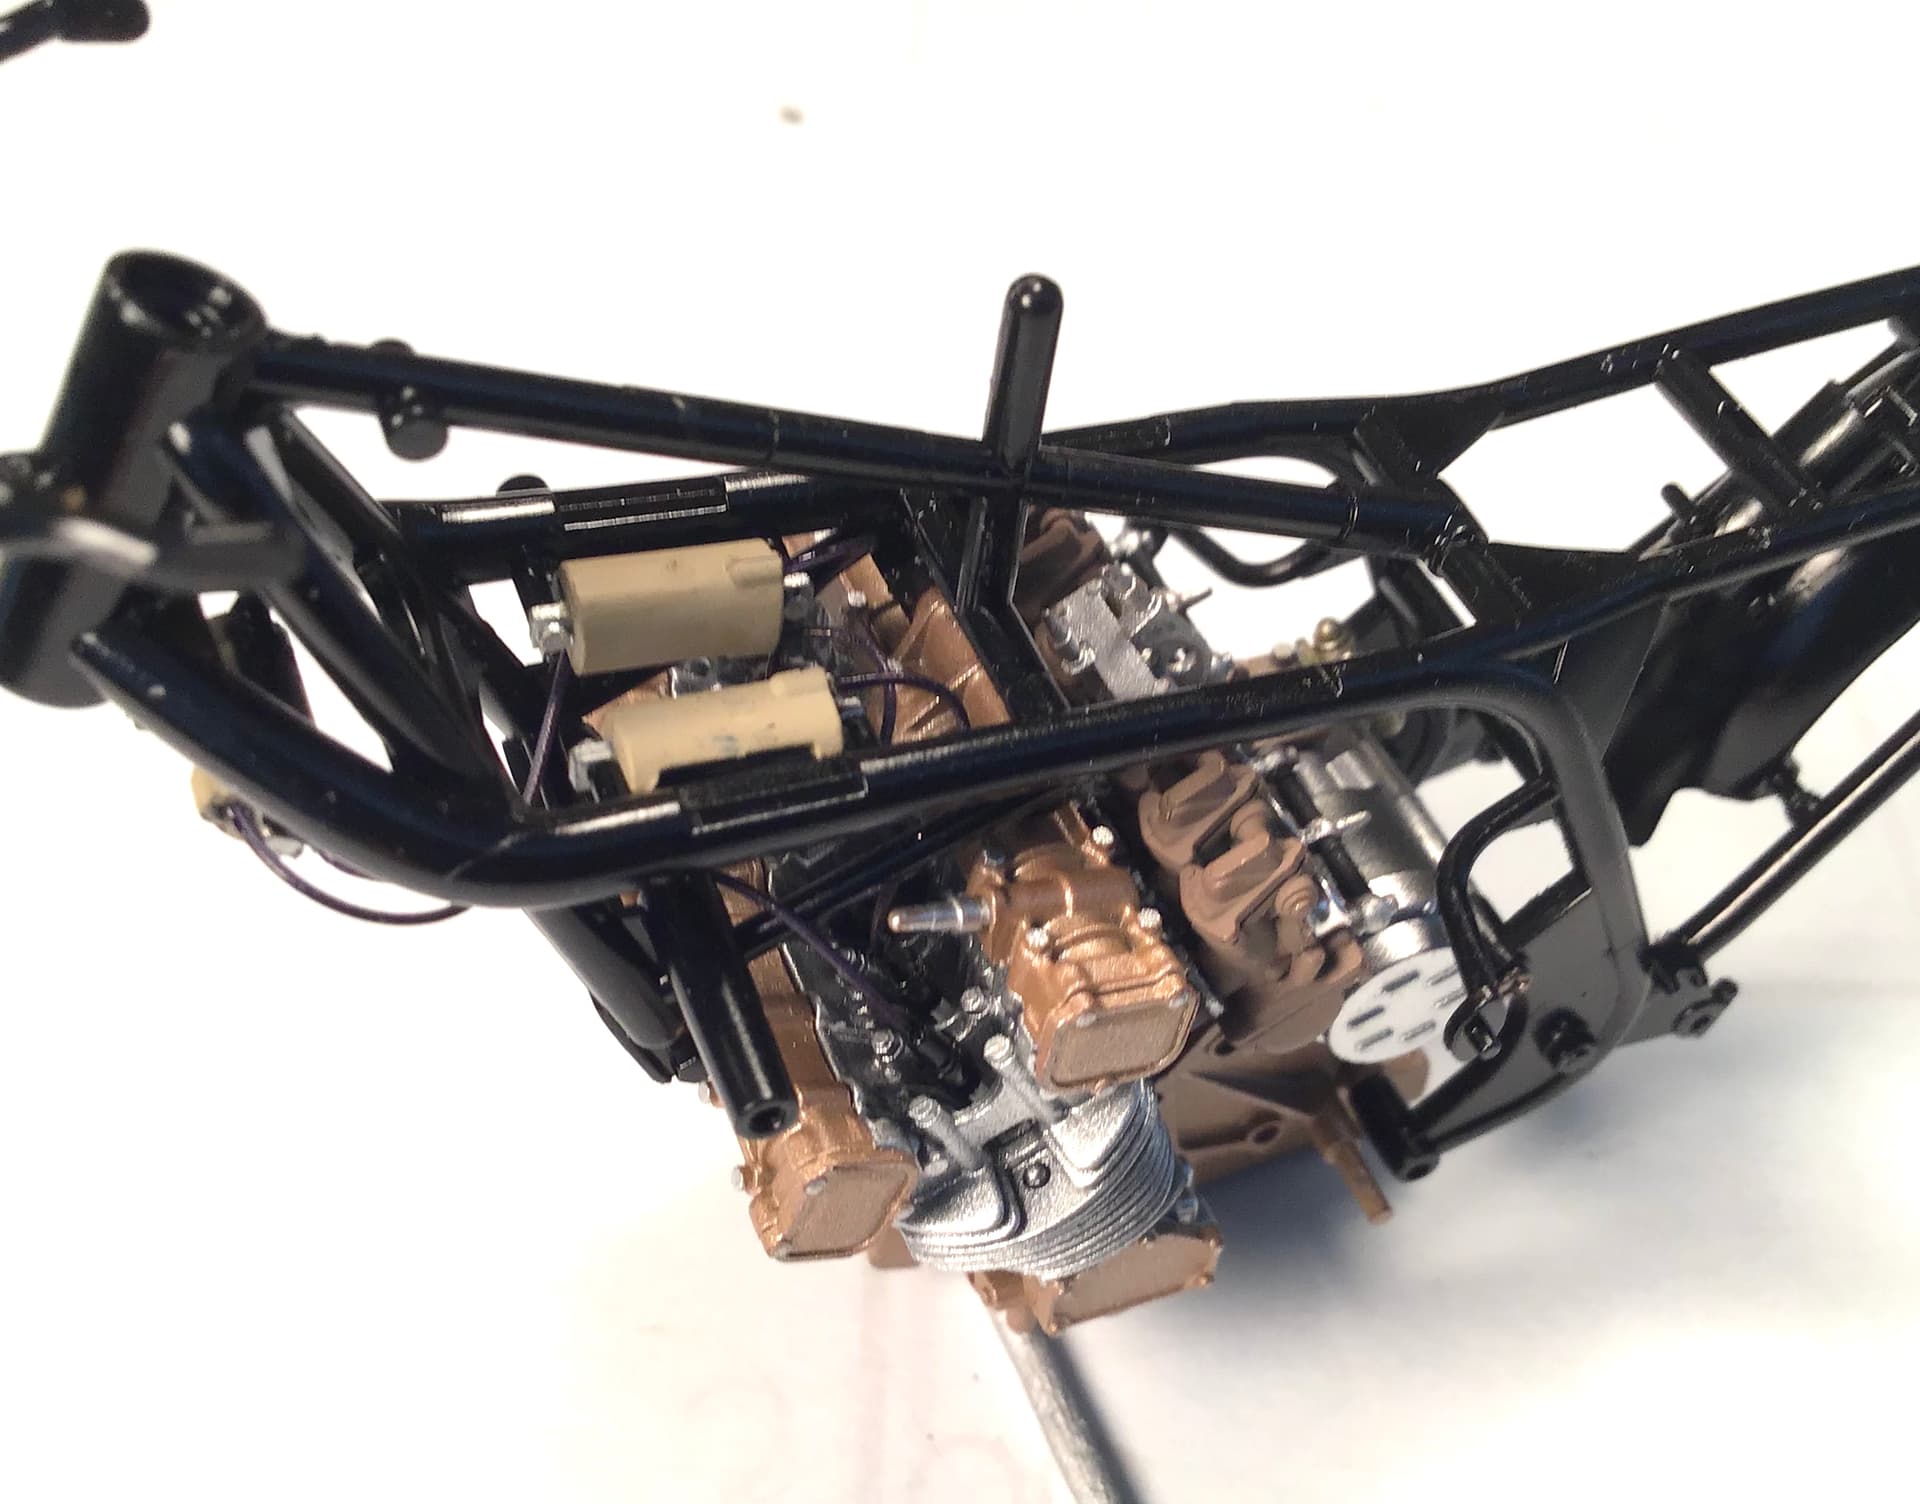
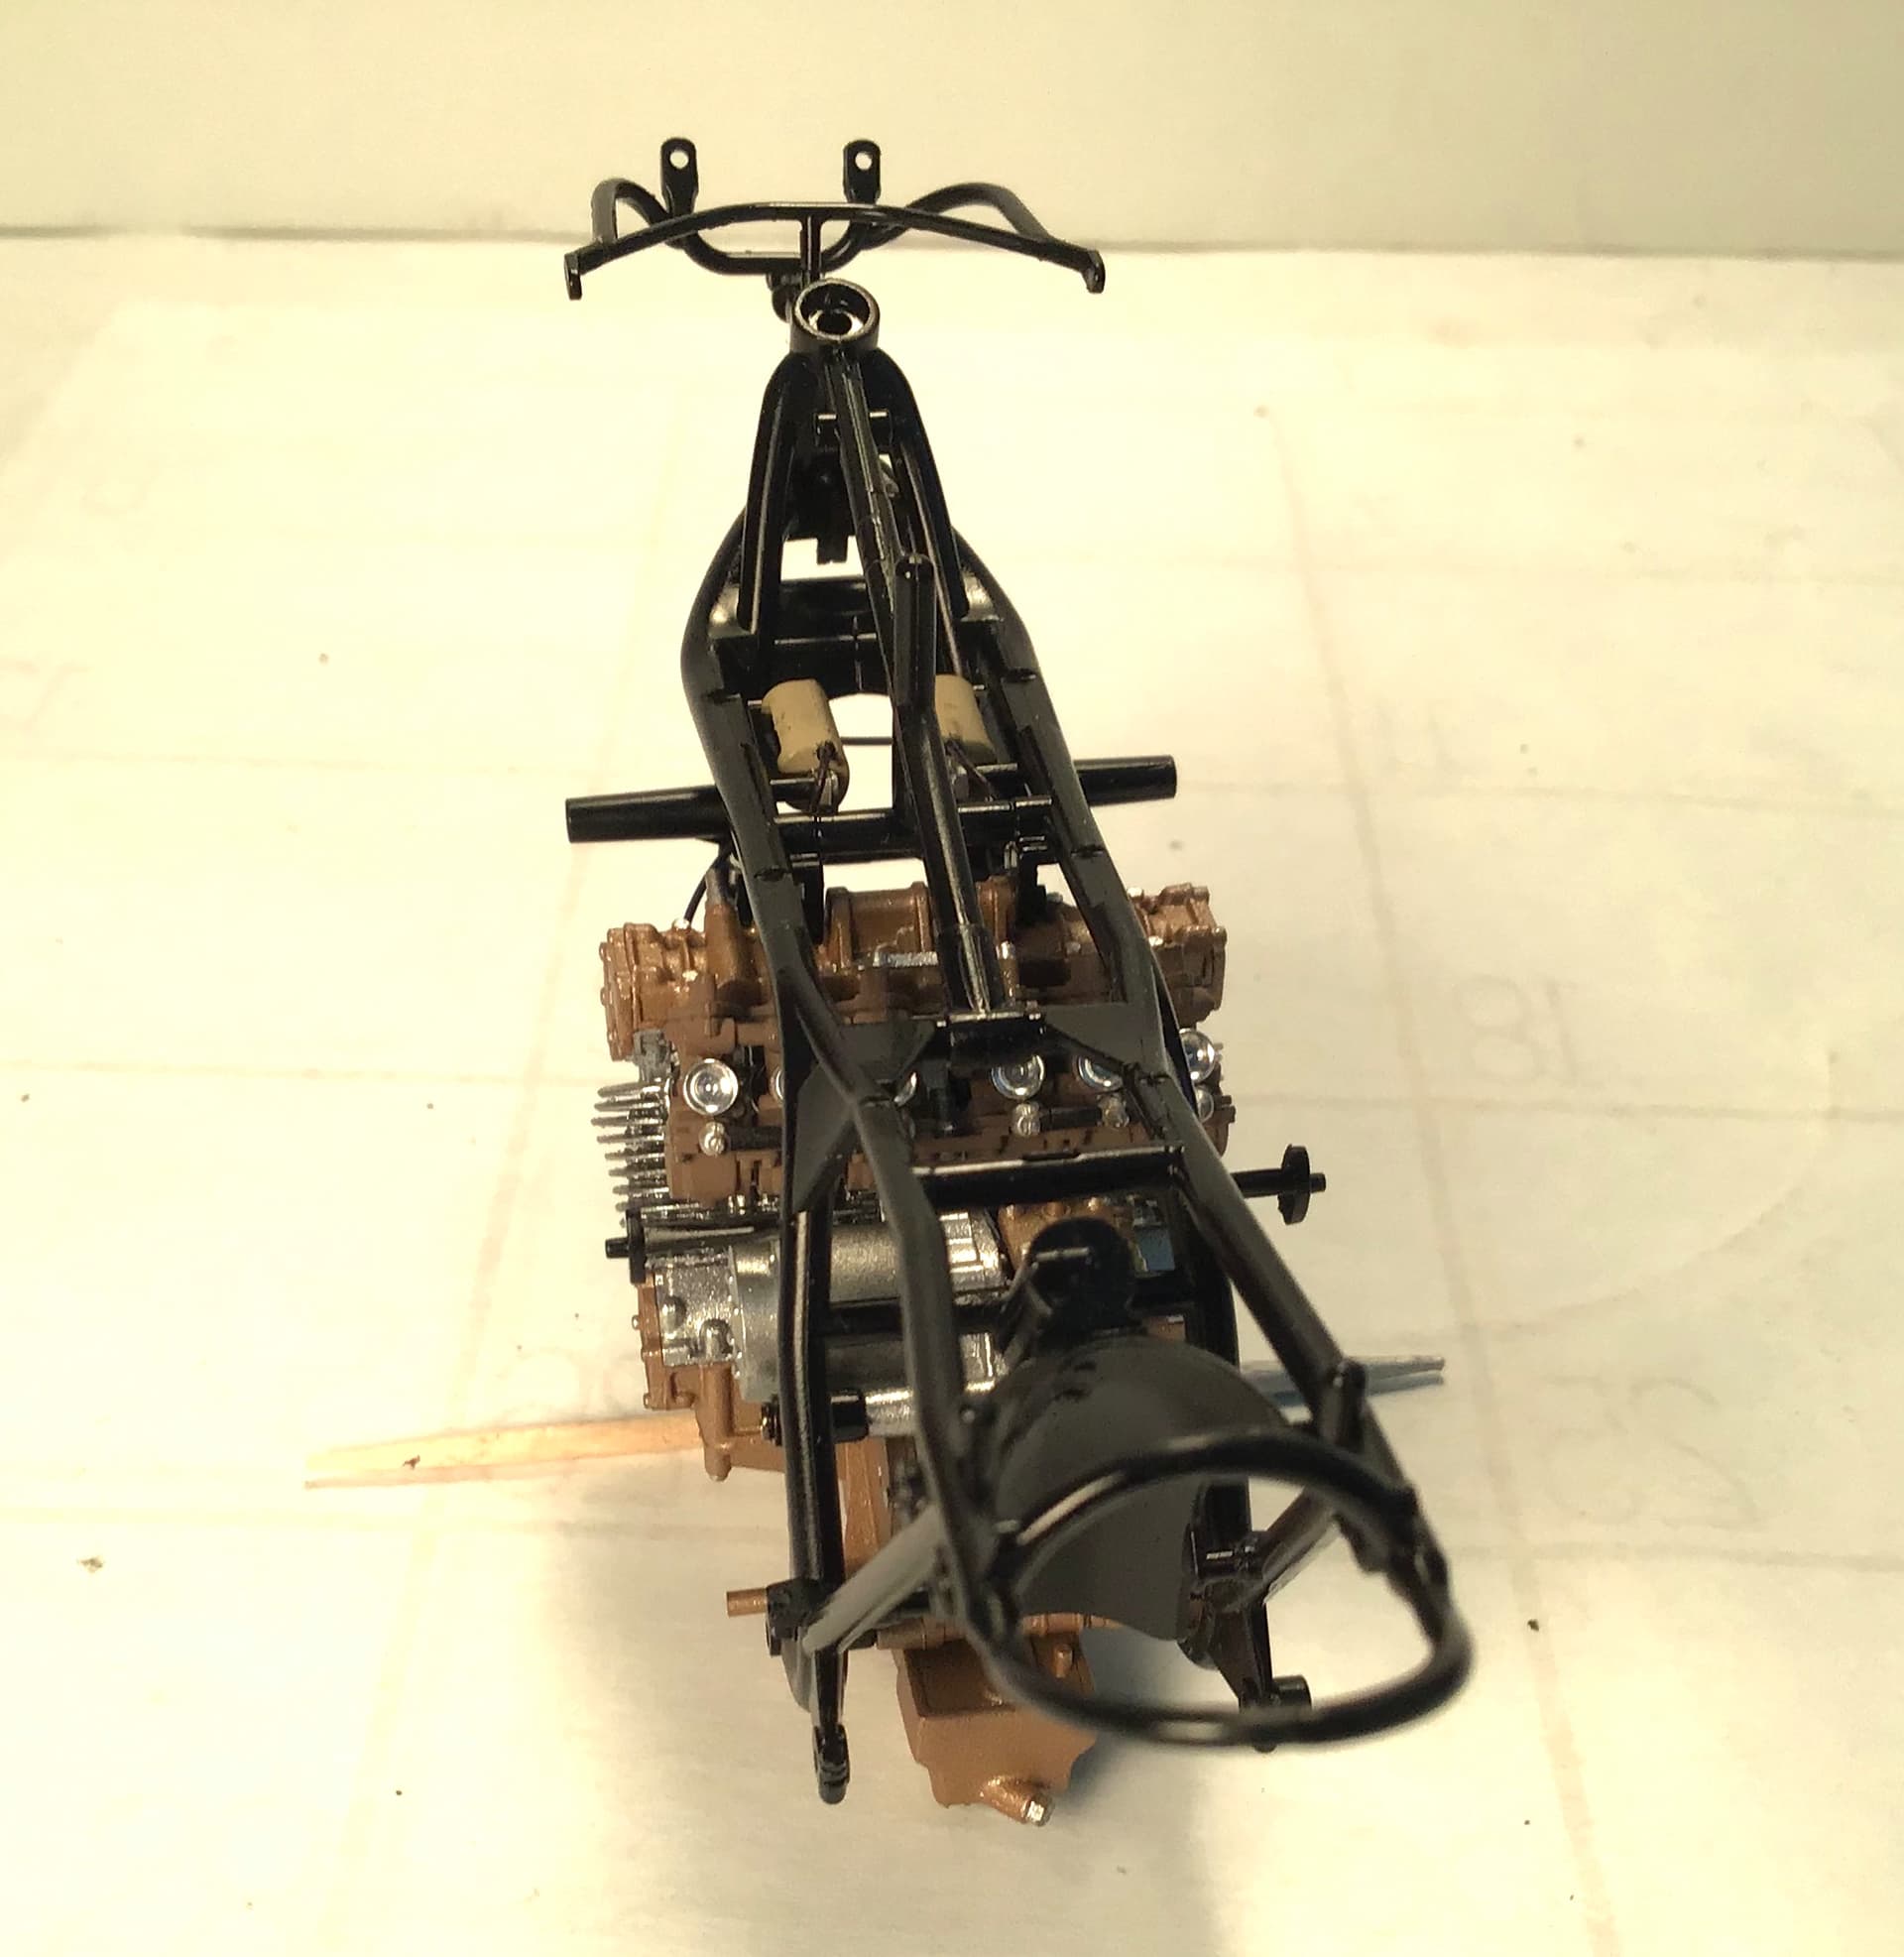
Some more progress - engine installed in chassis & ignition wires from coils to plugs installed.
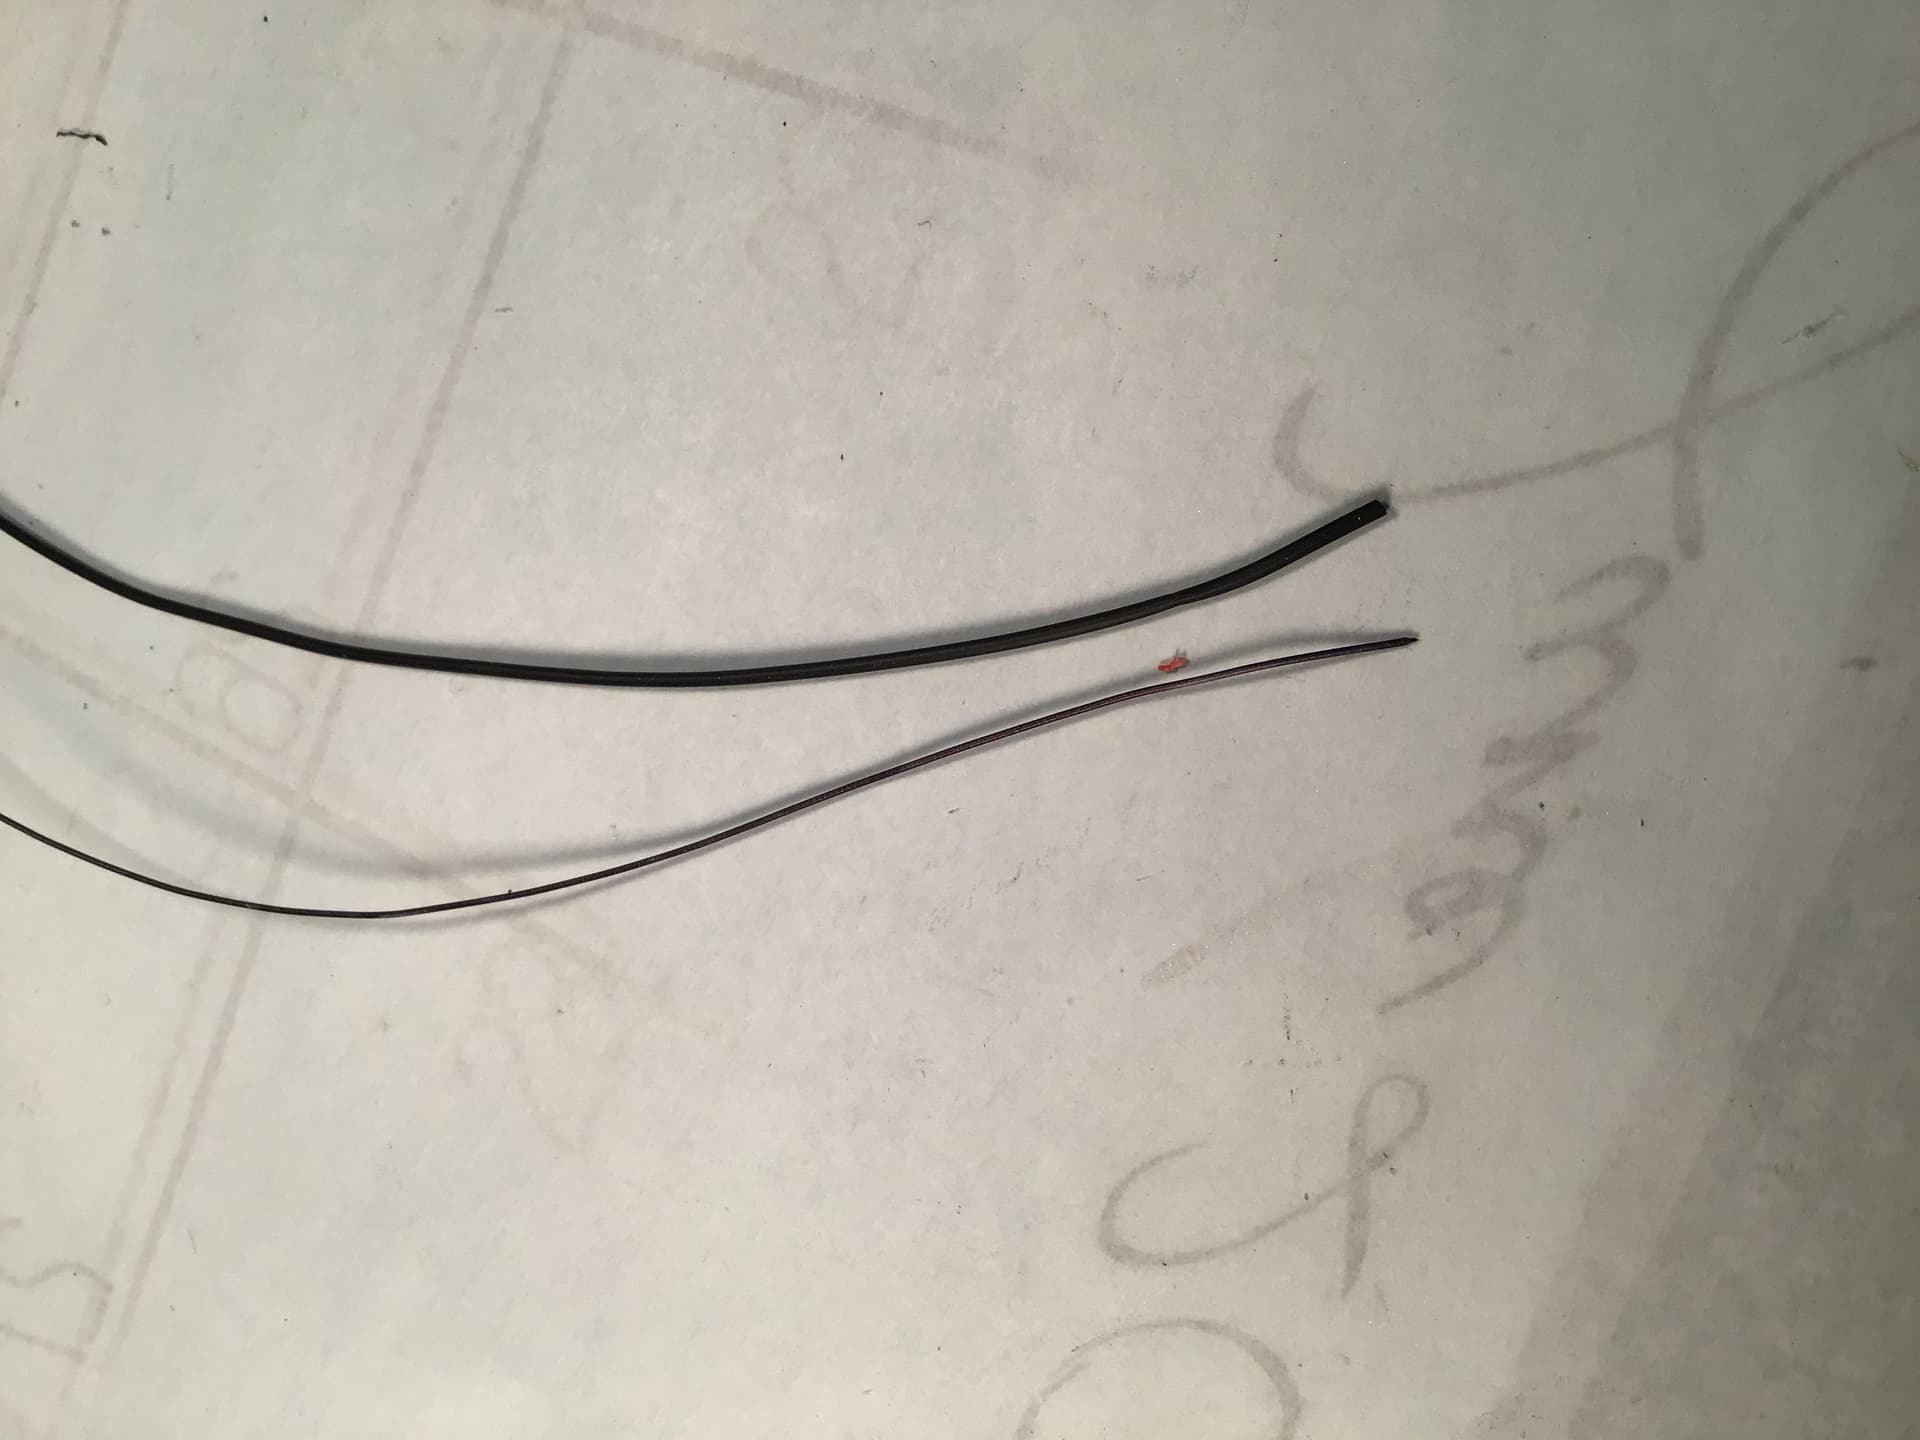
Tamiya is a world leader with wonderful kits yet they continue to supply vinyl tube for wires and cables that is too large a diameter and grossly out of scale.
The tube included in the kit measures .040 “ in diameter which , in 1/12 scale is nearly 1/2 “ - obviously too large for ignition wires/ control cables , etc. I had some fine electronics wire on hand, the outside diameter of the jacket measuring .019 “ which scales out to just under 1/4” .
The cables / ignition wires on my real bikes measure between 3/16 “ - 5/16 so the .019” wire is just about right . Unfortunately it is white but easily colored black with a permanent marker . I carefully stripped out the wire core leaving a fine hollow tube.
Tamiya supply the parts to be wired with pins that the tube is pushed over . I cut these of and drilled .020” holes in their place to insert the smaller diameter replacement in place . Really looks much better. New wire at bottom, Tamiya tube at top .
Richard,
Your attention to details is just amazing. Your replacement ignition wires without even measuring them looks true to scale in your pictures.
I’m guessing that the wire included in the kit is the same diameter wire that they supply in their 1/12 race car kits. If so, then is that wire out of scale as well, or is the wiring in a F1 car a larger diameter in real life?
BTW, The engine/transmission installed in the frame looks as Tony the Tiger would say: GGGGREAT!!
Nice progress Richard! As Joel said, if you’ve spent any time working on vehicles, some things just look way out of scale as soon as you take them out of the box. Your simple fix here was well worth the effort, and the engine mounted in the frame looks spot on!