HG,
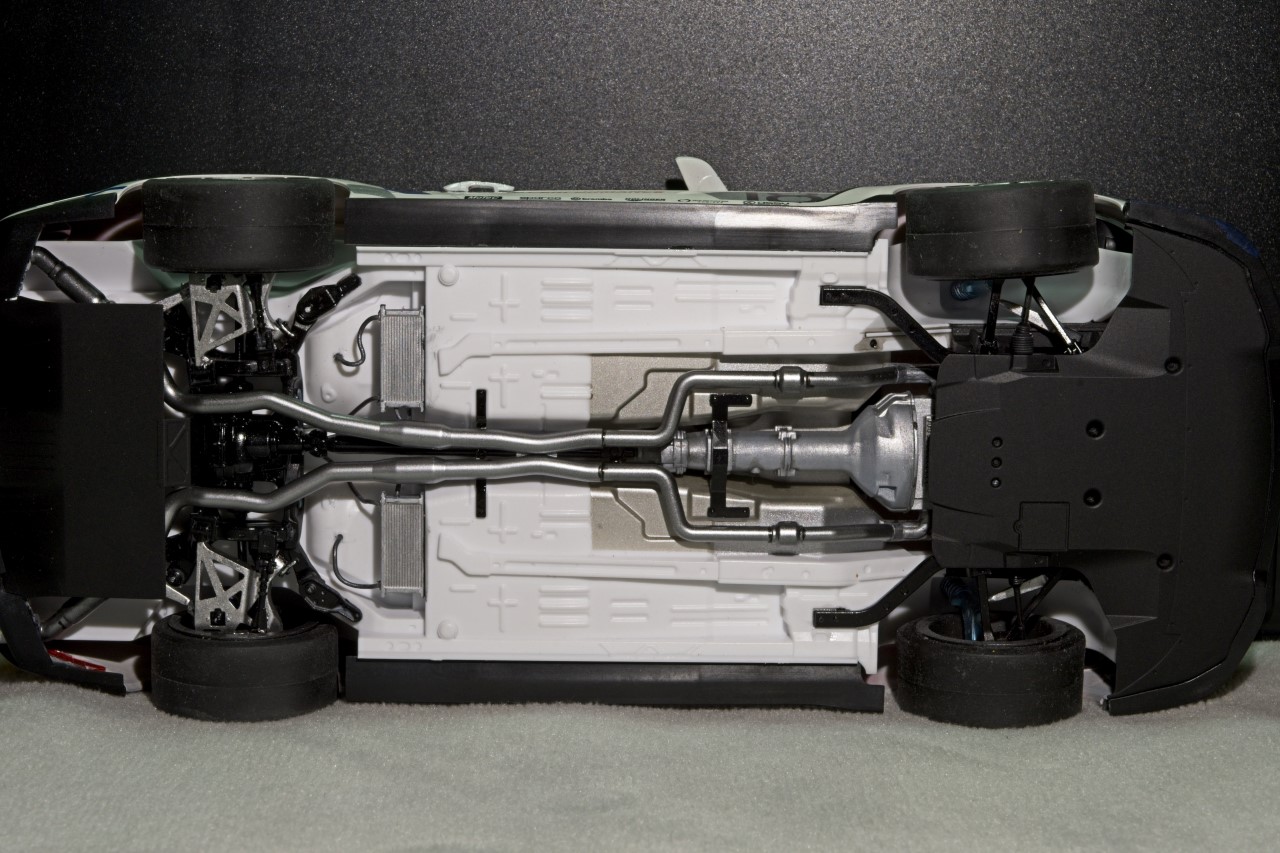
Always great to see and hear from you. And thanks for your Thumbs Up on the under chassis work.
The sad part is that both front and back suspensions will get aero plates that cover most of them. Just gotta learn how to work with mini magnets so I can remove parts like those for display/show, then replace them.
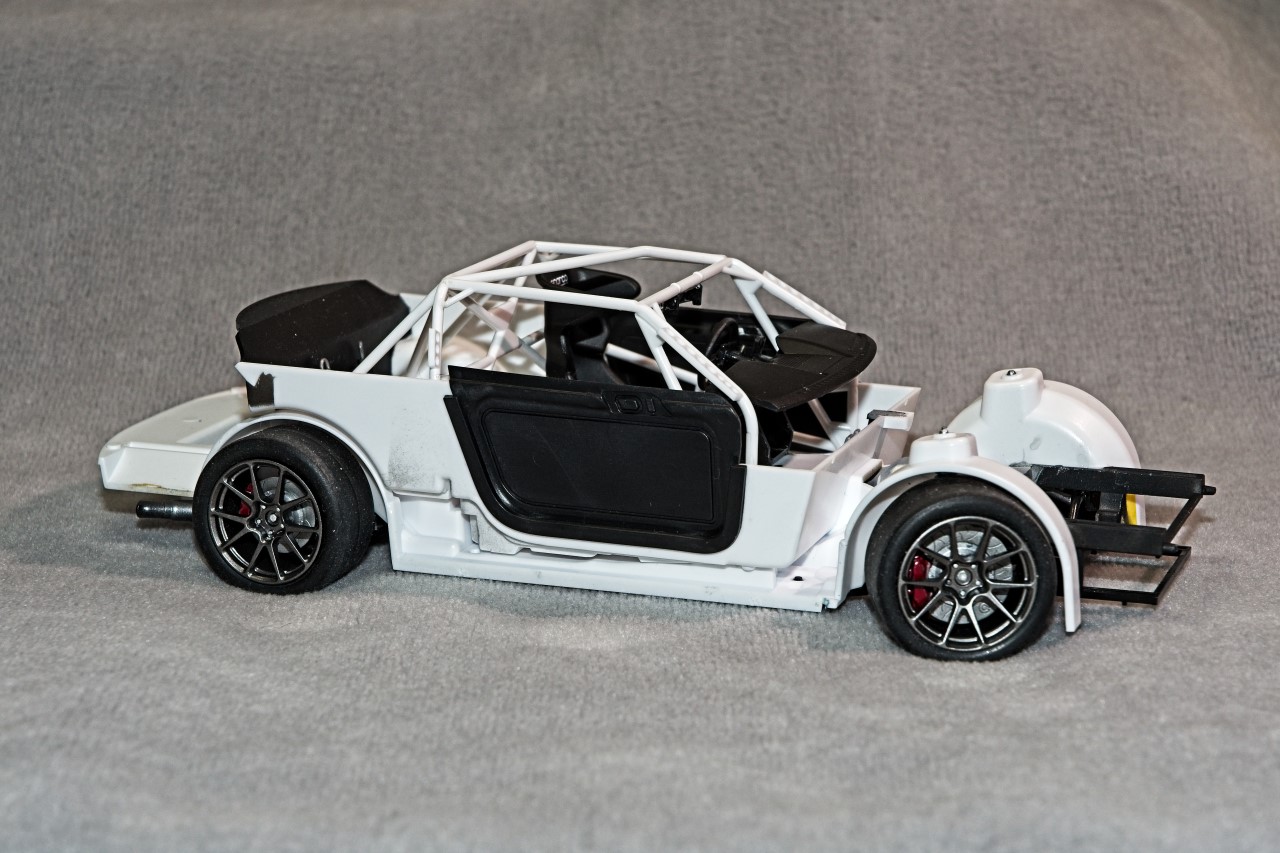
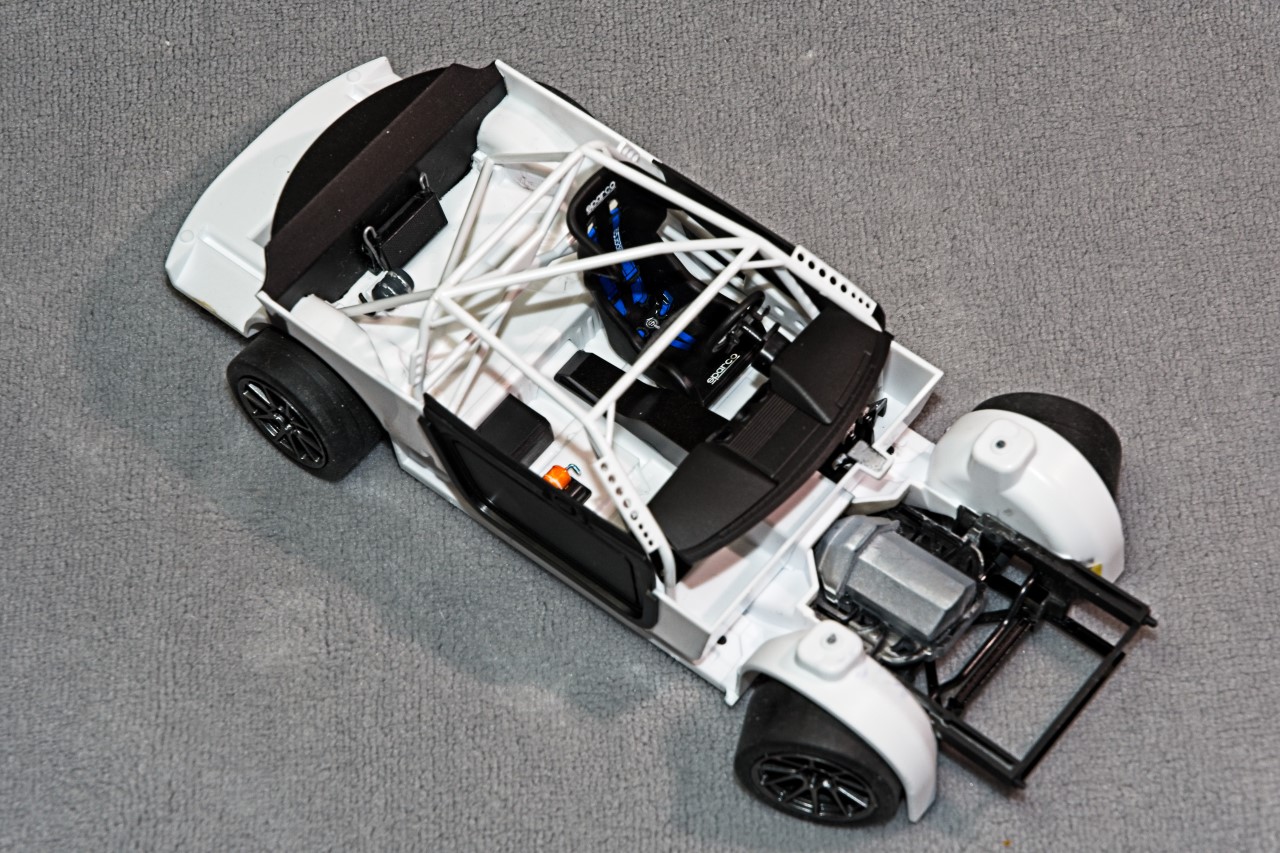
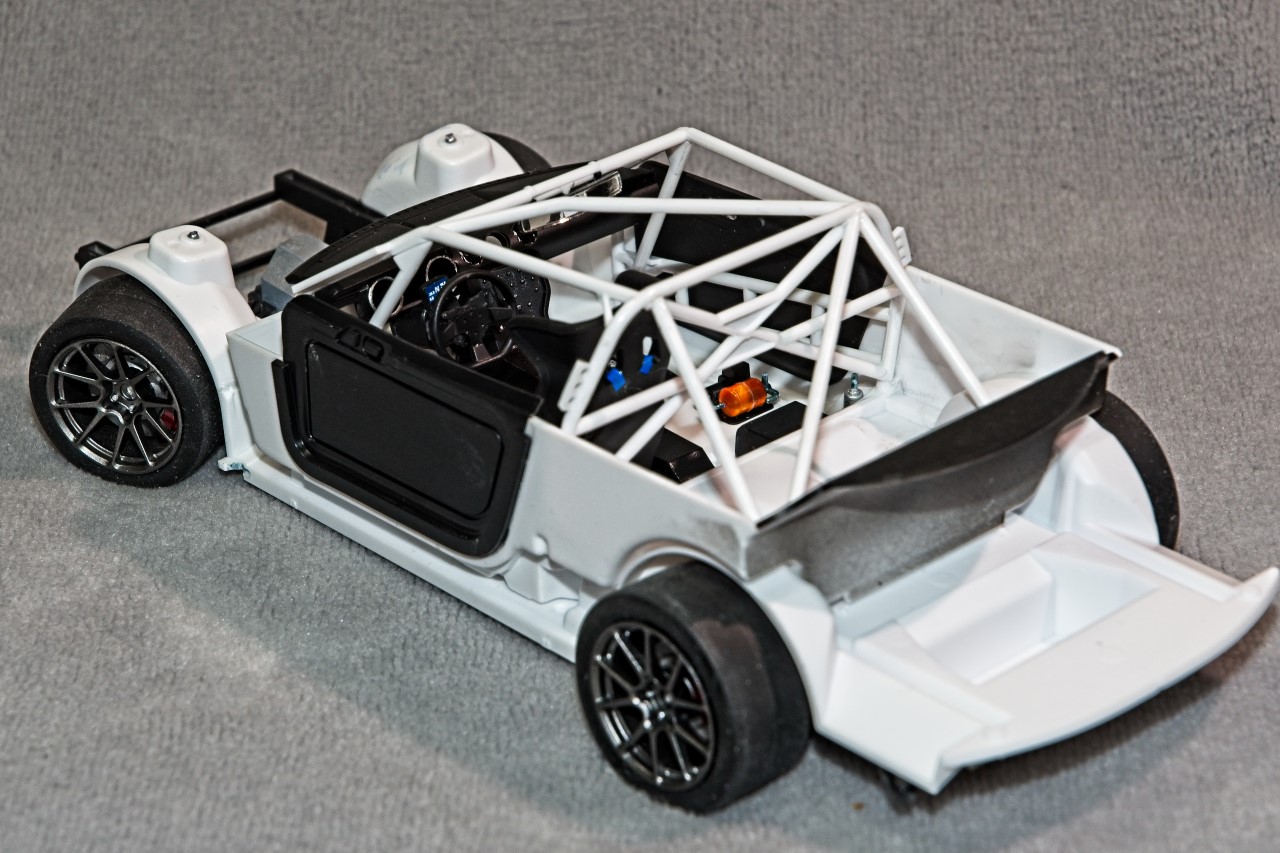
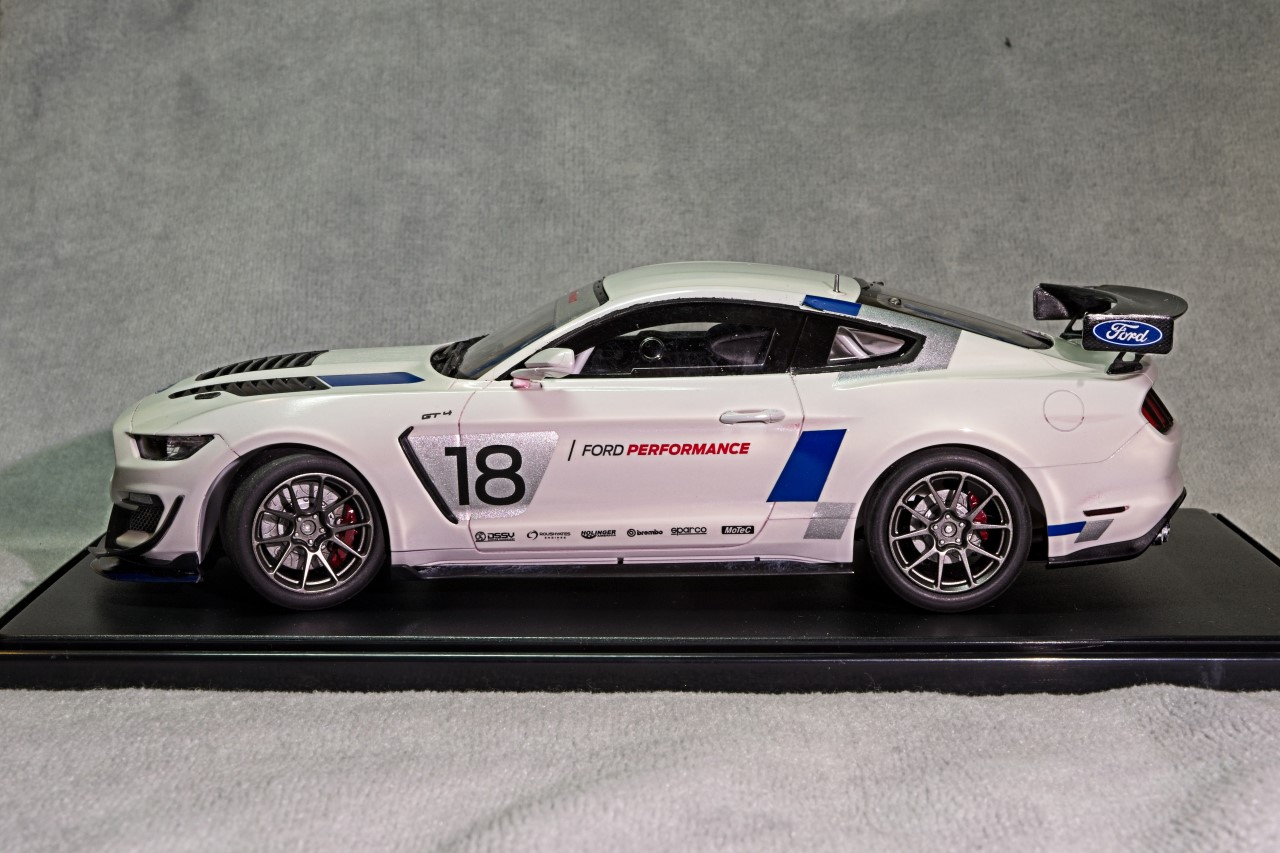
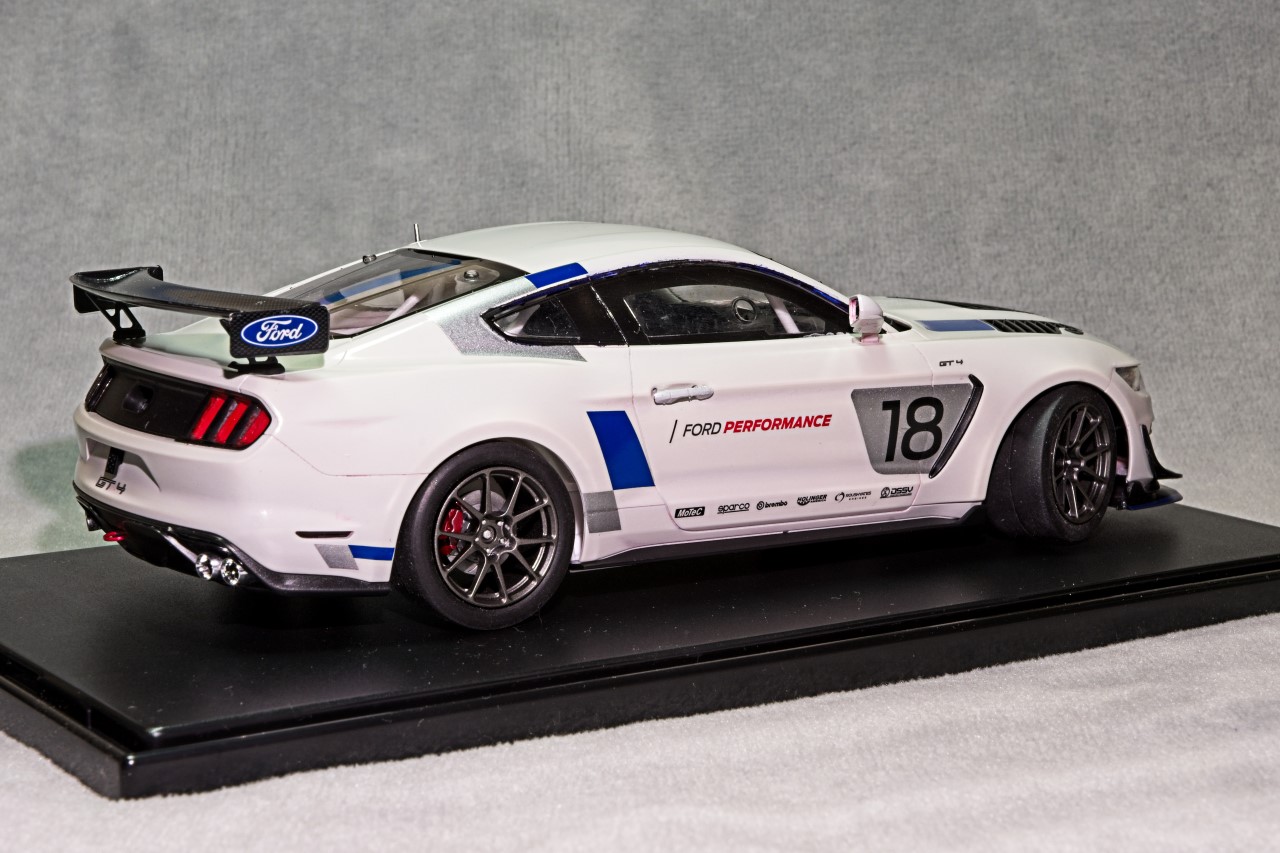
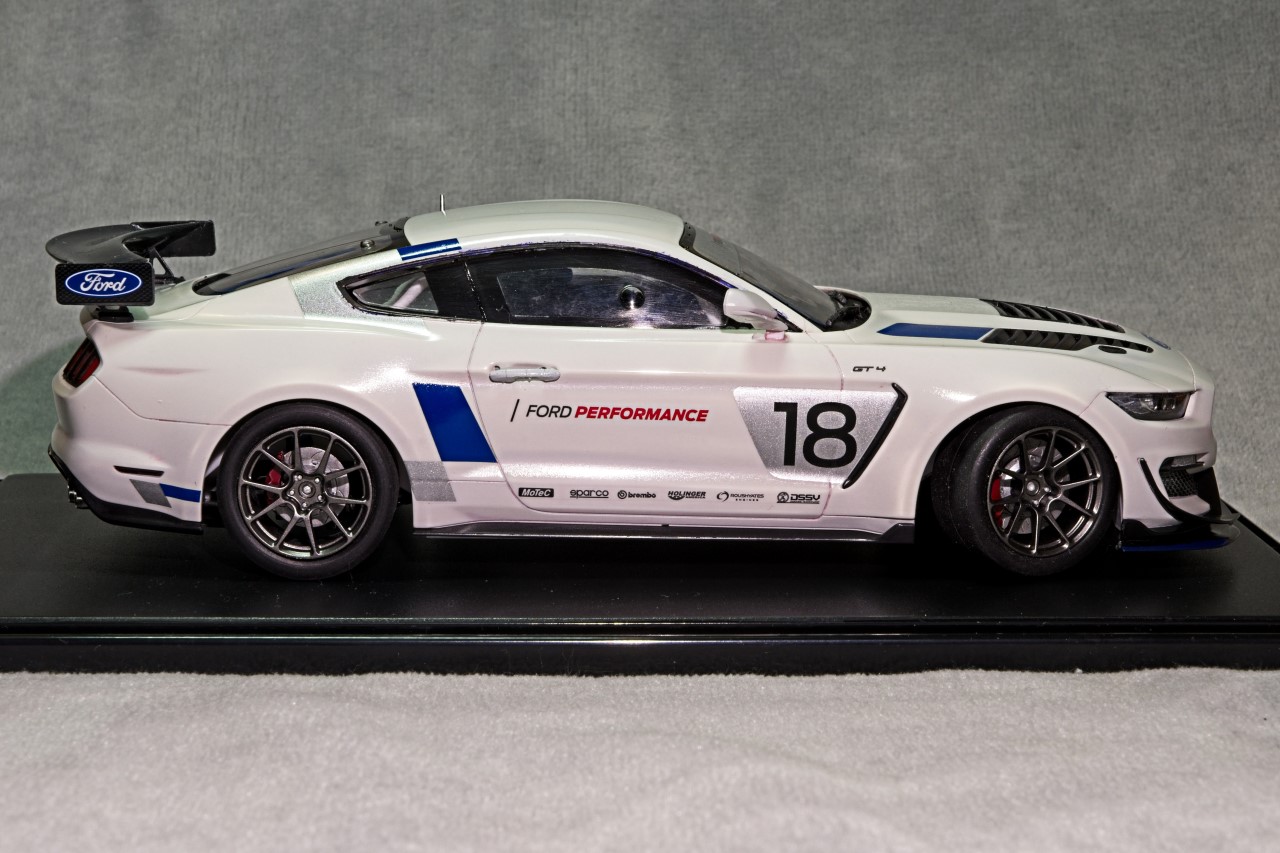
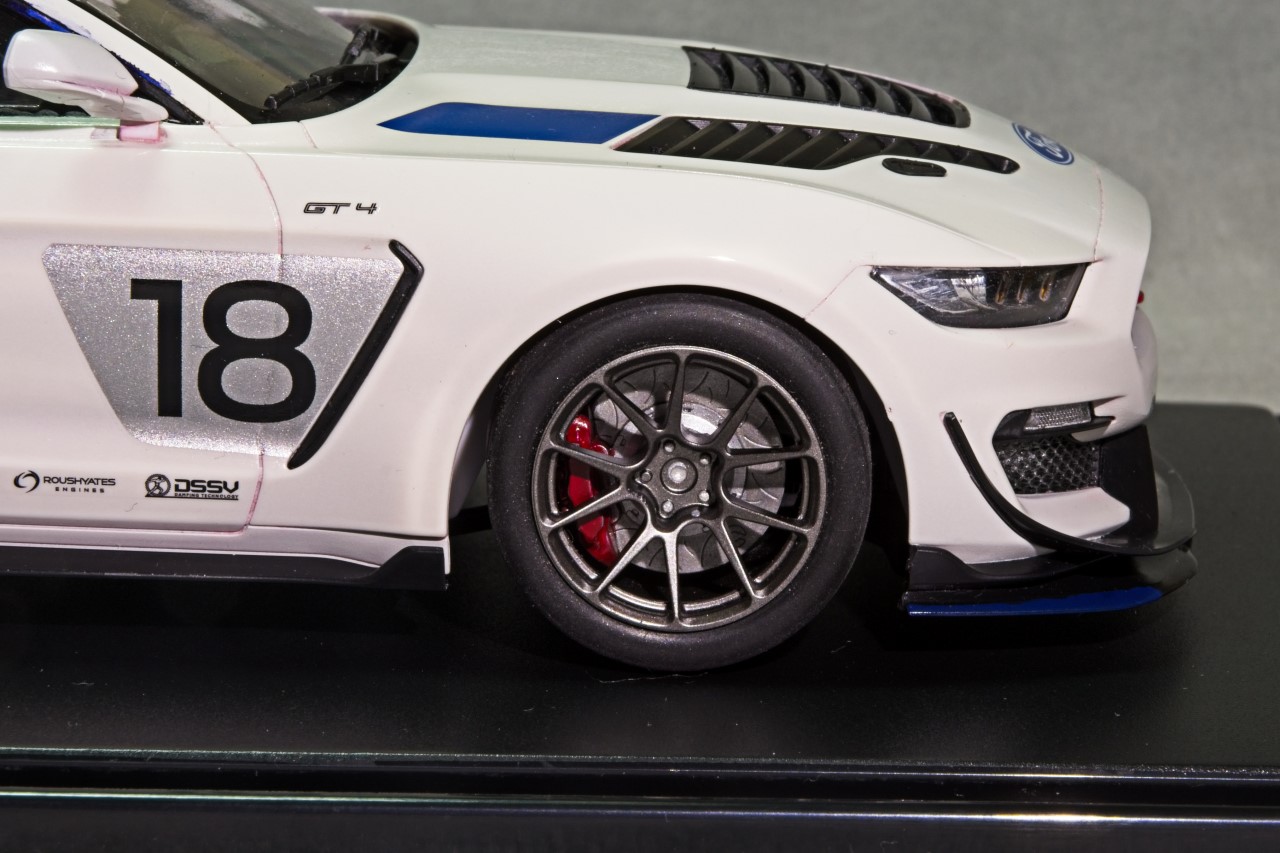
After another week of work, I finally finished the chassis with the addition of the tires & wheels. The alloy wheels were painted Tamiya Gun Metal which is a pretty close match to how they look in real life. the tires were sanded to give the the treadless surface a worn look, but leave the centerline molding seam as I’ve seen it that way in real life. One decision I seem to make on nearly all my builds is to paint the brake calibers Gloss Red as they add just that little bit of color that is really needed with the the brakes being just several different shades of Metallic Alloys. The only things missing is the tire company logos which should be Continental which I found on a Powerslide sheet and ordered, but am still waiting for them. They’re 1/25 scale, so I hope that they look ok as the model is 1/24 scale.
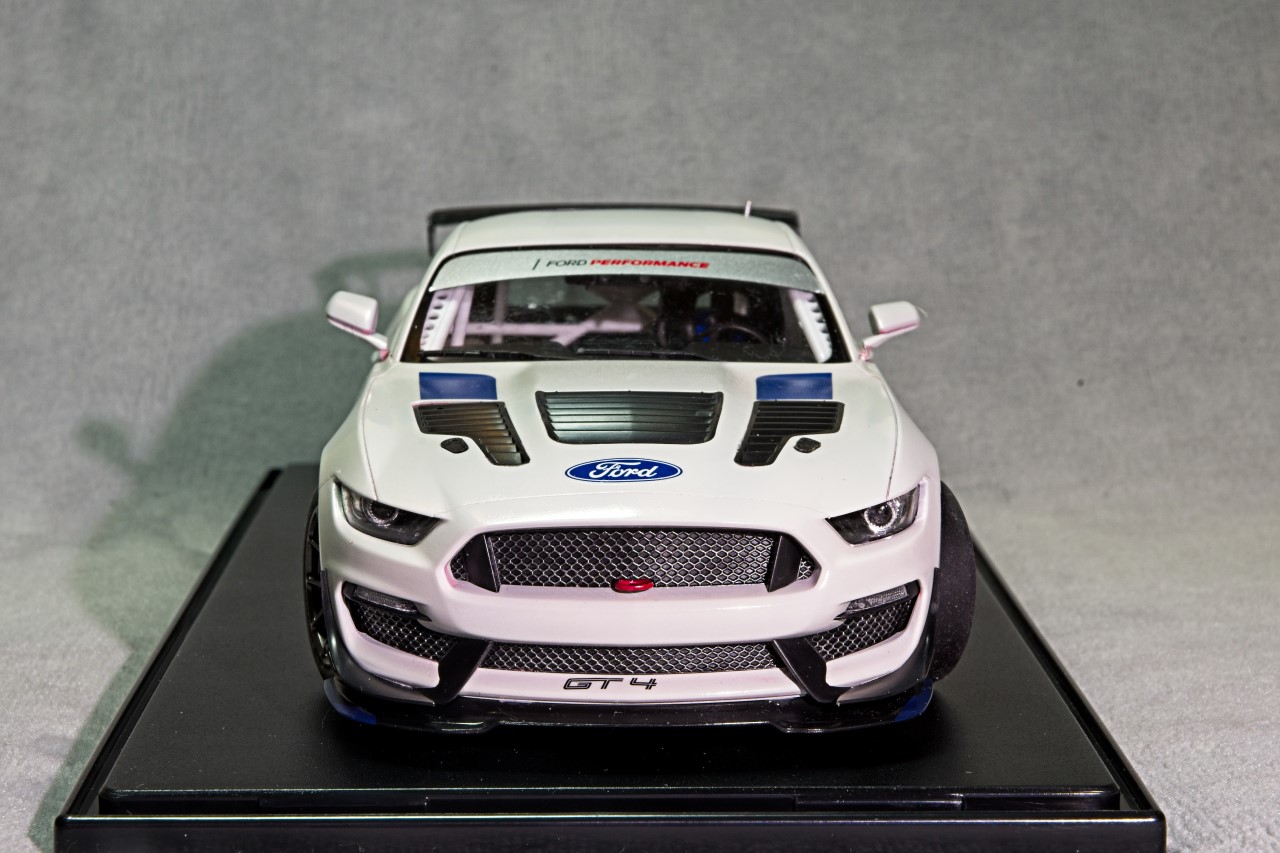
Next up I painted all the interior parts that should be Carbon Fiber either Tamiya Nato Black or Mr. Color Dark German Gray. I decided to use the kit decals for the 5 way seat harness as a kind of experiment, and I do like the basic look. Bits and pieces were added to busy up the interior, then the roll cage was added. Perfect engineering by Tamiya as it literally fell together. Actually, everything piece for the interior fit perfectly.
Looks incredible Joel. Really love the look of those wheels; the Tamiya gun metal is a perfect match, for those wheels and the white body color. The red brake calibers are sitting there like little gems, perfect.
Looks like you’re getting there Joel. It’s at this part that I get really nervous about putting the body over the chassis. There’s no turning back once it’s all fastened down. I’m right there with you on the red calipers as well (sometimes I’ll go with an aluminum color) to add contrast to the wheel/ tire assy. Decals should work out well as they’re close enough.
Joseph,
Much appreciated for your stopping by and your comments. I’ve lost count how many times I’ve popped a part off or broke a part trying to get the body to wiggle over and down to its mounting points on the chassis.
Of course I’m prone to all sorts of final issues. My preferred way to add a little more drama is attaching all the clear glass, which I’ve switched to thick CCA. Normally it works fine, but today I managed to slip and I got it all over one of the side windows. Now there’s a A+ screw up for sure. So I popped out the window, let the CCA dry, then I sanded it with 400, 600, 800, 4k, 6k, 8k, and finally 12k. Then out came the Gravity polishing system from course, fine, and finish. Got lucky and it’s perfect. Didn’t even screw up all the black paint framing in the process.
Decided that 4 hours would more then do for today, and called it quitting time.
joel
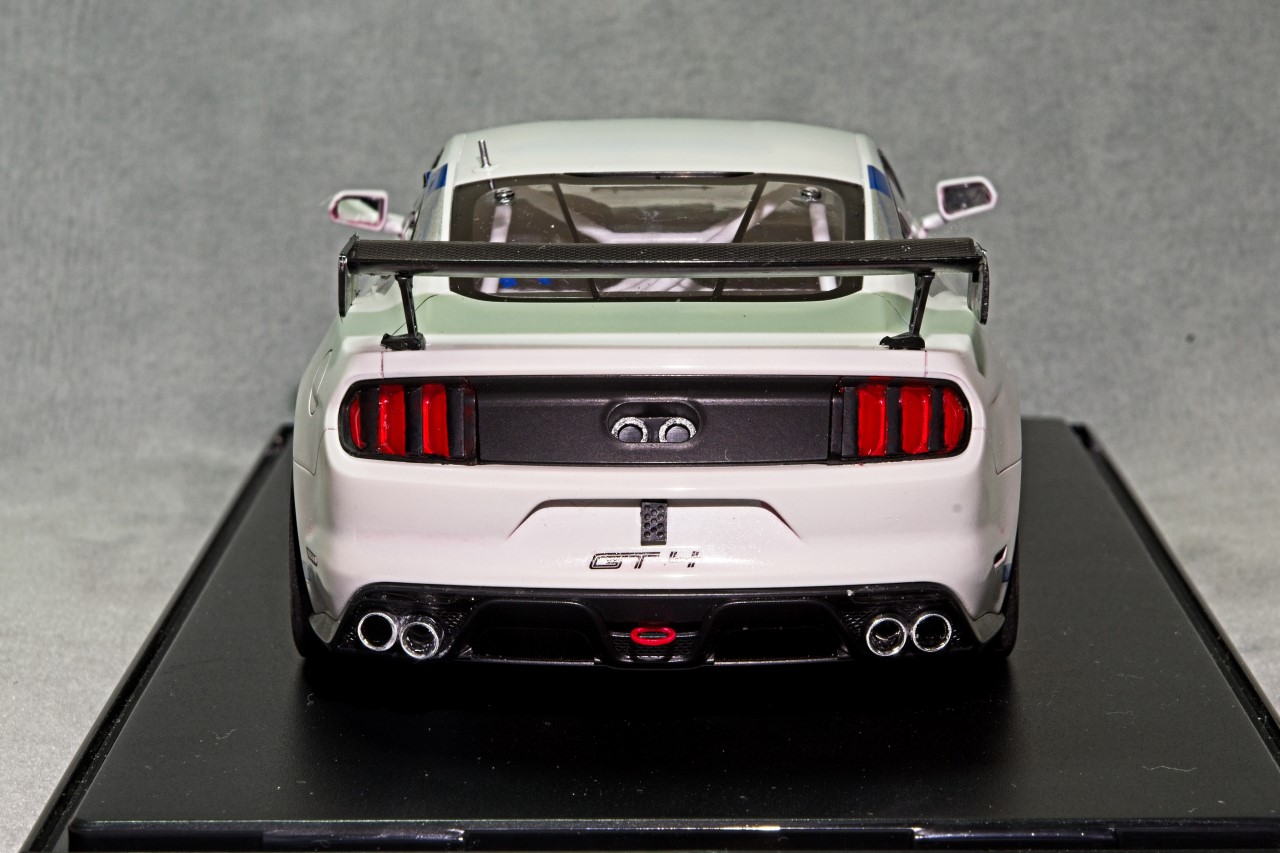
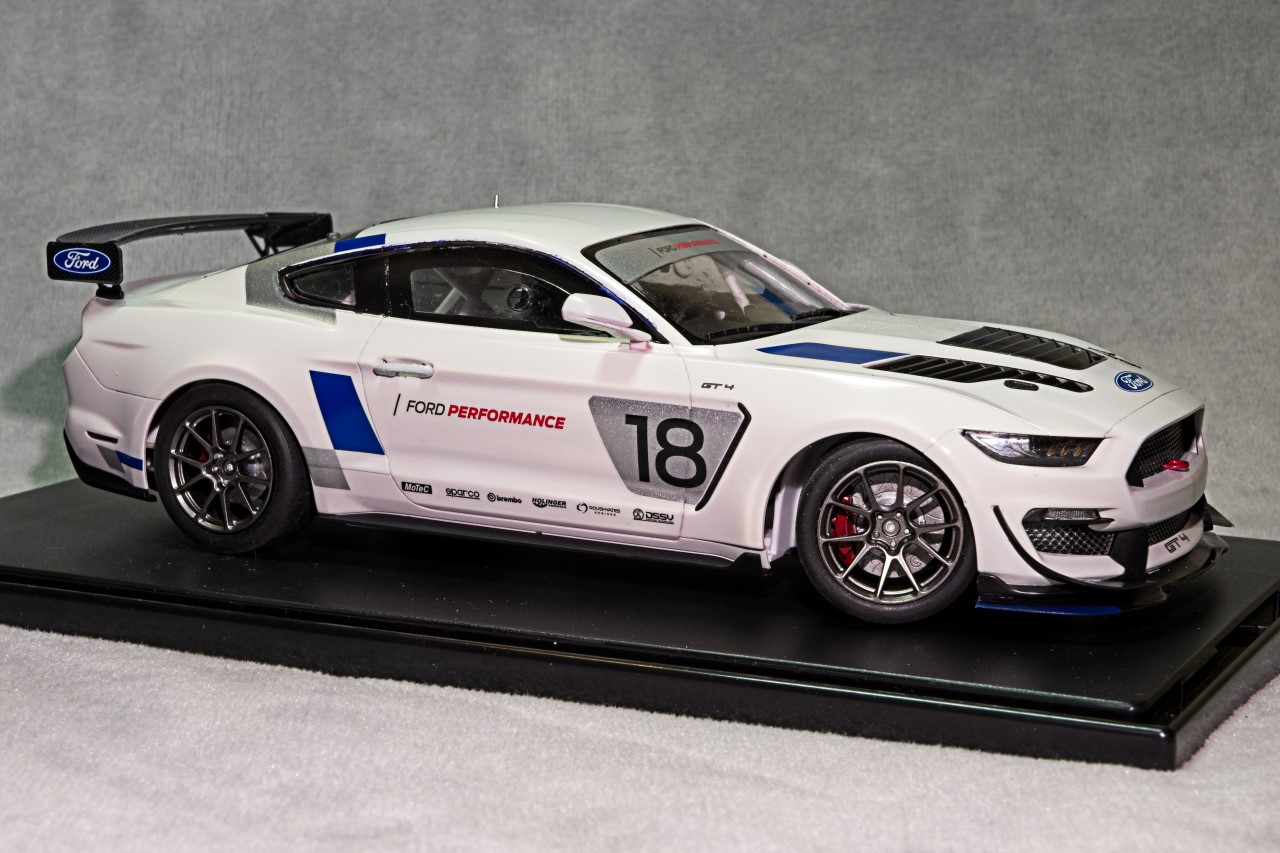
Finished up the body work with the various aero diffusers both front and rear, added both mirrors, door handles, home made roof antenna as I somehow lost the kit one, inserts for the opening in the fenders right behind the wheels for the hot air off of the brakes to exit, which makes no sense to me to close both of them off as now the air has no place to go, the bottom chassis front and rear diffuser plates, and finally the Carbon Fiber rear wing. the only things that are still missing is the decals for the tires which haven’t arrived as yet.
Hats off to Tamiya who did their usual outstanding job of creating a kit that basically just fell together. Simply a joy to build.
Despite the early paint issues this has turned out superbly. Tamyia may make the kit easy to assemble but it is your skills Joel that make it look special. Another stunner for your collection.
Michael,
Thanks so much for those most kind words, as they’re greatly appreciated.
Believe me, the build isn’t close to a contest winner as there’s plenty of paint issues if you look closely. Around the side windows the body rubber molding has always been a major issue with me. so I mask with detacked 2mm Tamiya tape then I try to very carefully hand paint in lite coats, but it’s still a work in progress. Better, but certainly not perfect. Many of the “Top Guns” on You Tube mask with several layers of Tamiya tape, then finish covering the entire model with plastic wrap. My greatest fear is the tape pulling up even a small section of decal through the clear.
Decal ruined, and most of the time a strip and repaint/decal is required. I’ve seen this over and over again, so I stay away from taping over cleared decals.
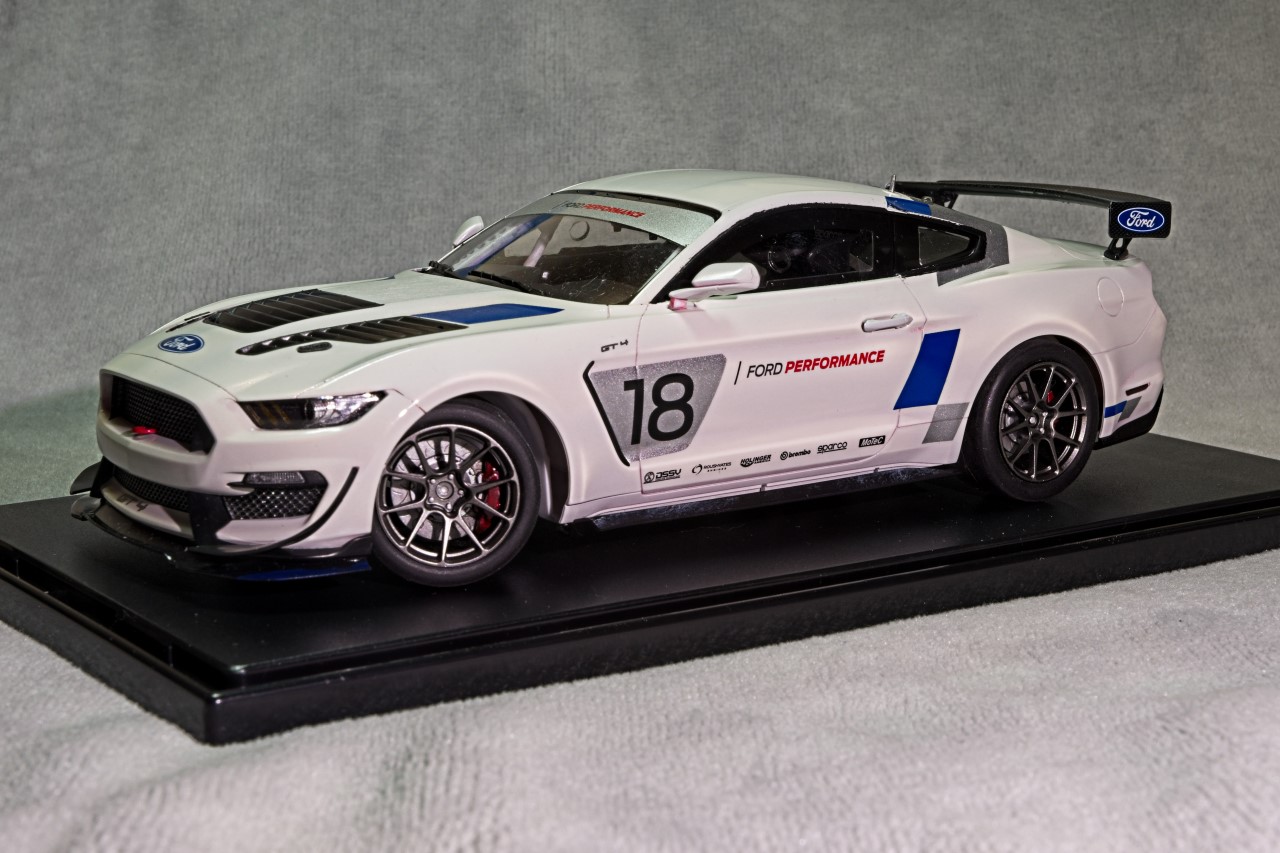
HG,
Thanks so much for stopping by and checking out my Ford Mustang GT4 build. Your thumbs up means quite a lot to me.
As for the number 18 which appears on both doors, it use to be used for how cars was scored every lap as they drove across the scoring line. Was it a perfect system? Nope not a chance as it wasn’t uncommon to miss a car that was directly behind another car and hidden from the scorers. This was the method used when I raced back in the late 1960 thru the early 1970s.
These days it’s there mostly so that it’s easier for the fans, announcers, officials, etc. to keep track of the cars especially similar painted or the same paint scheme for team cars, that has also become a thing of the past based on each car in a team generally has a different sponsor.
Cars today are scored by a electric transponder each time it crosses the electronic scoring line.
Back in my racing days, I always used the number 53 both for my E Production MGB, and later my Enduro Kart.