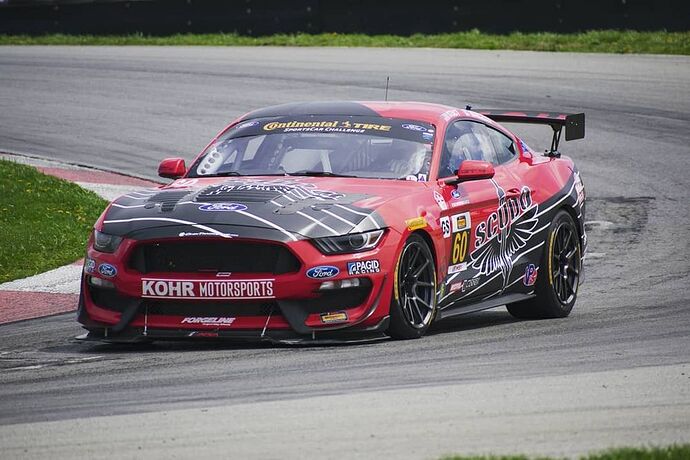
Tamiya 1/24 scale IMSA Ford Mustang GT4

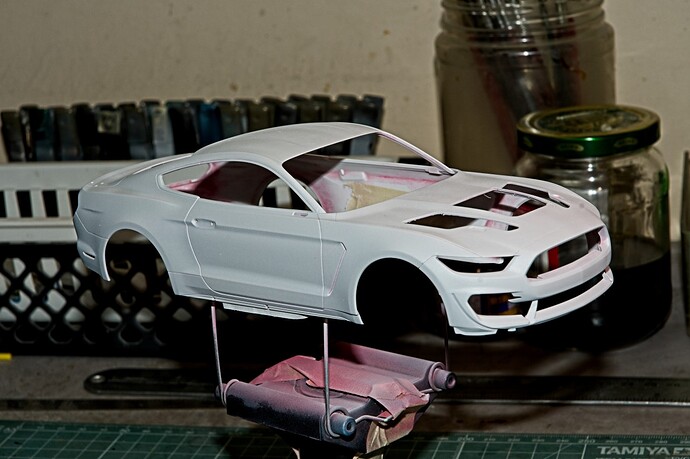
After deciding that my Mojo levels for the Monogram ford Mustang GTP car just wasn’t there for the time being, I switched gears and opted to go with the Tamiya Ford Mustang GT4 car instead, which as the Asian trend currently is: a curbside on Steroids. And honestly, unless I was going for a full blownout engine compartment and suspension, these type of kits are fantastic.

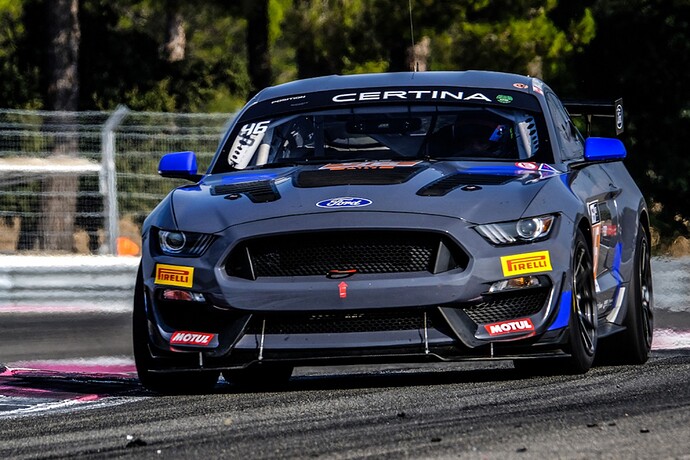
Just as a little history on the car itself which is a little confusing if you ask me. It was jointly designed and engineered by the Ford Performance Div., and Multimatic Motorsports with the inspiration coming from the current Ford Shelby GT350R-C GT4 car. the goal was to design and build a ready to race competitive GT4 race car right out of the box, that would race in the IMSA Continental GT4 Sportscar Challenge, as well as the Pirelli World Challenge GTS/GT4 series, both of which are North American based, as well as being legal for the multitude of European GT4 series.

Ford already had the 2015 GT350R-C Mustang racing in the GT4 IMSA categories, but for 2016 released the Ford Mustang GT4 in a full race version for $100,000 plus (unfortunately, I still can’t afford a proper competitive GT4 car), so you just go racing as it’s already maxed out for both IMSA classes. Even the infamous weekend warriors reported just how easy it is to drive competitively.

Tamiya produced a kit of the 2016 Multimatic Motorsports team cars; where one was painted gray and the other painted in white.

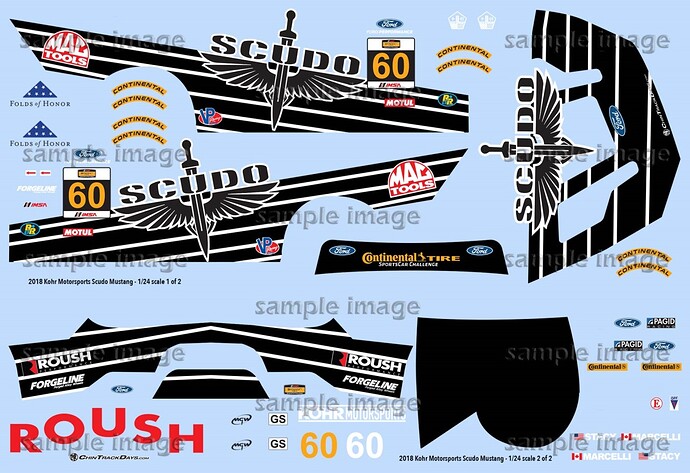
Originally, I was going to go with the 2016 Kohr Motorsports Scudo Mustang with the decals from Indy Cal, but more on that in a bit.

As my usual practice I started with the body assembly right through primer, paint, decaling, polish, & Wax.

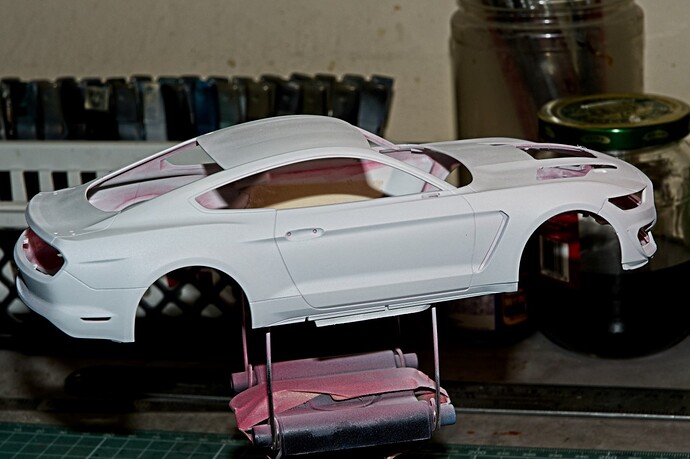
Once the body was ready for primer, which is till my own blend of Tamiya Gray & white lacquer primer fill then cut 50/50 with Mr. Thinner’s Leveler 400 thinner. I gave that a full day to cure, then a very light sanding with a Tamiya #3000 sponge and it was color time.

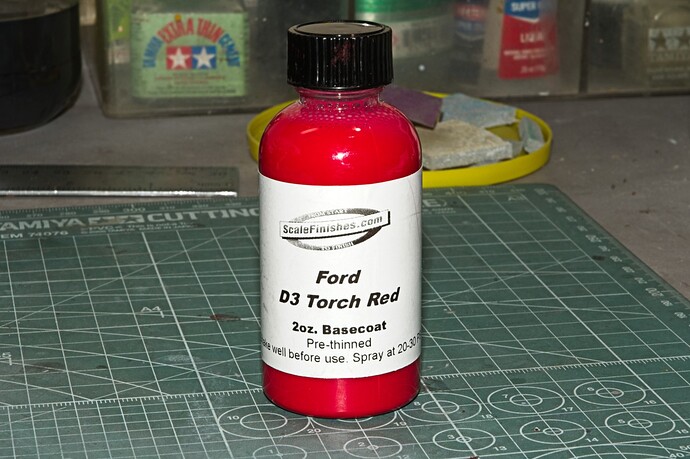
I switched from Gravity to ScaleFinishes for all new colors as well as their super Gloss. I must have a min of 6-9 different shades of Red from Gravity, but still wanted to try the Scale finishes Ford Racing Red lacquer paint that’s pre-thinned. It went on smooth as silk.

Gave the body a good 2 days to cure, then I polished the body with Micro Mesh 6,000, 8,000, & finally 12,000. Now it’s decal time.

I’ve been using Indy Cal’s decals for several years having gone from their Alps printers to their current printer system, making slight adjustments along the way. The quality of the print seemed better, but the decals seemed to be more “stretchy” if that makes any sense. The only issue I have is that the sheet is one giant decal, so you have to cut out each decal. I’ve also had issues with trying to cut out clear sections of their decals while they’re still wet as they just stretch, but don’t cut.

The decal I started with is the what I considered the hardest decal to apply, the hood decal with the sword. Since the sword will be over several louvers of the center vent, I installed all three hood vents before decaling which was a huge mistake on my part. I spent more then 45 min very carefully cutting away all the clear decal film for the vents, and planned on just laying down the sword over the center vent and when dry coming back cutting and slicing it work it one grill louver at a time. Unfortunately, the decal just wouldn’t align properly with the spacing for the two side vents no matter what i tried while trying to keep the decal aligned on the top and left hand side using the hood lines as a guide. The issue after thinking about this for some time is that the decal just stretched out of shape, which is a something that I just didn’t plan for. The decal was ruined, and needless to say I was kind of PO’d at myself. At this point I just threw in the towel as it wasn’t working for me. I could have contacted Michael at Indy Cals, and he would have sent me a replacement decal via his Oops policy, but for the time being I decided not to as Michael just answered my email questions about the Orange color on the Gull GT40 Wyler cars. and sent me masks for painting them instead free of charge.

So once again I changed gears, and stripped the body down to bare plastic, and now reprimed.

Instead I’ve opted to go with the Ford Dark Lead Foot Gray from Gravity Multimatic body car which is one of the two schemes offered by Tamiya. Hopefully, the Tamiya decals aren’t to thick so I can deal with that issue.

No painting today as it’s way to Humid from the all night and morning rain. Once the AC kicks in for the summer season, weather/humidity is no longer an issue till next spring.

joel
5 Likes

Following along Joel :slightly_smiling_face:

I like the look of this kit from Tamiya :+1:

Love those racing Mustang’s. A shame about the decals, the Scudo 'Stang would have looked spectacular.

Scudo or not, I have no doubt you’ll build another winner.

Russelle,
Thanks for the climbing onboard for my build. It’s always much appreciated.

Yep, Tamiya hit another home run with the kit. While I’d love to have seen a full suspension and engine/trans, it’s the same level of detail as the Nunu & BeeMax GT kits I’ve been building over the last few years.

joel

1 Like

Jesper,
I’ve followed for many years the Trans Am series right along with the Can AM series both of which had their hay days from the late 1960’s through the 1980’s. The Trans Am is still alive, but doesn’t get the same love as it use to with all the other Tin Top series. Mustangs & Camaros were and still are the main stays in the Trans Am, and you see them all the time in the GT3 & GT4 series. Unfortunately, they’re just not the match for their German brothering.

joel

1 Like

Yessir…this is gonna be one helluva build I can tell ya that!

1 Like

Unlike my Porsche 911 GT3 build which I added a good deal of extra details, this build will be almost entirely OOB. At least that’s the plan for now.

joel

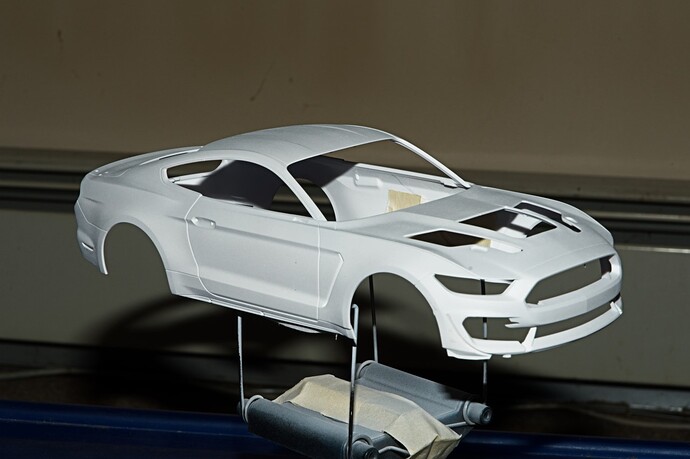
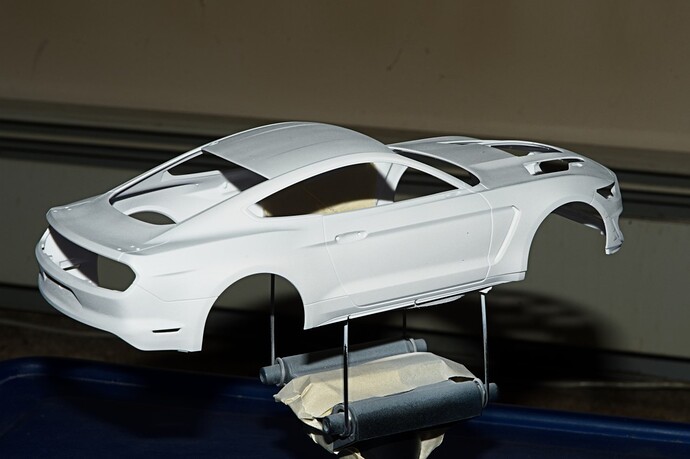
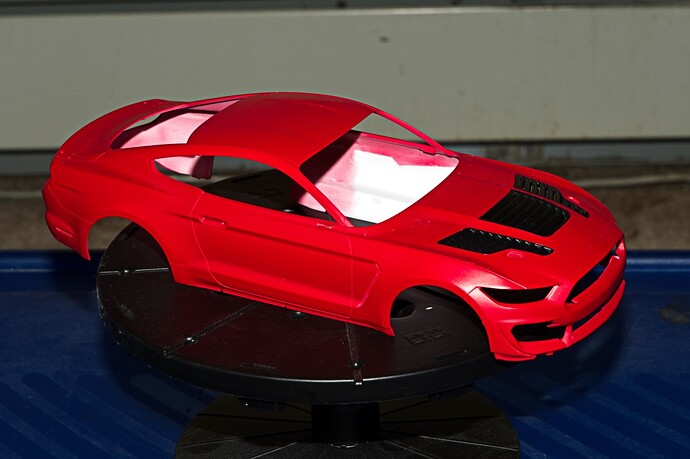
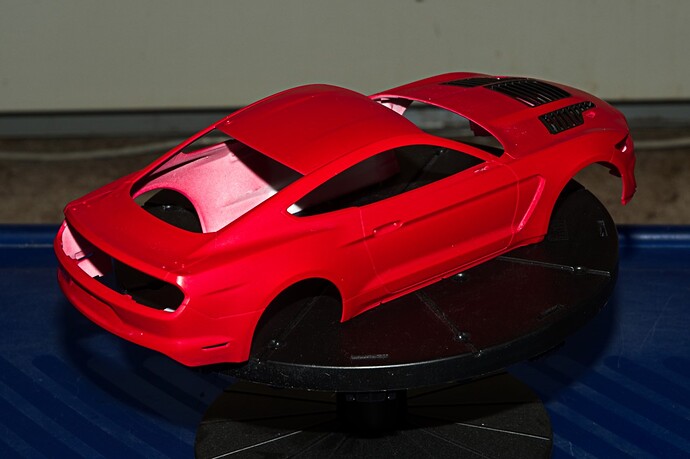
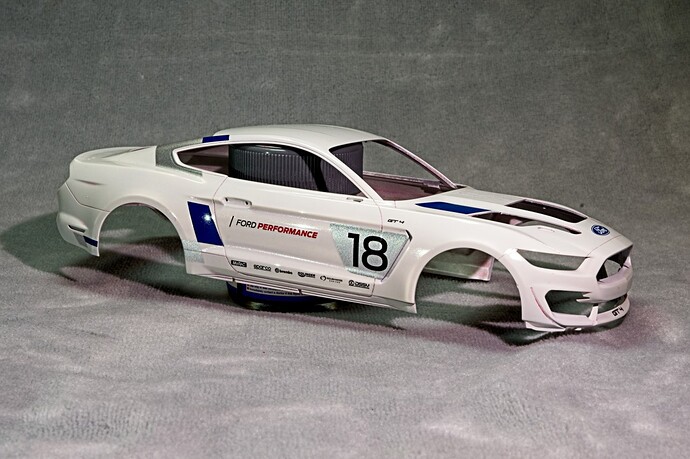
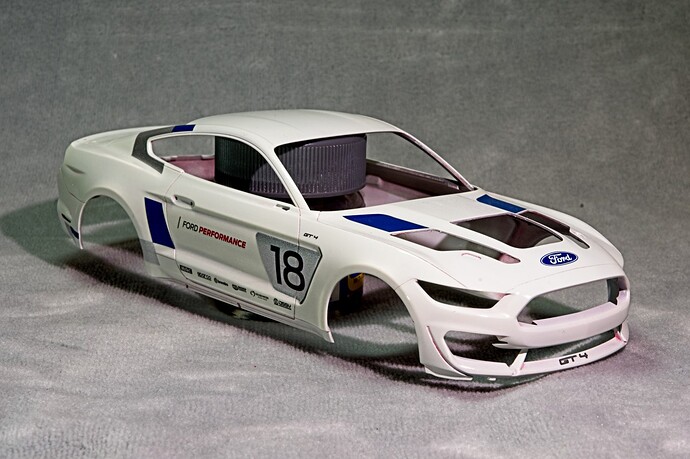
With the completion of the basic body, it’s time for the next chapter in my build saga of the Tamiya Ford Mustang GT4.

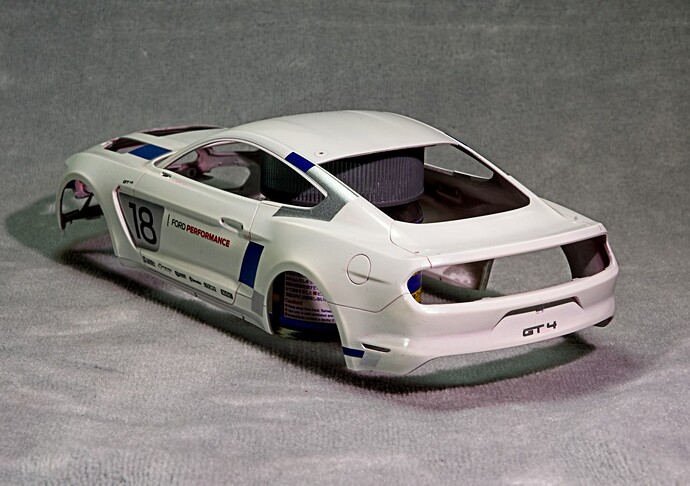
When I last left you, I had striped the body of the ScaleFinishes Ford Racing Red paint, and reprimed in my own mixture of Tamiya Gray & White primer. A lite sanding with a wet piece of Tamiya 3,000 sponge, and when dried a once over with a tack cloth. The paint of choice was Gravity’s Ford Dark Lead Foot Gray, which seems like the color most opted for in all the online builds I’ve seen. So I’d be in very good company. Well things really didn’t work out quite as I had planned it.

I’ve always been some what absent minded, and with old age, it’s just getting worse. I mixed the paint in the bottle with my brand new Trumpeter electric paint mixer that sure looks just like the old Badger one, but boy does it mix up the paint in no time flat. I didn’t bother to replace the bottle cap before I went to place the mixer on one of my paint shelves. Unfortunately for me, I reached right over, or should I say through the top lip of the open bottle, and there’s goes a full bottle of paint. Not only did I loose all of the paint, but the clean up was a real mess and a total time waster. Needless to say I was once again really PO’d at myself. If Stupidity was a Olympic event, I’d most likely win the Gold hands down.

So now what do I do? I could use Tamiya or Mr. Color German Gray as that’s the actual color that Tamiya calls out on the instructions, and I have both. But comparing them to the Gravity paint left over in the bottle close was about it, neither really matched the Gravity paint, so I once again decided to switch gears. yep, you guessed it, another change of color. I opted to go with Gravity’s Ford Wimbledon white as I have 2 1/2 bottles of it. It’s a Ford Mustang color because on the label there’s a earlish Ford Mustang. And with my super light gray primer mix, there shouldn’t be much a color shift if any with the White paint.

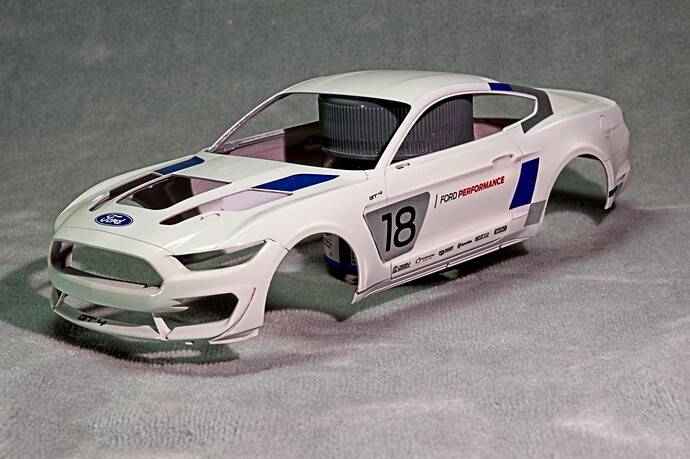
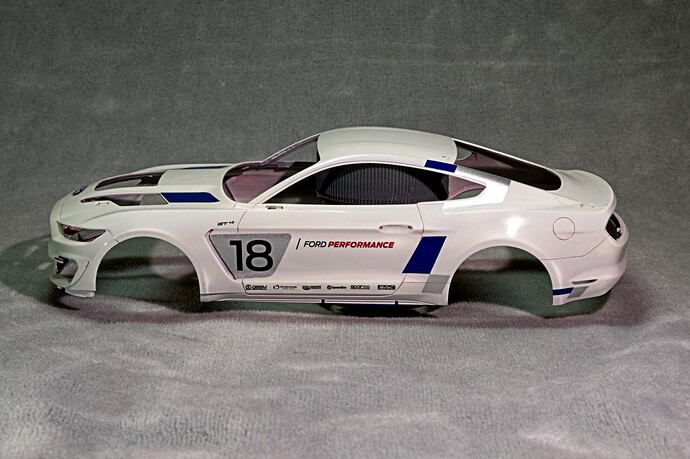
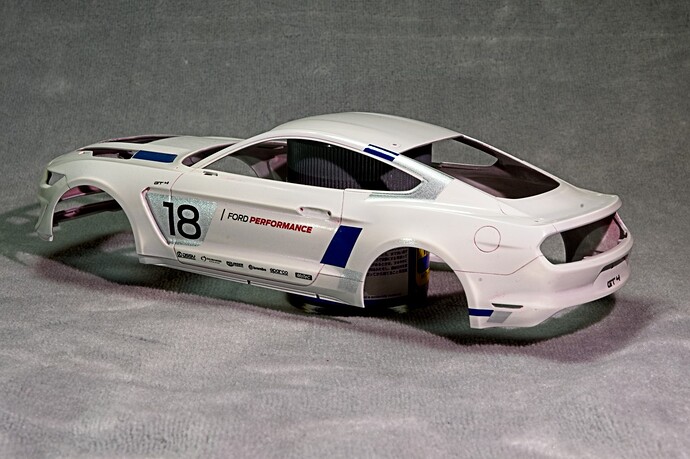
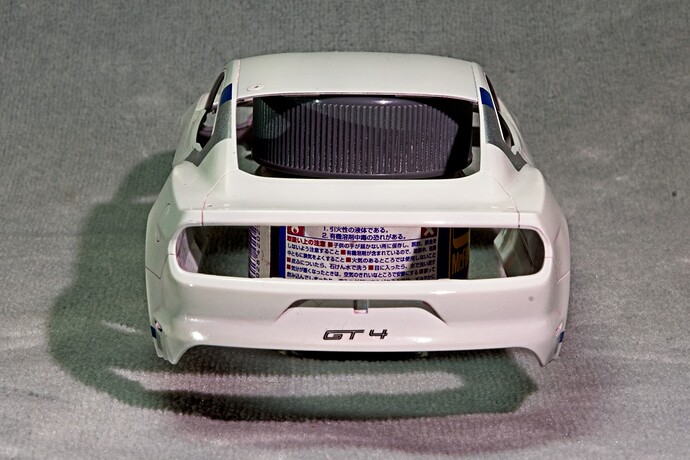
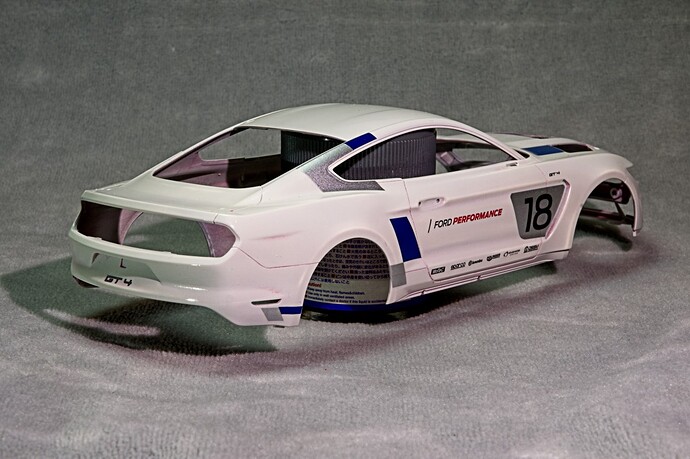
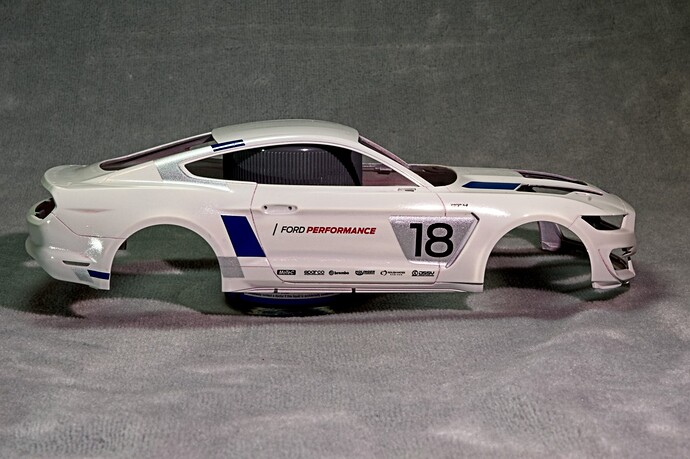
As usual, I applied the paint in 6 plus lite even coats with my .5mm Grex setup. After a few days, I rubbed out the Color coat with 8,000 then 12,000 Micro Mesh, another wipe with the tack cloth, and proceeded to use the kit decals which worked perfectly.

Boy was I surprised. They weren’t those old super thick Tamiya decals, but not really thin either. Still they with laid down over the compound curves with my 3 part decaling process. I gave the decals 2 days to dry, then a wash in warm water, followed by the tack cloth once again. And now came my test of the ScaleFinishes Lacquer 500 Super Gloss clear. Light, even coats with my .5mm setup where I actually lost count, but once it looked right, back into my drying box for a few days.

I was really impressed with the new Clear Gloss. Just a lite wet rubbing with Micro Mesh 8,000 followed by 12,000, then the Gravity 3 part polishing system, and finally the 1st coat of wax. I was more then satisfied with the shell at this stage of the game.

I was really impressed with the new Clear Gloss. Just a lite wet rubbing with Micro Mesh 8,000 followed by 12,000, then the Gravity 3 part polishing system, and finally the 1st coat of wax. I was more then satisfied with the shell at this stage of the game.

Here’s some pictures of what the shell looks like as of now.

joel

5 Likes

Stunning finish Joel! As they say, every cloud etc.
And I’ll take the credit for Gravity’s Wimbledon White. When I was building my Belkits’ Ford Escorts I asked Gravity if they would make the two Ford colours required, Olympic Blue and Wimbledon White. They did and the rest is history. Looks good on your Mustang. The white has just the right balance.

cheers
Michael

1 Like

Michael,
Thanks, and many thanks for getting Gravity to make the Wimbledon White, it really is the best White I used to date. Some are way to bright, and others a little to creamy for my tastes. But when it comes to my Porsches, I use whatever White Gravity or ScaleFinishes has listed as the proper one. Just never thought that there was so many different shades of White out in the real world.

I’ve yet to get bitten by the Rally World, but sooner or later it’s bound to happen. I’m about ready to take a plunge back into Nascar modeling. I don’t watch many oval races if there’s road racing on cable or on you tube (this year it’s almost non-stop), but Nascar has gone from 1 road race years ago to 2 for several years, and this year it’s 7!! as the fans love it. Chase Elliot is the best of the best on the road courses. To bad you can’t buy any kits of the current generation Nascar bodies other then resin if you can find them.

joel

1 Like

I think I agree on Nascar. I have never really followed it as I struggle these to understand what’s going on. It seems quite manufactured in terms of actual racing. I do appreciate the skill of the drivers wrestling those huge metal lumps around at the speeds they go at. The cars are colourful that’s for sure. I am surprised that Tamiya have never taken up the challenge of doing a Nascar car given Toyota are in the series and they were happy to make the Lemans Toyota cars.

cheers
Michael

Michael,
Well, I just bit the bullet yesterday and bought not one but two Salvino jr classic Nascar kits from the 1980s of drivers and teams I actually remember. These kits are the old Monogram 1/24 scale molds that have been reworked with many new parts. What’s more they all come with Powerslide decals, which are excellent from everything I’ve read and seen, and they’re even Silk Screened!!

Agreed that the oval races tend to get boring for non-super fans as just turning left makes for a poor view on TV, but not so in person. I’ve been to one Oval race at Pocono Penn many years ago and our local 1/4 mile track at Riverhead Ny, which is about 30 min from my house. Their 3 race sections per race is to try and keep the field tightly bunched which is better then the old fake Yellow flag deal that we all knew was contrived.

As for these cars being a handful to drive, they’re way easier on the driver then in the old days as the cars are smaller, have way better chassis, power steering, and even helmet A/C as it gets over 100 degrees in those cars once the summer gets here.

Agreed as to why Tamiya hasn’t bitten the bullet about getting into Nascar racing as they’re about the only company that could afford the huge royalties that Nascar has to protect their branding. On the other hand, outside of the USA, Canada, and a few tracks in Europe, the rest of the racing world has no real interest in this form of racing, so would the kits appeal to other markets outside of the USA?

joel

1 Like

The red and black livery, would have been killer, but, personally, I prefer the Wimbledon white over the dark lead foot gray. Looks amazing Joel.

Jesper.
Thanks so much my friend for stopping by, and your thumbs up on where the body shell is to date. I gotta agree that the White does have a certain look that the Dark Lead Foot Gray just doesn’t have, as I’m not exactly a big fan of the solid Gray that’s a big hit with today’s cars.

One thing I really need to remember to do and concentrate on, is to remove nearly all of the wax residue especially as it’s a redish color which shows everywhere I look in the pictures. I thought that I got most of it, but apparently I sure didn’t.

joel

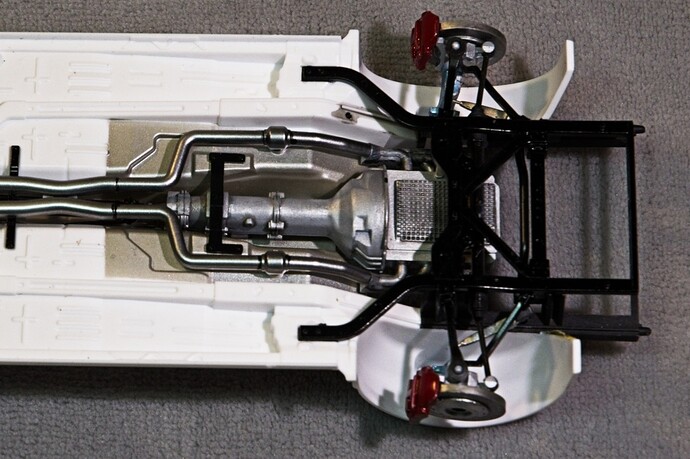
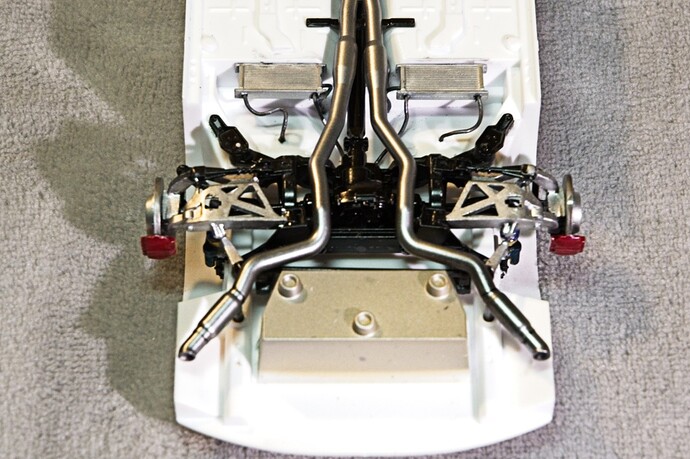
Been spending all my time and efforts on finishing the bottom of the chassis which contains the lower engine/transmission plus the exhaust headers, the front suspension, drive shaft, rear gear housing oil coolers that I just ran some of the oil lines from one to the other, then to the rear end, and the return line re-appears and goes to the other cooler. Complete rear suspension, and finally the exhaust pipes.

Most of the parts were painted as per the Tamiya instructions with main exceptions being all 4 brake calibers as I have a few pictures of them being painted Red, so I went that route just to add a little much needed color. The exhaust pipes were painted gloss Black then Alcad 2 Duralumin because it has a very coldish Blue hue to it like heated exhaust pipes once they cool down. The over all effect does catch one’s eye, so I’m more then pleased with the look of them.

I know it doesn’t sound like much work, but the front and rear suspension assemblies are quite complex, and took this old timer quite some time to complete.

joel

5 Likes

Great mix of metallics underneath Joel. I am fan of Duraluminium, using for brake calipers and such. Your red ones a good modern touch.

cheers
Michael

Michael.
Thanks so much for stopping by and checking out my progress to date, it’s always much appreciated.

joel

Looks great Joel. Great use of metallics. The red really make the calibers pop and ad to the tonal variety.

No, it looks like it :slight_smile:

Jesper,
Agreed, the unusually high number of different shades of Metallics really made quite a difference. The exhaust pipes are the shinning example of that. Now I only hope I can duplicate that next time I reach for that bottle of Allcad 2.

joel