Hi all - starting a new build here while waiting for some base materials for the P 38 .
Stepping WAY out of my comfort zone - early jets , bare metal finish ( foil & maybe some paint )
and riveting .
I picked up this kit from a vendor at a show a few years back ( remember those ? Large gatherings of like minded people having fun without masks and fear of shaking hands ? )
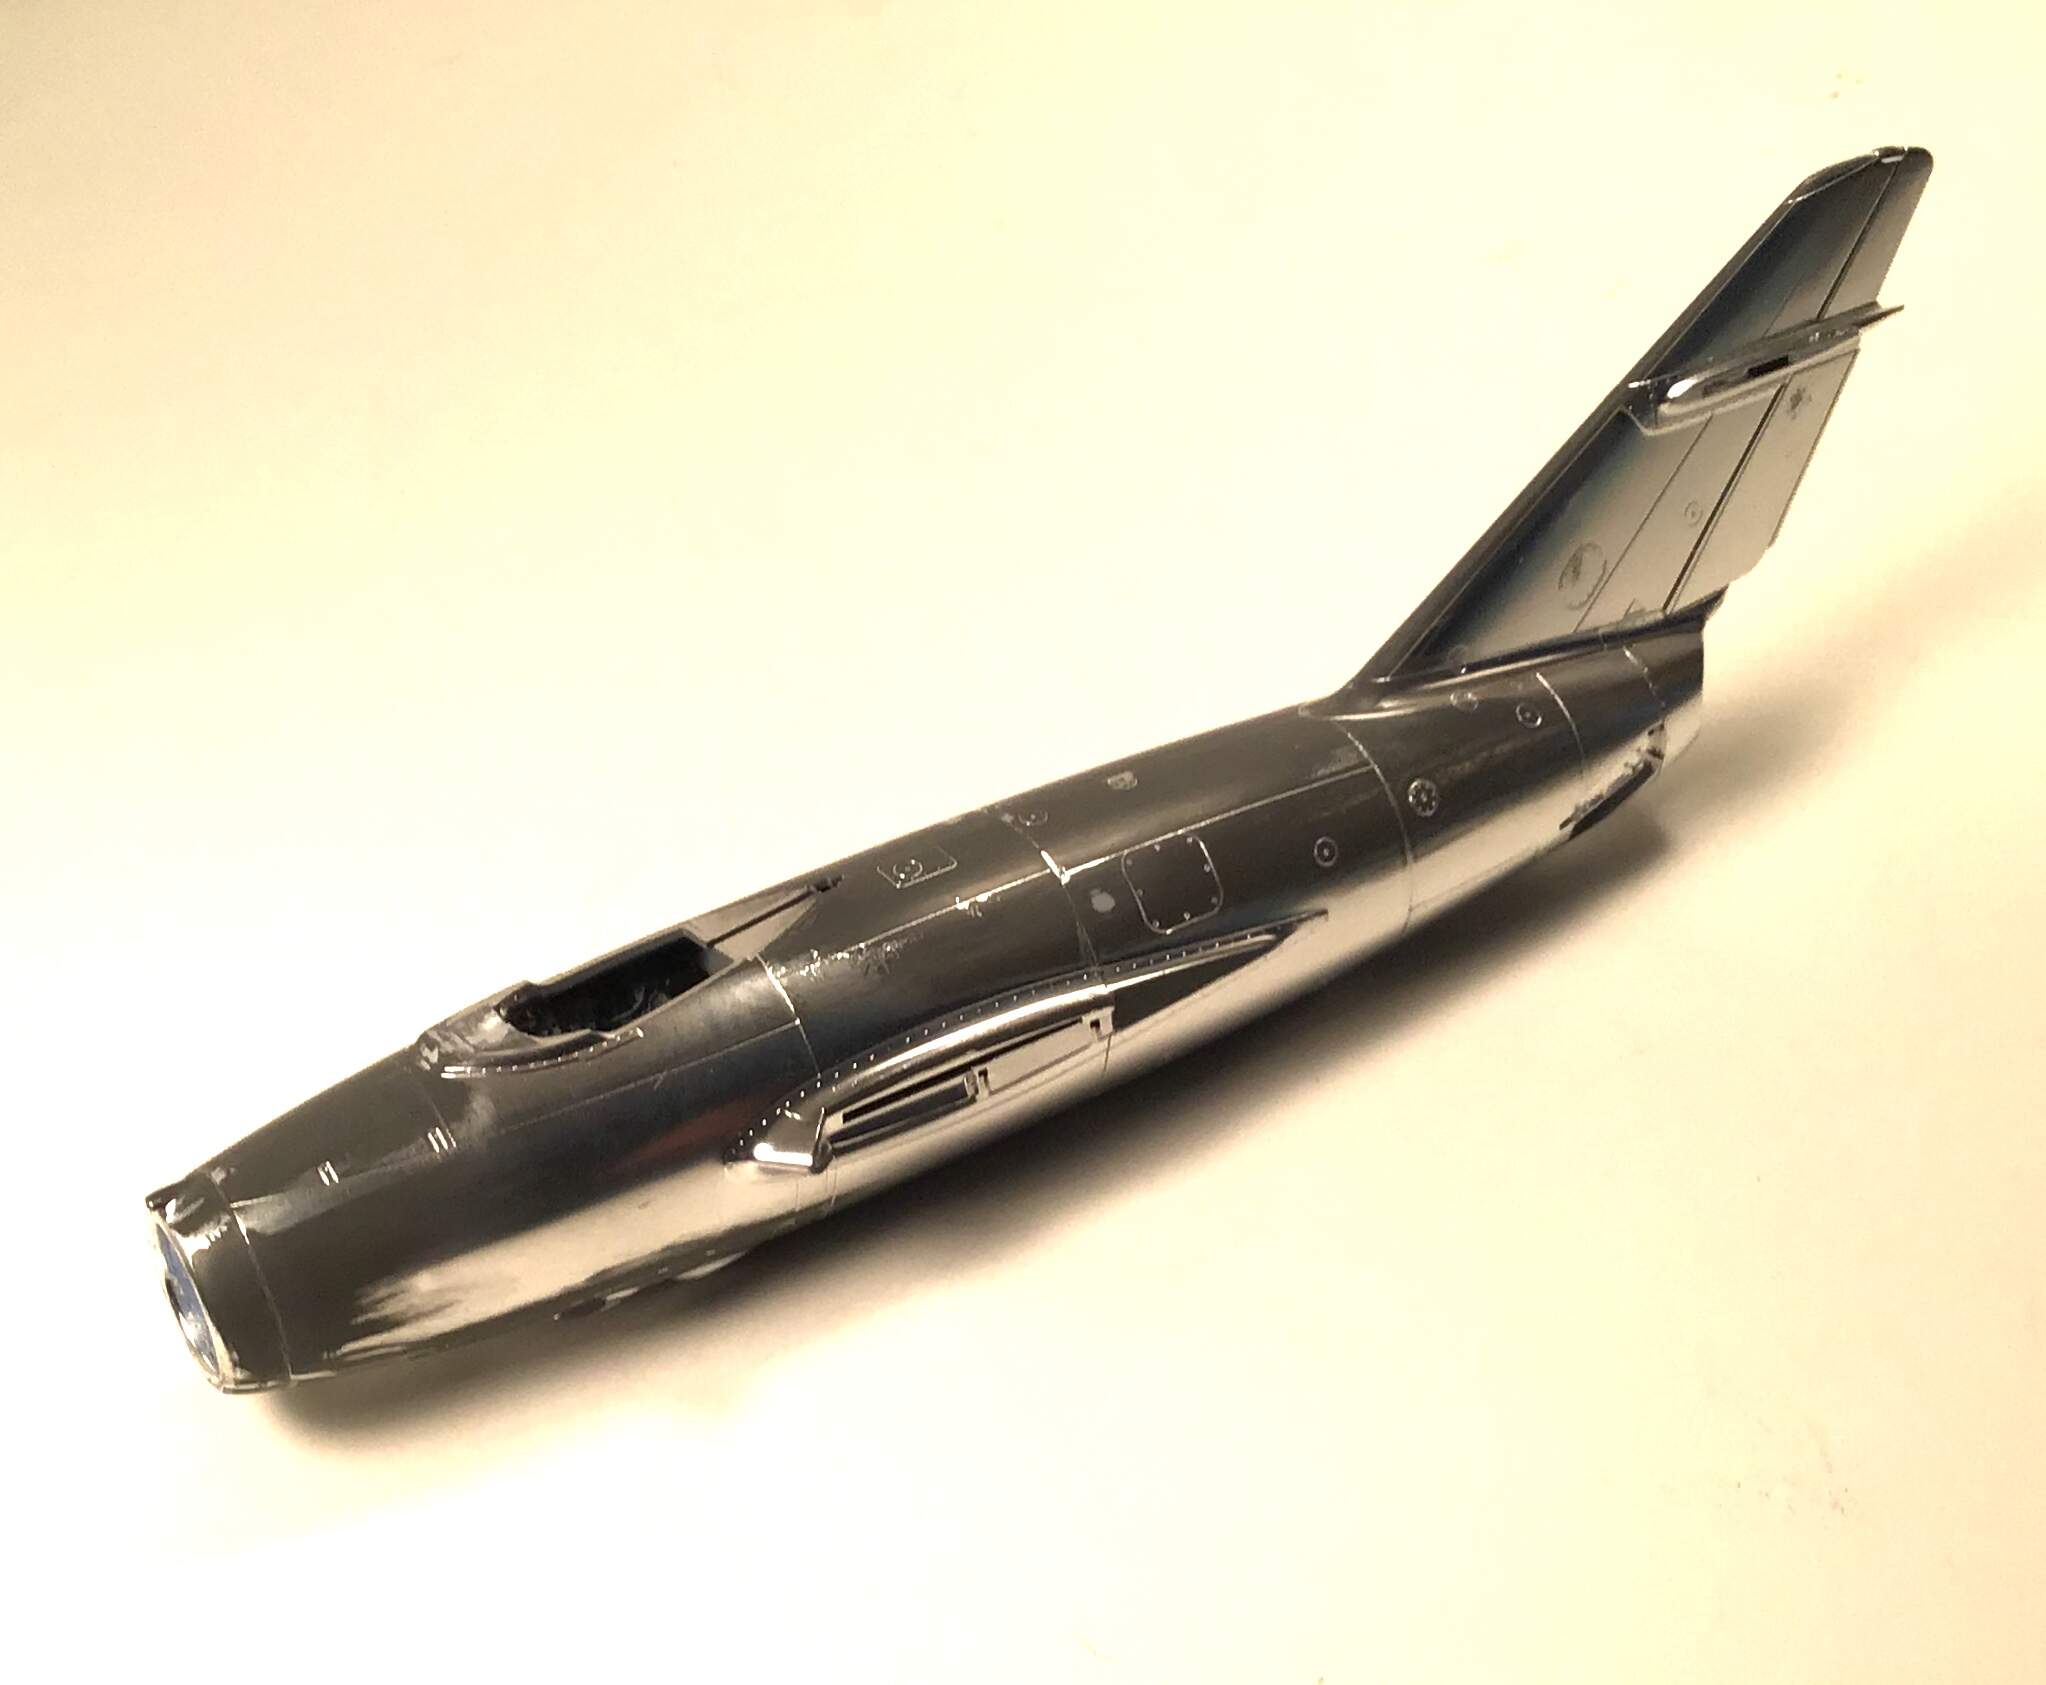
Tamiya’s MiG with the gimmickry plated finish - 21 bucks all in and it included a beautiful resin cockpit from the now defunct KMC models .
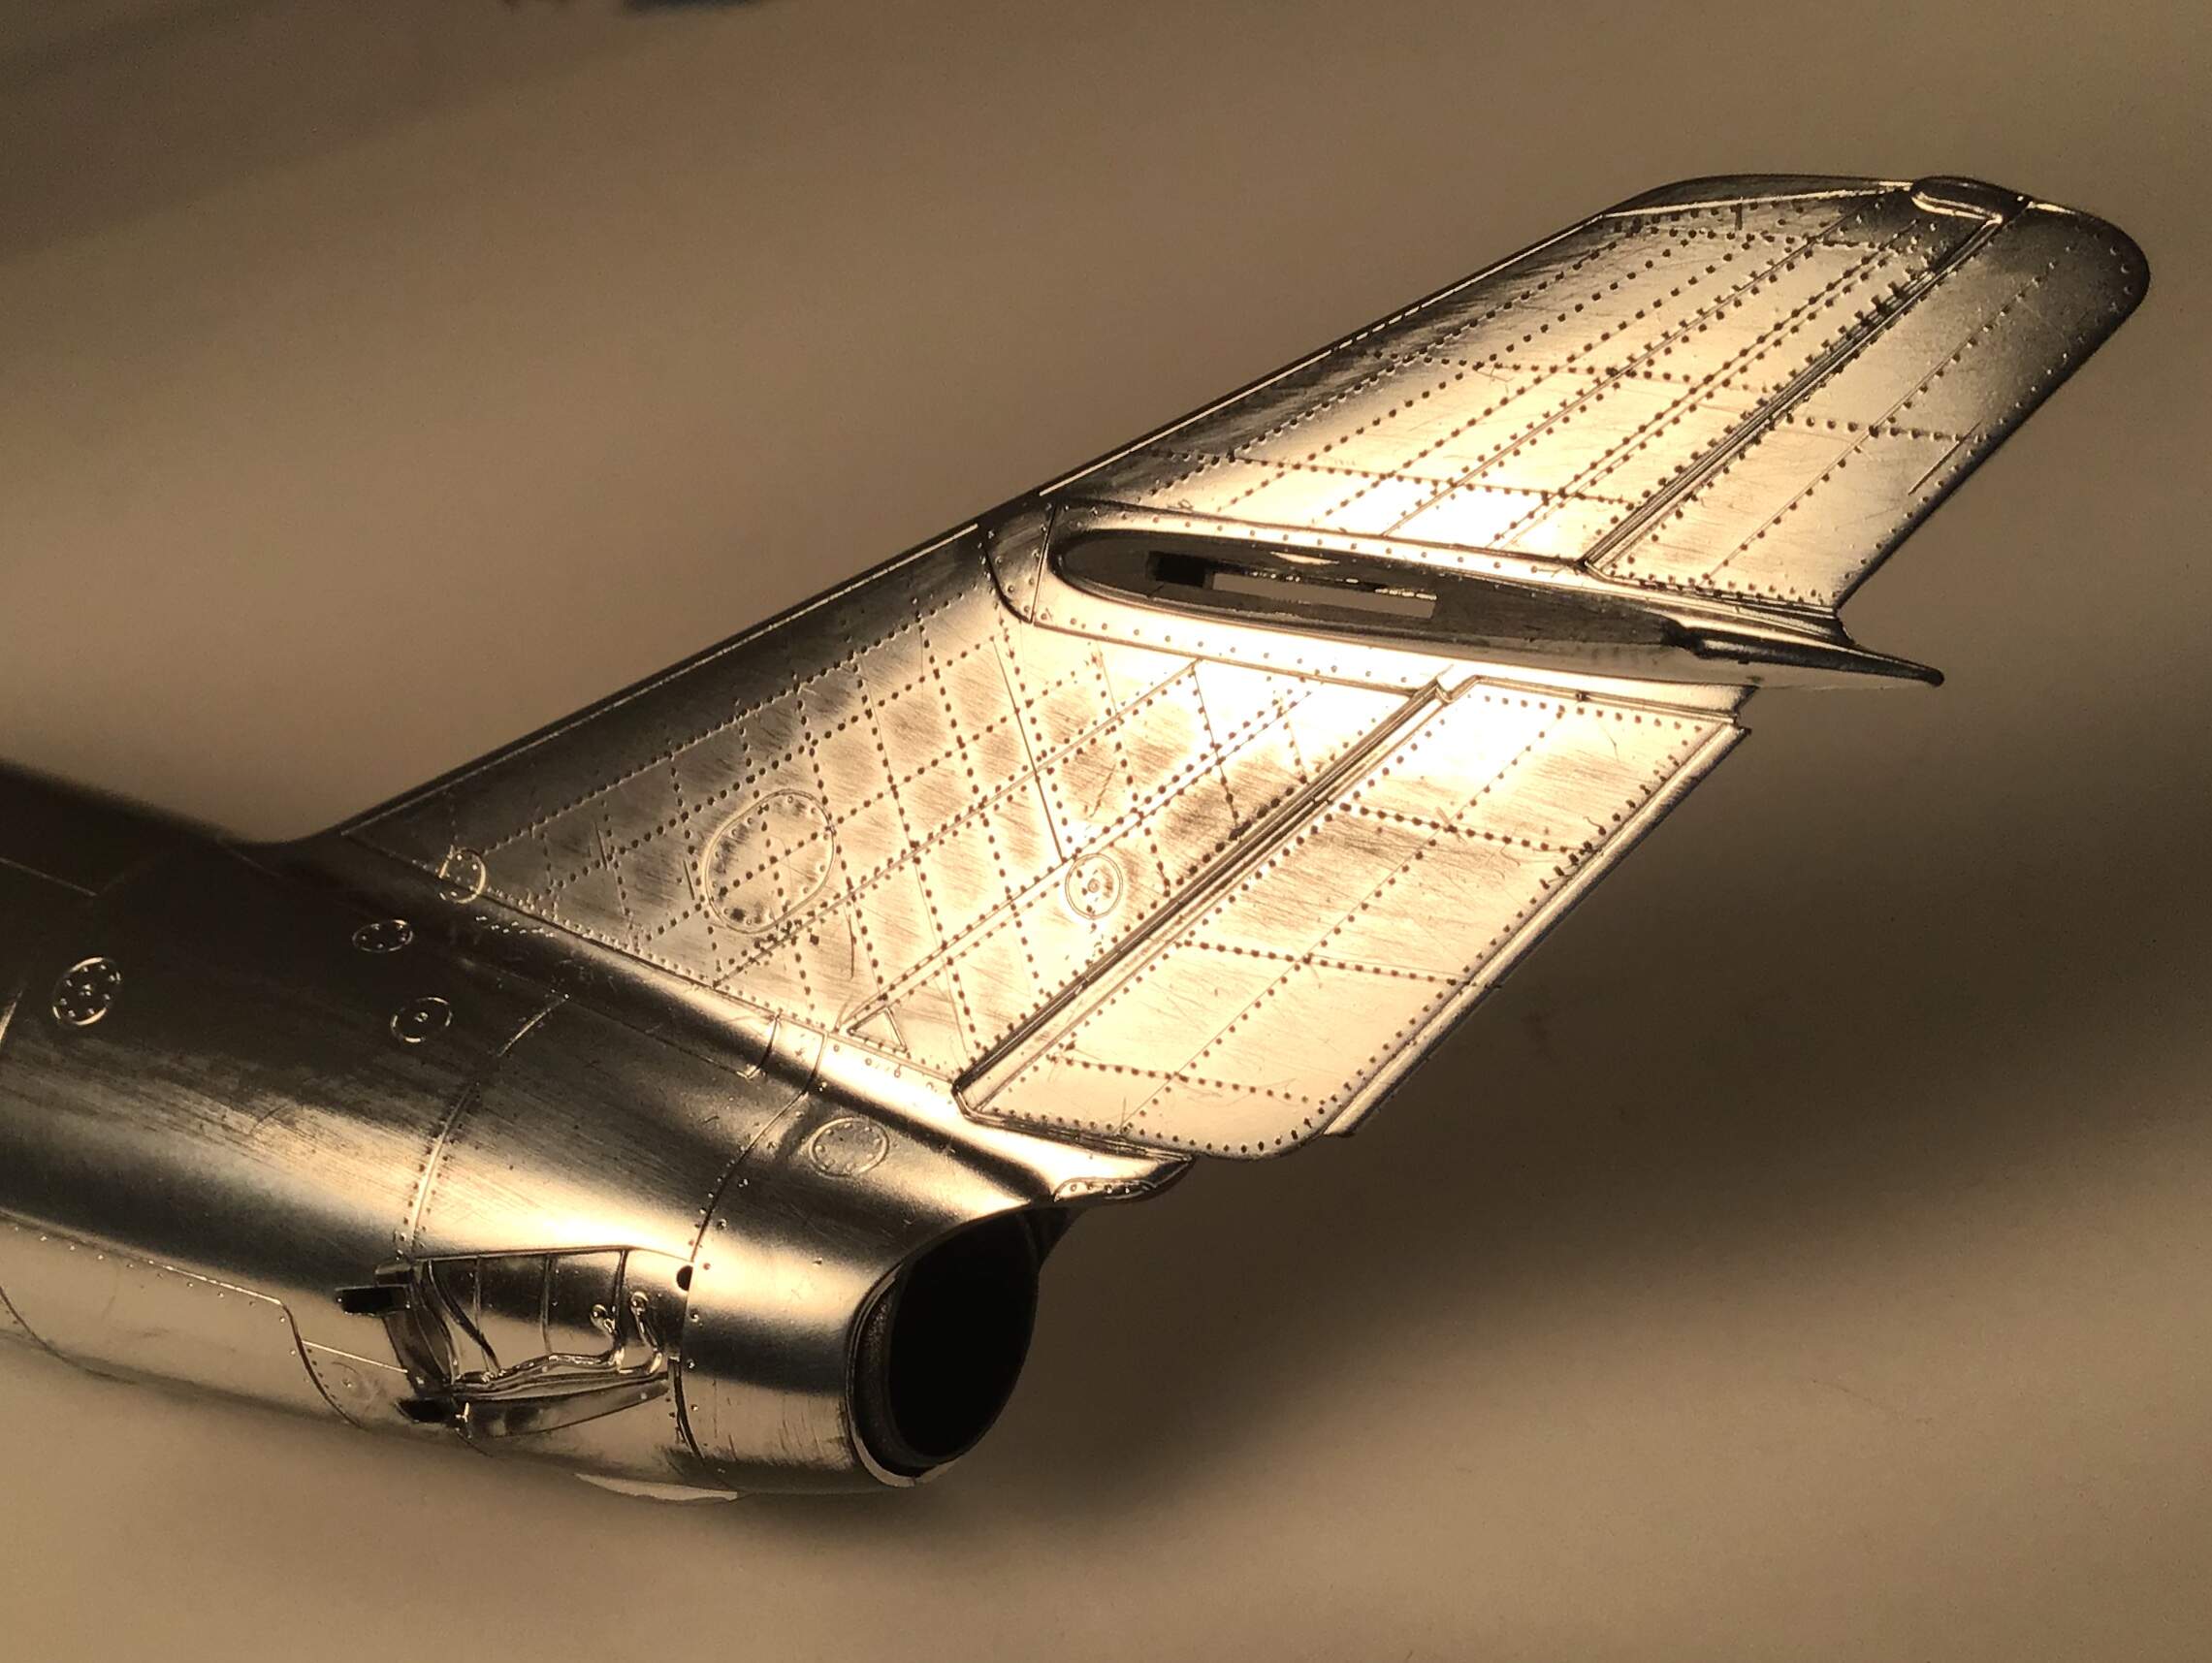
This aircraft was festooned with flush rivets and said rivets are largely lacking on the kit so I am going to try to at least give a suggestion of them.
Stay tuned -

2 Likes
You got me. I love the look of the early Mig’s. Please post progress photos.
I’ll be following this build.
Cheers,
C.
Thanks for the interest Charles-
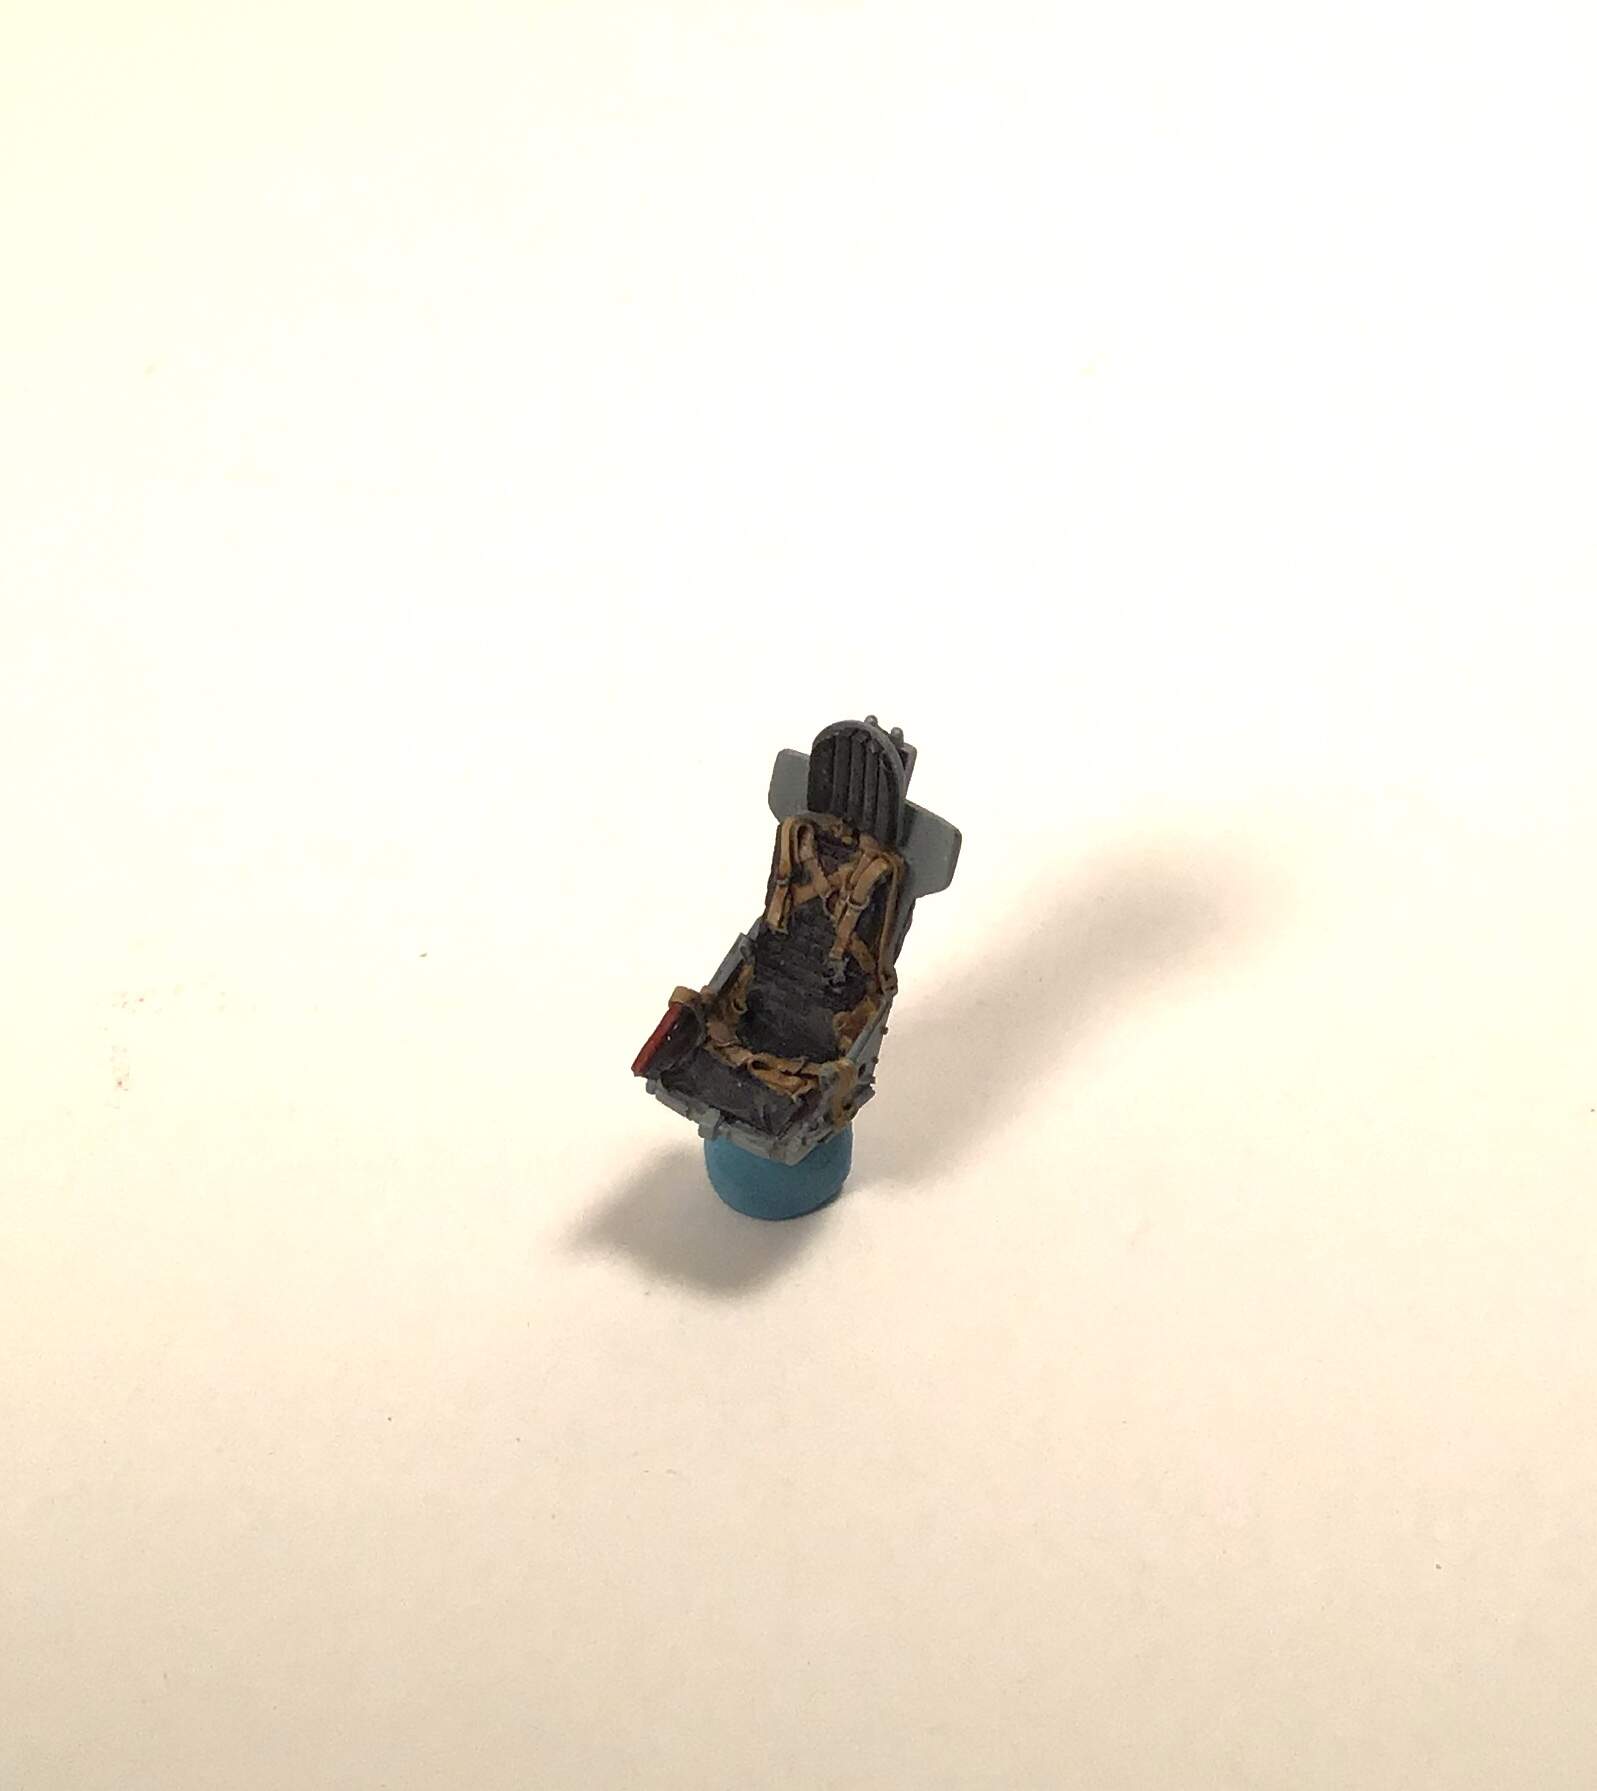
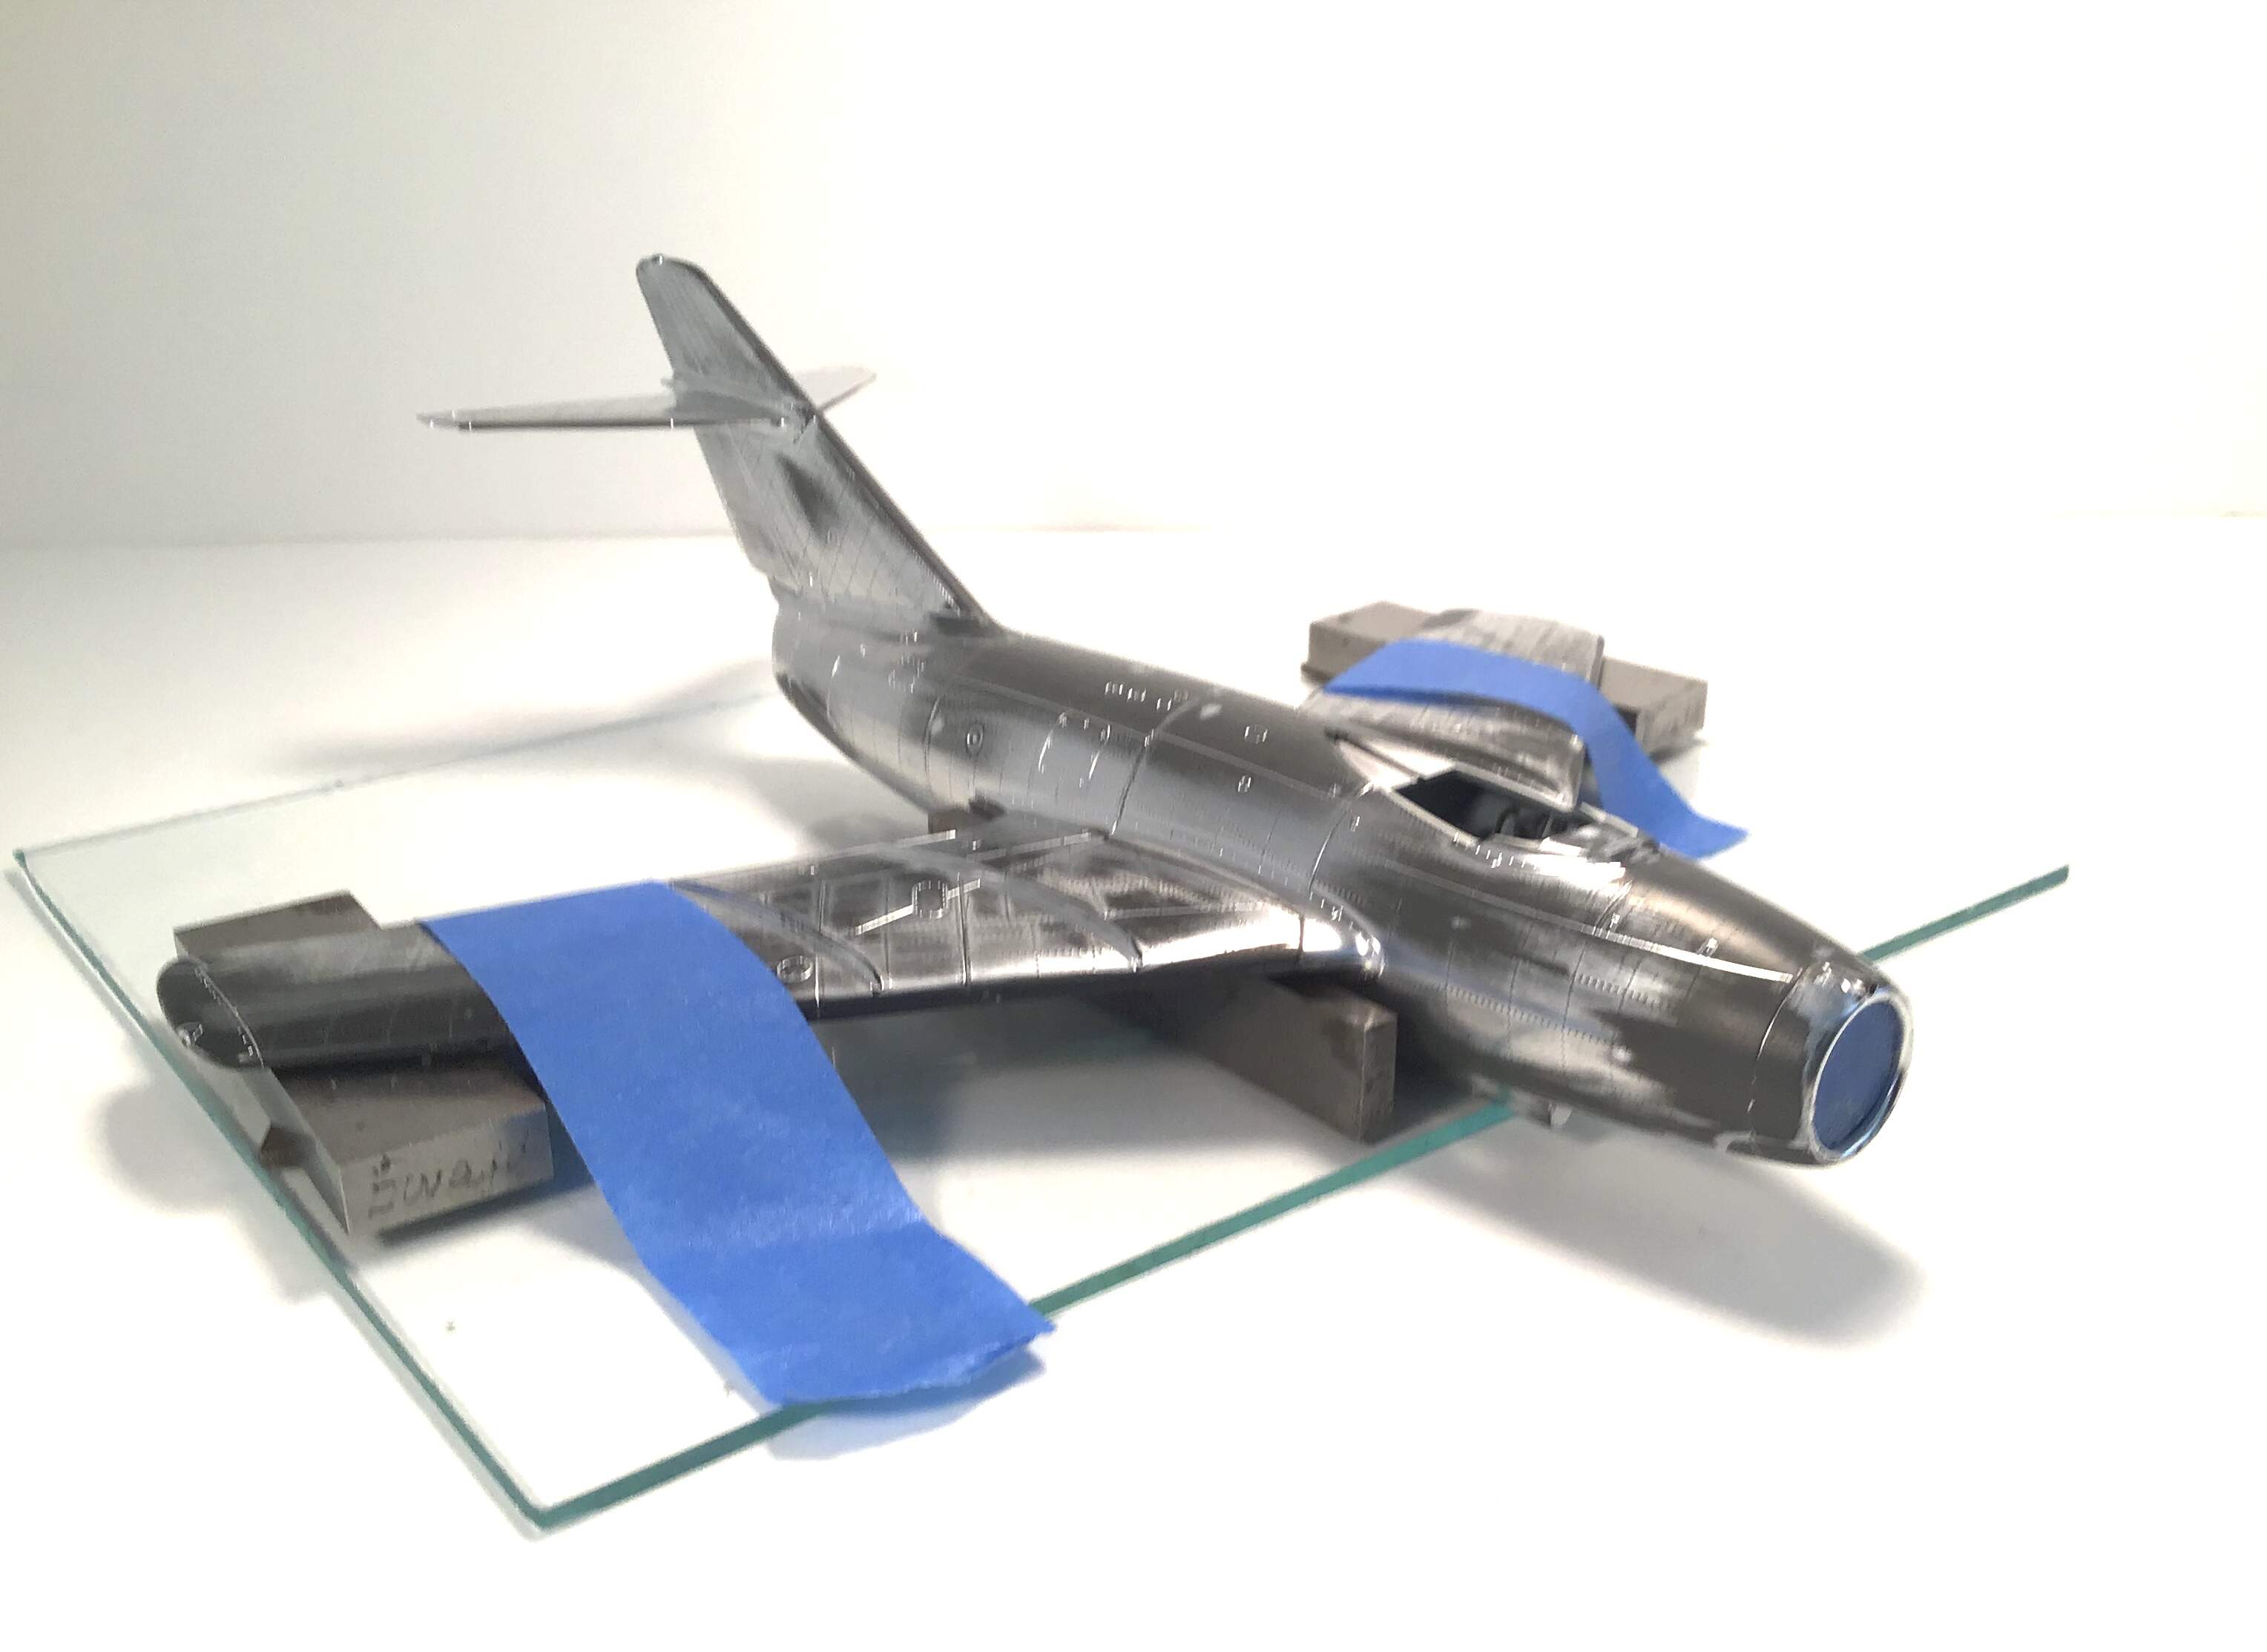
I had done some assembly prior to starting this
blog . Aftermarket resin cockpit done and painted along with the ejection seat. Luftwafe Heleblau seems to be pretty close to the light grey- blue appropriate for this era. Fuselage assembled as are the wings . Some seam work needed on the fuselage but nothing too bad.
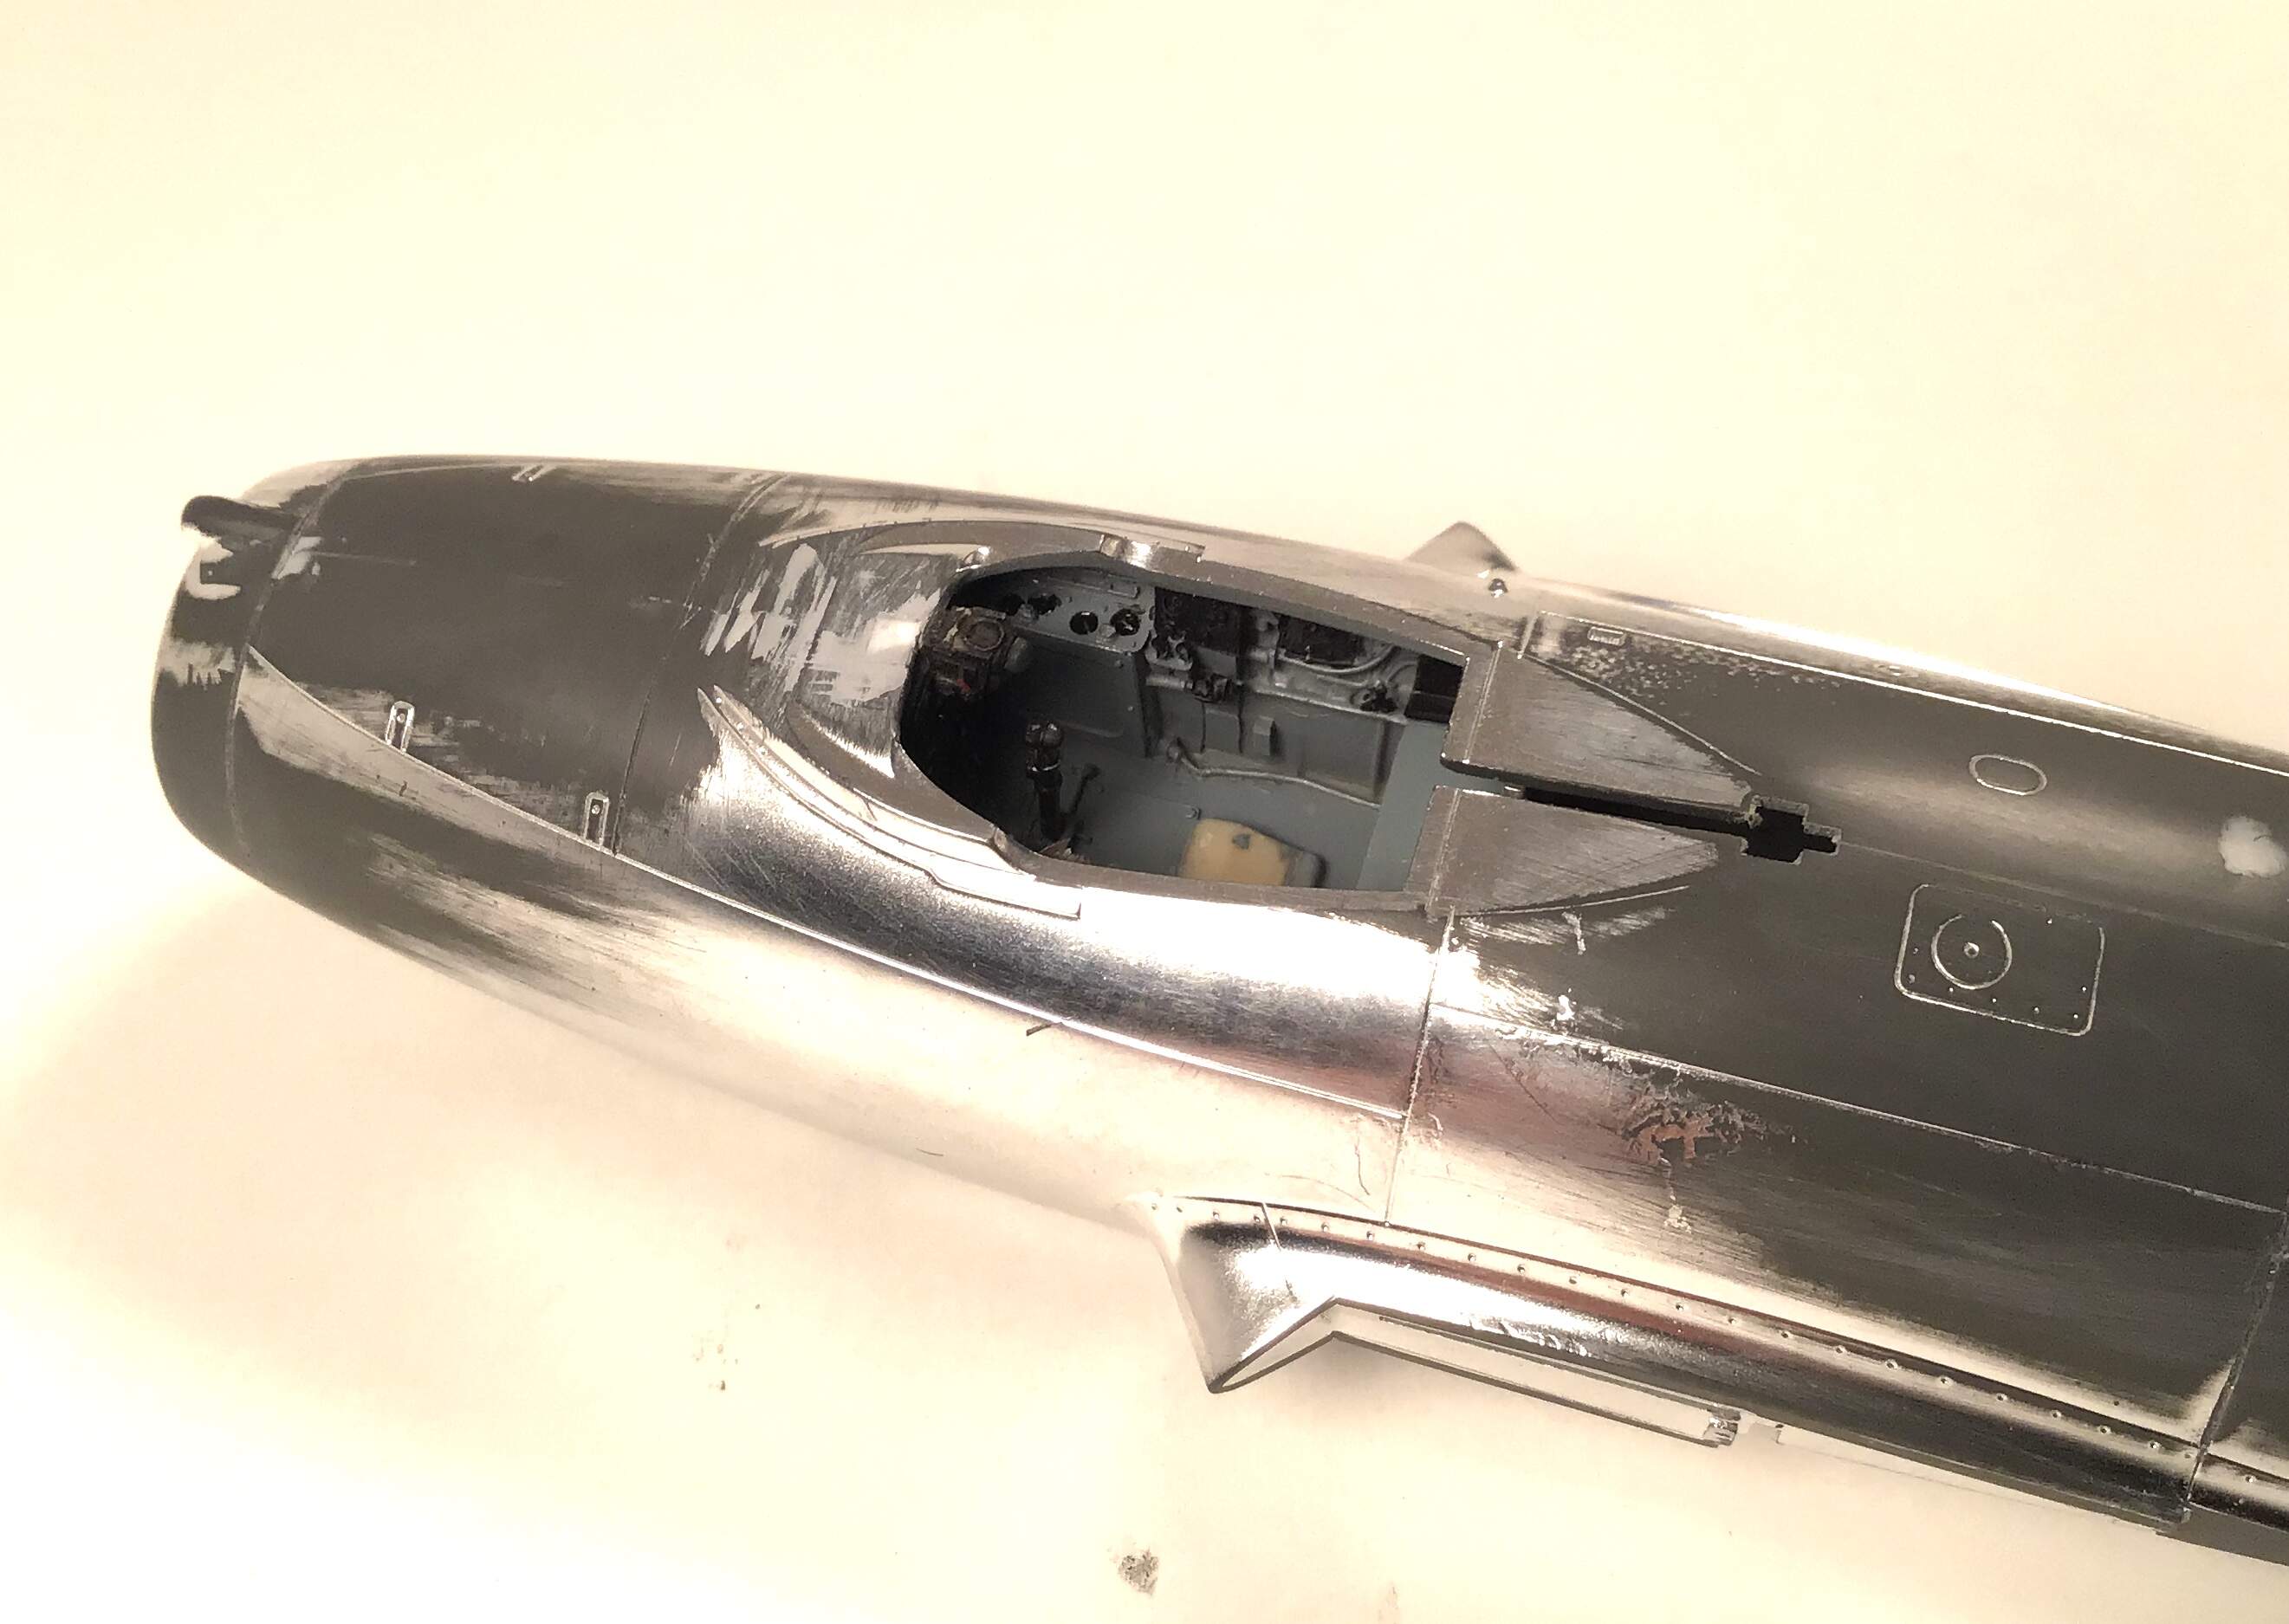
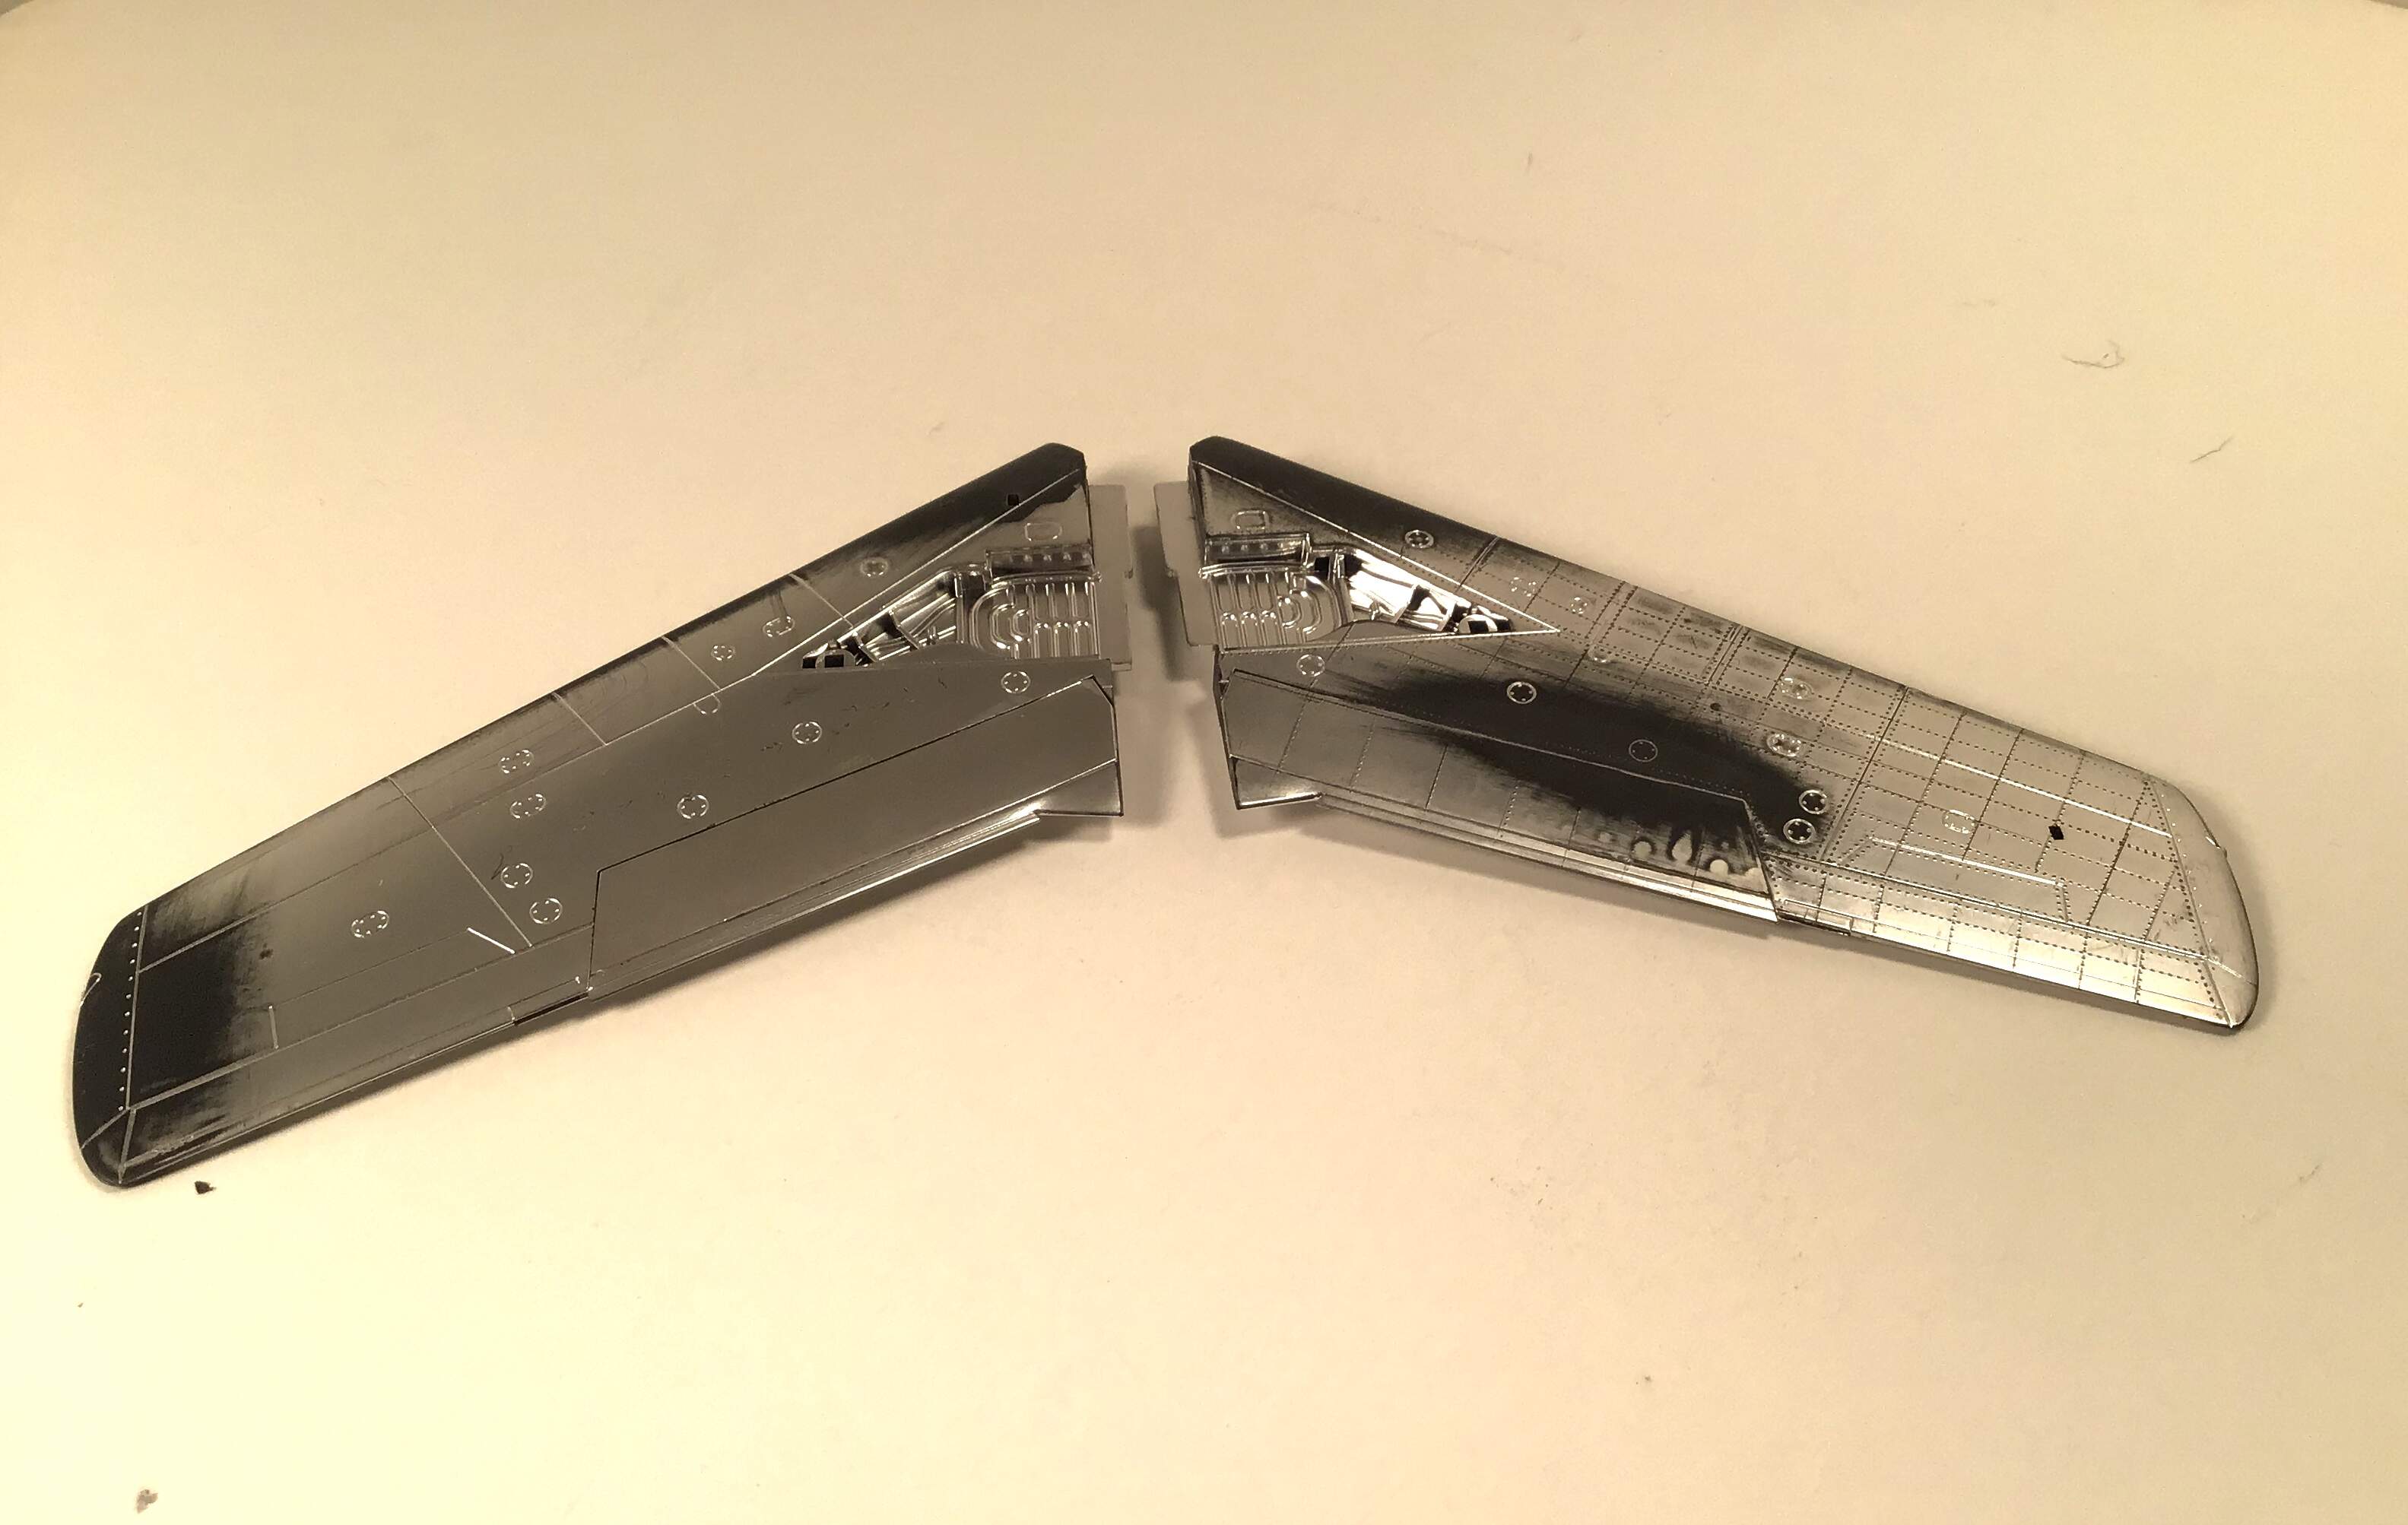
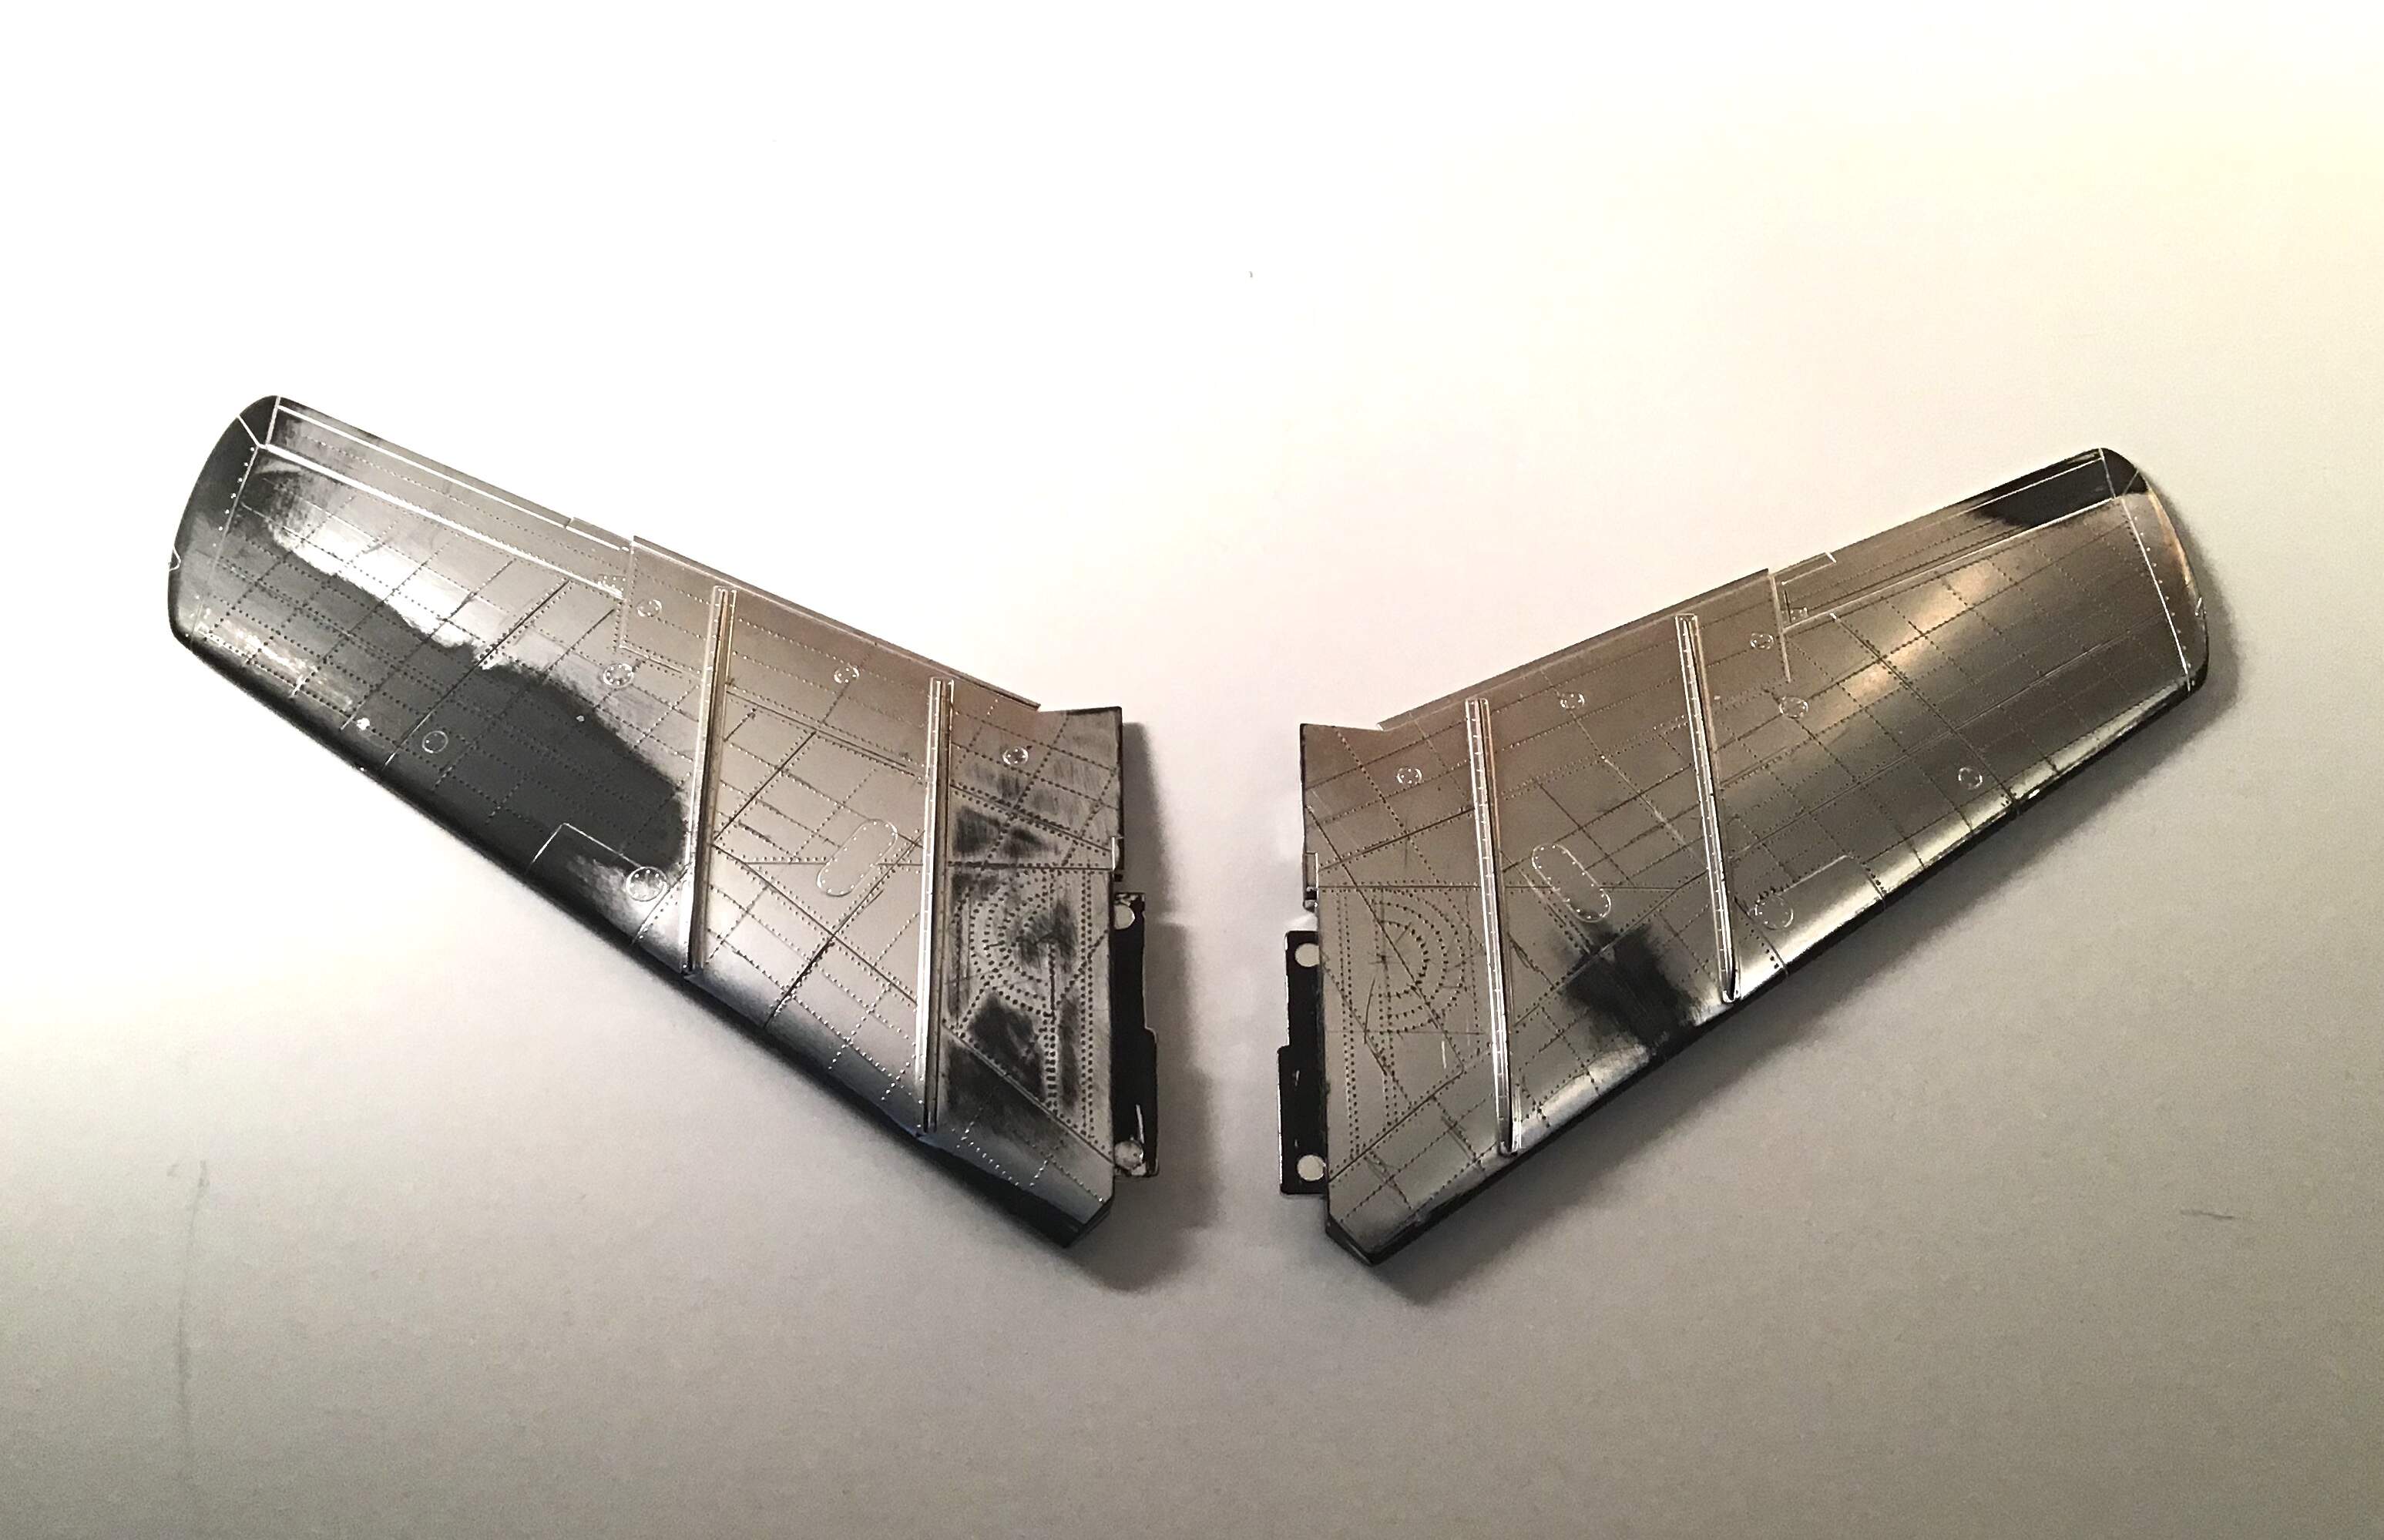
I am regarding this build as an experiment in some techniques. I would have liked to do the riveting after application of the foil because I thought I would need to apply tape as a guide for the rivet tool and my tests revealed that removing the tape also removed some foil . To that end I started the riveting on the bare plastic but quickly discovered that it was easier to layout the lines of rivets in pencil and use the riveting tool freehand , following the pencil lines.
The current plan is to do all the riveting and then assemble the wings and stabs followed by painting nose , wheel wells etc - then apply foil and chase over rivets again . We’ll see how it goes.
Rivets started on underside of left wing .
4 Likes
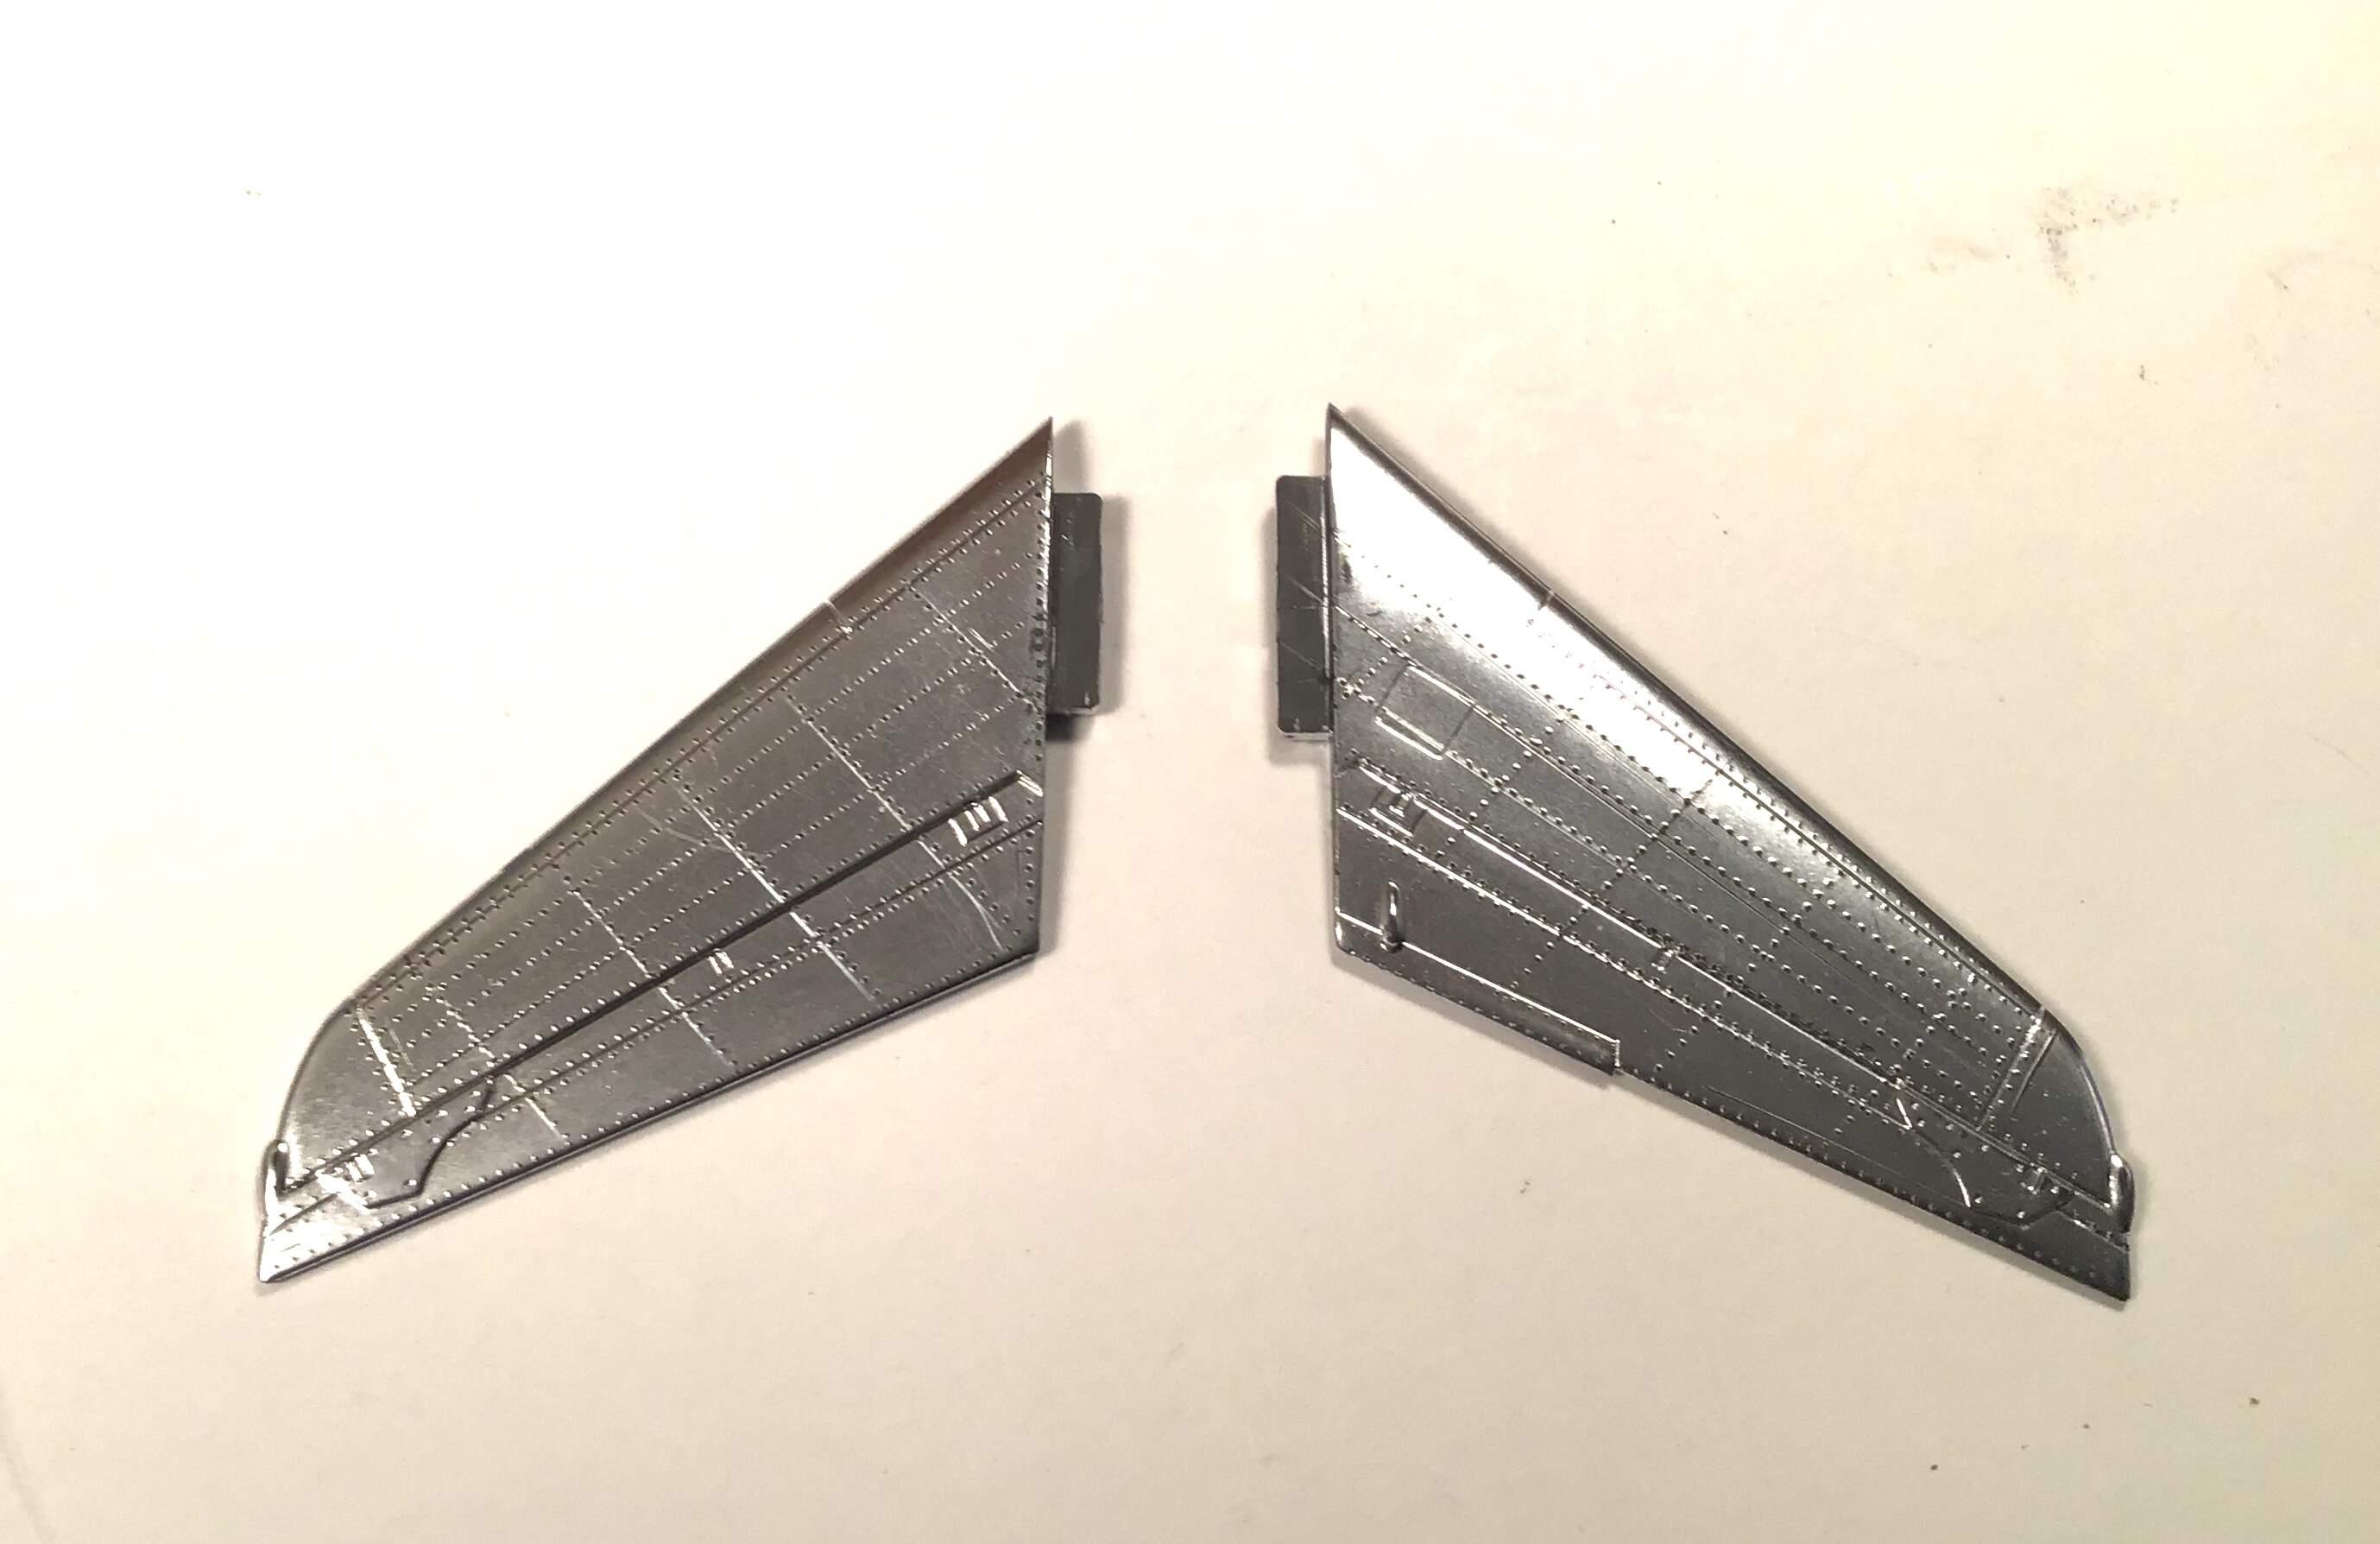
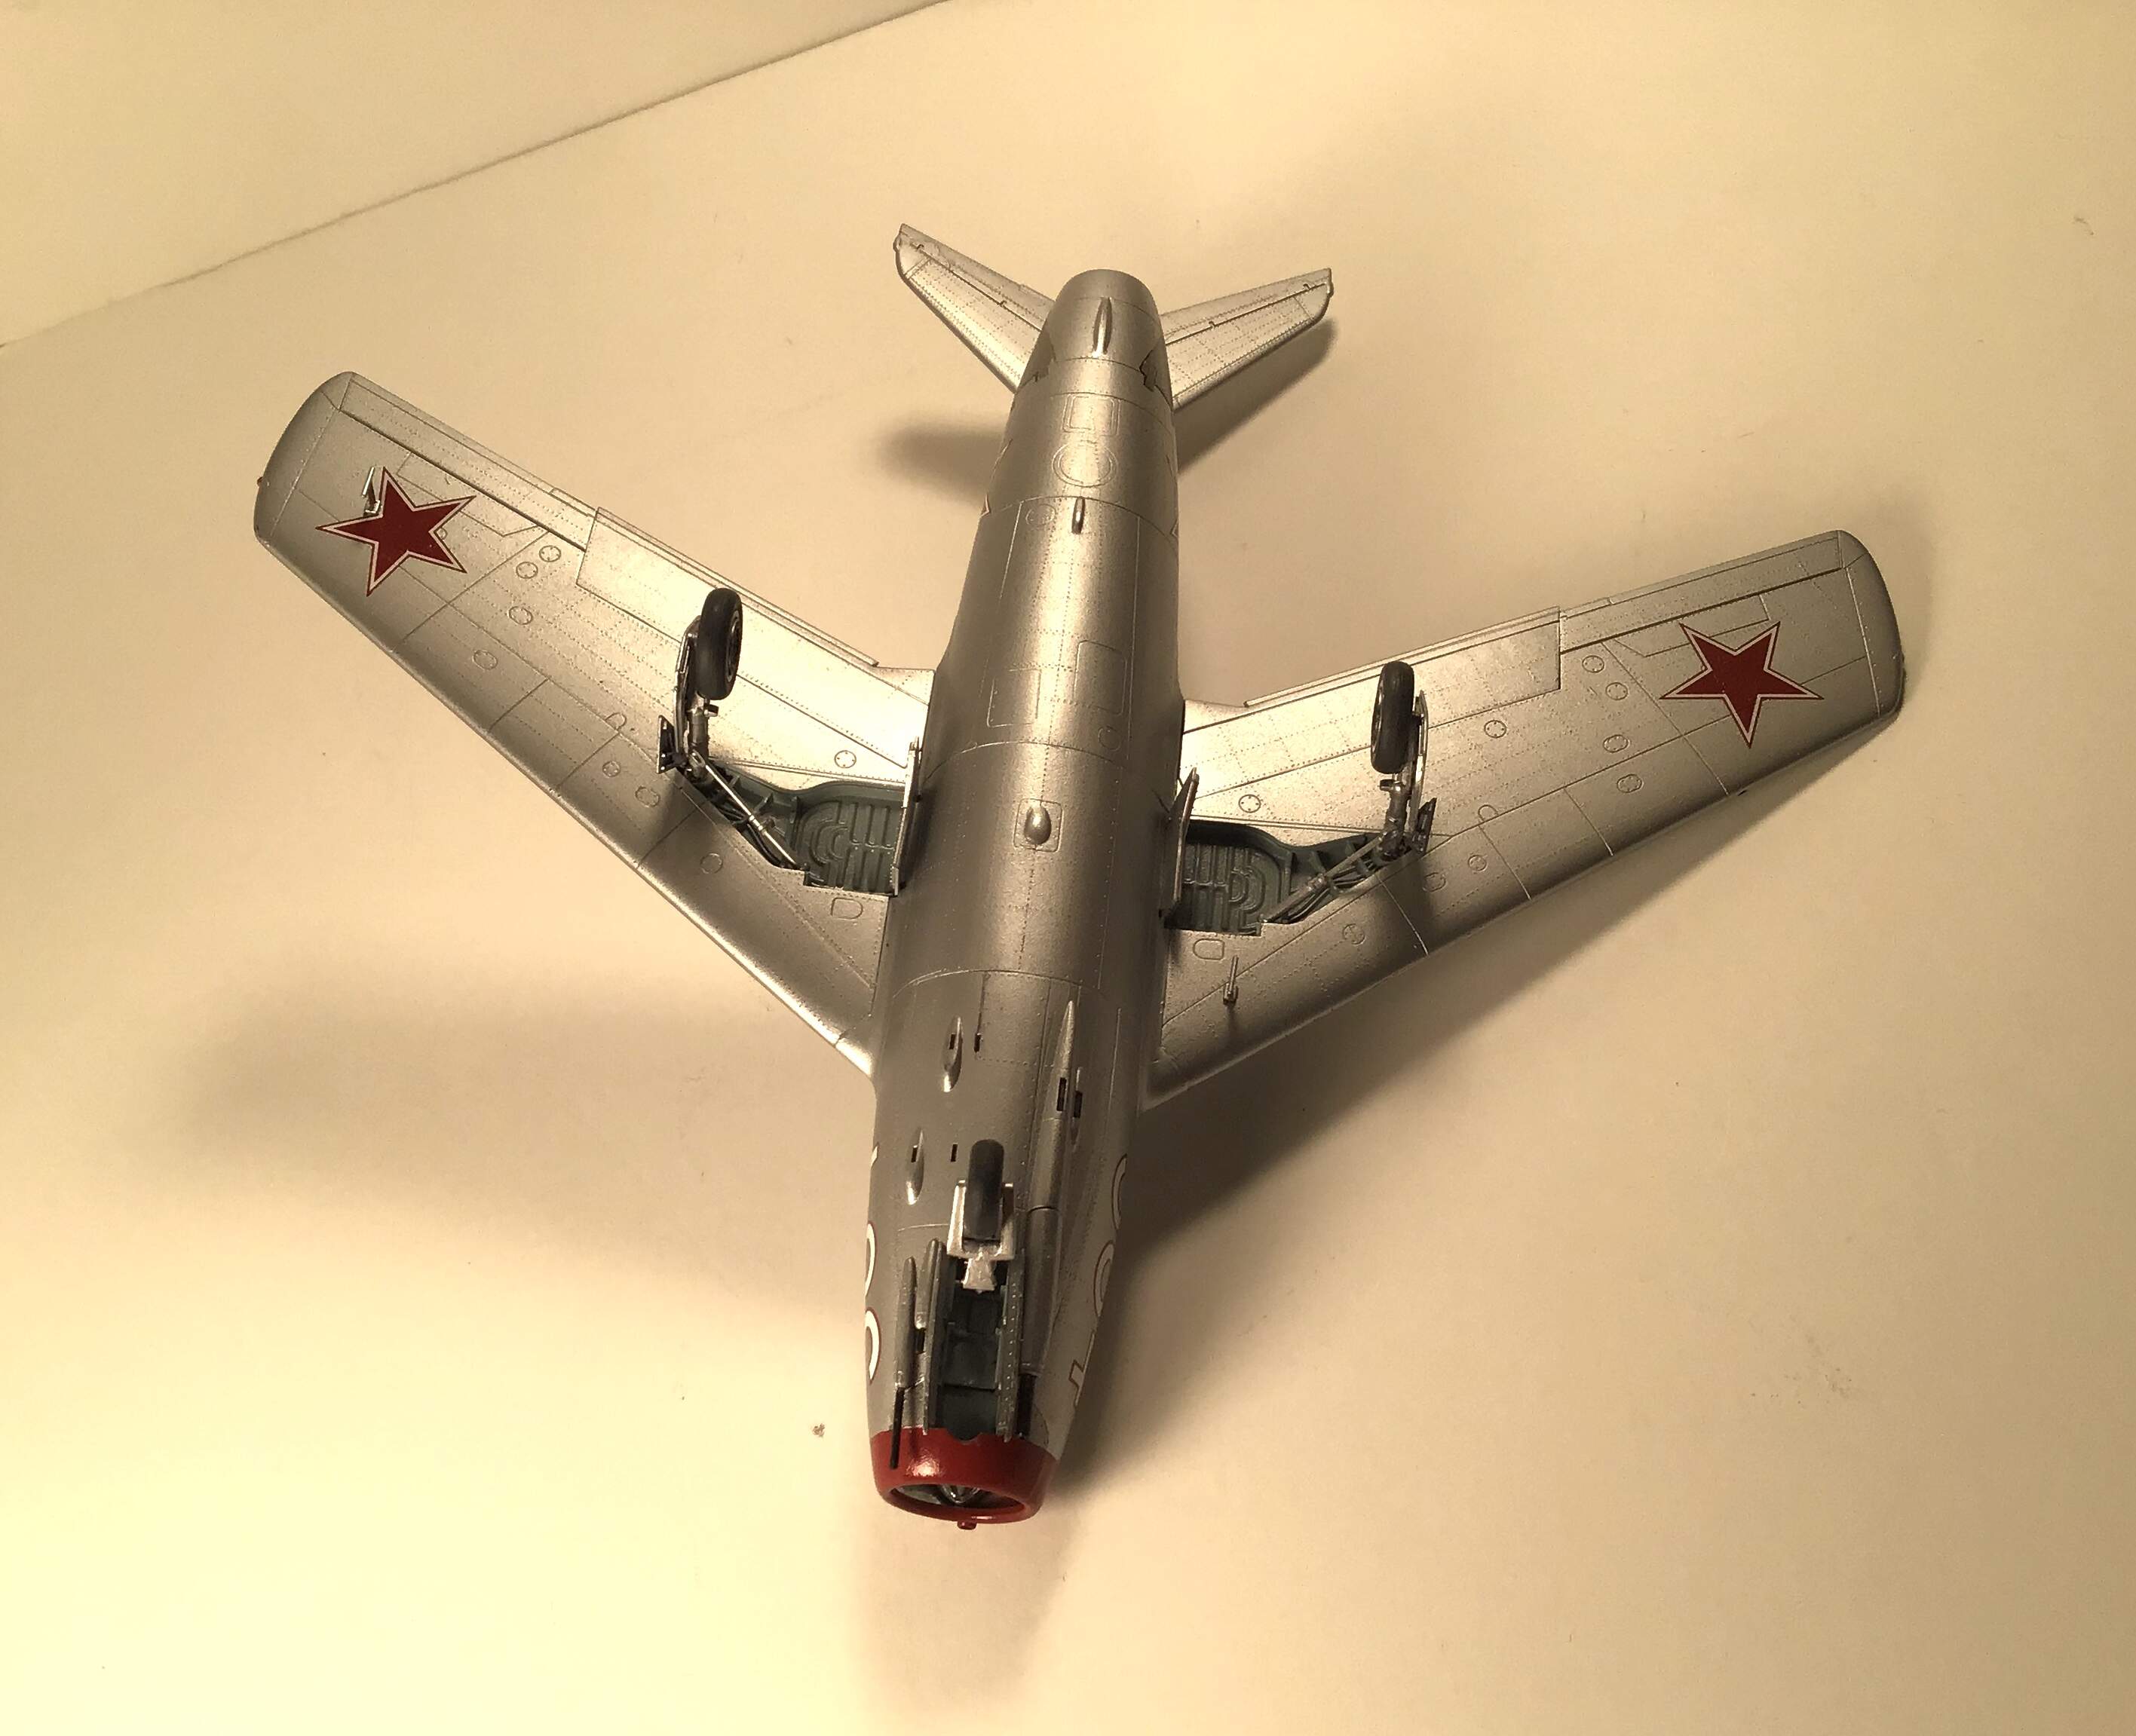
Riveting on wings done . Rivet counters ( and rivet locators ) will find that this is a general pattern derived from photographs meant to offer a suggestion of the many rivets apparent on this airframe .
2 Likes
Those rivets look great!
Are you planning on foiling the whole plane with Bare Metal? I’m Curious to see how the Bare Metal foil looks en masse. I’ve tried a few small samples and wasn’t entirely satisfied with its smoothness. Seems like the adhesive gums up a bit under the foil, but it might just be that my sheet is a bit old. Although its great for the compound curves, I’m thinking about using Microscale MM Foil Adhesive with a thicker foil on my F-104 build so that I can get a polished finish.
Looking forward to more updates 
Cheers 
Marty
Hi Marty - Thanks for the kind words .
I plan on doing nearly all with Bare Metal Foil .
It is difficult to use on extreme compound curve areas - wing root fillets , tail root fillets etc. I had hoped to preserve the the plated finish on these areas . The wing roots look ok but the vertical tail root fillet and wing tips needed too much seam
work . I may paint these areas with Vallejo Metal Color - works well when new but my supply is a few years old and it seems to have a shelf life - we’ll see.
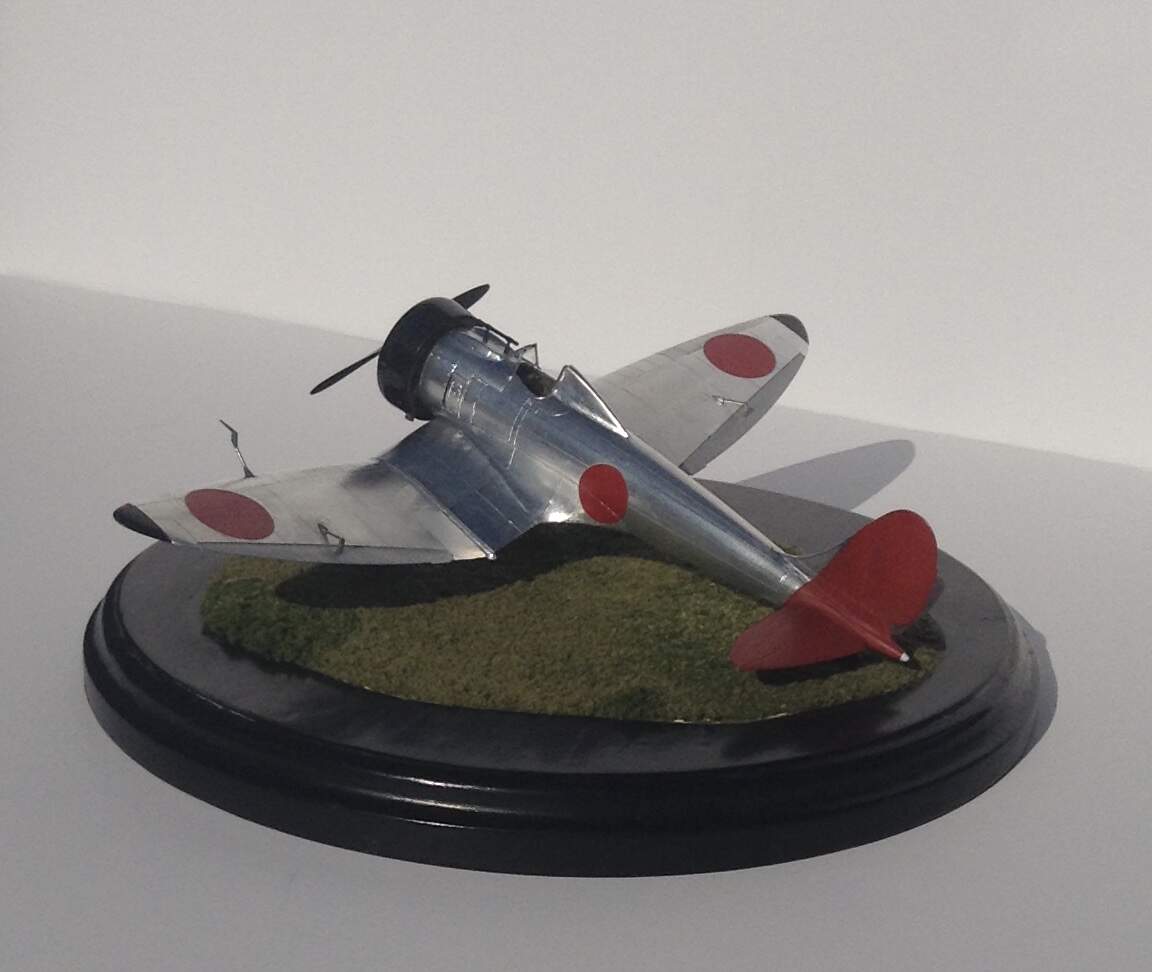
Here is a Mitsubishi Ka 14 prototype I built a few years back with a “ hybrid “ finish . Largely Bare Metal Foil but Metal Color on the wheel pants , fillets etc.

Thanks for the interest
Cheers- Richard
2 Likes
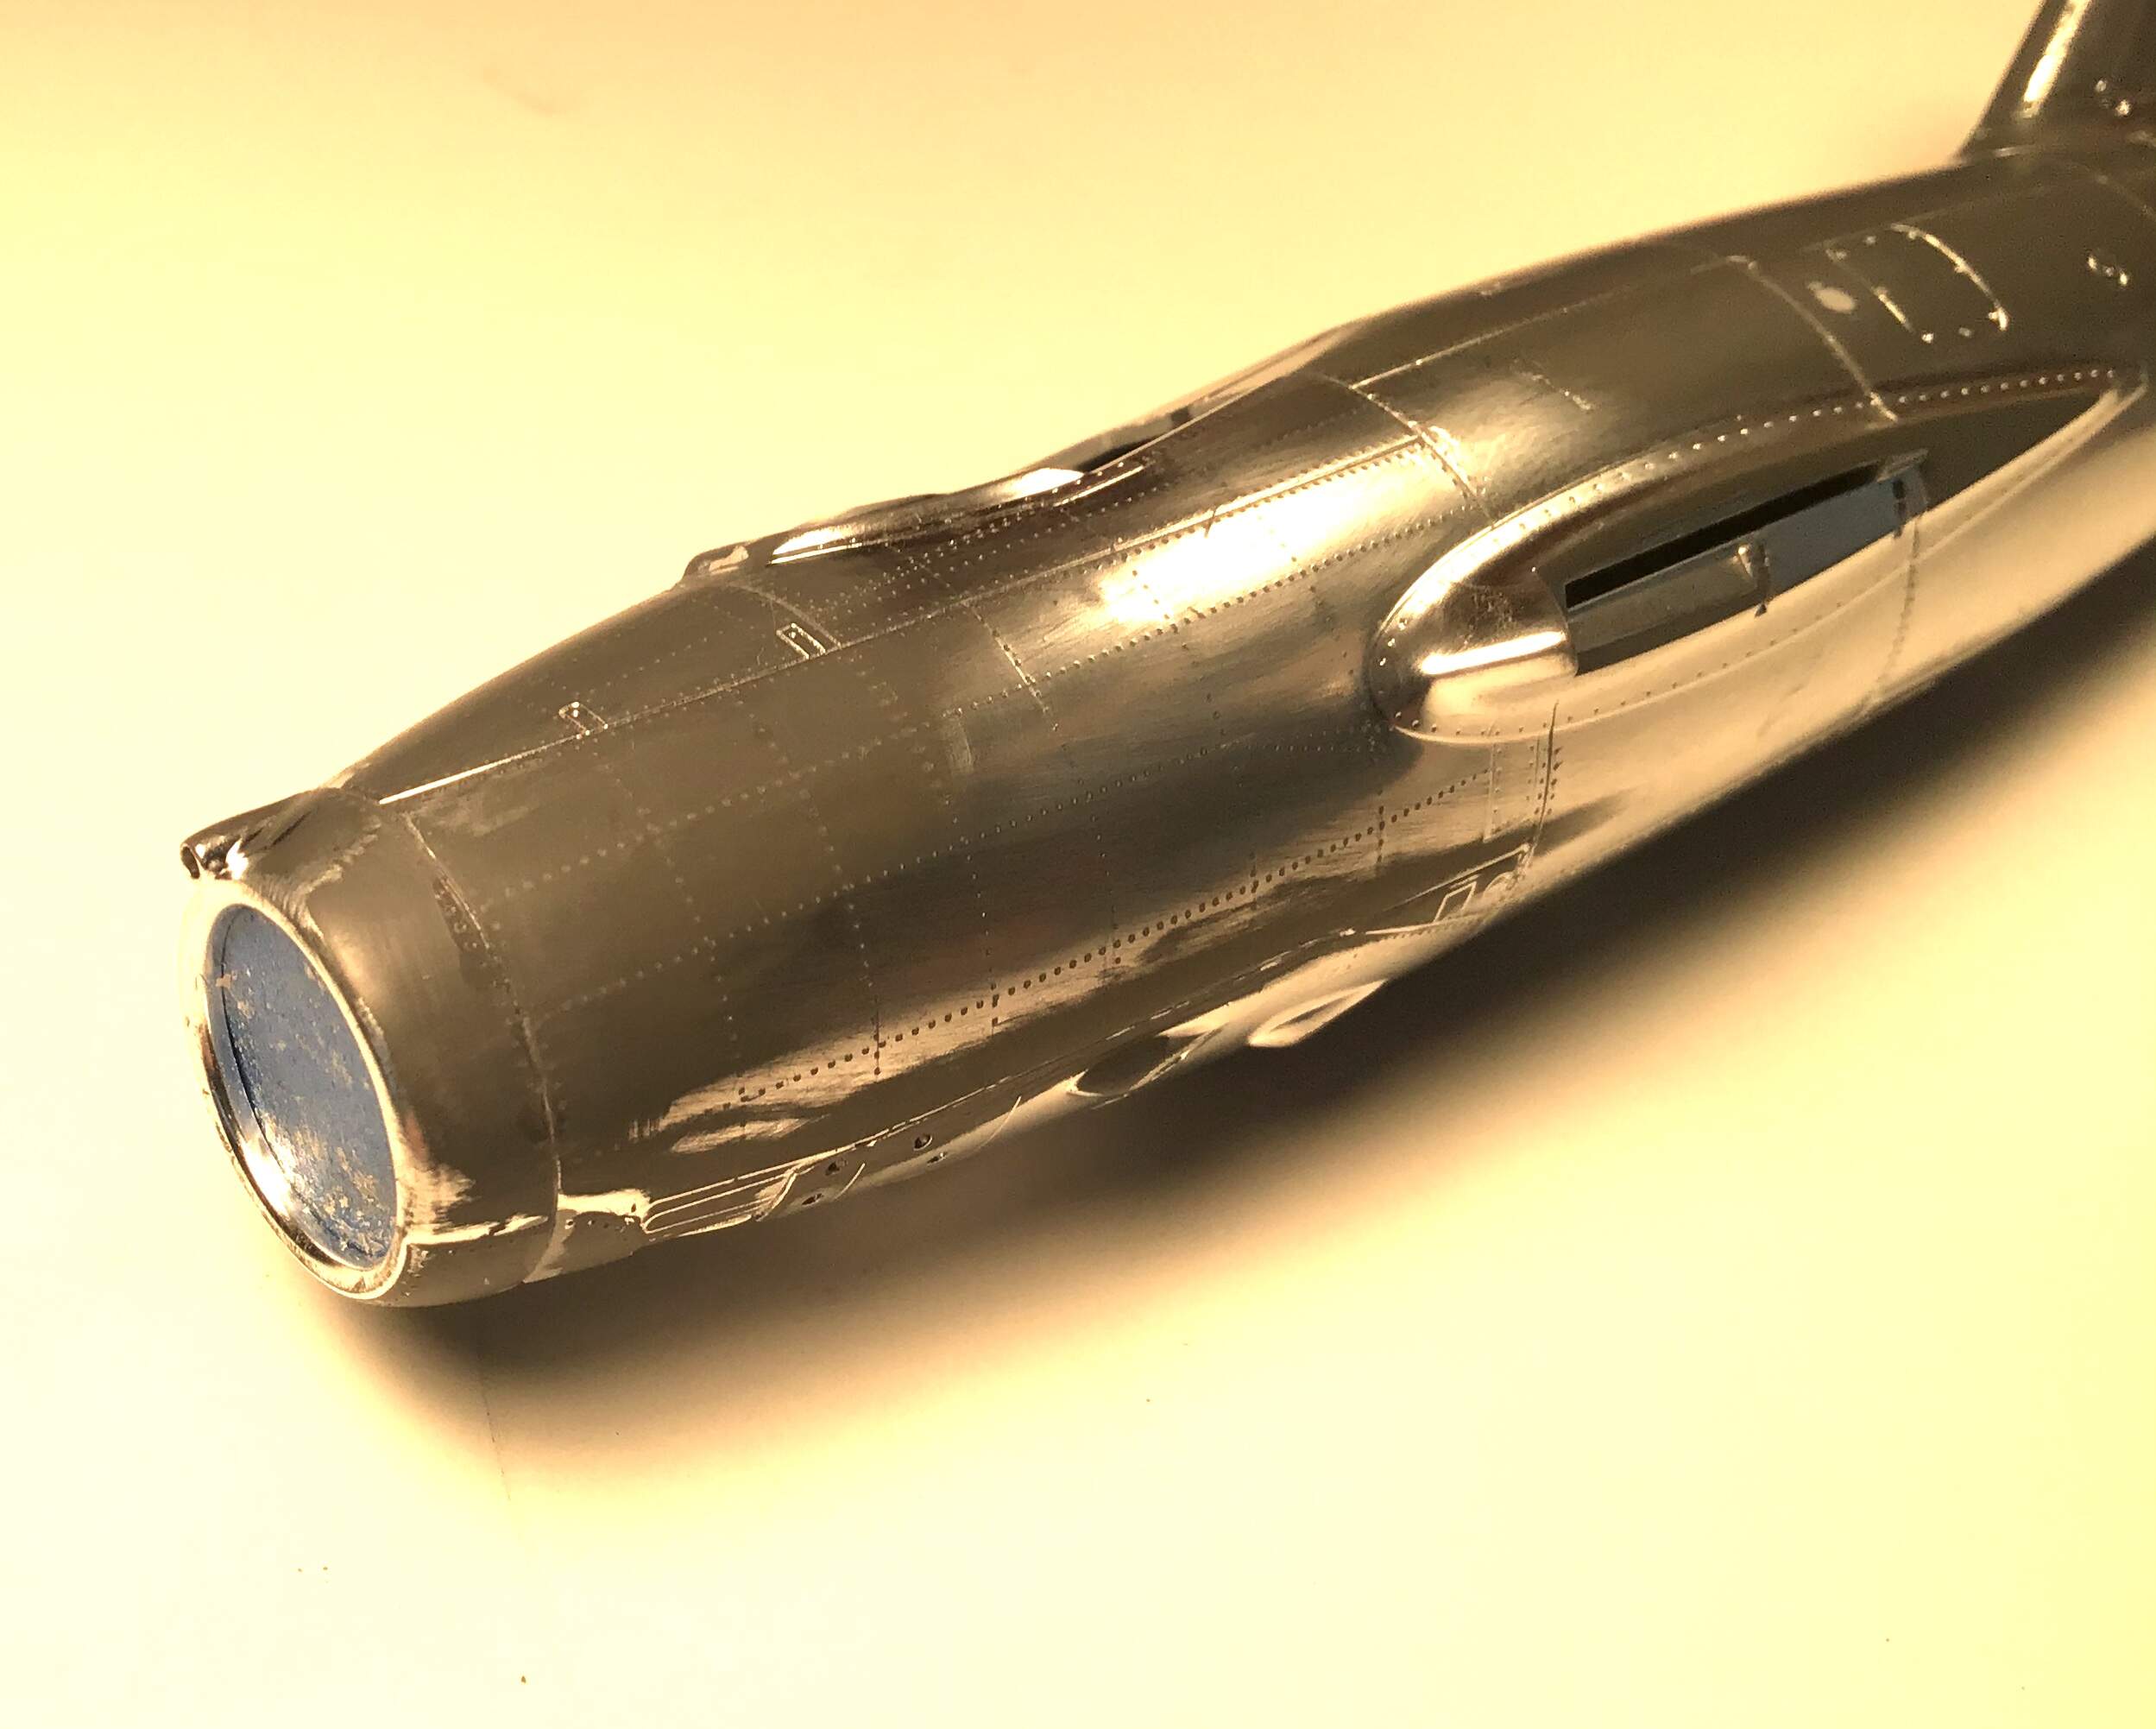
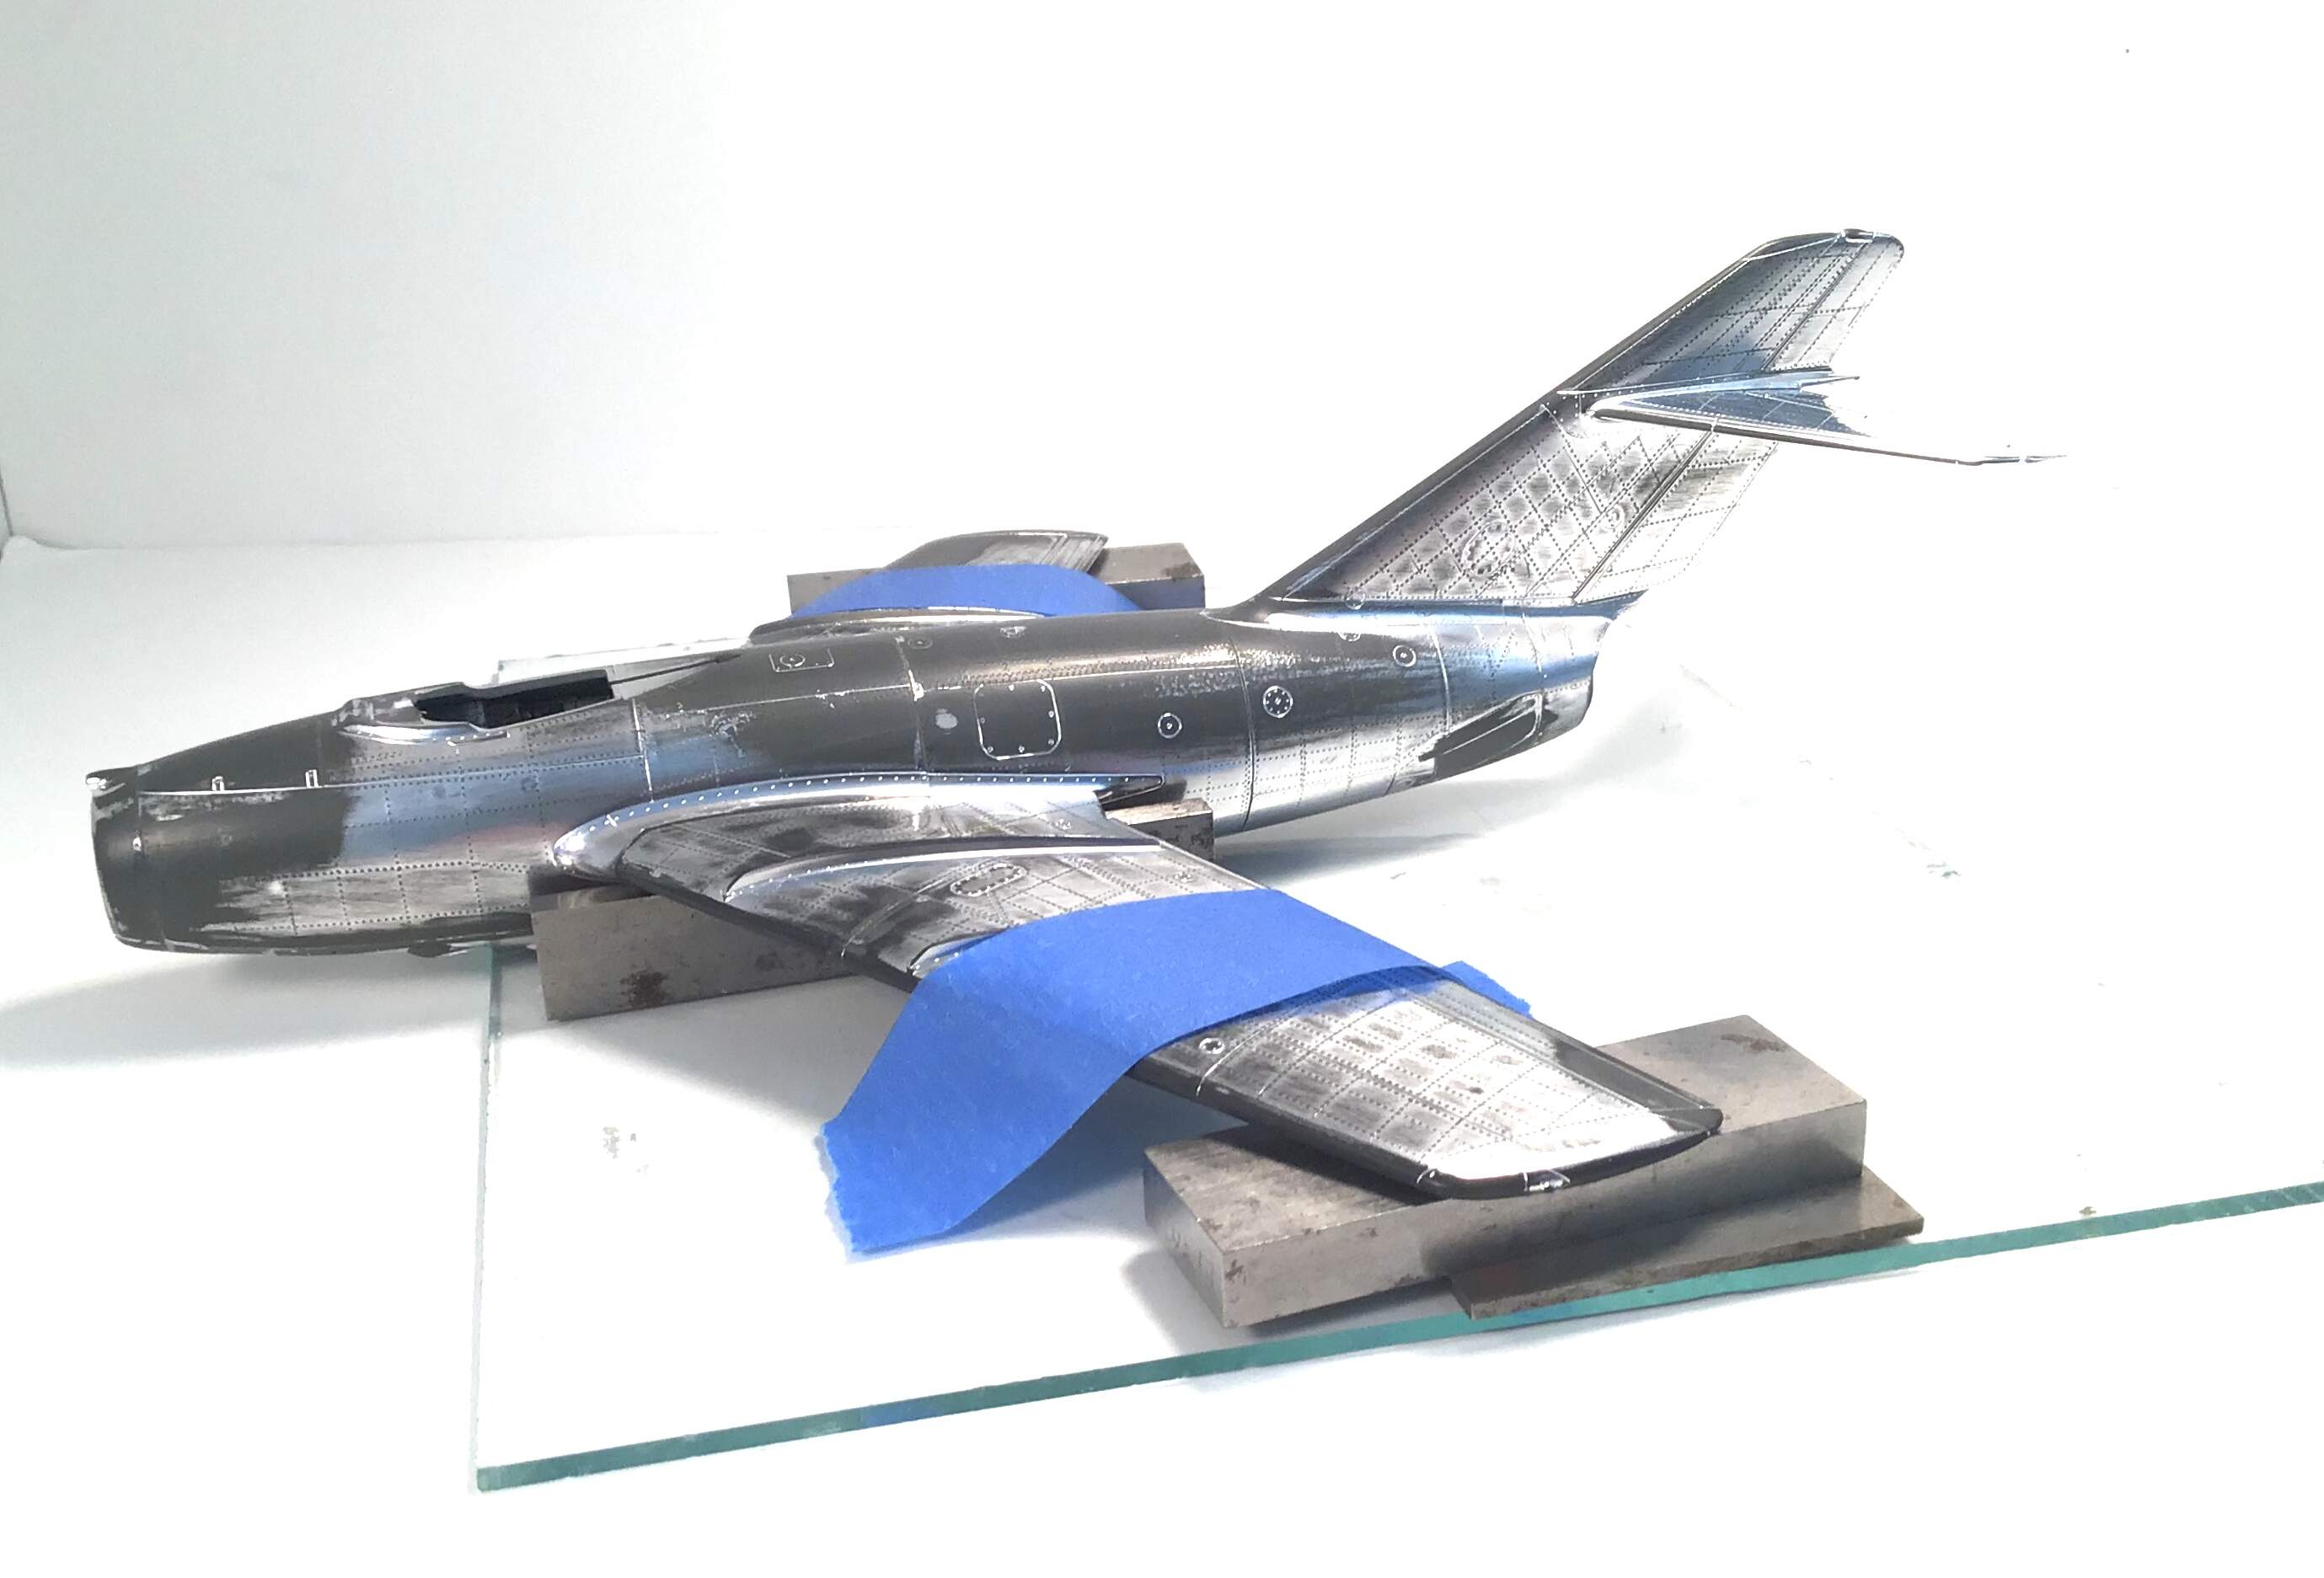
I have bailed on the foil covering . I did some tests before beginning the riveting on the airframe and it showed that the rivets would show through the foil if burnished down enough . I began the foil application on the landing gear covers and the riveting was spotty at best . After all the time spent on the riveting I thought it better to paint .
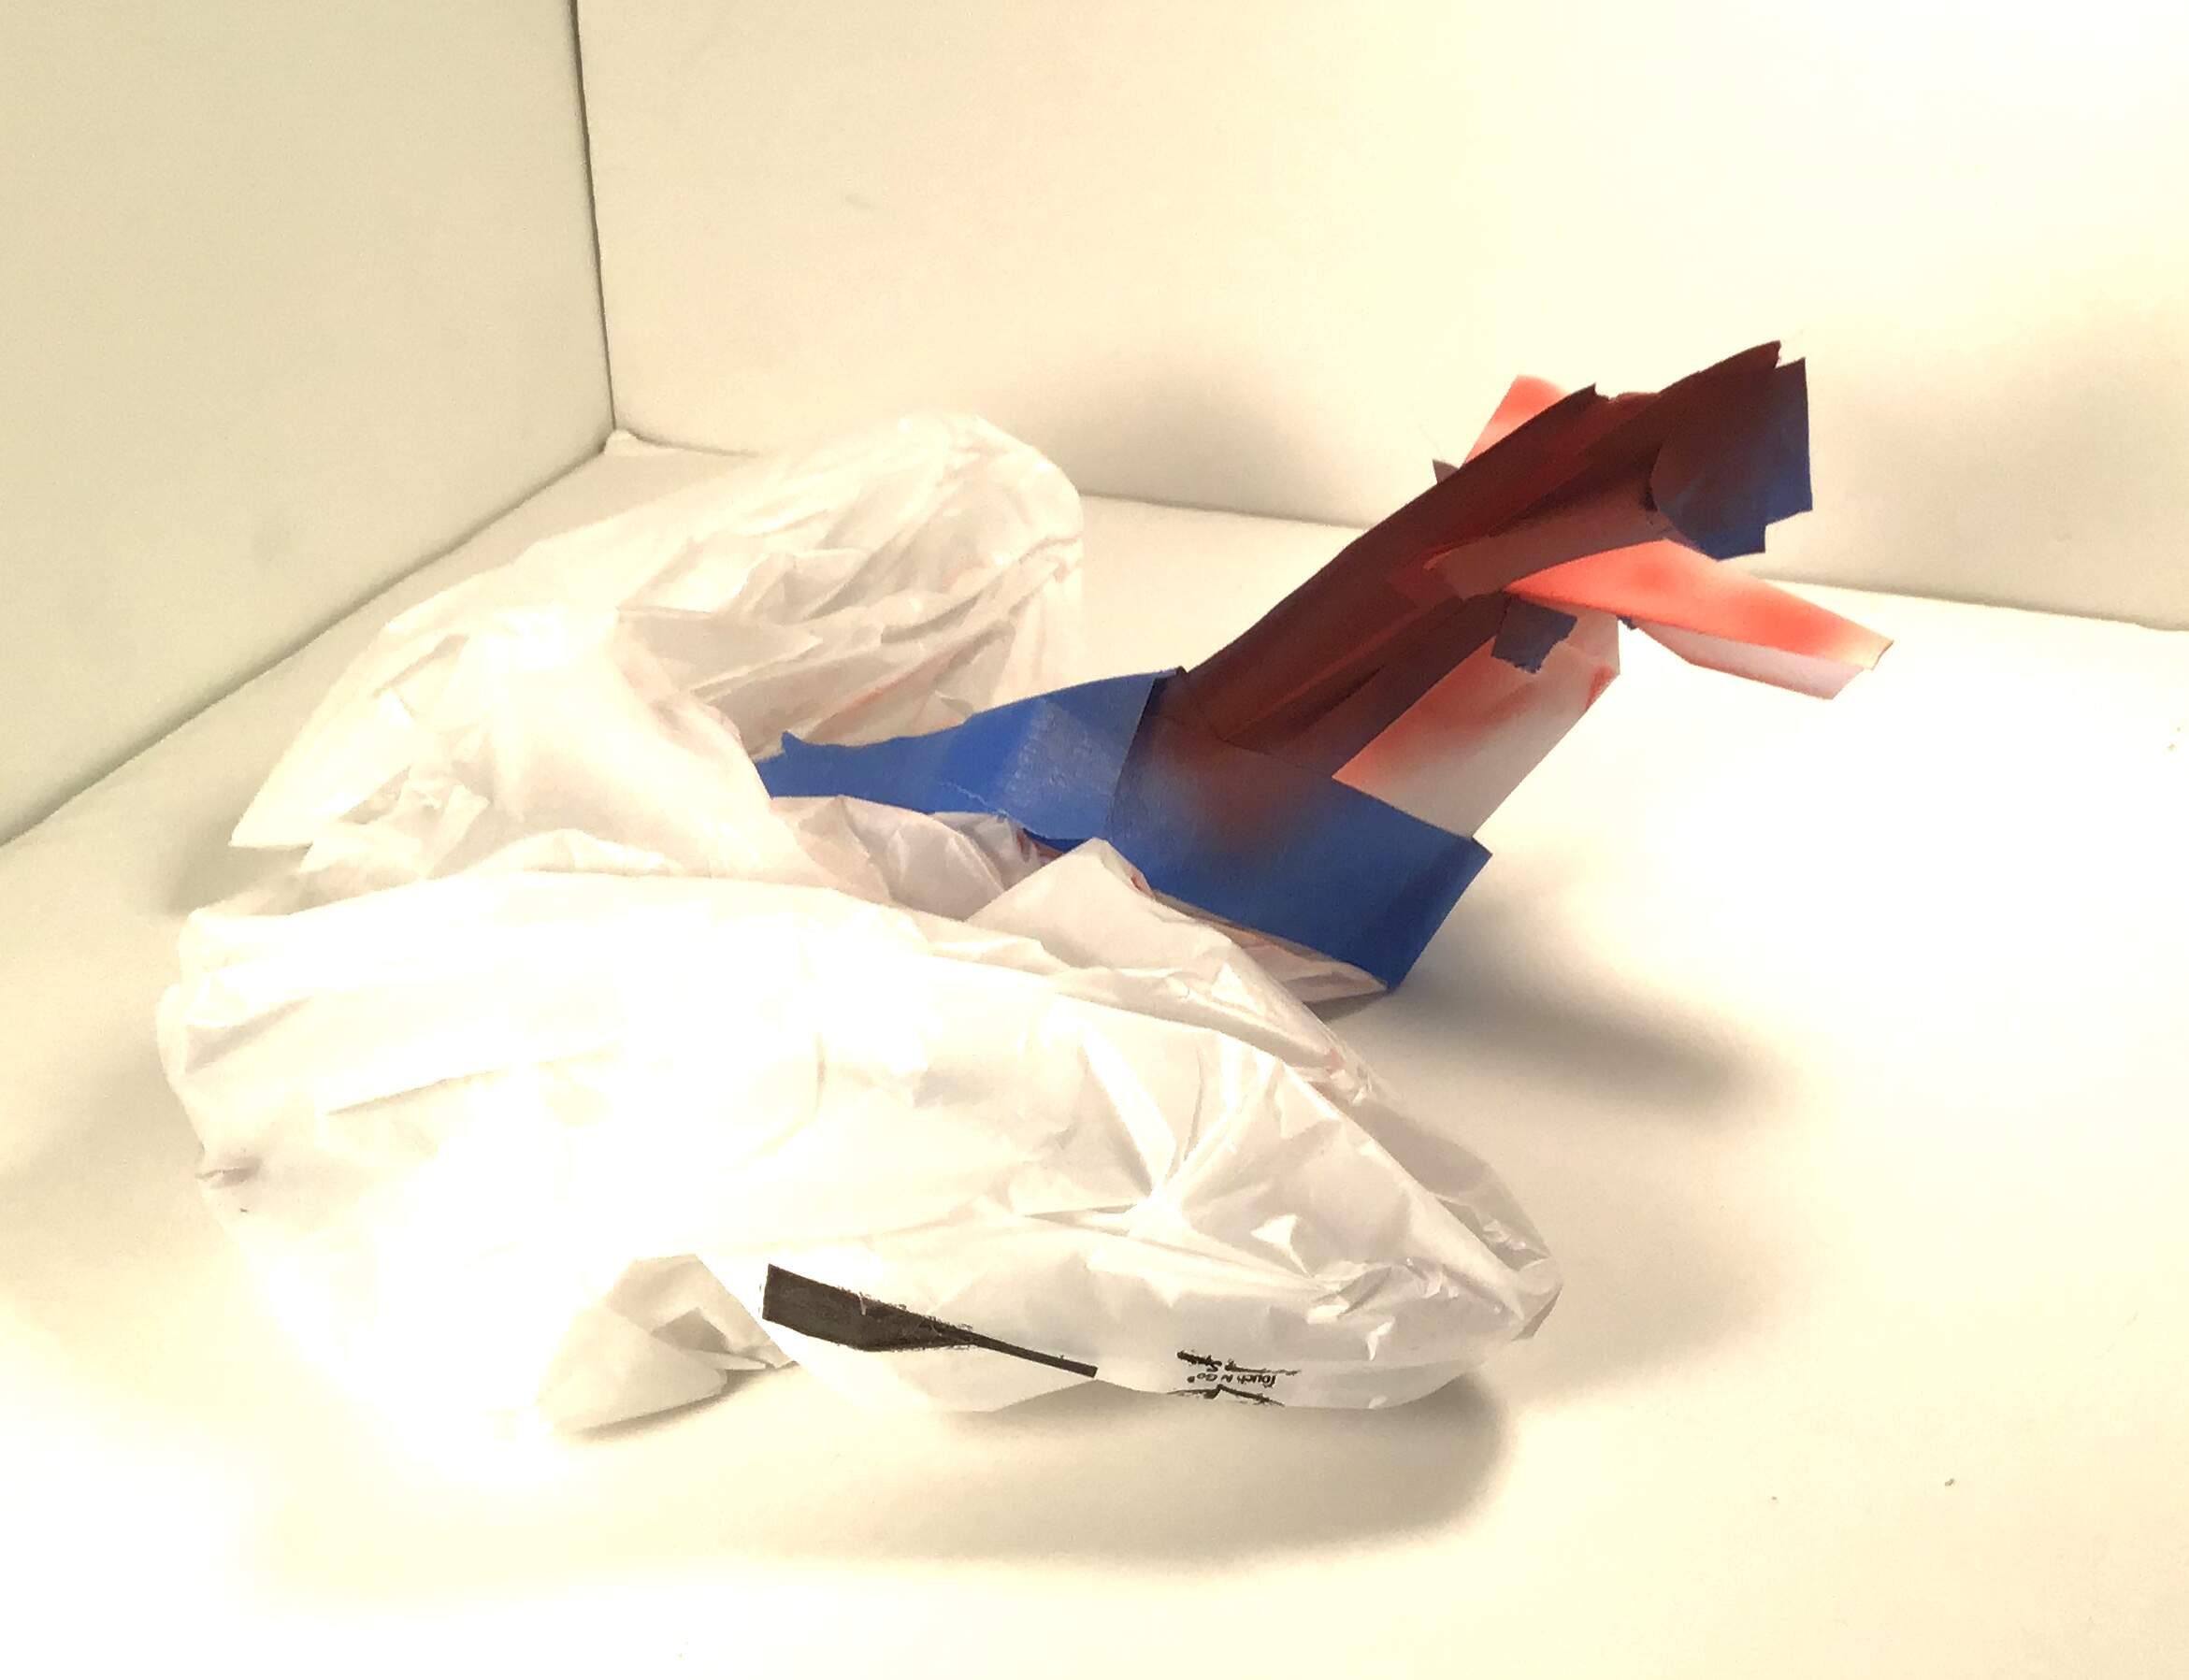
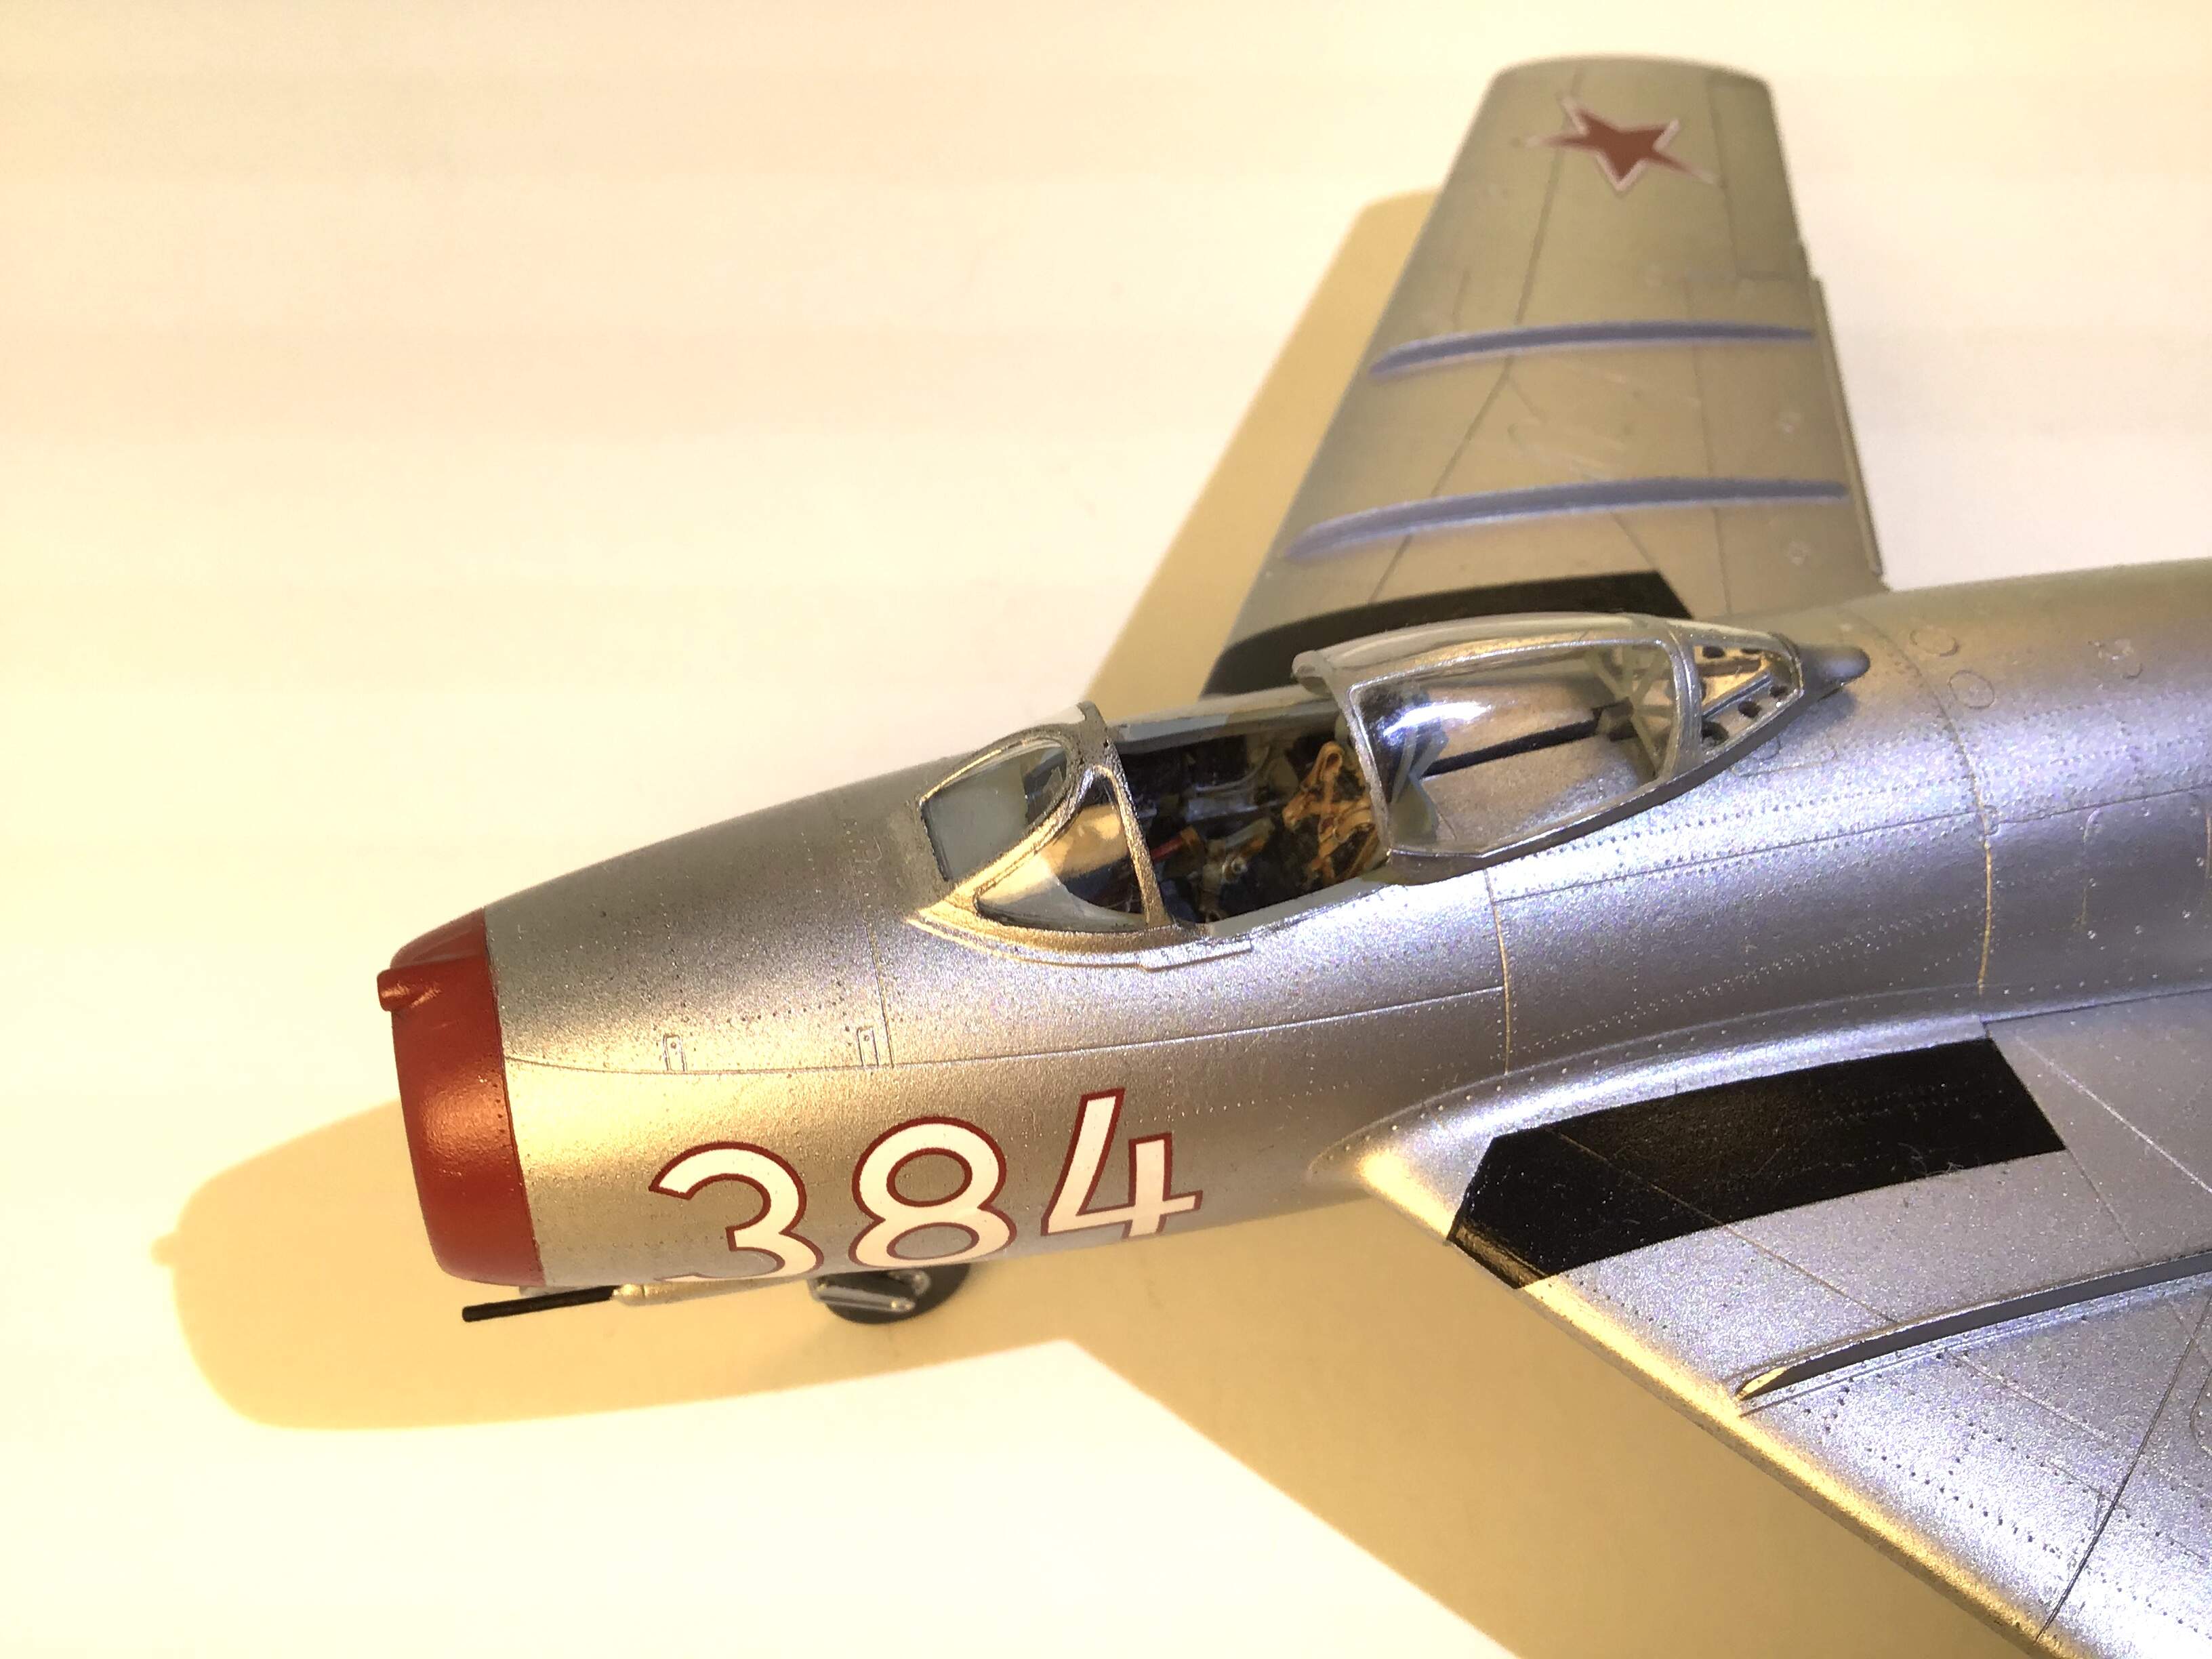
I have primed with Stynylrez black and sprayed the speed brakes and blast protection plate between the gun muzzles and intake area with Vallejo Dark Aluminium. Photos show these areas are much darker than the aircraft skin .

1 Like
 Looking good!
Cheers,
C.
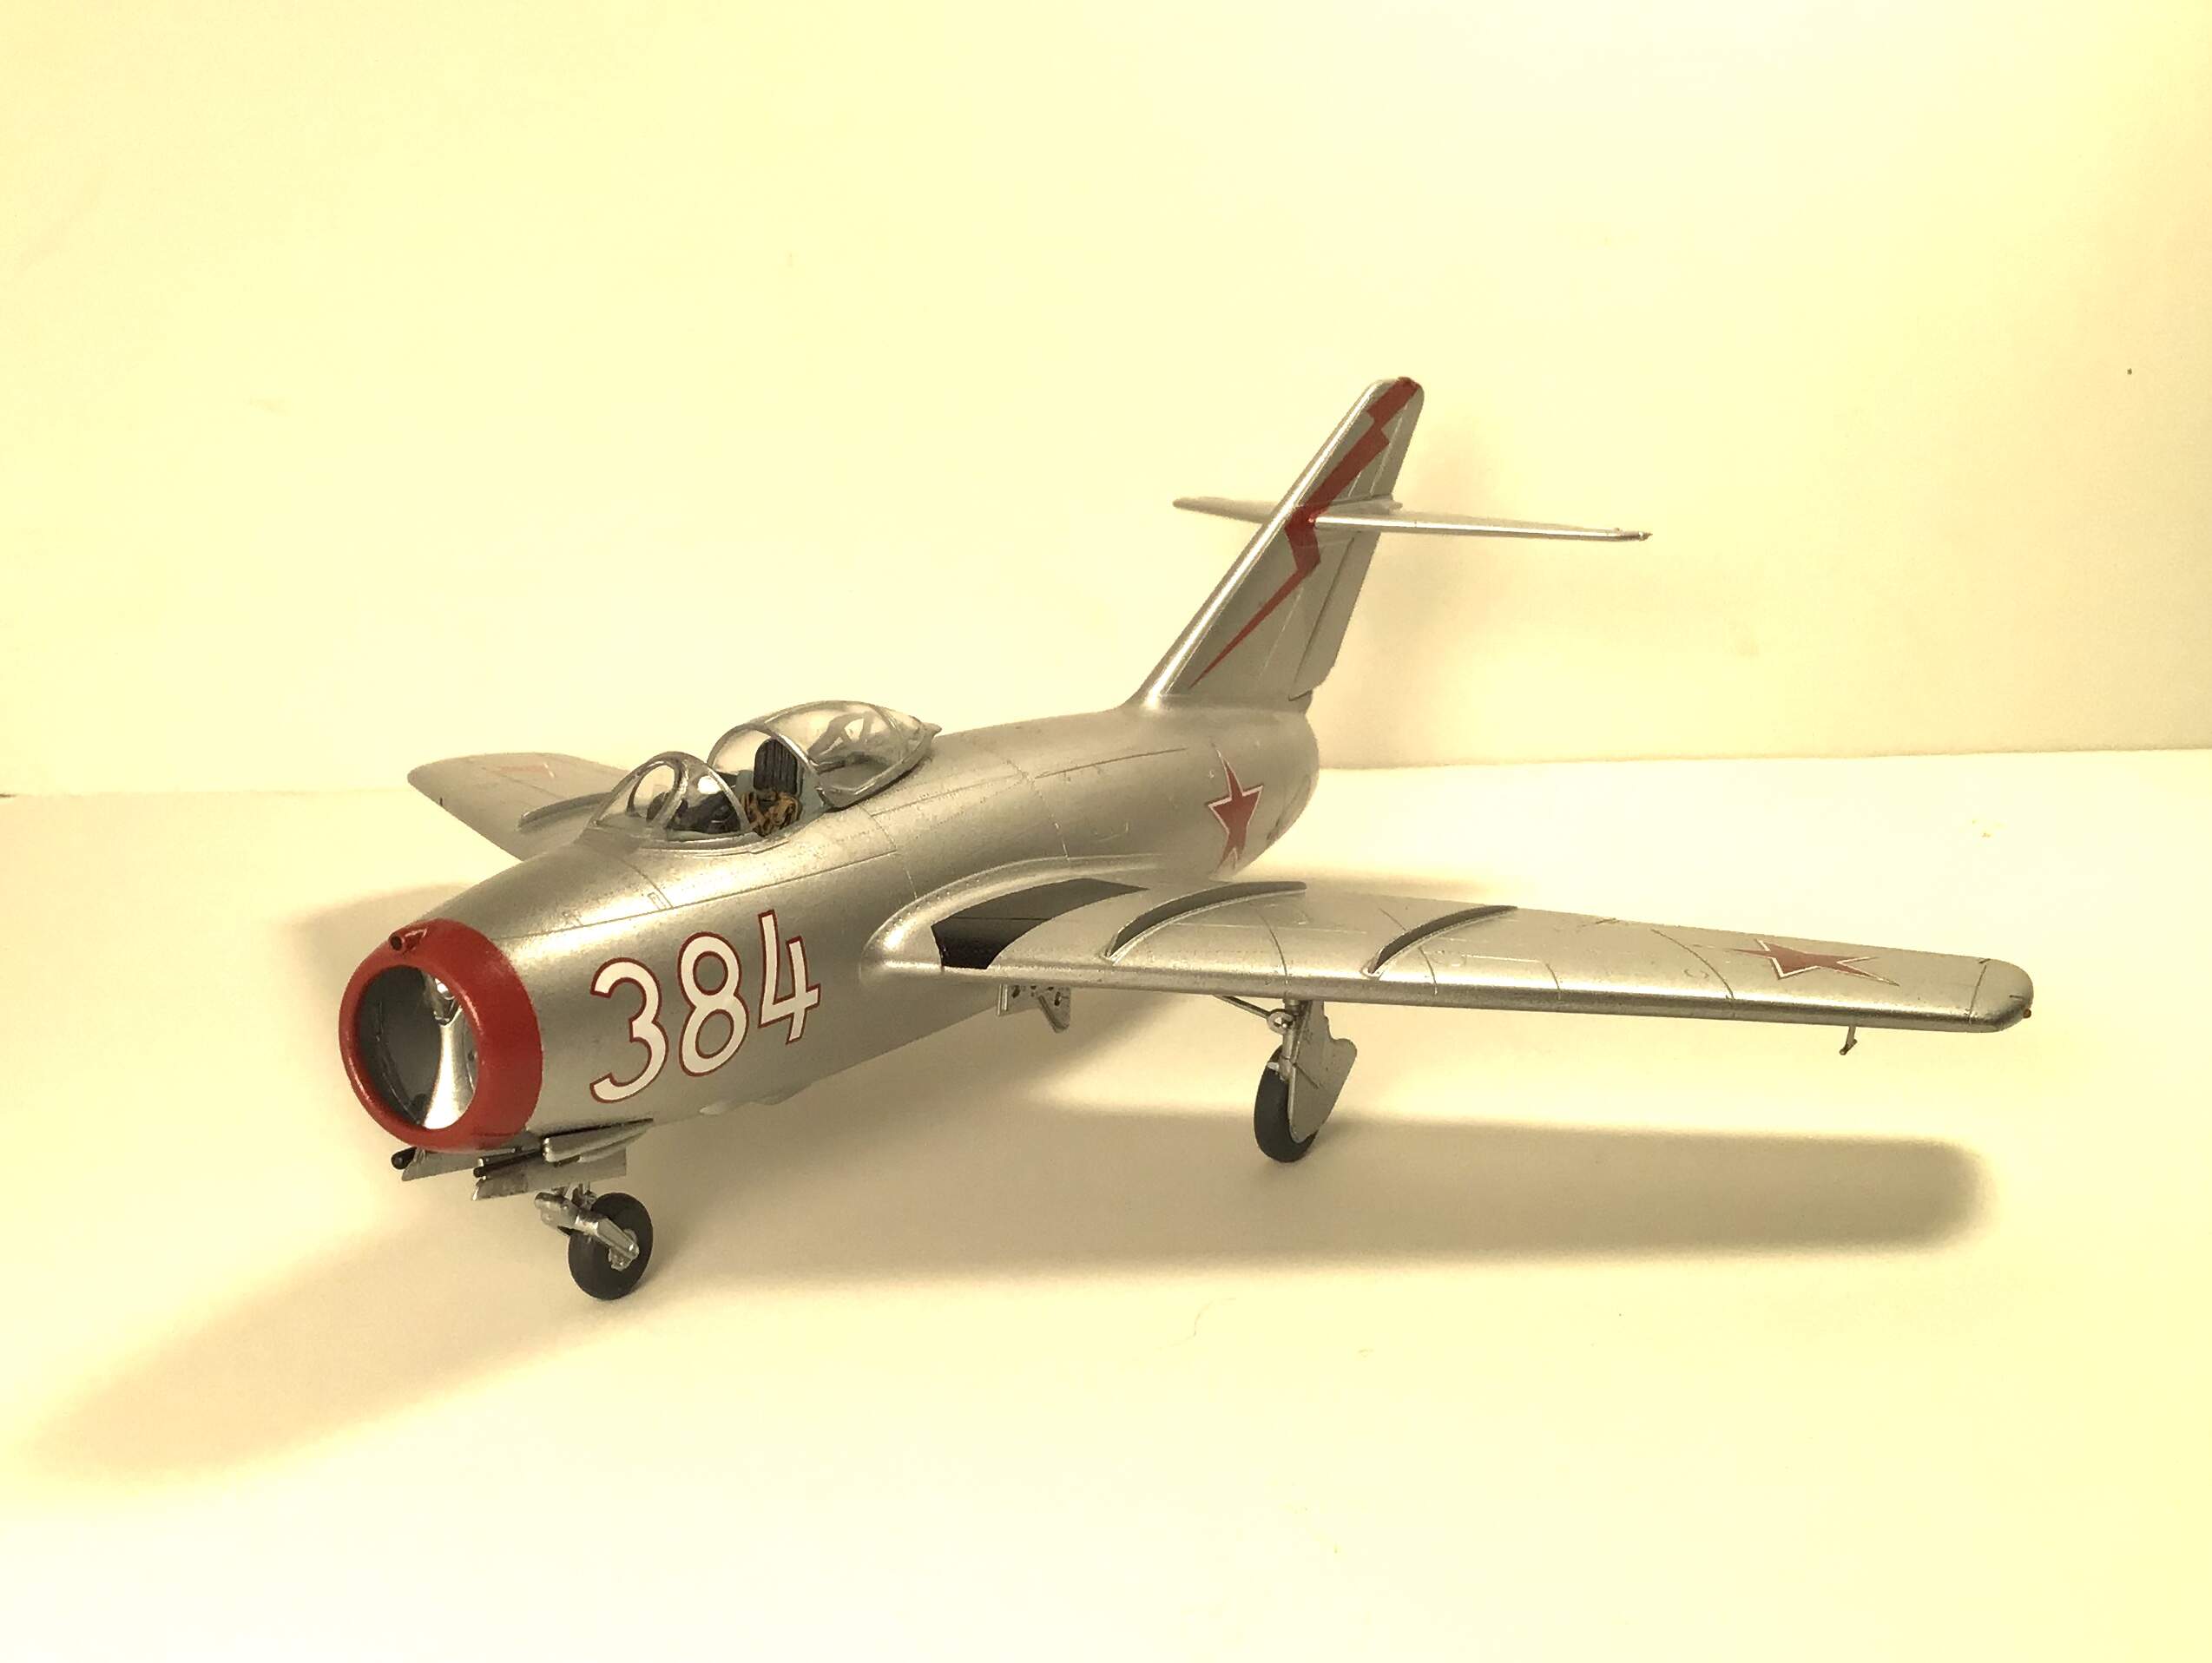
Some more progress. Airframe painted with Vallejo Aluminum. Speed brakes and muzzle blast plating done with Vallejo Dark Aluminium . Nose and lightning bolt on tail done with Tamiya Flat Red toned down with a few drops of Tamiya Red Brown to match red in decals . The decals were old and fragile- 1995 dated - and the lightning bolt decal for the tail shattered into many pieces so I cut masks using a photo copy of the remaining decal and sprayed the bolt on . One coat of Tamiya clear gloss before decals and I will do another after.
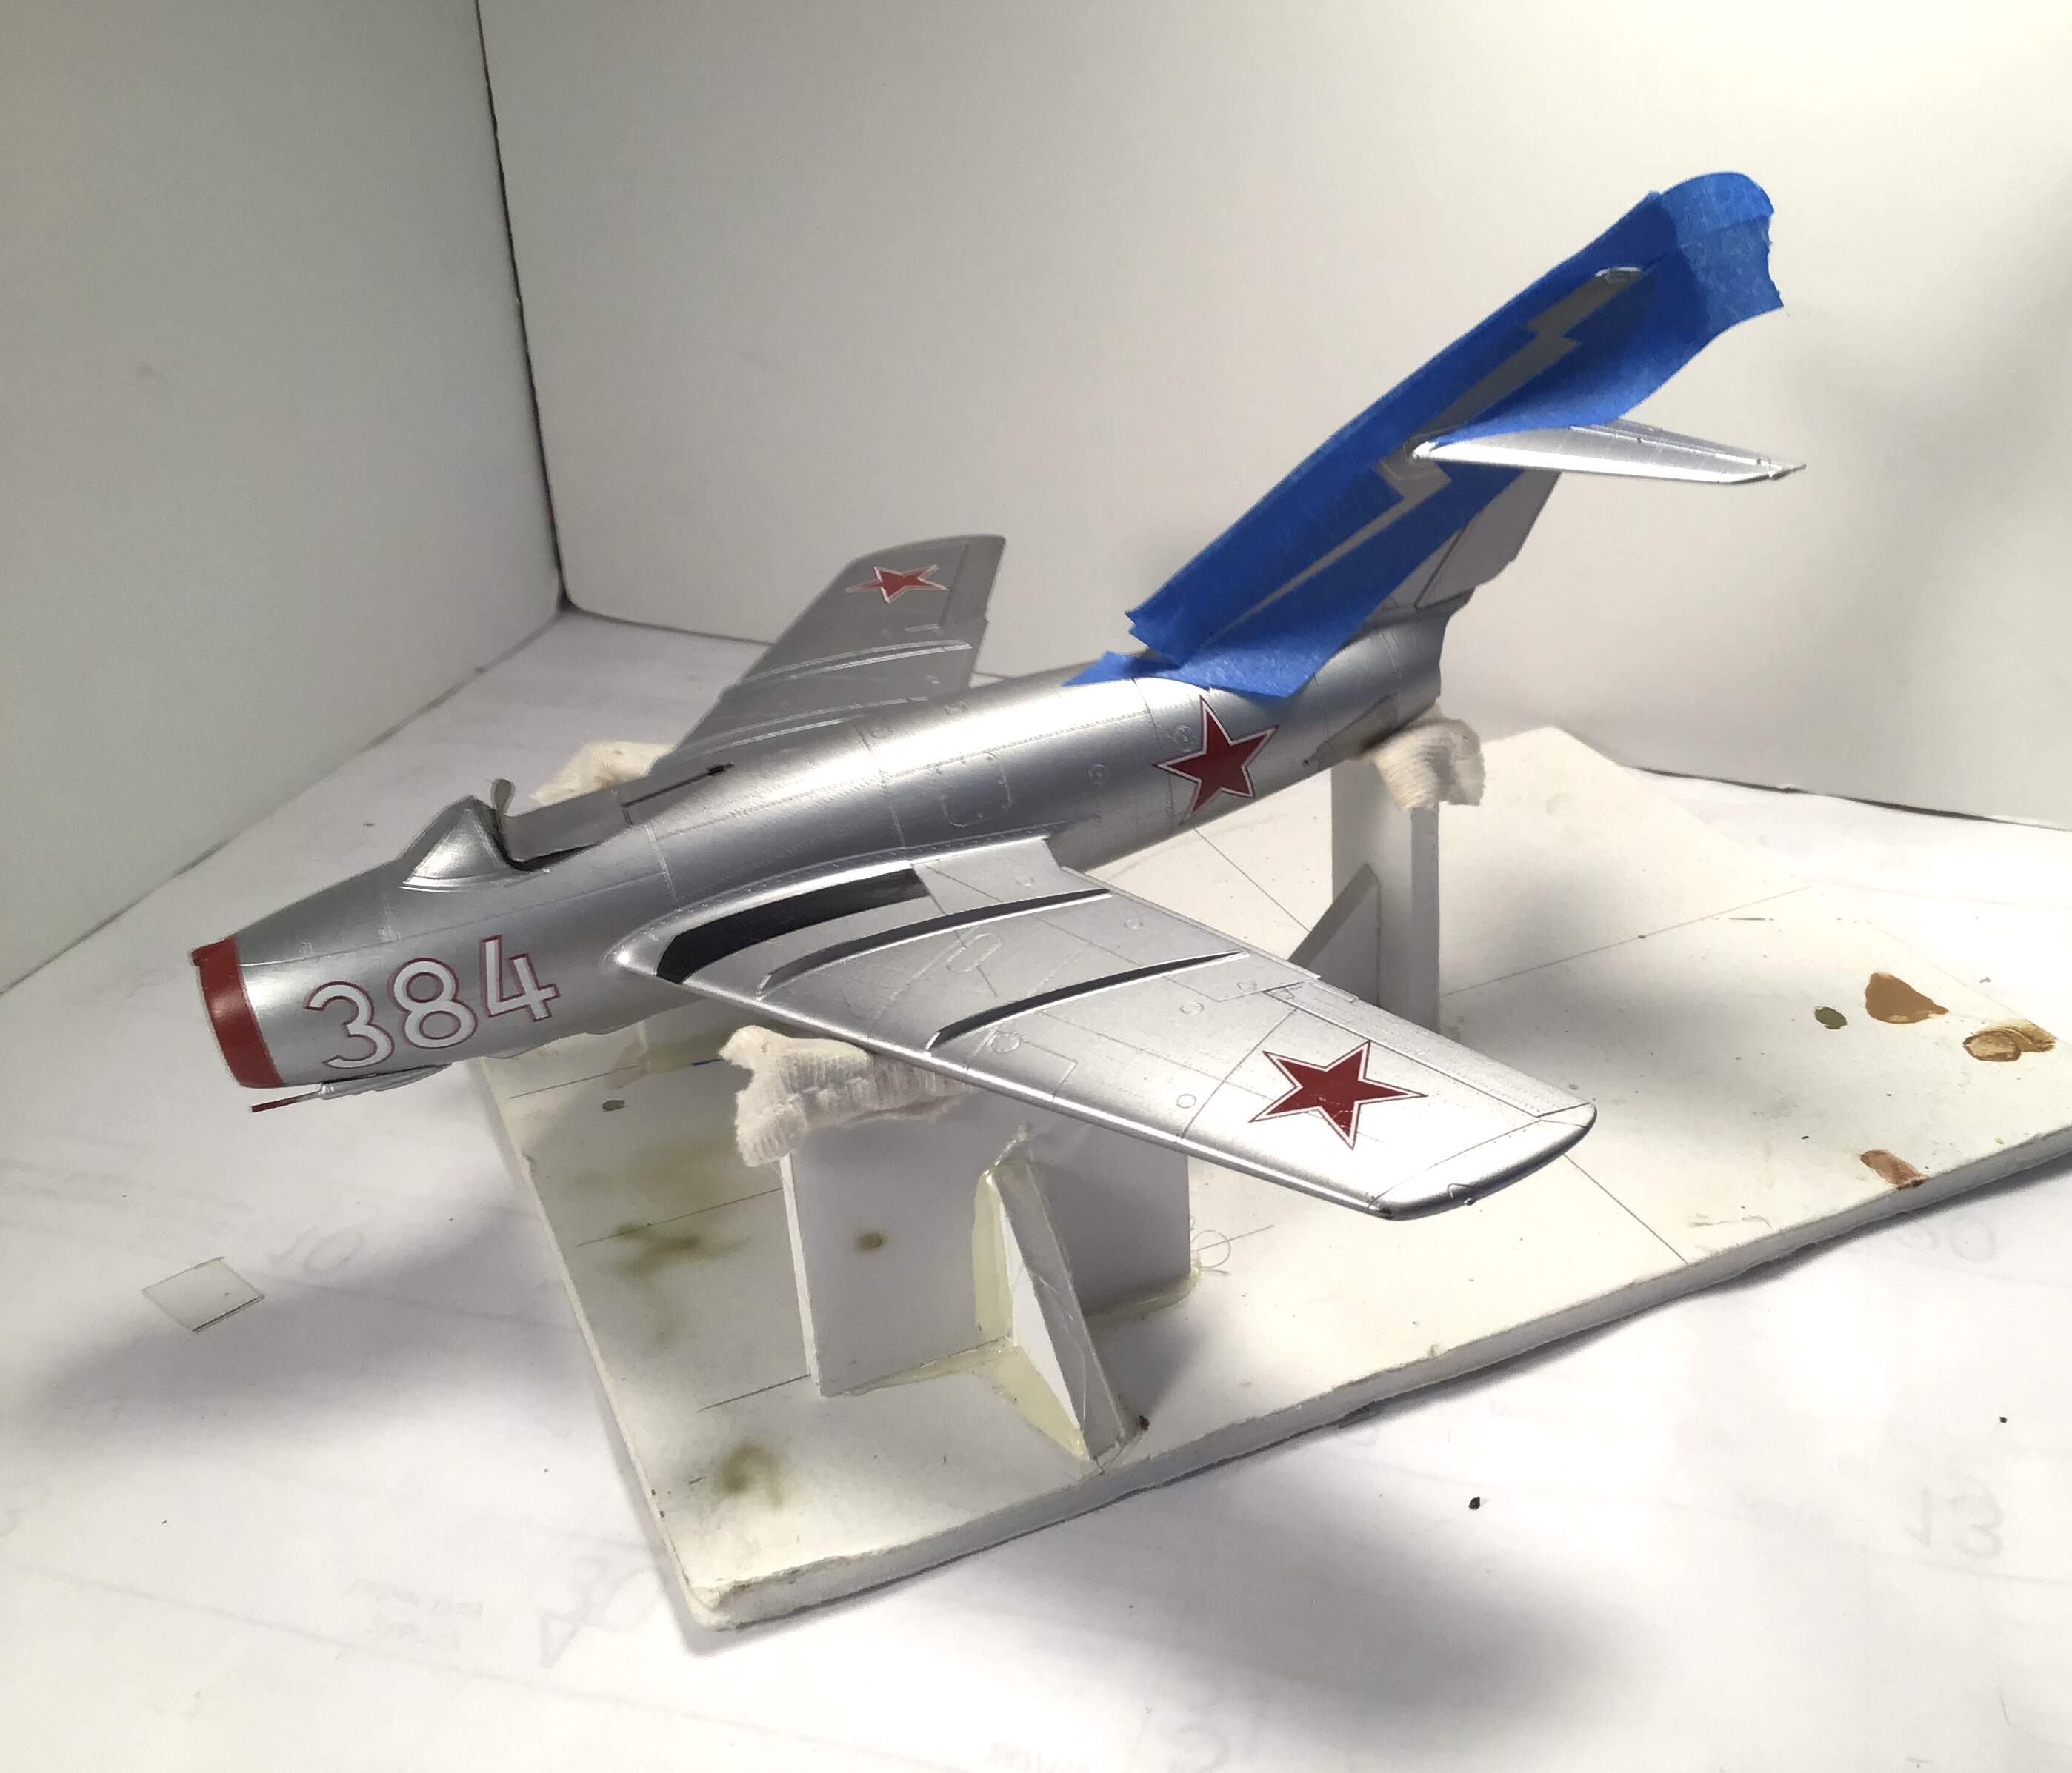

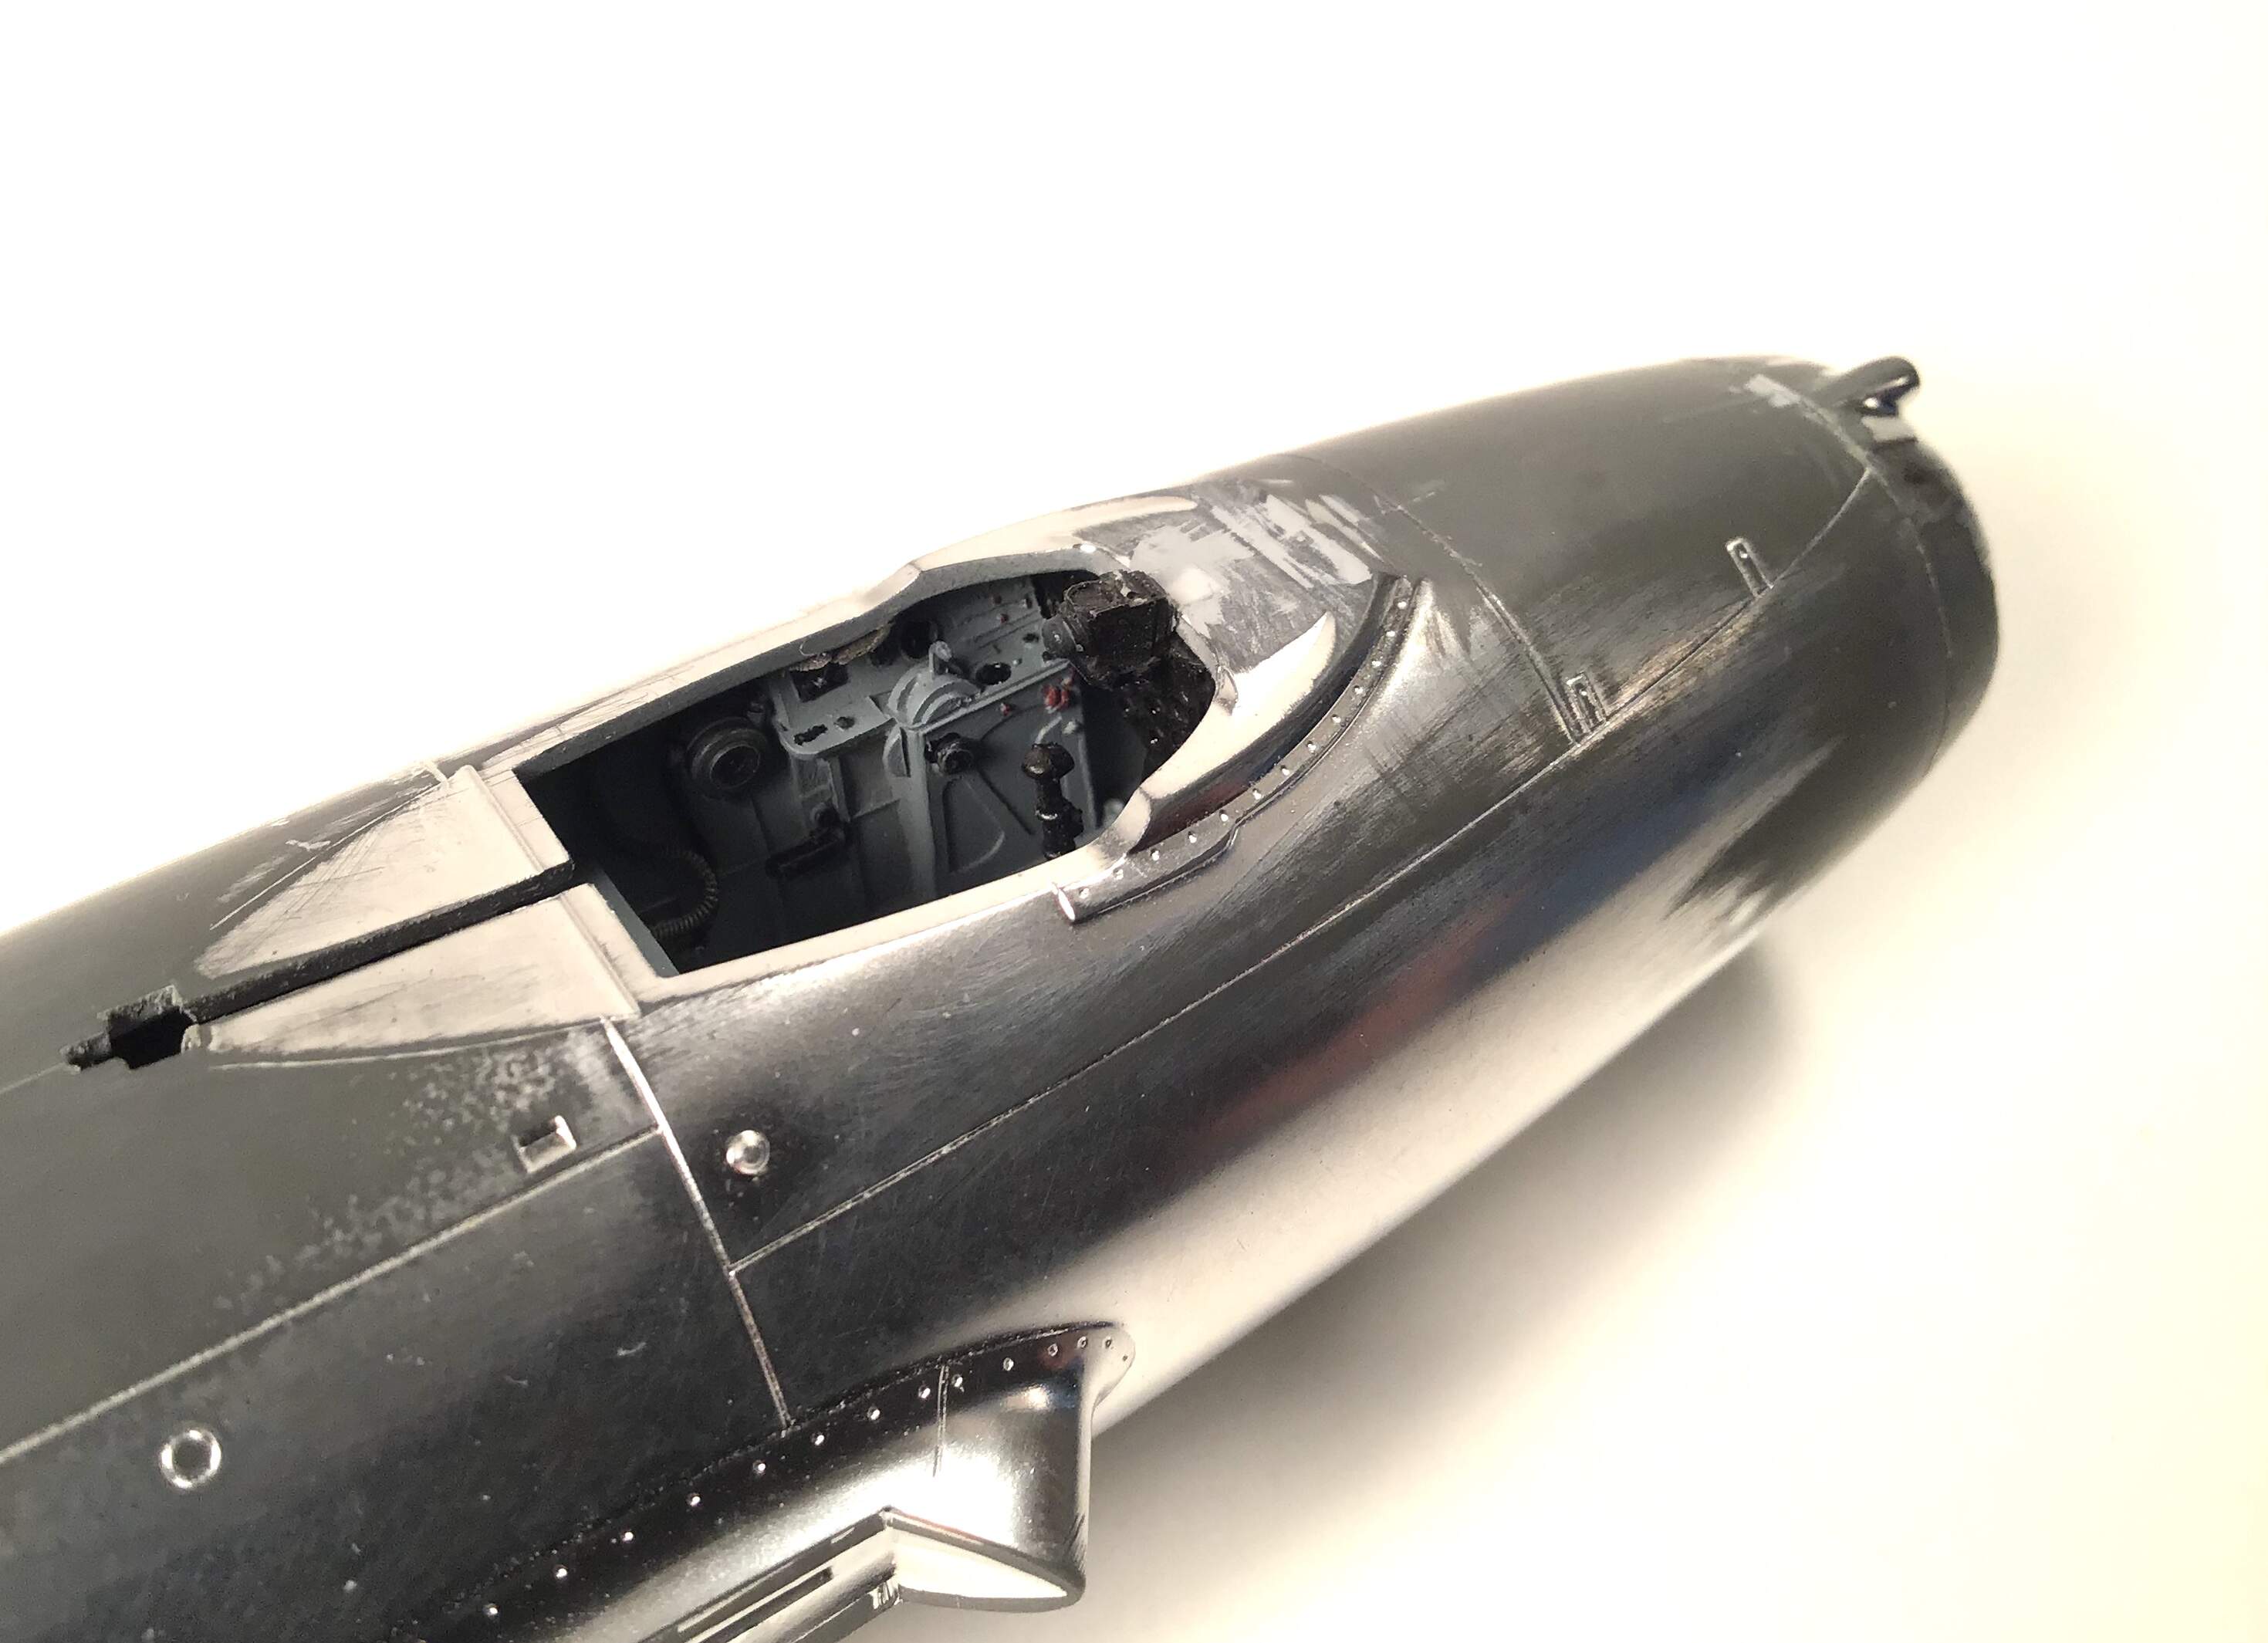
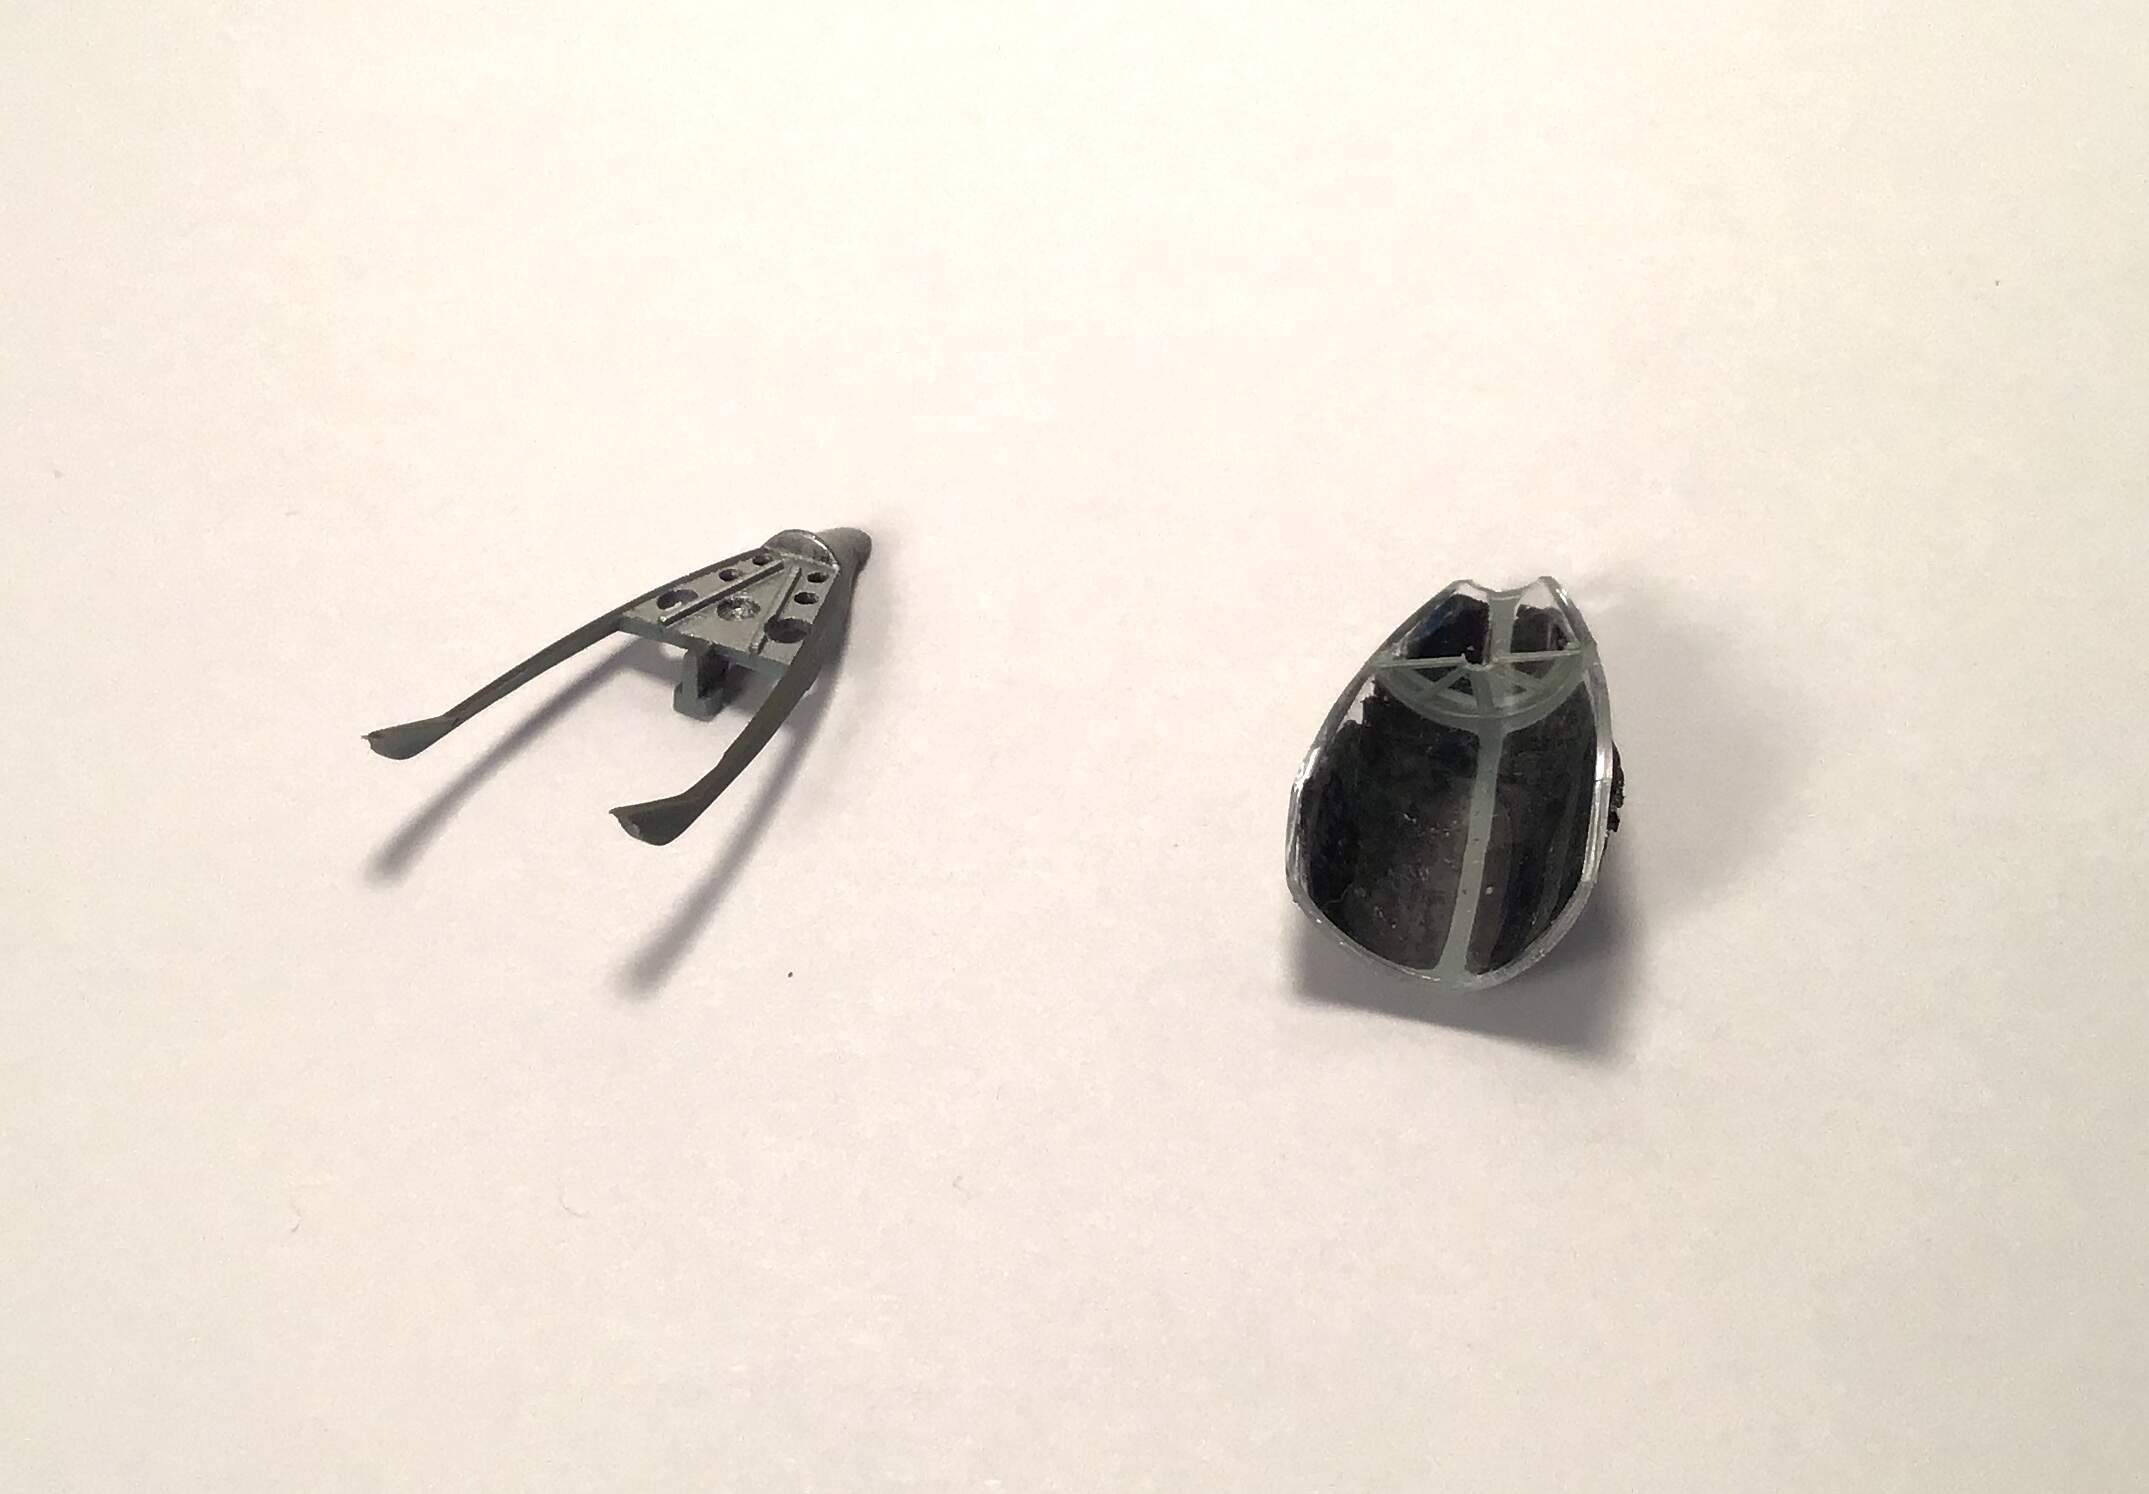
Conspicuous in its absence is the semicircular armored glass panel behind the pilots head in the canopy so I cut one out of clear styrene sheet and painted the framing on the back side and cemented it in the canopy. I also drilled the large lightening holes in the deck section of the canopy frame .
Thanks for looking- Richard
5 Likes
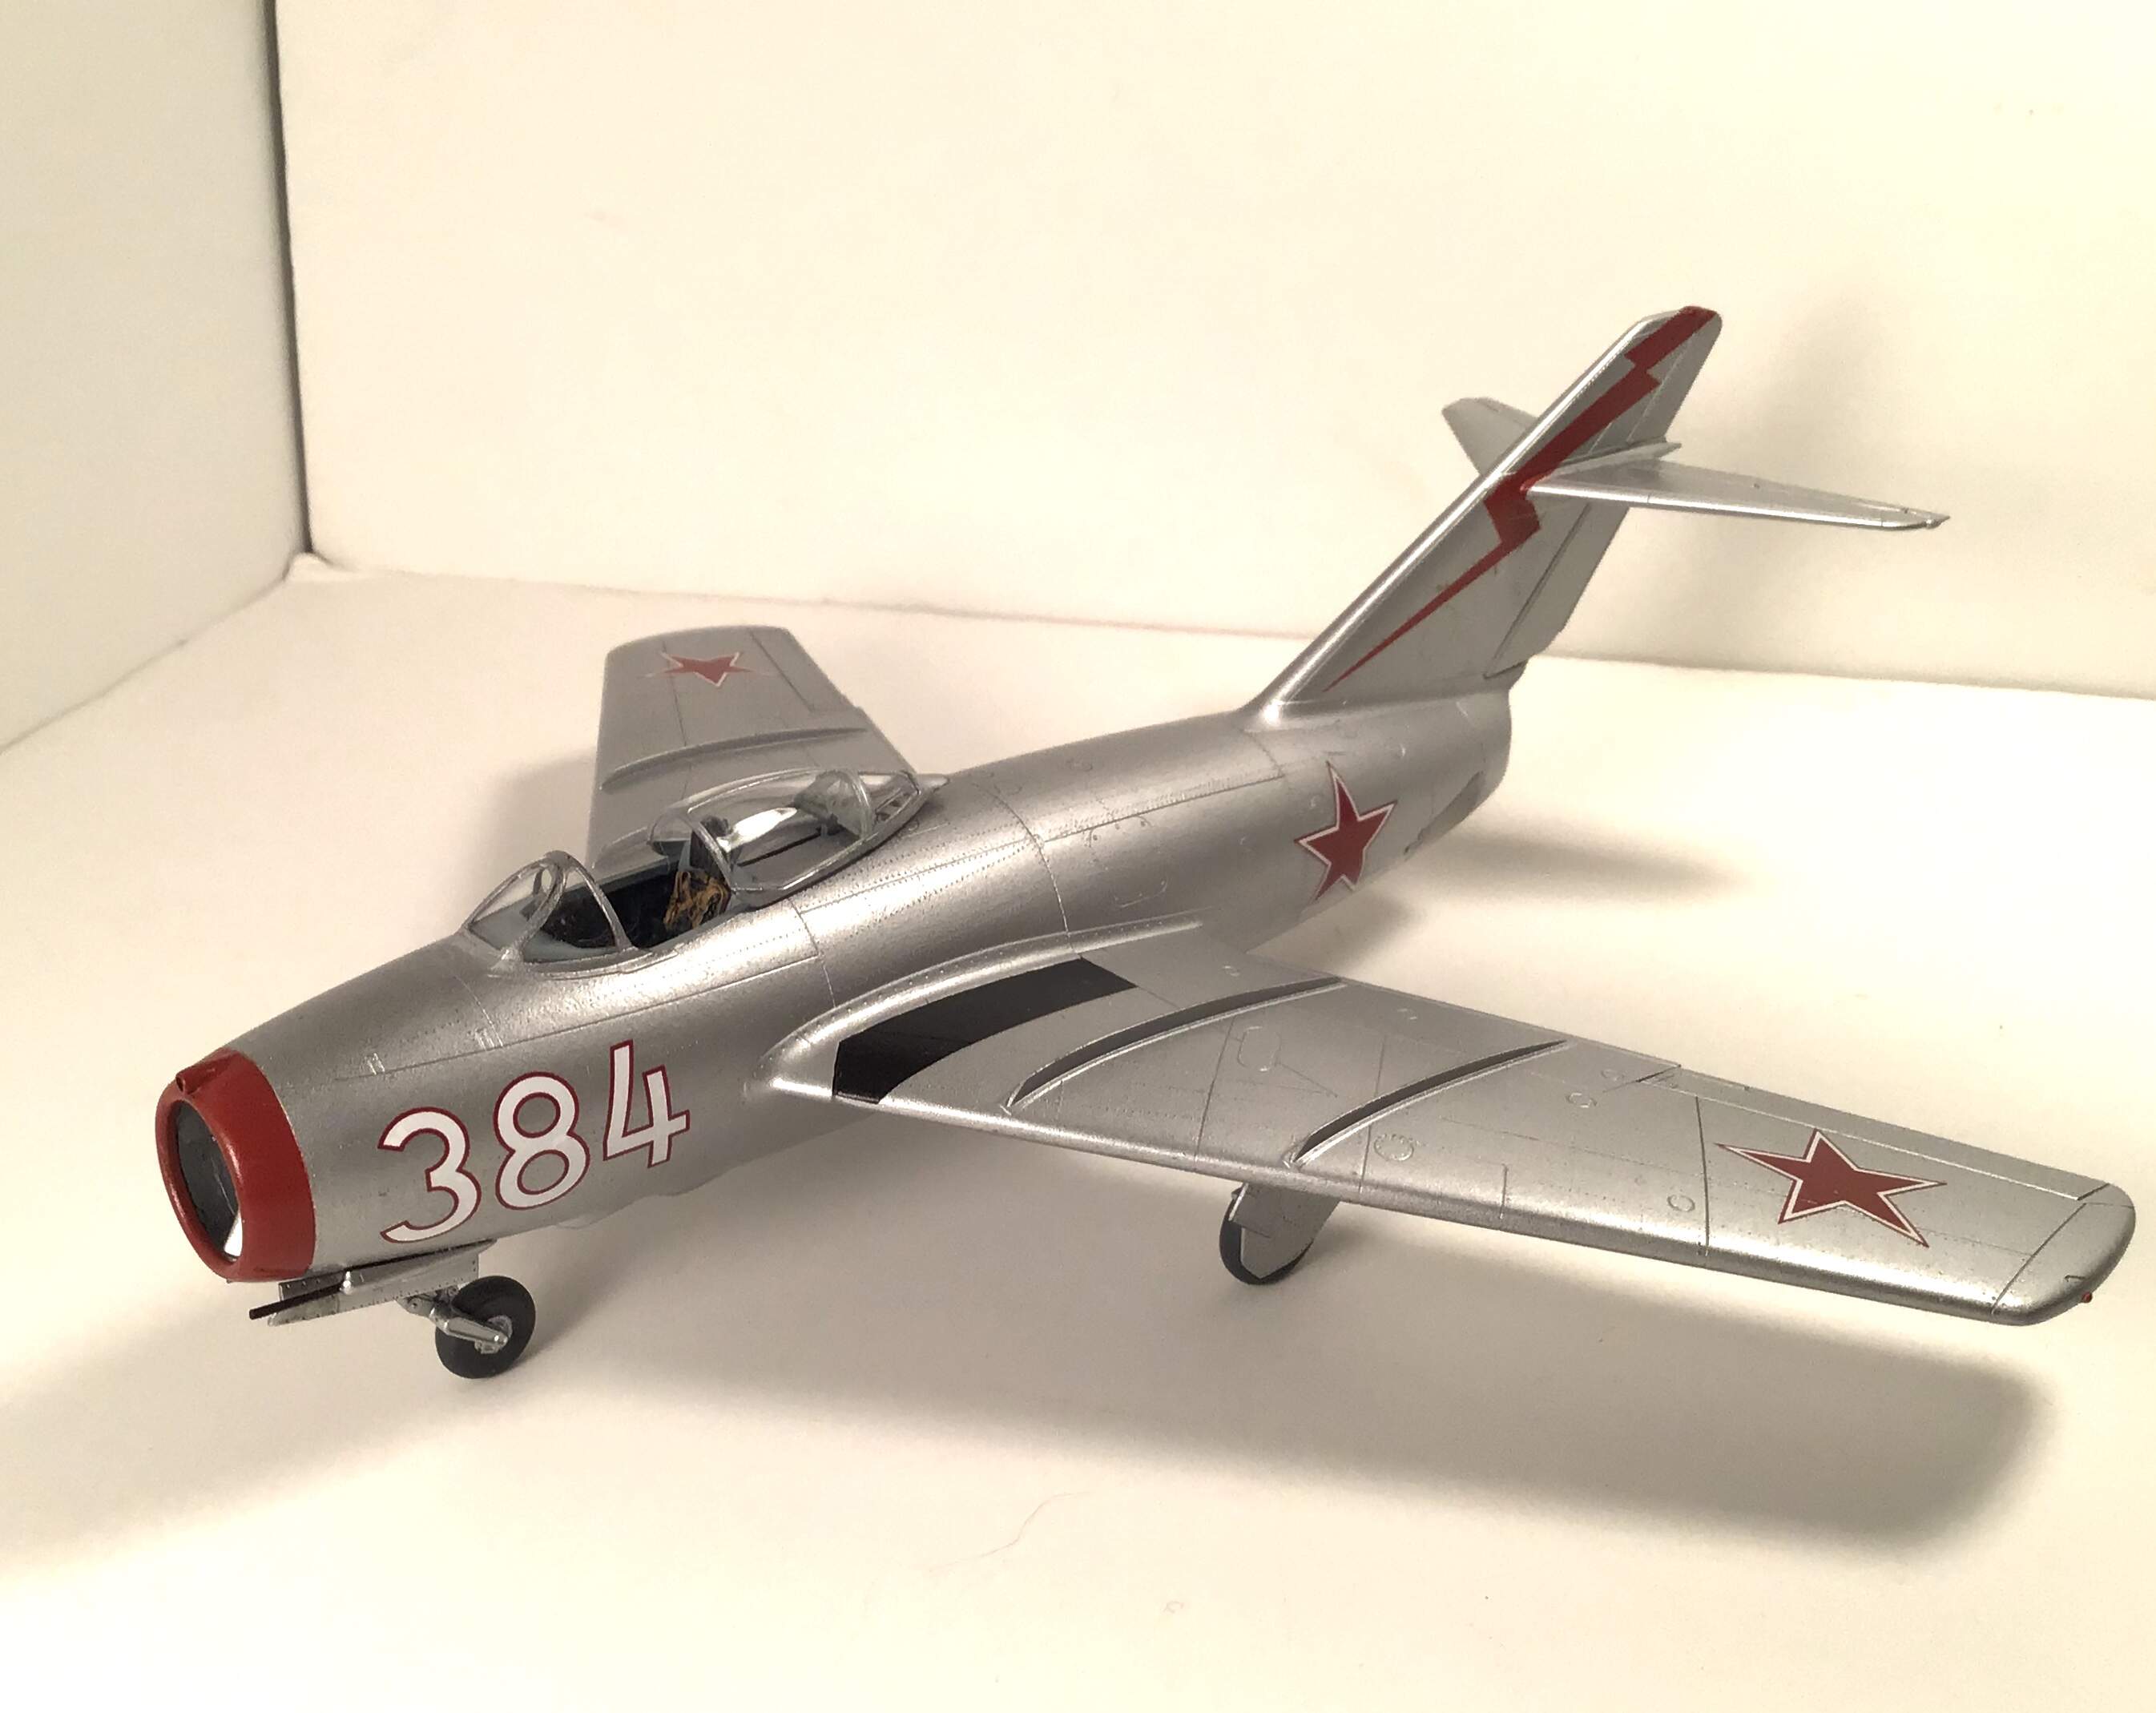
Calling this one done except for pitot and antenna mast - will add those later when new display cabinet is done . This started as an exercise in riveting and foil covering but in the end the necessity of having to do the rivets before foil left the problem of the foil minimizing the rivets , so it made sense to switch to paint.


5 Likes
The finished product looks great in paint, Richard!
Marty
Thanks Marty !