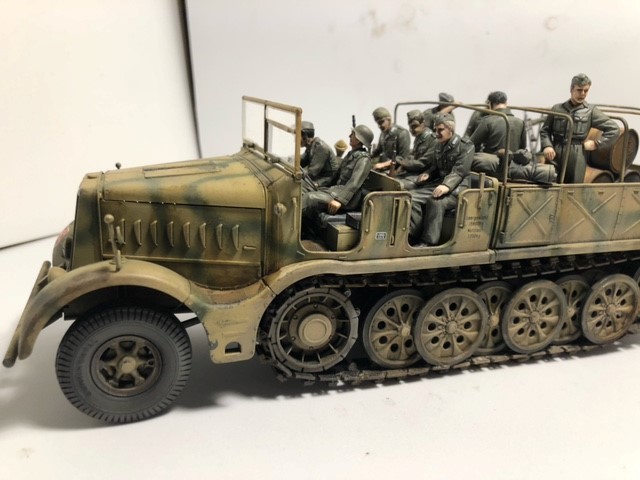
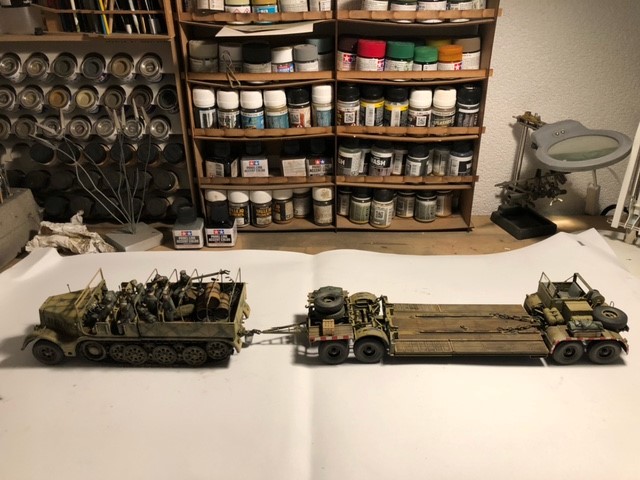
Calling finished on the Tamiya FAMO - build time 99 hours.
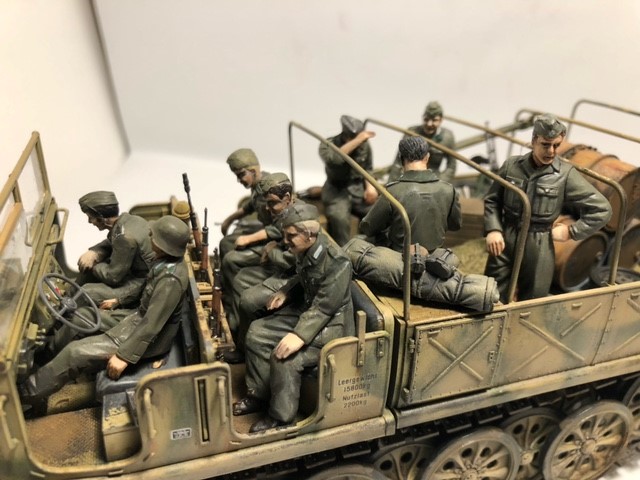
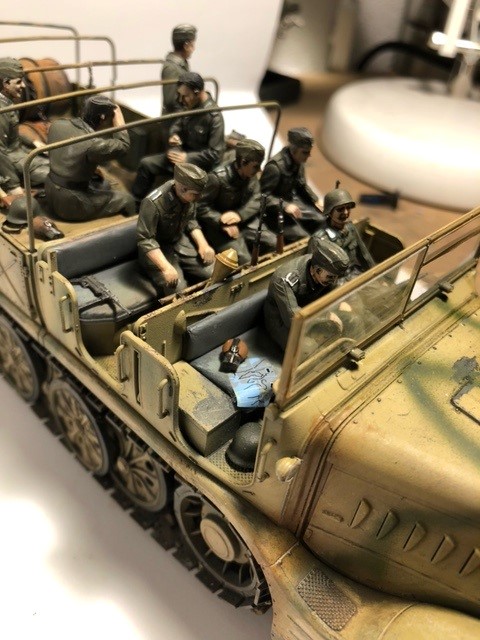
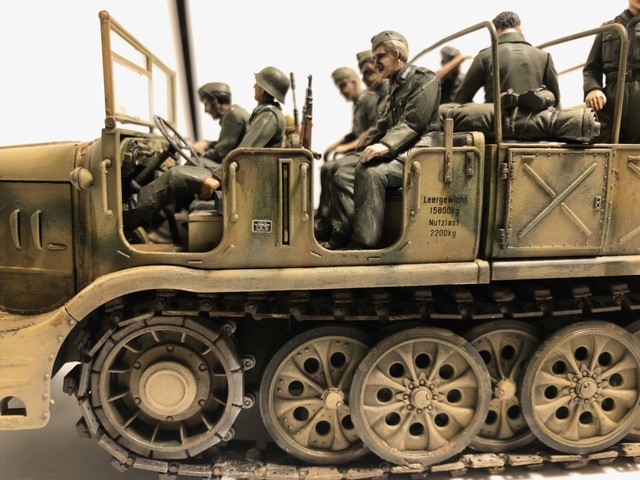
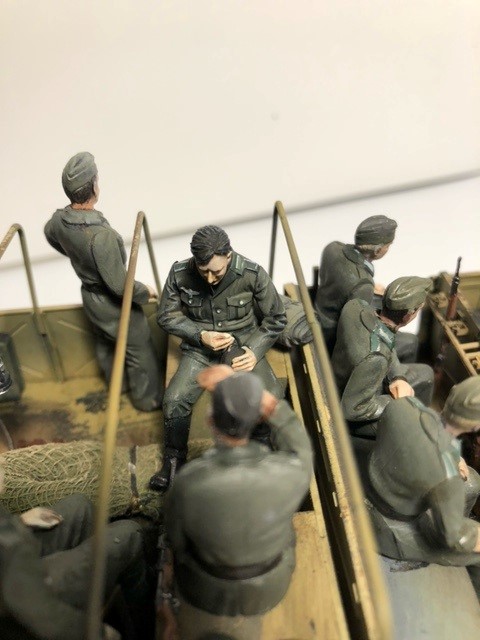
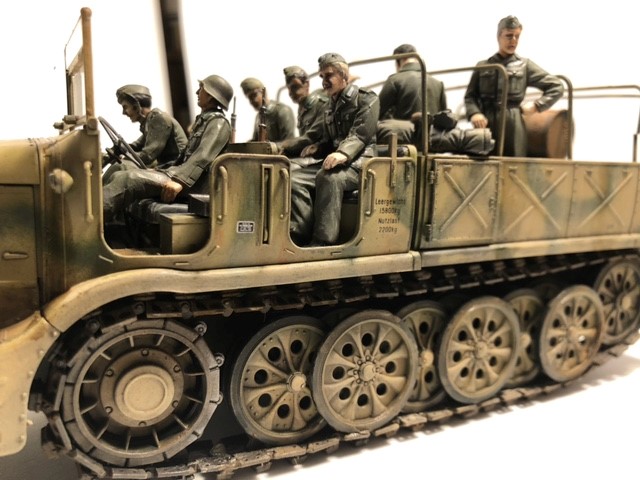
As you likely know, this FAMO kit with the Anhanger 116 trailer is widely regarded as Tamiya’s finest in this scale and I cannot argue with that. It is stunning. I admit I had high expectations but this absolutely blew them out of the park. If there is a weakness in the kit is is the rubber/vinyl tyres and the (relatively) dodgy crew figures but these can be overlooked. I’m not a good enough figure painter to start clamouring for better figures!
So here is my interpretation, in all her weathered, chipped, battered, scratched, abused and scraped glory. Not sure I’ve managed to do it justice but I gave it my best shot. This was shot with black MiG OneShot primer with VMA burnt umber and Mig Red Primer mix for preshading.
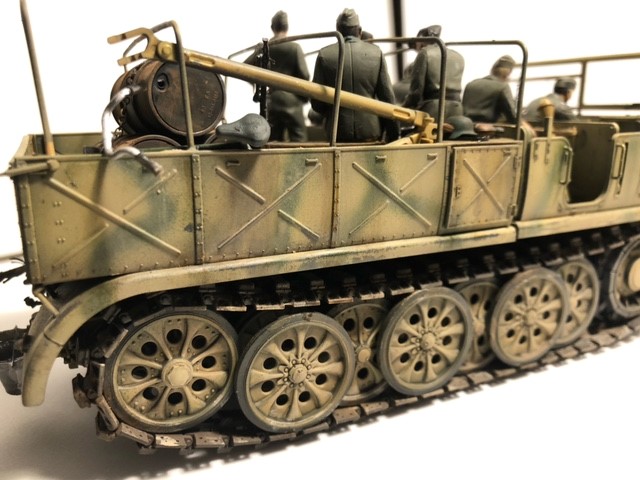
The base cost was VMA Dunkelgelb with four layers of highlighting - that got totally lost in the dust layers unfortunately. The camo was VMA dark green which in hindsight I think was too dark.
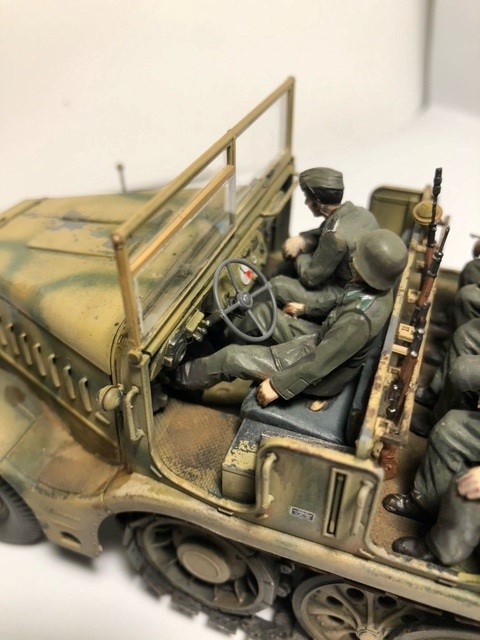
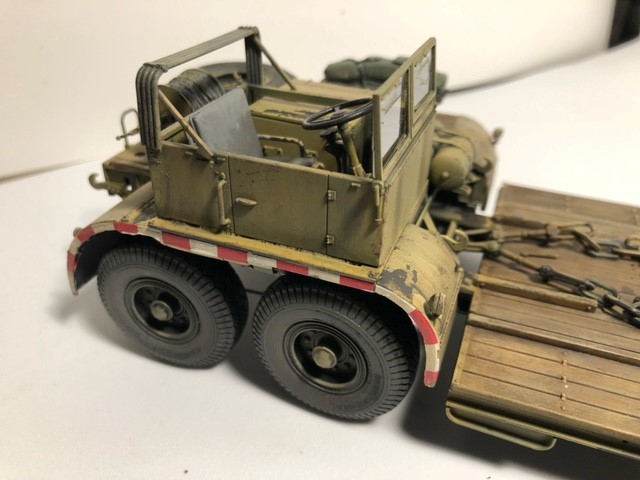
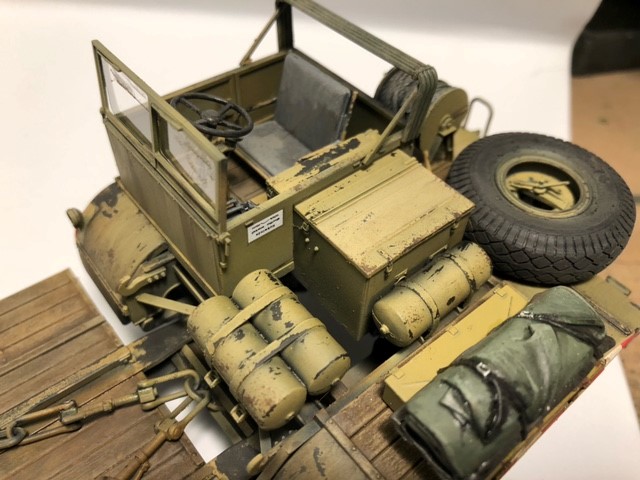
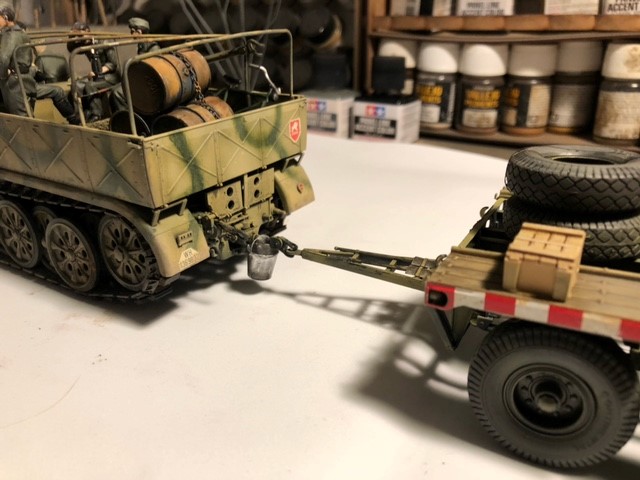
On the rear driver section I didn’t like the roof canopy thing in the kit so I scratched a folded roof canvas and I think it looks better, if not 100% true accurate to the real thing which should have the canopy offset from the back wall of the driver’s cabin. I dry fitted it there and it didnt look “right” so I took a semi-artistic flyer and placed it at the back. I think it looks better like that.
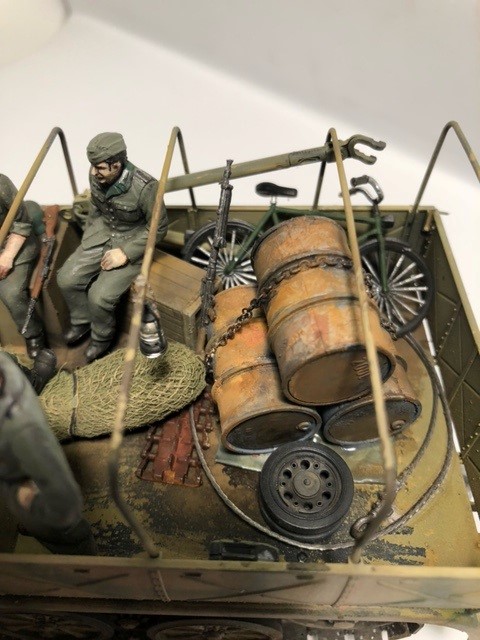
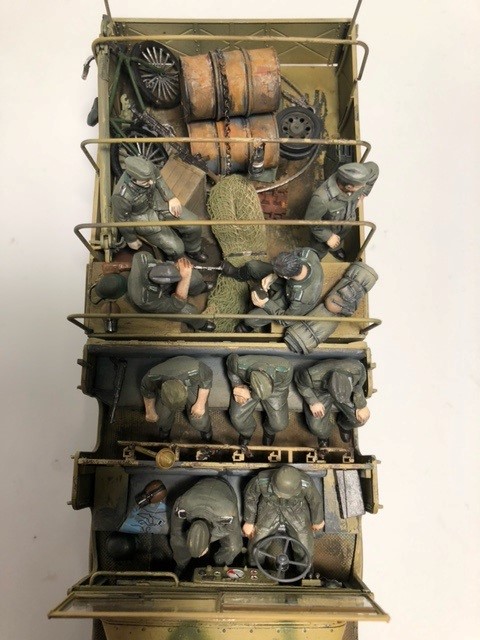
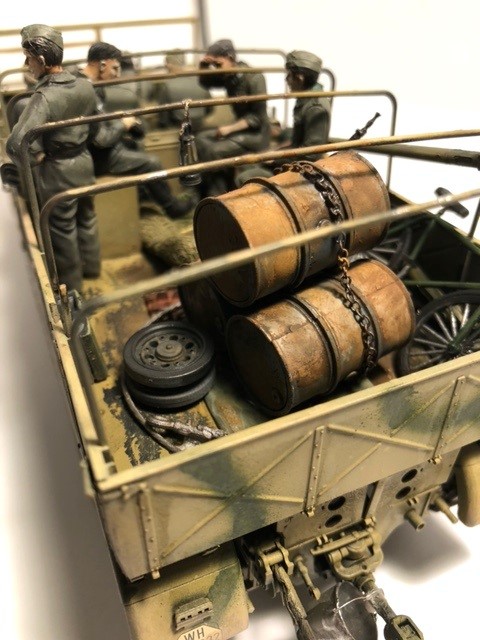
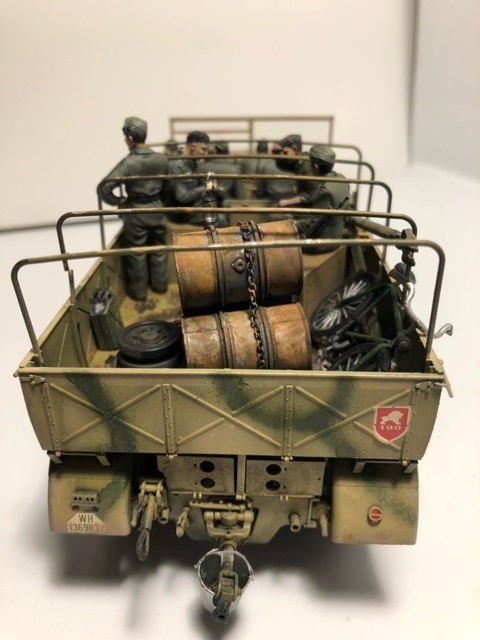
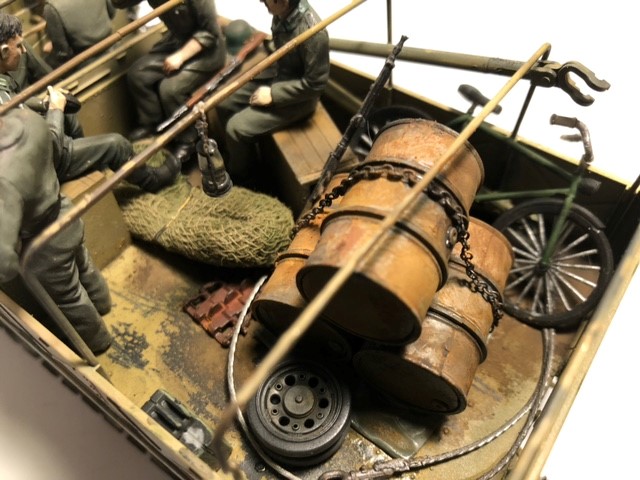
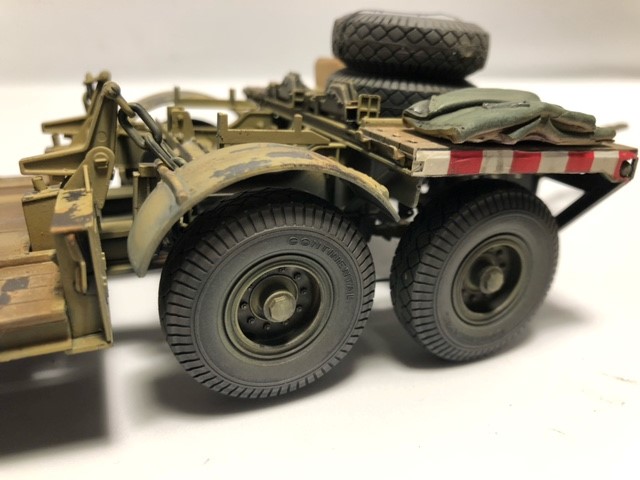
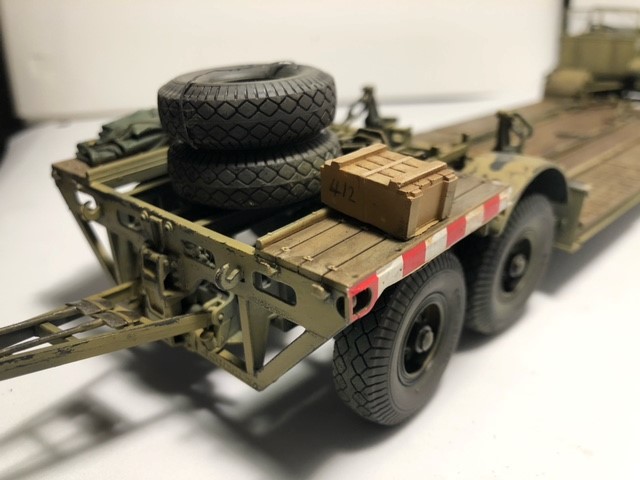
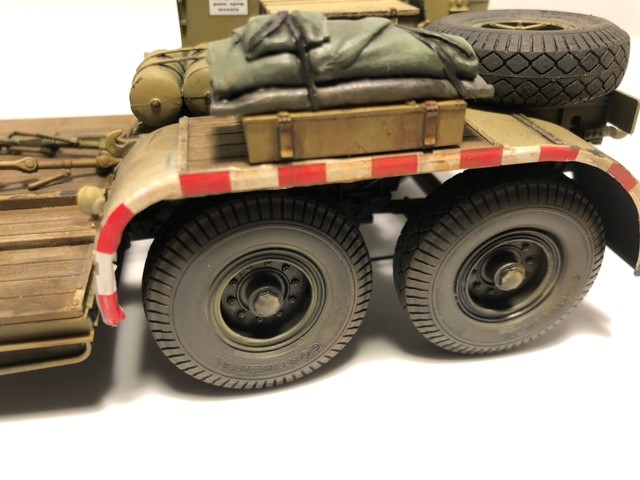
I also replaced the FAMO wheels with PanzerArt resin ones. I still think they look a bit clean (could do with a dust coloured wash I think) but I’m ok with them. Reasoning here is the dio this is going into is set in September 1944 in Sothern Holland and the FAMO will have been going around on paved roads and grassy areas with little mud as it was summer. So there is a heavy dust layer but only a little bit of mud on the running gear. The stowage and bike, lantern, etc just what I had in the parts box. I quite like the idea these guys had a whole cargo compartment full of random stuff they accumulated over time.
This is going in my big diorama as more or less the centerpiece and to quote Jaws - “we’re gonna need a bigger base!” - This thing is HUGE!
In the Dio it will have a broken down StuG III on the back and I’ll put a rear driver into the trailer steering compartment. The FAMO itself is stopped on the road while the guy stood up in the back of the cargo compartment speaks to an NCO in a Schwimmwagen coming the other way. The driver and the rest of the guys in the FAMO look a bit bored, clearly this conversation has gone on for long enough. The title of the dio is “HURRY UP, THE TOMMIES WILL BE HERE SOON” so this is an integral part of it.
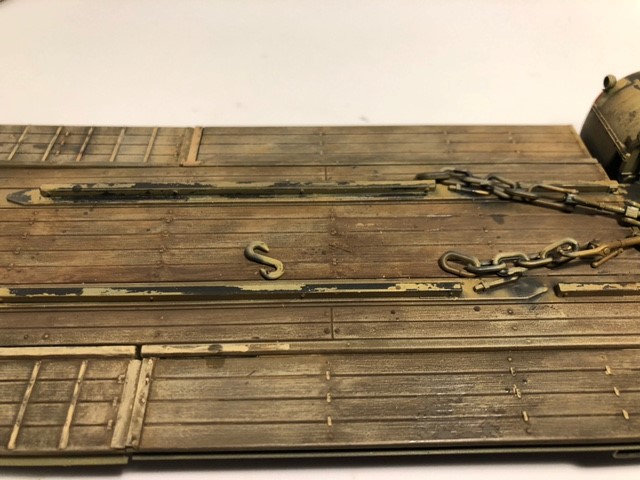
The FAMO (for me) is nothing special in the end result which is perhaps why I’ve gone the extra mile with the stowage and bits and pieces in the back, but the trailer I think is really dramatic and striking. I found the decals on the trailer section to be too large for the parts they were supposed to go on but I discovered (totally by accident) that if you very gently run the TETC brush applicator along the edge of the part where the excess decal overhangs from above it, it does a brilliant job of cutting away (dissolving!) the excess (and only the excess) and also wrapping the decal on the part very nicely. If you really gently “stab” the brush into the extremities you can actually chip the decals! Total accident (I was trying to get the decal on there really strongly so I could try to slice away the excess with a hobby blade) but a very cool thing to know.
Followers of my builds on my Insta will likely know I tend not to chip and scratch AFVs models as in WW2 they usually didn’t survive long enough to get chipped and worn paint like you see here. But the tank transport and recovery teams behind the lines will have had very worn and weathered equipment indeed and that’s why builds like this are great fun as you can really let yourself off the leash a bit. Is it too much? Maybe, but who can say?
I looked at a lot of pics online and the theme I came away with was that these vehicles were worked very hard indeed, were incredibly dusty and in most cases you can barely see the camo (if it was even painted at all), so I’ve tried to capture that as best I can.
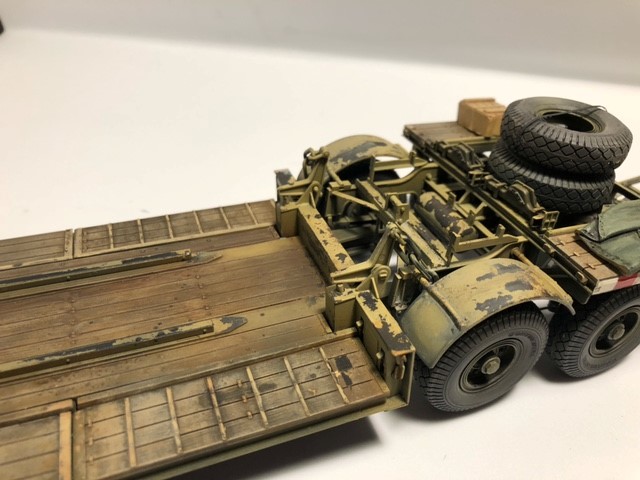
The wood on the trailer was a light brown base coat, then a series of washes and localized filters in black, different shades of brown, grey etc. Then distressed with a Buff drybrush to age it, then a satin coat. Once the varnish dried I ground in various oil paints in several different shades in different parts. I also spattered some oil marks and rust wash/streaks which were enamel based. Once done, I repainted the dunkelgelb areas with a lighter shade and washed around the edges with panel liner in dark brown so bring them out a bit. Some areas got some chipping too. I actually think it’s not aged enough and needs more spots and stains etc. looks too uniform to me. But it’ll do. I figure you aren’t going to see much of it once the StuG is on the back  the oils really make it pop. You can see about six different shades of grey and yellow and brown in there. Thing I like about it is you can put loads on then use a brush dipped in thinner to take it down so it’s never over-done. Oils are a new thing for me, I’ve only incorporated them into my last two builds. I’m still learning a lot - I only started modeling in September 2020.
It is always the case that you can only notice the problems with a build once you see the pictures online. In this case I see one of the roof canopy supports on the left side of the FAMO has snapped which is an easy fix and the rear trailer number plate has started to come away as two coats of MarkFit Set weren’t enough, clearly hahahaha. ![]() I am also promising myself to take a lot more care on seam lines on the figures from now on as you only really see the seams when they are already in the model. I don’t know why that is, but it is frustrating.
I am also promising myself to take a lot more care on seam lines on the figures from now on as you only really see the seams when they are already in the model. I don’t know why that is, but it is frustrating.
Other than that I would love the benefit of your feedback on areas where I can improve. I wont get better otherwise!
Next up is the AFV Club Bussing Nag crane truck and finishing the Miniart Werkstattkraftwagen and the Takom Chieftain Mk10 for a UK Group build on FB. Wish me luck!