Speaking of which, this thread from last year has a lot of good info in it.
1 Like
Thanks for the link 18B. Those photos will come in very handy. Very much appreciated sir!
Back in the saddle on this one today
I added the small bits to the rear of the hull

and began adding the small bits to the front of the hull

Not much longer until hull construction is done…
6 Likes
Still like what you’ve done very much. Would you consider a little extra detail where the rear fender braces meet the hull? And the front ones with the turnbuckles aren’t much better.

2 Likes
Well that looks like a proper attachment point. I might be able to come up with something to make it look more like that anchor point.
I finally finished all the basic construction on the hull. It was pointed out to me above that the hull attachment point for the rear fender braces was inaccurate. So I modified them to look more like the real thing.


And I added all of the little bits to the front of the hull

Now I just need to add the cast armor texturing and casting marks to the hull
10 Likes
Looking really good!
Coming along nicely. Good job.
Ezra and Gino, thank you. It’s good to have this one progressing again.
This is good stuff! Virtually a tutorial on how to get the best from what is still a very good kit.
1 Like
Thank you Brian. It is indeed a very solid base kit OOB. With a little more TLC here and there, it can really shine. When some folks badmouth Italeri kits, they’ve obviously never built kits like this one or the Leopard 1A4 (much nicer than Tamiyas kit of the same subject and vintage). Pretty good work on their part from that era.
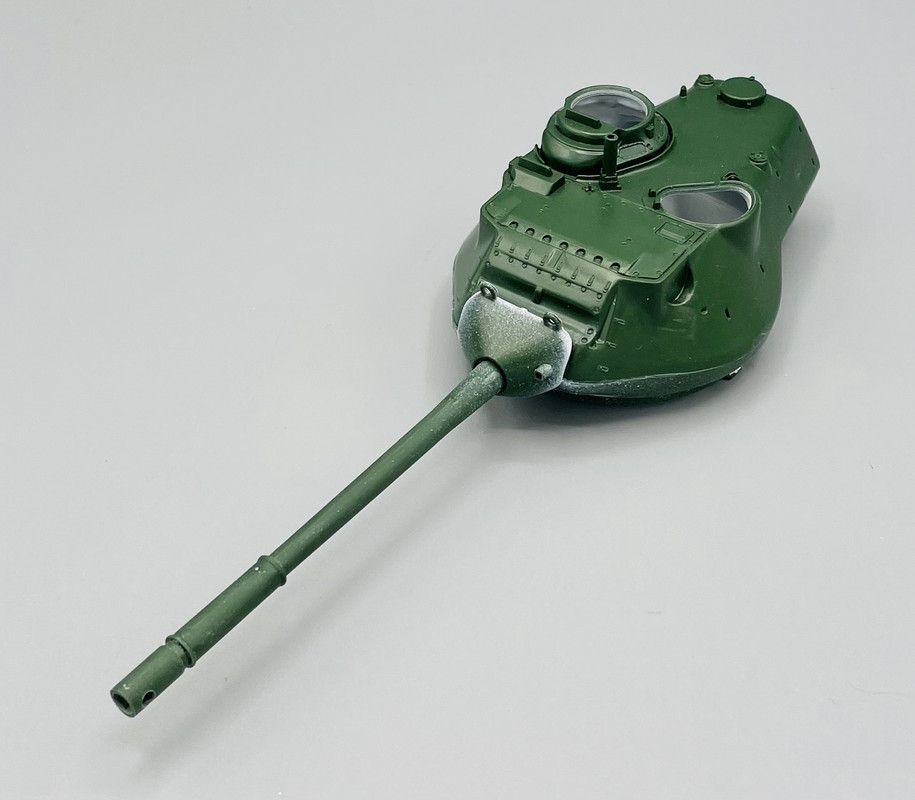
Small progress on the turret. Over the past few days I assembled the main gun, sanded the seams smooth then installed it into the turret bottom

And today I airbrushed the turret interior white…

I just need to paint the breech block steel, sand off the paint on the surfaces to be glued, and assemble the turret halves… then this will start looking like a TANK!
5 Likes
That was such a fun kit, it and the M42. I’ve bought a few Renwals for nostalgia.
Those are his??? I’ve looked at them and thinking of ordering some.
Yes, they are his.
Well, I just had to forge ahead this morning…
Breech block painted steel. Not sure if it’s accurate or not for the M47, but I like the look, and I’ve seen it before on other types. Besides, the turret hatches will be closed and no one will see it…

Then I glued the upper and lower turret halves together
and well, I just had to fit it on the hull

Now it looks like a tank!
Next up, adding all the little bits to the turret before the cast armor texturing
8 Likes
Looking great dude!
Ditto!
Armor texture is my fav so cant wait to see it applied/
Thanks guys! Ezra, I’m looking forward to adding the armor texture on my next update after this.
So more work on the turret this week. Firstly I puttied up the points where the cargo rails attach, since I won’t be using the kit parts. I also added some very thin rod styrene along the seam line where the turret halves go together to replicate the weld seam on the real turret. Today I sanded the putty smooth and using some “hotter” plastic cement and my finger nail to texture the weld seam bead.


11 Likes
that is coming together nice and neat. I have one of these Tamiya Italeri amalgamations in the stash, so I’m watching this with real interest, Do Eduard offer a decent PE set for the exterior, like the turn buckles on the fenders?