So, after letting the dust settle and any vitriol abate, I thought I would chime in once more.
First, I was VERY happy to see so many scratch builders and their works. It truly seems i may have been premature in labeling the death of scratch-building.
For, me, I am like some of those who responded, I am OLD SCHOOL. Now is that a bad thing ?? NO, but it has and will shape my views. I began by paying the lofty sum of 6.75usd for a Monogram and or Tamiya Armour kit way back in the 70’s. Meaning there was NOTHING but what the builder created, or kit bashed to add to a build. Move ahead pert near 50 years, and it feels like everything and anything you want to add to your build is available. tracks, accessories, fuel cans, boxes PE this and PE that. Is all this bad, NO. It is the new norm, as well as paying 75.00 to 100.00usd for a kit.
Like many old farts I simply miss the era where a builder needed to think outside the box and scratch, good bad or indifferent, the world moved on.
Sometimes the builder will still HAVE to do it ALL by himself,
in some cases there just is no kit at all and absolutely
no aftermarket parts for it.
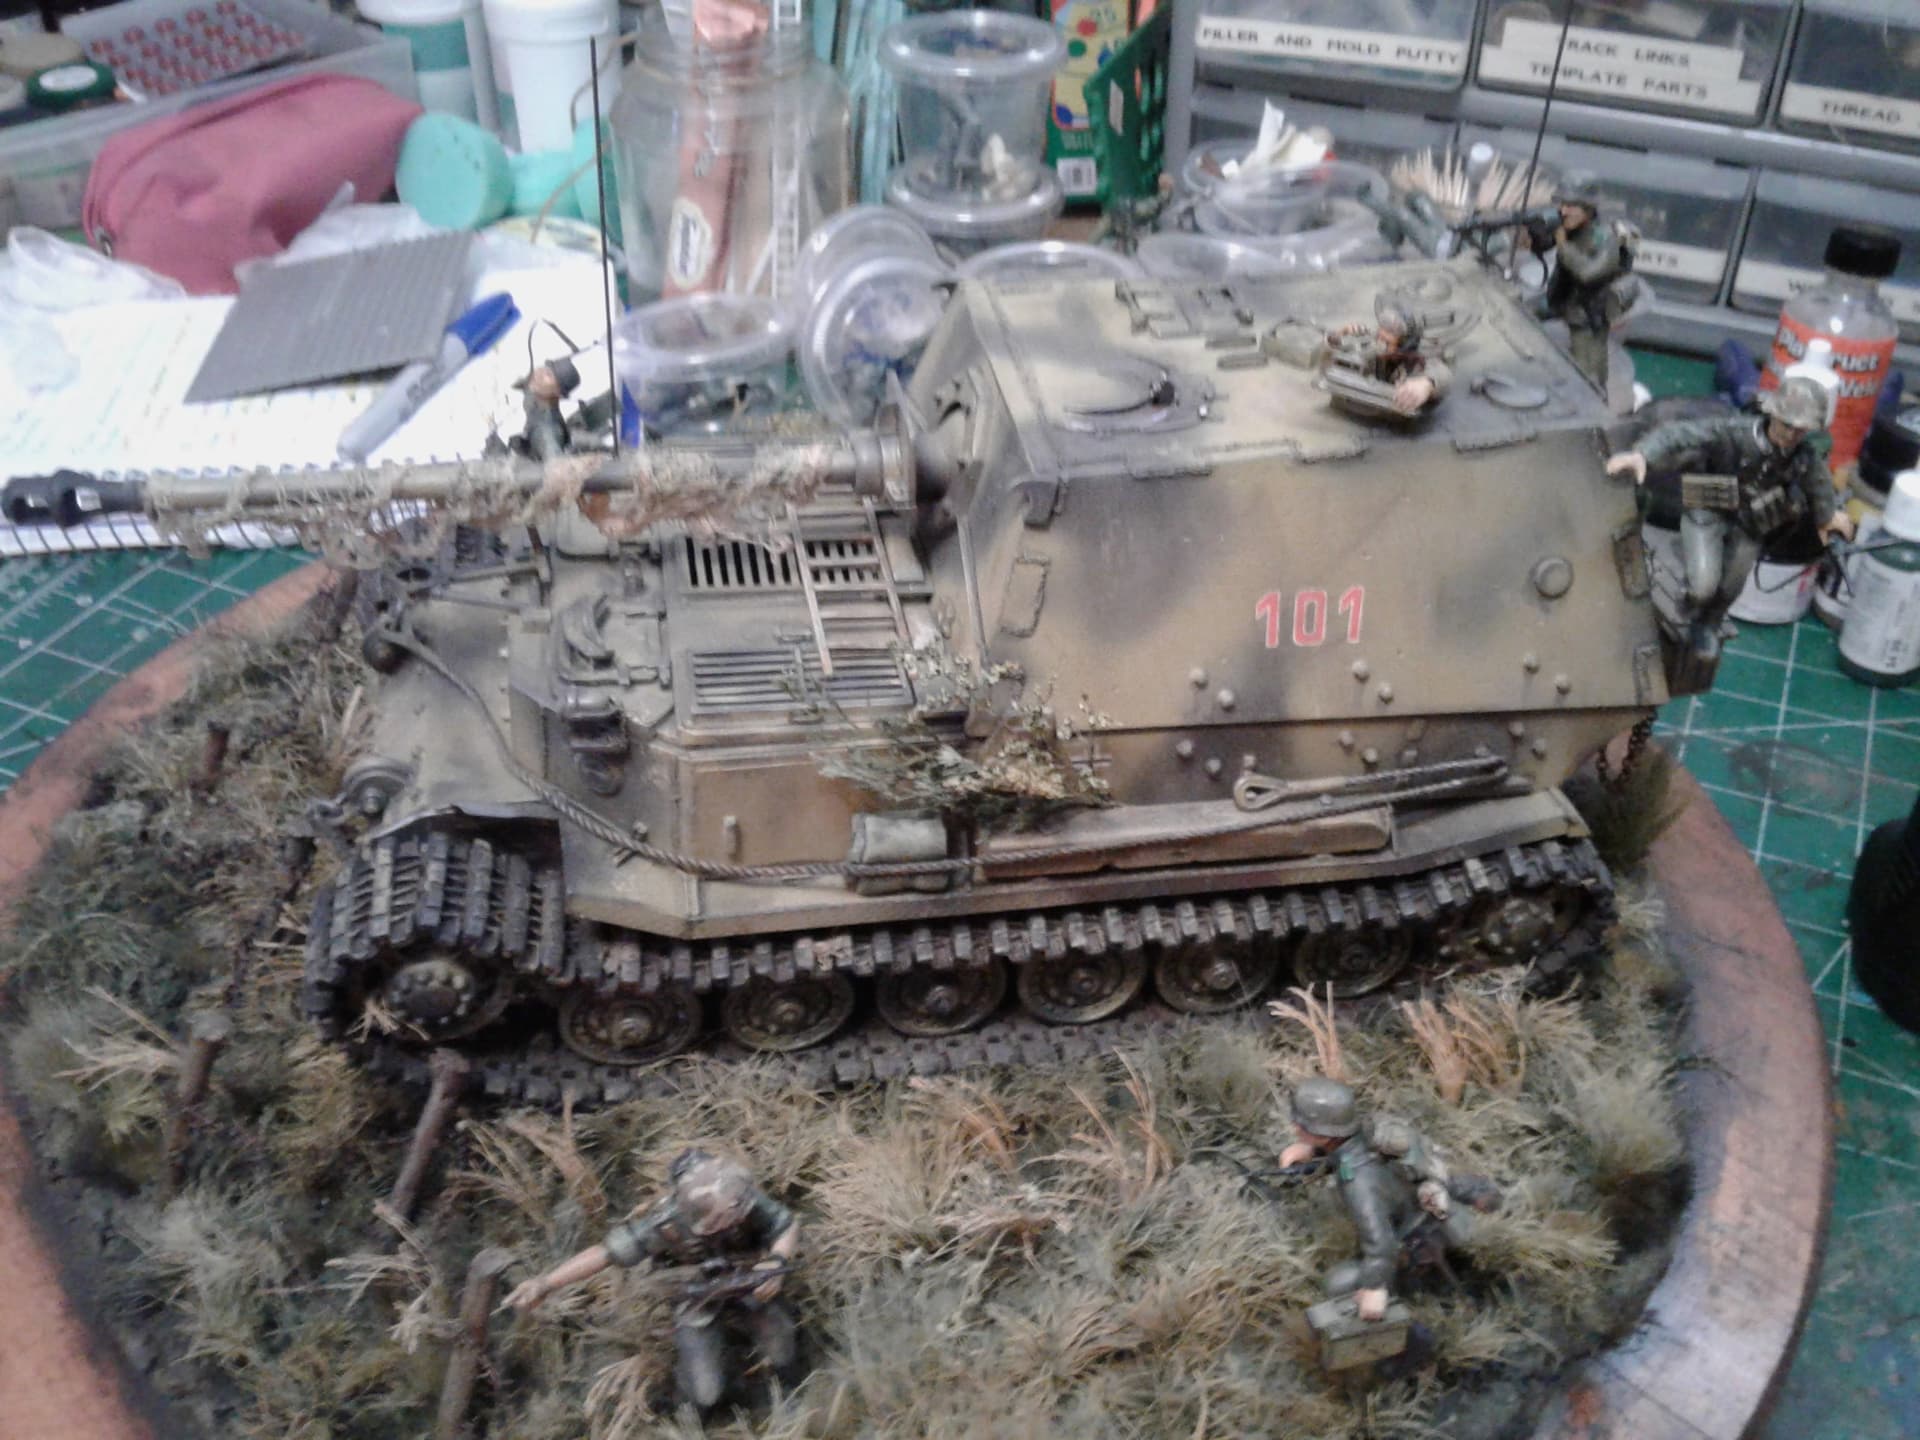
OCD in regard to model building? perhaps my research starts here on kitmaker forum? ![]()
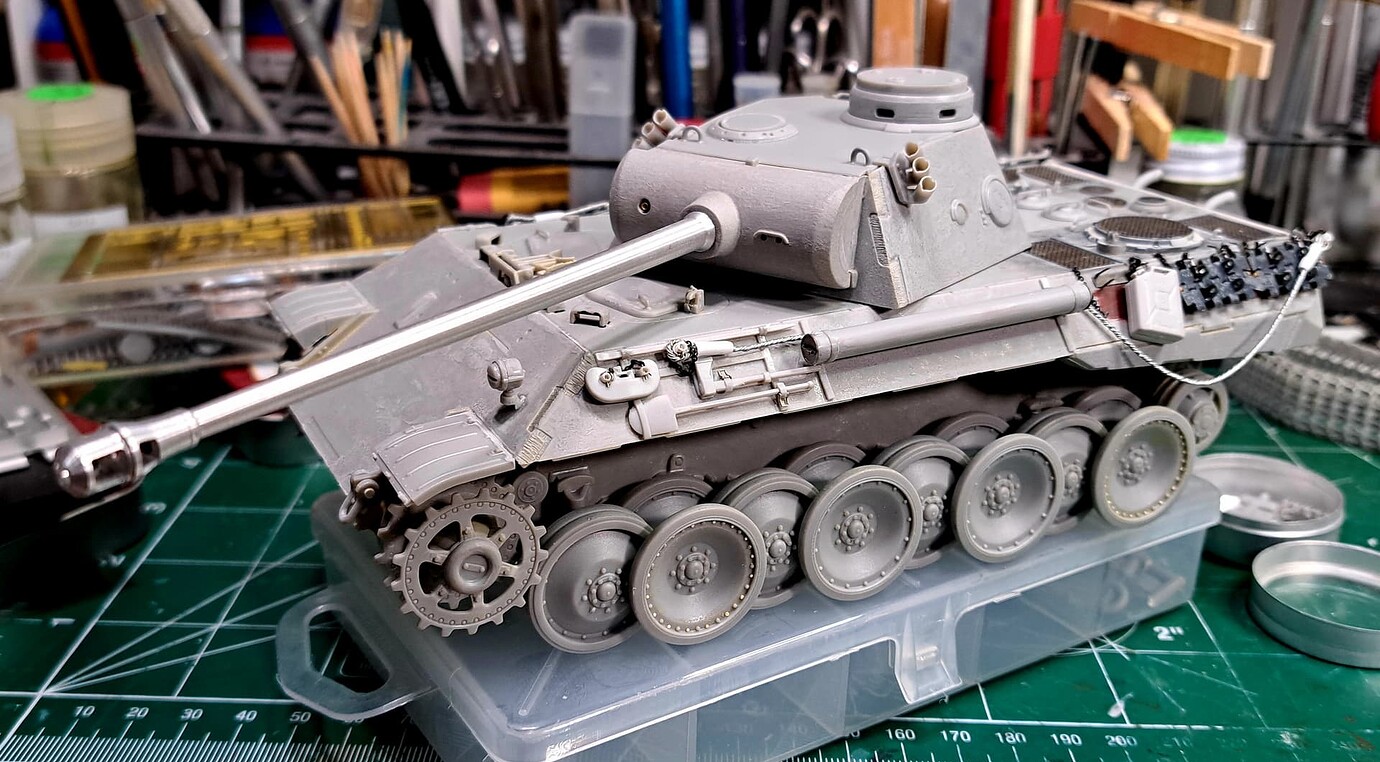
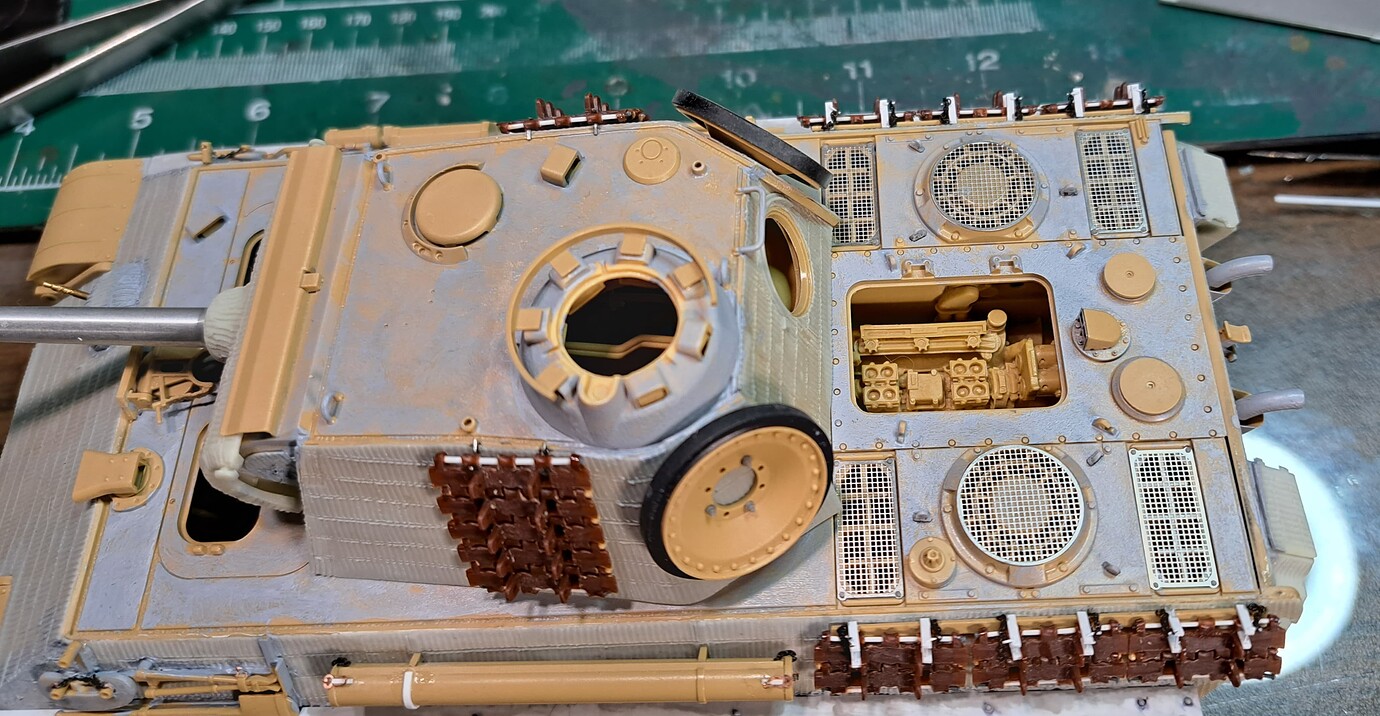
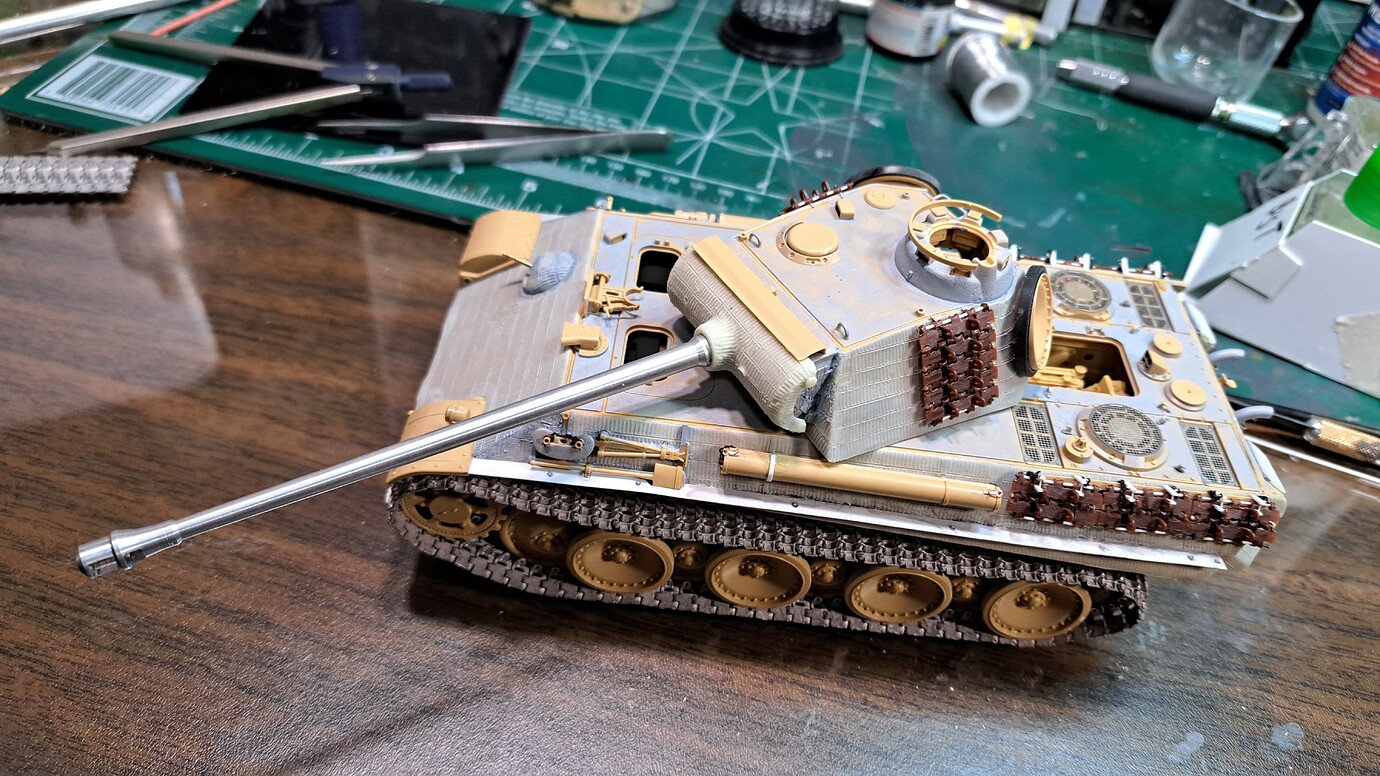
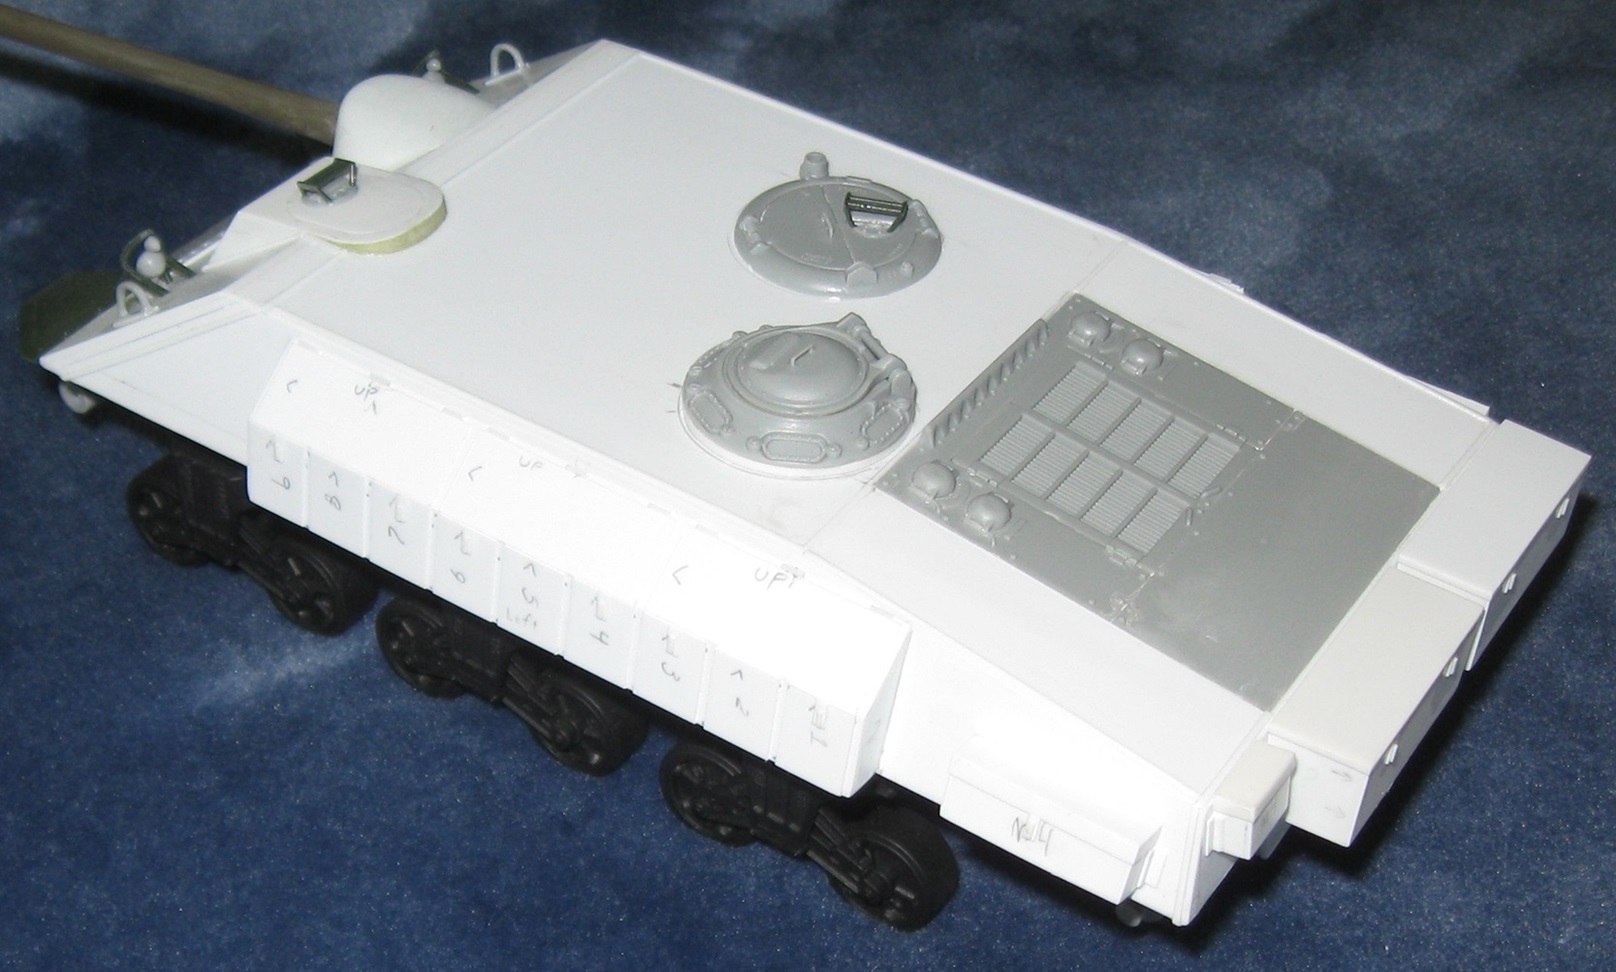
With 13.6 % kit parts, this Italeri Panther felt like a scratch build even with a blend of aftermarket goodies & scratch work.

More old school, 2002 Dragon Panther D.
Kicking it like it’s 1995, old school Tamiya Panther G with same era aftermarket.
The old 1970’s era Tamiya Tiger 1 got a lot of old skool love as well plus Model-Kasten goodies & OTM PE.

^^^^My old school projects in the last year, I’m tired of old school for a few months! (j/k)
The real benefits in my opinion of doing an occasional old school project is it helps hone skills and makes one really appreciate the awesome kits we have today like Ryefield Model’s KV-1 1942.


No death to scratch building. But an ever increased opportunity for those either uninterested or unable to fabricate on their own to buy aftermarket details.
One might argue this all started with decals. So much easier than making stencils or hand painting.
I don’t compete so I’m not looking for a level playing field.
For me and ME alone, when I say scratch-building, I mean just that. Armour Buff’s Panther is darn close. LOADS of After-market, but very little scratch, (NO that’s not a shot). Here is what I mean by scratch, from scratch, 100 percent plastic, metal, wood and bits. No she isn’t perfect, but she is 100 percent scratch

built


You know, @Whitney_Foreman, the point you raise is certainly a good one. I build quite a bit of what I consider to be scratch work, but it could also be described as kitbashing, or base model plus varying degrees of changes. I enjoy doing it, and will continue to do so.
In regard to degree or percentage of scratch - well, I don’t know how to assign a blanket percentage.
Some projects, like this Irish Army Ranger truck - well, I cut up what was once a 1/24 scale Ford F-350 crewcab, and made it into something else - a two door version, with no roof, rebuilt suspension, new cab interior, gunner’s turret, and some other parts:
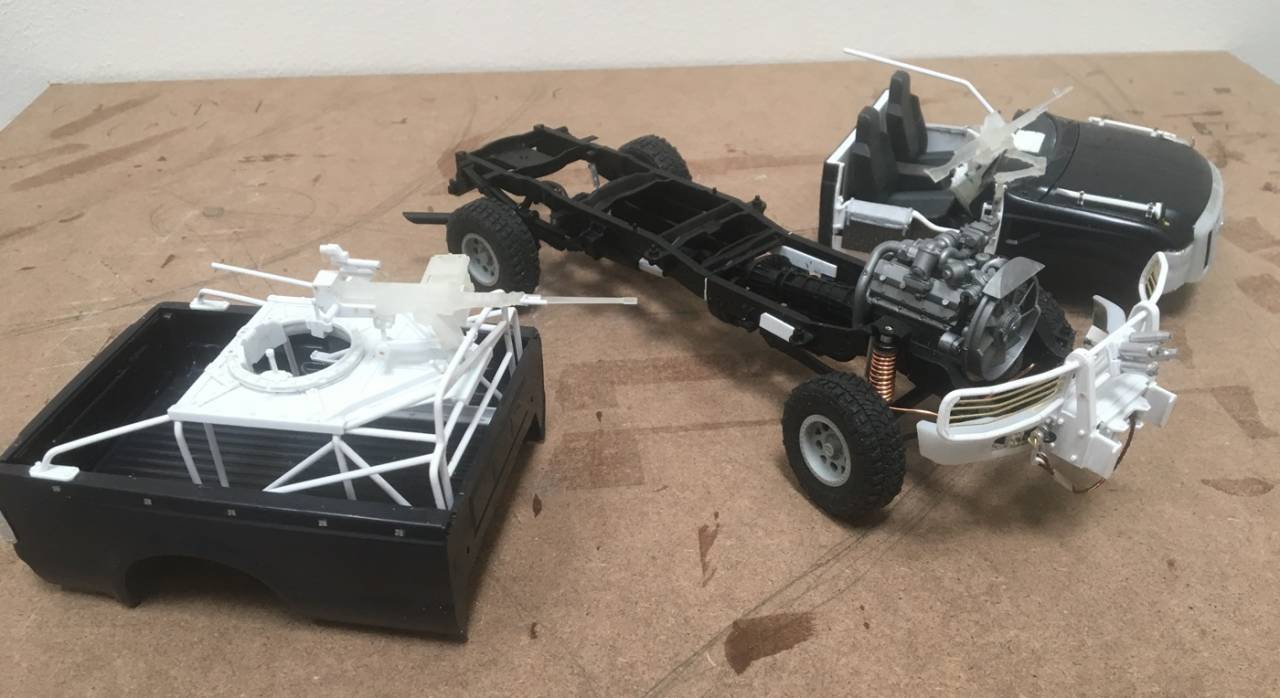
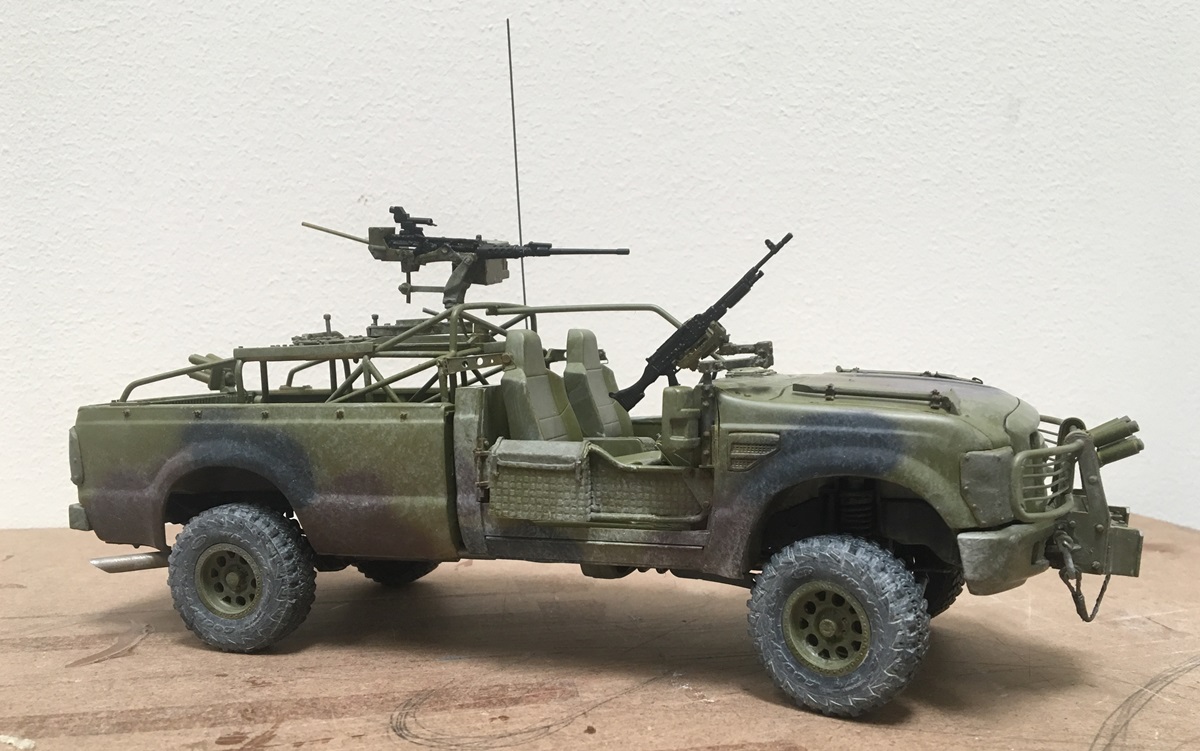
So, not full scratch, but some big changes.
For this, I started with the old AMT Cat D8 and changed it to look like a modern Cat D7R:
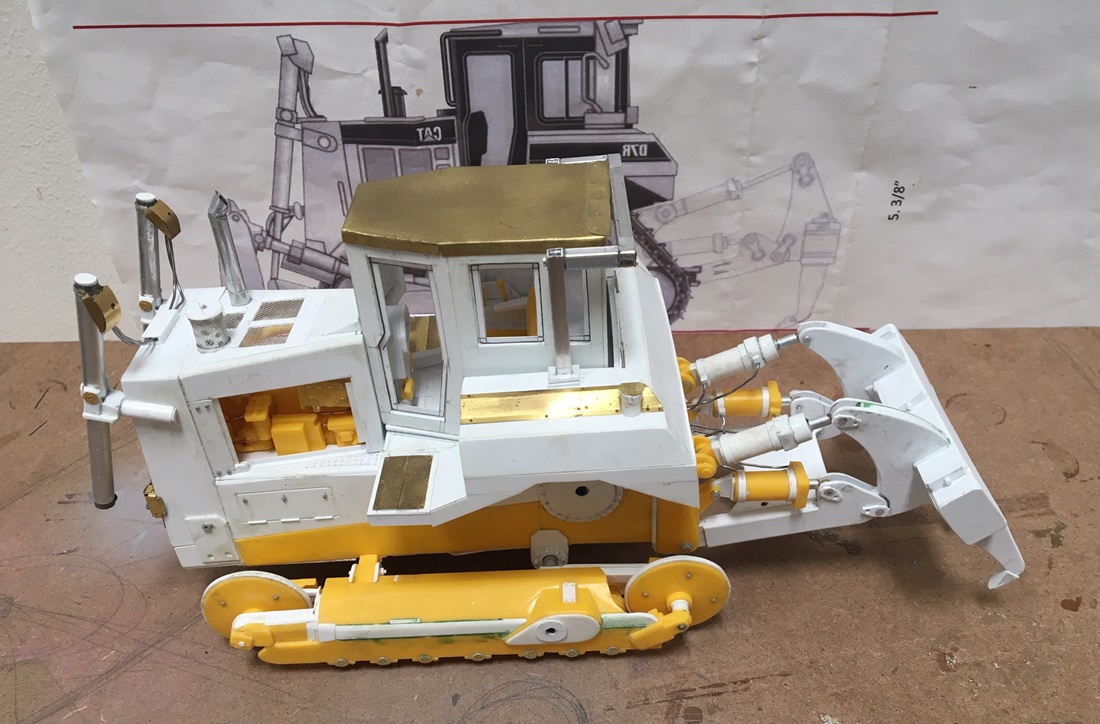
As you can see, I kept some sections of the chassis and track rails, tracks, and basic engine, but also reworked the chassis and rails, made a new body, ripper, and final drive to get this:

Not a scratch build, but not out of box with extra parts either.
I built this truck a few years ago, coincidentally, as part of a scratch build campaign on the old Armorama forums! ![]()
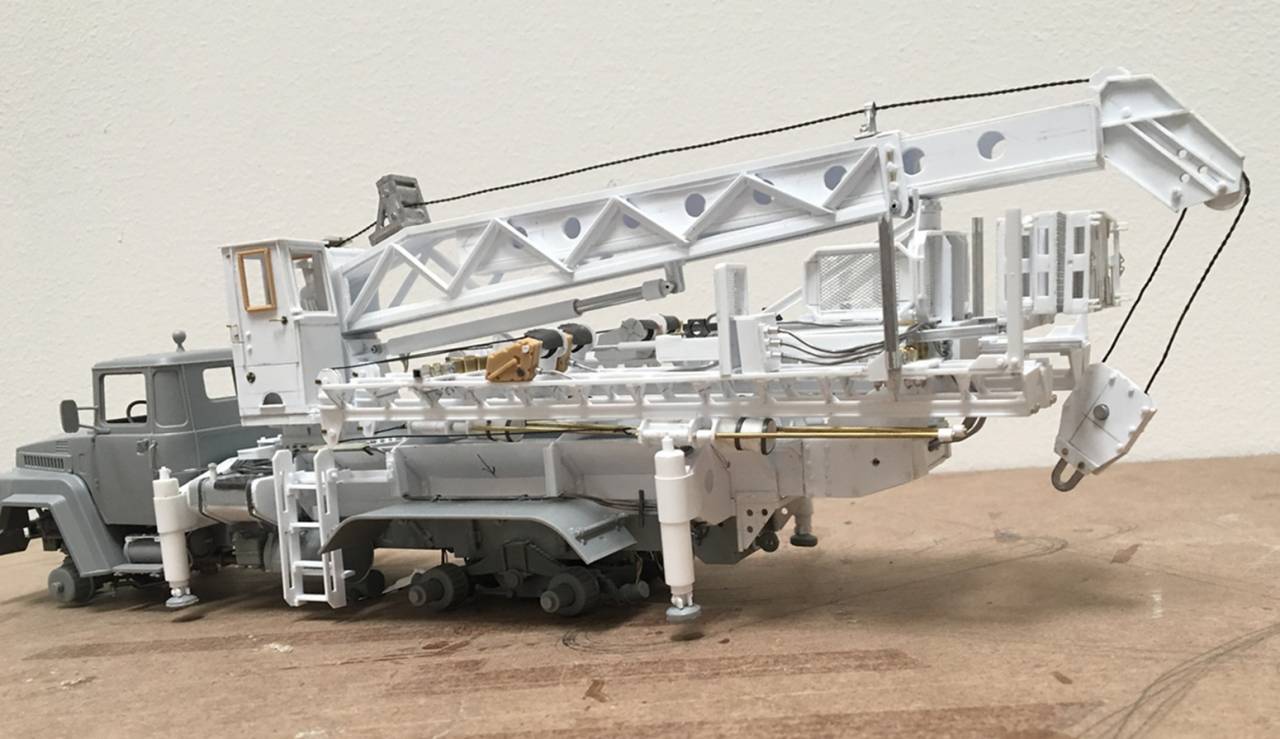
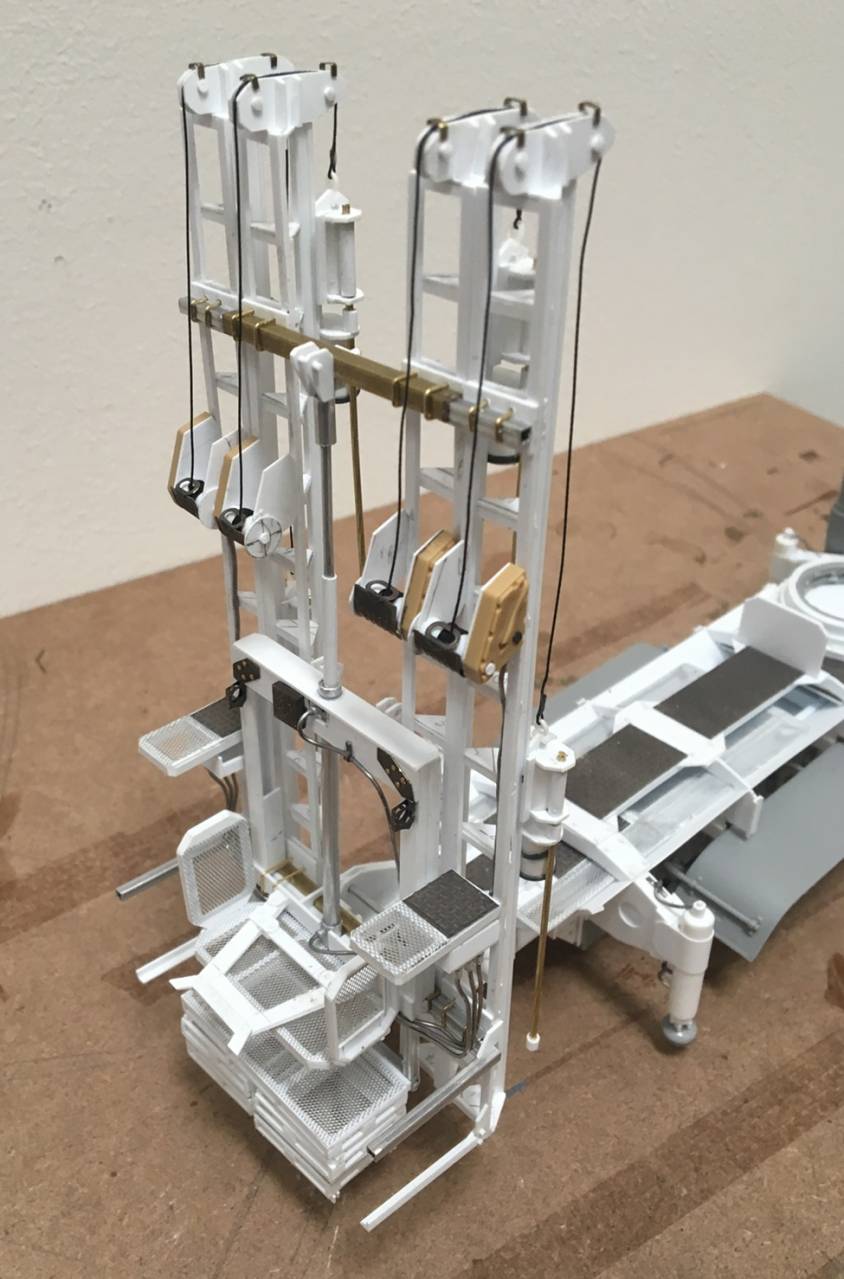
It’s a 1/35 Kraz tractor with a pile driver - and when done:
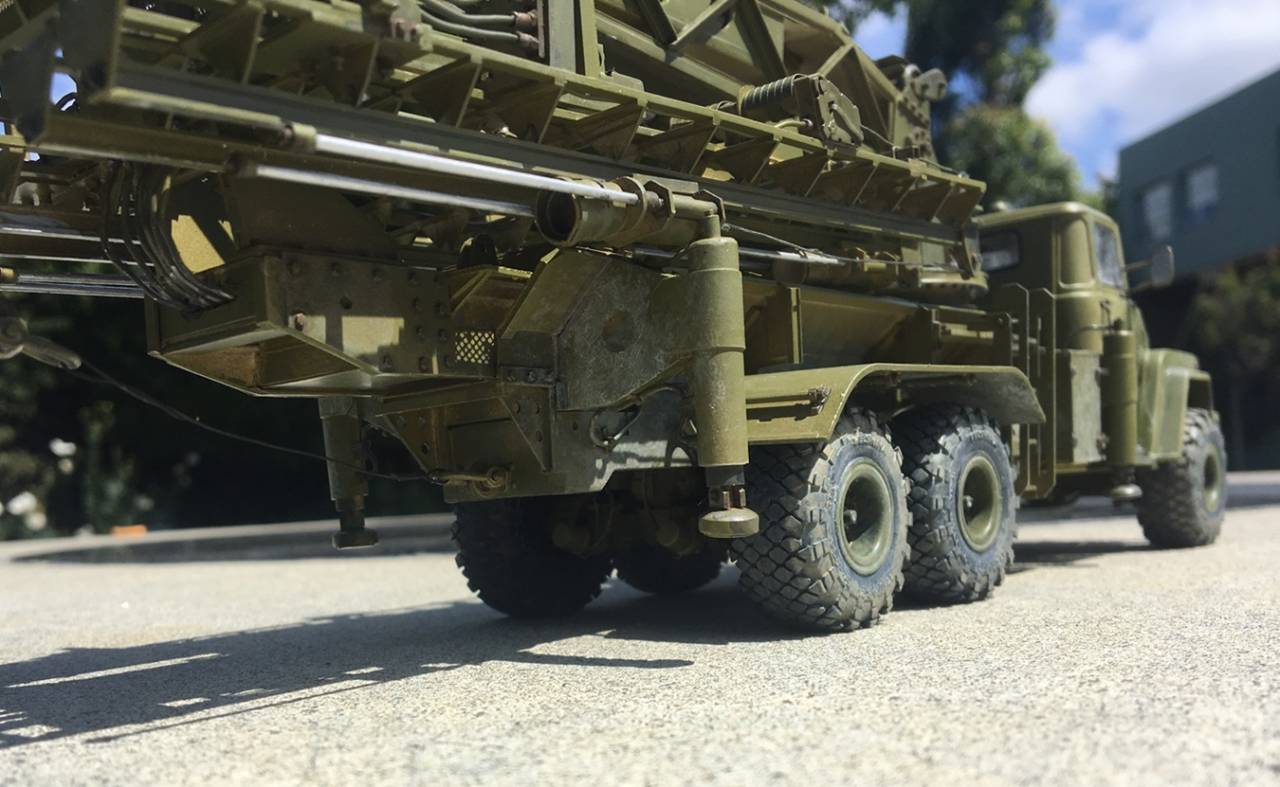
So another not scratch built, but also not a kit.
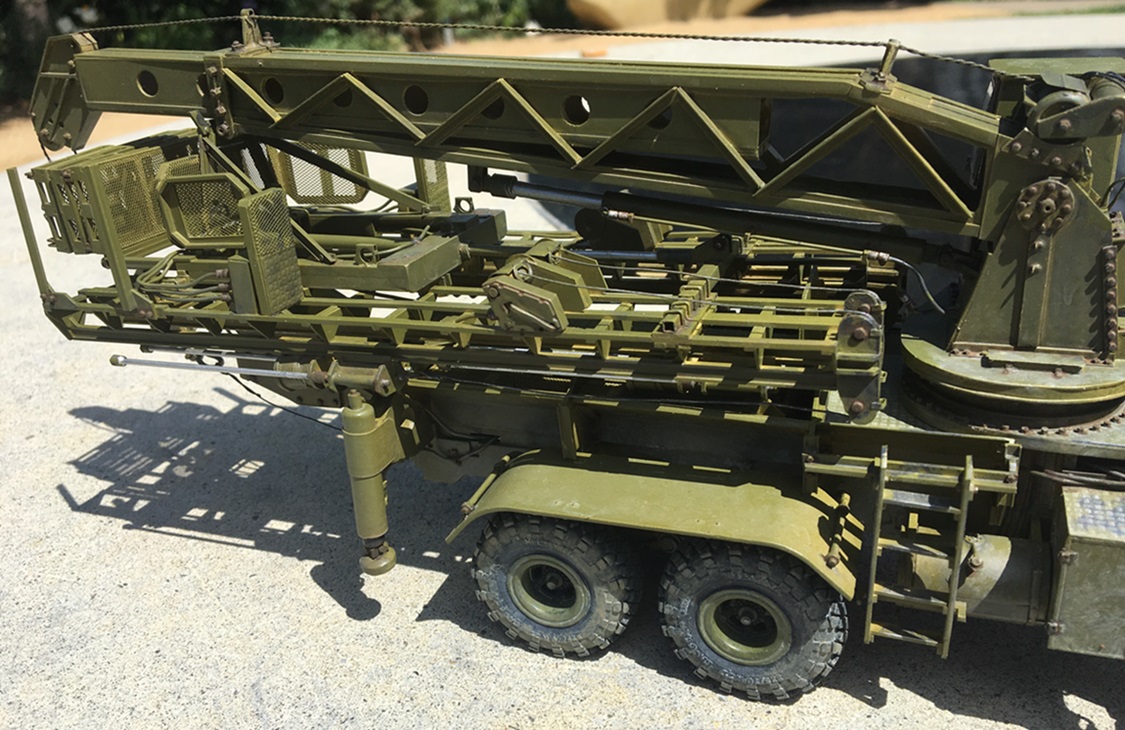
This case is a bit harder to label, a SOCOM RG-33. There is no kit of this truck but, I like it, so went about trying to make a representation. Parts of the cab are from two RG 31’s cut up - parts of the bed are from an M1083, and the majority of the rest is evergreen and remnant PE - the CROWs is made from evergreen and remnant PE:

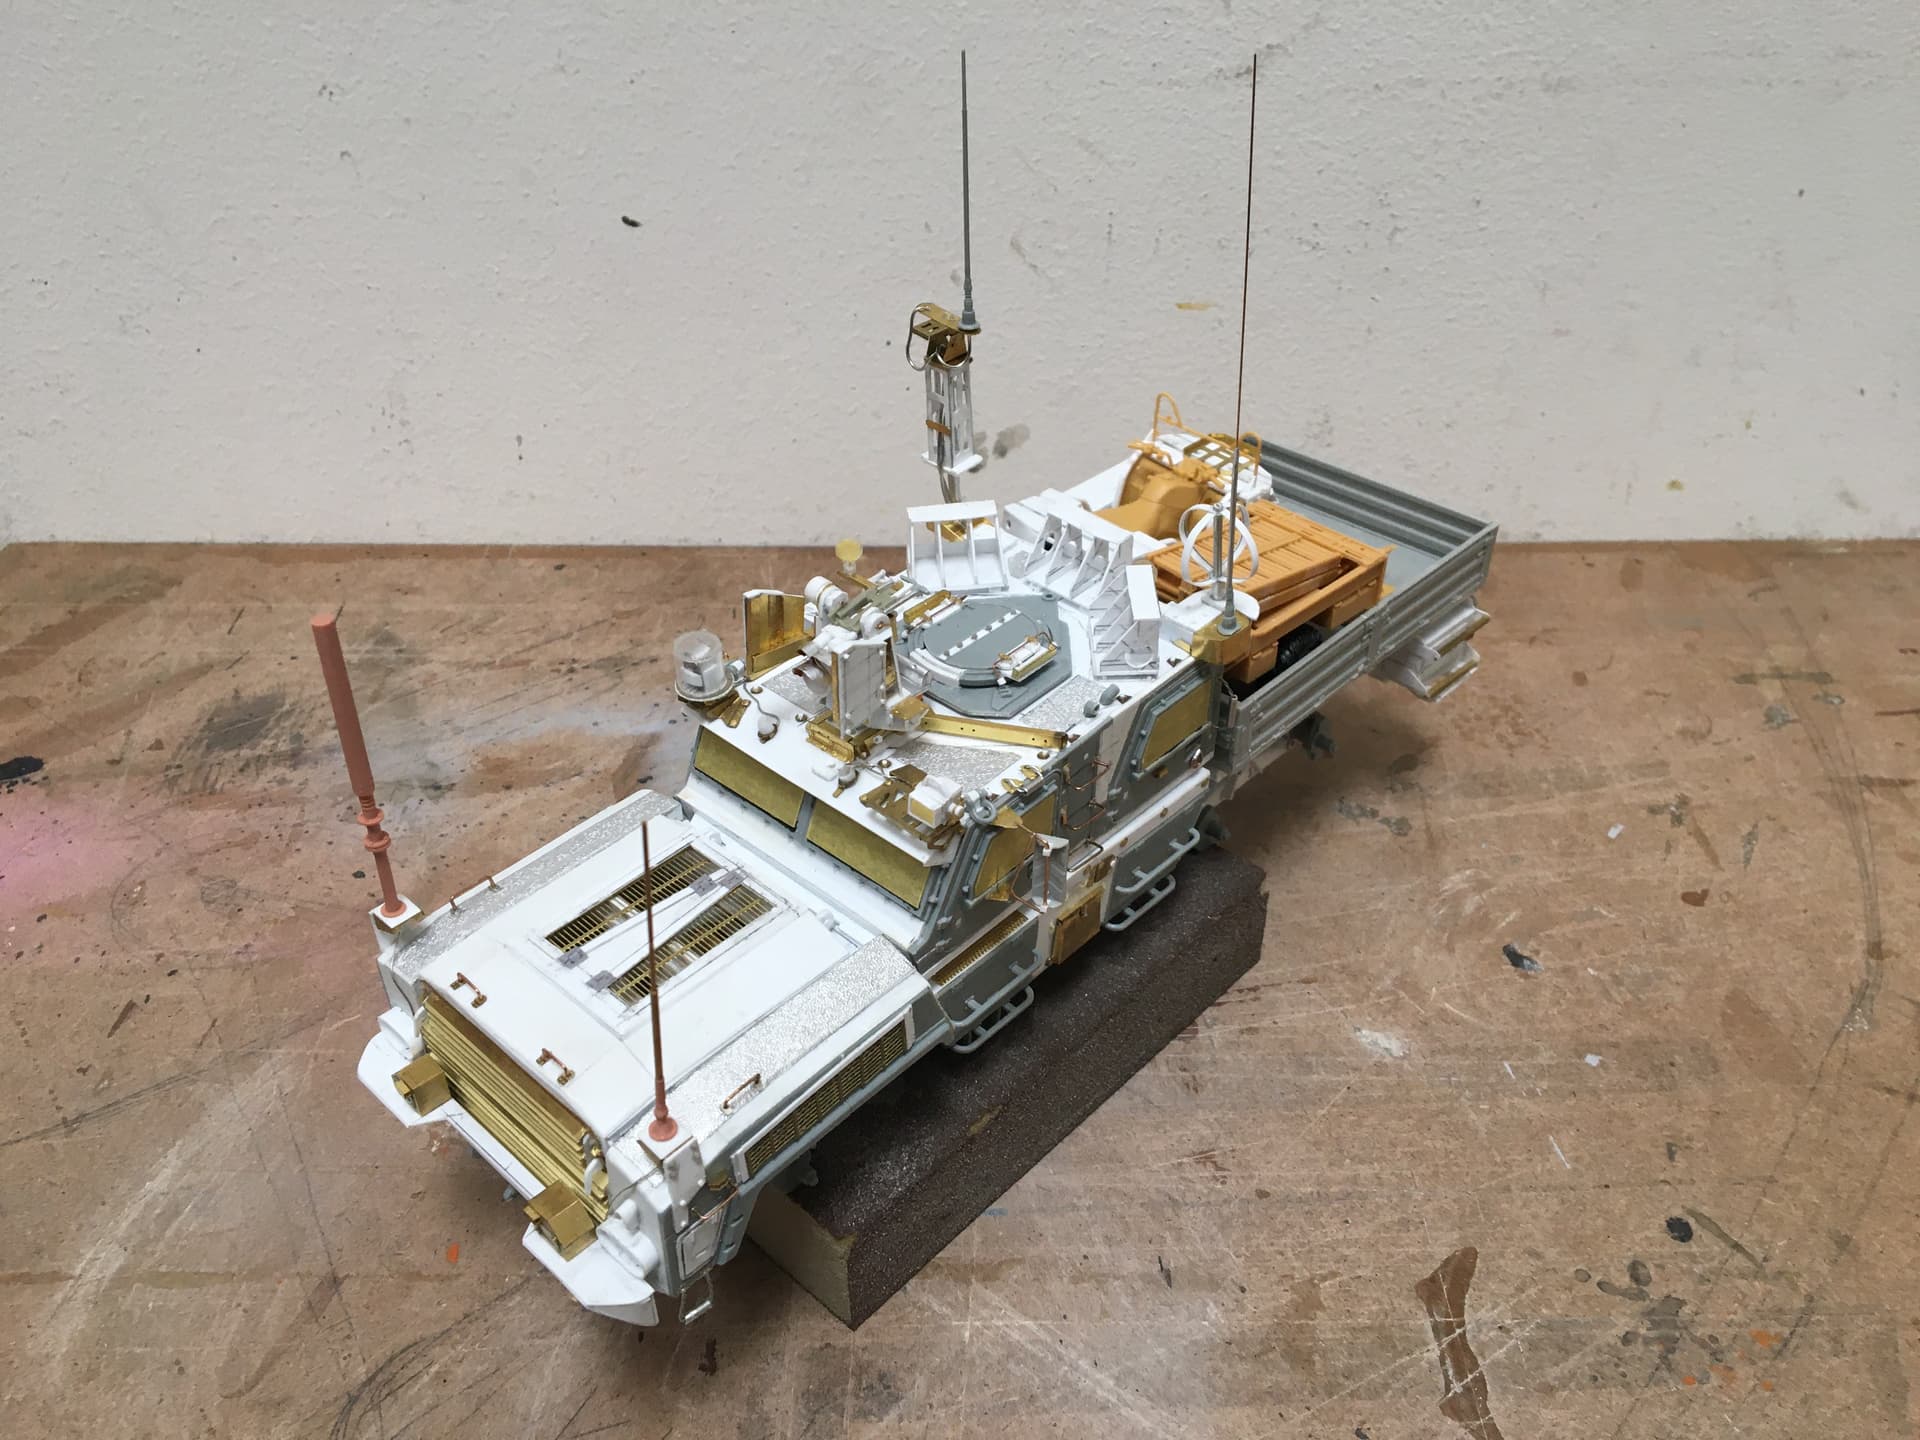
I used left over axles, but built the walking beam suspension and underside of the hull/chassis using evergreen - used some kit parts for part of the hull, but scratch built the full hood, cabin and cabin roof, using evergreen. The grill uses brass strip material. The non-slip material on the front fenders is the foil wrap from San Pellegrino soda cans. The hood vents are made from 1/24 PE manhole covers cut up, and so on.
And when done -

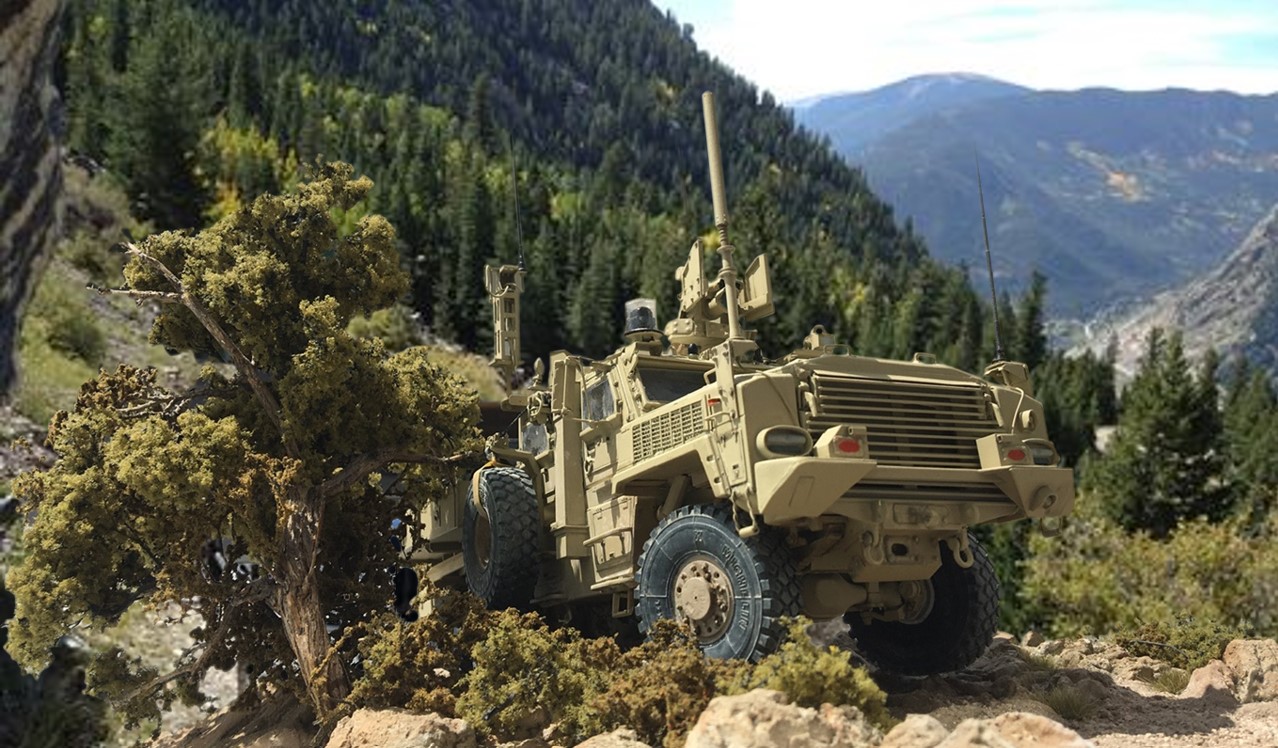
So, sadly, by definition none of these are 100% scratch built.
I’m working on a project now that is largely scratch built - the tires and wheels are resin, as I am not that interested in making my own, and I have kept a few kit parts, but have cut them up quite a bit along the way to get to the project I want.
It seems to me there is enough scratch work in these (and many other builds posted on the forum) to conclude that some form of scratch building is indeed alive and active.
Happy model building
Cheers
Nick
Nick, your work is awesome. And yes it does fall in the category of scratch-built. But you didn’t need me to tell you that. Luv to see more
I’ve always found plastic card/stip hard to affix, I’ve tried various glues/solvents.Do you have a recommendation? Thanks.
I use ethyl acetate for everything made of styrene.
I think Tamiya ultra thin is essentially the same, one of Tamiyas paint thinners/cleaners is the same stuff but cheaper in a larger bottle.
Toluene/Toluol and Xylene/Xylol also works on styrene.
Ethyl acetate can be found in acetone free nail polish removers (it is a HOT solvent), check the labels or test on a piece of styrene. The removers can contain oils and other stuff which can create issues.
All of the products I named above are solvents, no solids left behind, doesn’t fill gaps.
The consequence of this is that the joints must be tight, no gaps allowed.
The solvent softens the plastic, the plastic from the two parts melts/welds together and the
solvent evaporates. Depending on the parts (shape, thickness, hard/soft styrene) it can be possible to close gaps by a combination of liberal use of solvents and force.
The solvent softens the plastic, force squeezes it around, repeat until gap is closed.
I prefer to trim and adjust the parts and/or add scrap styrene to fill or eliminate gaps.
The best result is achieved by holding the parts together, adjusting position until everything
is lined up. Clamps, if needed, can be positioned et.c. The solvent is then added to the joint with a very fine brush and it gets sucked into the joint by capillary action. Brushing solvent on the joint in advance does not work, it evaporates too fast so that once you have put the brush down and picked up the other part it is already to late.
The capillary action thing will also imprint the parts with your fingerprints if the fingers touch the joint (done that a few times …).
Very thin styrene strips require extreme caution, the melted zone can quickly become the whole
thickness of the thin styrene. Use very fine brush and very little solvent, you can always add more if you started with too little, using too much at the first try will result in a gooey mess (done that …)
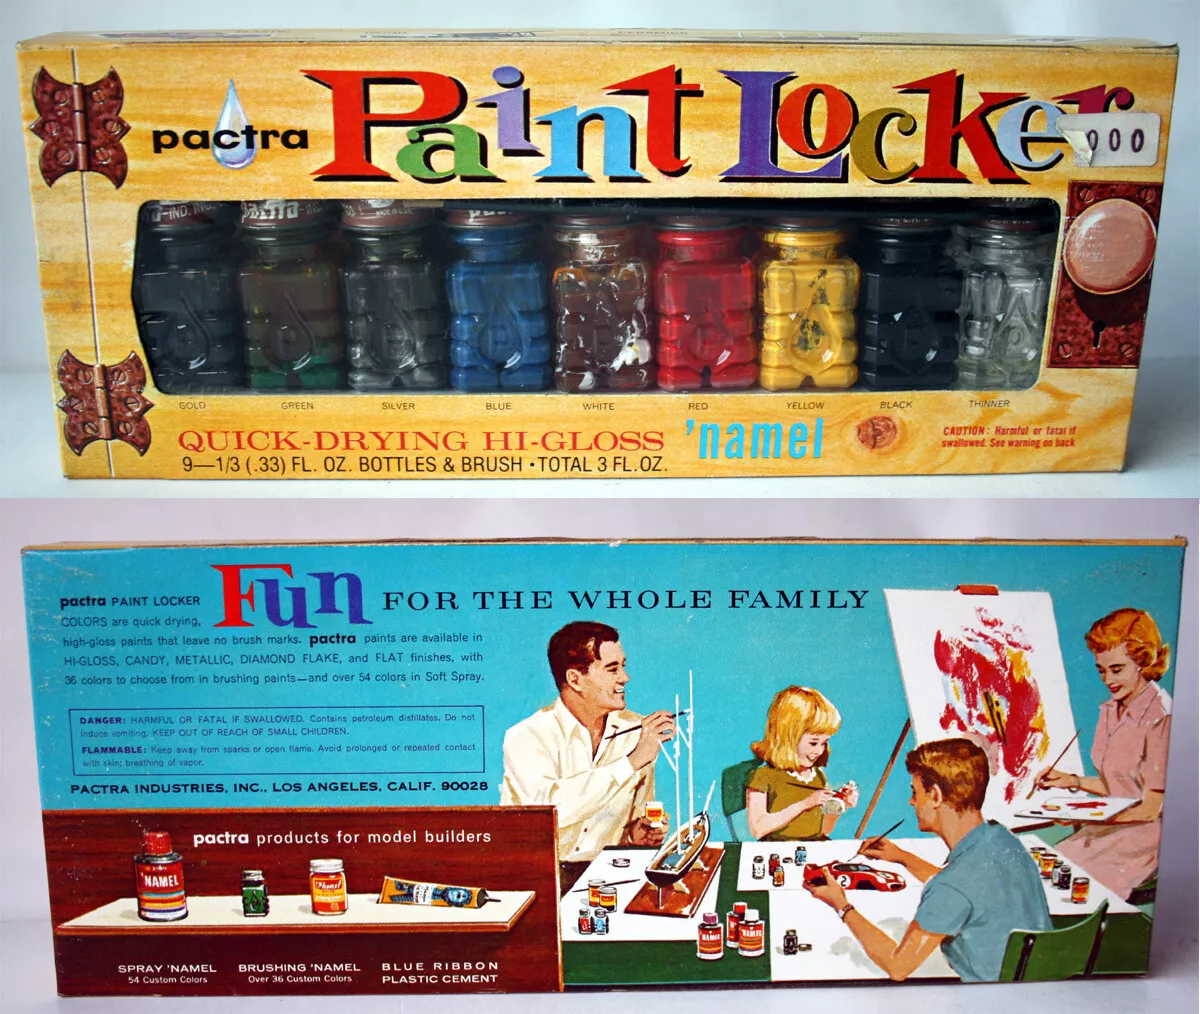
Does anyone remember Pactra paints?
I used to use sticks I found outside for logs.
And Kleenex tissues for tarps and bedrolls for my 1/35 scale Armor projects.
Yup - I grew up with those funky Pactra square bottles! It was that or Testors in my LHS as a kid…
I recently found a bottle of Pactra Weather with a tiny bit left. I loved that stuff.
I wonder if there is anything similar now? Is there a way to formulate your own?
Very nice for splashed mud.
Yes, remember Pactra from the 1960’s. One local general store carried Pactra & Testor’s for a while back in the day…
I still use Pactra Acrylic Flat A48 these days. Keeping it old school or at least mid 2000’s…lol
Thank you for the information.I will have to experiment further with your suggestions.
I have used ’ perfect plastic putty’ for gaps with a careful dab of T.ET. which helps to seal it.
I suspect it is the inadequate clamping whilst solvent/ cement sets which is causing the problems I’ve had when using plastic strip.
Thanks again.
Pactra had an excellent line of flat military colors back in the early '70s. They were what I first learned to airbrush with (along with a few selective Humbol paints which were considerably more expensive but also carried by my LHS). Unfortunately, the Pactras were also the first paint line that I use which was discontinued forcing me to switch to the large Testors line of enamel paints. (In between, I was stationed in Germany and using either Revell or Humbrol in the tins.)
Floquil came out with a line of military colors in the late 80s which were excellent and wonderful to airbrush. Unfortunately, the color range was pretty limited and by then I was also heavily invested in Testors enameles. I used those Floquil military colors along with a number of other Floquil Model RR colors - as adjuncts to the Testors enamels - until they were also discontinued (with regular Floquil Model RR following shortly after the military color line).
Oh well… I have really fond memories of those Pactra Military Color paints, though. I painted lots and lots of models and figures with those and was really sorry to see them go.
I bought at least three sets of the military flats over the years. I went through a couple of bottles of the scale black, olive drab and brick red myself. I used the camouflage gray for mortar on multiple sets of Tamiya brick walls. Great stuff.
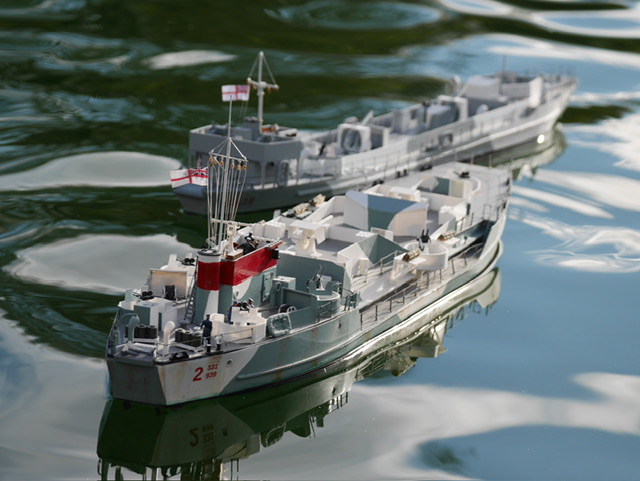
I agree with many that the nature of scratchbuild has changed. These two pictures taken 40 years apart. The lower one, HMS Gorgon was hand scratch built over three years using wood, plastic sheet and aluminium. The only parts bought were props, shafts, handrail stanchions, figures and a friend turned the 9.2” guns for me. The tug in the background was a gummed paper strip hull, ply and plastic upperworks. The upper picture is LCG(L)939 in the foreground, hand scratchbuilt hull and superstructure, 3D printed details, only items purchased are props, shafts, handrail stanchions and figures
. LCG(L)19 in the background is entirely 3D printed except for the props, shafts and stanchions. All 3D work is from my own CAD. I regard all 4 ships as equally scratch built, there are no kit elements in any of them, no one else contributed to their conception, design or build, they are all my own work. Scratchbuilding is not dead, it is just evolving

Since this discussion started over two years ago I scratch built this…
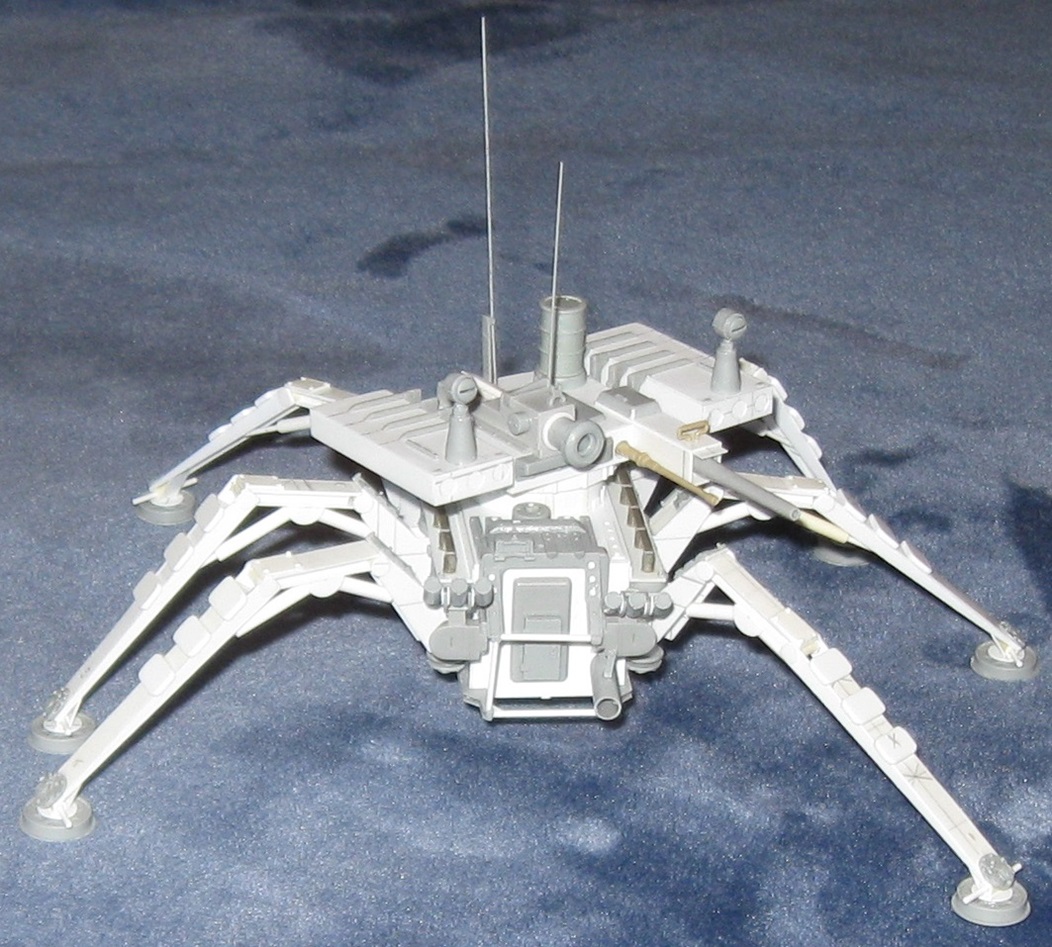
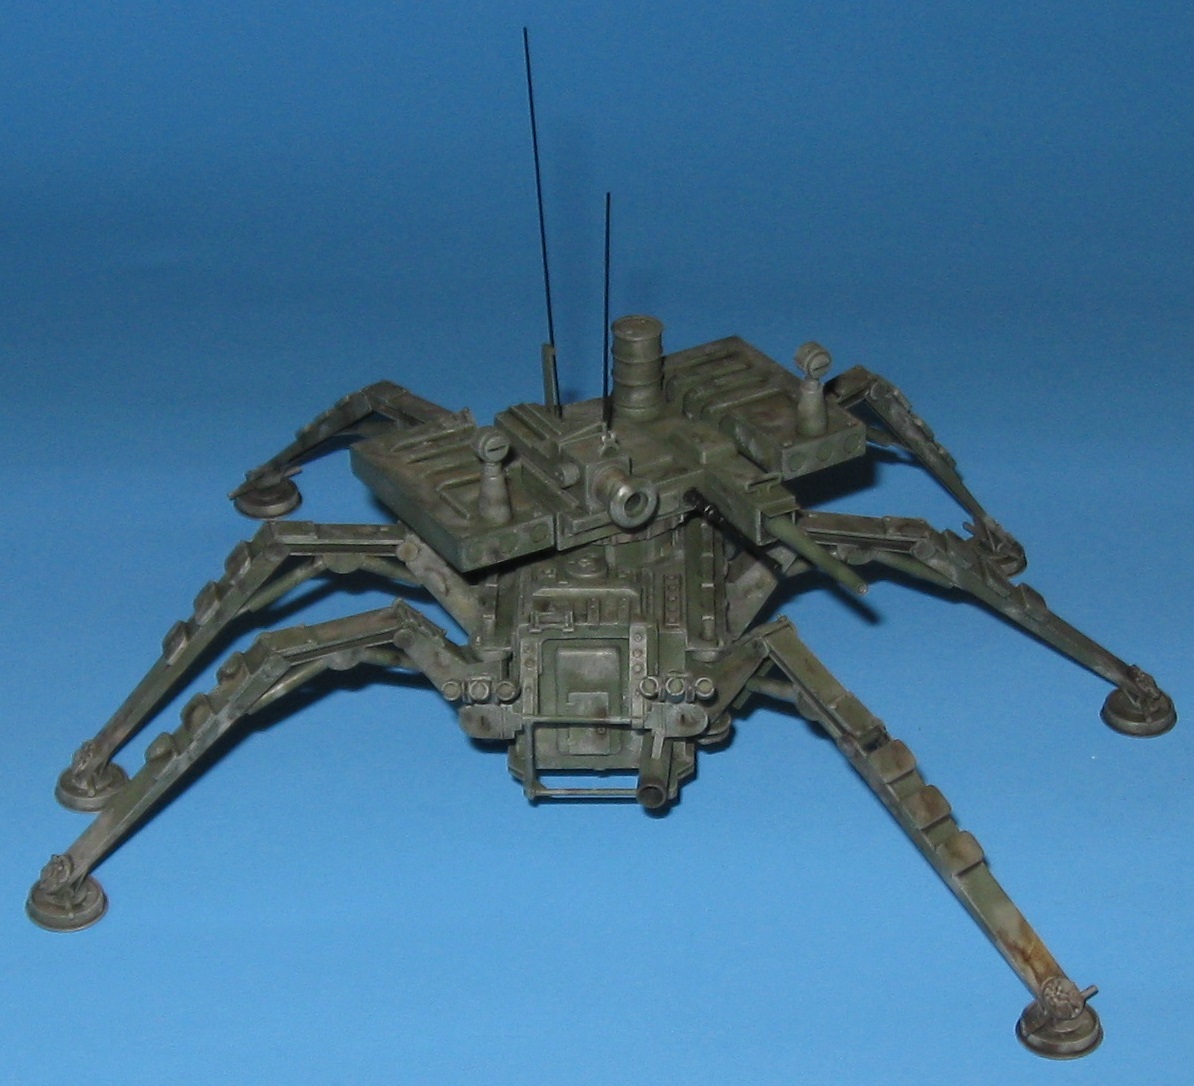
and this…
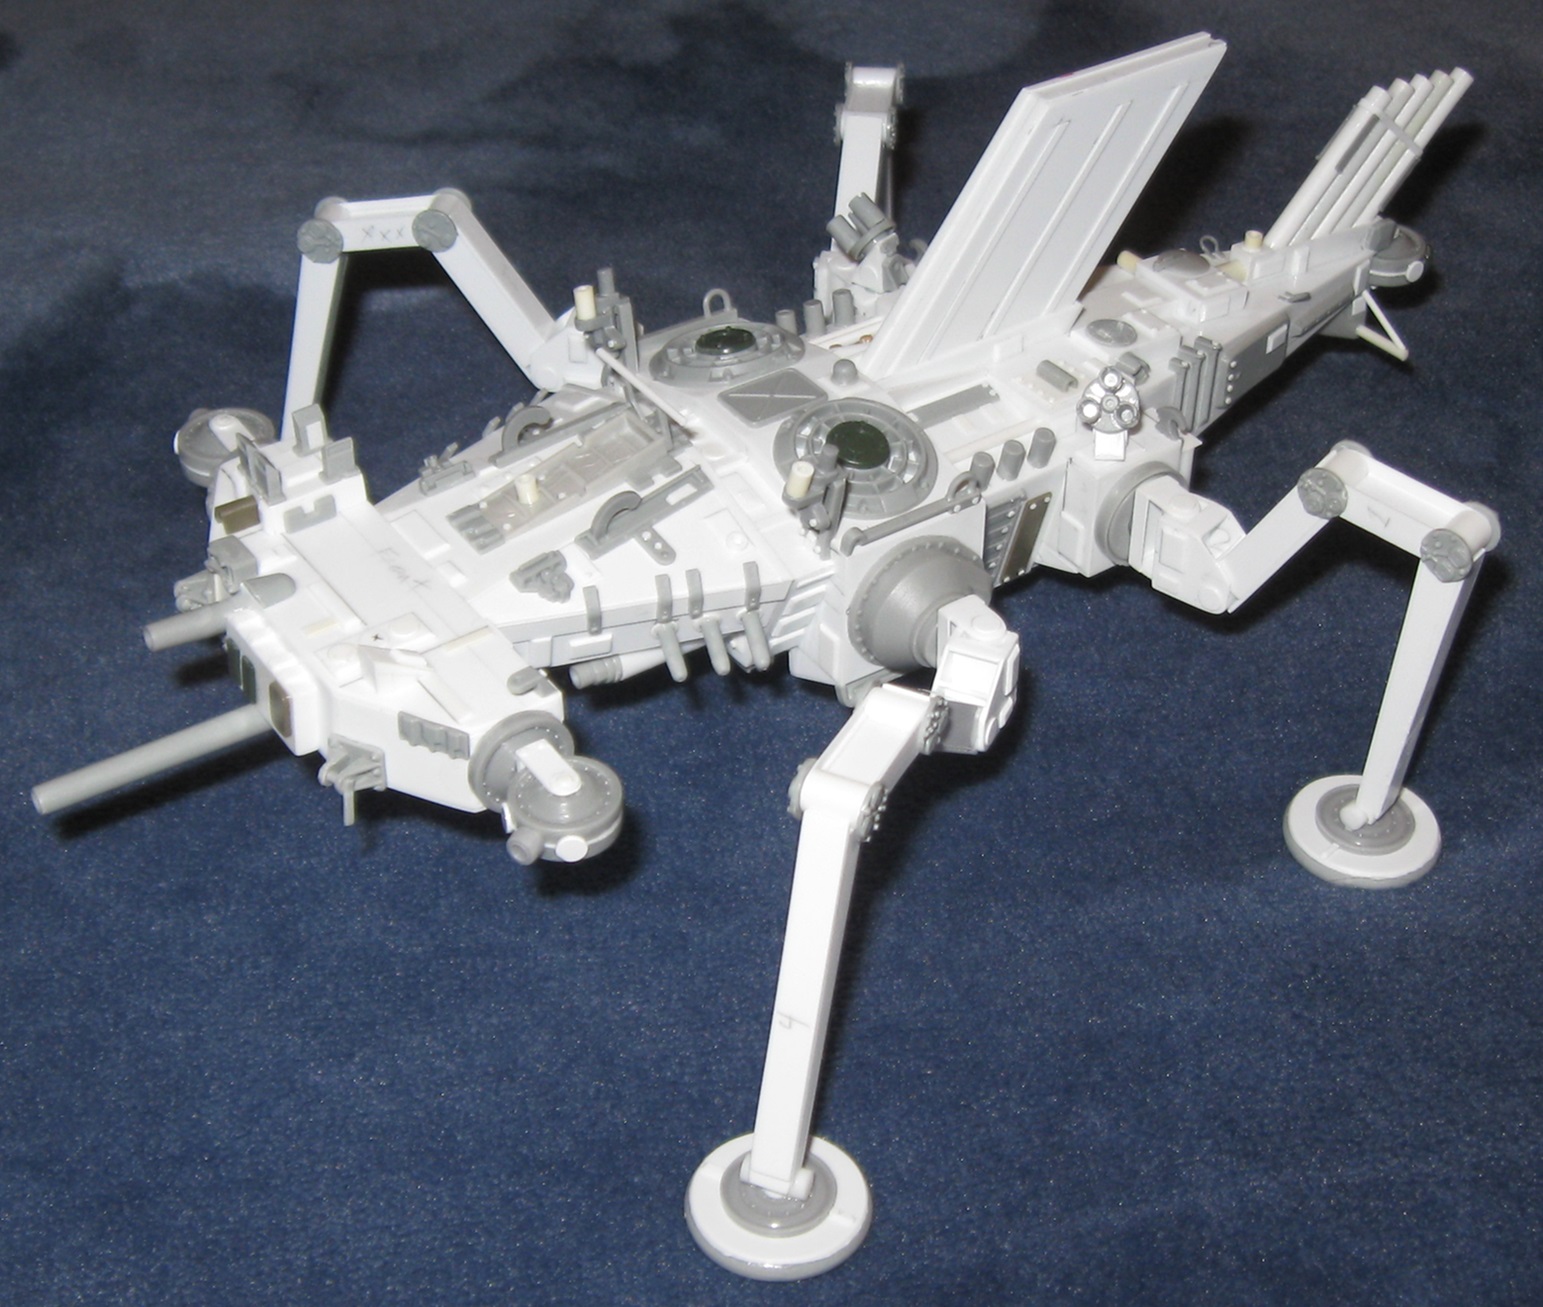

And this (not quite done)…

And this (not quite done)…
I returned to the hobby about the time this discussion started. I am not as good at scratch building as many people here but learn new stuff regularly and plan to scratch build lots of things in the future.