The Die is Cast (Continued) - Grumman "Operation Torch" F4F-4 Wildcat and Martlet Mk. IV (F4F-4B)

Mojo evidence submitted below.

So, yes, after ages of getting ready to get ready, I started.

The cowling is the Vector FM-2 replcaement cowling for the Hobby Boss kit (Not the complete engine and forward fuselage, just the cowling). Getting the part separated from the huge casting plug (visible in the preceding post) was a tricky business, but I managed to get it done without damage to the opening, That was the first milestone in and of itself.

The engine is a Vector R-1820G mini-kit. You can see I have also painted the cylinder heads and barrels black, because that’s how they appear in these aircraft (as near as I can tell). The engine is supposed to be an Wright R-1820-40B or an R-1820-G205 depending on source, though I think it’s the latter. For this one, I’m going with this kind of look . . .

though I will probably use brass wire for the ignition wires.

If I can get the engine painted and positioned (but not glued in yet) this weekend I’ll be happy. I do plan to give it some time.

4 Likes

Git Yer Motor Runnin

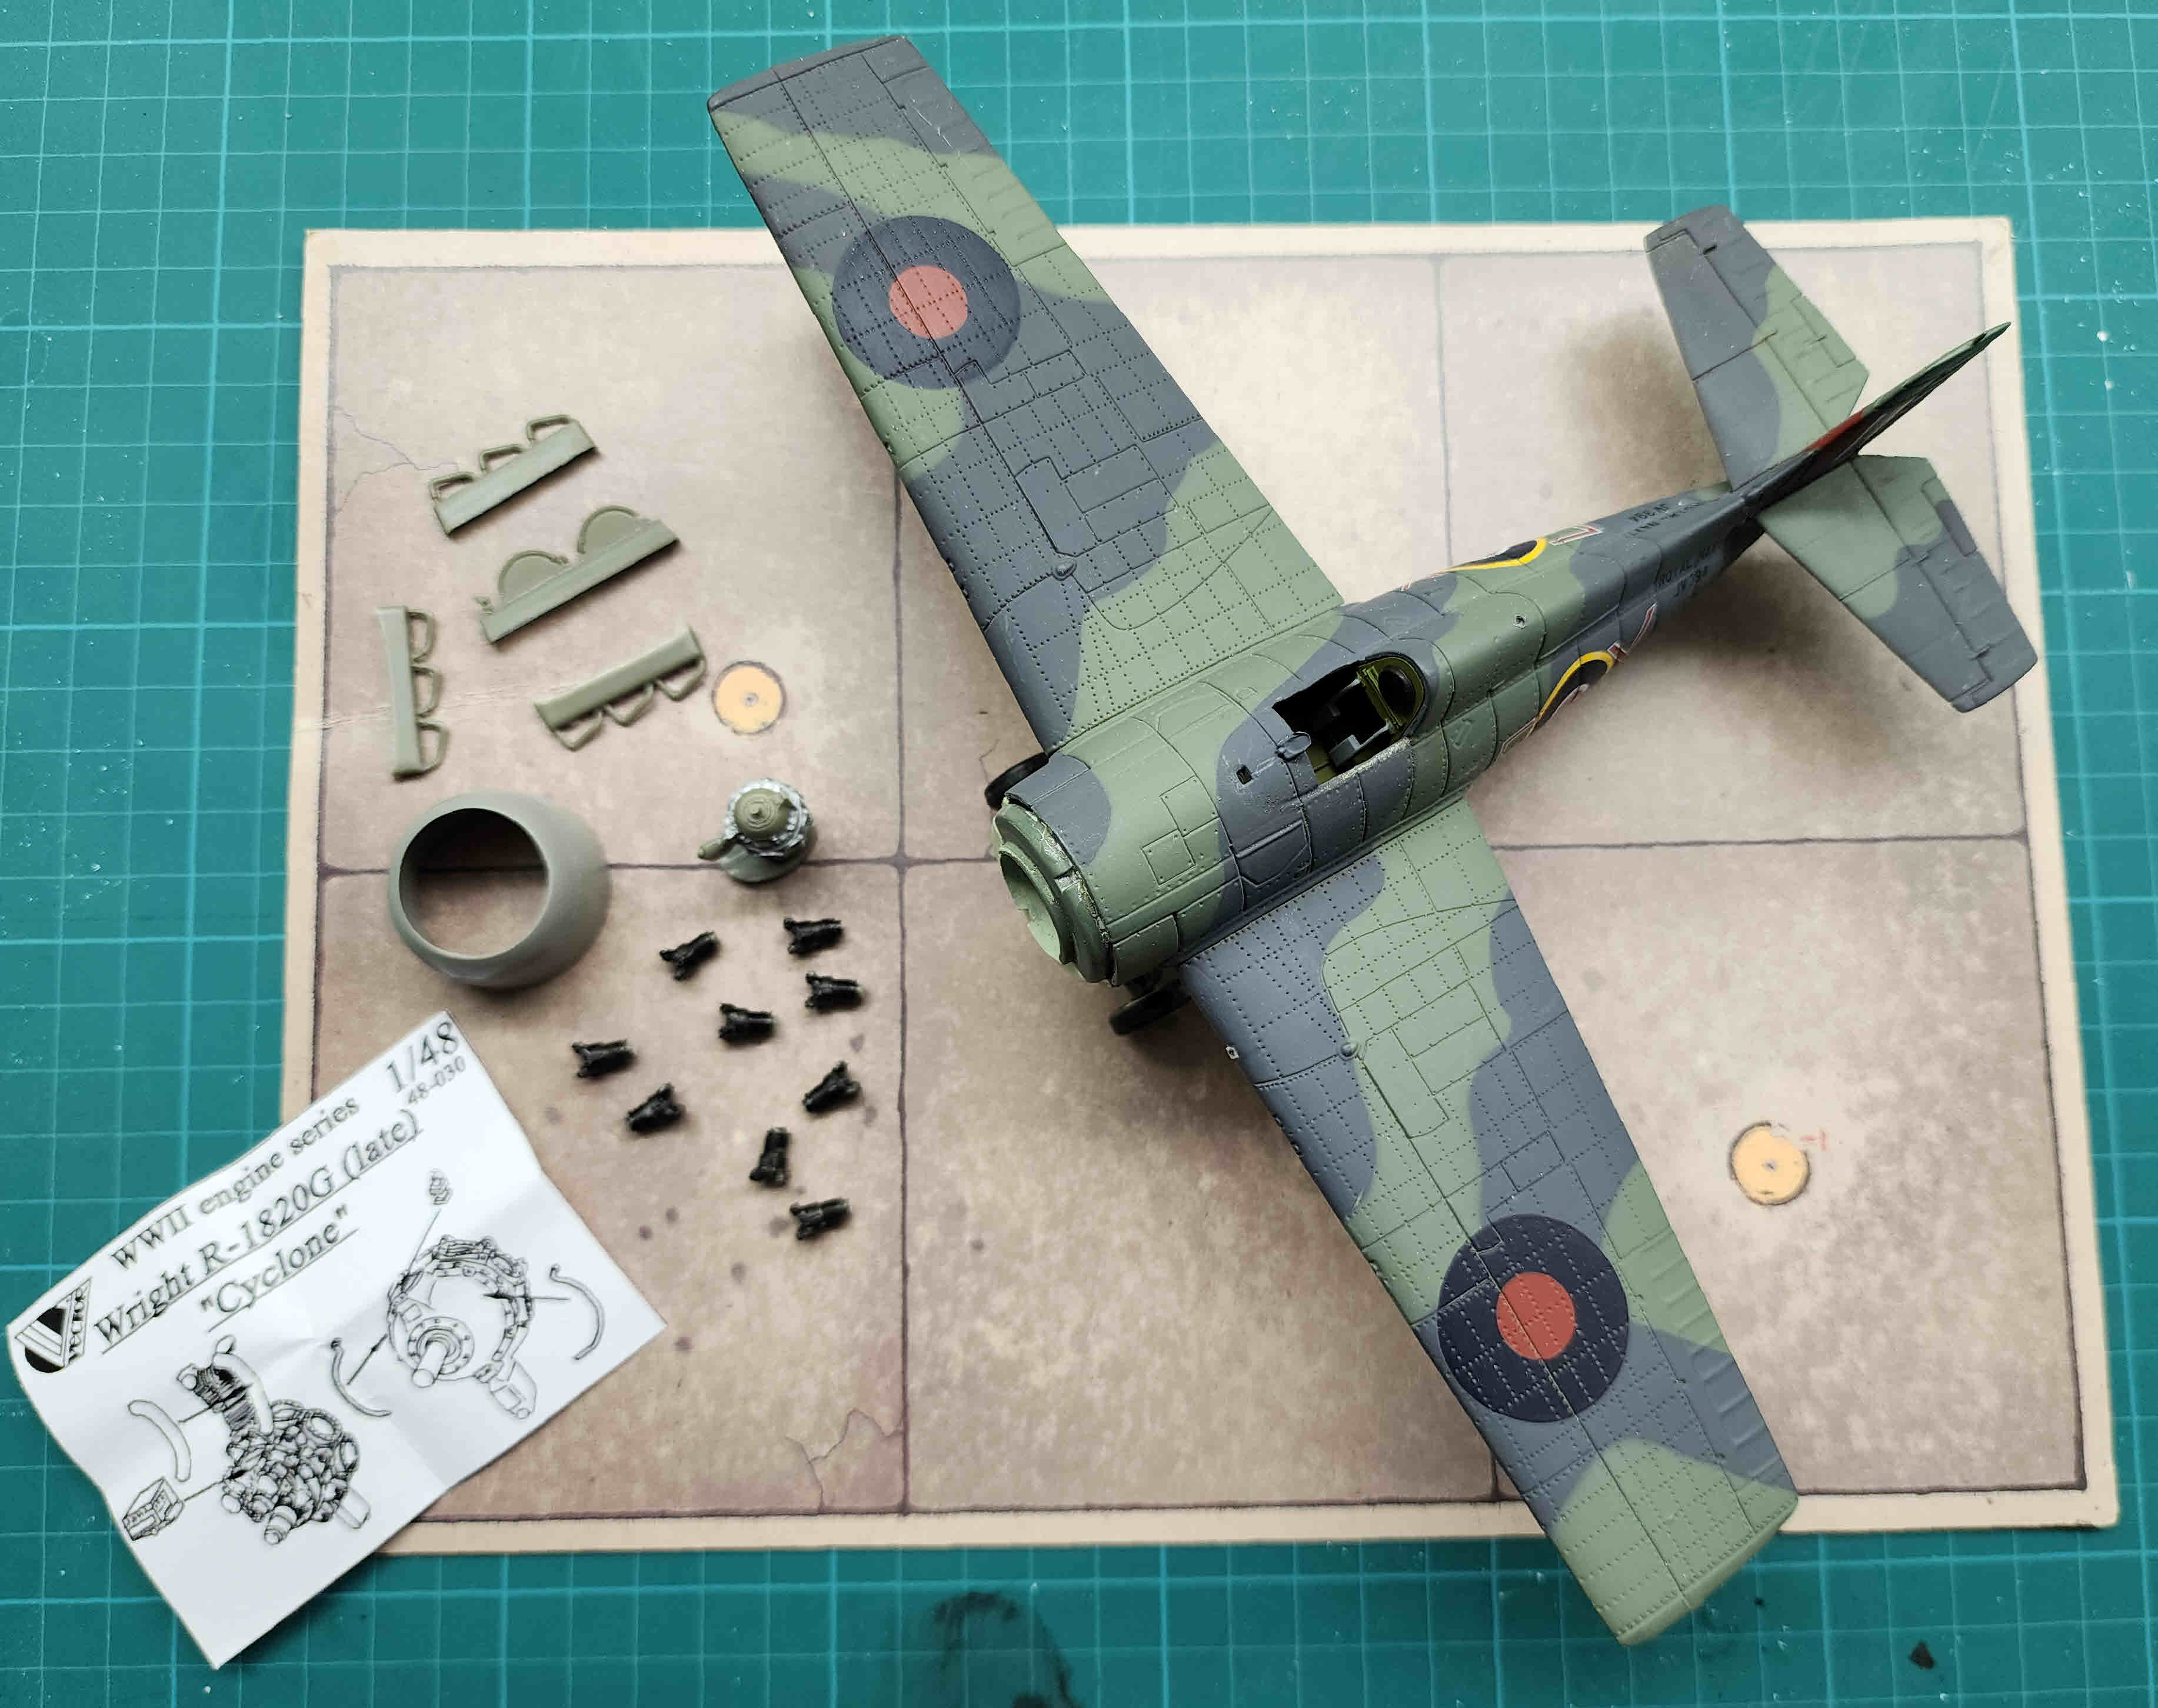
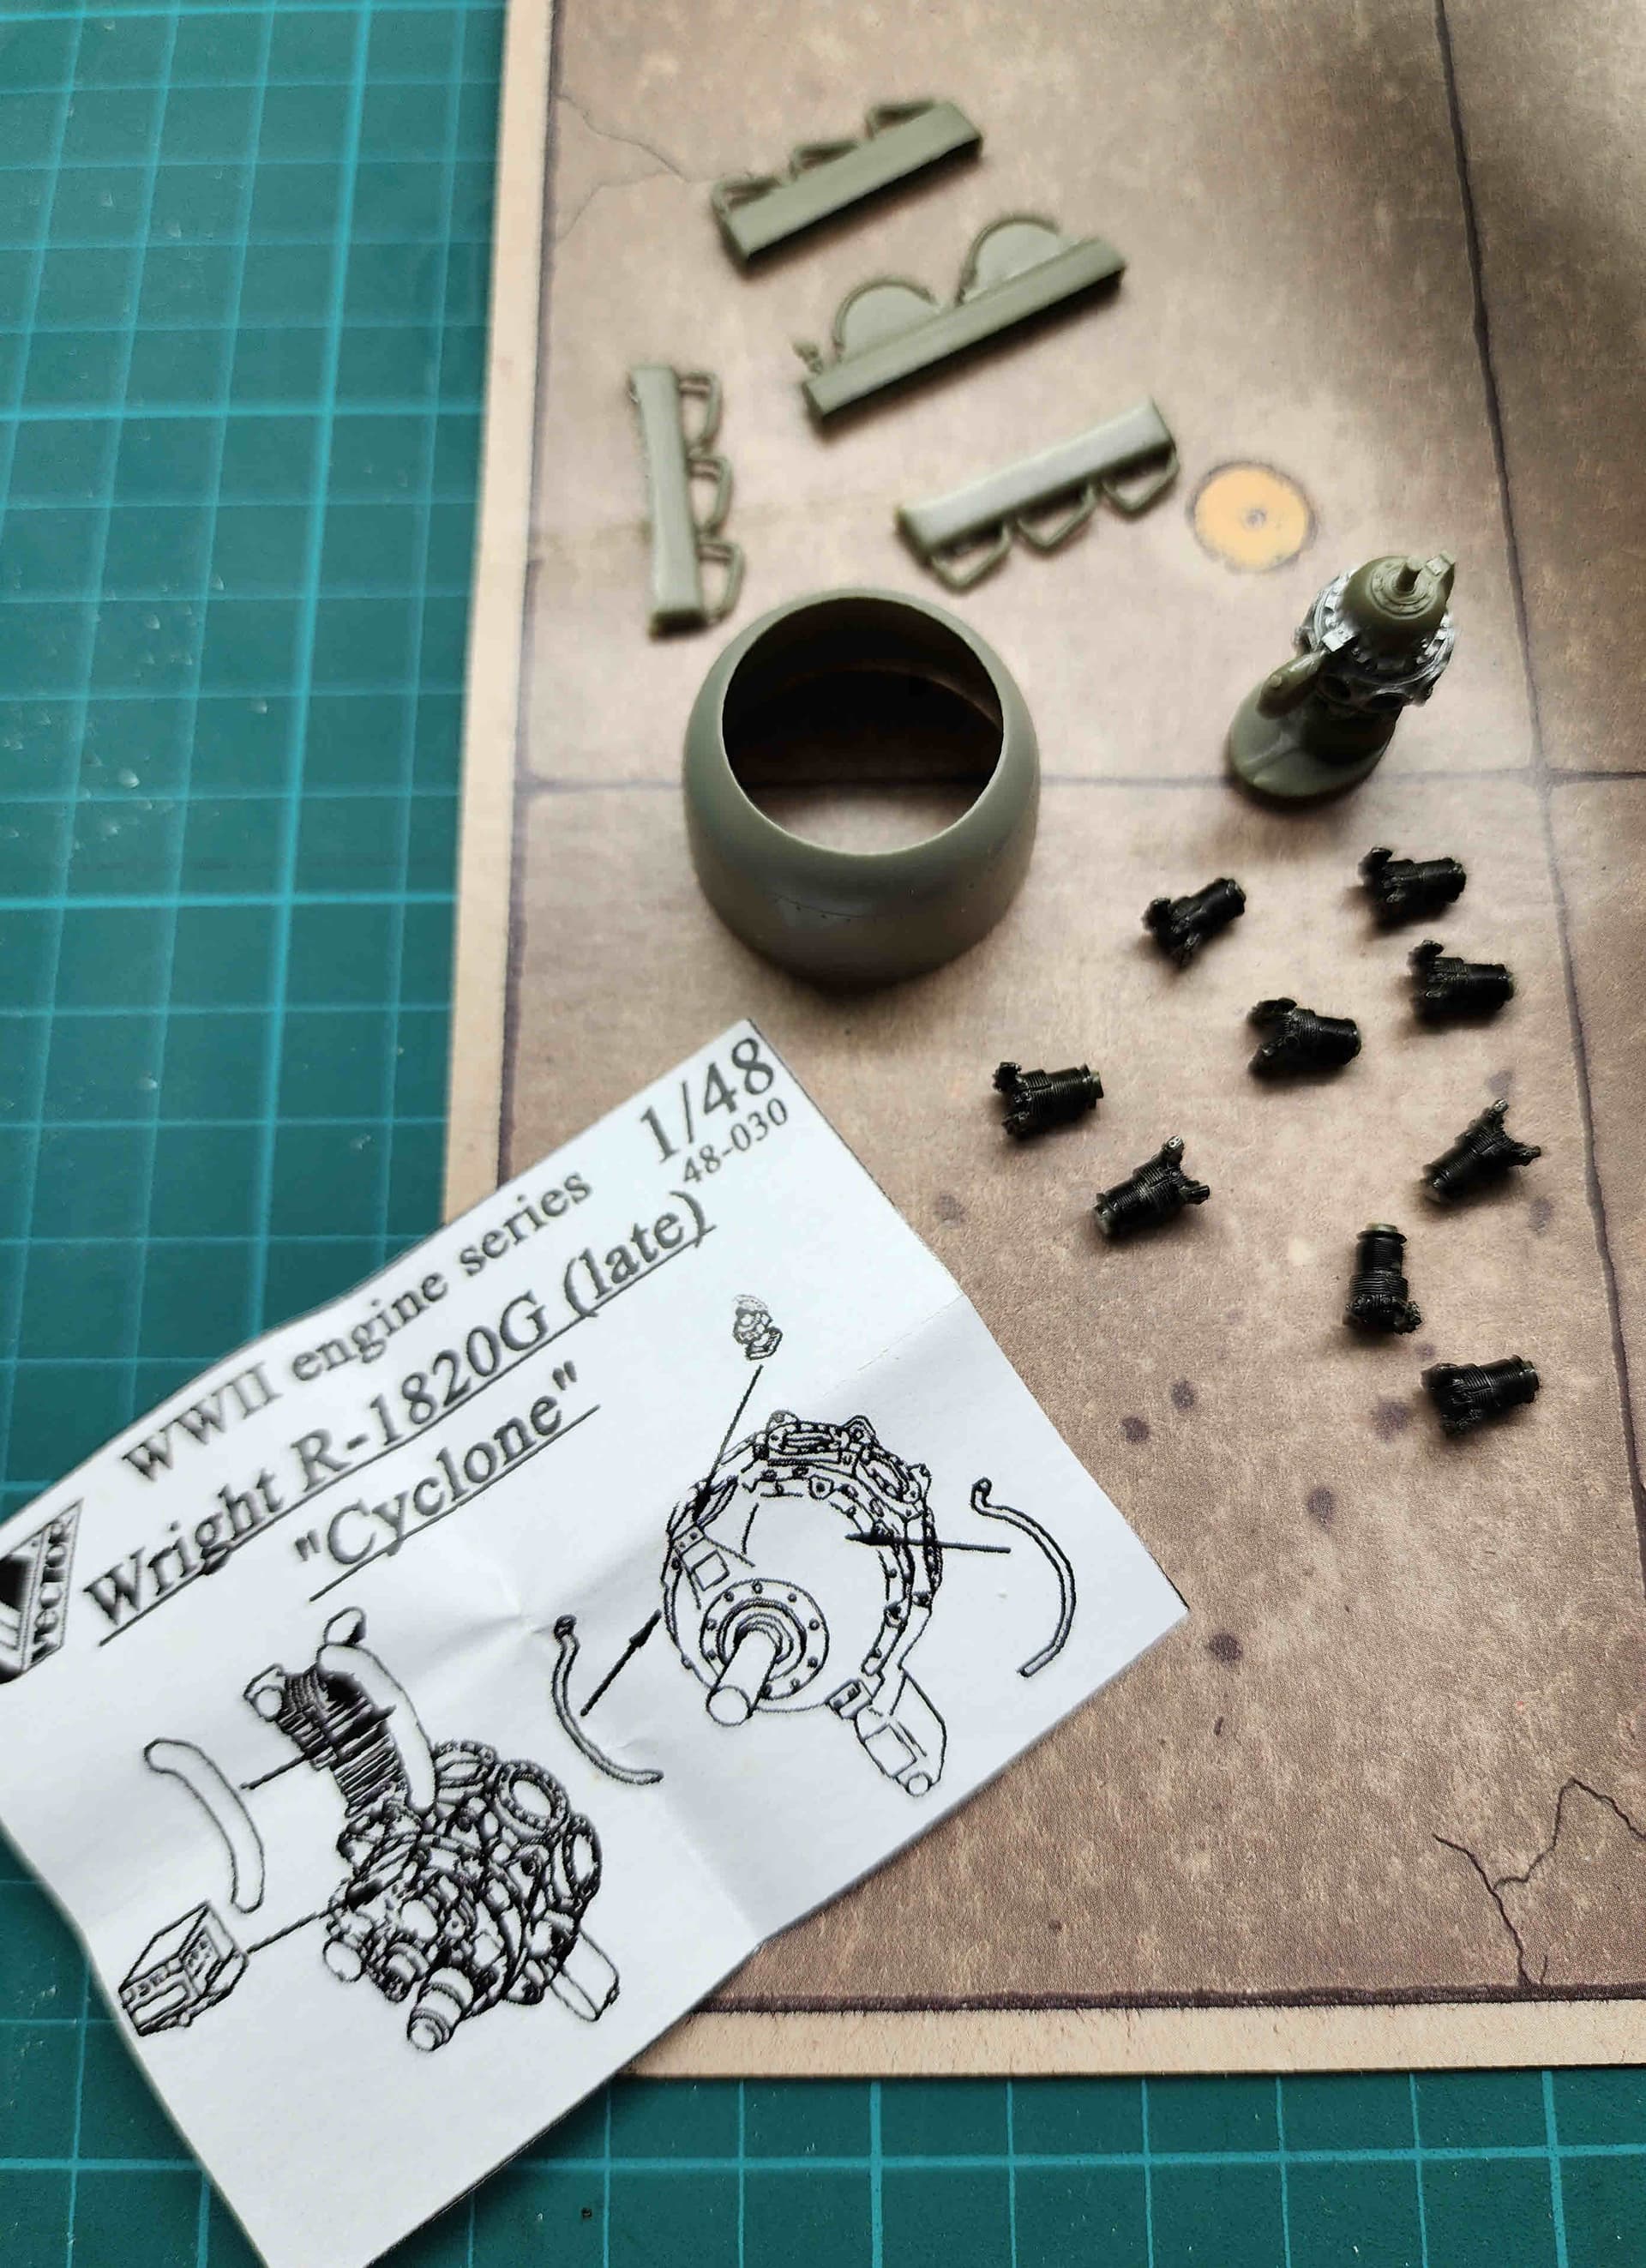
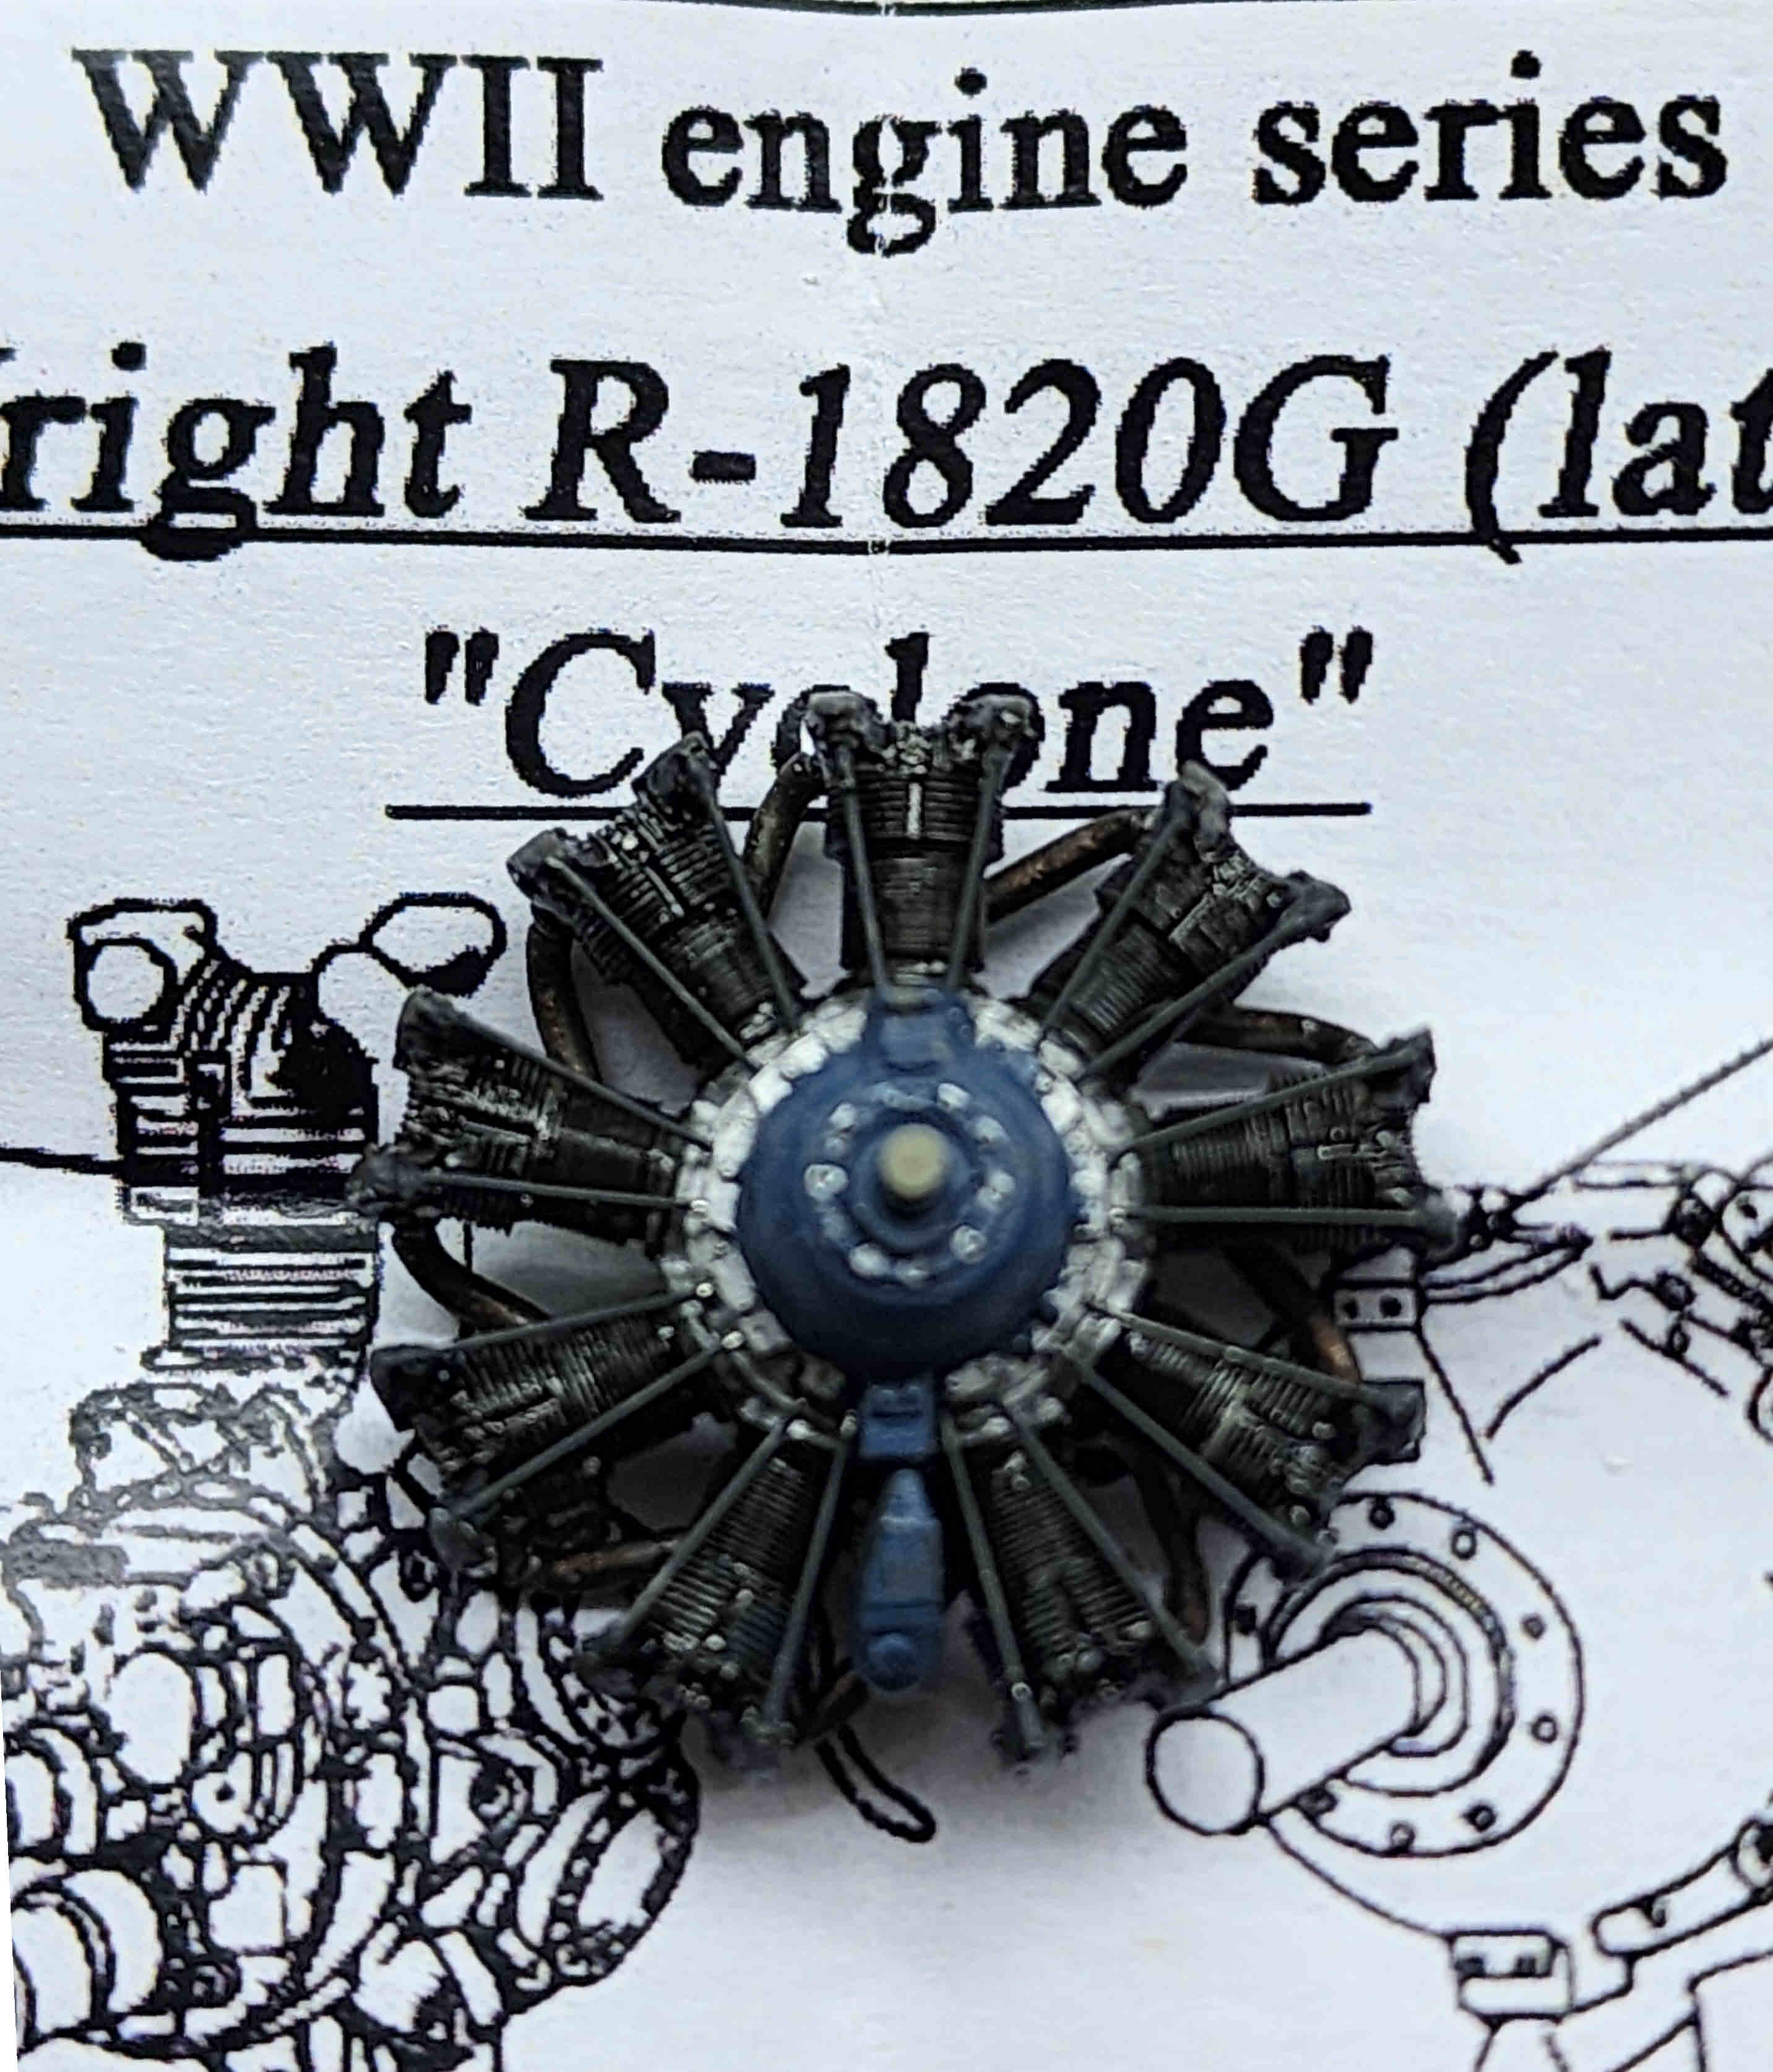
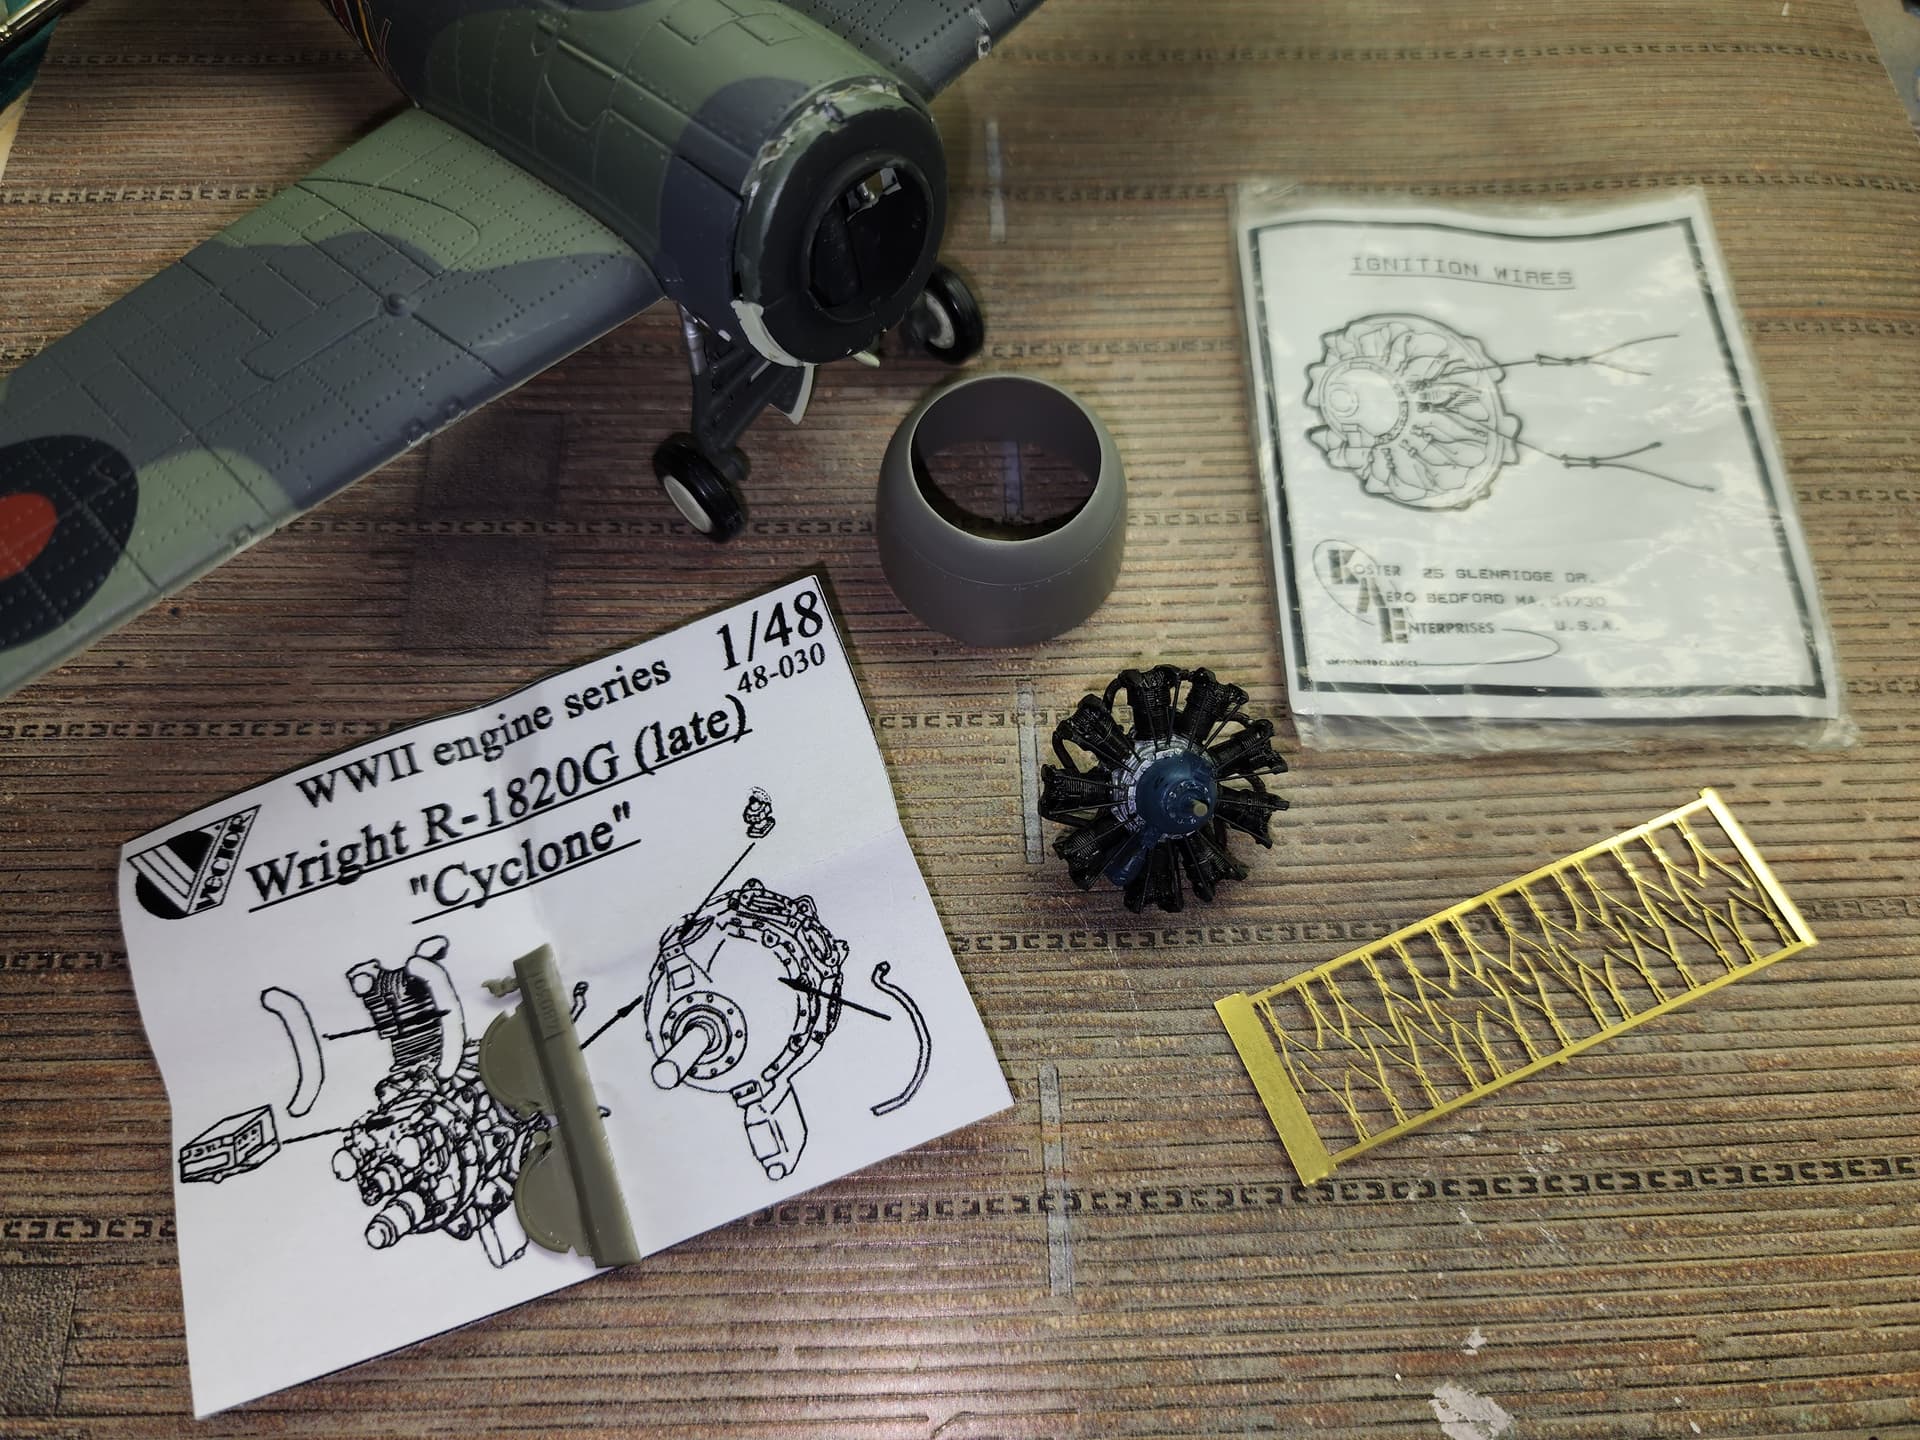
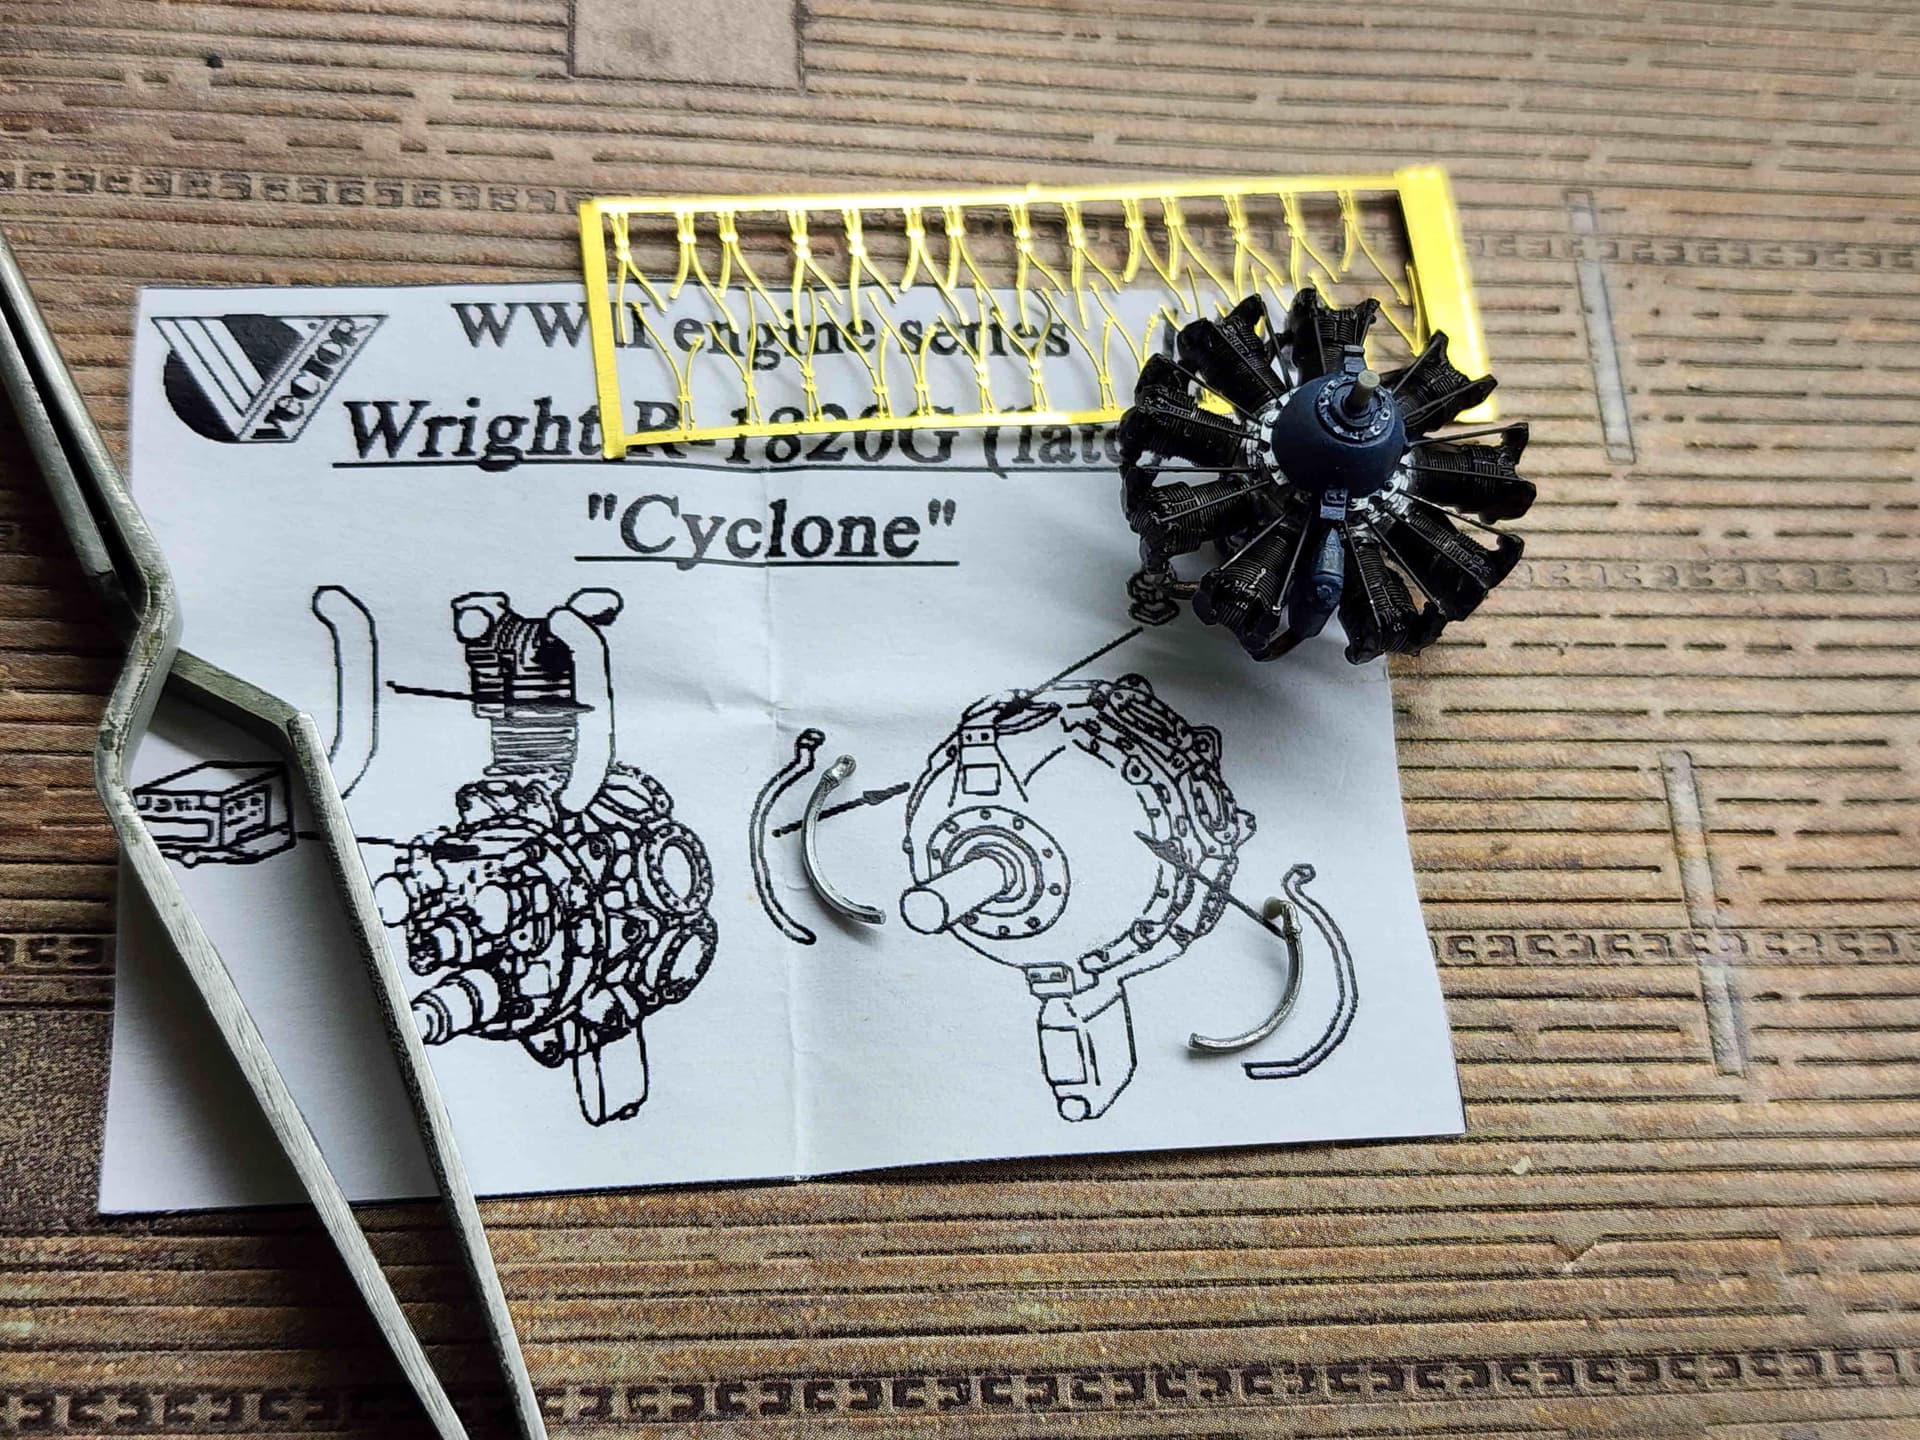
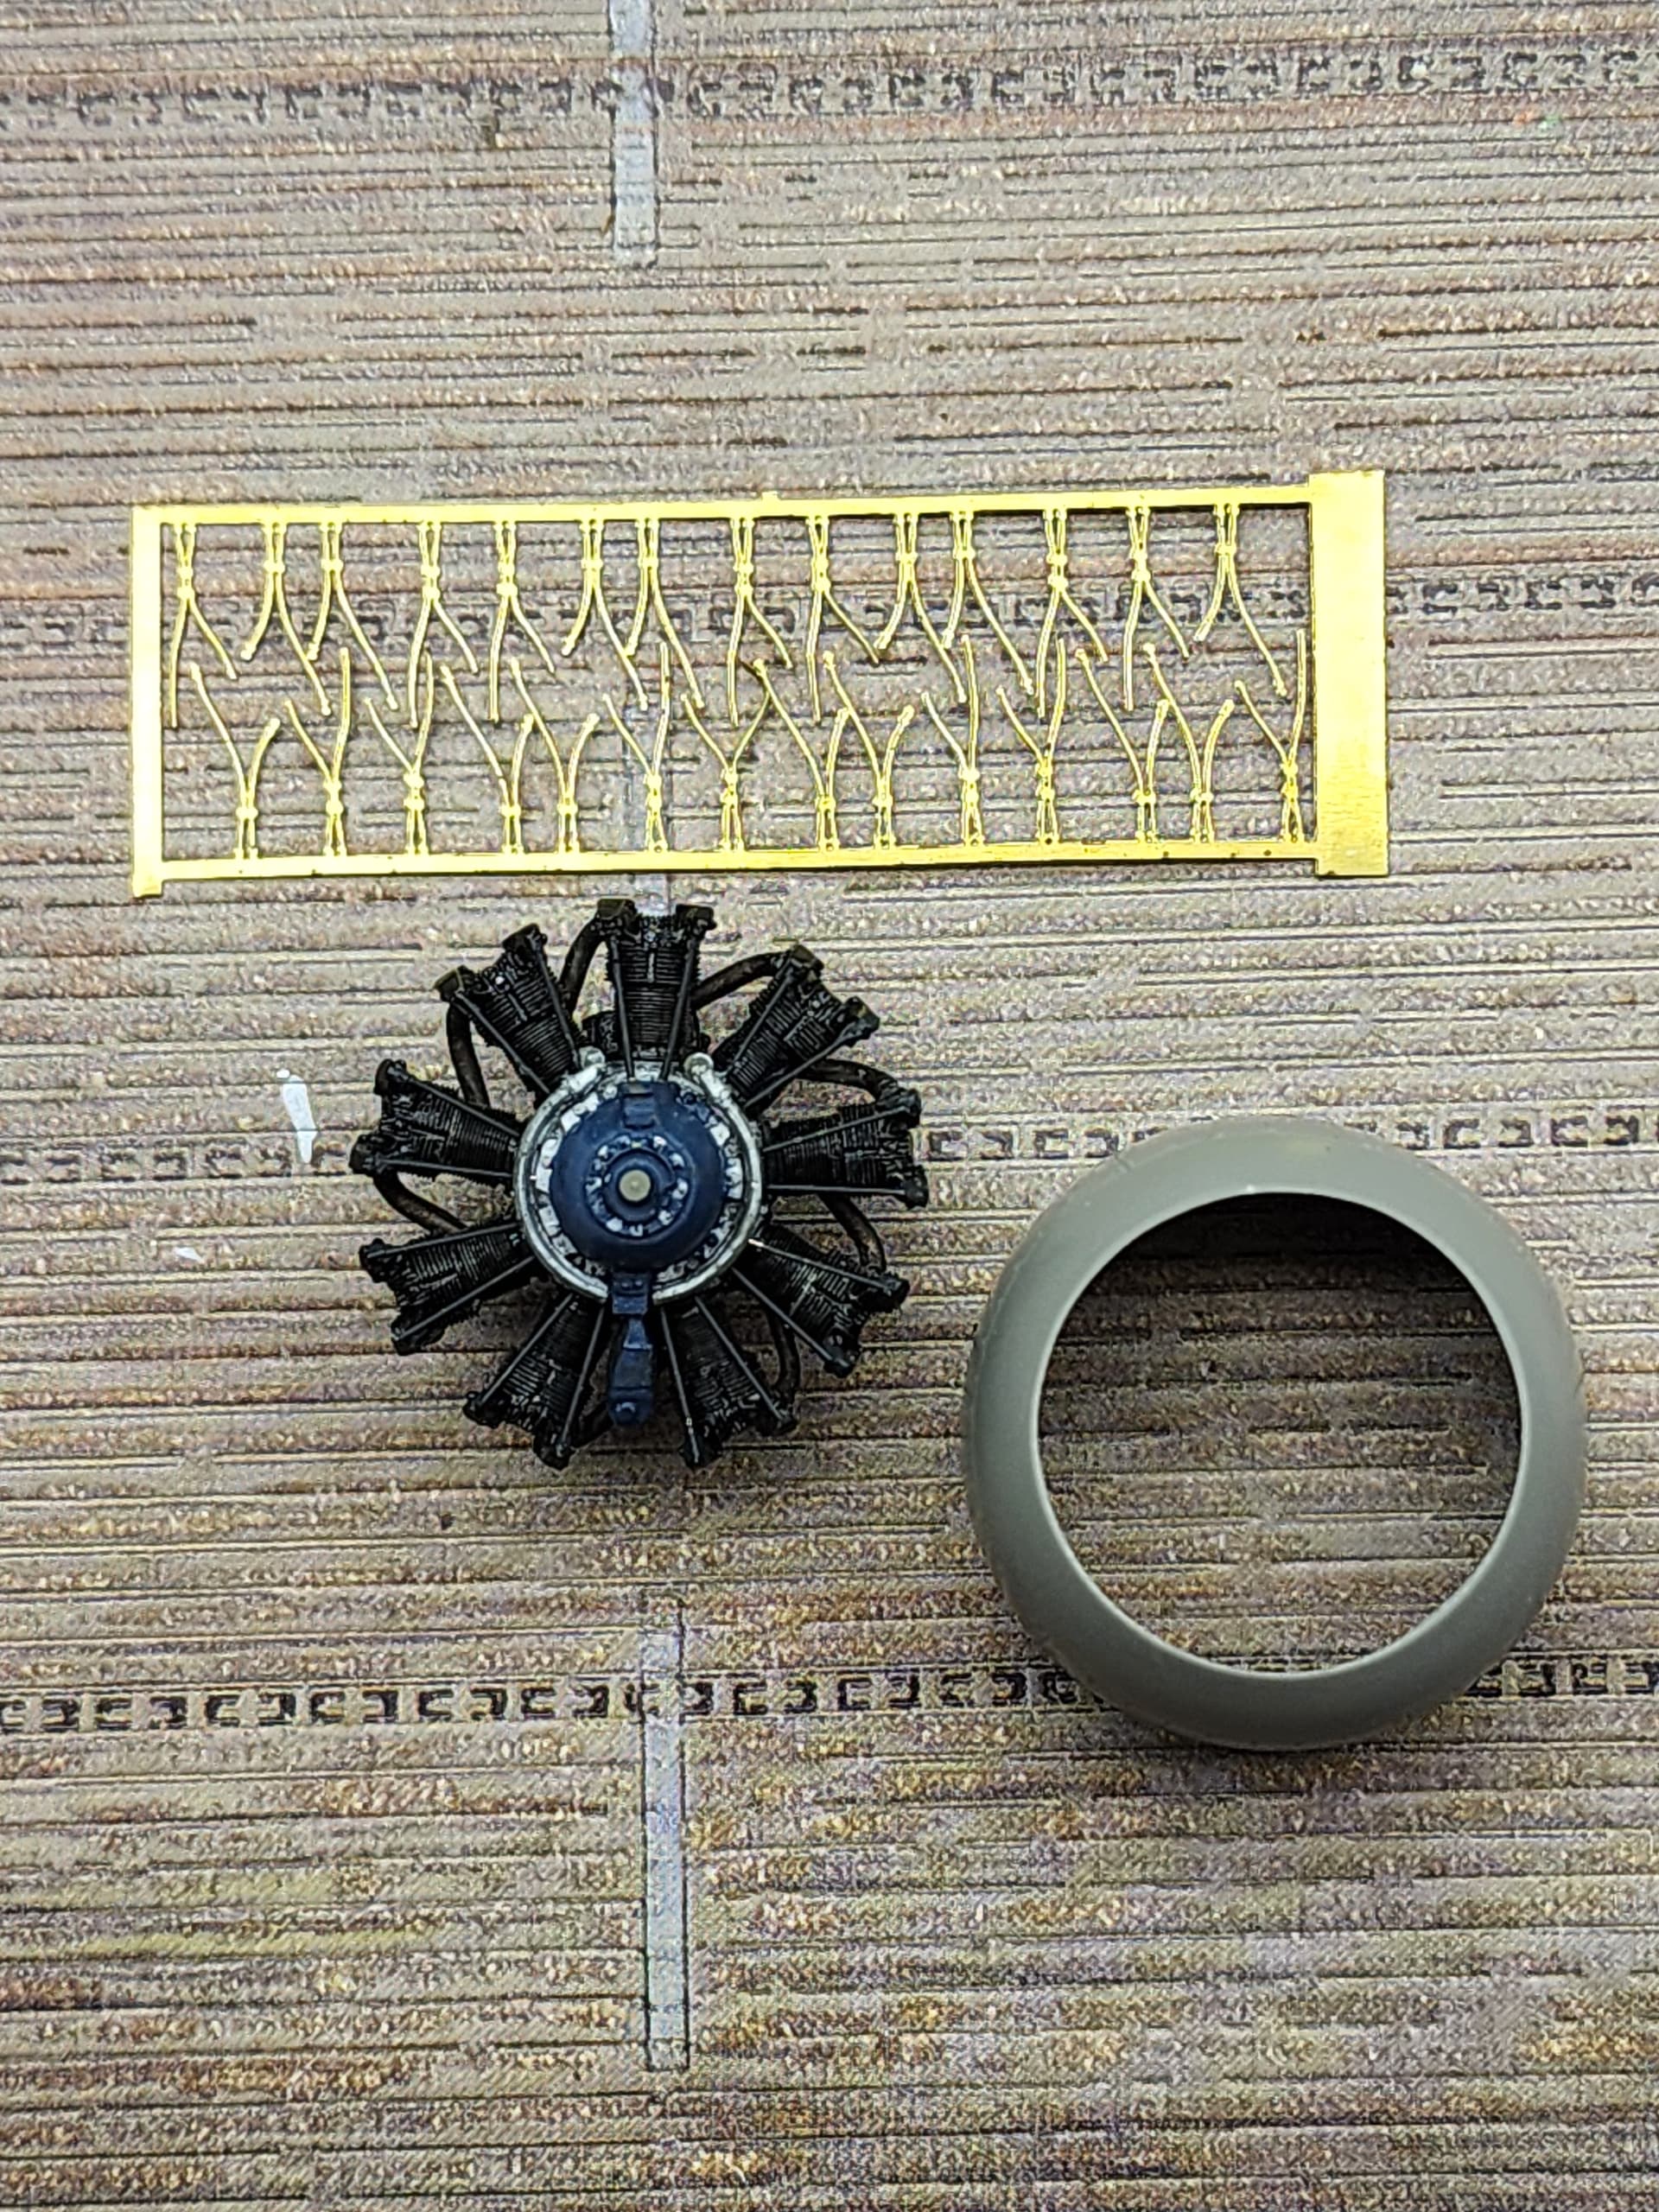
Extra points if you know the source of this lyric line without clicking the link, and I dub thee an old knight, Sir, if you saw the flick in a movie theatre like I did when it first came out. But I digress, and move to my motor – actually a misnomer, as I believe “motors” are run by electricity, and I mean a miniature R-1820.

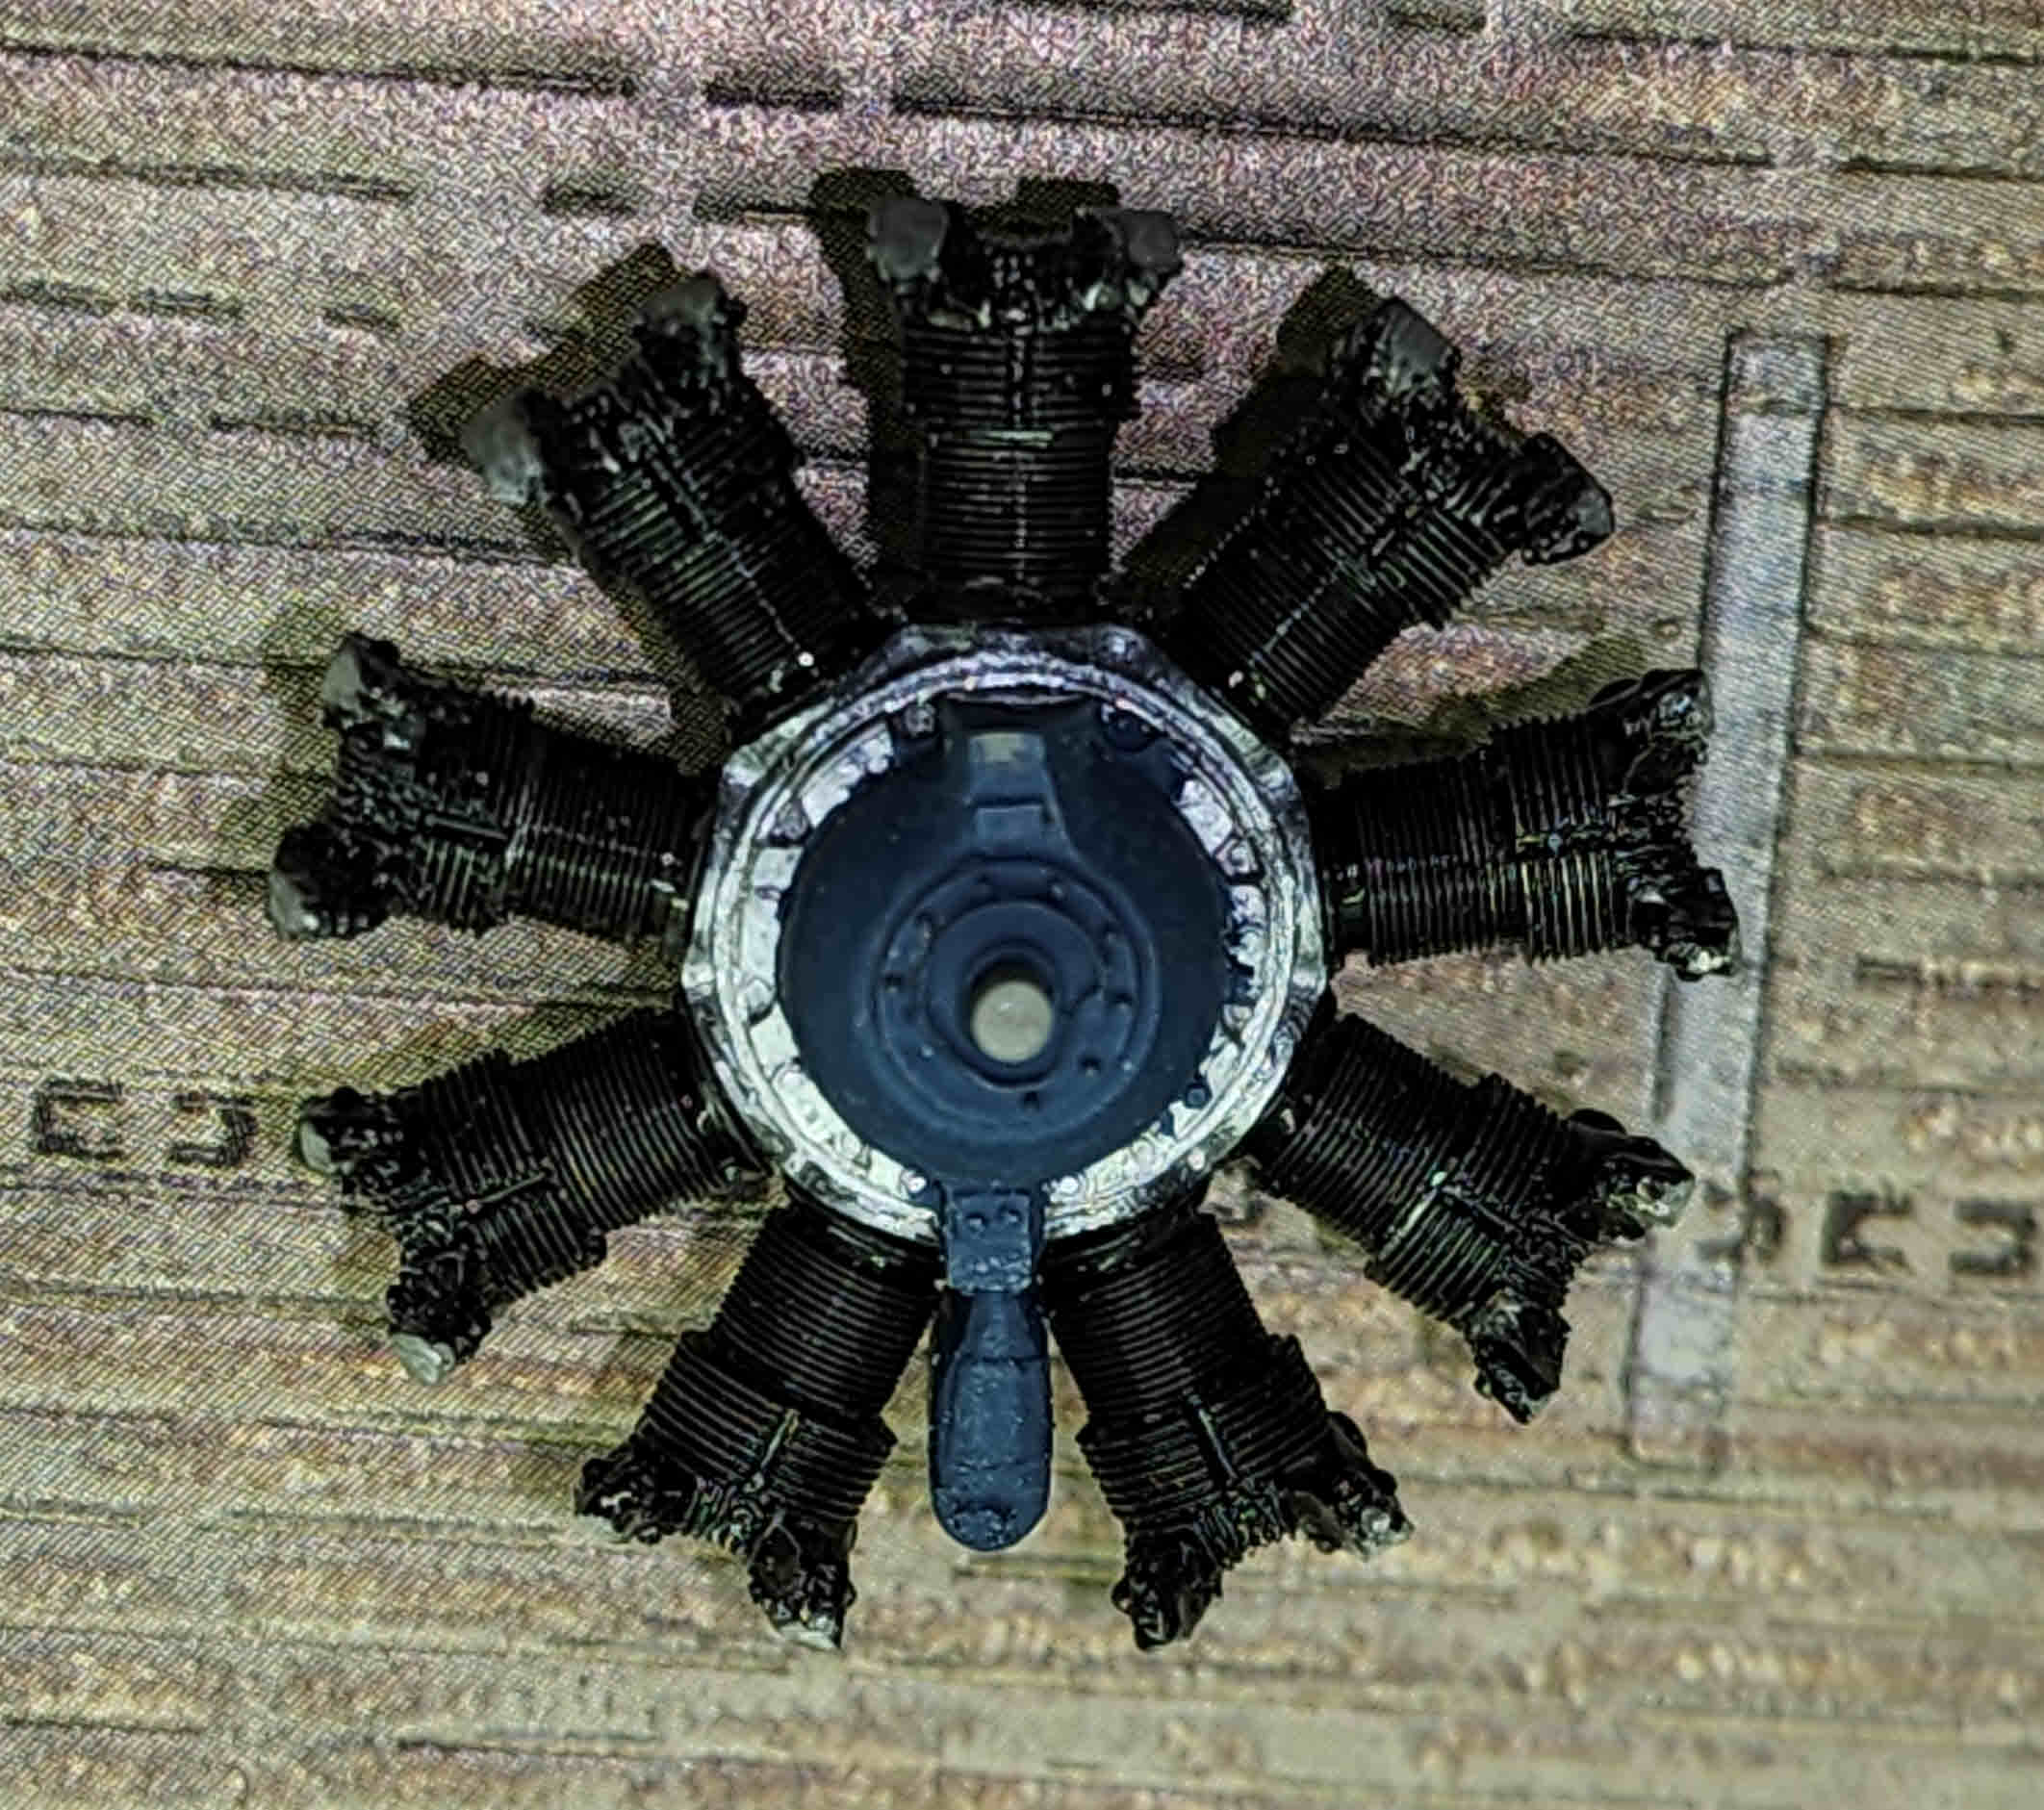
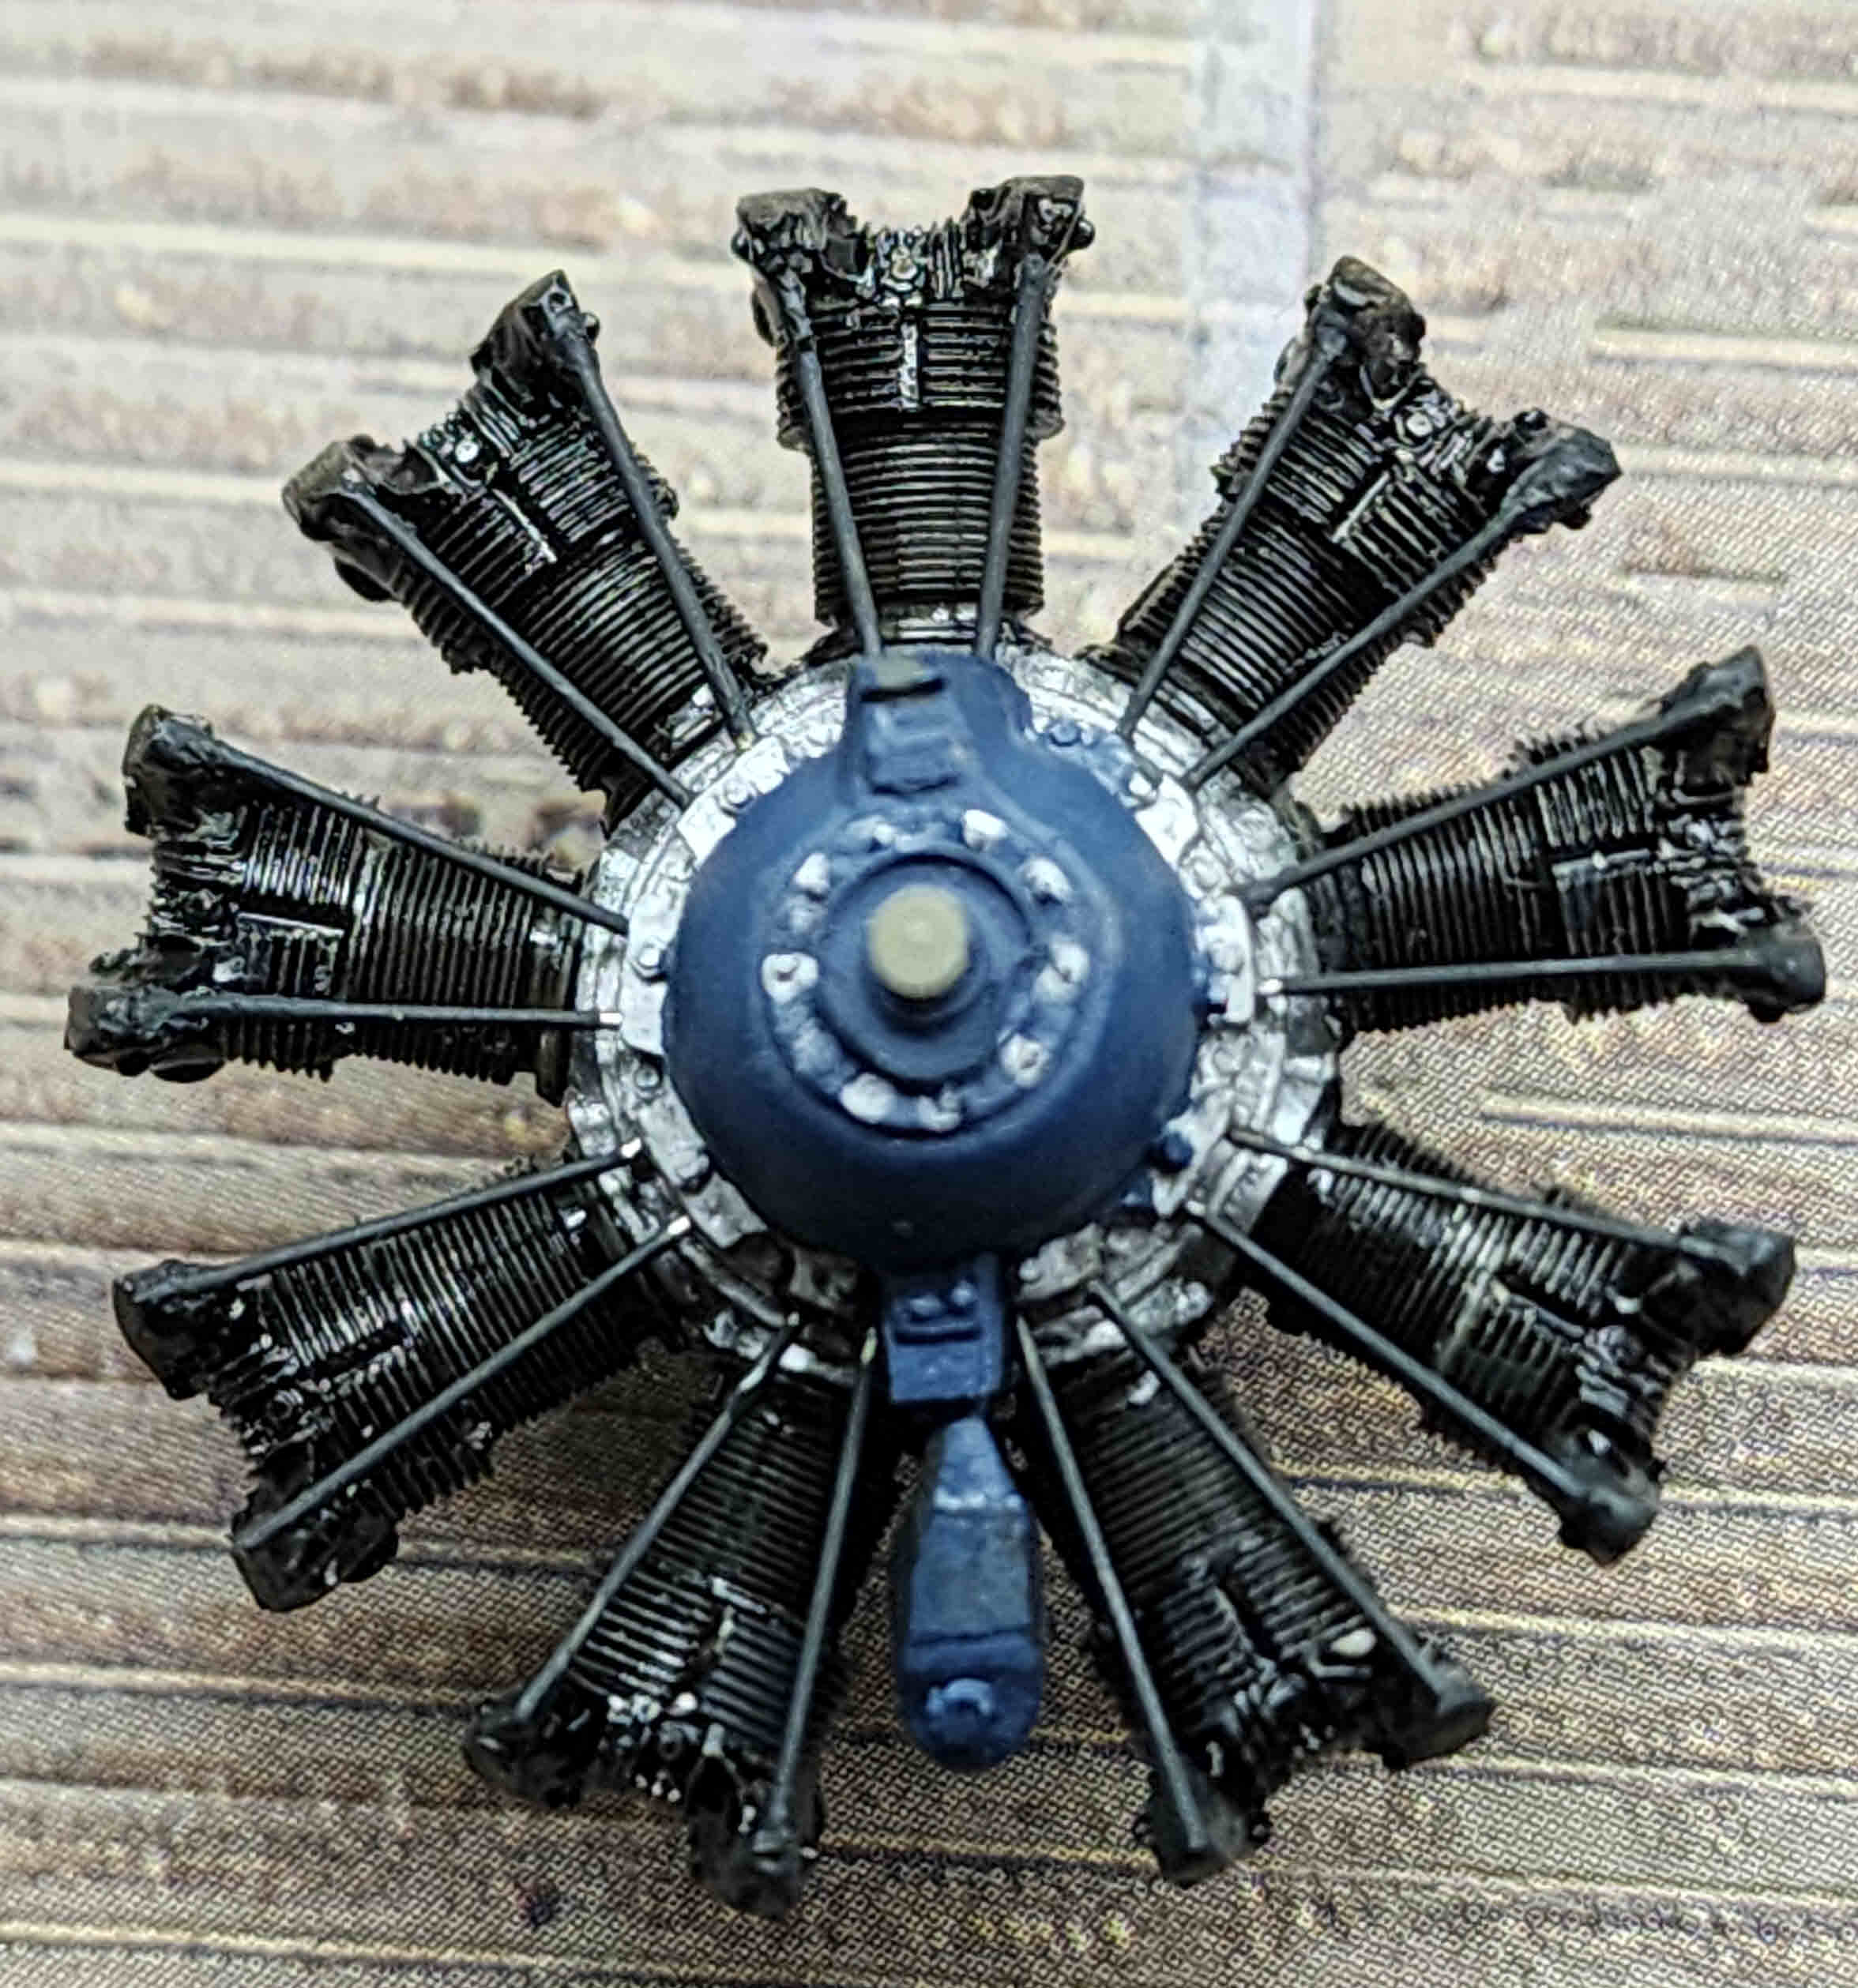
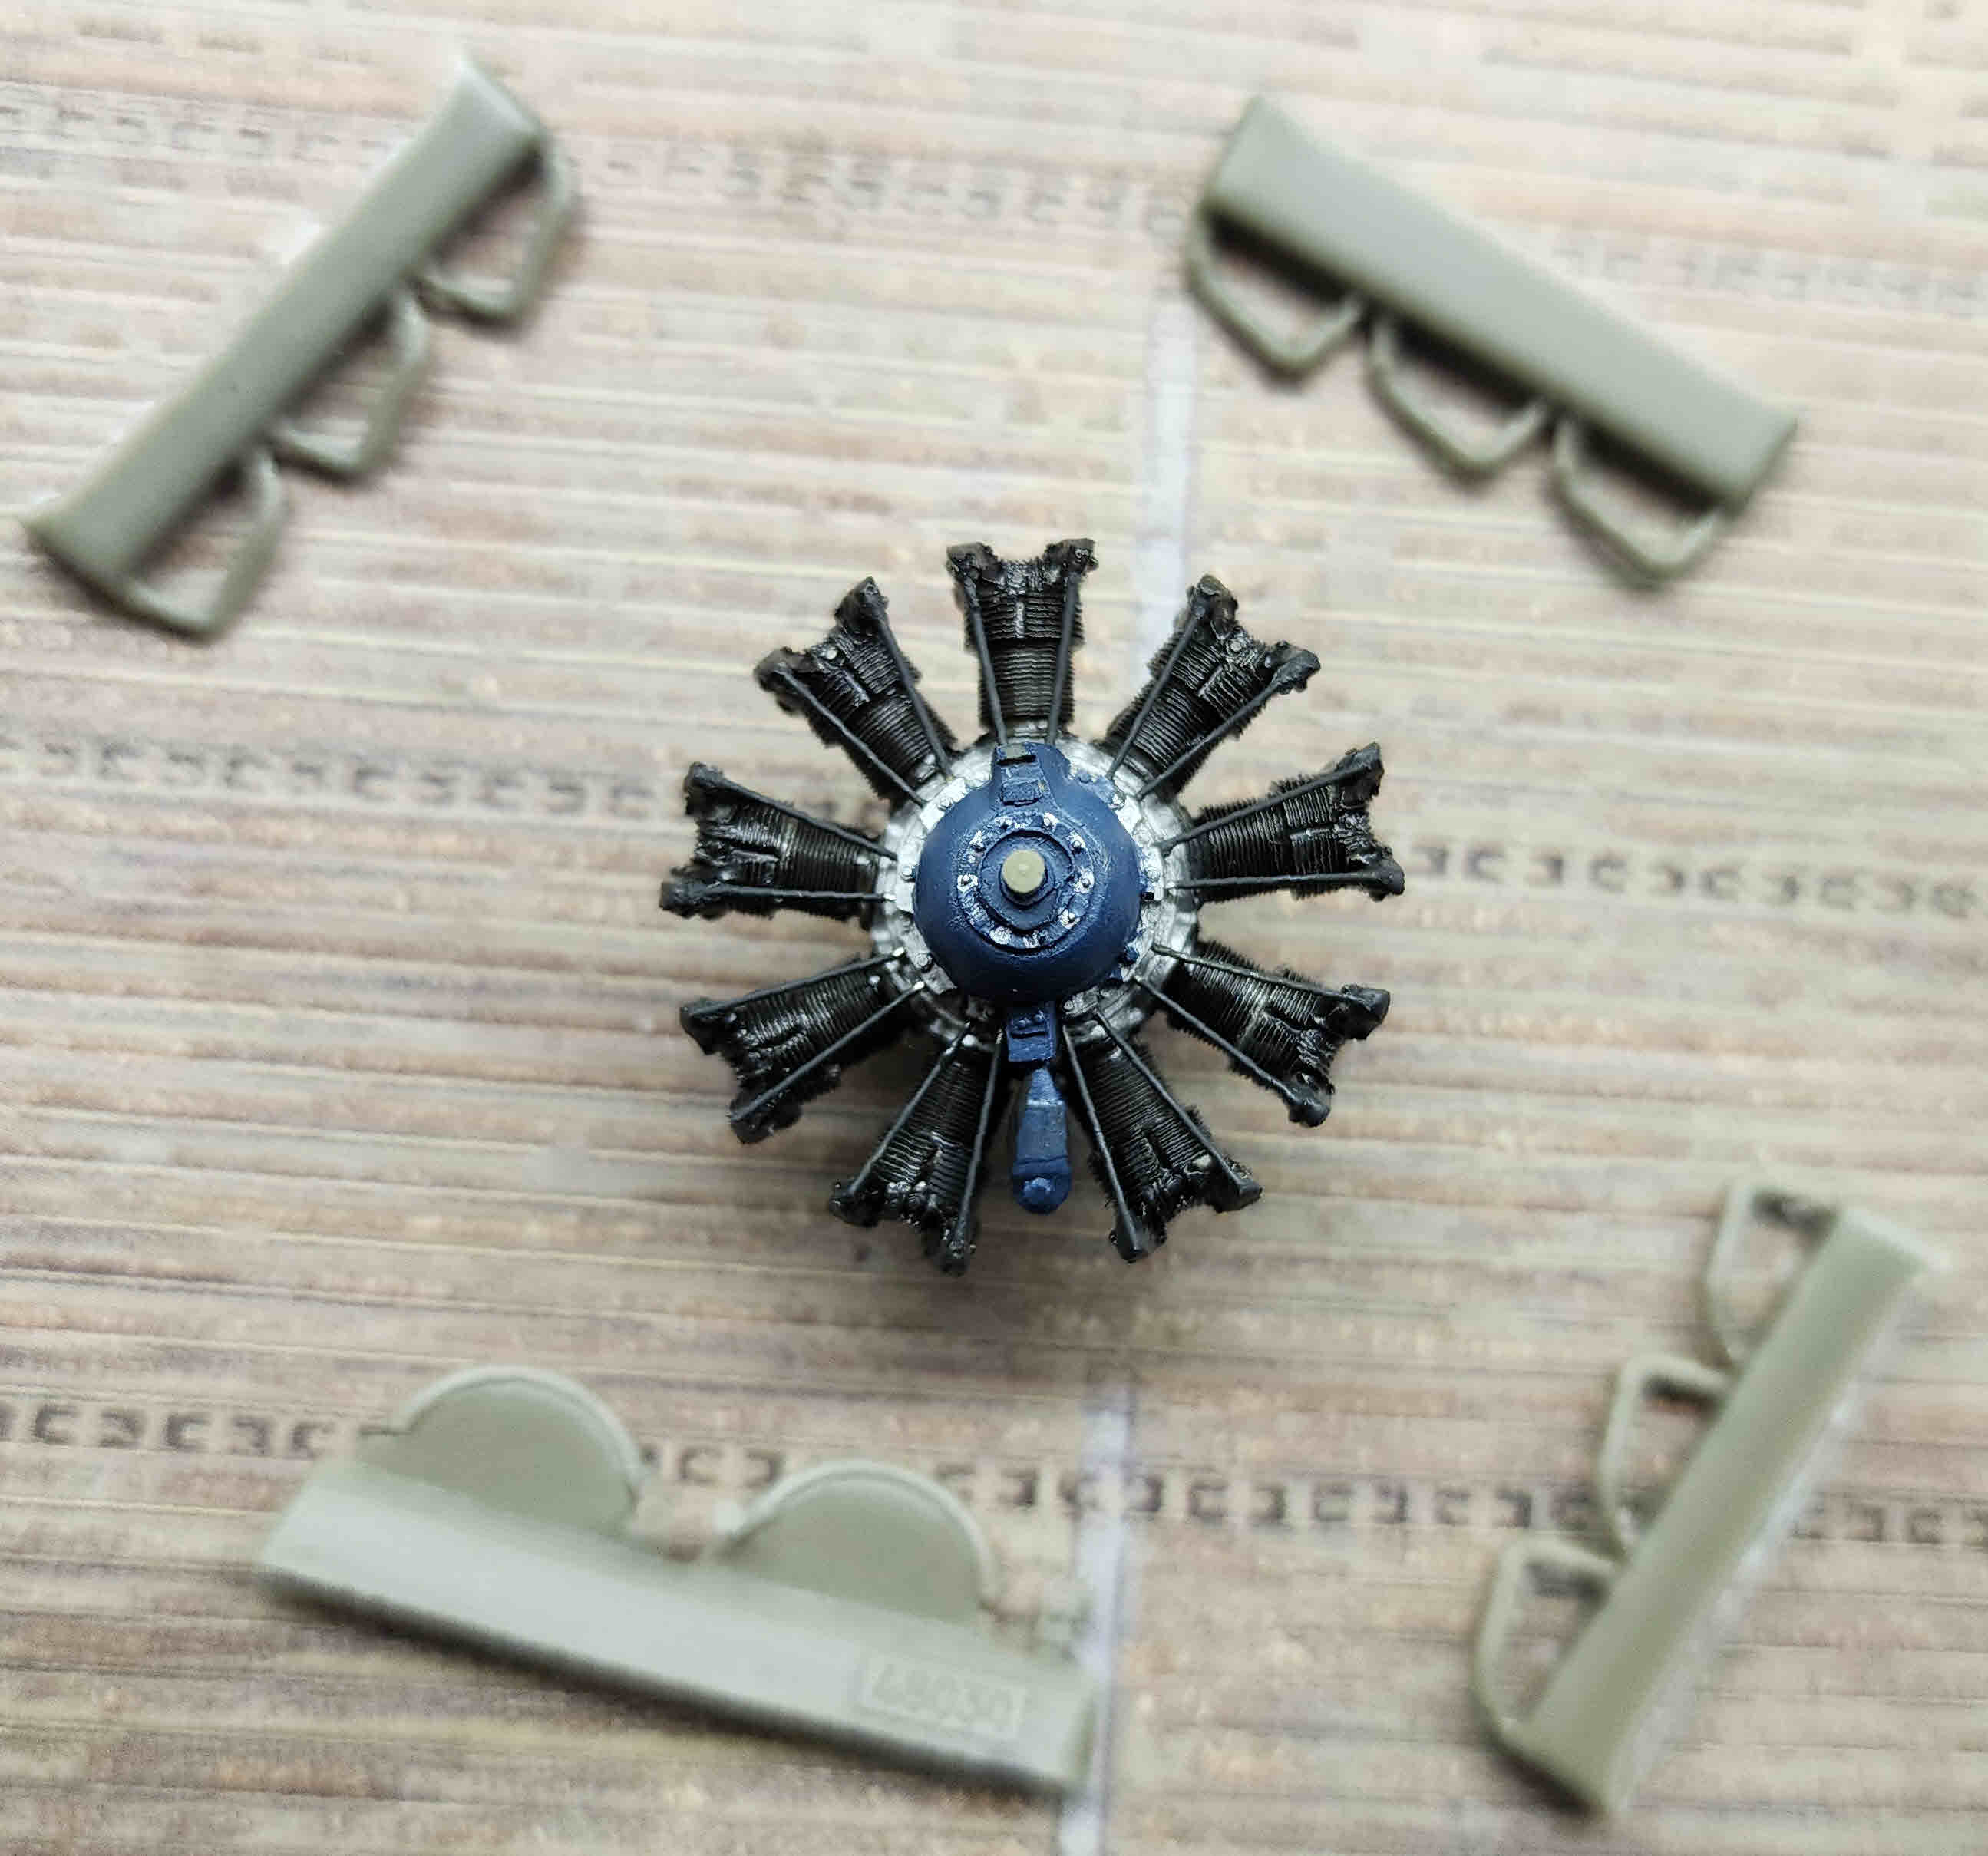
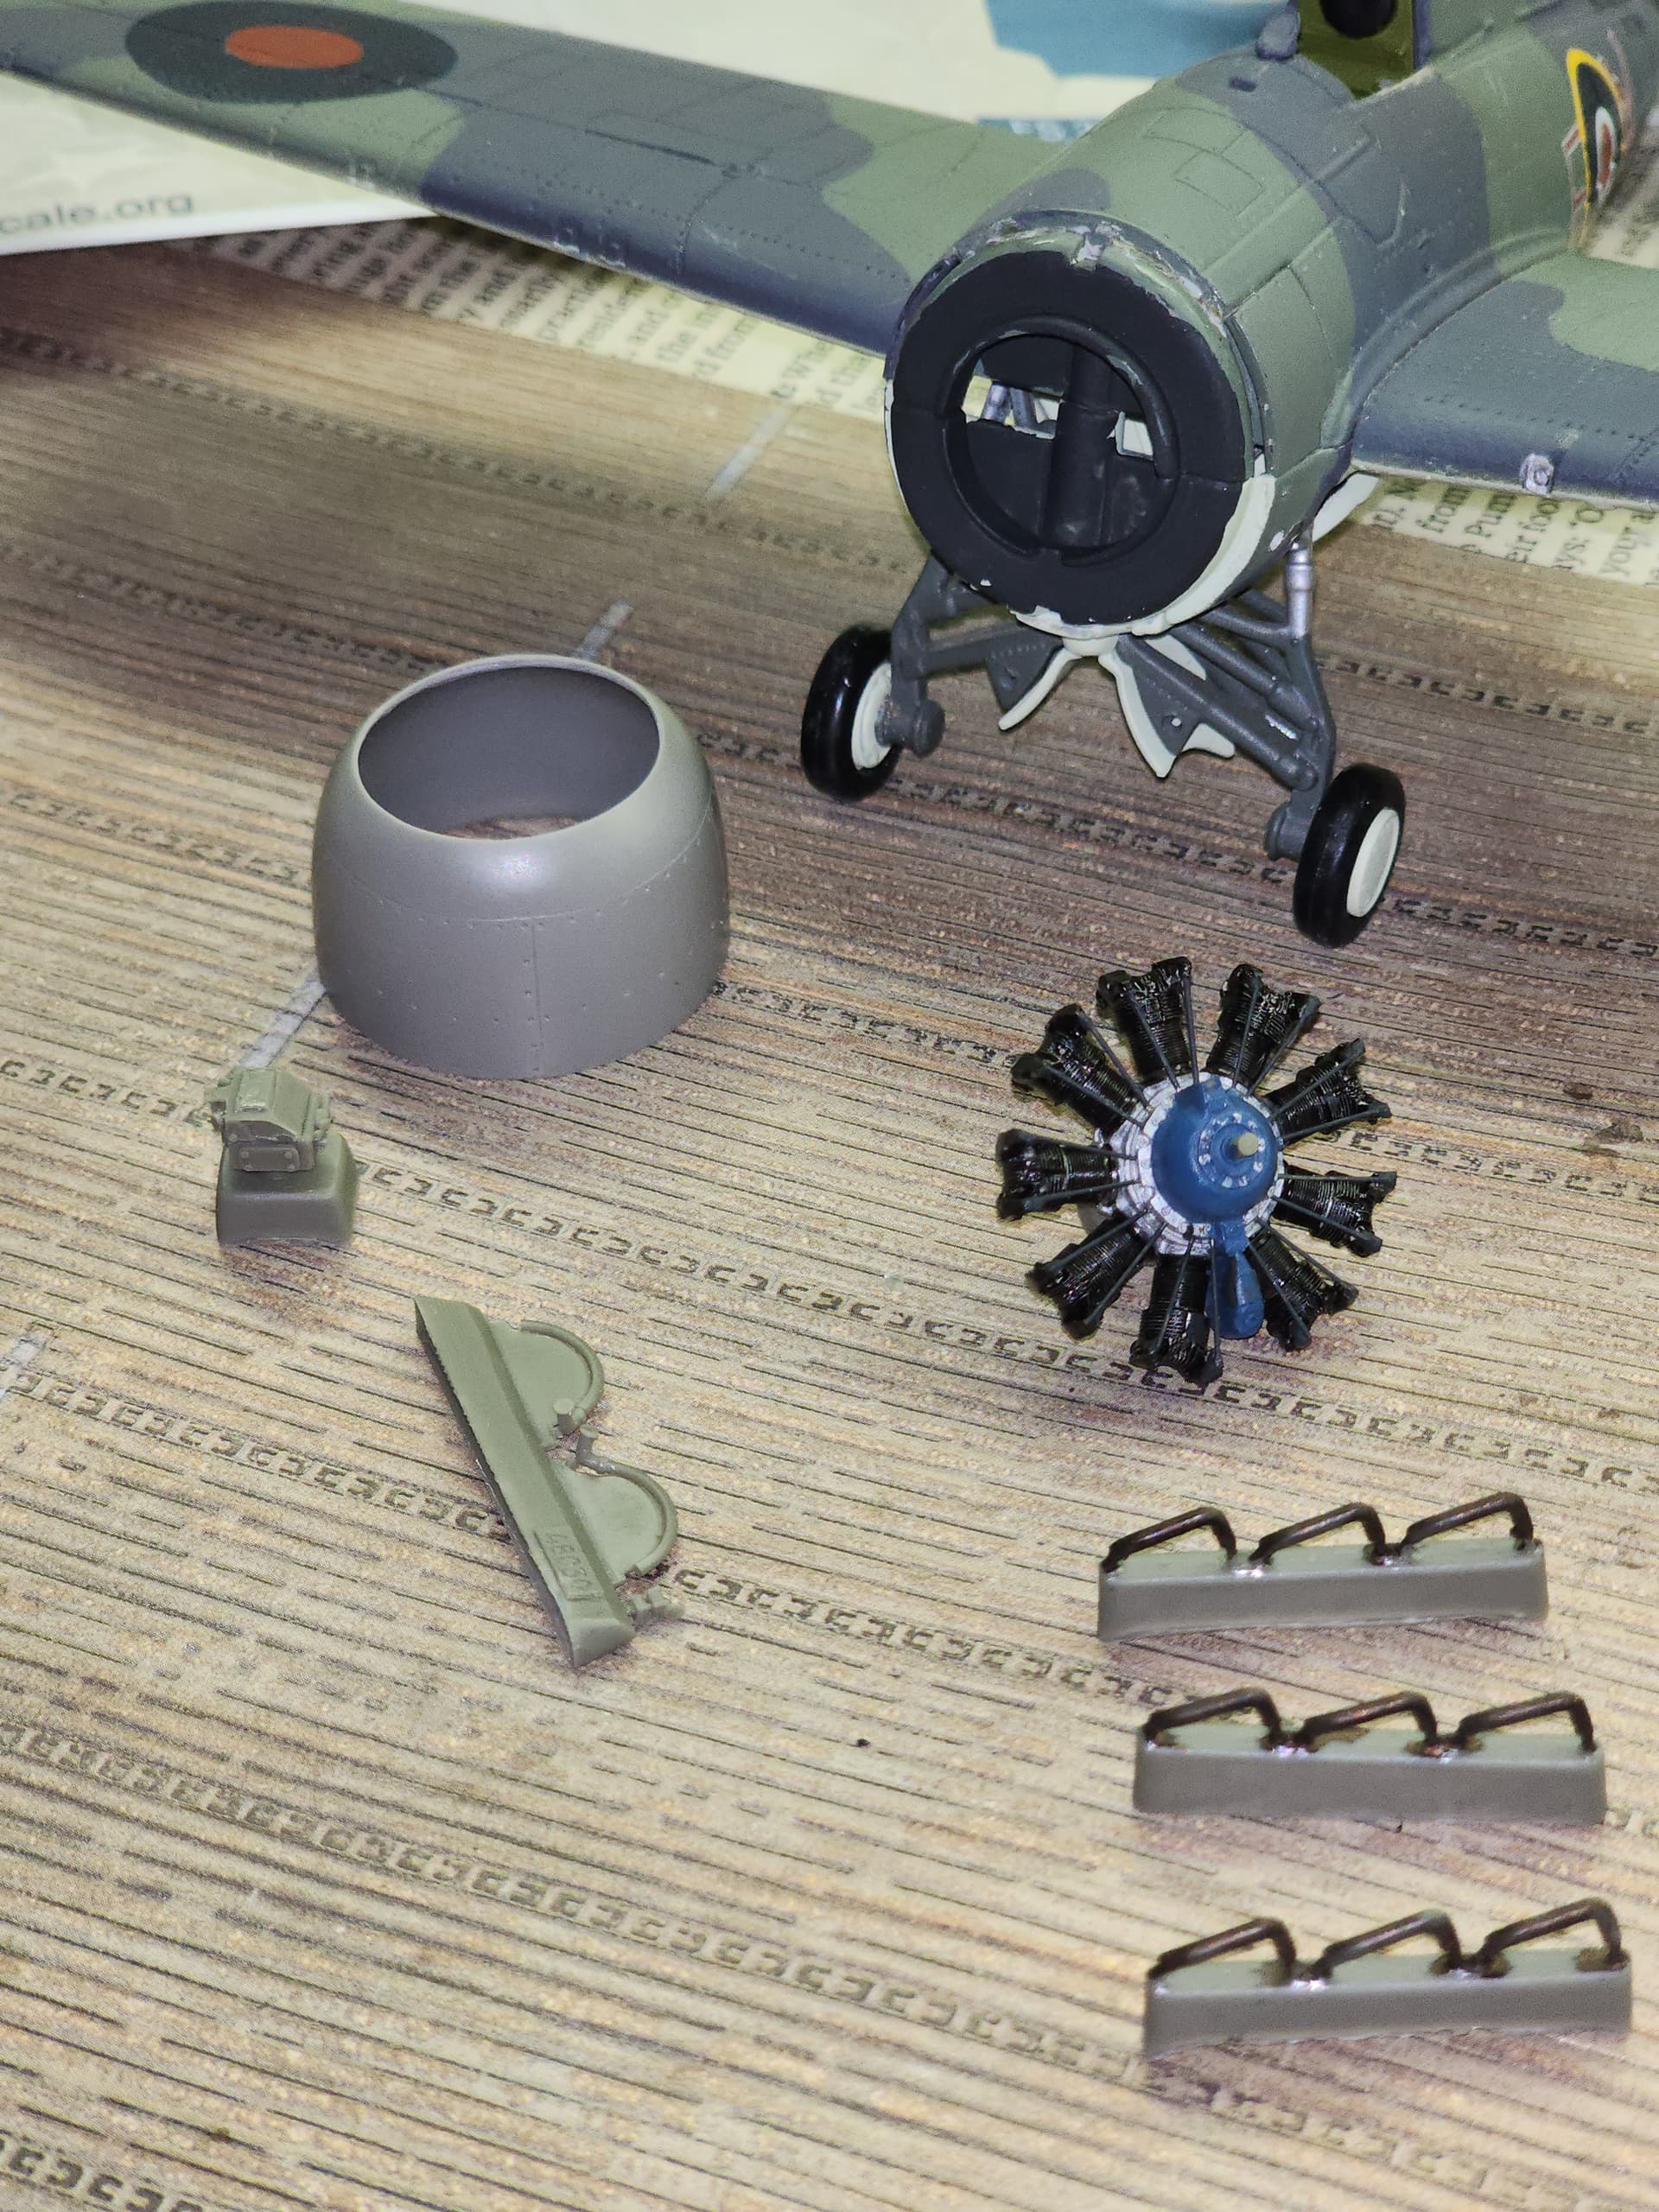
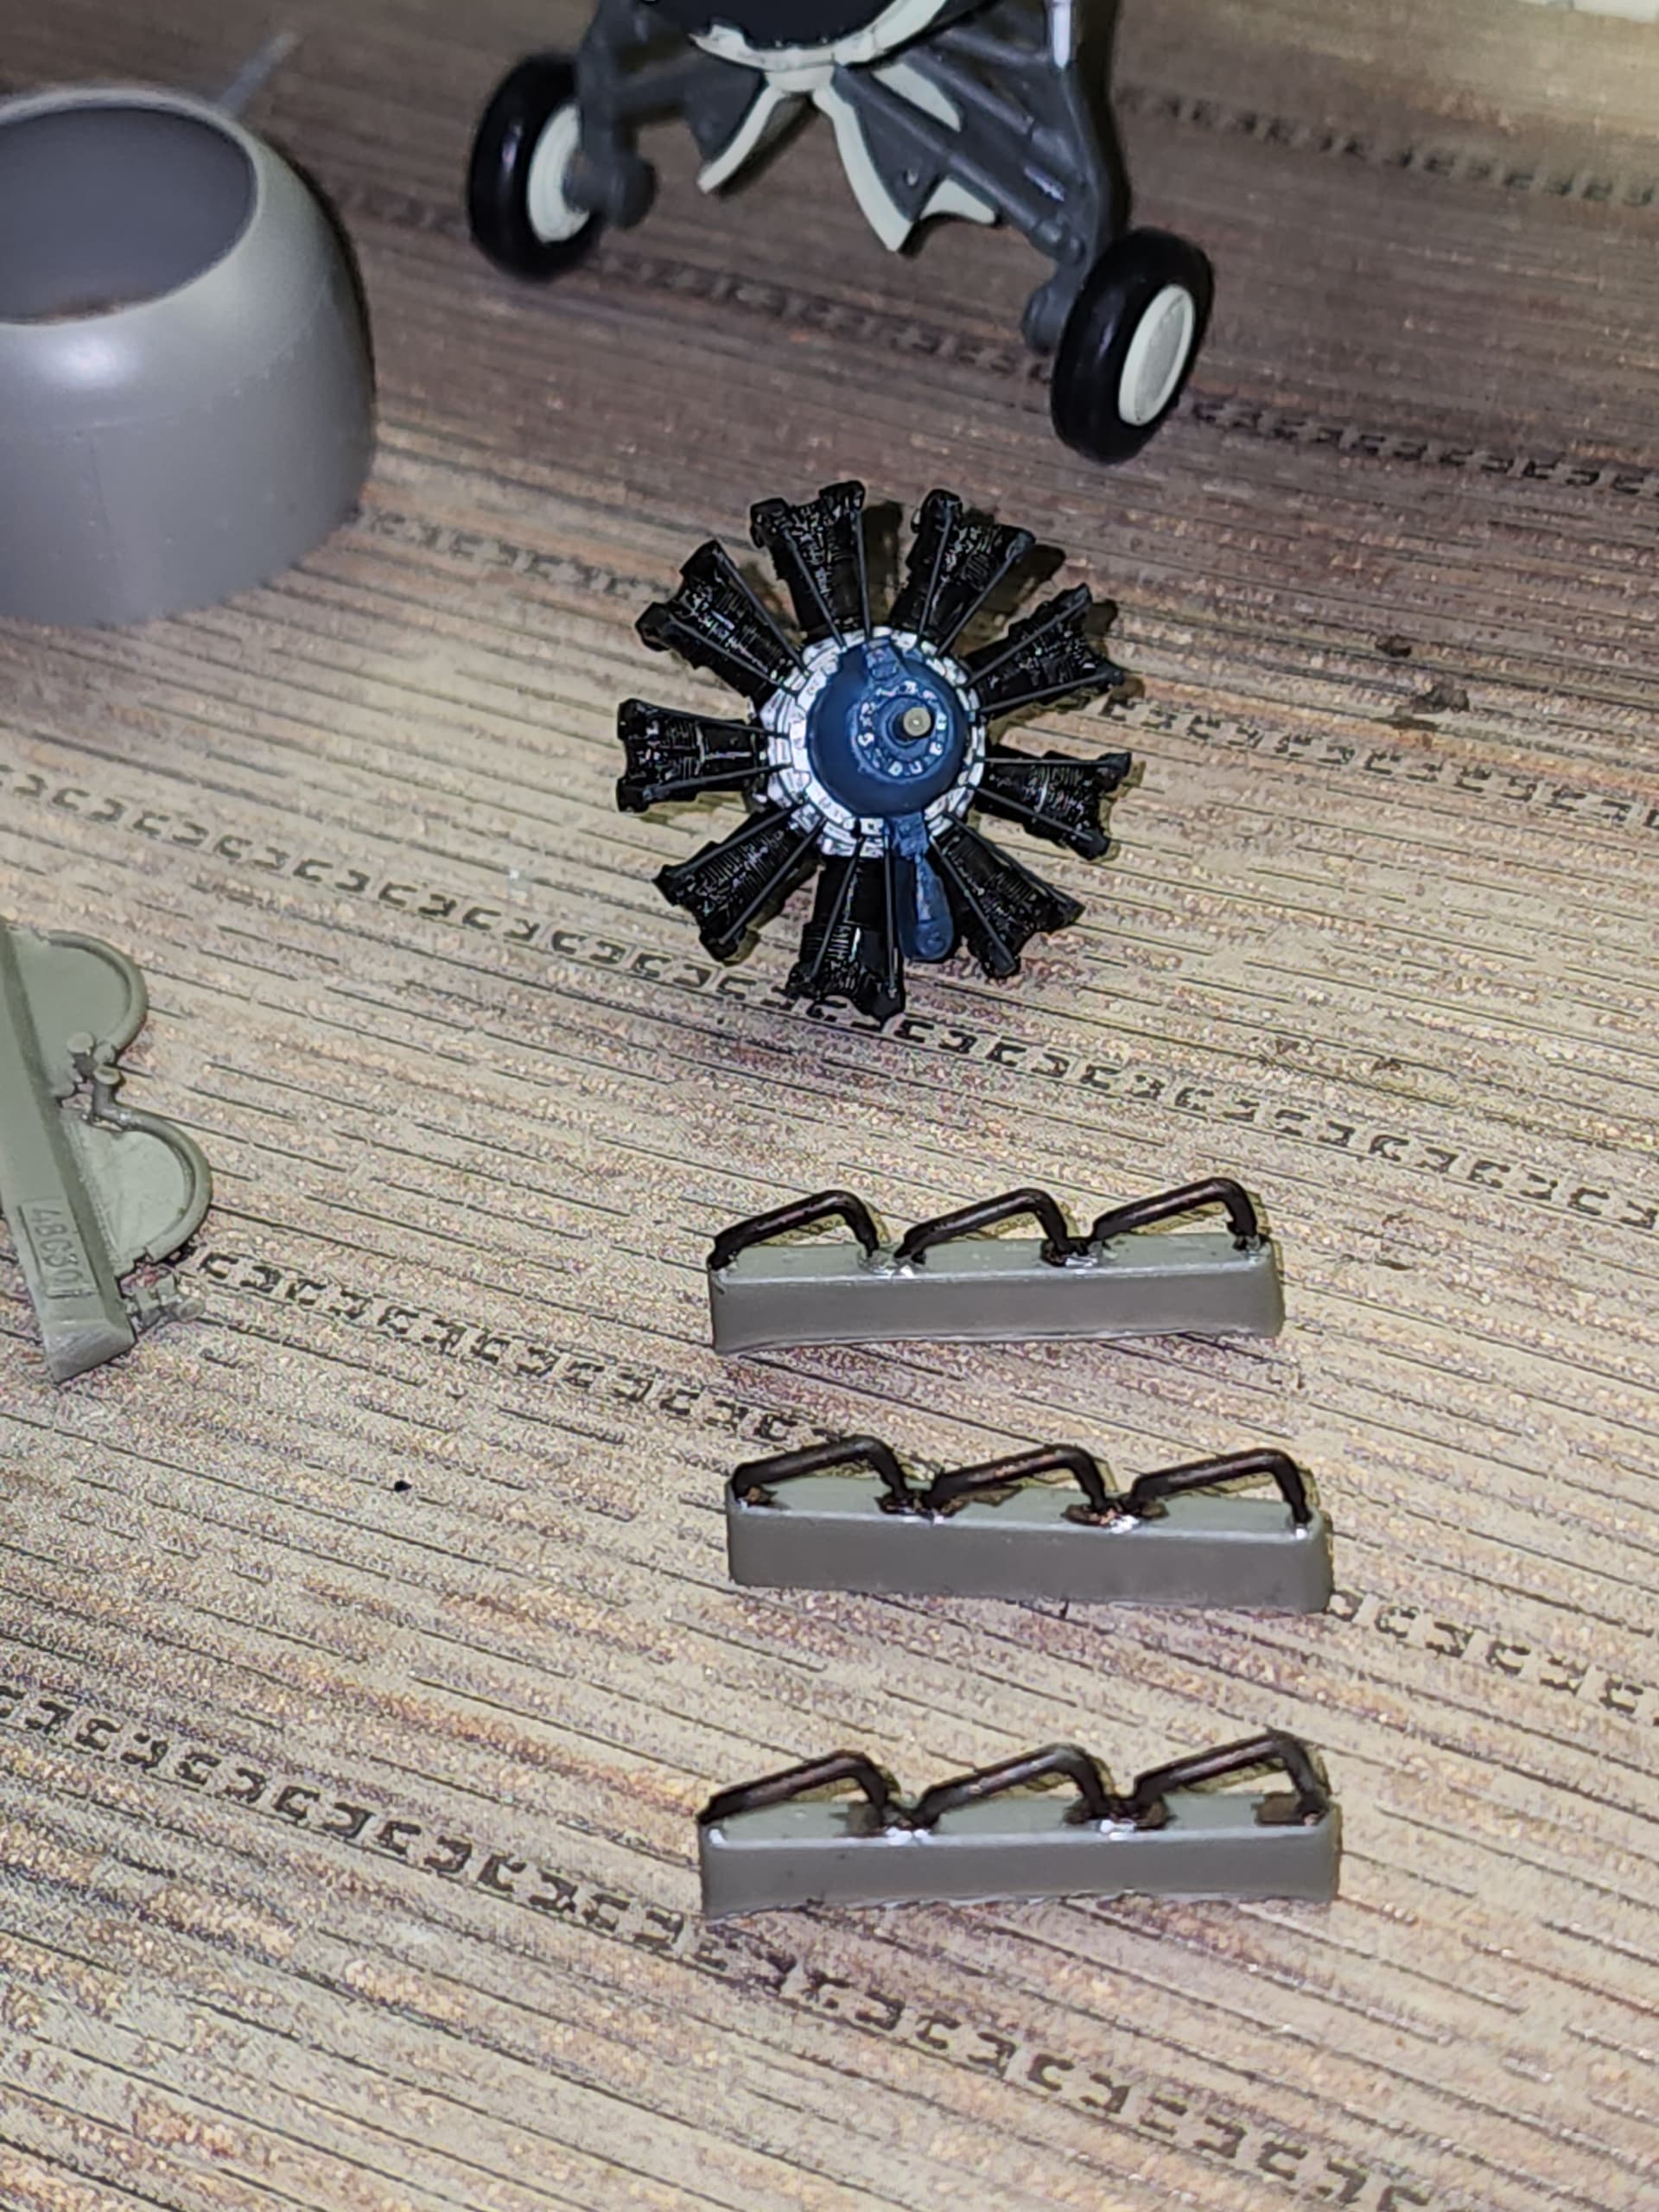
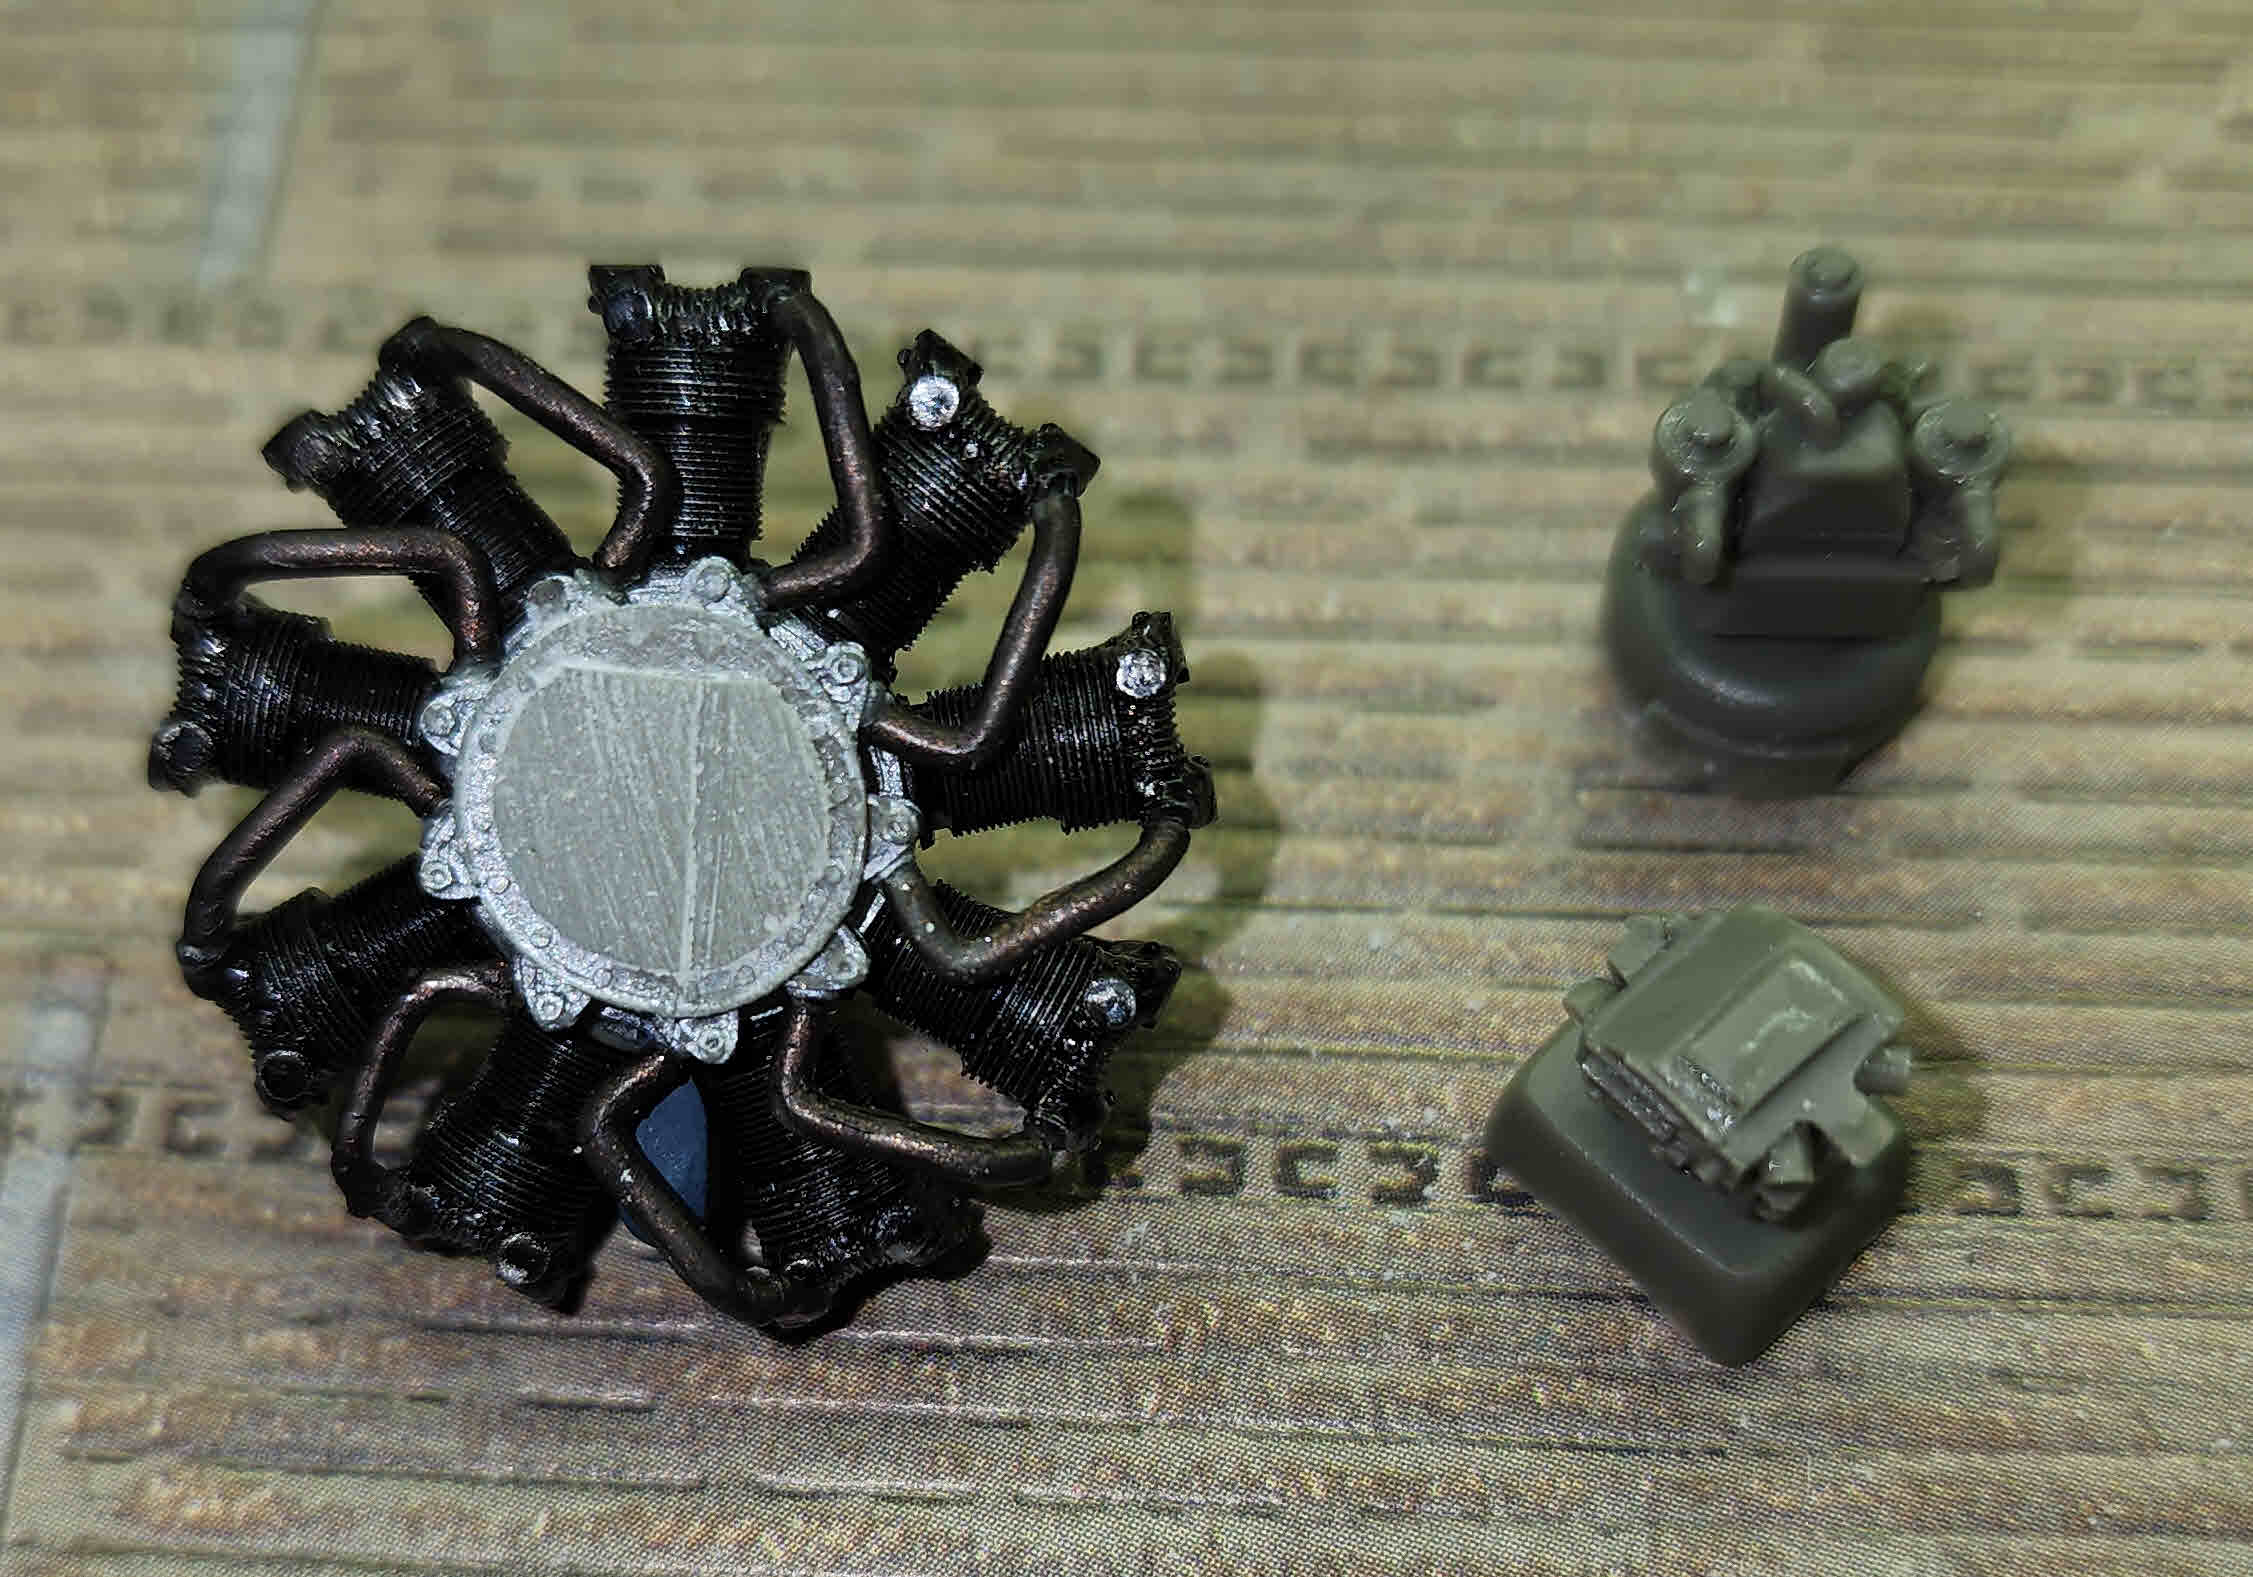
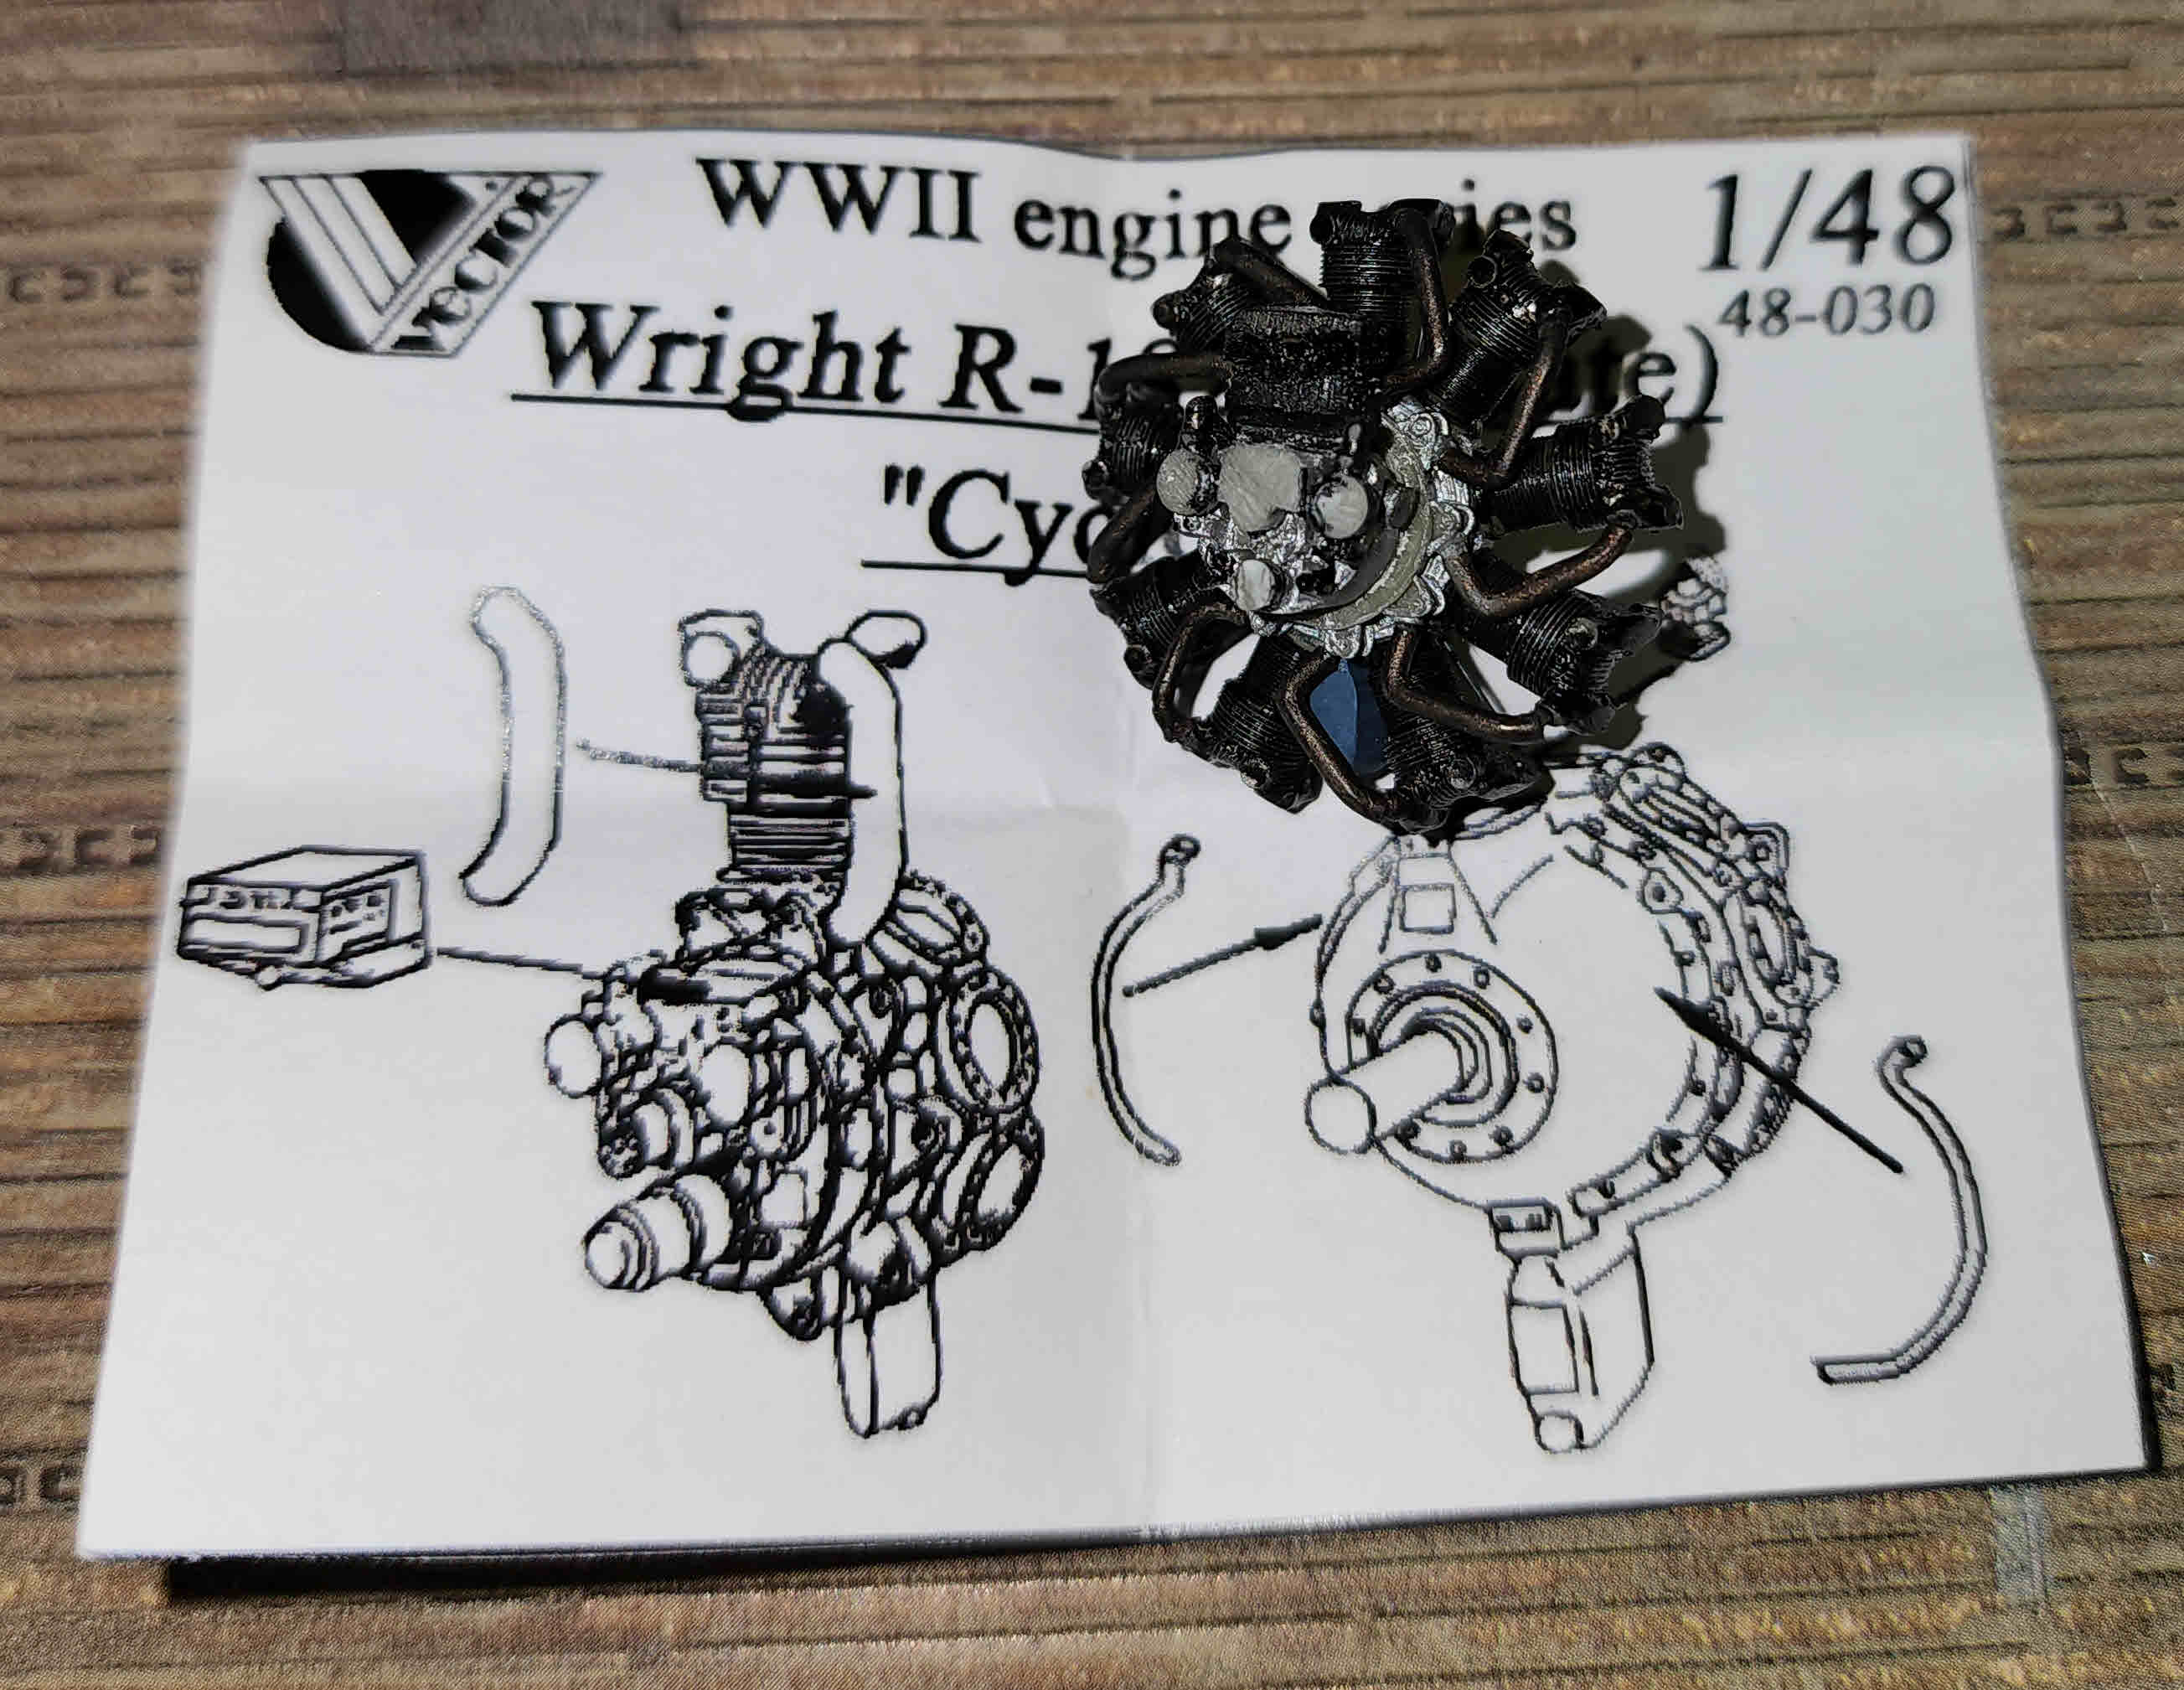
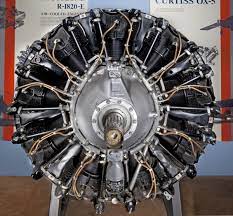
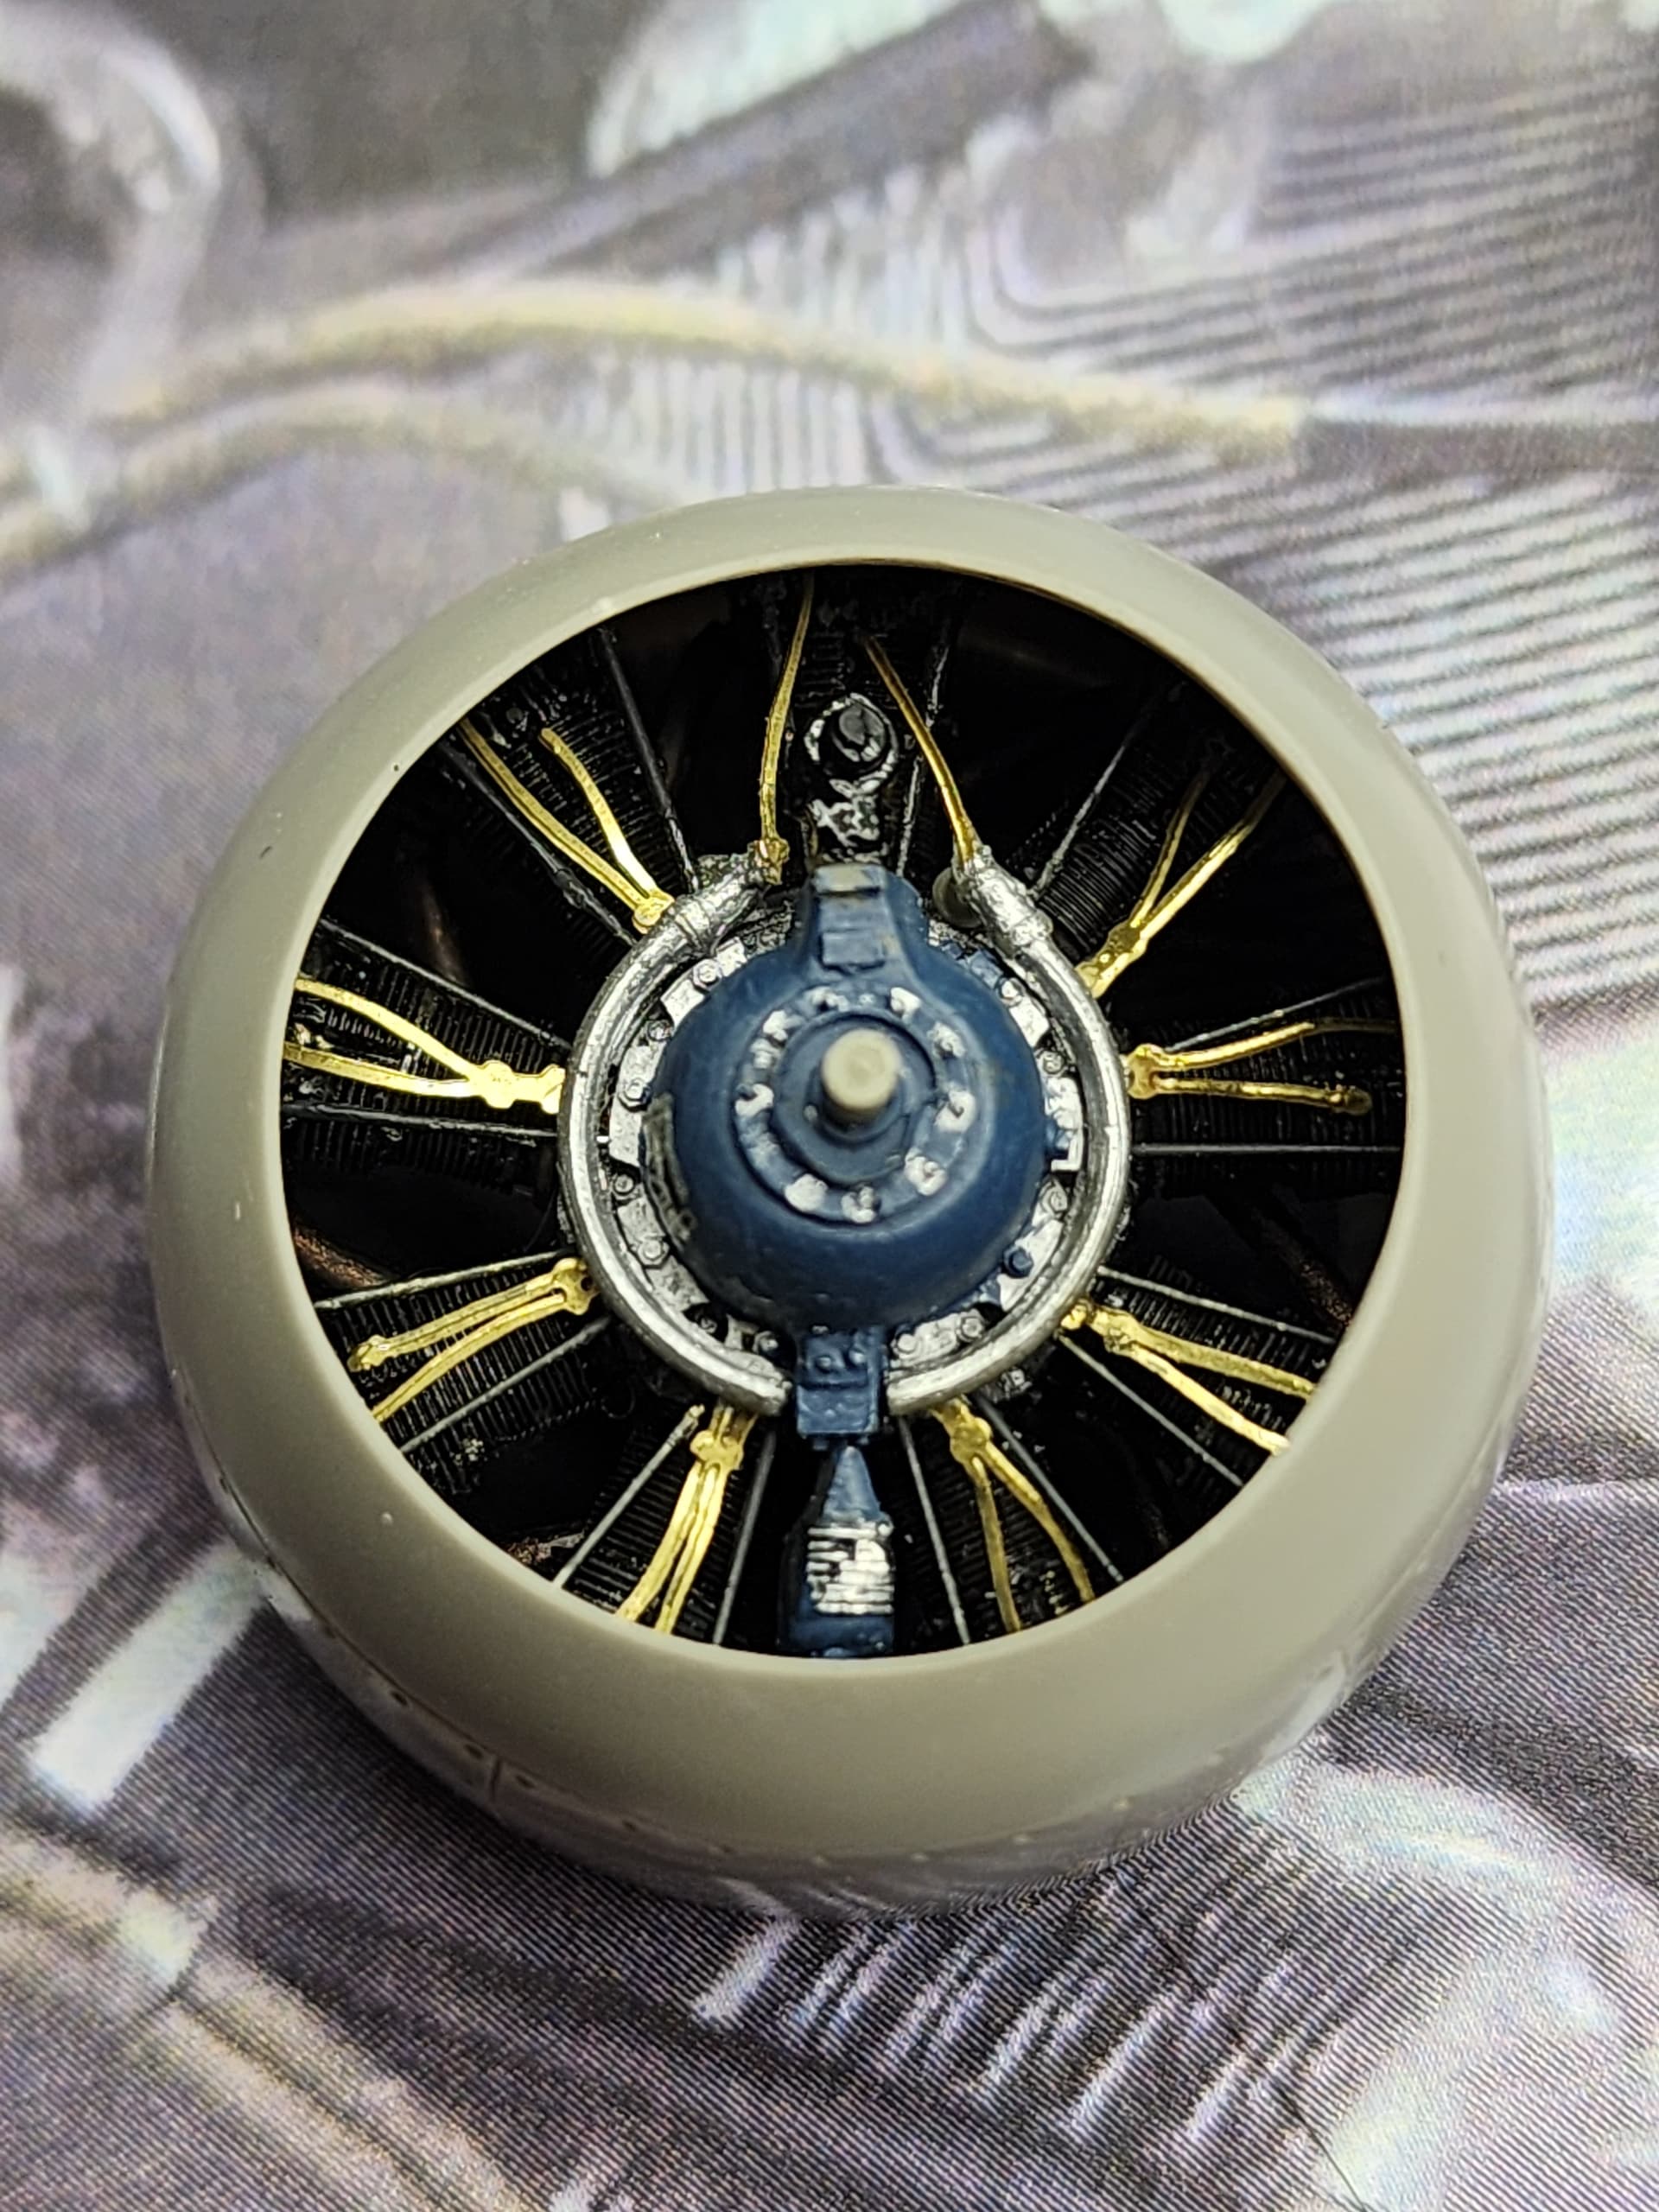
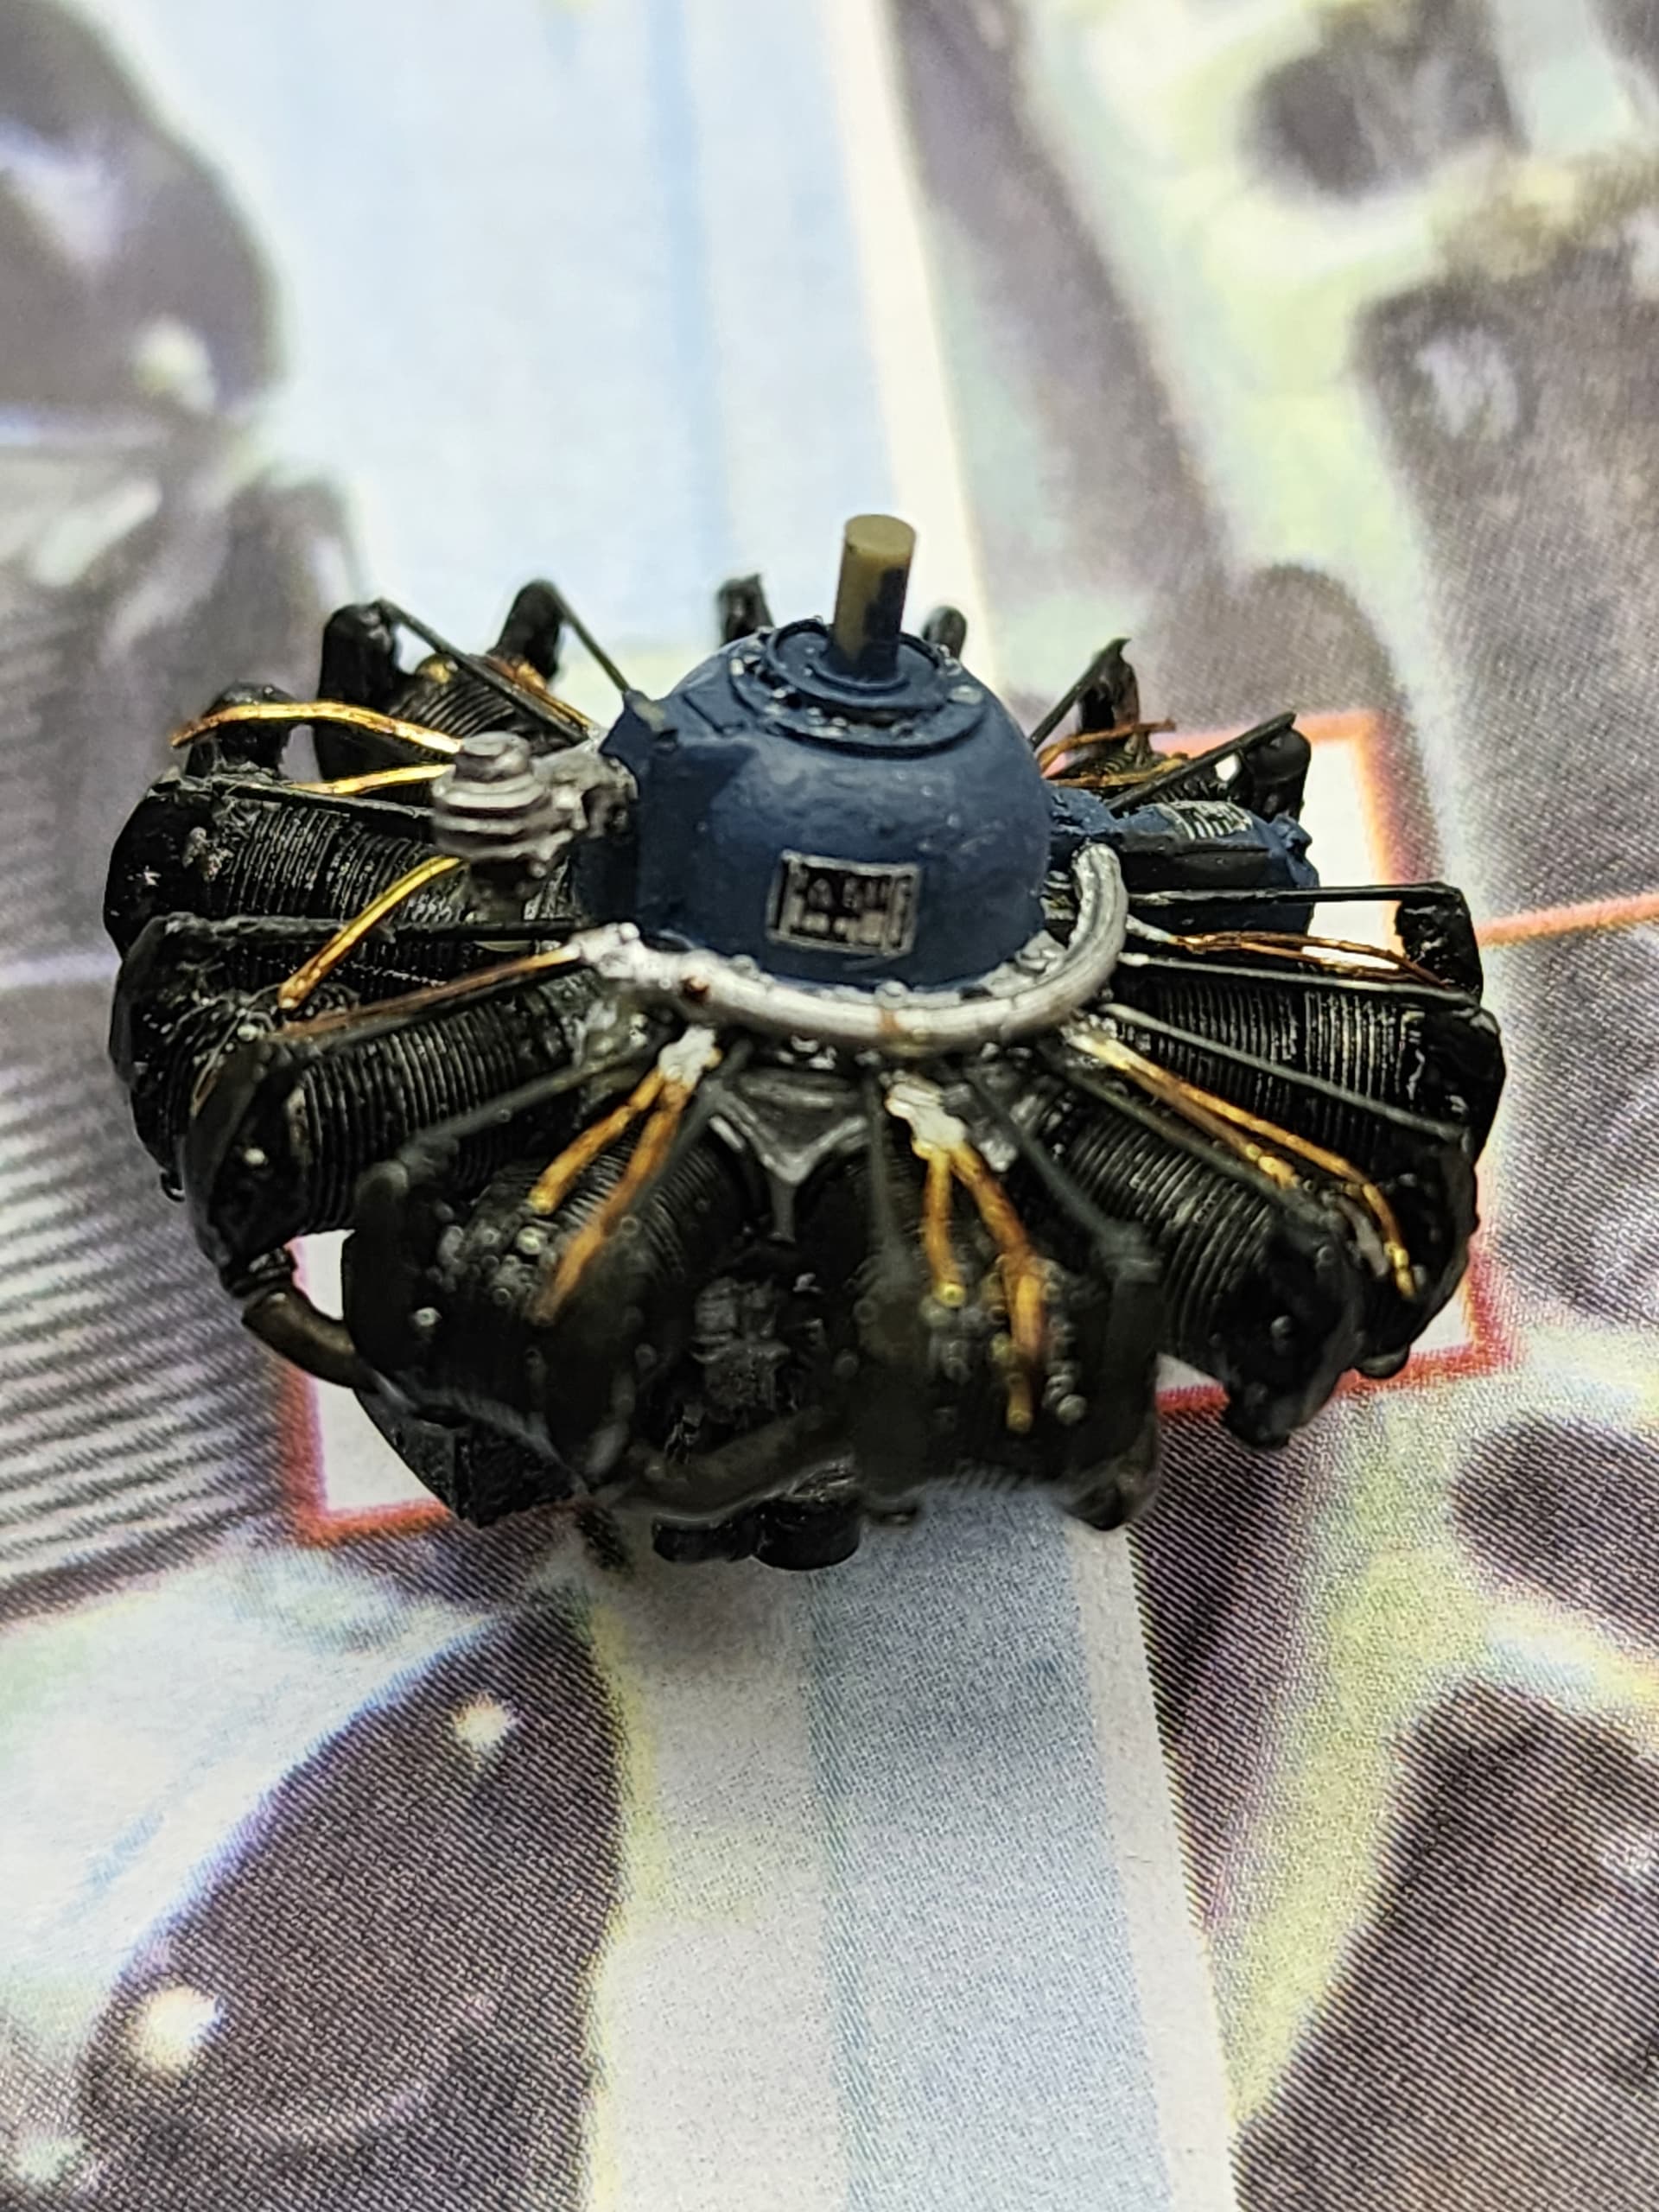
I’ll spare you even more graphic images that magnify the imperfections with horrifying megapixel images invisible to the naked eye. The point is I put some paint on the gearbox (USN intermediate blue to kinda match the color on the reference museum photo) and I glued on the cylinders. I also had to shave down the rocker boxes so it would fit inside the cowling. (If memory serves, H.G. also had to do that with the Dutch H-75A7, as did I with my resin CW-21B.)

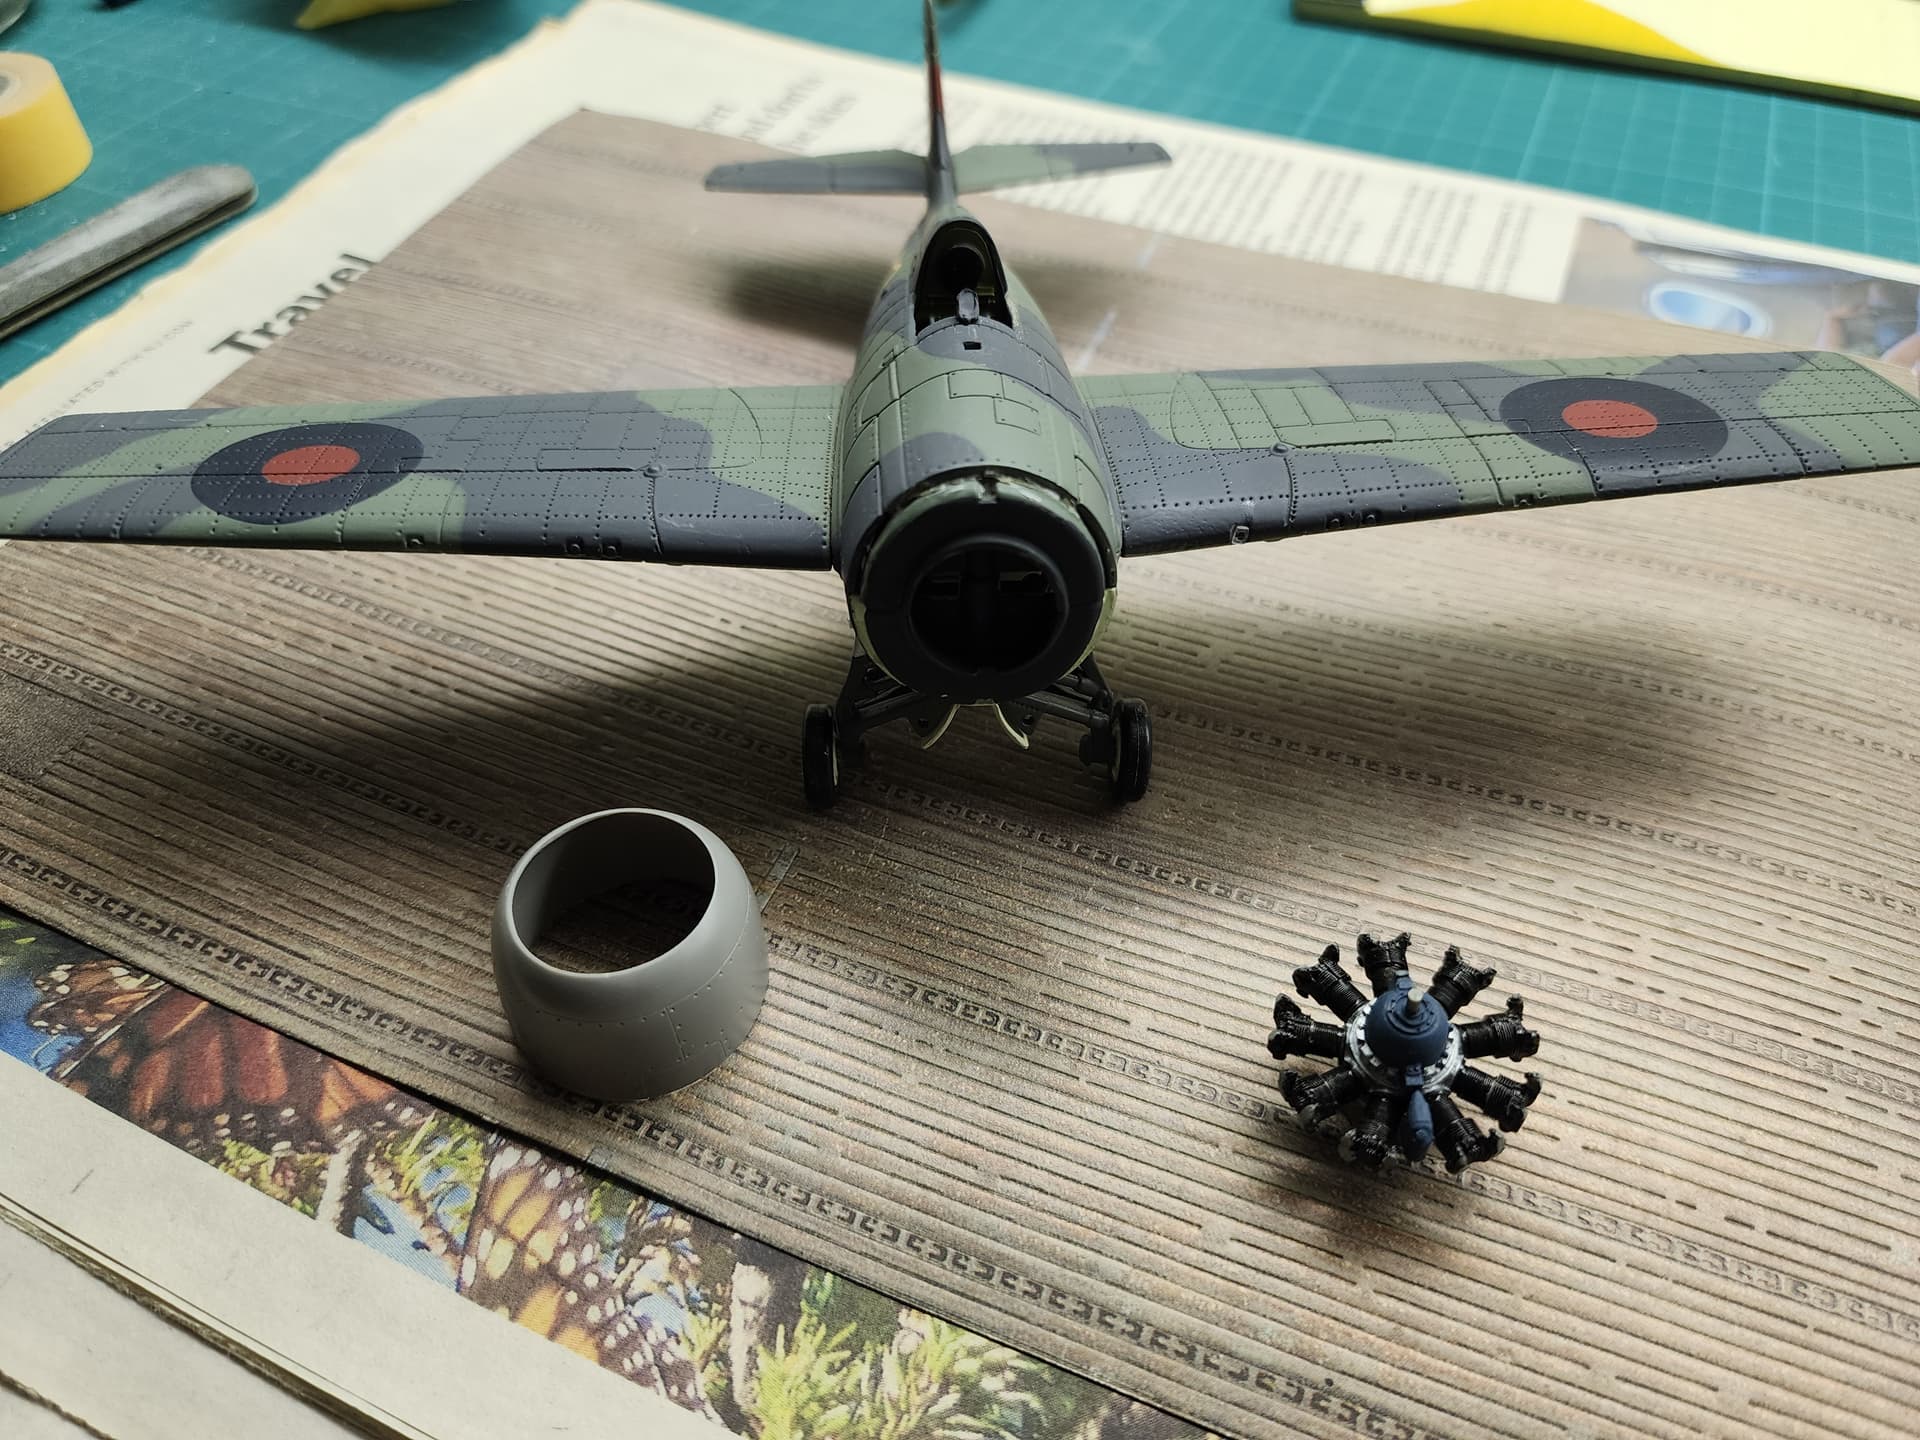
I’ll show the fit when I get everything aligned and glued in.

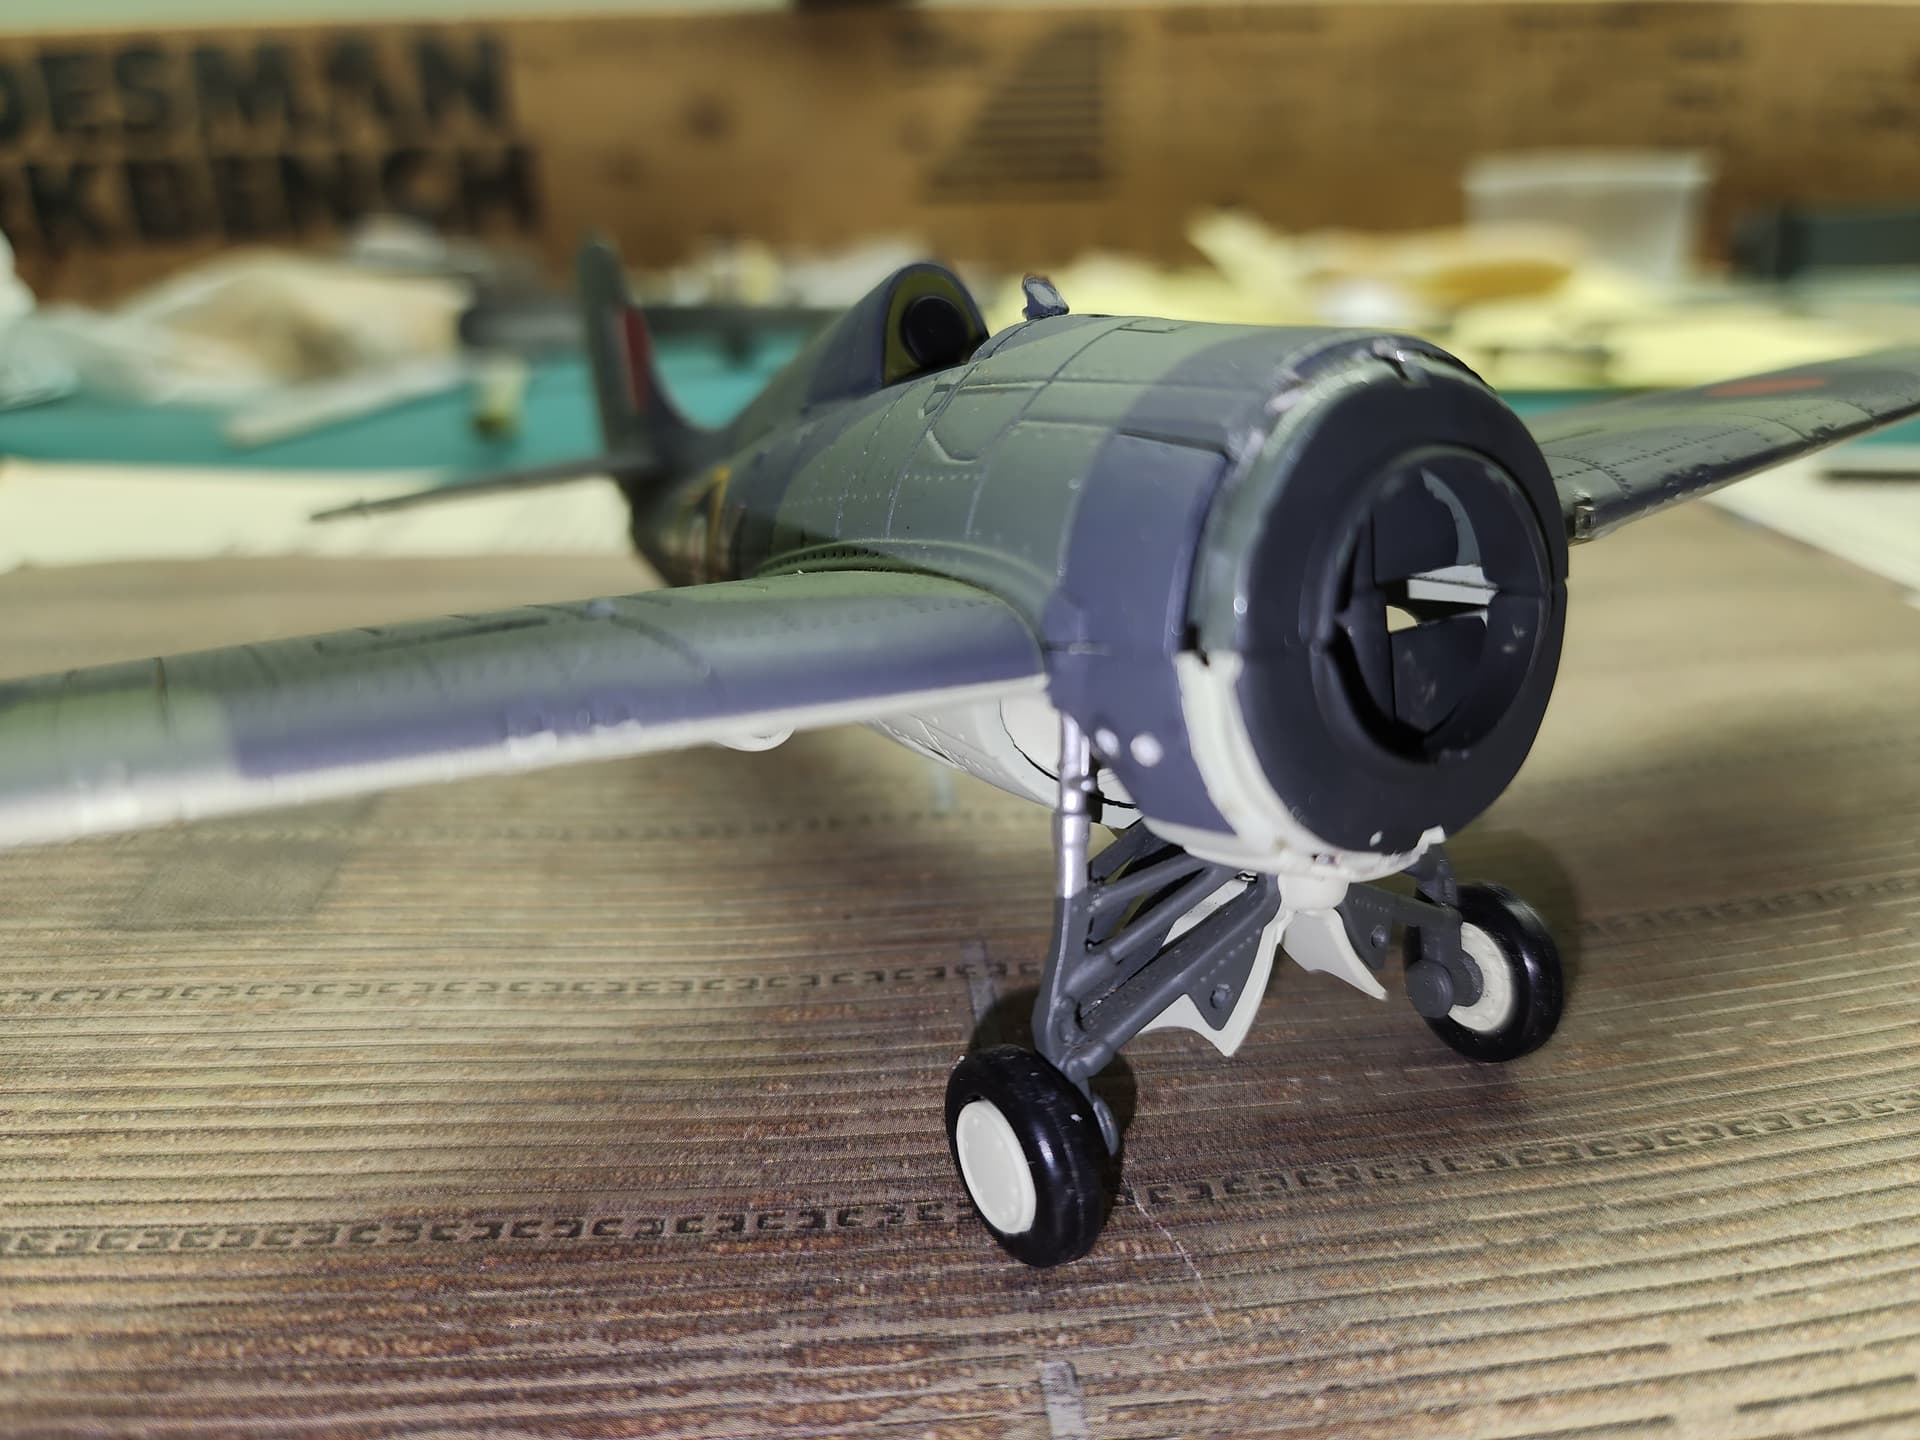
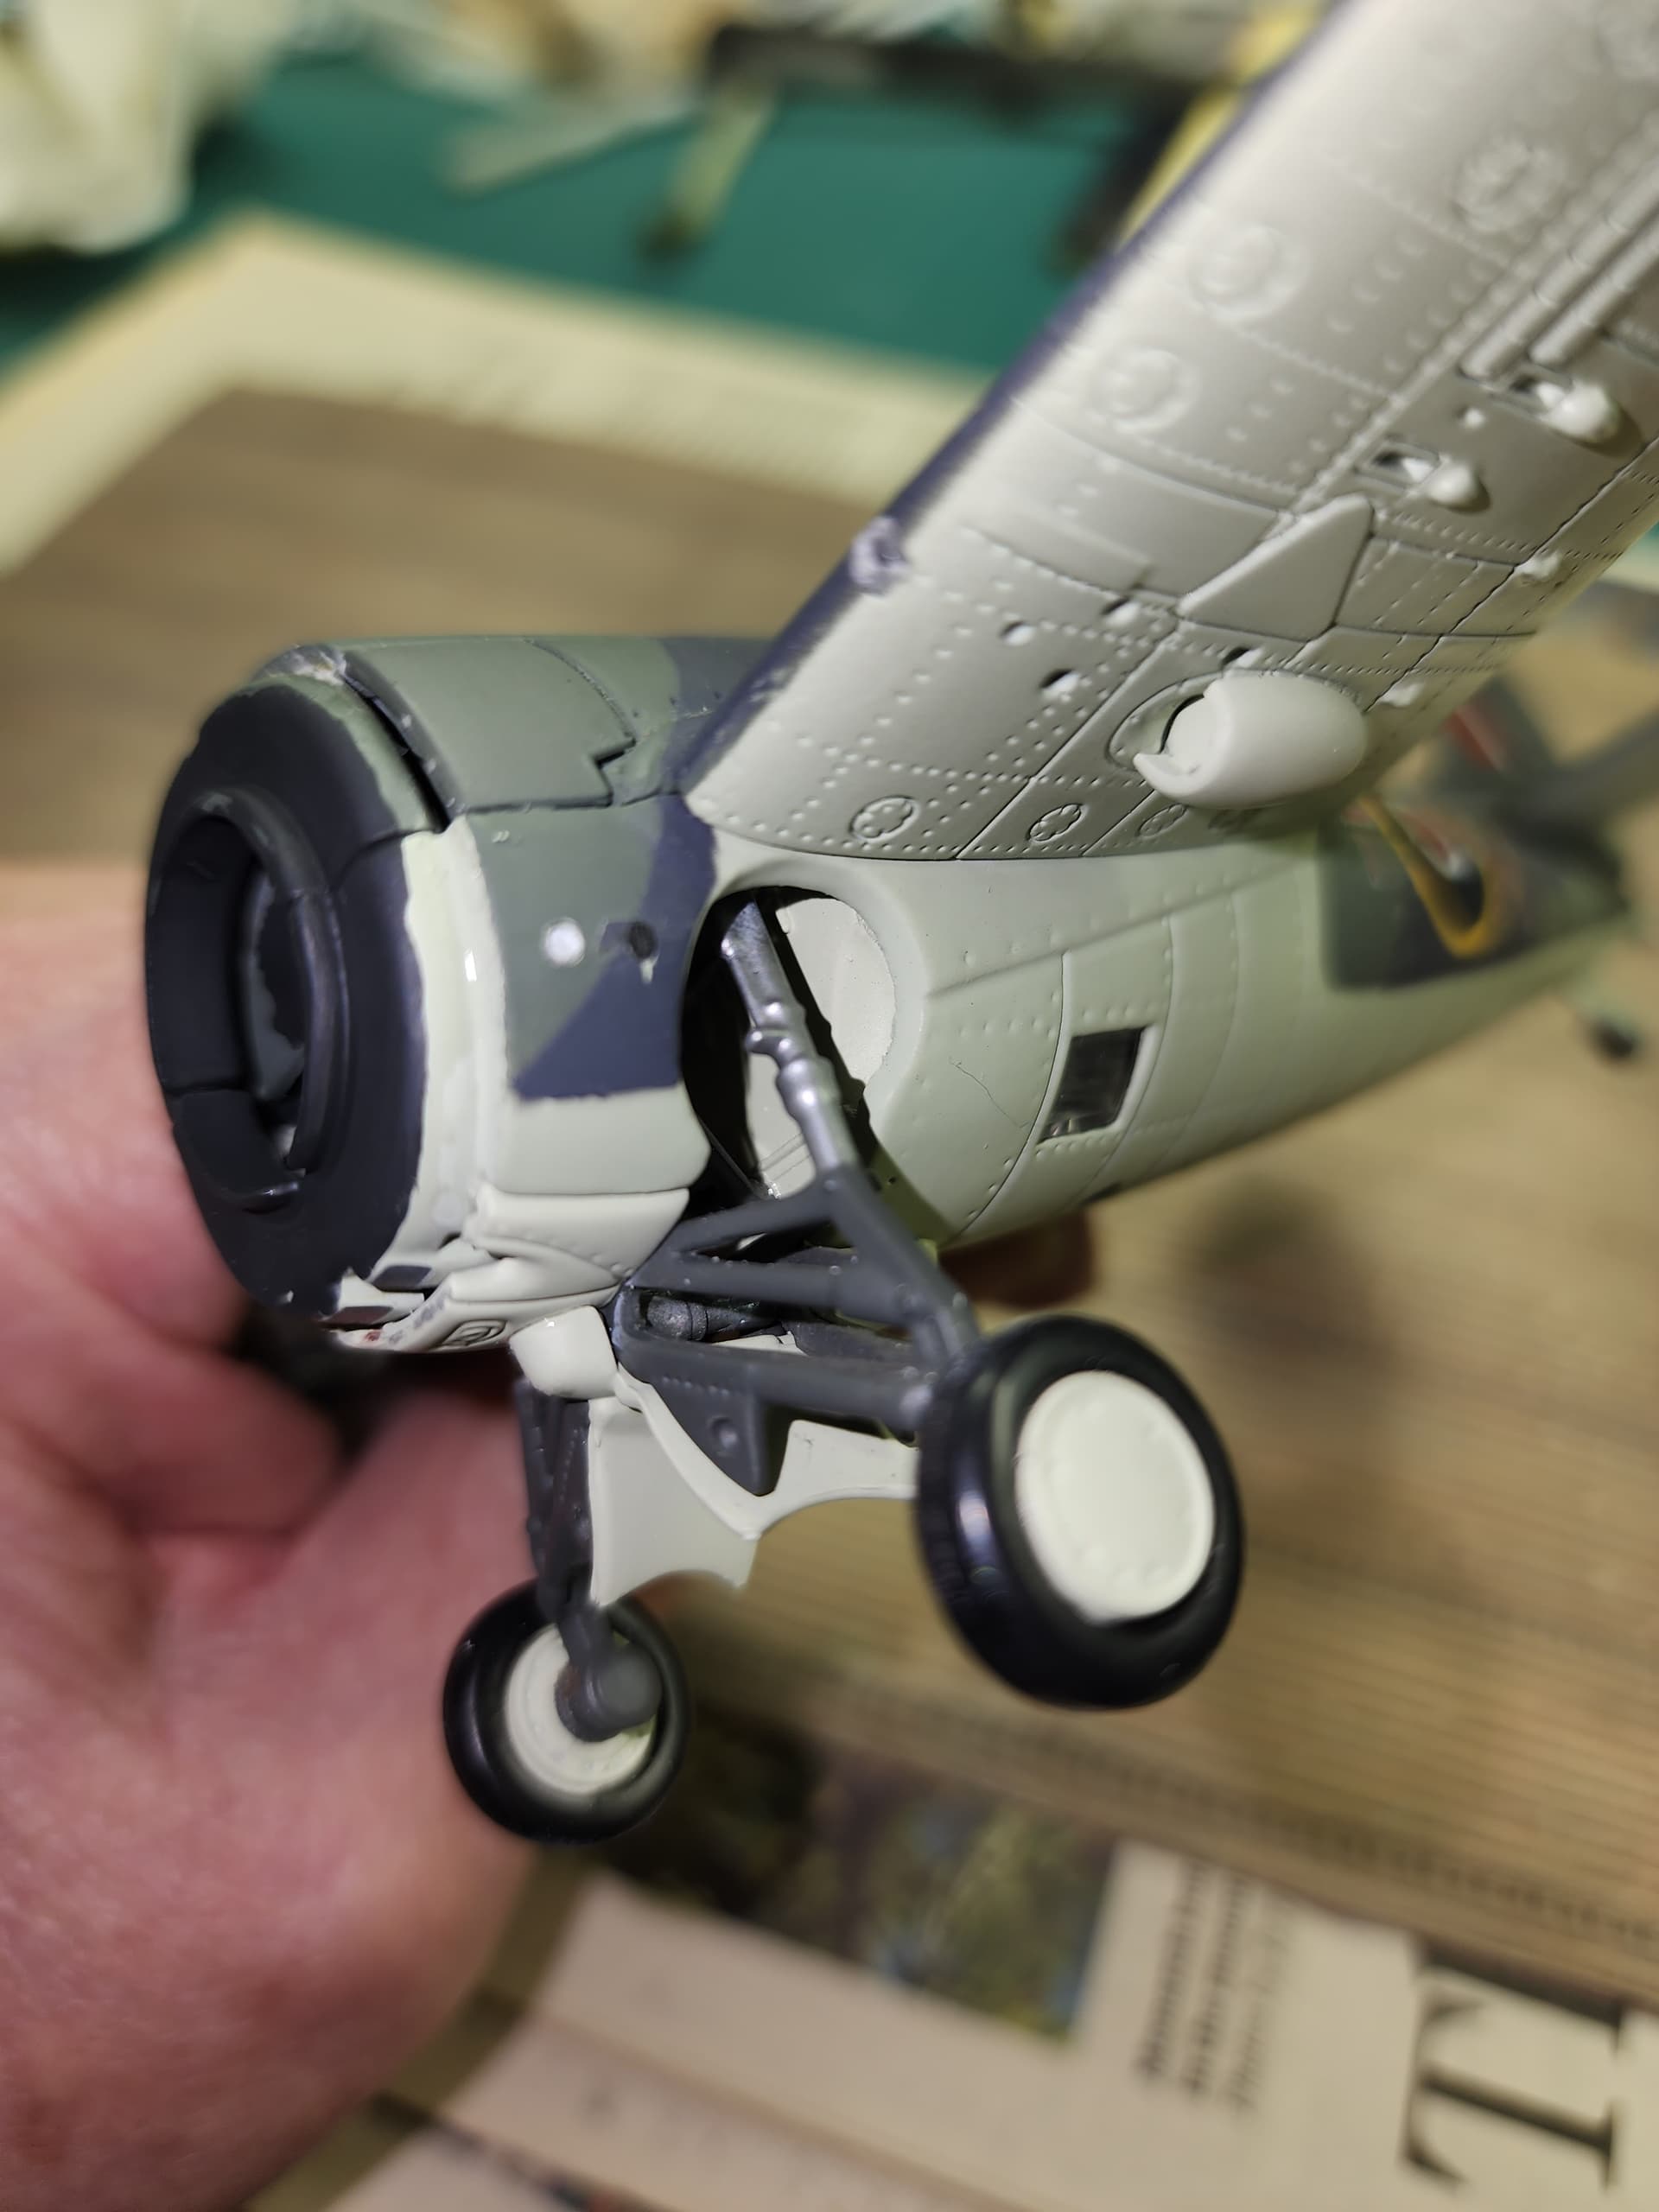
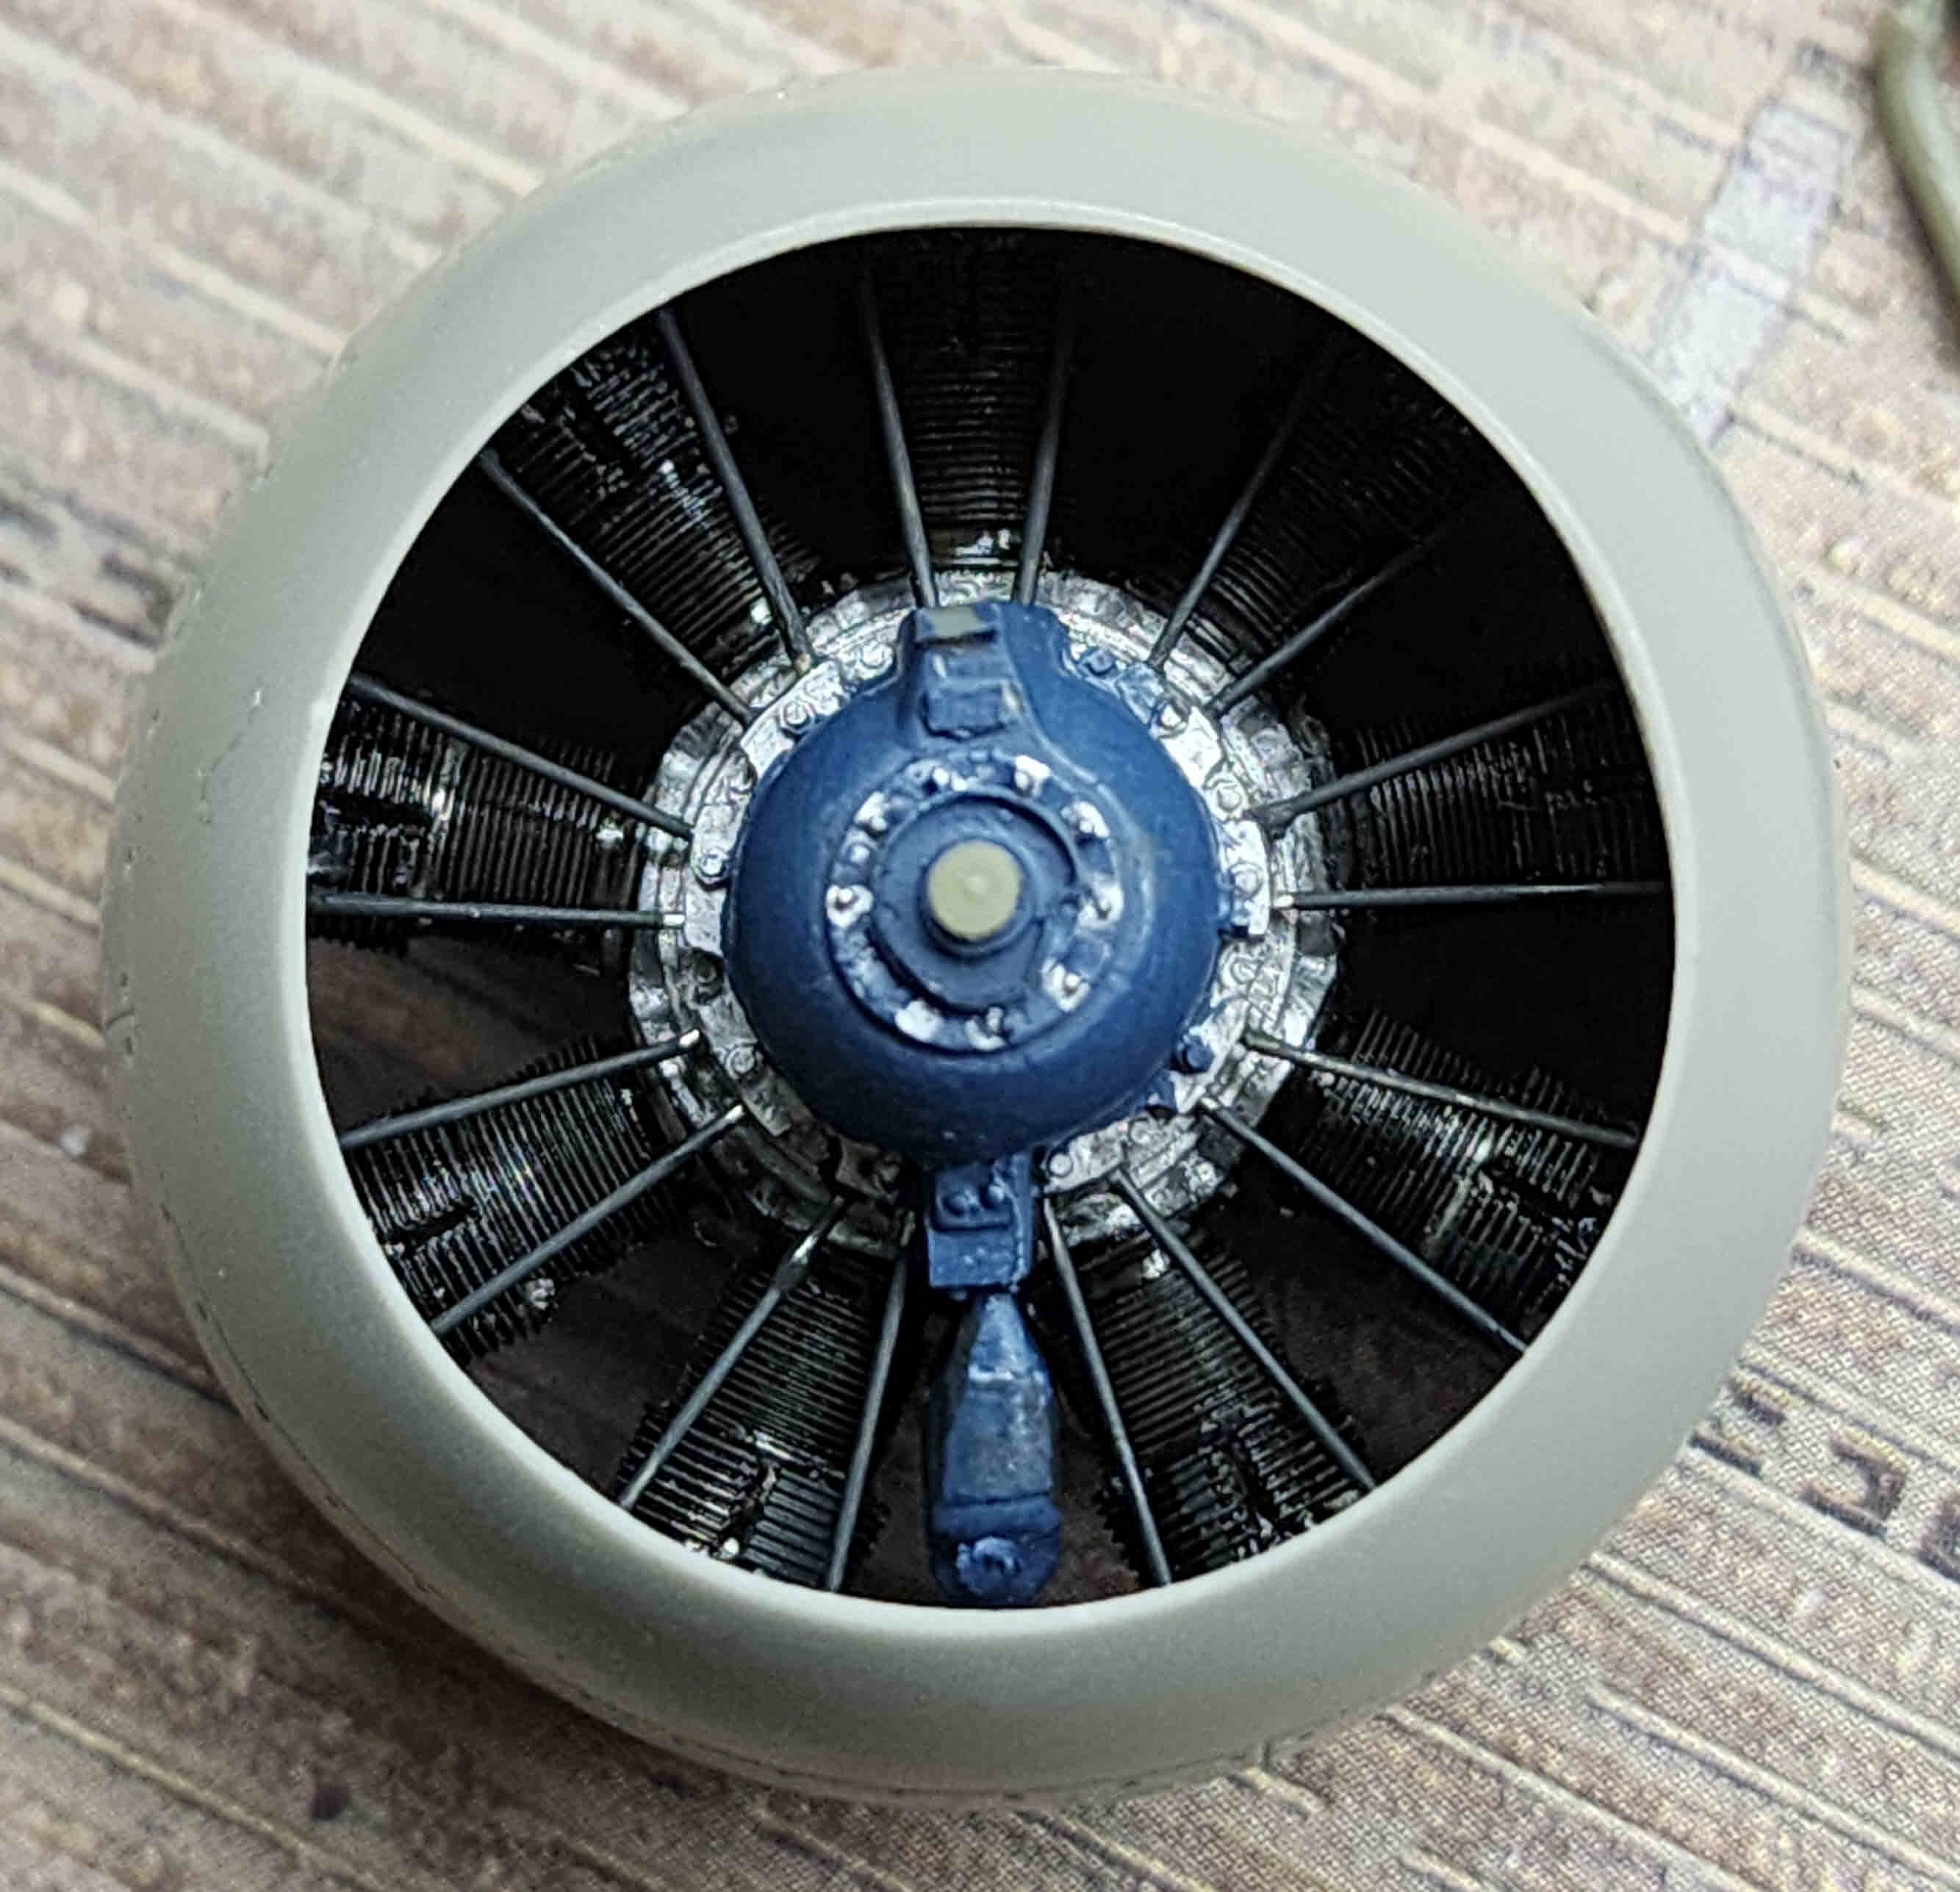
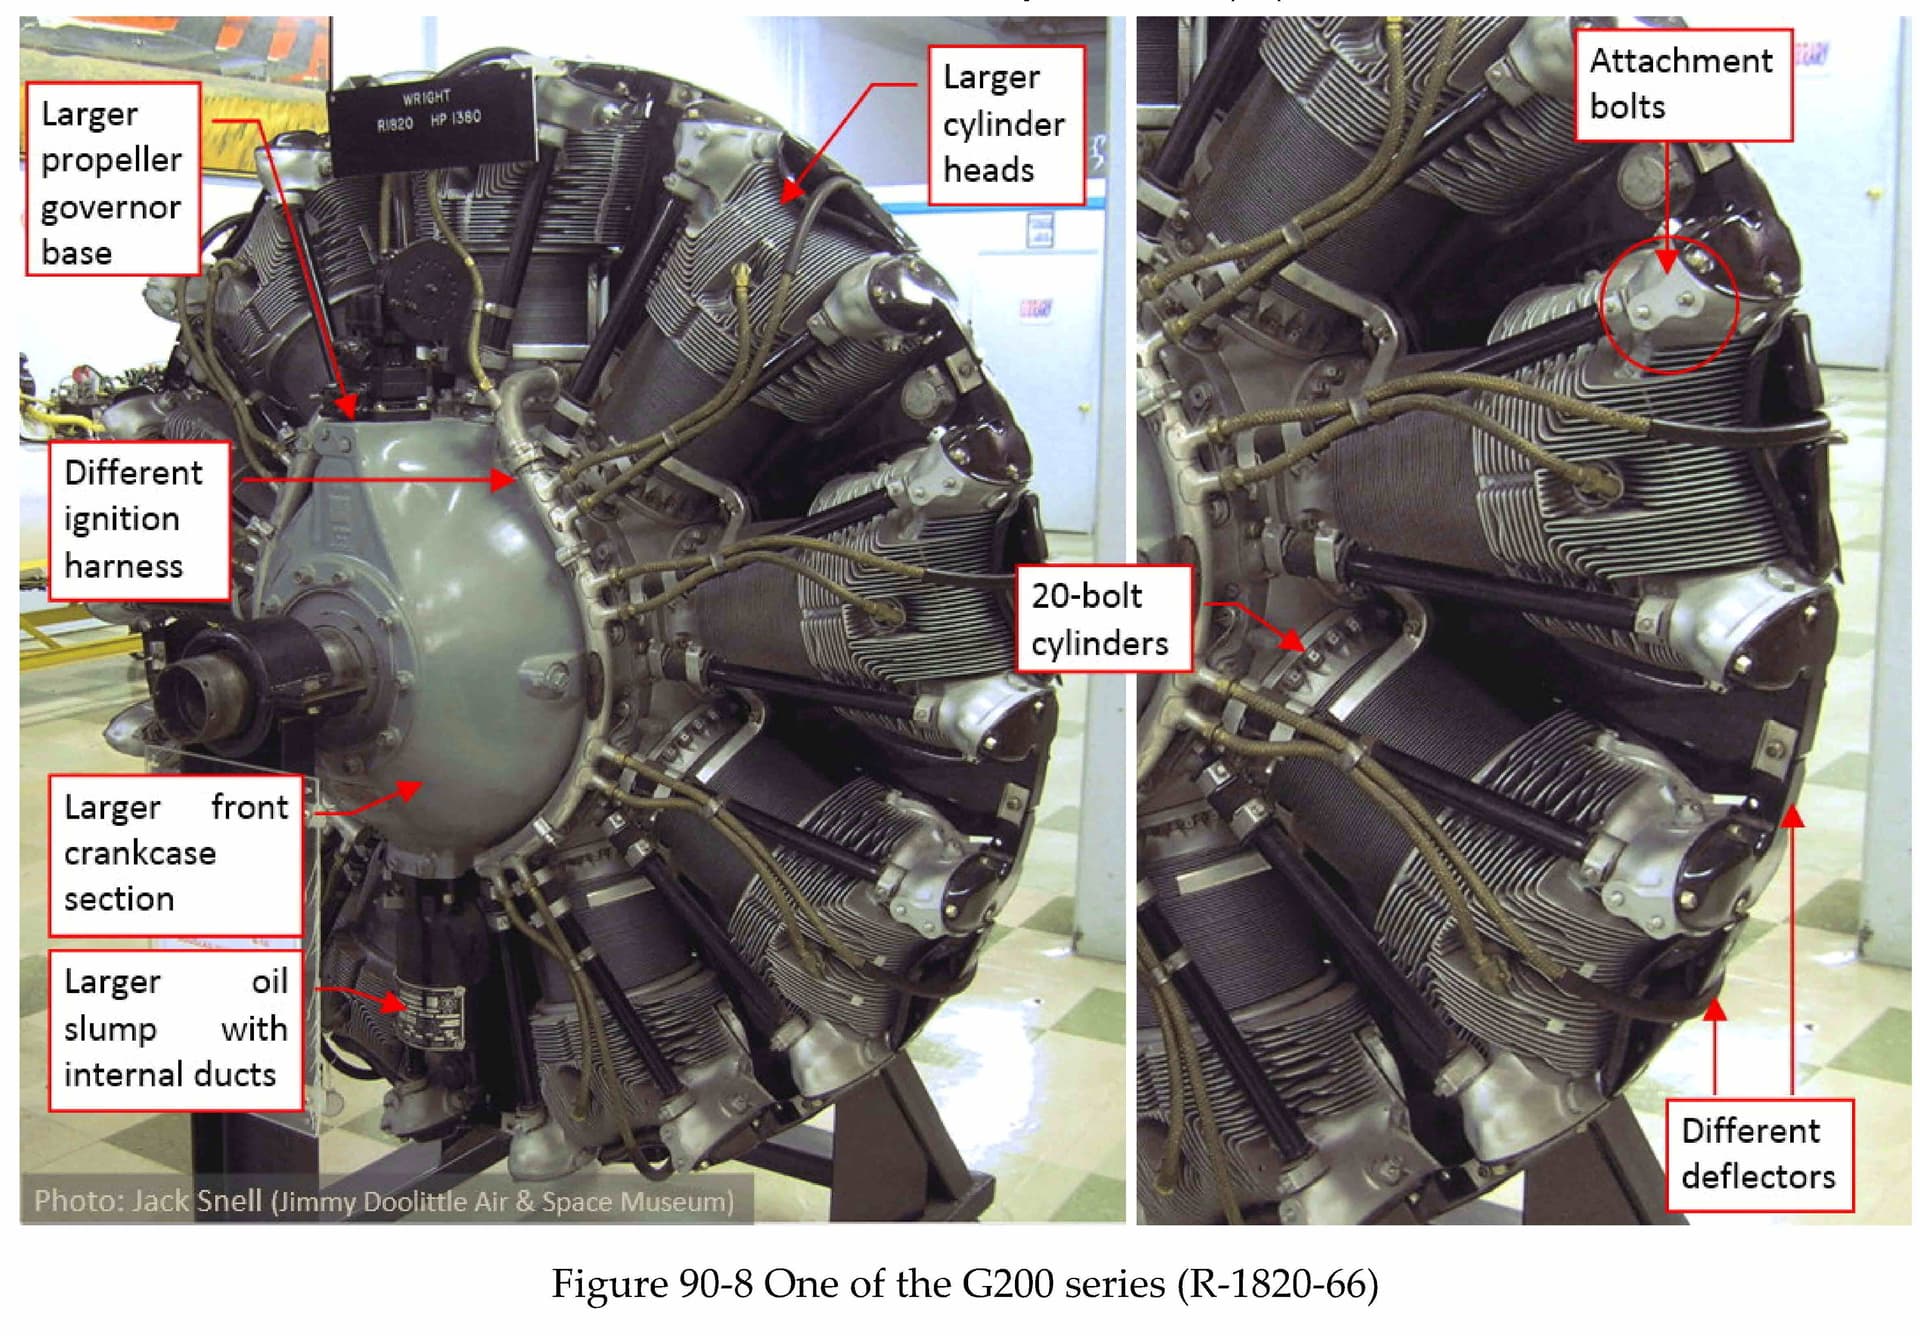
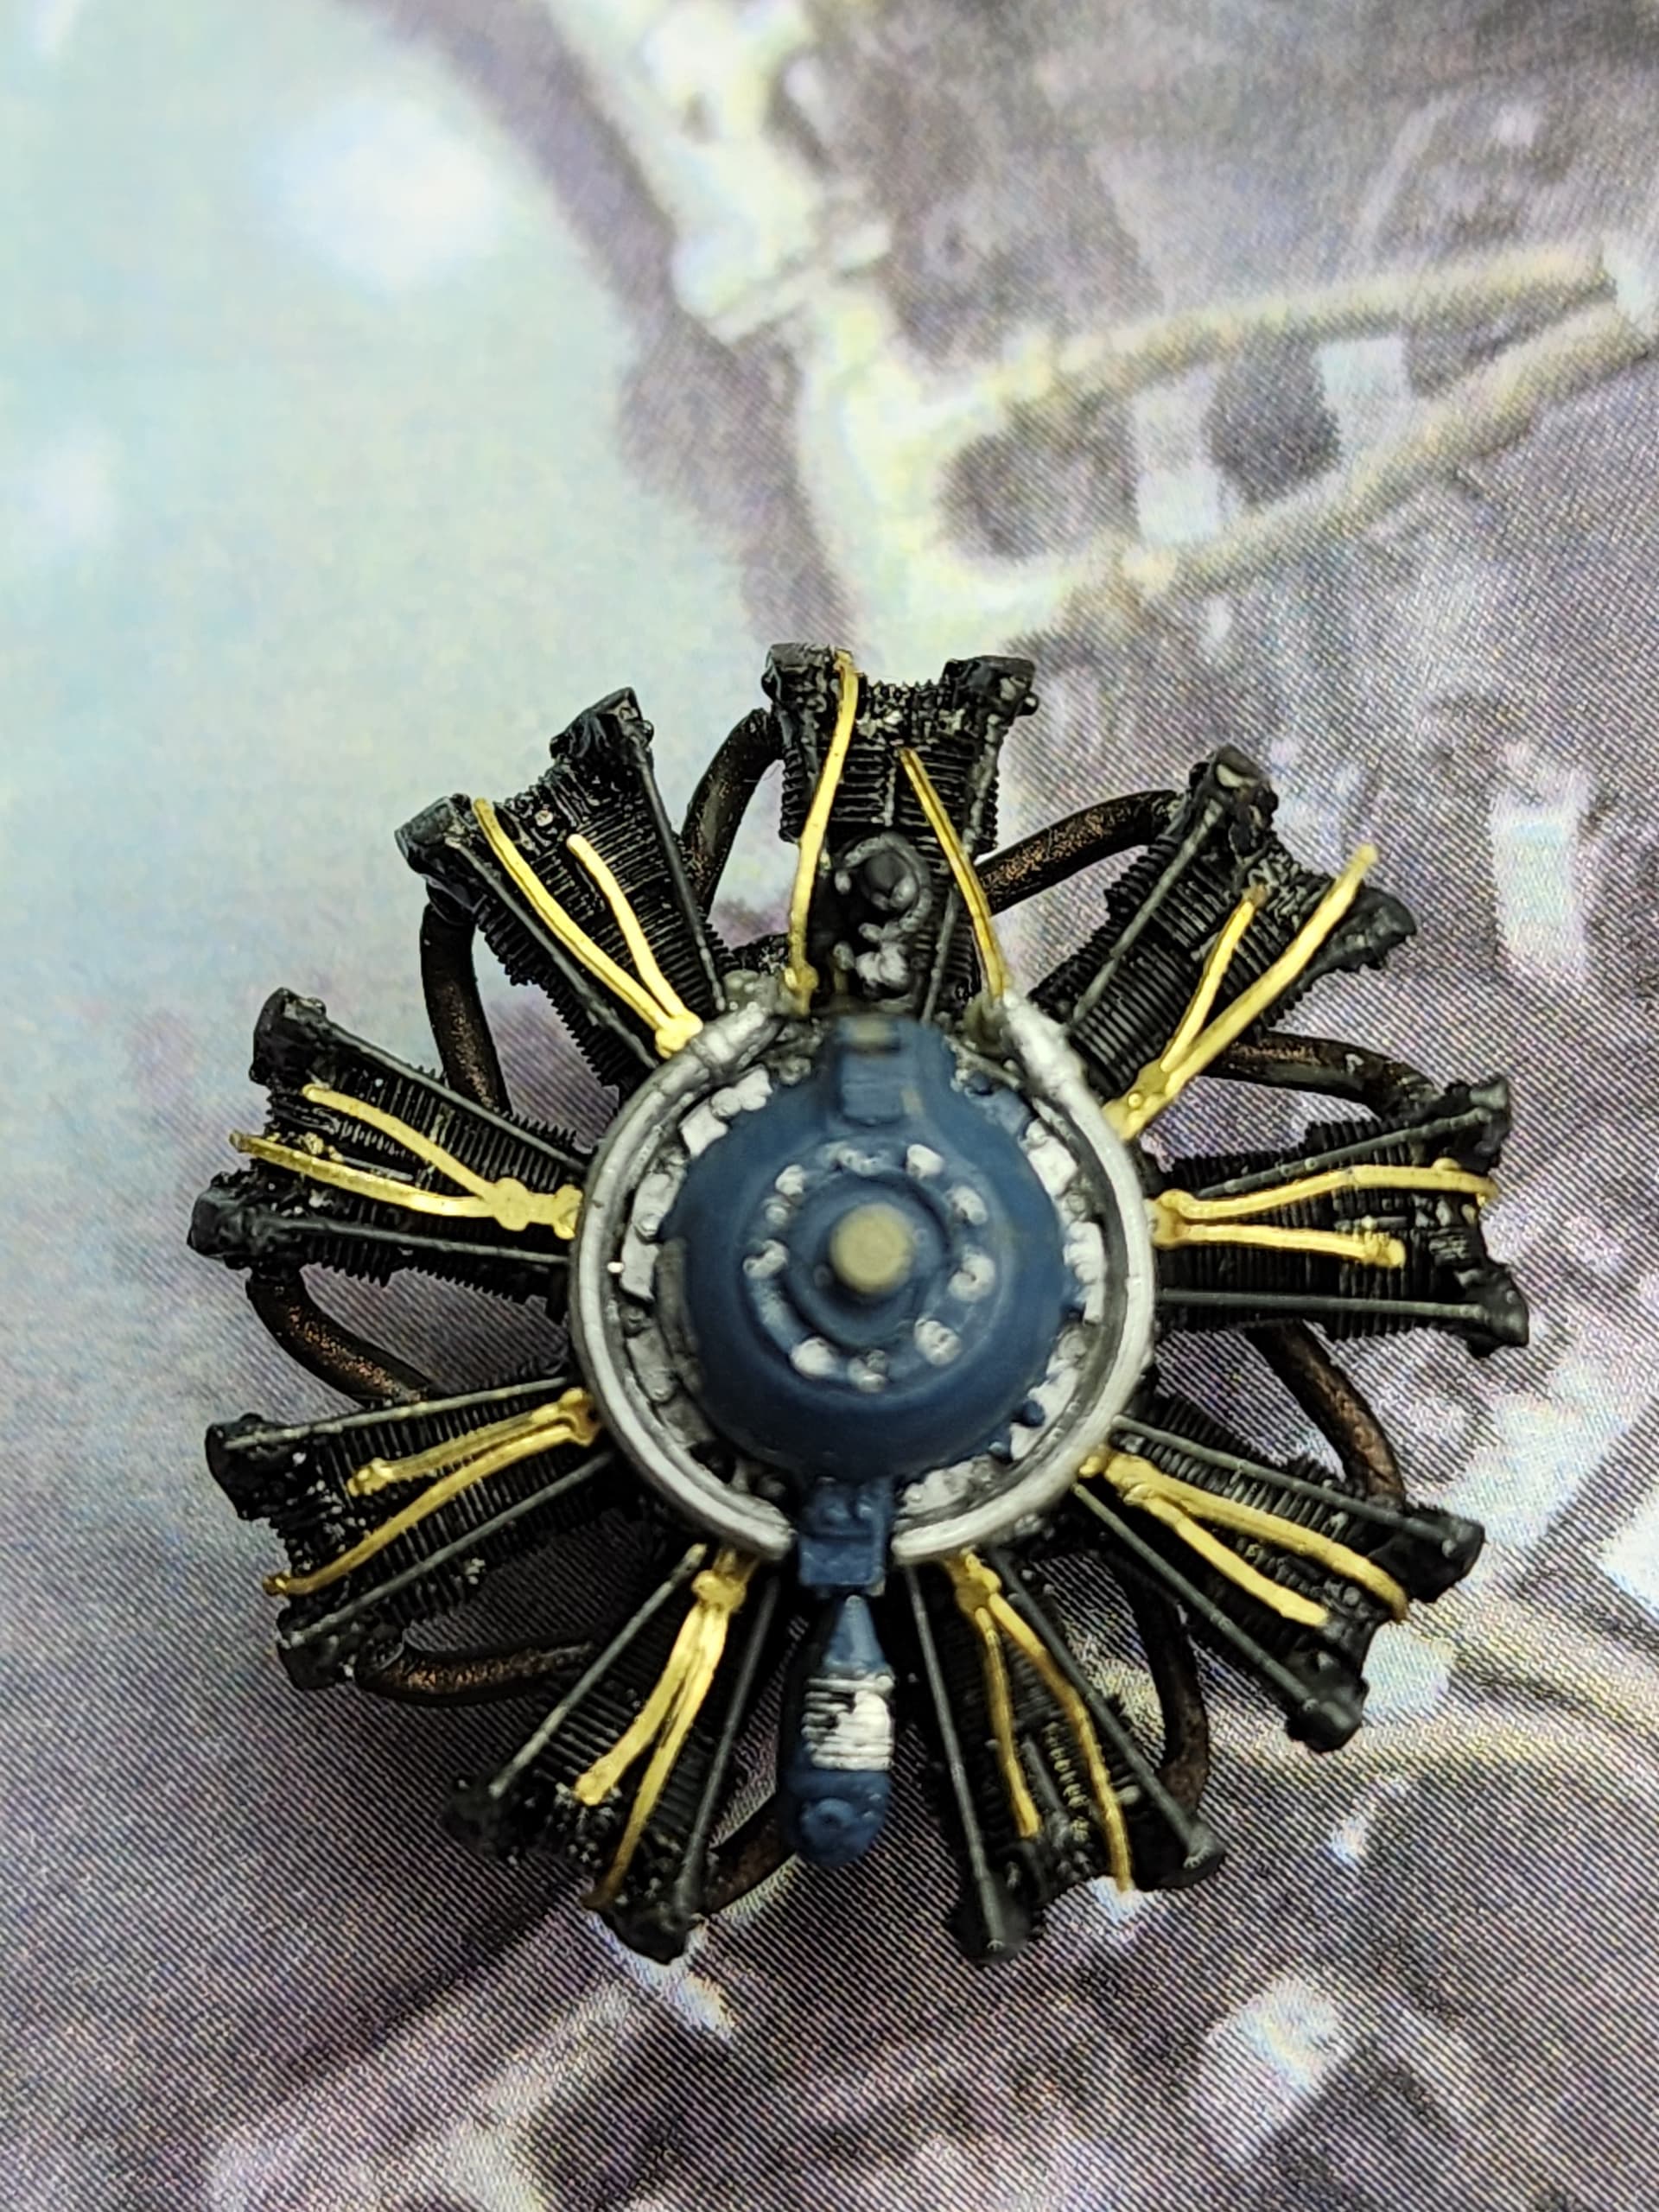
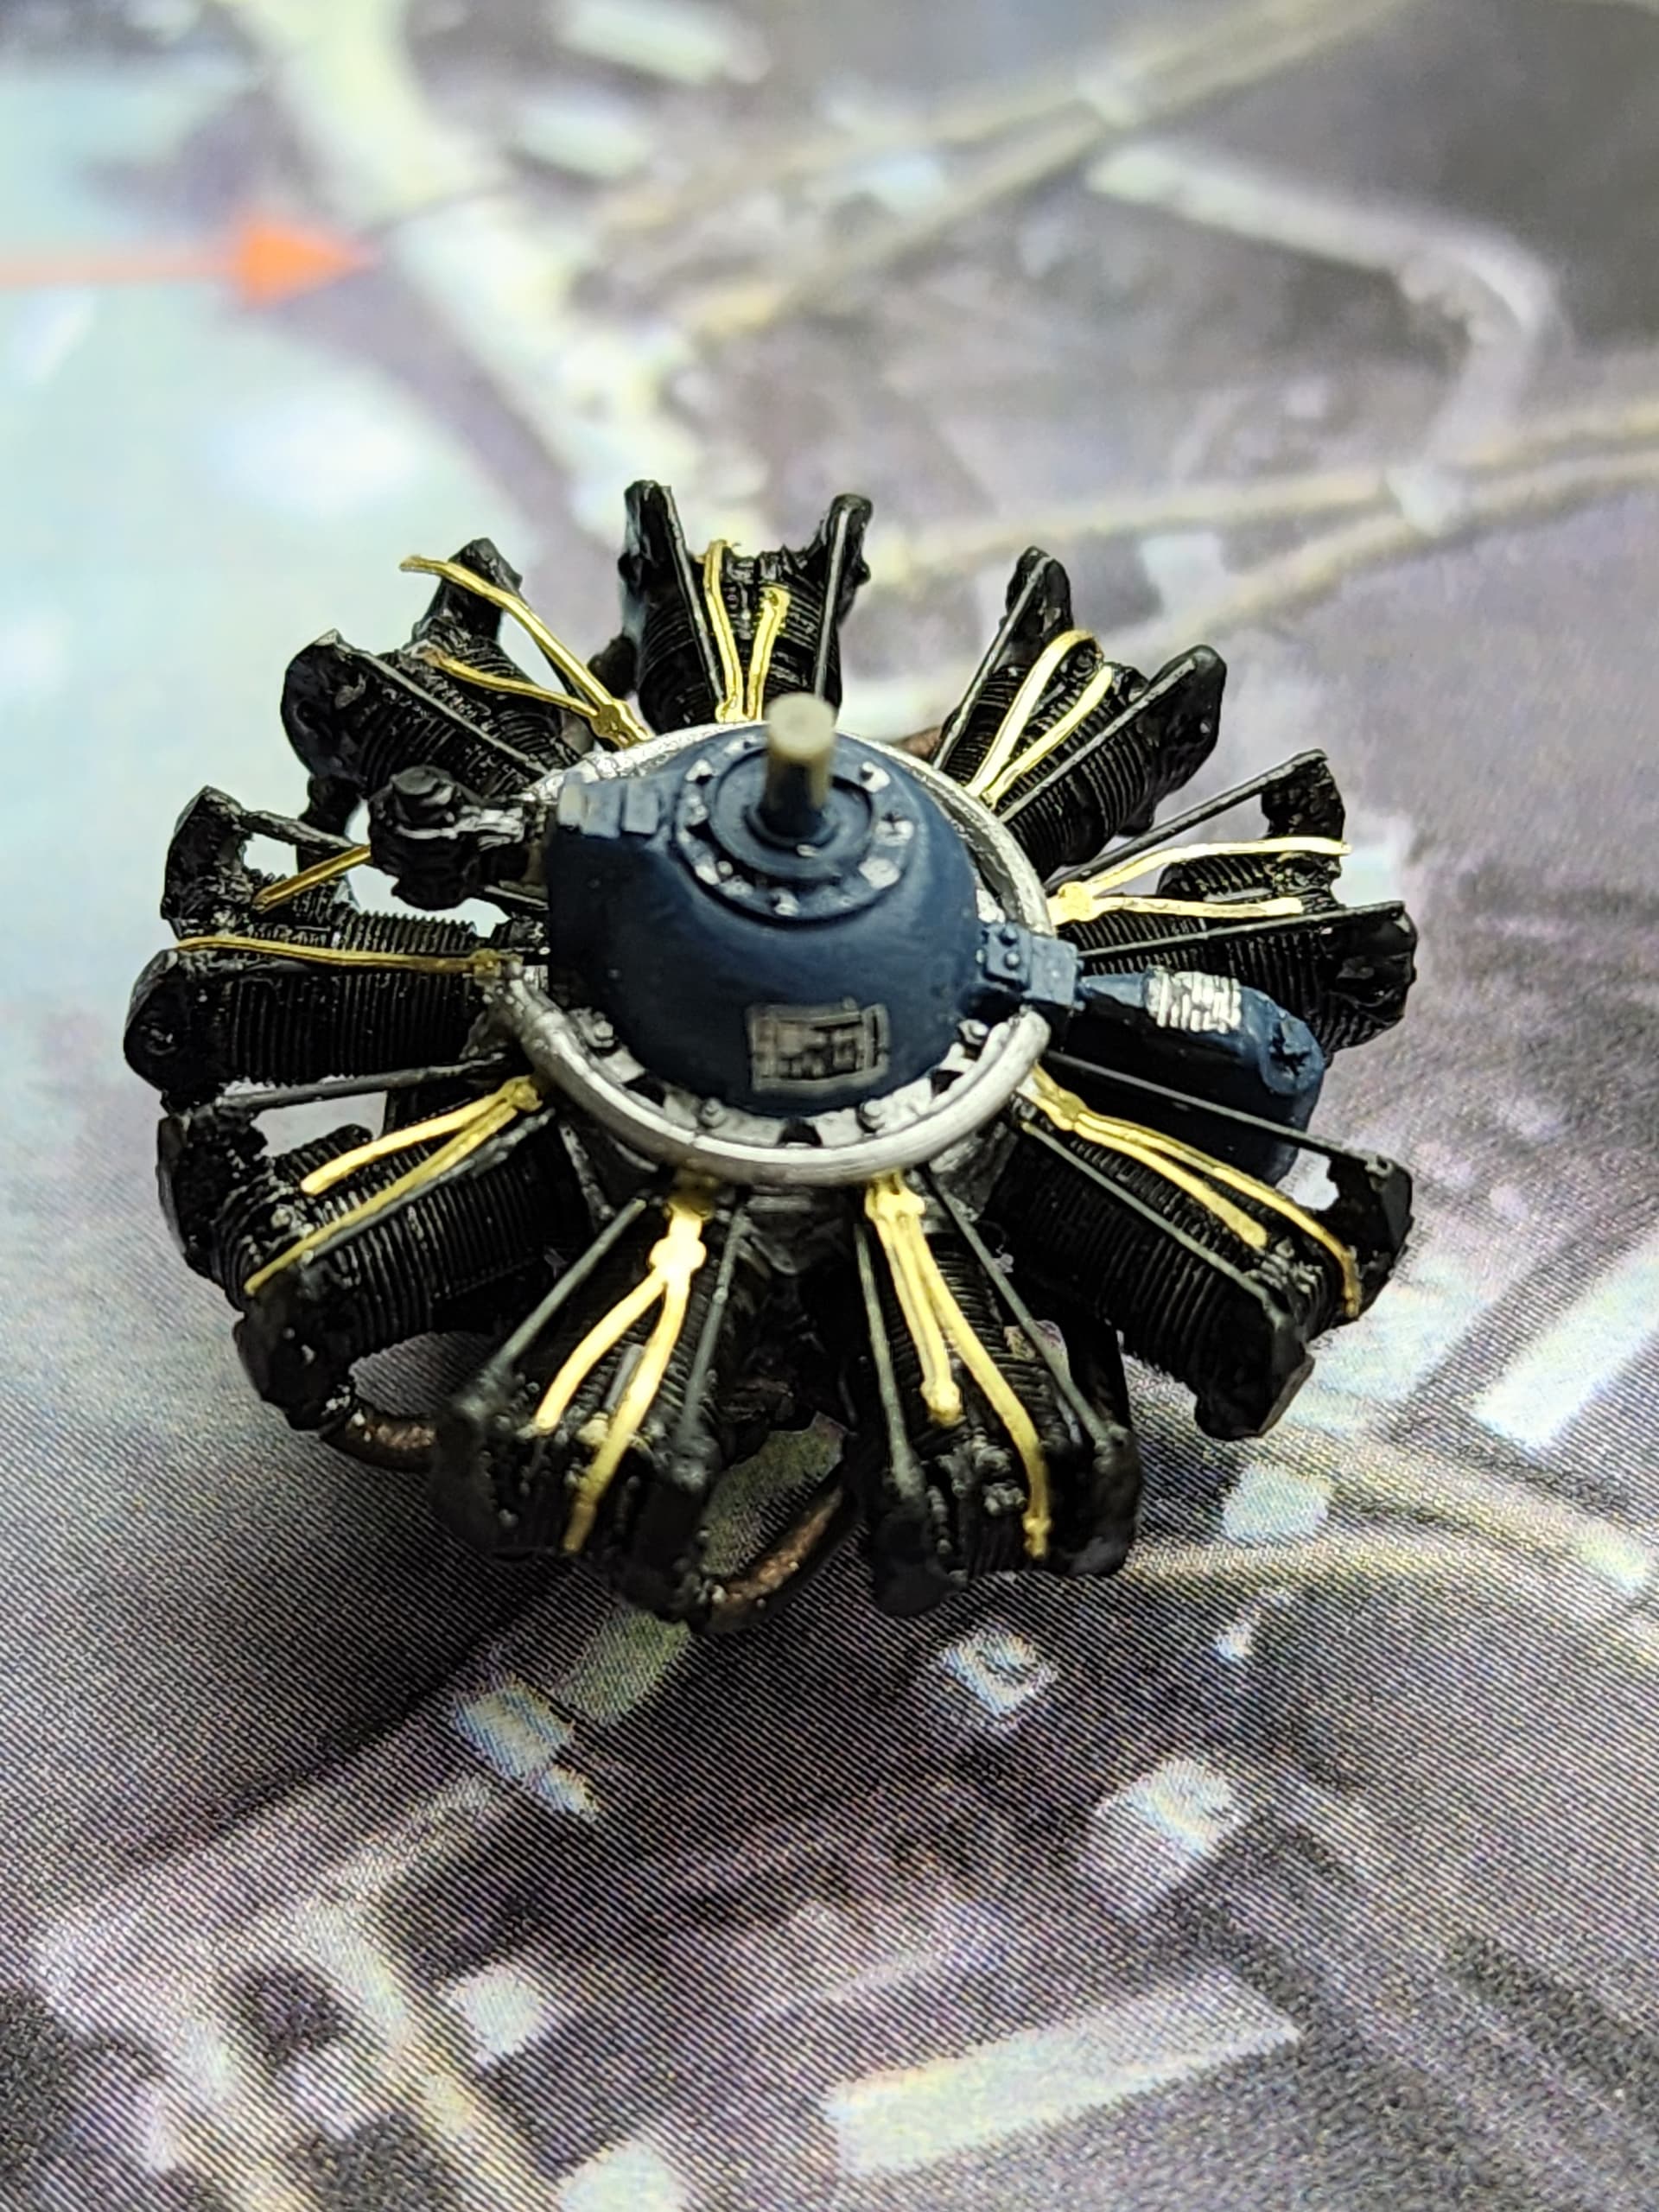
There is some prep painting necessary behind the cylinders at what passes for a firewall. You can see the NATO Black applied above, and this side view shows what I was covering up.

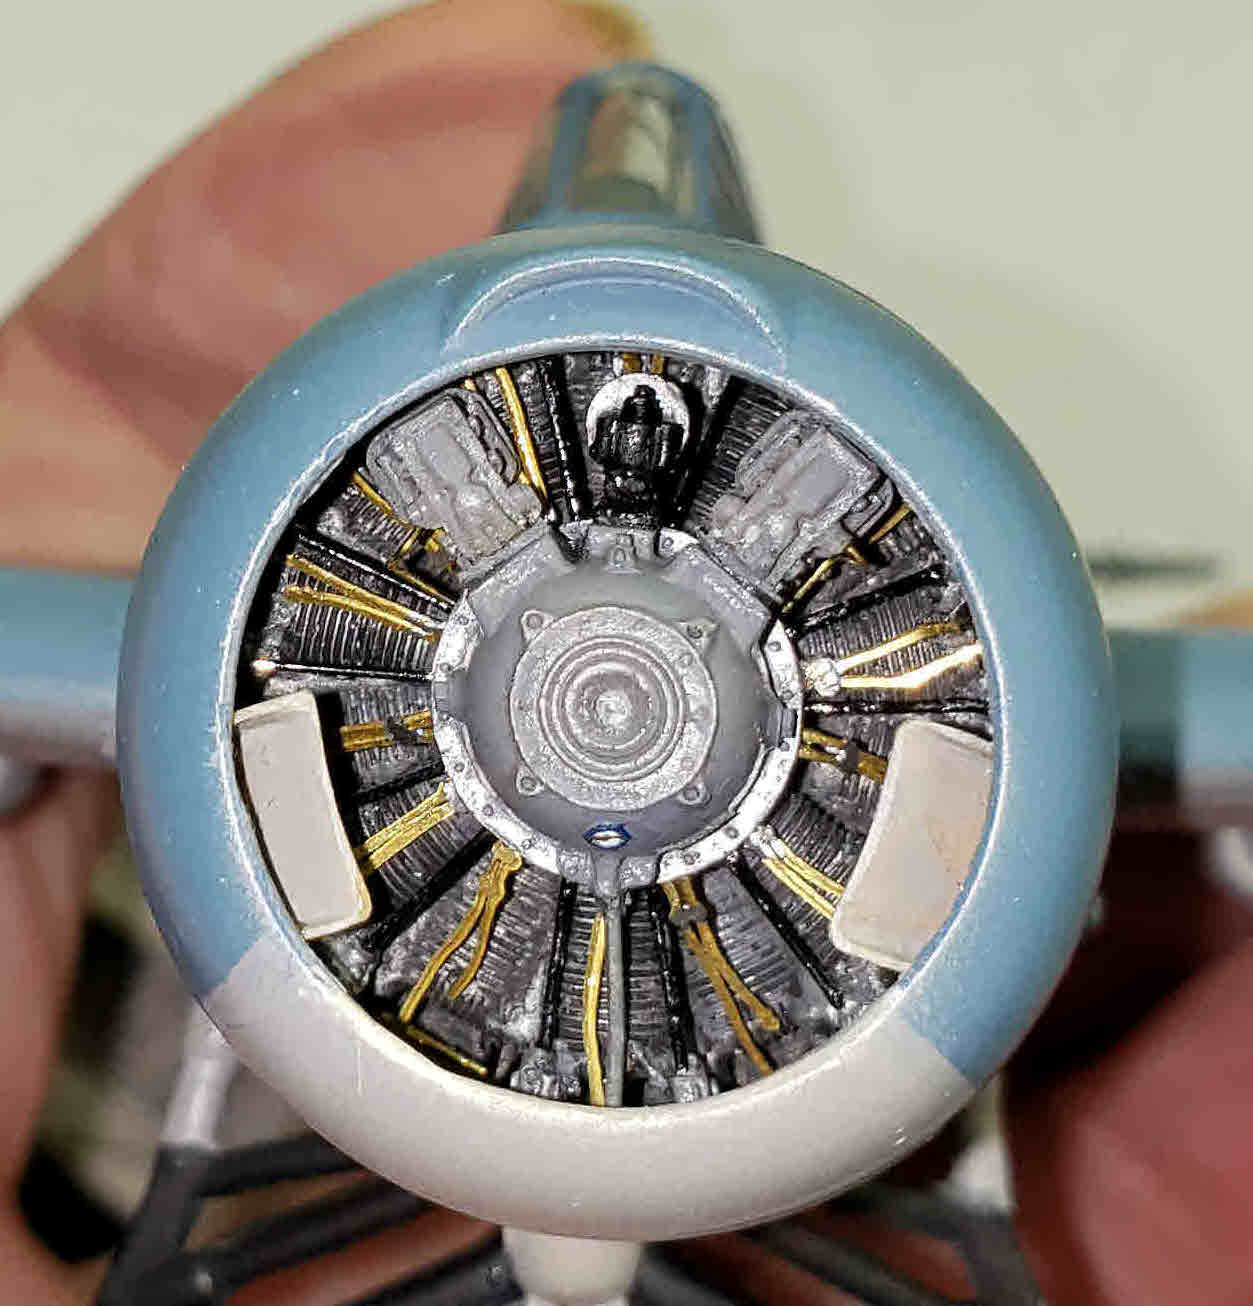
That dark and light color split, and if you are wondering what the two white bumps are on either side

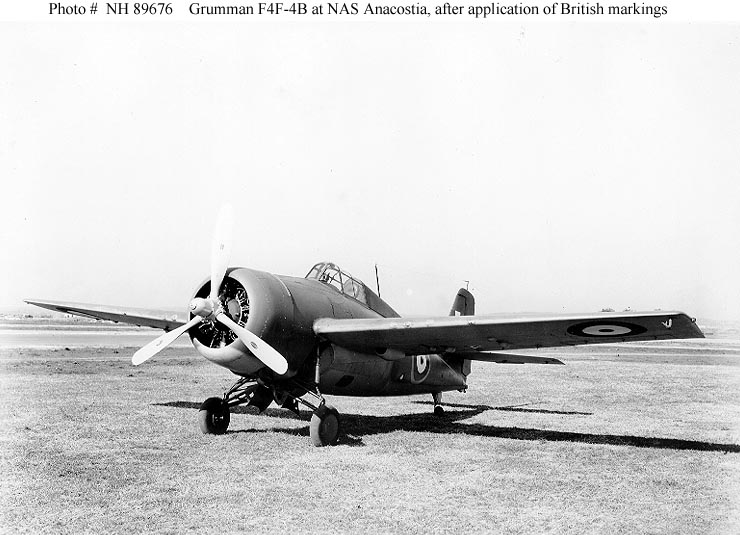
(oops, one is old and black) please remember those little aerodynamic bulges on the F4F.

They weren’t on the Martlet IV.

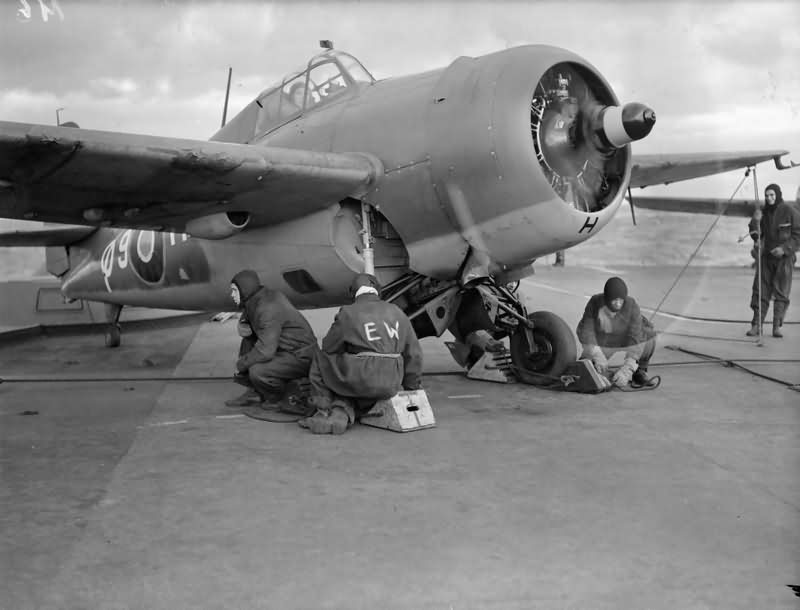
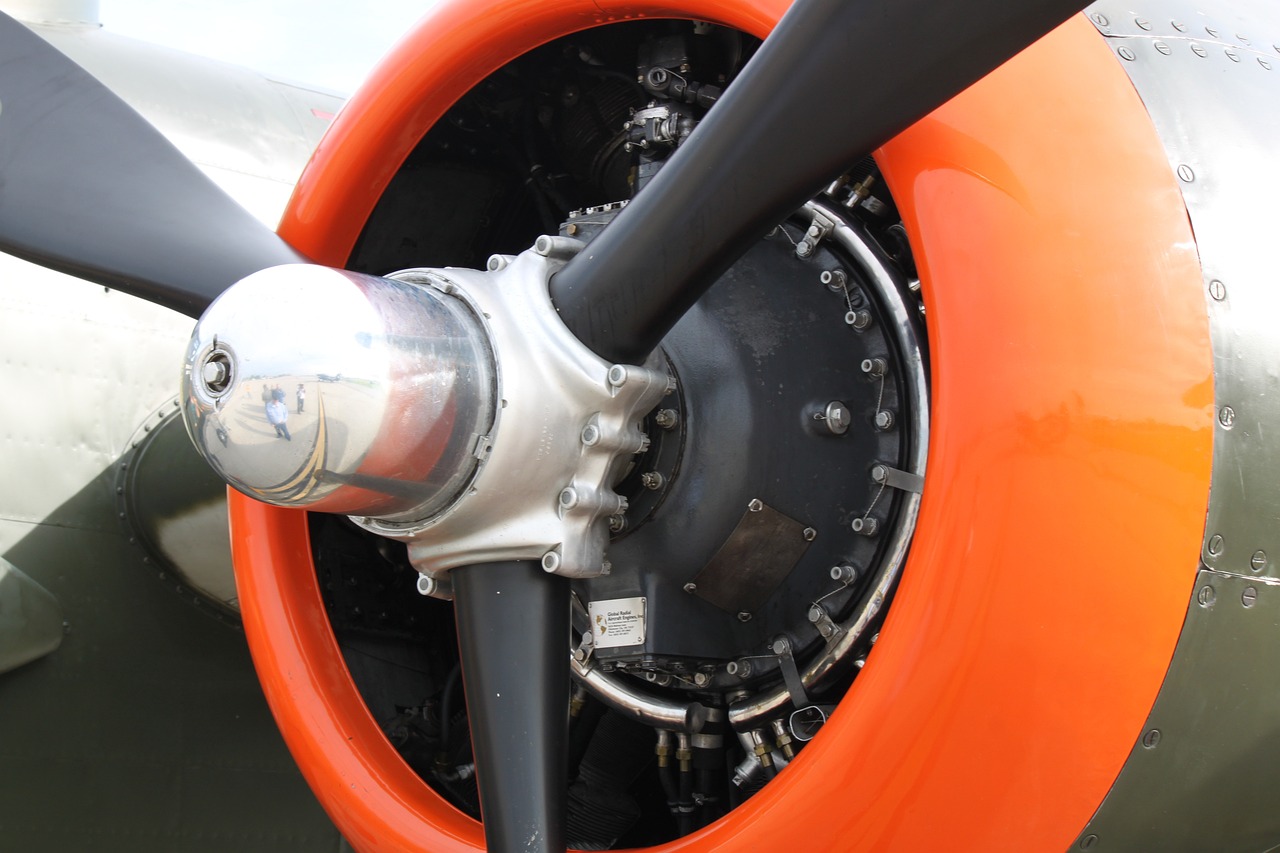
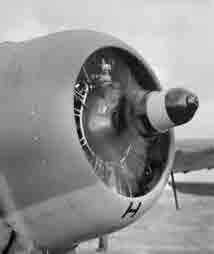
Grumman Martlet Mk IV FN144 is warmed up on board HMS Formidable

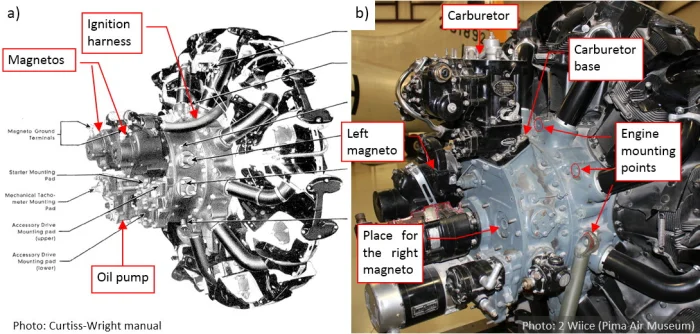
Why? Well, the intercoolers that were part of the Wildcat R-1830 powerplant didn’t quite fit inside the wheelwell, so room had to be made for the top outboard edges.

Within reason, we want to be as accurate as possible given the limitations of the model, especially on the exterior.

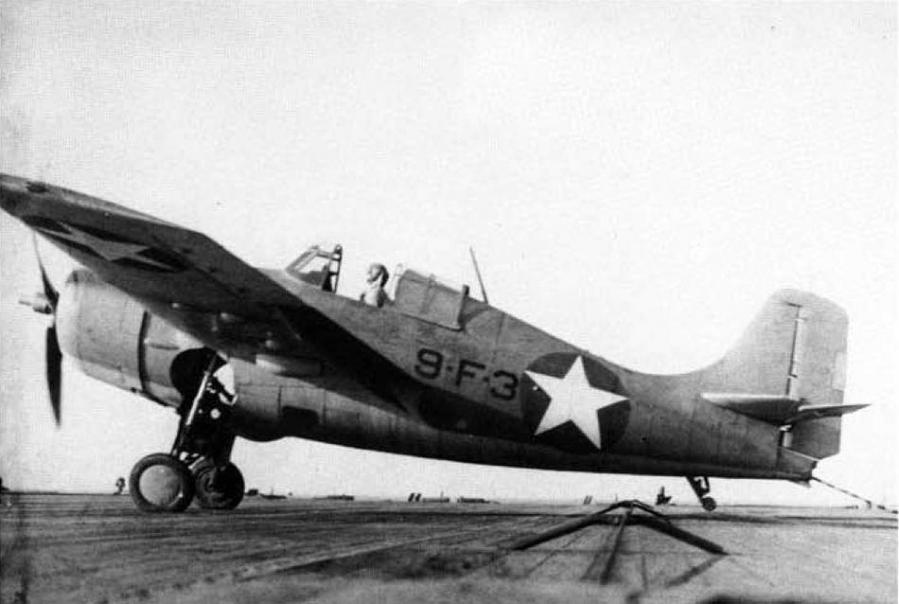
Speaking of details, that photo of Martlet Mk IV FN144 above has good detail on the Hamilton Standard propeller dome. It is interesting that the bolt at the tip of the dome protudes, unlike the other Ham Standard prop domes where the bolt has a more inverted look.

Diversity is the spice of life, I guess, and on this subject I won’t say more.

More to come over the weekend, I hope.

4 Likes

Not only “extra points,” but I had a major flashback as well! :crazy_face:

—mike :sunglasses:

2 Likes

My USAF family had been in Europe from 1966 to 1969 and the USA was absolutely unrecognizable to us on our return. I went to see this with my college girlfriend as much for re-acculturation as for entertainment. (She had also been overseas in an Air Force family.) The end of the movie was * * * well, you already know. :astonished:

3 Likes

So Brian - it seems you may have been “ born
to be wild “ …

3 Likes

Pushrods

This is a short post to show I am slowly working on the engine. I cut wire for 18 pushrods, then glued to the rocker arm covers and the crankcase base.

It gets the job done.

Next will be gluing and paint the exhaust pipes to the cylinder rears, then on to the circular ignition harness, spark plug wiring and a flywheel accessory in front of #1 cylynder.

Couldn’t resist matching it to the cowling now.

Copy of Grumman_Martlet_Mk_IV_FN144_is_warmed_up_on_board_HMS_Formidable

Slowly getting there.

4 Likes

Cylinder Exhaust Piping

Some small steps but I was lucky to locate my paint of choice: Testors Metallic Burnt Iron, so I painted the pipes on the sprues a little while ago.

I’ll trim some small bits of flash from them in the next couple of days, do a bit of touch up where needed, then cut them off and glue them on the rear of the cylinders and what passes for an exhaust collection ring on the back.

It should be fun. As you can see on the illustrations, there were many small variations on the R-1820 and in due course l’ll link to a really interesting article on that subject.

3 Likes

Exhaust Pipes Attached

Close enough. Here’s the backside, and I determined that the whole engine, including the accessory sections at the rear, will fit inside the cowling, so got rid of the mold stubs, and will include the whole shebang. One good reason is the smaller, rectangular accessory box will peak out from behind #1 cylinder looking from the front.

Details, details in the background.

I want to get this done. It’s been waiting for about two years. I hope to do a little bit each day or so.

I will close with a very interesting discussion of the pilot of this A/C, with his picture. His background explains why this particular Martlet IV was photographed for Operation Torch.

2 Likes

Engine-ir-ing

A brief update.

In the last post I wrote,

In fact, I had to cut the rear down significantly

to ensure a proper fit.

Next up will be some touch-up painting followed by attachment of the circular ignition harness halves, and the ignition cables (A Koster product, as you can see below).

My instinct is to keep the brass color, but that impulse is subject to change.

3 Likes

One Step at a Time

Ignition Harness

I am beginning to remember the small pleasures of actually building something in our hobby, piece by piece. The engine is getting close to being finished.

4 Likes

Ignition Wiring

There are various configurations for the ignition wiring on the many dififferent versions Wright Aeronautical Corp. (the aircraft engine part of Curtiss-Wright Corp.) produced of the R-1820 “Cyclone” engine.

Curtiss 8-200x200

Basically, all R-1820 engines are not the same. A good introduction to the complexity can be found at an online article titled The R-1820 “Cyclone” Versions by Witold Jaworski at his fascinating site, Airplanes in 3D. (Highly recommended for modeling nerds of WWII aircraft!)

Based on the available photos I have of Martlet IV (F4F-4B) aircraft showing the engine,

I’m using the following illustration from the Jaworski article to position the ignition wiring on this bird.

Last night I glued on the circular parts of the ignition harness, and based on the above illustration

I am comfortable with a weathered brass look for the ignition wiring running from the ring. It’s pretty obvious, however, that the Koster brass wiring will have to be bent into shape.

I’ll try to get started on this over the weekend.

3 Likes

All but finished – the engine that is.

As a reminder, this was the starting point.

Here’s another one.

download

Here’s a fronr view of the Vector R-1820.

And a side shot of the real thing in situ.

Copy of Grumman_Martlet_Mk_IV_FN144_is_warmed_up_on_board_HMS_Formidable

With the model below.

and seen front end with cowling.

Could it be better? For sure!

But aside from a few tweaks, I’m OK with it.

Stay tuned.

6 Likes

So, I decided to execute the “few tweeks.”

First, I painted the connectors on the ignition wires aluminum, and then gave the flattened, bright ignition wires a brownish wash to create a worn brass look.

It’s a bit closer to reality, I think.

download

Next, I made a smaller manufacturer data plate decal and relocated it better to match the photo I have of an R-1820 in a Martlet IV.

Copy of Grumman_Martlet_Mk_IV_FN144_is_warmed_up_on_board_HMS_Formidable

Finally you will note that that thing-a-ma-bob on top of the reduction gear housing (I believe it’s a mechanism that has something to do with prop pitch controls) is a light metal color in the above photo .

So, I changed the color on mine from black to aluminum.

I could try to clean up those metal bolts on the front of the reduction gear housing, but they will be completely invisible when the prop is attached.

At this point, it’s interesting to compare this R-1820 with the R-1830 in the diecast improvement of the Torch F4F-4 I did.

I do think detailing engines is one of the more “bang for the buck” aspects of the hobby. These details are an automatic eye magnet for radial engine models, IMO.

Next up will be creating a connector between this cowling and the open front of the fuselage so that it isn’t just a butt join.

Maybe this weekend,

4 Likes